The Ubuntu installer finally has a “safe graphics” installer. Server admins around the world rejoiced. As did anyone with bleeding edge graphics.
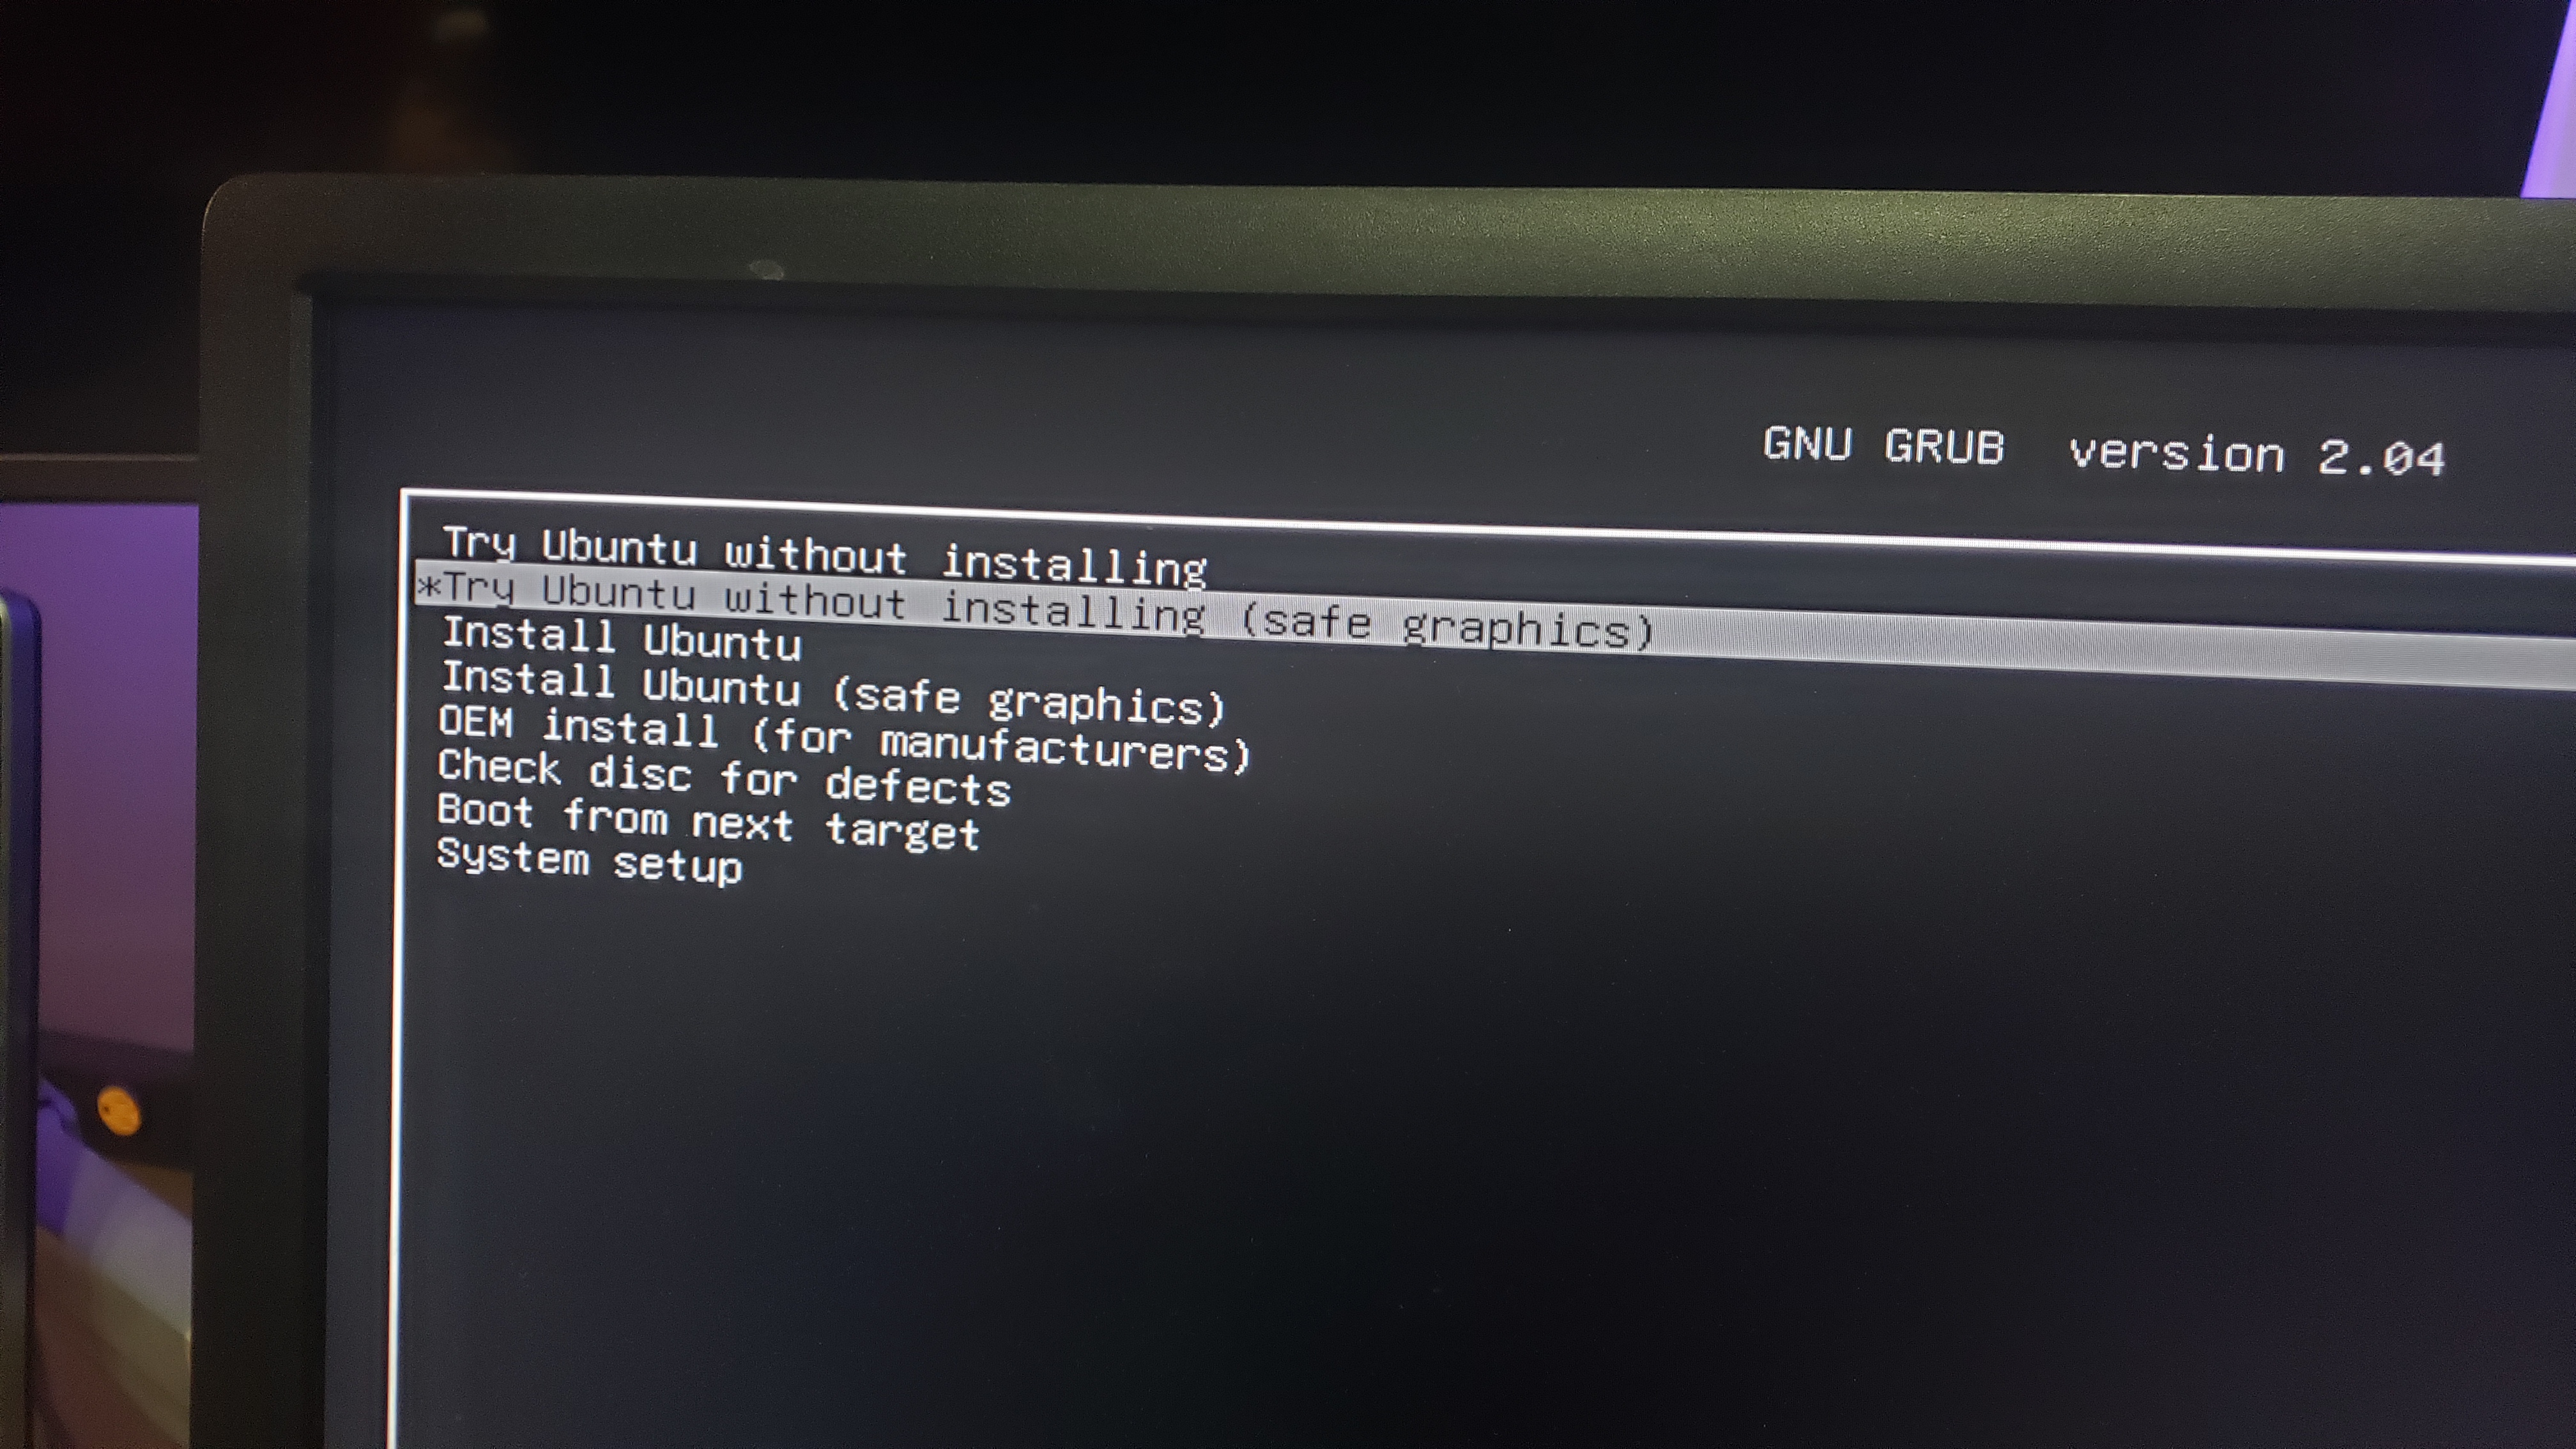
Unfortunately the installer doesn’t seem to make it easy to deploy Linux md (soft raid). No worries – we’ll do it manually.
First, partition the devices. In my case I’m using 4x nvme. The first partition should be about 200 Meg and marked efi.
You will have to format with mkfs.fat
The second partition I made 1gb and formatted ext2. This will be /boot
Normally /boot would be part of your root fs but we need a boot partition because our root filesystem is a bit exotic. Ironically I think grub works with zfs on root in this beta. We’ll try that later…
*Note: There are no hard and fast rules about how you do this. Ideally, you have an EFI partition (that’ll be formatted fat) and a reasonably-sized /boot partition (1gb+). *
*Since I’m using 4 disks, I usually setup the first 500M of each NVMe as reserved. I have an EFI partition on one and a /boot partition on the other. I am also manually mirroring the contents of the EFI partition and the /boot partition to the other two NVMe drives, just in case, but this is not part of the scope of this tutorial. Just know that, ideally, you have an EXT4-formatted /boot partition and a proper FAT-formatted EFI partition. In addition to the other Linux types. *
Example of this:
 isk /dev/nvme3n1: 372.63 GiB, 400088457216 bytes, 781422768 sectors
Disk model: KINGSTON SEPM2280P3400G
Units: sectors of 1 * 512 = 512 bytes
Sector size (logical/physical): 512 bytes / 512 bytes
I/O size (minimum/optimal): 512 bytes / 512 bytes
Disklabel type: dos
Disk identifier: 0x94f3ebc1

Device         Boot   Start       End   Sectors   Size Id Type
/dev/nvme3n1p1         2048   1026047   1024000   500M 83 Linux
/dev/nvme3n1p2      1026048 781422767 780396720 372.1G fd Linux raid autodetect

Filesystem/RAID signature on partition 1 will be wiped.
Each of my 4 NVMe is setup prettymuch the same way, except the partition type of the first partition will vary.
isk /dev/nvme3n1: 372.63 GiB, 400088457216 bytes, 781422768 sectors
Disk model: KINGSTON SEPM2280P3400G
Units: sectors of 1 * 512 = 512 bytes
Sector size (logical/physical): 512 bytes / 512 bytes
I/O size (minimum/optimal): 512 bytes / 512 bytes
Disklabel type: dos
Disk identifier: 0x94f3ebc1

Device         Boot   Start       End   Sectors   Size Id Type
/dev/nvme3n1p1         2048   1026047   1024000   500M 83 Linux
/dev/nvme3n1p2      1026048 781422767 780396720 372.1G fd Linux raid autodetect

Filesystem/RAID signature on partition 1 will be wiped.
^ EFI in this case.
If you like, you can create two partitions on each device – it really isn’t a lot of space – one for EFI and one for /boot. But automatic /boot partition mirroring isn’t really a thing that I’m aware of.
Disk /dev/nvme0n1: 372.63 GiB, 400088457216 bytes, 781422768 sectors
Disk model: KINGSTON SEPM2280P3400G
Units: sectors of 1 * 512 = 512 bytes
Sector size (logical/physical): 512 bytes / 512 bytes
I/O size (minimum/optimal): 512 bytes / 512 bytes
Disklabel type: dos
Disk identifier: 0x94f3ebdc

Device         Boot   Start       End   Sectors   Size Id Type
/dev/nvme0n1p1         2048   1026047   1024000   500M ef EFI (FAT-12/16/32)
/dev/nvme0n1p2      1026048 781422767 780396720 372.1G 83 Linux
Now, what’s wrong with this disk? It’s the EFI partition. But what’s wrong? The type hasn’t been changed from Linux to Linux MD Autodetect.
Once you get your partitions setup, from the live installer, you will need to sudo apt install mdadm
So I recommend each disk in your array is partitioned the same way. Mdadm can’t really seem to auto assemble arrays unless the components of the array are partitions, not disks, and each partition that’s part of the raid set should be the same size.
lsblk
Output:
root@ubuntu:/home/ubuntu# lsblk
NAME        MAJ:MIN RM   SIZE RO TYPE  MOUNTPOINT
loop0         7:0    0     2G  1 loop  /rofs
sda           8:0    1  14.8G  0 disk
└─sda1        8:1    1  14.8G  0 part  /cdrom
nvme3n1     259:0    0 372.6G  0 disk
├─nvme3n1p1 259:10   0   500M  0 part
└─nvme3n1p2 259:11   0 372.1G  0 part
  └─md0       9:0    0   1.5T  0 raid0
nvme2n1     259:1    0 372.6G  0 disk
├─nvme2n1p1 259:8    0   500M  0 part
└─nvme2n1p2 259:9    0 372.1G  0 part
  └─md0       9:0    0   1.5T  0 raid0
nvme1n1     259:2    0 372.6G  0 disk
├─nvme1n1p1 259:6    0   500M  0 part
└─nvme1n1p2 259:7    0 372.1G  0 part
  └─md0       9:0    0   1.5T  0 raid0
nvme0n1     259:3    0 372.6G  0 disk
├─nvme0n1p1 259:4    0   500M  0 part
└─nvme0n1p2 259:5    0 372.1G  0 part
  └─md0       9:0    0   1.5T  0 raid0
mdadm --create /dev/md0 --chunk=128K --level=0 --raid-devices=4 /dev/nvme0n1p2 /dev/nvme1n1p2 /dev/nvme2n1p2 /dev/nvme3n1p2
Output:
mdadm: Defaulting to version 1.2 metadata
mdadm: array /dev/md0 started.
Learning What We’re Doing
This is a stripe of NVMe. No redundancy! Very dangerous! But also very fast. If ANY device fails ALL information is lost. With 4 drives, you can create a striped mirror which offers speed and capacity (2x the capacity of one NVMe and 4x the read speed and 2x the write speed). This is sometimes referred to as raid10 or raid1+0 (or raid 0+1). Technically Linux MD does something special in this case that’s not truly the textbook definition of raid0+1 but that’s a story for another day. Raid5 is also an option where you would have 3x capacity and any one drive could die, but the write performance is not great.
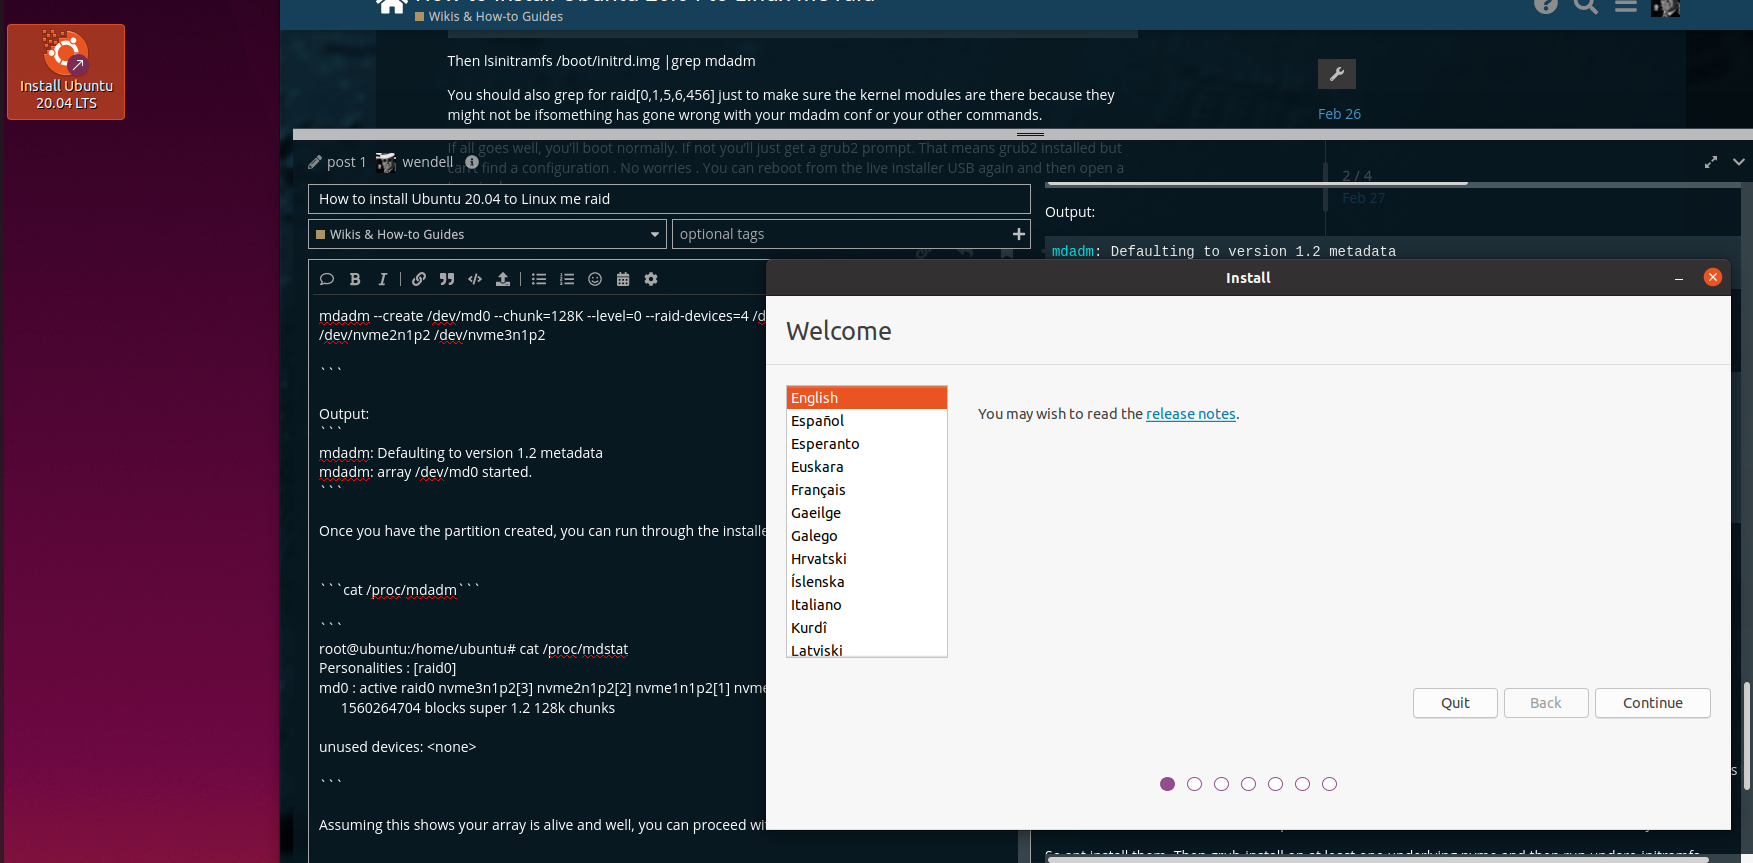
On with the Install
Once you have the partition created, you can run through the installer. Don’t worry, the installer will fail.
cat /proc/mdadm
root@ubuntu:/home/ubuntu# cat /proc/mdstat
Personalities : [raid0]
md0 : active raid0 nvme3n1p2[3] nvme2n1p2[2] nvme1n1p2[1] nvme0n1p2[0]
      1560264704 blocks super 1.2 128k chunks

unused devices: <none>
Assuming this shows your array is alive and well, you can proceed with the install.
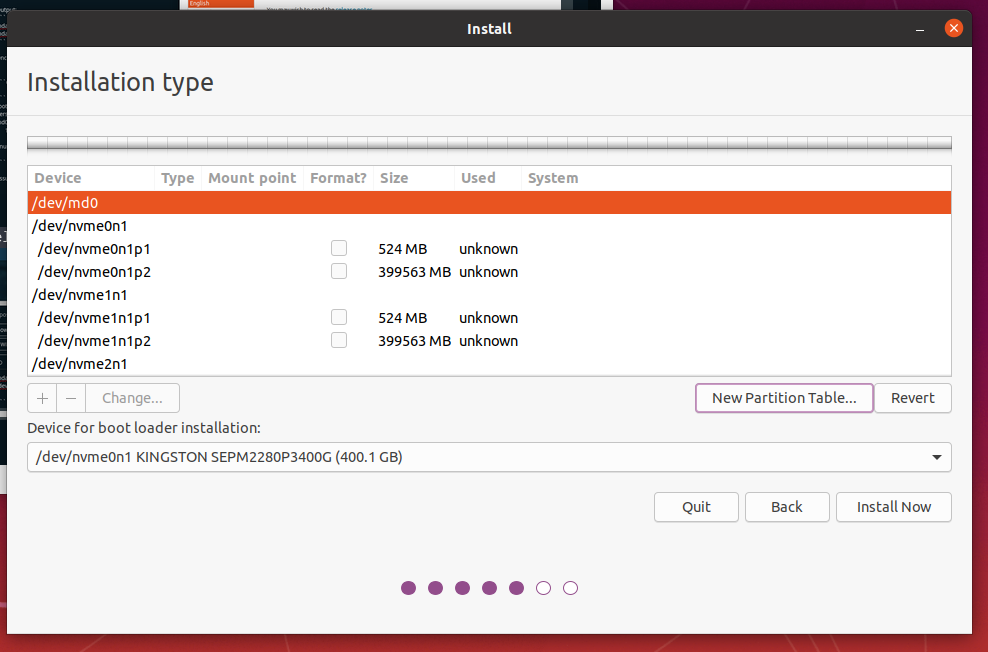
Select something else
Select md0 and select “New Partition Table”
Then hit the + symbol to add new, and configure as follows:
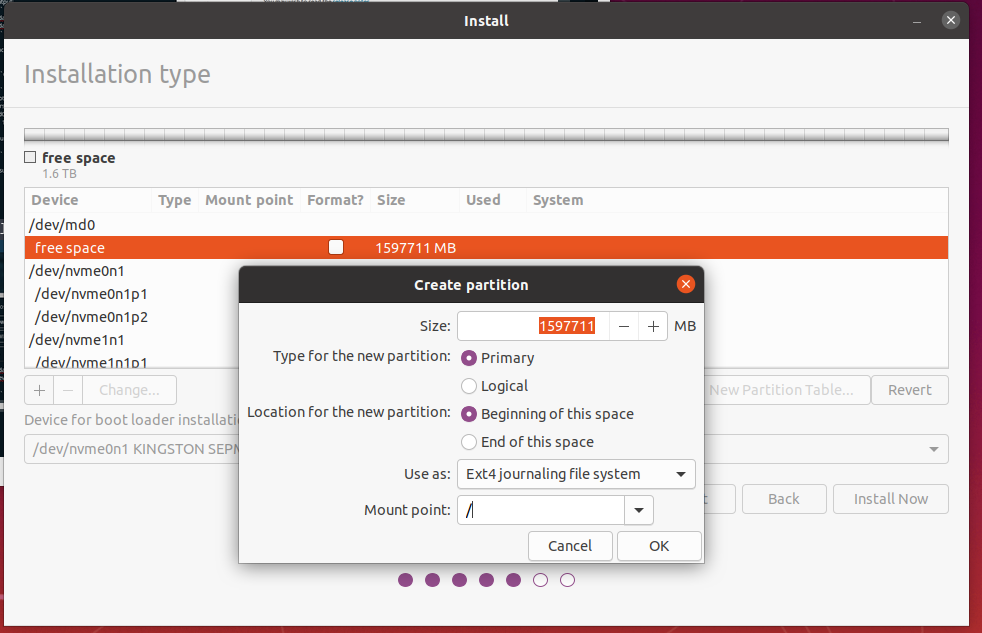
It is also critical to select the EFI partition and the boot partition (and make sure to format /boot as EXT4)
NOTE: It isn’t possible to have ubuntu format the EFI partition automatically. Hop back to the terminal and format it. DO NOT FORMAT IT if you are dual booting or if the EFI partition has already been created from prior installs or otherwise already existed before you started fiddling with things. It is also not necessary to make an EFI partition if you are dual booting and have other block devices that already contain an EFI partition. That EFI partition will “bootstrap” your Linux install, mount the /boot parition and THEN assemble the array and boot.
It isn’t as complex as it seems if you understand this sequence of events.
The command in my case was
root@ubuntu:/home/ubuntu# mkfs.fat /dev/nvme0n1p1
mkfs.fat 4.1 (2017-01-24)
I know that once you hit next the installer SAYS it will format the partition as ESP. But in my case it didn’t.
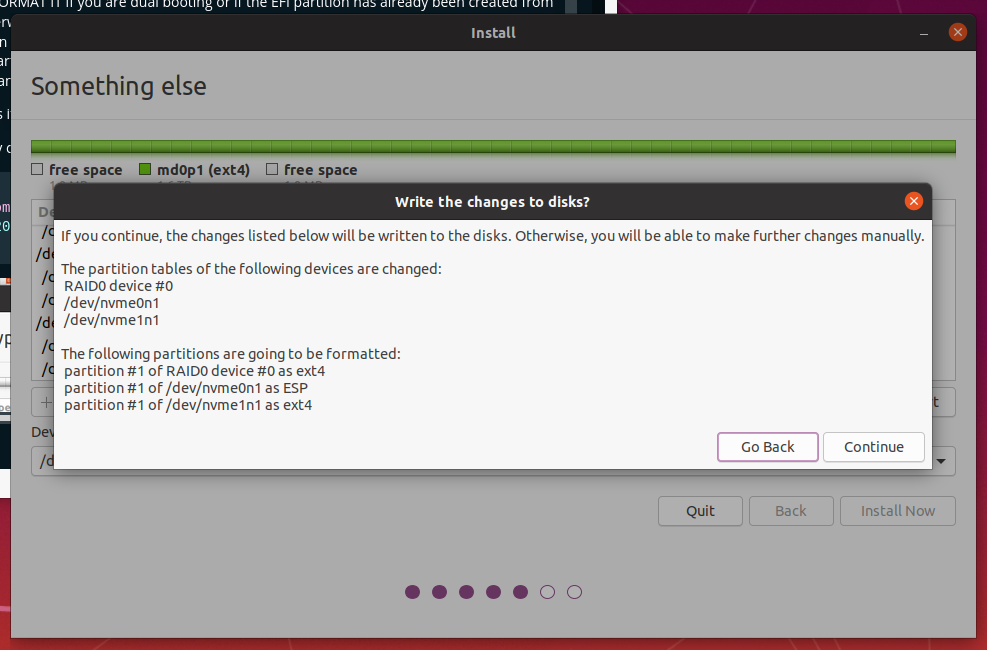
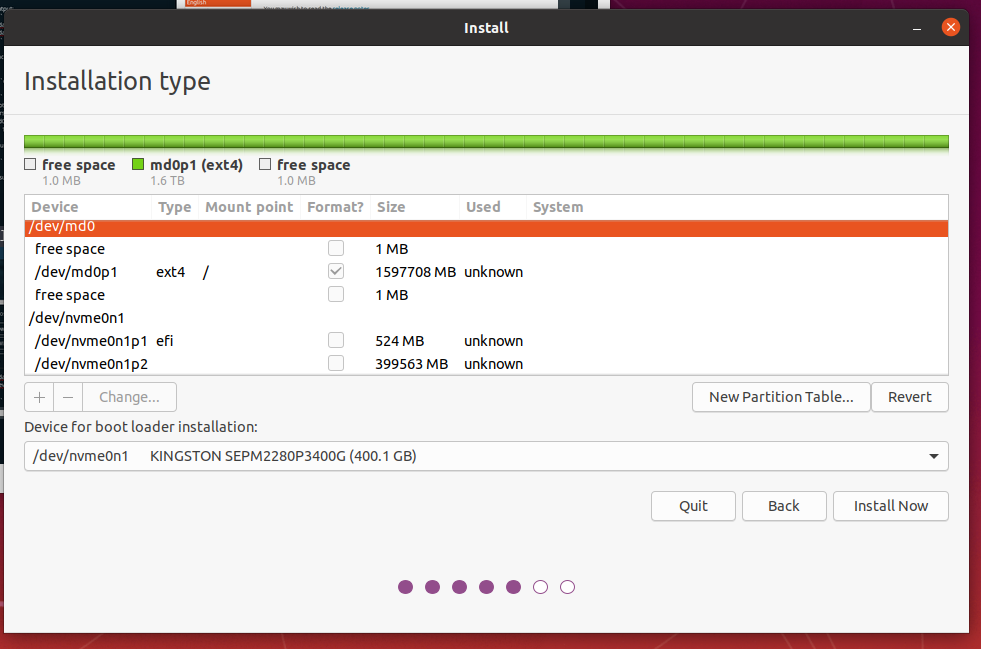
Select your efi partition, the partition for /boot and /dev/md0p1 for /
Proceed with the Installation Normally
The really crazy thing is that, I believe, Linux MD works perfectly fine via point-n-click in the Ubuntu Server Installer?
At the end of the installer you will probably get an error. Or It’ll ask to Continue Testing or Restart now. You want to Continue Testing. (Or next through the Error)
it’s back to the terminal for us.
Before rebooting drop to a terminal again and make sure /target is mounted
root@ubuntu:/home/ubuntu# lsblk
NAME        MAJ:MIN RM   SIZE RO TYPE  MOUNTPOINT
loop0         7:0    0     2G  1 loop  /rofs
sda           8:0    1  14.8G  0 disk
└─sda1        8:1    1  14.8G  0 part  /target/cdrom
nvme3n1     259:0    0 372.6G  0 disk
├─nvme3n1p1 259:10   0   500M  0 part
└─nvme3n1p2 259:11   0 372.1G  0 part
  └─md0       9:0    0   1.5T  0 raid0
    └─md0p1 259:13   0   1.5T  0 part  /target
nvme2n1     259:1    0 372.6G  0 disk
├─nvme2n1p1 259:8    0   500M  0 part
└─nvme2n1p2 259:9    0 372.1G  0 part
  └─md0       9:0    0   1.5T  0 raid0
    └─md0p1 259:13   0   1.5T  0 part  /target
nvme1n1     259:2    0 372.6G  0 disk
├─nvme1n1p1 259:6    0   500M  0 part  /target/boot
└─nvme1n1p2 259:7    0 372.1G  0 part
  └─md0       9:0    0   1.5T  0 raid0
    └─md0p1 259:13   0   1.5T  0 part  /target
nvme0n1     259:3    0 372.6G  0 disk
├─nvme0n1p1 259:4    0   500M  0 part  /target/boot/efi
└─nvme0n1p2 259:5    0 372.1G  0 part
  └─md0       9:0    0   1.5T  0 raid0
    └─md0p1 259:13   0   1.5T  0 part  /target
So even though we installed mdadm, we did not install mdadm on our freshly setup system currently mounted at /target
Inside there you will have to chroot and apt install mdadm again … this is why the grub-install installer fails – the initial ramdisk and grub do not understand md devices. Kind of makes sense.
The initial ramdisk lives on the boot partition so it can load the drivers and utils to boot the system.
So apt install them. Then grub-install on at least one underlying nvme and then run update-initramfs
Also save your mdadm config before running update initramfs otherwise guess what doesn’t get copied to the initial ramdisk? Ulgh
All that, but step by step:
First, chrooting and apt installing:
root@ubuntu:/home/ubuntu# cd /target
root@ubuntu:/target# mount --bind /dev dev
root@ubuntu:/target# mount --bind /proc proc
root@ubuntu:/target# mount --bind /sys sys
root@ubuntu:/target# chroot .
root@ubuntu:/# apt install mdadm
Reading package lists... Done
Building dependency tree
Reading state information... Done
The following package was automatically installed and is no longer required:
  linux-modules-5.4.0-1002-oem
Use 'sudo apt autoremove' to remove it.
The following additional packages will be installed:
  finalrd
Suggested packages:
  default-mta | mail-transport-agent dracut-core
The following NEW packages will be installed:
  finalrd mdadm
0 upgraded, 2 newly installed, 0 to remove and 817 not upgraded.
Need to get 422 kB of archives.
After this operation, 1281 kB of additional disk space will be used.
Do you want to continue? [Y/n]
NOTE: If you get an error here it is because DNS is not working.
echo "nameserver 1.1.1.1" >> /etc/resolv.conf
then re-run the above apt commands. If that doesn’t work, let us know.
Next up we can make sure mdadm correctly scanned & configured the array for a reboot
cat /etc/mdadm/mdadm should output something like
root@ubuntu:/# cat /etc/mdadm/mdadm.conf
# mdadm.conf
#
# !NB! Run update-initramfs -u after updating this file.
# !NB! This will ensure that initramfs has an uptodate copy.
#
# Please refer to mdadm.conf(5) for information about this file.
#

# by default (built-in), scan all partitions (/proc/partitions) and all
# containers for MD superblocks. alternatively, specify devices to scan, using
# wildcards if desired.
#DEVICE partitions containers

# automatically tag new arrays as belonging to the local system
HOMEHOST <system>

# instruct the monitoring daemon where to send mail alerts
MAILADDR root

# definitions of existing MD arrays
ARRAY /dev/md/0  metadata=1.2 UUID=000000:000000:000000:000000 name=ubuntu:0

# This configuration was auto-generated on Thu, 16 Apr 2020 20:42:01 -0400 by mkconf
(Your numbers will be unique).
If you do NOT get any output, or a file not found, no problem. We’ll do it manually:
mdadm --detail --scan >>/etc/mdadm/mdadm
Finally, if you had to do that manually, you need to tell the system you need raid at boot. Manually.
echo raid0 >> /etc/modules
NOTE: Use raid1 or raid5 here if you created that type of array in an earlier step.
Then lsinitramfs /boot/initrd.img |grep mdadm
root@ubuntu:/# lsinitramfs /boot/initrd.img |grep mdadm
etc/mdadm
etc/mdadm/mdadm.conf
etc/modprobe.d/mdadm.conf
scripts/local-block/mdadm
scripts/local-bottom/mdadm
usr/sbin/mdadm
This command just verifies our initial ramdisk, located at /boot, contains the files necessary to assemble the array. If you’re thinking gosh, I wonder if /boot is a parition or just a directory on the raid array then look at you, you galaxy brain, you. Let’s verify with lsblk:
root@ubuntu:/# lsblk
NAME        MAJ:MIN RM   SIZE RO TYPE  MOUNTPOINT
loop0         7:0    0     2G  1 loop
sda           8:0    1  14.8G  0 disk
└─sda1        8:1    1  14.8G  0 part
nvme3n1     259:0    0 372.6G  0 disk
├─nvme3n1p1 259:10   0   500M  0 part
└─nvme3n1p2 259:11   0 372.1G  0 part
  └─md0       9:0    0   1.5T  0 raid0
    └─md0p1 259:13   0   1.5T  0 part  /
nvme2n1     259:1    0 372.6G  0 disk
├─nvme2n1p1 259:8    0   500M  0 part
└─nvme2n1p2 259:9    0 372.1G  0 part
  └─md0       9:0    0   1.5T  0 raid0
    └─md0p1 259:13   0   1.5T  0 part  /
nvme1n1     259:2    0 372.6G  0 disk
**├─nvme1n1p1 259:6    0   500M  0 part  /boot**
└─nvme1n1p2 259:7    0 372.1G  0 part
  └─md0       9:0    0   1.5T  0 raid0
    └─md0p1 259:13   0   1.5T  0 part  /
nvme0n1     259:3    0 372.6G  0 disk
├─nvme0n1p1 259:4    0   500M  0 part  /boot/efi
└─nvme0n1p2 259:5    0 372.1G  0 part
  └─md0       9:0    0   1.5T  0 raid0
    └─md0p1 259:13   0   1.5T  0 part  /
Bold for emphasis. So yes, /boot is its own parition and this is more likely to work.
You should also grep around in initrd.img for raid[0,1,5,6,456] just to make sure the kernel modules are there because they might not be if something has gone wrong with your mdadm conf or your other commands.
If all goes well, you’ll boot normally.
If not you’ll just get a grub2 prompt. That means grub2 installed but can’t find a configuration .
No worries . You can reboot from the live installer USB again and then open a terminal and run update-grub2 from the chroot again.
root@ubuntu:/# update-grub2
Sourcing file `/etc/default/grub'
Sourcing file `/etc/default/grub.d/init-select.cfg'
Generating grub configuration file ...
Found linux image: /boot/vmlinuz-5.4.0-24-generic
Found initrd image: /boot/initrd.img-5.4.0-24-generic
Found linux image: /boot/vmlinuz-5.4.0-14-generic
Found initrd image: /boot/initrd.img-5.4.0-14-generic
Adding boot menu entry for UEFI Firmware Settings
done
Tada! Up and running with Linux MD on a fresh install of Ubuntu 20.04 in only 83 easy steps! 
Thanks for sticking with me. Any questions?