I decided to just start a thread for all of my build logs here instead of starting a new one each one.
So welcome to my emporium of bad decisions!
I decided to just start a thread for all of my build logs here instead of starting a new one each one.
So welcome to my emporium of bad decisions!
So, a month ago, there was this guy on reddit who posted really nice Gamcube build on Reddit. Seeing that made me want to emulate it with a transparent ice blue shell. Anyway, I was already thinking of downsizing my PC because:
But now it has been one month since I asked the guy for is .stl, with no sign of life. So I decided that instead to wait for I don’t how long it can be, I might just do it myself.
However, compared to my last Dreamcast build, the Minisforum UM870 do not have a readily available 3D model of its shell online compared to the GMKtec M6 Ultra. So I need to do that myself. I’m still not well verse in 3D conception, so instead of going all in in that Gamecube project, I will do intermediary steps in between. Maybe even those steps will gain me some commission work, who knows.
Welcome to my first intermediary step: the NES PC!
I found a 3D model of it online (a bit smaller than the original), and I’m using it to make myself a case that I will fully 3D print. Had already to do some major change to the model like adding columns on the bottom and upper piece so I can screw them together. And also make it more fit to have a mini PC inside.
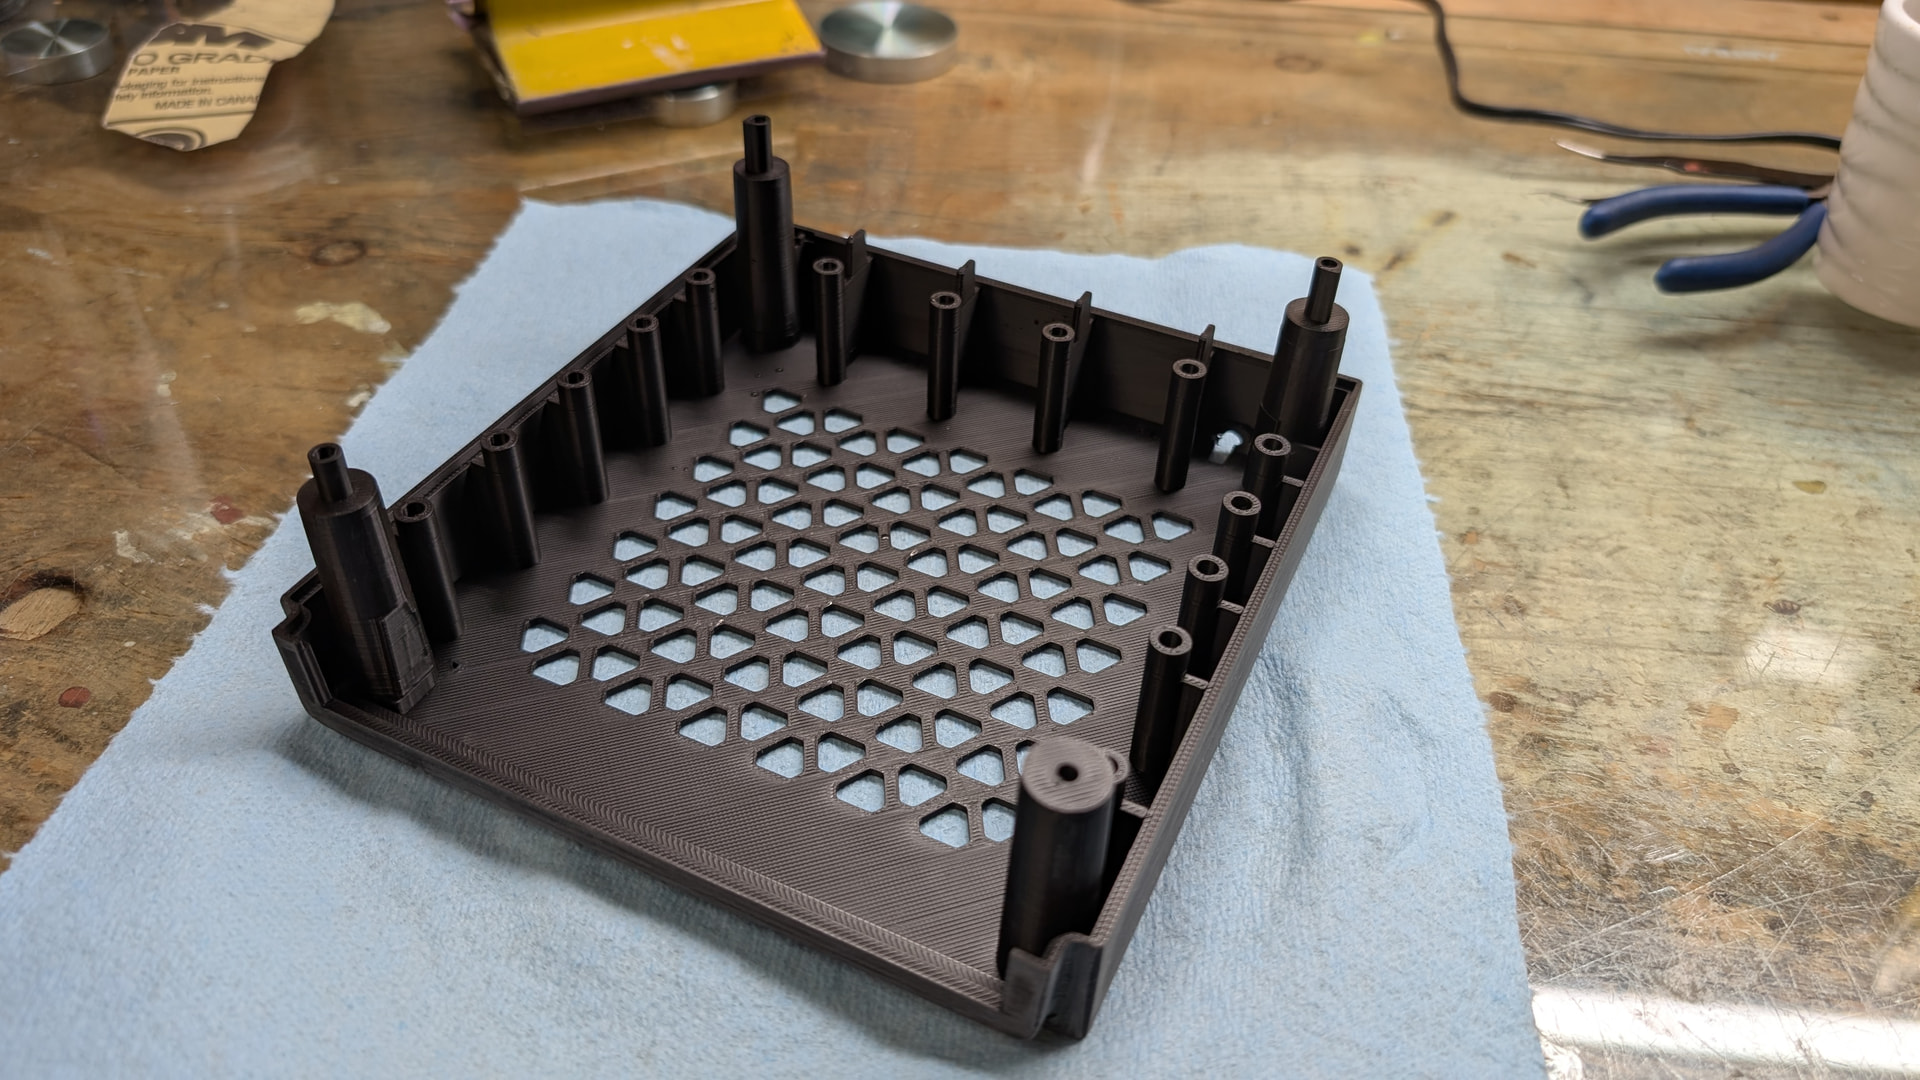
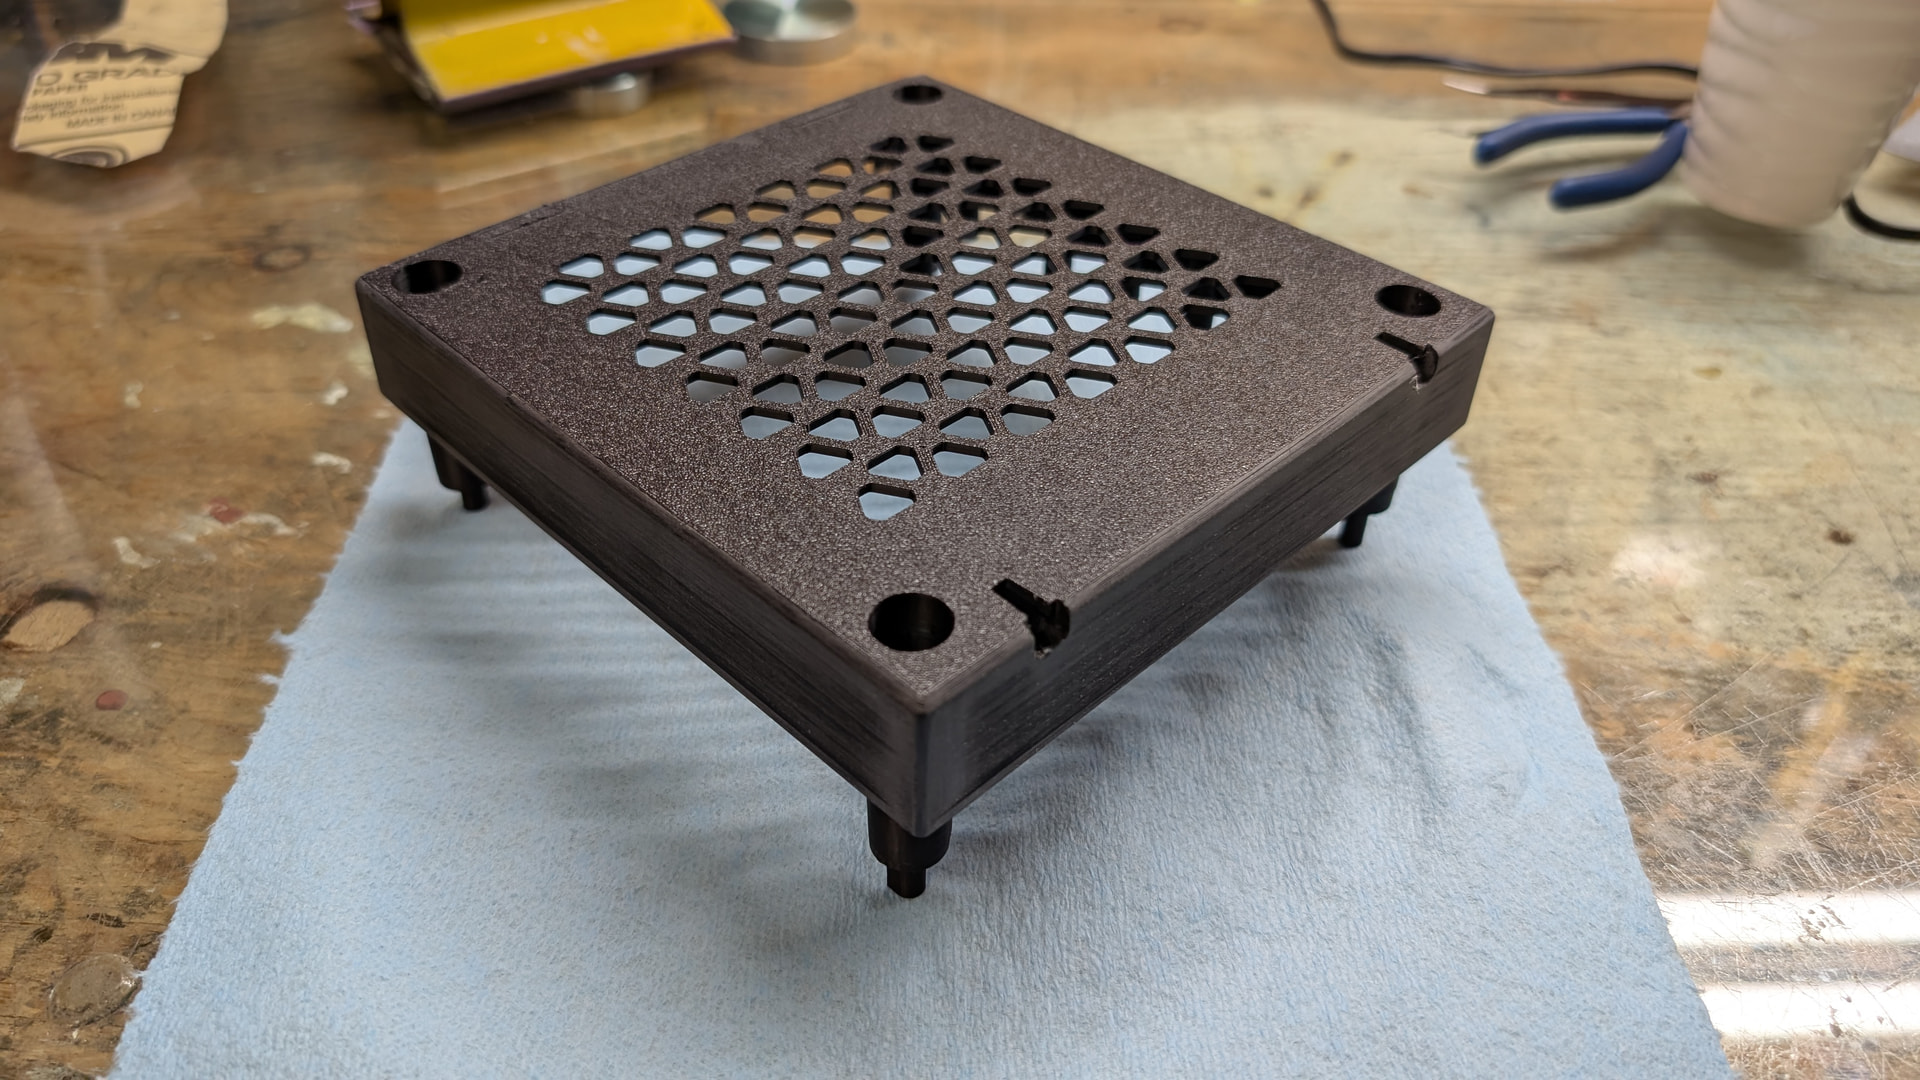
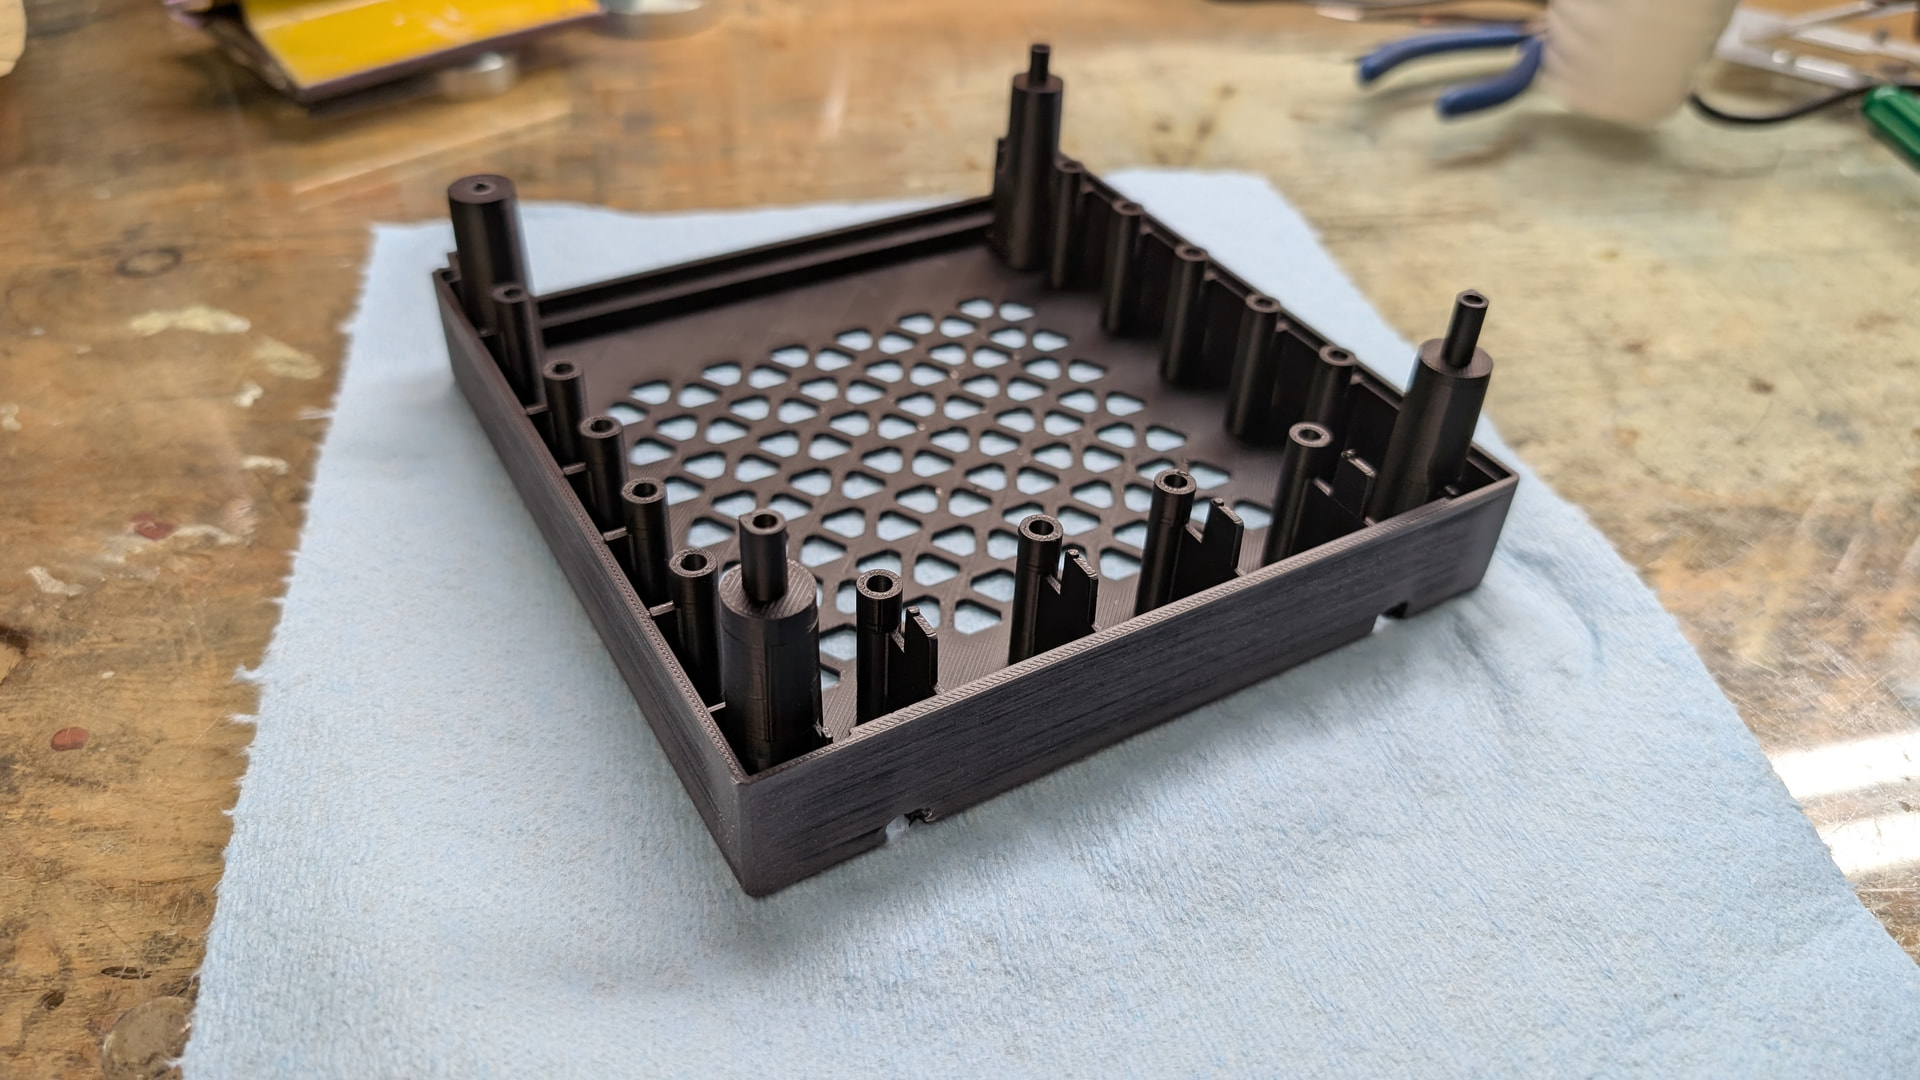
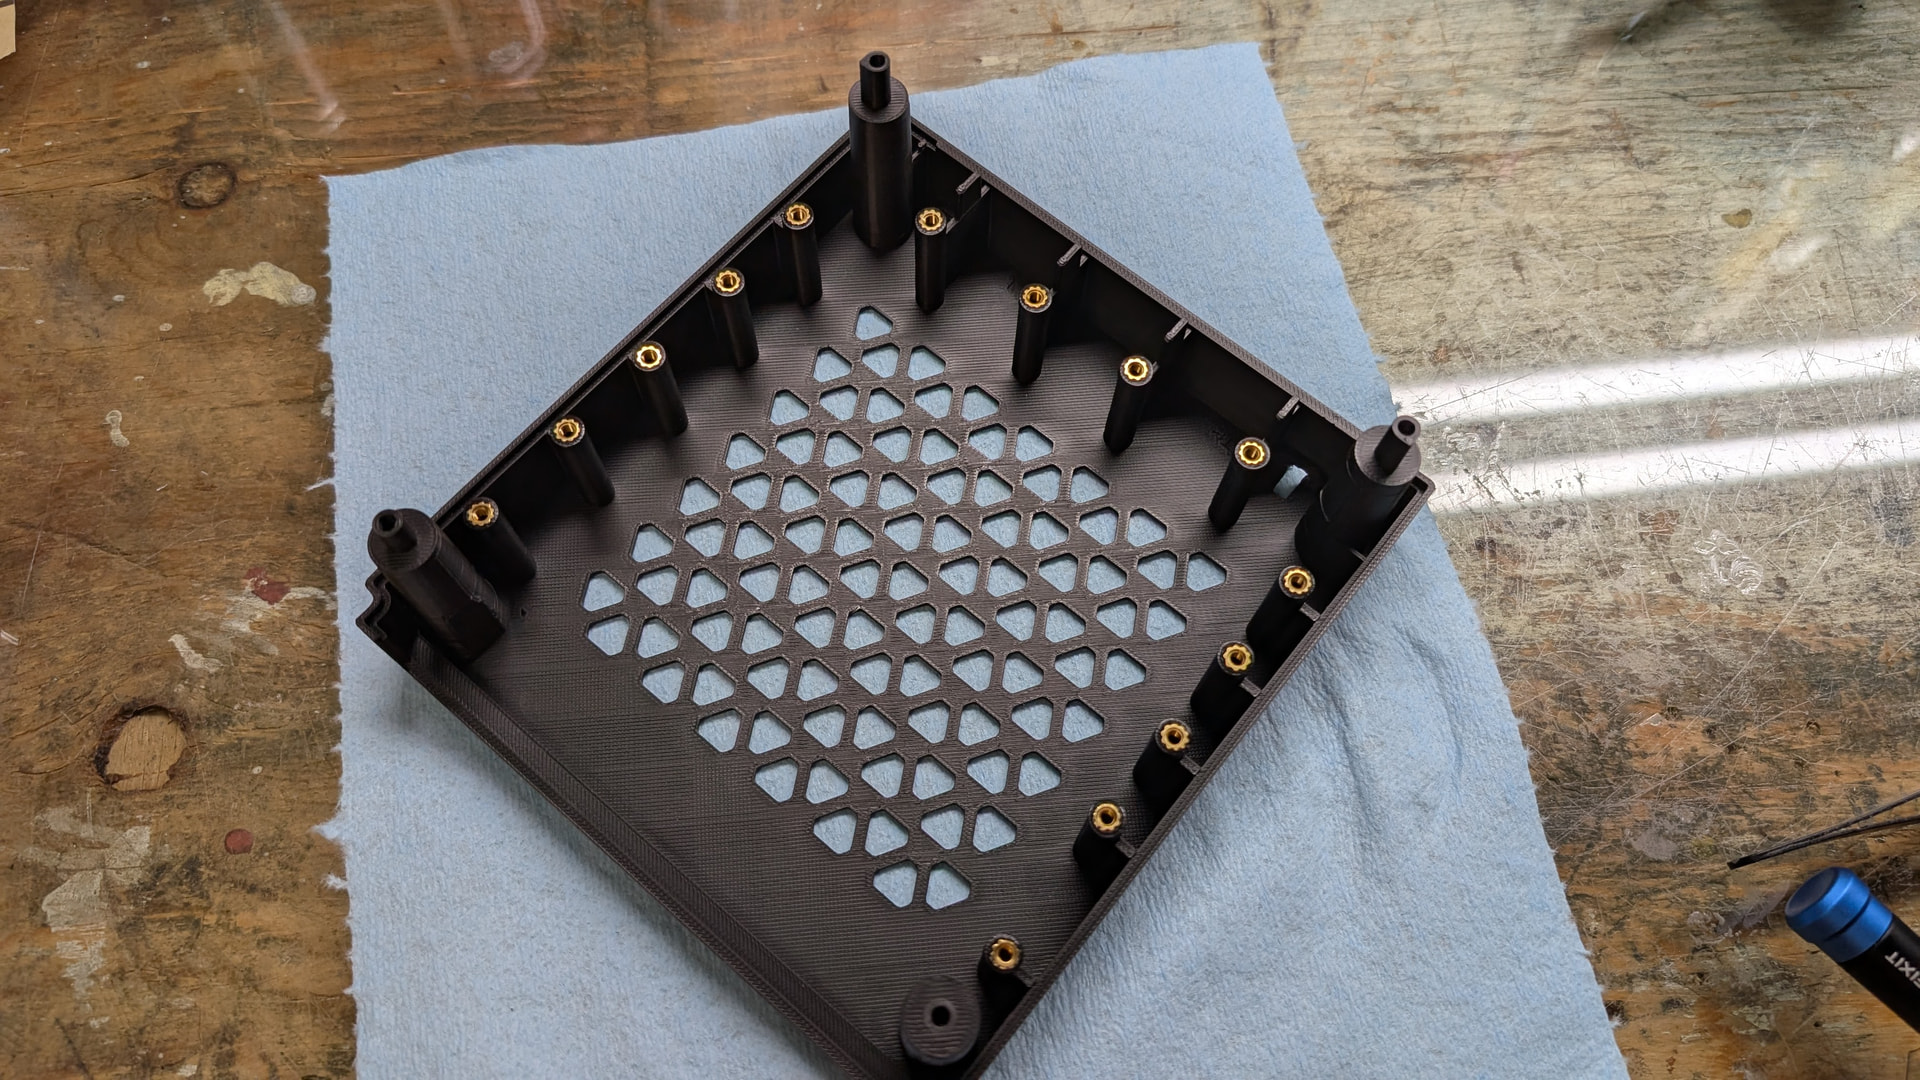
But first I need to print a prototype to see if I was able to successfully reproduce the Minisforum UM870’s back IO and stand off.
After 3 iterations, I was finally able to nail the location of the IO and supporting posts. Also I change the orientation from CPU at the bottom, from CPU at the top. With a NES build, the button can just push on the actual minipc button that way, and already in the right orientation for the target Gamecube build.
 You change your mind
Like a girl changes clothes
Ya, I might have commitment issues lol
But I didn’t felt like completing the NES build. The idea to pay to print everything for something I will likely not use a lot is not tempting me too much in a context where I should not spent much. But I did acquired 3D design skills tinkering with that project, so not everything is lost. And I will complete it at a later date.
But now, time to what motivates me really: a Gamecube build!
6 years have been since my OG, my jewel コンパ (Compa)
I never thought I would main again a Gamecube build, but apparently the temptation is too strong lol. I’m born for miniPCs. But now the paradigm of the build is totally different: from hack and saw to exclusively 3D printed. But there is that 3D printable Gamecube, which make it way easier to do everything in 3D
And Aqua because I already bought an aftermarket shell in ice blue. I like the colour so much, and the current trends has transparent tech making a come back lol.
I will definitely not get the files from the inspiration Gamecube build on Reddit, but I’m working my way around by analyzing is video.
By example, by educated guess I know the standoff used are 10mm tall. That means the ram and SSD are literally like barely 1mm from the base plate. So I understand why he made his be CNCed in metal, but I might stick to 3D printed pieces and just plan opening to let heat move. Also that means there needs to be a cutout for the IO to not hit the plate.
Also I realized the back IO will sit further recess than the Gamecube’s, but it will be 3D printed, so not problem.
And I don’t need to copy him, I can just do my own stuff. So planning to do custom mounts for 40mm fan at each fan to provide the system with plenty of air (wanted to do a 60mm slim Noctua fan, but not gonna fit at the end). I don’t need to be constrained by the OG internal Gamecube pieces.
I’m excited to do it. Just hoping the library will have bought that translucent ice blue PLA lol.
And maybe need to make Aqua as the mascot of the build (even if I have not watched Konosuba lol)
And just got the shell!
It’s kinda bright, kinda fluorescent almost lol. But with stuff inside that will surely tone it down. Also I will paint the front port panel and the power button grey so it looks more like a run of the mill Gamecube.
Aside of that, I will soon a print a prototype of the platform for the mini PC. To solve the issue of the ram and SSD being potentially really close to it, I put triangle for aeration holes, and thicken that part to 4mm to be sure there is no rigidity concerns.
And the back Io panel is coming along nicely. Hopefully everything is aligned from the start so I don’t need to move around any of the ports.
And designed two fan mounts for Noctua 40mm fans. Maybe might need to sand down the base a little bit, or maybe not. But it will close with the PCB that’s for sure.
The pieces are finished to be designed, and I just went today at the library to print them. The pieces will surely be printed in 2 days. Hoping the IO port will indeed fit 
And worked on the shell. I founded out transparent plastic really doesn’t behave the same way as opaque plastic. I heard about that, but now I’ve experienced it and I understand now.
Decided to drill the inside of the post to be able to put an heat insert inside. My logic was that it would be more solid than just being screwed in the plastic. But that means the sides were now thin, and with the heat insert, the plastic was more giving way than melting around the heat insert, which makes it look sloppy. I already drilled the insides, so I had to put them. Would not redo it, or would do it with 2mm heat insert, not 3mm I had on hand.
Luckily the holes still align at least
Also just got that not working Xbox today. Was cheap, 30$. Saw it by chance on Marketplace. So ya, I already have a build in the queue lol.
There is progress… and stepbacks lol
First I crudely installed a memory flap holder and put mesh on the controller ports. Will design a better holder for the memory flaps, and will probably print fake ports, but for the moments it gives a preview of the looks.
And I got all the 3D printed pieces printed
The support plate for the mobo works well. Enough rigidity, enough ventilation, enough clearance for the ports, a 1mm clearance between the plate and the ram as expected. Designed it well (except maybe the most forward holes for the heat insert I should have put more material around, but still fine). However one hole is severely misaligned for the mobo, but I got 3 screwed done correctly, so it’s fine for the moment.
However, the heat insert I put in the lower shell are misaligned, so will need to probably drill the hole to widen them so I screw all the screws. It was really a mistake to put those heat inserts, otherwise I would have no problem for the alignment.
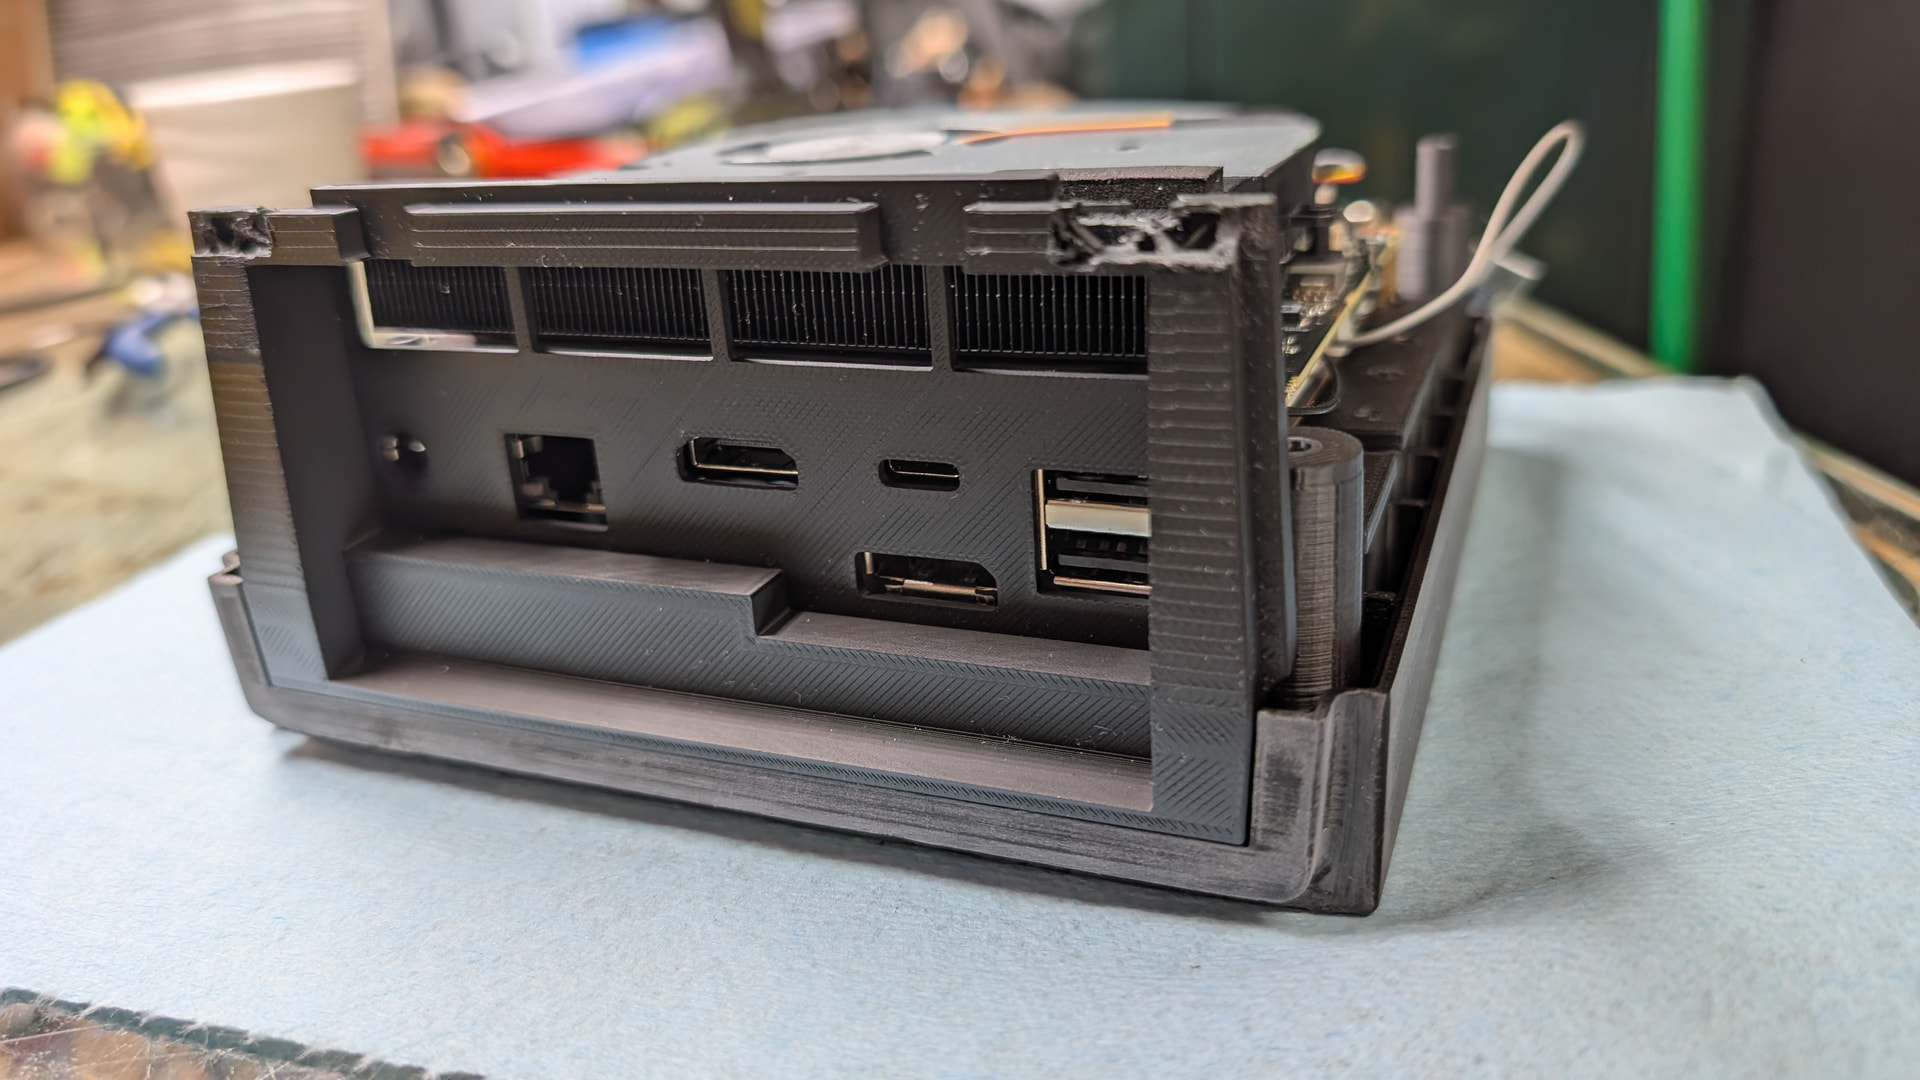
However, where it begins to have fit issues was with the back IO plate. The ports do aligned well, but I forgot to take into consideration notches on the upper case. So I dremelled material off to make it fit.
Anyway that piece is temporary because I will print translucent blue when that colour will be available. So will just adjust the 3D model and print it with the proper notches.
At least the IO do align. That was my greatest worry but just went flawlessly on that side.
Where the fit was really wrong was with the fan. For the left fan where usually there are no fan on the Gamecube, the fan assembly is in conflict with the upper shell. I could trim down the fan assembly, but then I have another problem that I need to raise the fan from its initial position because it enters in conflict with the PCB of the mobo.
And for the right fan, where there is actually a fan on the Gamecube, it’s in conflict with a support post of the CPU cooler.
So now I decided if I want fans or not. Will do some test to see the temps. If I want the Noctua fans, I would probably be able only to only have one, and I would need to shift the mobo (and IO cutout) to the left to make it fit. I was thinking I would be able to make fit two, but I should have just followed the initial video and only put one with the mobo offset to the left.
For the time being I assembled it to test everything and see the temps, and I will decide from there about what to do.
I did a pressure test to assess the lack of fan, and noticed my ram was getting pretty toasty.
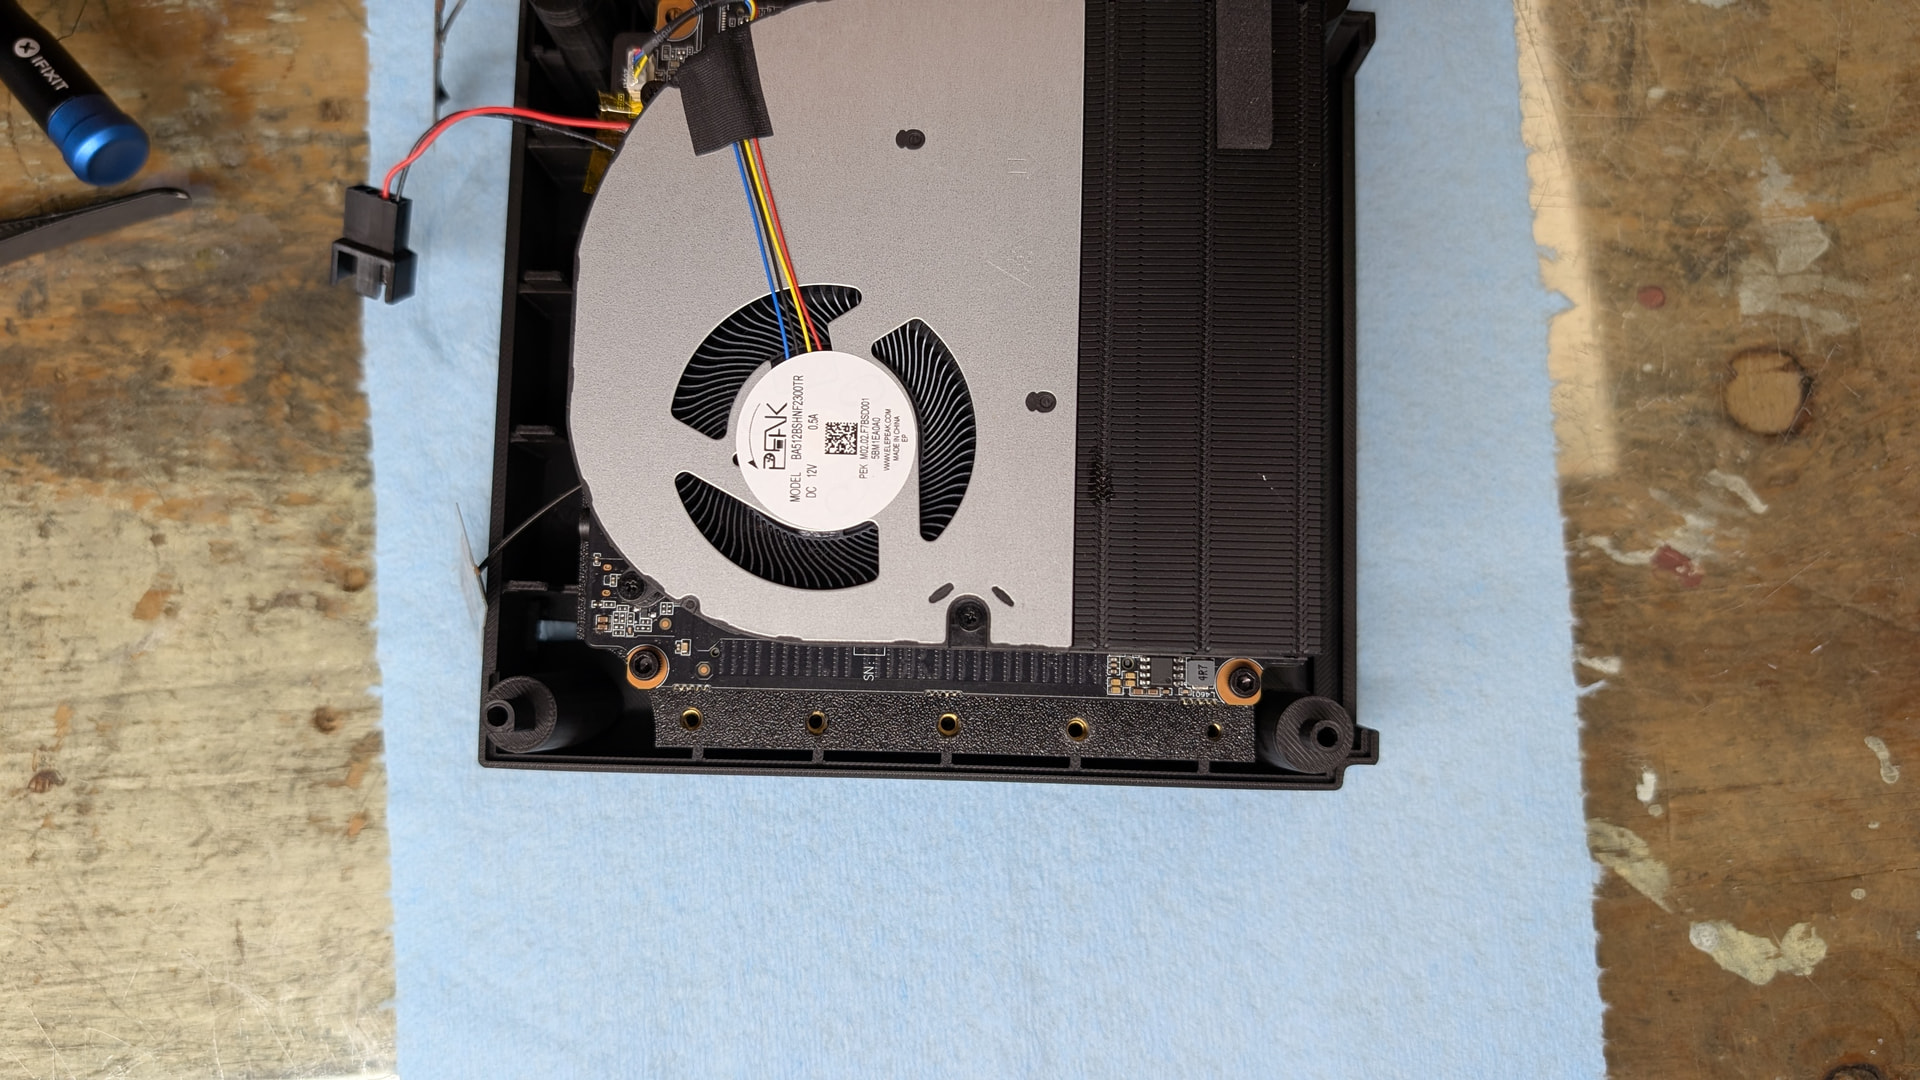
Seeing that, I had the idea to put the small original fan case to cool the ram. However, were the ram is is a surelevated part of the bottom shell, so put it over the SSD instead just to offer some airflow. Also had to remove some support posts to make sure the fan could spin freely.
And would you look at that, ram temps are much better now. So ya will not add case fans because the temps are not worst than in the original enclosure. Repurposing the small fan case for the ram is better instead.
Also I adjusted the standoffs, and enlarged the holes on the base plate, but the heat insert are still too often off because I decided to put heat insert. So ya that would not fix with how I did it.
So I’m thinking of just 3D printing the bottom shell (while simplifying the geometry inside to have more space for the fan and what not. And I would paint it the same grey I used for the small pieces to get that same 2-tone look that this ice blue N64.
Also I realized I need to bring the port cutout nearer to the mobo because right now there is a 1-2mm gap and I’m not able to plus my usb C cable.
Simplified the base to only print the essential. And also as I was changing everything, I made the columns way thicker and all the same perfect height. So now it will be good to have heat inserts.
And then I figured out, why not cut the amount of material to use, and just made the bottom full of aeration openings. Would be perfect for the SSD and ram
And might just put a 90mm Noctua fan in the basement too at this point, now I have the space lol. The piece is now for print, so will switch to the Xbox build as I worked also on it on the side.
Vert is the first from the Neptunia series to have a built with the console she actually represents! But I already named my previous PC, the NFC-4TF build, Vert. So for differentiation, this one is named Green Heart, her HDD form. And I want to experience it as a console too, hence why I will use a small SSD I have laying around to install Steam OS on it (until somebody commission me for an Xbox build, then gonna use that shell)
I got the idea to build in an Xbox to try to get rid of my old’s PC components. Ended selling most no problem, but was stuck with this idea in my mind.
The OG Xbox is the only console big enough that can fit a low profile GPU without using a riser, which was a big plus. I still have my RTX LP 3050, so gonna play with it.
And happened that I saw by chance a cheap not working OG Xbox on Marketplace, so I had to do the idea with my mom’s old pc parts lol.
And you have people that already designed great ITX test bench for LP GPUs. So I started this project by using Reeal’s ITX testbench with flex psu and Low profile vga.
From there, I tinkered to also be able to use my HPPlex GAN 250W as I still have this one on hand. Ended up with the following design.
The assembly is the same width as the recessed part of the back of xbox, making it an easy slot in after cutting it out. The HDPlex is mounted vertically on the wall so everything can be rigid and take less space. And there was lot of work that done to reduce the height of the 3D model I started with. The original would have been too tall to fit. This is in part achieved by making the floor of the model only 2mm thick.
The cutouts for the GPU bracket and the IO panel thus need to be through all the floor, which make it flimsy in some areas, but as it will be after glued to the floor of the Xbox, it’s not an issue at the end.
The print came out beautiful, and the C6 power plug, that I chose to kept the same style as with the original Xbox’ power plug, fits snugly.
However, building the PC, there are some slight issues. The HDPlex enters in conflict a little bit with the C6 power plug. I would redesign the piece to make a step back for the HDPLEX to solve that, but for the moment it’s fine. Only if I receive a commission I will fix this and reprint a new piece. It’s an expensive piece lol.
Also, because the HDPlex is too near, I’m unable to put the fan on top of the cooler with the bracket, so will just put the box cooler instead. Also had to cut the tab on the CPU cable because again it was entering in conflict.
The I proceed to disassemble the Xbox, and shaved the bottom to have a flat surface. Fun fact: the Xbox is not black, it’s a really dark green, as you can see per the dust lol.
And everything fits well! For the moment the testbench is just hot glued in, would only crazy glue a revised piece because of the aforementioned conflicts. But aside of that looks good, happy with how relatively uncomplicated it was.
Now I need to take are of the front. Will reuse the original power button, just need to figure how to solder it. And will do usb c 2.0 front ports at the location of the old controller ports .
Worked on the power button PCB today. So reused the preexisting cable to wire everything directly to the solder joint on the back. Was thinking of wiring the eject button as the reset button, but decided against as it would have been pressed accidentally too often. However, my wires were shorts, so with the front panel attached, they don’t quite reach the pins on the mobo
Also when testing I had the issue that the green lights would always stay on even when the system was power off.
Then I remember in preparation for this having read that the power button and the lights has a common ground, so decided to chop the end of the PCB off to break that common ground, without success.
I then realized the ground is just the common copper plate of the PCB, so I physically separated the LEDs from it with an exacto. And problem solved! The LEDs only turned on when the system would turn on.
And made my cable longer, so now they will reach the header.
So it all worked at the end! Looking like a real Xbox.
And it runs Bazzite! However, as you can notice, no more green light. I think the LEDs were not rated for the voltage of a normal PC header, so they burned out. Would need to replace that now 
Also, if I ever do a commission with it, I would for sure just buy a Minisforum BD775i SE has the CPU fan exhaus from the back. Right now the system is more toasty than I would like, so will surely had 80mm fans at each side, but with the Minisforum the cooling would be better and more adapted to this build.
Just now waiting for the USB C connectors to arrive, and I will call it done for the moment.
That is a very cool project funny to see what you all could fit into an old Xbox.
Received the USB C boards. Though I could just snip the sides to make it fit and be good with it, but realized the whole mounting plate was not allowing me to install the USB C ports.
Used dazzaXx’s OG Xbox USB C Controller Mount I found online, so didn’t want to change anything to it. So had to desolder the mounting bracket and now it’s good.
After a quick soldering job, everything is well soldered. I just used a USB 2 header to USB 3 header converter cable that I had on hand for a long time. Don’t remember why it was bought in the first place.
But then it dawned on me while I was in the shower after I finished soldering: the USB 3.0 header is a FEMALE one, not a MALE one like I would need. So cannot plug it lol.
I was too much on autopilot with the USB C header idea I totally gloss over that fact. So for the moment those 2 USB Cs will not be used. Maybe there is a male-to-male adapter so I don’t need to resolder lol
And the LEDs were not totally burned, so also soldered a 100ohm resistor to the positive wire, so now they should be good no problem. But then they burned out again. Maybe I need to add a 200ohm resistor instead? I’m wondering if my assumption of them being 3V is wrong.
Hot glued everything togheter and taadaa, just looks like an OG Xbox, but it runs Bazzite!
Bazzite is so smooth on it. I like it. Kind of tempting me to switch to Linux. Maybe not now for my main PC, but keeping the idea in mind. Just Steam Big Pictures mode is so sluggish. I guess it’s the use of a NVidia GPU which doesn’t help, so better to use it without the Bazzite install with the the Steam launcher.
New update. I finally went around to adjust the 3D to solve the small issues I had. Made some holes a little bit bigger for the heat inserts, and adjusted the region around the HDPlex without changing too much.
This include lowering the power plug by 4mm, and moving it toward the IO by 1 mm. And I thinned the wall supporting the HDPlex by 0.5mm, while also squaring the inside corner, so this way there should no more conflict.
I was thinking to add also a fan mount to the skeleton itself, but then I decided it would be better if any fan mount is made and glued separately.
And a a big new for me, the 3D model is now available on MakerWorld! (I still wish somebody would ask for a commission though lol)
https://makerworld.com/en/models/3029444-skeleton-for-og-xbox-pc-build
Ya long time without an update. The following I did right after finishing the xbox, but never posted it because I went away to see my gf. So it has been done since a while.
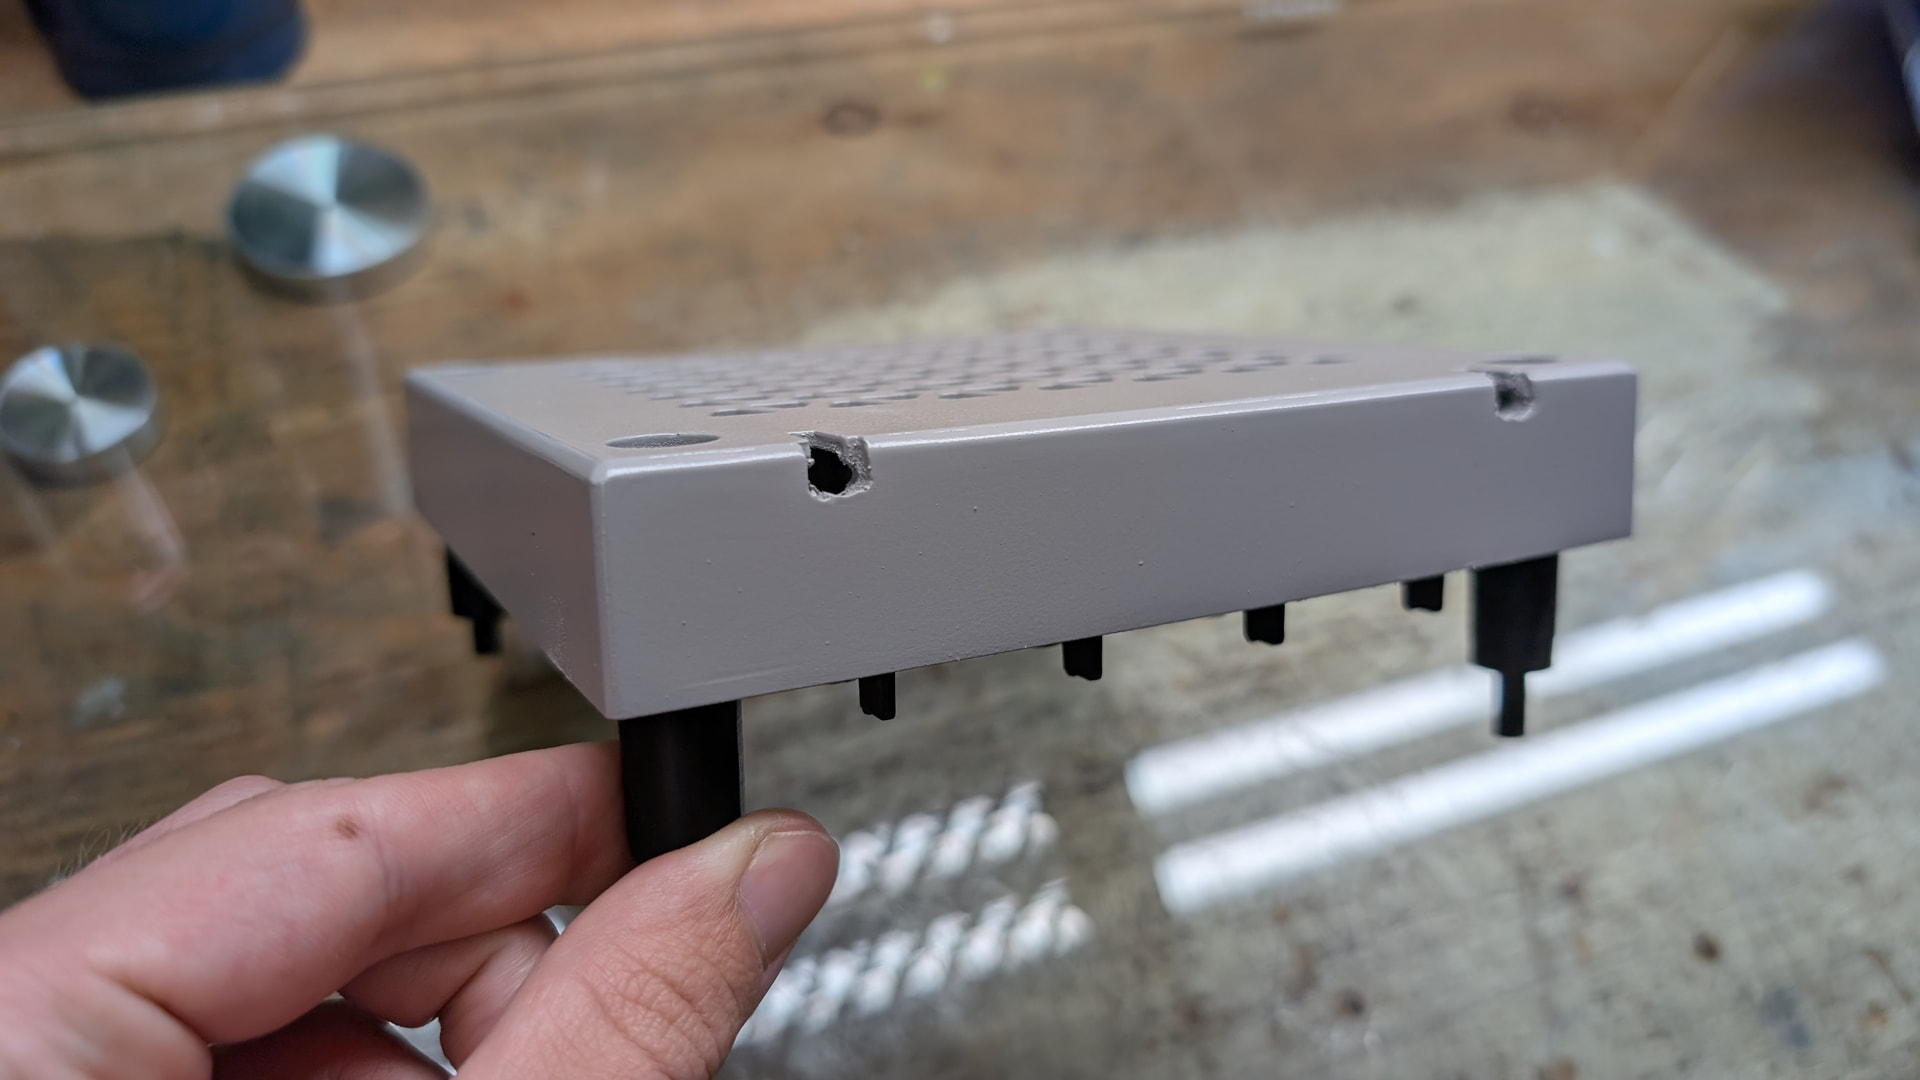
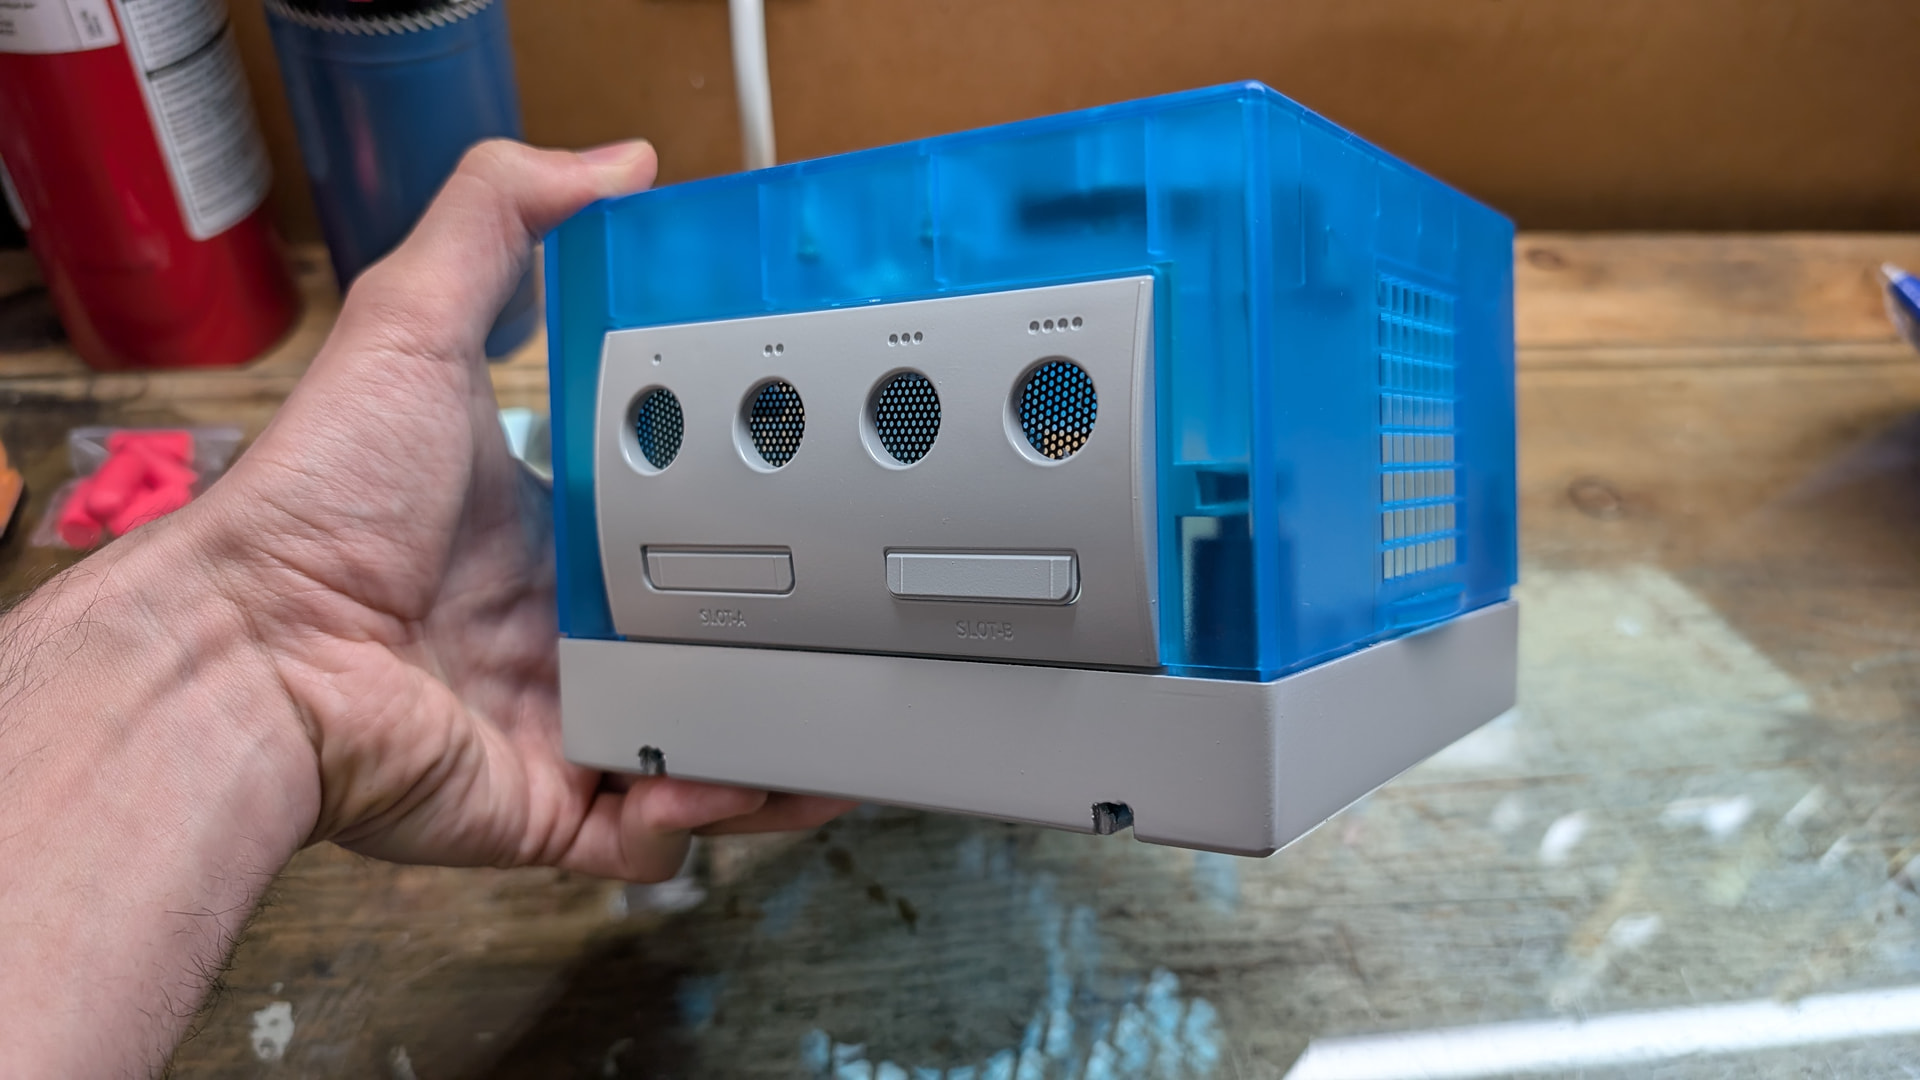
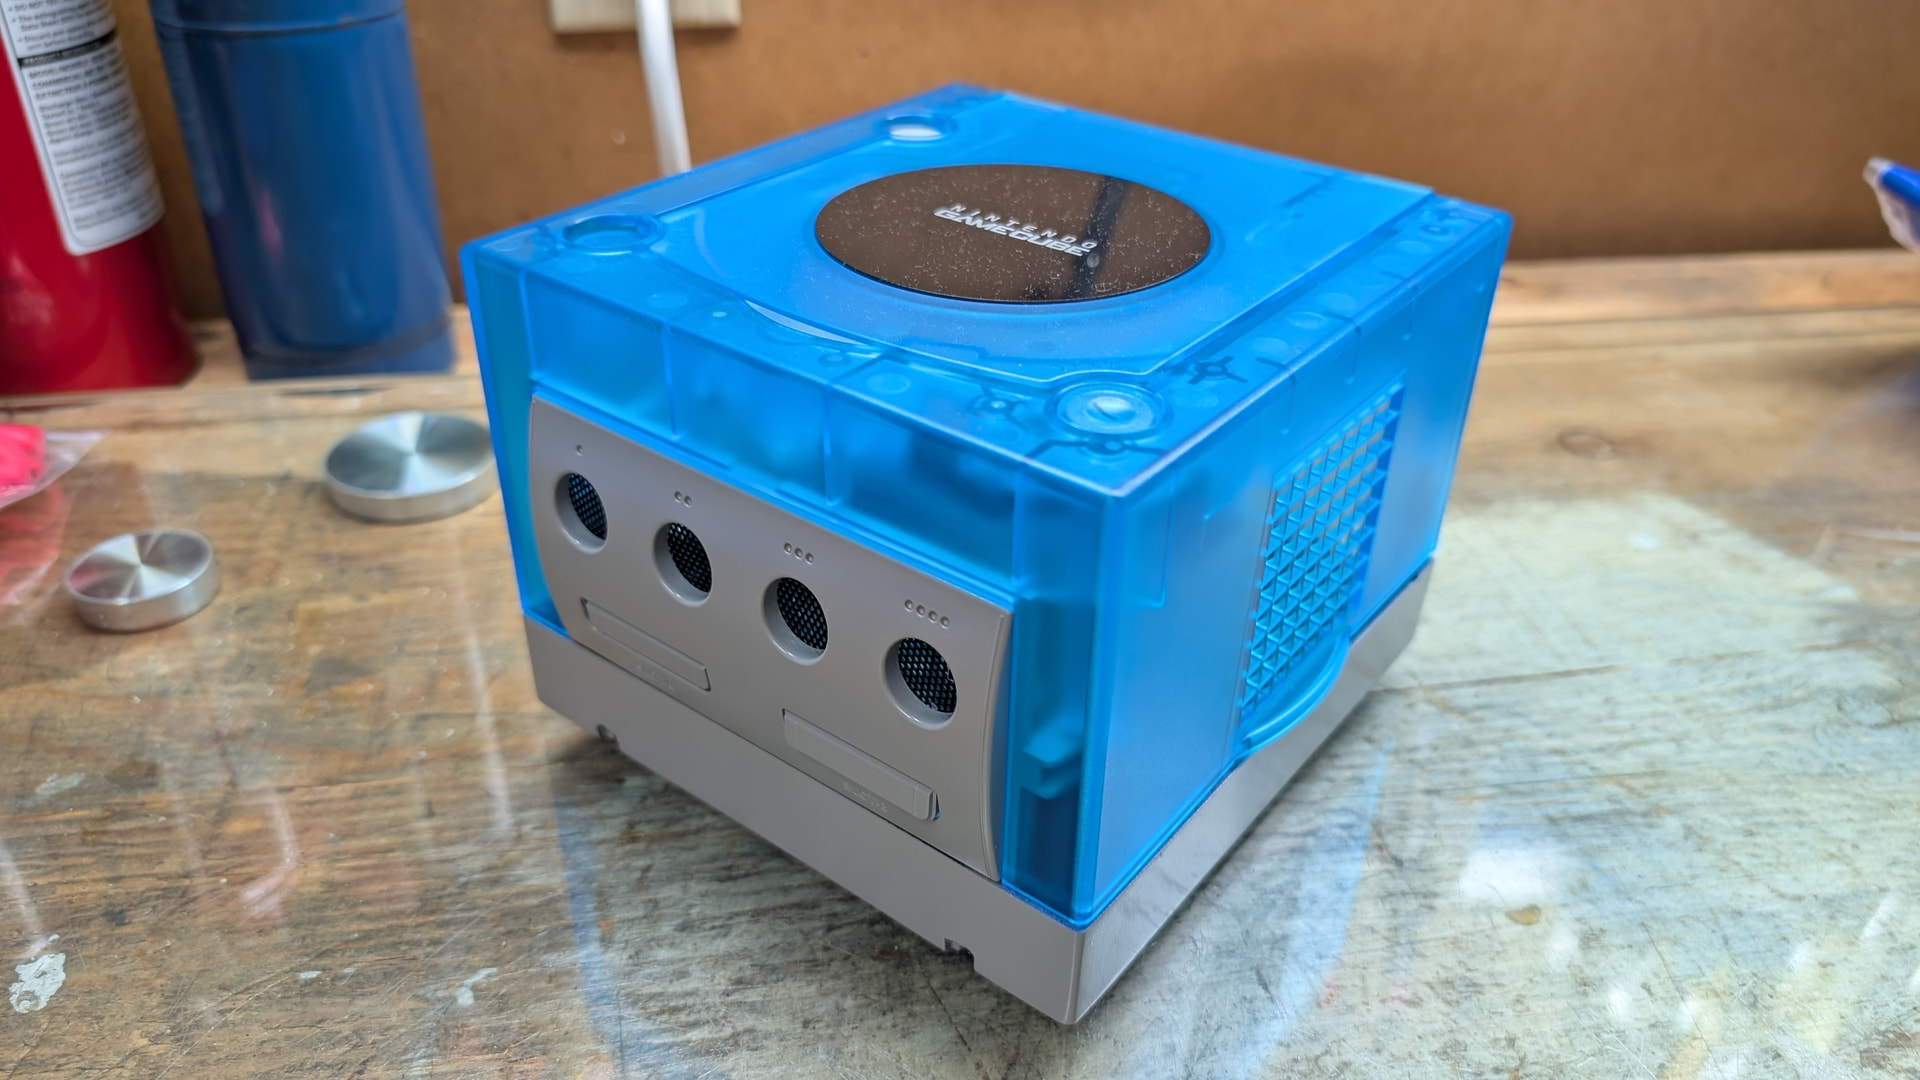
3D printed the new base for the Gamecube.
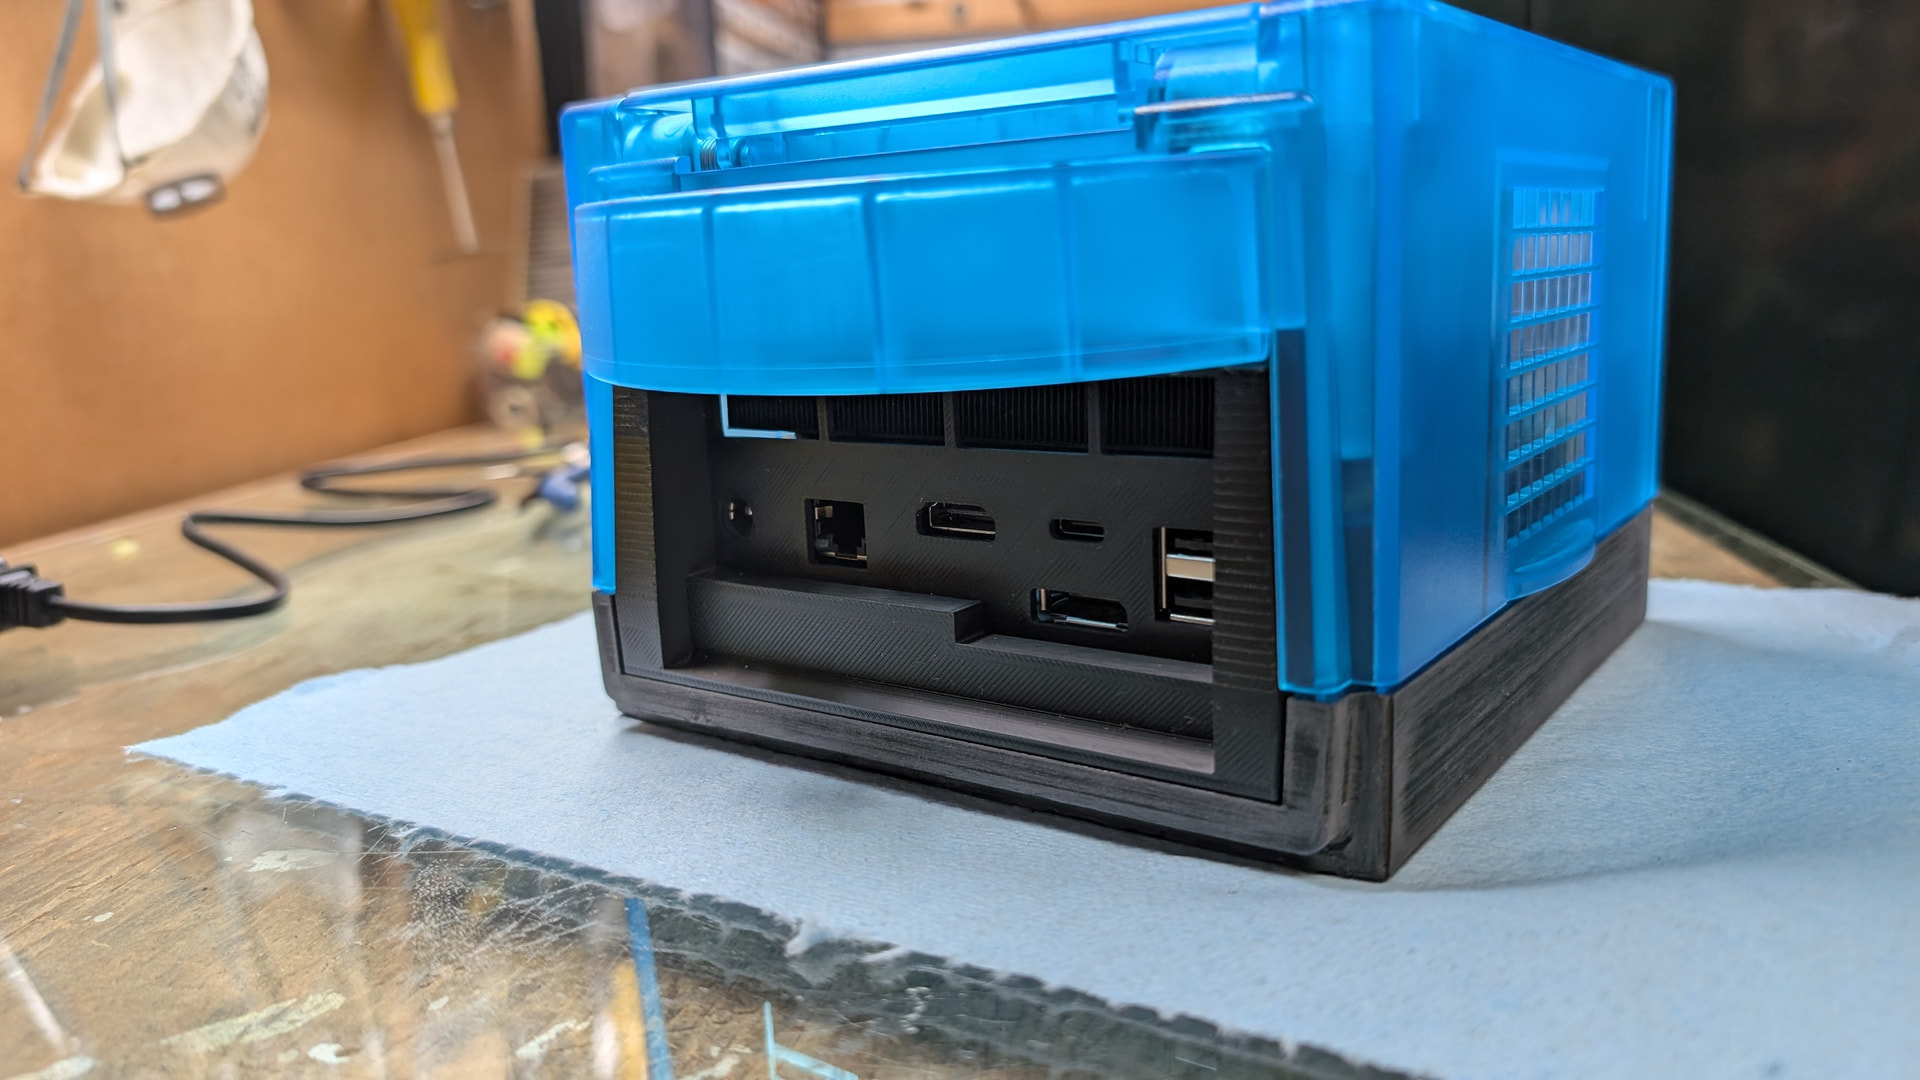
And everything fits perfectly. Even now the back IO is no longer an issue, aligns perfectly. So I did designed the piece well before, it’s just the heat insert on the previous bottom was misaligning everything.
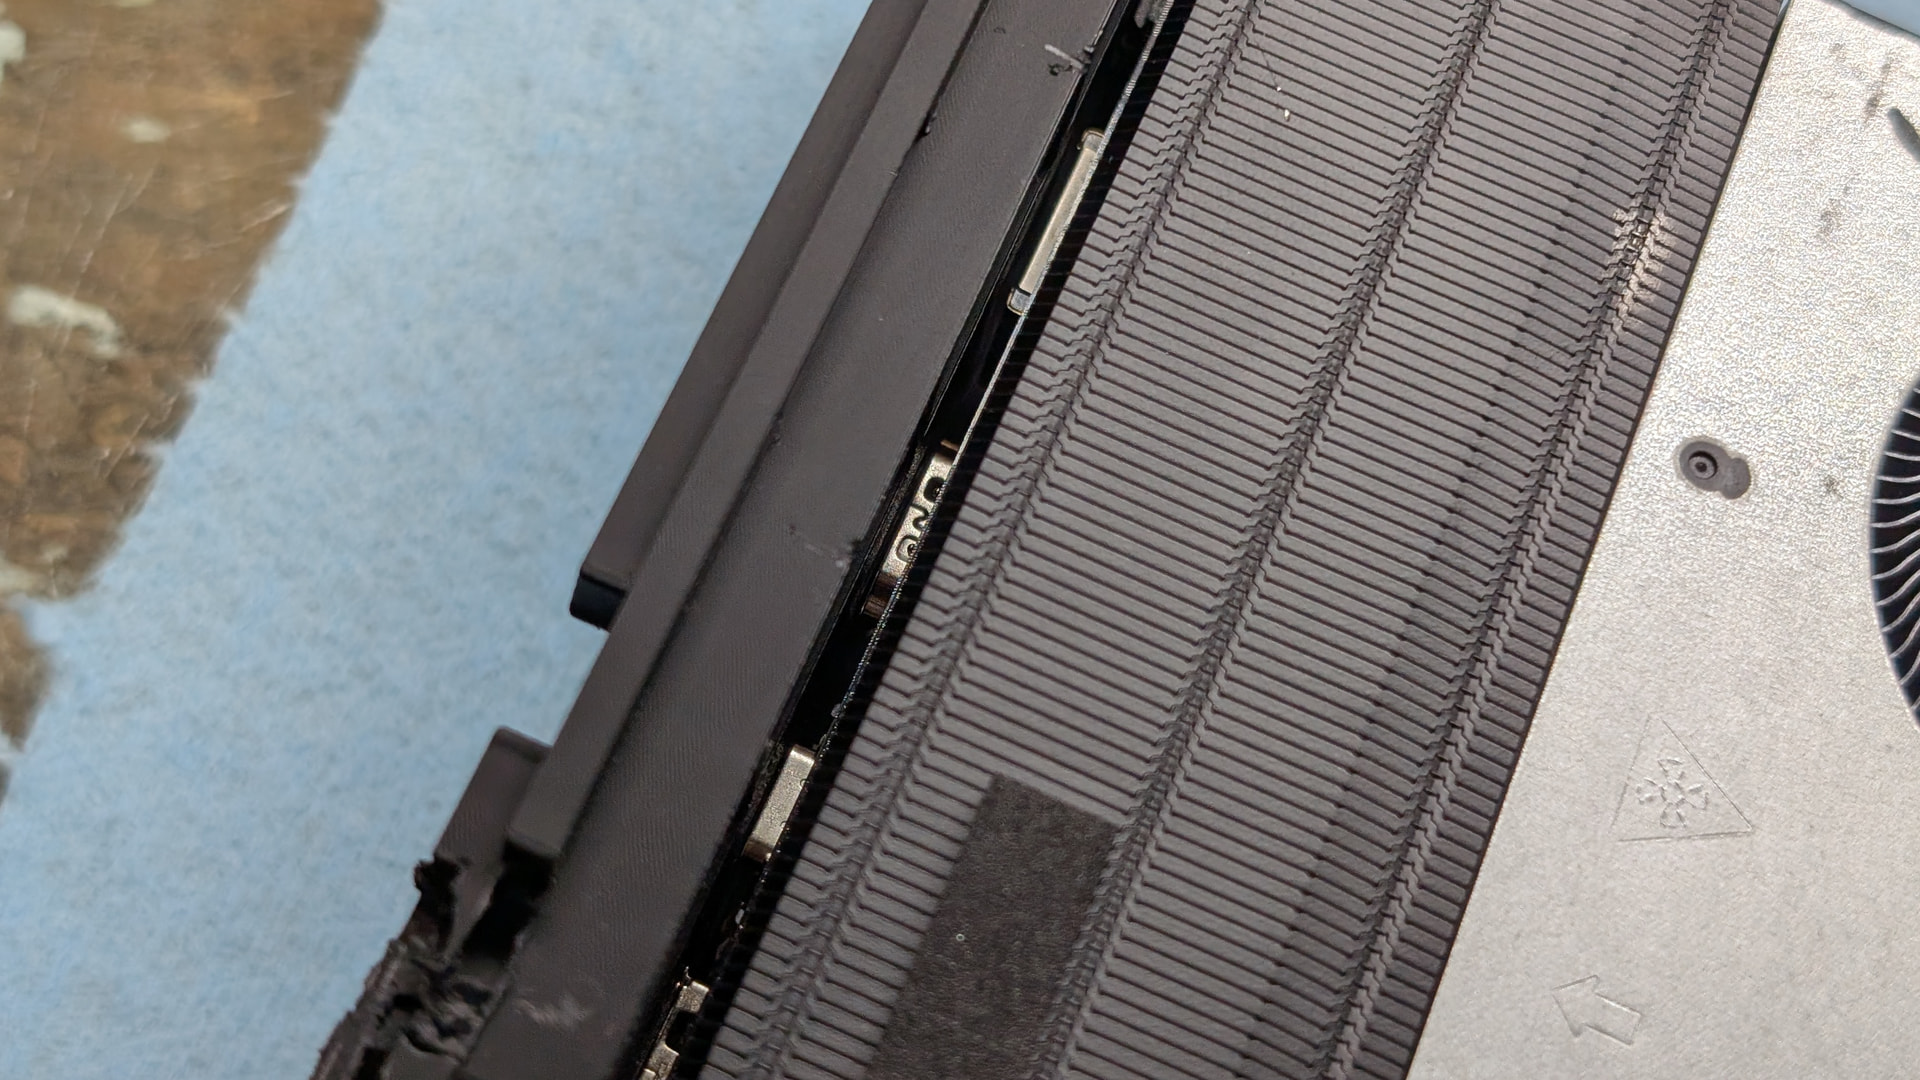
Some support material was hard to remove though, so I had to use the rotary tool for them which ruins the otherwise smooth plastic in some problematic regions. So had to sand down a lot and put several layer of paint to make it look all smooth.
However now having came back, I find the actual solution/painted piece kind of ugly. Doesn’t look as good than if all transparent blue. And now finding even the idea of a Gamecube PC kind of big for nothing, so rn the project is on hold.
Anyway at the end of my stay in Japan I was beginning to worry about my digital independence with the bat shit US. As a Canadian, want to get away from any american products. This include Google Photos that I recently had to increase the storage because I was lacking place.
So now I’m thinkering with the idea to legit do a NAS, and use Immich as a replcement to Google Storage, and Onedrive for the few files I need on the cloud. It’s just storage is so expensive now  fucking AI that just do slop and stupid propaganda pictures
Also, eyeing to purchase an used Surface Pro 9 to run Linux on it, so my laptop will already be 100% on Linux, and need to begin to be more serious about using Linux on my desktop.
What fun builds!
I love the idea of repurposing old shells.
maybe painting the grey cover the cream color and leaving the bottom blue would fit better