1.4 DP L1KVM switch DIY remote

I’ve ordered L1KVM switch, but it lacks a very useful feature - remote control, because I want to hide the switch under my desk. So I was wondering - would it work if I desoldered those buttons from kvm switch, soldered extension cables to them, printed buttons enclosure and use it like that? I know i’d loose the warranty, but i’m fine with that. I’m quite good at soldering, have all the tools, but i don’t know the theory (maybe something would not work because of ~1m cable i need to place the buttons where i need?).

Or maybe anyone knows any better solution how to make a wired/wireless remote for l1kvm switch? It would really help for cable management and the looks of my battlestation :)))

Can’t you just use keyboard shortcuts? Double tap scroll lock and hit the input number. Done.

2 Likes

I don’t have the kvm yet (ordered it yesterday), sending it to Lithuania, so i’ll have it maybe in two weeks, but I guess I won’t be able to use shortcuts because i’m using Logitech MX Keys mini through Logitech dongle, so i’ll have to use usb3 port.

But still event if i’m able to switch between computers using keyboard shortcuts, i’d really love to be able to switch using hardware keys, also the light indicator is cool.

Edit: Also because english is not my main language, i have to switch keyboard languages (number keys siwtch to my language letters) and it’s annoying when you think your keyboard layout is english, but it’s lithuanian and instead of numbers you type lithuanian letters so you have to switch keyboard layout and press keys again.

I have the exact same issue. Too lazy to deal with it yet as I’m not in my new place yet. I found a single-key keyboard (rofl) but besides that, haven’t made much progress on what could remotely send a 2-key signal that would trigger the shortcut to switch computers

Edit: Also just thought of those 10-key (or so) accessories made to activate shortcuts like the Elgato Stream Deck.

I think i’ll do the soldering thing anyway, unless someone will change my mind. And will post here my results. I also have elgato stream deck, i’ll try to configure it too.

1 Like

Also interested in this.

Are you considering going the Teensy route? This weekend, I’m planning to rough up a housing design for a control box.

My requirements are the full control capability of the KVM, so switching ports, audio and USB 3.2, so I’m planning to design something with a layout something like this:

[P]  [N]  [A]  [U]
[1]  [2]  [3]  [4]

Or

[1]  [2]  [3]  [4]
   [A]      [U]
   [R]      [R]

Not sure if I want the next/prev keys or not; might be useless.


This post has all the keyboard commands:

Yes, I’ve just finished reading on Teensy, already ordered one, also ordered Arduino Pro Micro with ATmega32U4, as it is much cheaper and can simulate HID keyboard too.

i think i’ll only need two buttons - pc1 and pc2, never had a kvm, i don’t know what “scanning through ports” or “follows port selection” does and if i need it and i don’t need audio ports as i’m using Mayflower ARC MK2 usb sound card.

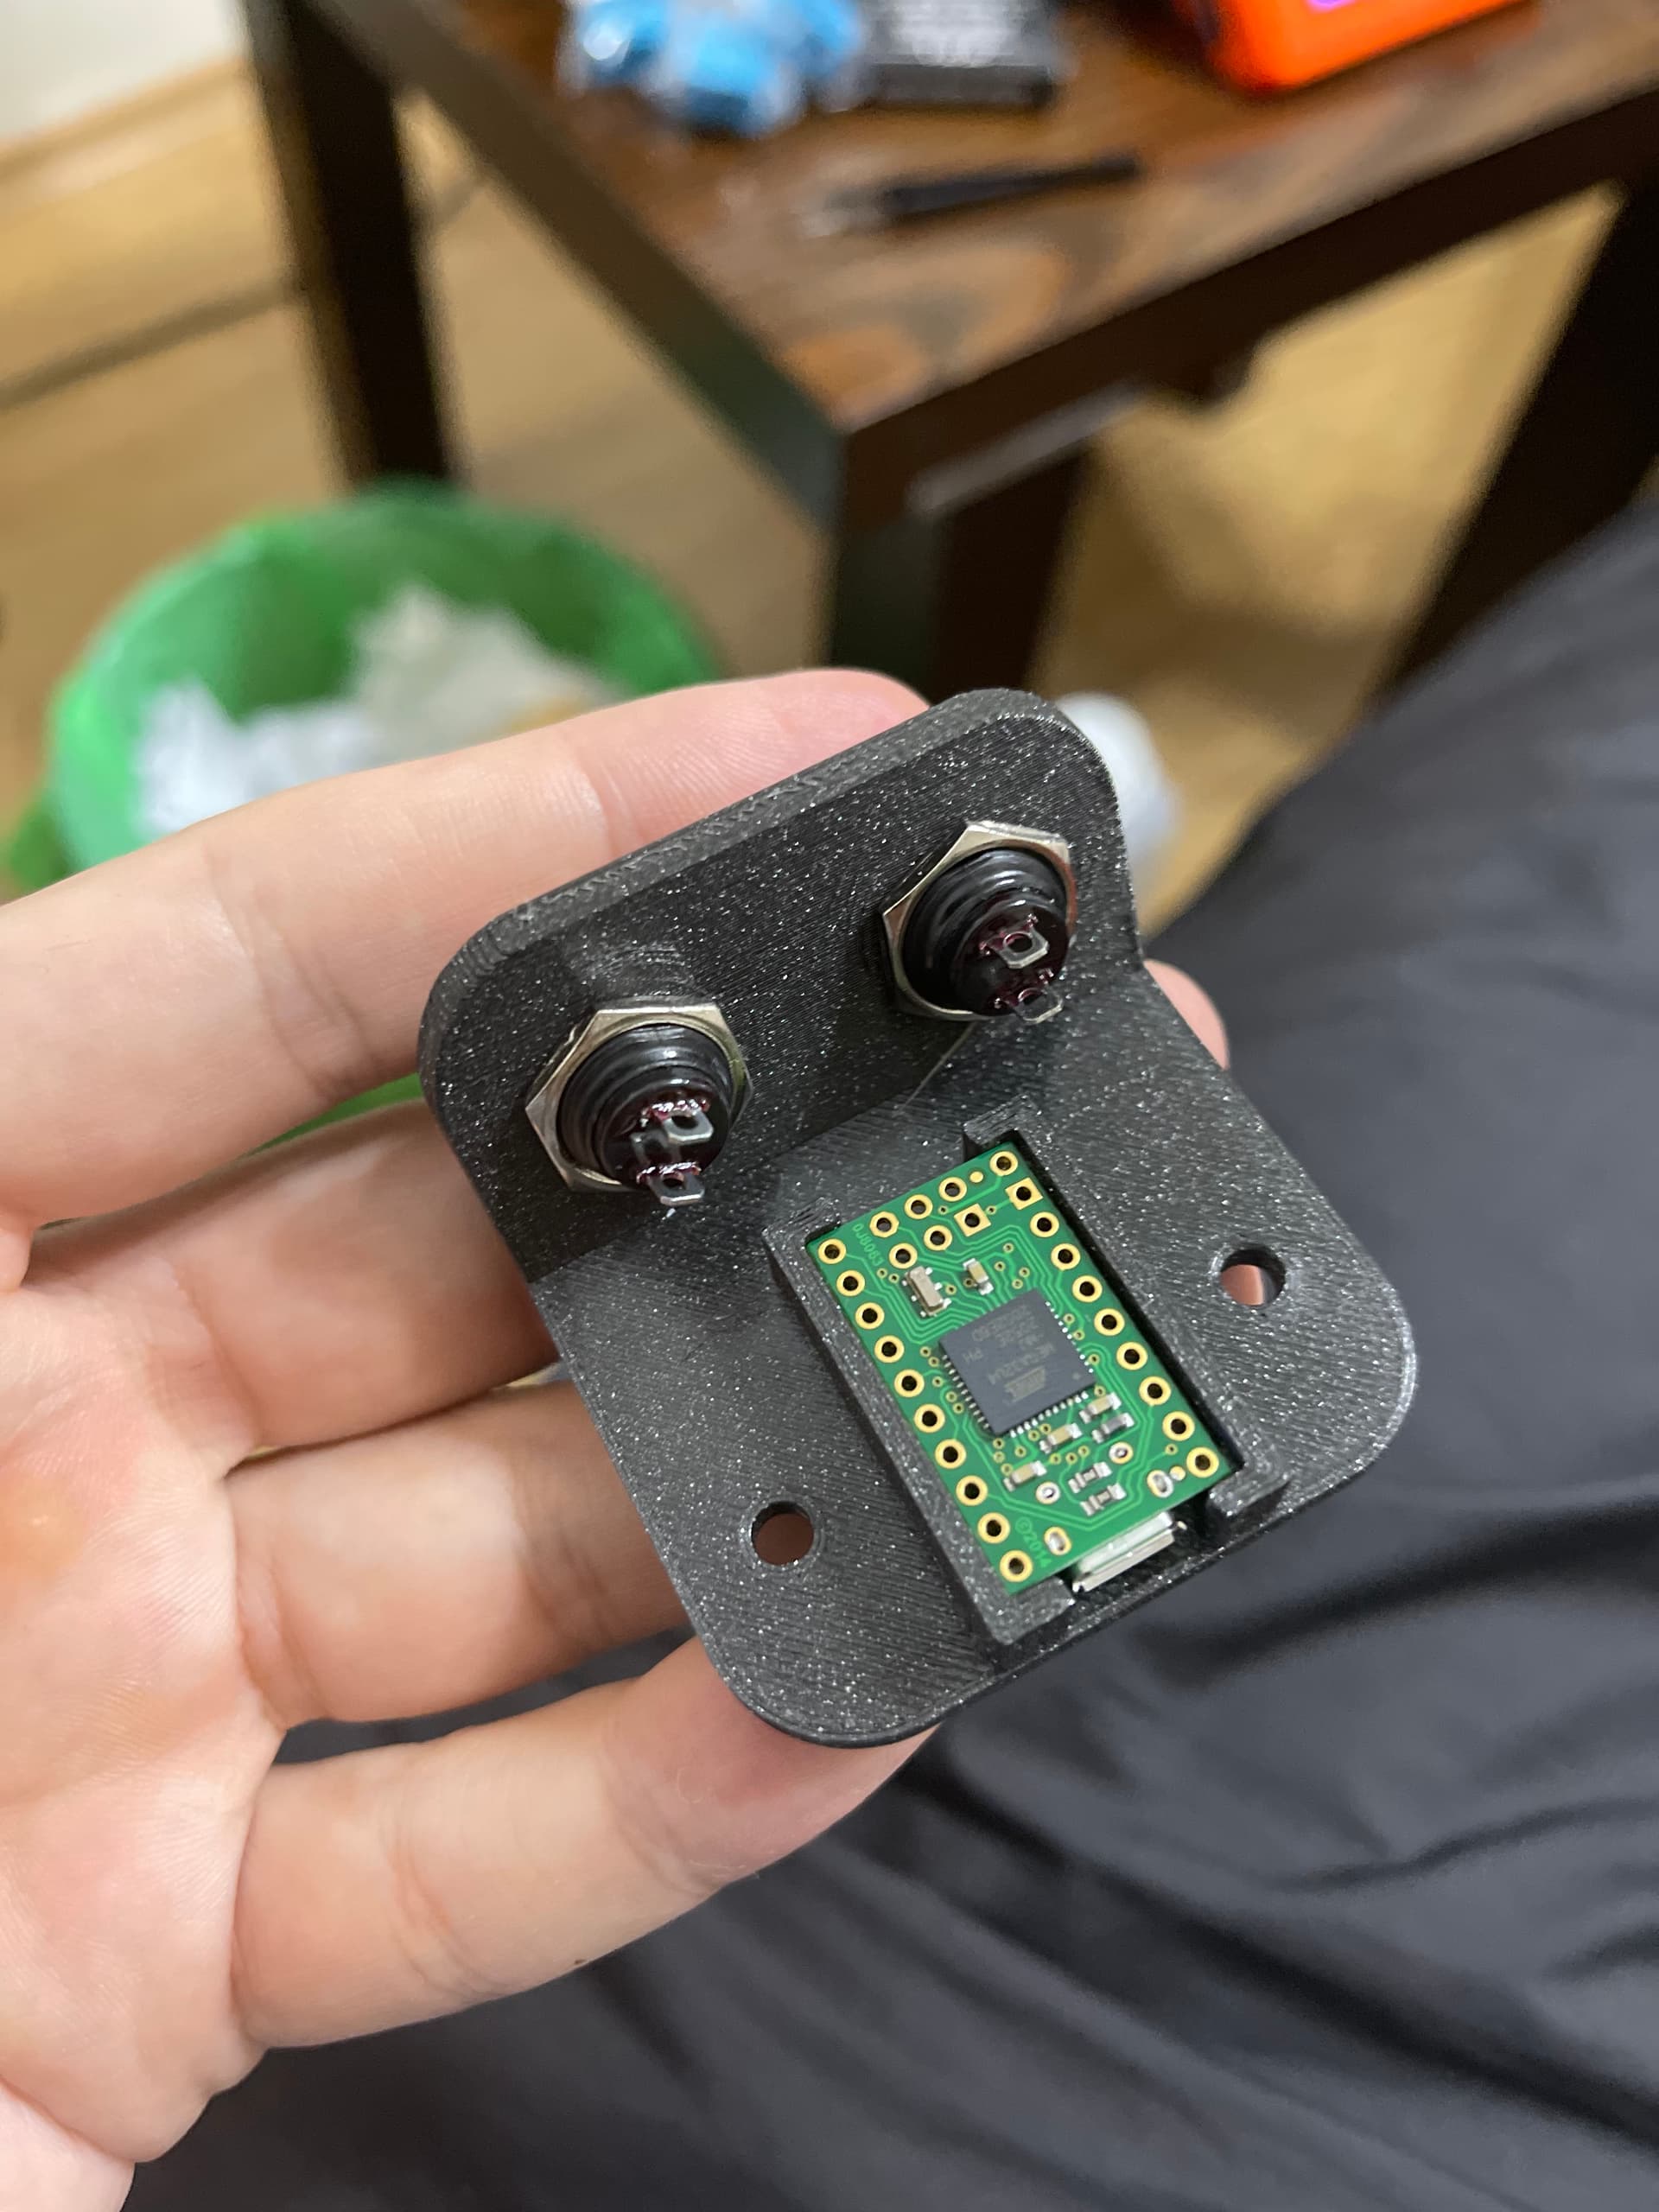
I’ve got a teensy 4.1 laying around somewhere and have played with it a bunch. I’m probably going to use a 4.0 for my final, considering the cost difference, though I am considering an attempt to build a custom PCB.

Arduino Pro Micro

I don’t know much about the features of the Pro Micro, but as long as it can be configured to interrupt on most of the digital pins (we can do with scanning, but interrupts are the better option) it should be all good.

So the scanning through ports is basically like the “scan” button on an AM/FM radio; it cycles through the ports till it finds one that’s on.

The “follow port selection” is the opposite of sticky USB or Audio. So, let’s say you’re listening to music through the KVM on port 1 and copying files to a storage device via USB 3.2 on port 2. You want to use the VM on port 3. so you go to port 2, tell the USB to hold on that port, then go to port 1, tell the Audio to hold on that port, then go to port 3 to do things there.

the follow port selection set those USB and Audio subsystems to start switching with the KVM selection again, so when you go from 3 to 2, the USB and Audio go there as well. It basically just disables the hold feature, if that makes sense. I use it occasionally.

Regarding audio, I’m using a USB DAC as well, so I might not use it, but I’m one of those completionists, so I was just going to use that as an excuse to add a feature.

I’ve got the 4 system variant of the KVM, so my plan was to support all 4.


Hmmm, the RPi Pico is $5. That’s pretty sweet. Looks like it’s designed to be used with micropython though. Python is enough for our purposes, but I really prefer to work with C.

Thank you for explanation, that makes sense, i was wondering about these situations when you want to switch systems, but don’t want to switch audio etc. and buttons to help do that would be very useful. But i think i’ll start with two buttons and then see if i really need those additional buttons, i want my remote to contain only a single row of buttons and fixed next to my sit/stand desk controls, there’s only about 6cm of horizontal space.

I’ll start building my remote as soon as i’ll receive teensy and/or arduino and i hope my kvm will arrive sooner rather than later as i’m buying it through a “middleman” company (cheaper and much easier to deal with customs duties).

Post updates on your progress, i’m very interested on how it’s going for you. 4 systems is a lot, i bet your battle station is amazing.

Also are you planning to mount your remote (like i do), o make it a “stream deck” style? And what buttons are you planning to use? I was thinking about keyboard style keys, but i’m afraid they will be too easy to press by accident, as i’m planing to mount them next do my desk controls in front/right of the table.

1 Like

Yeah, my desk doesn’t really have a good place to mount it; I’m thinking the opposite side to my sit-stand controls because I’ve got a desk with a curved cutout. (never making that mistake again)

1 desktop, 2 thunderbolt docks, 1 VM running on the desktop. you can see it when it was 3 machines if you click the featured topic in my user card.

Cable management is such a nightmare on this one. nam flashbacks

I’d like to mount it under my desk, similar to you are, but I suppose the “stream deck” option could be another design.

As far as buttons go, I’m trying to find some nice 2ish mm actuation distance buttons but not mechanical keys. Unfortunately, they’re either expensive in small quantities or not high quality. I really need to reach out to my friend who designs hardware. Of course, I’m just at the software prototyping stage right now. I’ve got some Pi Picos on order, so I’m excited to try those. It seems like the toolchain is more vim-compatible than teensy. (which is an absolute nightmare to not use in the arduino IDE)

As for the accidental press, you could set it up so you have to hold it down for 2 seconds, or something like that, in the code so an accidental bump doesn’t re-arrange your windows.

Ideally, I’d do the same. pulls out calipers I’ve got the uplift desk stand-uper with the presets. The buttons are 10mm square, so my initial plans for 16mm buttons are definitely going to be too large. I think I’m going to have to rethink at least that part. I’ve got these 1mm actuation buttons (I’ll add a pic in a moment) but I’m not entirely sure how I’ll mount them because I think they’re designed to be mounted to a PCB. I’m also not a big fan of the pastel colors the button caps come in lol


(forgive the poor quality. My old phone’s camera is damaged and Google still hasn’t shipped the pixel 6 I ordered middle of last month)

I see we are doing the same thing, this is me at the moment (arduino i use does not support HID):

and yeah those buttons you use have to be soldered to pcb or glued with a glue gun :)) and they are a little bit wobbly, but a case which would hold them from the sides would definitely help.

I’m in search of a nice looking push buttons, ones i have are decent, but far from perfect, at the moment i’m leaning towards the one with red cap (in photo), if i won’t be able to find better ones, a little bit of force is needed to press it and almost impossible to press them by accident. Pressing and holding to switch is an option too, but i’d rather find a button with the firmness i want.

Nice setup you have there, one day i’m going to change my desk to a wider one and was interested in ones with a cut out, but i never sat at one, why is it bad? it looks comfortable. And how did you mount kvm under your desk? its not obvious from just looking at the photo you posted, did you screw it to the table or used velcro or double side tape?

1 Like

Saw those on mouser, didn’t like the style, but it does look cleanest of the ones you have. Maybe I’m too picky.

3m command strips. I can de-velcro it if I need to, and its not permanent.

Its very comfortable, but it reduces usable space and my racing wheel won’t stay on the beveled lip.

I’ve taken to using my arm wrests instead of the desk edge, and that helps with my posture anyways.


I’ve found an STL for the tactile buttons that you and I have. I’ll attempt printing it this weekend. If the prints come out good (I would much prefer a gray button on black housing or something to that effect) I’ll be ordering a few more of those buttons and I’ll figure out a way to mount them.

So I just test printed the cap, and while the dimensions are a tiny bit off, I do like it, almost more than the cast ones.

Sorry again for potato cam.

Hey, how’s your remote going? Yesterday I built mine, tested keyboard commands with a simple script, works like a charm. Today i’m planing on finishing writing the script. My l1kvm is finally in my country, but still in delivery center, but I hope i’ll receive it till new years eve. Bought all new Club 3d cables, so excited to finishing up this project :relieved: :grin:

Here’s some pictures, i’m using buttons from AliExpress, box was “designed” by me on Fusion 360 (man it was not easy for such a noob like me, but youtube saved me), for arduino i’m using A-Star 32U4 Micro it’s so tiny


2 Likes

Definitely coming along.

I have the software done, but the printer is giving me trouble. Here’s the CAD I have so far.

Part A:

Part B:

There will be a third one that mounts behind Part B and houses the Pi Pico. I think I want to rough print the first two to see how they come out and test clearances before I waste filament on a third piece that probably won’t even fit correctly. I’m using 0.05mm clearances, which is probably too tight. I think it probably needs more like 0.15mm.

And for the record, I know this is probably over-engineered.


So I’ve been using the breadboarded system for about a week now, and it works great, only downside is that I need to snake my way past the wires on the breadboard to get to the buttons haha

1 Like

I’ve got to say, that’s a very clean design. For someone who’s new to CAD, it looks very solid.

FWIW, I’ve only been working with CAD software on and off for about a year. After a while, you learn to think in terms of the type of operations CAD allows you to do and it gets much easier.

What filament did you use for that print?

Took me like a week of few hours a day and multiple remakes till I got where i am :smiley: 
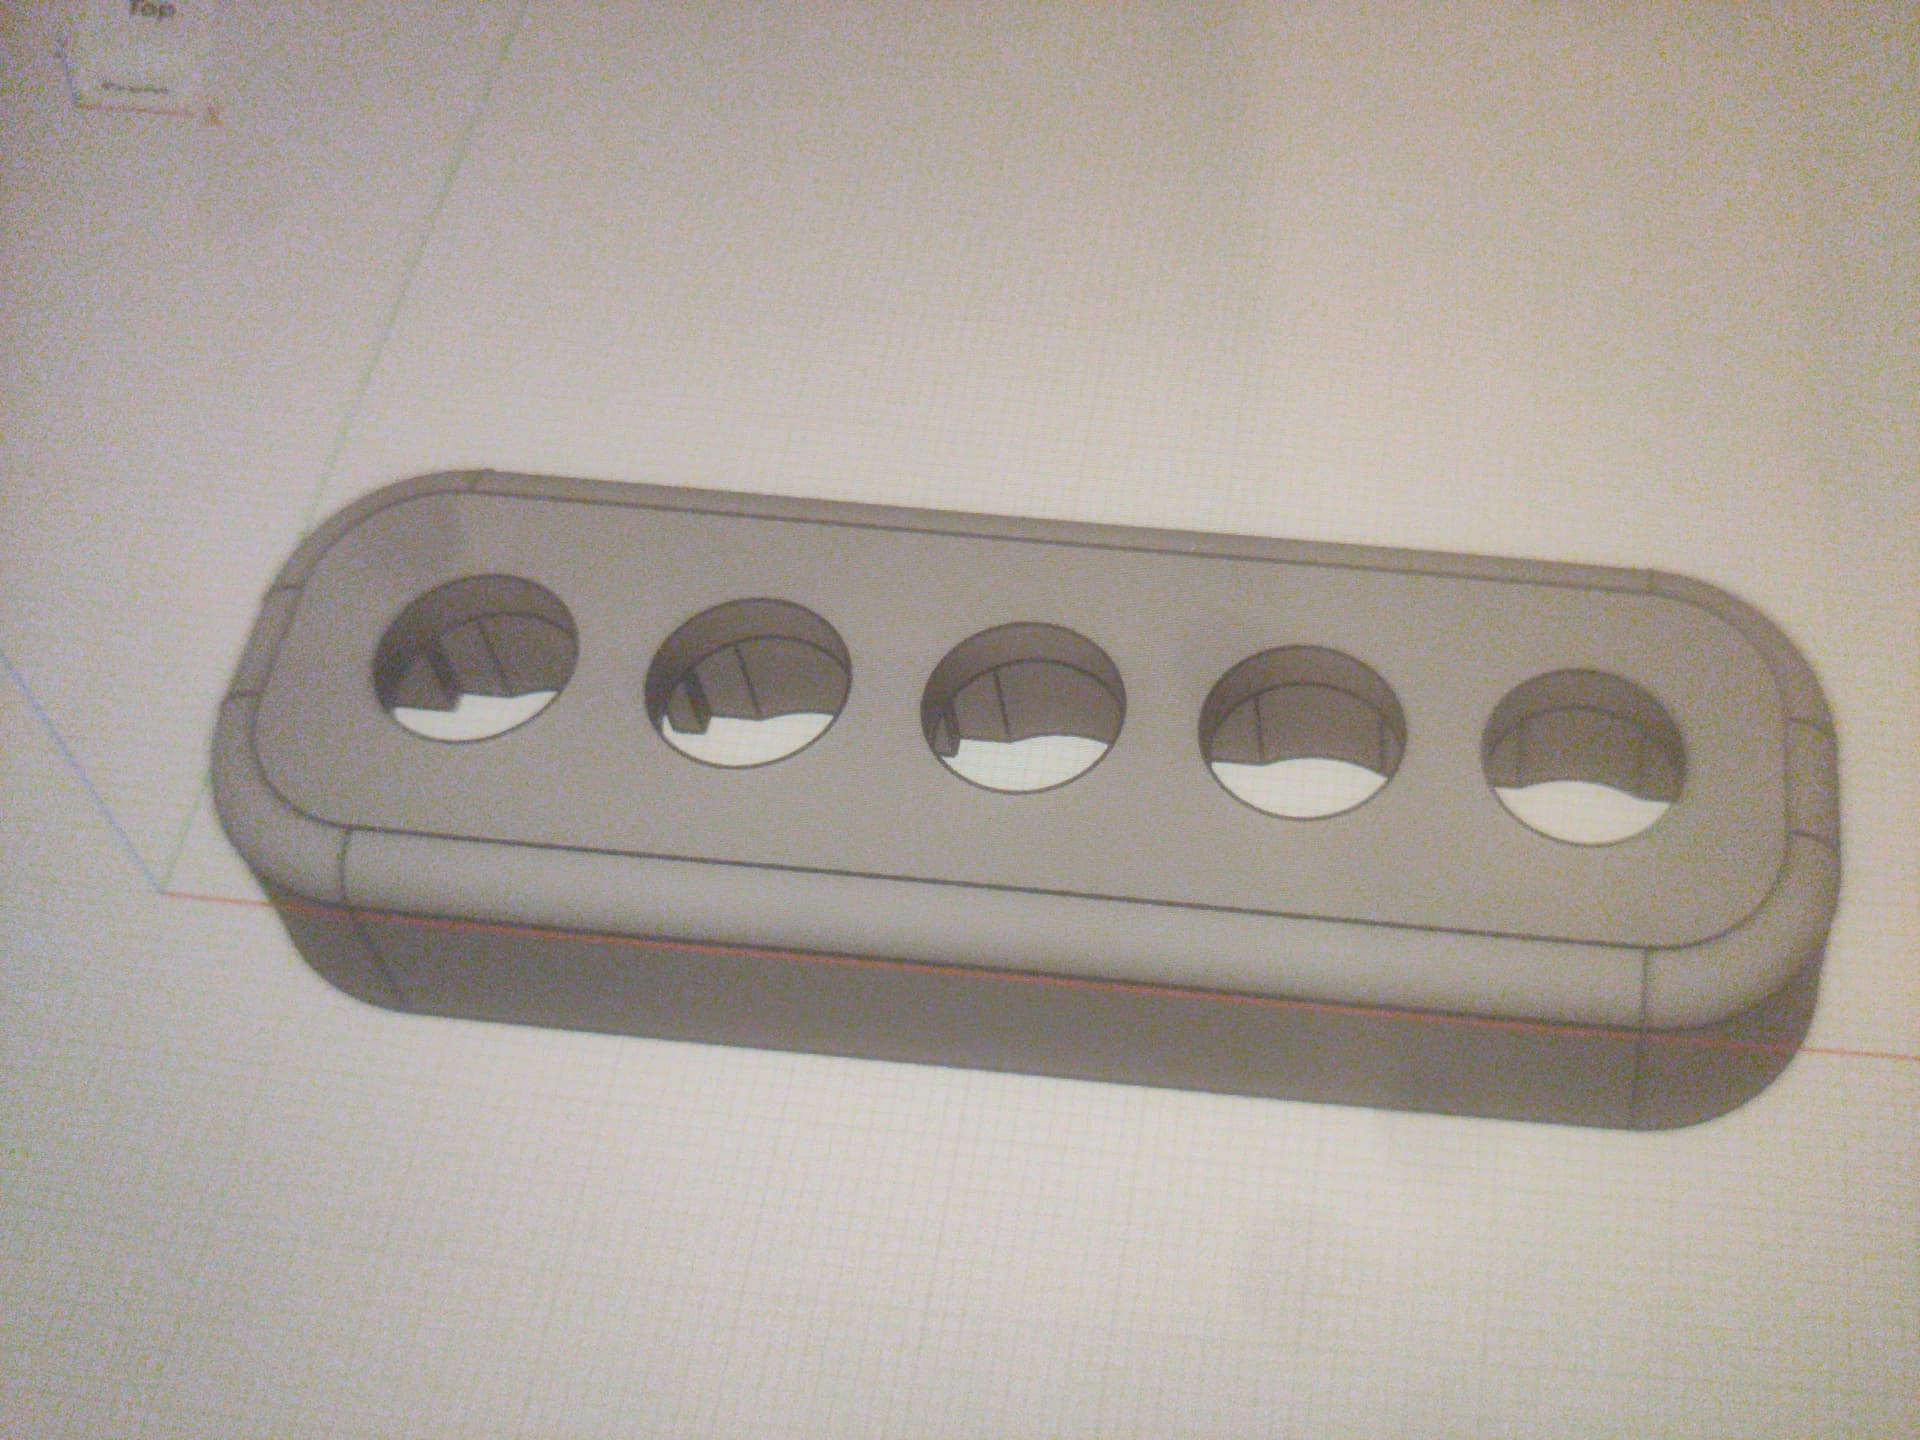
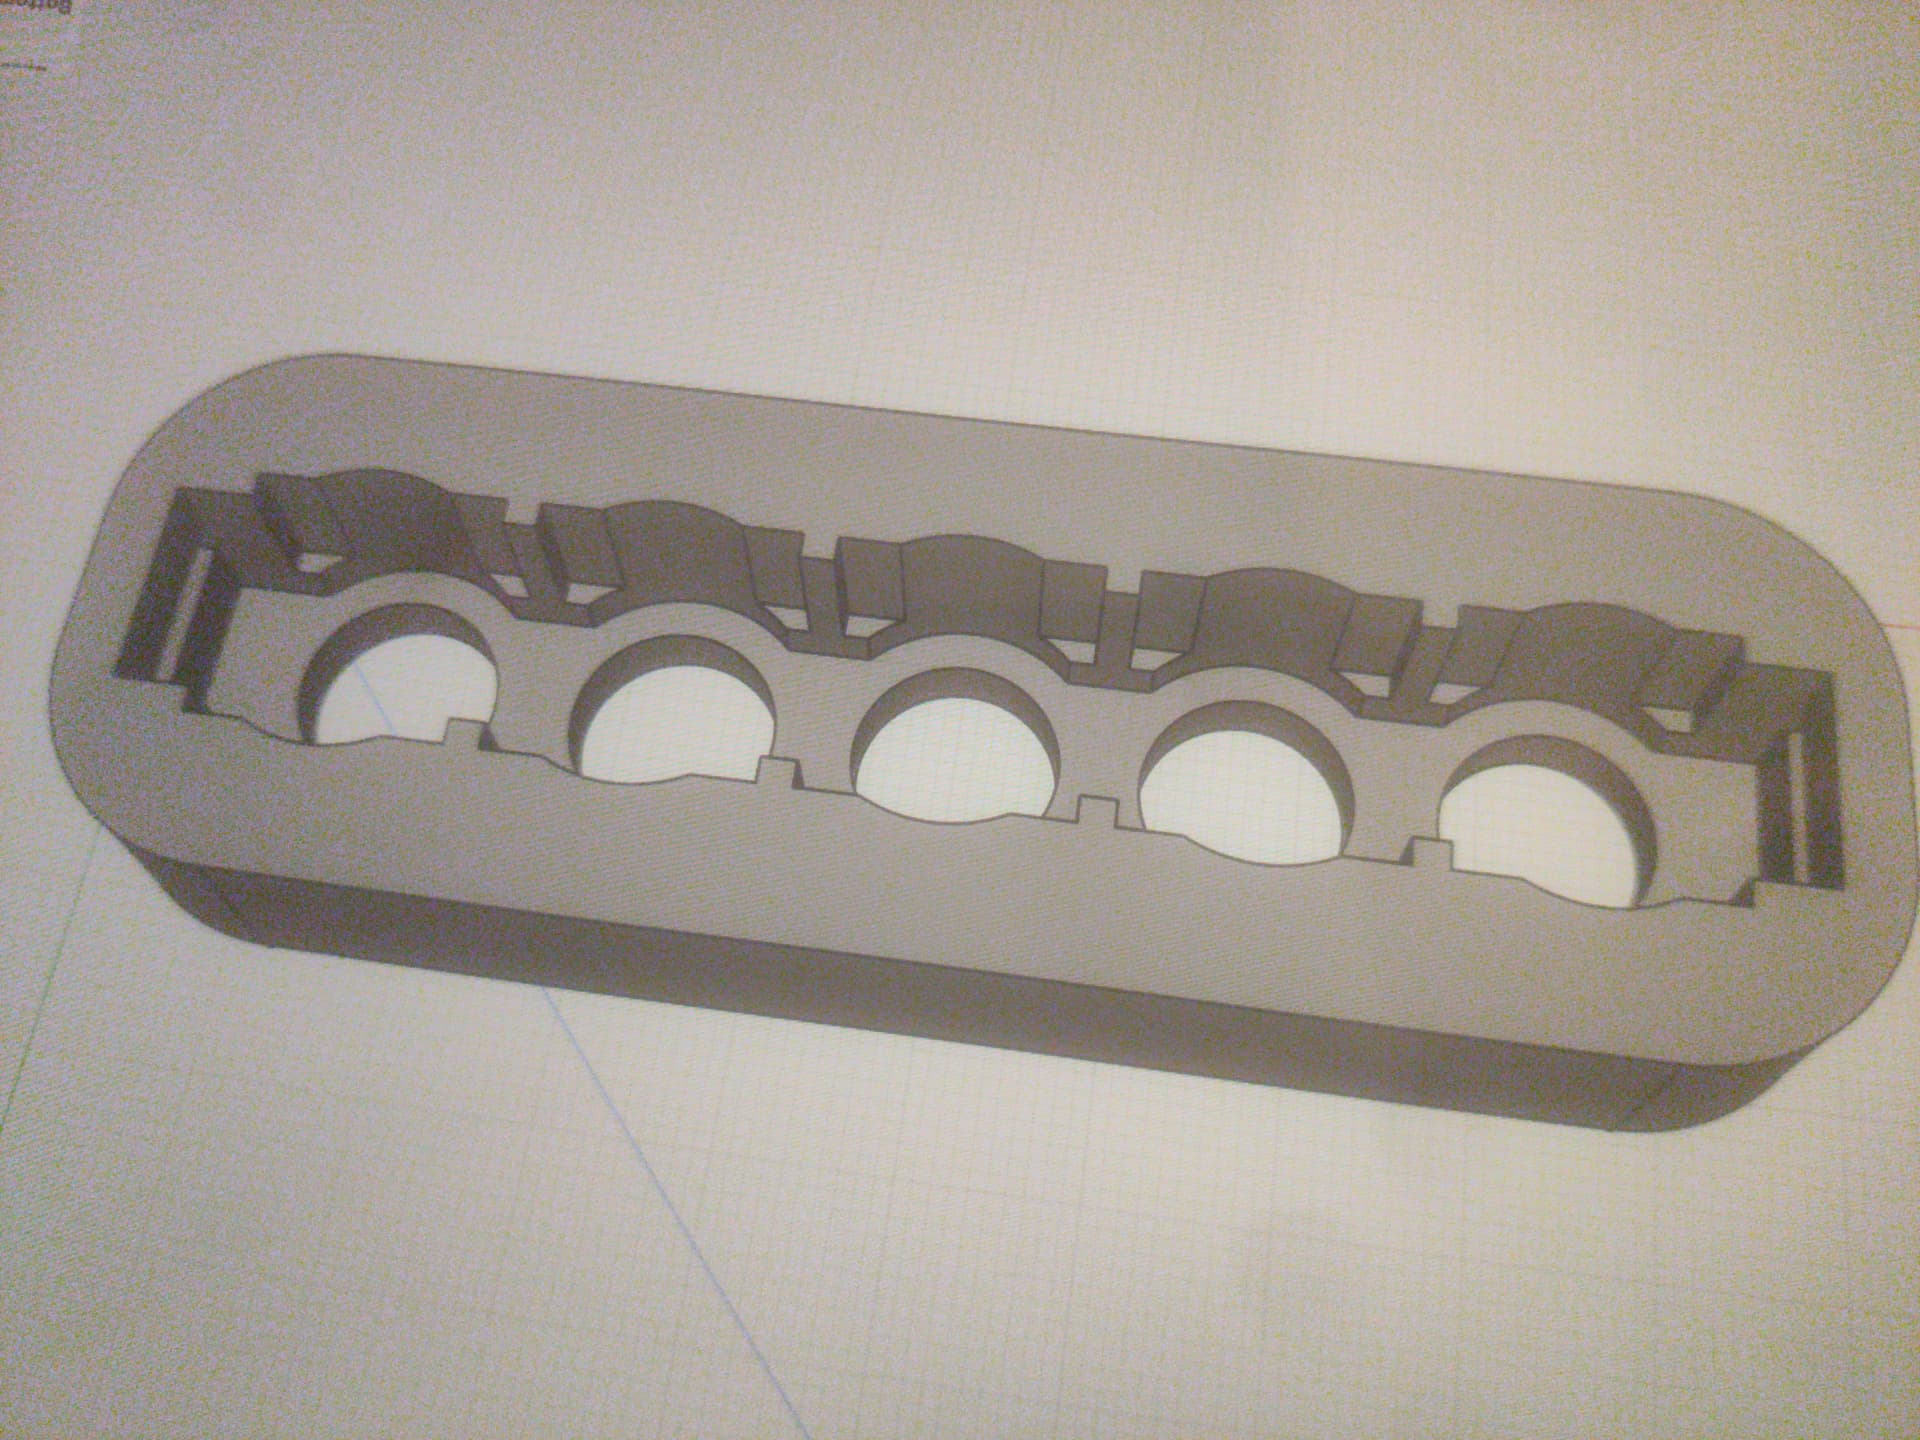
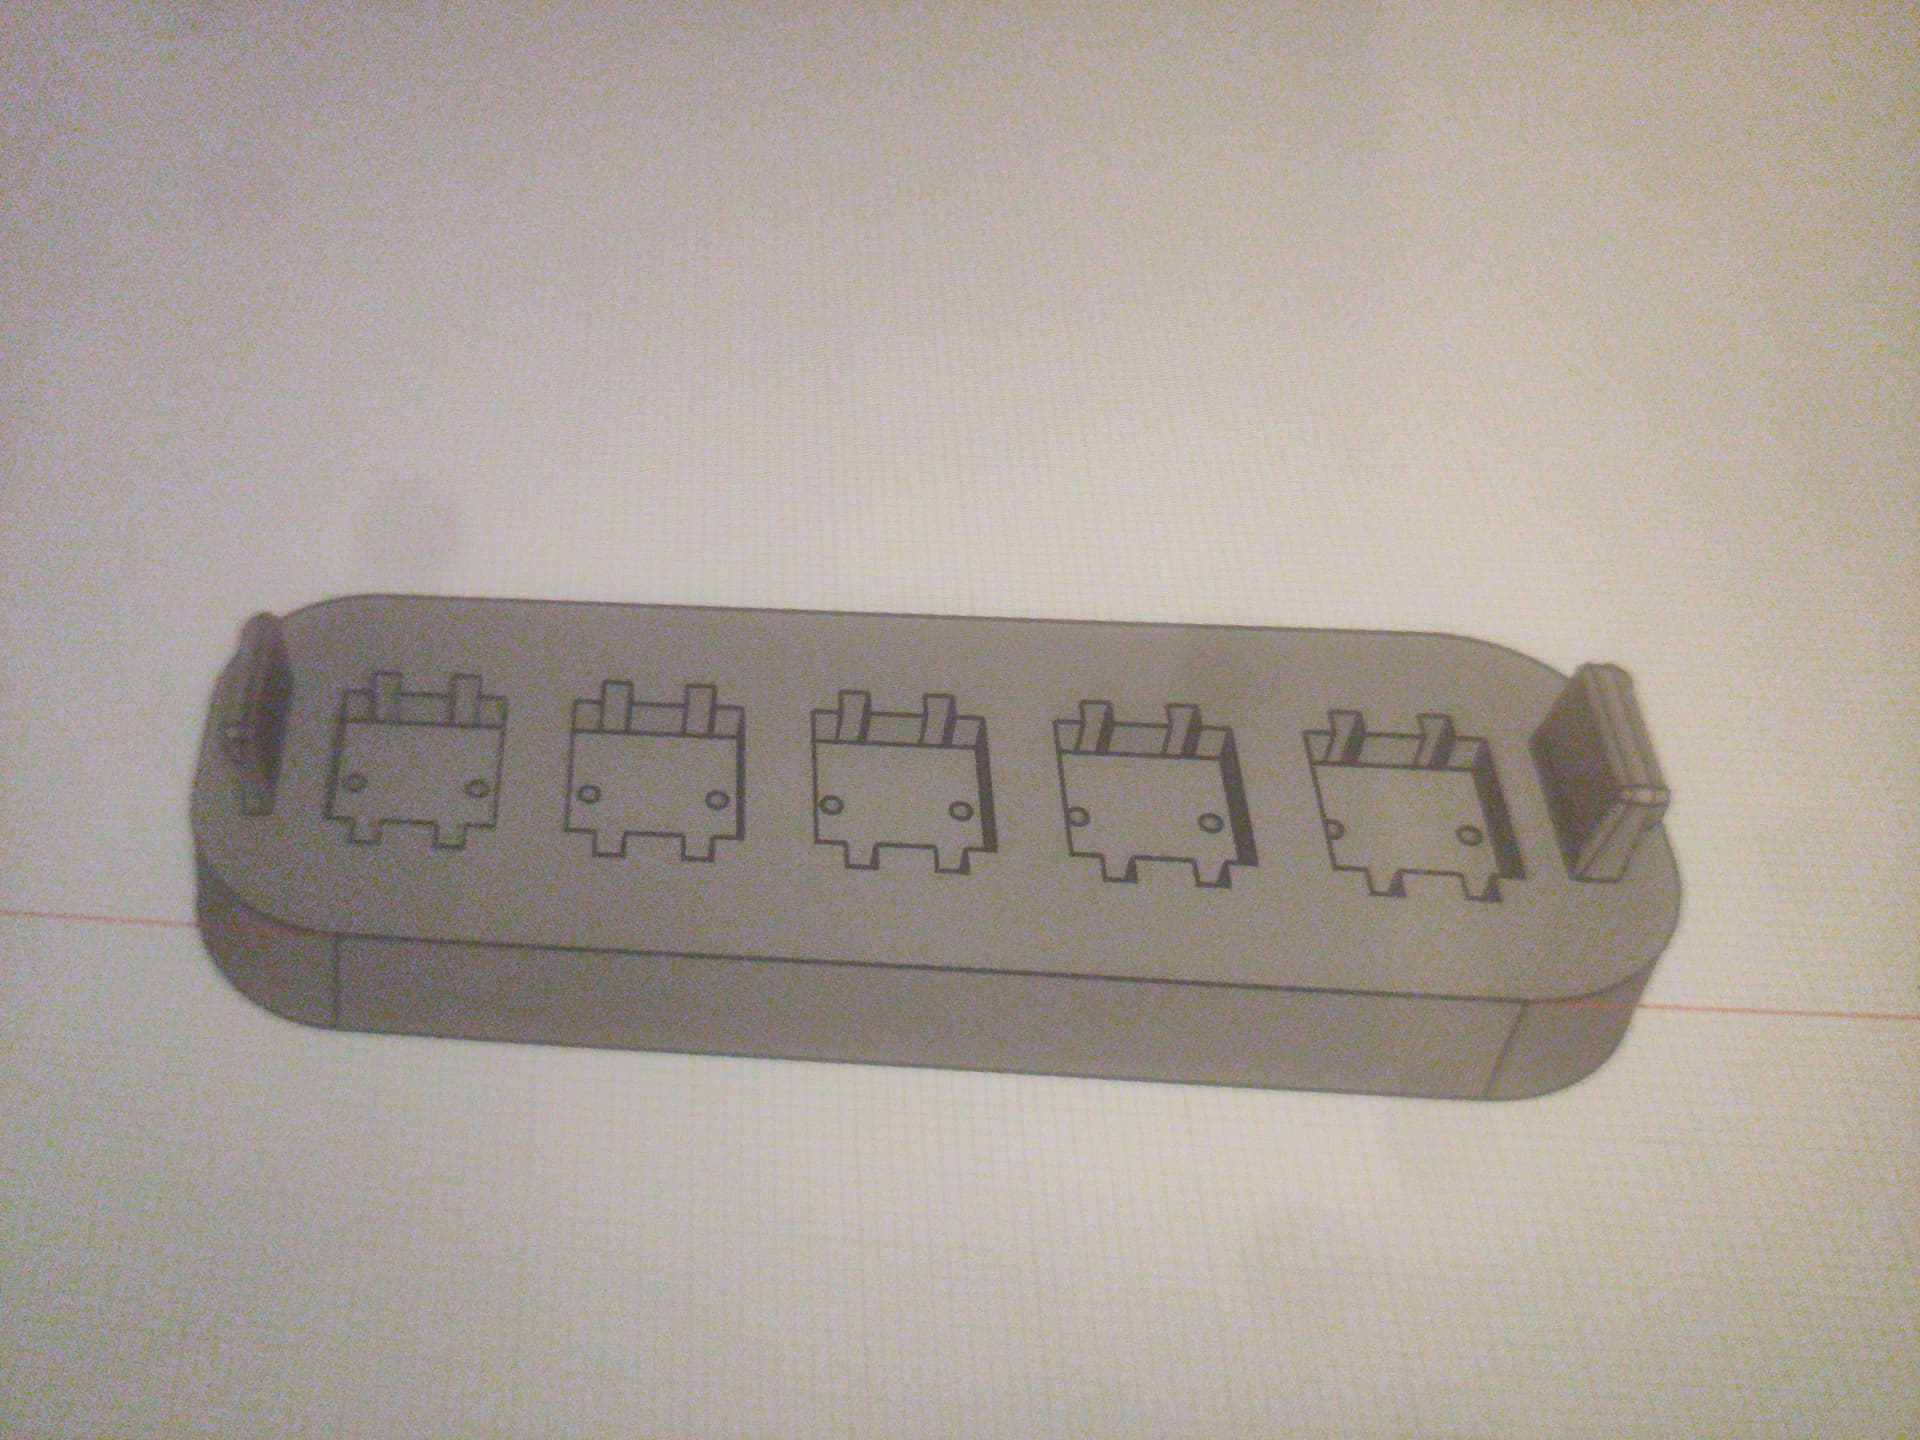
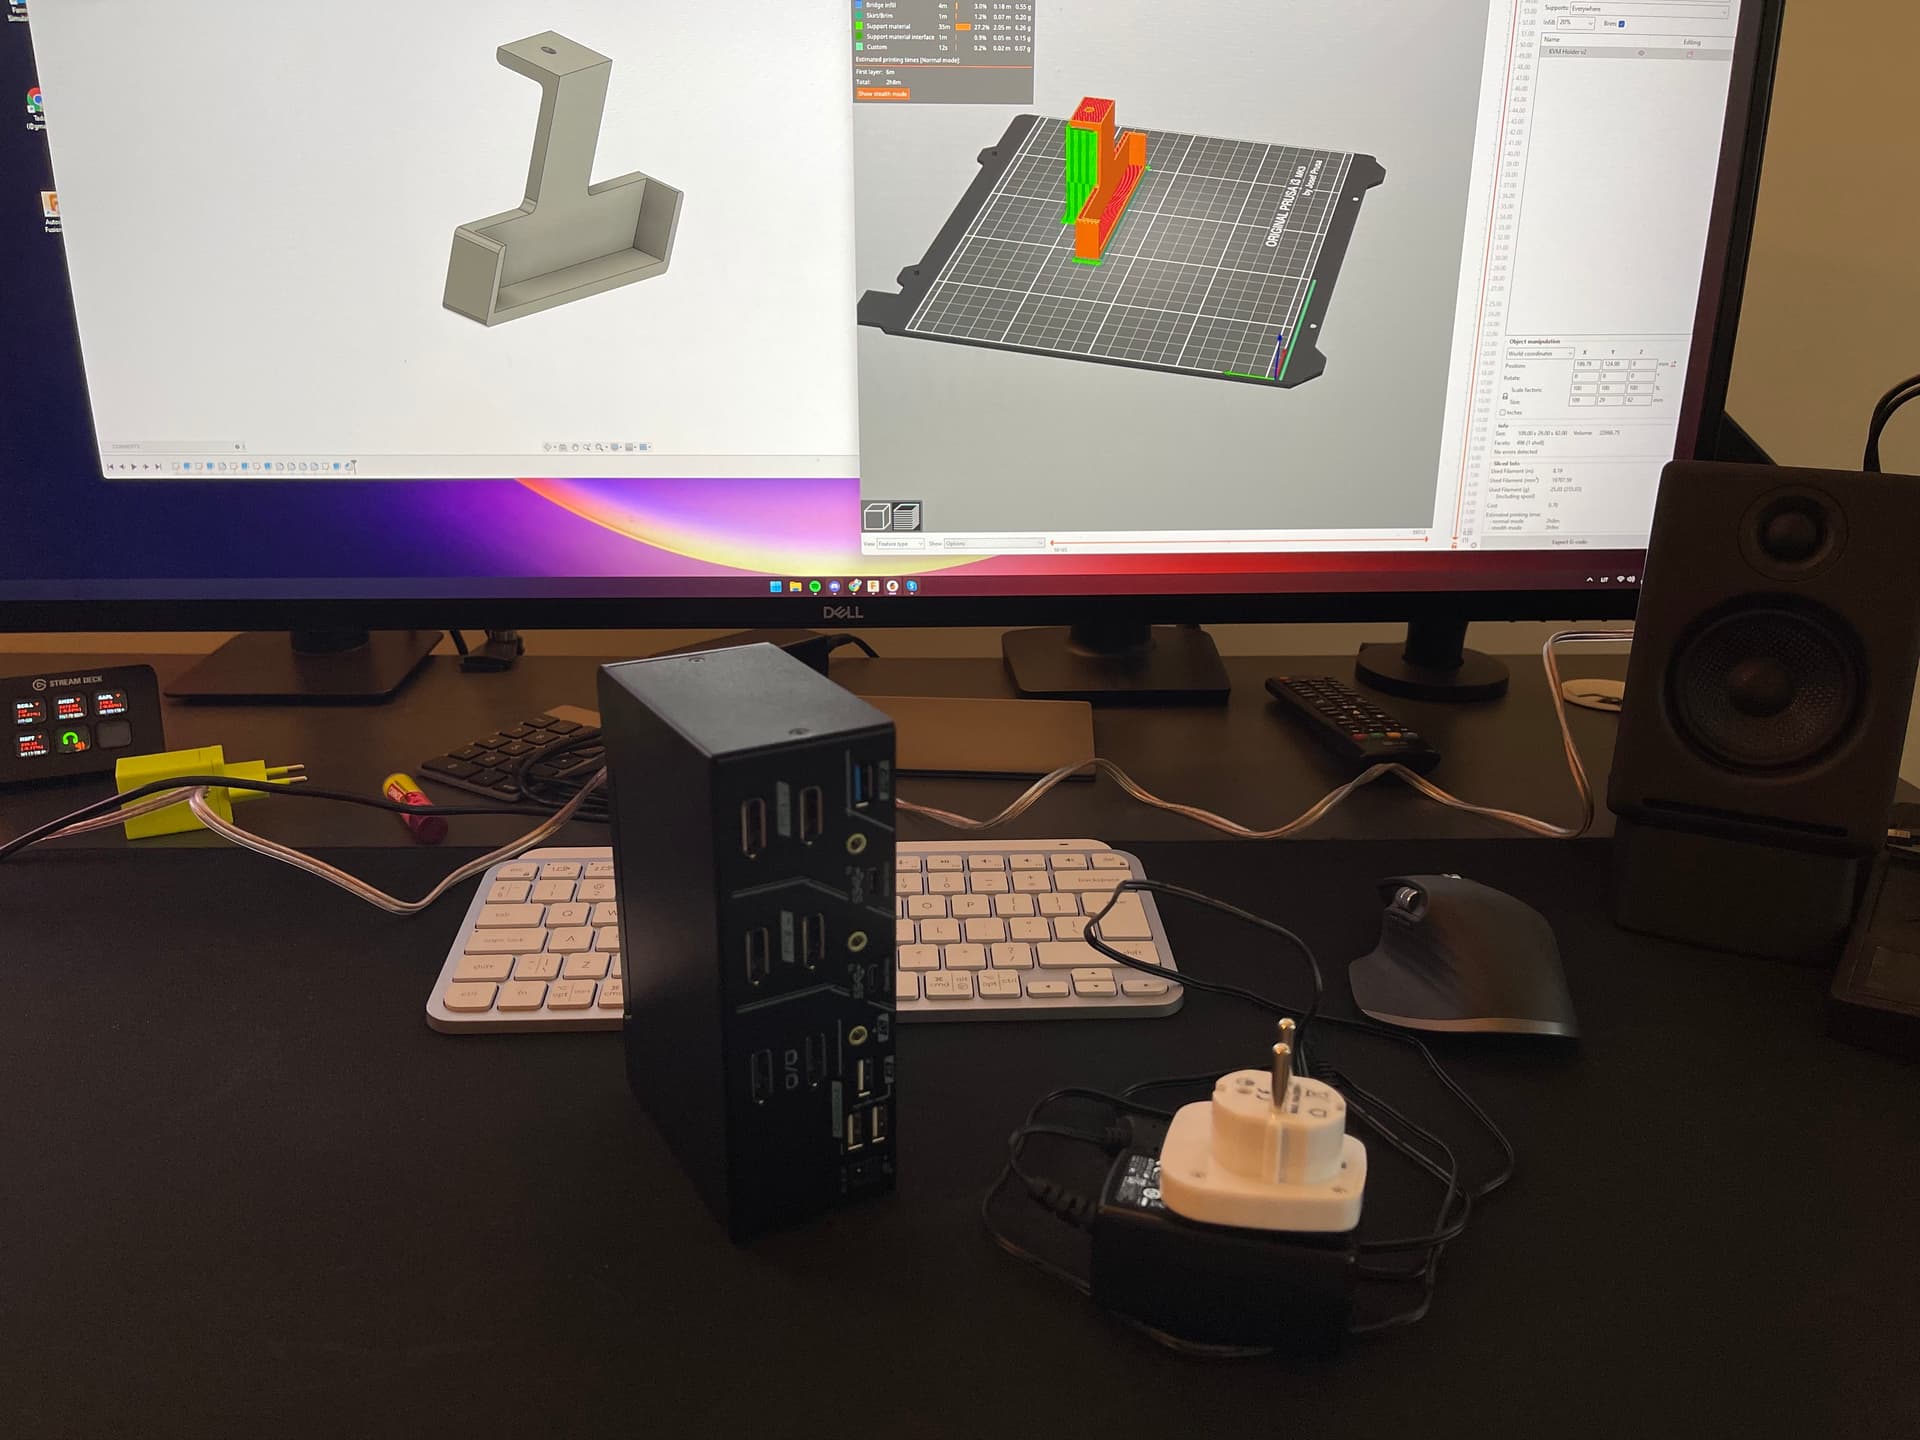
but yeah, need to change how i think in terms of CAD and not some photoshop/paint and practice practice practice.

I’m using PETG Prusa Galaxy Black

From your CAD design i’m guessing that your buttons will be “living” on the desk? Are you planing on sticking something made from rubber to make it not so slippery?

1 Like

Its going to mount under the desk, just like yours, I just haven’t made the mounting holes yet. I should really plan those out haha.

Oh, excellent. That explains the flecks. I’ll have to give that a go some day, but I don’t print much petg.

Finally received my l1kvm switch, sadly it came with uk/ca power plug (don’t know if it was my middleman who made a mistake, o l1), but already bought an adapter. Now printing a holder to mount it under the table and tomorrow i’ll try to finish this project or a day after tomorrow, because you’ll never know what happens on those new year eves :DD

What library are you using to send the key strokes? I’m trying to do it with arduino Keyboard library, sending Keyboard.write(…), it “sends” those keys if i plug it to usb3 port (but does not change pc, just types ctrl ctrl 1 for example), but nothing happens when i plug it to hid usb port :confused: