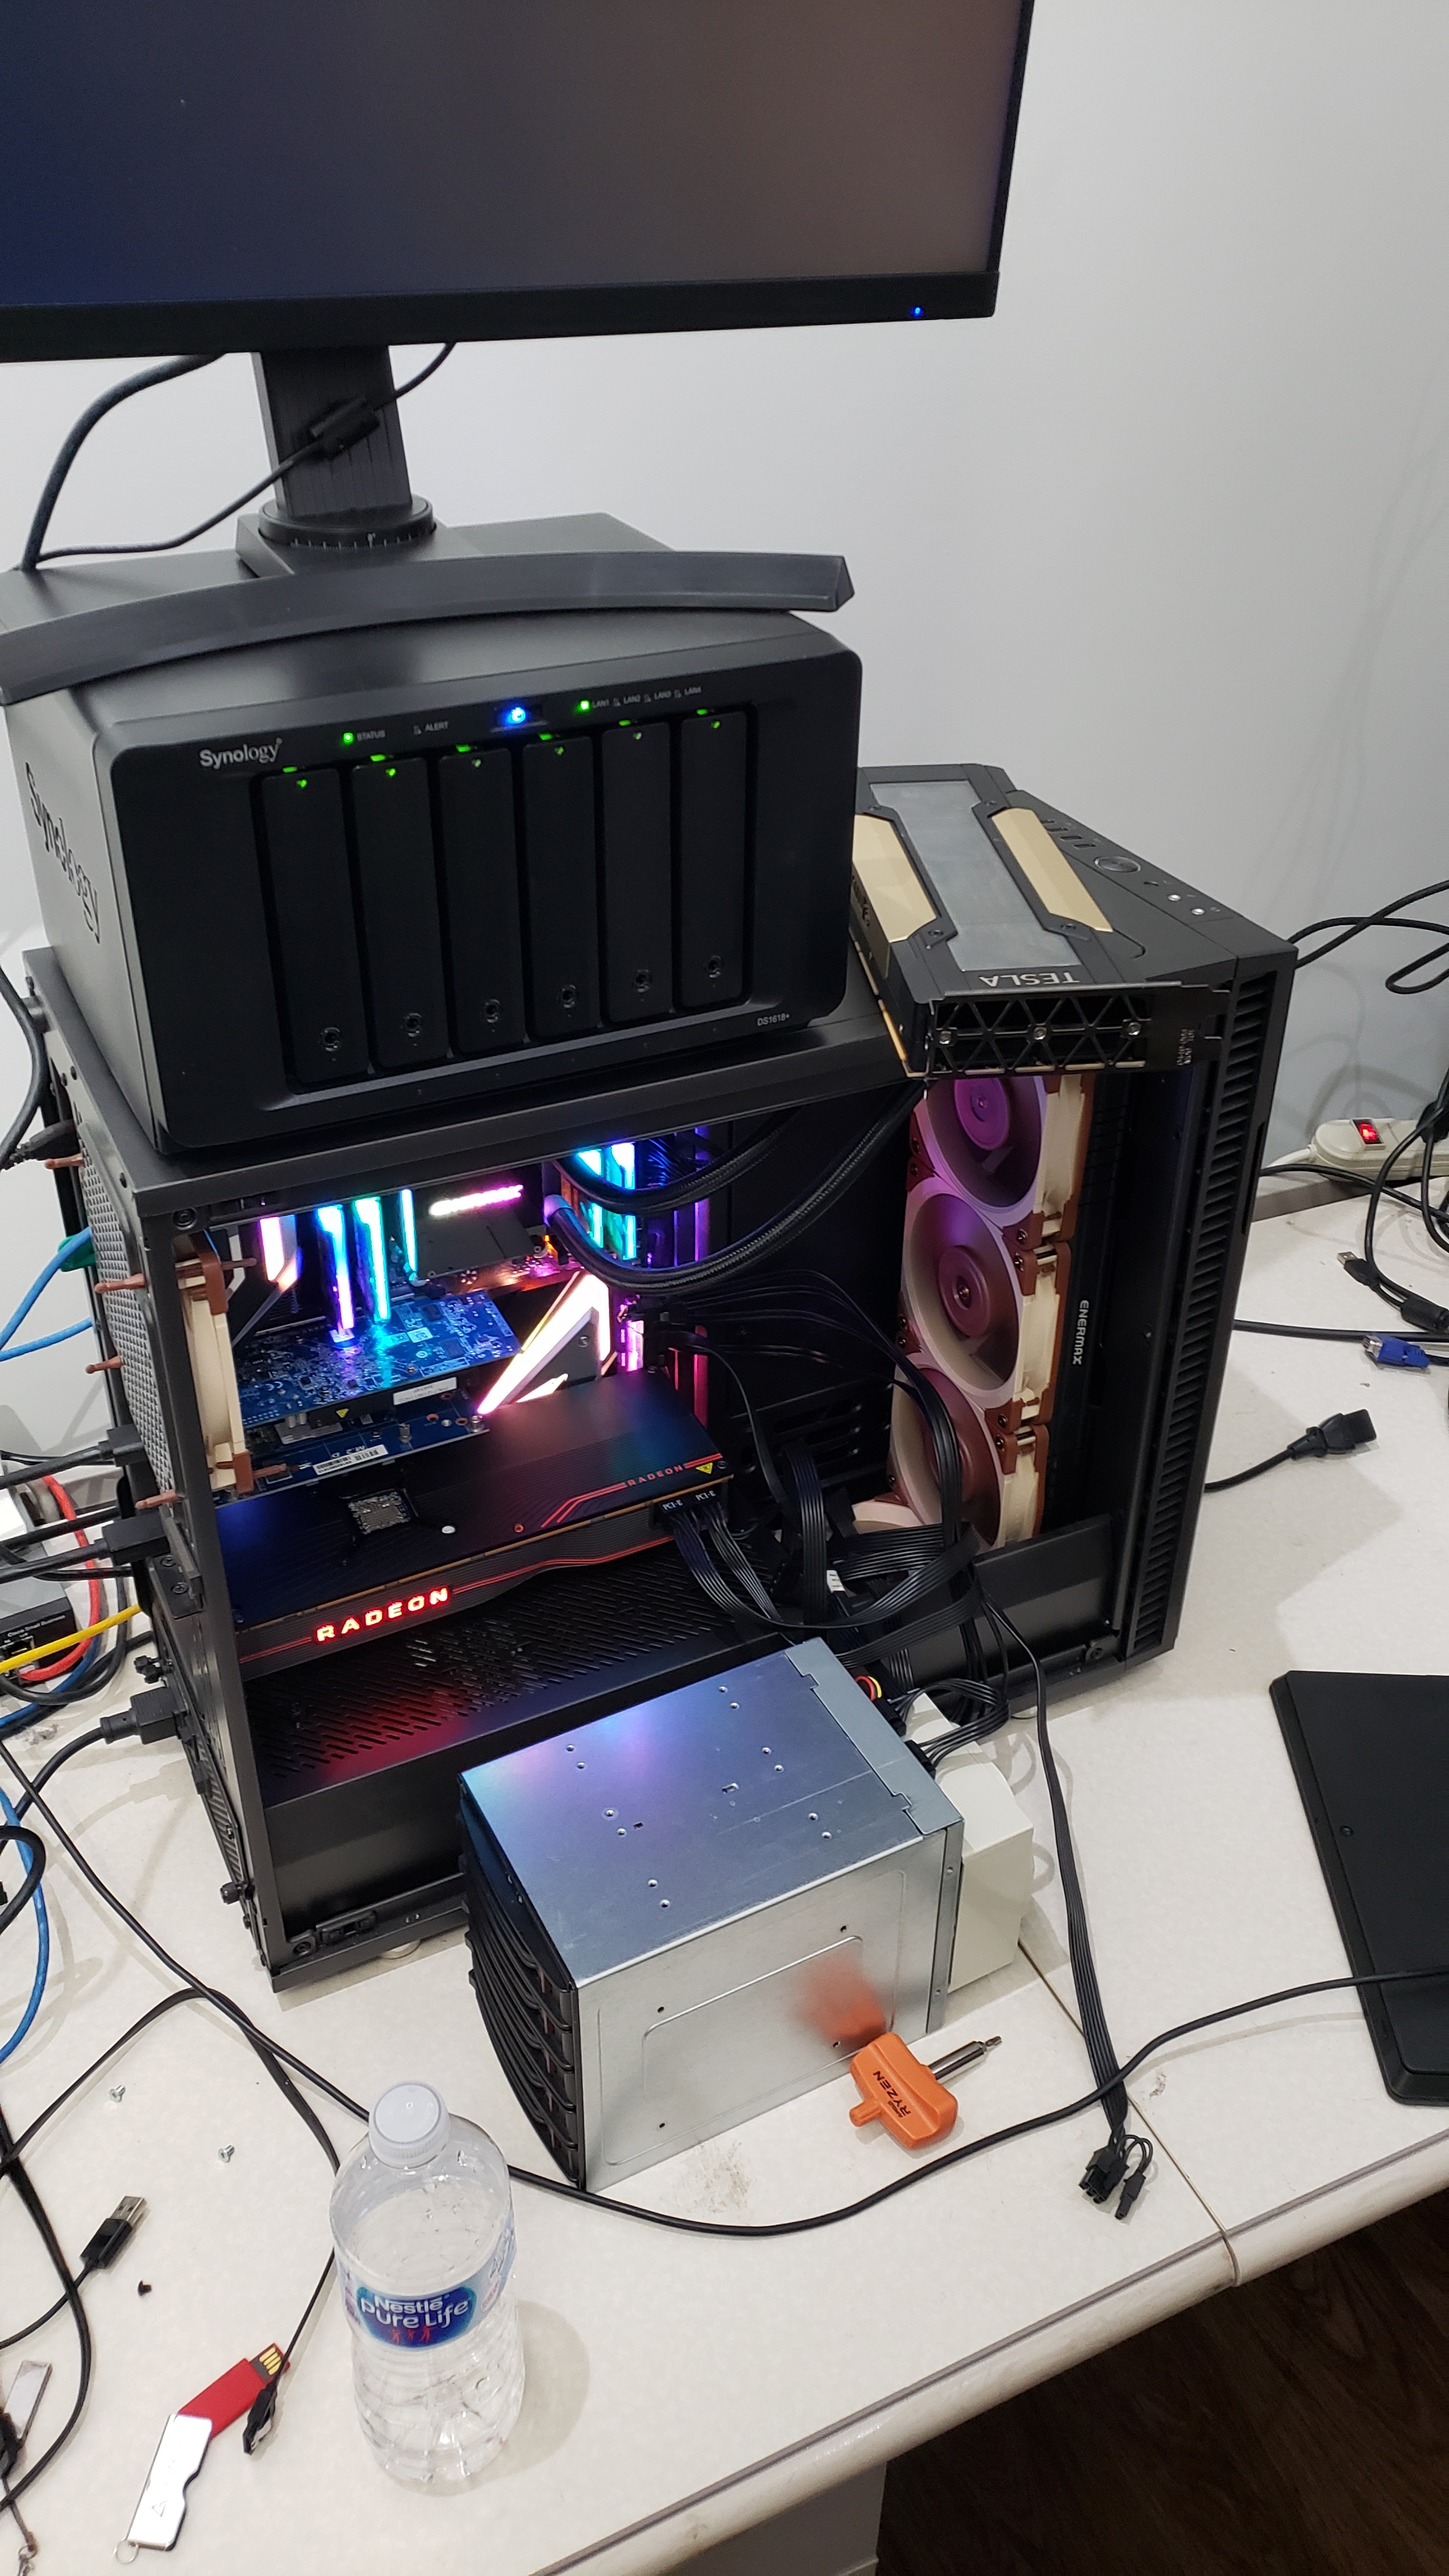
The Prototype Test Box for the Gamers Nexus Server. Tried 5 different NAS distros.
Show Me The Gamers Nexus Stuff
I want to do this
ZFS on Unraid
You are in for an adventure let me tell you. ZFS on Linux is great, and finally mostly mature. It has great performance – very nearly at parity with FreeBSD (and therefor FreeNAS ) in most scenarios – and it’s the one true filesystem.
Look, I like BTRFS too. And I did a lot of failure mode testing to go with these videos, but it held up surprisngly well so maybe those videos aren’t super interesting. But ZFS? ZFS is the FS.
Unraid is not built to support ZFS. The last few weeks have been the first time I’ve used Unraid in some time and it has matured well. It seems to have a diverse and talented user base and the user base is adding a lot of features and flexibility to the system.
Getting Started
First: Backup your data. Things can go wrong and your data can get trashed. ZFS support on Unraid is not supported by Lime Tech or, well, anyone. It’s a life-in-your-own-hands scenario using the system off-script like this.
I didn’t see a clean way to use only a ZFS pool either. You’ll need at least 1 or 2 other storage devices to create an “Unraid Array” so that the Plugins/Docker/VMs tab will work in Unraid (bummer).
Here is the info for the ZFS on unraid plugin:
Here is the github link:
Plugins on unraid involve pasting links into unraid, so that’s neat.
The plugin documentation has a handy hint about limiting the arc cache size which is great for mixed-use boxes. Otherwise the arc filesystem cache will happily use all your ram. Whether or not this is a bad thing is probably on the side of not really a bad thing if it uses all your ram as it will give up ram if the ram becomes short. There have been cases in the past where that mechanism was not good at sharing memory with other processes, but by and large you may not need that. Experiment, though, and report your results here for the benefit of everyone?
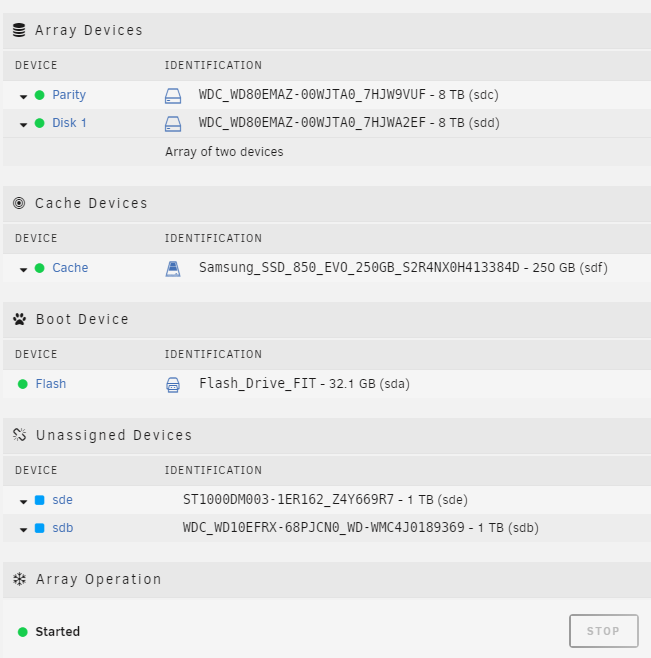
Creating your zpool
lsblk
This will help you identify block devices on your system. I had sd[b-e] available to create a new zpool. I used
zpool create dumpster raidz /dev/sdb /dev/sdc /dev/sdd /dev/sde
and then
zpool status
 pool: dumpster
 state: ONLINE
  scan: none requested
config:

        NAME        STATE     READ WRITE CKSUM
        dumpster    ONLINE       0     0     0
          sdb       ONLINE       0     0     0
          sdc       ONLINE       0     0     0
          sdd       ONLINE       0     0     0
          sde       ONLINE       0     0     0

errors: No known data errors
to verify that my tiny 4 disk raidz1 setup had been created correctly.
Testing your setup
Unraid seems to be based on slackware, but lsb_release and the usual handy stuff for figuring out what version of slackware seemed to be missing. I stumbled through installing fio manually by guessing it may be slack 14.2 and downloading this:
https://slackware.pkgs.org/14.2/slackonly-x86_64/fio-3.7-x86_64-1_slonly.txz.html
then installing it manually:
upgradepkg --install-new ./fio-3.7-x86_64-1_slonly.txz
Tada! now we can use fio to test zfs.
First create a zfs dataset that lacks compression and atime (compression can skew results especially if the file is highly compressible).
zfs create dumpster/test -o casesensitivity=insensitive -o compression=off -o atime=off -o sync=standard^C
then you can use fio
fio --direct=1 --name=test --bs=256k --filename=/mnt/dumpster/test/whatever.tmp --thread --size=32G --iodepth=64 --readwrite=randrw ( --sync=1 )
The above command will do an fio test with a 256k block test writing 32 gigabytes. On any spinning rust that’s likely to take a while. You “kind of” want the testing to be larger than the ram you have to get a sense of how the performance of the disk subsystem is. sync=1 will force synchronous writes, which is the type of thing you encounter when this zfs dataset (path) is doing something like hosting a database and in some virtual machine workloads.
 fio --direct=1 --name=test --bs=256k --filename=/mnt/dumpster/test/whatever.tmp --thread --size=32G --iodepth=64 --readwrite=randrw
test: (g=0): rw=randrw, bs=(R) 256KiB-256KiB, (W) 256KiB-256KiB, (T) 256KiB-256KiB, ioengine=psync, iodepth=64
fio-3.7
Starting 1 thread
test: Laying out IO file (1 file / 32768MiB)
Jobs: 1 (f=1): [m(1)][98.1%][r=104MiB/s,w=98.3MiB/s][r=415,w=393 IOPS][eta 00m:02s]
test: (groupid=0, jobs=1): err= 0: pid=70275: Tue Oct 15 18:25:55 2019
   read: IOPS=614, BW=154MiB/s (161MB/s)(16.0GiB/106862msec)
    clat (usec): min=26, max=1076.0k, avg=1552.75, stdev=18477.46
     lat (usec): min=26, max=1076.0k, avg=1552.89, stdev=18477.46
    clat percentiles (usec):
     |  1.00th=[     44],  5.00th=[     51], 10.00th=[     54],
     | 20.00th=[     57], 30.00th=[     59], 40.00th=[     61],
     | 50.00th=[     62], 60.00th=[     64], 70.00th=[     68],
     | 80.00th=[     76], 90.00th=[   5997], 95.00th=[   8979],
     | 99.00th=[  11863], 99.50th=[  15664], 99.90th=[  42730],
     | 99.95th=[  53740], 99.99th=[1027605]
   bw (  KiB/s): min=  512, max=330752, per=100.00%, avg=173656.65, stdev=62328.05, samples=191
   iops        : min=    2, max= 1292, avg=678.31, stdev=243.47, samples=191
  write: IOPS=611, BW=153MiB/s (160MB/s)(15.0GiB/106862msec)
    clat (usec): min=29, max=25951, avg=68.80, stdev=258.87
     lat (usec): min=30, max=25956, avg=71.38, stdev=258.88
    clat percentiles (usec):
     |  1.00th=[   39],  5.00th=[   50], 10.00th=[   53], 20.00th=[   56],
     | 30.00th=[   58], 40.00th=[   59], 50.00th=[   61], 60.00th=[   62],
     | 70.00th=[   64], 80.00th=[   68], 90.00th=[   77], 95.00th=[   83],
     | 99.00th=[  108], 99.50th=[  130], 99.90th=[  644], 99.95th=[ 5604],
     | 99.99th=[10552]
   bw (  KiB/s): min= 1024, max=320000, per=100.00%, avg=173646.78, stdev=61451.08, samples=190
   iops        : min=    4, max= 1250, avg=678.27, stdev=240.06, samples=190
  lat (usec)   : 50=4.98%, 100=86.13%, 250=1.03%, 500=0.10%, 750=0.12%
  lat (usec)   : 1000=0.45%
  lat (msec)   : 2=0.09%, 4=0.57%, 10=4.88%, 20=1.51%, 50=0.11%
  lat (msec)   : 100=0.02%, 250=0.01%, 1000=0.01%
  cpu          : usr=0.33%, sys=7.71%, ctx=14442, majf=0, minf=84
  IO depths    : 1=100.0%, 2=0.0%, 4=0.0%, 8=0.0%, 16=0.0%, 32=0.0%, >=64=0.0%
     submit    : 0=0.0%, 4=100.0%, 8=0.0%, 16=0.0%, 32=0.0%, 64=0.0%, >=64=0.0%
     complete  : 0=0.0%, 4=100.0%, 8=0.0%, 16=0.0%, 32=0.0%, 64=0.0%, >=64=0.0%
     issued rwts: total=65713,65359,0,0 short=0,0,0,0 dropped=0,0,0,0
     latency   : target=0, window=0, percentile=100.00%, depth=64

Run status group 0 (all jobs):
   READ: bw=154MiB/s (161MB/s), 154MiB/s-154MiB/s (161MB/s-161MB/s), io=16.0GiB (17.2GB), run=106862-106862msec
  WRITE: bw=153MiB/s (160MB/s), 153MiB/s-153MiB/s (160MB/s-160MB/s), io=15.0GiB (17.1GB), run=106862-106862msec
This result isn’t too bad for just 4 spinning 8tb disks (5400 rpm) and is close to the same level of performance that I was seeing on FreeNAS.
ZFS Snapshots – Shadow copies!!! Part 1, the underlying config
I will never understand why no one bothers to make this easy. Prettymuch all the NAS distros out there make one jump through unnecessary hoops and most OSs have “BUILT IN” functionality for managing and accessing snapshots over the network. It’s a must-have feature. Why is it not on by default?
Anyway, to use this on unraid you have to have a script and you have to create a periodic job (cron job) to run the script on a fixed interval to generate a snapshot and discard the old ones. It must be in a specific folder, and samba must be configured to enable mapping shadowcopy entries on the file system to the client software via vfs. Fun times.
That script is linked above, but (histortically) it needs a patch to change the way the snapshots are named in order to be consistent with what other OSes expect of the snapshots.
Read this:
It’s pretty straight forward. As unraid lacks basic things like… you know… man or git or make… things get a bit more interesting.
The key thing to understand about zfs-auto-snapshot.sh is that you must set it up to run in cron, but a simple command that snapshots all zfs datasets will do. If you have a dataset you don’t want to snapshot you can use
zfs get all |grep snapshot
dumpster                                     usedbysnapshots             0B                          -
dumpster                                     snapshot_limit              none                        default
dumpster                                     snapshot_count              none                        default
zfs set com.sun:auto-snapshot=true dumpster/vms
zfs set com.sun:auto-snapshot=false dumpster/test
the shell script will look for and honor the auto-snapshot variable that can be preset in your ZFS dataset. Neat, huh? That’s pretty awesome.
./zfs-auto-snapshot.sh // -k 28 --label=01
This command will allow there to be 28 snapshots at any given time. If you run this snapshot at, say, 11pm and 11am on a given day this is two weeks of snapshots.
Cron, the unraid way
That’s great and all (it creates a snapshot) but we need to run that on a schedule. Cron is the thing on Linux (and prettymuch everything not-windows), but it must be setup on unraid.
Cron landmines on Unraid aka this doesn't work
Another fun landmine that’s the direct result of the overly-gimped slackware underbelly of the system. crontab -e seemed to be lost on reboot, which would be the usual way to do this.
cd /boot/config/plugins
mkdir cronjobs
cat zfs_snap.cron

    55      11,23      *       *       *       *       /mnt/dumpster/scripts/zfs-auto-snapshot-upstream-1.2.4/src/zfs-auto-snapshot.sh // -k 28
This crontab format runs at 11:55 once then again at 23:55.
Note the path to the zfs auto snap script. That’s where I extracted it (in the zfs storage pool). You could copy it to a more friendly path, but I was unsure of anything other than my zfs pool in terms of ‘survive reboot’ with unraid.
I used vi to create zfs_snap.cron containing the following cron job. The * represent days of week, month, etc. see the example in man crontab.5 … oh right. man is not a luxury we can afford in the era of $5 32gb flash disks with unraid. Well you can happily man crontab.5 on another system, anyway. It applies here too.
update_cron will cause unraid to reload the cron config. Perhaps there is a user-plugin GUI for cron jobs that I just missed. I will update this guide if there is an easier way.
The spoiler above is how NOT do to cron on unraid. This seems to still be what users on the unraid forum recommend, but it didn’t work for me. Instead, there is the “Community Applications” plugin which, I think, most people with unraid install. It has a scheduling function.
So to setup a reliable cron (which it turns out we will need for the optional docker section, too), you will need this plugin. Install the same way the ZFS plugin was installed. Go to plugins → install then paste in
https://raw.githubusercontent.com/Squidly271/community.applications/master/plugins/community.applications.plg
Once that’s installed, you’ll have a new apps tab. On that click install and search for User Scripts, and install that. The folks that maintain this code are the real heroes; Unraid should put them on the payroll and move this functionality into the core functionality ASAP.
Once you’ve done that, you can use the User Scripts tab to create a new script with a custom schedule. The custom schedule text box takes a cron-formatted string for time and there is a link to a ‘cheat sheet’ of how to setup cron with the “What is Cron” link on this plugin.
For this Unraid setup, I used
55 11,23 * * *
and for the ‘edit script’ portion, it is just one line:
/dumpster/zfs-auto-snapshot.sh // -k 28 --label=01
To be sure its working, you can check the log icon or copy-paste that command into the terminal to be sure it runs right. This will create a snapshot at the specified time of all datasets and keep up to 28 snapshots. If we snap twice a day, that’s two weeks of snapshots.
If you want to be sure cron is running, you can change the custom line to:
*/5 * * * *
This translates to “run every 5 minutes” – but the snapshot mechanism will only create 28 snapshots because of the -k 28 command, and so the oldest will be discarded.
To enable automatic scrubbing, create a new scheduled task and the script command will be:
zpool dumpster scrub
… where dumpster is the name of your zfs pool (literally dumpster in my case; tank or something like that in other zfs documentation).
Scrubbing is a periodic process that looks for errors or inconsistencies in your pool. I recommend a weekly or monthly scrub that is run at times when the system is unlikely to have users using it.
ZFS Snapshots – Part 2, The Samba bits
Yeah, there’s more. Sorry. The next part is configuring samba to be aware of the aforementioned snapshots that are now (hopefully) working correctly. On unraid, it is possible to edit
/boot/config/smb-extra.conf
with the custom params, but the SMB icon in settings (extra parameters) will allow you to manage it perhaps more easily than the CLI.
In the examples so far, I’ve got /mnt/dumpster as the zfs root with dumpster/vms as one of the datasets under there. This is the config you can paste into the extra settings in SMB on the unraid web gui to access the snapshots in the hidden .zfs snapshots folder:
[data]
path = /mnt/dumpster/vms
browseable = yes
guest ok = yes
writeable = yes
read only = no
create mask = 0775
directory mask = 0775
vfs objects = shadow_copy2
shadow: snapdir = .zfs/snapshot
shadow: sort = desc
shadow: format = zfs-auto-snap_%S-%Y-%m-%d-%H%M
shadow: localtime =  yes
This may need to be tweaked to your system. The name in brackets is the share name.
Ginally samba reload to reload samba and, hopefully, expose the snapshot or two we created manually earlier.
If all has gone according to plan, the path you set above should be browsable from windows (and other) clients including the previous versions tabs.
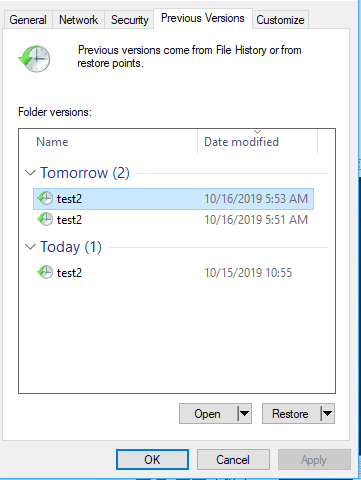
tada!
If you do not see any snapshots in the “Shadow Copy” tab – did you run the snapper script? If not you can run it manually a couple of times. After that you should see the snapshots in “Shadow Copy” and if not use the Log icon to the right of the script to see what went wrong with your snapshot script.
Now you should understand enough to configure snapshots and retention however you like. The subsequent posts on the unraid forum also show you how to get ZFS events tied into unraid’s event system, which is nice. In the event of data correction from a scrub operation, you’ll be notified.
It’s also worth making sure that the pool is scrubbed periodically (once per week is about right and even once per month would be ok). A scrub operation scans the entire storage pool for any inconsistency between redundant data and uses the checksum values to correct any bad data. This can be an early warning sign of hardware failure.
But wait – user permissions!?
Here are some example configs. I created 3 users through the unraid gui – georgi, picard and barclay. These two shares are setup so that only barclay can write to test3 and barclay cannot write to test2
[test2]
path = /mnt/TANK/YOURSHARENAME

# Secure
public = yes
writeable = no
write list = geordi

; etcetra
create mask = 0775
directory mask = 0775
vfs objects = shadow_copy2
shadow: snapdir = .zfs/snapshot
shadow: sort = desc
shadow: format = zfs-auto-snap_%S-%Y-%m-%d-%H%M
shadow: localtime =  yes

[test3]
path = /mnt/somewhere/something

writeable = no
write list = barclay

create mask = 0775
directory mask = 0775
vfs objects = shadow_copy2
shadow: snapdir = .zfs/snapshot
shadow: sort = desc
shadow: format = zfs-auto-snap_%S-%Y-%m-%d-%H%M
shadow: localtime =  yes
If you run into permissions issue, a chown nobody:users at the path should resolve permissions issues, especially if you have copied data form elsewhere via ssh.
Congratulations! You’re basically up and running. From here it would be a good idea to update the paths that the unraid Docker and VM functions use to store their data to be in the zpool. I’d even recommend creating separate zfs datasets under the main dataset to contain such information.
Optional: Getting ready for Windows VMs
Visit the VM are of Unraid settings. There is a button to download the VirtIO drivers CD from RedHat. It is important to do this step if you plan to use Windows VMs. It will provide storage and networking drivers for the Windows installer.
pwd
/mnt/user/isos
root@Tower:/mnt/user/isos# wget https://fedorapeople.org/groups/virt/virtio-win/direct-downloads/stable-virtio/virtio-win.iso
The above ISO contains drivers for virtio networking and storage. I did it with wget before noticing a handy link in the Unraid gui, so all you have to do is click.
The isos folder is also shared on the network, so you can drop a Windows install ISO in there. Once you have both ISOs, you can use the Unraid Gui to create a Windows 10 VM. At the end of this guide is the specific setup we did for Gamers Nexus.
Optional: Docker, SteamCache, Origin Cache, Caching Battle.net
Lancache to the rescue! Lancache is a really awesome project for providing local caching services on your lan, headache-free.
Once again, however, we are going to run into quirks of Unraid that make this far more annoying than it should be.
The first step is to disable the Nginx web browser, which provides the web gui we’ve been using to configure Unraid, from listening on any IP Addresses.
Why on earth would we have to do that?
Normally Docker lets you manage containers two ways – map arbitrary ports on the local computer’s IP address(s) to ports on the Docker containers OR allow the docker container to use an IP on your local network in which case it picks its own IP addresses.
Unraid lacks an adequate gui facility for assigning more than one IP address to the system (to be used by Docker containers) and when you do it manually from the CLI nginx uses those IP addresses too. Unraid does provide a facility for letting a container use an IP on the local network, but then two containers can’t share portso n an IP address.
So Nginx needs to listen only on the primary IP address in order to allow the caching proxy containers to operate
The lan caching thing depends on 3 containers – one for DNS and two for web traffic. One web traffic docker container handles unencrypted web traffic and the storage of cached assets.
The other, sniproxy, handles https traffic. This type of traffic is encrypted and cannot be cached. Having this container is important because if any traffic is sent to the encrypted endpoint, the sniproxy just forwards it on (unaltered) to where it was trying to go.
Unfortunately, the Docker gui is basically completely broken for what we’re going to do. It’s really buggy – you know you’re experiencing the bugs if (once we’ve created these Docker instances) you click “Restart all” and one of them won’t restart because the other one is using the same port. This might be a bug in the monolithic lan cache container – it really shouldn’t be claiming port 443 – but even if you work around that you still can’t have two containers share the same IP without the IP being mapped on the host system (more details in the “Why” accordion above).
Instead, we will use the Unraid User Scripts thing to set these up. Create a new script, and paste in:
ip addr add 192.168.xxx.yyy/24 dev br0
ip addr add 192.168.xxx.yyz/24 dev br0

docker run --restart unless-stopped --name lancache-dns -p 192.168.xxx.yyy:53:53/udp -e USE_GENERIC_CACHE=true -e LANCACHE_IP=192.168.xxx.yyz -e UPSTREAM_DNS="YOUR DNS SERVER IP" -d lancachenet/lancache-dns:latest

docker run --restart unless-stopped --name lancache-sniproxy -p 192.168.xxx.yyz:443:443 -e LANCACHE_IP=192.168.xxx.yyz -d --privileged lancachenet/sniproxy:latest

docker run --restart unless-stopped --name lancache -v /cache/data:/tank/docker/lancache/data -v /cache/logs:/tank/docker/lancache/logs -d --privileged -p 192.168.xxx.yyz:80:80 -p 192.168.xxx.yyz:444:443 lancachenet/monolithic:latest
You Must make changes to the above script to suit your environment.
There is kind of a lot to unpack here in these commands, but I will try to explain.
In the first two commands, there are two IPs:
192.168.xxx.yyy
192.168.xxx.yyz
Ideally these IPs are on your local network that are unused and would never be assigned by the DHCP server. Whether you elect to run unraid in static IP more or DHCP mode doesn’t matter – the IP command will assign them to the network device you specify. Unraid by default bridges all the nics togethr for redundancy, so our interface was br0 (there may be some variation in that so check your setups!).
You could use the same IP for DNS, HTTP and HTTPS since they all run on different ports. I chose to do this because DNS almost works flawlessly with the unraid gui and DNS being down is a much more annoying problem for the network than Steam Caching/Lan caching behing down. So you could set the DNS docker container to auto-start in the unraid gui and it mostly works fine. In that case you would not use the ip addr add command in the script for the IP you intend for DNS to be on.
The other important part of the command is the -v parameter. This maps storage from the local machine to the container. In my case the paths are appropriate for how I’ve configured the ZFS pool . All you need to know here is to put the data and logs volumes on bulk storage. It doesn’t need to be on flash.
These commands should make sense. If you’re in really unfamiliar territory, it may be necessary to read the documentation on the Lancache github pages to get a better understanding how the docker containers work.
For unraid specifically, I’d also recommend moving the Docker image (in the unraid settings gui) to your ZFS storage pool and setting it to be a much larger image (by default it is only 20gb).
I also elected to use zfs create to create some new zfs datasets in my /dumpster zfs pool specifically for docker and unraid’s docker image.
Once you have the script the way that matters for your network, you can click “Start.” Note that you have to always start these manually. Even if you say “At Array Start” for the schedule, Docker takes a little while to come up after the array has started and this script will always run before Docker itself is running. There would need to be a new time from the plugin maintainer “After Array and Everything Else has Actually Already Started” which would be handy for a number of other reasons, I’m sure.
Test the dns server by changing your computer’s dns server to the IP of the unraid machine, or by using nslookup or dig commands to specifically test dns.
The lancache github page also has some handy commands for checking the logs and seeing the HIT/MISS output as in the GN video.
Particulars of the Gamers Nexus Setup
Hardware Setup:

Silverstone CS381
ttps://www.silverstonetek.com/product.php?pid=861&bno=0&tb=44&area=en
ASRock Rack X470D4U-2T
https://www.asrockrack.com/general/productdetail.asp?Model=X470D4U2-2T#Specifications
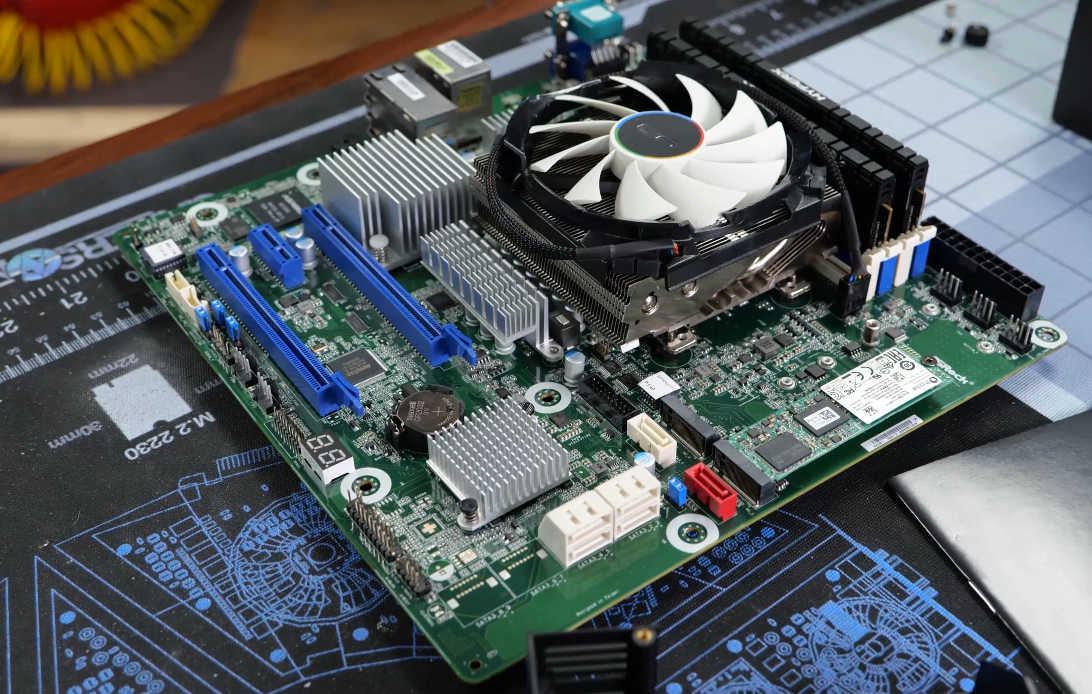
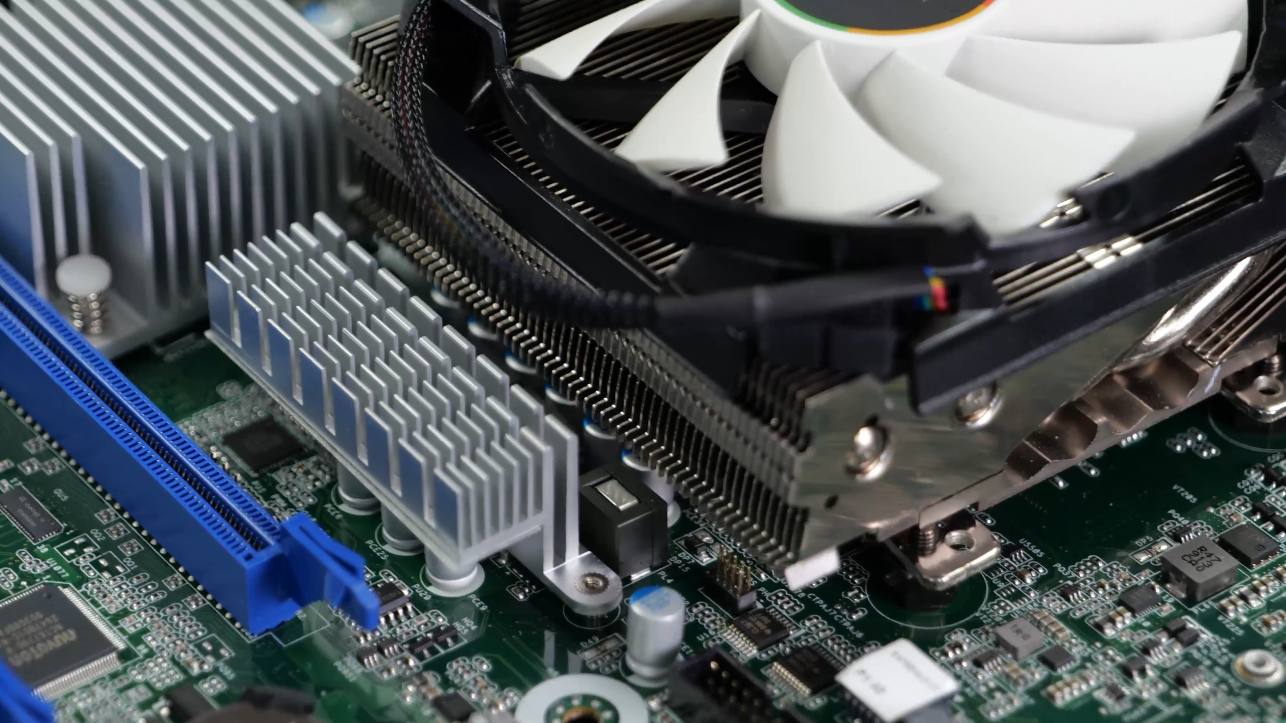
This was the heatsink we had to flip around the other way so the Cryorg heatsink would fit (would not recommend).
64gb ECC 2666 UDimm (Soon)
AMD Ryzen 3600X (3900X Soon, Probably)
LSI/Broadcom 9405W-16i Tri-Mode Storage Adapter
NetApp DS4346 w/2x IOM6
4x 14tb Seagate IronWolf drives
https://www.newegg.com/p/N82E16822184759
12x 2tb Refurb Drives
1x Plextor NVMe (512gb)
Silverstone 700w SFX PSU
2x SAS 8643 Patch Cable (9405W to Silverstone Backplanes)
2x SAS 8643 → 8088E Breakout Cable/IO Slot Interface (for NetApp Disk Shelf)
2x QSFP+ to LSI External SAS cables
Radeon RX5700 (IOMMU / Passthrough GPU for Transcode)
The Silverstone case has a lot of ideas but the execution could be much better with some minor improvements. Look for the Gamers Nexus video on this case for more info.
The main thing we did with this build was to use the add-in disk controller, which bills itself as “Tri mode” – I used this controller specifically for future expandability and excellent performance. The U.2 connections support SAS, Sata and NVMe operational modes. At some point GN would likelly upgrade storage solutions and this controller will support using up to NVMe devices.
The PCie Layout of the X470 motherboard from ASRock Rack was nearly perfect for our use case – x8 for the GPU and x8 for the disk interface card.
As I am weary of using onboard sata ports for disk arrays, I also sleep better knowing the disks are connected to a reputable HBA.
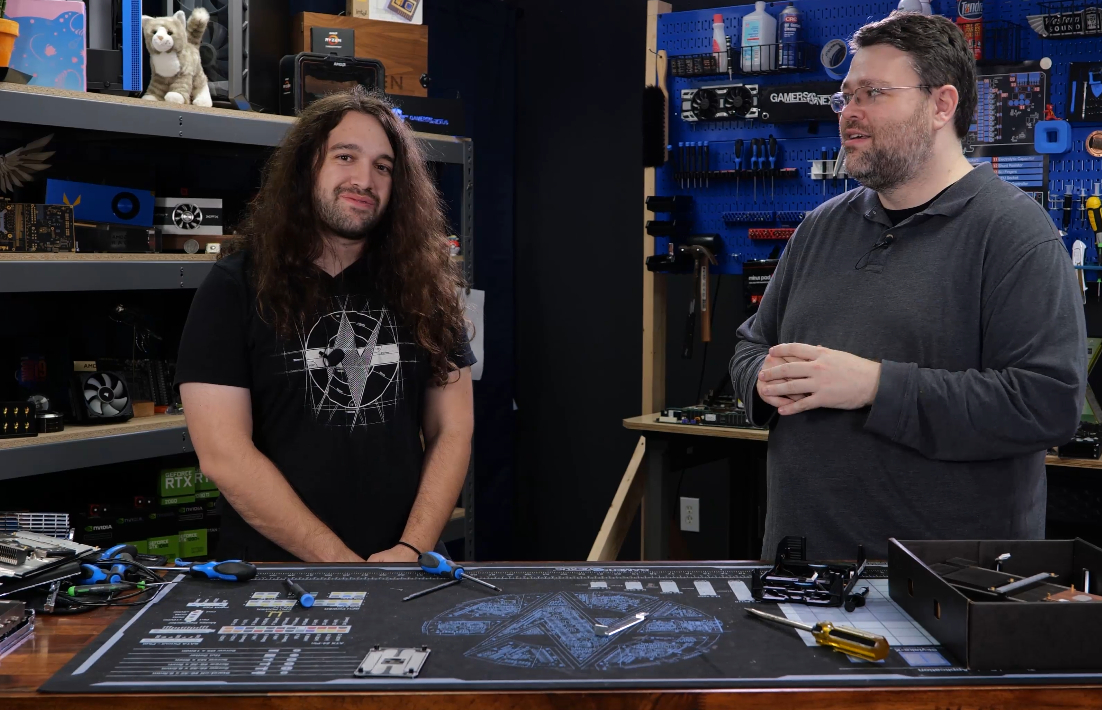
It was a lot of fun to introduce Stephen to IPMI – this was one of the key things I wanted for Gamers Nexus out of ths build. From the get-go we used the IPMI constantly, first for updating the Bios to support the 3600X and later to monitor the system when setting up wthe Windows virtual machine.

…