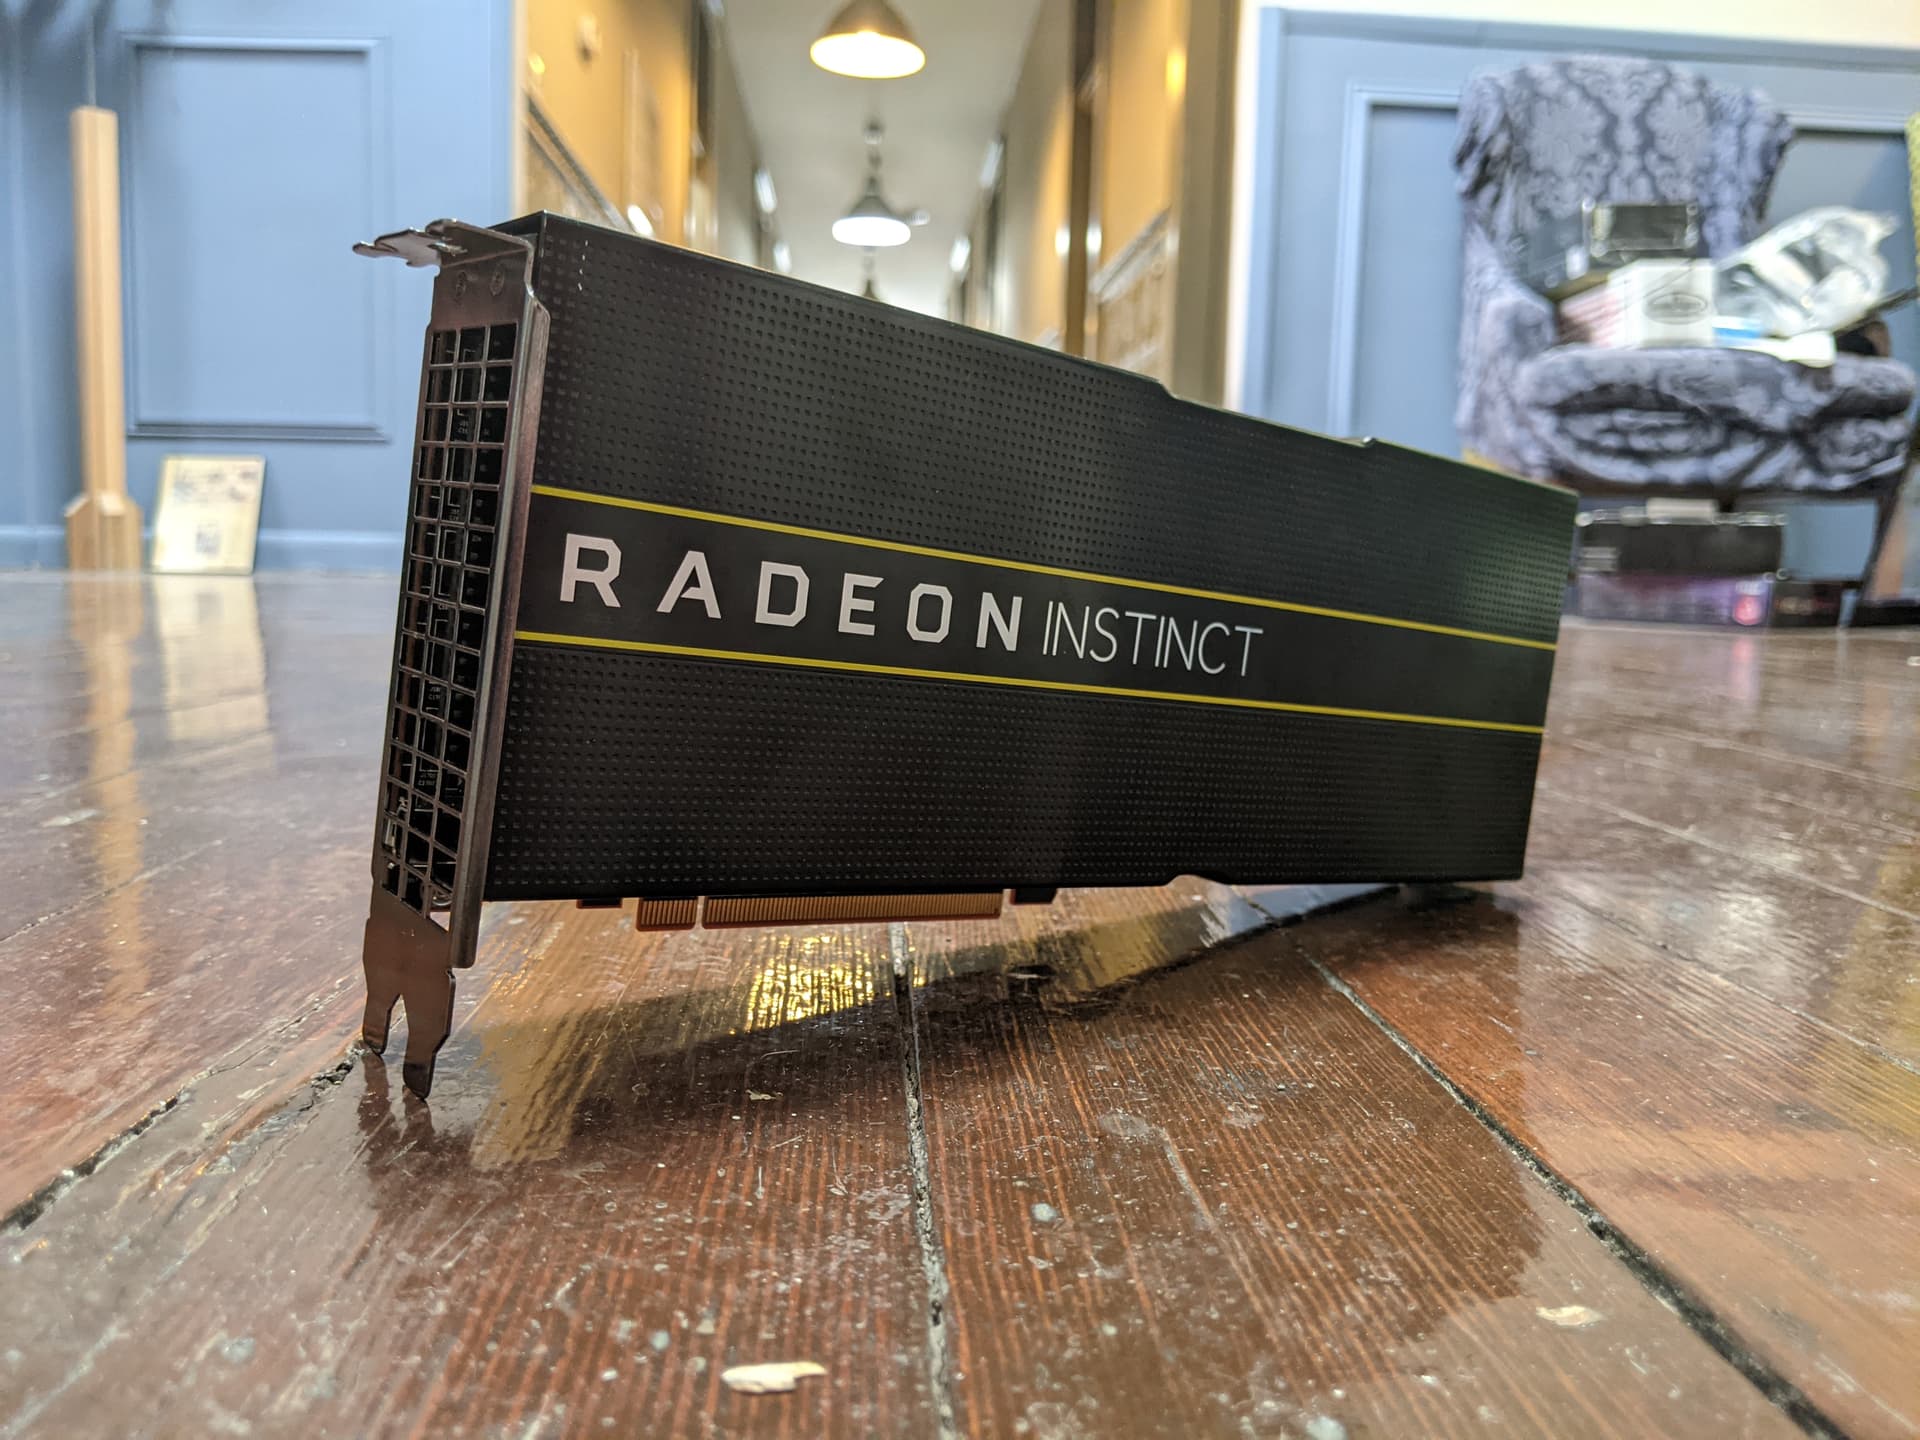
- In this guide I’ll show you how to get stable diffusion up and running on your 100$ Mi25 on linux
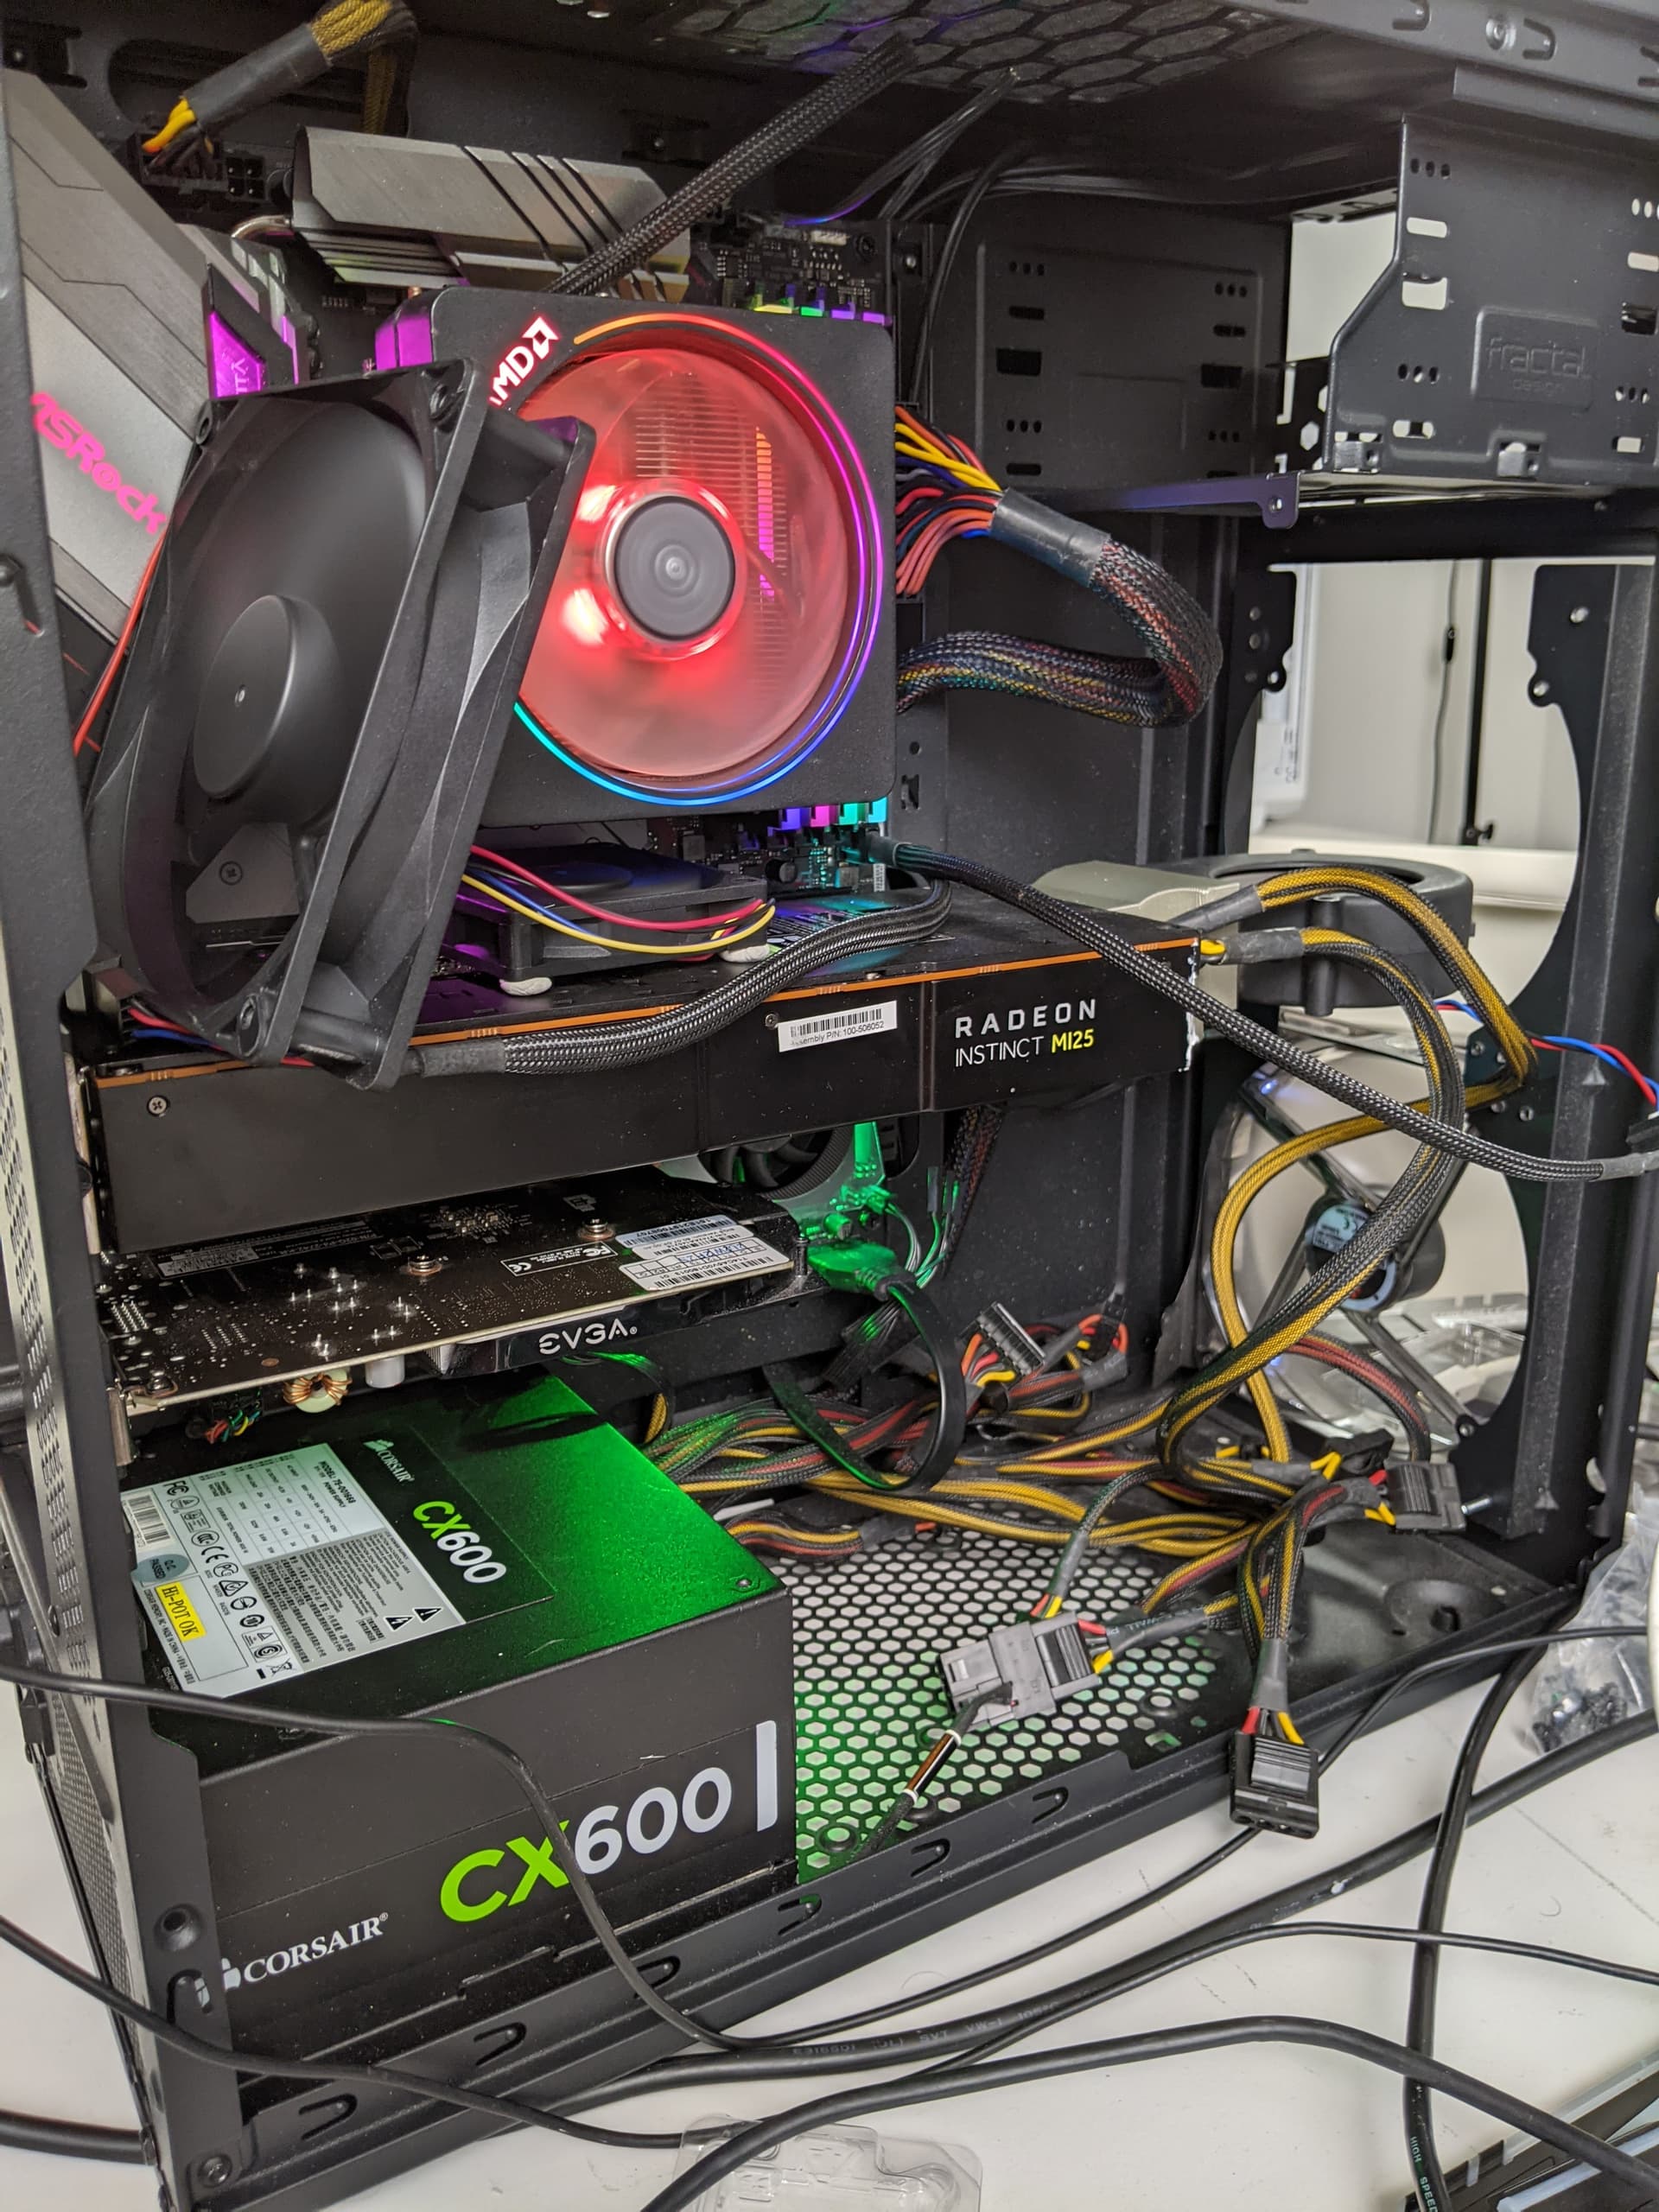
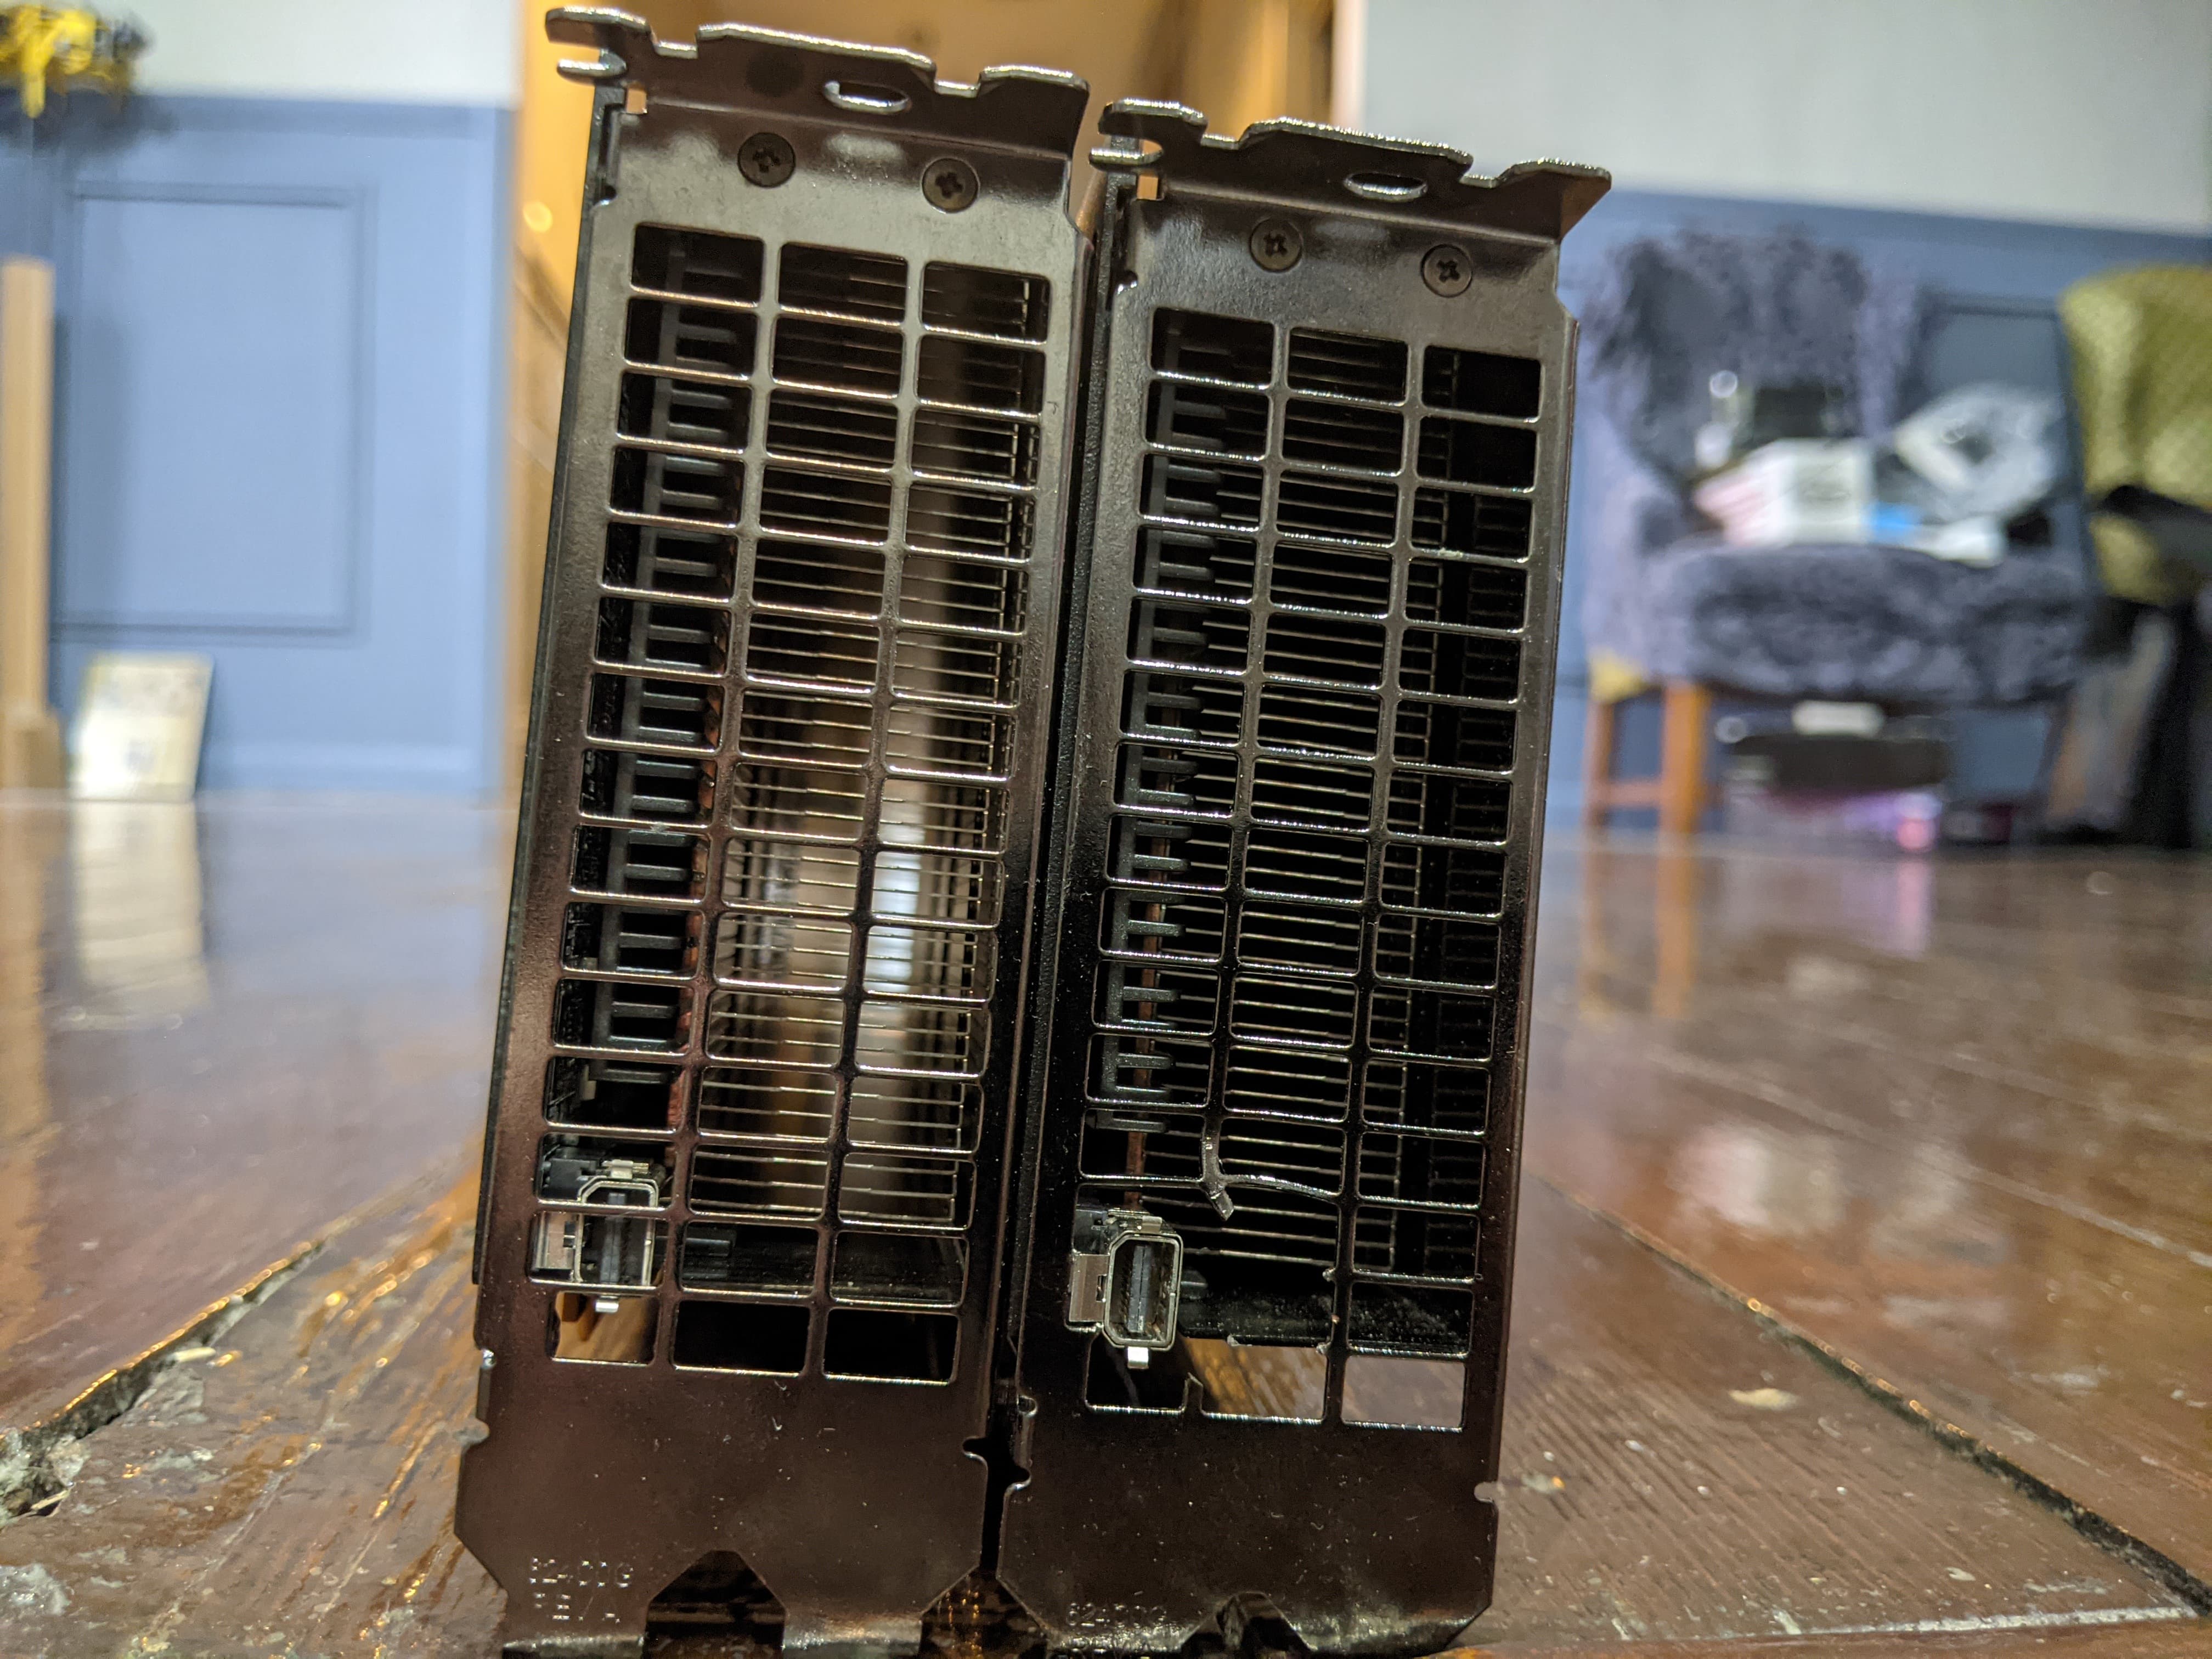
Cooling
-
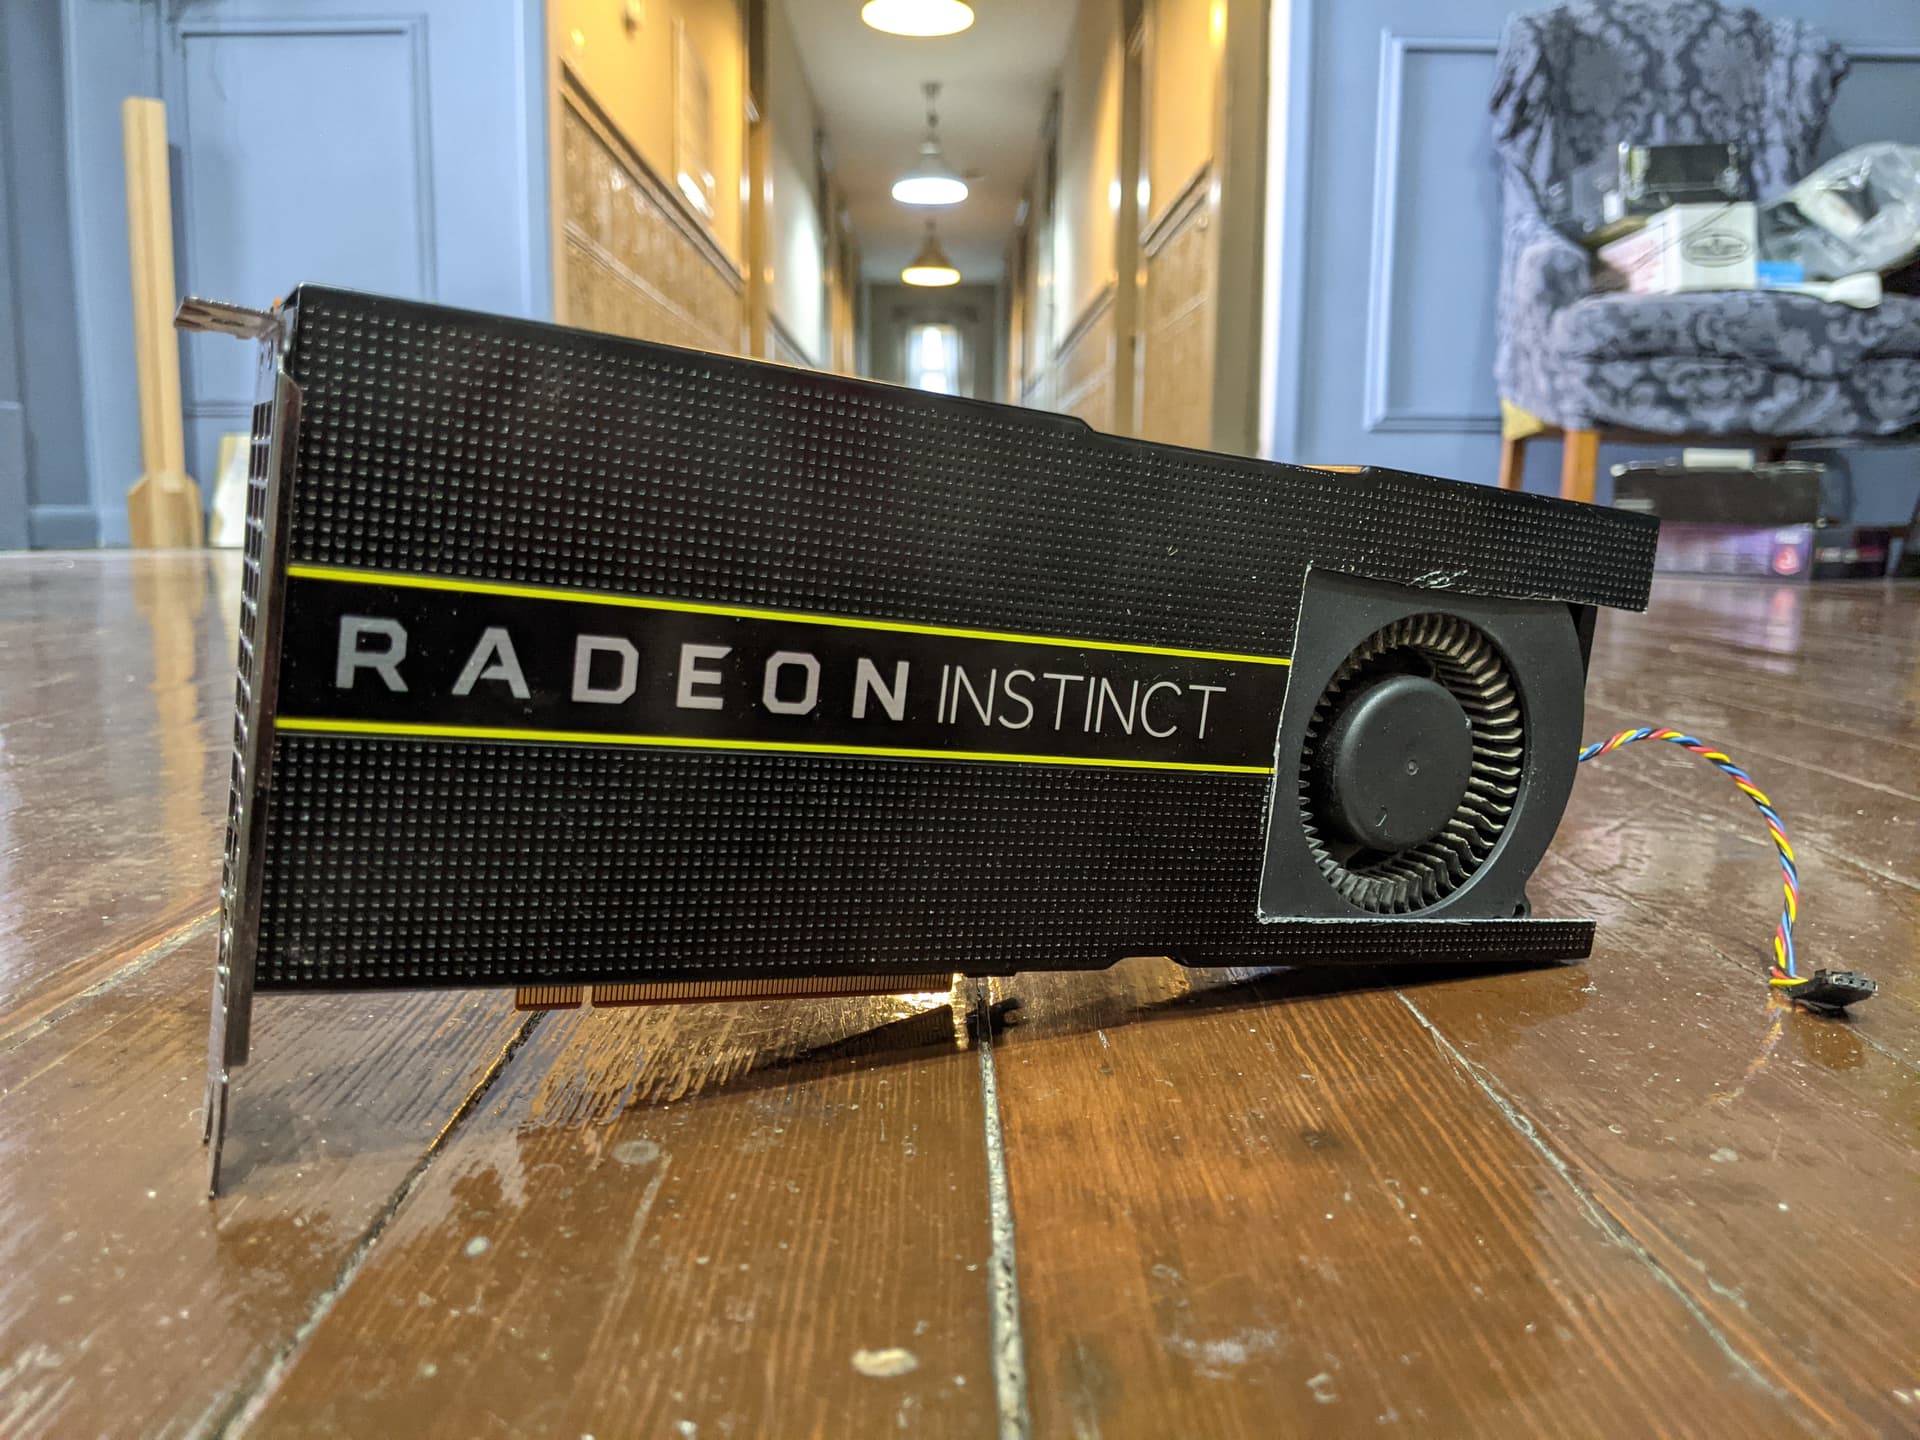
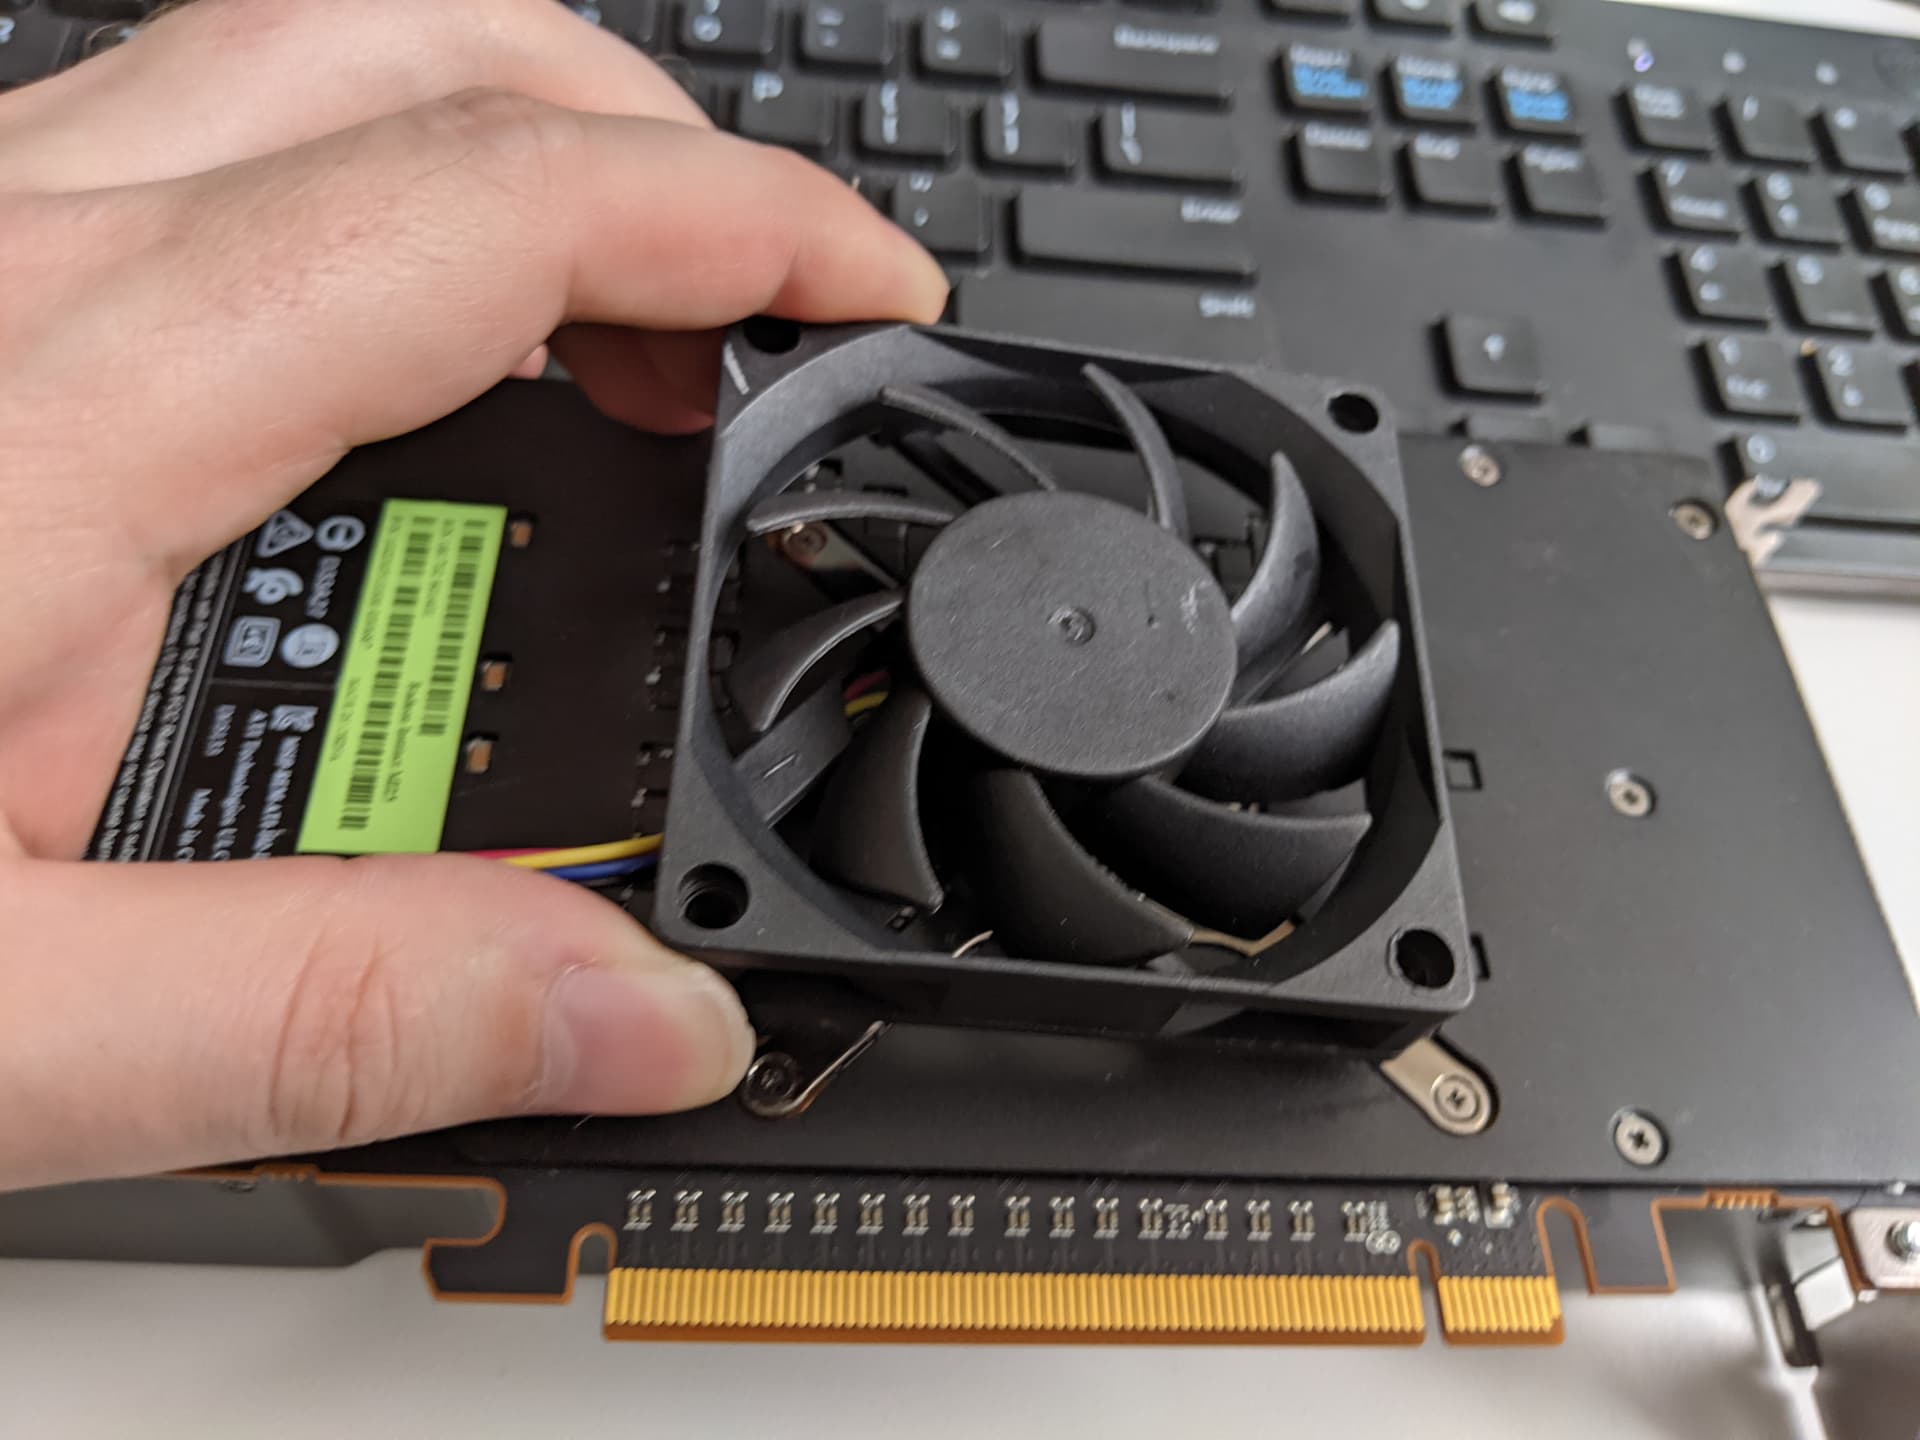
This thing does not come with a fan, you need to rig up your own cooling solution
-
This thing is HOT and its heatsink is not that large, I had enough space to fit an entire blower fan in the shroud
-
You might be able to do this on a stock MI25 bios or even Flashed to a Vega FE but I’ve done my testing with the MI25 Flashed to a WX9100
-
MI25 and Vega FE both have higher power limits but neither have video output working, also with stock heatsink its VERY hard to cool more than 170w
-
Vega FE stock will need A LOT of voltage tuning to be stable

- There are VRMs on the back as well you need to keep cool, they need Direct airflow
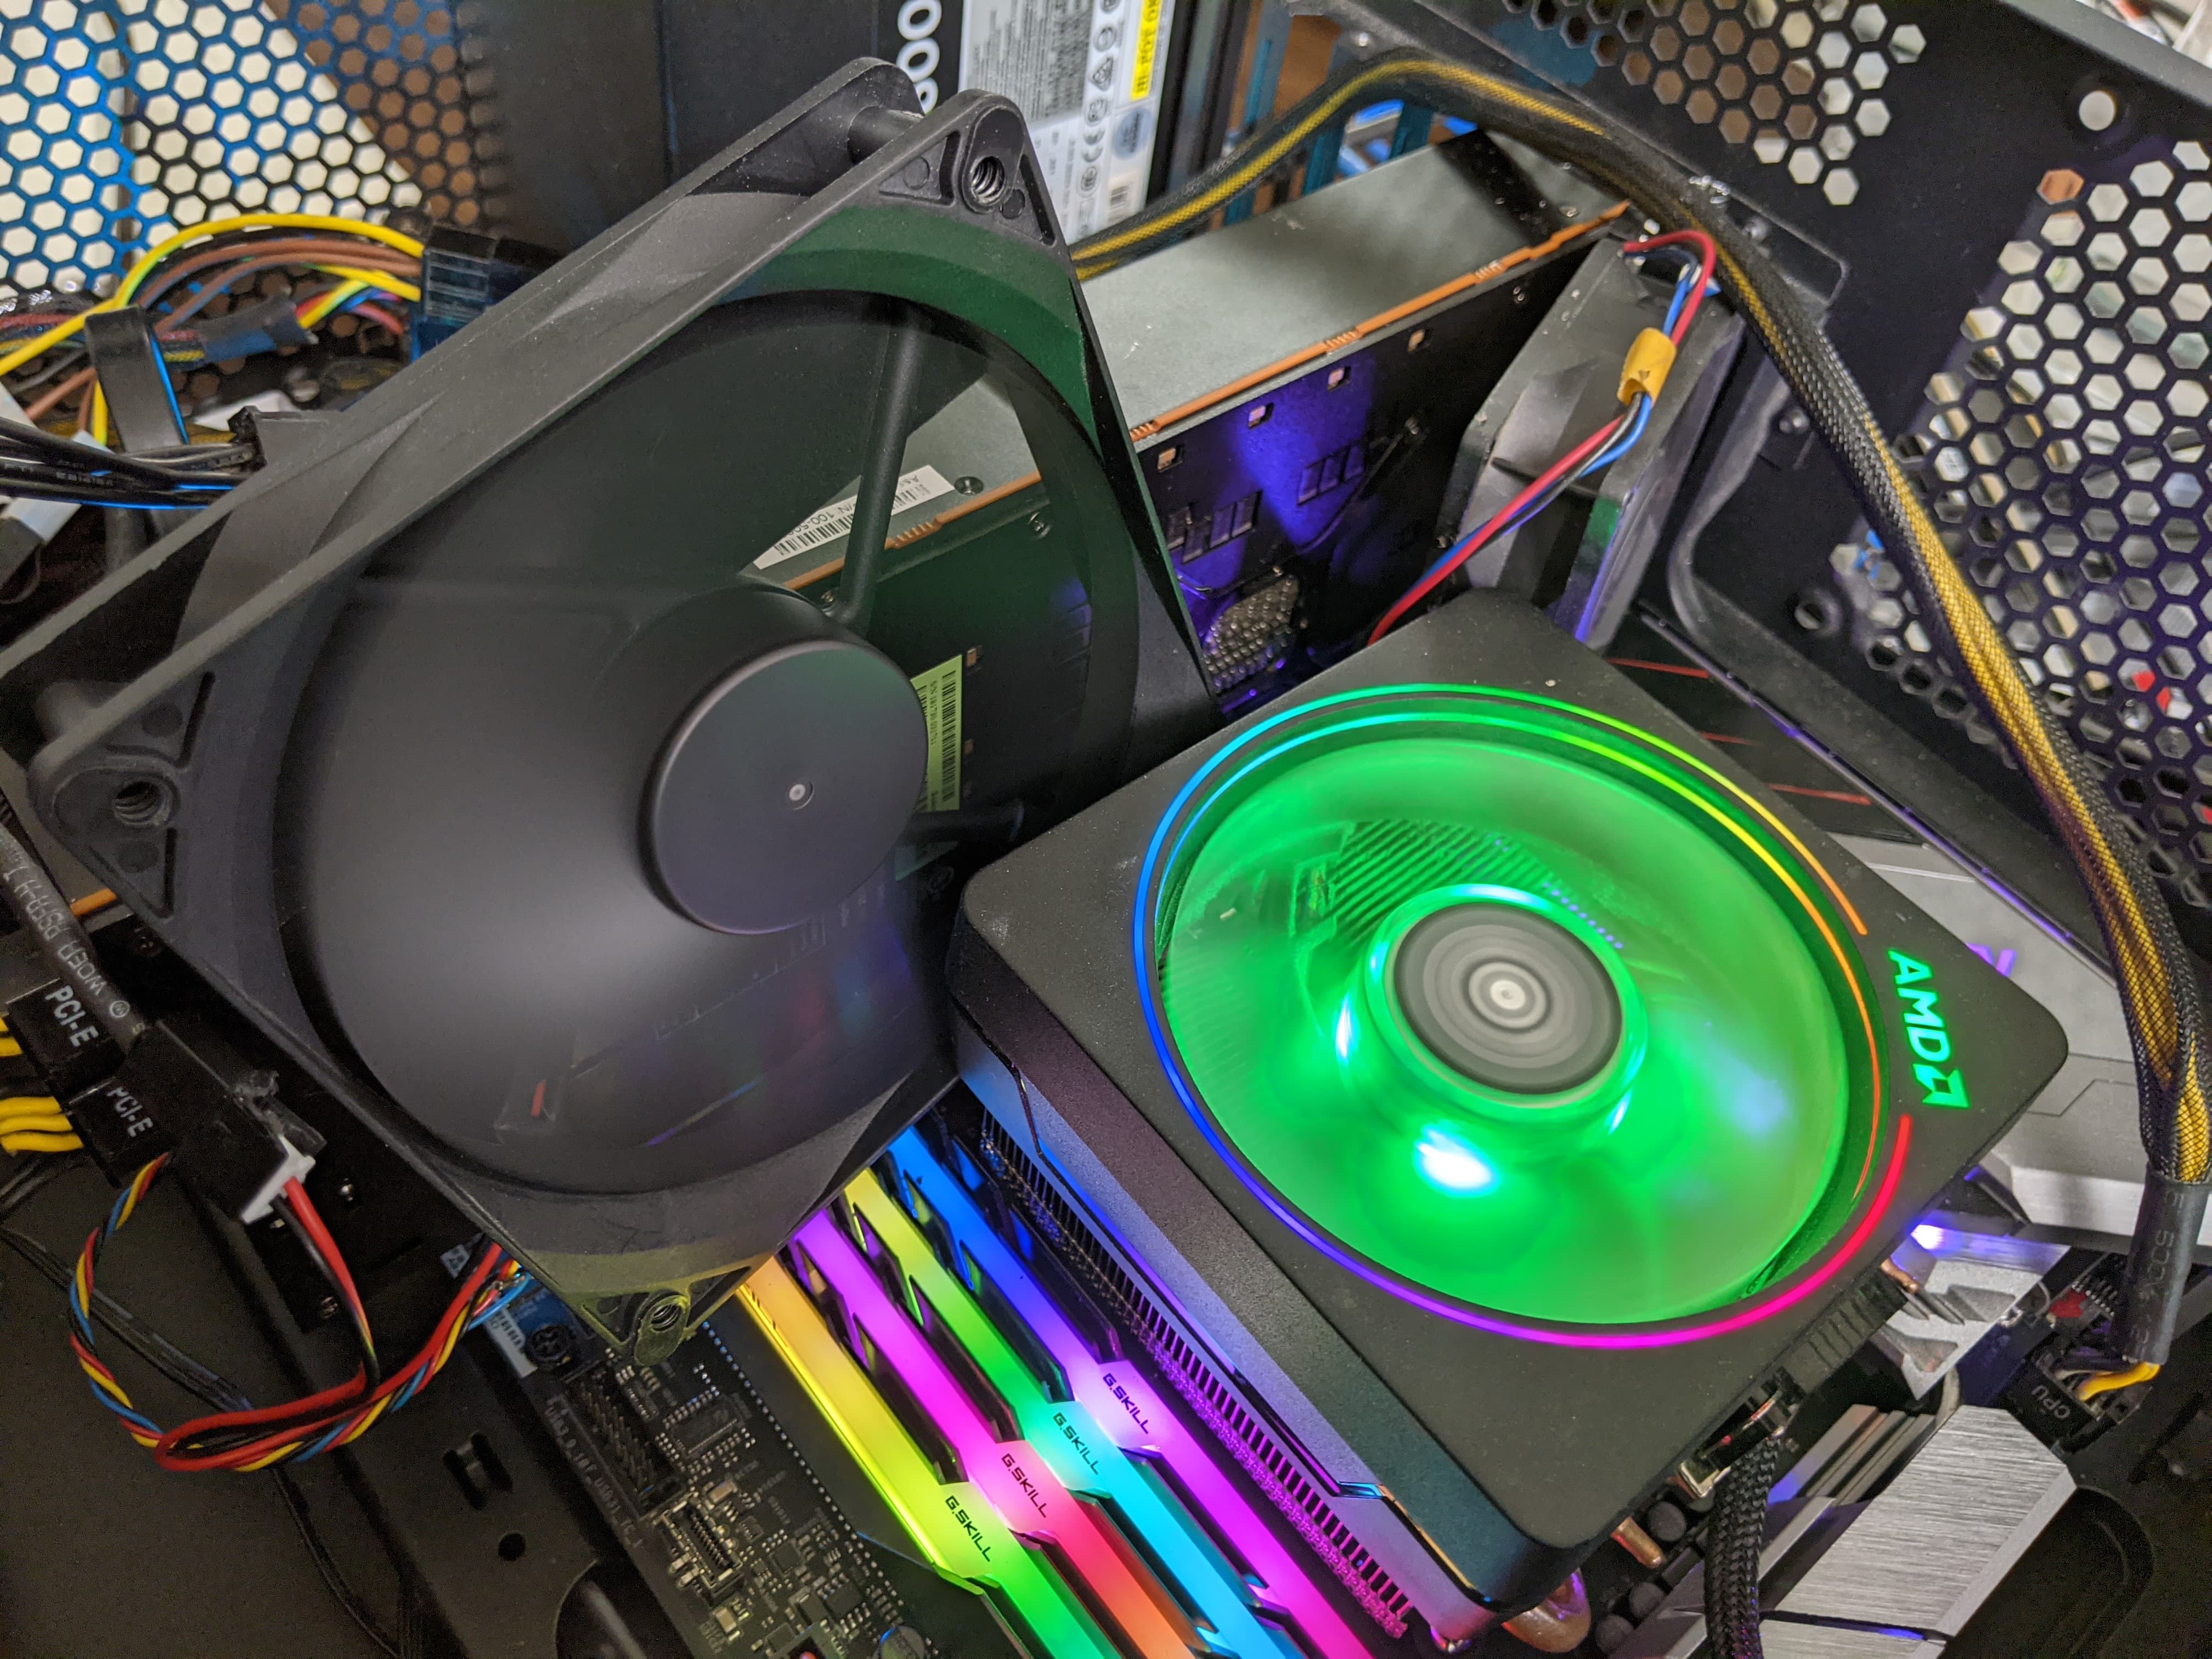
- I went a little overboard but a 80mx15mm or 92mmx15 fan raised 5mm laying on the back of the card would be fine
- Just don’t use metal to raise it, sticky tac or rubber feet are fine
Transformation Sequence
-
The MI25 has a Mini-Display port meant for debugging but its not active under any Vbios except the WX9100
-
If you wish to use it you must free it from its cage
-
Be very gentle as its a fragile connector not designed to be used, maybe put some HotSnot to reenforce it
-
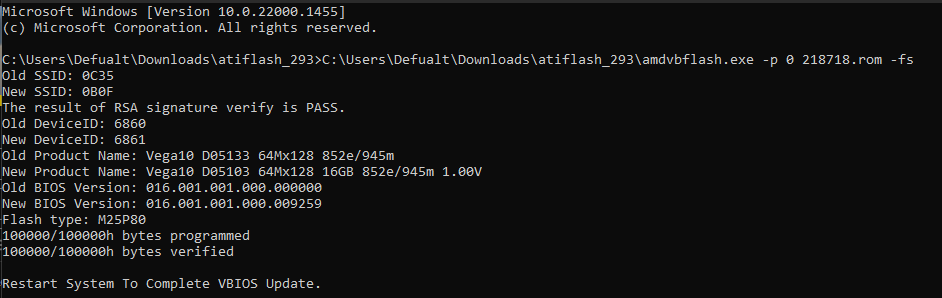
First things first, we need to get your Mi25 Flashed into a WX9100
-
You’ll need ATI Flash 2.93 specifically
-
You’ll need a uefi bios which you can nab here
-
Make sure CSM is disabled
-
put the rom in the folder you have the flasher in
-
then open open cmd as admin, navigate to the folder with the flasher inside, you want to use amdvbflash.exe, not amdvbflashWin.exe
-
run amdvbflash.exe -i to find the device ID
-
amdvbflash.exe -p 0 218718.rom -fs
where 0 is the device id of the mi25
you might have to right click amdvbflash.exe run as admin first to trigger it in cmd
Installing Linux
- First things first get your self and iso of Ubuntu 20.04.4
-
Just ctrl+f 20.04.4-desktop-amd64.iso
-
It has to be that version to save yourself some headache, if you’re a linux jedi master maybe you can use something else but I am a caveman, if I can do it I know you can
-
I tend to install it with the minimal setup, you can download updates if you want
Hyper Specific Kernel
- If you update the kernel we will have to remove the new one it installs
- You’ll want to boot into the 5.13.0-30 kernel, you can do this from the advanced boot options right after the PC posts its splash screen
- To remove the new Kernels follow this guide
https://help.ubuntu.com/community/RemoveOldKernels
- To show what kernels are installed
apt-mark showauto 'linux-image-.*'
- Then copy and paste in at the end of this command any that isn’t
linux-image-5.13.0-30-generic
linux-image-generic-hwe-20.04
sudo apt-get purge linux-image-version-you-want-to-remove linux-image-unsigned-same-version
- After that it’ll make an Unsigned version that you’ll need to purge too, just run the same command and after that
Sudo apt autoremove
Reboot
AMD ROCm Suite
- Now we want the 5.2.5 installer of rocm which we can get from this
http://repo.radeon.com/amdgpu-install/22.20.5/ubuntu/focal/
- Install that package then-
amdgpu-install --usecase=rocm,lrt,opencl,openclsdk,hip,hiplibsdk,dkms,mllib
- Then we need to add your user to these group so just type you user name after each
sudo usermod -a -G video
sudo usermod -a -G render
- Wooo buddy 16GB driver suit, not sure if you need all of those but we can figure that out later
Reboot
Dependencies, Dependencies, Dependencies!

- Next we need a few prerequisites
sudo apt install -y git
sudo apt install -y python3
sudo apt install -y python3-pip
- Now we need the appropriate version of pytorch, the rocm 5.2 variant
pip3 install torch torchvision --extra-index-url https://download.pytorch.org/whl/rocm5.2
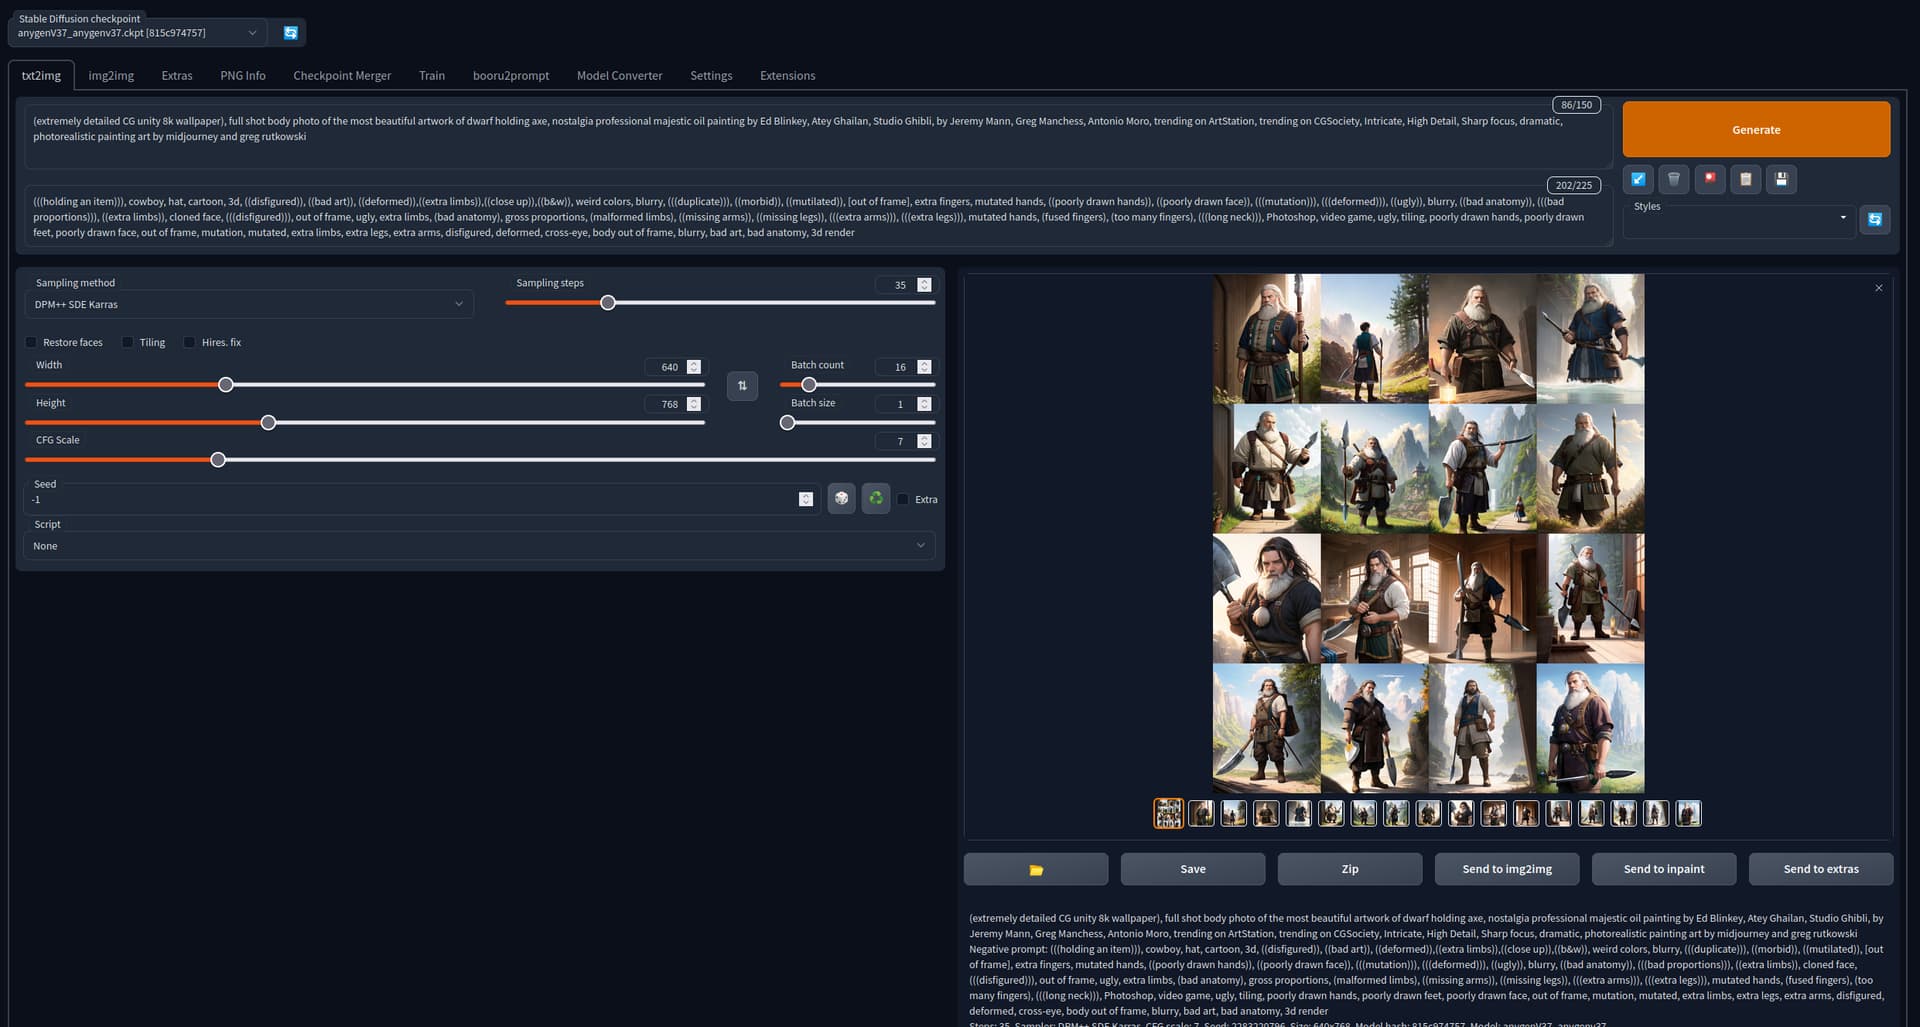
Stable Diffusion with a web Gui
- next we need to grab the webui for stable diffusion
git clone https://github.com/AUTOMATIC1111/stable-diffusion-webui
-
It’s at this point you want to grab your models and VAE and put them in the appropriate folder before starting
-
FP16 is twice as fast and uses half as much ram, but you need FP16 checkpoints to use it
cd stable-diffusion-webui
- If you have FP16 checkpoints just use
python3 launch.py
- If you use regular FP32 then do
python3 launch.py --precision full --no-half
-
You have to enter those commands while you’re in the stable-diffusion-webui folder in the terminal
-
You might get an error like this on every time you start the program and do your first genneration
MIOpen(HIP): Warning [SQLiteBase] Missing system database file: gfx900_64.kdb Performance may degrade. Please follow instructions to install: https://github.com/ROCmSoftwarePlatform/MIOpen#installing-miopen-kernels-package
- I haven’t figured out how to fix that yet, but its fine, the first genneration will take forever but the rest will be fine
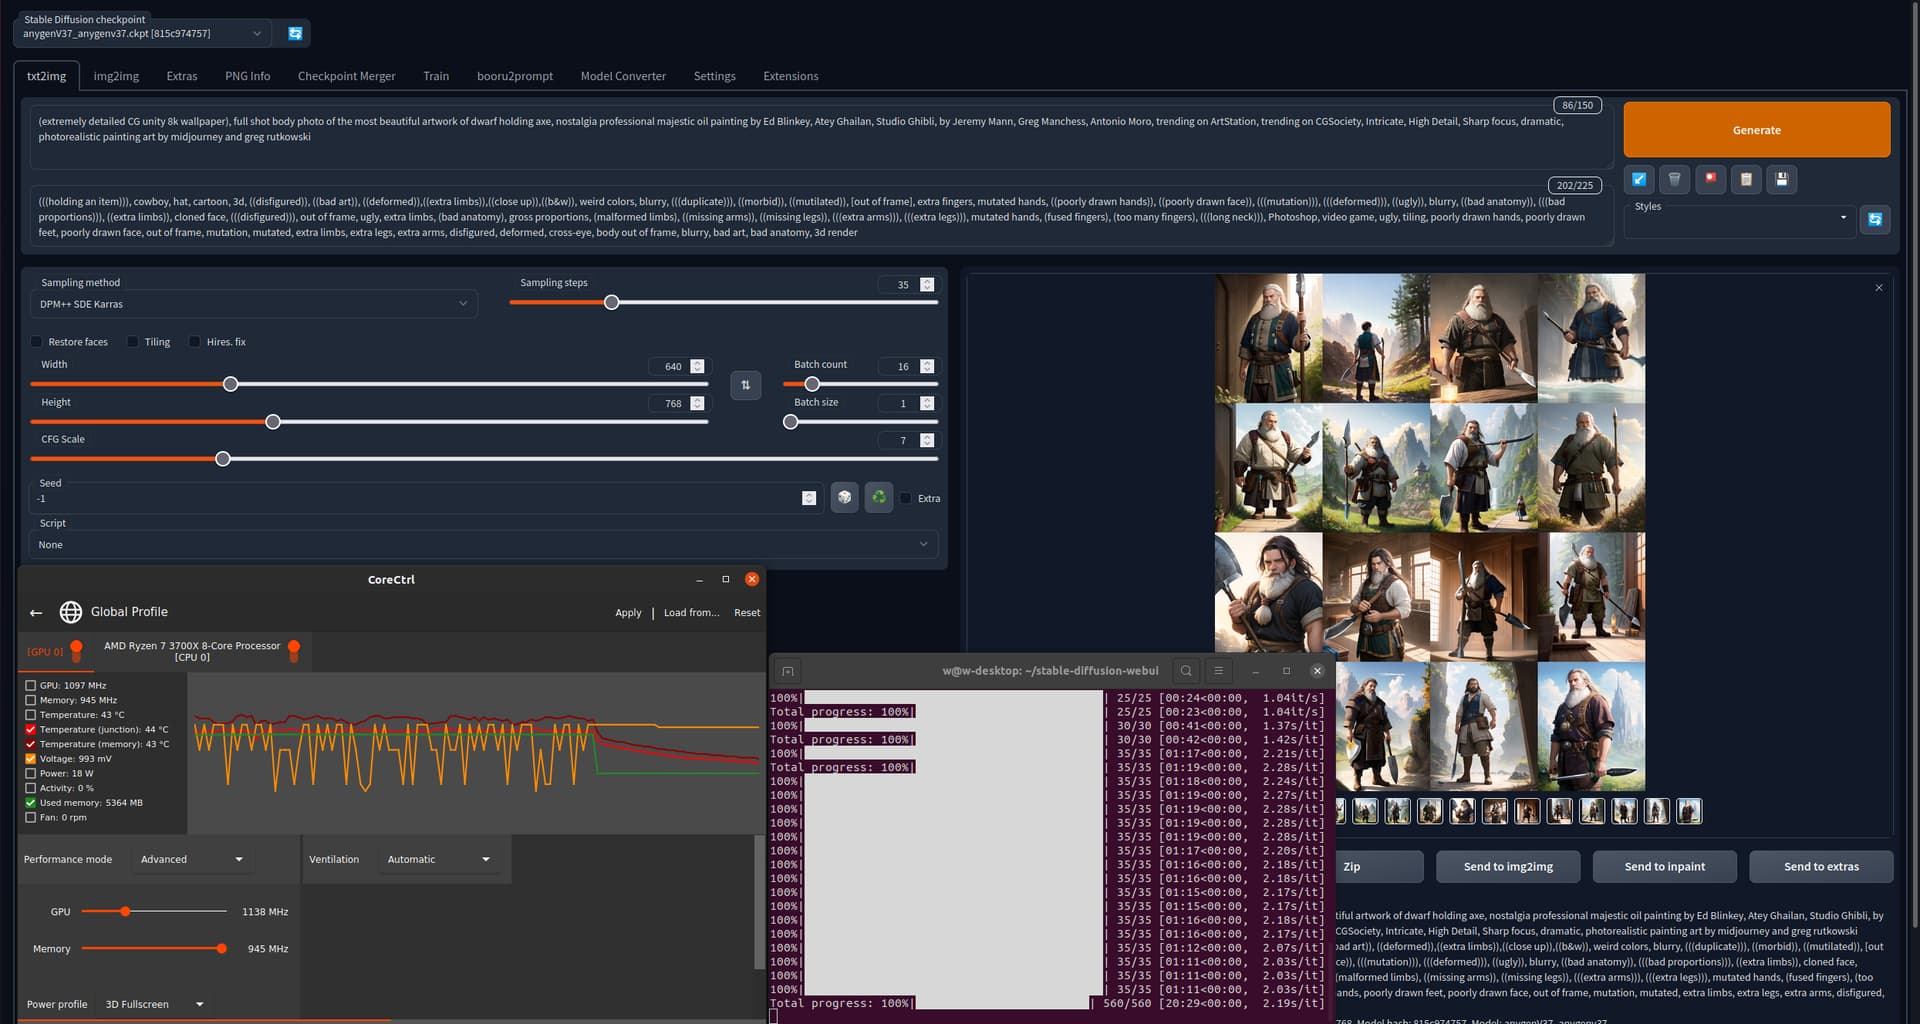
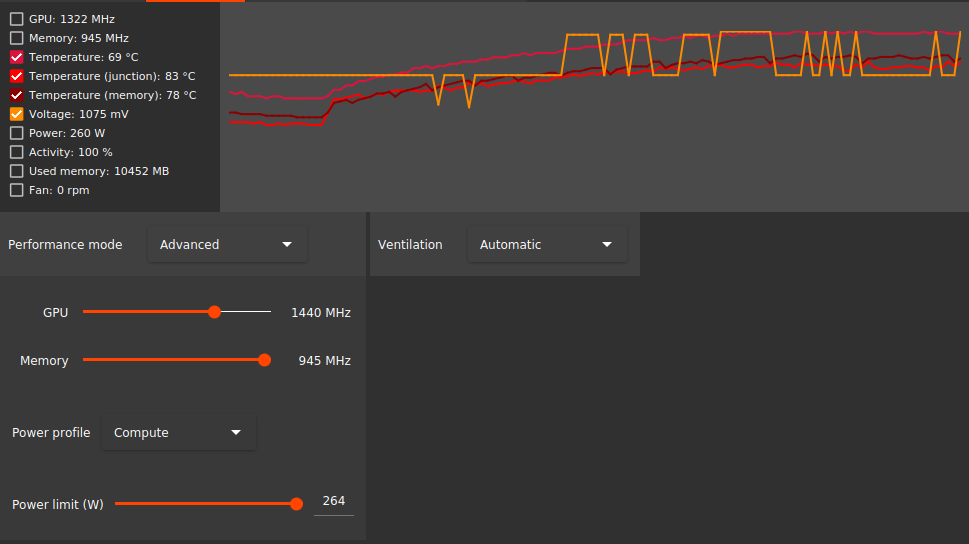
Underclocking? In My Linux
-
The wx9100 bios is a little more aggressive with the frequency than the stock MI25 so its possible you want to limit it to 991 or 1138Mhz on the core using CoreCTRL and ROCm-smi
CoreCtrl / CoreCtrl · GitLab -
You can control power limit in ROCm-smi with this command
rocm-smi -d 0 --setpoweroverdrive 140
-
Replace 140 with how many watts you want it to top out at
-
You will likely have no voltage control