WRX80 VFIO based multi-VM workstation

I don’t like cliffhangers so it’s not really gonna be full build log as this project is 90% complete but I’ll try to recreate my own journey that brought this machine where it is now as I think it’s quite unique approach to well what one could consider “workstation”.

I’m working in ITSec and as such I’m often creating various emulated customer networks as “virtual lab”. Also I’m trying to keep my “main” operational OS always-offline just in case my lab experiments would go terribly wrong. In free time I’m sometimes doing some amateur 3D modelling in Blender. Daily OS os choice is Linux OpenSUSE. Occasionally I’m playing some Windows games so I wanted to address this topic as well.

This machine has been built to replace my good old workstation-for-everything which was so severely overloaded and i/o starved that it just couldn’t handle it anymore. It was P67 based workstation and I ran out of pci-e lanes loooong time ago, as soon as I started upgrading network and storage to 10G and storage RAID (and still had to have GPU).

So this new WRX80 based workstation was supposed to replace workstation-for-everything in a bit more modern way. Instead of using one monolithic OS for everything where every part of OS colided with everything else and after some time installing software updates was impossible, I decided to implement it in microservice manner - using VFIO based VMs for various tasks, with pci-e passthrough for native performance.

I chose WRX80 platform because it has lots of i/o and I knew it’s gonna serve me well for many years since realistically - performance of i7-2600k wasn’t main problem for me in the first place. It was lack of i/o.

Project was ambitious but well defined and vision was relatively clear. I wanted this machine to:

  • run up to 3 OSes with native GPUs performance (in most cases 2)
  • virtualized drives for easy snapshotting and VMs management
  • as close as possible to minimal type-1 hypervisor model - all “usable” OSes as VMs
  • all VMs including smaller headless ones for LAB with access to 10G hardware backed network
  • behavior as close to having multiple baremetal workstations as possible

Motherboard choice was relatively easy - WRX80 platform didn’t have a lot of support from OEM vendors so realistically there was ASUS and ASRock and I really wanted mid-tower build in Fractal Define R6 chassis so:

  • ASRock WRX80 Creator because it had TB and really was the only viable option for me.
  • TR5965WX as I wanted to have decent single core performance as well
  • Quadro RTX 4000 as I already had one + 2x RTX3090 because at the time dual slot 4090 was unobtainium in EU and I didn’t want to waste my precious pci-e slots.
  • 256GB ECC
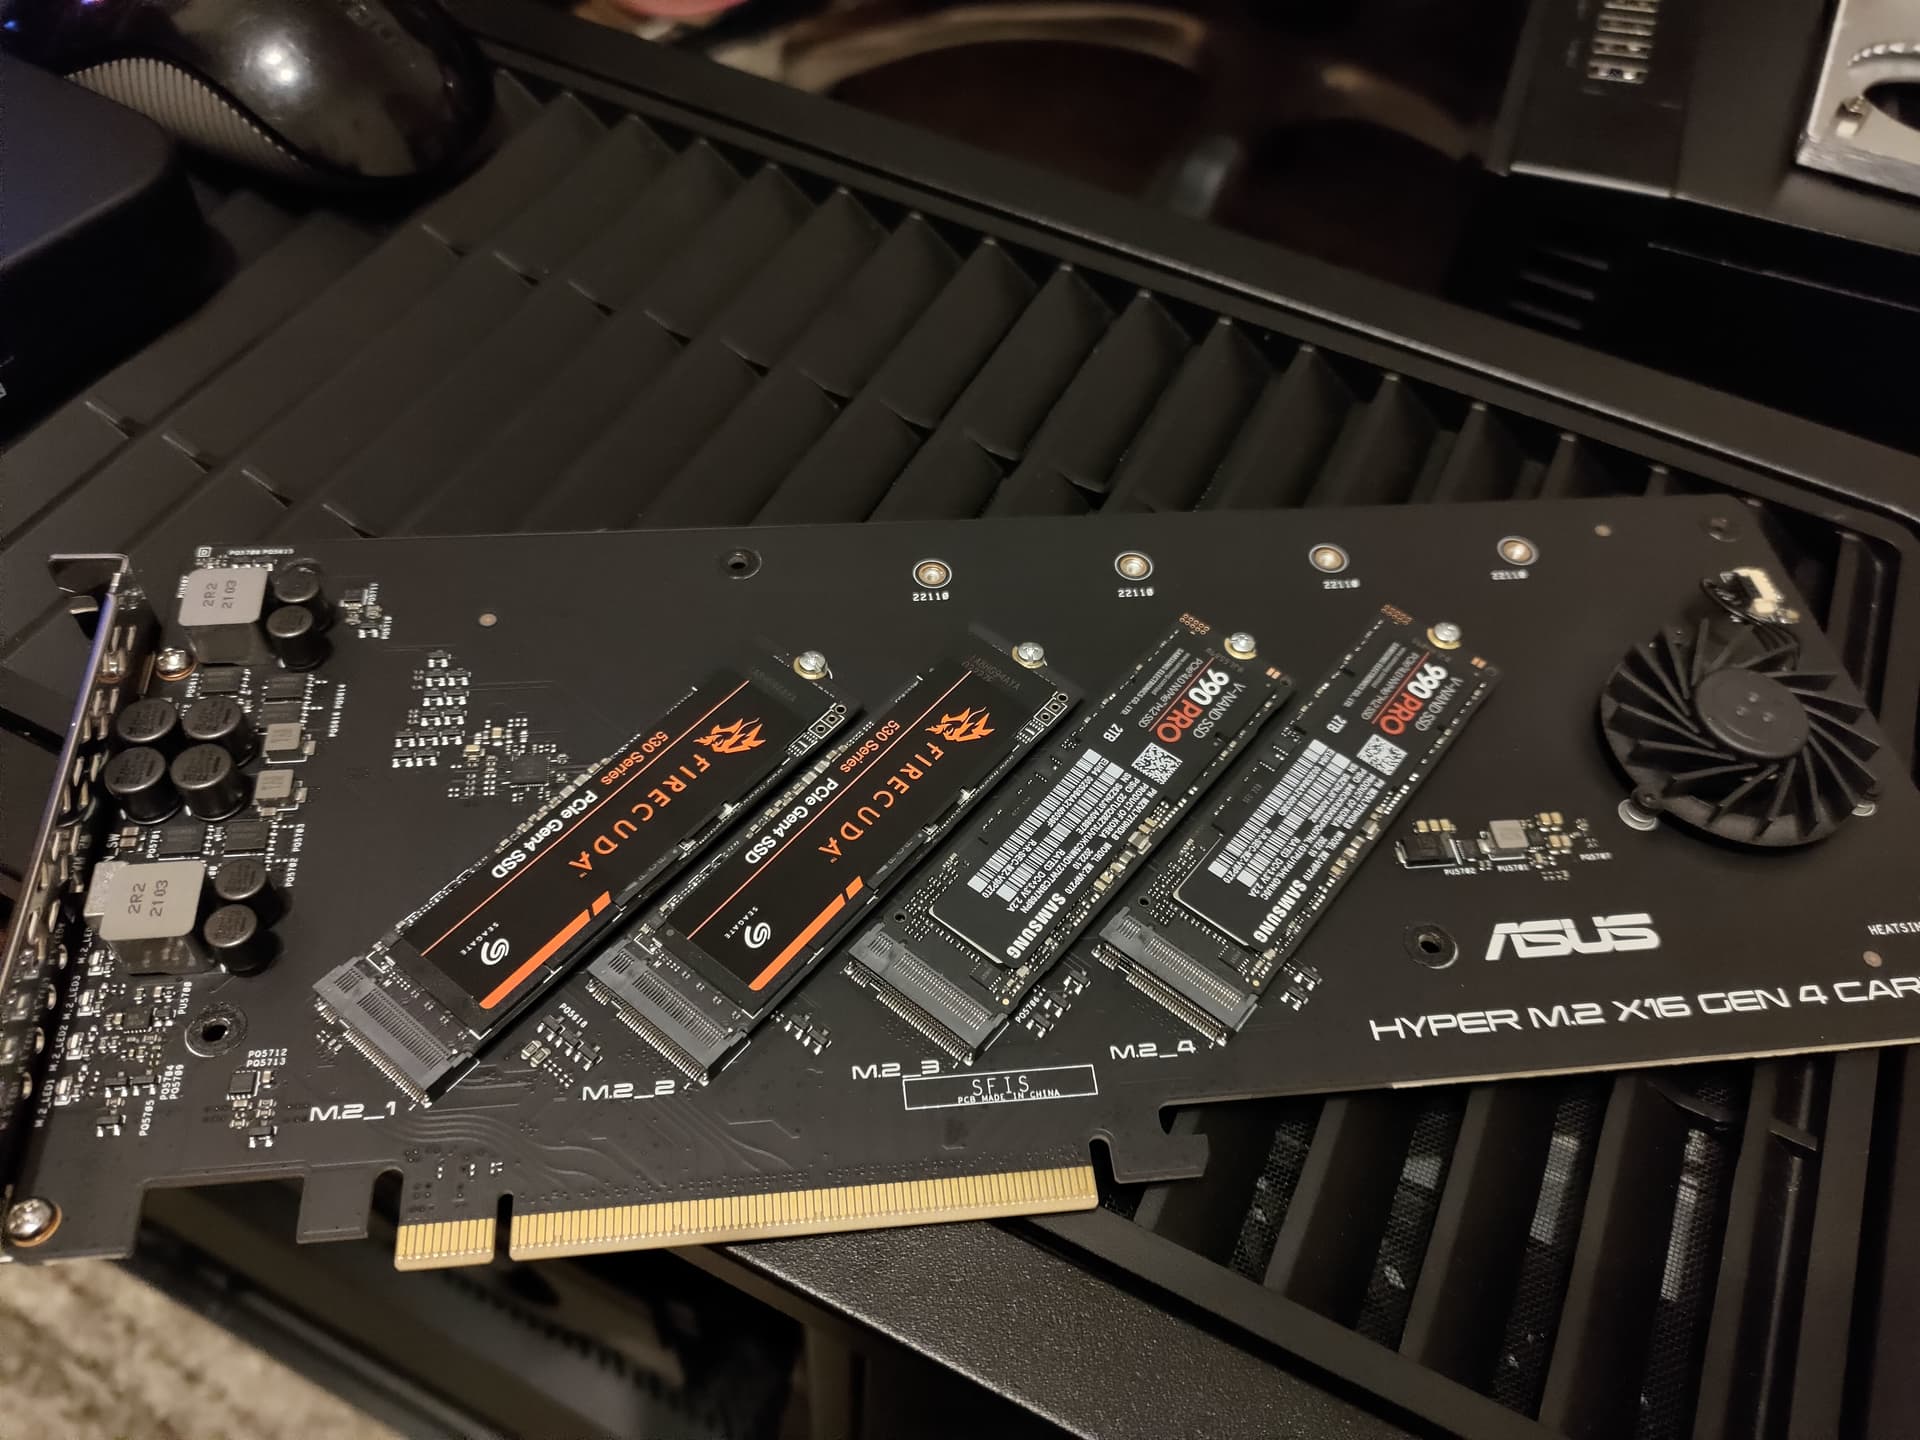
  • SSDs suitable for more write-oriented workloads but not enterprise ones - I chose 2x FireCuda 530 4TB for VMs storage due to their great sustained-write performance and 2x Samsung 990 Pro for home storage in main OpenSUSE VM (nvme pci-e passthrough) since it’s all-round performance king and 2x junkyard laptop salvaged 512gb nvme for host OS since it’s barely used
  • 2x Intel X710-DA4 for lots of 10G networking in VMs (and because I use MikroTik CRS317 which doesn’t have real VEPA support so I can only have 1 VM in VLAN per port so if I wanted to have up to 8VMs in single VLAN I had to get 8x10G sfp+

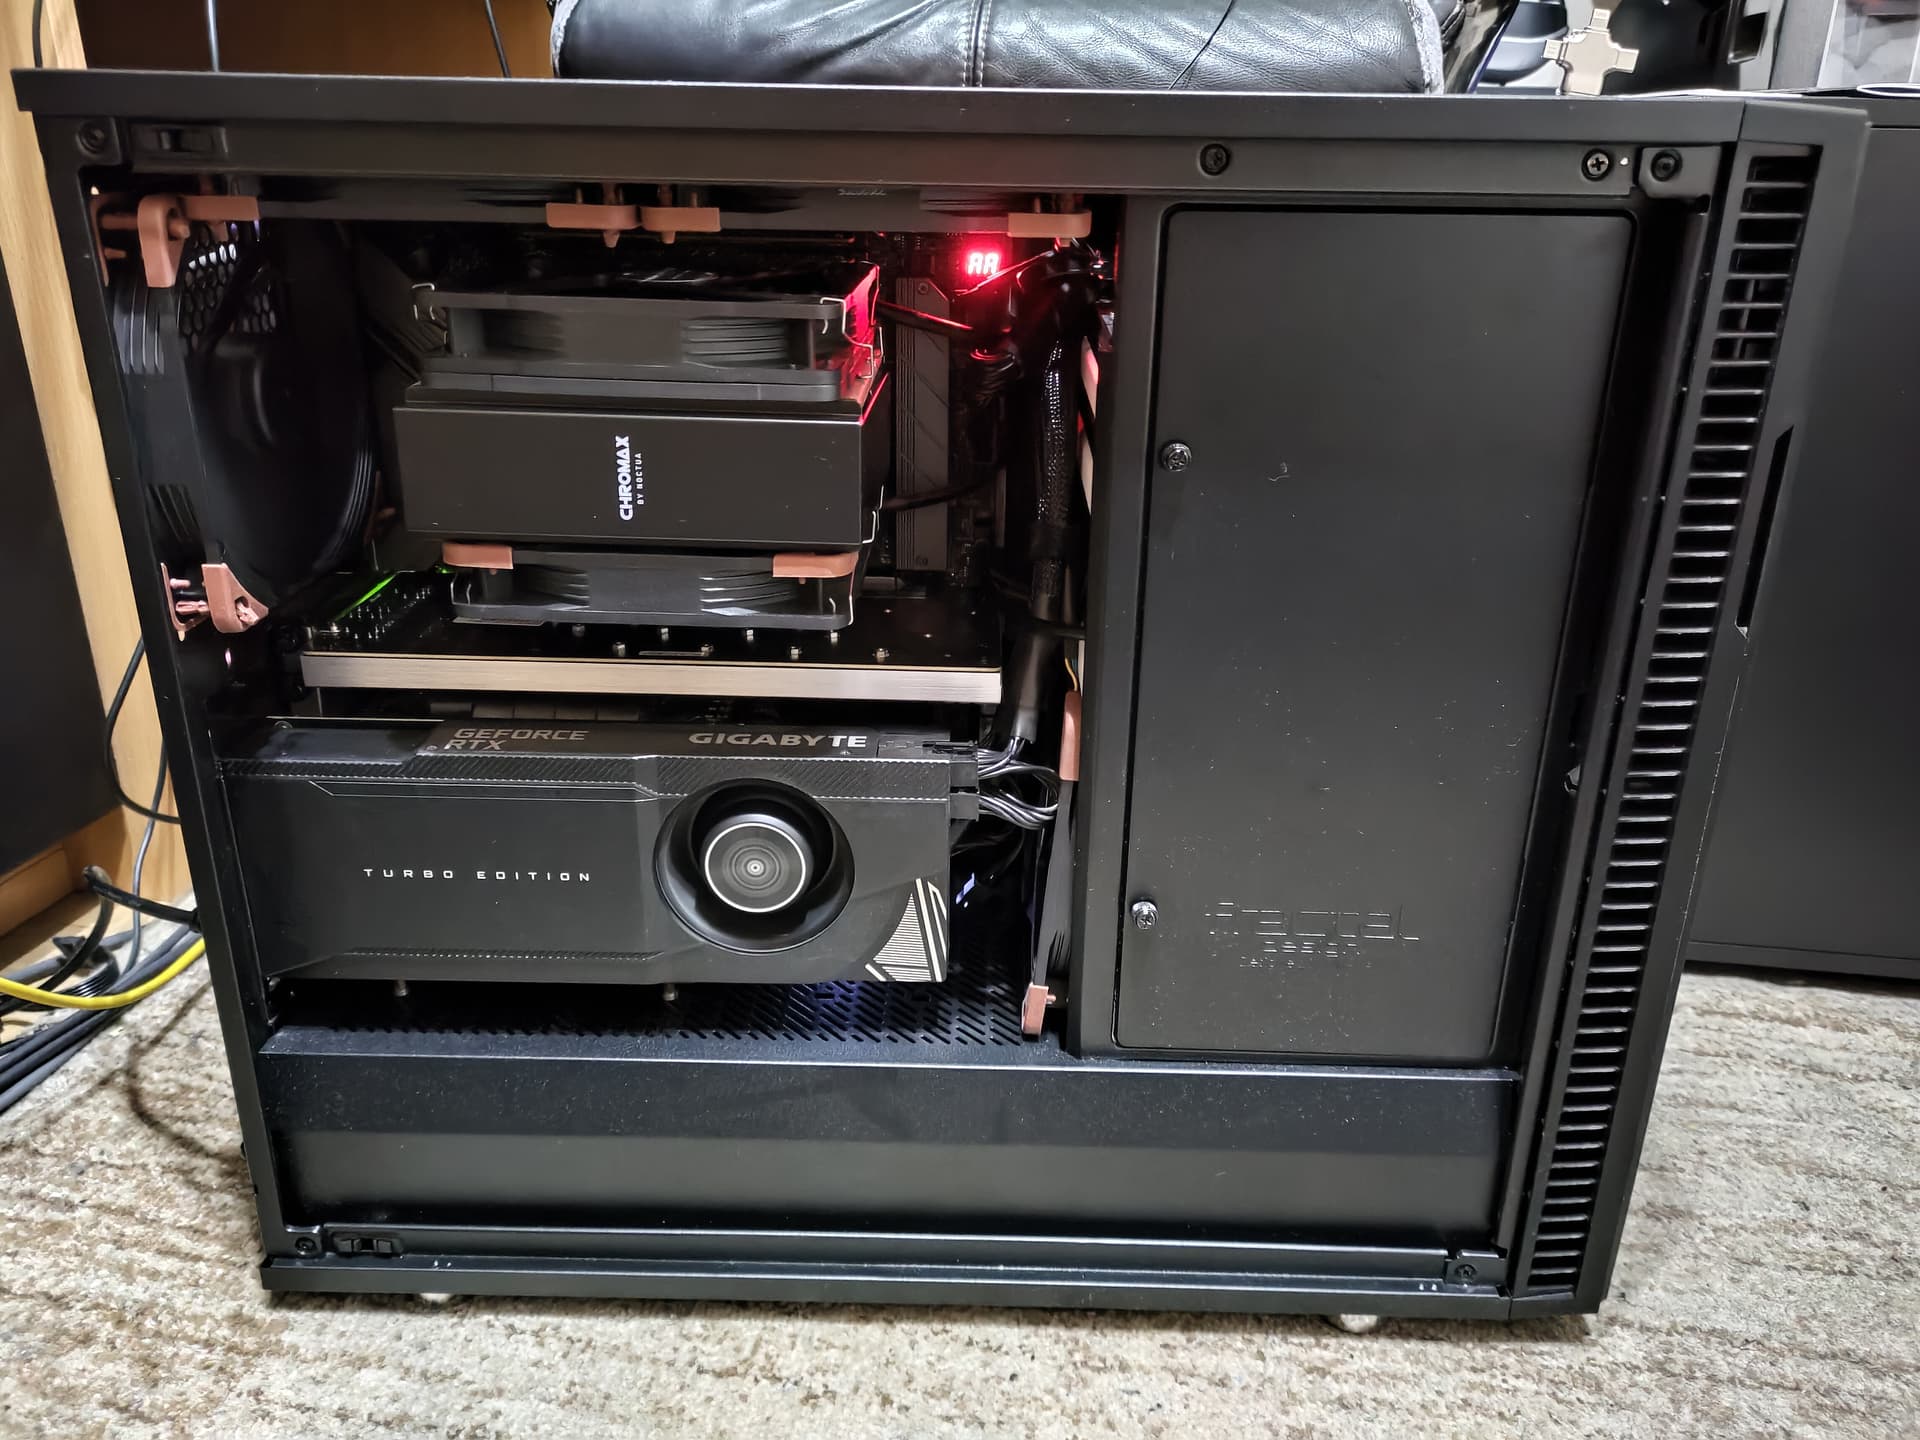
Due to space constraints and other hardware heat management I decided to go with air cooling. Which was quite questionable choice and I really didn’t know at the time if I’m gonna pull this off - but decided to try anyways.

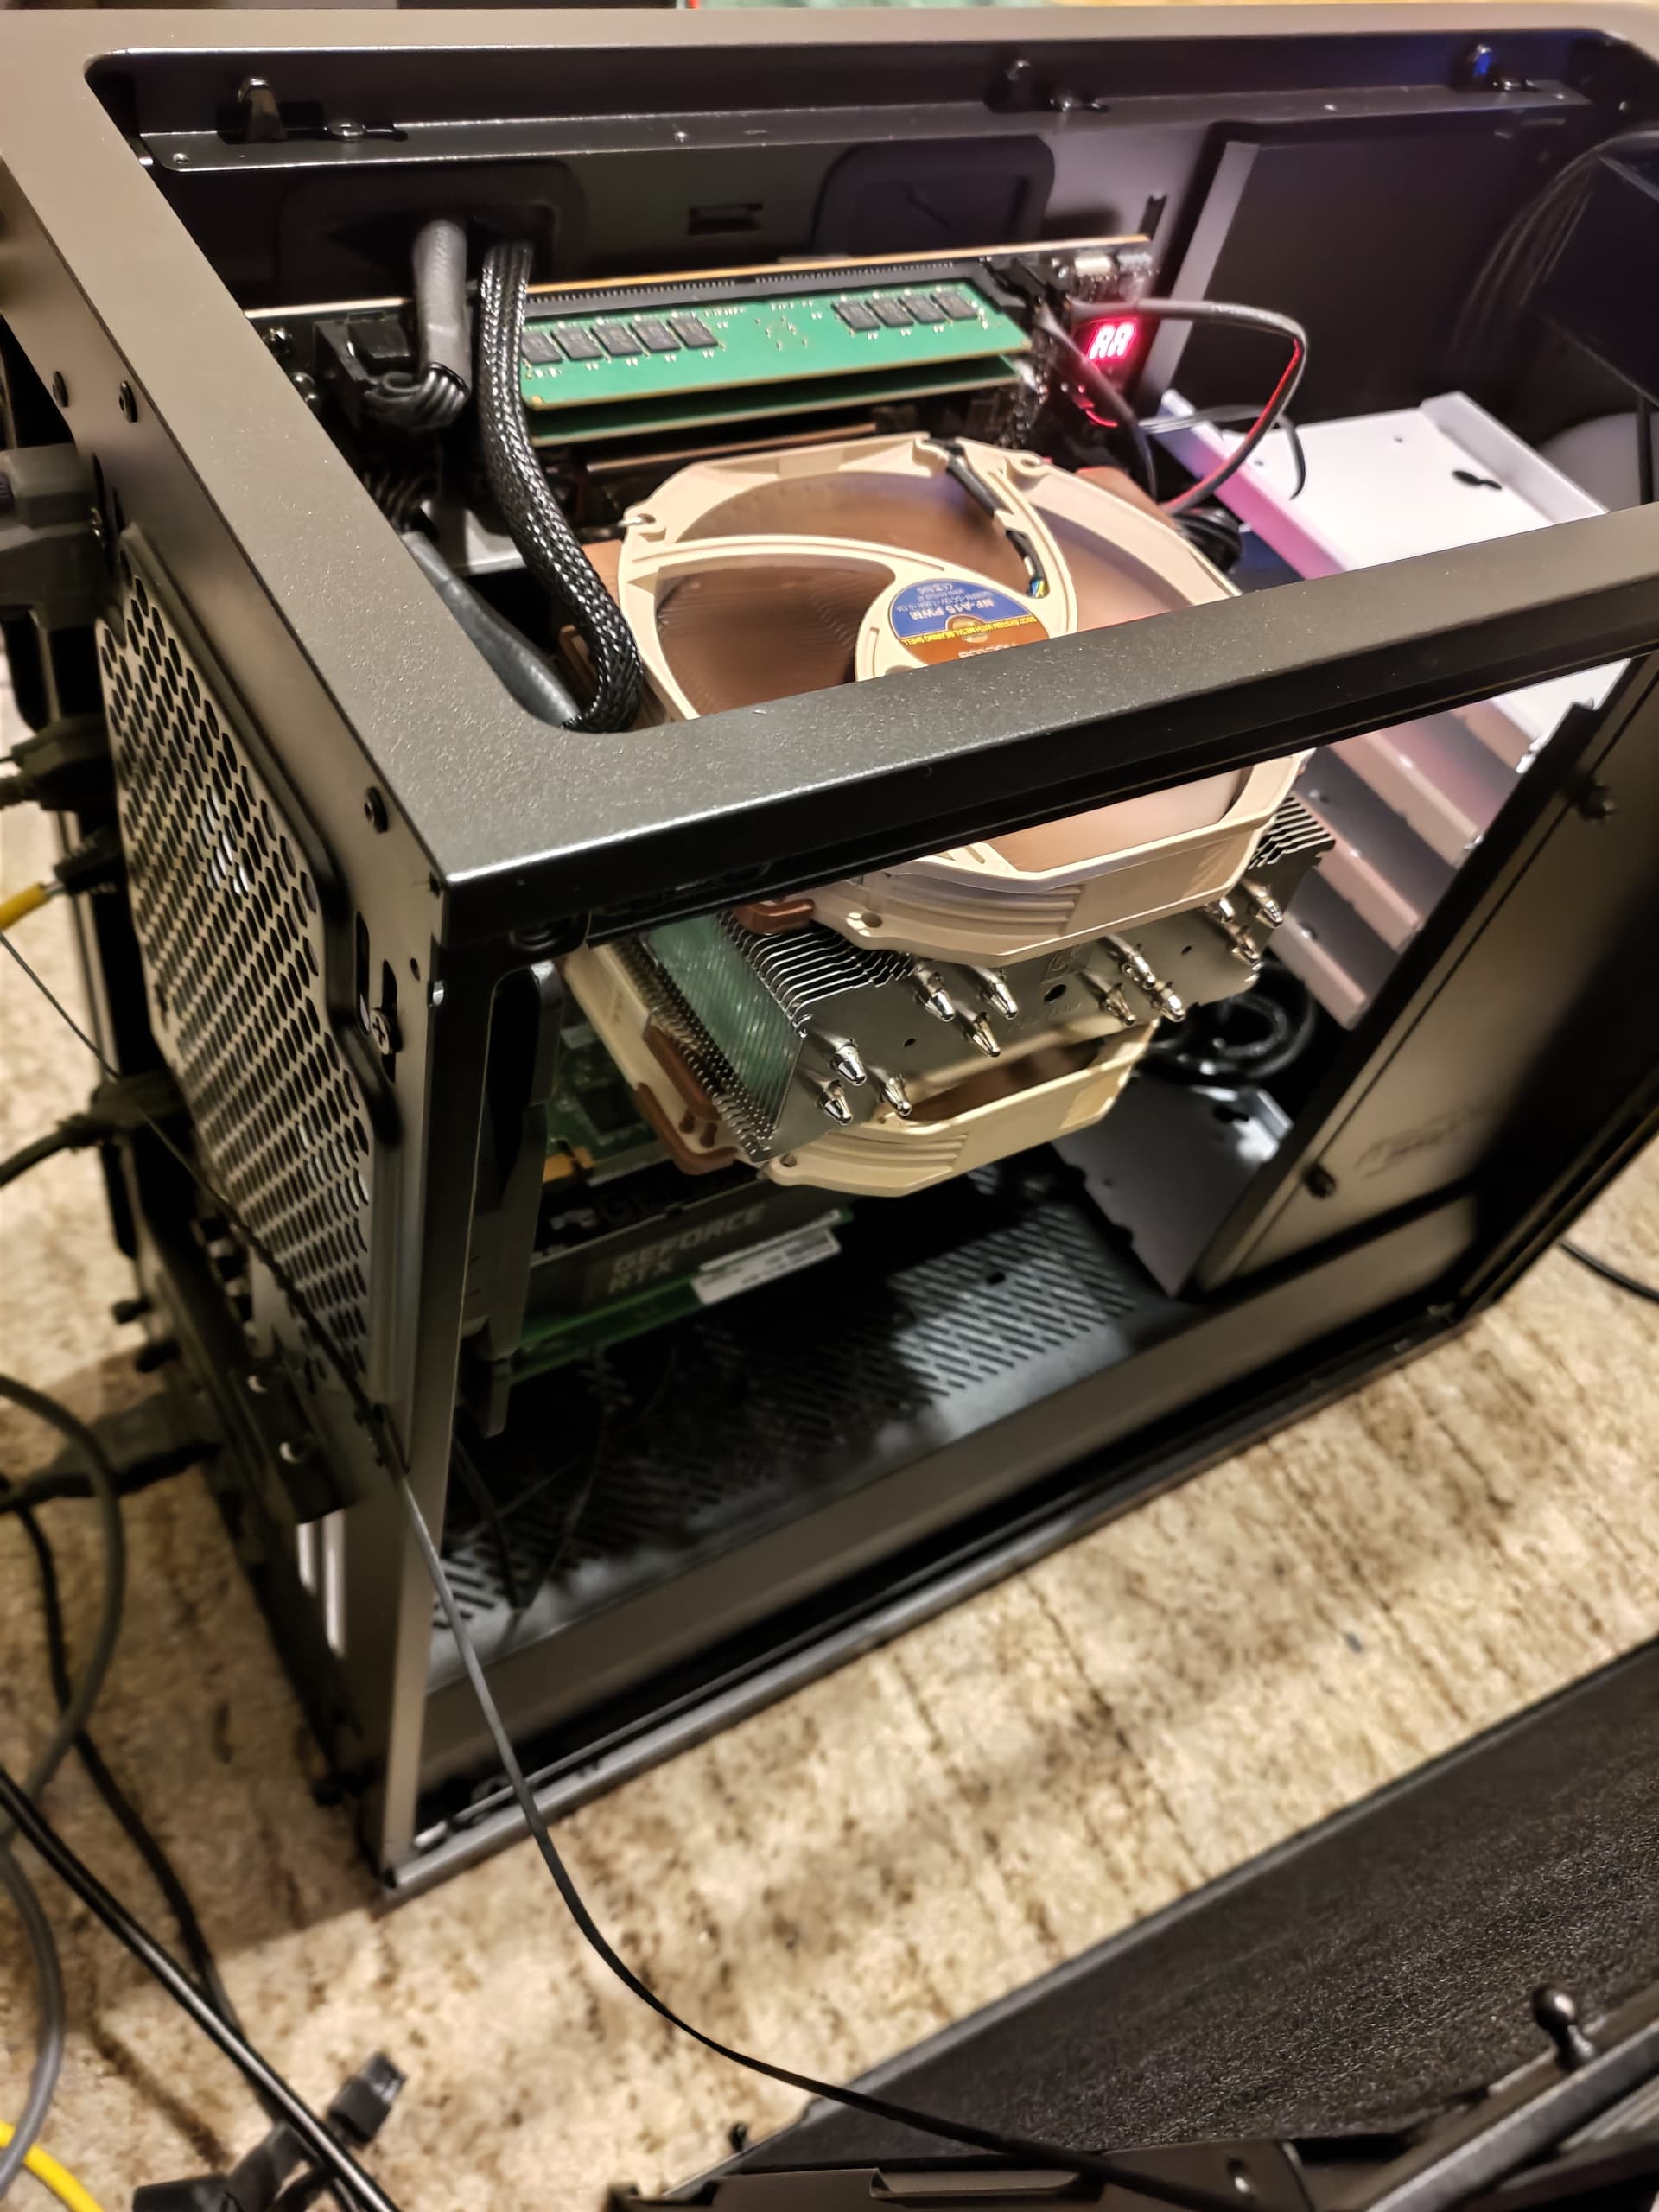
And I failed immediately. Even with “open bench” like one on photo CPU was throttling and it wasn’t even placed under desk yet where access to cold air is a bit more obstructed. But it was just beginning of problems. Since I didn’t want to loose pci-e slots for 3090 I needed pci-e gen 4 riser and there was no such riser available for my chassis so I had to improvise.

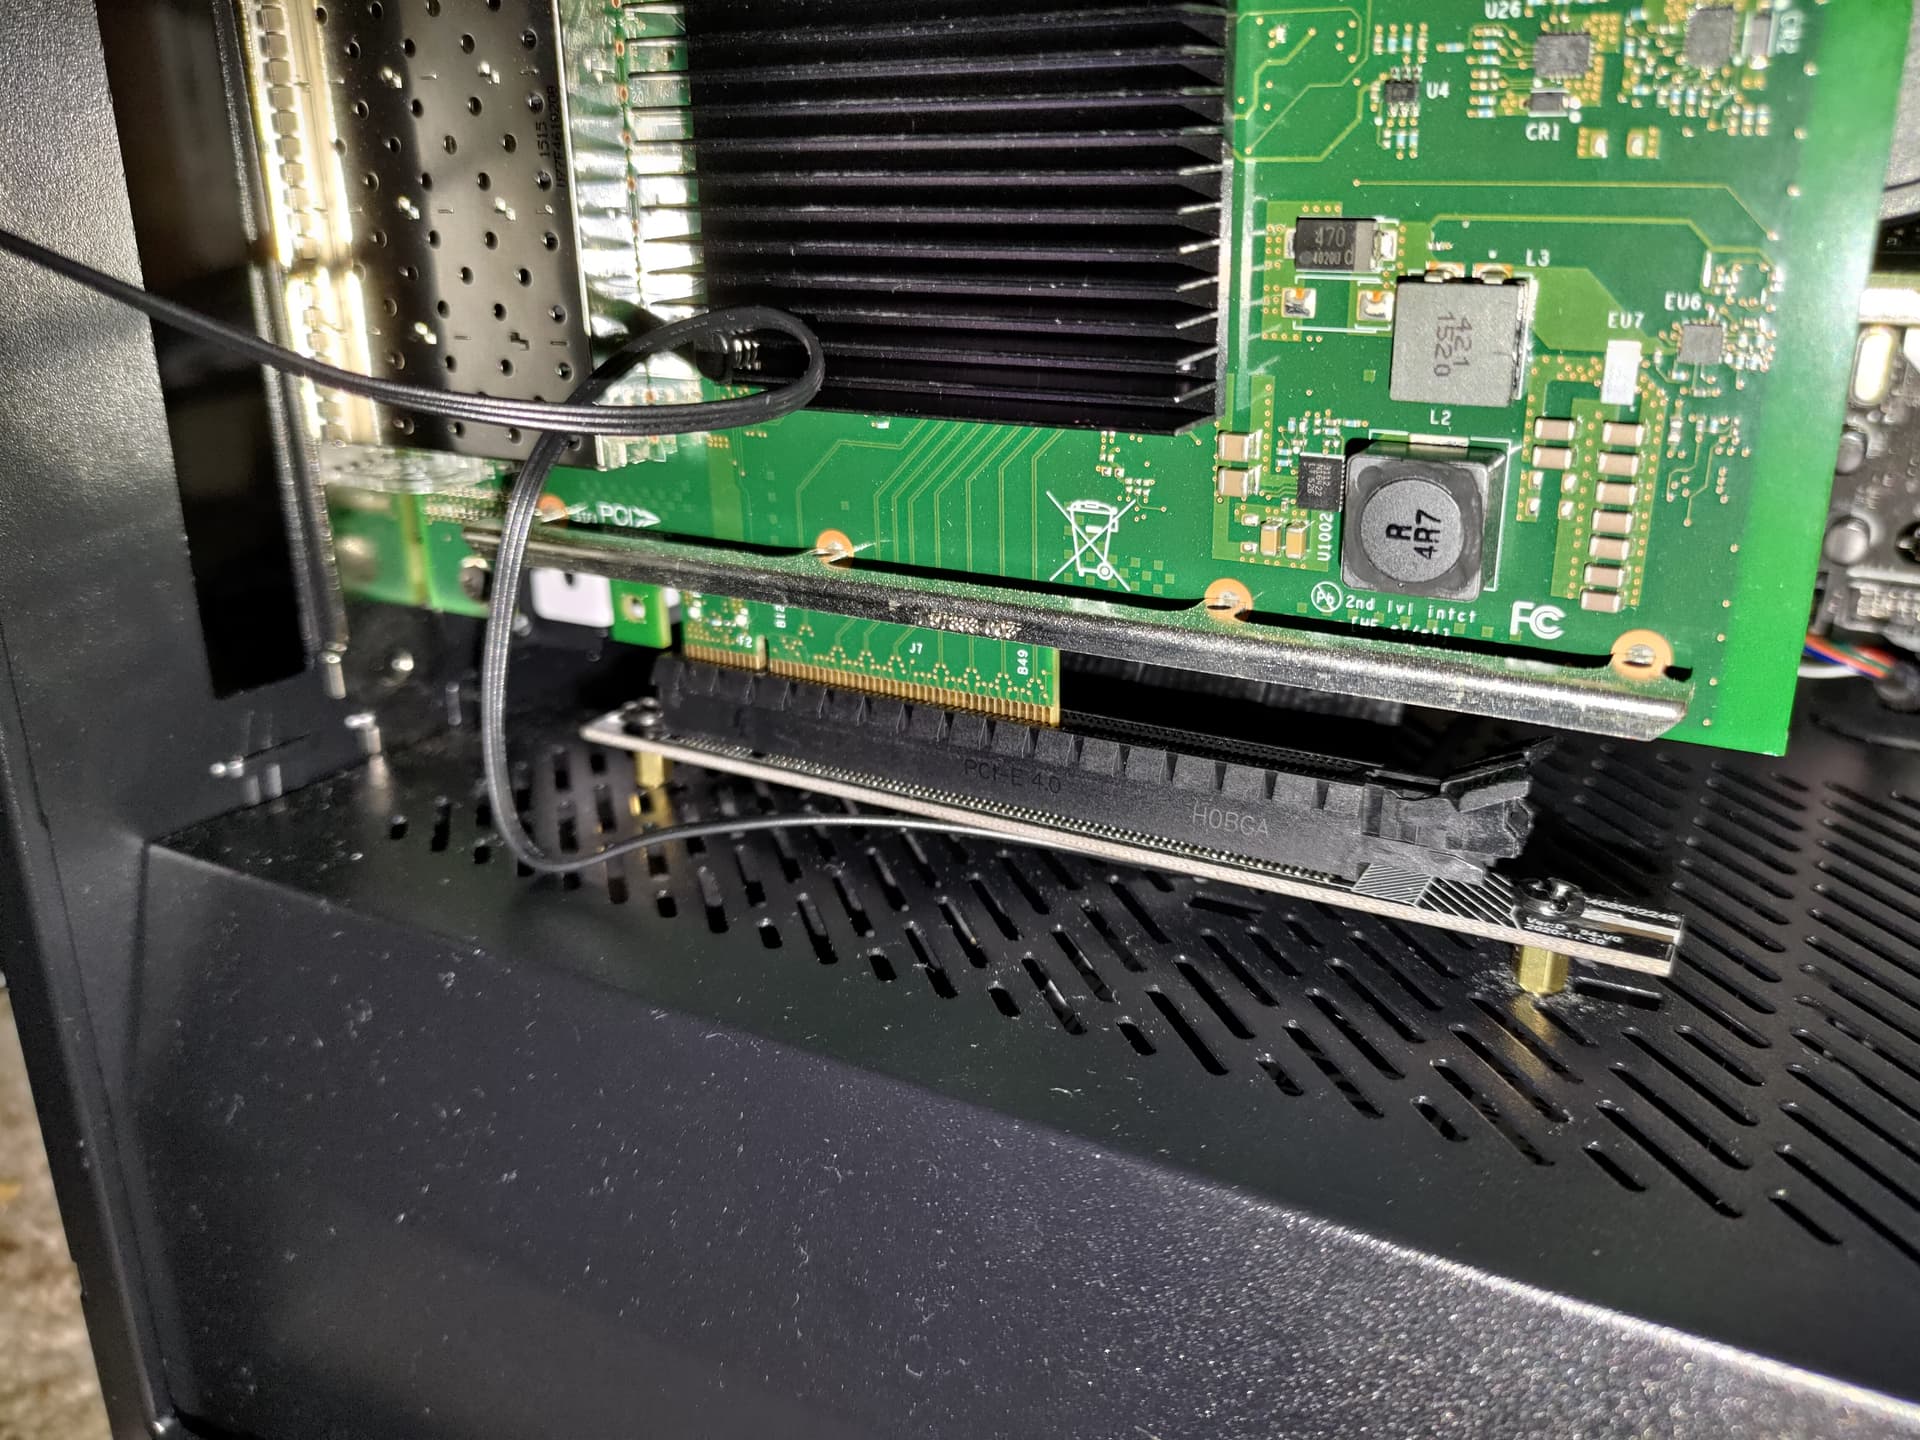
And failed again xD But after few trips to local Home Depot equivalent I found few washers that allowed me to properly align height of riser to properly support pci-e slot. But then unfortunately it turned out that I can’t fit one of x710-DA4 in the lowest pci-e slot because riser is too close… I found alternative but I’m gonna describe that later because it arrived with MASSIVE delay. Soon v1 was somewhat ready with Noctua IndustrialPPC 3000rpm 140mm fans:

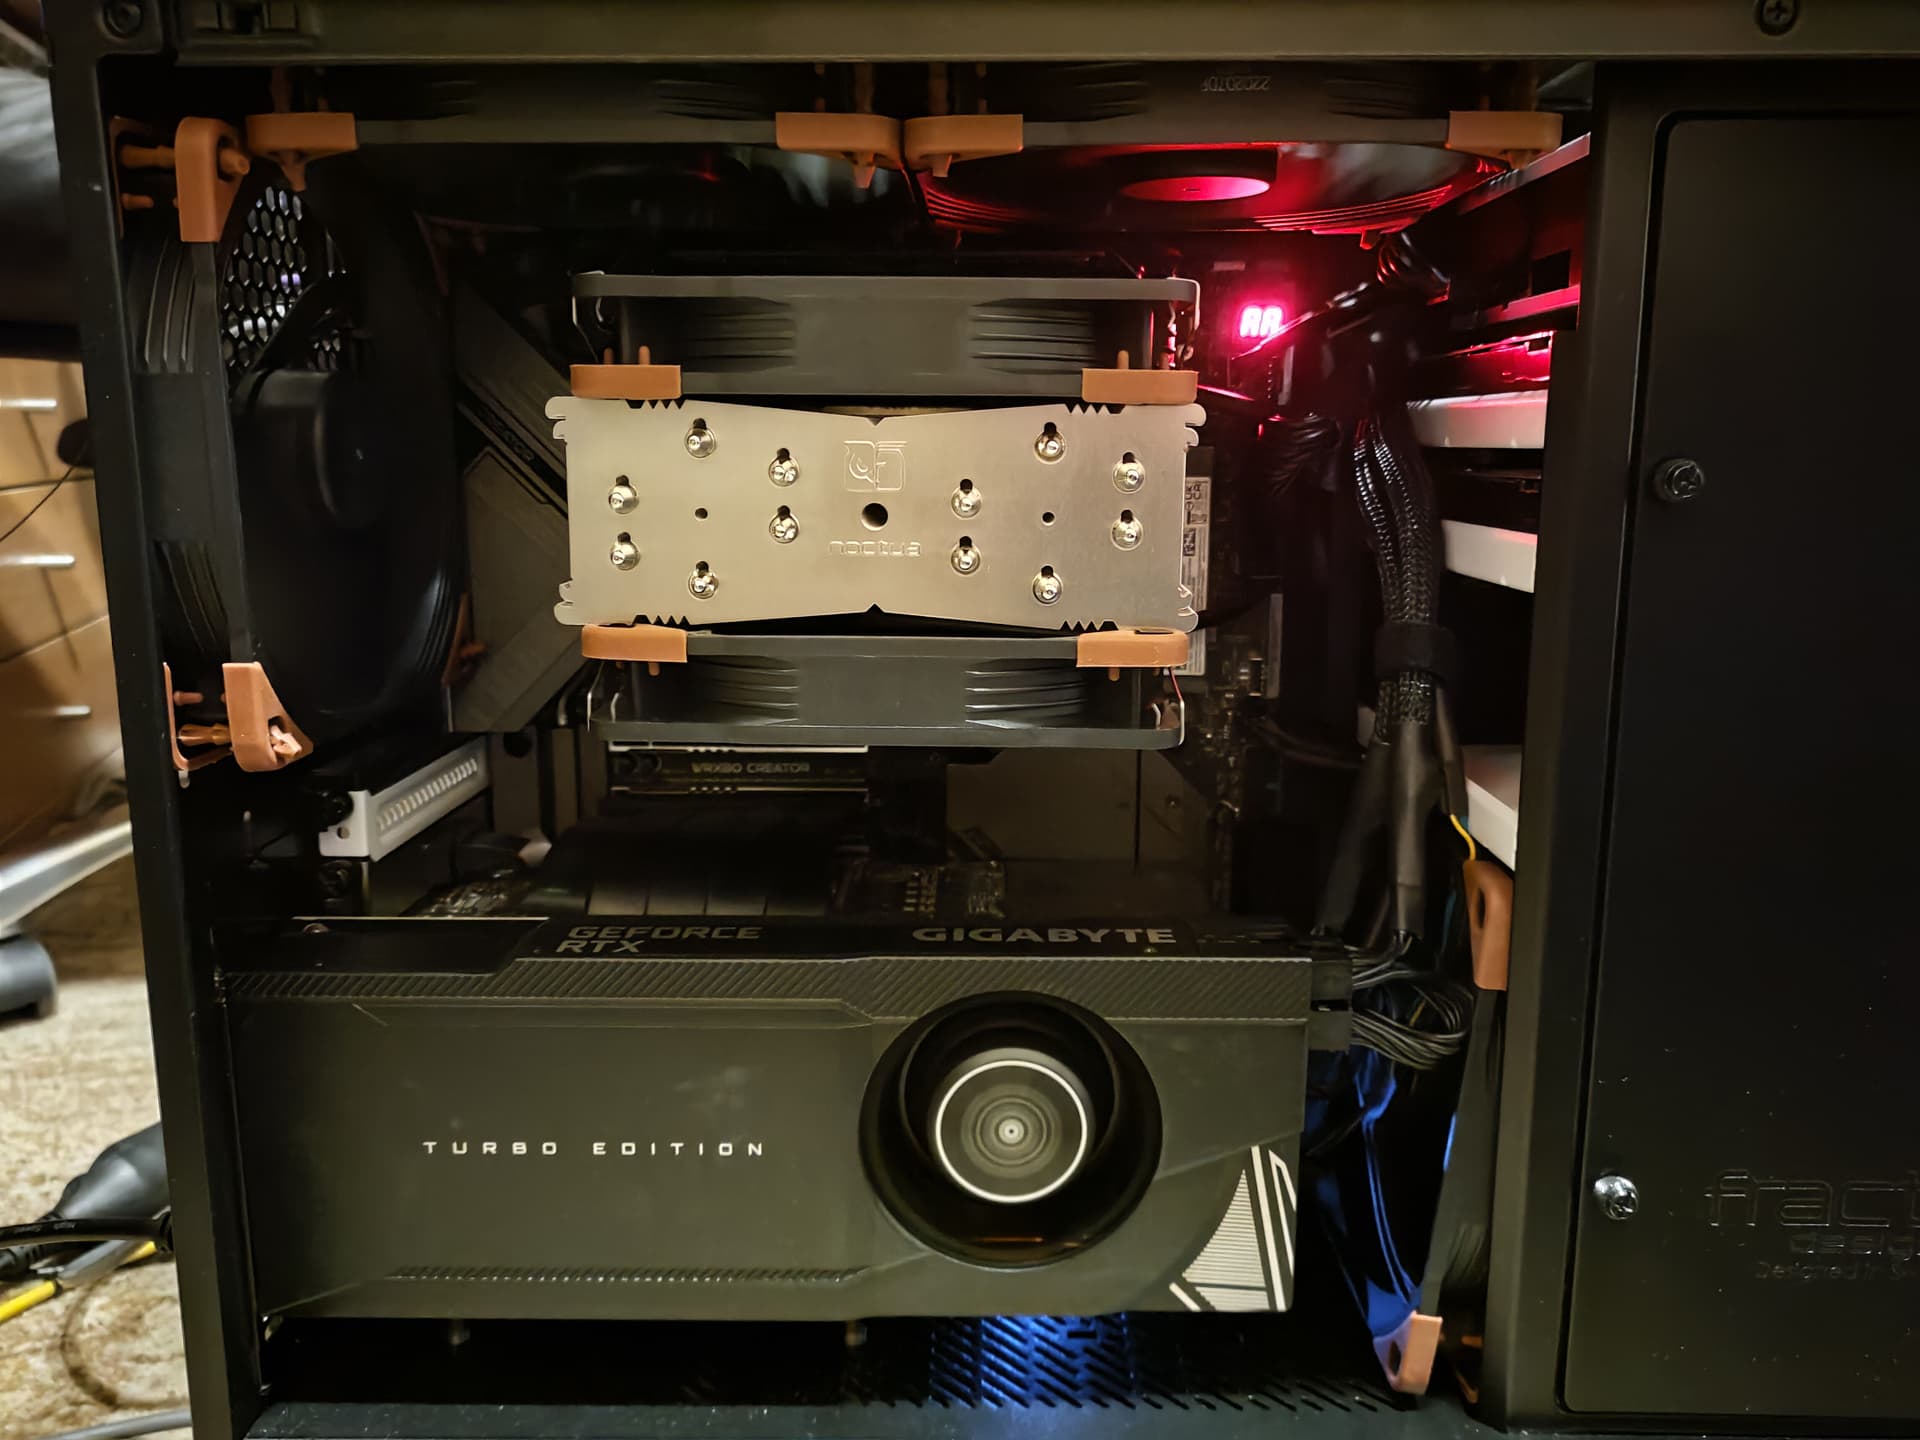
It worked. Well. Very well. Maintains solid boost clock for very long time and while yeah, it’s unbearable in stress - I rarely do have 100% full stress on all cores so irl it’s not that bad. And when it is - it’s rendering something anyways so I can just go touch the grass during that period.

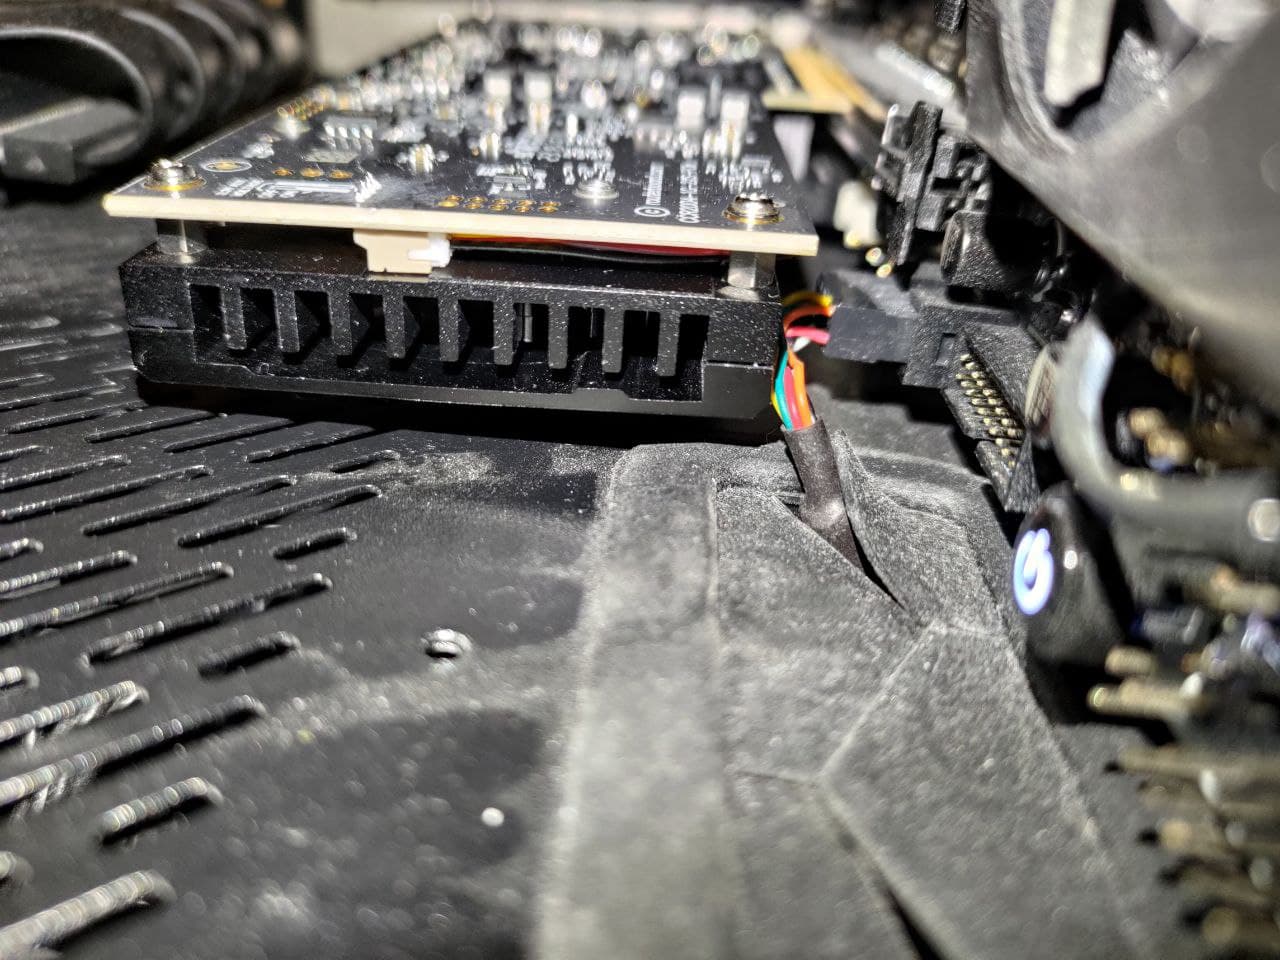
Once storage arrived I put it in carrier board

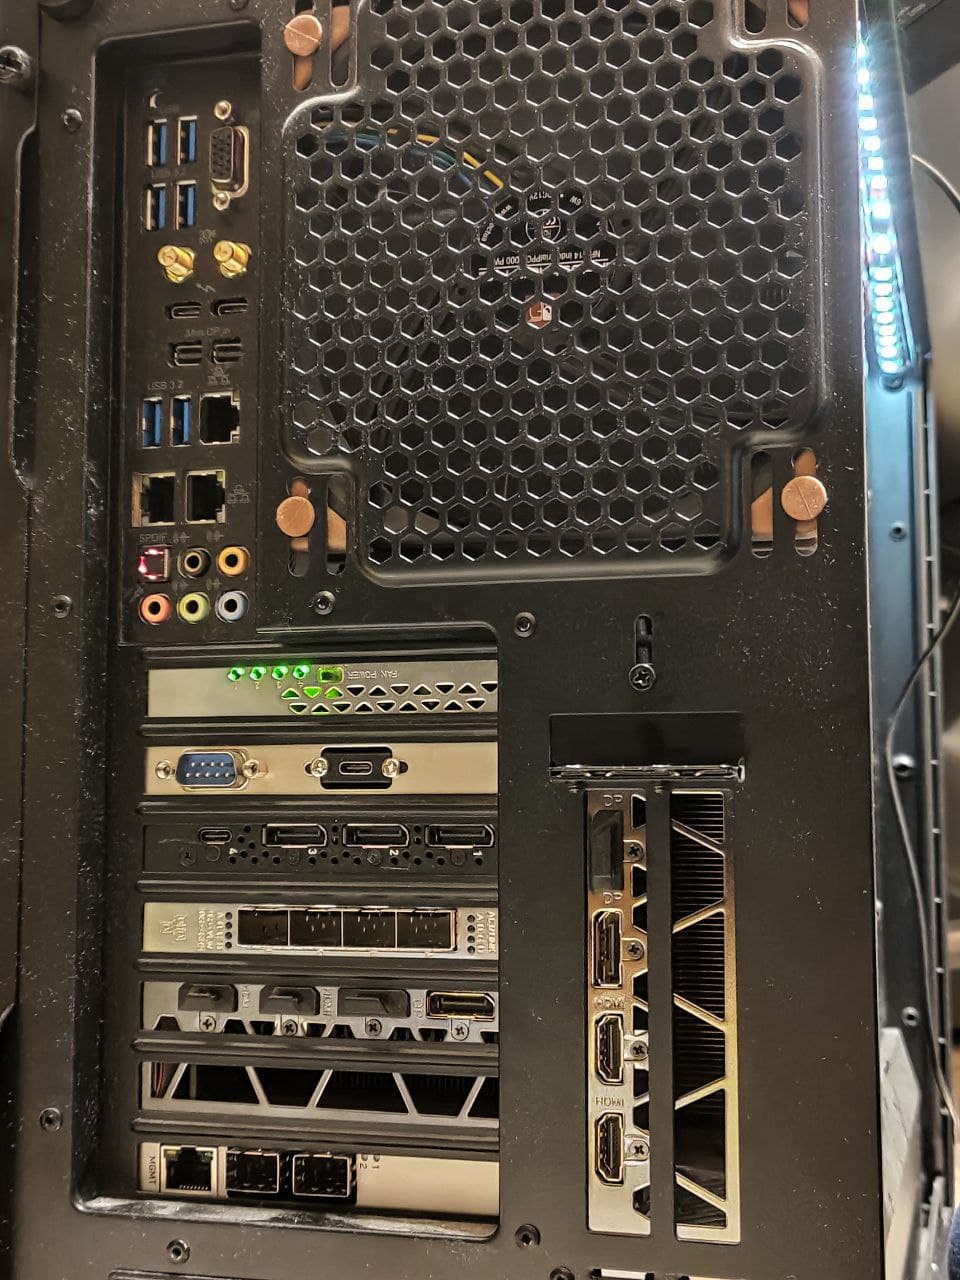
And repurposed lost pci-e slot for riser to add RS232 bracket which comes handy for routers management

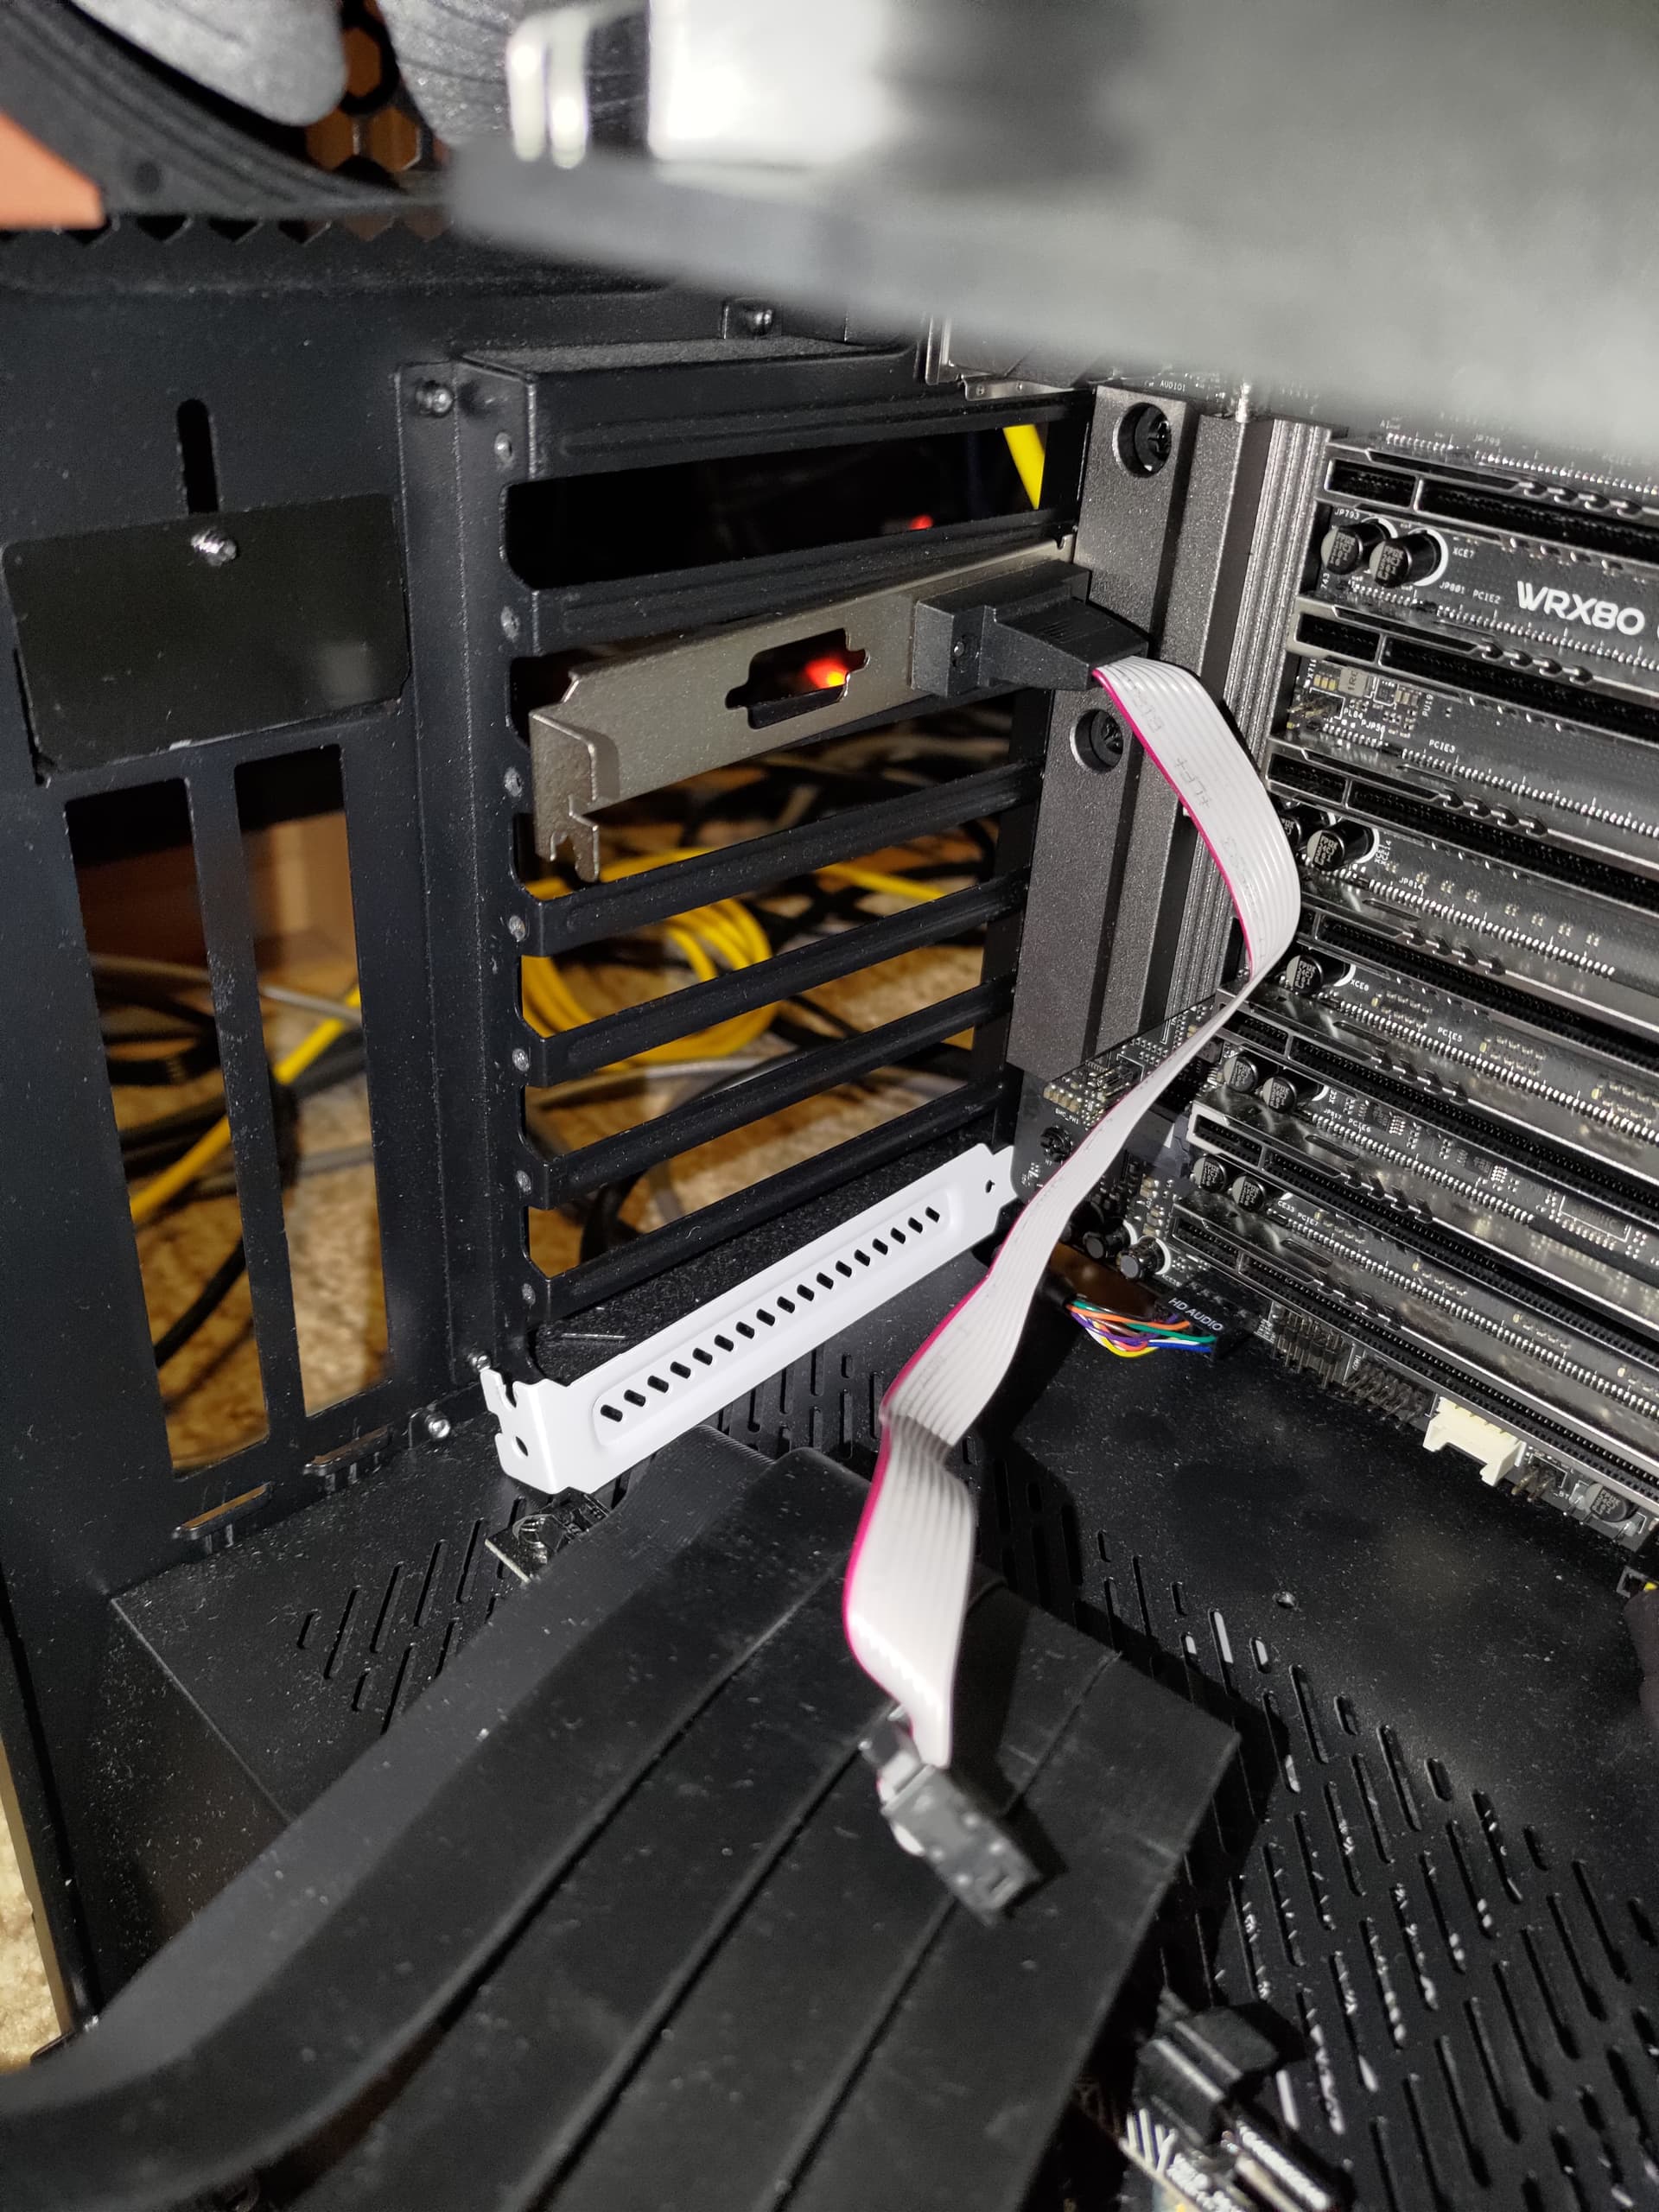
Second hole has been repurposed to route additional usb-c controller to make USB passthrough a bit more flexible:

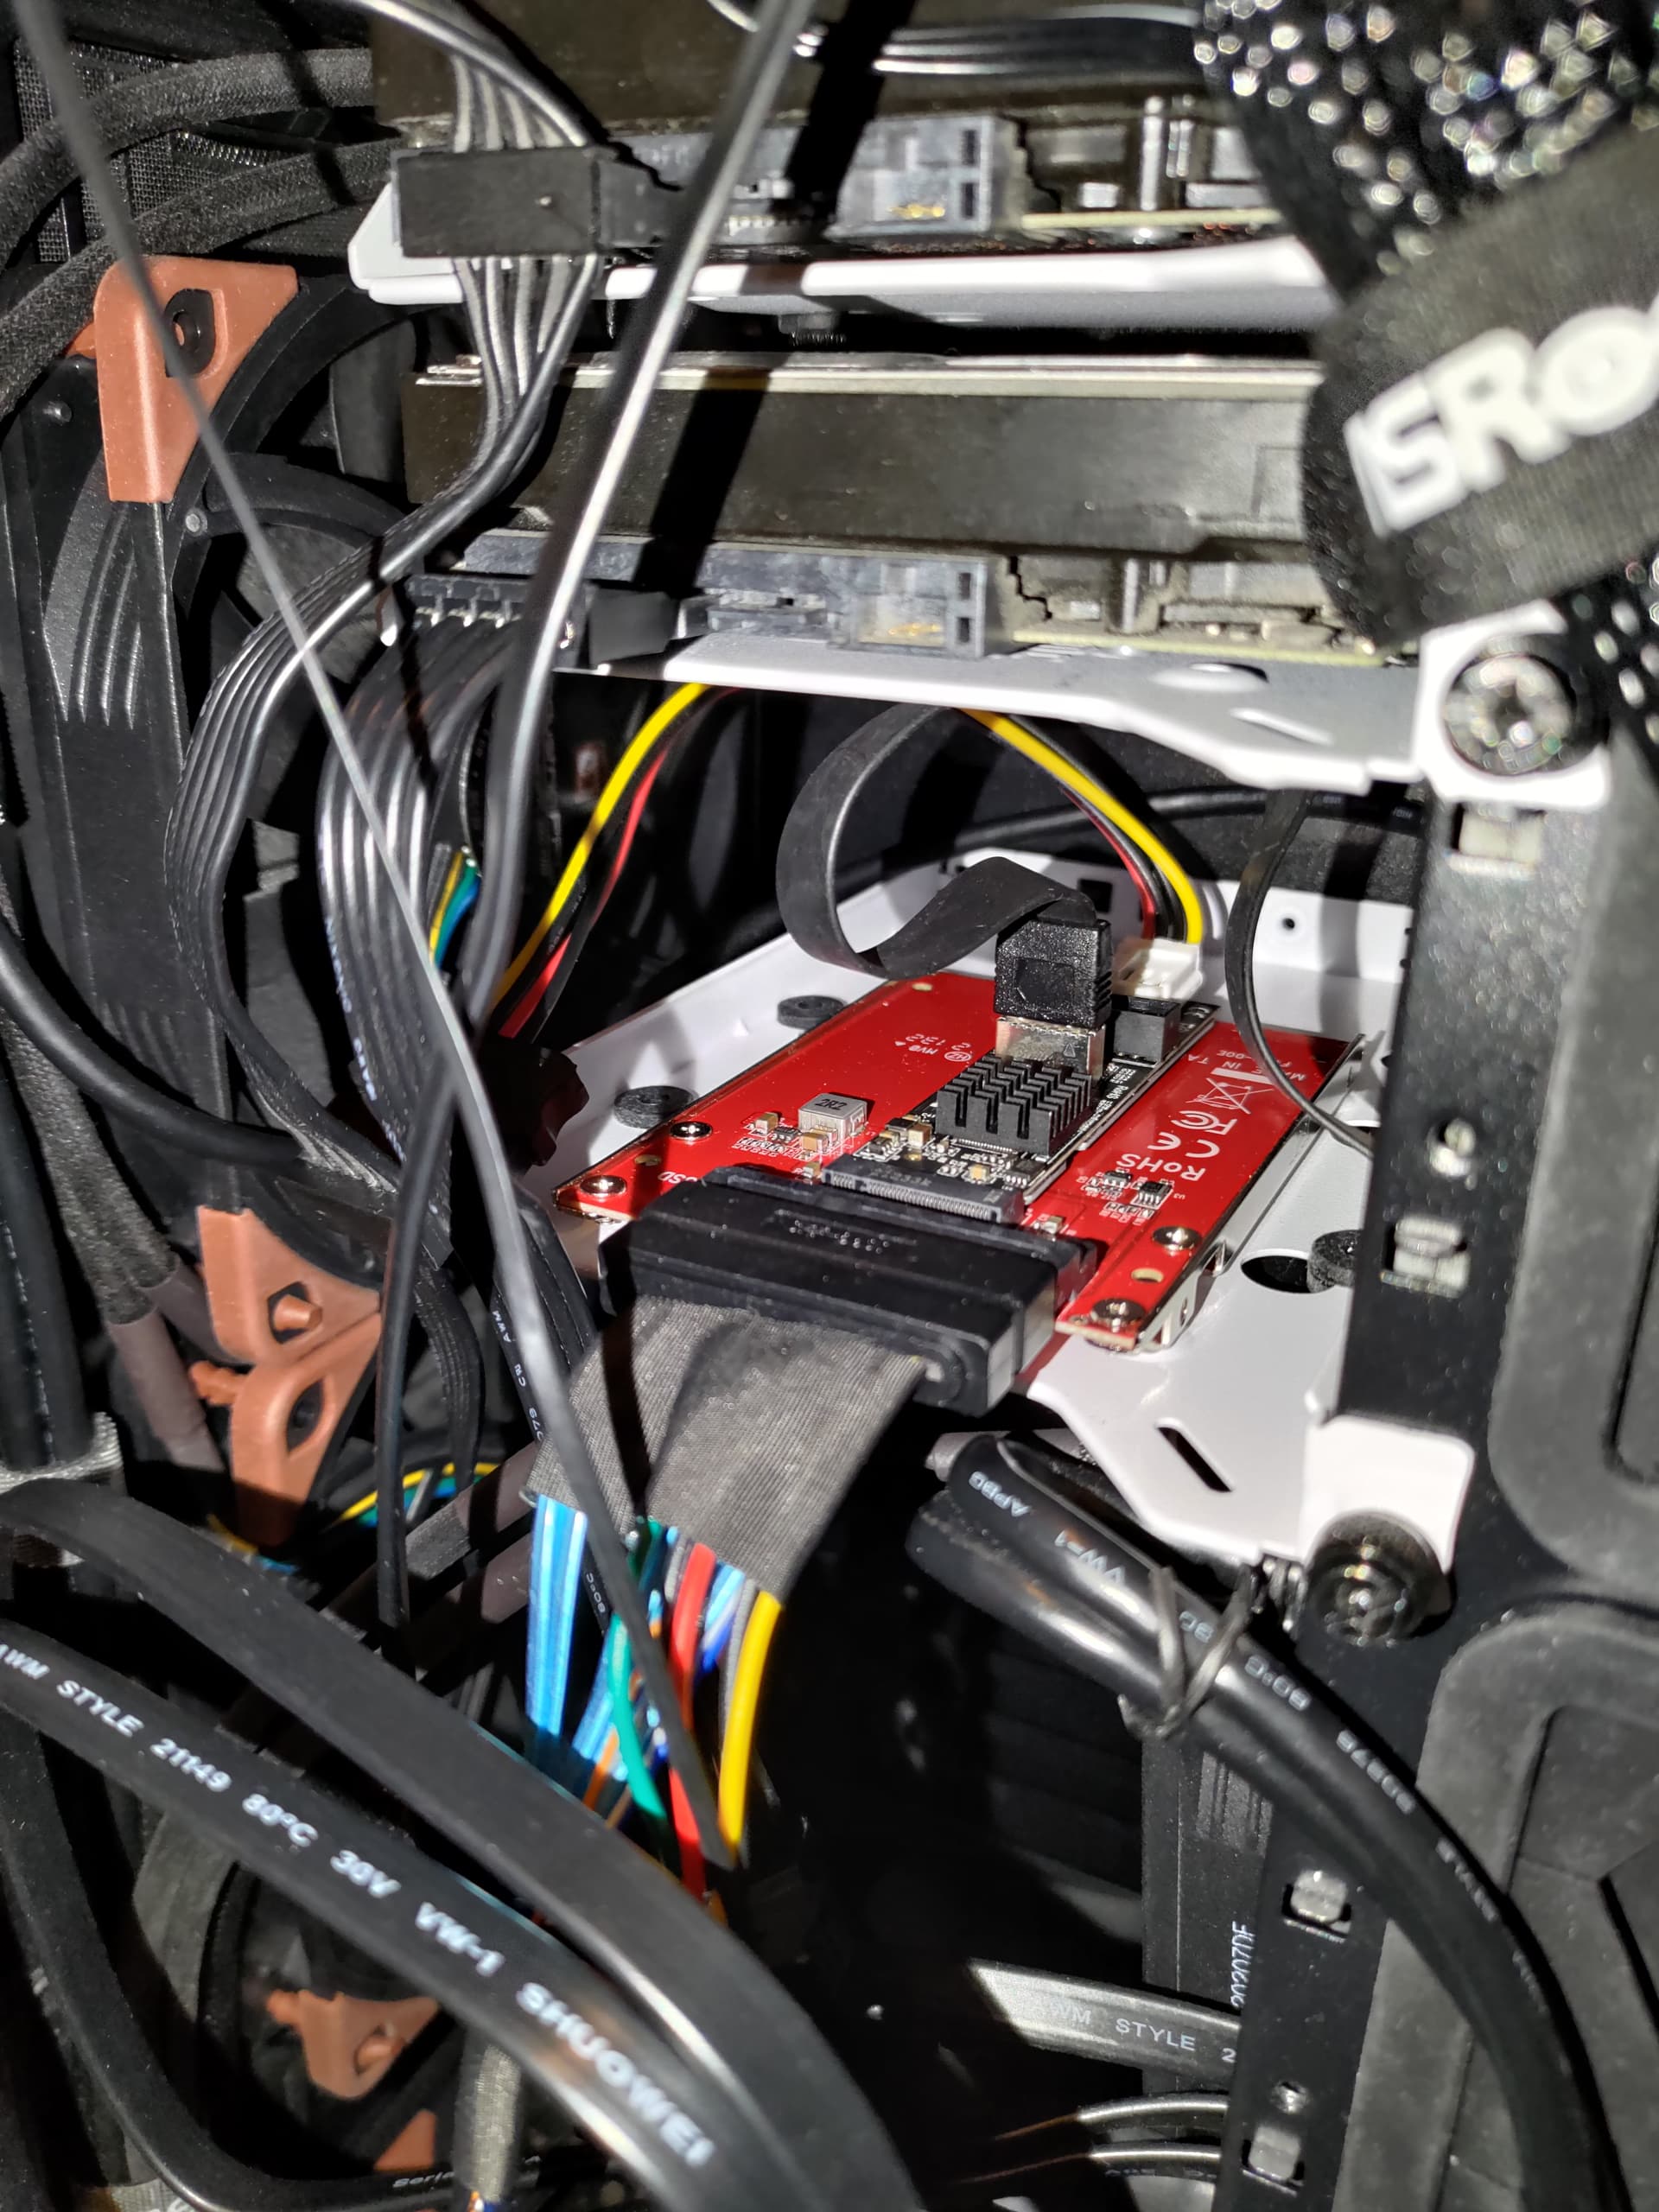
Since Optane is already quite difficult to find and I couldn’t really find any good deal I decided to abandon idea of using Optane and instead repurpose U.2 connection on motherboard for USB-C controller using U.2 → M.2 → USB adapters.

After some further struggle with fans connection, LEDs and some final touches v2 was complete but BIOS said no.

Luckily thanks to community help and ASRock support I managed to obtain patched BIOS. But machine was still missing one crucial piece:

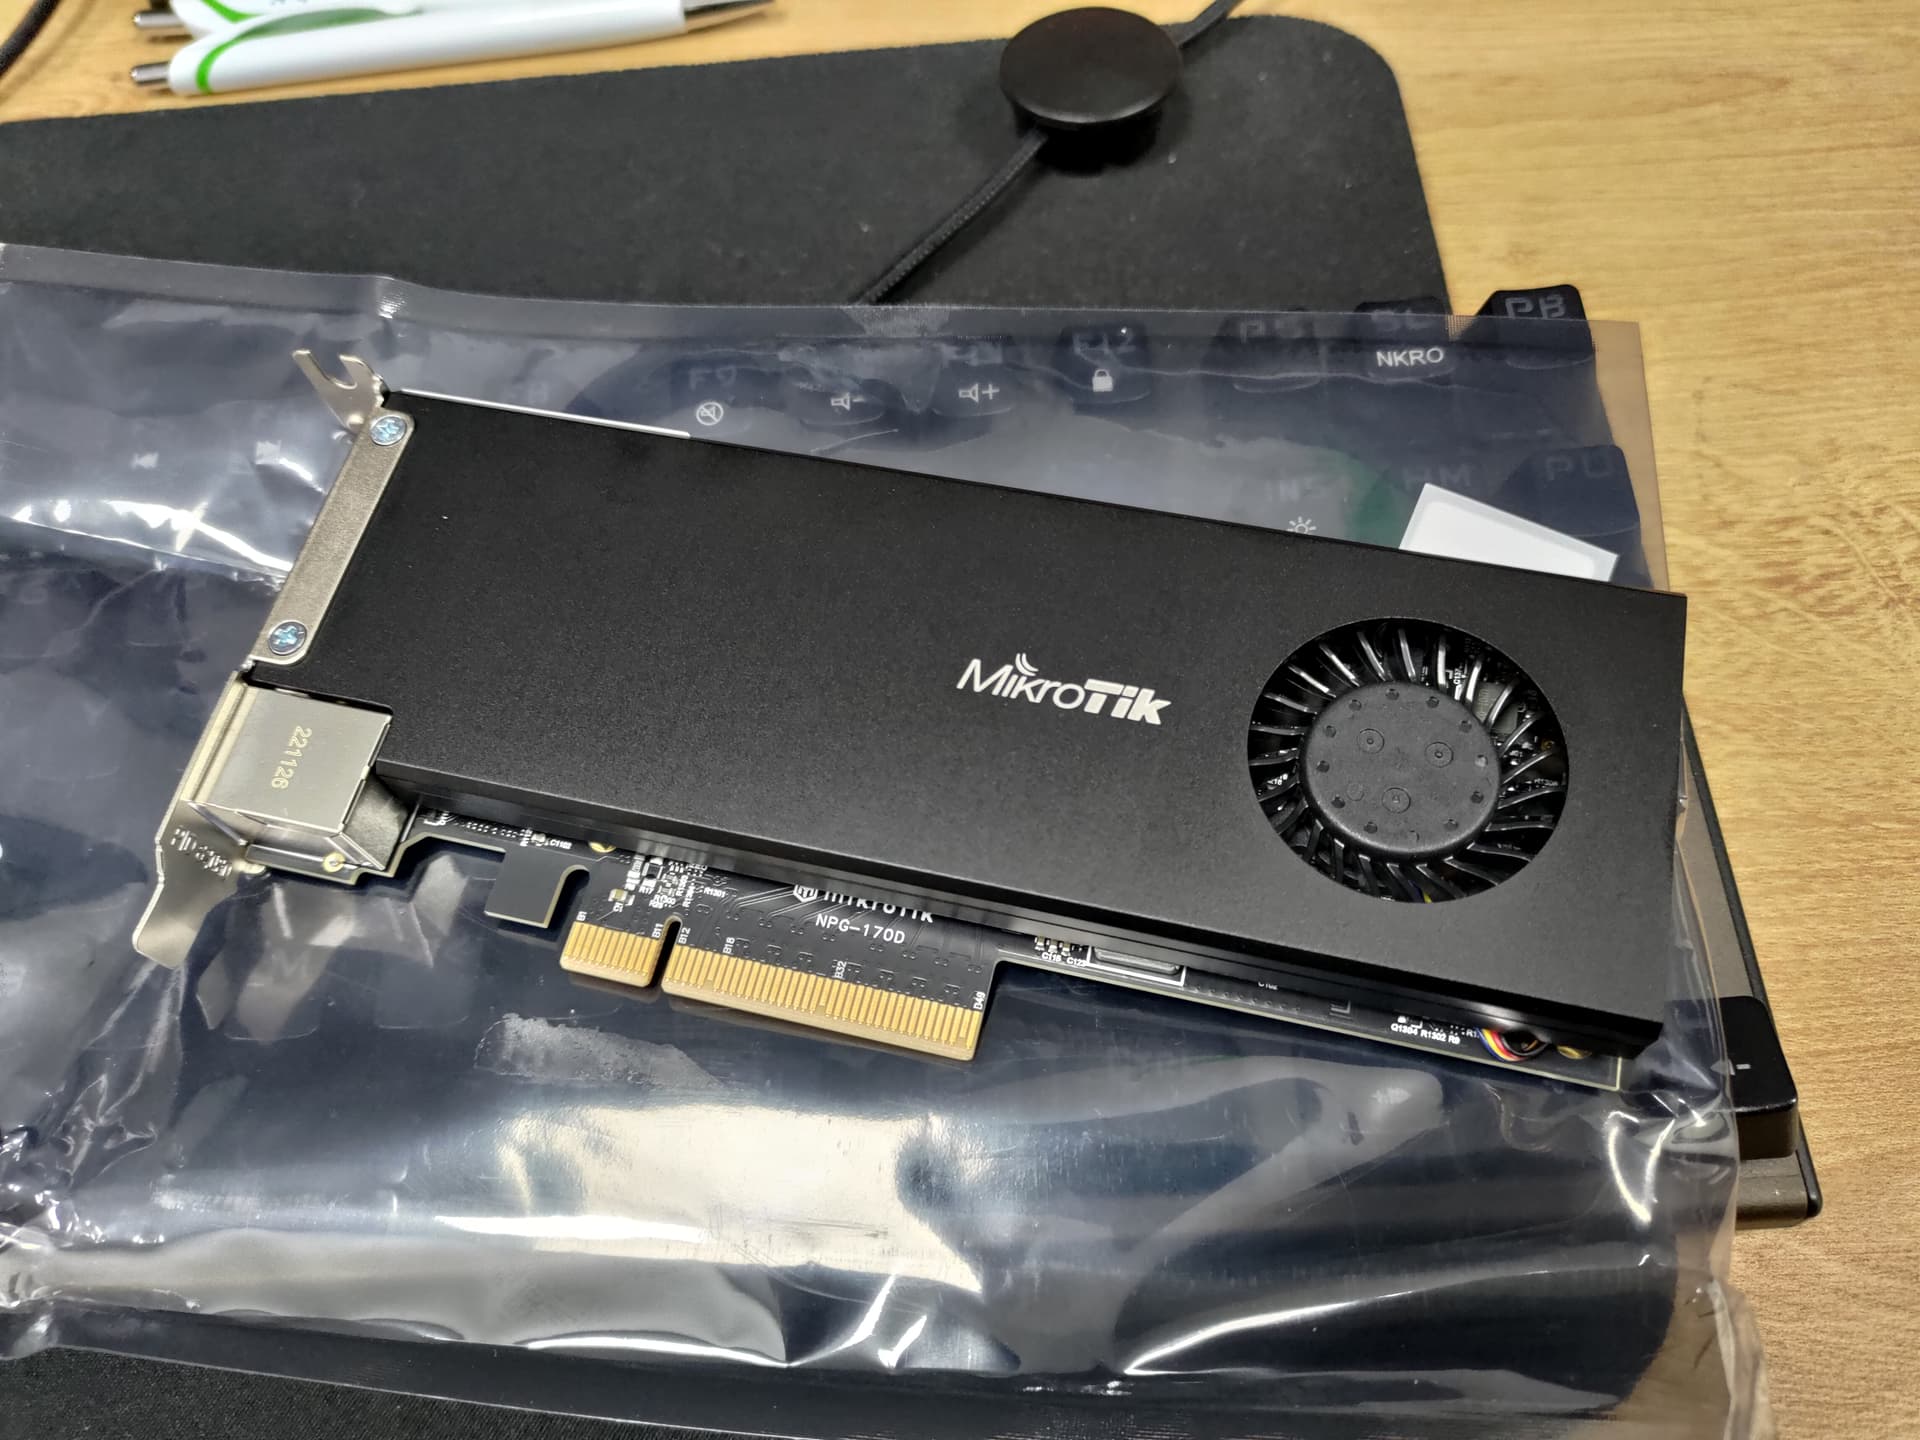
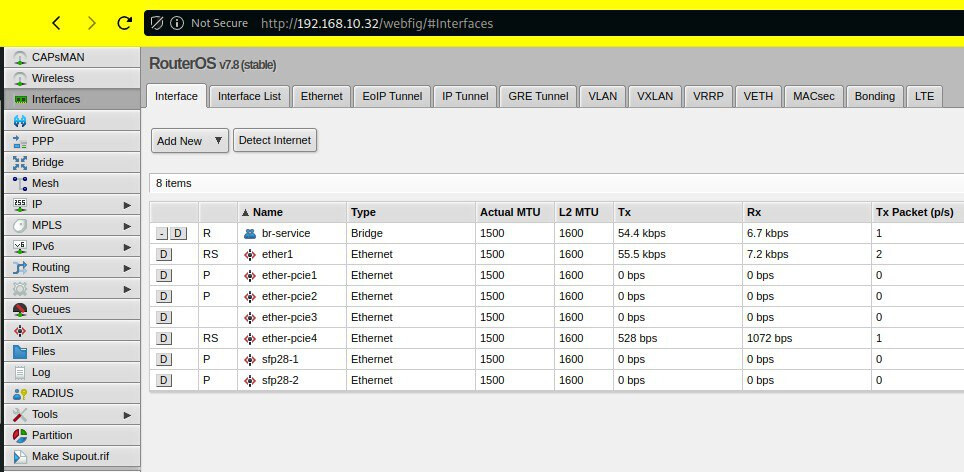
MikroTik CCR2004-pcie which is 2x25G RouterOS based router which also functions like network card. But you can totally just log into it over ssh and it behaves just like regular router with virtual ports facing pci-e slot.

And id didn’t fit.

But I broke USB header cables and managed to make it fit. With that current, final v3 was ready and I could start struggling with OS setup.

And with storage space limitations, which led to obtaining two more Kingston DC600M SSDs.
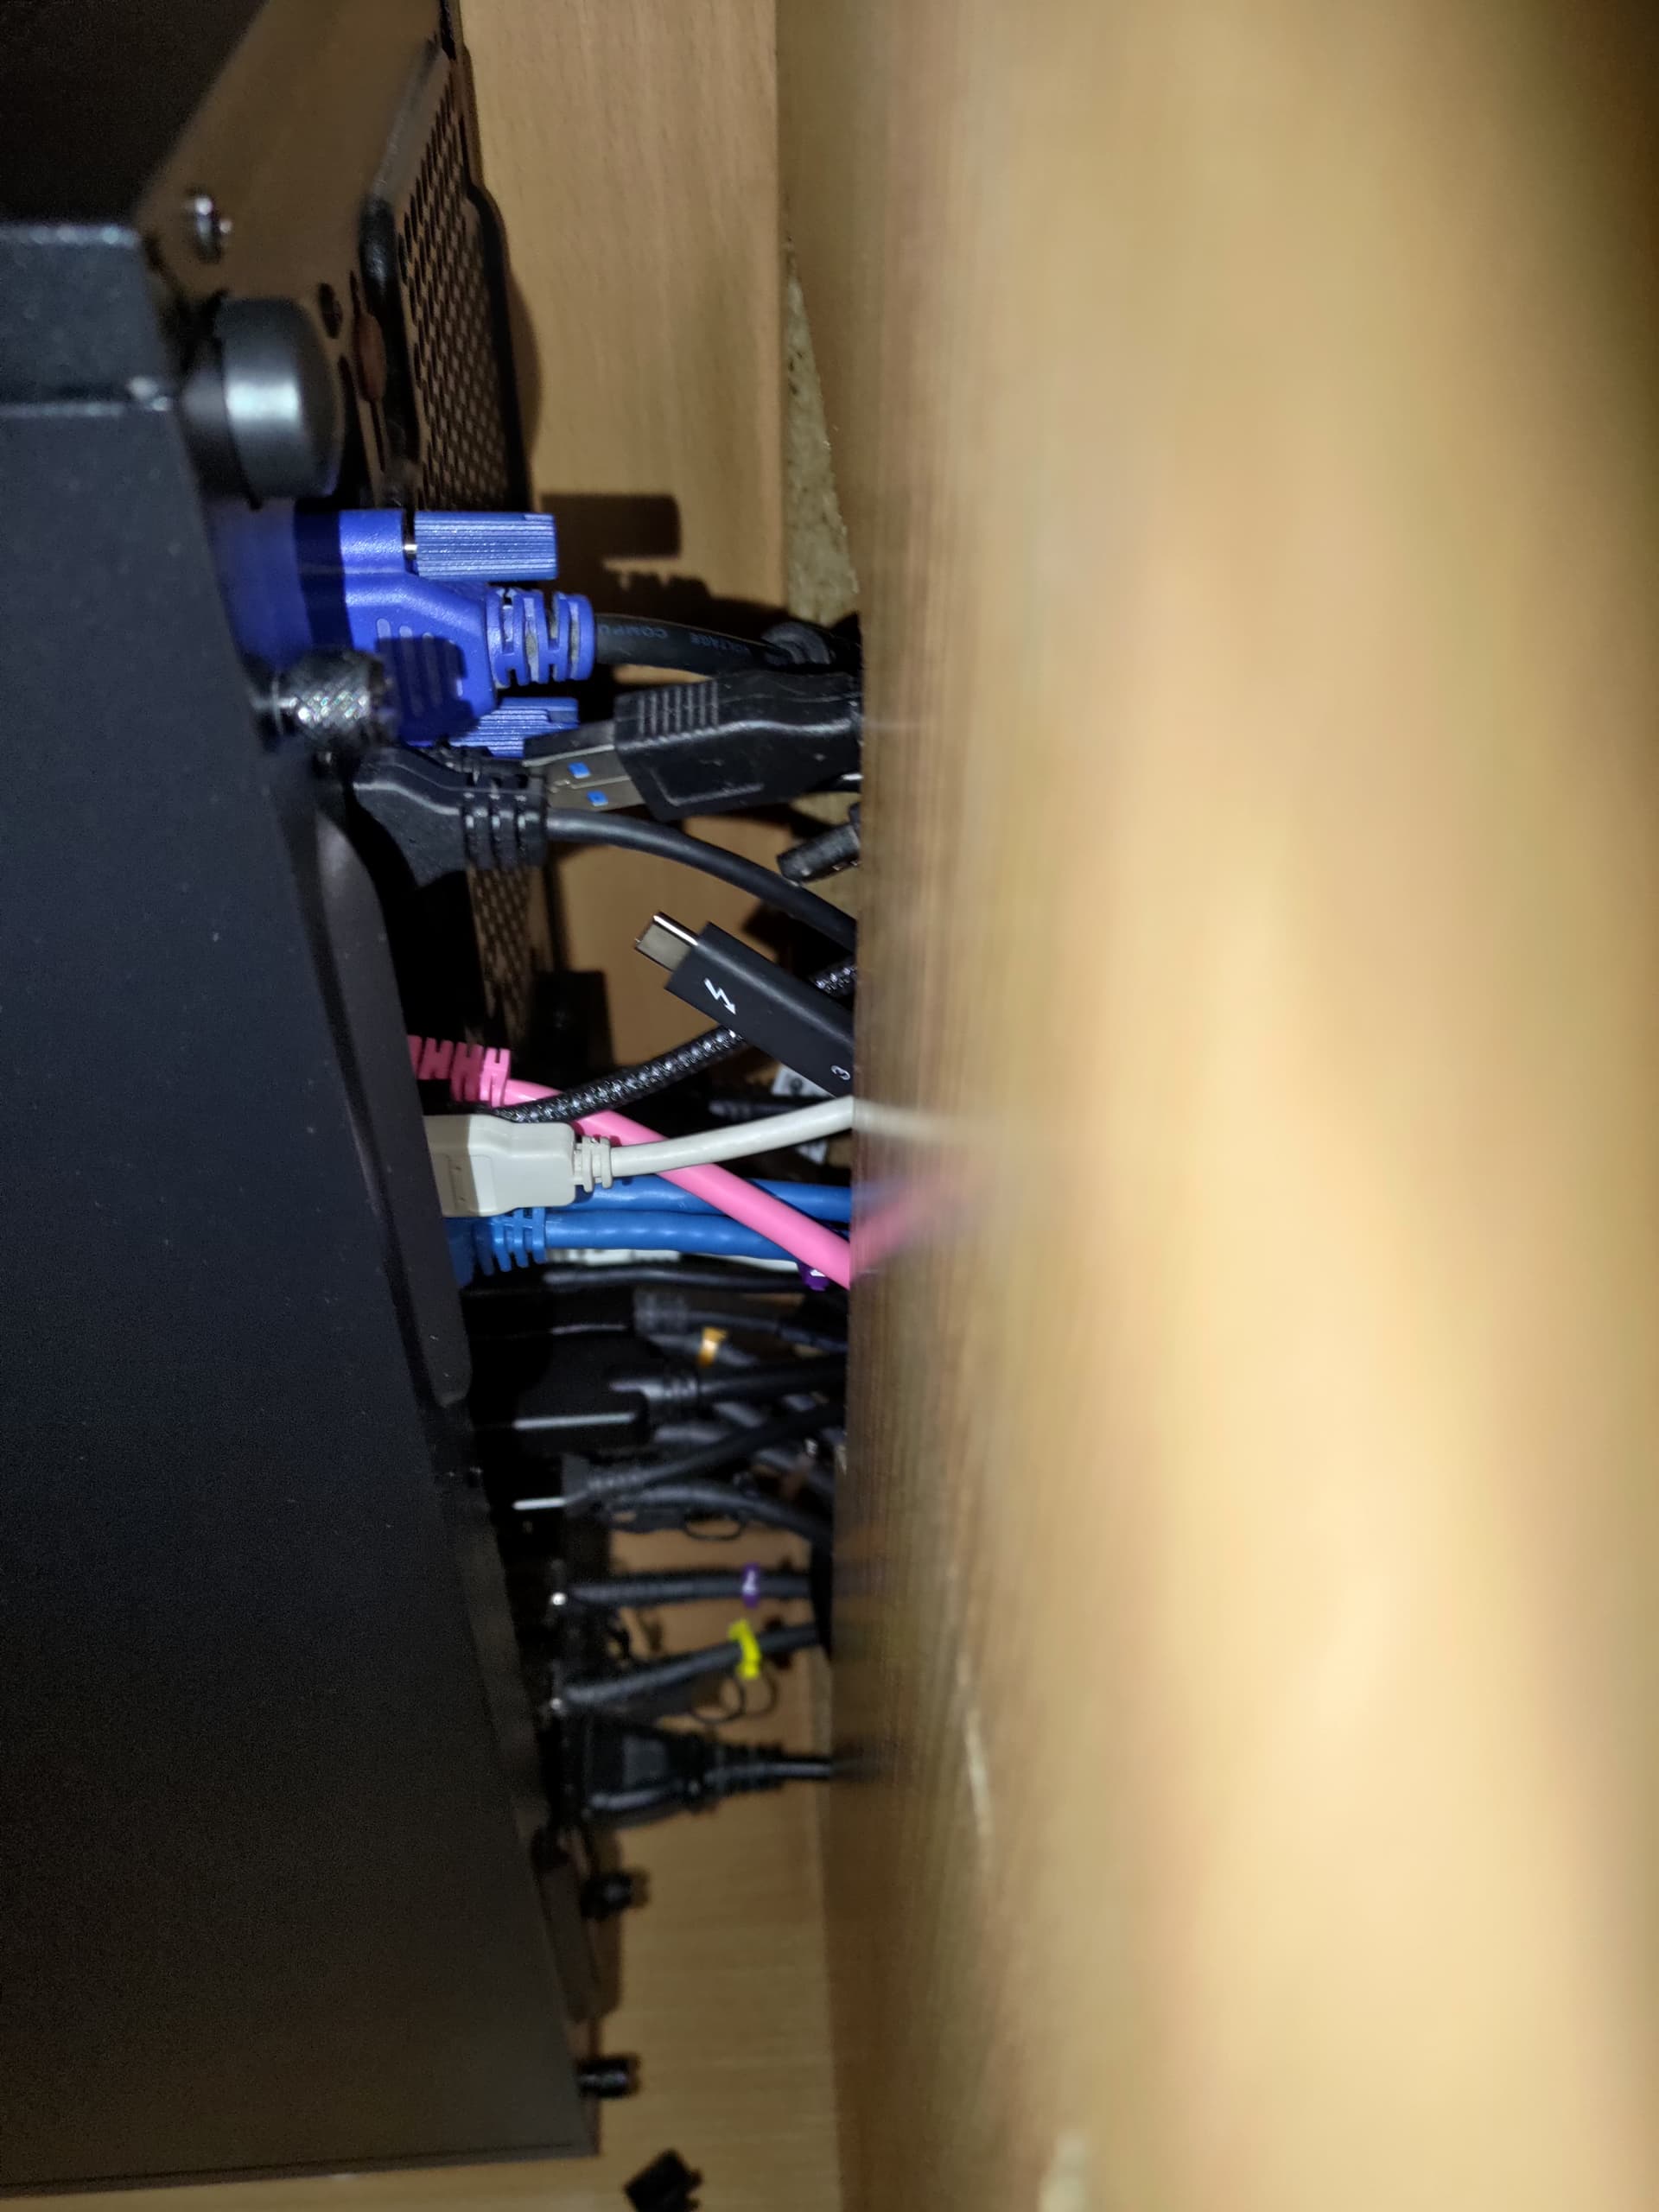
Final result:


And yes, everything is connected which is pretty hillarious xD

In order to switch between VMs I’m using physical HDMI KVM switch, just as if those were physical PCs. OpenSUSE VM connects to host (which is set up on headless Arch) using virt-manager and manages all VMs (including itself).

Since OpenSUSE VM also uses JACK Audio framework for podcasting/streaming it’s set up in RT fashion using statically bound cores, FIFO shed and other RT KVM practices.

Also other VMs having USB controllers are connected to audio stack in OpenSUSE VM physically (plugged into mixer and interfaces) which even more emphasizes separation between those.

At this point one could ask - why even bother building such Frankenstein if you could just have 3 separate PCs which would be much simpler and cheaper. Well yes I probably could. But they would take more place (physically) plus I wouldn’t be able to easily combine resources from all of them into one machine. While here I’m able to either split resources or in case I need it - I can just assign all cores and all GPUs and all goodies to one VM.

It draws 1600w under full load XD

4 Likes

Well, in the picture there are at least two cables not connected, which I find hilarious :wink:

Anyways, thanks for your detailed write-up of your journey.

2 Likes

it’s because cables are just-right-length short so I cannot plug them until PC is fully shoved into cutout in desk but then I wouldn’t be able to take photo xD Currently they are indeed connected

3 Likes

What was your thought process in choosing Arch as your host VM instead of a hypervisor like Proxmox?

1 Like

There were plenty of reasons at the beginning and there were few issues I noticed later down the road that could potentially bite me if I didn’t go Linux route. For starters I’m often using Arch on servers because it’s very small. When I’m creating lab environments 2gb virtual disk is enough to set up Arch on btrfs with zlib compression. So it’s fairly compact for headless setups but at the same time very flexible. That means I know this distro fairly well and I’m able to set it up even in quite complicated scenarios.

It’s one of very few distros that I know how to set up with LUKS encrypted /boot partition and kernel (the only other distro supporting such setup that I know of is OpenSUSE which I also considered in minimal server variant).

Then there’s support for weird tweaks. I tried ESXi first but it didn’t work (couldn’t properly reset USB controllers on this motherboard so I could only start VM once).

Then I’m also using fairly complex btrfs setup for everything and LUKS with detached header stored on external thumb drive. All of this fairly exceeds typical supported setup options for dedicated, specialized systems like Proxmox / ESXi since I’d most likely have to quite seriously tamper with shell to adjust it to my requirements and at that point it kinda misses whole point of using specialized OS if you have to “generify” it back to normal Linux.

Then there are things I noticed later on. It turns out I need to have installed and loaded nvidia drivers on host OS, even though it doesn’t actually use those cards and I have to configure GPUs on host into persistence mode. Otherwise RTX 3090 has terrible power management and idles at 110w each when it’s not attached to any VM. It’s not only inefficient but also loud in my case because 2x3090+Quadro RTX 4000 without persistence mode result in 300W power draw on idle just from GPUs alone, doing nothing.

Arch is also relatively bleeding edge distro so it always gets patches farily early. As such there’s lower risk of waiting for years to get support for new hardware or bugfixes (and as of now I am actually affected by VMWare-on-KVM nested virtualization bug on AMD that has patch merged to mainline kernel in december, so fairly recent)

And final reason is just convenience of files checksumming, backups, automated btrfs snapshots and so on. Sometimes it’s just convenient to manage your VM files the same way you work with VirtualBox / VMWare Workstation VMs.

Also Arch has fairly decent tutorial for VFIO so it was some nice-to-have thing.


TL;DR it’s relatively exotic setup overall and using off-shelf hypervisor would most likely require more tweaking than it’s worth.

2 Likes

For quite some time I didn’t have any interesting upgrades in this machine, but now I just did.

So due to some more advanced VM’ing I ran out of performance from my 2 bay RAID1 array dedicated for VMs storage and I decided to rebalance it into 4 bay RAID10 made of 4x FireCuda 530 4TB.

However after that I was left with no way to connect those two 990 Pro 2TB to my workstation. I did have that sketchy M.2 USB controller though on U.2 slot. So after finding out that OWC Shuttle U.2 is a thing I decided to give it a try.

I thought this setup will be quite sketchy and I’ll have to always passthrough USB controller together with both of those two 990’s but apparently OWC Shuttle seems to support IOMMU quite properly to my surprise and my host listed each device in separate IOMMU group.

Overall I’m extremely satisfied with this upgrade. I know OWC Shuttle has only x2 gen3 connection to each drive but kinda whatever - in my workloads those drives are typically tanking on random i/o anyways waaay before they reach bandwidth limits. I think that now since I have some space for “junk” NVME drives - I will also consider adding some single crappy NVME drive here, into last slot - for ESXi install to have dual-boot just in case I’ll have to deploy some proprietary, quirky VM that only works in ESXi.

inb4 - oh yeah, that USB controller didn’t fit due to molex connector and I simply bent it 45°. I was kinda worried that it’s gonna crack or something but it seems to work just fine so whatev I guess. And drives have no heatsink since it didn’t fit over controller. I’ll monitor thermals and if they’re gonna be bad I’ll look for some standalone heatsinks but I don’t think thermals are gonna be an issue considering that those SSDs sit right in front of front chassis fans blasting at considerable speeds due to workstation being well… air-cooled Threadripper after all.


Also due to lack of space for “regular” files I happened to add two more Kingstons DC600M 8TB and rebalanced it into RAID10 as well - but seeing how things go so far… I guess I’ll have to add even two more - maxing out all onboard SATA ports.

1 Like

Hey sorry I know this post is old but if you don’t mind me asking, what case did you use for this build?

1 Like

Fractal Define R6

1 Like

thank you :slight_smile:

okay since this thread got necrobumped 3 times this month I may just as well post some small update with funny stuff I encountered xD

ASM3142 from AliExpress…

So first thing - I decided to get some offsite backup. My previous setup based on 7 separate WD Elements drives but it started to be very cumbersome and clunky solution so I decided to look for HDD enclosures and decided to get two of ICY BOX enclosures.

And oh boy - what a ride that was. I’m not gonna quote too much from that thread since anyone interested can follow link but TL;DR - turned out those enclosure REALLY don’t like AMD USB controllers. Up to point where they plain don’t work. Unfortunately my

was only 5G so I decided to upgrade and buy one from AliExpress again - this time ASMedia Technology Inc. ASM3142 USB 3.2 Gen 2x1 xHCI Controller. Which is 10G. Well… it SHOULD be 10G…

And it kind of is… but is it though? That’s the AliExpress quality bites your a*s part xD

And well it probably wouldn’t be that bad if I had it routed to front panel… but I don’t. I mean it’s too freaky to waste my only 10G usb-c port on front panel for this crap. But at the same time I need to connect stuff directly to it (without hub) to reach 10G speeds sooo… eh…

duct tape.

I need to take off dust filter every time I want to connect SSD and it’s absolutely terrible ghetto rig but well… if it works it works right?.. >.>

I don’t yet know if there’s anything that can be done here, I kind of don’t want to buy second one because all those ASM3142 adapters from AliExpress look like the same rebrand in 1000 names and I’m almost certain I’ll end up with 2 broken USB-C controllers…


TPM on AMD… as always…

When I was looking at diagram of my motherboard I noticed TPM header. Golly gosh, would it be cool to have physical TPM right? After all some dude in some internetz said fTPM bad so it sure must be better to go with physical one right? It’s pennies also so why not!

So I bought ASRock TPM module for my motherboard and plugged it in. Very tiny thing wow. Switched to SPI header in BIOS and called it a day. It seemed to work fine at first though performance of it was quite terrible. /dev/hwrng was getting 1.5 kB/s throughput while my laptop hardware TPM generates like 17 kB/s. But you know like… whatever. I used PC for few days and I realized at some point that…

My Thunderbolt docking station doesn’t work… Because my VM with pci-e passthrough of network card in that TB3 dock didn’t boot up with missing hardware error… It’s like complete brick. I’m connecting cable and there’s just nothing in dmesg. Sometimes wild “pciport: Cannot find switch at position 0” came up few times but then radio silence followed that.

Must be docking station right? Probably power supply got bad or something. We had power surge that week. I borrowed identical dock from work aaaand it also didn’t work…

*shocked pikachu*

I had a stroke for a while because I thought TB3 controller on my precious motherboard might be dead but after few hours of hopeless troubleshooting I tried to remember if anything changed in my workstation last week… and the only thing I thought of was TPM. But it can’t be TPM right? I mean why would it? How the hell would TPM be ever related to Thunderbolt in any way?..

it was TPM.

I do not know yet why it happens or whether it should happen. I’ll try reaching out to ASRock support and ask whether they ever tested TB3 controller working with external TPM module but for now I just disabled that TPM module. I couldn’t find any info in the internet regarding TB3 not working with external TPM. Sad. :<

2 Likes

Another chapter to my workstation saga. I bought AKiTiO Node Titan - really neat Thunderbolt 4 eGPU chassis. It only has 12v 8 pin connectors by default but I managed to find additional cables to SFX PSU insidee it, to get additional 5v and 3.3v power inside.

As a result I was able to connect old pci cards via pci-e → pci bridge made by InLine, that takes 5v input by molex.

More detailed story of AKiTiO Node Titan and 5v/3.3v power output below: