Hello Forum!
This is my first post, this project is a passion project of mine that has had many iterations over the years. I’ve always wanted to build my own case but just now (due to a happy move in which i adquired a personal shop) i’ve been able to actually make it.
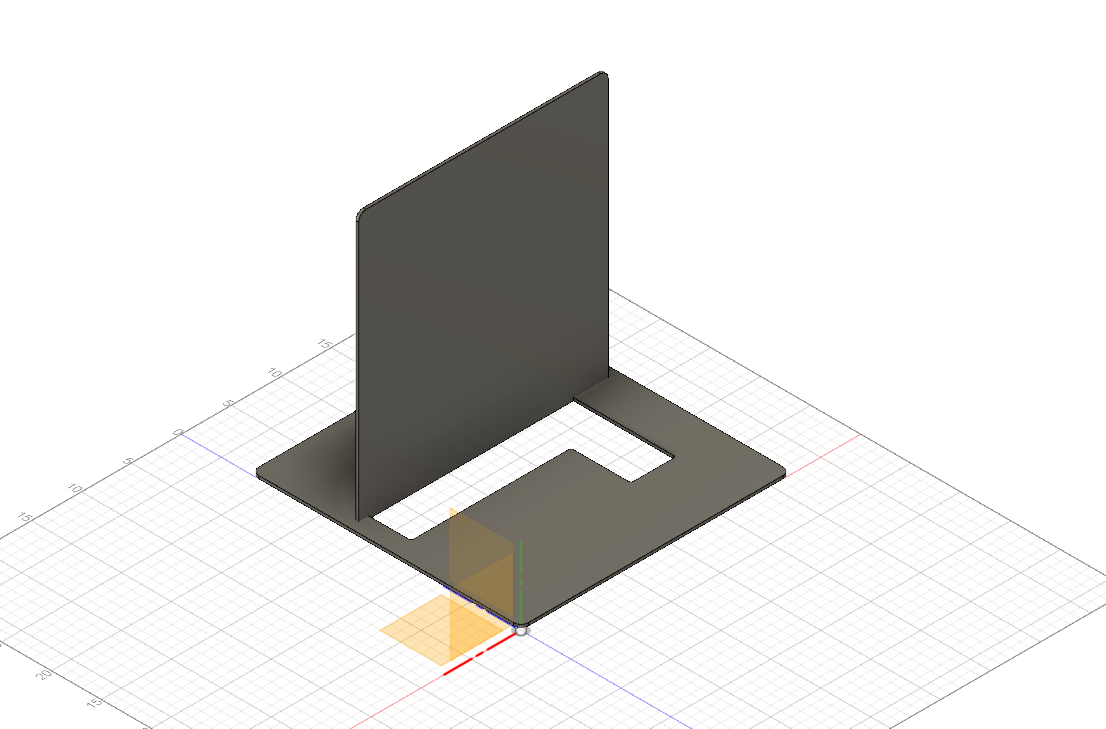
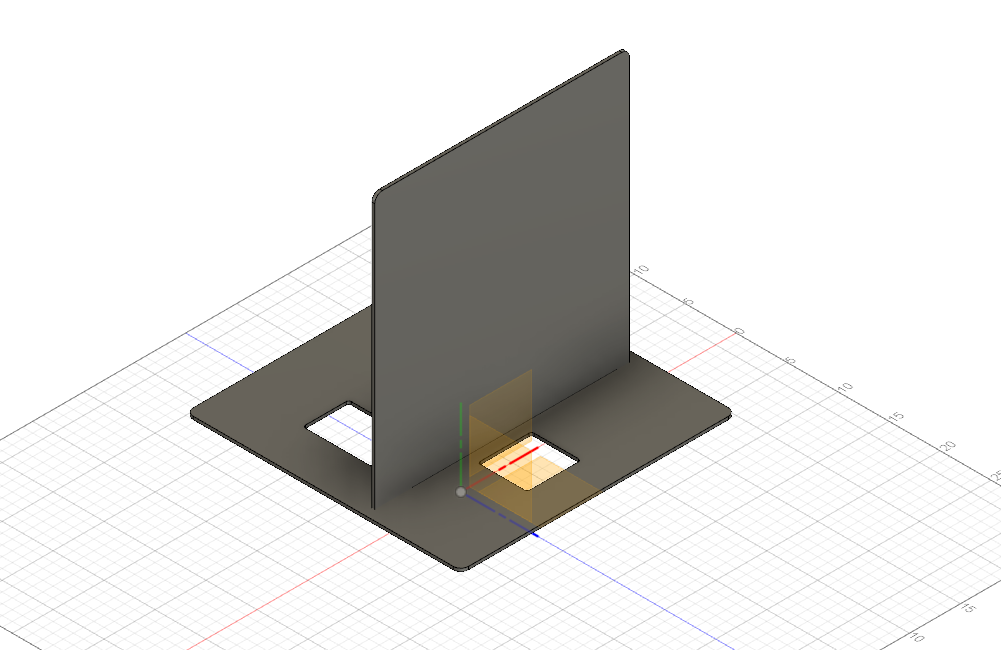
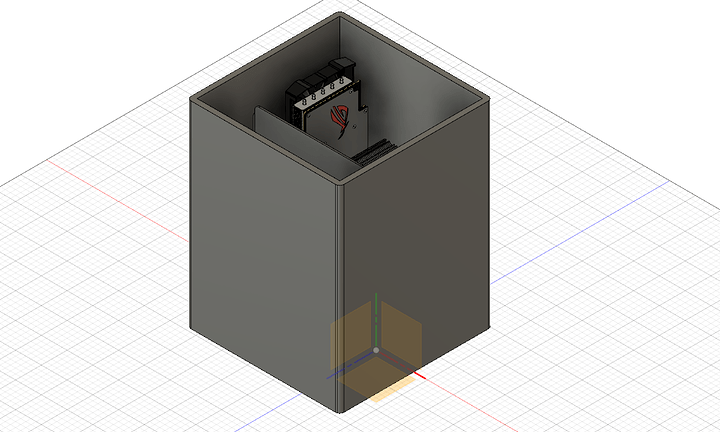
So without further introduction here are the initial desings, some parts have already been built and i will post pics of the whole process as ir progresses.
More pics will come about the projects’s current state
PD: the name sunken cost reffers to the state of the hardware thats going into it ( almost 10 yr/old) and the time i’ve taken thinking and planning this thing
8 Likes
Great, but unless youre planning on using it open like this:
I’m not sure what your plan for ventilation is…
And if you planning, that it will be closed, then hole at the back where processor is and some holes in front should work, up to point.
If I was planning on doing something like this, then using home methods I would probably make carton box the size of your planned case, put ~100-500W heater in it (depending on what your PC will be), some fans, and monitor temperature inside.
You can always drill holes or cut slots for ventilation lol.
I like the design though. What material are you planning on using?
The orientation will be like the second to last picture just with a cover over the front ?
Well, seems like that’s the way of some case manufacturers too. RGB is a must and prime concern, ventilation just an afterthought.
That is, until you find out you have to put server grade jet fan to case of this size, to keep it reasonably warm. Because basically that’s what it is, more or less, components packed like in rack case. I have few of those, they’re not exactly quiet 
Hey thanks for the interest! (first reply ever)
My plan is to cool it by convection trashbin mac style, the enclosure is TBD for now only the structure will be constructed
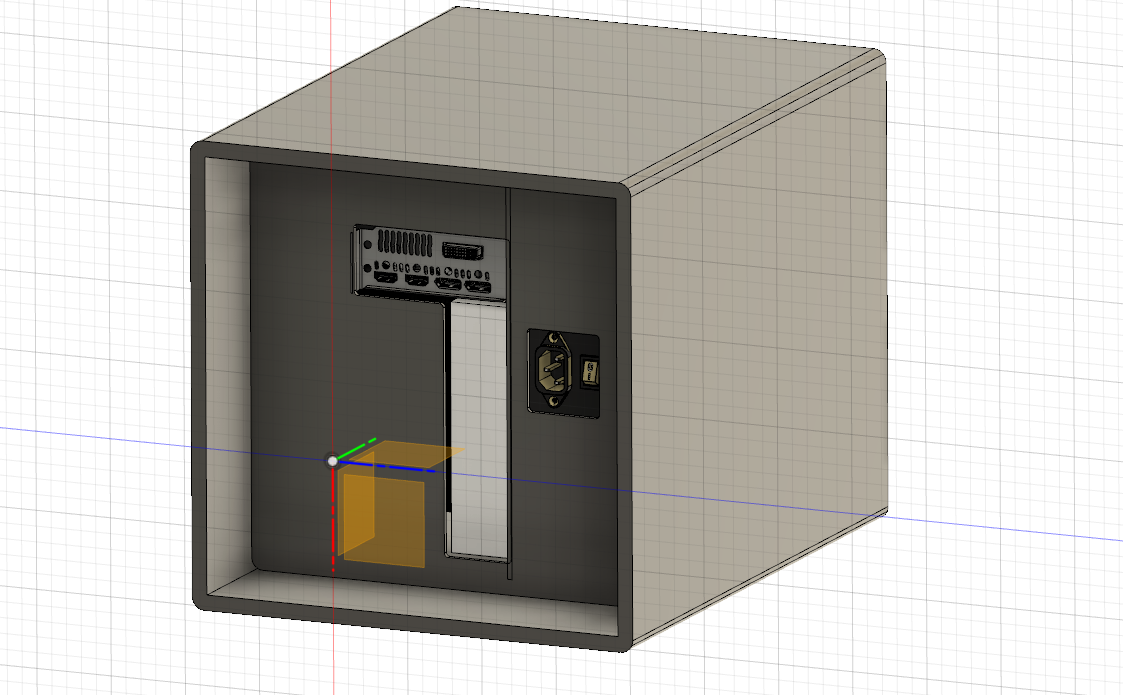
orientation will me standing with the big hole covered with a mesh at the top, I/O connects from the bottom ( not expecting much connect/disconnect )
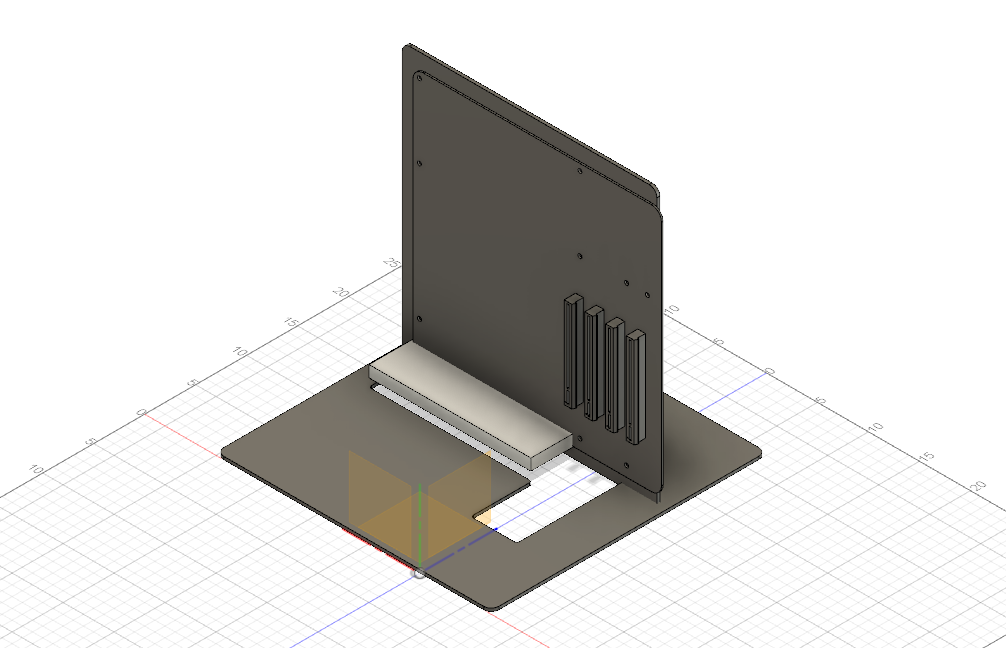
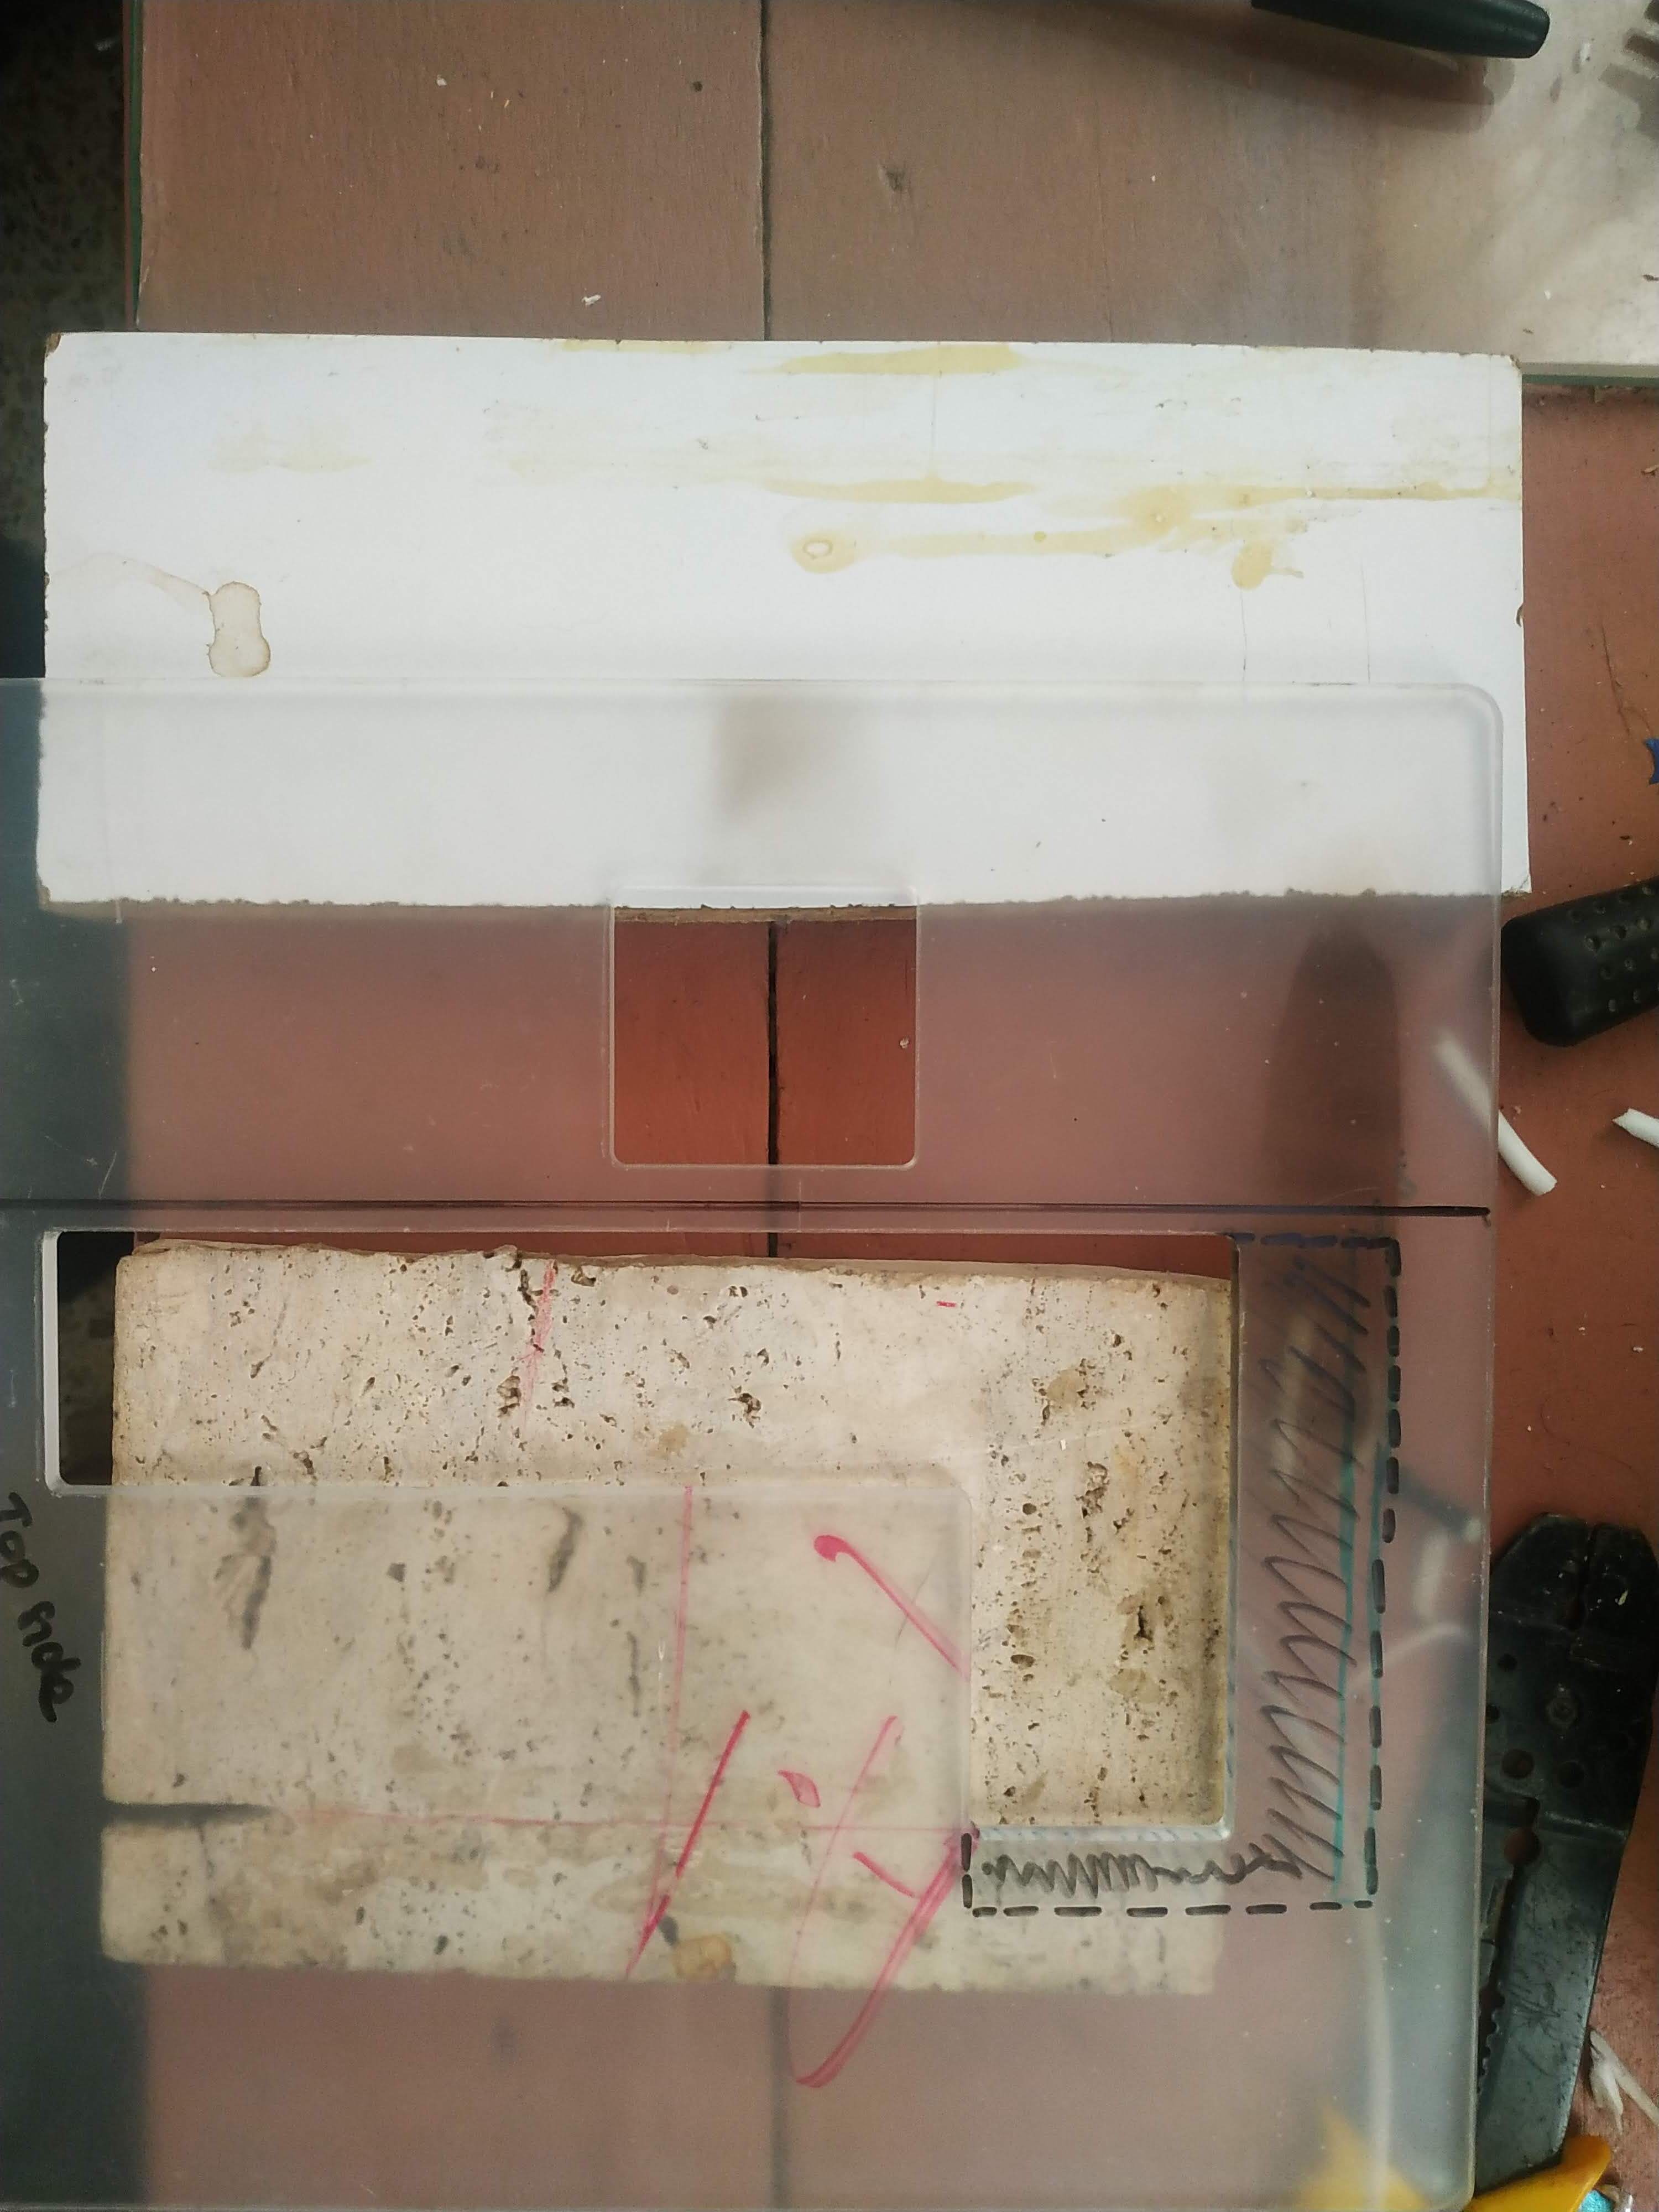
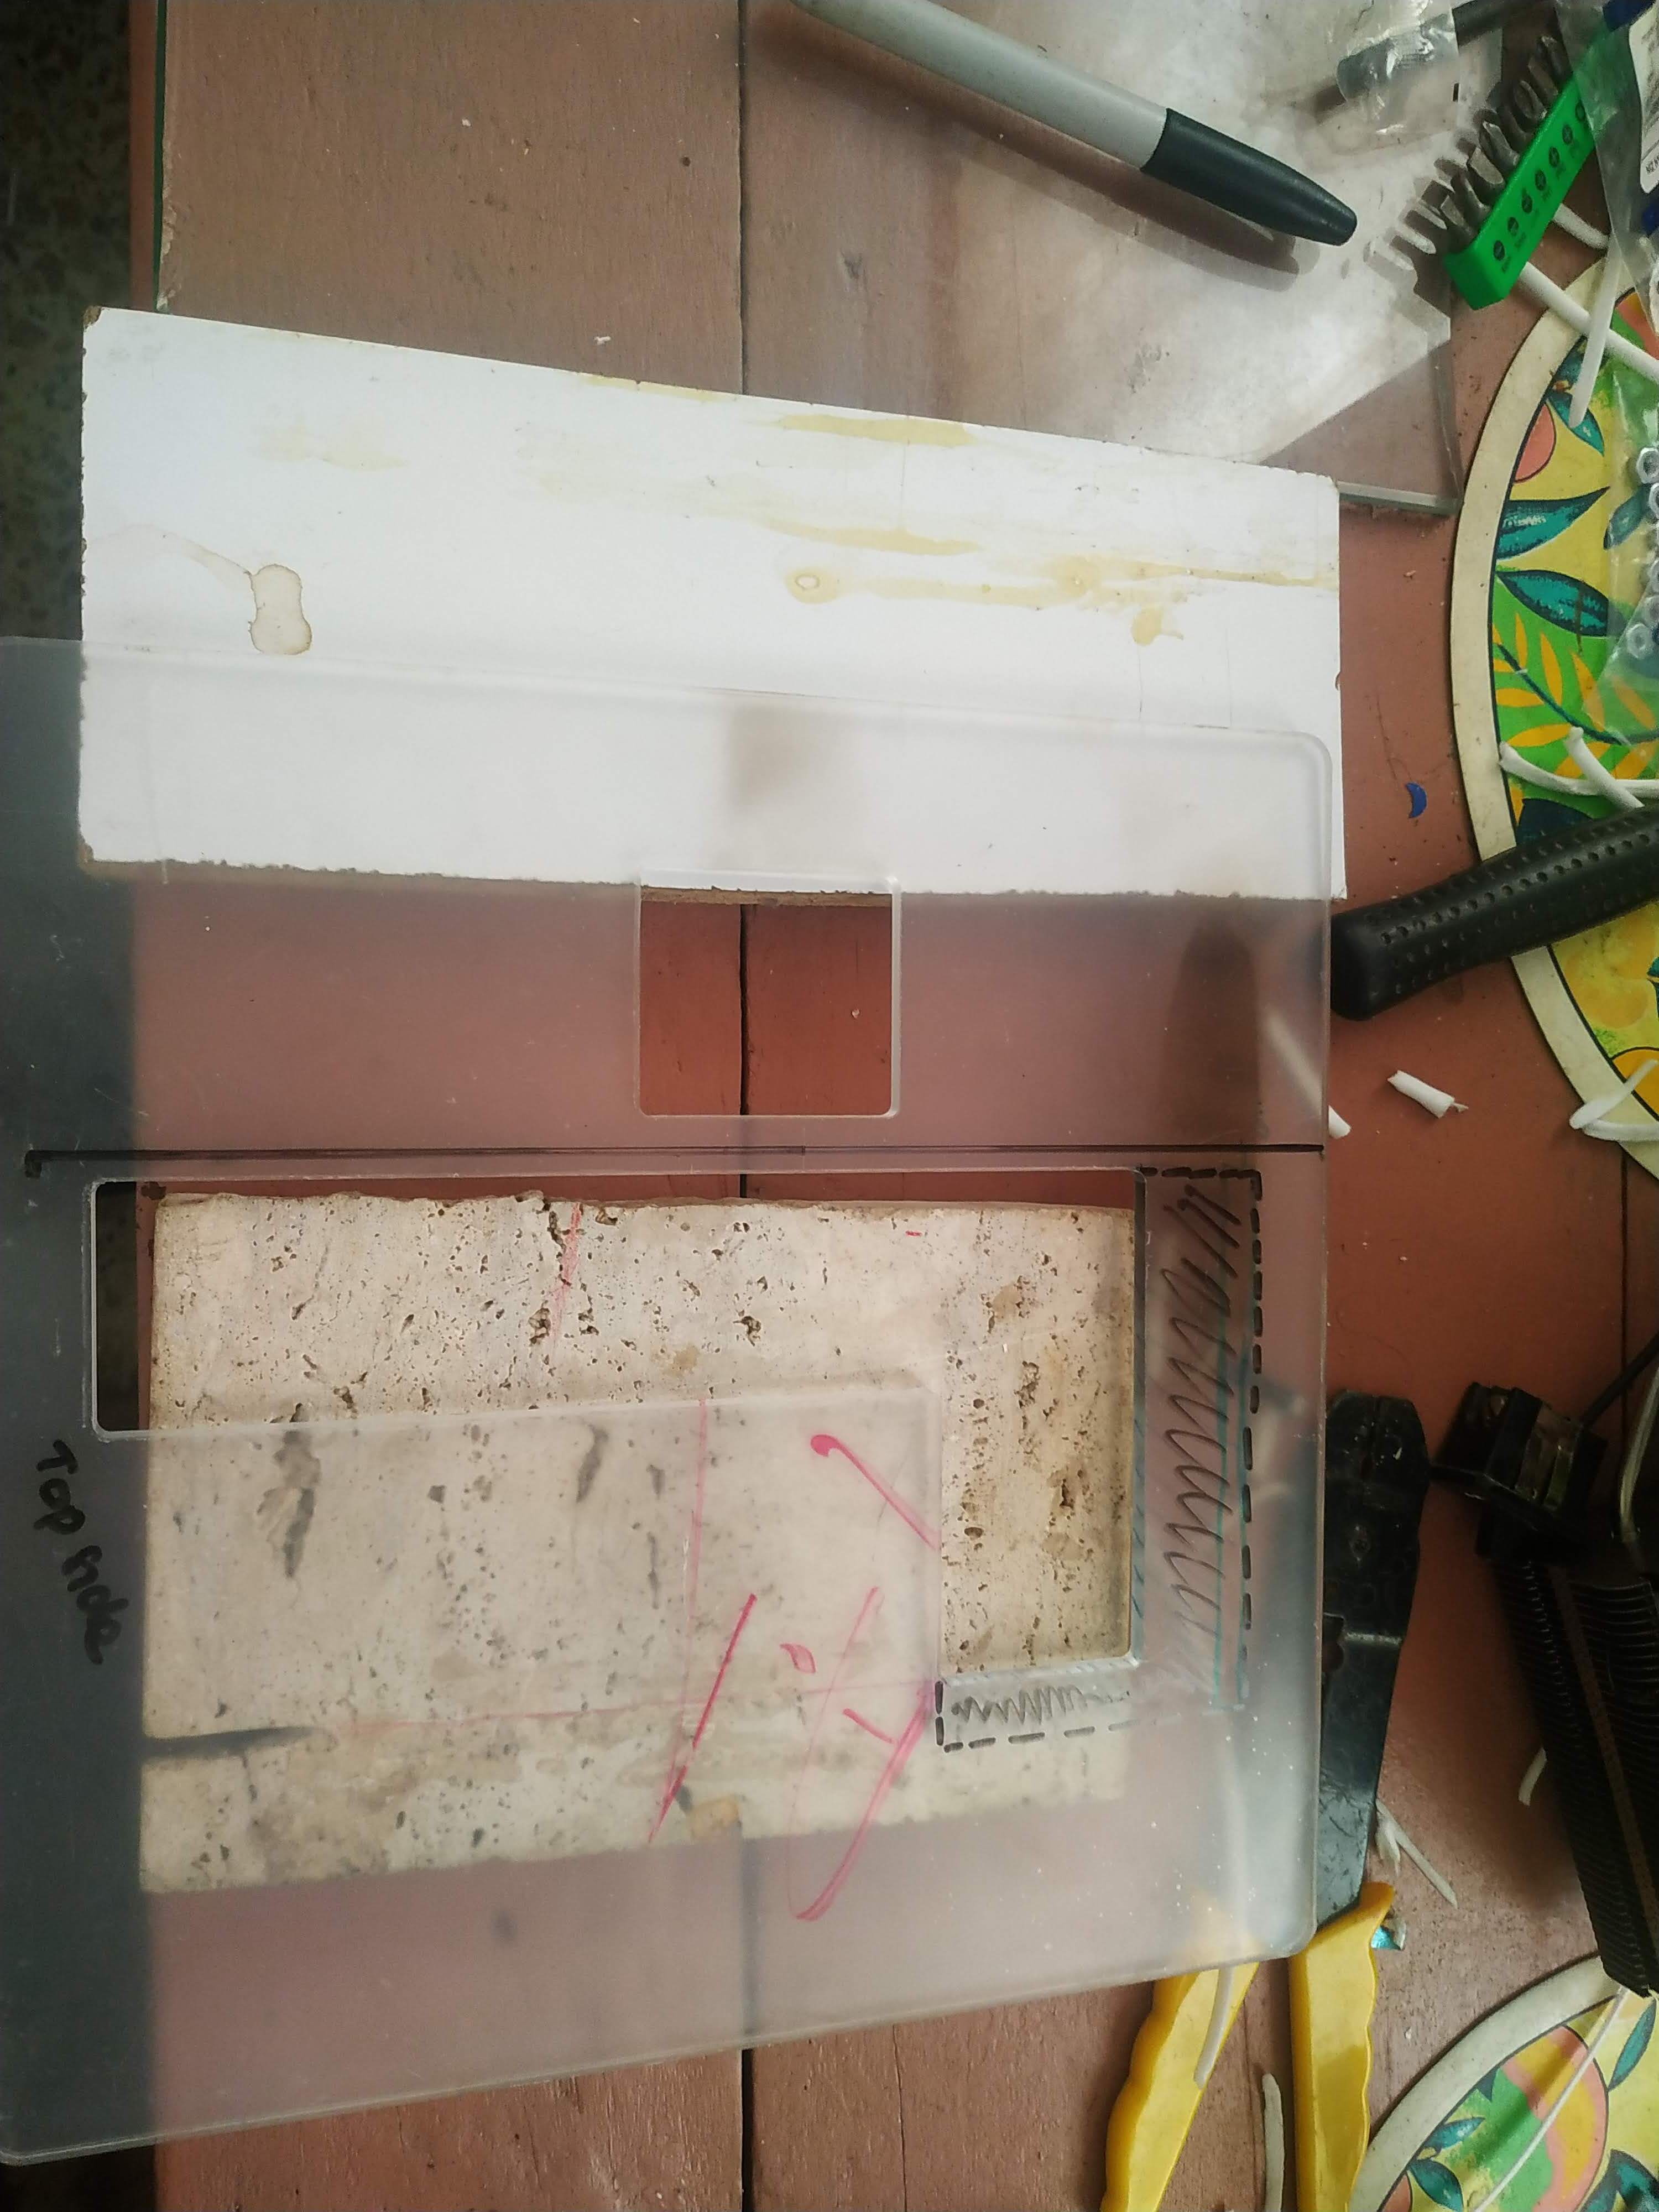
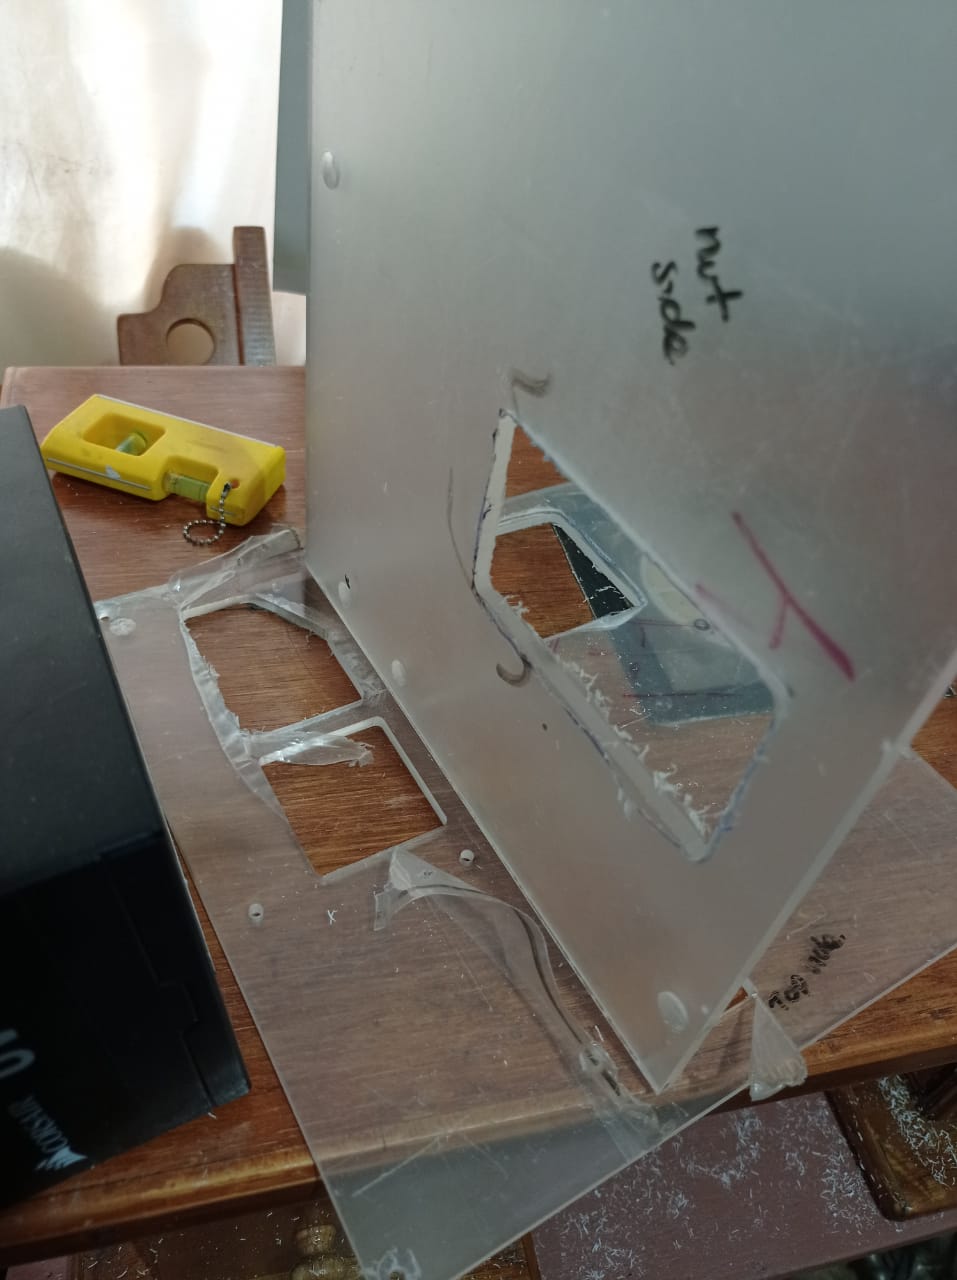
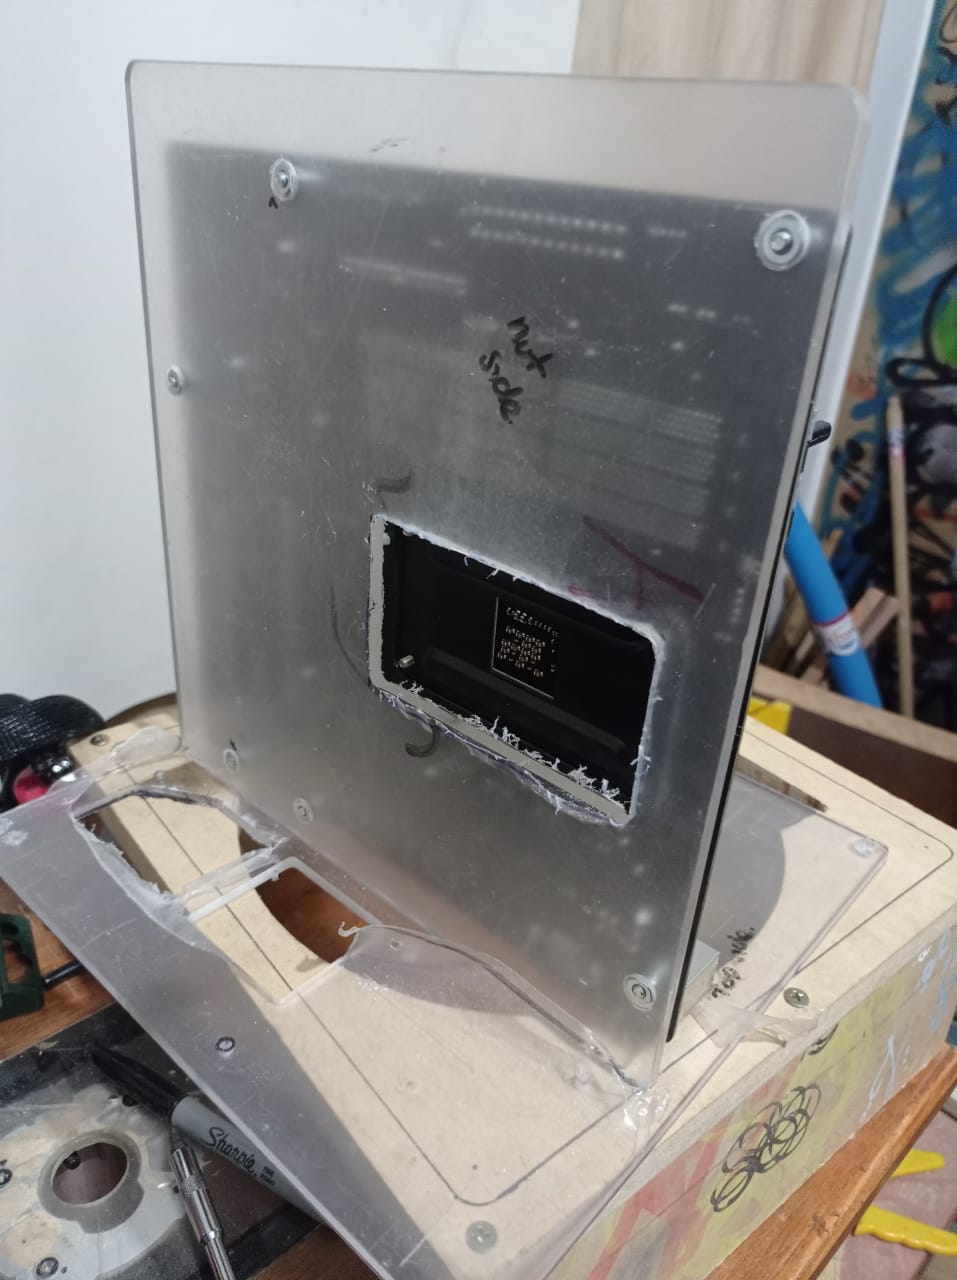
So here are some pics of the pieces i have so far, I had the pieces laser cut to size in plexyglass since i have a shop close by and i can get them for 5 bucks a piece ( they also look really cool… glassy hehe).
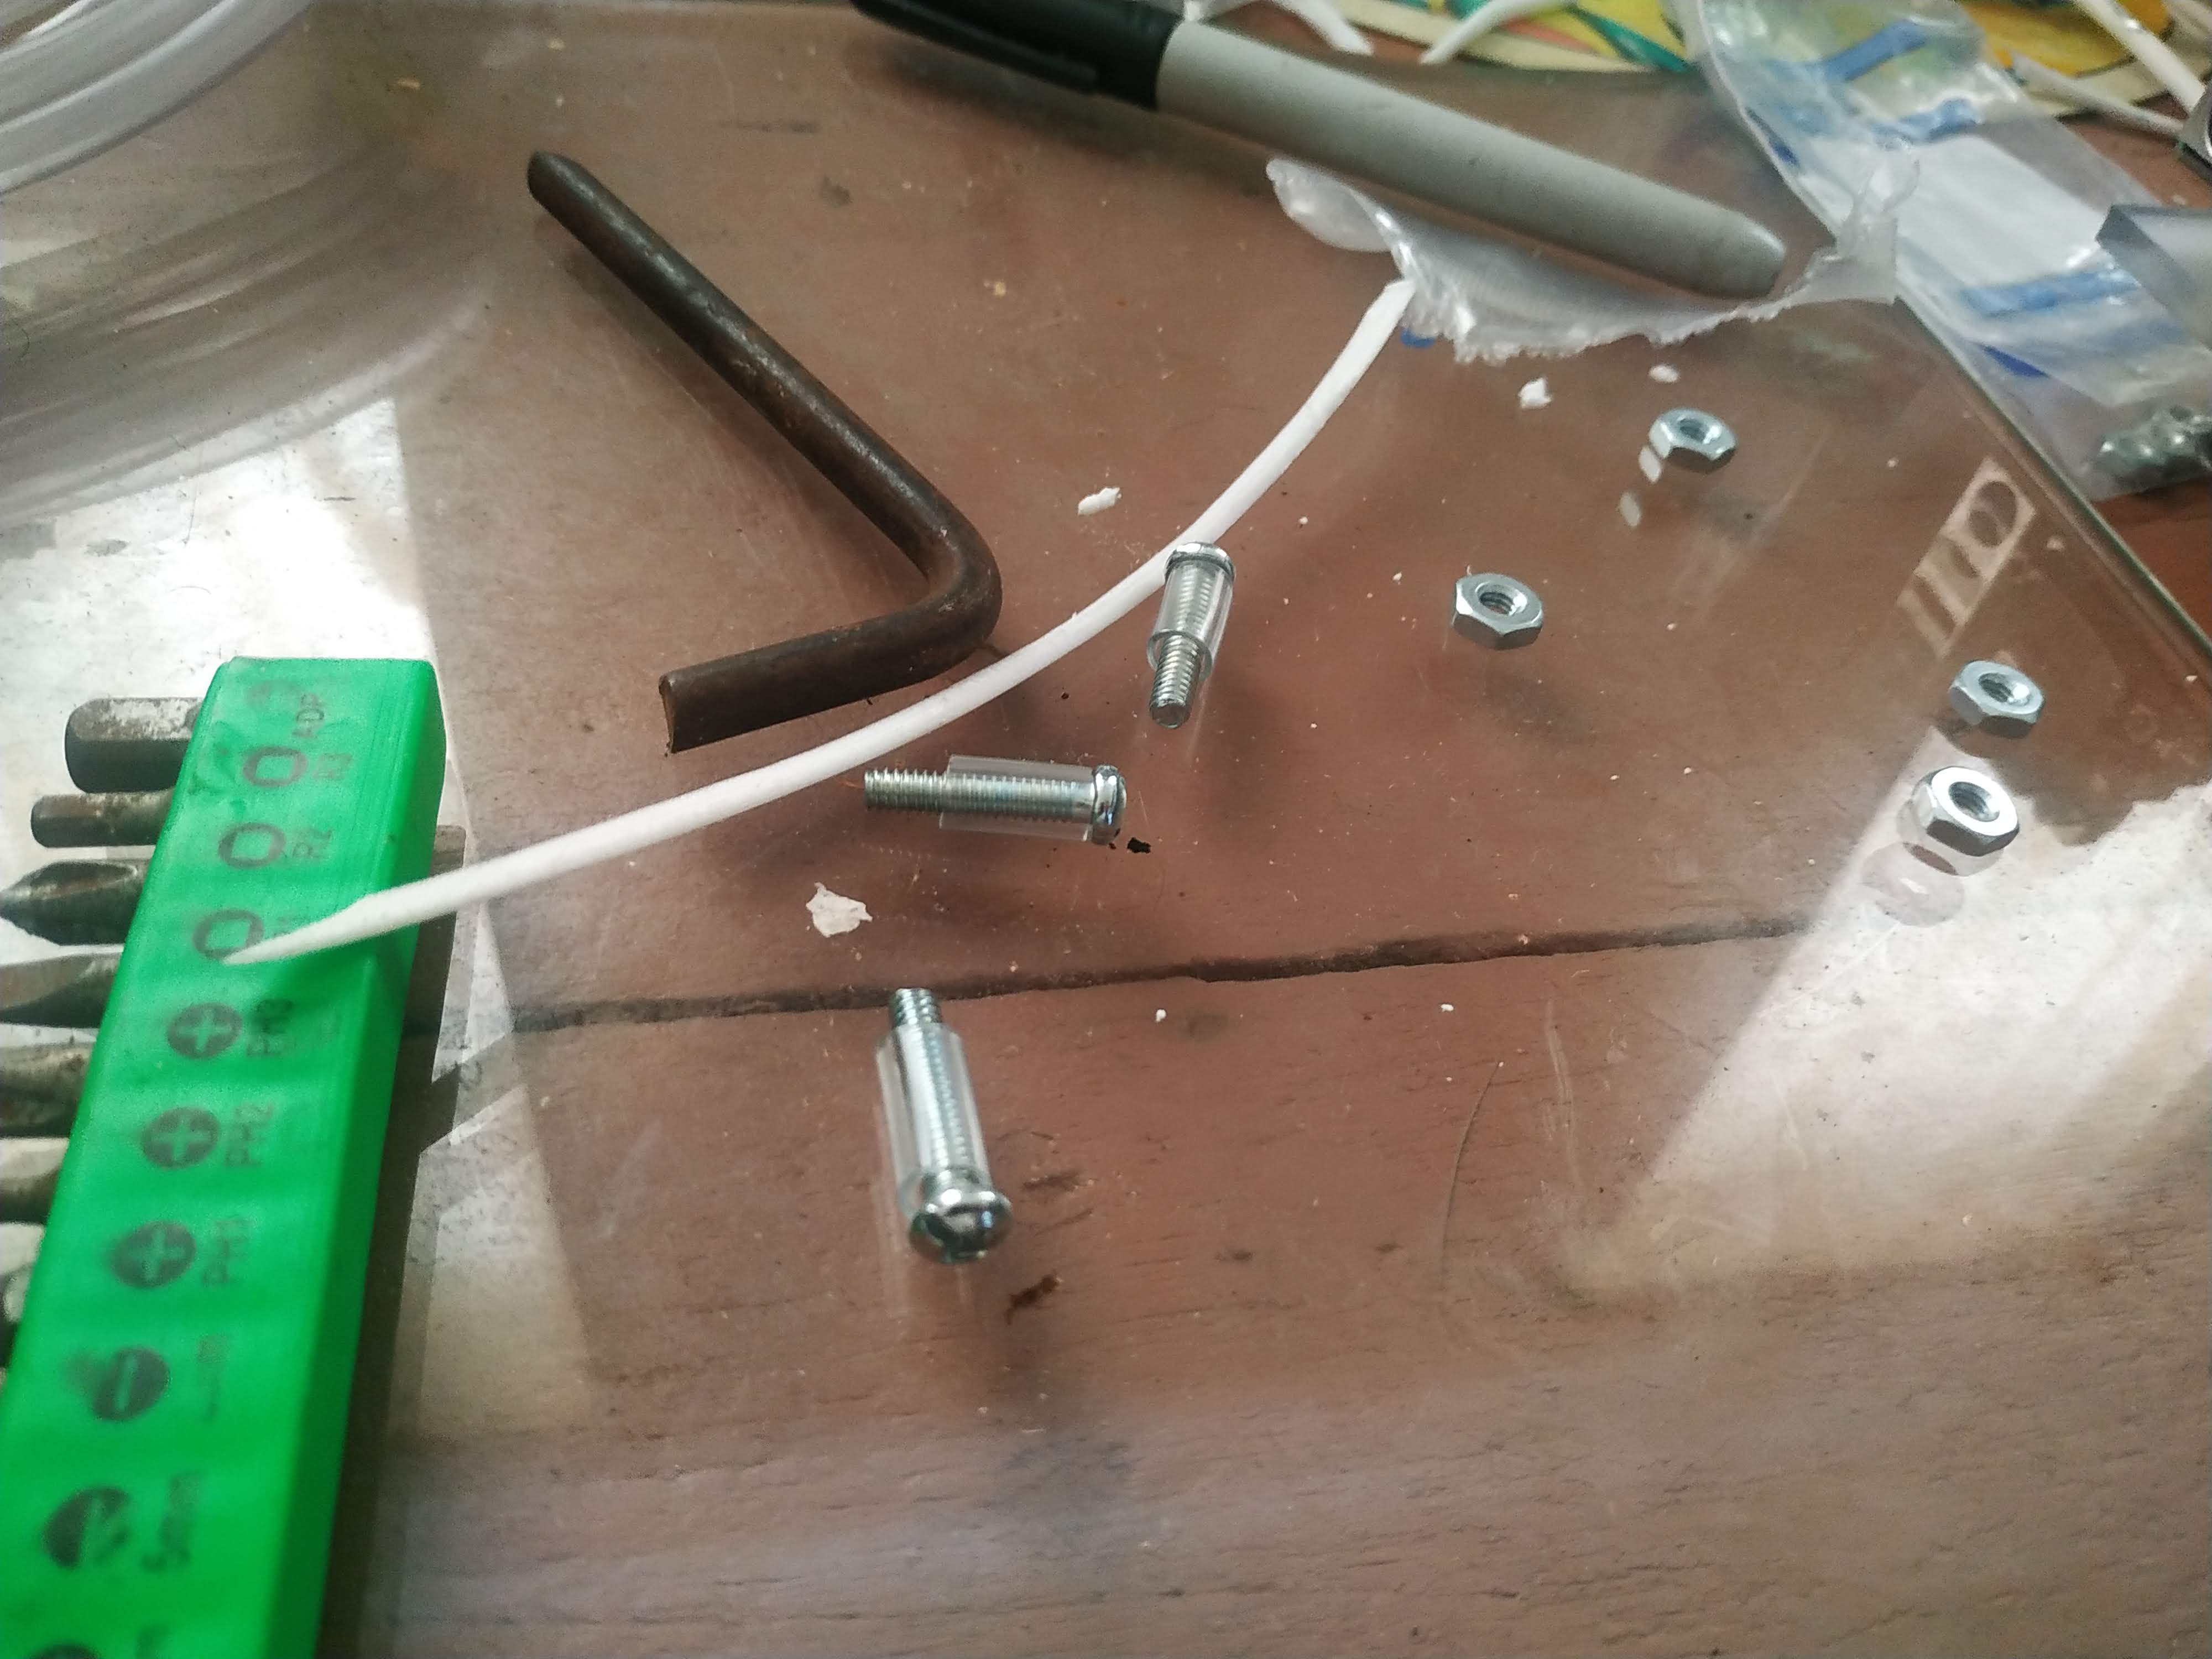
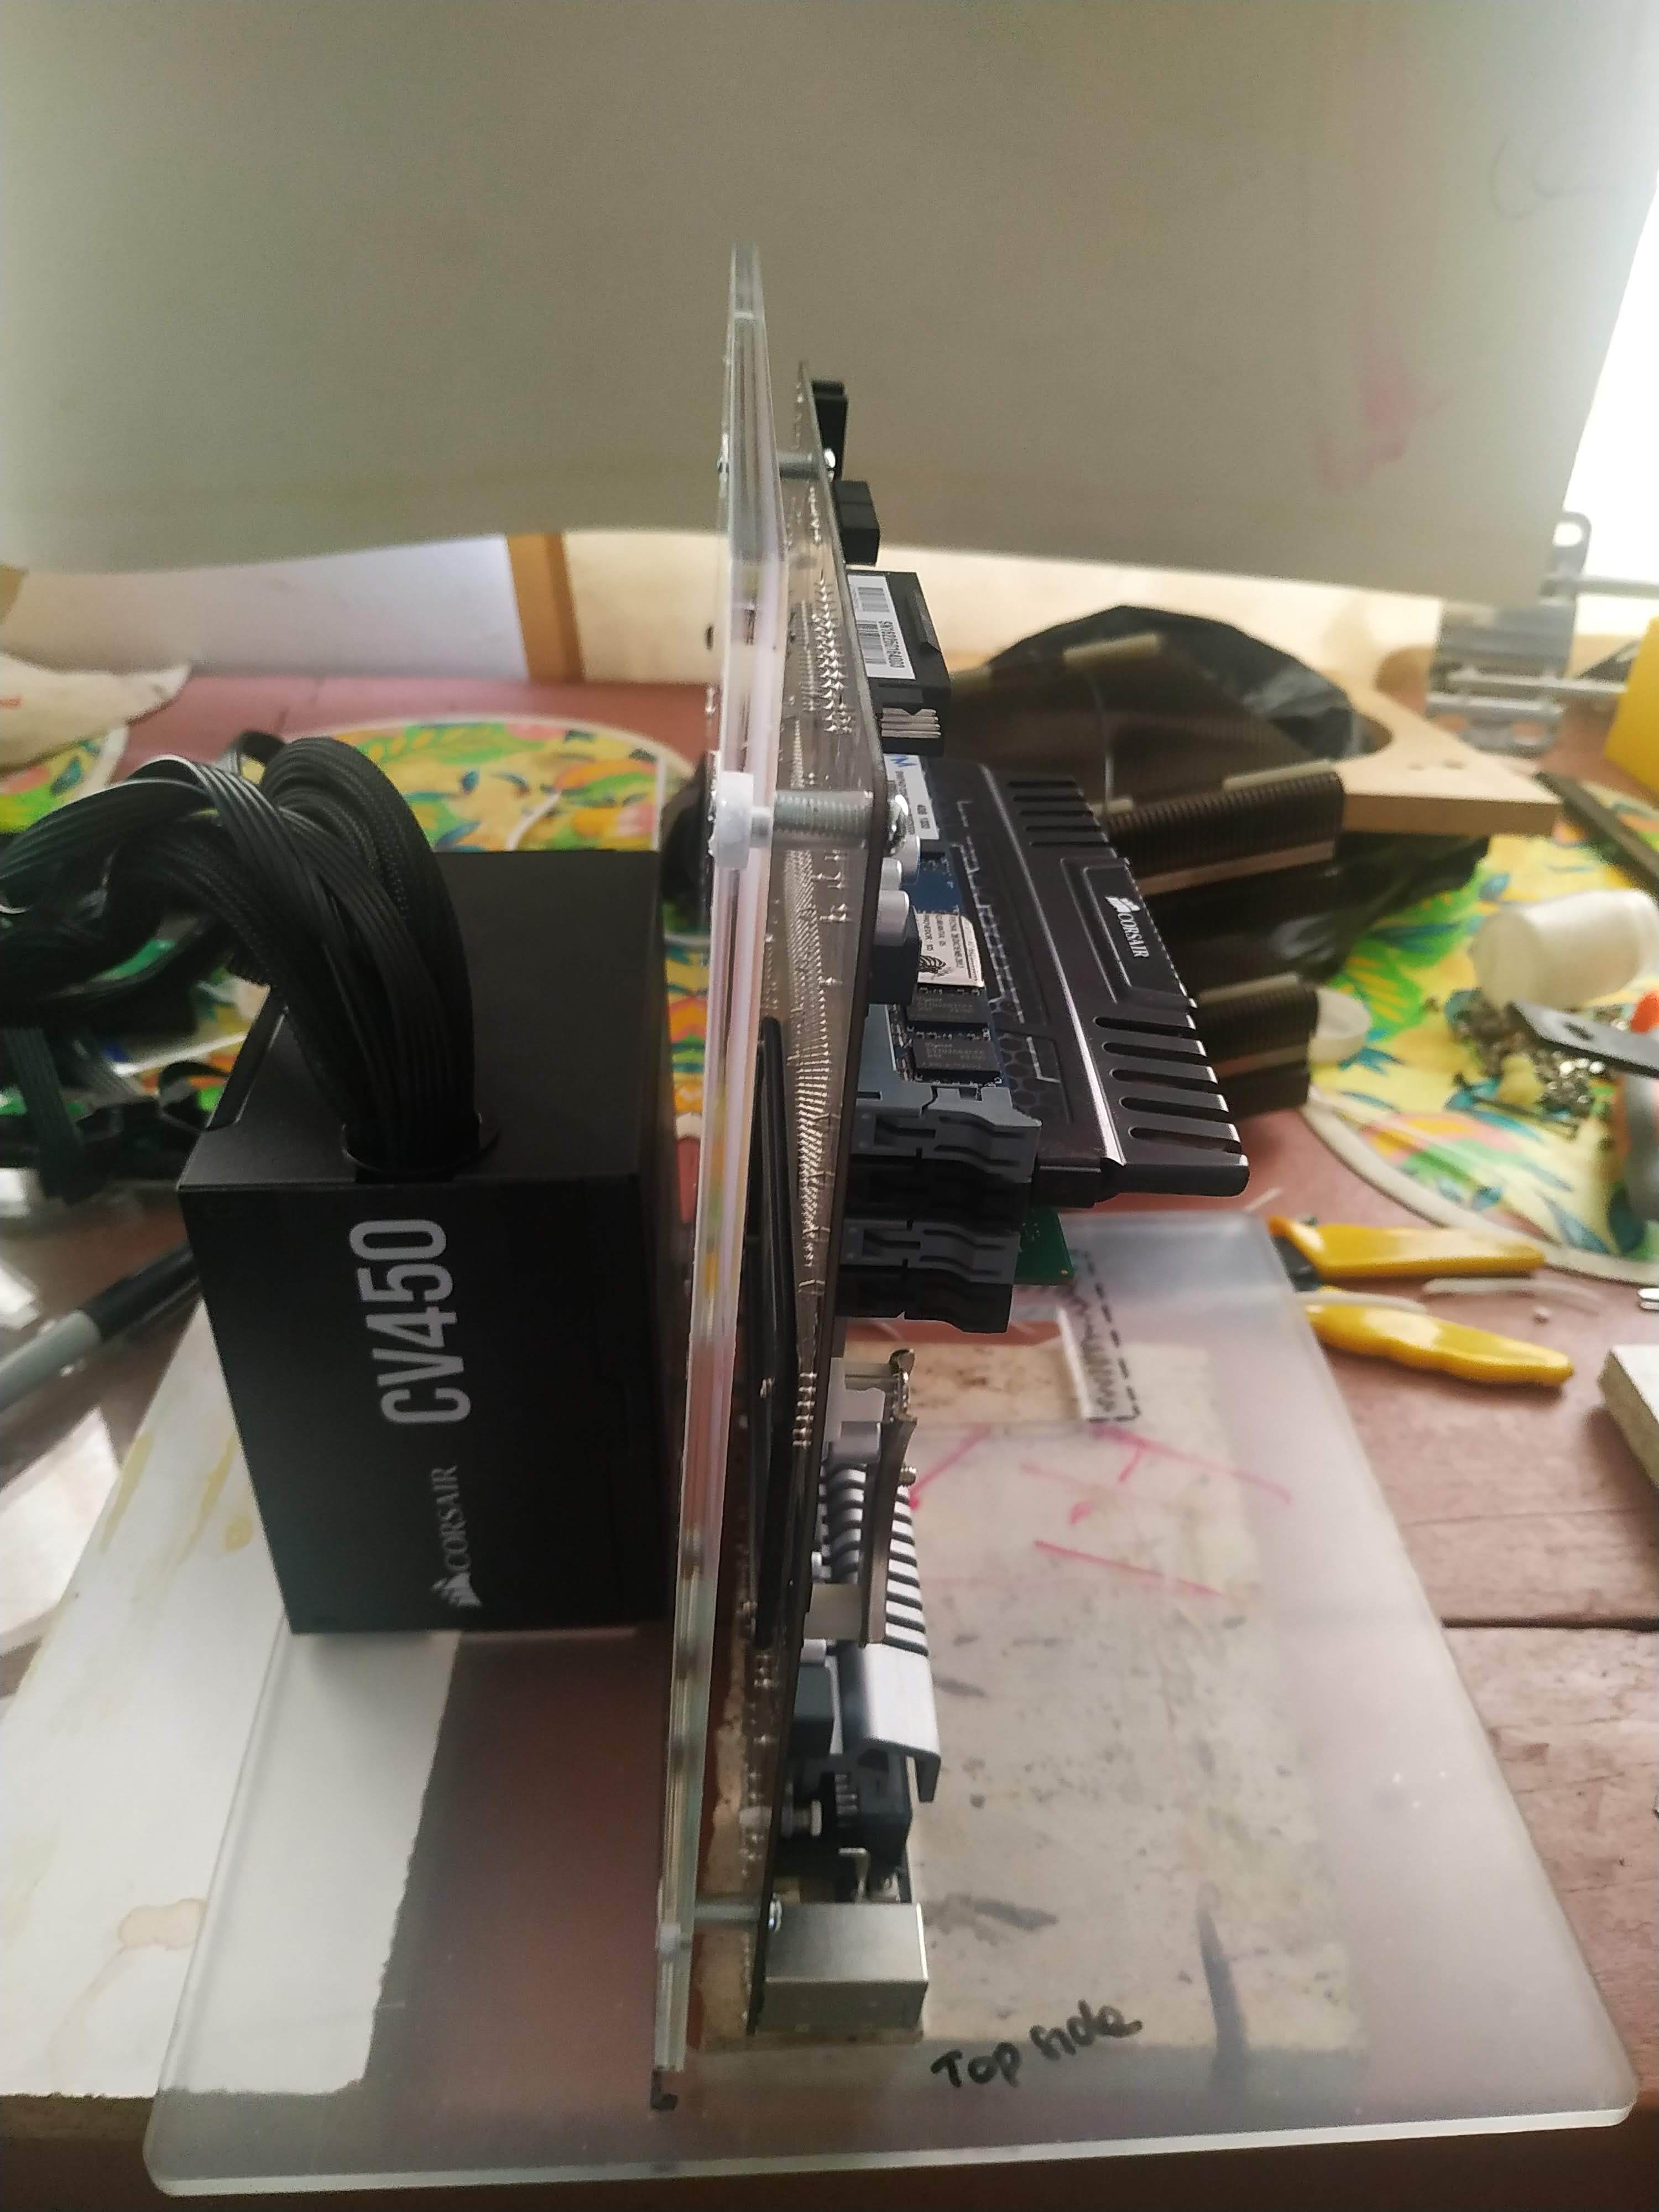
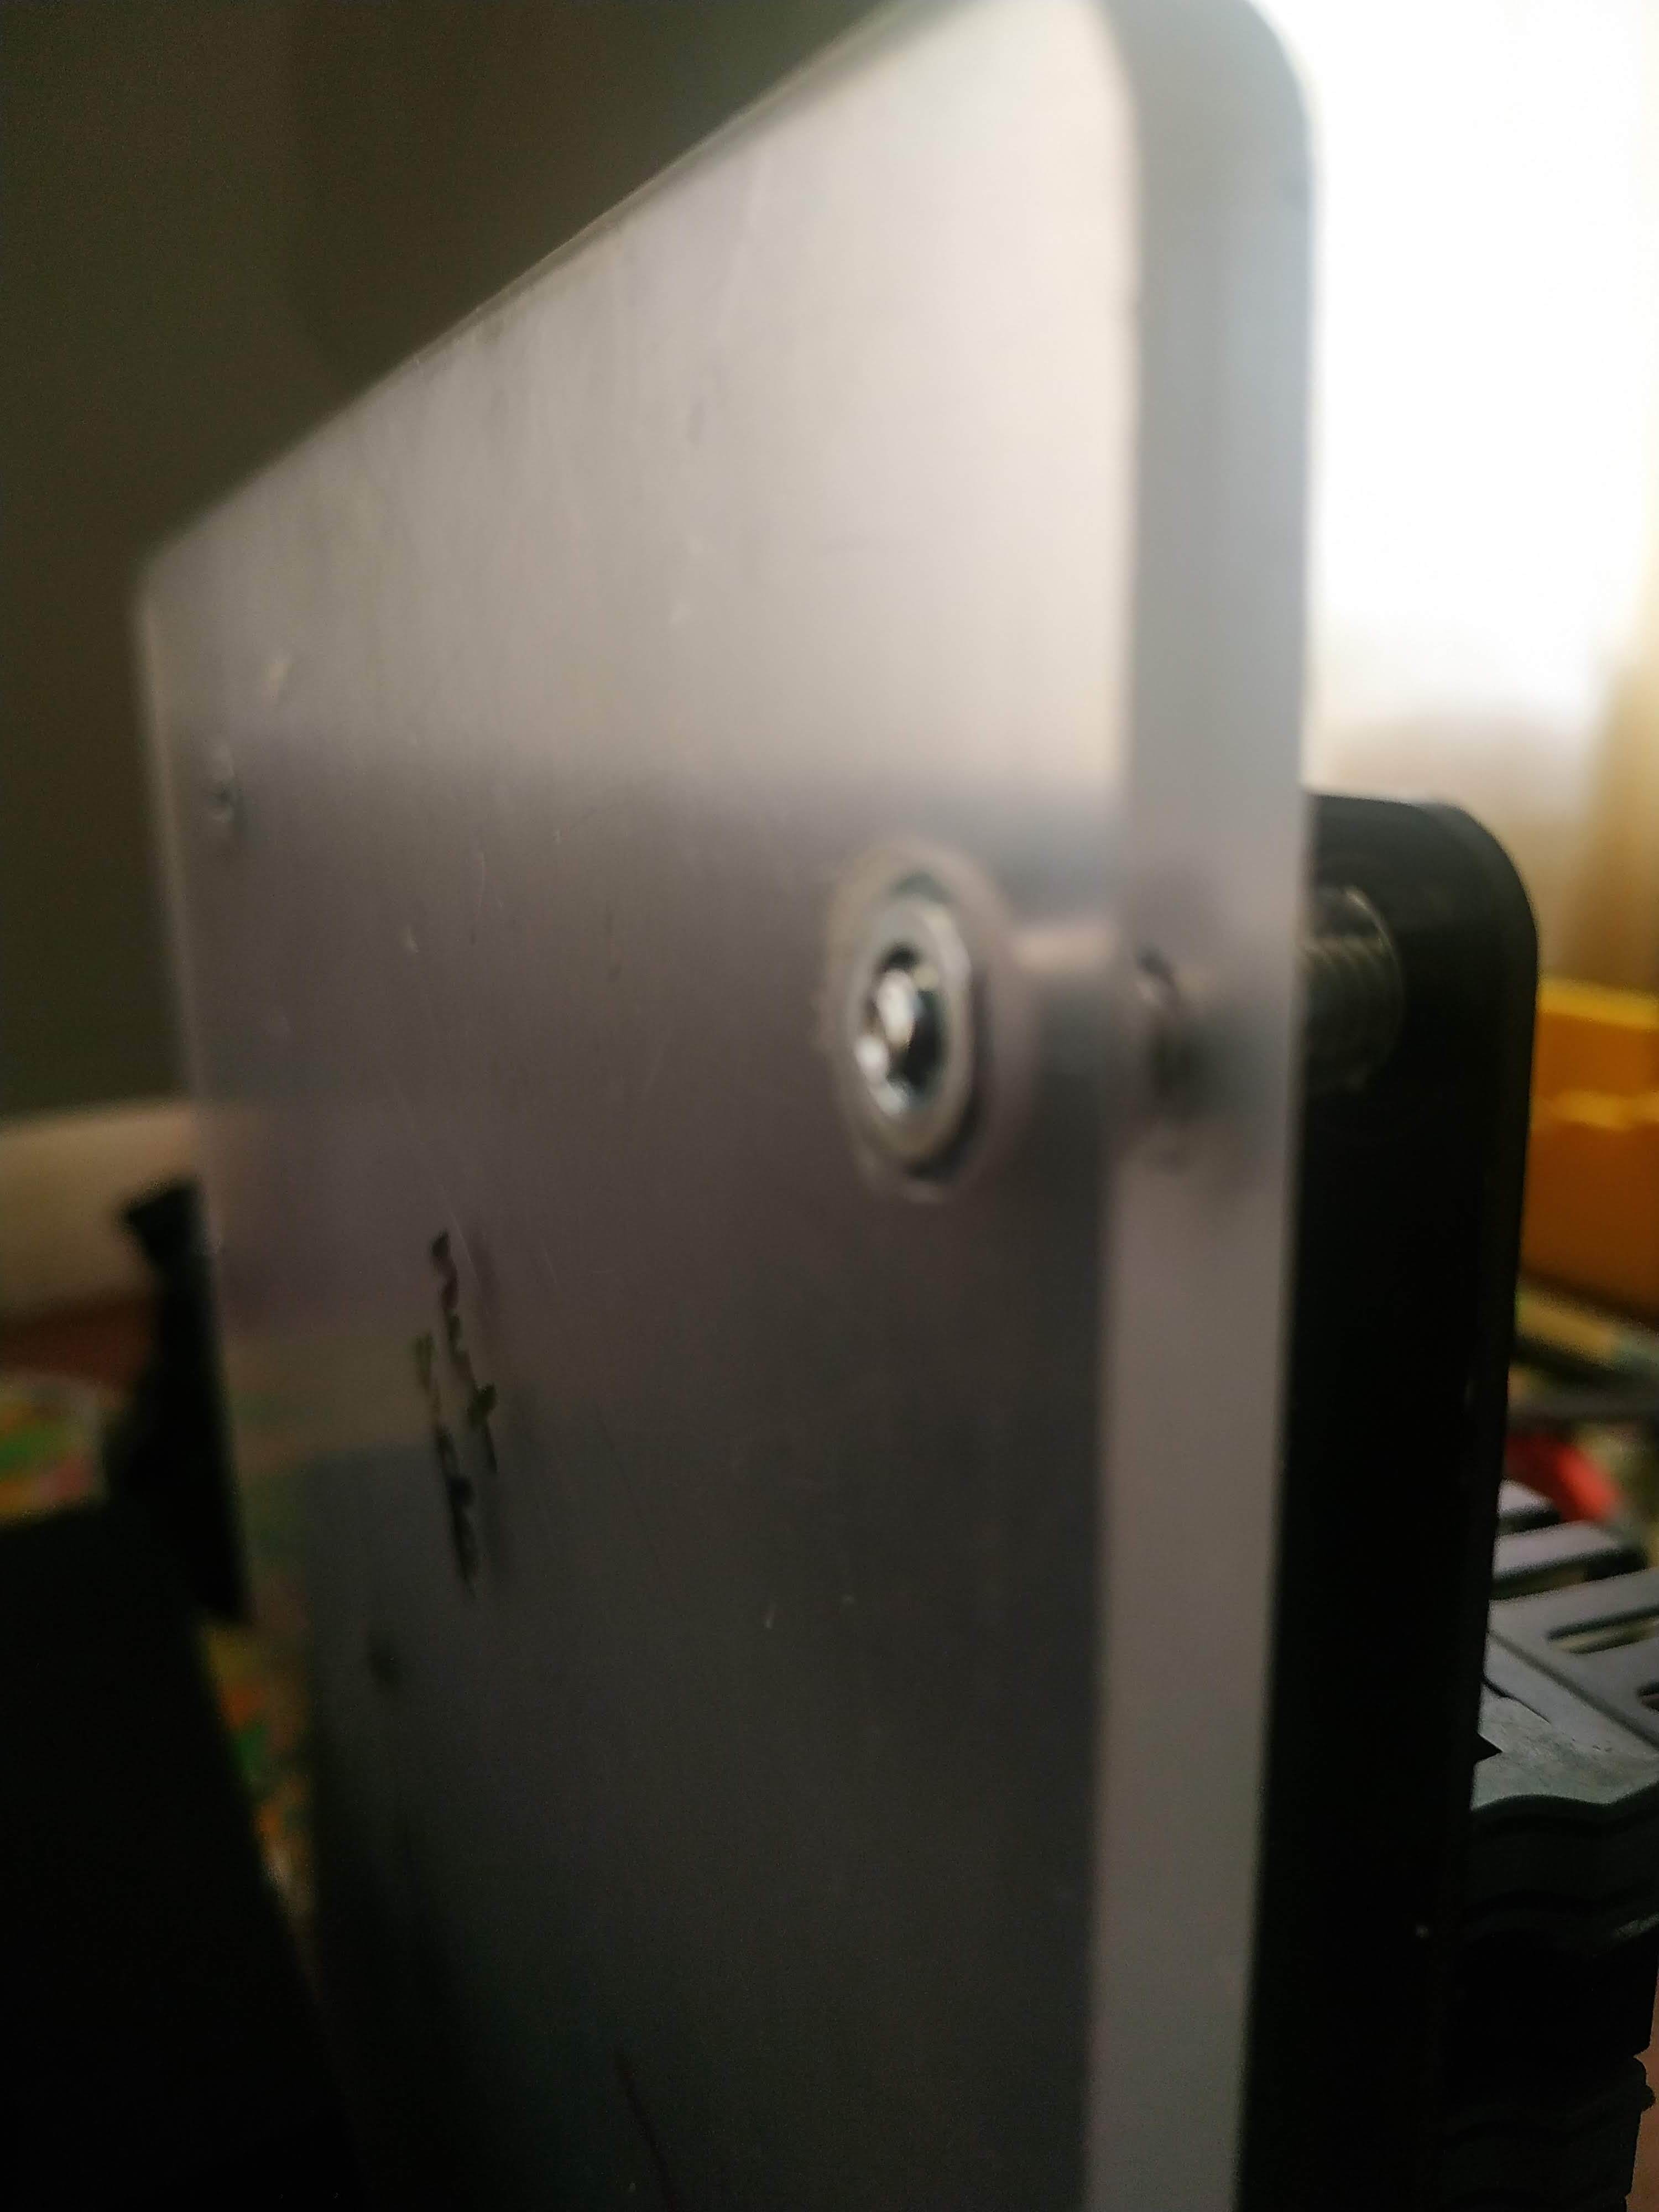
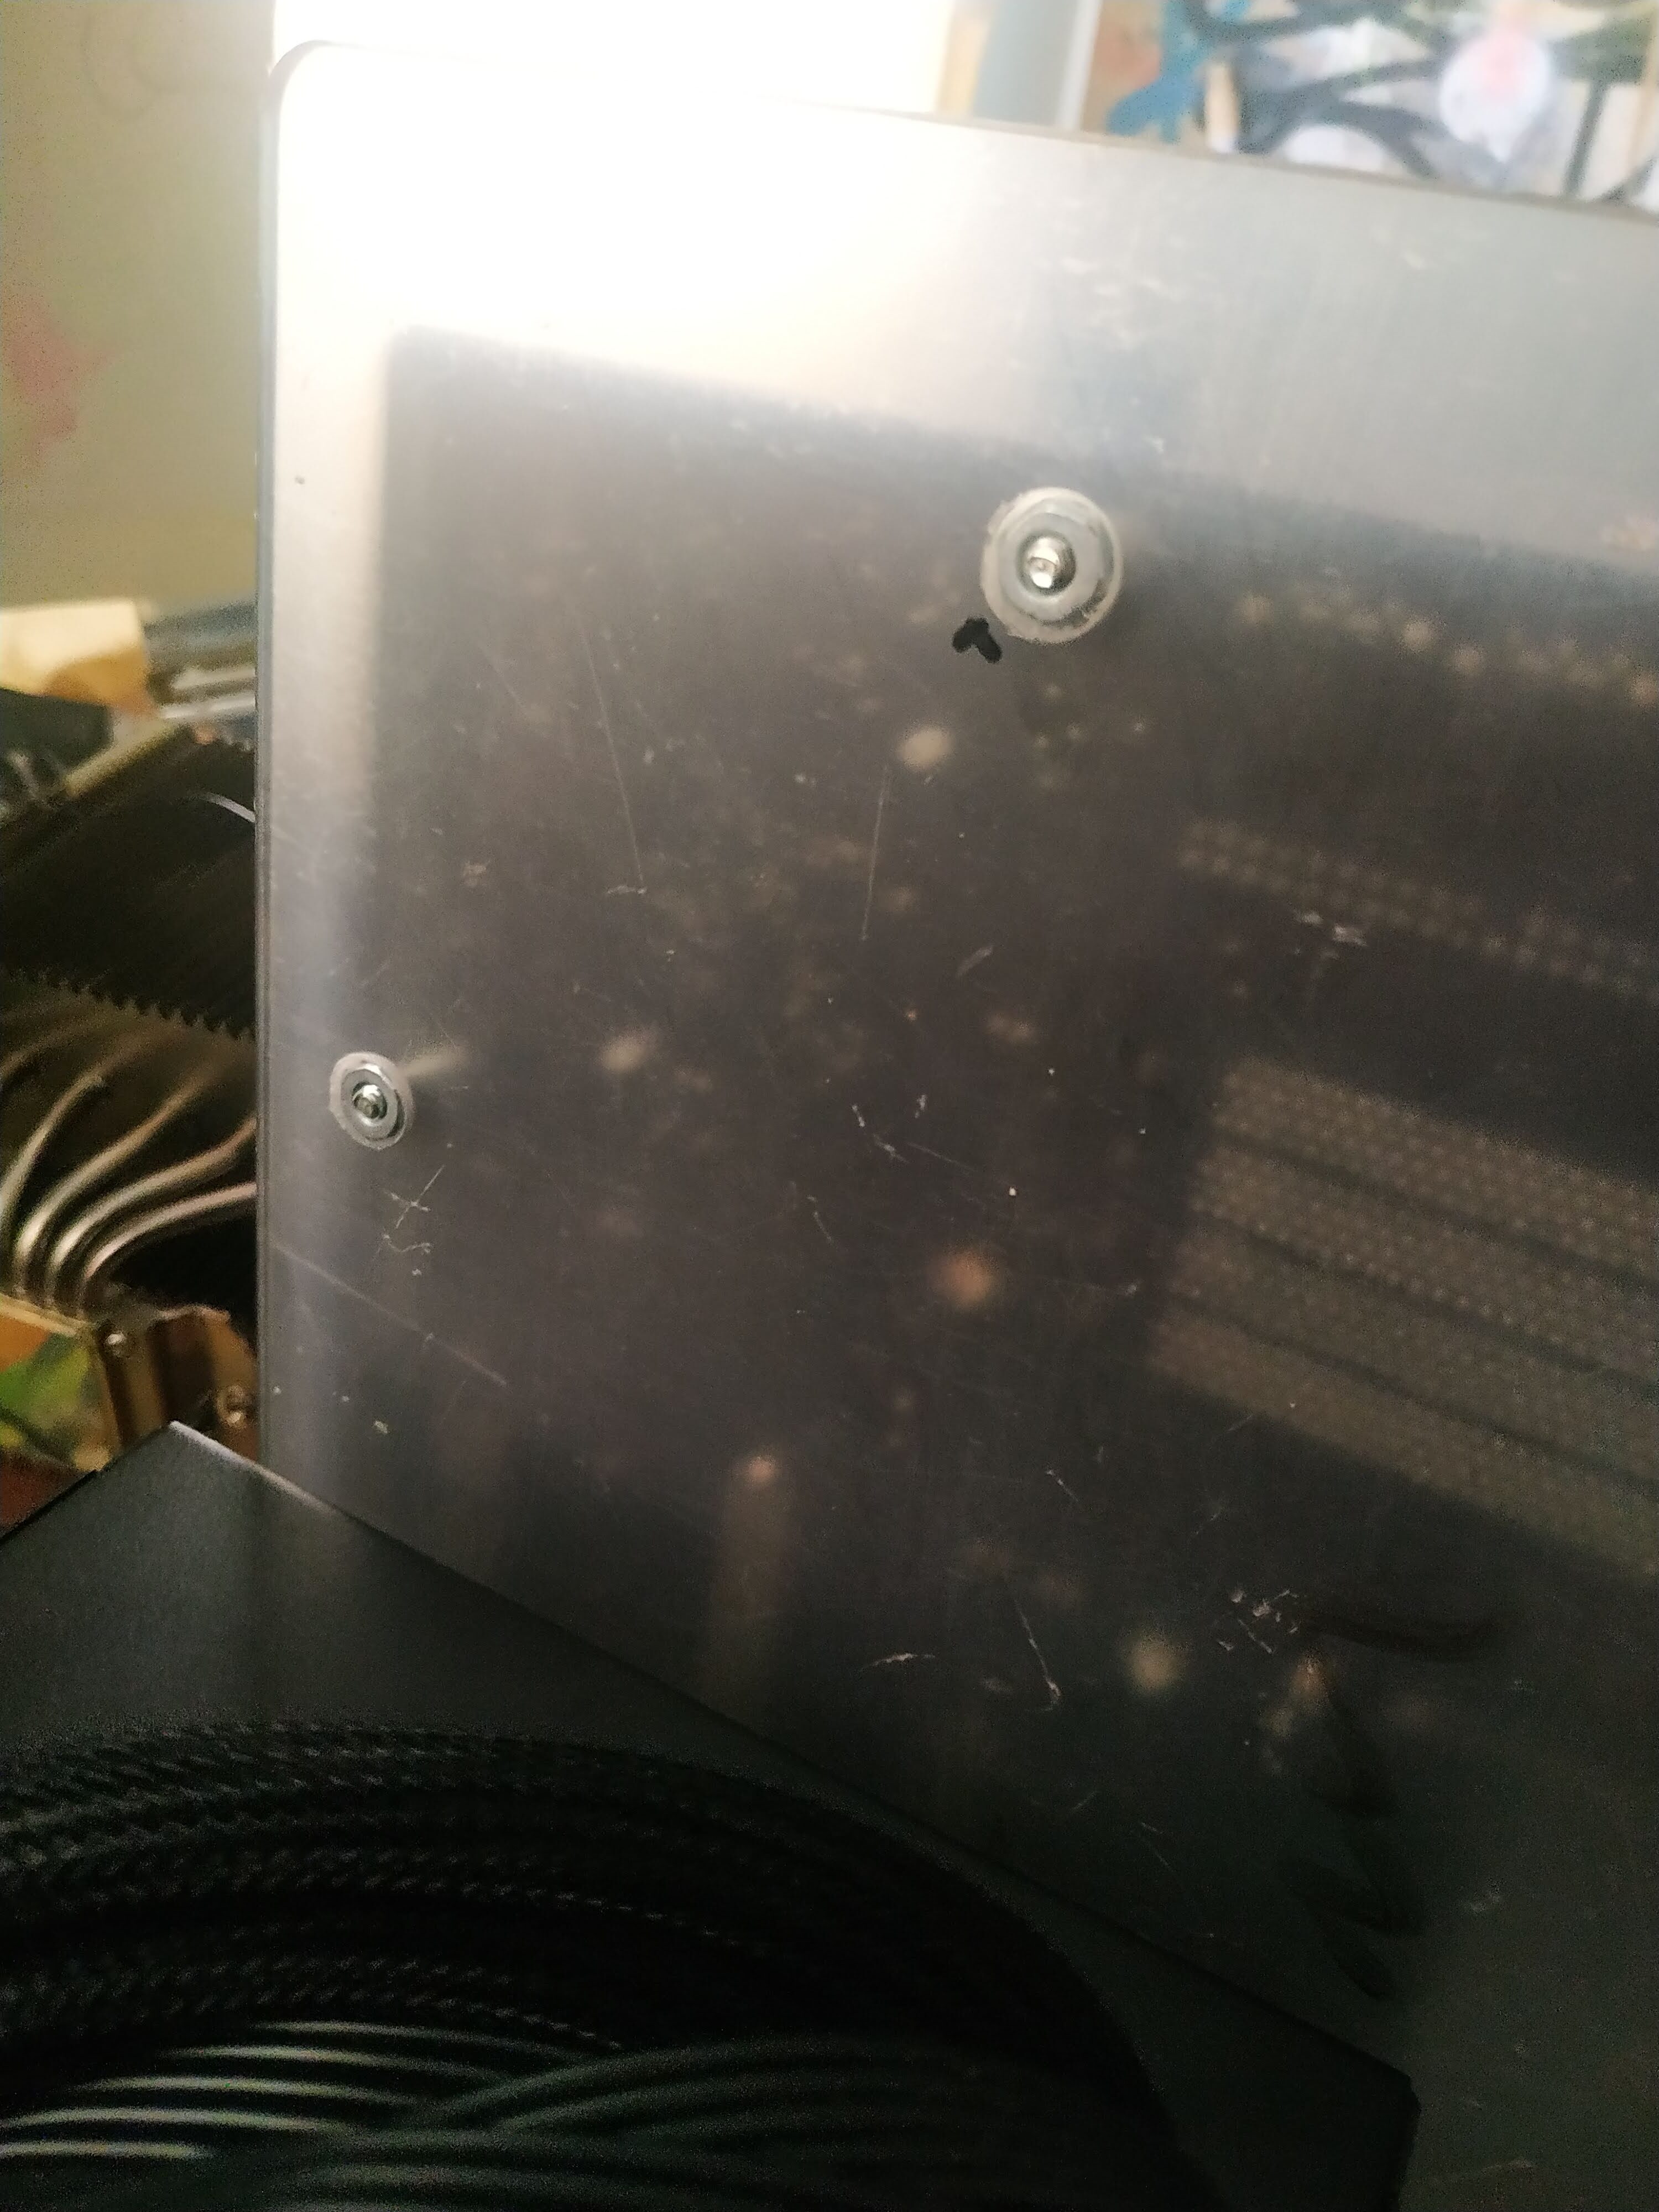
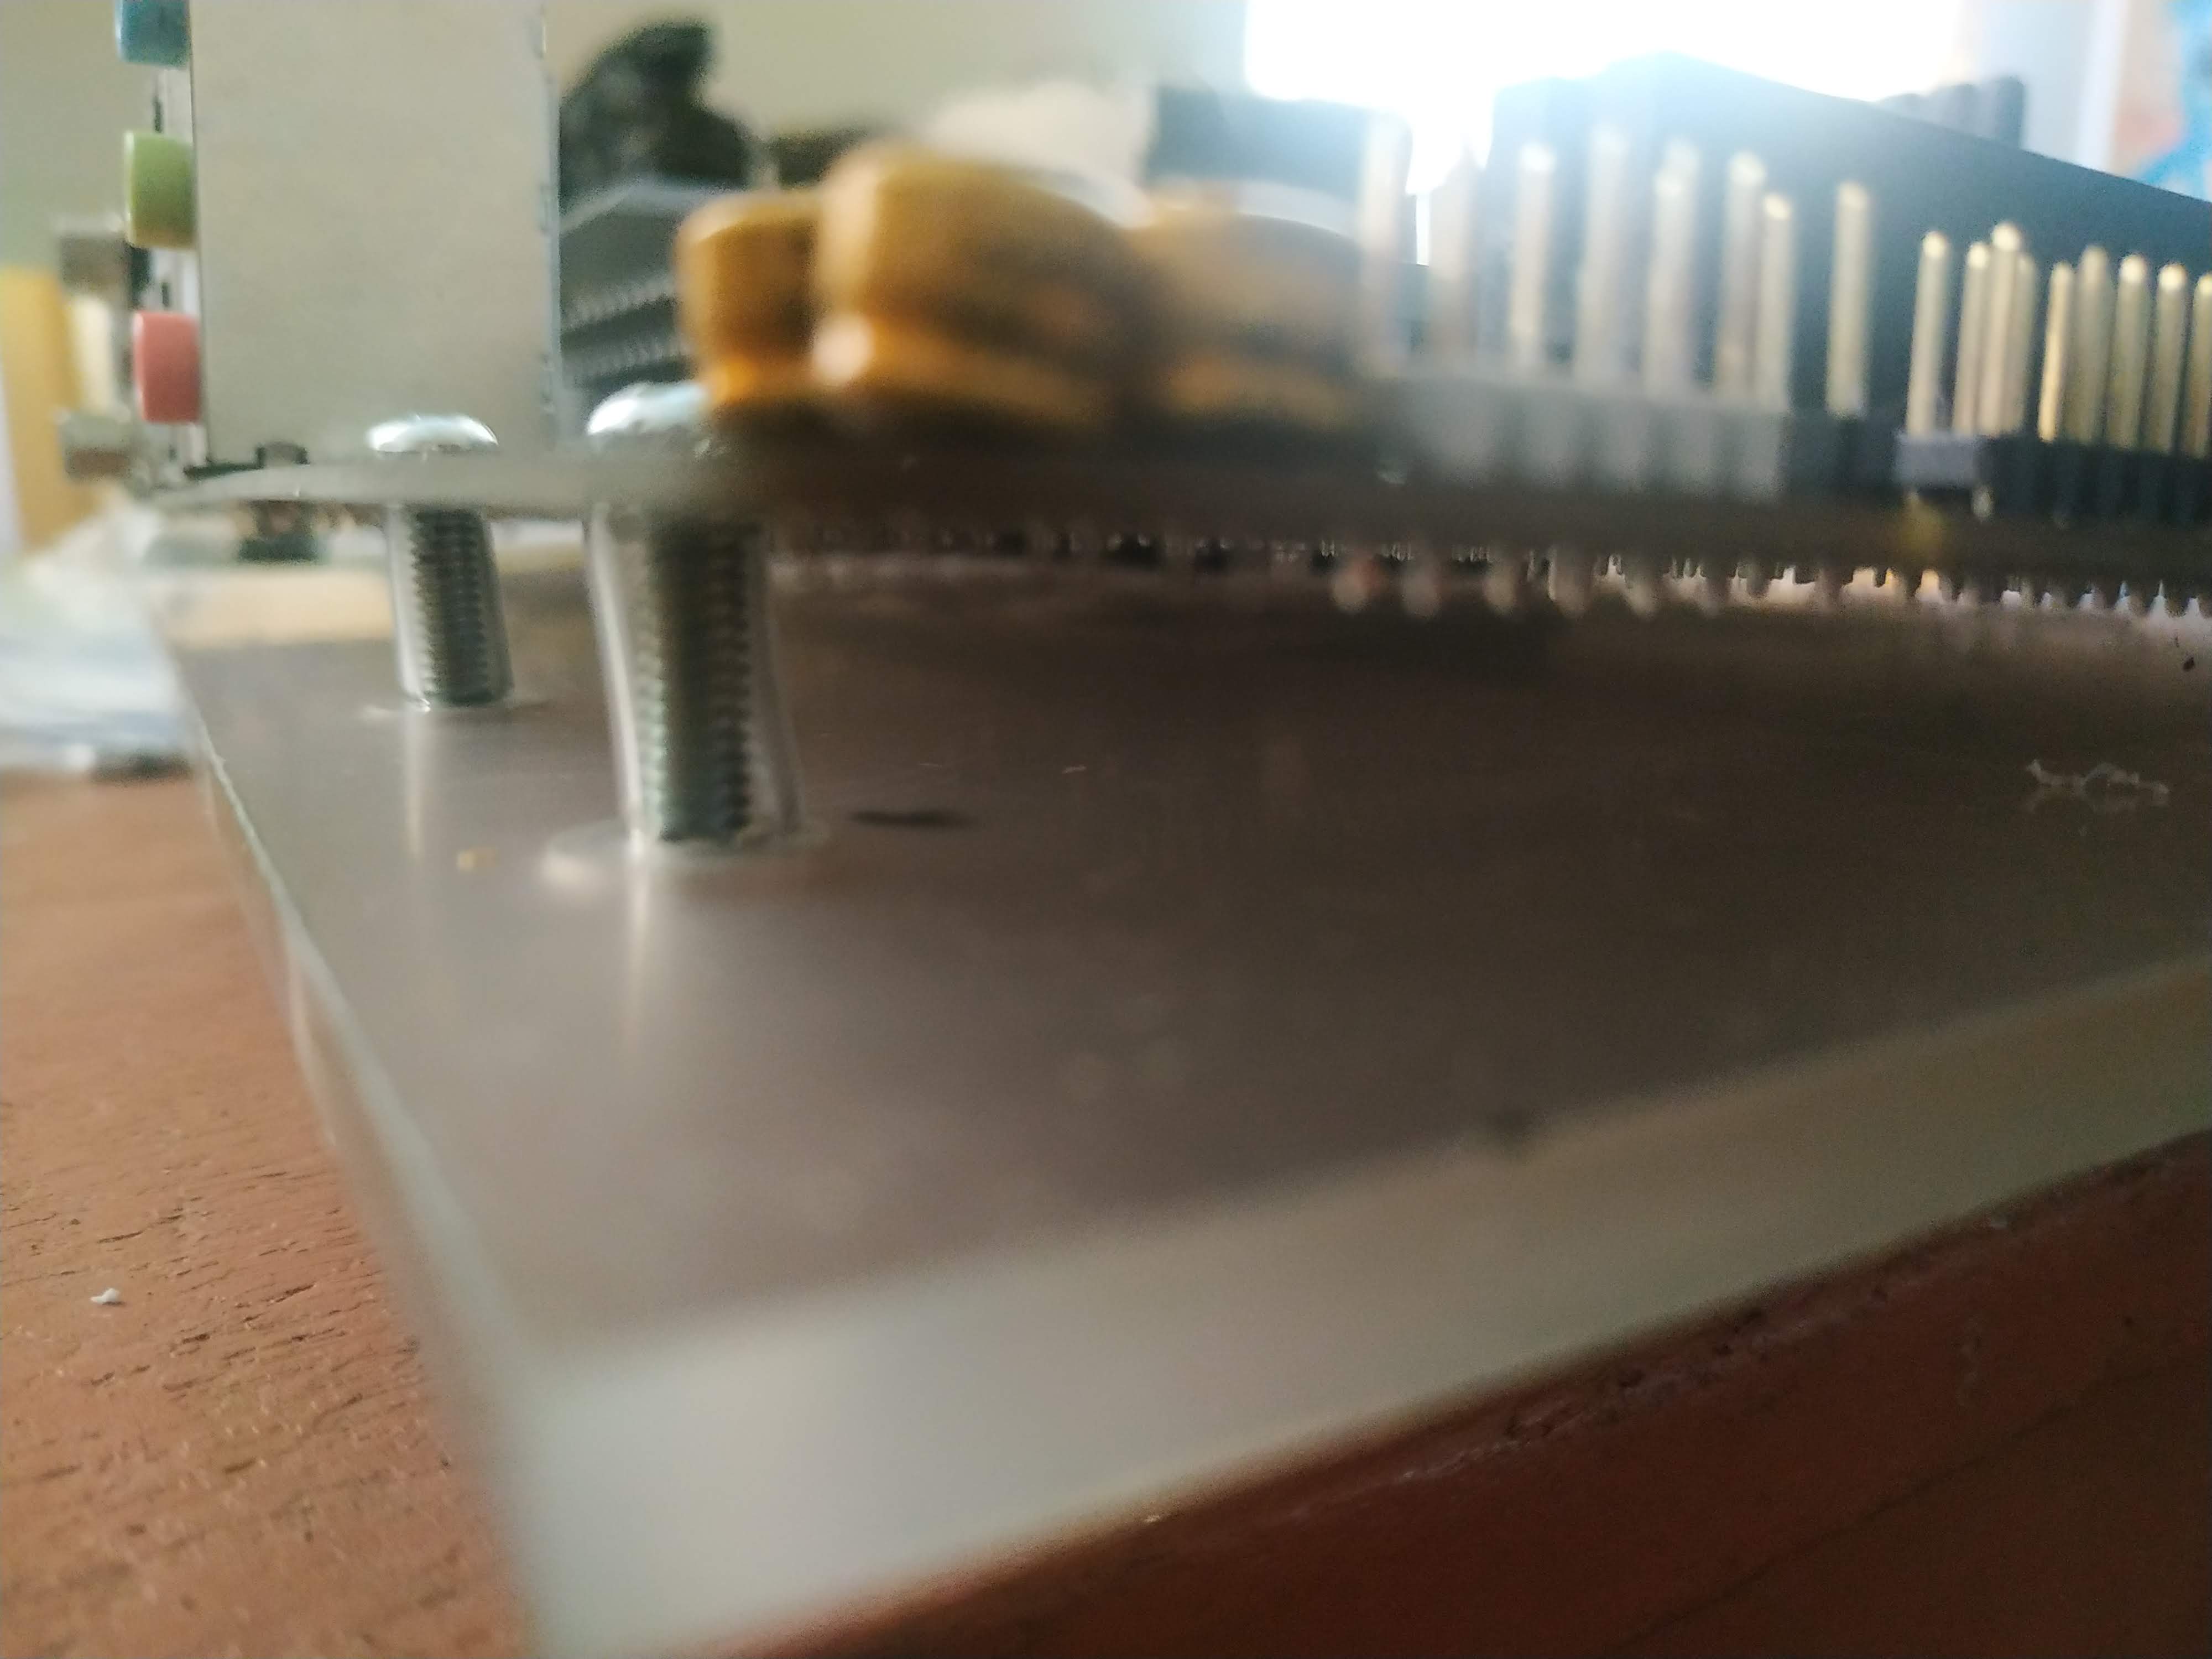
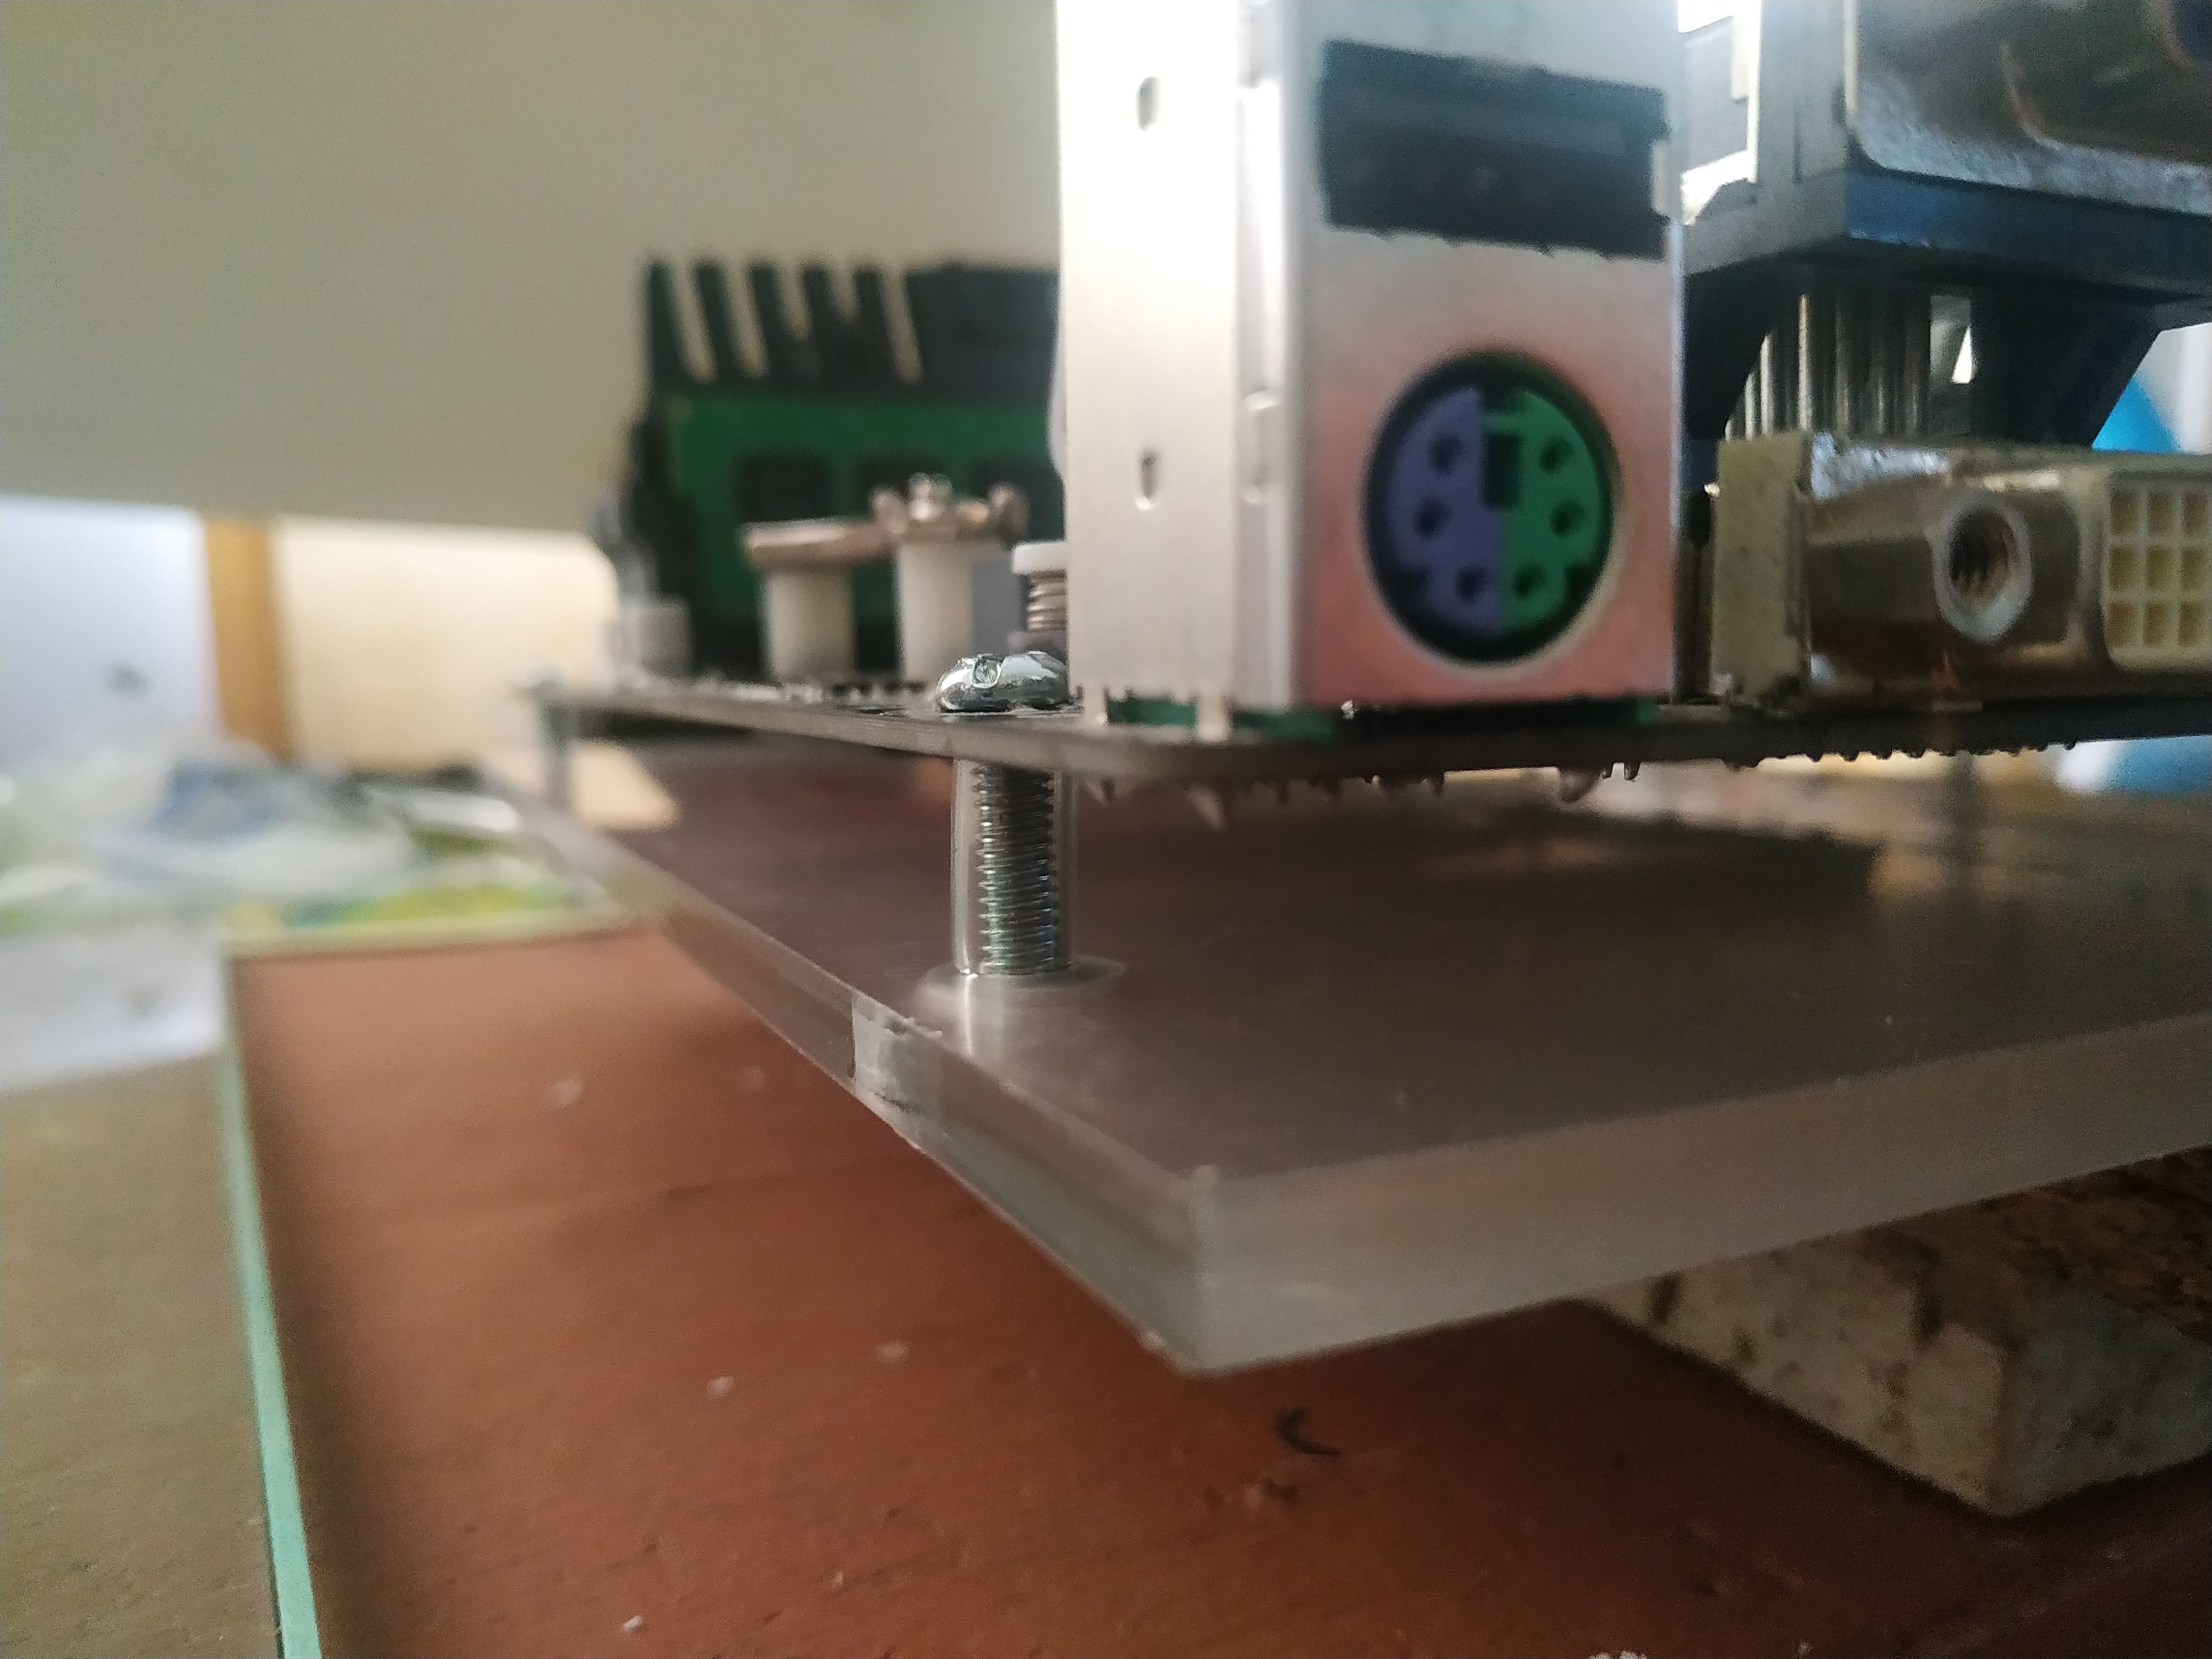
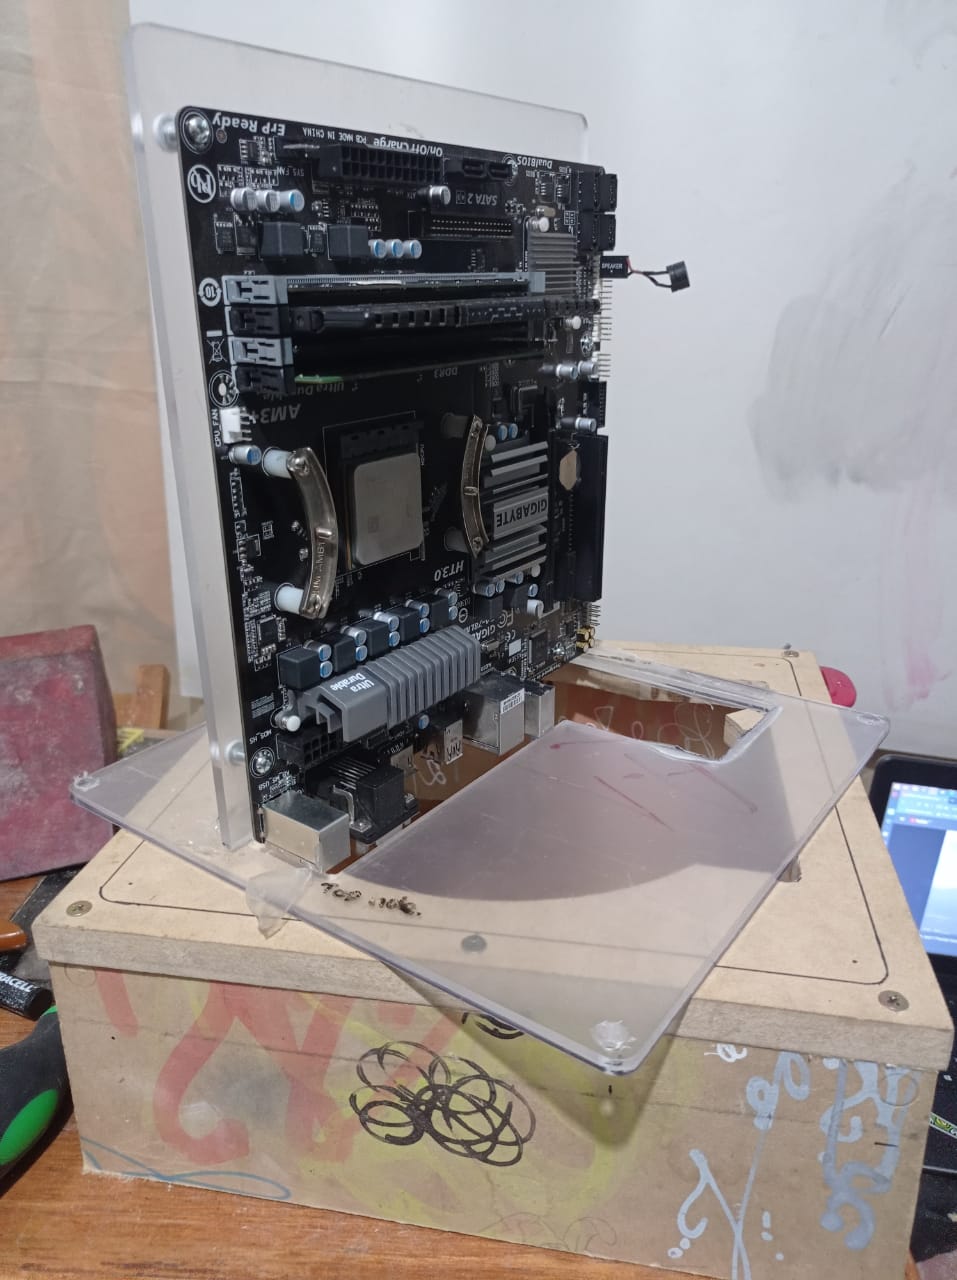
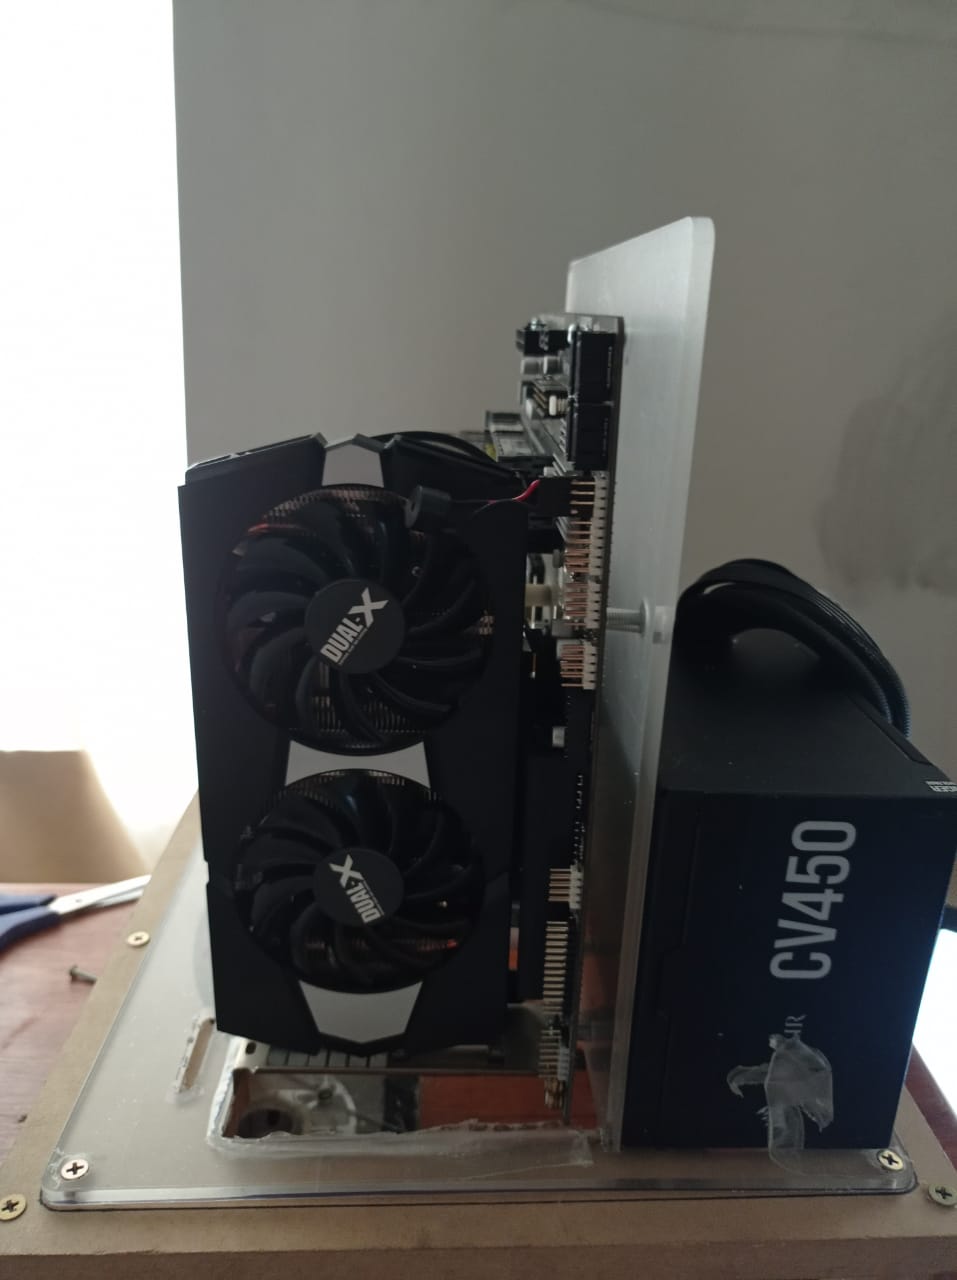
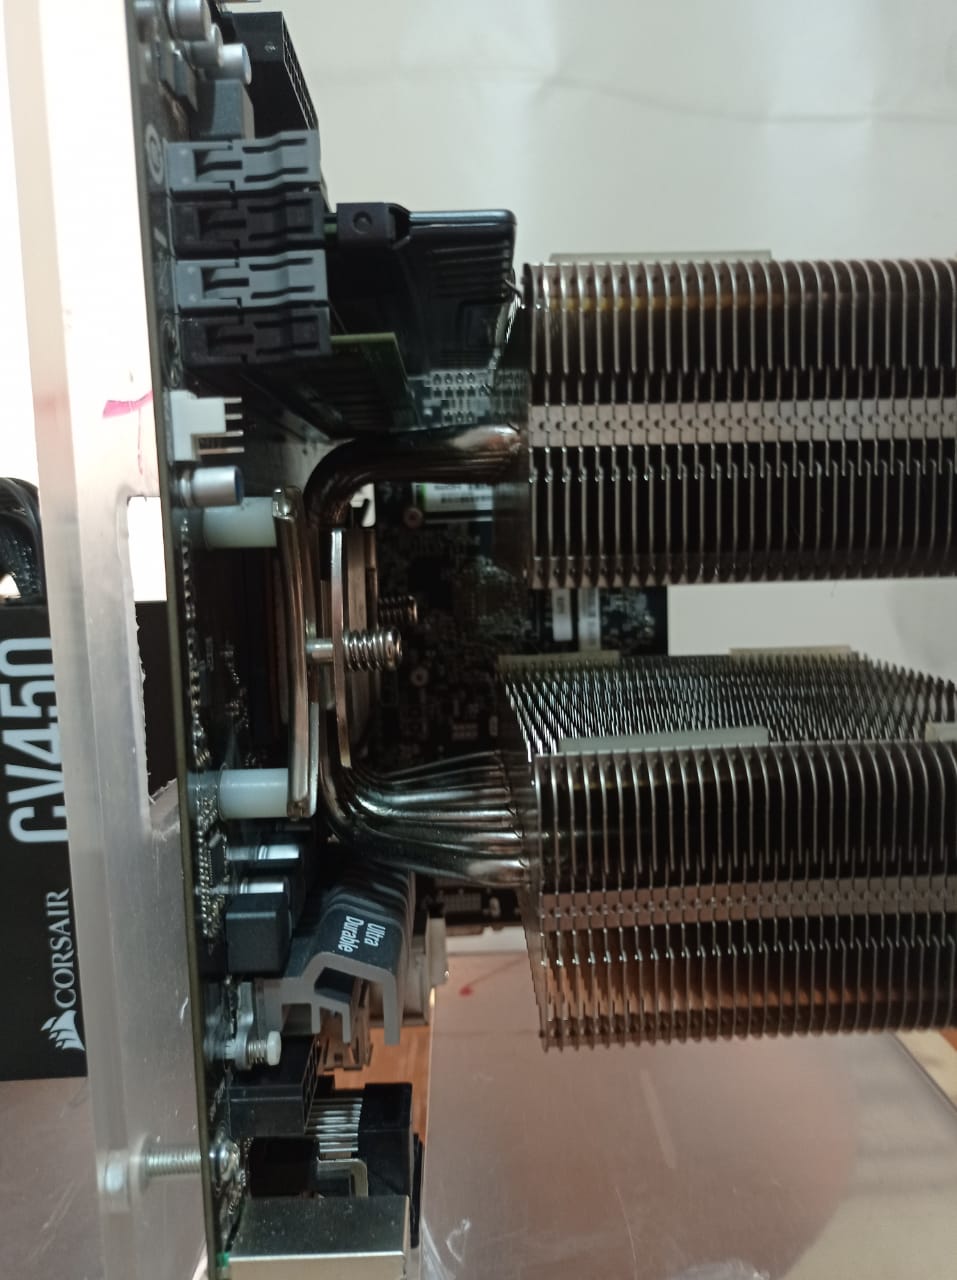
I did a test fit and drilled holes for a mATX MB, will secure it with nuts and screws and offsetting it with some tubbing since i had no brass standoffs and i refuse to spend actual money on them (like 7 bucks plus shipping… hell no).
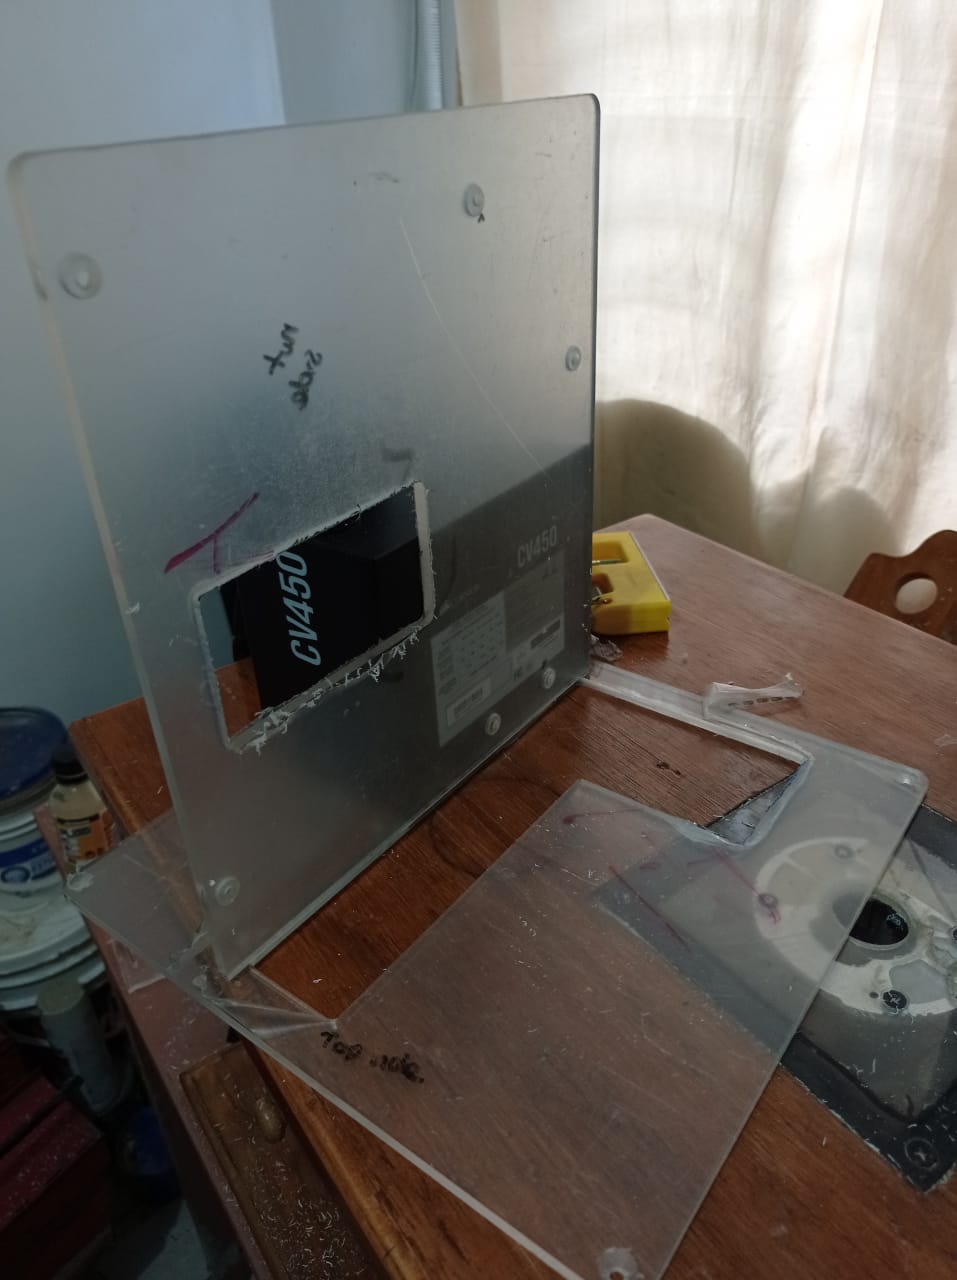
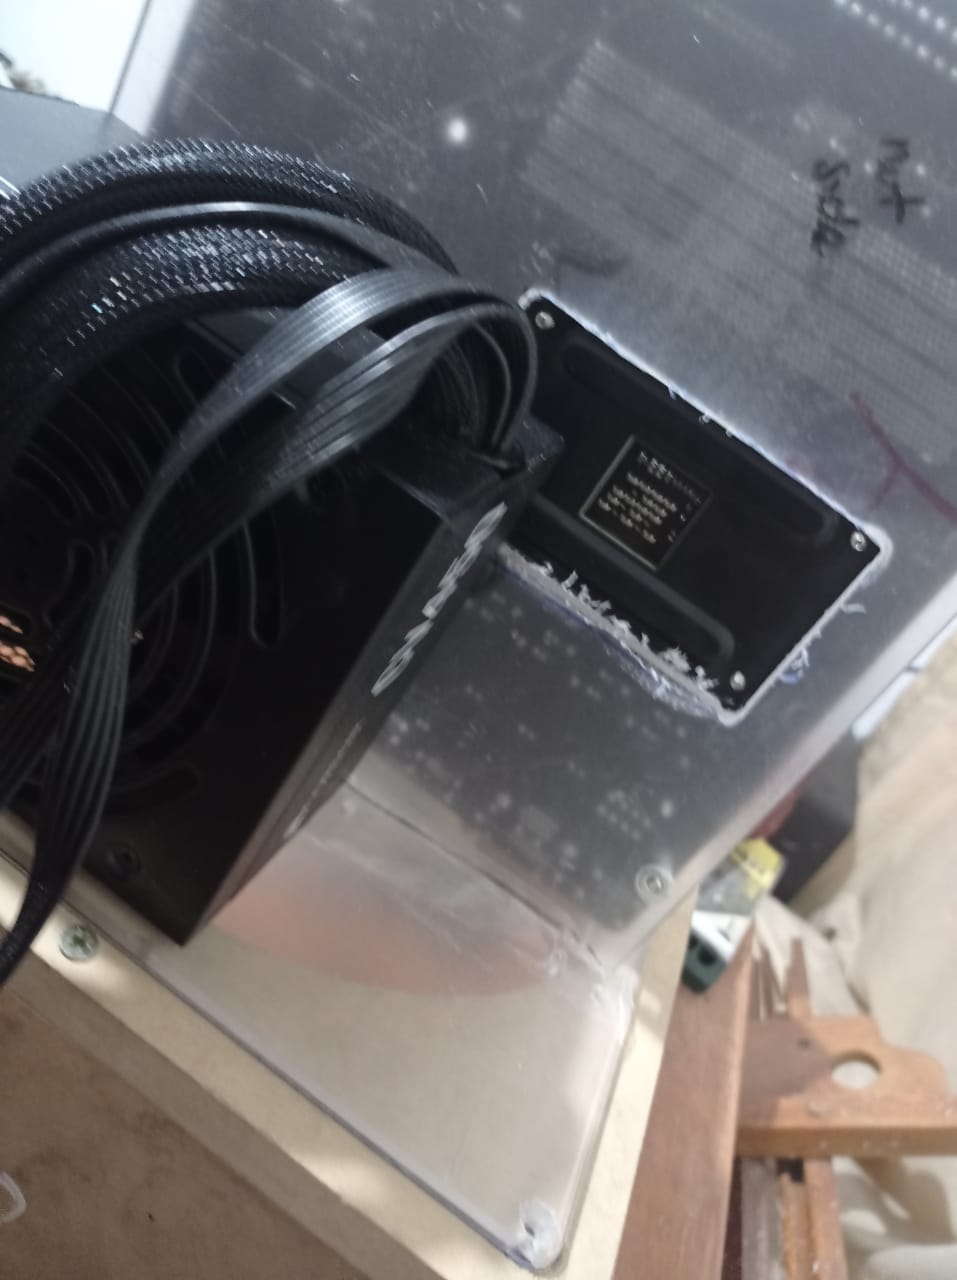
For the base i did the same but it needs some further adjustments, i also need to source some other screws for the PSU and SSD. Also the fit of the GPU needs adjustment so a bit of material will be removed around the I/O shield.
Will also drill some ventilation holes for the PSU
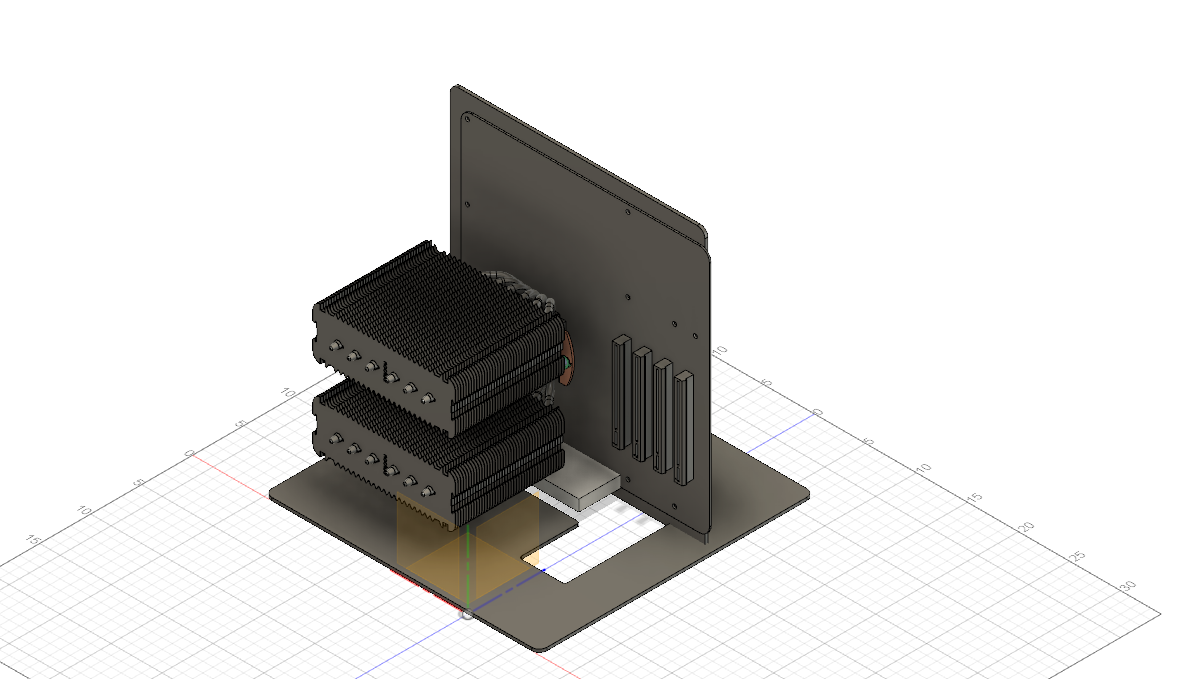
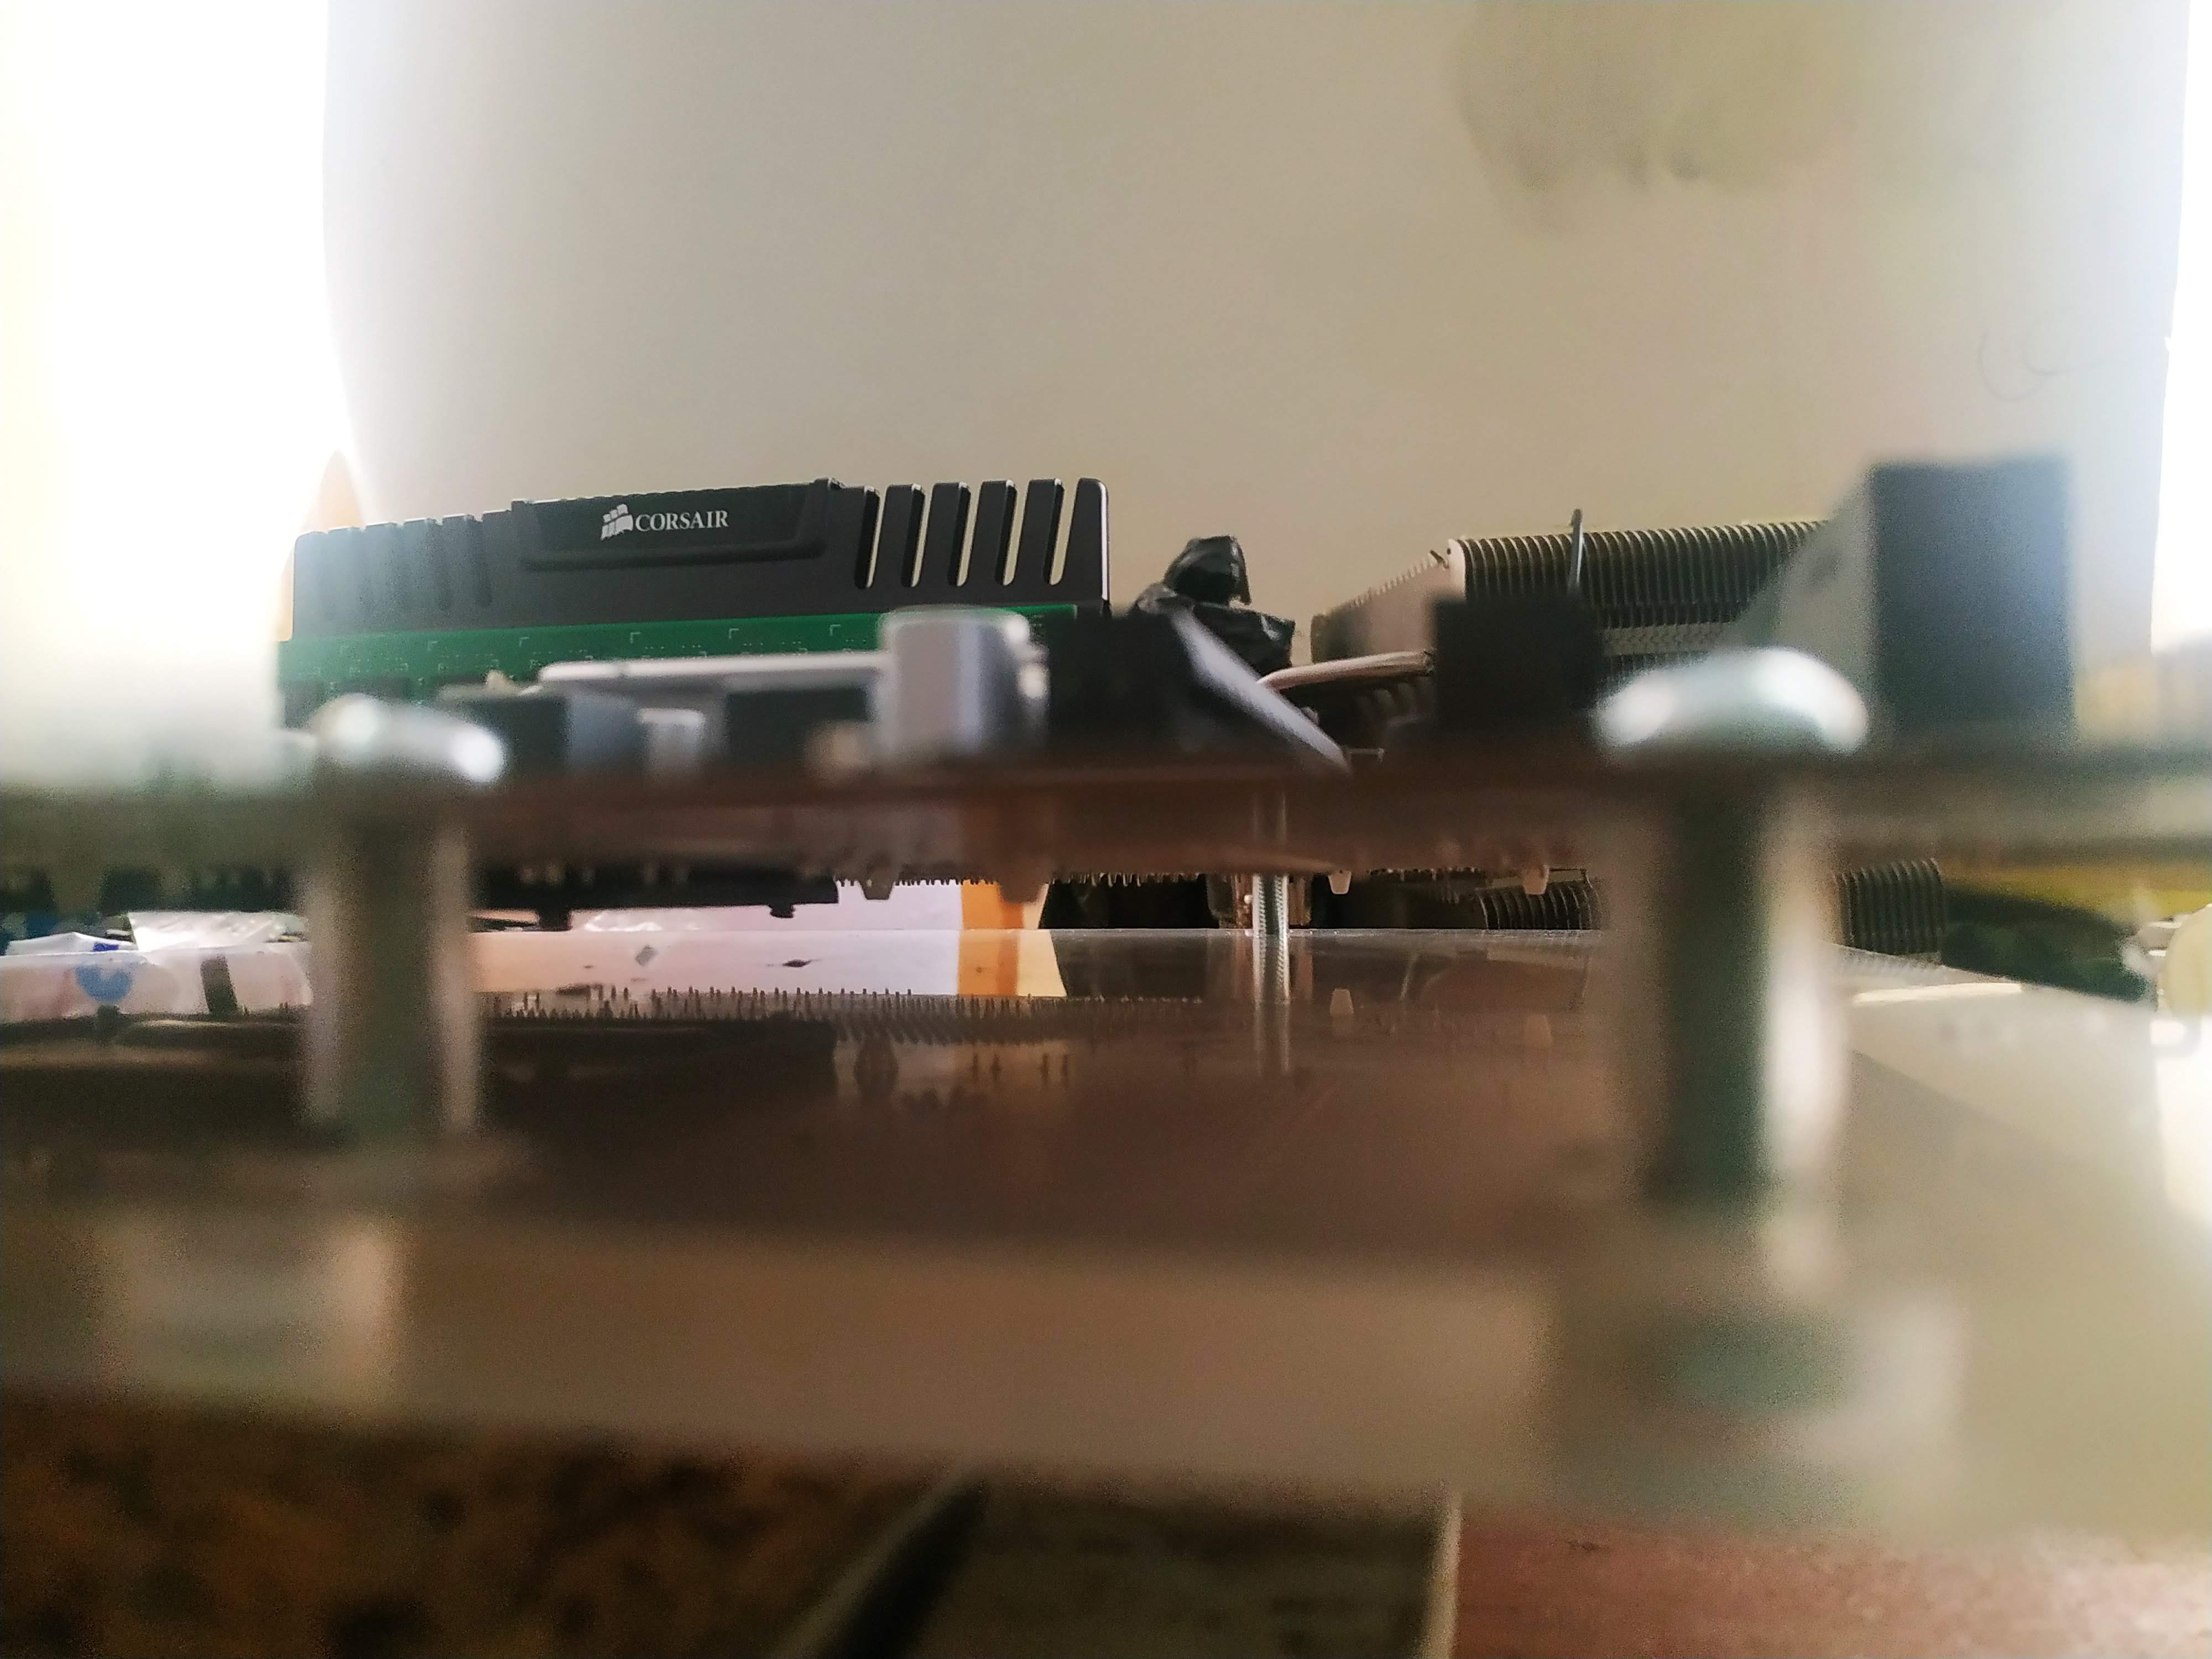
Now for a really exciting test fit, sans CPU cooler and GPU since its not supported.
2 Likes
Ok, that could work, you want to basically make chimney.
However, for chimney to work properly you need at least hole at the bottom, and should be higher. Otherwise hot air will be probably mostly staying under that mesh you planning.
Also your choice of material… is this plexiglass? There’s reason why there’s still no cheap plastic chineese cases. Its called electrostatic charge. There’s good chance you will kill your mobo even before you finish that case.
Oh, and I dont want to sway you away from this project. My first computer was in cardboard box, because I couldn’t even afford case.
And I wish you best luck with it.
umm interesting… ive seen it used on others ( MB armor and such) though, i can also ground it there is ample space in the corners
You cannot ground plexi. Charge is gathering all over surface and its non conducting.
You would have to glue like aluminum foil on it or sth. You can ground that.
yeah thats what i meant, in a corner where the current peaks ( i know how static works ) but i think is an overkill since its grounded plenty through the PSU.
Assuming that discharge will go to ground, yes. But with that potential differential it may go pretty much how it wants. And I doubt chips will like it.
Overkill, maybe, but better safe than sorry imho. Well we will know for sure soon I suppose… I hope I’m wrong
Well, i didnt thik about that. But I think you should take small piece of your plexi and check how well it burns on open flame 
Hopefully doesn’t have any celluloid in it, great accelerant
1 Like
Me watching the video… thinking about just routing a window under the CPU area…
1 Like
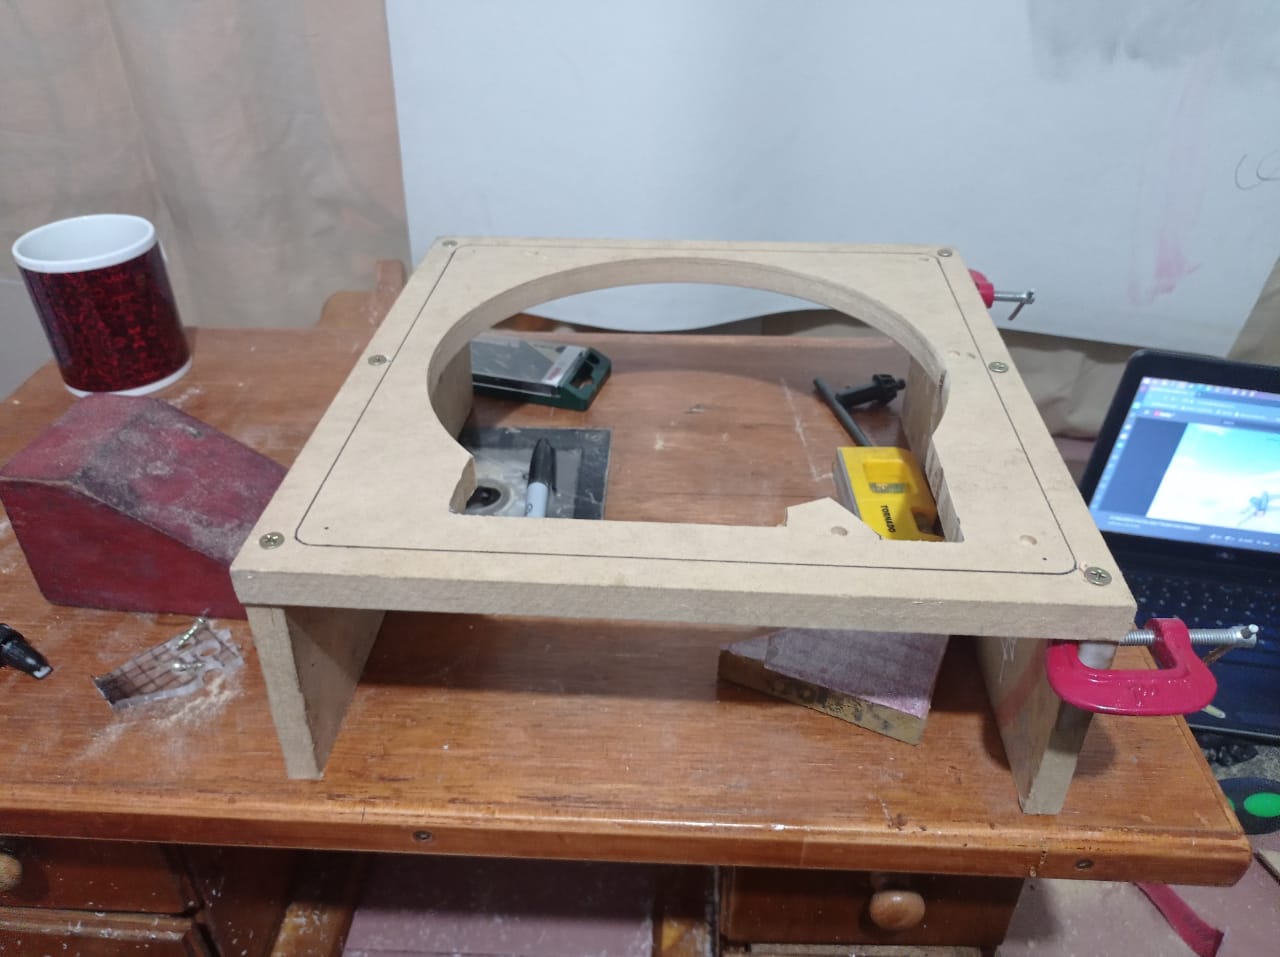
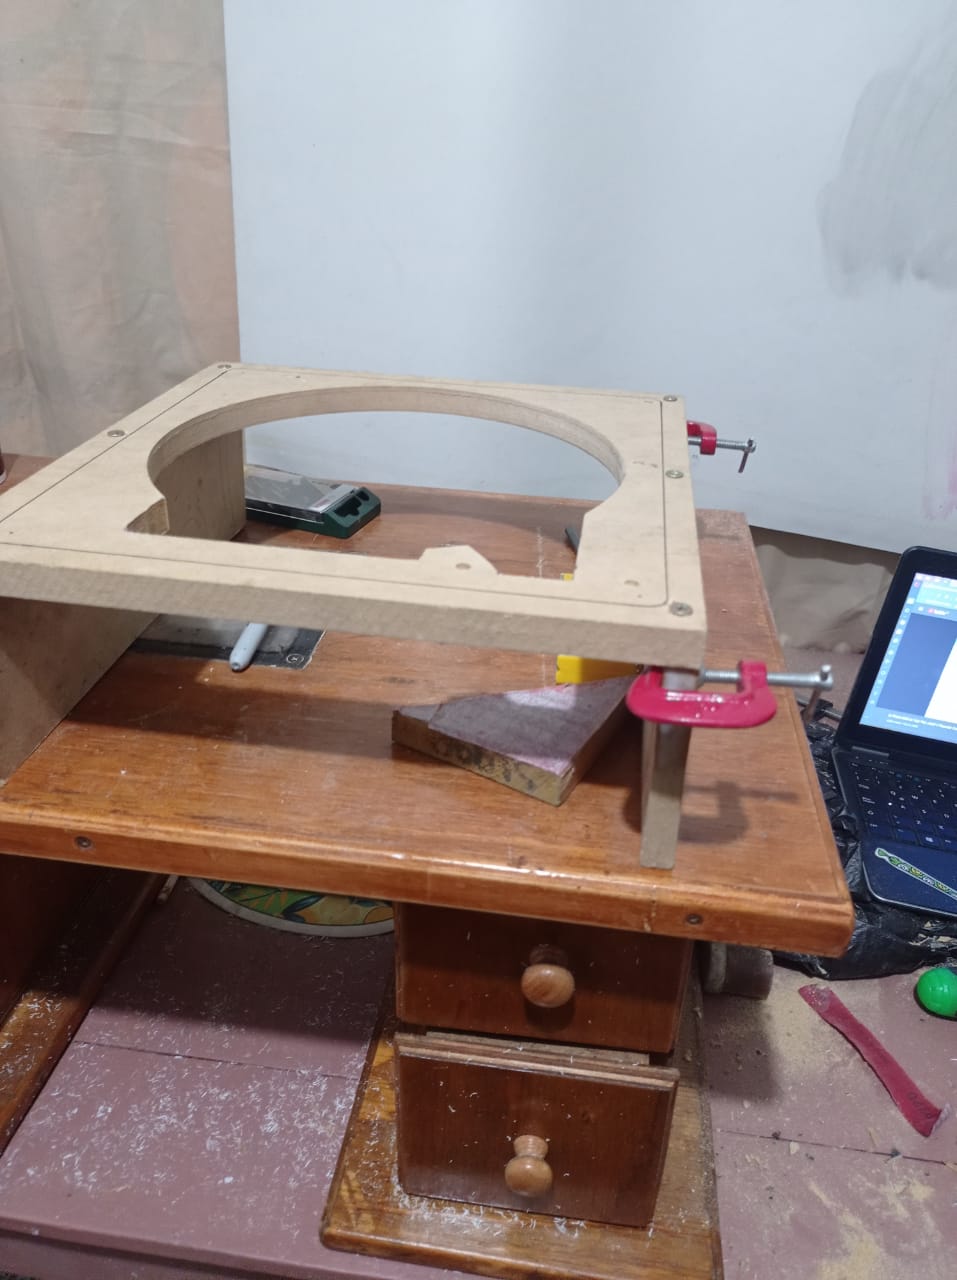
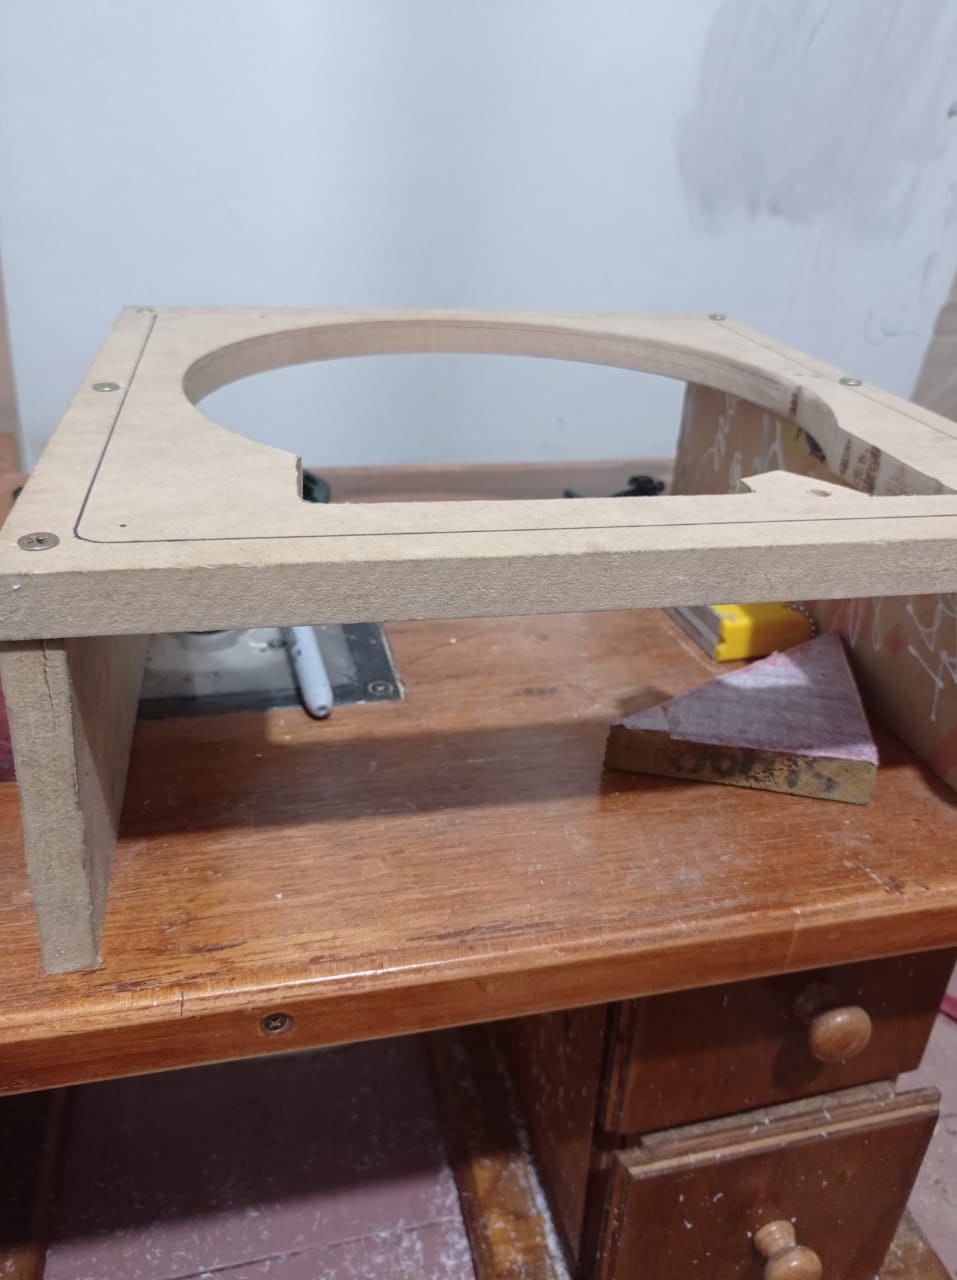
Hey!! Status update!
Ok so these past 2 weeks have been really holidayei so I’ve had little time.
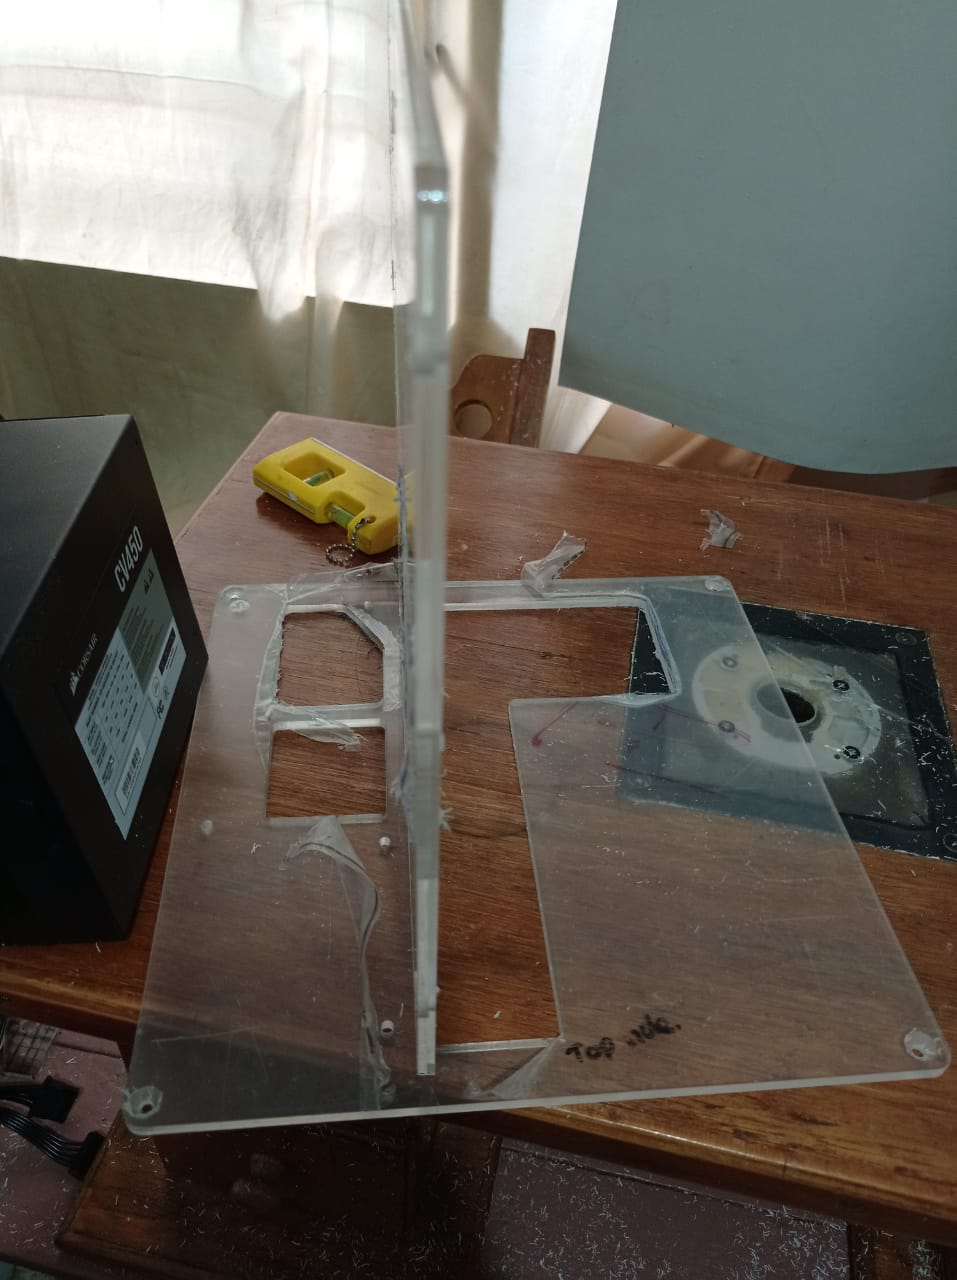
I got the modifications done to the pieces, routed them and then sanded with a block to get rid of the machining grooves.
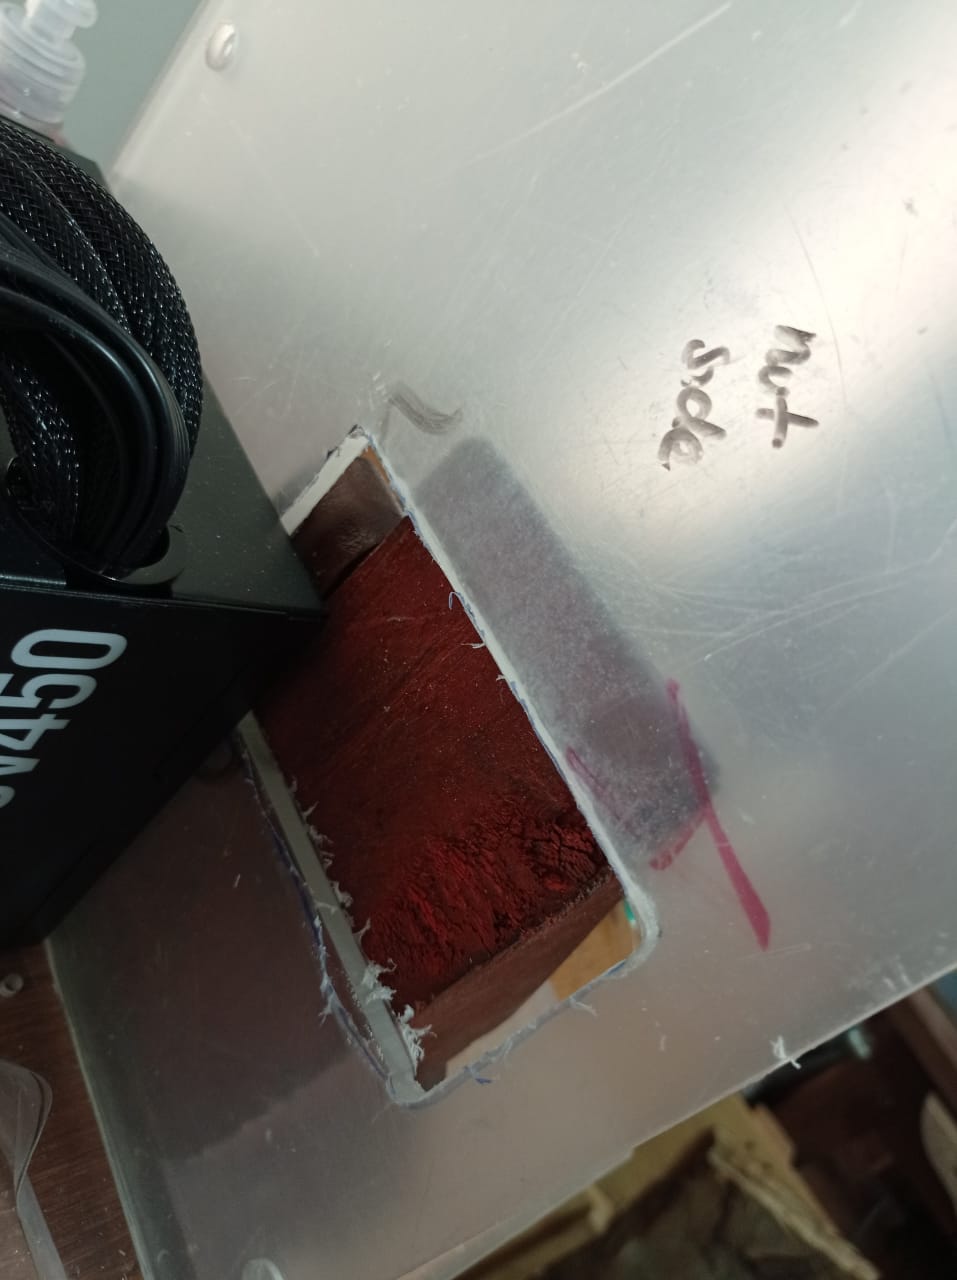
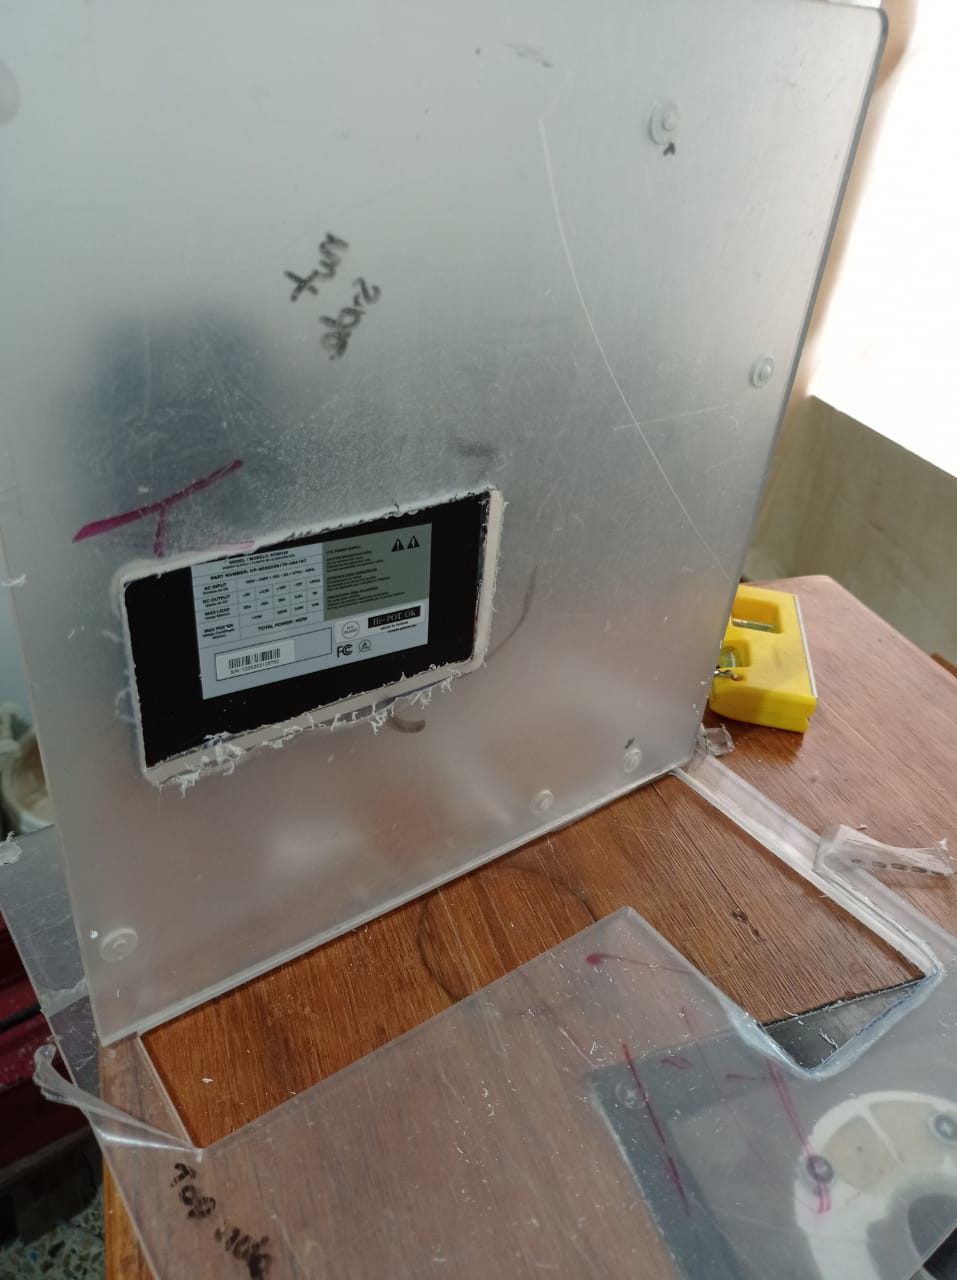
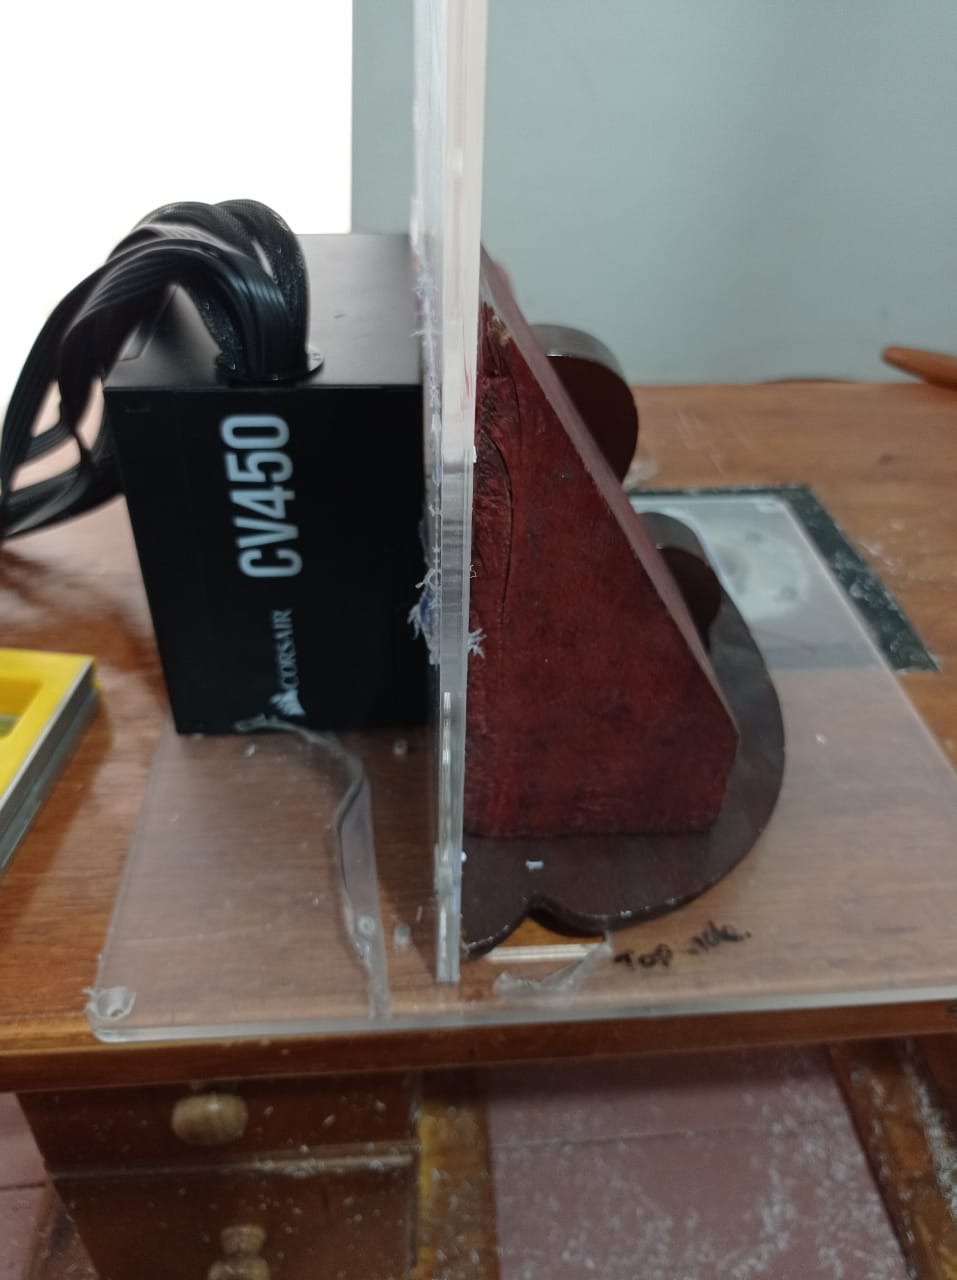
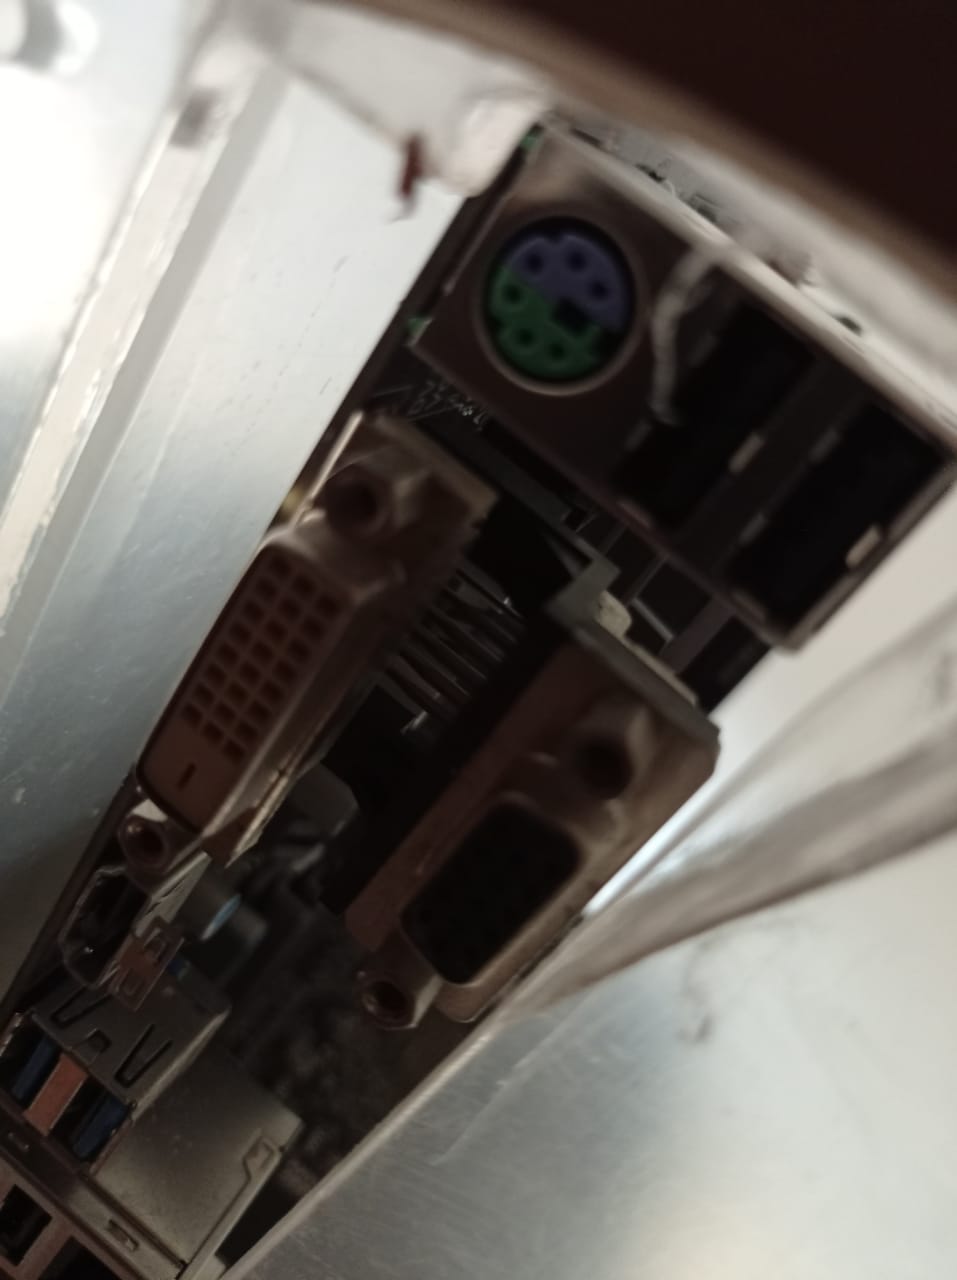
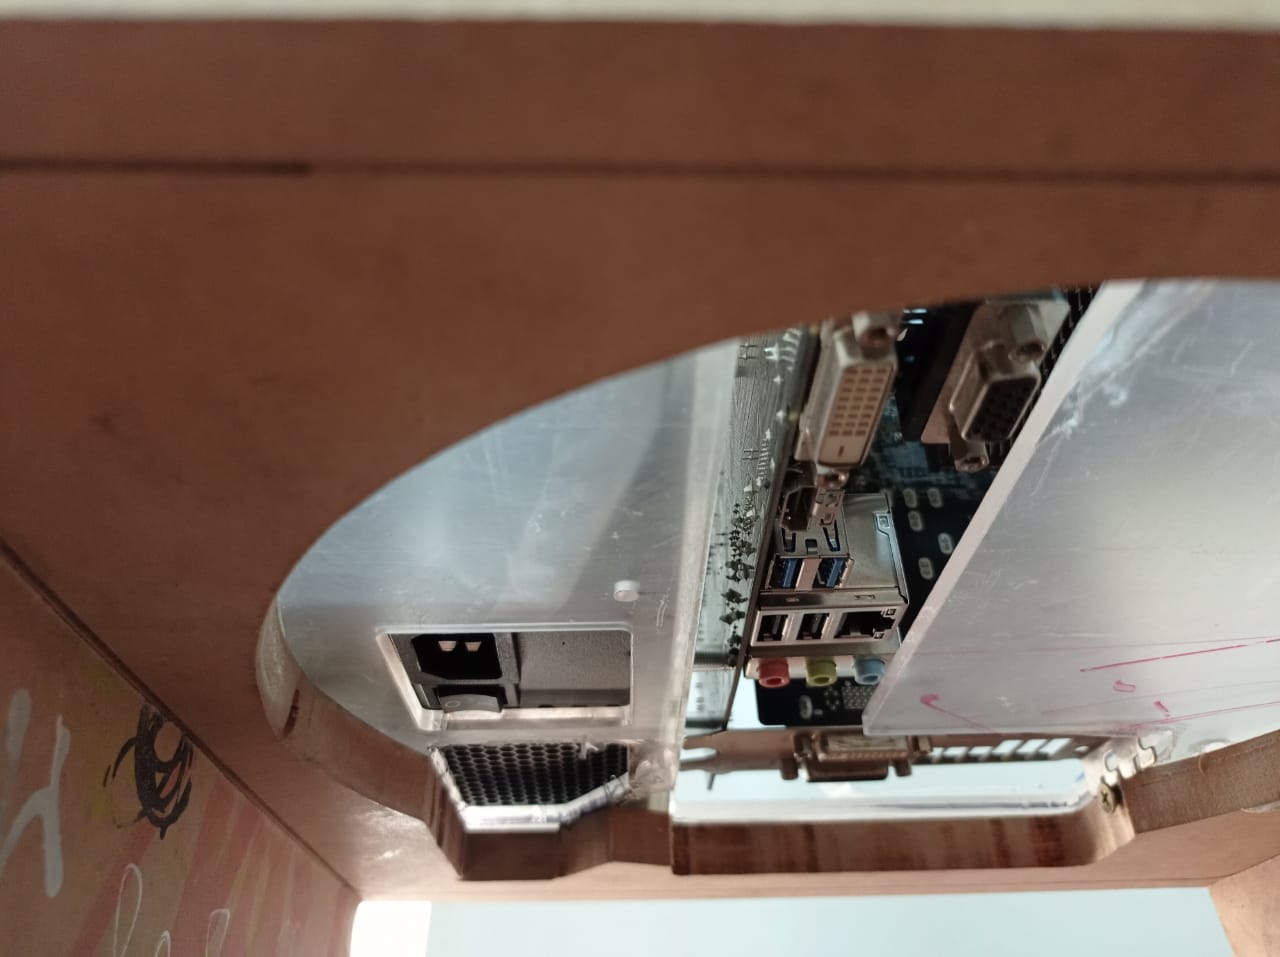
I added a window behind the CPU cooler plate to prevent melting/fire just to be safe. Adjusted the I/O shield opening to fit the actual hardware and also added a window for the PSU next to the switch/socket since it has ventilation on that side.
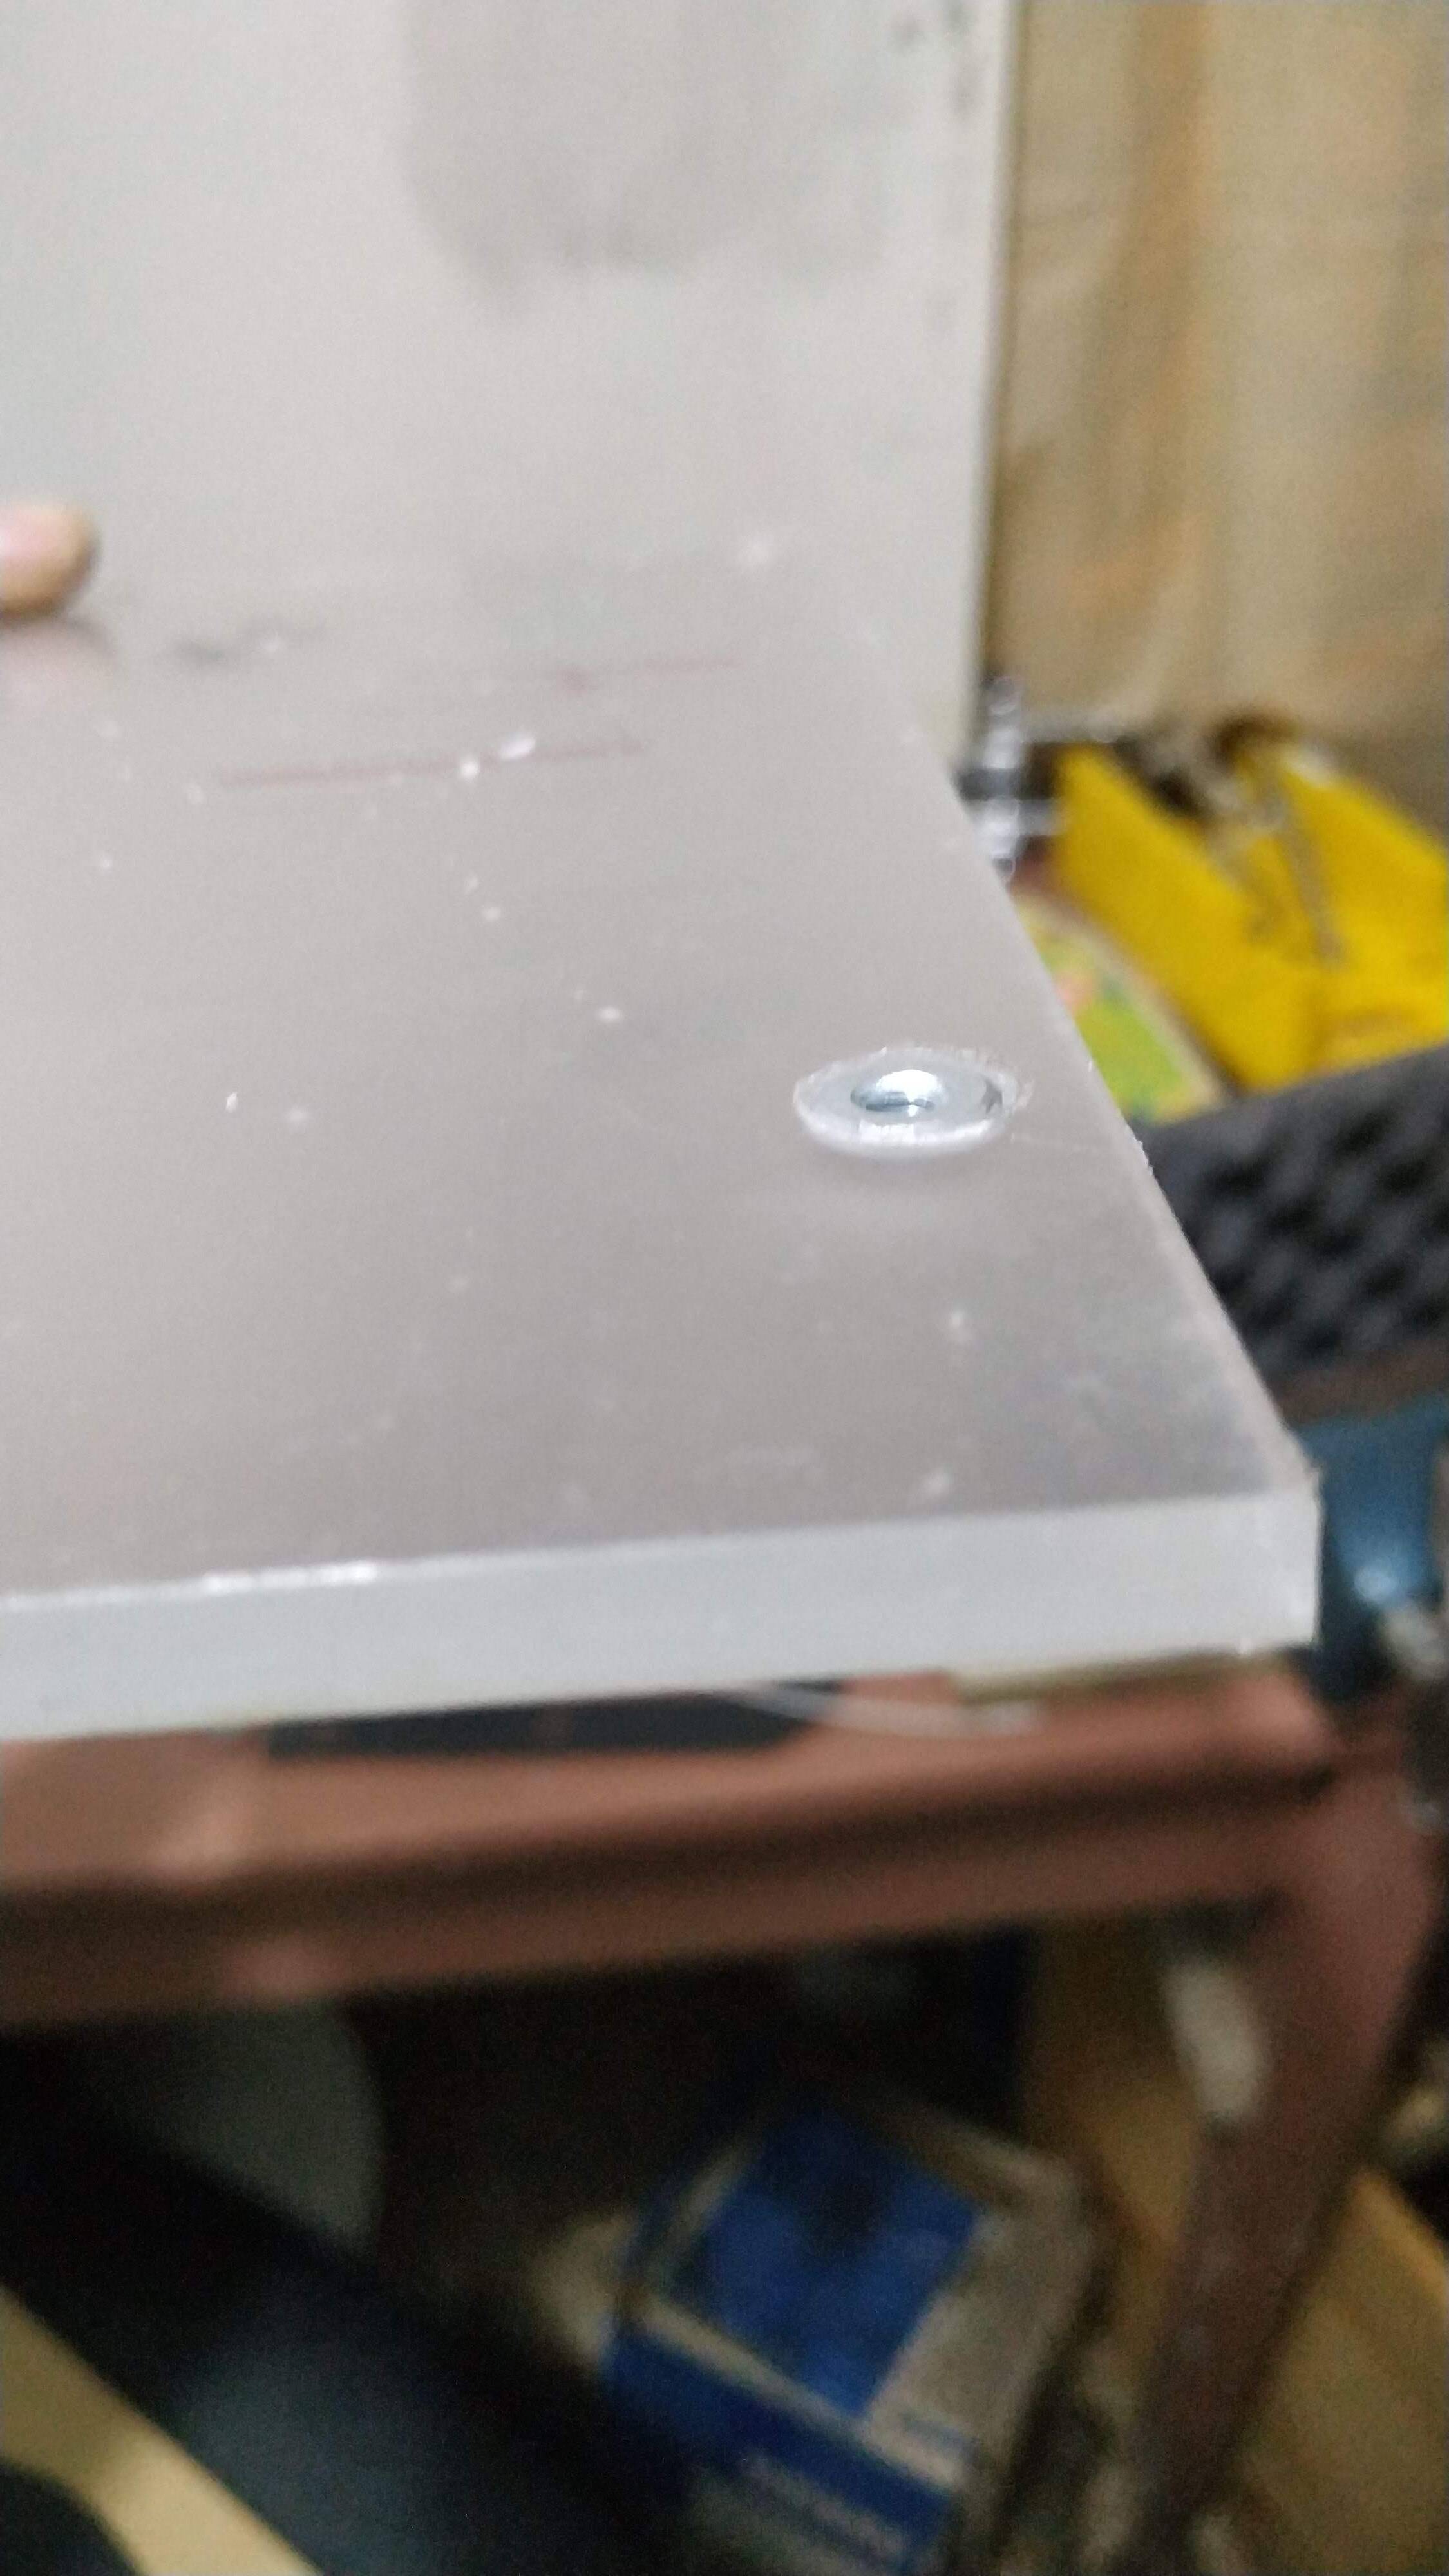
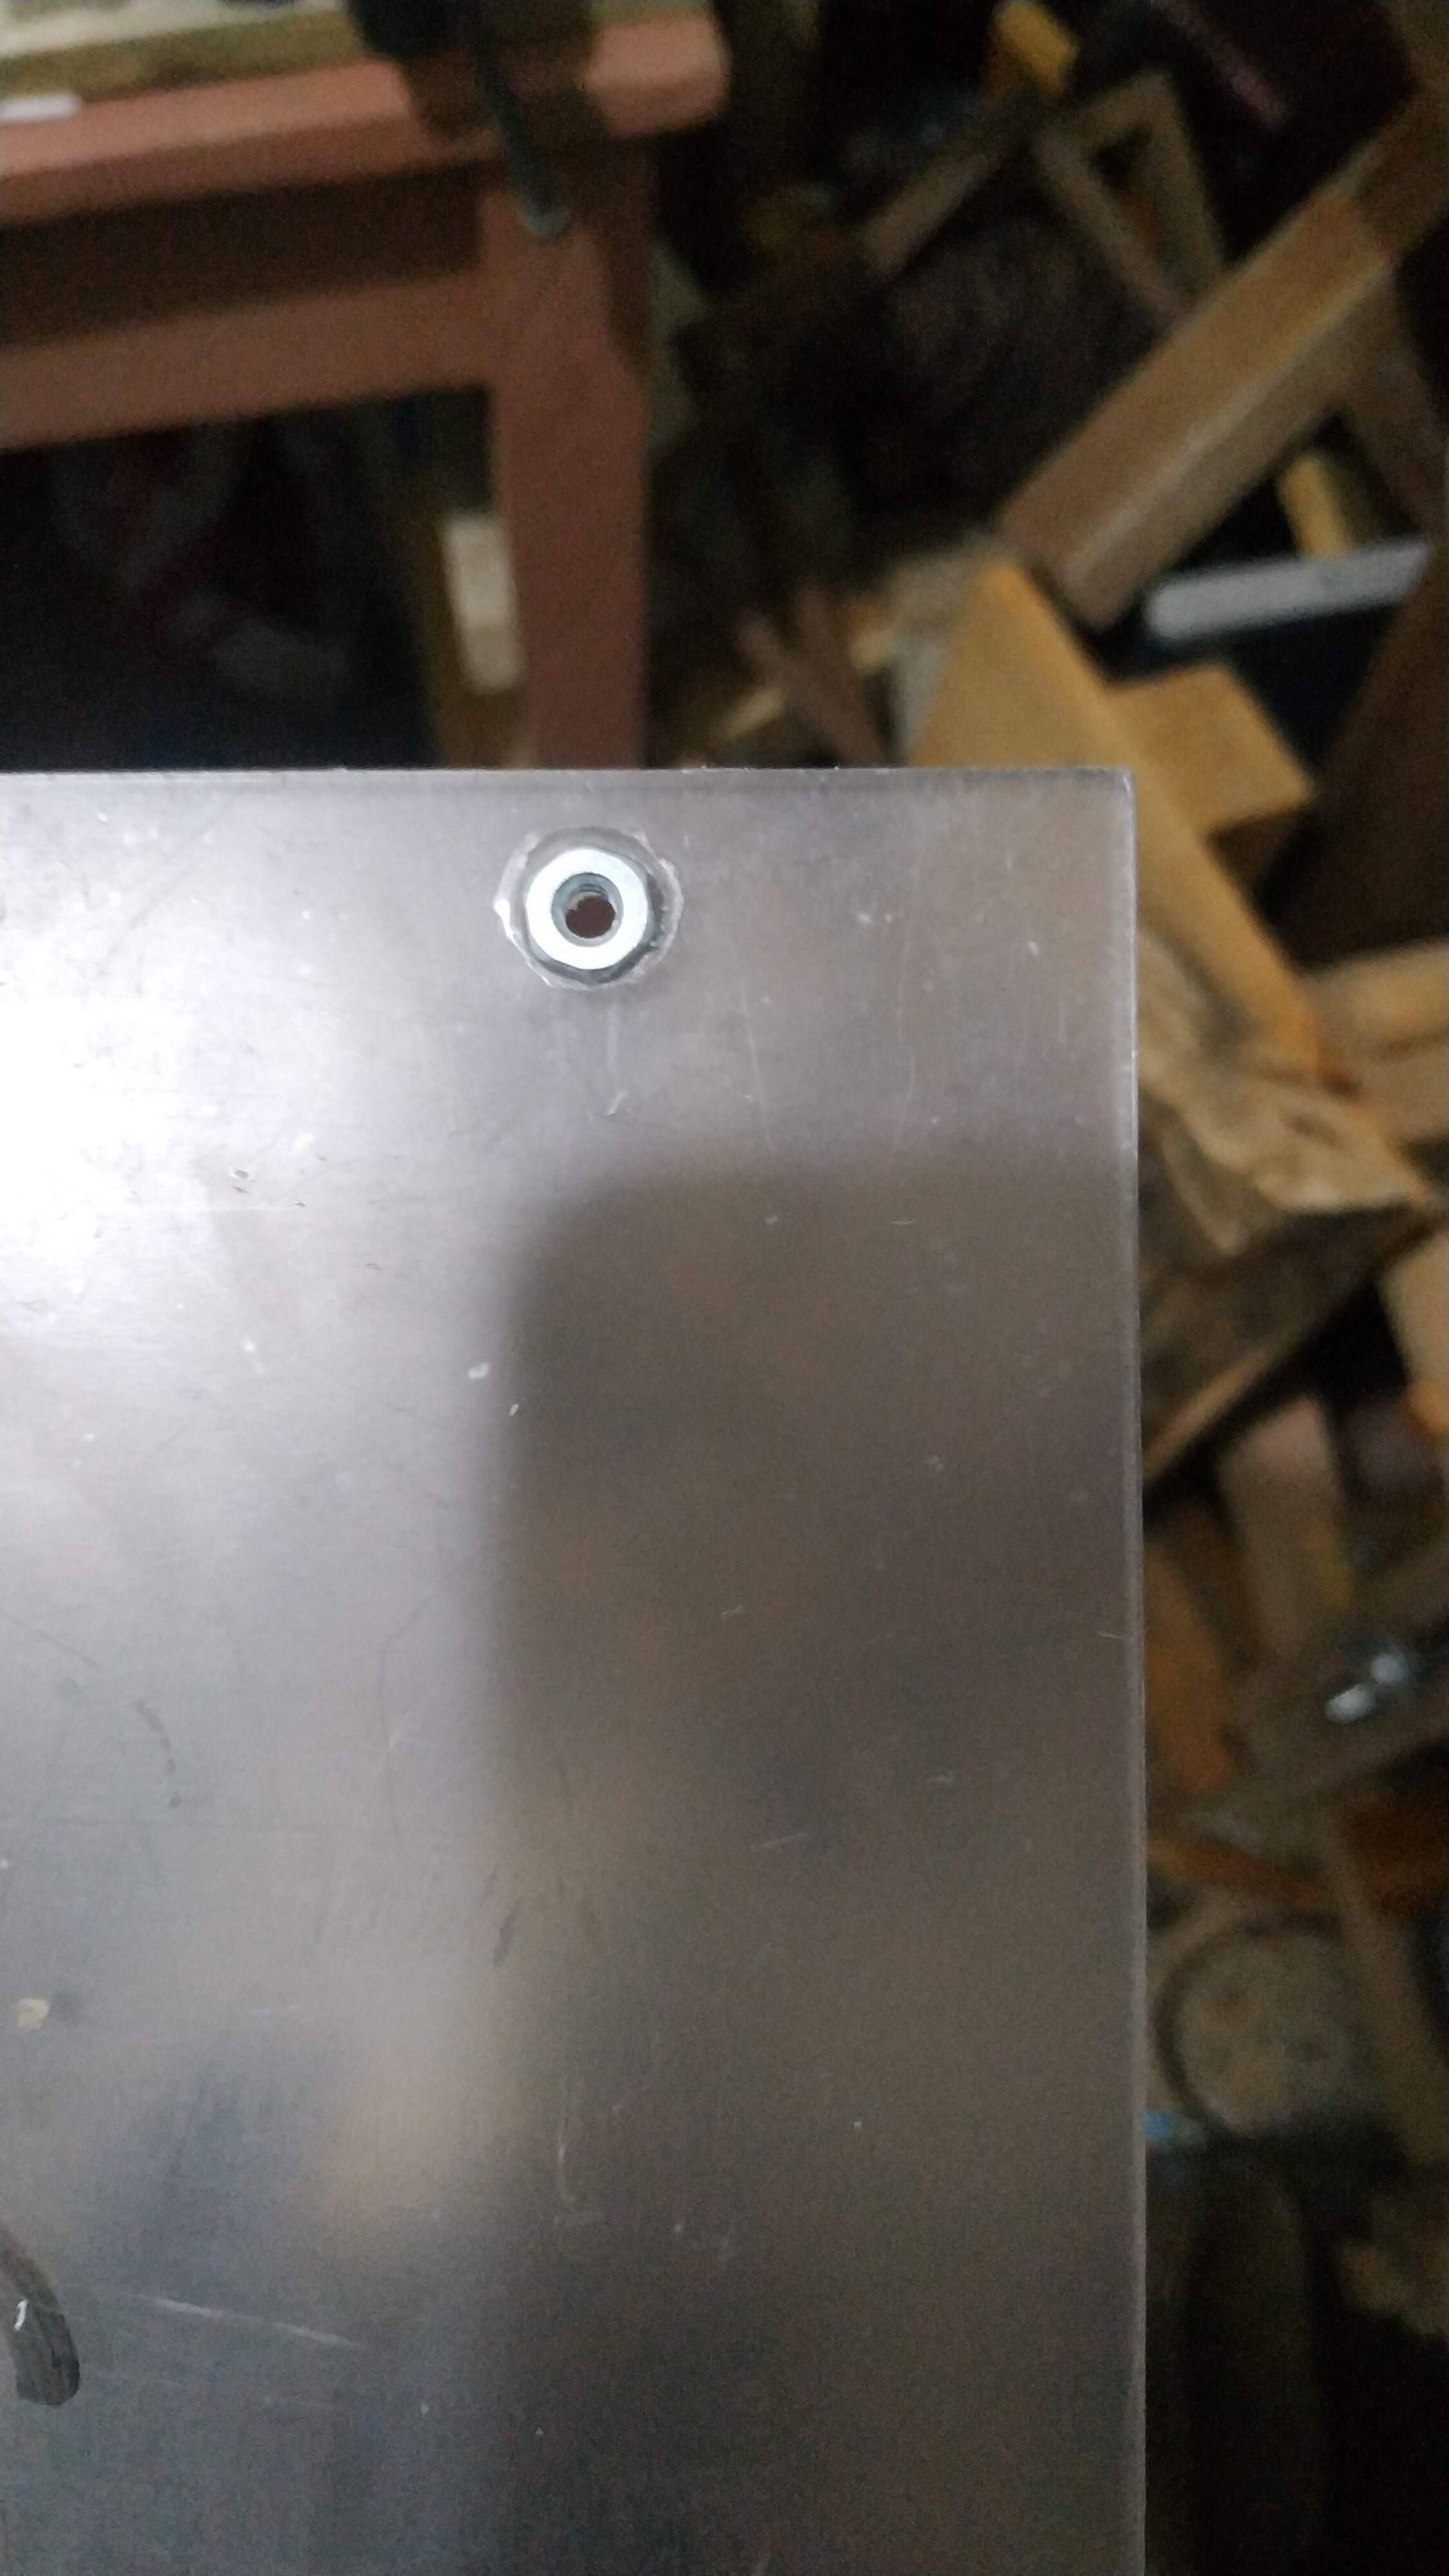
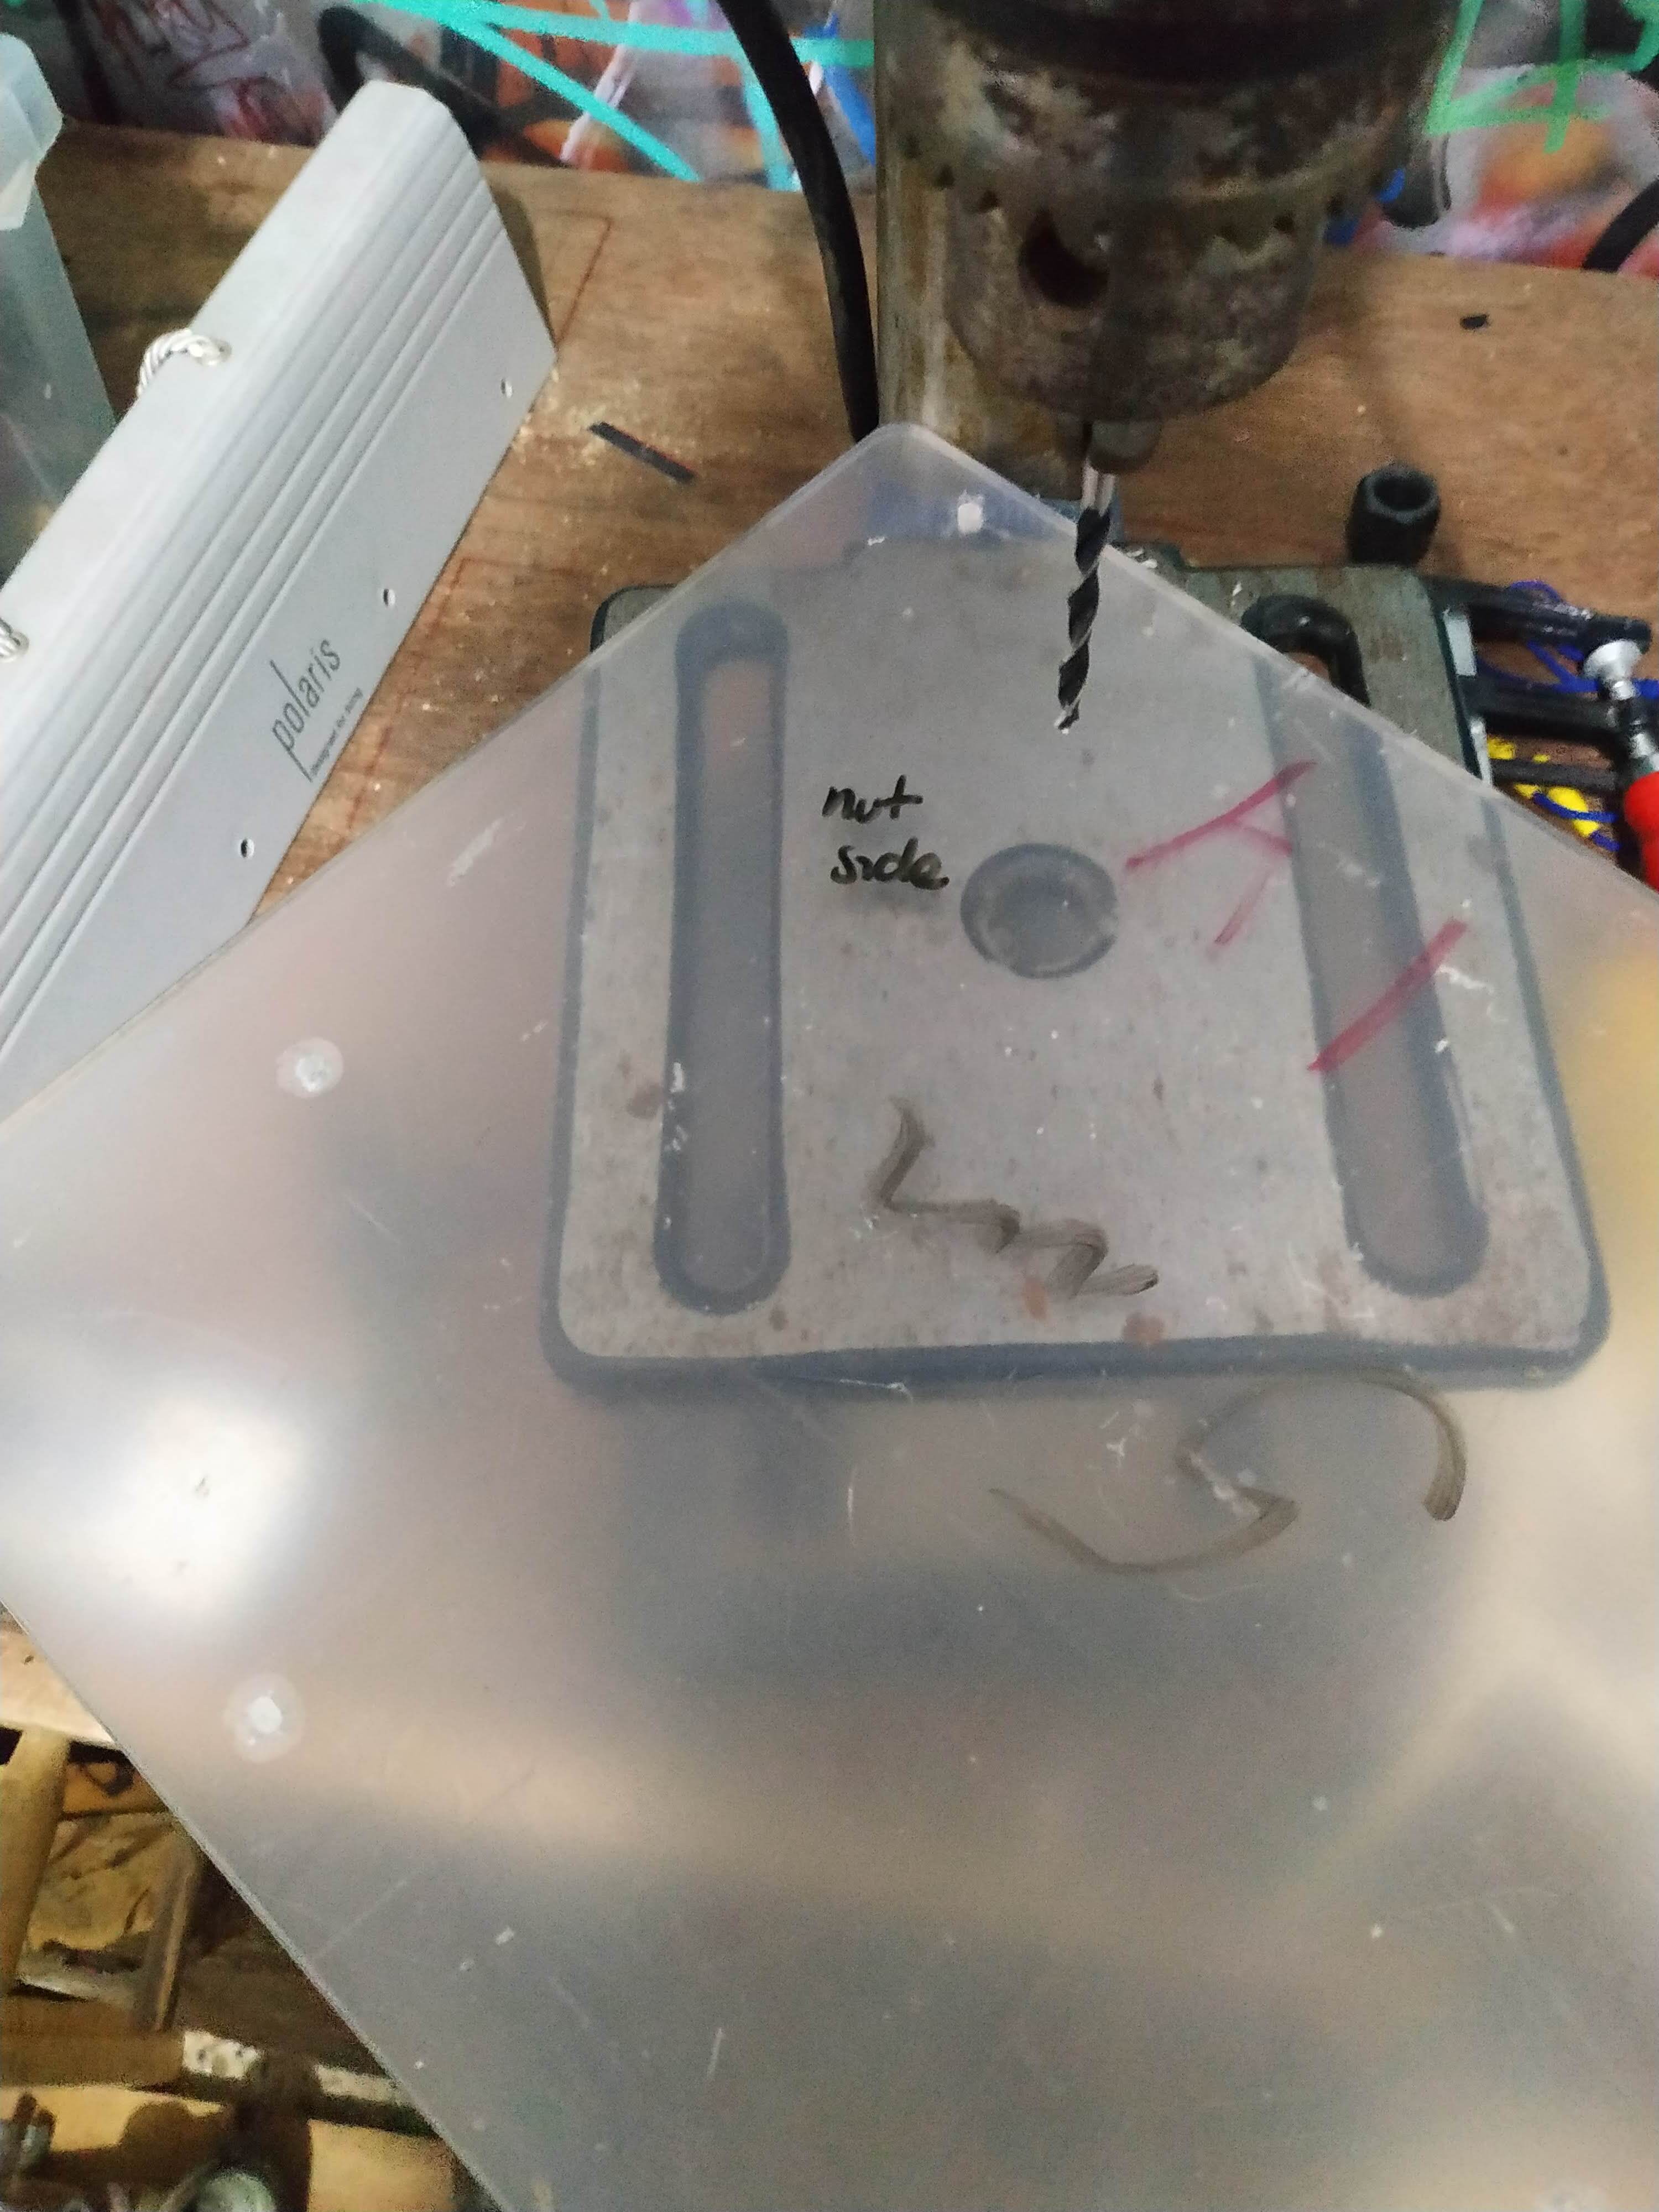
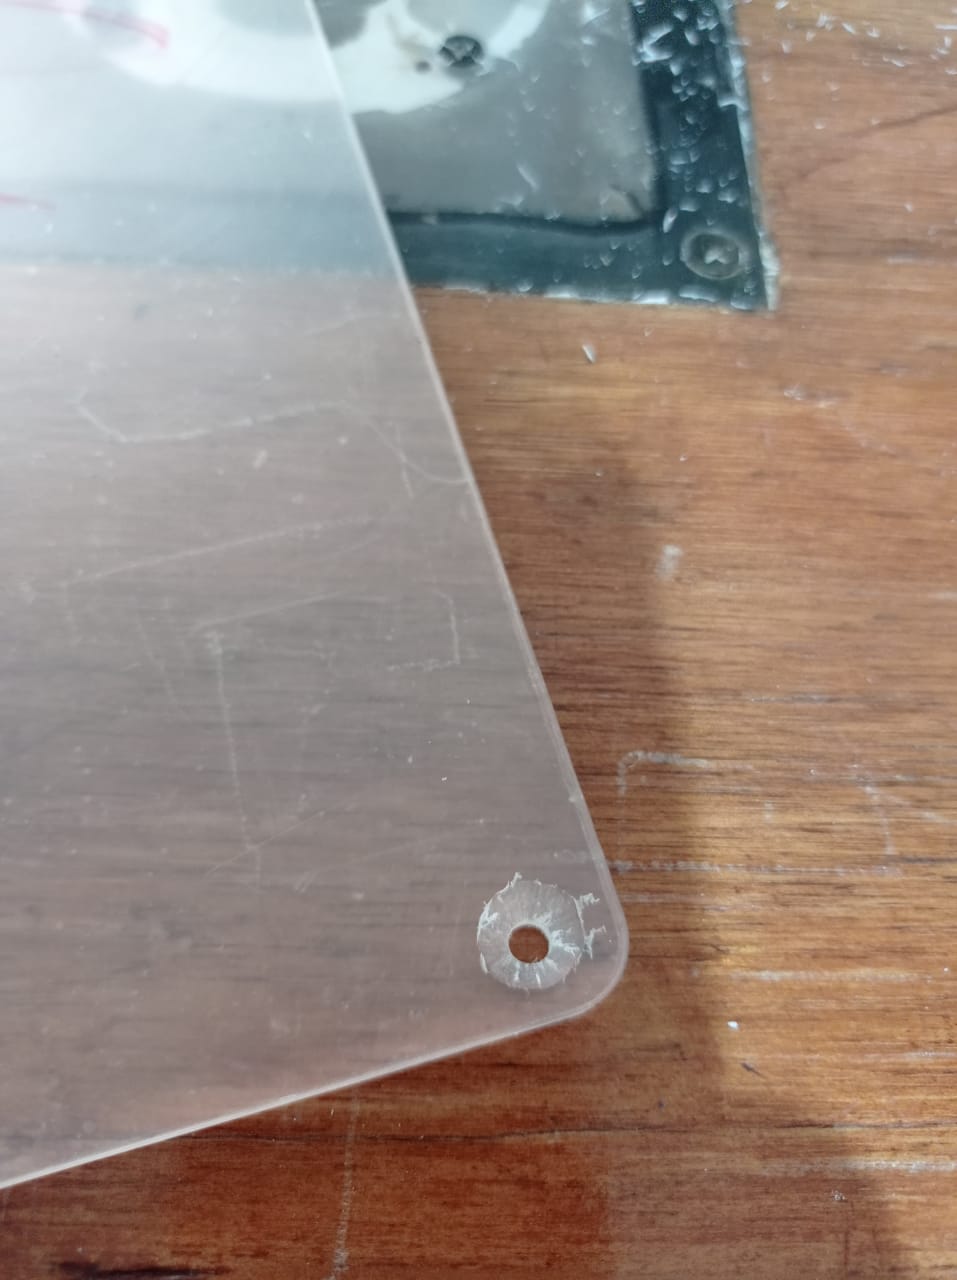
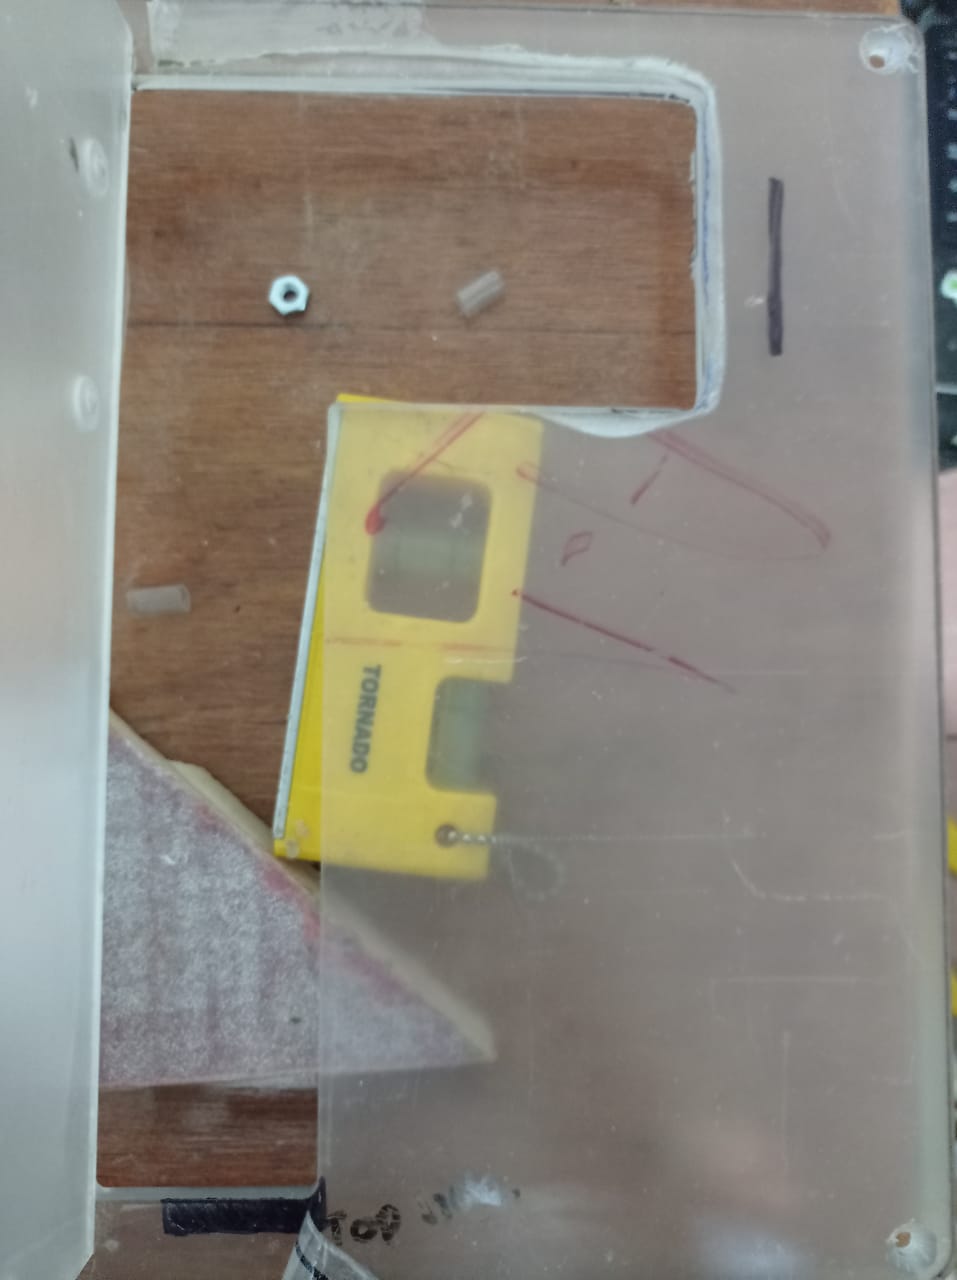
I counter sunk 4 holes on the side to fit it to a temporary base to test the best height for the basement/cable garage.
Parts are welded and curing at the moment 24/48 hours to go!!!
Next step first assembly!
3 Likes
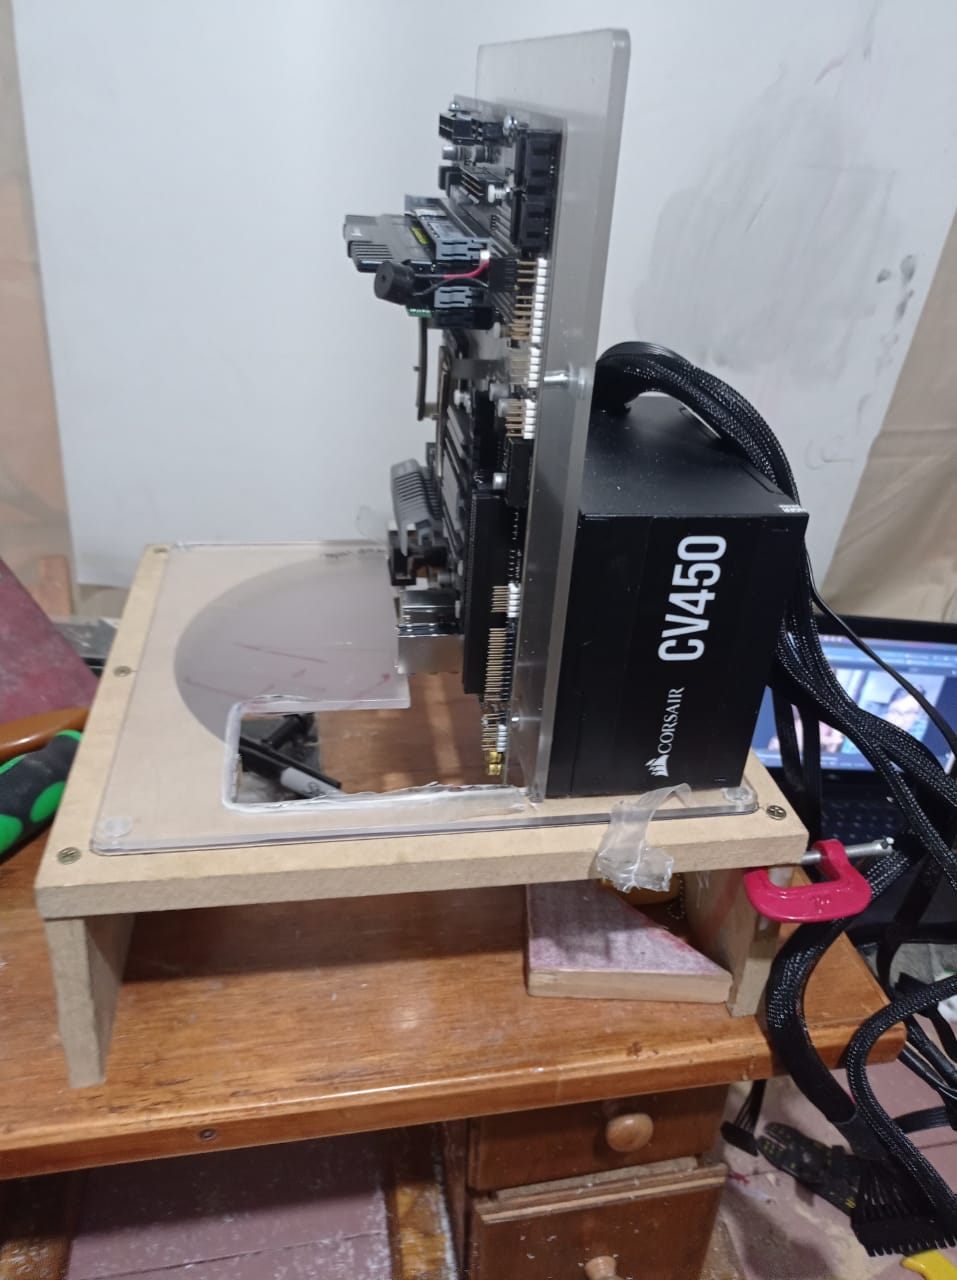
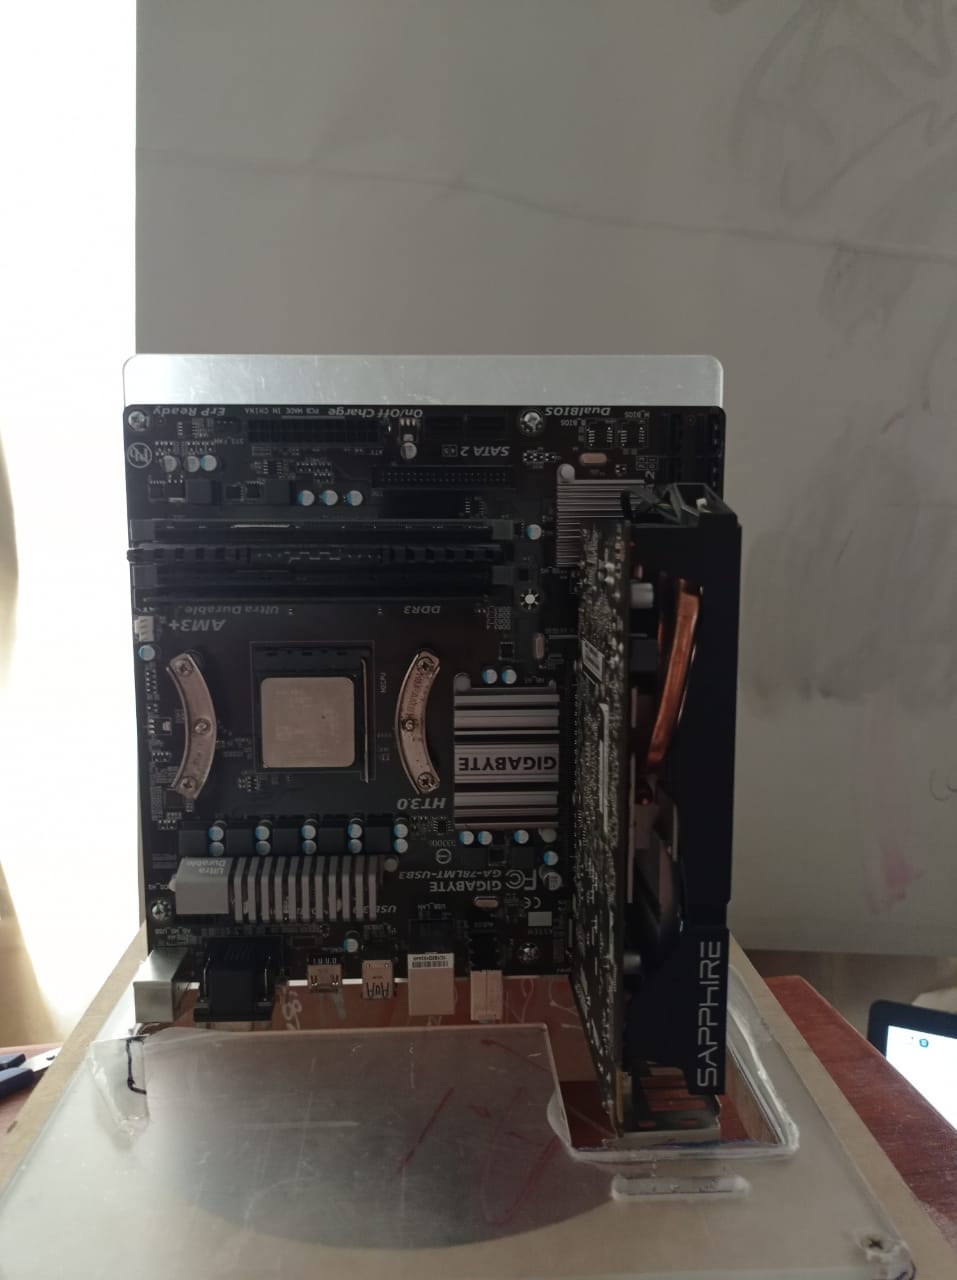
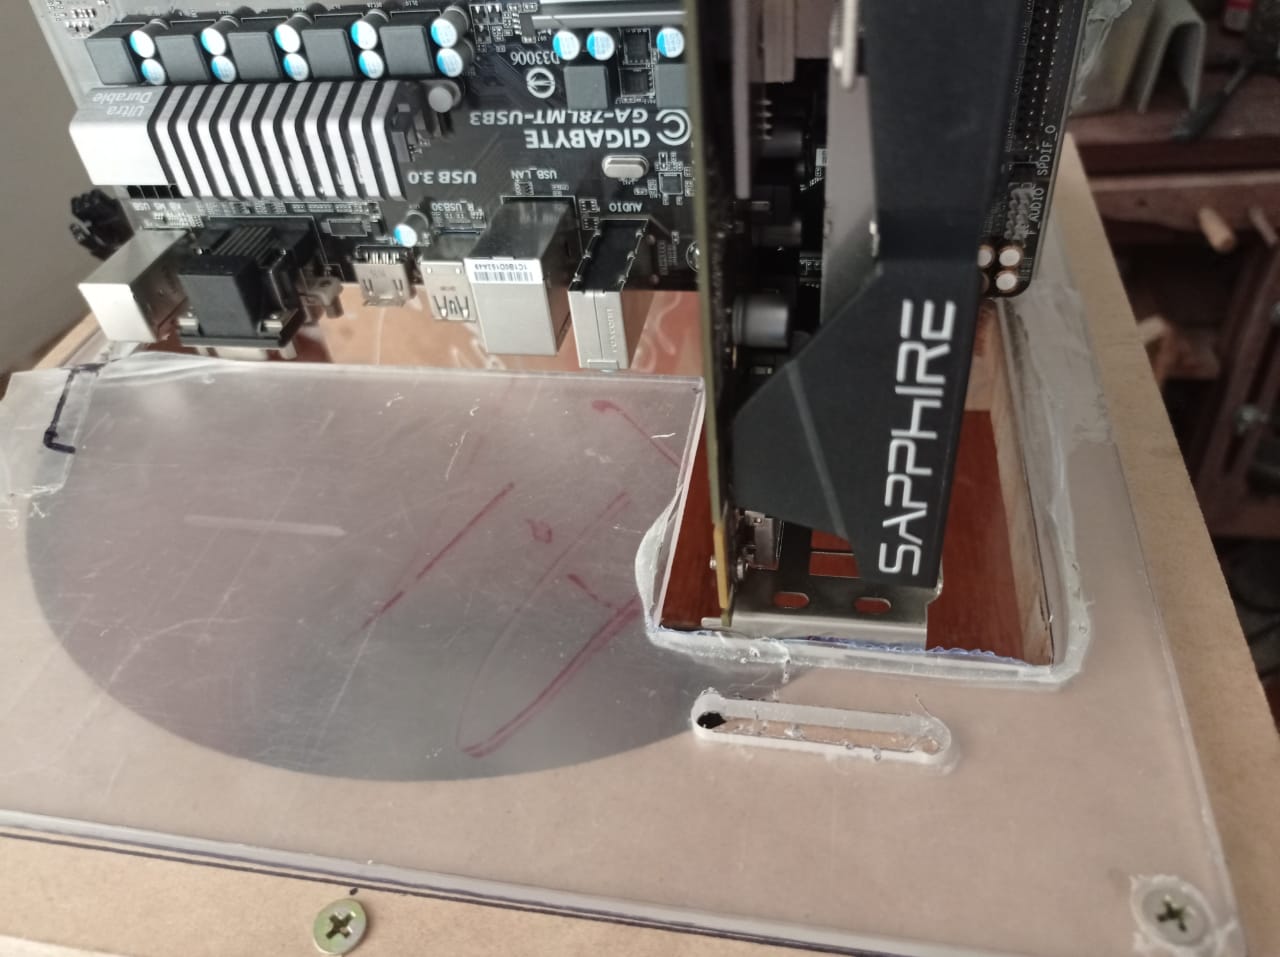
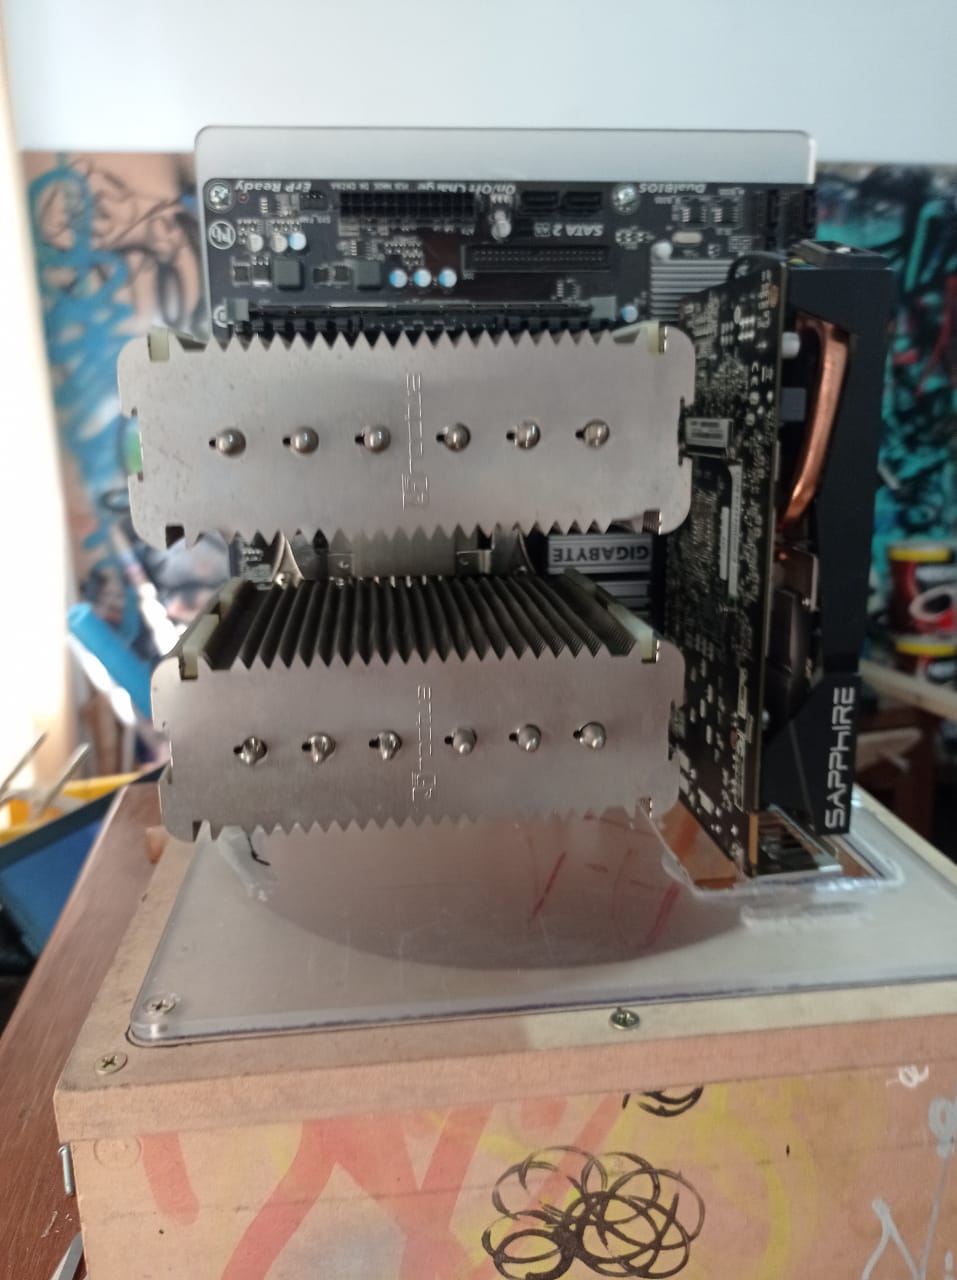
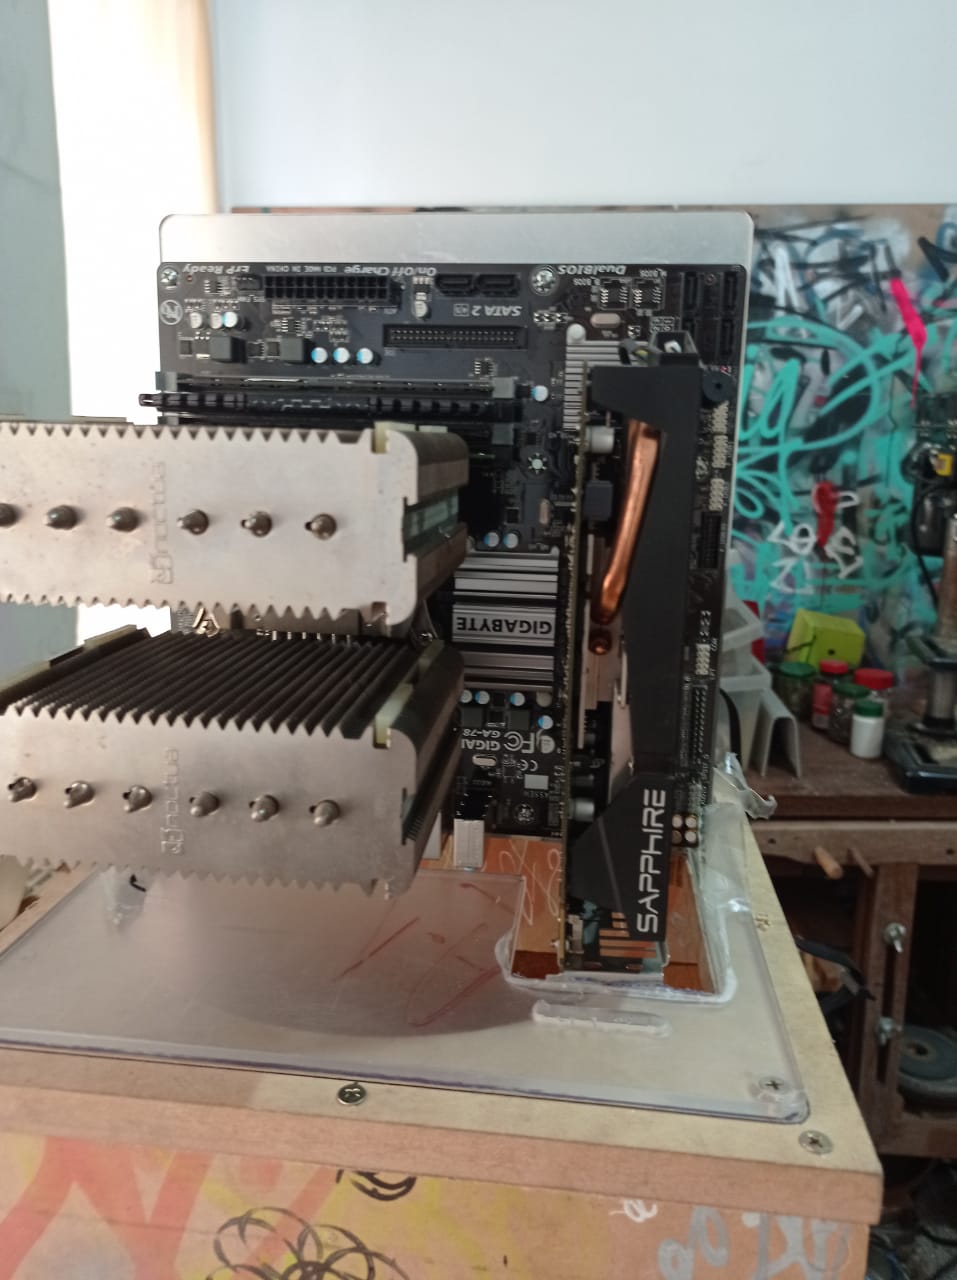
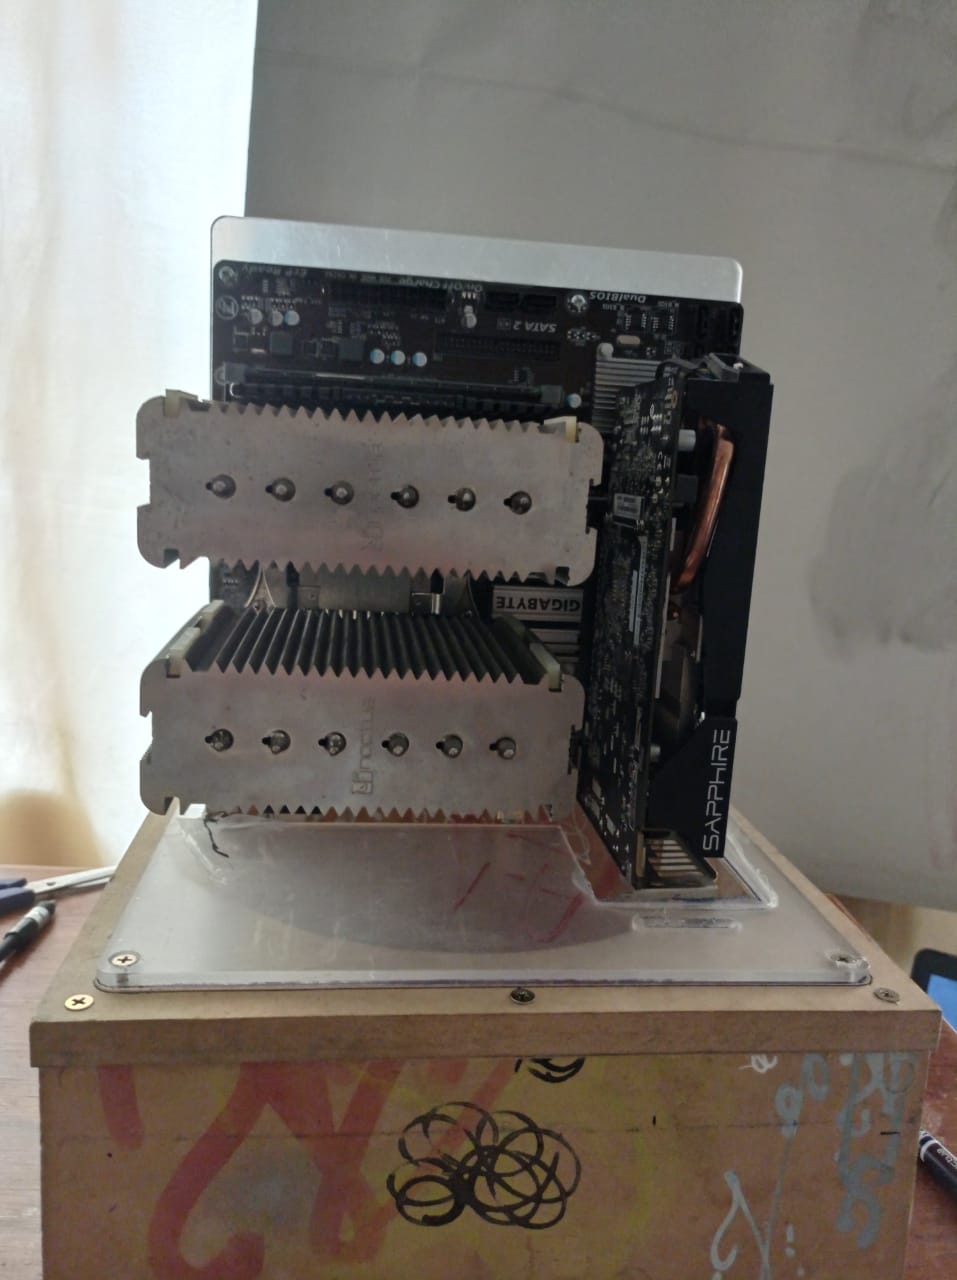
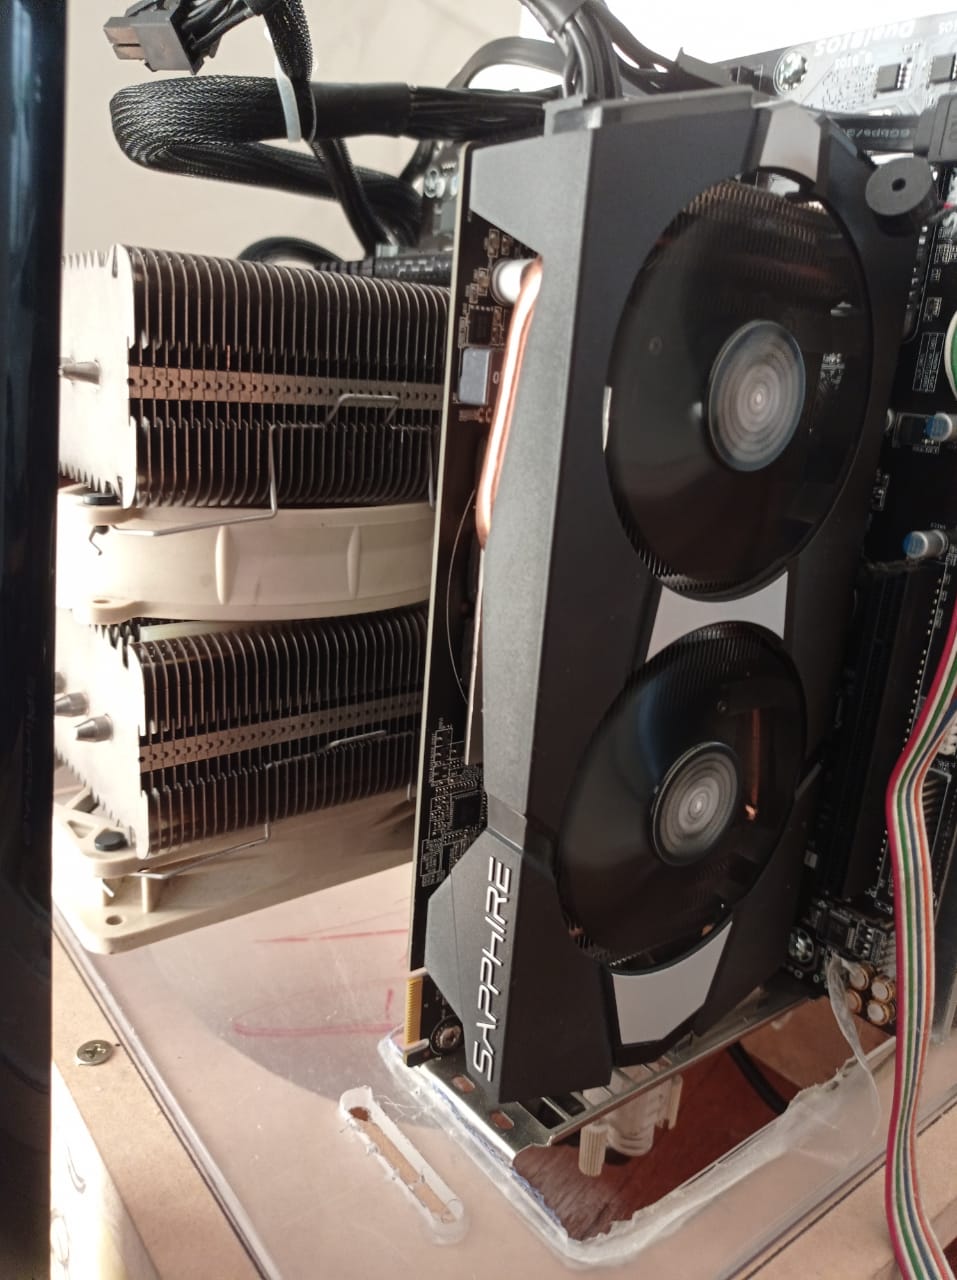
Test fit time!
Ok, soout of the bat, there won´t be any full assembly today much to my dissapointment. The reason, GPU is unmoutable due to interference of the normal case mounting bracket.
Modding the GPU bracket is a no-no since i want this case to work with my future hardware and don’t want to remove the back bracket of the card.
Also built a base to conduct my test fittings and run the computer while i finish designing/building the enclosure
For now i marked the areas to be removed, will machine them and try again, now picture time!
The assembly so far:
The areas of interference to remove :
More to come, next time hopefuly full assembly and boot! Also coming, enclosure drawings and renders!
2 Likes
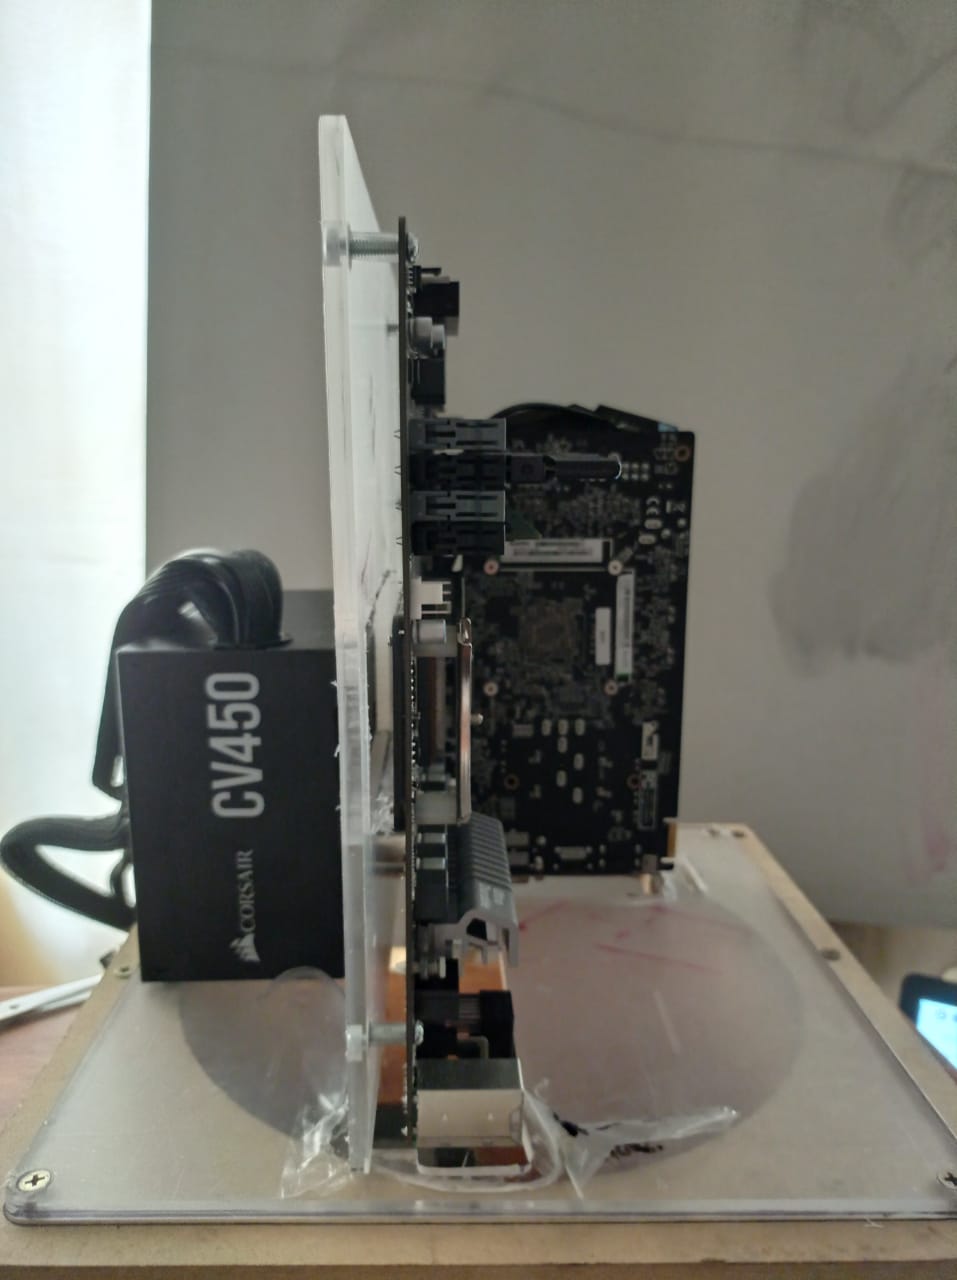
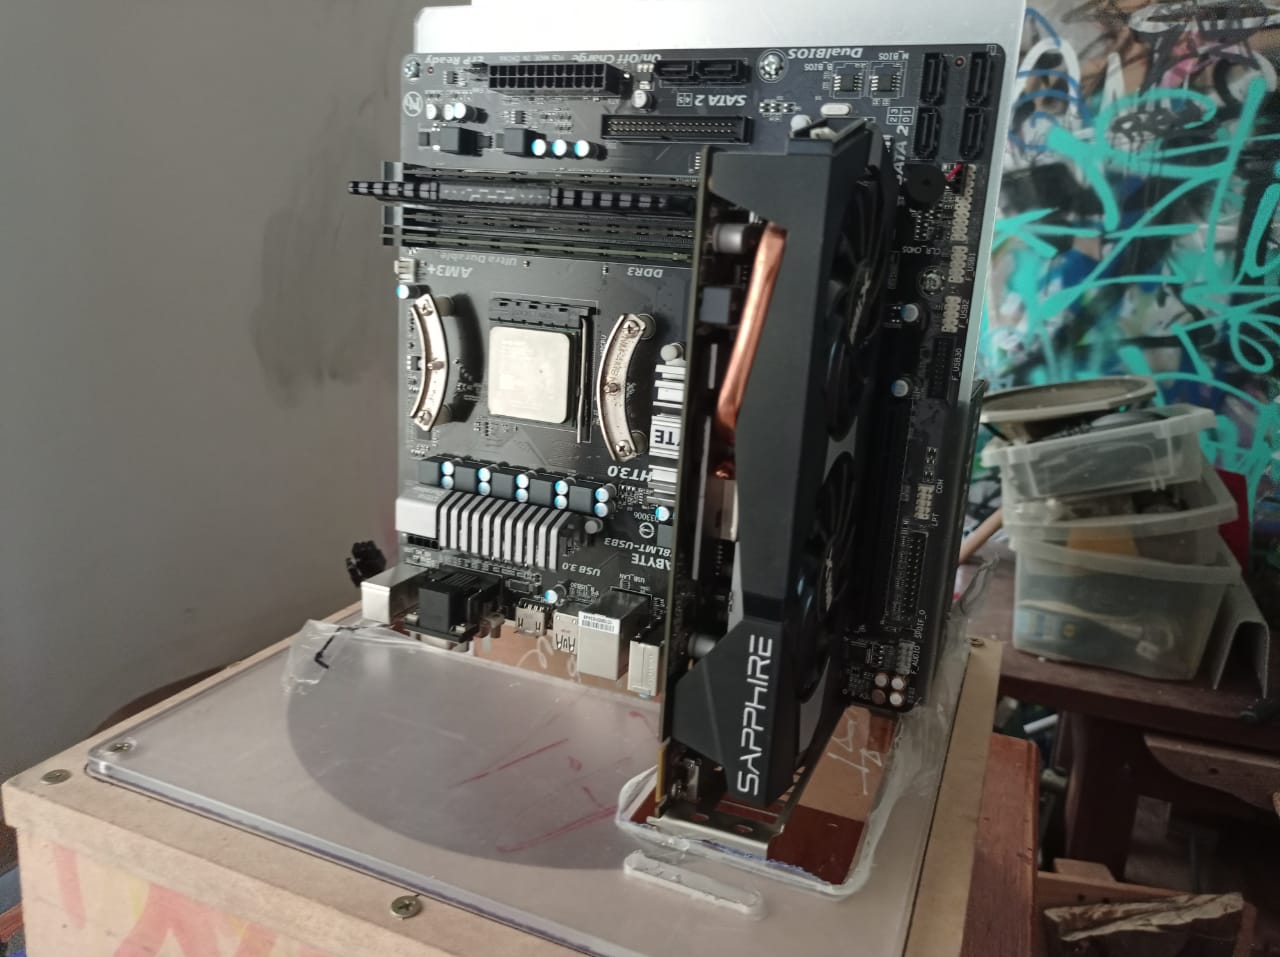
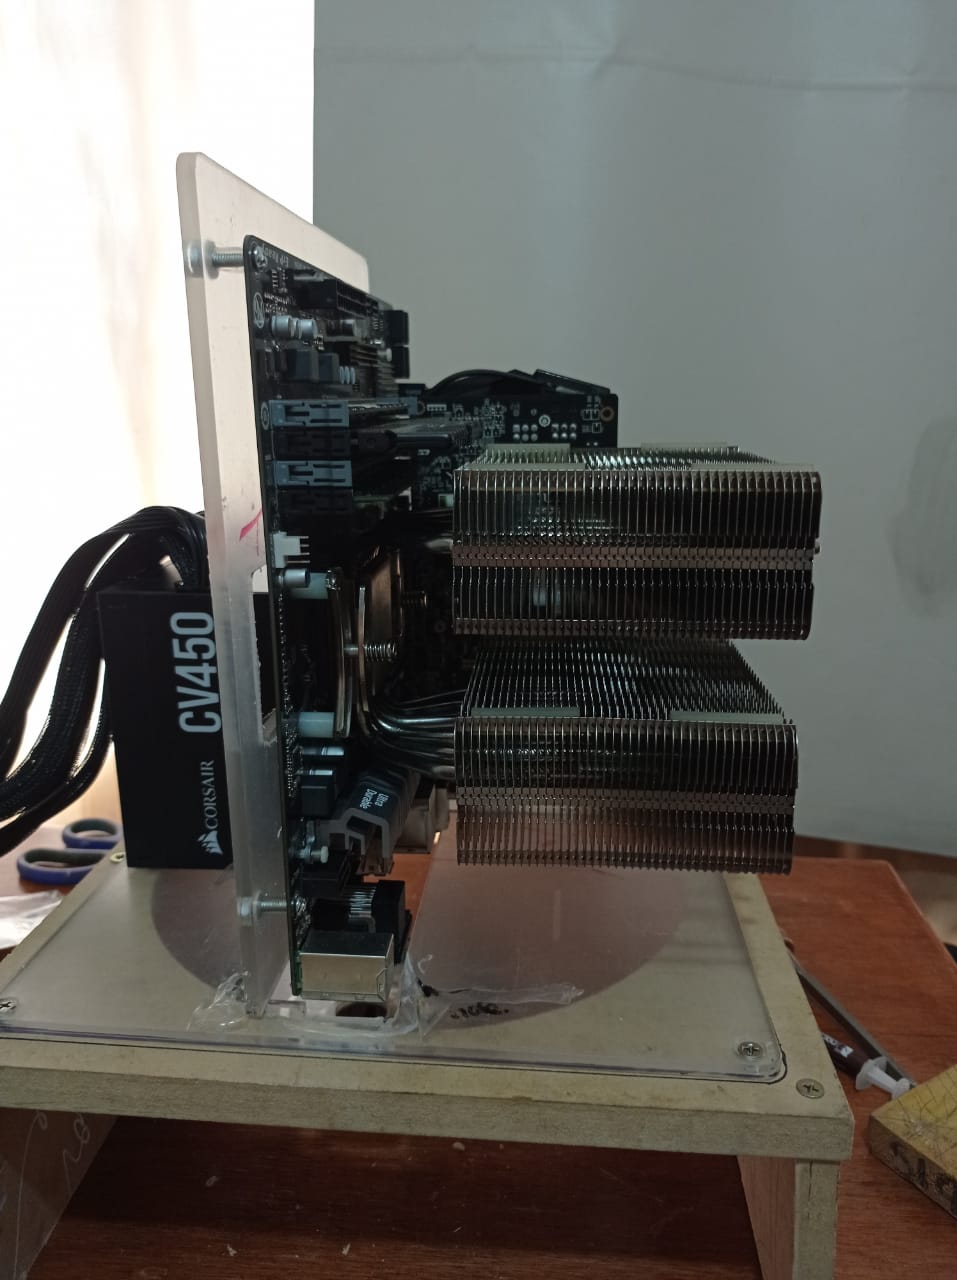
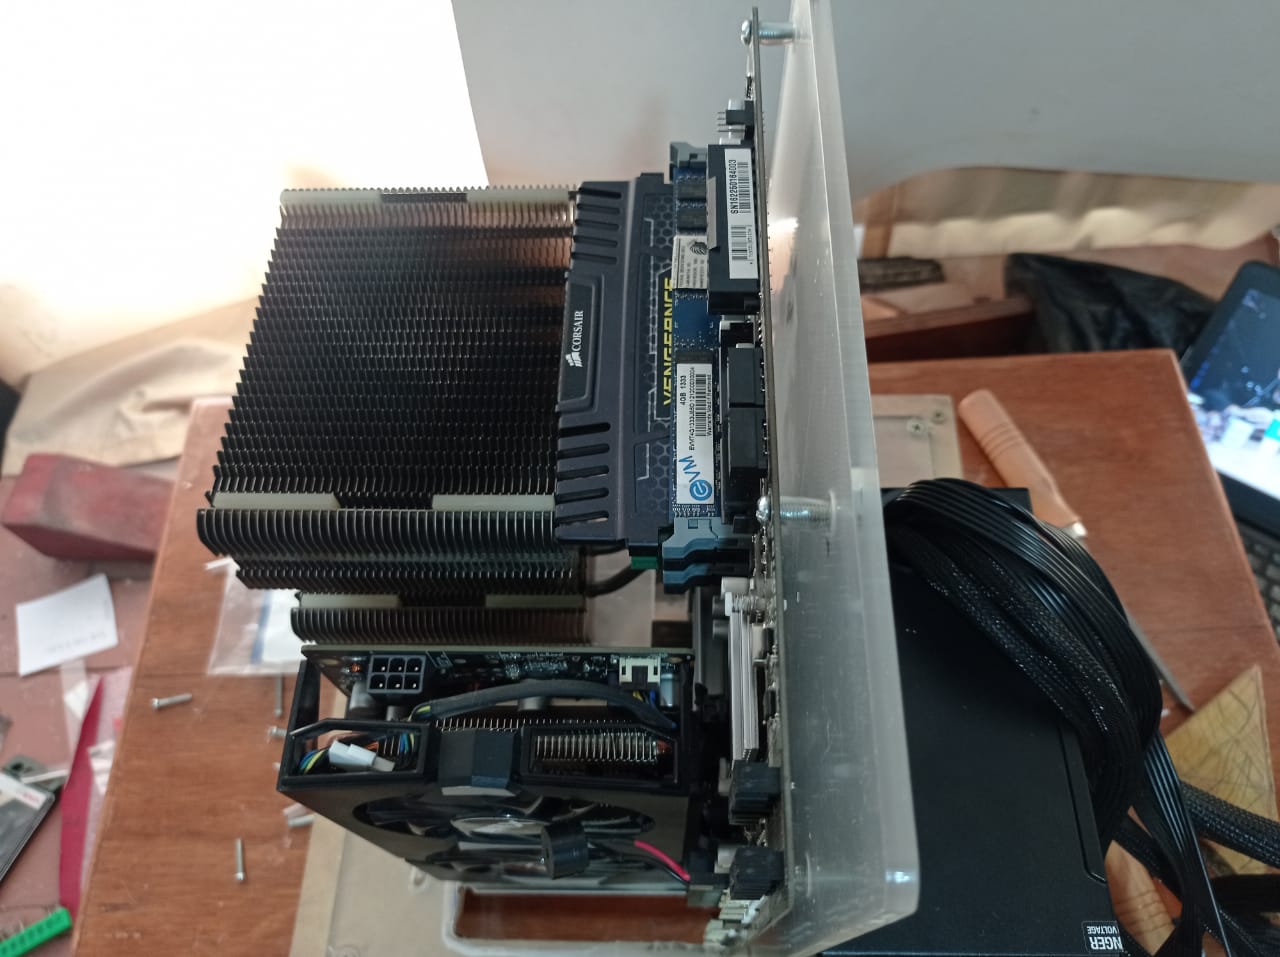
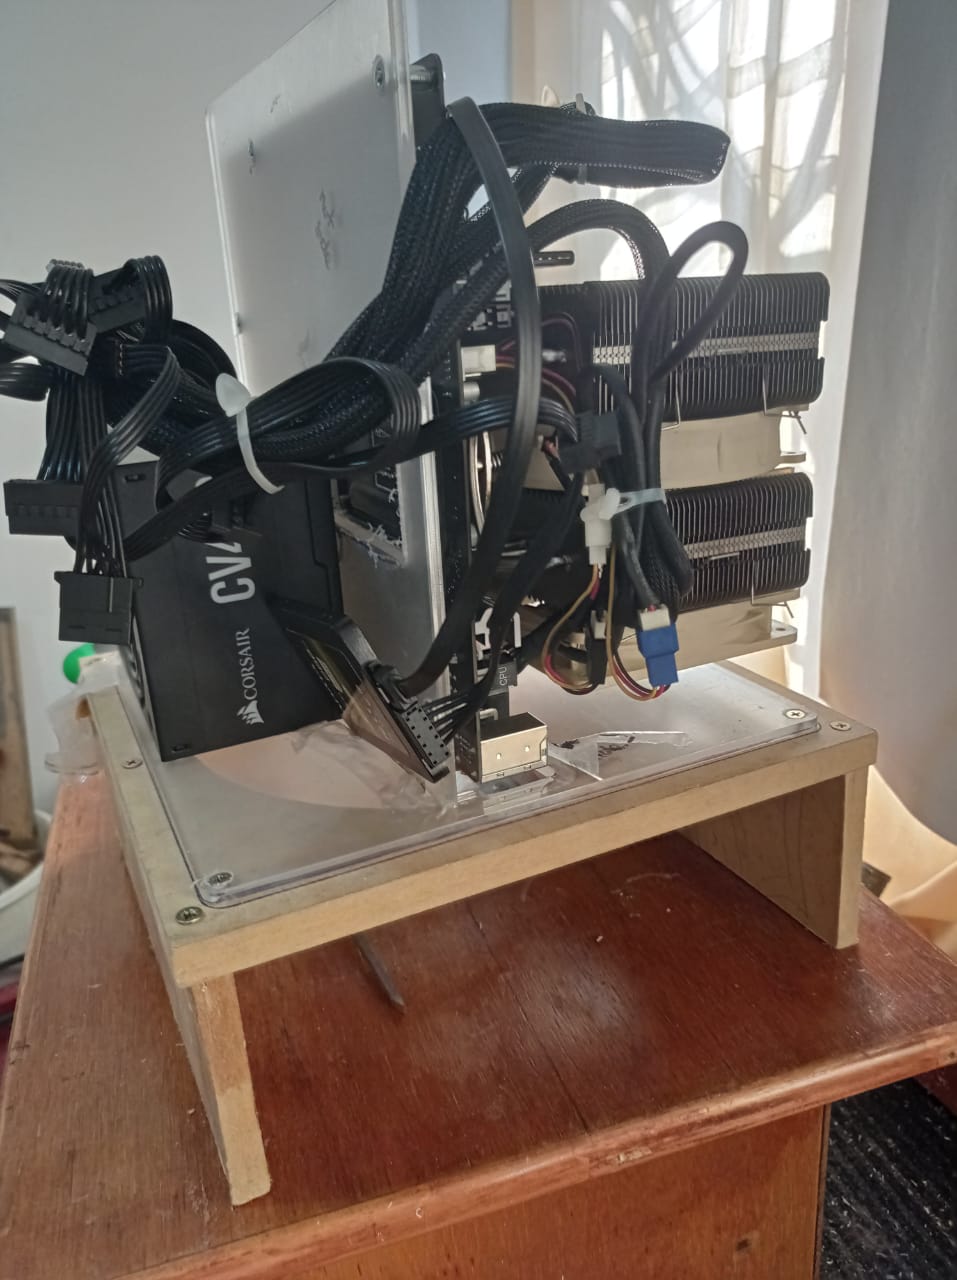
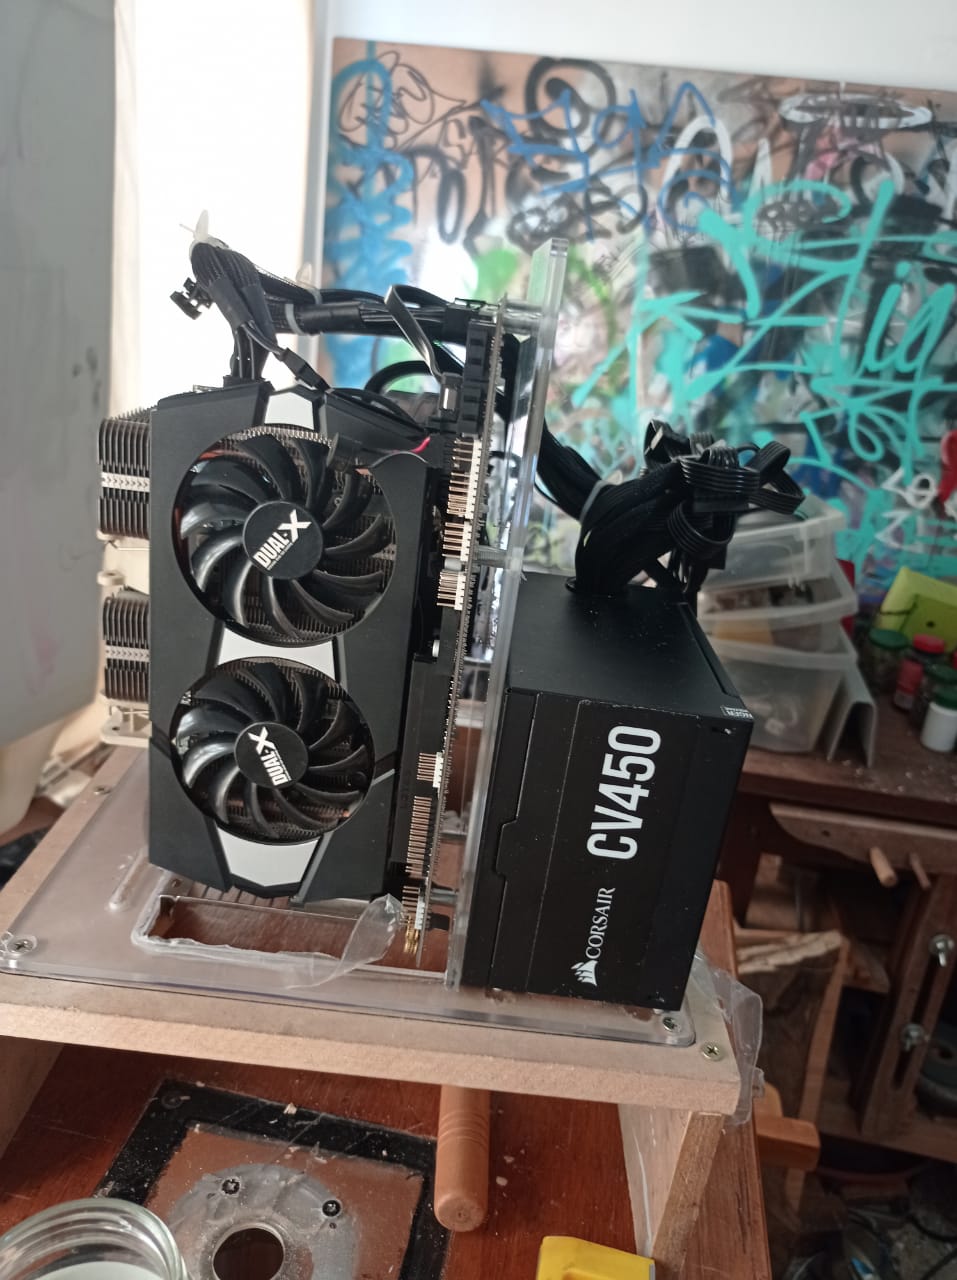
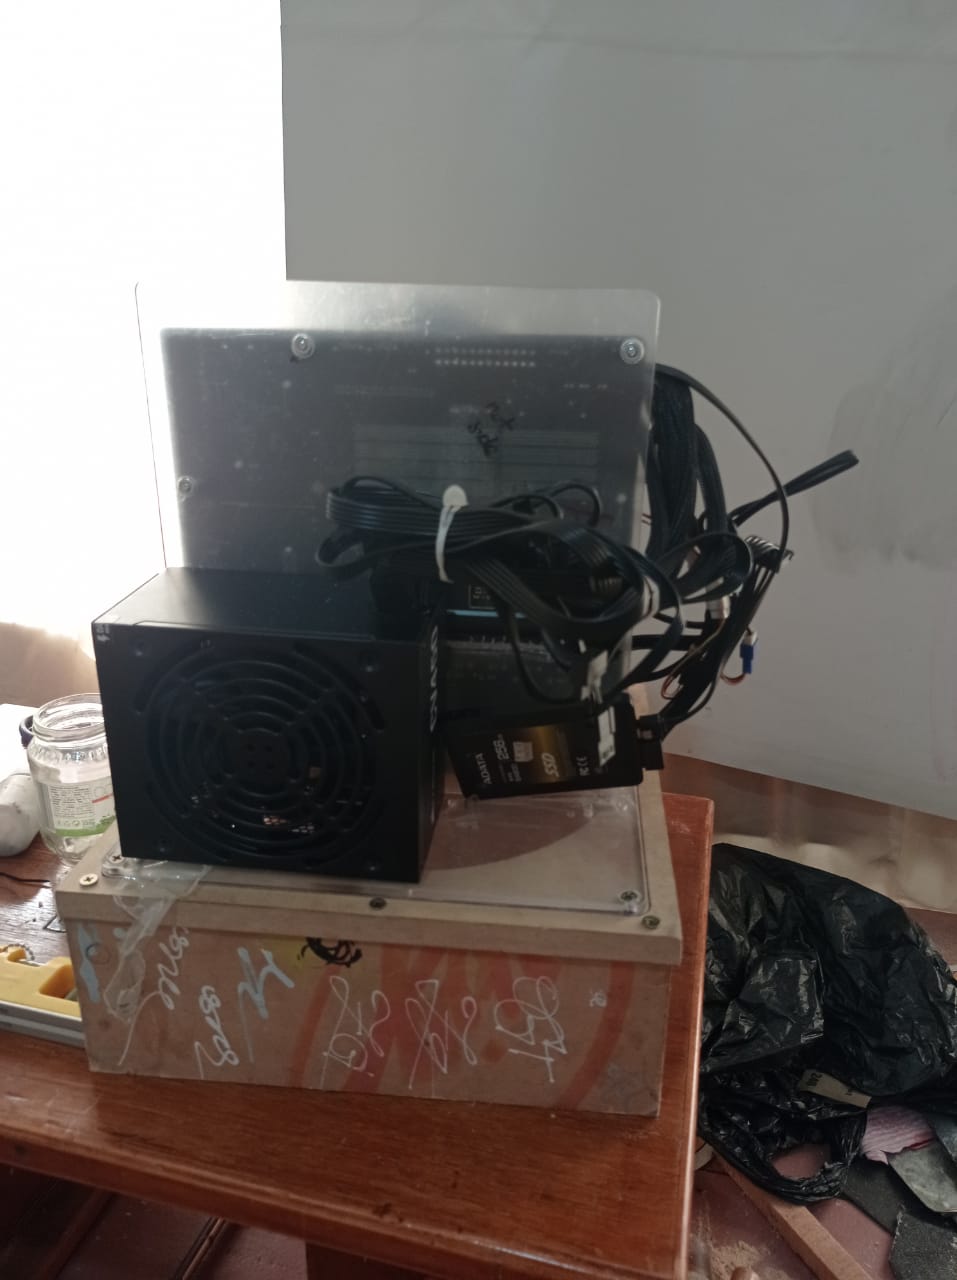
Hey! build time!!!
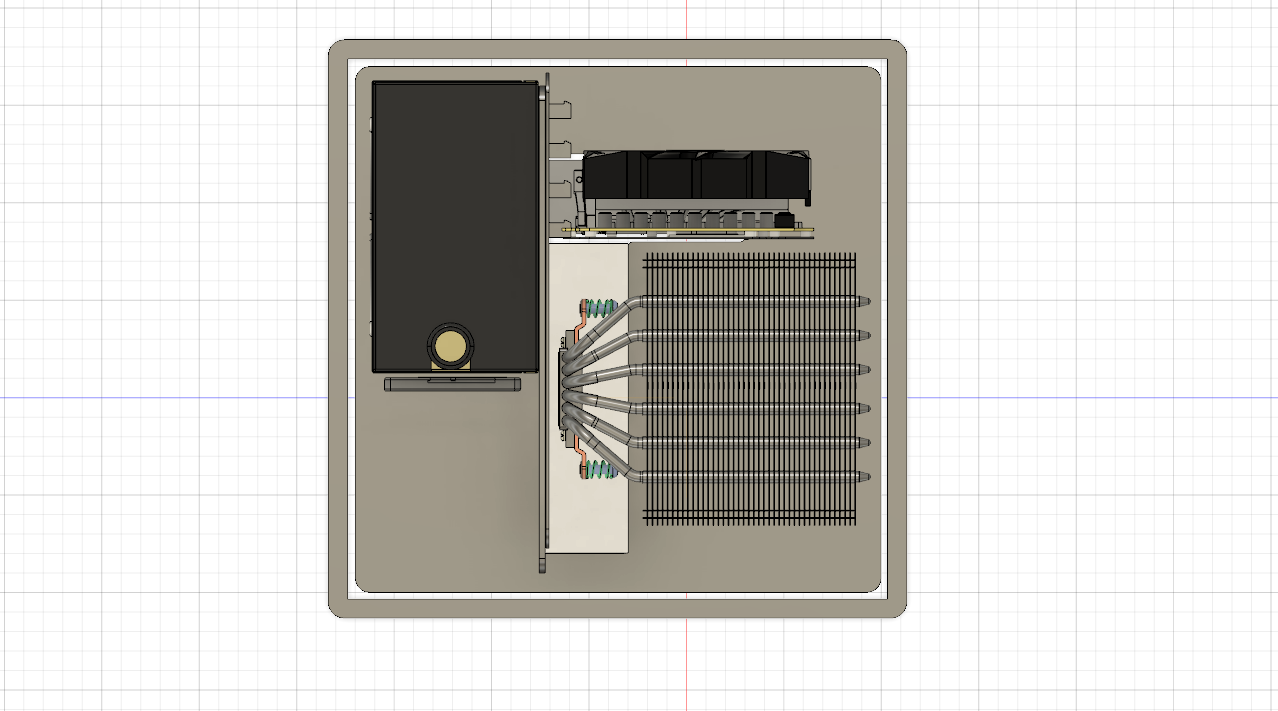
I actually put in all parts of the computer into the chassis!! and… learned a few things to say the least. this one is definetly SN1 ( to make a tiny homage to spacex glorious fireball prototypes). To say the least we need to go back to CAD and do some “adjusting” BUT! SN2 will be way closer to finish product (hopefully something im cool leaving be).
Problems in SN1:
GPU is firm but it could be way better, we also need a better way of hoding it in place (right now is propped by a screw to the temp base)
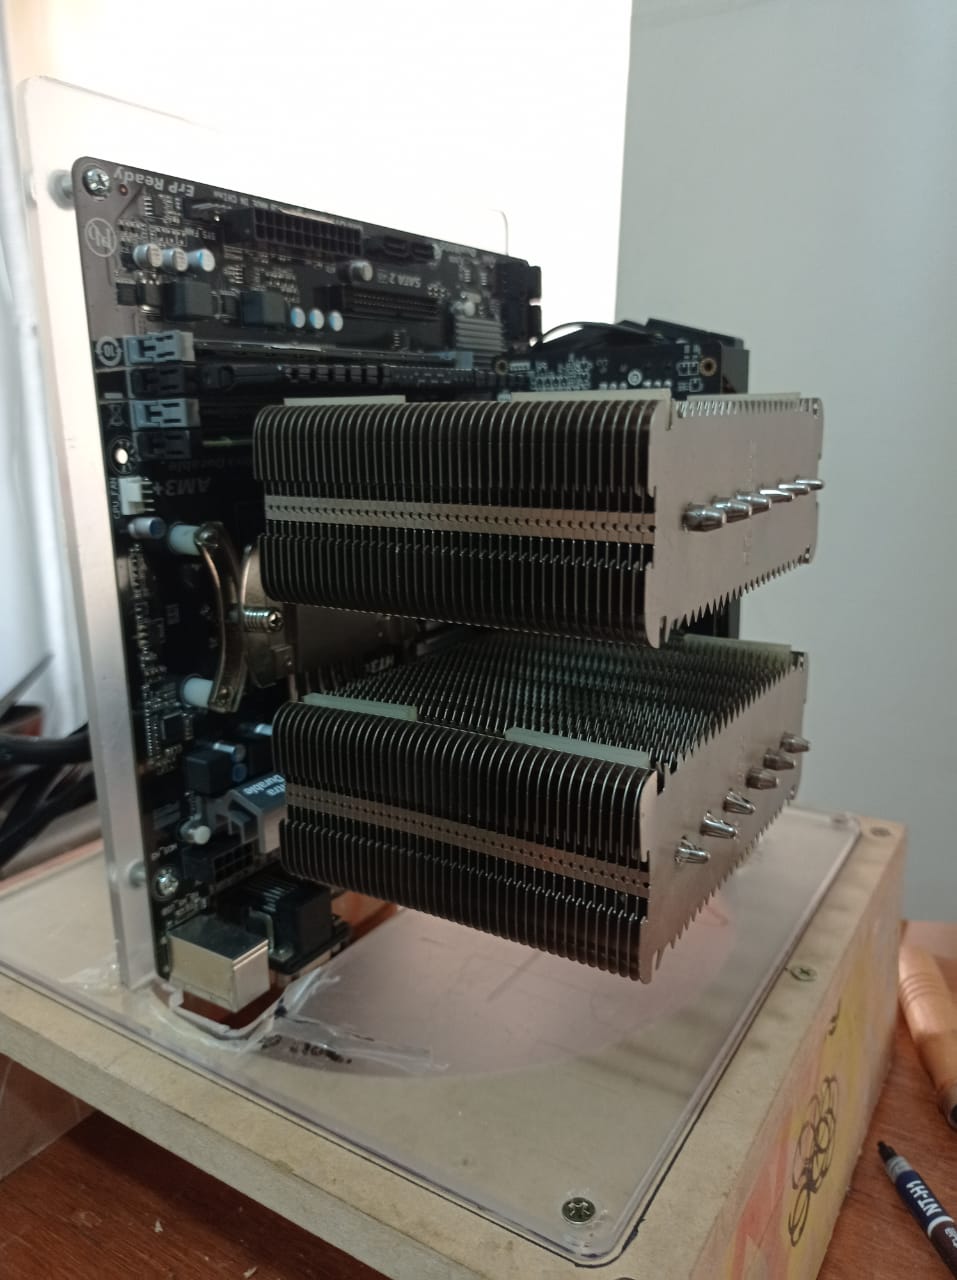
Cable Management, lets just way that no mind was paid to this… I need to add some more openings to route/tie cables
Deck flex. Like a lot! hehehe kids… computers are heavy! so next one will be on 10mm plexy
Misplaced holes: some holes for the psu and ssd are misplaced… will be less cocky now when finding them in ikea furniture… humbling experience lol
So withouth further ado the pics:
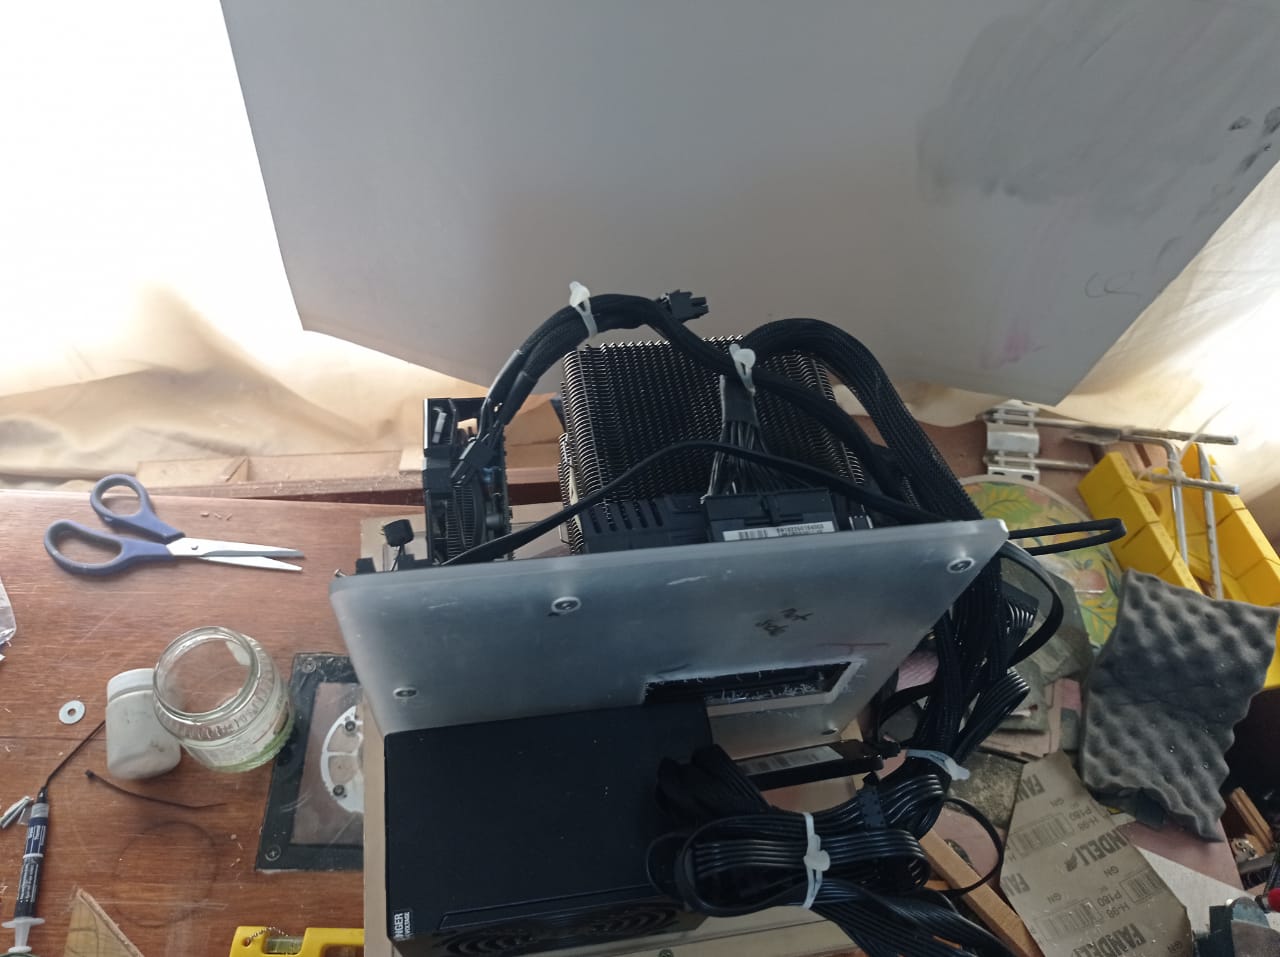
Cooler really put some torsion into the whole thing
Cables and fans ready to be powered…once i sort the switch
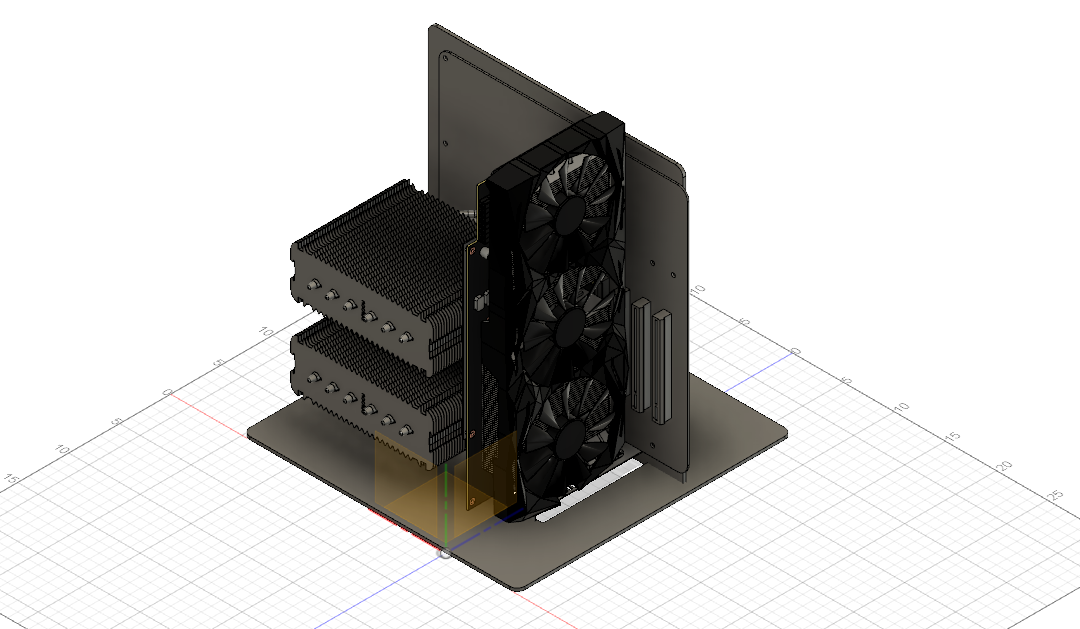
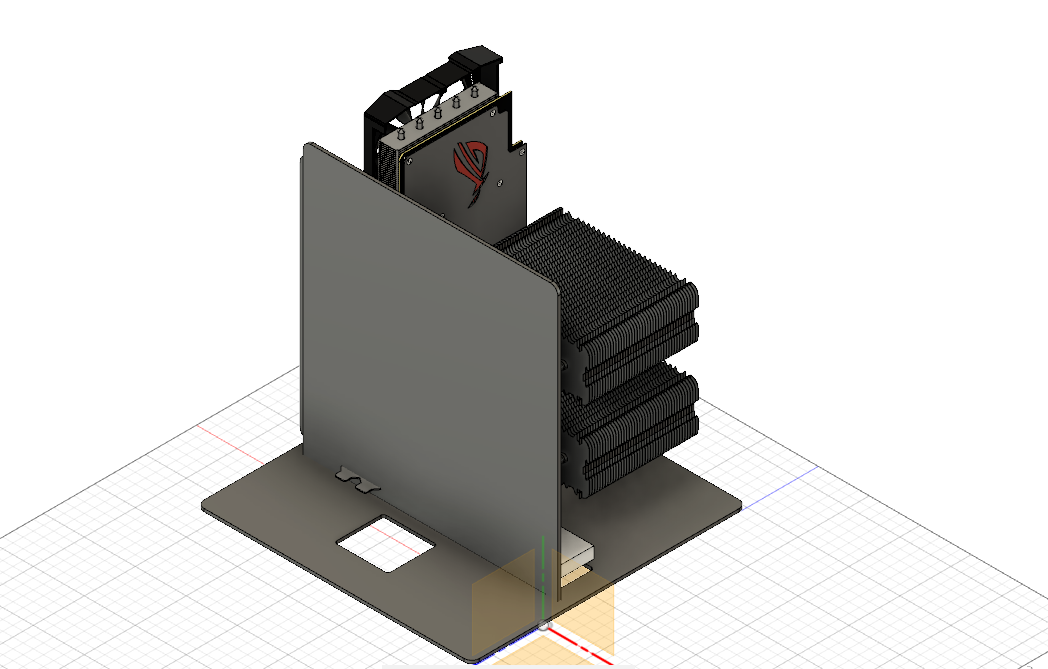
As promised last a sneak peek of the enclosure designs
4 Likes
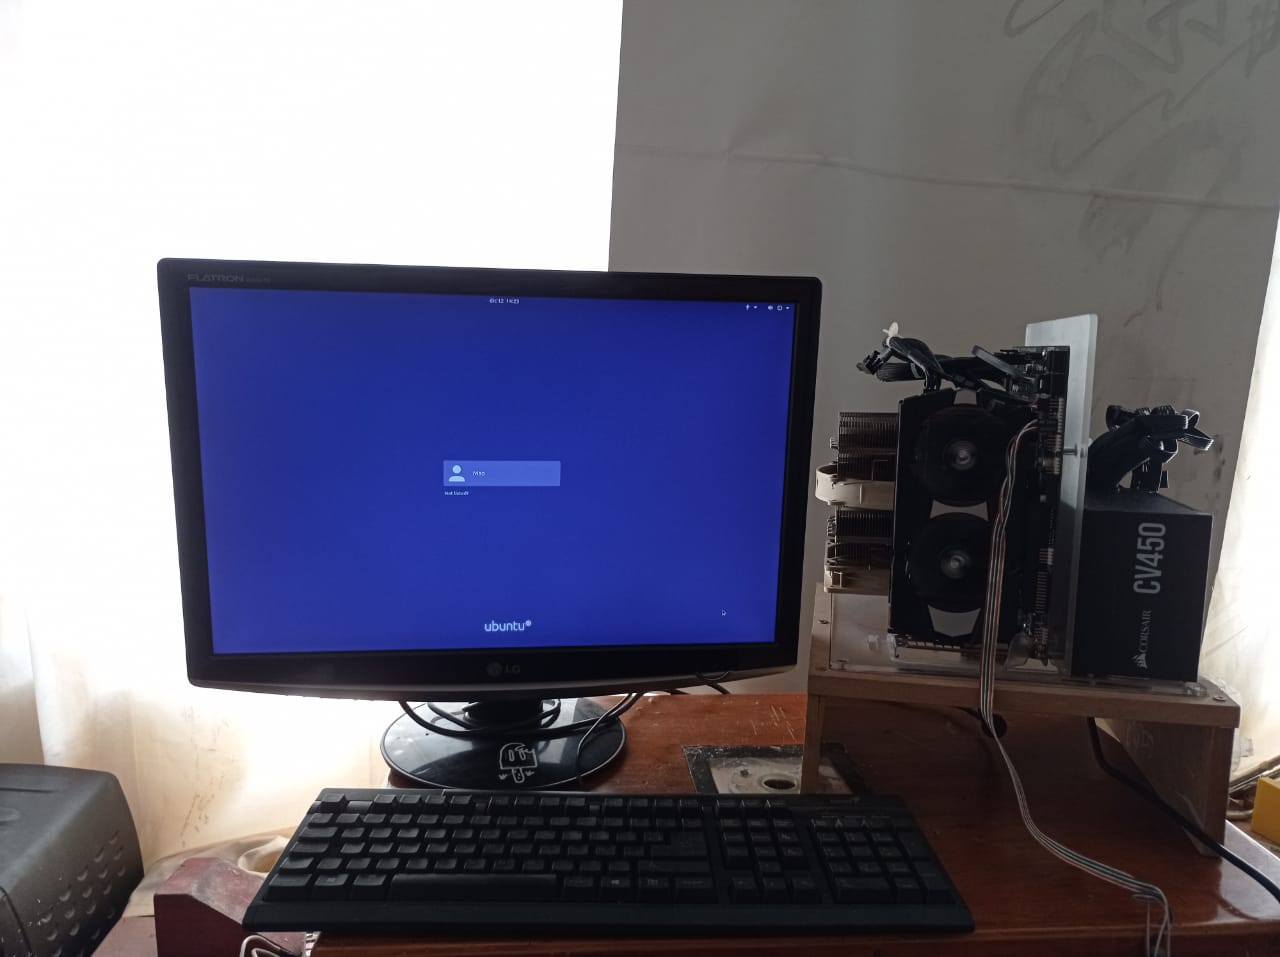
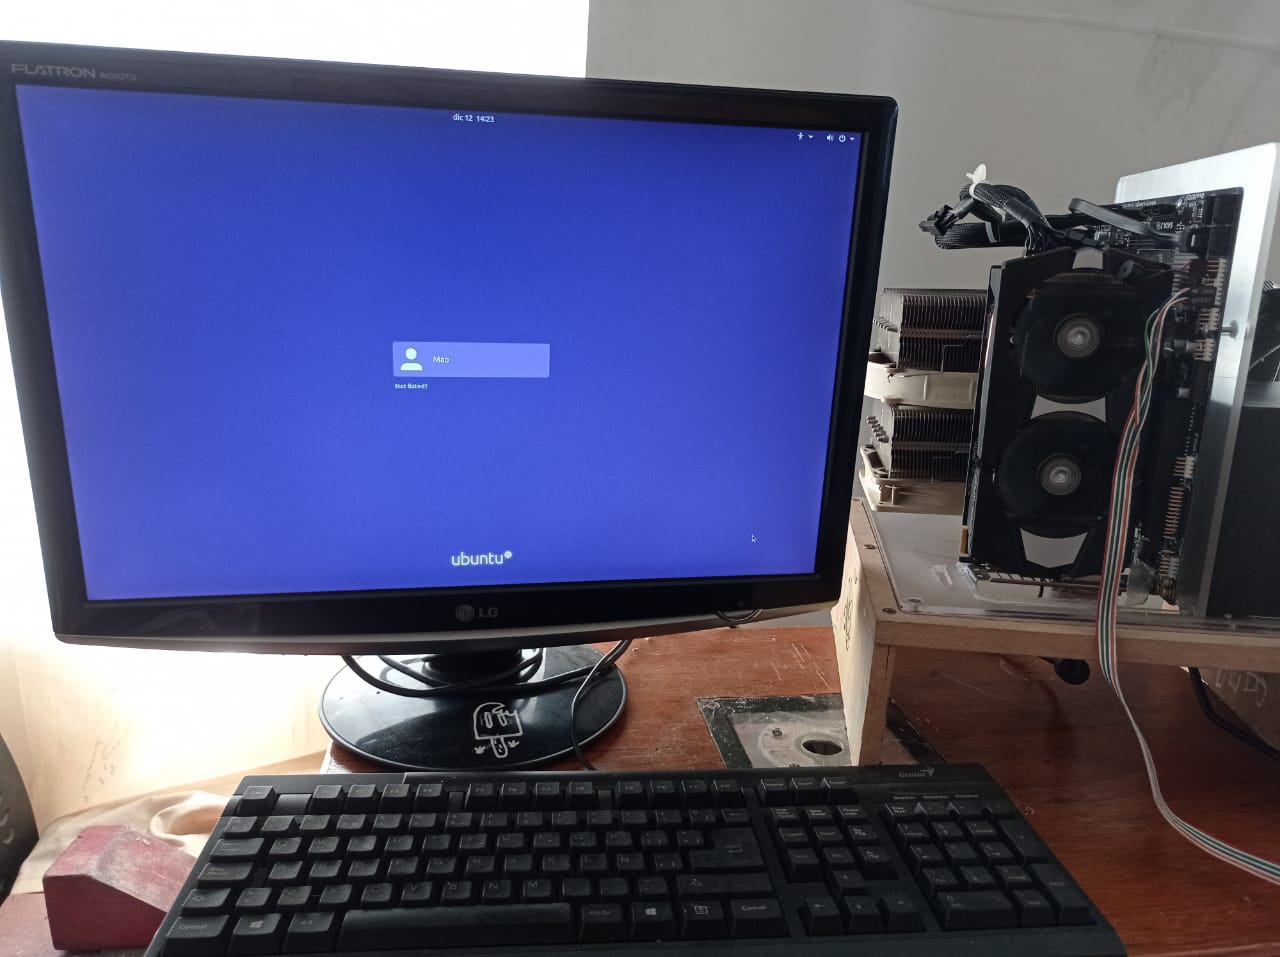
OK status update! ITS ALIVE!!!
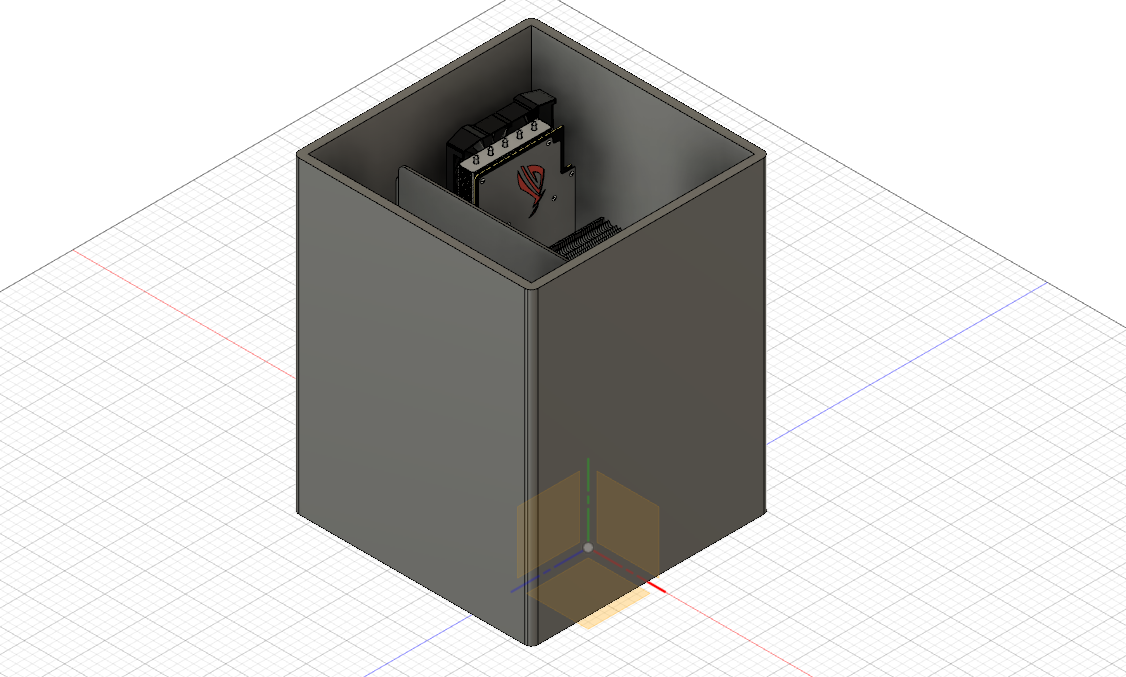
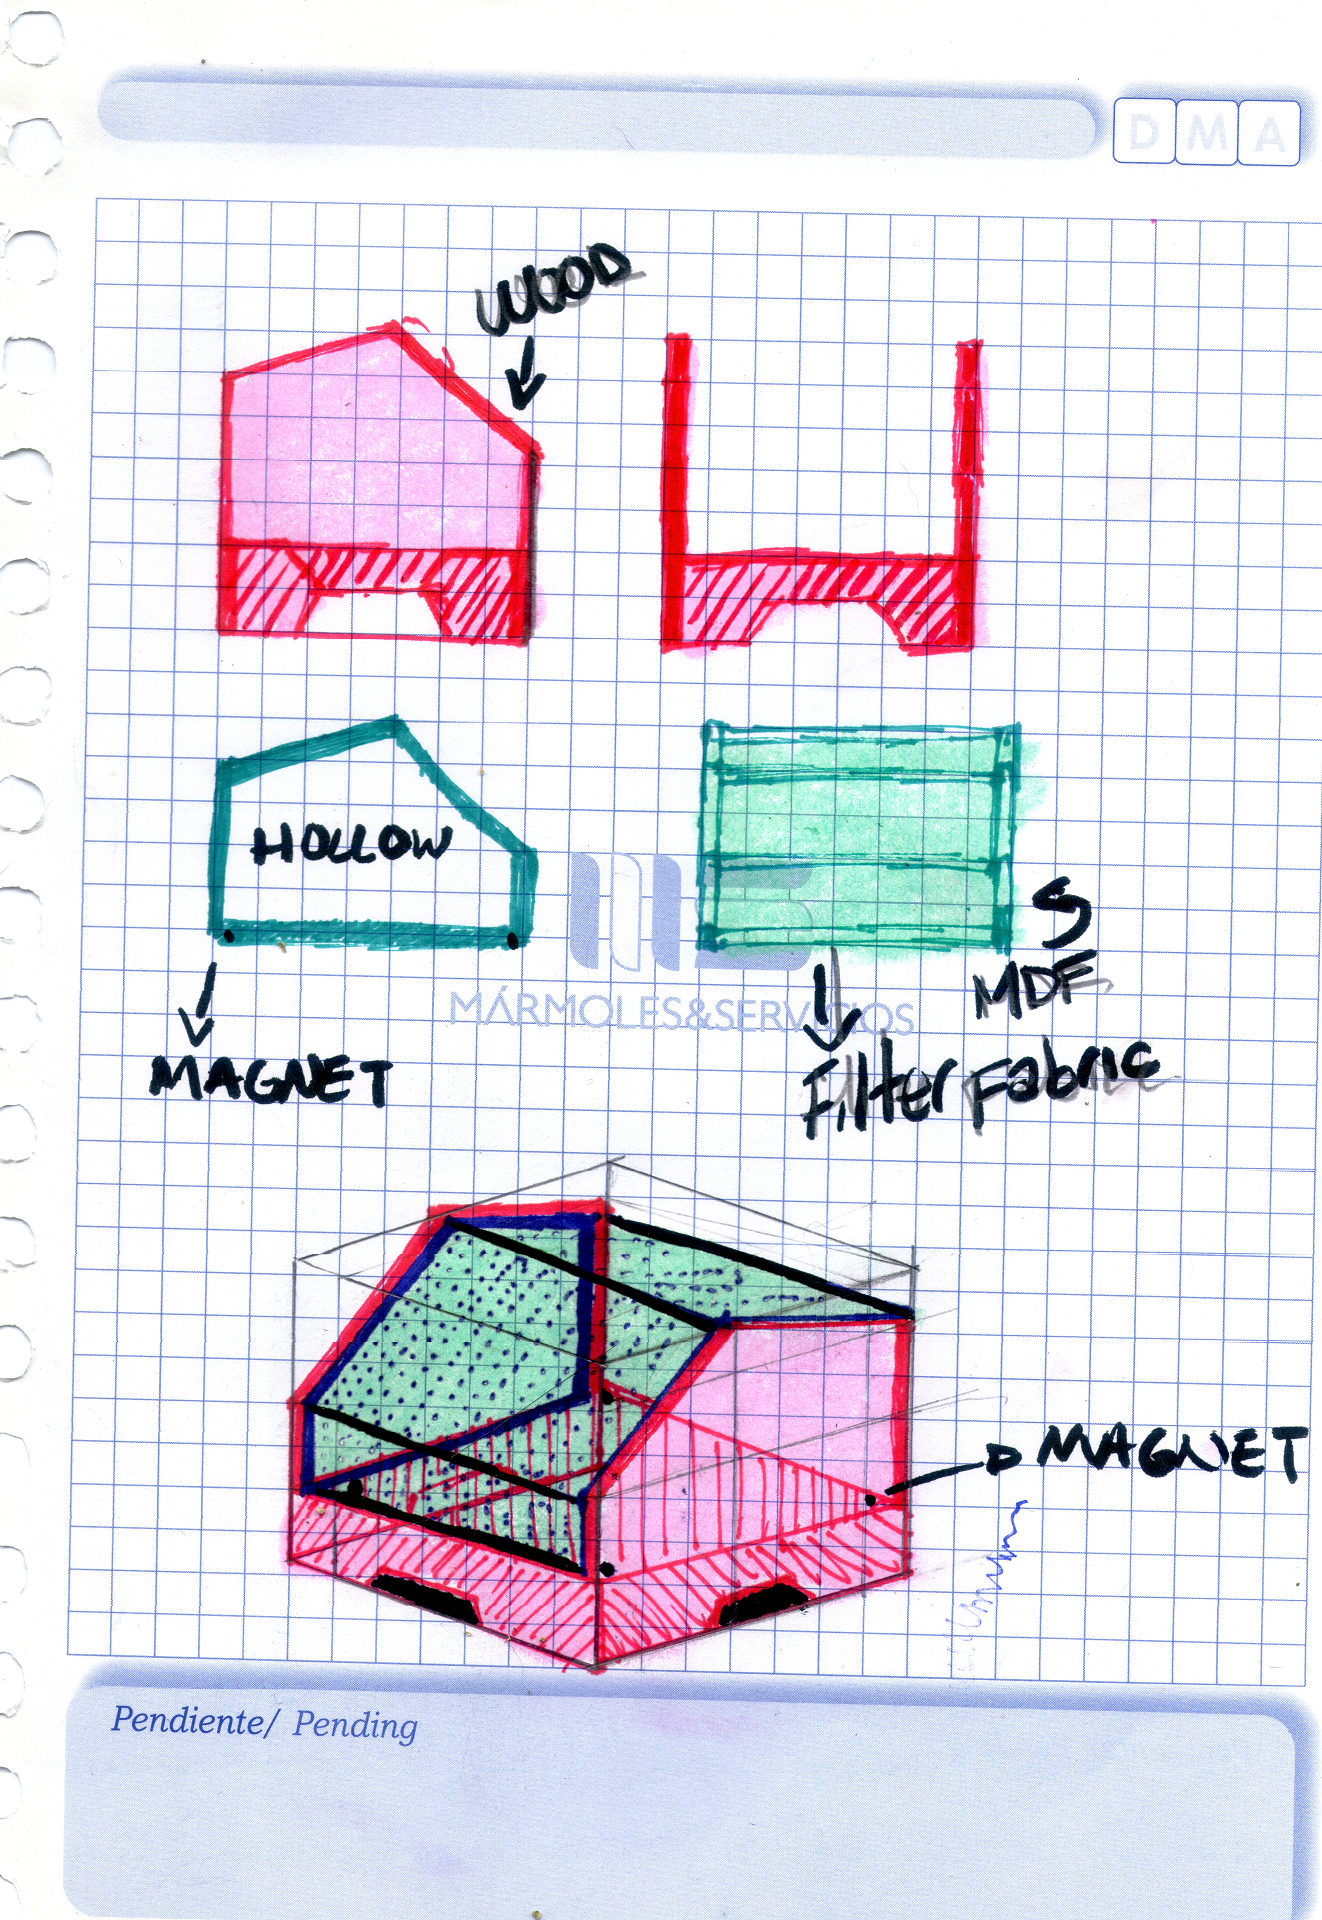
As for the enclosure design, I’ve been doing some inspiration searches (asking myself…“who would Jony Ive copy?”), so i decided that i like the idea of the filter fabric on top and wood on the sides but the shape needs some serious work either to go full house shape or more boxy, will upload explorations soon.
As you can see this will be more of lengthy build log more so aided by the fact that the final HW to go into this case is still TBD! so many exciting things going on on the HW space right now and also the scarcity of new parts mean that we have more time to polish our turd before actualy having to use it as a case for a main rig
3 Likes
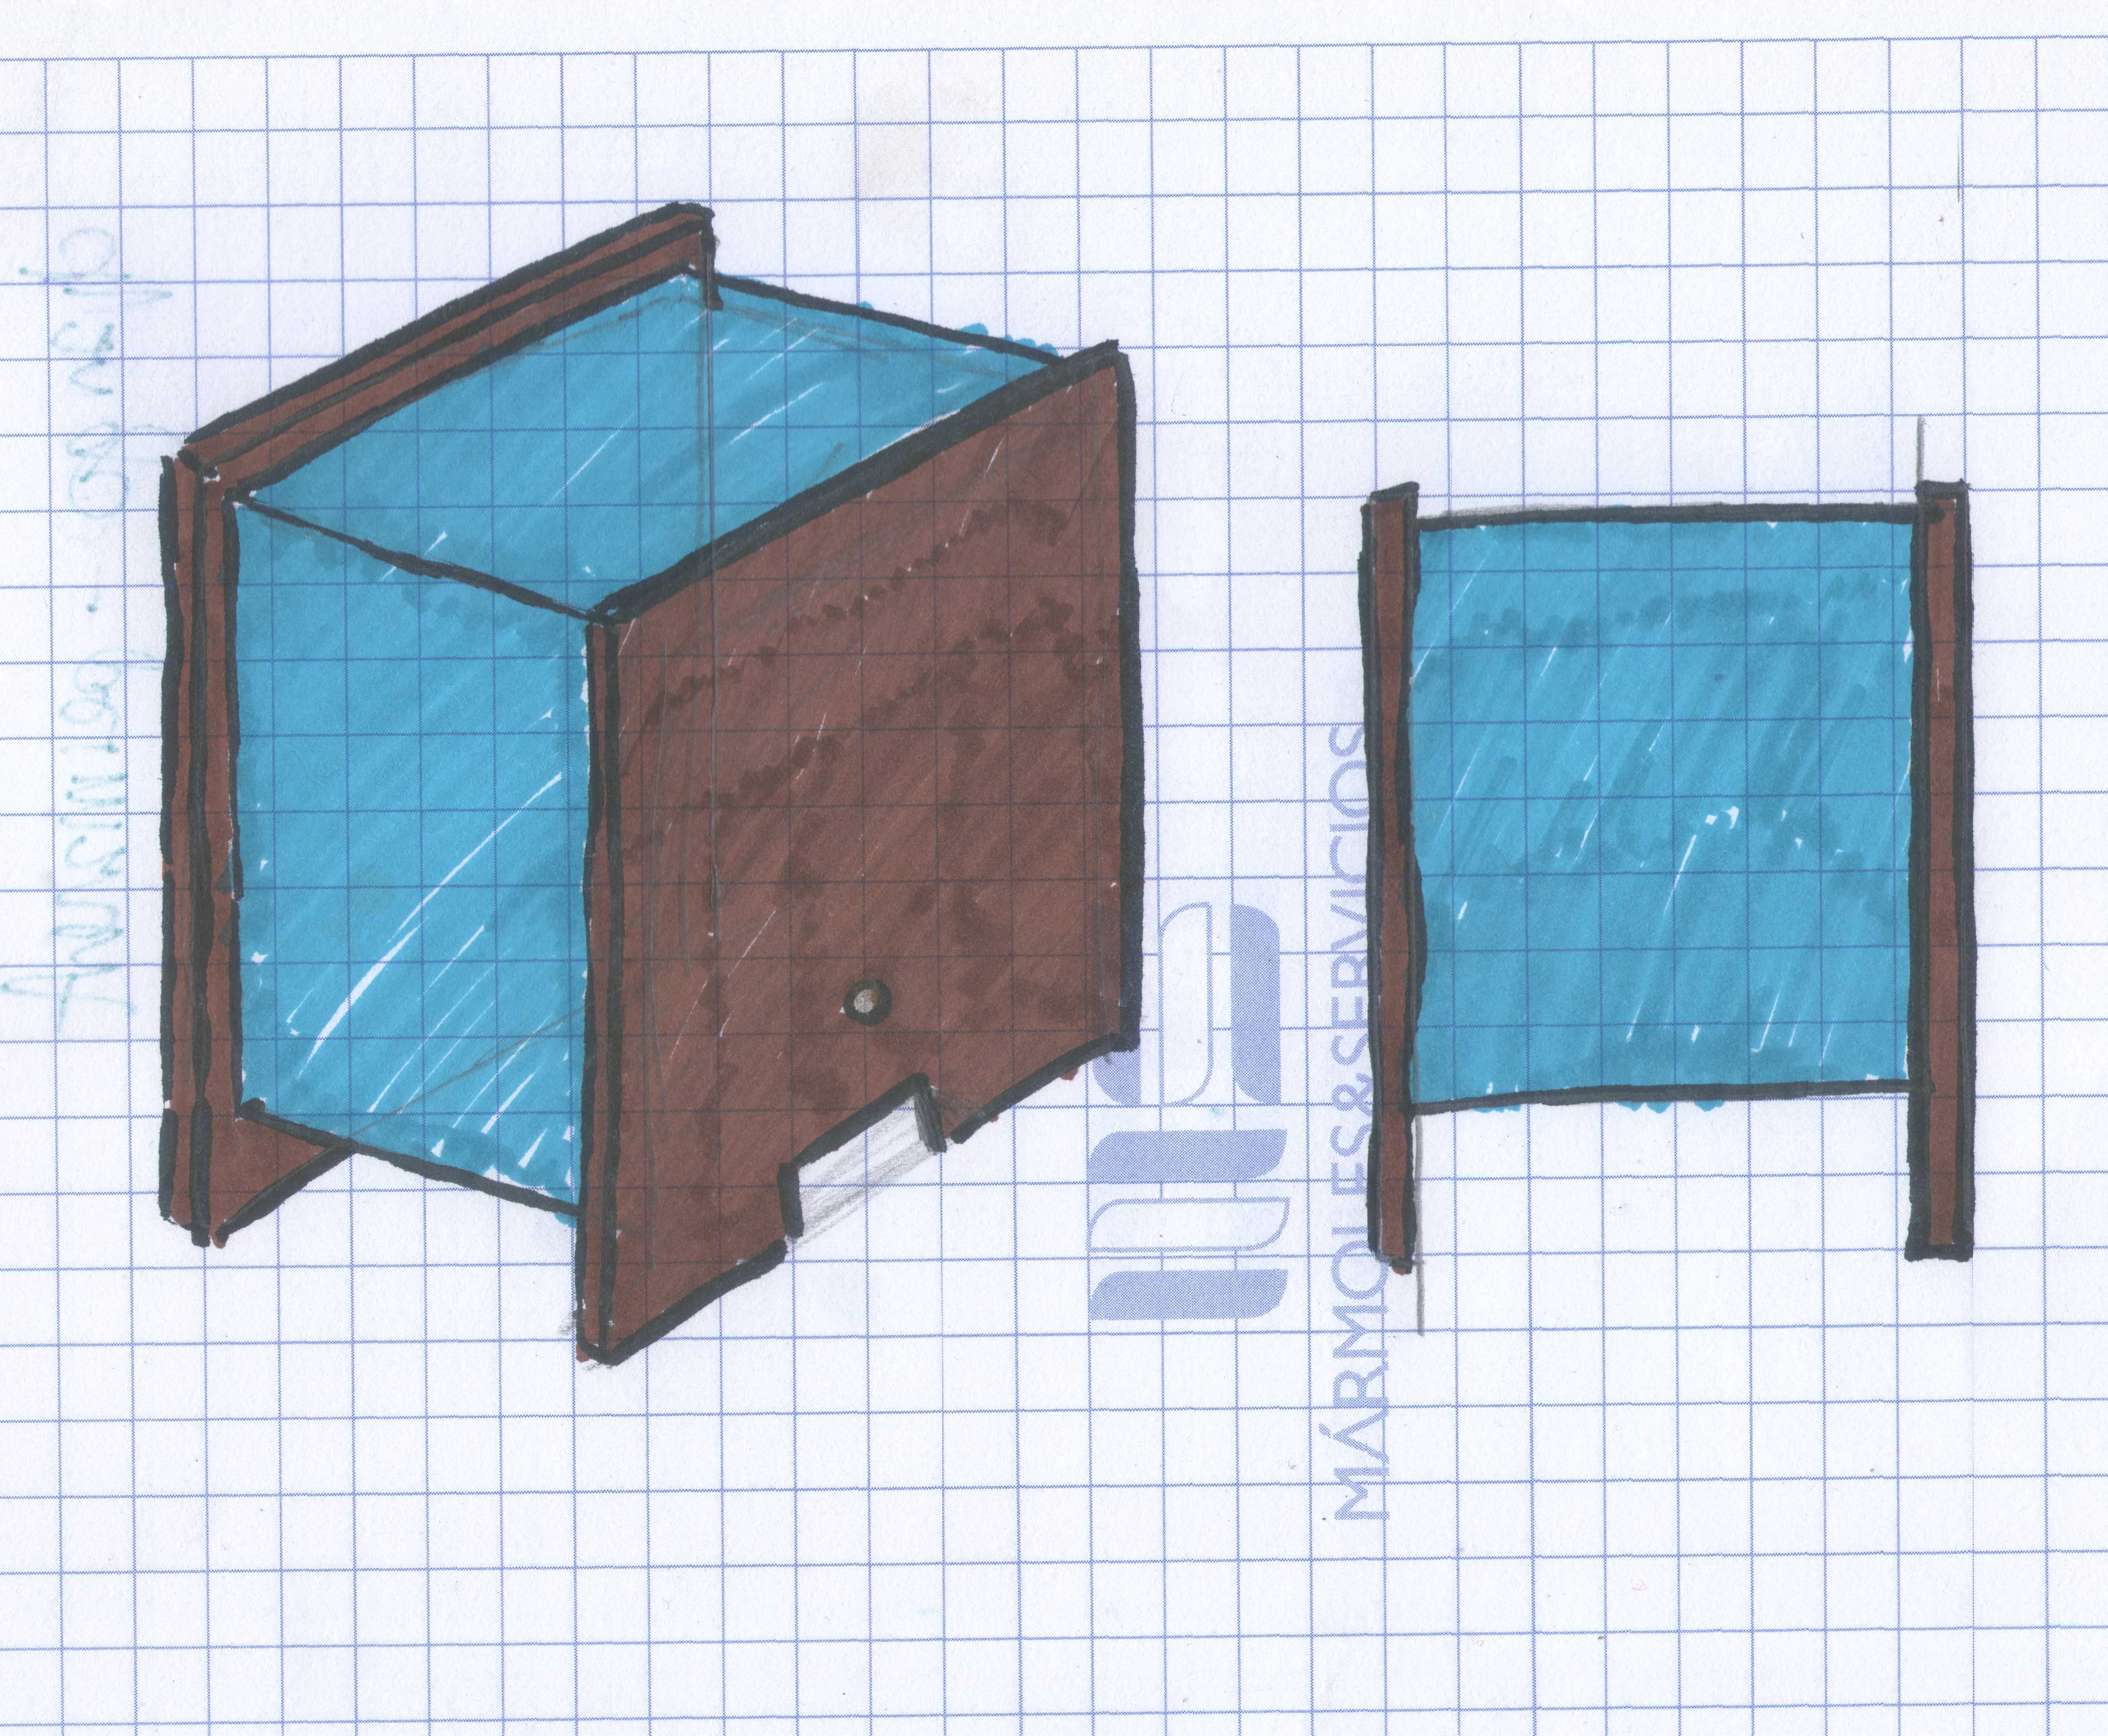
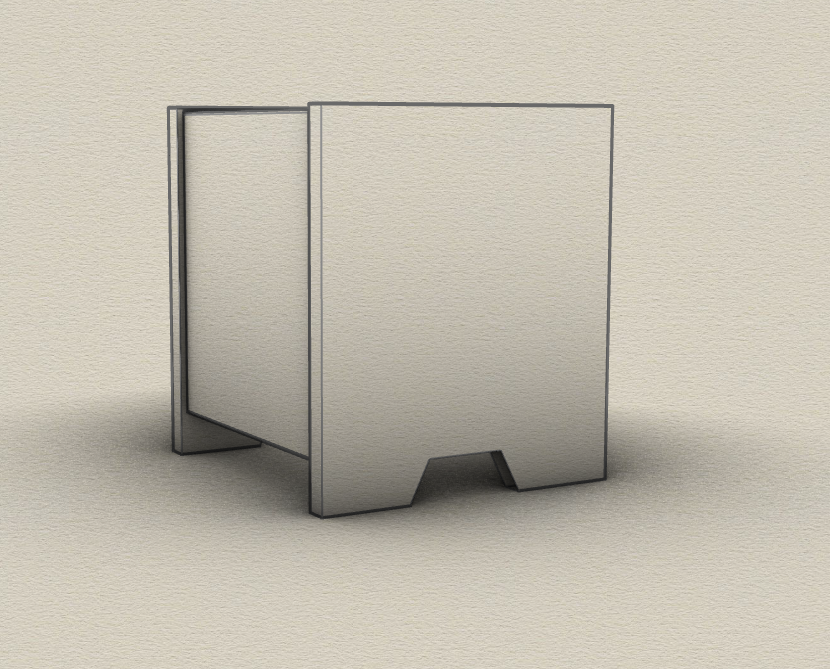
So lots of thinking going on, this is what i got so far, the blue area would be filter fabric. brown will be wood either teak or acacia depending on availability
Need to do some detailed design before cutting anything, will post here also, and need to find the most important part also… the switch!
1 Like