Marelooke's mess

Figured documenting my homelab exploits might be interesting to at least some people, and it might motivate me to actually finish some of the stuff I start working on… :wink:

So this will mostly be a WIP ongoing thing, in case I actually finish something I might do a proper writeup on my blog (or as a separate post on these forums, or both, depending).

Short history

Like many people I initially started out by (ab)using old desktops as servers. This went fine until I switched to a 5 disk RAID6 setup (+ 1 OS disk) and melted the motherboard chipset (pretty close to literally, burnt my finger on the damn thing) on my then-server. Result was some corrupted data and a pretty dead motherboard.
So I bought a (new) Supermicro server and moved the entire setup over. With this I now had hardware that should be more suitable for constant operation, but still no real protection against data corruption (it did gain me ECC RAM though).

Unfortunatley the only real option at the time for that was ZFS, on Solaris. And while OpenSolaris was a thing, switching my only server to Solaris was just not going to happen.

So I’d been keeping an eye on Btrfs hoping for raid5/6 to stabilize to a point where I’d feel comfortable to start using it, which never really happened. Though even if it had it would still have posed the problem that I already had a lvm+mdadm setup so I’d have to do some funky stuff to get that to work in the current setup, and I doubt that would have been pretty. Alternatively, I’d have to look for a new machine and move everything over…

Starting hardware

Name superbia
Enclosure Supermicro SC743TQ-865-SQ
Motherboard Supermicro X9SCA-F
CPU Intel Pentium G620T
RAM 8Gb DDR3 Unbuffered ECC
HDDs 1 x Seagate Barracuda 320GB
3 x WD Green 1TB
2 x WD RE4 1TB
OS Gentoo GNU/Linux

This box ran basically everything, among which:

  • router/firewall/dns/ntp
  • incoming e-mail and spam filtering
  • build environment (Jenkins, etc.)
  • IRC client
  • version control
  • file sync and sharing
  • media server
  • web server

So if this machine was down our entire network was basically down, so experimentation had to happen when it bothered no-one. Not ideal, but this is how I ran my stuff for a very long time.

Initial upgrade

Since I started running into both memory as well as CPU limitations (I blame Docker :wink: ) I researched what was possible with the motherboard and took to Ebay (big mistake) to see if I could find anything at a reasonable price.

I ended up buying a Xeon I3-1270 v2 and 32GB of DDR3 ECC SDRAM (effectively making this machine more powerful than my desktop. Hmm)

I also noticed how relatively cheap old enterprise stuff was. Not having upgraded anything in quite a while due to the entire “buying a house”-thing tying up most of my …time… I figured it was time to treat myself to some new toys. After a bunch of research, since I was basically 8 years out-of-date on hardware.
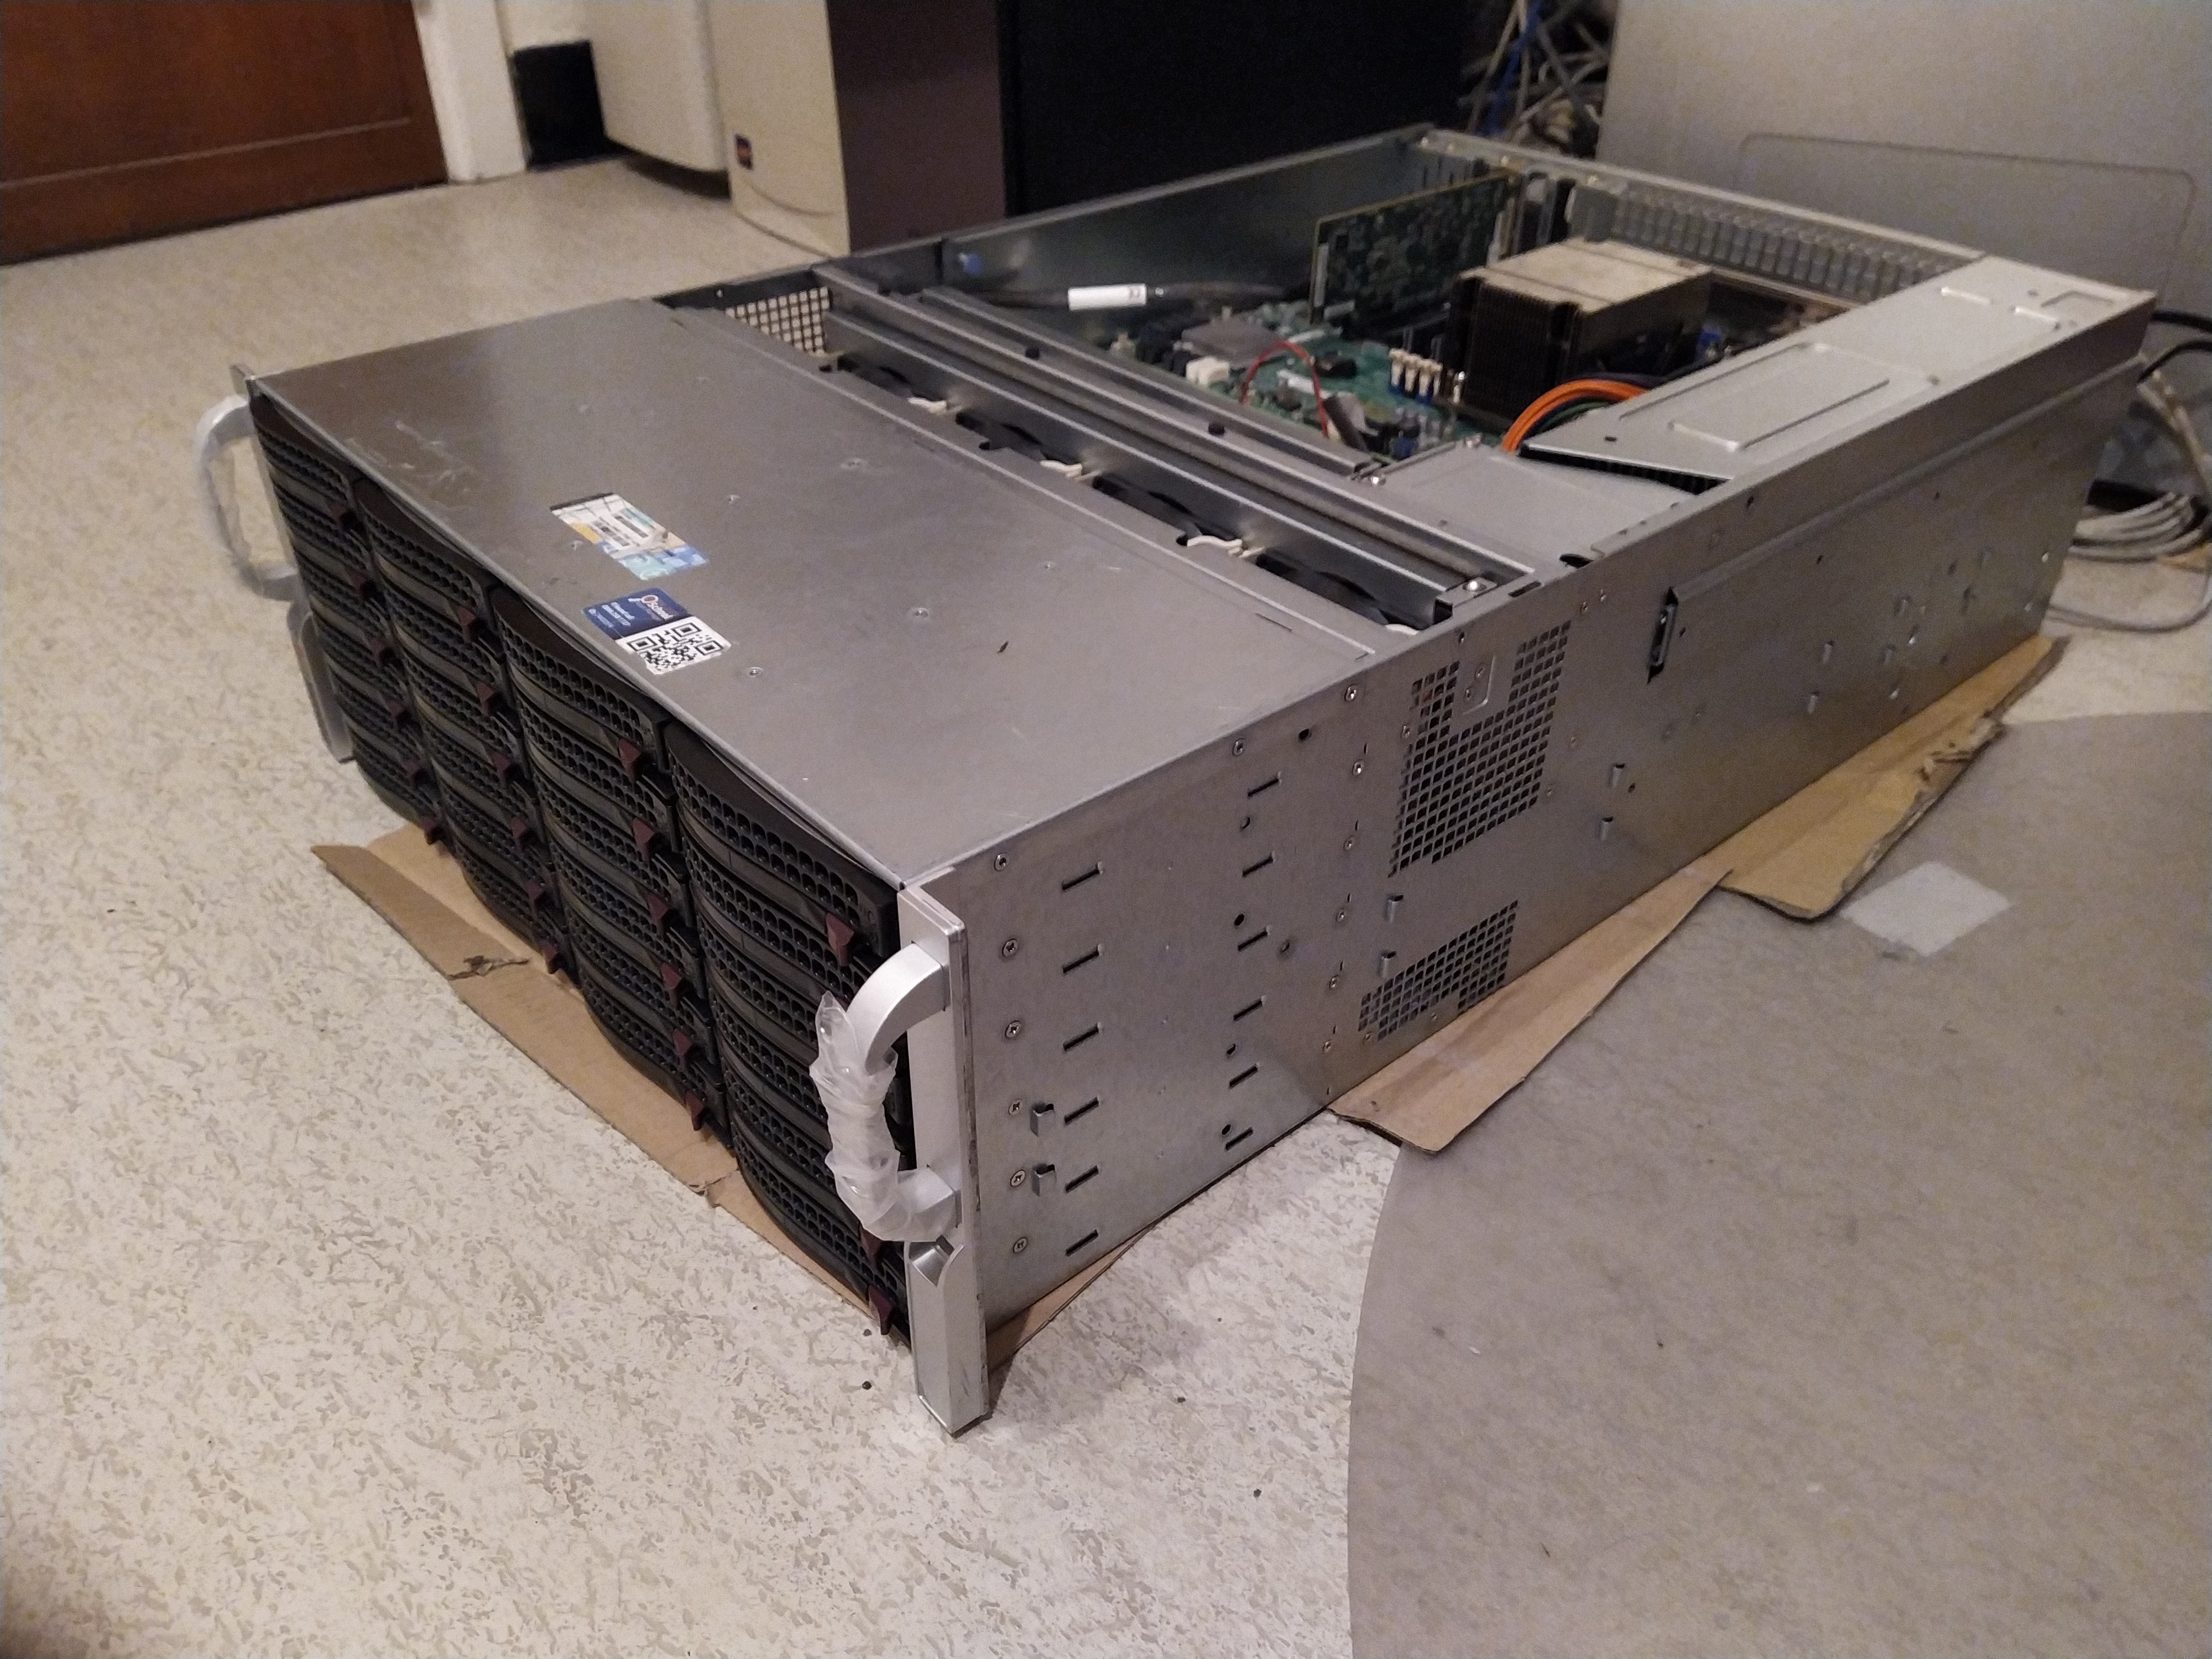
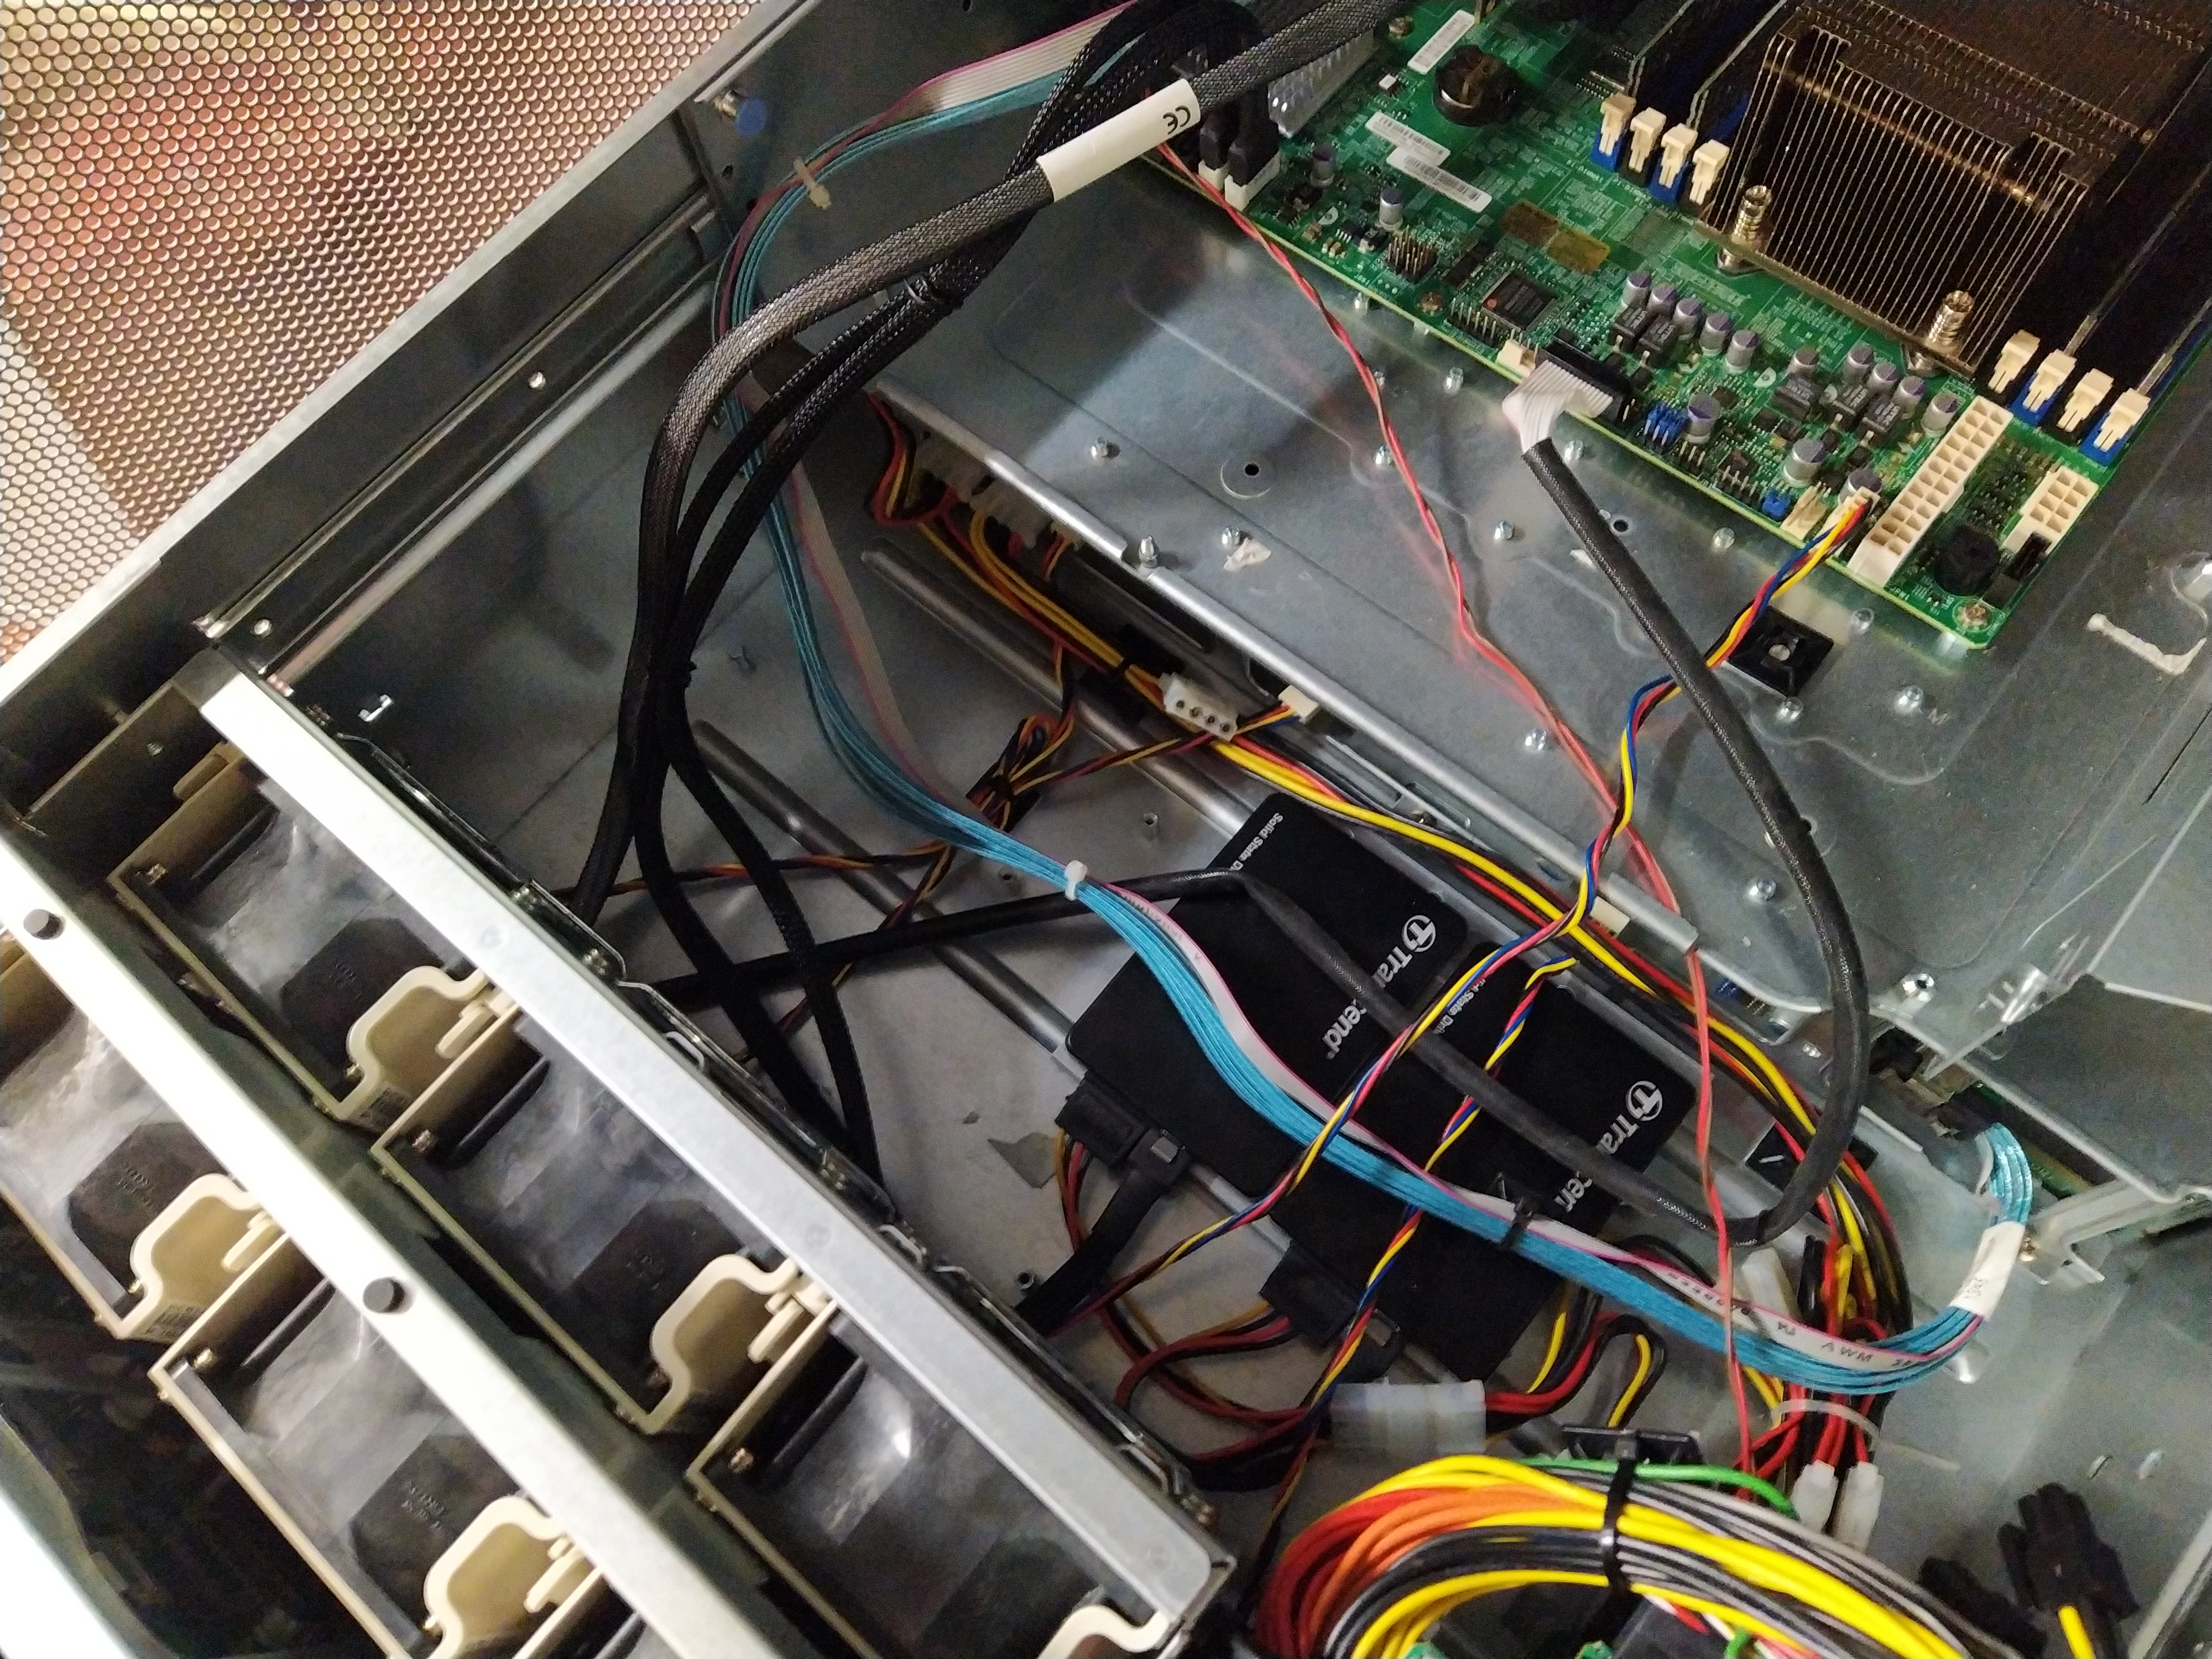
Gula (FreeNAS)

So after reading a bunch (but not quite enough, never enough…) I ended up getting gula (more details on that build in the thread here). The idea was to offload a bunch of stuff from the main server, most notably docker containers that shouldn’t be exposed externally (since docker likes to punch holes in the firewall, having it on your firewall box is not ideal…) and also be able to move data over from the aging drives in superbia (all of them have 7+ years of uptime on them). Unfortunately I hadn’t quite considered power consumption, or rather, I wasn’t quite aware how much more power efficient server hardware had gotten in just a few generations. With a Xeon L5140 this machine still easily gobbles up over 300 Watts at idle, which isn’t exactly ideal…

For now I’m using it as an offline backup box. I power it on during the weekend (while power is cheaper), run the backups, and then shut it back down.

Current hardware in this system:

Name Gula
Case 3U enclosure with 16 SATA2 hot-swap bays
Motherboard Supermicro X7DBE (and a SIMLP-B IPMI card)
CPU 2 x Intel Xeon L5140
RAM 32GB Fully Buffered ECC DDR2
HBA IBM LSI Sas9201-8i based HBA
Intel RES2SV240 SAS Expander
System drive Kingston A400 120GB SSD
HDD 8 x 1TB

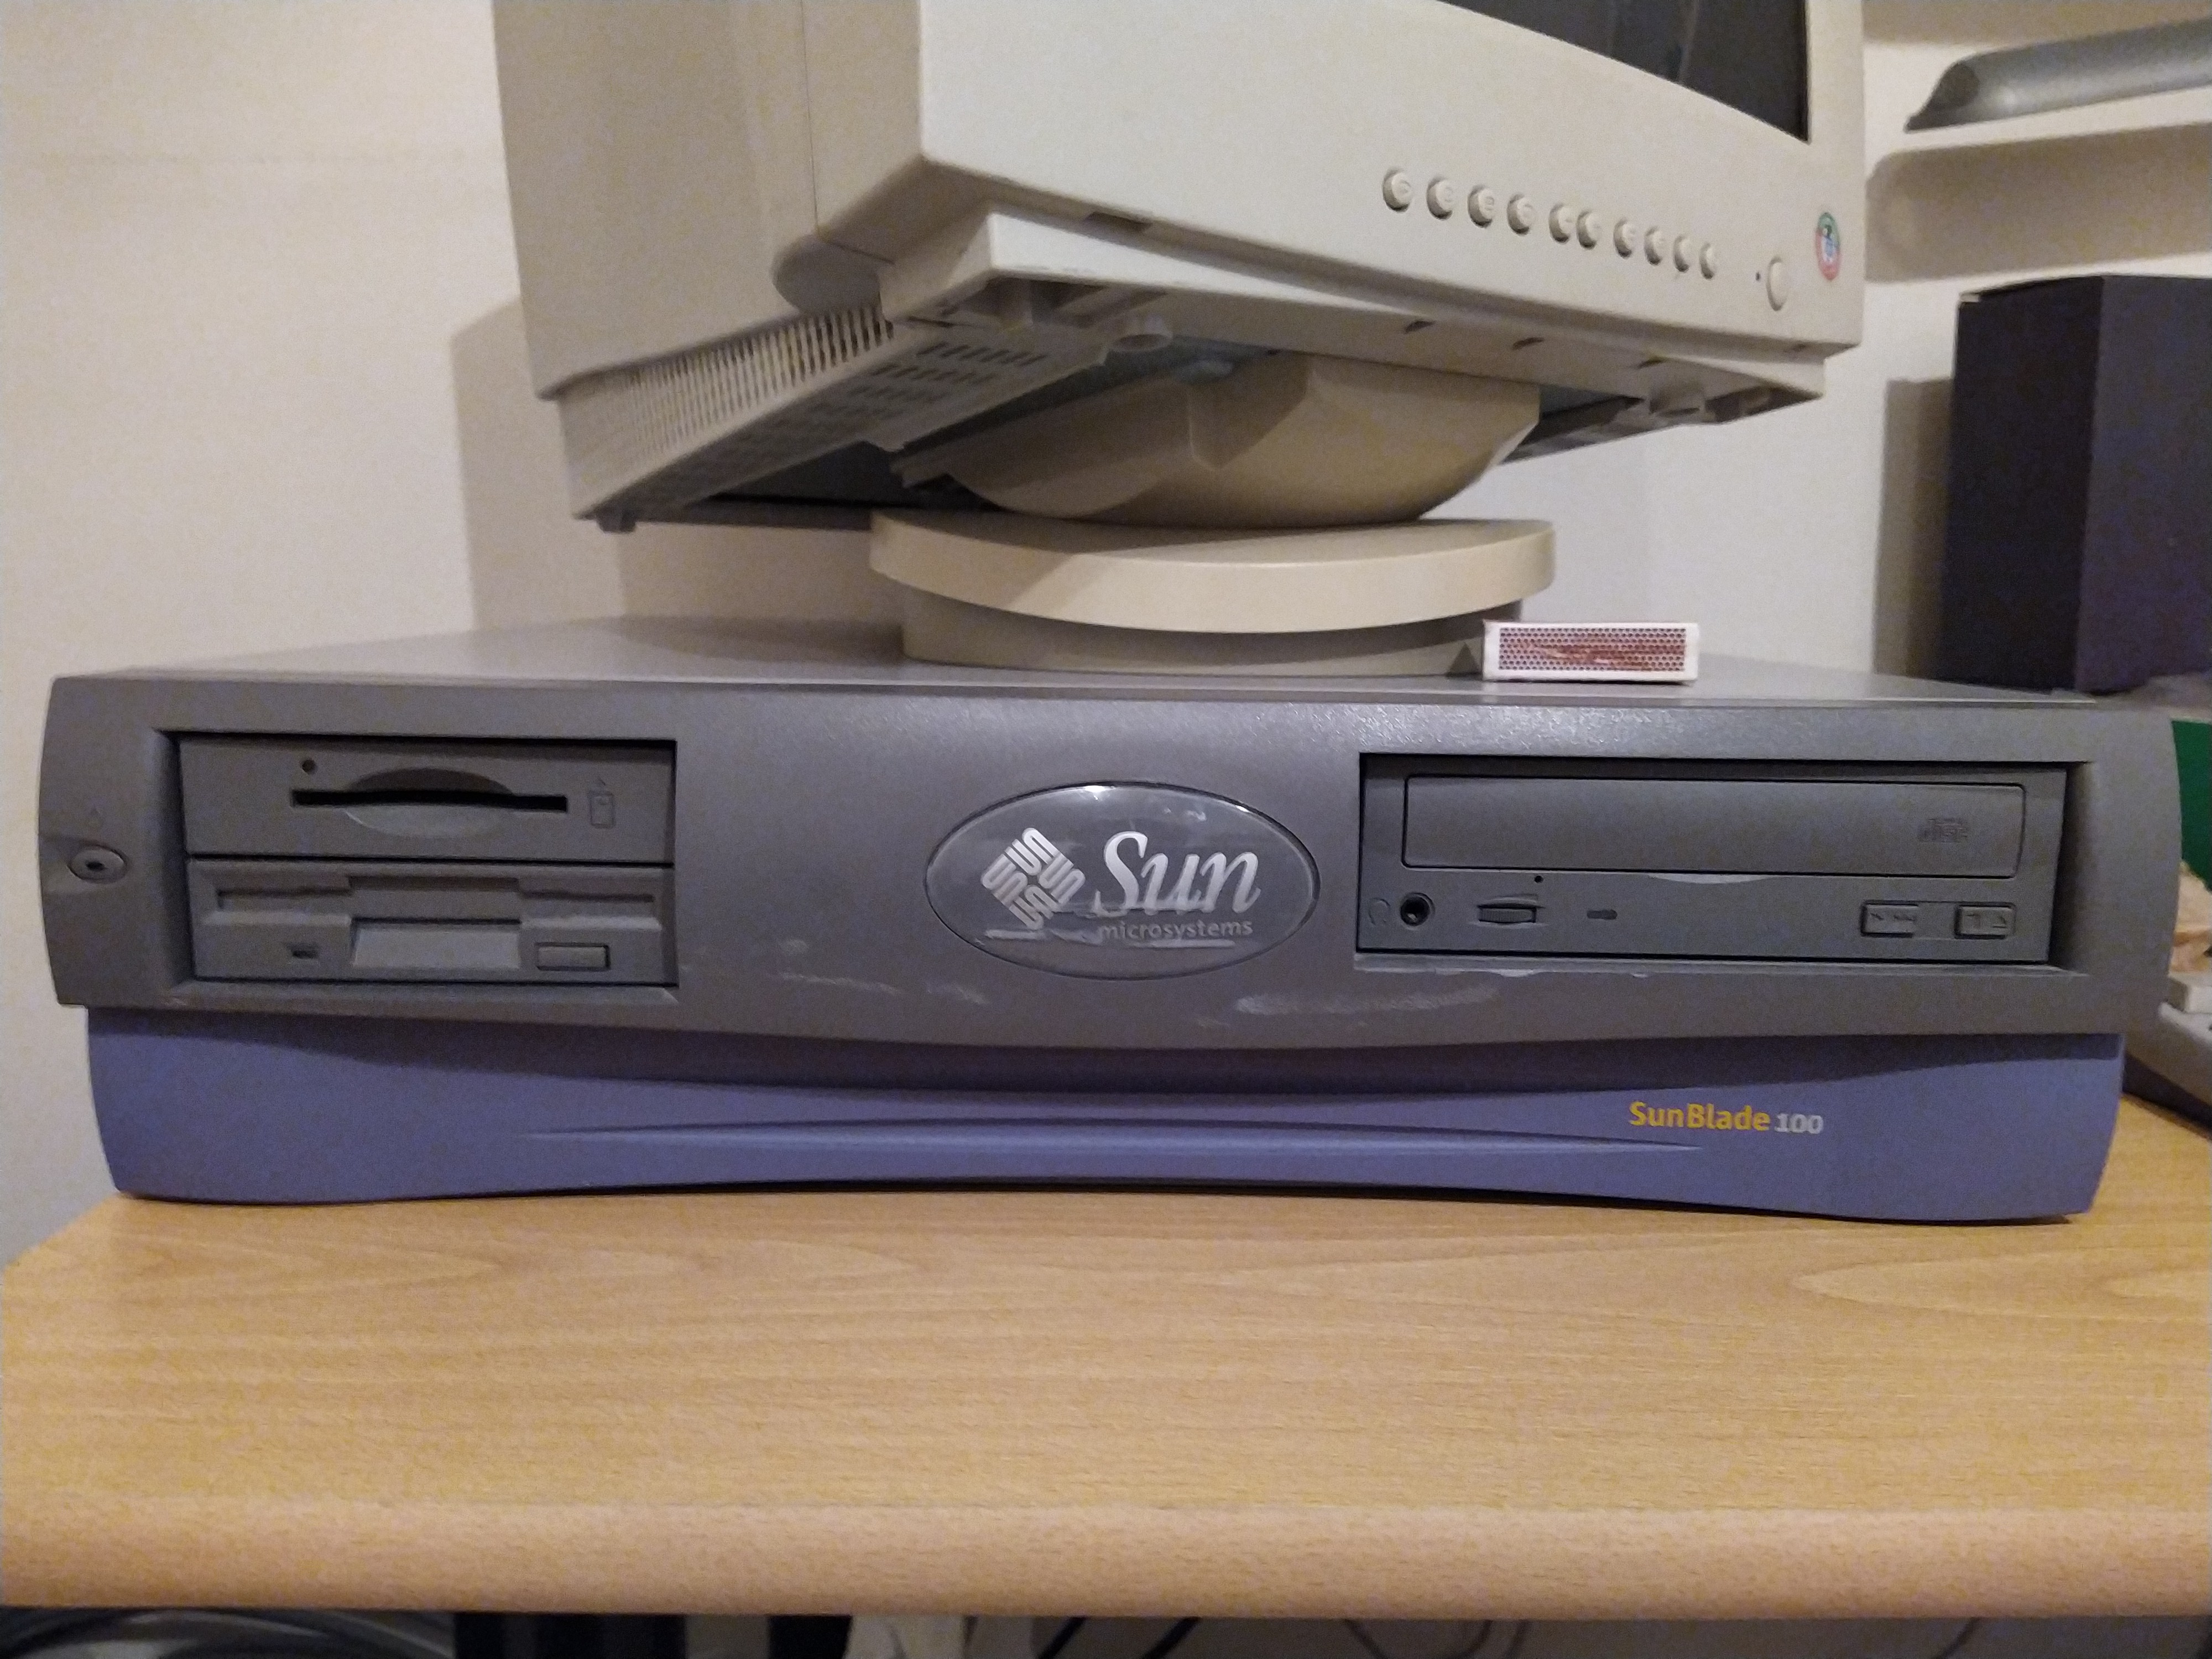
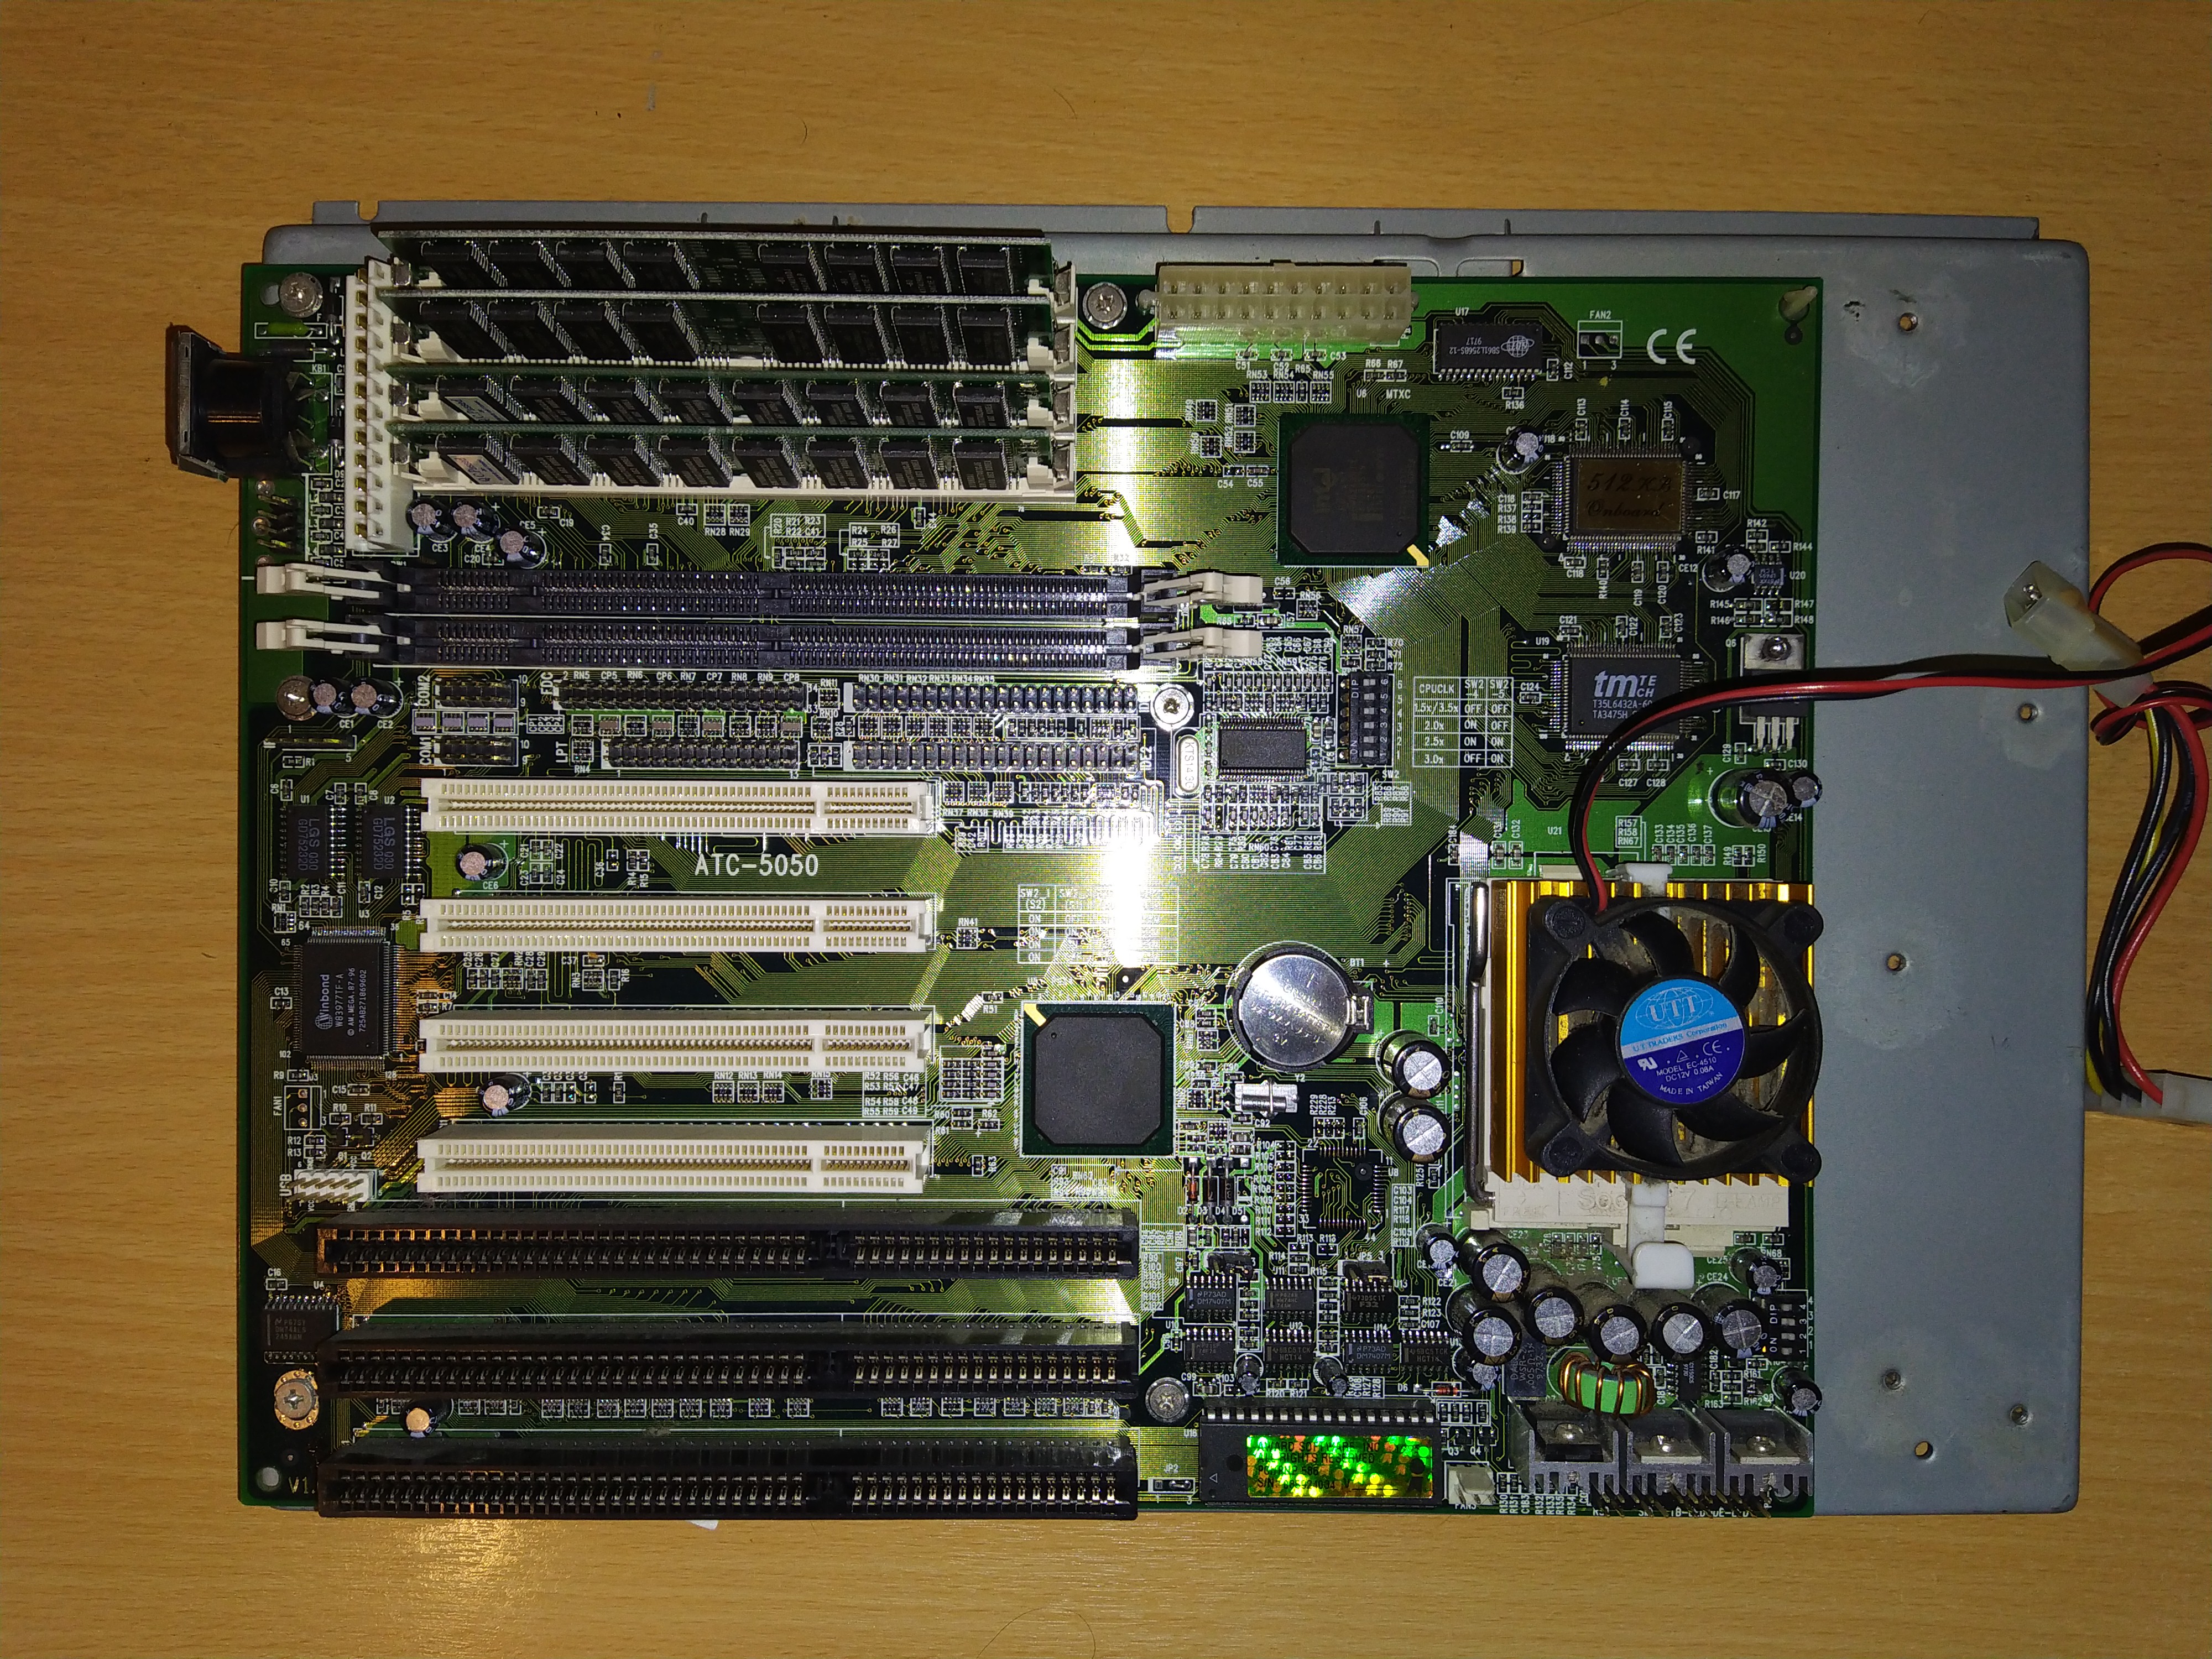
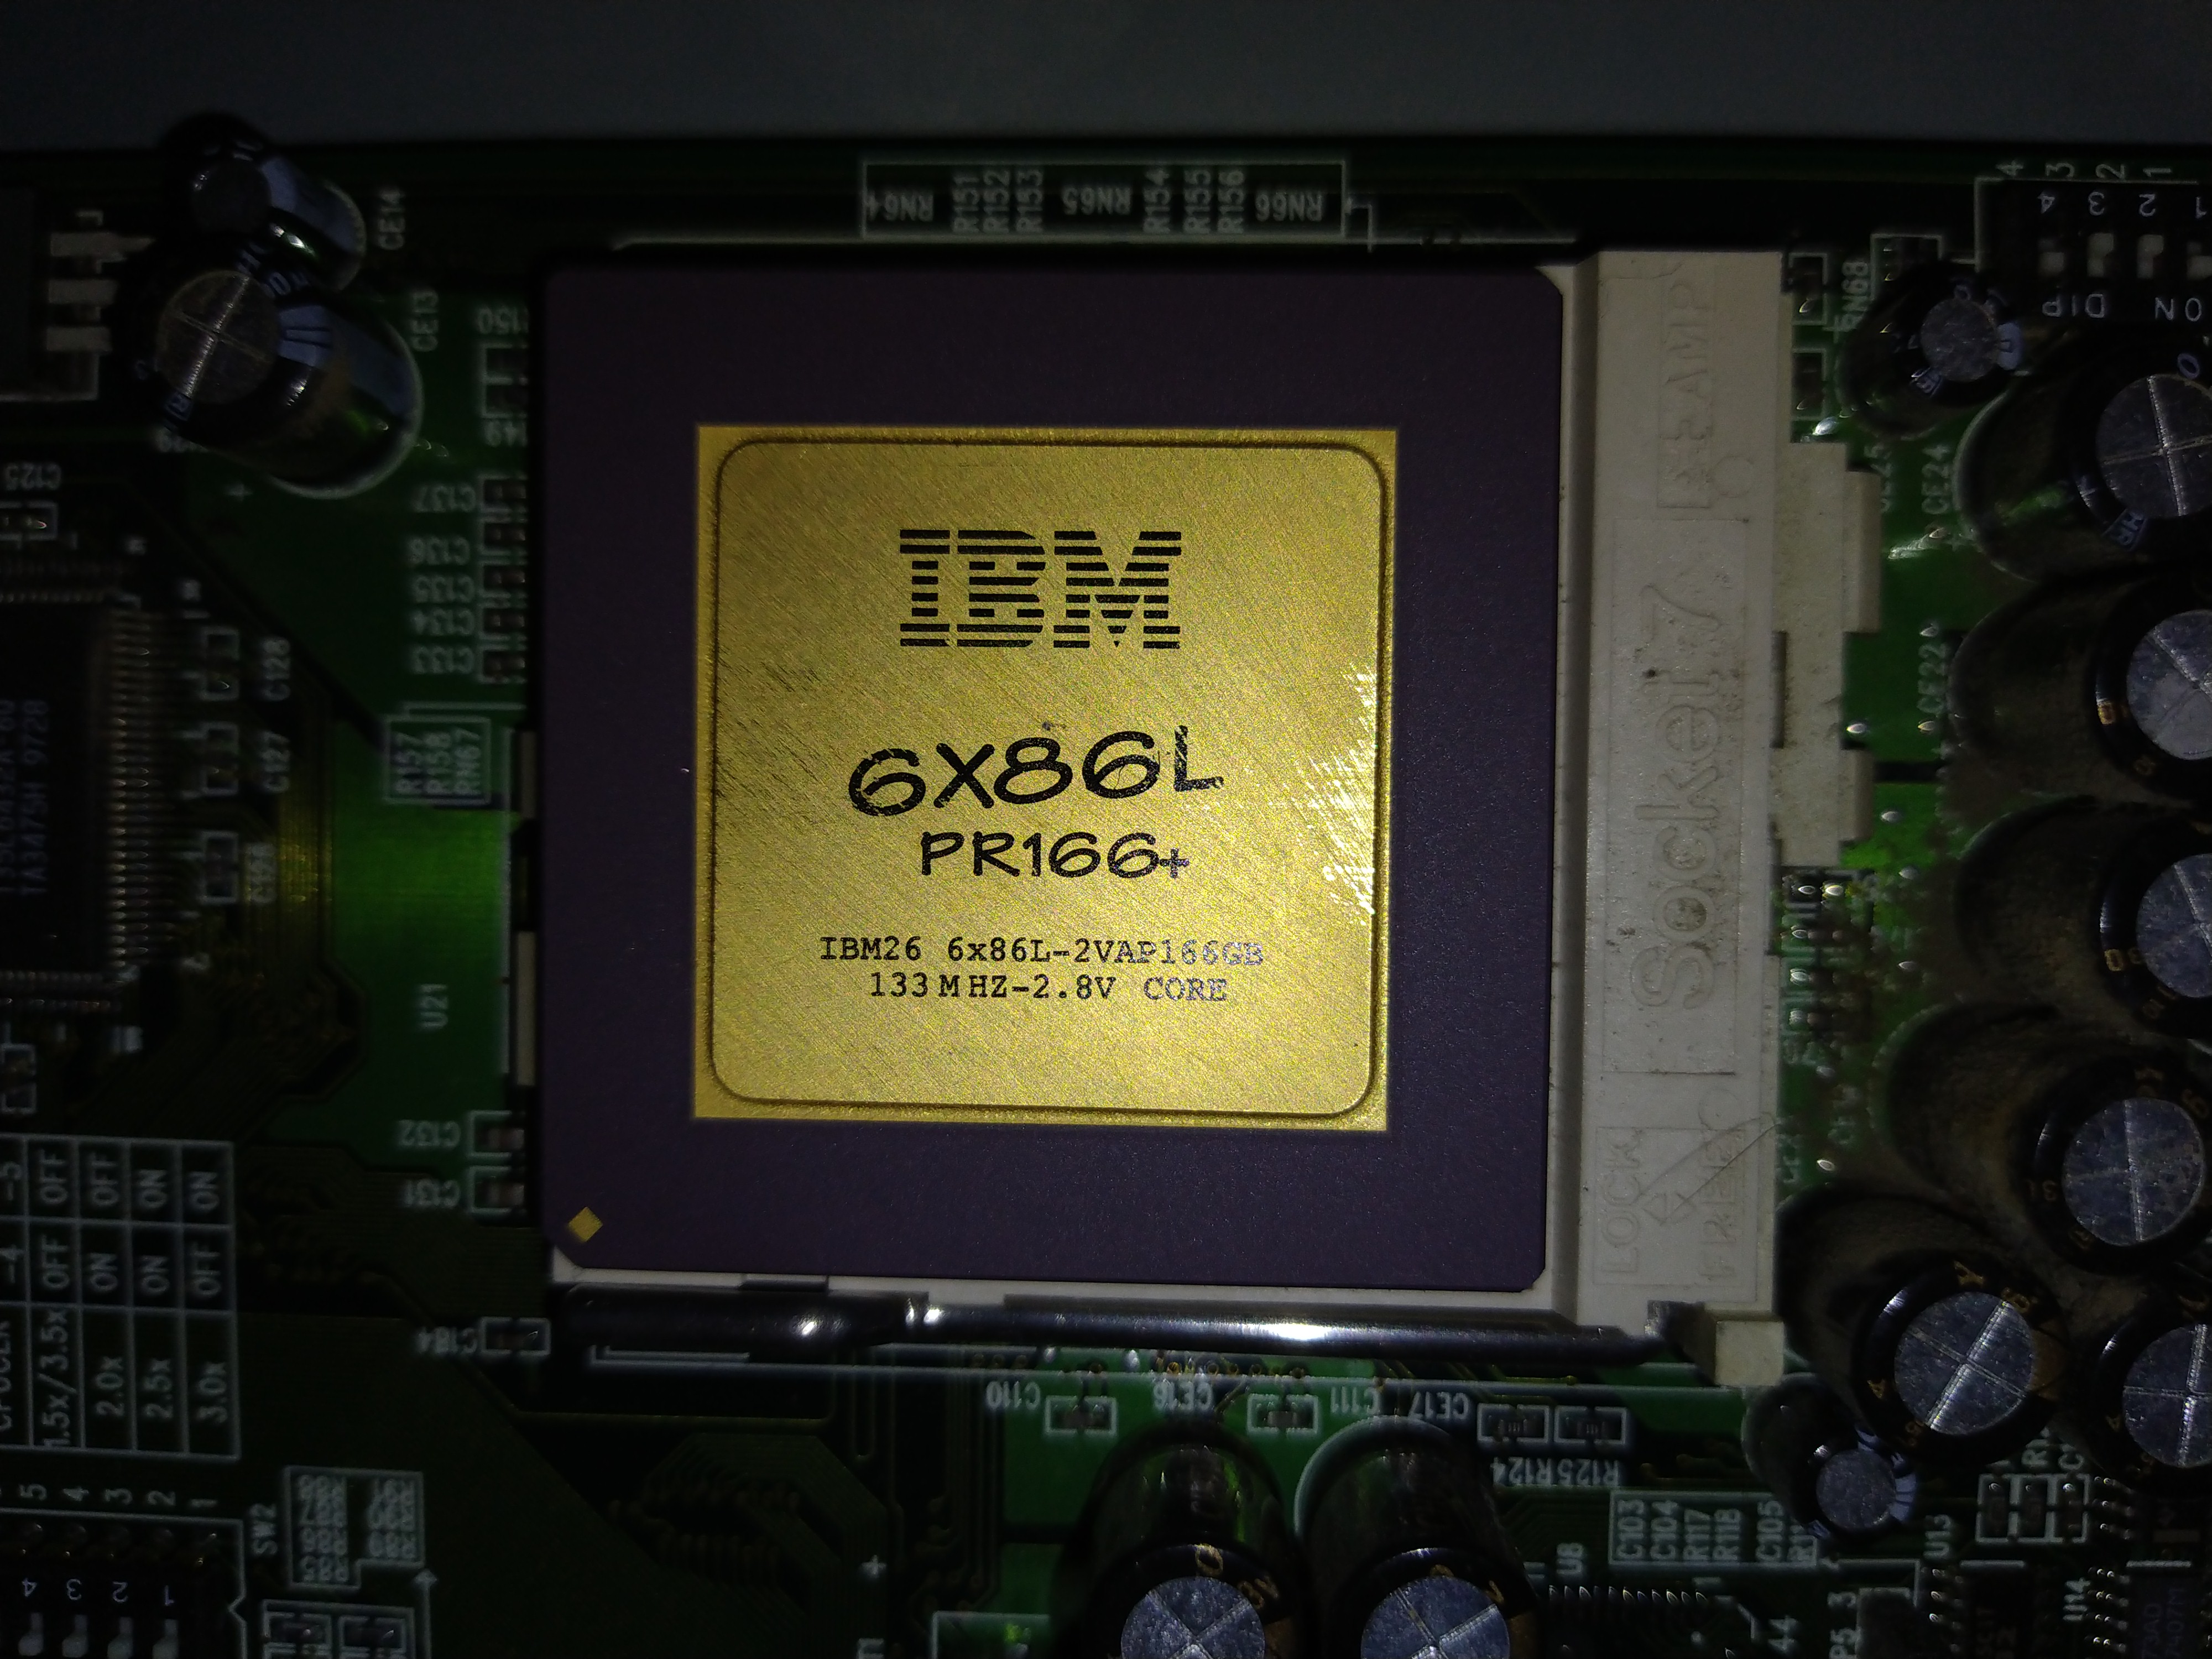
Luxuria (Sun Fire/Oracle Enterprise T5120)

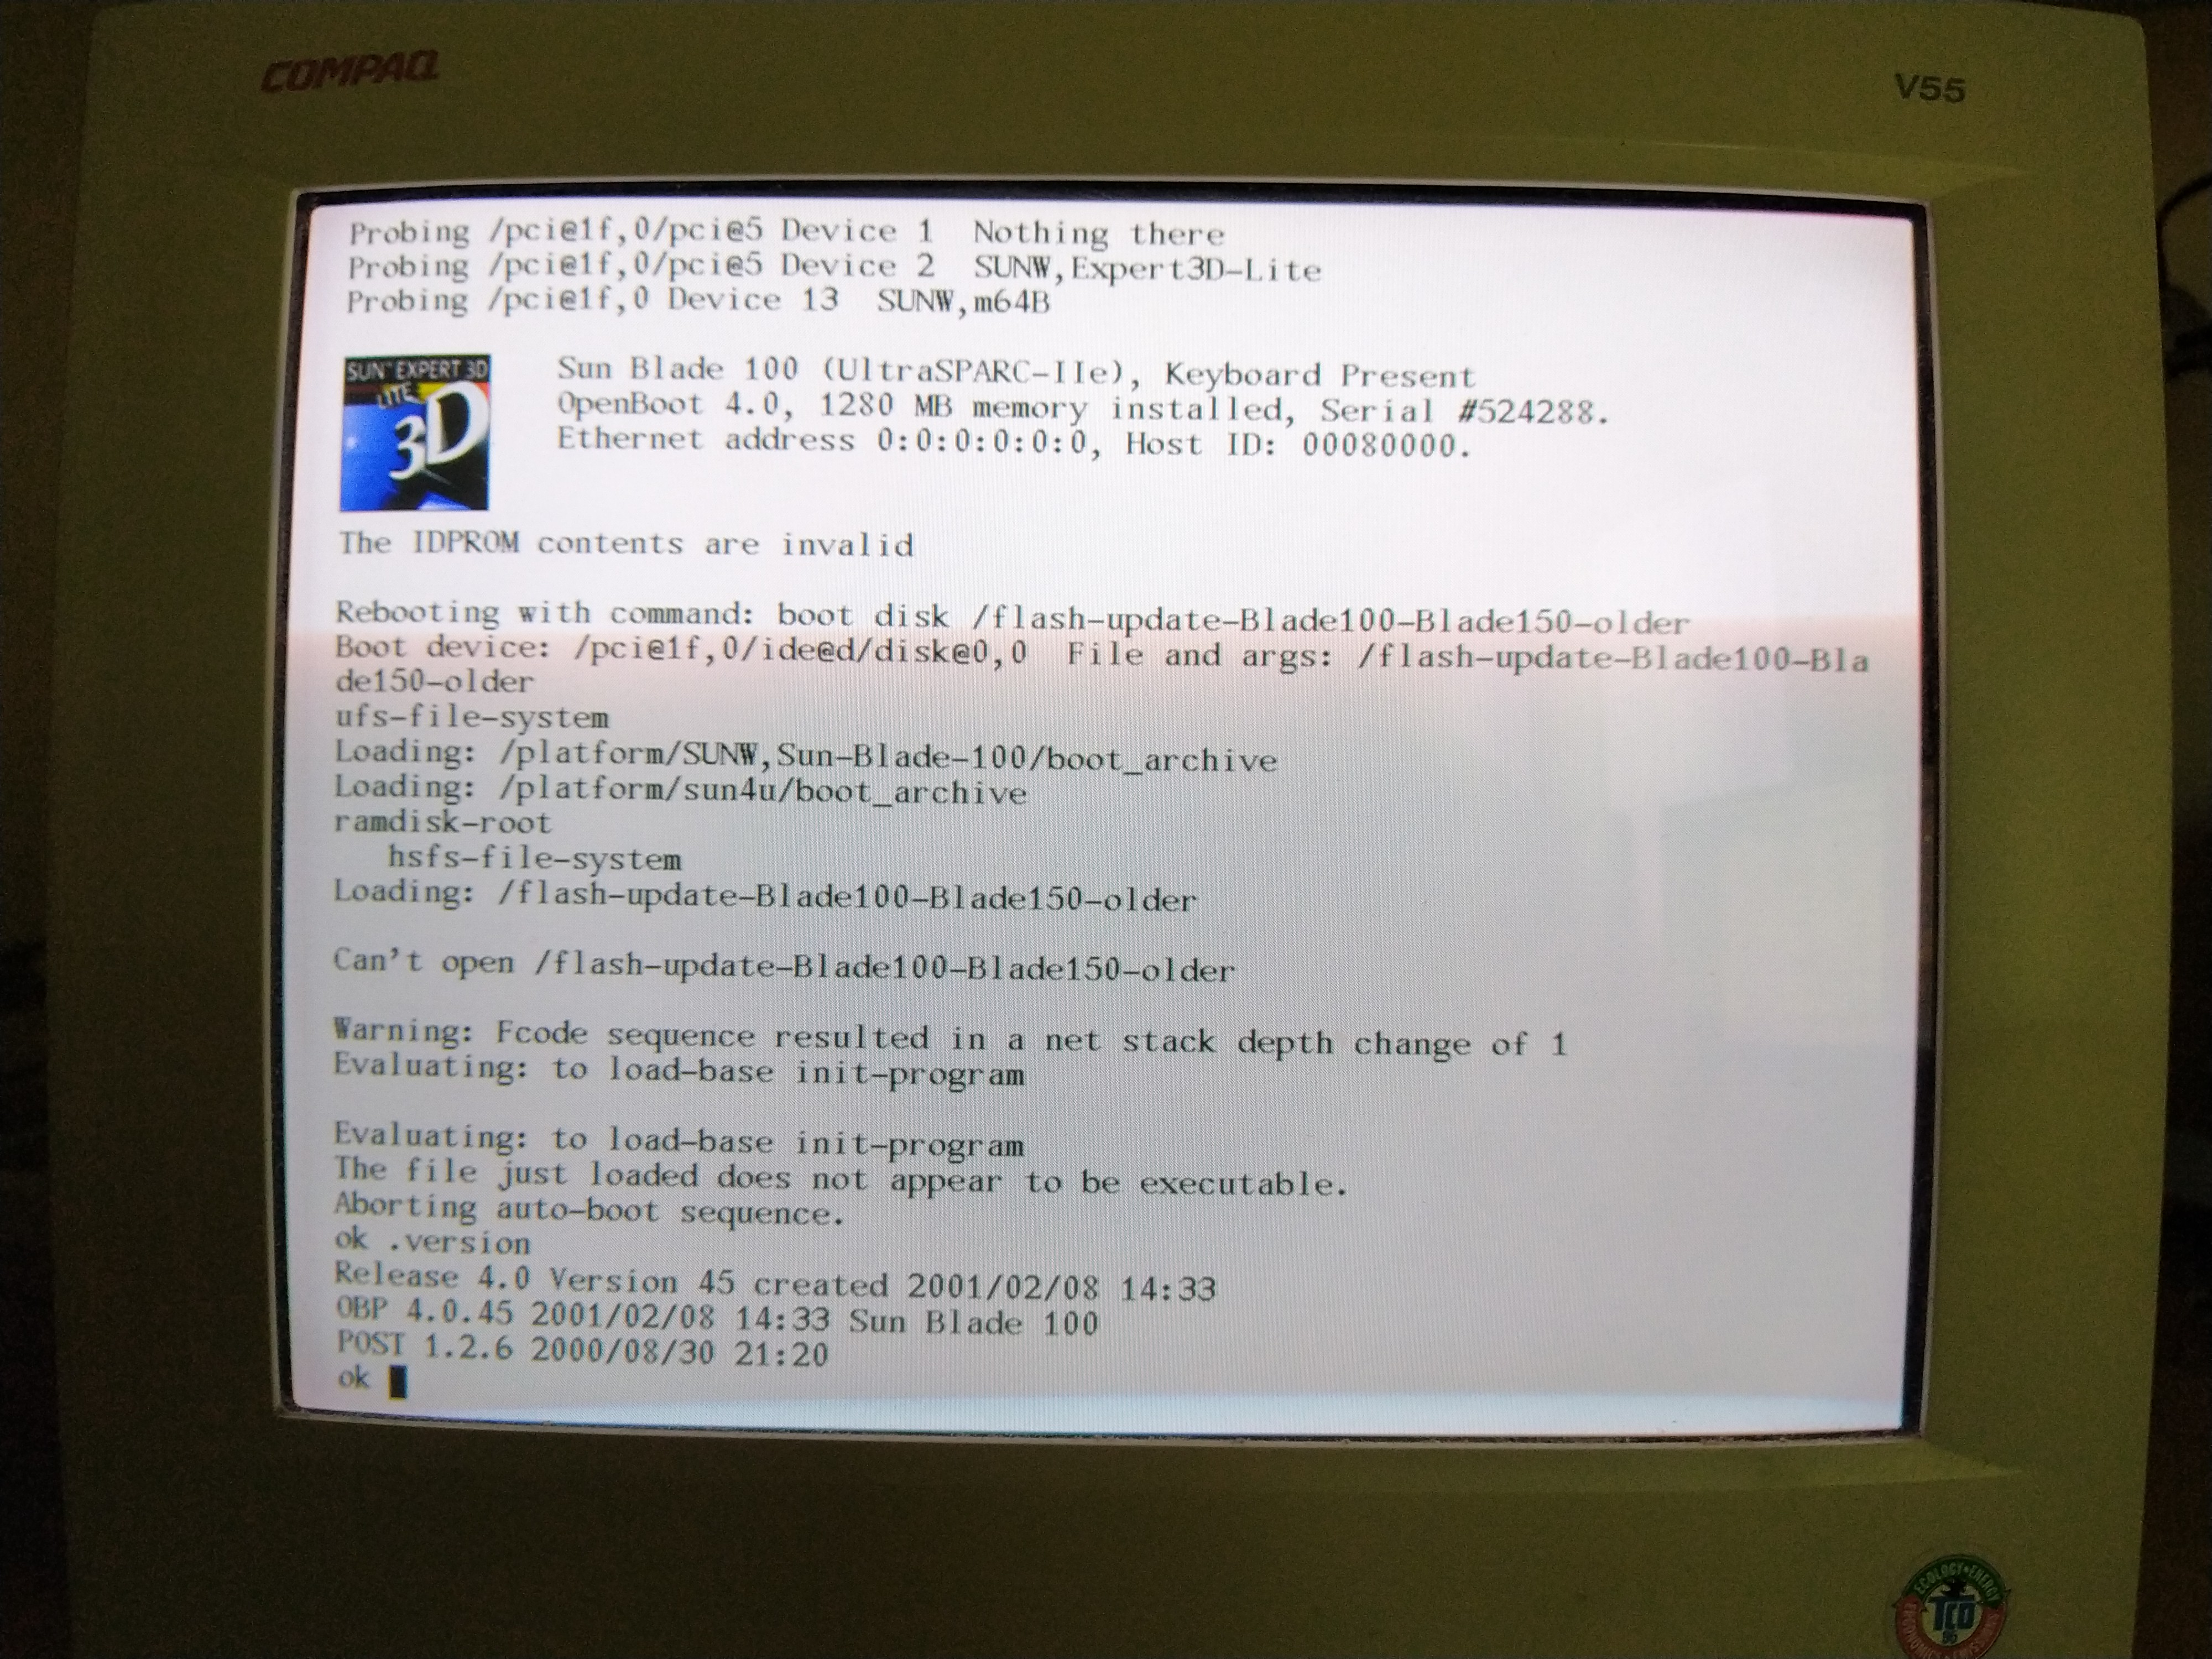
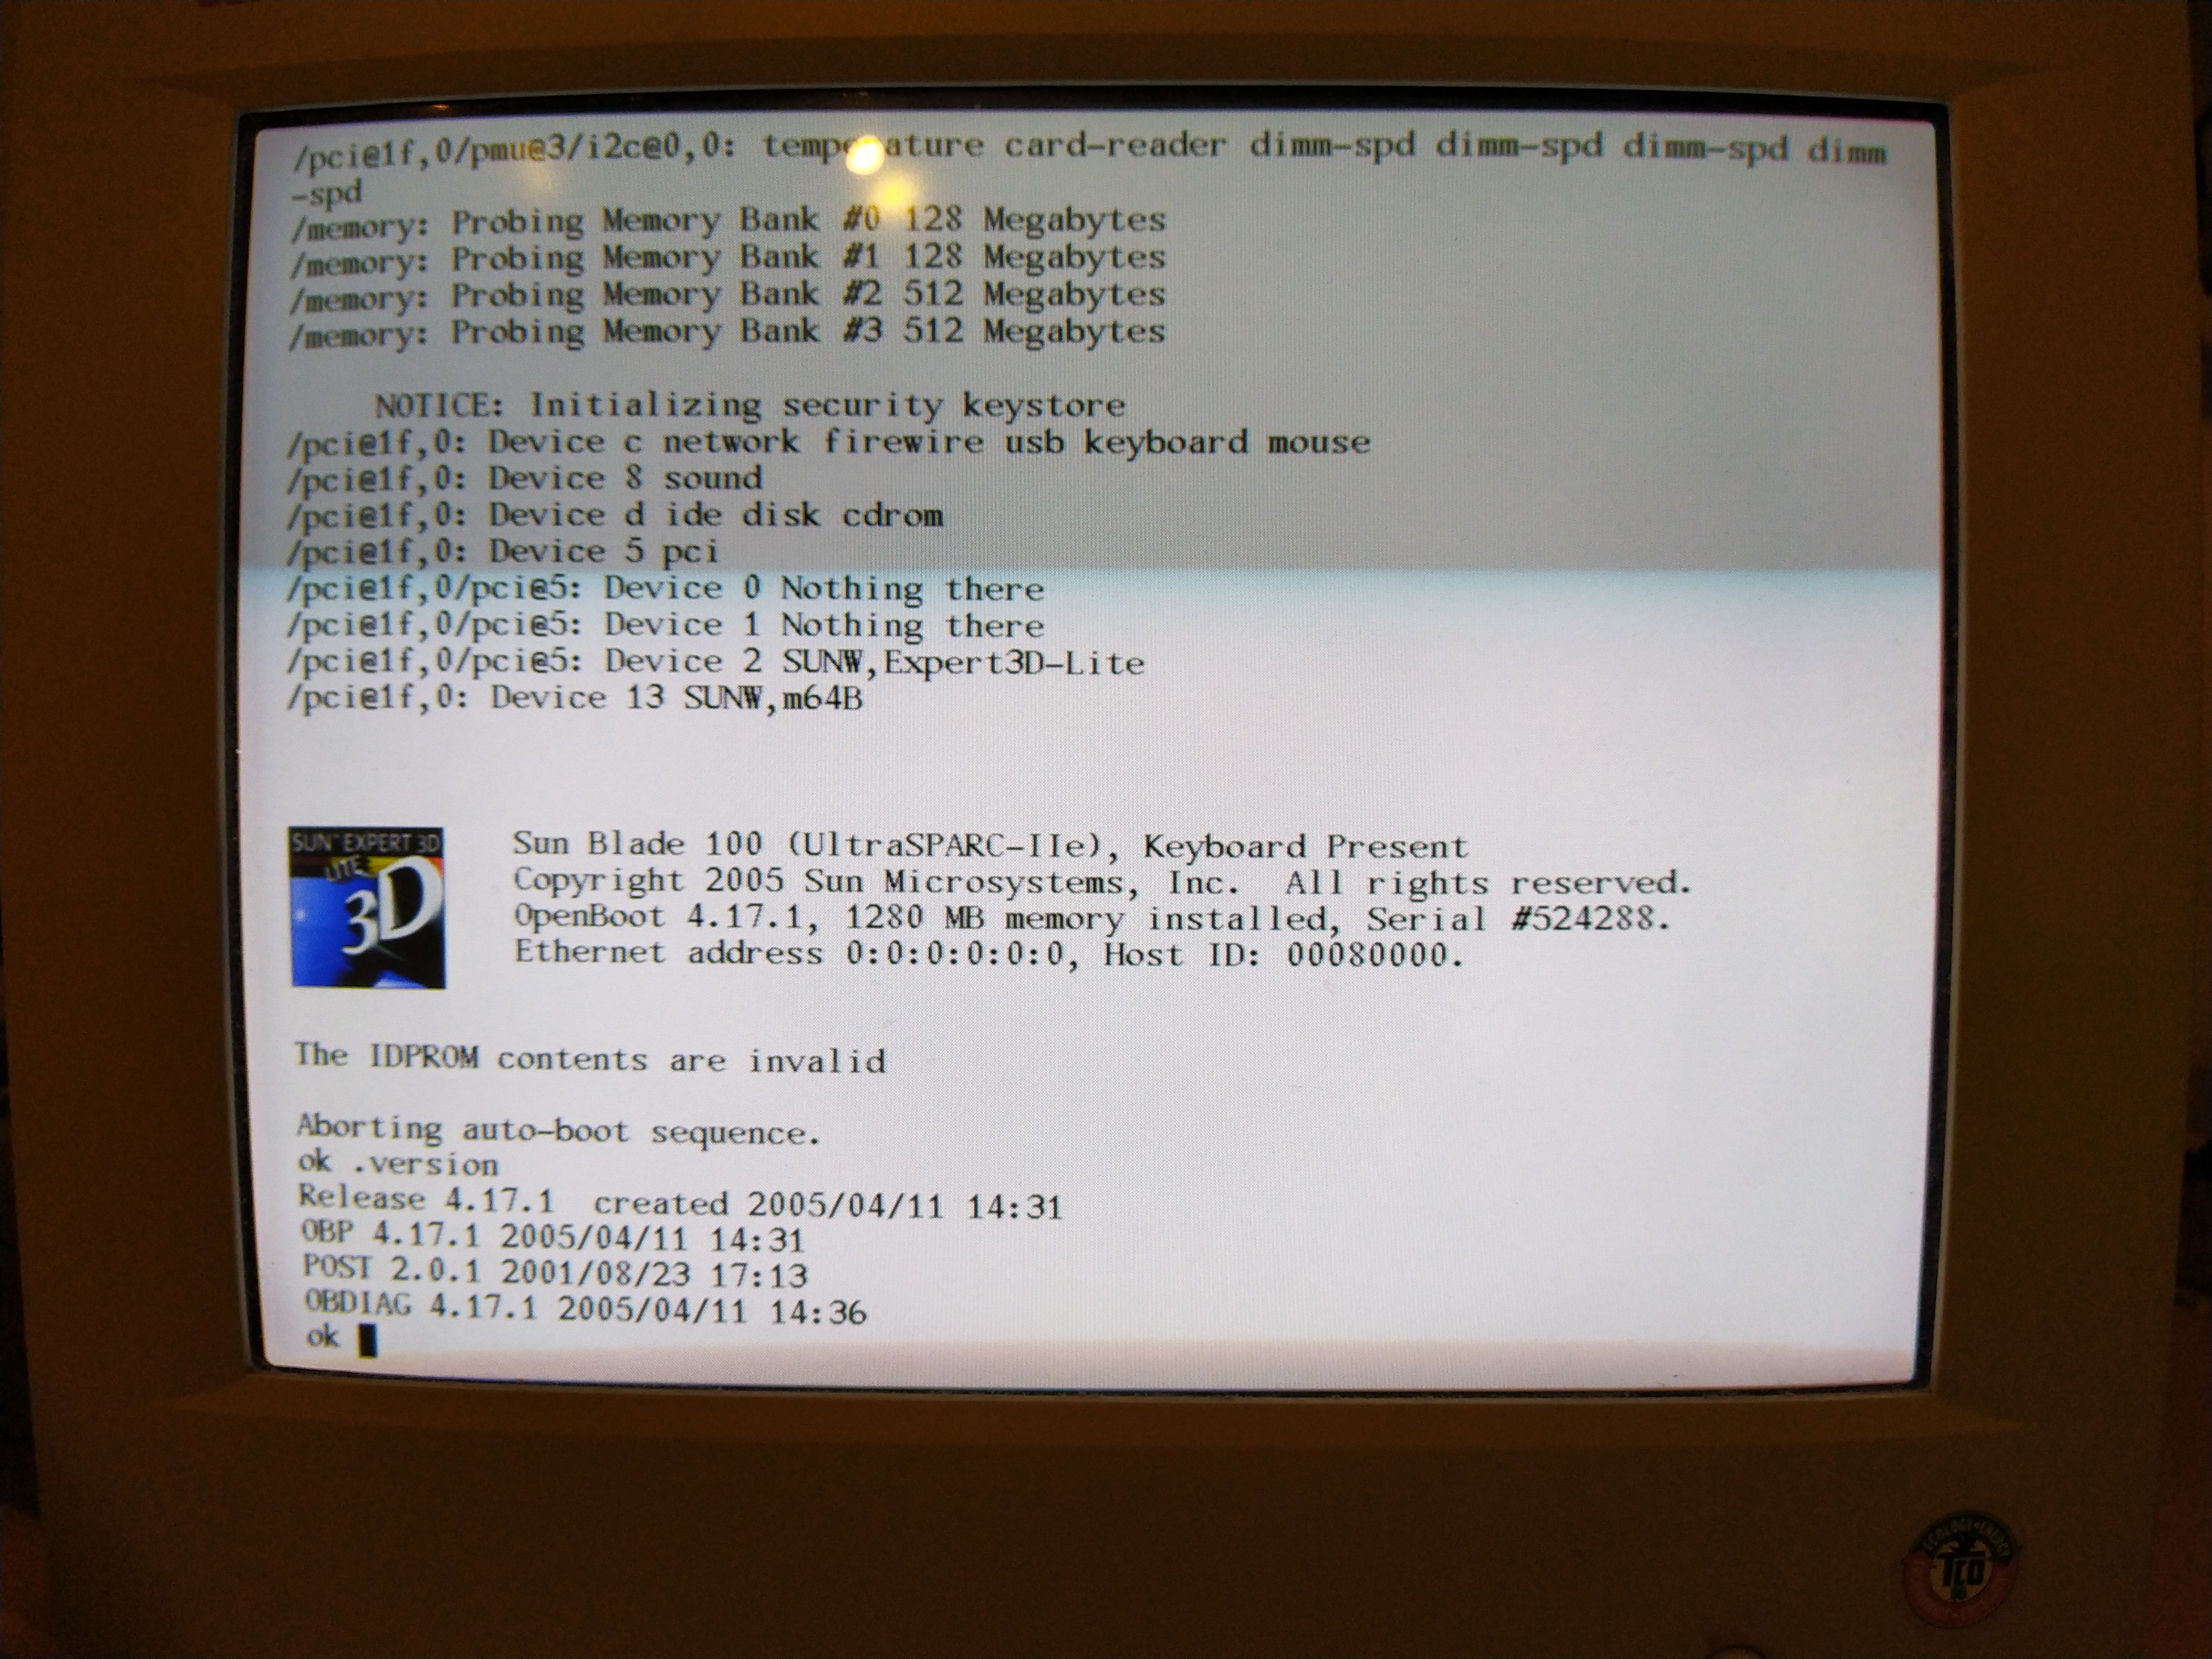
I got this one for a pretty decent deal. These are UltraSPARC T2 powered systems, supposedly the last to be designed by Sun before the Oracle takeover. I’ve always had a bit of a soft spot for SPARC systems but my Sun Blade 100 is, at this point in time, rather underpowered for “real” use (it also has a dead IDPROM battery, which is rather annoying, and slightly scary to fix).

And well, you can get a feel for that Threadripper life with these for quite a bit less money (but about the same power bill, I imagine :wink: ):

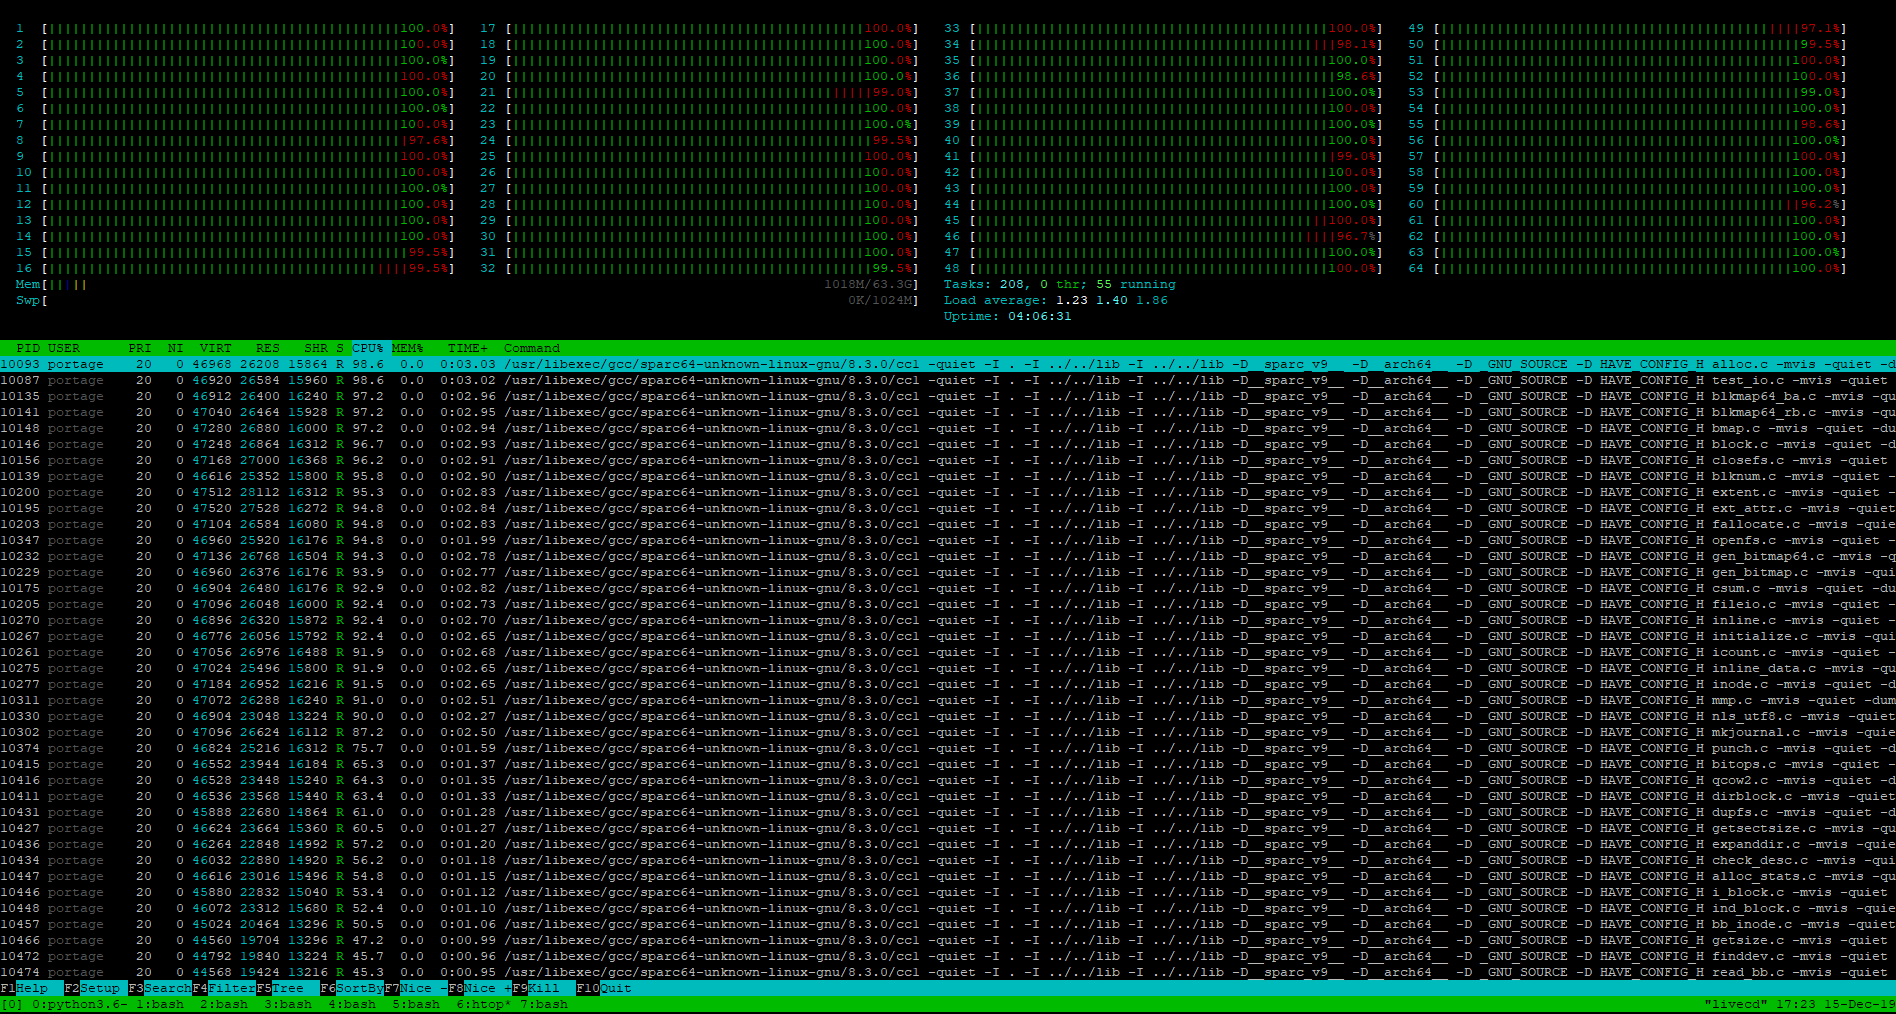
The goal is to try to install Gentoo on a ZFS mirror of the first two disks in this system. So far I’ve managed to install a regular Gentoo on the third hard drive so I can use that to bootstrap the target install (and I’ll be able to use this bootstrap disk as a backup in the rather likely case something eventually goes wrong with my experimental Gentoo-on-ZFS-on-UltraSPARC setup, assuming I even make it to a bootable state at all).

If all of the above materializes the machine also came with two fibre channel HBAs that are tempting to play with…

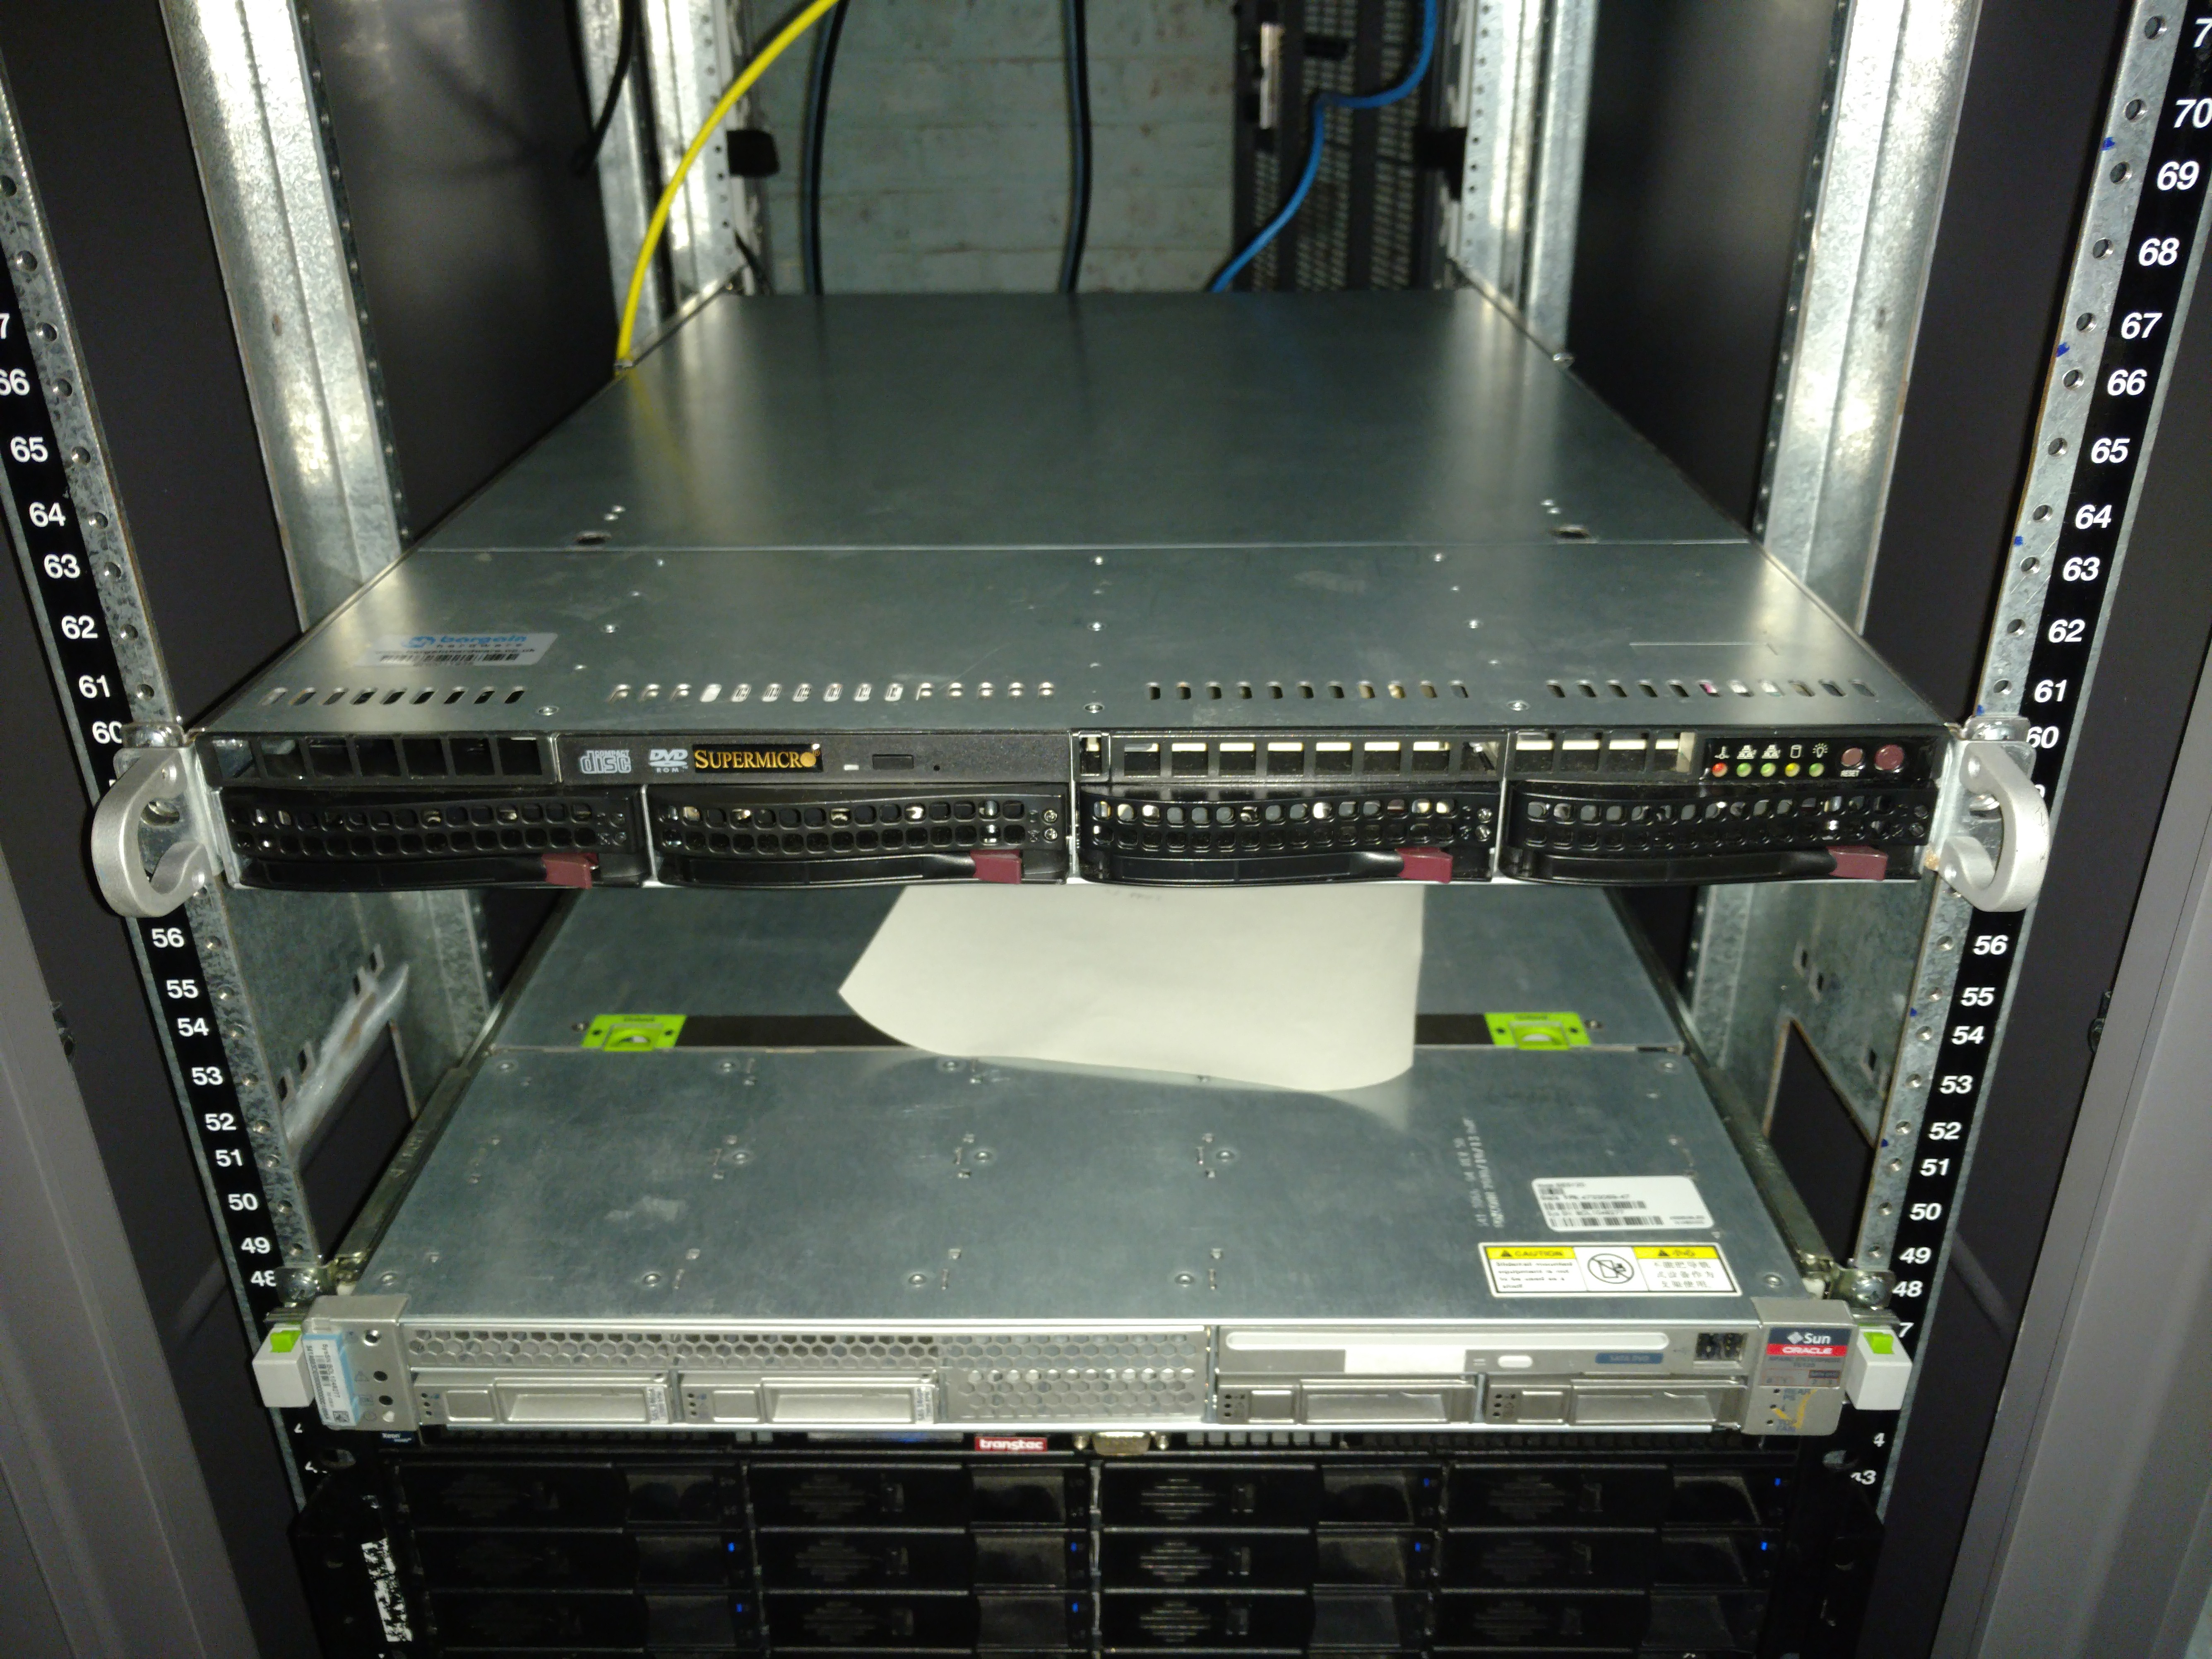
Janus (router/firewall)

All of the above still left me with a lot of services on what was essentially my firewall box. Still not exactly ideal, so after some digging I ended up buying another server, though this time I did pay attention to power consumption (and noise, no 70dBA fans this time around).

Name superbia
Enclosure Supermicro CSE-815 (1U)
Motherboard Supermicro X9SCI-LN4
CPU Intel Xeon E3-1240 v2
RAM 8Gb DDR3 Unbuffered ECC
HDDs 2 x 120GB SSD in ZFS mirror

I got the system without CPU or memory. For the memory I just used the old memory from my initial server, superbia. At first I also intended to use the Pentium G620T from that system, but that CPU lacks hardware encryption (AES-NI support), so I ended up getting the Xeon E3-1240 v2.

As OS I started off with OPNSense, however it would suddenly “forget” the port forwarding rules, and on every restart it would just stop passing traffic entirely. I could ping to outside (on IP, and on hostname, so DNS was fine) but I was unable to surf anywhere (including the modem on the WAN link), not on IP, nor on hostname. I factory reset the OS and ended up with the exact same issue a day later.

Initially I thought it was a cabling issue (had pulled new cables) as I had issues with packet loss that I fixed by re-punching. But attaching a laptop proved that everything was working as far as hardware was concerned, so the issue really was with OPNSense, somehow.

Given that for the entire duration of this the network was down (unappy household) I ended up not wanting to spend too much time on debugging what was going on and ended up installing pfSense instead. I set that up the exact same way as I had set up OPNSense and it has been humming along great ever since.
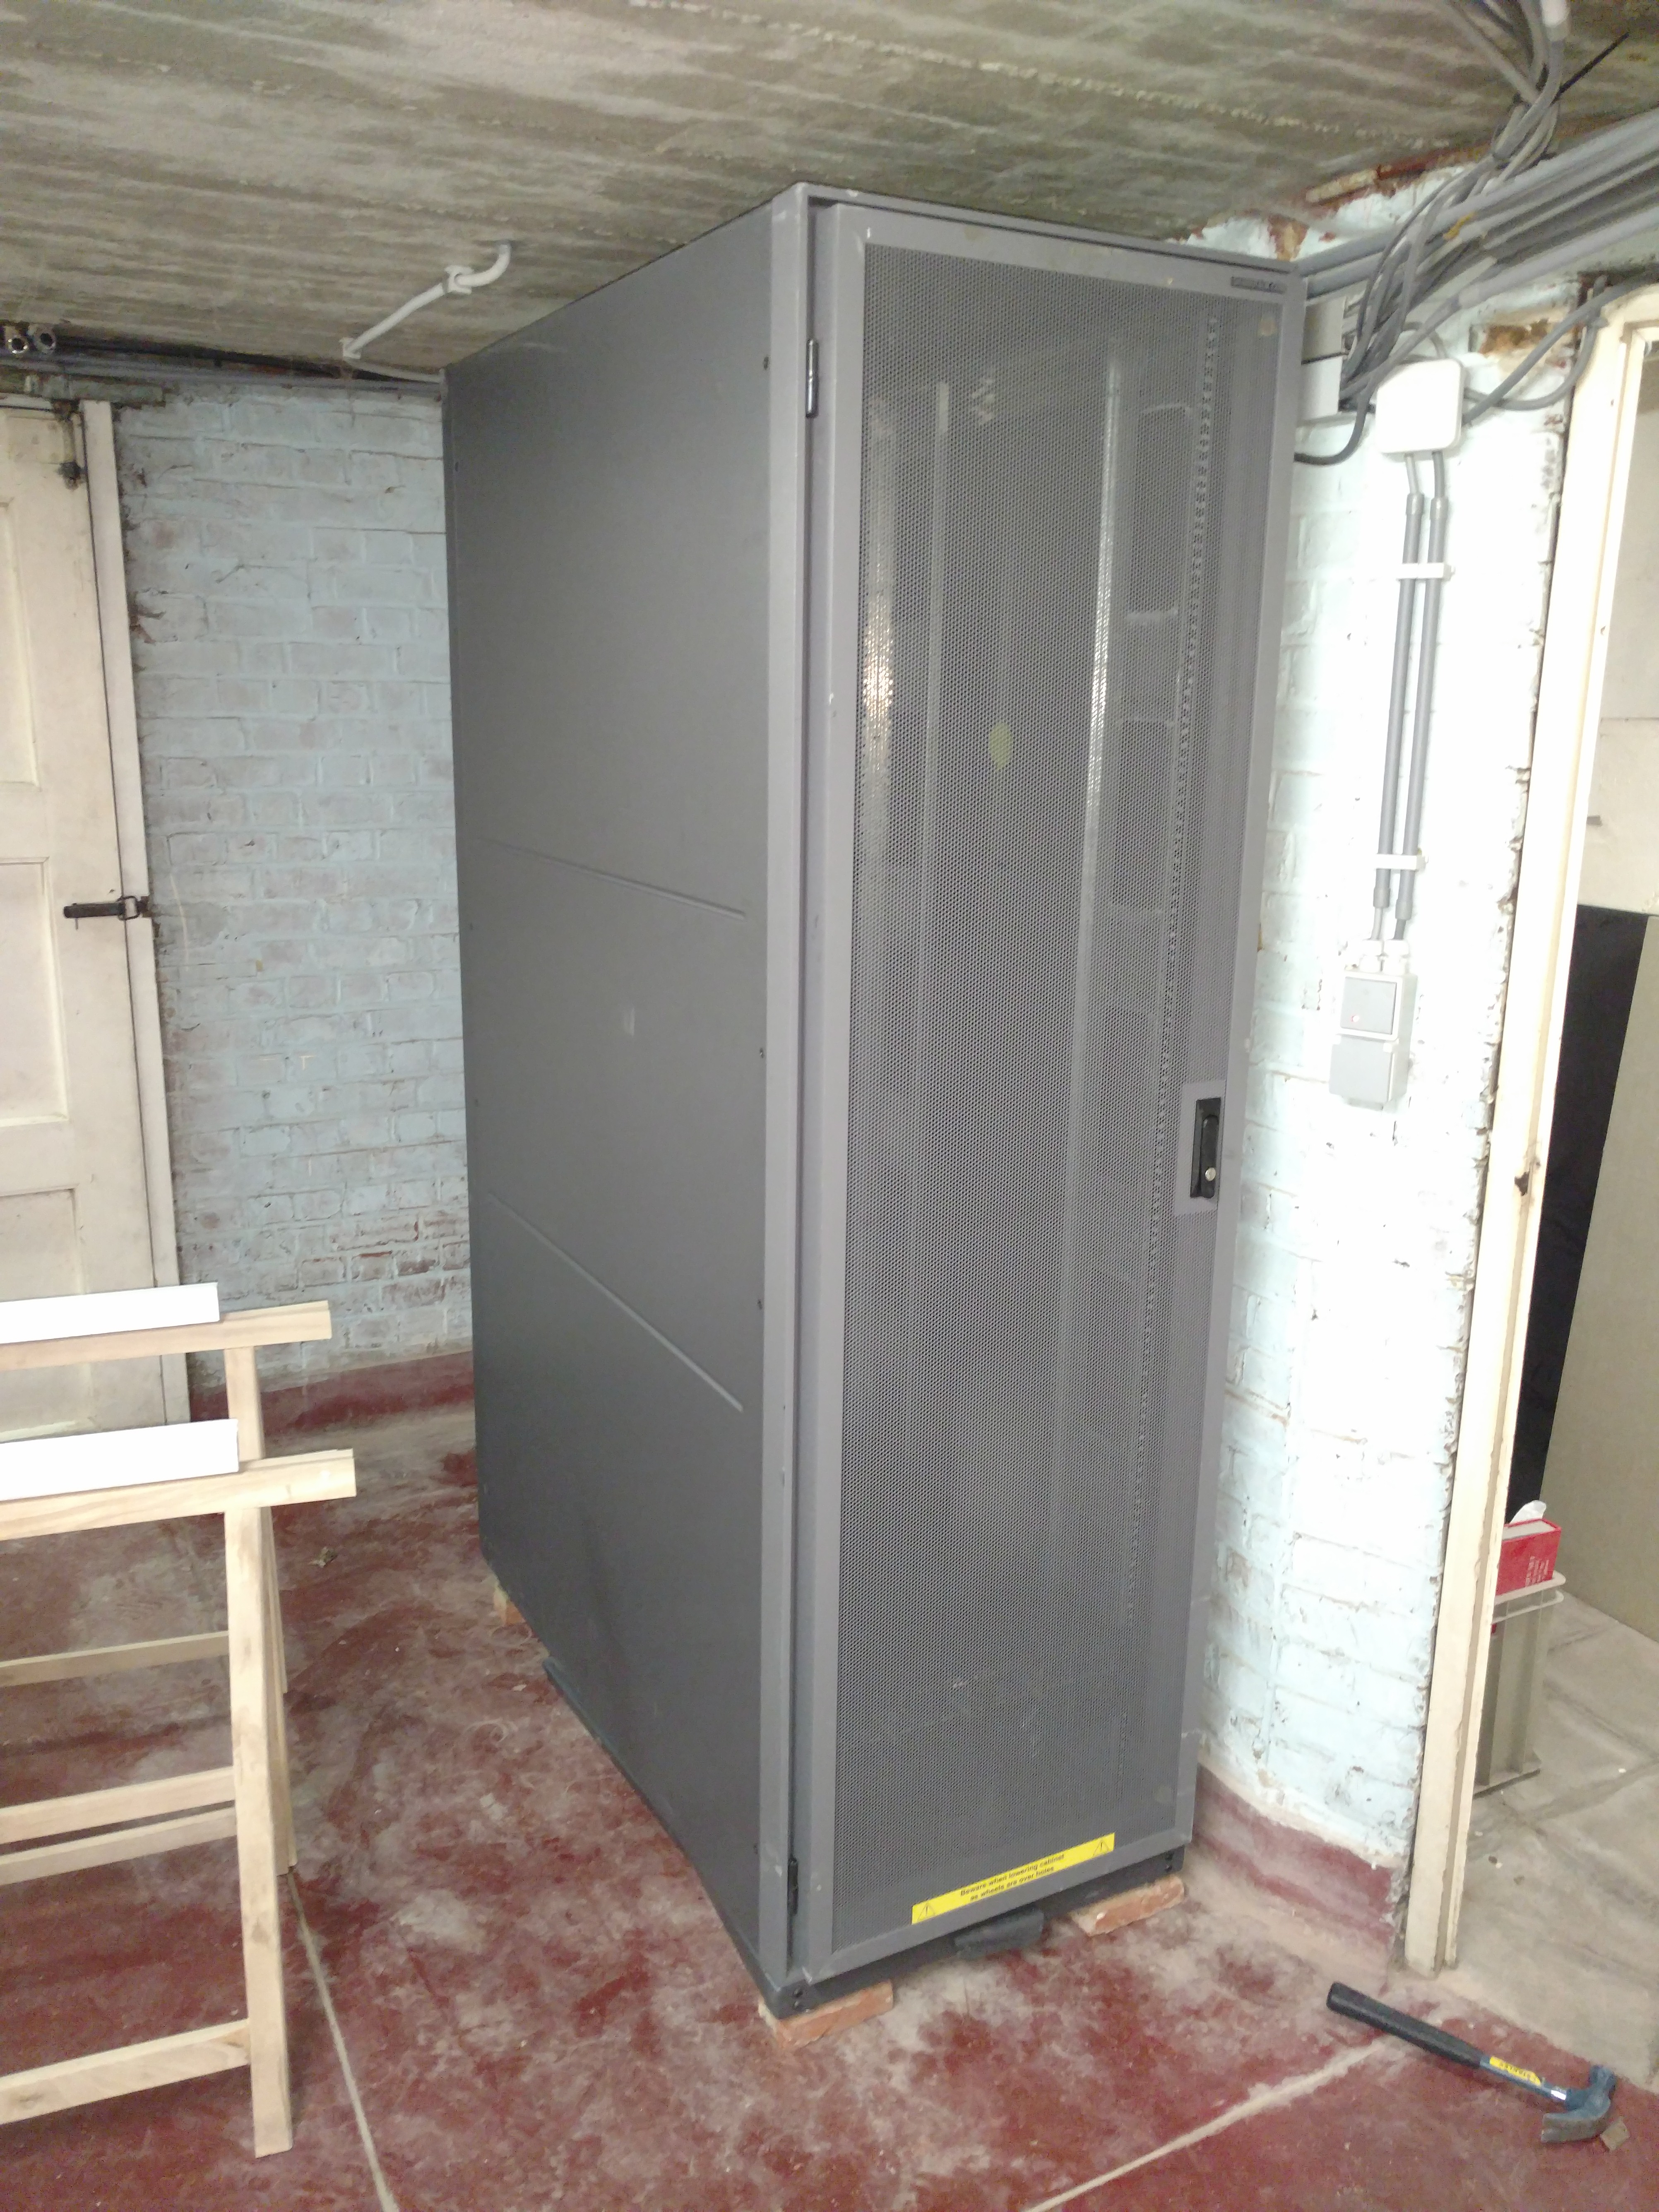
Rack

I also wanted to move all that out of my office. So I started looking for a rack (not quite as easy/cheap this side of the Atlantic, it would appear) so I could move everything to the basement.

Future

This is basically the starting point, next "planned"steps include:

  • setting up InfiniBand between the servers (and potentially getting that routed by pfSense)
  • get another machine for storage
  • centralize logging
  • add monitoring
  • update OBP on the Blade 100, and potentially fix the IDPROM (if it turns out I need to get a new one I’ll probably just make do)
7 Likes

Decided to upgrade OpenBoot on the Sun Blade 100 hoping that will give me access to newer commands to more easily reprogram the IDPROM.
Sun Blade 100

The original firmware was still the 2001 version (the error in the screenshot is explained further down):

There were two issues I had to solve before I could even start:

  1. acquire newer firmware. After the acquisition of Sun by Oracle firmware access got locked down by Oracle, without an enterprise contract you can’t download anything. For these old systems one can still find firmware floating around on old Sun mirrors though, which is how I got mine.
  2. firmware update needs to be done from a UFS partition. My system had a Linux install on it on an ext partition, so the firmware flasher was unable to read from that. While the readme claims the update is OS agnostic I figured if I was going through all the effort I might as well just install Solaris, just to be on the safe side.
    Which lead to the issue of finding a version of Solaris I could install on the machine, since Oracle only allows one to download the latest version for free. It also had to be a CD version since the machine doesn’t have a DVD drive.

After acquiring firmware and Solaris 10 U7 CDs I was able to install Solaris and get to work by just following the firmware’s readme.

I unpacked the firmware file to the OS root directory and set the proper permissions

cp flash*latest  /
chmod 755 /flash-update*

Then I shut down the system to make the Flash PROM writeable by setting the very inconveniently located jumper.

Flash PROM jumper

Nicely located just under the riser board cables…
As an aside the big block in the screenshot with the yellow (orange?) sticker is the IDPROM chip that’s the cause of all this effort.

Then I tried to start the actual flashing from the OBP prompt

ok boot disk /flash-update-Blade100-Blade150-latest

Resulting in an error along these lines (see screenshot of initial firmware versions):

Warning: Fcode sequence resulted in a net stack depth change of 1

Evaluating:


Evaluating:

The file just loaded does not appear to be executable.

{1} ok

This is documented in the Oracle knowledge-base here (warning: requires login) and is the result of Solaris patch 137137-09.

The solution is running the following, in Solaris, to add the patch files to the boot archive:

echo /flash-update* >> /boot/solaris/filelist.ramdisk
bootadm update-archive

After that the firmware flashed just fine and I now have a Blade 100 with state-of-the-art 2005 firmware.

3 Likes

I’ve been struggling to get Gentoo (re-)installed on the Blade 100.

SILO keeps complaining it can’t find the configuration file in /etc/silo.conf, which I’m pretty sure is correct (since I copied it from the old, working, installation).

My guess now is that I’m missing some kernel modules, likely something to do with the IDE subsystem since the old install used a 2.6.x kernel and the entire IDE subsystem got deprecated since then, so the kernel config didn’t exactly import cleanly.

Then again, SILO is able to find itself, since it displays the full SILO prompt, which means it’s able to load the ILO part from disk, as far as I understand.

It’s been pretty slow going since kernel compiles take forever (sure got a bit more bloated over the years…). I might have to set up distcc just to speed this up. I shouldn’t even have to bother with cross-compilation if I use the T5120.

Other options would be to try and get Grub 2 working. It’s hardmasked on sparc so that might be interesting…

Got tired of dealing with SILO so unmasked Grub 2 and installed that, the old documentation I found was still perfectly adequate. The one thing to watch out for is that on older SPARC systems (T4 and below) Grub should be installed on the boot partition, rather than in the MBR as is usual on x86/amd64 systems.

The configuration generation etc is the same as for non-SPARC systems.

grub-install --force --skip-fs-probe /dev/sda1
grub-mkconfig -o /boot/grub/grub.cfg

And wouldn’t you know it, the system actually fires up the kernel, only to stop output when dropping to tty0, which might be related to the system having two GPUs (the built in one and an expansion card) so it’s possible that it actually boots succesfully, there’s just no video output.

Progress at least…

1 Like

A little while ago I acquired a Supermicro SC847 based server, since then I’ve been basically waiting for parts and doing more digging into some of the options with this chassis.

One of the things I’ve been digging into is what options I have for controlling the fans.

So let’s go over the relevant hardware:

Component Model
Motherboard X9SRL-F
Front backplane BPN-SAS2-846EL2
Rear backplane BPN-SAS2-826EL2

I made sure to get SAS2 expander backplanes, since those tend to have PWM headers for the fans on the backplane, and while they do indeed spin down somewhat after going full jet during boot, they don’t come down quite as much as I’d like (and no, I don’t want them to be “whisper quiet” or anything like that).

One might get the (mistaken) impression that these fans are just loud, but one of them is connected to the motherboard CPU fan header and during OS install, memtesting etc. I removed all the fans except for this one CPU fan. And that one was pretty darn quiet (I mean, relatively speaking, it’s no Noctua) when controlled by the motherboard. Meaning that there is quite a bit more room for the rest of the fans to spin slower when properly controlled.

Which leads to the question: how is the motherboard supposed to control these backplane fans? They don’t show up in sensor output, not from the OS, nor from IPMI, and there’s no cables running from the motherboard to the backplanes either.

The only “control” channel that isn’t, well, data, would be through the sideband (SGPIO) of the SAS cables, but some digging seems to indicate that channel only transports data related to the disks (failed state etc.), nothing about the fans.

In the front backplane manual did I find mention of an i2c port and some digging teaches me that the JBOD version of this server does use i2c to control the fans through an i2c connector on the power board. And, while not mentioned in the manual at all, the rear backplane also turns out to have this connector.

So theoretically I should be able to control the backplane fans through this i2c channel. Except for the little detail that the motherboard only has 2 i2c headers, one for the PMBUS and one labeld JIPMB for the “System Management Bus” which, after some research, appears to be for an IPMI card. Which is weird since the board has onboard IPMI, so not quite sure what that is about, whether it could be used to attach to the backplane (which would still leave me a port short), or whether it’s intended for something else, in which case…what?

A few posters on the STH forums claimed they’d try things with them, but none of them ever followed up, so I’m not quite sure if it’s worth to keep digging into these i2c ports. It would be nice if it were possible to use them (even nicer if that wouldn’t require another motherboard :wink: ).

In the meantime I’ve ordered a cheap powered PWM hub.

1 Like

Set up XCP-NG with the compiled version of Xen Orchestra with some help from the LawrenceSystems videos on the subject:

I then installed FreeNAS in a VM, passed through the HBA with my ZFS disks to FreeNAS and set up an iSCSI link to FreeNAS on XCP-NG. That all went pretty much like the manual described.

So far so good.

Now on to the less great news: I have an Infiniband switch and I was planning on using Infiniband as a storage backbone, either with iSER, or by using RDMA + NFS (or more likely: both). Unfortunately neither XCP-NG nor FreeNAS have Infiniband support worth writing home about, nor does there appear to be any enthusiasm with the devs about IB.

That said, unlike pfSense, they do at least both include the InfiniBand drivers for the Mellanox cards, if not the tooling, so I easily got the Mellanox card working and got quite decent speeds out of it:

# iperf3 -P 32 -c 192.168.1.151
...snip...
[SUM]   0.00-10.00  sec  29.8 GBytes  25.6 Gbits/sec  1940             sender
[SUM]   0.00-10.00  sec  29.7 GBytes  25.5 Gbits/sec                  receiver

Some digging learned that Proxmox actually does support Infiniband, so I might have to go back to Proxmox after all, and possibly use it for storage as well. Shame, as I really liked Xen Orchestra a lot better than Proxmox’ web UI.

Of course, I could just pass the IB HBA through to FreeNAS and use iSCSI over IPoIB, it’d be fast enough for my needs but just the idea makes me feel kind of dirty. Hmm, decisions…

1 Like

Well, that doesn’t work, passing the Mellanox card through to the VM results in a FreeNAS kernel panic on boot…

Attempting to pass it through while FreeNAS is already running crashes the entire XCP-NG host. Whoops.

Will have to test whether passing it through to a Linux VM works properly, if it does I might need to look into alternatives to FreeNAS. Hmm.

Well, I skipped the testing the Linux VM bit, instead I installed Proxmox.

To that end I removed the old 500Gb Samsung HDD I’d been using for XCP-NG and added 2 SATA SSDs inside the chassis with a special bracket:

It clips in over two pins on the chassis and fits over a bunch of the other standoffs that are present at the bottom (hence some of the extra holes) I noticed there’s room for another one of these, meaning that you could fit 40 drives in this chassis, if using 2.5" for the fixed internal ones, or 38 3.5" drives…

Final result:

The reason why I hadn’t installed XCP-NG this way is because these are really cheap 30Gb HDDs and XCP-NG requires more space to install.

One of the things I noticed after installing Proxmox is that the system idled cooler and consumed quite a bit less power. Odd.

The Mellanox card was immediately recognized and an Infiniband link brought up without me having to take any action (this being a first), and all the Infiniband tooling is readily available since Proxmox doesn’t shield off the “normal” Debian repositories, so on that front it’s a net improvement.

Wonder if it would be best to just use Proxmox as file server or to go the VM/container route? There’s of course IB to take into consideration…

4 Likes

NFS over RDMA (Infiniband)

Well, I set up Proxmox with an NFS share for testing. Getting infiniband working was a doozy since everything’s already available in Debian (and on Gentoo, as the client), so it was a matter of pulling in the dependencies as per the Debian RDMA Wiki.

Unfortunately that page is woefully incomplete for anything other than just installing the tools you need, and making sure you have a working Infiniband link.

So the missing parts I managed to puzzle together with the help of RHEL documentation and some good old fashioned searching, and reading of friendly manuals, of course :wink:

Setting up the NFS server

First we need to set up our share, so we add the following to /etc/exports:

/mnt/zpool0/test 192.168.1.152/255.255.255.0(fsid=0,rw,async,insecure,no_subtree_check,no_root_squash)

Note that insecure is a must to get RDMA working, ideally you’d use this on a separate storage network.

Then we make NFS listen on the RDMA port:

echo rdma 20049 > /proc/fs/nfsd/portlist

However, setting this each time is rather undesirable, after some serious digging I found out that you need to add the appropriate variable to the NFS server configuration file /etc/default/nfs-kernel-server (the variable was not there before, so just add it):

RPCNFSDOPTS="--rdma=20049"

and restart the server with systemctl restart nfs-server then verify whether the RDMA port shows up in /proc/fs/nfsd/portlist, if not, something went wrong (hopefully not, because the journalctl output is just horrific).

Setting up the NFS client

On the client we can then mount the share:

mount -o rdma,port=20049 192.168.1.152:/mnt/zpool0/test /mnt/test

or through an entry in /etc/fstab:

192.168.1.152:/mnt/zpool0/test          /mnt/test          nfs             rdma,port=20049               0 0

Benchmark

Now for some benchmarking with fio.

Random reads

fio --rw=randread --bs=64k --numjobs=4 --iodepth=8 --runtime=30 --time_based --loops=1 --ioengine=libaio --direct=1 --invalidate=1 --fsync_on_close=1 --randrepeat=1 --norandommap --exitall --name task1 --filename=/mnt/test/1.txt --size=10000000

For reference, ext4 on RAID6 mdadm+lvm array (some of the disks are on SATA2 ports):

READ: bw=732MiB/s (768MB/s), 183MiB/s-183MiB/s (192MB/s-192MB/s), io=21.5GiB (23.1GB), run=30035-30036msec

ZFS over NFS with RDMA:

READ: bw=3072MiB/s (3221MB/s), 767MiB/s-769MiB/s (805MB/s-806MB/s), io=90.0GiB (96.6GB), run=30001-30001msec

Random reads & writes

fio --rw=randrw --bs=64k --numjobs=4 --iodepth=8 --runtime=30 --time_based --loops=1 --ioengine=libaio --direct=1 --invalidate=1 --fsync_on_close=1 --randrepeat=1 --norandommap --exitall --name task1 --filename=/mnt/test/1.txt --size=10000000

Our reference RAID6 array:

  READ: bw=11.8MiB/s (12.3MB/s), 2922KiB/s-3083KiB/s (2993kB/s-3156kB/s), io=357MiB (375MB), run=30396-30397msec
  WRITE: bw=12.2MiB/s (12.8MB/s), 3070KiB/s-3181KiB/s (3143kB/s-3258kB/s), io=372MiB (390MB), run=30396-30397msec

ZFS over NFS with RDMA:

  READ: bw=1688MiB/s (1770MB/s), 420MiB/s-426MiB/s (440MB/s-446MB/s), io=49.4GiB (53.1GB), run=30001-30001msec
  WRITE: bw=1691MiB/s (1773MB/s), 422MiB/s-426MiB/s (442MB/s-446MB/s), io=49.5GiB (53.2GB), run=30001-30001msec

Not bad for old and unsupported hardware…

1 Like

NFSv4

My intention is to NFS mount all the stuff that’s on my old RAID6 array on superbia and then slowly move services over into new VMs on avaritia. I ran into the little issue with the previously described NFSv3 setup when I tried to move my EGG setup (Elasticsearch, Graylog, Grafana <-> ELK :wink: ) over to NFS as NFSv3 doesn’t support locking, so I had to switch that to NFSv4.

NFSv4 uses a virtual root that all exports fall under. So I created a /export directory and then bind mounted the original location to the NFS root.

NFSv4 Server configuration

/etc/fstab on the server:

# NFSv4
/mnt/zpool0/test          /export/test      none    bind  0  0

/etc/exports:

/export                   192.168.1.152/24(fsid=0,rw,async,insecure,no_subtree_check,no_root_squash)
/export/test              192.168.1.152/24(fsid=1,rw,async,insecure,no_subtree_check,no_root_squash)

The first line sets up our NFSv4 root (note the fsid of 0, indicating the root), following lines are exported filesystems, each time incrementing fsid.

NFSv4 client configuration

The changes on the client are limited to referencing the remote file system relative to the root, rather than the full path and specifying nfs4 as the file system type.

/etc/fstab on the client:

192.168.1.152:/test          /mnt/test          nfs4            rdma,port=20049               0 0

Docker containers on NFSv4

Unfortunately that doesn’t quite work, the Elasticsearch/Mongodb/Graylog/Grafana containers just hang forever on startup. The same issue occurs with Transmission in Docker over NFSv4 (NFSv3 works just fine).
Permissions appears OK since I can browse directories and create files fine, but containers just hang indefinitely during startup.

Not sure what’s going on there, input from people with more NFS experience definitely welcome :slight_smile:

1 Like

For the NFSv4 problem, looks like I might have hit upon a kernel bug: https://bugzilla.kernel.org/show_bug.cgi?id=198053#c7

Guess I’ll have to use iSCSI or try to get lockd working with NFSv3…

1 Like

Will do a writeup on iSCSI soon-ish (particularly with iSER), but am currently trying to figure out ways to make it more robust to network failures, or other hiccups (one disk in the target array is a bit dodgy and prone to slow responses occasionally. Yes I’ll replace it, but it resets itself and then works fine for days/weeks, so not a priority).

Currently when it disconnects the iSCSI drive goes into read-only mode and the only way to get it out of that is to stop everything running on the mount, unmount the disk, then logout of the target using iscsiadm, then re-login again (making sure to set all parameters again) and then remount the disk, and then restart everything running on it.

Not exactly convenient, so I’m wondering if there’s no better way to handle this. Searching leads to a lot of “your share is full” posts, which aren’t particularly helpful (it’s not full) so I’m probably looking for the wrong stuff…

Oh, I also fiddled a bit with CIFS over RDMA, documentation on that is really, really sparse (you’d think it’s some sort of military secret…) so not sure if I got it working (not really any way to know, as far as I can tell, aside from running fio…)

But you basically set this in your smb.conf:

##RDMA
server multi channel support = yes
aio read size = 1
aio write size = 1

Even t hough multi-channel suport was introduced quite a ways back it’s hard to tell whether it ever got out of the “experimental” phase, so keep that in mind.

Still digging further into this one though.

Ended up replacing the disk that occasionally reset itself with a new Seagate Exos 7E2. The old disk was a Samsung Spinpoint F3 fwiw, a desktop drive and out of all the HDDs I’ve had over the years this model has been the worst, reliability wise, by far.

I decided to take the disk offline and then replace it rather than doing an online replace, mostly just so I could put it in the bay the previous disk was in.

Here I ran into some differences between ZOL (or ZFS on Proxmox anyway) and FreeNAS, namely Proxmox ZFS appears to not default to “by-id” display instead using drive letters.
No big deal in the grand scheme of things since ZFS doesn’t depend on the drive names to import the array but it did lead to some head scratching because this didn’t work:

root@avaritia:~# zpool offline zpool0 sdh
cannot offline sdh: no such device in pool

nor this
zpool offline zpool0 /dev/sdh
it would just state there was no “sdh” device in the pool

While zpool status zpool0 would disagree:

        NAME             STATE     READ WRITE CKSUM
        zpool0           ONLINE       0     0     0
          raidz2-0       ONLINE       0     0     0
            sda2         ONLINE       0     0     0
            sdc2         ONLINE       0     0     0
            sde2         ONLINE       0     0     0
            sdh          ONLINE       4     2     0
            sdb          ONLINE       0     0     0
            sdd          ONLINE       0     0     0
            sdf          ONLINE       0     0     0
            sdg          ONLINE       0     0     0

I had to look into zdb to discover that the path, according to zfs was /dev/sdh2, with that information zpool offline zpool0 /dev/sdh2 did work as expected.

Removing and then inserting the replacement disk conveniently assigned it to /dev/sdh again.
For the replace command it shouldn’t have been necessary to specify the disk we were replacing as it should have just taken the offline one, but it once again was unable to find sdh. Thus the replace command line became the rather odd looking:
zpool replace zpool0 /dev/sdh2 /dev/sdh

And now we’re in business:

root@avaritia:~# zpool status zpool0
  pool: zpool0
 state: DEGRADED
status: One or more devices is currently being resilvered.  The pool will
        continue to function, possibly in a degraded state.
action: Wait for the resilver to complete.
  scan: resilver in progress since Thu Jun 11 17:08:40 2020
        3.78T scanned at 1.48G/s, 1.12T issued at 449M/s, 3.78T total
        133G resilvered, 29.72% done, 0 days 01:43:13 to go
config:

        NAME             STATE     READ WRITE CKSUM
        zpool0           DEGRADED     0     0     0
          raidz2-0       DEGRADED     0     0     0
            sda2         ONLINE       0     0     0
            sdc2         ONLINE       0     0     0
            sde2         ONLINE       0     0     0
            replacing-3  DEGRADED     0     0     0
              sdh        OFFLINE      4     2     0
              sdh        ONLINE       0     0     0  (resilvering)
            sdb          ONLINE       0     0     0
            sdd          ONLINE       0     0     0
            sdf          ONLINE       0     0     0
            sdg          ONLINE       0     0     0

errors: No known data errors

It should be noted that this array was originally created by FreeNAS, and then imported into Proxmox (but not upgraded), so that might account for some off the weirdness.

Dug through my, errr, parts pile at my parents’ place and found this:

Looks like just like any old AT motherboard, well, that is until you take of the cooler…

Getting this to run should be interesting, since I apparently didn’t have the foresight to at least keep the PSU…

Oh yes, and no thermal paste on the CPU at all, but then again, my P120 had a fan that didn’t spin most of the time and wasn’t bothered by that either, so yeah, different times I guess…

EDIT: should’ve paid more attention rather than assume (you know what they say), because the connector is actually just ATX, not AT as I just supidly just assumed based on age.

4 Likes

Upgraded systems (Gentoo on one side, Proxmox on the other) and NFS stopped basically working with “Permission denied” everywhere. This will be fun to figure out…sigh.

The only “odd” thing I see is duplicate options in exportfs -v output, no idea where those come from, eg:

/mnt/zpool0/music
                192.168.1.152/24(rw,async,wdelay,insecure,no_root_squash,no_subtree_check,sec=sys,rw,insecure,no_root_squash,no_all_squash)

Just looks like the defaults get appended to whatever is in /etc/exports.

uid and gid match between the machines, so…stumped. Going to upgrade the client’s kernel and reboot and see if that helps any.

Well, root still has access, so must have something to do with permissions after all…

1 Like

Looks like a group problem since the account that owns the files can write to them, but the group can’t. Will have to double check the other user is part of the correct group…

1 Like

Bought a DeepCool FH-10 fan hub as the one I ordered from BangGood around the start of the Covid pandemic never arrived.

I couldn’t manage to get the fans controlled through the backplane so I decided to just hang all of them from the motherboard so they could at least be PWM controlled.

Currently 6 fans are attached to the hub from the second fan header while one fan was already plugged into the first fan header for CPU cooling when I got the system (and I left it that way).

This brought the RPM of these 6 fans down to around 2700 from the 5000-ish they were running at before, with only a 2C increase in hard drive temperature in the worst case.

2 Likes

Ran into an interesting problem while installing grub on ZFS:

(chroot) luxuria / # grub-probe /boot
grub-probe: error: failed to get canonical path of `/dev/wwn-0x5000cca0576d17b4'.

Grub does something pretty braindead by parsing the zpool status output, which is not strictly specified. Then, like a proper derp, it just concatenates /dev/ in front of whatever it finds there…
The entire issue is documented in this bug report, which is still accurate as of Grub 2.04, 7 years after the initial report.

Workaround is to make zpool status output the full path to the device:

(chroot) luxuria / # export ZPOOL_VDEV_NAME_PATH=YES
(chroot) luxuria / # zpool status
  pool: bpool
 state: ONLINE
  scan: none requested
config:

        NAME                                              STATE     READ WRITE CKSUM
        bpool                                             ONLINE       0     0     0
          mirror-0                                        ONLINE       0     0     0
            /dev/disk/by-id/wwn-0x5000cca0576d17b4-part1  ONLINE       0     0     0
            /dev/disk/by-id/wwn-0x5000cca0576d1984-part1  ONLINE       0     0     0

errors: No known data errors
(chroot) luxuria / # grub-probe /boot
zfs
1 Like

Noticed Proxmox doesn’t run scheduled long SMART tests by default, so I kicked off a bunch myself and I noticed this:

Num  Test_Description    Status                  Remaining  LifeTime(hours)  LBA_of_first_error
# 1  Extended offline    Completed without error       00%       1699         -
# 2  Extended offline    Completed without error       00%     53420         -
# 3  Extended offline    Completed without error       00%     53252         -
# 4  Extended offline    Completed without error       00%     53085         -

Odd. The counter in the attribute appears to increase correctly:

  9 Power_On_Hours          0x0032   008   008   000    Old_age   Always       -       67235

So I ran a short test to see if it wasn’t a fluke:

Num  Test_Description    Status                  Remaining  LifeTime(hours)  LBA_of_first_error
# 1  Short offline       Completed without error       00%      1703         -
# 2  Extended offline    Completed without error       00%      1699         -
# 3  Extended offline    Completed without error       00%     53420         -
# 4  Extended offline    Completed without error       00%     53252         -
# 5  Extended offline    Completed without error       00%     53085         -

So not a fluke. The fact that it just happened around the 65k mark made me wonder though… And wouldn’t you know, it turns out the value of the LifeTime counter for the SMART tests is a 16 bit word, so it wrapped around. Guess they didn’t expect HDDs to last this long… :wink:

And yes, that drive has over 7.5 years of uptime and its SMART stats are still really clean:

Model Family:     Western Digital RE4
Device Model:     WDC WD1003FBYX-01Y7B1
<snip>
ID# ATTRIBUTE_NAME          FLAG     VALUE WORST THRESH TYPE      UPDATED  WHEN_FAILED RAW_VALUE
  1 Raw_Read_Error_Rate     0x002f   200   200   051    Pre-fail  Always       -       0
  3 Spin_Up_Time            0x0027   168   166   021    Pre-fail  Always       -       4575
  4 Start_Stop_Count        0x0032   100   100   000    Old_age   Always       -       110
  5 Reallocated_Sector_Ct   0x0033   200   200   140    Pre-fail  Always       -       0
  7 Seek_Error_Rate         0x002e   200   200   000    Old_age   Always       -       0
  9 Power_On_Hours          0x0032   008   008   000    Old_age   Always       -       67240
 10 Spin_Retry_Count        0x0032   100   100   000    Old_age   Always       -       0
 11 Calibration_Retry_Count 0x0032   100   100   000    Old_age   Always       -       0
 12 Power_Cycle_Count       0x0032   100   100   000    Old_age   Always       -       109
192 Power-Off_Retract_Count 0x0032   200   200   000    Old_age   Always       -       83
193 Load_Cycle_Count        0x0032   200   200   000    Old_age   Always       -       26
194 Temperature_Celsius     0x0022   110   085   000    Old_age   Always       -       37
196 Reallocated_Event_Count 0x0032   200   200   000    Old_age   Always       -       0
197 Current_Pending_Sector  0x0032   200   200   000    Old_age   Always       -       0
198 Offline_Uncorrectable   0x0030   200   200   000    Old_age   Offline      -       0
199 UDMA_CRC_Error_Count    0x0032   200   200   000    Old_age   Always       -       0
200 Multi_Zone_Error_Rate   0x0008   200   200   000    Old_age   Offline      -       0

It does run hotter than the newer drives (of the same model) by 2 to 3 degrees (Celsius) but still well within tolerances.

3 Likes