Goals
I currently have a server with a 5 disk raid6 array (mdadm+lvm2), however I would like to have a setup that also protects against data corruption.
Given how docker likes to muck around with firewall settings it would also be nice to be able to run any containers that shouldn’t be exposed to the internet on this machine, rather than on the current one which also server as firewall/router.
In summary:
- NAS
- light container use
- reliable
- should just work™ (if I need to fiddle a lot to get/keep basic things going I might as well just install Gentoo, which I’m familiar with, and be done with it)
- protection against file corruption (iow. ZFS or BTRFS)
- RAID6 (or similar), which basically leaves ZFS.
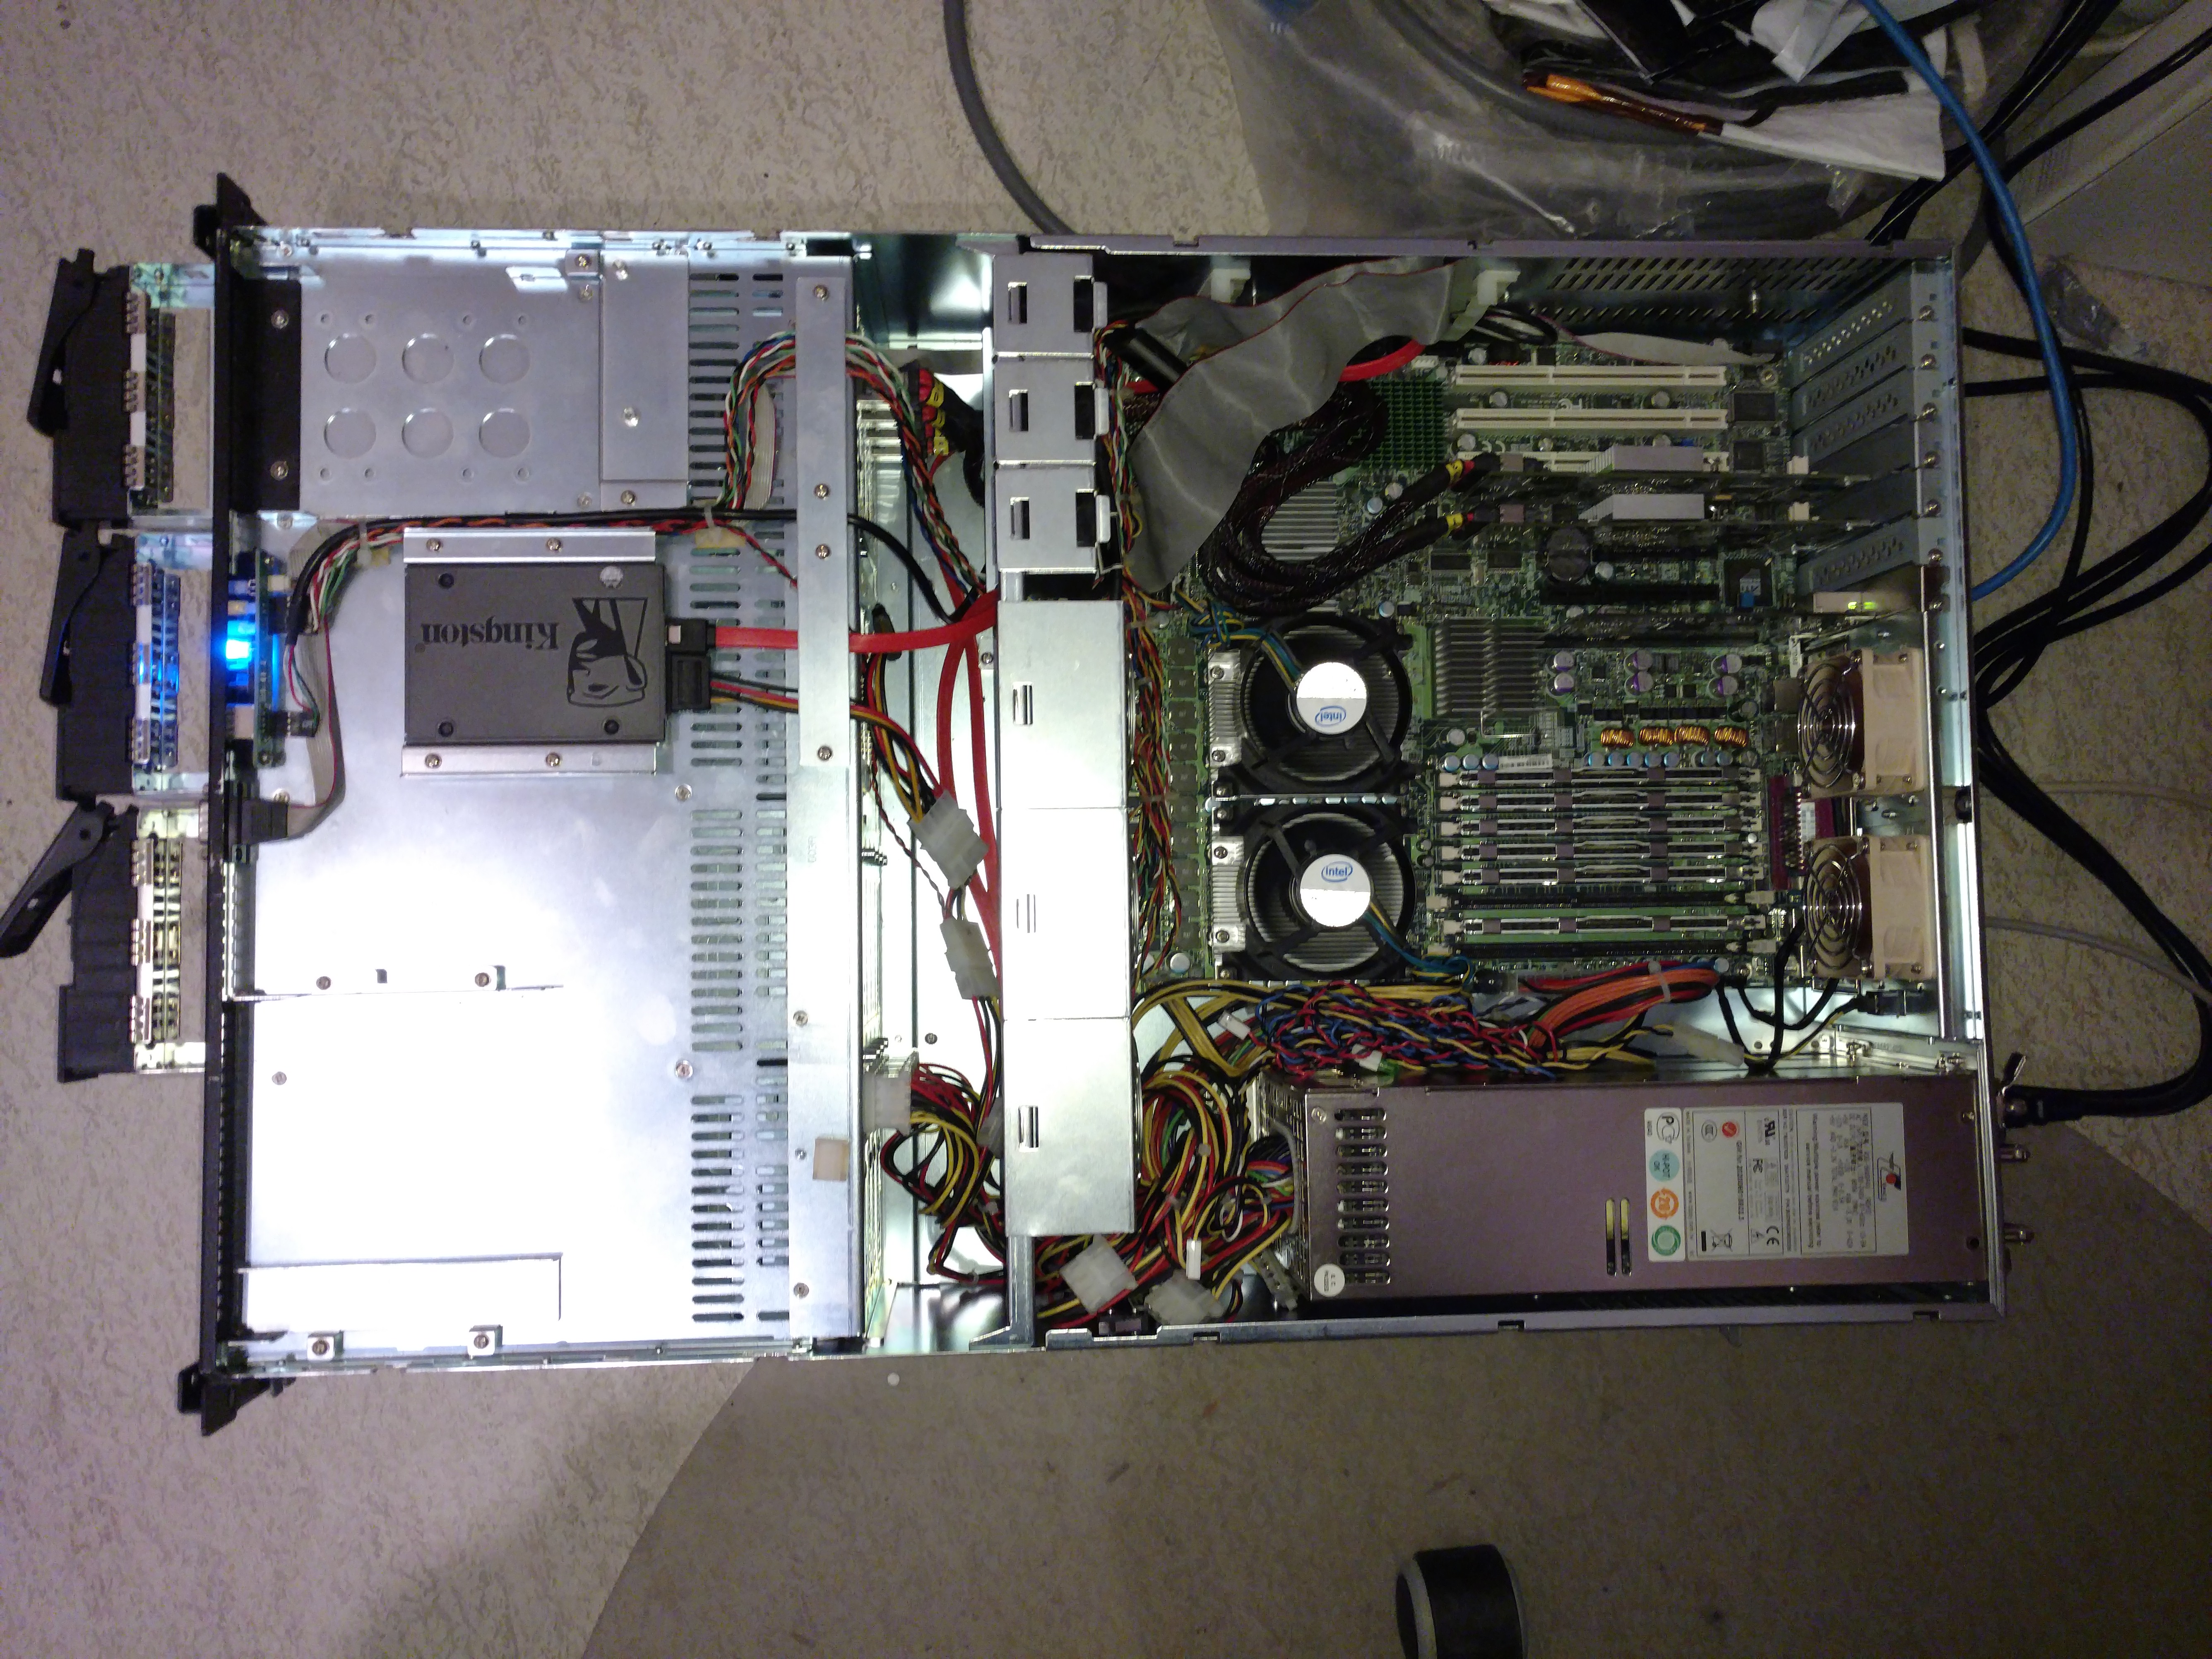
Hardware
| Name | Gula (Why the name?) |
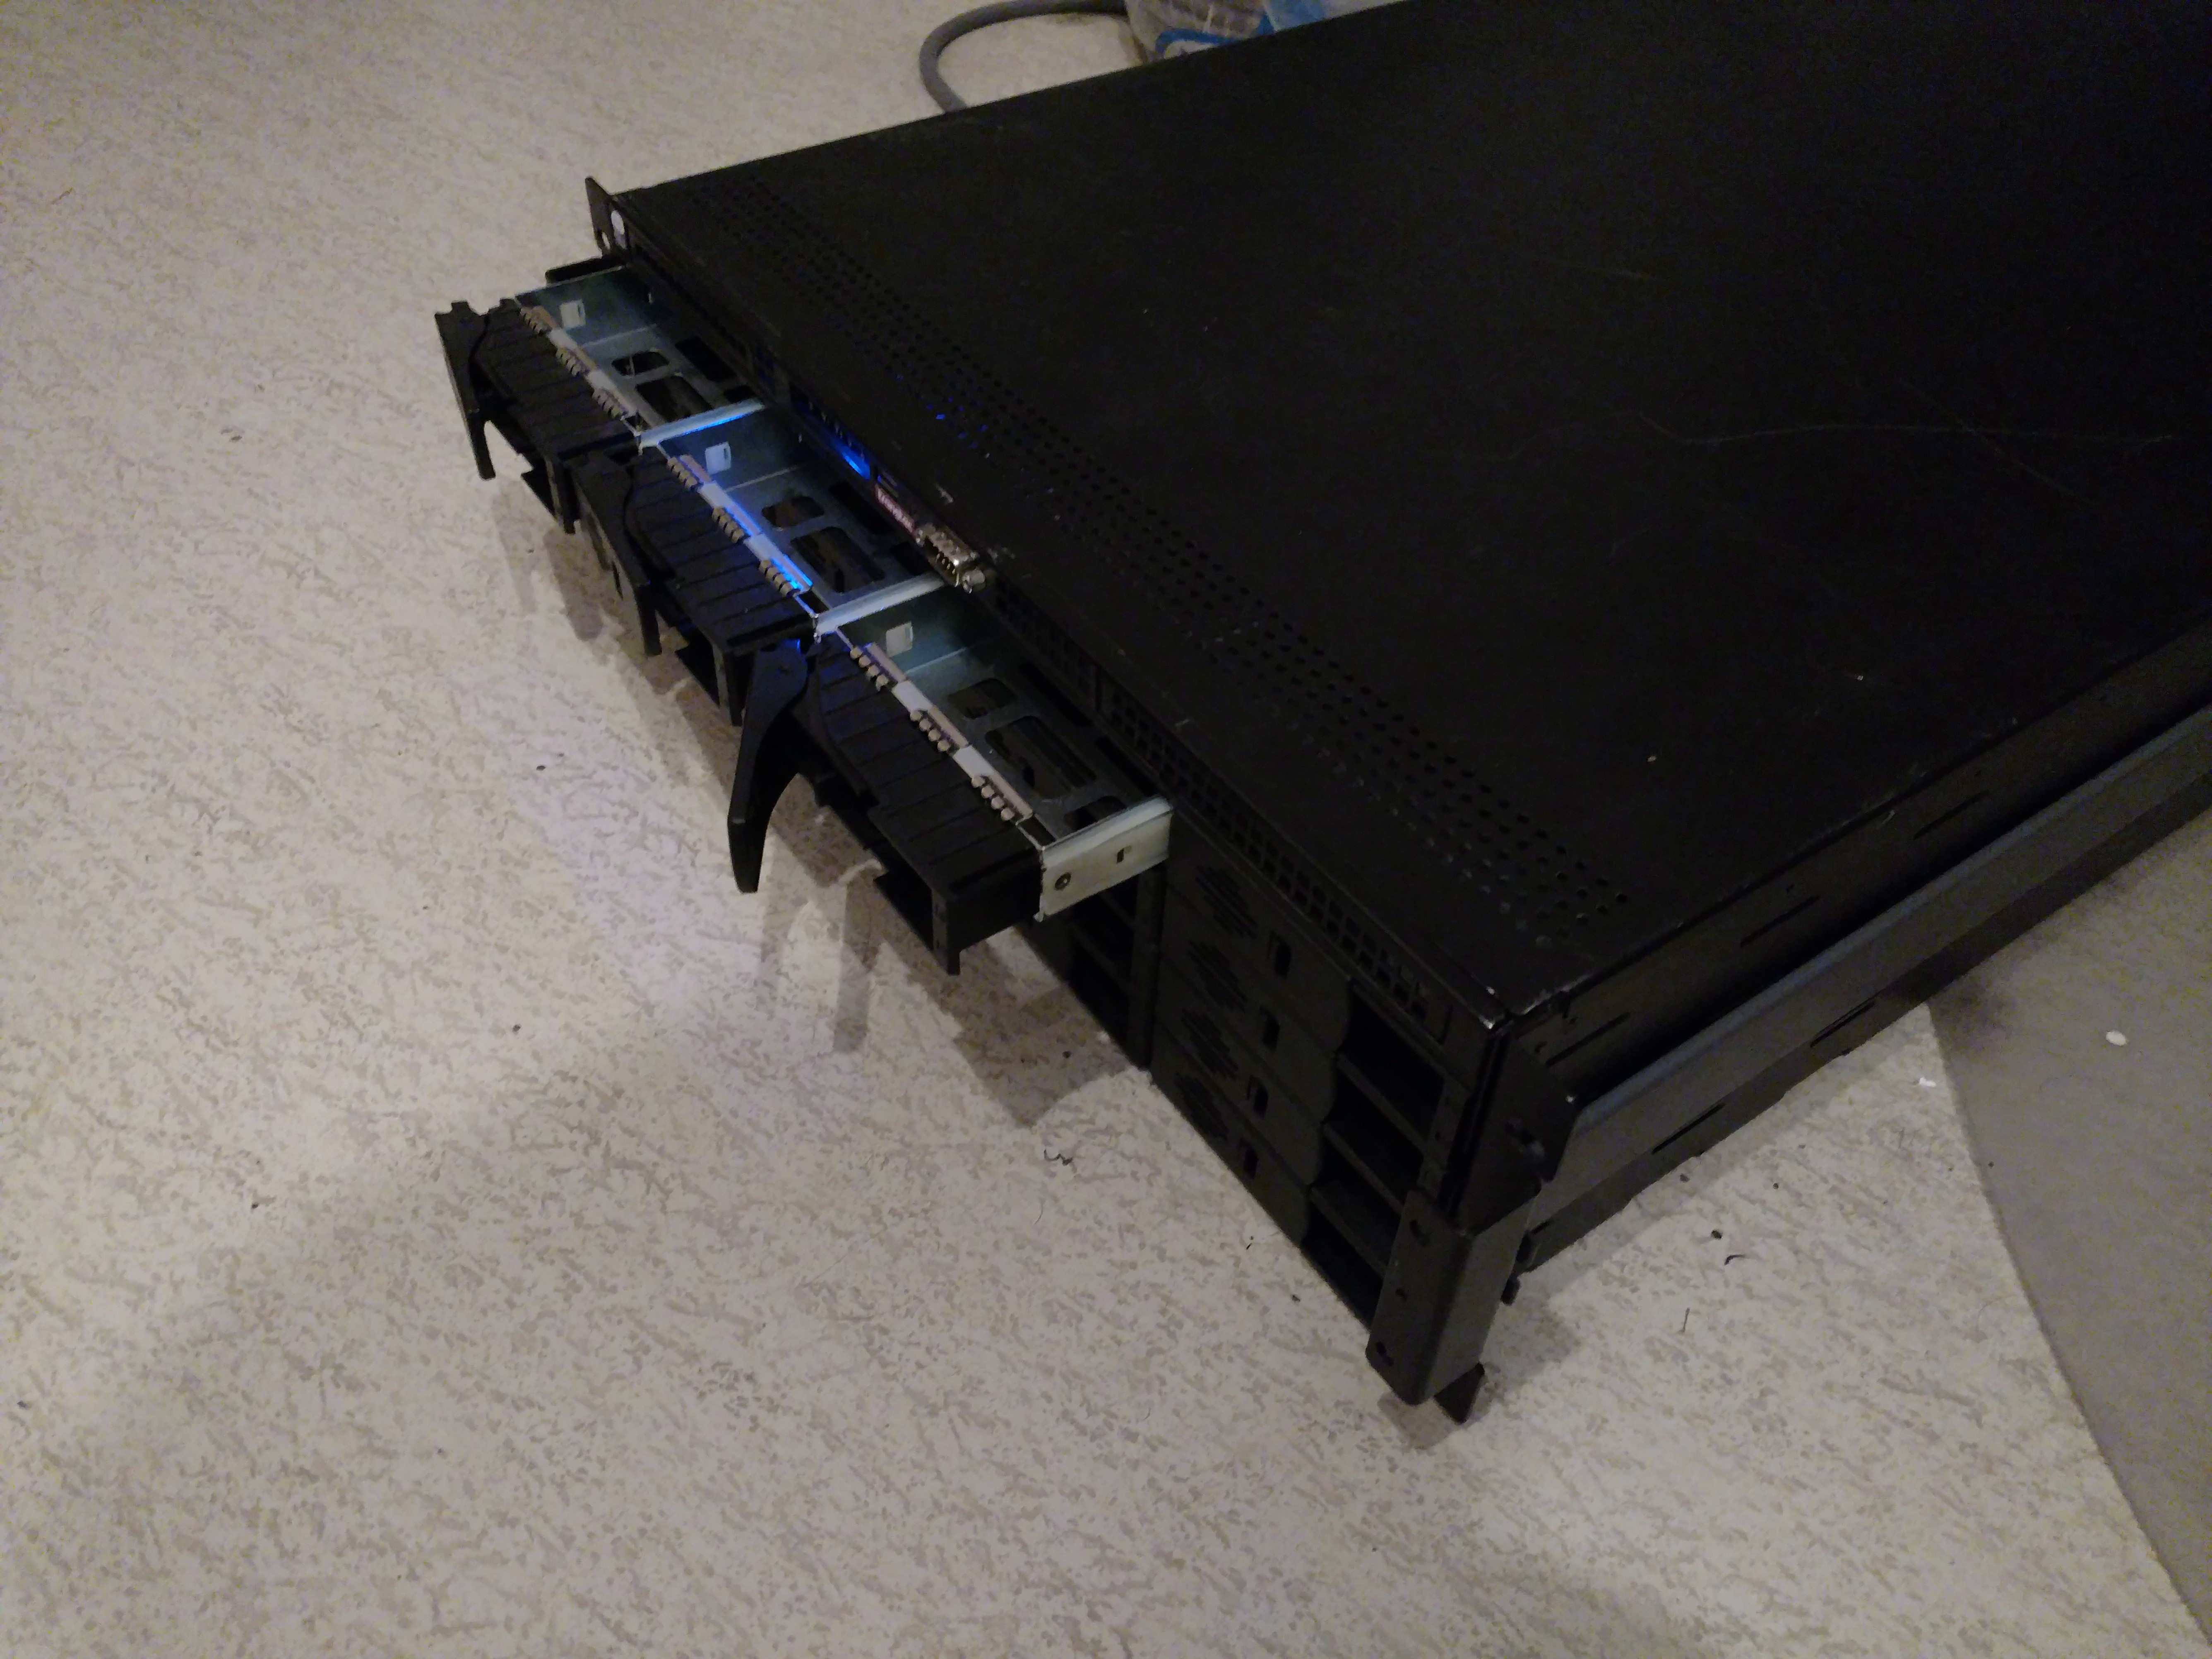
| Case | 3U enclosure with 16 SATA2 hot-swap bays |
| Motherboard | Supermicro X7DBE (and a SIMLP-B IPMI card) |
| CPU | 2 x Intel Xeon E5335 2.0 Ghz |
| RAM | 32GB Fully Buffered ECC DDR2 |
| RAID Controller/HBA | 3Ware 9650SE-16ML (replaced with 2 Dell PERC H310s) |
| System drive | Kingston A400 120GB SSD |
| HDDs (currently) | 3 x 1TB drives for testing purposes (+1 1TB broken drive for error handling testing) |
Two of the drives have SMART warnings, one is just plain “toast” and the last one is just a normal functional drive (the weirdo  ).
).
Preparation
Since this is an old server it didn’t need assembly, however it did come with some issues which broadly fell into two categories.
Issues I suspected to be BIOS related:
- inability to boot from USB devices (even though the Phoenix BIOS detected them)
- inability to set up networking for the IPMI card
- inability to find and boot from the Kingston SSD connected to a motherboard SATA port
And slightly more hardware related issues, namely fans:
- noise
- fan on second PSU turned out to be broken
Solving BIOS related issues
Finding and upgrading BIOS
Judging by the version and date on the BIOS the board might still have been on the release BIOS: 2.0b dated 2008-03-20. Unfortunately BIOS updates were no longer available from Supermicro’s site and I had to go hunting around the internet, eventually landing on a Supermicro supplier’s support page where I found a 2.1a version of the BIOS, not the latest (2.1c), but much more recent than what I had.
Flashing was a bit of a pain since these old BIOS’s assume floppies and all that rot. I ended up formatting an IDE drive as FAT32 and stuffing the BIOS tools on there and creating a FreeDOS boot CD to flash that way. One issue I ran into was that one of the EXEs required by the flash script was missing, so I had to grab that from another BIOS firmware zip (from the X7DB8, which, as I understand, is basically the same board but with SCSI). Once I had that I was able to succesfully flash the new BIOS. Yay!
Sorting out IPMI
This gave me new IPMI options in the BIOS now allowing me to set up the networking on the SIMLP-B card. Yay!
Next up was trying to log in, there appeared to still be some configuraiton on there from a previous owner (4 users all starting with cern: cernanon, cernoracle, …? Wait, what?). Thankfully the “administrator” user just used the default Supermicro password of “ADMIN”.
Solving the SSD boot device issue
This board has 3 SATA controllers, the “normal” one provided by the chipset, which appeared unable to detect the SSD for some reason (SATA HDD on same port worked fine), and then two RAID controllers, an Intel and an Adaptec one. Switching to the Adaptec controller and setting that to passthrough resulted in the SSD finally being recognized correctly.
USB boot devices
The USB booting still doesn’t work. I’ve just resorted to attaching an IDE DVD drive (hence the IDE cable in the first picture) instead of wasting more time on getting that sorted.
The actual issue is that the Phoenix BIOS doesn’t allow me to move the USB devices up in the boot order (it just beeps at me), moving other devices (eg. floppies) works fine though.
Fan fun!
The machine turned out even louder than I expected (I’m not unfamiliar with server noise), I measured a constant noise of over 74dBA with “professional equipment” (aka, my phone ), after the fans had spun down. So yeah, loud was expected, but this loud, well, that would have to be take care of.
I then measured all fans in isolation to judge which ones were the loudest and most ripe for replacement.
Measurement were taken as follows:
- phone was put 20cm away from fan
- fans were moved out of the case into a quieter case to avoid getting drowned out by the PSU fans
- PSU fan was measure by unplugging all other fans and PSU’s (the PSU consists of three reduntant units)
- I didn’t measure the CPU fans (maybe I should try doing that)
The chassis contains 10 fans, of 5 different types (if people are interested in the exact models I can add those):
| Location | Amount | Size (mm) | Noise (dBA) | Replacement |
|---|---|---|---|---|
| PSU | 3 | 40 | 59 | Everflow R124028BL |
| Exhaust | 2 | 60 | 65 | Noctua NF-A6-25 PWM |
| Mid 40 | 3 | 40 | 61 | Supermicro FAN-0100L4 |
| Mid 80 | 3 | 80 | 61 | SilverStone SST-FM84 |
Requirements were that they’d still need to actually move some air, while all of them are obviously weaker than the stock fans I didn’t just want to replace everything with Noctuas and lose all airflow, instead I tried to stick to “reasonable” downgrades based on the specification of the original fans (though I couldn’t find specs for the 80mm fans). The PSU fan replacements were picked based on a few Reddit posts of someone who claimed success with these specific fans in a similar Supermicro PSU.
The replacement I’m the least happy with would be the Noctuas for the 60mm fan, they are a lot weaker than the fans that were in there but I just wasn’t able to find anything closer to the stock fans in that size.
So far I’ve installed all but the SilverStone fans which has brought noise down to a more reasonable 50-ish dBA.
Temperatures have also been more than fine (CPU’s sitting around 24-27degrees Celsius and case around 34, peaking at 37 during ZFS module compile), but we’ll see how that evolves come summer and when I fill more bays with hard drives.
FreeNAS
Installation was smooth as butter, with one caveat: since it wouldn’t find the SSD I performed the install on another machine, and then moved the SSD to the server (and then solved the booting from SSD issue). There are known issues with some old Supermicro boards that result in the installer just outright crashing, or hanging, which mine did when I initially tried to install to an IDE HDD before the SSD arrived in the mail.
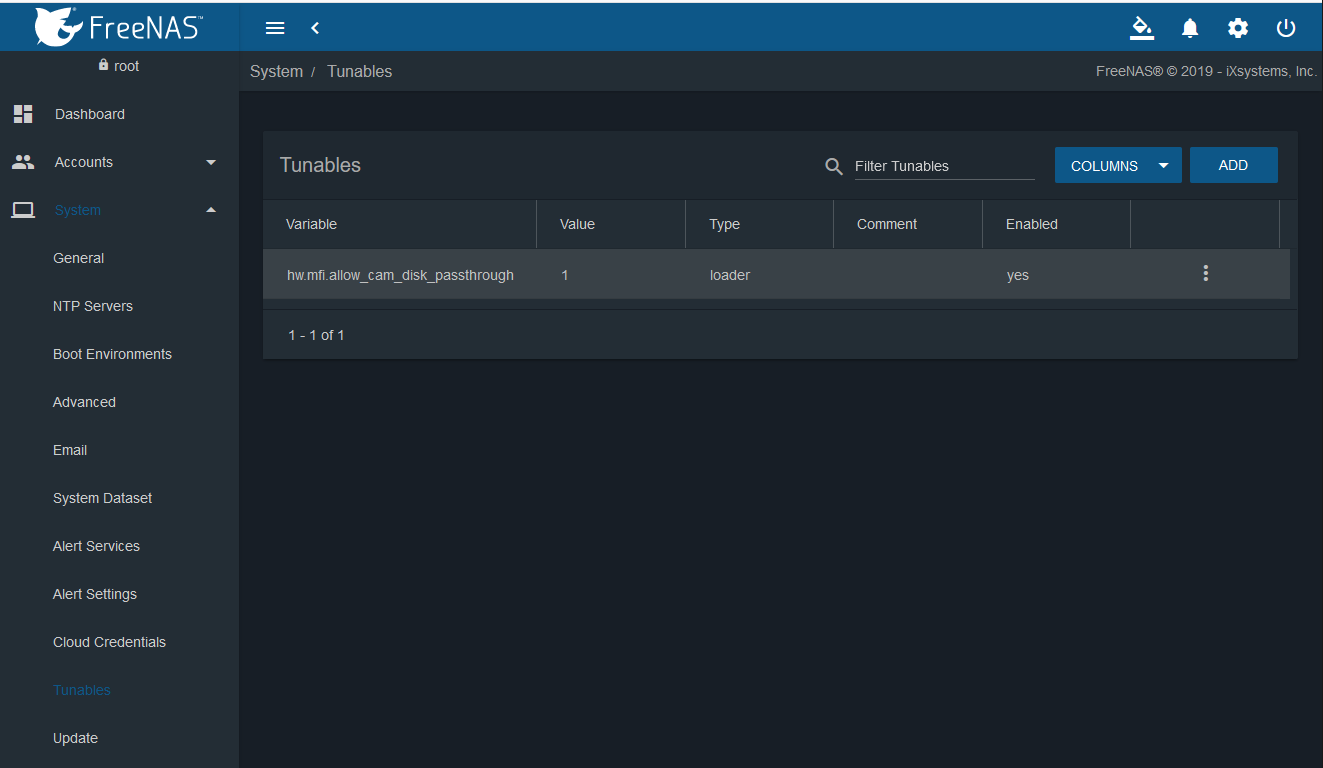
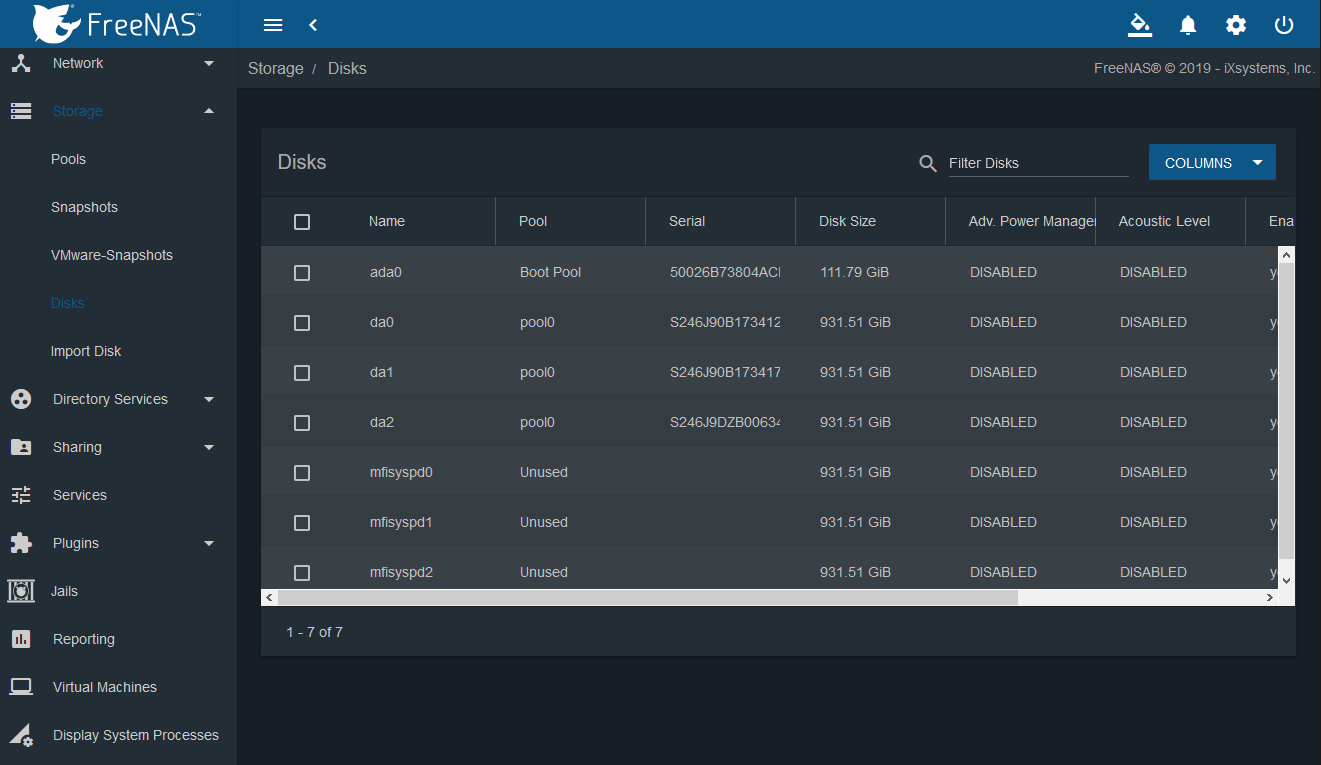
I then set up the four spinning disks disks as JBOD in the 3Ware controller and then created a zpool out of them (note that I was aware that hardware raid controllers, including this one specifically, are discouraged for use with FreeNAS/ZFS, just wanted to see what would happen). Since, as mentioned, one of the drives is actually toast the 3Ware controller interfered and just kept spamming errors during FreeNAS boot, never allowing the OS to come up, eventually just rebooting instead to start the entire ordeal over again.
To avoid a bootloop I just shut down the system and replaced the 3Ware with 2 Dell PERC H310 HBAs. The H310s BIOS allowed me to switch between both cards, addressing a concern I’d had as some people reported that certain motherboards didn’t allow chain loading HBAs (so only the first one would “boot”). I removed all RAID configuration so the disks would just be passed to the OS (also tossed the 4th, broken disk, for now)
Not much else to say, rather smooth sailing from then on out. Unfortunately FreeNAS appeared unable to access the drives’ SMART status and didn’t have support for hardware sensors (a patch was apparently proposed for FreeBSD, but rejected, a few years ago, so doesn’t appear to be a big priority for upstream).
Good:
- quick and easy install
- snappy UI
- everything “just works™” after installation, no surprises
- ZFS integration is excellent
Bad:
- installer can just hang on some older Supermicro boards requiring installation through another machine
- appears unable to read SMART data without flashing controller (even when in passthrough mode)
- no hardware sensors (fan speeds, case temperature, …)
- setting up services not intuitive (no big deal, nothing some rtfm can’t fix)
OpenMediaVault
First installation attempt I didn’t remove drives (aside form boot disk), despite that being strongly recommended. Installation proceeds smoothly (albeit extremely slowly). After the post-install reboot, I fail to login until I search some and discover that you can’t login as root in the web UI but have to use “admin” with default password “openmediavault”. I also discover that the UI doesn’t work at all without JavaScript (I run NoScript). Promising.
I then notice oddities with drive lettering (boot drive is /dev/sdd), so I decide to just start over (not a complaint, just a warning to those who might want to ignore the manual as I did )
This time around I do remove the HDDs and leave only the boot disk connected. Install crawls (seriously, why so slow?) to a close and I reboot, only to be thrown into an initramfs prompt. Turns out it did try to boot from /dev/sda this time around, except that adding the other disks back to the system resulted in the boot device becoming /dev/sdd again. Whoops.
So I remove the disks, reboot, succesfully this time since sdd is now sda again. Fiddle with Grub some to try and see what is going on, find a bug report that appears relevant and decide to upgrade OMV from 5.0.5 (latest iso at time of writing) to 5.1.1-1 with the updater, hoping that newer versions include the fix from upstream.
Running grub-install /dev/sda now appears to give me a functional Grub config using UUIDs. Victory!
During the installer I’d just let the system set up DHCP on the first NIC. So I figure it’s time to change that, especially since OMV somehow manages to get a different IP address from DHCP each time. To make sure I wouldn’t have to bother with keyboards and monitors in case I do mess something up I decide to set up the second NIC to use DHCP as a backup, there’s no cable attached, but hey, what’s the worst that could happen? Famous last words, as it turns out.
So I let OMV apply the changes…aaaaand “An error has occured”. This completely breaks the web UI, and, after a glance at ntopng, appears to have outright killed the networking. Welp, so much for reliability.
System ignores my attempts at a “Graceful Shutdown” over IPMI, so “Reset” it is.
Comes back up, and thankfully managed to store the networking configuration, so onwards to setting up a static IP for NIC0. This time I get the error again, but likely because I changed the IP, networking appears to still be up. We’re still in business, phew.
ZFS
First install OMV Extras plugin as per the instructions.
Then I installed the ZFS plugin, which appeared to install zfs tooling before compiling the kernel module, which resulted in a failure. Despite this the module was marked as installed, so I had to uninstall it and try again, this time it appeared to have worked (zfs menu item appeared).
Importing the pool previously created on FreeNAS worked just fine once I added the force option.
Good:
- SMART data on PERC controller without having to flash
- ZFS support
Bad:
- extremely slow install
- latest ISO can result in broken bootloader configuration
- appears sluggish in general compared to FreeNAS on the same hardware
- networking setup seems a bit wonky
- terminal output unusably small on CRTs (no big deal as you normally don’t use it)
- ZFS support not part of core, concerns about surprises on upgrades.
- no support for hardware sensors in the web UI
Next?
So far I’ve mostly touched on the installation and initial configuration, of course those are rather important initial impressions and might result in the decision to just not put any more time into a system.
Given the issues I’ve experienced with OMV so far I doubt I’ll be sticking with it, at least for this particular purpose. Maybe on more reasonable hardware (or unreasonable, I might have another system coming in that OMV might be a good fit for, if only because most other options don’t even support running on it)
So options for the future:
- try XigmaNAS, but since it’s also based on FreeBSD that might run into much the same issues as FreeNAS?
- try FreeNAS again, I found some information that using a different driver for the HBA card might give me access to SMART data
- try Proxmox, I think ZFS is available by default, so that might be a viable option. Would be interesting to see how many of the OMV quirks are due to Debian
- try some more stuff (eg. virtualisation, containers) and see how that’s handled.
Suggestions most definitely welcome, do note that I much prefer free (as in freedom) options, so Unraid would be a “last resort” kind of deal, but I’m aware of it (I saw the GN build )