Title states it in a nutshell- I’m totally new to photo/video editing with hardly any prior experience. My goal is to try & resize certain images I find to more suitable sizes without the stretching effect occurring! From what I’ve noticed, issues like this seem to occur when the image(s) have a narrower width than the height. But as clearly stated in the title, I don’t have ANY experience in doing so hence why I could use some guidance from experienced editors!
For me, my choice of editing tools is either gimp or any of these online website editing tools. (As long as they’re good with plenty of options.) I’m hoping someone here can give me some proper tips, pointers, advice, guidance, etc on this.
If any of you happen to have any questions for me or need further details, don’t hesitate to ask & I’ll do my best to fill you in! Thanks in advance to anyone who can help!
When resizing images, there’s usually a little chain link symbol that forces the aspect ratio of the image dimensions to remain the same. Clicking it toggles the function.
Alright guys, I have an update: I tried what you suggested. First, I made the image wider & saved it then I attempted to widen/enlarge the image afterward. To me, it looks like the image is stretched somehow even though that was *not * my intention. So this is where I got the original image: https://twitter.com/Meelowsh1/status/1296706350659952641/photo/1
And for some weird reason(s), I can’t upload the edited/larger image. Does gimp not allow you to save your file(s) in different formats/file types? Anyway, that’s the update. Guess I still have a LONG ways to go as far as learning how to edit images go…
I believe you are looking for the crop function, that is the only way to change the aspect ratio without stretching, unless you plan to paint in the sides yourself
The size I’m aiming for --(in regards to resizing the images)-- is 1920x1080. Just trying to keep it simple for when I’m ready to throw the images into the video project.
Actually, according to the image I saved directly off of Twitter, the dimensions are 1085 x 1338. As for resizing the image, I’m wanting to have it resized to 1920 x 1080. For a video project I’m working on.
for a target of 1920x1080 you will need to have a border on the width otherwise it will stretch to fit those dimensions. Can scale the height to 1080 first keeping the aspect ratio, then change the canvas size to 1920x1080.
Now when you say “border”, you mean like a limit? Also, Canvas is 1 of those terms that determines like what sort of shape I want the image to be, right? Just asking to be sure I have all my facts right.
The canvas will be the actual dimensions of the image. The border will be blank space that the image does not occupy, since the target aspect ratio does not match the original aspect ratio. Can fill it in with some color, or just leave it transparent.
If you do not want a border, will need to do as gigabuster suggested and crop the part you want to the correct aspect ratio, and scale to your target canvas size.
Go to Image → Resize Image, make sure the chain is linked and change the height to 1080 px. It will automatically reduce the width to 876px.
Then go to Image → Canvas Size, make sure the chain is NOT linked, then change the width to 1920. By default it puts the image in the upper-left corner, so click the Center button if you want it centered.
Then Image → Flatten Image and it will fill the extra width around the image with your background color.
Now it’s 1920x1080, and you can Export as to any image format you want.
So skipping the flatten step won’t add a background or transparency? I see. Now for other images --(Like I eluded to earlier.)-- that are taller than they are wider, I assume the same steps/directions you provided would work for that?
Hm. If you look above at the steps @rcxb provided, this looks like a solution that would work. But I have yet to know if skipping the flatten step would leave out any background color or transparency. Can anyone tell me?
You need to have SOMETHING to pad out the width. If you don’t want a fill color, you can have transparency. If you don’t want that, you really don’t want it to be 1920x1080 after all… In that case, just scale it to 1080 height and leave the width at whatever and export it, skipping the rest of the steps.
So you don’t know if skipping the flatten step will leave out any background color(s) or transparency or are you trying to say I need SOMETHING in order “fill in the gaps” so to speak?
 Thanks in advance to anyone who can help!
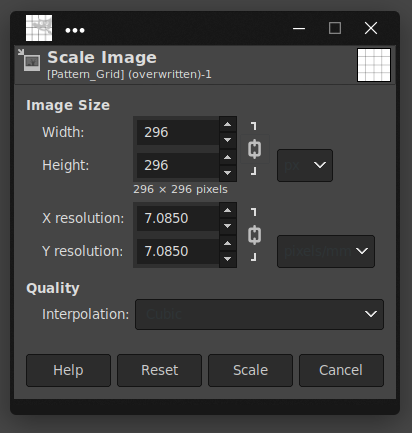
 Anyway, that’s the update. Guess I still have a LONG ways to go as far as learning how to edit images go…
