This is based on my own question thread. Home VLAN setup - #5 by oxbird
Goal: Isolate untrusted “smart” devices from the rest of your network
Hardware prerequisites: All routing devices have to be VLAN capable. Most nics and routers can work with VLANs, but not all ethernet switches can. Only managed switches allow you to set VLANs.
1. MR220AC - Main router
main router MR2200AC:
-Created Configured 2 additional VLANS. Note: VLAN1 is configured by default.

Settings for IOT network and I set a VLAN ID to 10 here.
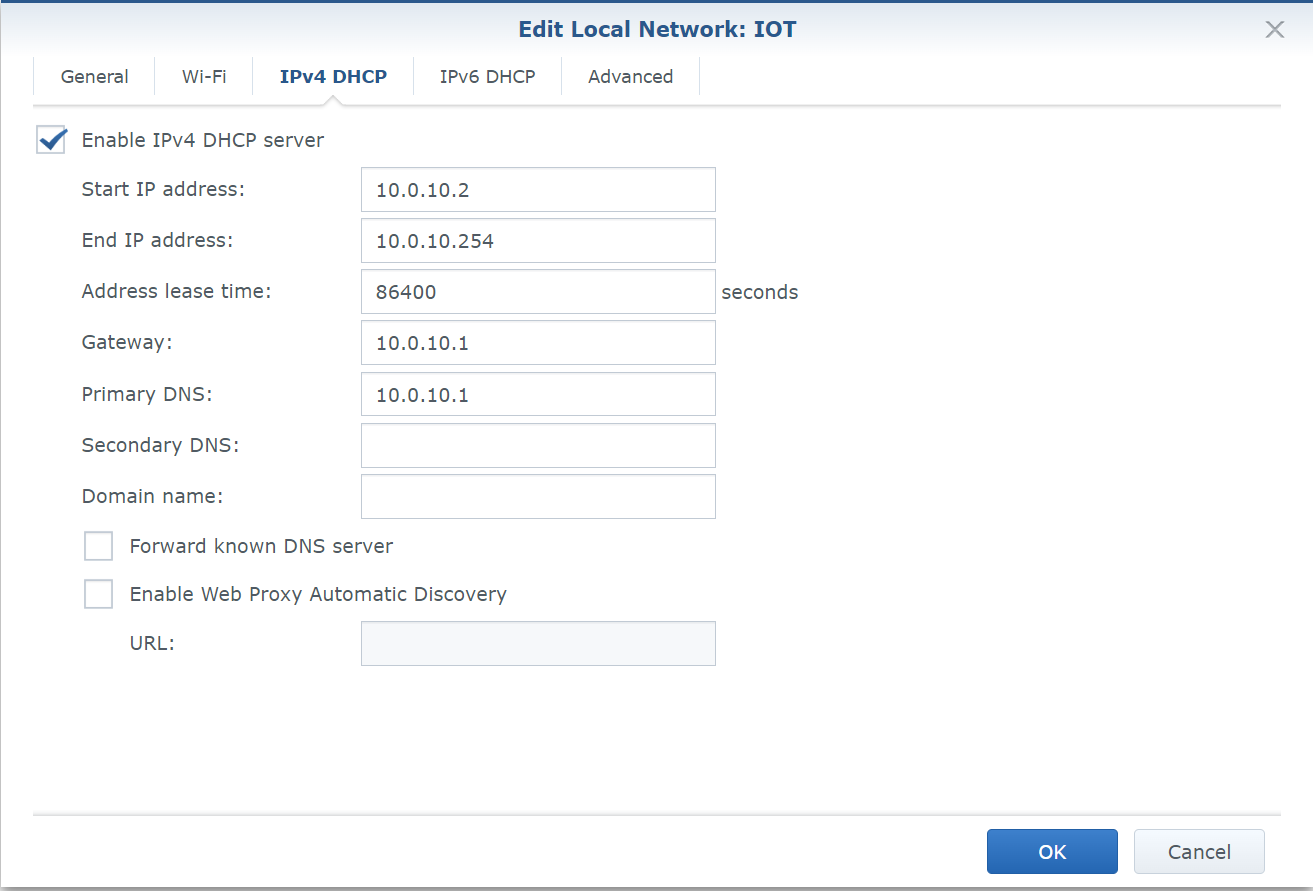
I configured the DHCP IP range here to 10.0.10.2 - 10.0.10.254
Ip range can be different but I thought it would be nice to have subnet that matches the VLAN id.
Optional: do the same for the Guest network but set it to, for example VLAN 30 and appropriate DHCP range.
Note that you also have to enable NAT option inside “advanced” tab if you want to have internet access on that network and or have network isolation.
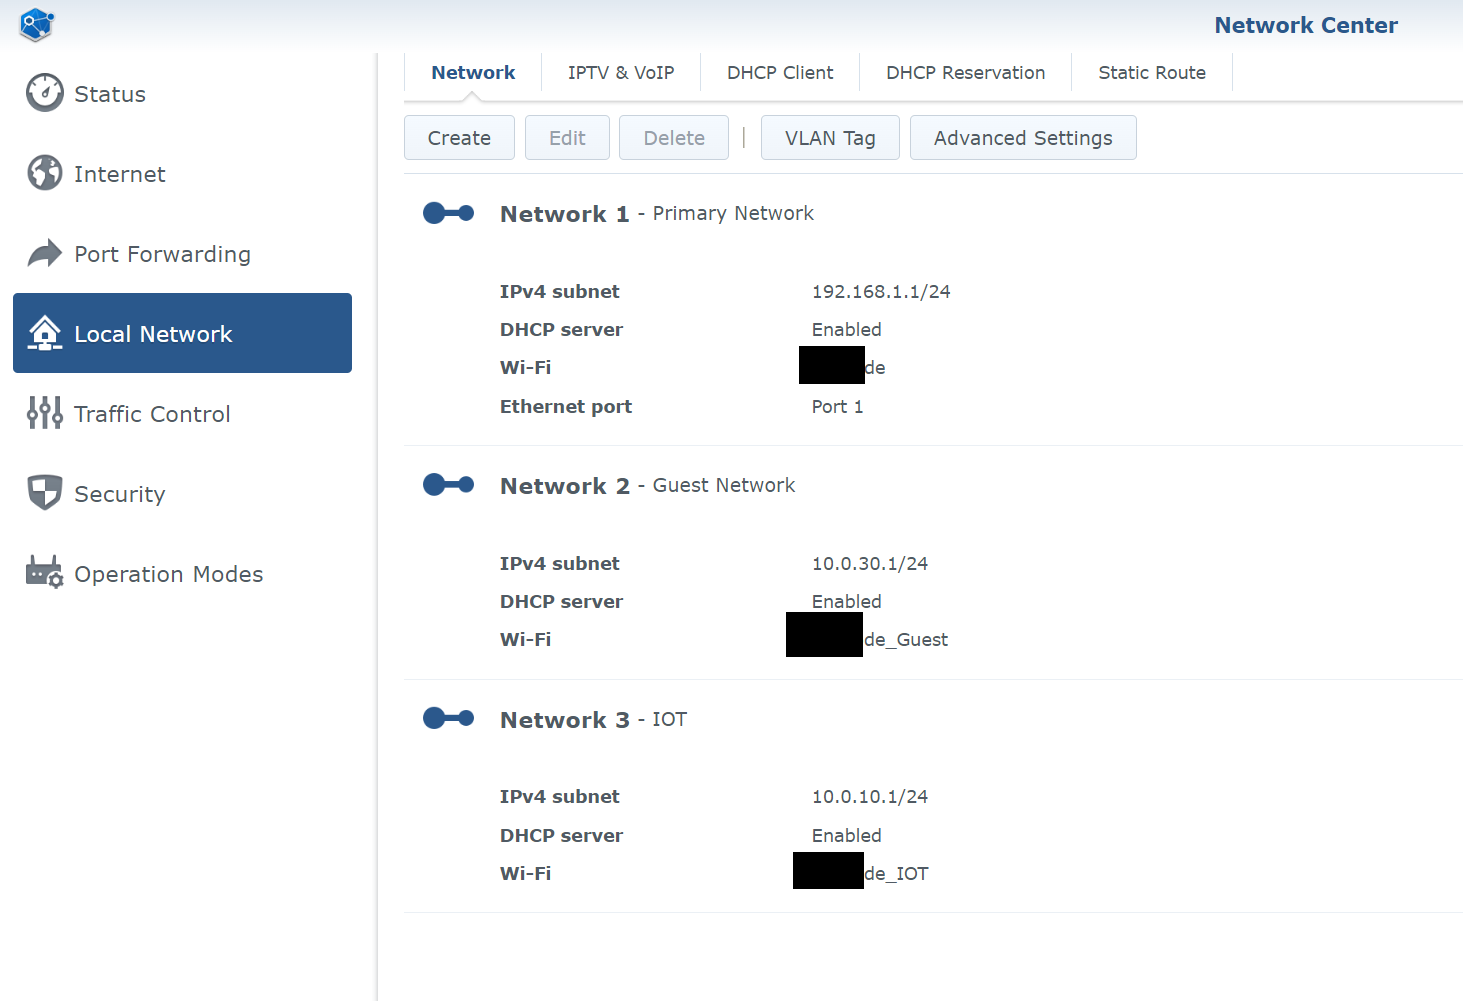
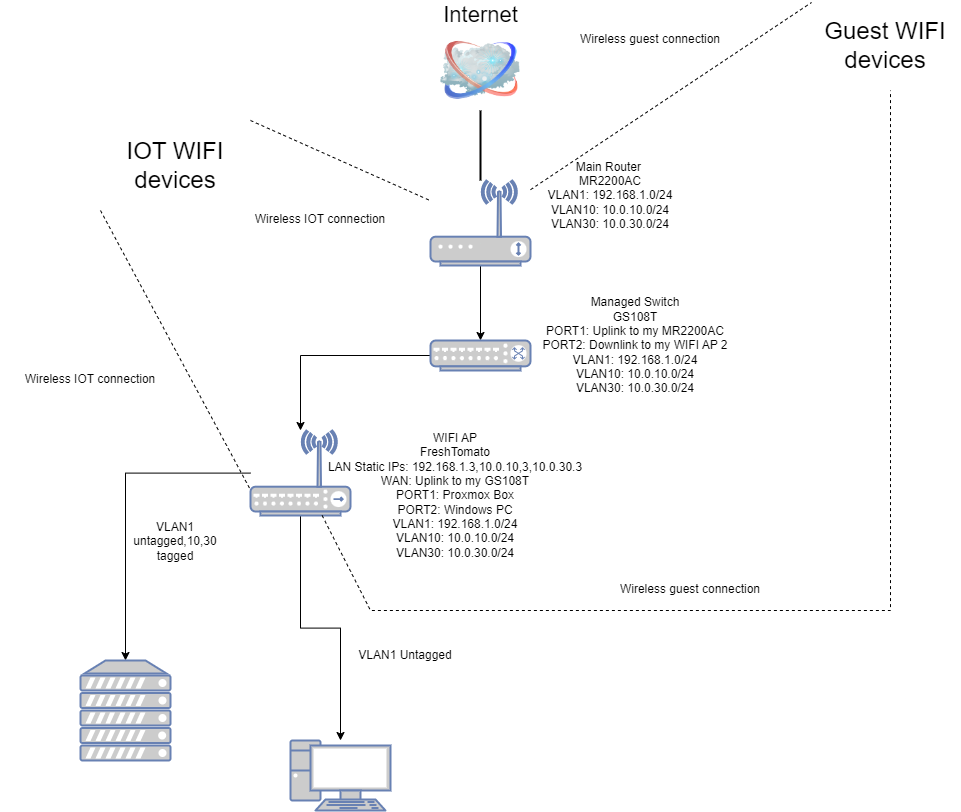
This is how all 3 networks look like.

3 Networks but 6 hotspots in total. (3x2.4Ghz + 3x5Ghz)
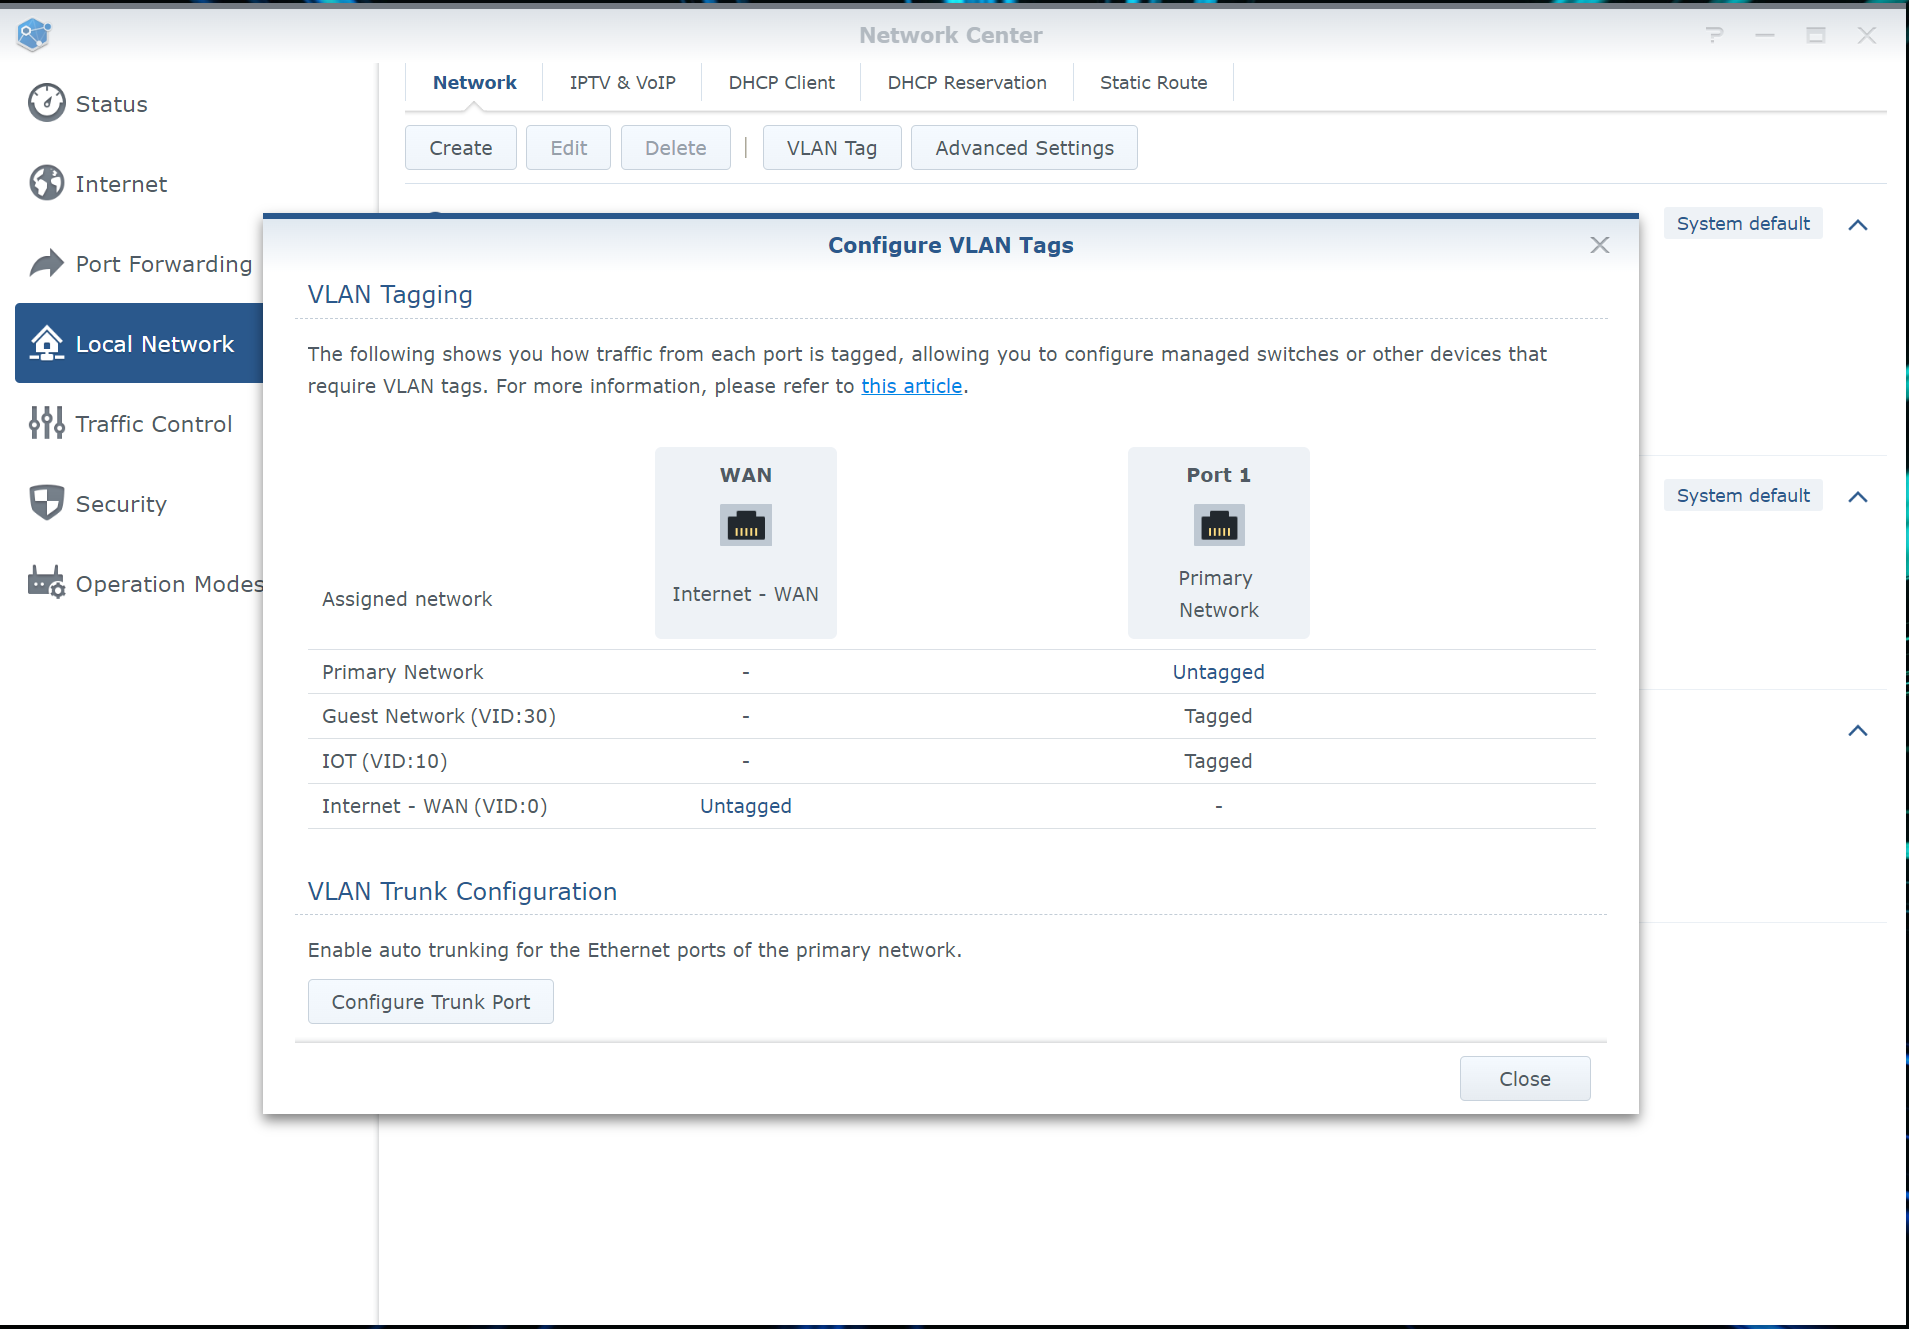
VLANs on the main router. Note this model only has a single LAN port, but you can still pass all traffic through that single LAN port and then split it out on your smart switch.
2. Managed Switch GS108T
PORT1: Uplink to my MR2200AC router that is VLAN capable.
PORT2: Downlink to my WIFI AP 2 router that is also VLAN capable.
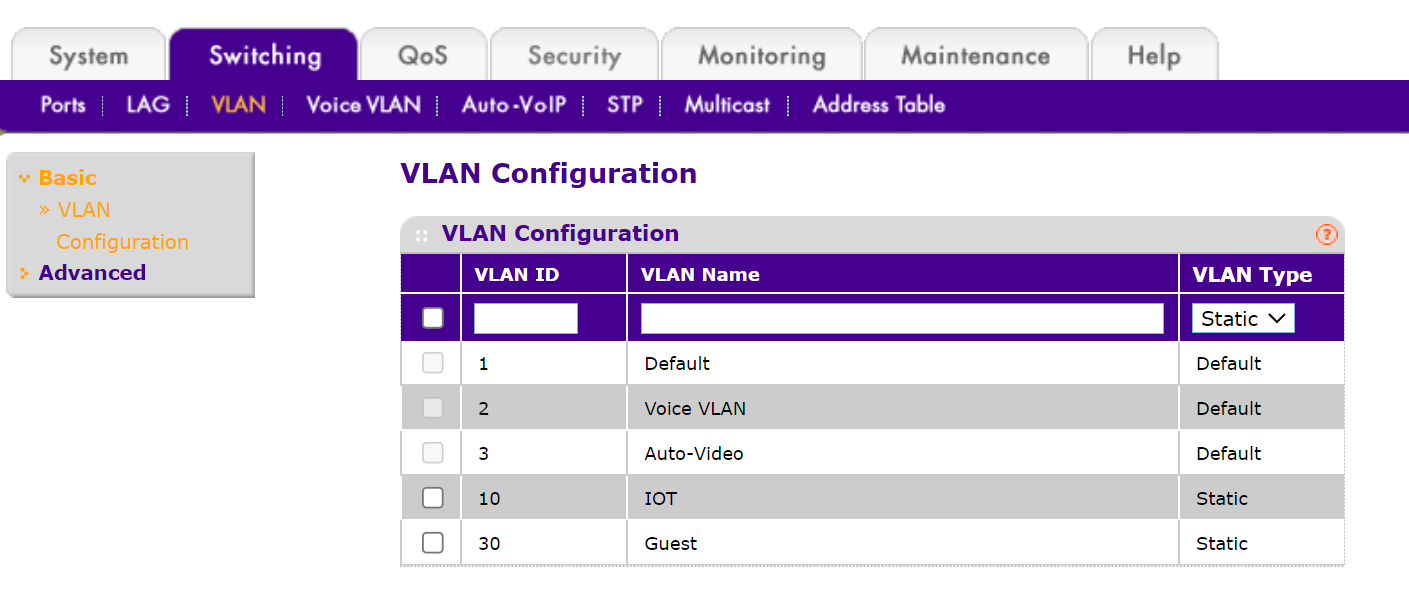
Here I created new VLANs so that they match to the ones on the main router
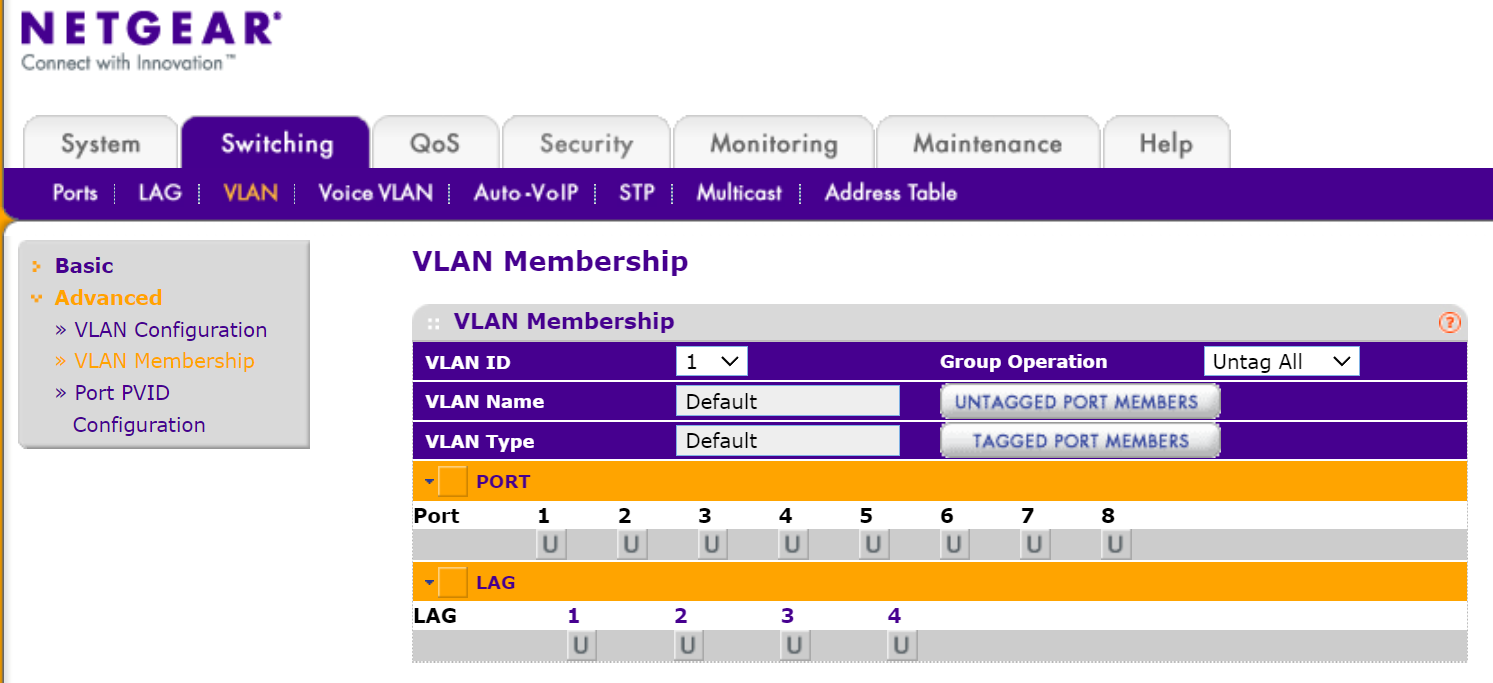
This is how my VLAN1 configuration looks like. “u” stands for “untagged”. This means that VLAN1 traffic can be routed through any type of switches dumb or otherwise.
“LAG” stands for link aggregation if you are bonding one or more ports then you have to set "tagged or “untagged” for that LAG group rather than physical port on the switch.
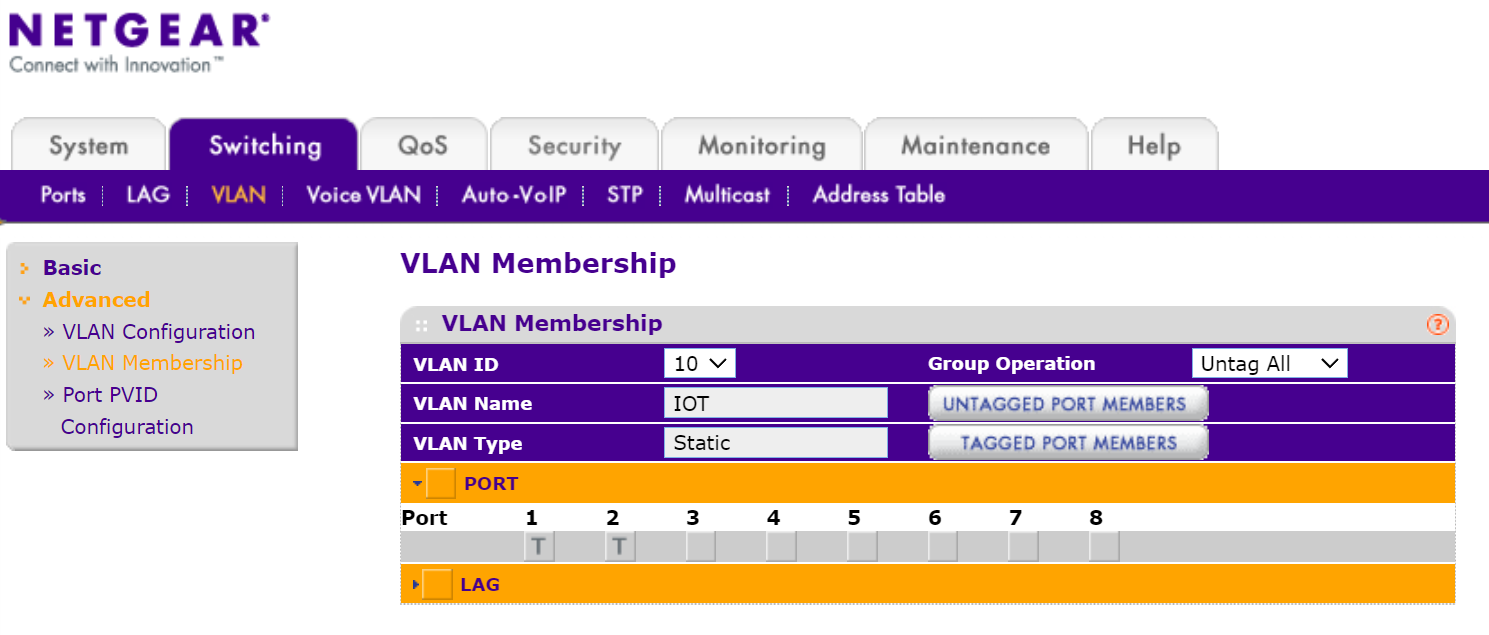
This is my IOT VLAN 10. Port 1: MR2200AC Port 2: WIFI AP 2
Optional: Repeat the same for your Guest VLAN 30
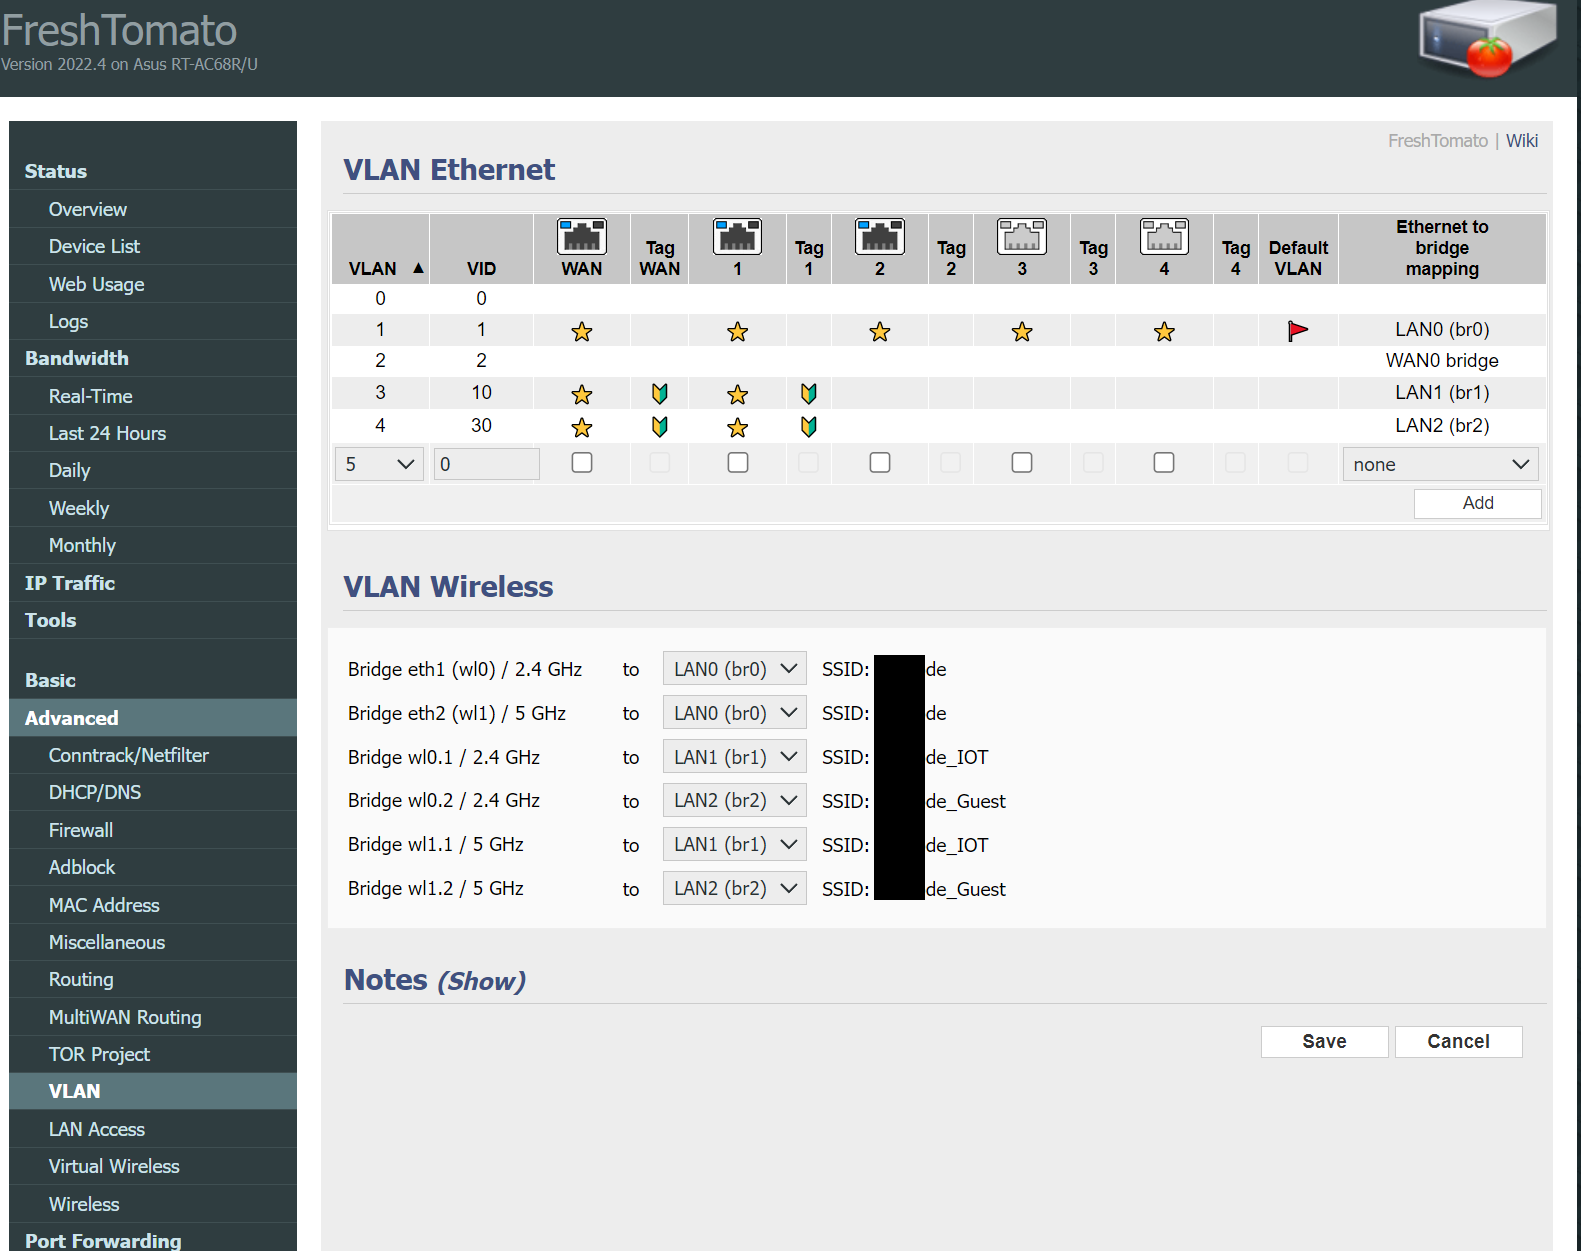
**3. WIFI AP 2 running FreshTomato firmware. **
Note: In theory should work on almost any router that is running FreshTomato, but the switch inside your router has to be capable of vlan tagging.
WAN: Uplink to my GS108T managed switch that is VLAN capable that’s why it’s VLAN tagged
PORT1: Proxmox Box that is capable of working with VLAN stuff, that’s why PORT 1 is tagged
PORT2: Windows PC that just needs VLAN 1 so no tagging for 10,30 is set for this port.
Conclusion: I have 3 separate networks. What is left to do is configure my VMs that do home automation to be able to see all of the IOT devices that are now on the separate network. In theory it can be done by just having either two virtual NICS or two IP ranges on the same NIC on that VM.
Hopefully this helps someone who just wants to have a basic VLAN setup.