HaaZtyleCats Misc Tech Tweaking Blog

Hello all, SO I decided my last blog was kinda outdated and needed a refresh and focus.

AFCI breaker are still the death of me but I may have a solution for this…more on that HERE Will link to post when I’m done and edit

So now I will be focusing on a few projects I have been working on and observations I have made along with DATA (Spreadsheets here we come!!!).

I really enjoy doing things like this in my spare time, and while I’m no hardware engineer or software guru, I am rather competent and can use the rarest resource in the UNIVERSE. Common sense. :slight_smile:

So below will be discourse (I hope) from people in the “know” about whatever I am working on along with people who are just interested in such topics.

I have a LOT oh hardware, cases, cooling options (Mostly watercooling). If any projects are feasible for me I’d be happy to try to fit testing into my SUPER busy UBER sarcastic here as I am retired schedule. Intel, Ryzen, and NVIDIA, but I hope to get an AMD card soon maybe the next gen.

So thats my intoduction. If I think of anything else I will edit as needed.

My sources usually come from google searches…but as we know there is a LOT of BS out there. Yet, also there are some nuggets of truth.

So if your into min/maxing, or just messing with hardware/software this might be a fun read worth your time.

Here I will attempt to list projects and links to where they start to save time reading/scrolling (Thanks @PhaseLockedLoop for this format as I find it VERY useful).

My first project will be tackling the Ryzen 3000 series heat/performance conundrum from the point of view of an Intel person moving over to Ryzen as this can be a very big beast of a change in thinking as well as settings. There are some good articles here, but just incase anyone is still looking for this info/OR is just getting one of these after having Intel it might be worth a read as I did alot of the work parsing BS from useful facts…also its just my findings so decide for yourself what you want and if its useful. :slight_smile:

Im also going to try to be very academic and try not to make assumptions people know certian acronyms and explain them as I go.

1.) The Ryzen 3000 Under Volt via offset experiment. HERE

2.) New Ryzen Build gaming PC with 3900XT and MSI MEG Unify X570 Mobo HERE

9 Likes

c6f

4 Likes

Ryzen 3000 (in particular the 3900XT in my case) and the heat/performance gains as well as overclocking strategies.

Background-History with Intel OC and Undervolting and what MY goals were

I have been a Intel guy since well forever. I got into Overclocking/Under-volting as a way to maximize performance while keeping temps down. I was obsessed with better clocks for less temps which led me from AIO (All In One) cooling to custom loops.

Intel made a lot of sense to me in how they functioned and where the settings were on how to control maximum voltage as well as clock speeds (I got to where I had memorized where to go and what to do moving from a I7 6700K to my current…well last used I7 8086K (a binned [meaning the company set aside the best performing processors for later sale because they performed better] 8700K variant). My settling on this chip I was using daily was a 1.275v max voltage (I had adjusted manually with an offset-more on that later) which was variable (meaning it would fluctuate with the load to keep idle temps down and go easier on the silicon for longevity) slightly below the 1.3-1.42 suggested depending on who you ask/read. With that voltage I was able to get a rock solid 5.0Ghz all core clock speed with AVX even. Remember this is a binned chip that also I had de-lided (removed the cover-IHS) applied liquid metal replacing the stock thermal paste, and installed a all copper IHS. I could have pushed to 5.2Ghz sure, but with these settings and my custom water loop I didn’t break 75C on some of the harshest benchmarks I could find. This meant depending on ambient temp (which is hugely important by the way) I would Idle at roughly 28-34C (It gets up to 120F-49C here/IE AC is sometimes 80F-27C to save some monies during the summer) and max temps under full load of 65C-78C MAX. I was happy with these numbers and increased performance.

Now on to the good stuff about Ryzen 3000 and my findings which may differ or coincide with personal experience and I’d love to hear from anyone with useful information and findings…More to come when I have more time. :slight_smile:

SIde note-Does anyone know a good way to capture Bio’s screen shots without fancy hardware or costly software…or is my phone the best option? lol

1 Like

Great, excelent suggestion! :slight_smile: Im going to run through a few options. For linux users ot might be nice to have a good bios guide… also some tools scare me a bit due to reading of actual voltage etc… I didnt measure at the actual SOC, but I trust more sensors than others…Ill get more into that later. I will check it out for sure though.

@SgtAwesomesauce I know you thought your 3000 ryzen ran warm… I can tell you I got mine under control and actually quite performant as well…but I dont have time for all the details just yet!

4 Likes

I had plenty of issues with my 3900x on a custom loop. I’m very curious to hear what you did to manage it.

Definitely ping me if you write up the details.

3 Likes

I just ran her stock :joy:

With a honkey chonkey heat sink

Voila

I have not undervolted nor underclocked nor overclocked. Its bone stock.

Load level calibration is set to level 3 on all LLCs
The VRM profile is “optimized”

Current is set to 130%

The voltage has been extra stable (a bit lower ive noticed) and the temps decent.

Literally feed it stable voltage and give it a good air cooler and keep it stock… It functions beautifully no issue.

Modify that and your fucked. Welcome to the new AMD :joy:

2 Likes

I completely agree, this exercise I am doing attempts to only maximize gains and lower overall heat. I’m just testing a theory for fun. In all actuality the chips on board regulation is super fast because its integrated INSIDE CPU (and able to take readings 1000 time or more a second to optimize its potential).

Stock is a valid option… I’m just messing for fun…Also, I have it in a not so airflow friendly SFF (Small Form Factor-for people who dont know the term) case where the 2080TI OC’ed AND the 3900XT reside on ONE 280mmX54mm rad … So heat minimization is the goal, not so much OC’ing.

3 Likes

I appreciate the explanation of terms. I did know this one but many I do not. And usually I dont have time to look up possible explanations. I’m trying to learn by osmosis. Not sure that’s working…lol.

2 Likes

It’ll happen here. A great group of very knowledgeable folks. :slight_smile: Still typing up my article, taking a few days so far with data collection.

3 Likes

I still have yet to try your method. I have so much data from my tests so far.

1 Like

Fair warning this will be VERY wordy, and I will try to explain a LOT for people who may not know as many terms or are just starting out with tweaking their hardware.

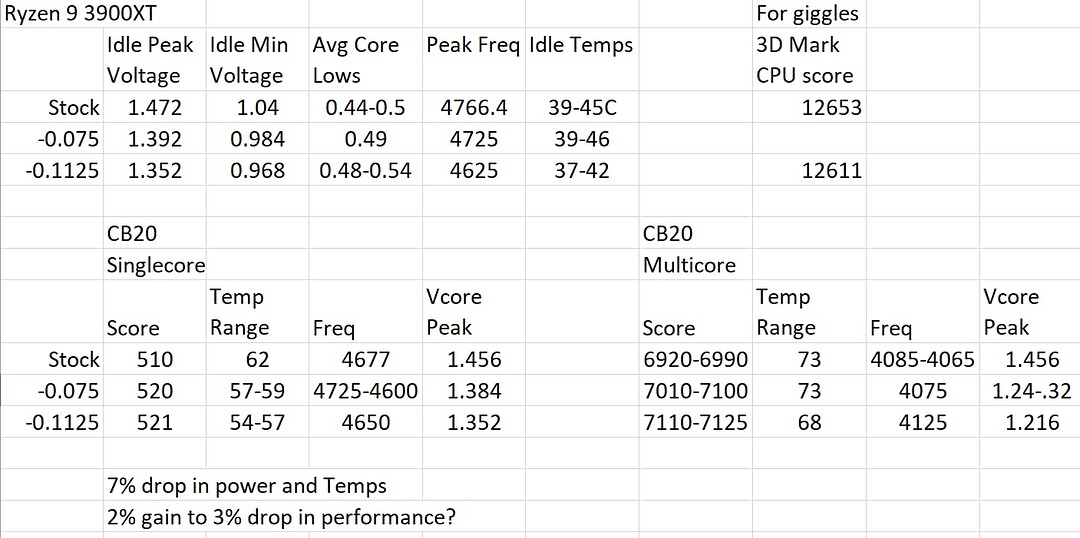
BLUF (Bottom Line Up Front)- I was able to achieve a +2% to -3% change in performance by lowing power and heat by 7%.
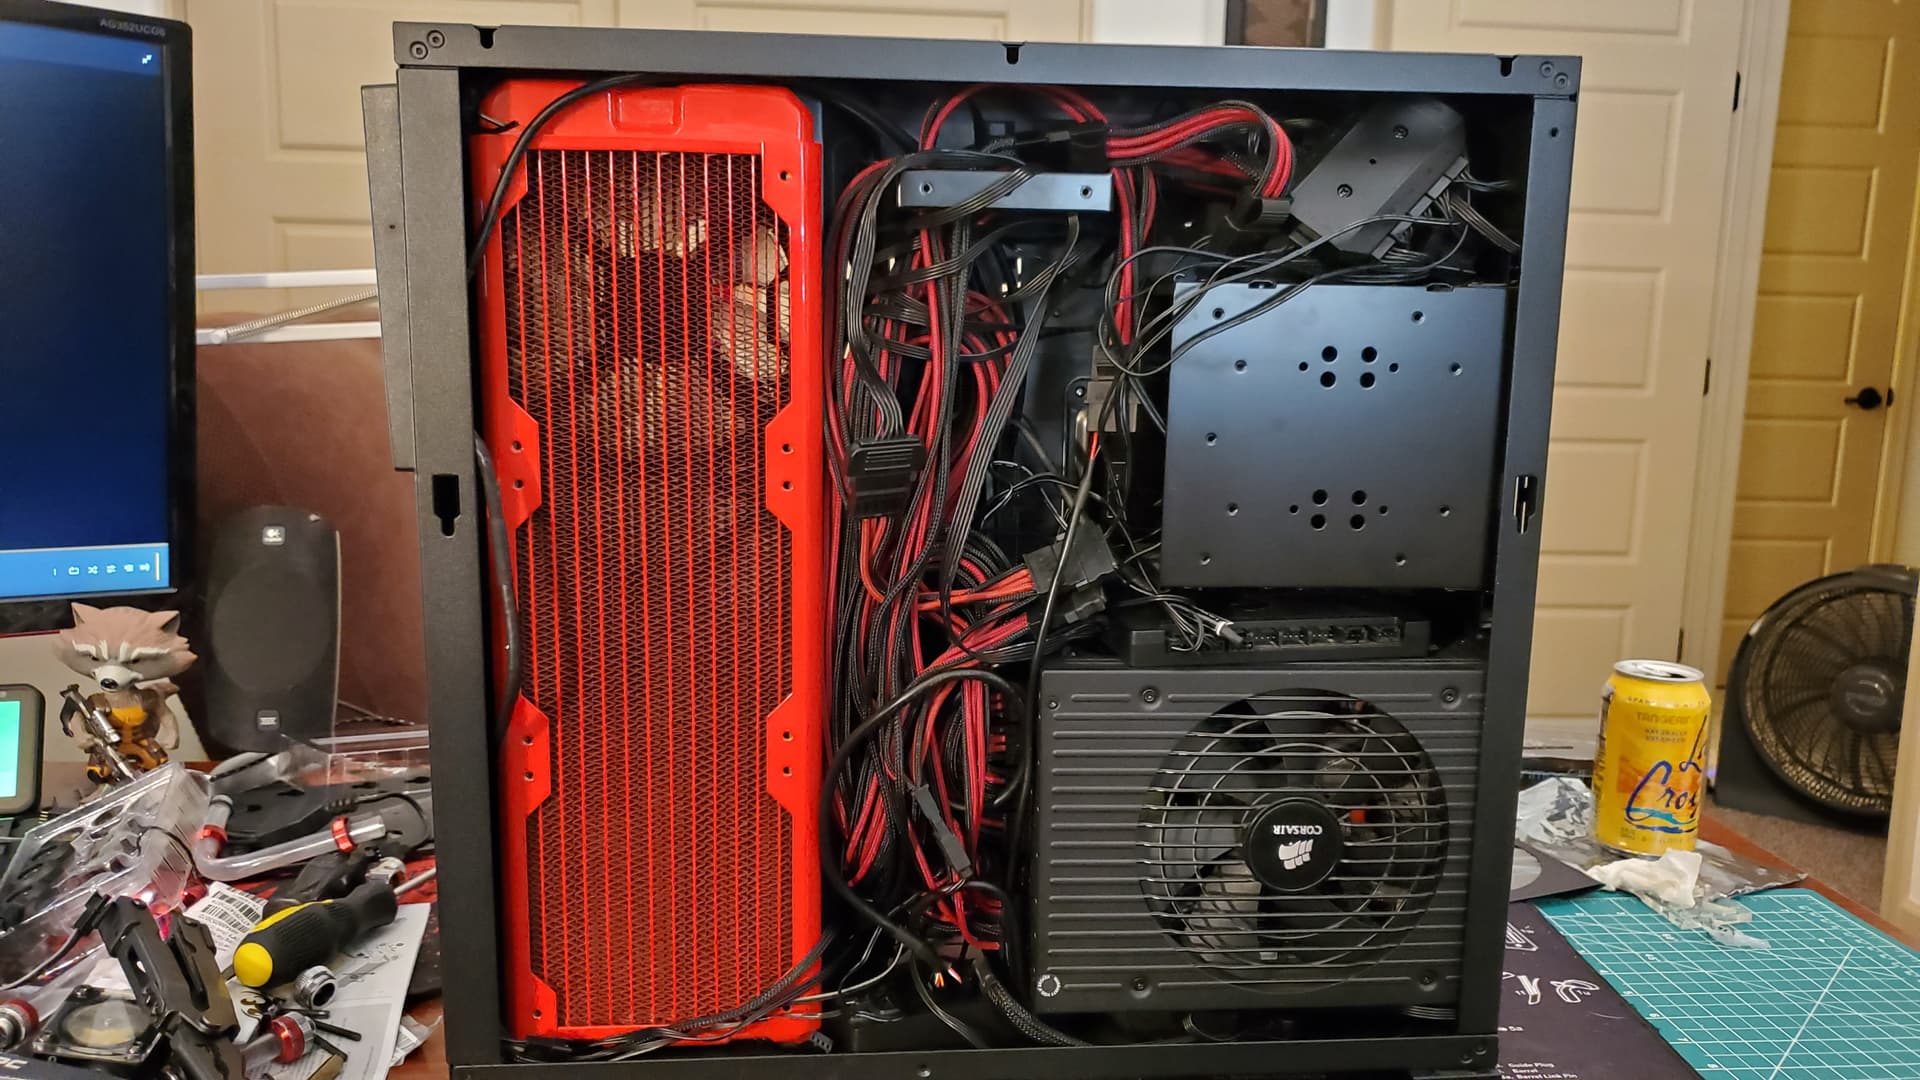
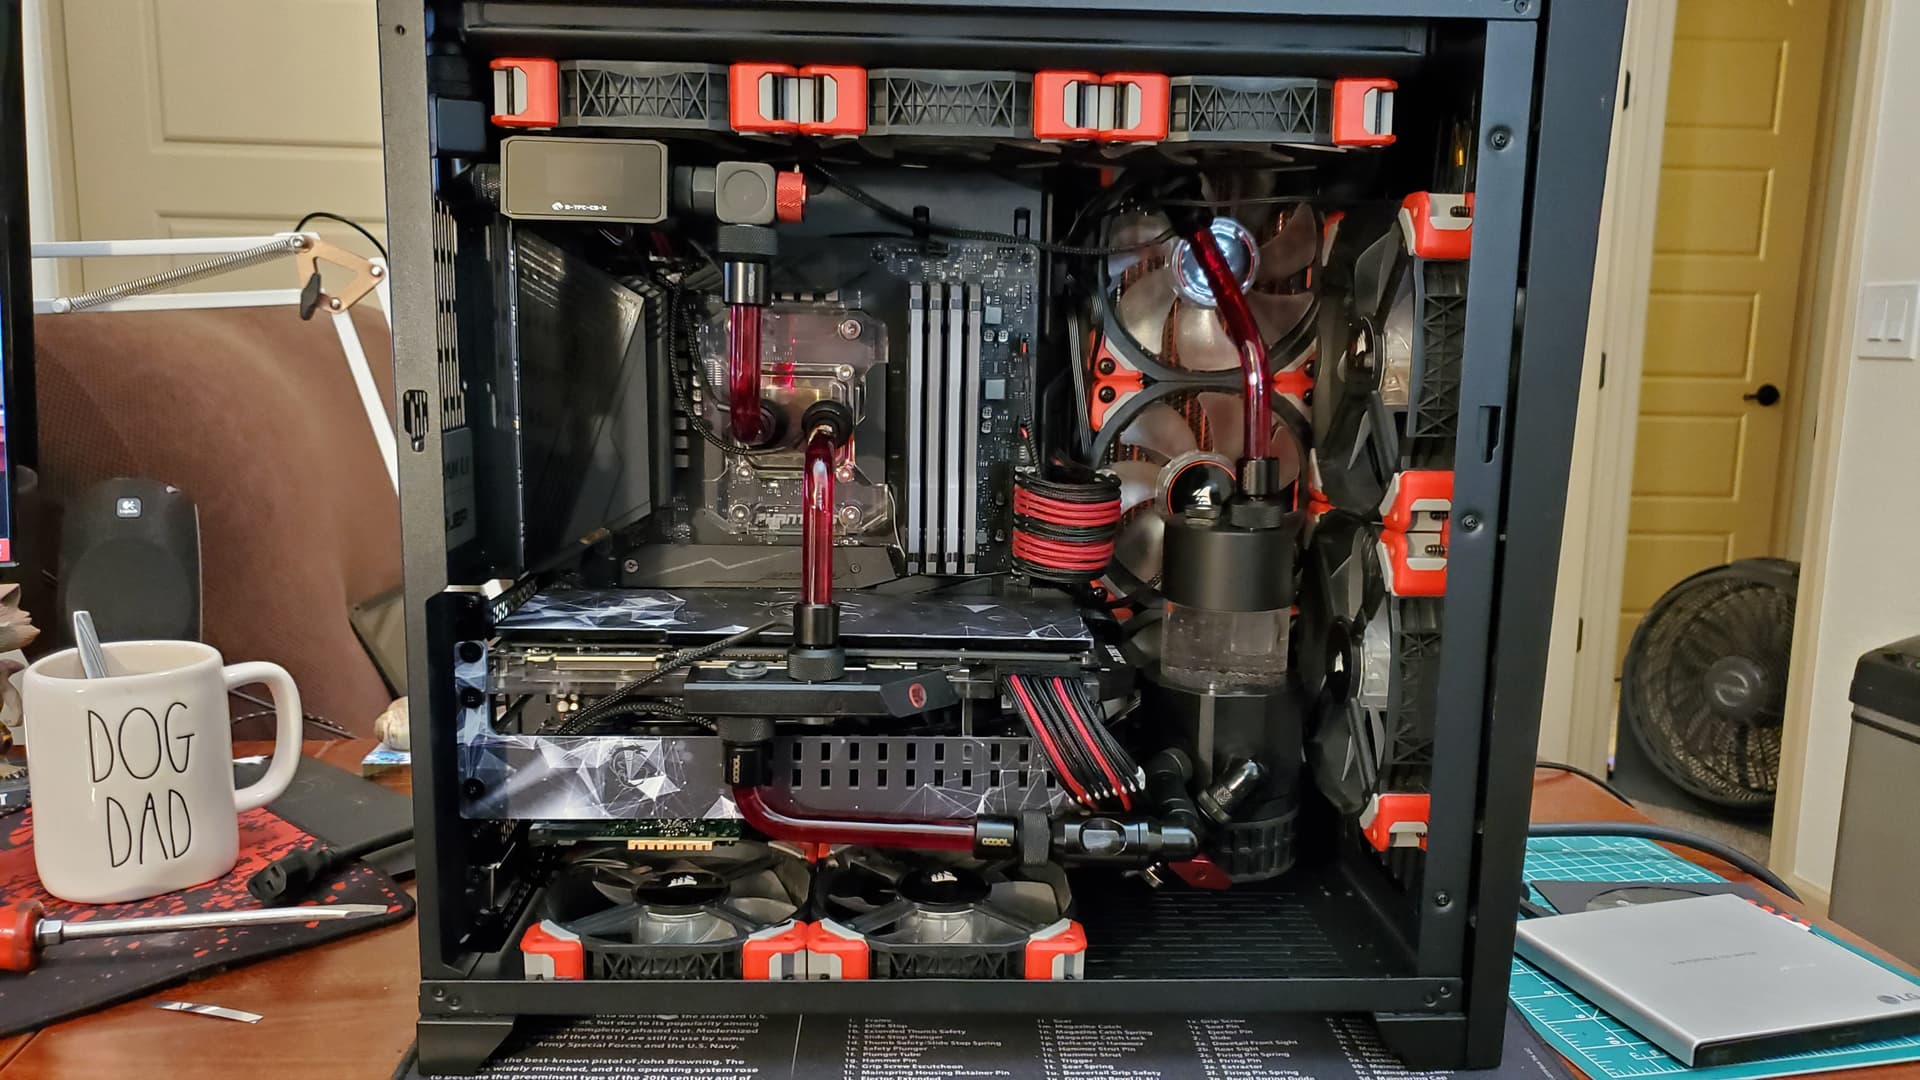
Build -

Ryzen 9 3900XT with Phanteks Glacier AMD Waterblock
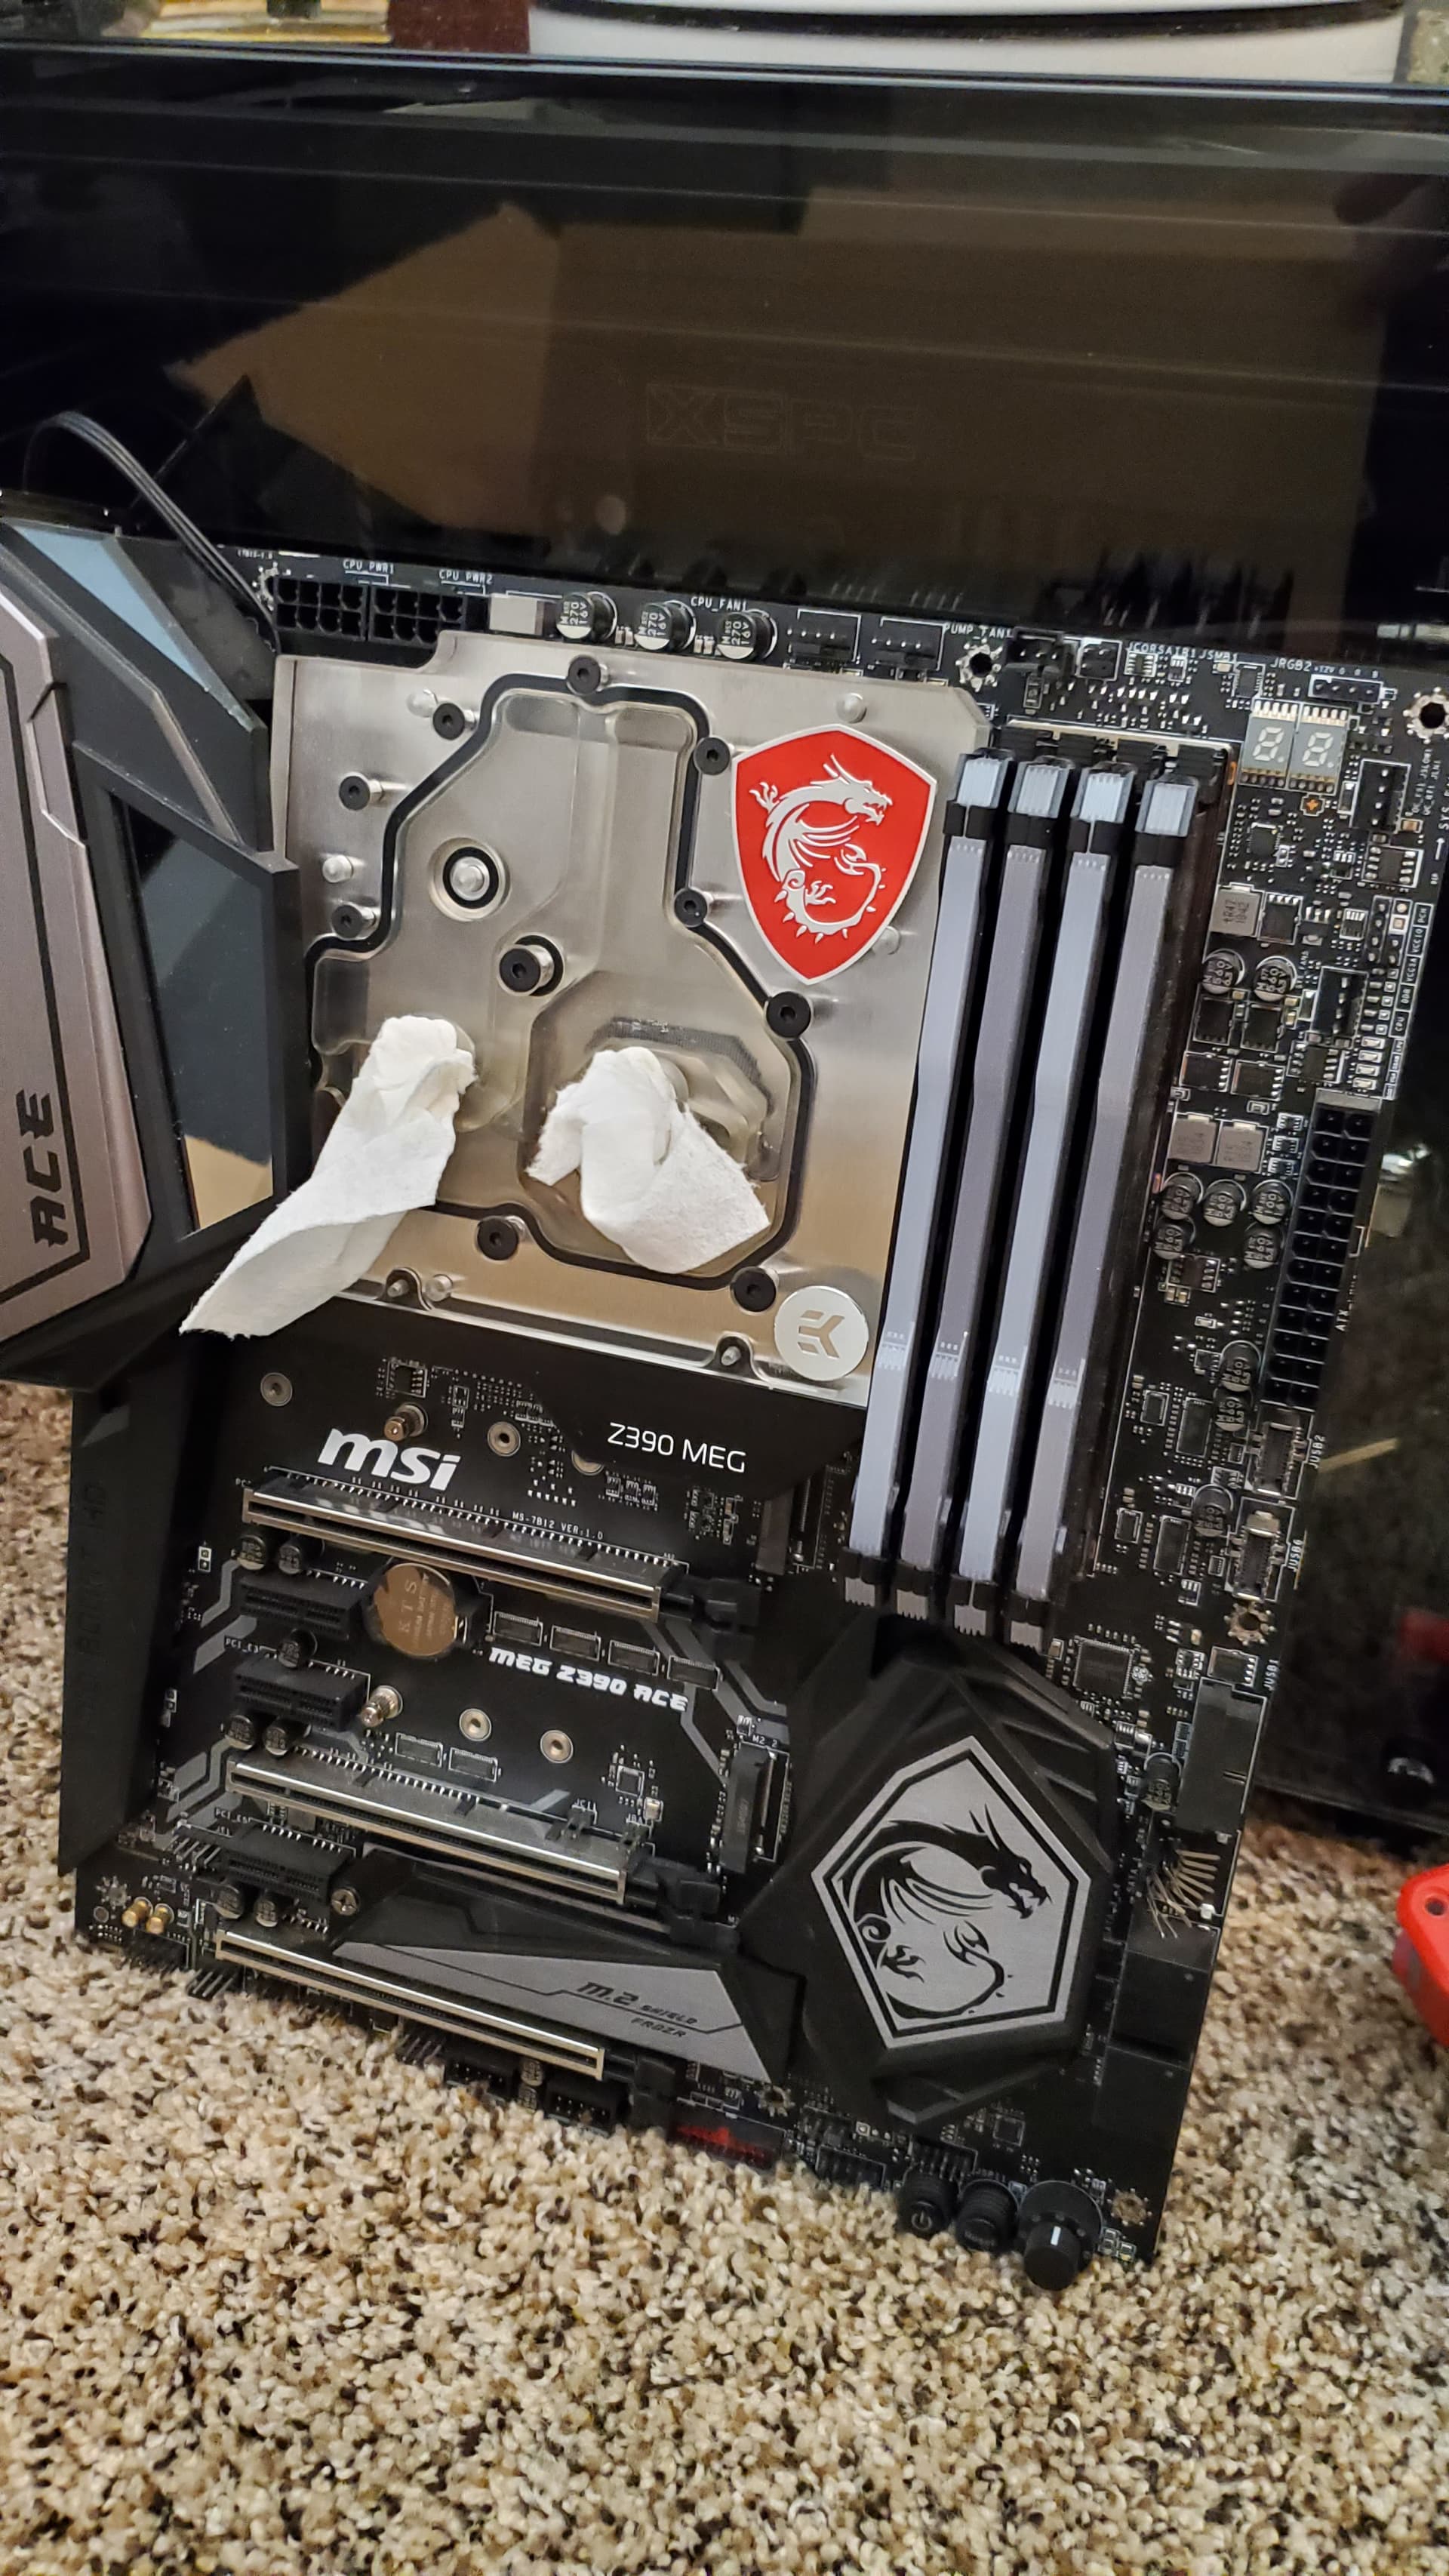
ASUS ROG X570-i (ITX Form Factor)
G.Skill Trident Z Neo Series 32GB 3600 16-19-19-39 F4-3600C16D-32GTZNC
RTX 2080Ti MSI Sea Hawk EK waterblock
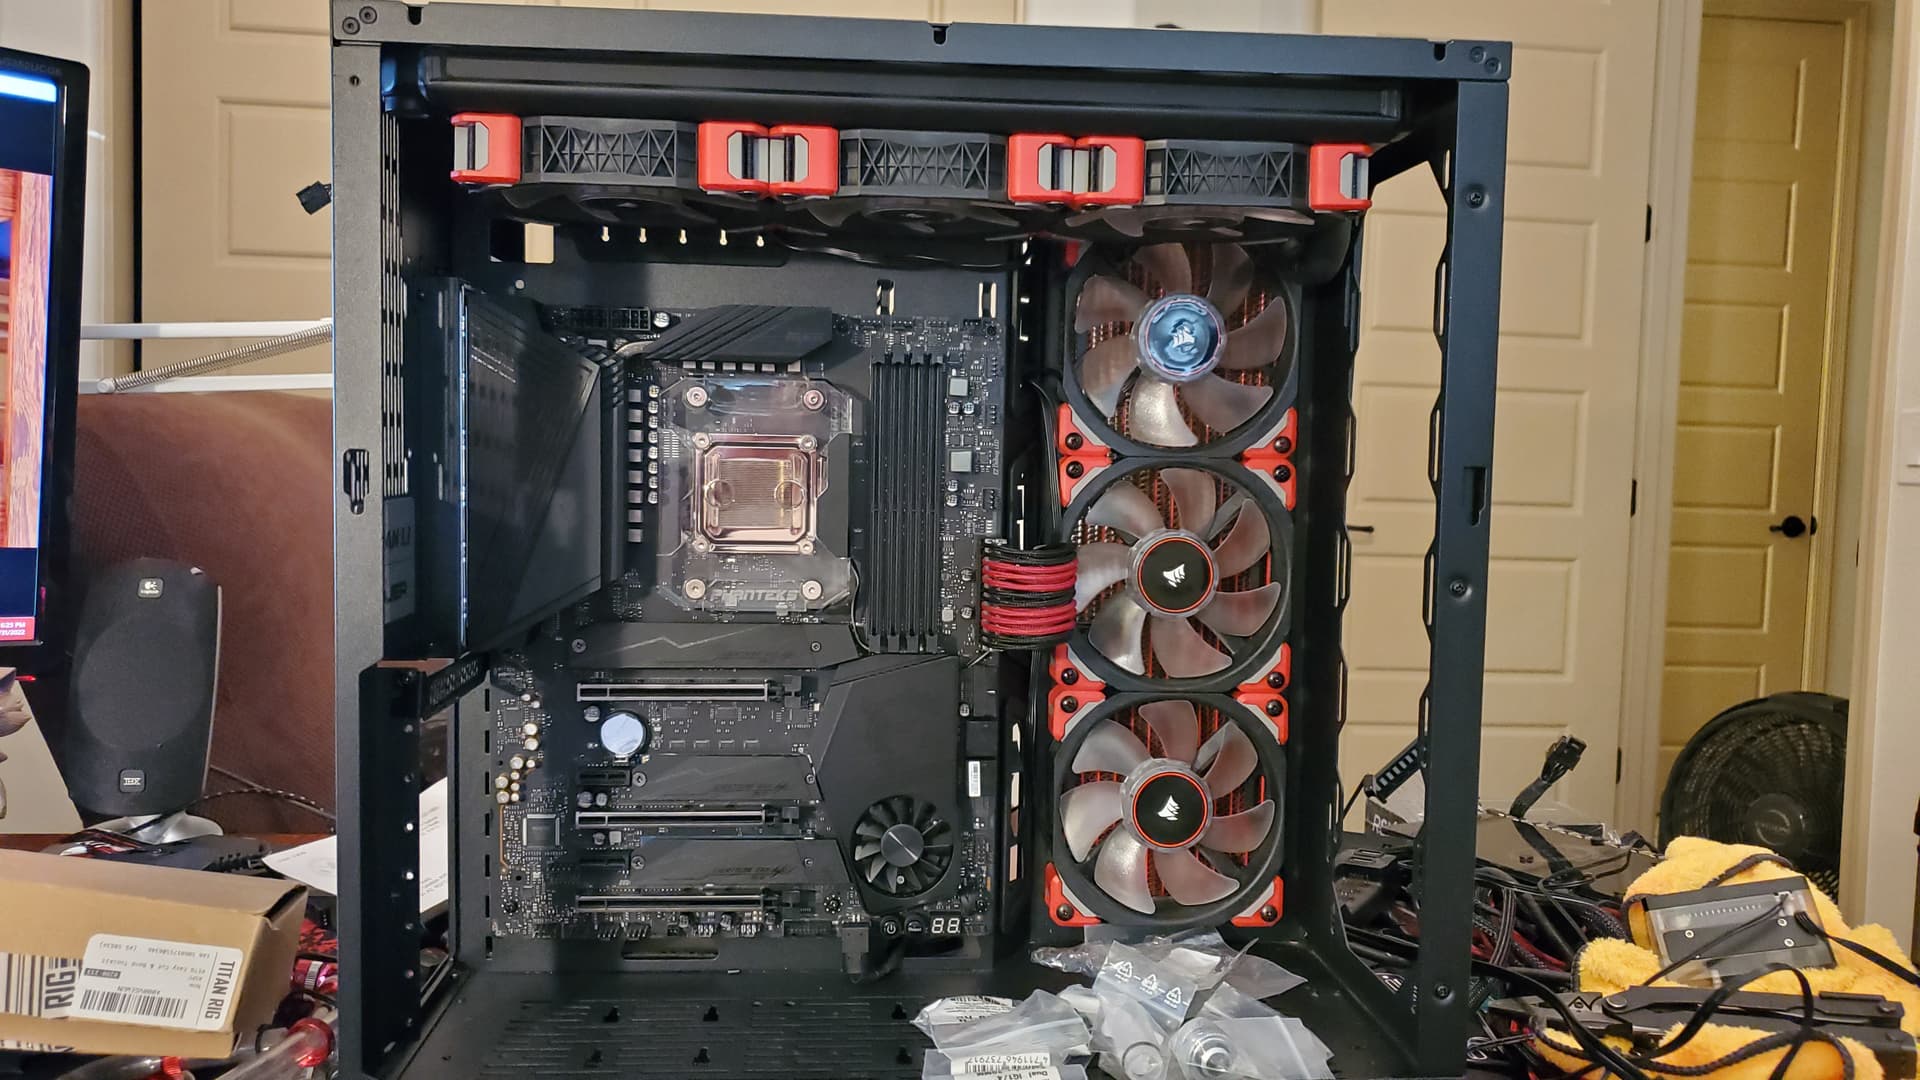
Phanteks Evolve Shift X with custom CNC cover from ModMyMods.com
Hardware Labs GTX 280mm x54mm Radiator
EK DDC PWM pump with case cooler
Corsair 750 Platinum SFX PSU

These tests are done in Windows 11, but because it is a BIOs change it should work with any OS.

Hypothesis- After having a processor named “Bulldozer” for the architecture and seeing how generations of AMD CPU’s were known for their power draw and heat generation to get the best performance from their silicon it made me think that instead of refining the chip making process, it seemed the company relied on more power for stability and performance so I went in with this in mind.

Take for example the 3900X… it is the same as a 3950 but with cores disabled…they were probably disabled because they didn’t perform as well, its kind of a numbers game for them accepting less refined silicon than say Intel who has control over its whole supply chain (This is all strictly supposition on my part). If they can get X number of processors from the same process why change it for each processor individually. Same with the 3800, 3700, 3600 etc. They all use the same chiplet.

So my idea is to lower power consumption and keep current performance of my CPU by lowing maximum suppled power the the CPU to see if it’s possible to lower power needed which in turn lowers temperatures. This is approached a number of diffrent ways depending on where yo read.

I settled on using voltage offset via BIO’s on my mother board. I SWEAR this wasn’t possible till a bios change recently or with release of the newer 5000 series.

Here’s why I chose this way.
1.) I trust my high-end motherboard to properly limit power to the CPU. This is the largest factor that effects performance as well as temperatures of a CPU.

2.) This allows the AMD chip to use it’s onboard monitoring and tweaking to the best of its ability within the parameters I control for it. This system is VERY effective. It’s also VERY different from Intel which does SUSTAINED loads at higher frequencies when overclocking or putting it under heavy load. With Intel I prefer to use a offset as well to allow the chip to rest and lower clocks and voltage draw which in turn lowers Temps.

Here’s my argument against some other attempts I had tried.
1.) Core Current Telemetry
-It worries me I wont be able to accurately read voltages via tools at my disposal
-An offset I can not measure leaves room for damage to the chip

2.) OC via Ryzen master/or VDDCR CPU Voltage
-This applies a static voltage with no relief for lower loads, OR minor super short bursts of power to reach maximum potential of the chip.

3.) Just using PBO and Auto OC-
-This works well to get the maximum out of your chip, and is plenty of performance for most, BUT for me the temperature and voltages applied seem excessive

There are others I can check out SO I will be doing so possibly later if people enjoy this read.

Here is the software I used:
AMD Ryzen Master https://www.amd.com/en/technologies/ryzen-master
CB 20 Download MAXON Cinebench R20
HWiNFO https://www.hwinfo.com/
OCCT https://www.ocbase.com/ (Great for maximum temp/stability testing)

There are a ton of other free tools and tests you can use from Prime95 to OCCT. Both of these are great for VERY HIGH stress tests for stability. This is more needed for Intel to see if you get a BSD from errors occurring. We shouldn’t need that here because we are using AMD’s built in safety’s and should only run into low voltage problems which would lower clock speeds.

Start with numbers I trust
Ryzen master-Temperature/ Avg core voltage/ Individual cores general speed (Misses burst top speed compared to HWiNFO)

HWiNFO- VCORE from MOTHERBOARD- CPU Core Voltage from Processor - Do not confuse with CPU Core VID (This is REQUESTED voltage from CPU)/ Processor MAX Frequency IE_Core Clocks from Processor (Need to run a few minutes [Can be anywhere from 5-20 minutes]to catch “Spikes” in CPU speed, these happens so fast it’s hard for a monitoring too to catch so needs to run over time)

These may not be the best readings as these are looking at derived values, but seem the most sane to me AND correlate with my findings and performance and heat generation.

Another note for overclockers, in BIO’s it is not actual bios so what you see displayed as “The BIOS” is in effect just a configuration menu for the AGESA. AGESA can cause the PC to not boot at all and forcing you to clear bios when attempting over clocking with Ryzen which is a bit different from Intel where you rely on a BSD (Blue Screen of Death) to test if your overclock is working.

Updating my definitive guide to configuring the Ry... - AMD Community

It is debated what voltage is safe for 3000 series processors which use TSMC 7nm node and in what circumstances. 1.3-1.35v for sustained loads is considered safe for 24/7 heavy use. While 1.45 spikes to achieve maximum boost are considered ok and wont degrade the silicon. Again this is HIGHLY debated and I’m not able to find a definitive answer. I figure if I can stay close to 1.35 AND get the same clocks why dont I try. In the end it comes down to what your comfortable with and how long you need your processor to last.

For those not aware there is a factor in all CPU’s called the Silicon Lottery (Which actually is a website you can see what percentage of chips are able to reach what speeds at what voltages-neat to check out) which basically means not all chips are created equal. Some silicon works better at lower voltages while others of the exact same chip may not. Making each chip unique both for AMD and Intel.

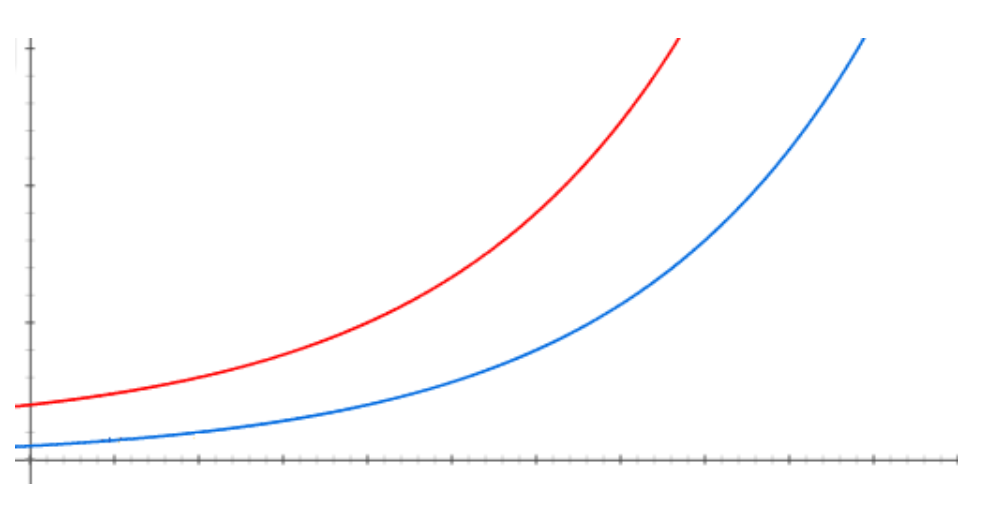
Here’s the other thing we are against. Its what’s called and exponential curve. It is the reference between power needed for said clock speed to be achieved. Which was covered in great depth by GamersNexus.

Basically it looks like this. There is a point for a chip where feeding it so much power can get you the desired clock speed, but the trade off is either heat (when using ambient cooling like Air, AIO or custom Loop) or possible degradation of the CPU (meaning it will not perform the same at the provided voltage and need more to achive previous clocks). The people who do overclocking with Liquid Nitrogen can get even higher because they can keep the PC cool to achieve those speeds, but I’m sure there is significant degridation of the processor afterwards.

As you can see by the chart (think Power on one side and Freq on the bottom) there is a point of diminishing returns where it requires so much power to get a higher clock its not even worth it.

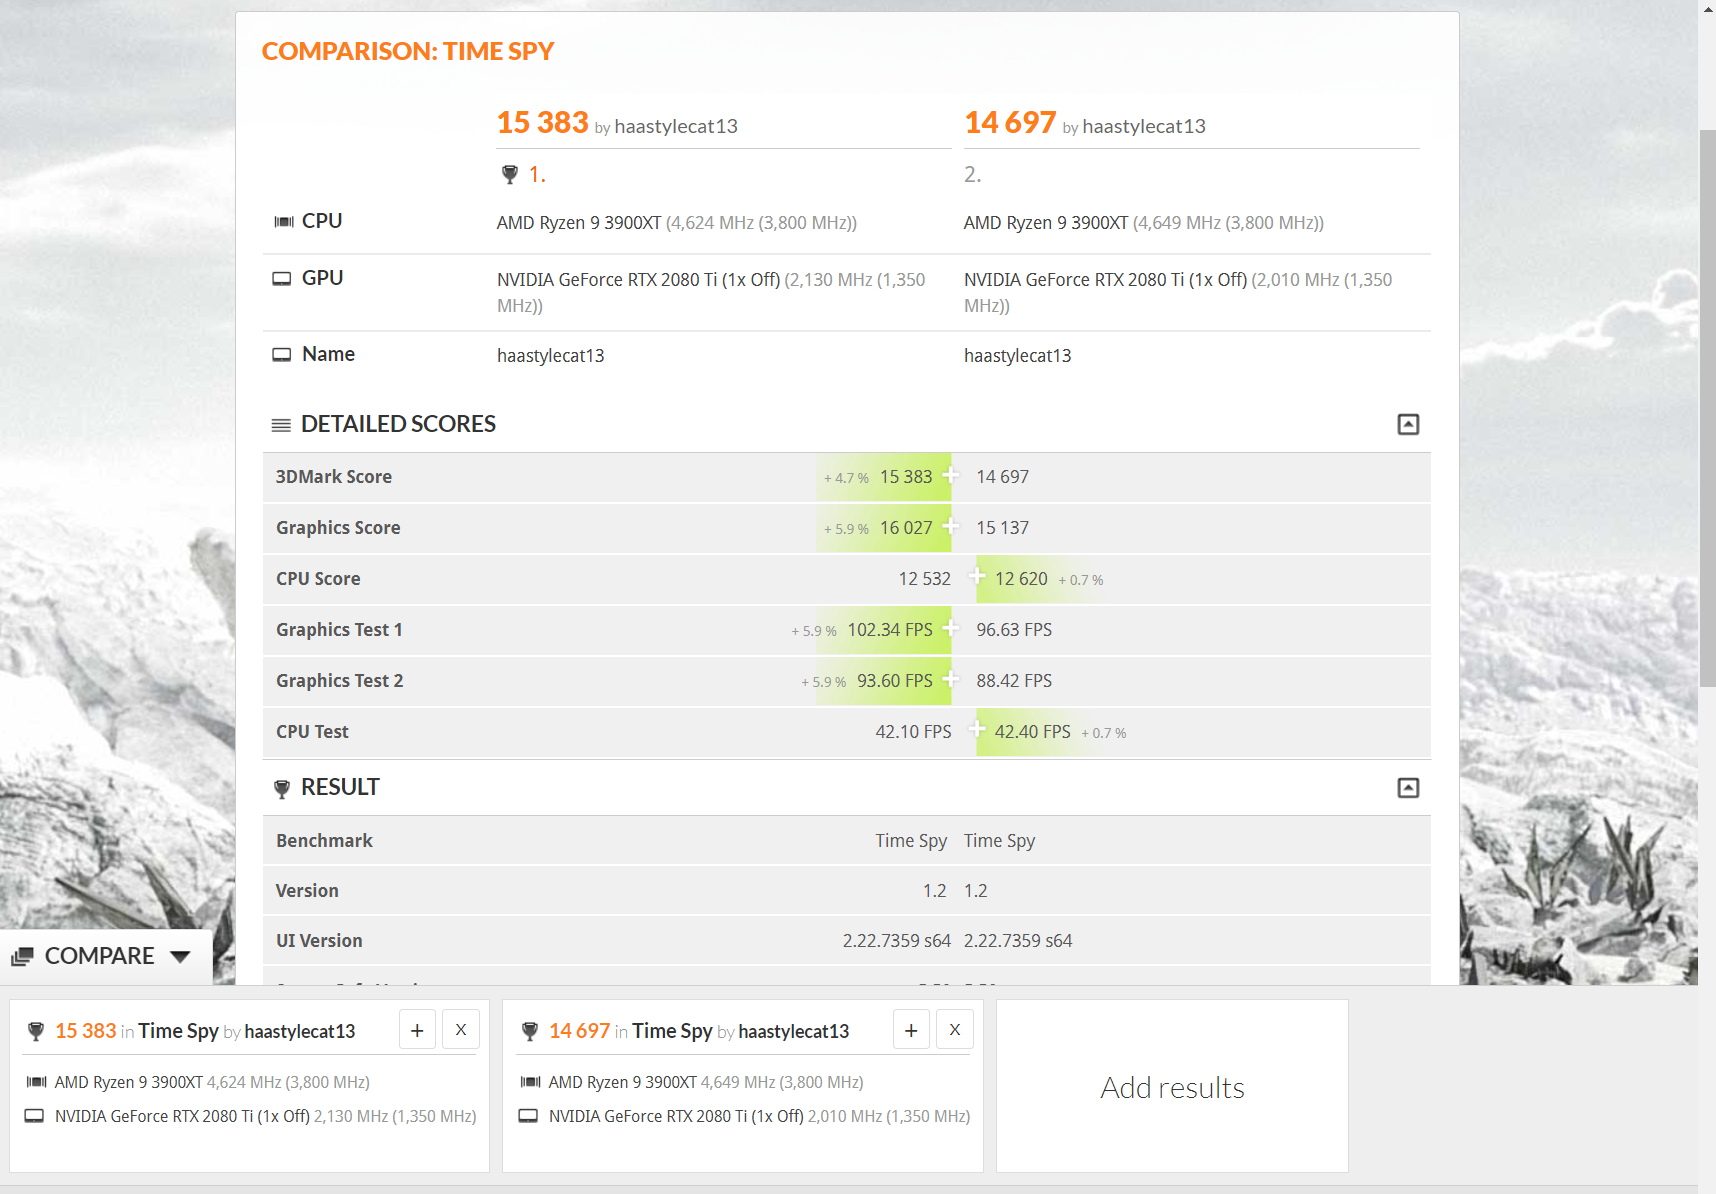
So here are some numbers and my findings which I have screen shots for but I’m not sure they are necessary. Below all this info is a easier to read chart.

Ryzen 9 3900XT Stock values according to AMD.
3.8Ghz base clock 4.7Ghz Max Boost

Stock Values- From sitting at idle
Peak Volatges- HWiNFO VCORe on mobo 1.472
Min Voltages- HWiNFO VCORe on mobo 1.04
Ryzen Master- avg cores low as 0.44-0.5

Peak Freq- 4766.4 MHz
Idle temps- 39C -45C

CB 20
Single core: Score- 510 Temps- 62C Freq- 4,677 Vcore peak- 1.456
Multicore: Score- 6920-6990 Temps-73C Freq-4,085-4,065 Vcore peak- 1.288

My first changes-
Ryzen power plan balanced in Windows 11 from most recent AMD x570 chipset drivers, and Ryzen Master which has the power plans and CPU drivers and function adjustments.

In Bios I changed a few settings as well which will vary via manufacturer but are usually listed in the documentation.
-Under AI Tweaker/Percision Boost Clock Override I raised the maximum Clock ceiling by 200, which in turn actually come to 4,975 Max Freqency.
-Under SMU options I set DF Cstates (Should announce and use AMDs power control for idling different cores as needed for load) to Enabled from Auto, CPPC (Collaborative Processor Performance Control) and CPPC Preferred Cores to enabled as well. The CPPC announces to the OS which cores are the fastest in the CPU to use them more efficently depending on the load. This was recently updated in some linux platforms recently as well to maximize performance and power draw.

Under AMD CBS I enabled Global C-state Control. I believe its needed for DF Cstates above to work properly.

***This may be wrong, but its my understanding. If need be please correct me and maybe provide a reference?

Roughly the same
CB 20
Single core: Score- 510 Temps- 62C Freq- 4,775-4,600 Vcore peak- 1.456
Multicore: Score- 6920-6990 Temps-73C Freq-4,085-4,065 Vcore peak- 1.288

-0.075 offset and up MAX OC 200 actually 275 to 4,975

Values- From sitting at idle
Peak Voltages- 1.392v HWiNFO VCORe on mobo
Min Voltages- 0.984 HWiNFO VCORe on mobo
Ryzen Master- 0.49 avg cores low as

Peak Freq- 4,725 MHz
Idle temps- 39- 46C

CB 20
Single core: Score- 520 Temps- 57-59C Freq- 4,725-4,600 Vcore peak- 1.384v
Multicore: Score- 7010-7100 Temps- 73C Freq- 4,075 Vcore peak- 1.24-.32v

-0.1125 offset and up MAX OC 200 actually 275 to 4,975

Values- From sitting at idle
Peak Voltages- 1.352v HWiNFO VCORe on mobo
Min Voltages- 0.968v HWiNFO VCORe on mobo
Ryzen Master- 0.48-0.54v avg cores low as

Peak Freq- 4,625 MHz
Idle temps- 37-42C

CB 20
Single core: Score- 521 Temps- 54-57C Freq-4,650 Vcore peak- v 1.352
Multicore: Score-7110-7125 Temps- 68C Freq-4,125 Vcore peak- v1.216

I had more data points, but I lost some, and these seemed most relevant. Actual VDDCR CPU Offset Voltage can be set in increments of 0.00625v so you can do a LOT of tweaking for what’s best for your needs.

Here is a easier to read chart I made really quick.

With this setting I am watching a movie, have Google open with a few tabs, Including Level 1 :), and Ryzen master and my temps are hovering at 42C with 45C momentary spikes. A bit lower from the 48-50 I had at stock.

Its safe, easy to do (long as you understand your settings on your board), and something fun to try if your interested.

There are more ways to optimize such as LLC (Load Line Calibration) and other settings as well. This is not a be all end all, and I’m sure other methods work as well.

So that’s all for now. Hope you found this useful. Any feedback is welcome.

Also, SO I DONT GET SUED… Any changes you make either accidentally or without understanding may damage your equipment and I am not liable for any damages incurred.

@SgtAwesomesauce may be of use to you for your watercooled SFF build to bring down some heat with your 3000 series.

I may try this with my 3600xt as well to see what it does.

2 Likes

Well the new project is removeing the old reliable i7 8086k and MSI Z390 MEG ACE from the lian li O11D Air case, and in with the MSI MEG Unify x570 and 3900xt… its fun so far… but a messssssss…


These were earlier in the day… its much worse now…lol I have a ton of cooling fittings and res lines out and about configuring…and I still need to pull the 2080ti outta the phanteks case lol

3 Likes

Well its been worth it. Ran into to small leaks I was able to just tighten up… Ran all day to get air out and also check for leaks… Here we are before OS install :slight_smile:

Managed to Jam the other 360mm radiator in there like I’ve wanted to for a long time. I had a Hardware Labs 360mm Cross Flow radiator… they are difficult to fit in regular 360mm fitting locations. In the back it was cockeyed, in the bottom it could have worked, but I needed to remove a front intake 120mm fan. Here I replaced the front three 120mm fans with two 140mm fans.

Heres the UGLY part first…

Then the pretty Part :slight_smile: Im so happy with the Red PETG lines…

6 Likes

Well I’m all done…ok…well done for now tweaking the Ryzen 3900XT and 2080Ti.

Here’s how I ended up. I Undervolted the 3900XT by 0.075v, and undervolted/overclocked the 2080TI to 0.978v with a clock of 2130MHz mem at 7500MHz. Lost a little performance on the 3900XT but made up for it in temps.

Heres just one benchmark… comparison between stock and what I have finally :slight_smile:

2 Likes

What was the difference in temperature?

1 Like

Was a little different. I need to comb through the data for the new rig…MSI and ASUS’s bios were very different.

I had notes above of what I got. It seems the single max speed drops down as multicore goes up till performance drops all together. I need to do multiple runs too to get new averages.

Here was from what I wrote before about undervolting the same CPU.

There I got a 7% temp drop with a 2% gain to 3% drop in performance. That was on a single 280mm by 54mm rad. Now they system has dual 360mm by 35mm rads. Will post some more info as I get it… I have to let the systems temp stabilize between runs to not affect the data.

Right now as I’m typing I’m idling at 37C with small spikes up to 42C. Also my ambient is roughly 27C.

1 Like

My 5800X cooled by a Noctua NH-U12S is idling at 33°C (according to my Mobo, while drawing 8W). Load temps are somewhere in the high 60°C

2 Likes

Really nice, whats your ambient temps?

18 to 25°C

2 Likes

Nice yeah mine gets up to 30C in my office so delta T is not far off. I still have some tweaking to do.

1 Like