Experiments with dm-integrity and T10-PI on Linux

Has anyone used Linux’s dm-integrity in a serious way? I’d love to hear any and all experiences. I gather that these days it works, but it tanks write performance due to using another journal.

On that note (the journal I mean), is the journal actually necessary? The journal is supposed to make sure that the data blocks and checksum blocks remain in sync, but if you have a journaling FS on top (i.e. Ext4 or XFS), and you lose power mid-write and a block ends up out of sync with it’s checksum, would it get fixed from the FS journal, or would the FS see it as like a “disk failure” kind of error?

2 Likes

I’m no expert, but if I’m correct, dm-integrity sits below the filesystem. The filesystem writes into the blocks presented to it by dm-integrity. Then, upon reads, those blocks are checked for integrity. If there is a corruption in the dm-integrity layer, it will just return an unrecoverable error (or something similar, EILSEQ?). If the filesystem’s journal happens to be in a corrupted block, then the journal itself will be corrupted. So, I think, the answer to your question is: Yes, the filesystem will just see it as a disk error. Whether it can recover, depends on where that error is.

What makes more sense to me is this: disk > dm-integrity > md-raid > filesystem

In this case, instead of the filesystem, md-raid would see the error and could recover (as raid normally does).

However, I’m still not sure whether even in this scenario it is safe to disable journaling (‘--integrity-no-journal’). Logic would say yes, because if the journal is not written, or incorrectly written, e.g. due to a power-cut, the upper layer (md-raid in this case) would just see it as a disk error and would recover.

Someone more knowledgeable, please confirm if I’m right, or I’m getting it wrong!

1 Like

Hey, welcome to the forum and thanks for the reply @tamas

Yeah I’ve also never actually tried it, but my rough sense is pretty much the same as what you’re saying here. I thought a little bit more about the disabling of dm-integrity journaling thing and I realized that the real question is how the filesystem code responds to getting the EILSEQ. Without knowing that for sure, I wouldn’t feel comfortable turning off the journaling.

So yes, I think the way to go is disk->dm-integrity->md-raid->filesystem, exactly like what you’re saying here. dm-integrity with journaling will slash write performance by half, but if the device(s) are nvme with very fast write performance, and if the workload isn’t particularly write sensitive, it might be basically fine. I mean, a SATA SSD basically feels fast enough for me most of the time…

Another option that I stumbled upon while reading more about this is the “protection information” (T10-PI) available as an optional feature in the NVMe spec. I’m not sure how many devices actually support it, but very roughly it works by attaching an extra few bytes to each block (e.g. 520 instead of 512) where the extra bytes contain a checksum. If the driver and the disk both support it, and if you format the disk correctly, you can basically get end-to-end checksumming between the actual flash and the OS (the OS then exposes only the e.g. 512 bytes up to the filesystem, so the world doesn’t explode). I’ve never tested this, just though I would mention it in case anyone is interested.

1 Like

Also, please let me know if you try out dm-integrity, and what your experiences are.

I think we need to think about why we would want to use dm-integrity in the first place. You didn’t mention your reasons in your original post, and neither did I in my reply. I just replied because I was researching this topic, and found your post.

I think, if you are just trying to achieve data integrity on a single disk, or without using Raid, you might be better off using ZFS or Btrfs. I’m not sure in what situations would dm-integrity be better in this case.

As for my reasons, I was looking for a way to have redundancy and integrity and, at the same time, to have the ability to expand and grow the Raid array. I.e. adding disks to and expanding a Raid-5 or Raid-6 array. This is not possible in ZFS, because you can’t expand vdevs. You can’t improve disk space utilisation once the vdev has been created. (I haven’t looked at Btrfs Raid-5 or 6, because that’s unstable according to the official documentation.)

By using md-raid on top of dm-integrity, I could have everything (integrity + redundancy + the ability to expand the array). Sounds perfect. The catch is that it’s going to be slow. So, I was looking at how to make it faster, and came across the idea of disabling journaling. Also note that I’m mainly interested in HDD storage, not SSDs. This is the story in short.

But in the meantime, I have also discovered that’s not a good idea to disable journaling. It’s unsafe. If there is a power outage, and dm-integrity writes out corrupted blocks, that’ll happen on all disks, because Raid writes to all disks simultaneously. So, Raid won’t be able to recover.

One other option I can think of to speed things up is to use dm-cache or dm-writecache. Like this: disk → dm-integrity → md-raid → dm-cache.

Another option would be to use dm-integrity with the --data-device option, and write the journal to a separate disk. Perhaps to SSDs. But I have not found any info or tutorials on it. What are the space requirements? How does this setup handle a power-loss? Etc. Also, I can’t imagine using this approach with a multi-disk Raid array. That could get out of hand really quickly if the number of disks grows, since each journal would need a different device, I suppose.

As for “protection information” (T10-PI), I haven’t looked at it in detail, but based on a quick search, it doesn’t feel like it’s actively used today. (I might be wrong!) First, it’s based on 512 or 520 block sizes, and it seems like the general direction nowadays is 4k block sizes. 512 is legacy… Second, you need an SAS controller that supports it…

But after reading your comment, as I was looking it up, I discovered some very interesting things:

  • SAS controllers have data integrity features built in on the controller level (or maybe driver level? not sure), while SATA controllers are more prone to communication errors. The difference is significant. A good article: Google for “Davide Piumetti Data integrity in the Enterprise environment”.
  • The price difference between SATA and SAS HDDs is not that big as I thought. The situation with SSDs is different though.
  • Some HDDs have persistent cache technology to prevent data-loss in a power-loss situation.

Well, some more rabbit holes to explore, I guess… Which I’m not going to do now. But I’ll add a few more notes that come to mind.

SAS controllers might be the reason why simple Raid without any fancy dm-integrity, ZFS or Btrfs works well in enterprise environments. Or why a simple journaling filesystem (ext4 or XFS) works well, even without extra checksums. It’s because SAS controllers provide data integrity.

I also want to add that I don’t believe in ‘bitrot’ (data corruption at rest). I think it’s a myth. Disks have ECC written on the platter after each block, which they verify on each read. Based on the articles and comments I’ve read, my conclusion is that ‘silent’ data corruption is almost always the result of

  • A) a bad cable connection
  • B) a faulty controller
  • C) bad, non-ECC system memory, or
  • D) the wrong data written out in the first place, e.g. due to buggy software.

Now, it’s true that even if bitrot is a myth, we still need protection against the other causes of corruption (points A. and B. from above). But I wonder whether using software integrity checks (be it dm-integrity, ZFS or Btrfs) has any added benefits if we have a SAS controller. It may be totally unnecessary. And regarding points C. and D., nothing will protect against those, not even software integrity checks, or a SAS controller.

Maybe dm-integrity’s main benefit (with journaling) is not preventing silent data corruption, at least with SAS drives, but protecting against a crash or power-loss? Journaling filesystems are quite reliable on their own. And Raid is quite safe against URE (Unrecoverable Read Errors), or disk failures. But writes are still not atomic on the block level, which is a risk. That’s where dm-integrity with journaling comes in. In other words: dm-integrity without journaling on SAS drives makes no sense to me, because integrity in itself is not an issue with SAS.

It feels like dm-integrity without journaling makes sense only for SATA drives. It would add data integrity. (But still without protection against a power-loss.)

If a drive itself has protection against power-loss events with persistent cache, would disabling journaling for dm-integrity be safe? Apart from a power-loss, in what other situations would dm-integrity without journaling write out corrupted blocks?

To even further complicate things, there is also --integrity-bitmap-mode in dm-integrity. This is another thing I don’t get! How is this better than no journaling at all? What is the intended purpose of this feature? What’s the use-case? Yes, we get data integrity, but we get that without journaling or bitmap mode too if there is no power-loss. And if there is a power-loss, bitmap mode can still corrupt the data. So it’s not any better than not having it all. I don’t understand in what situations, and how it is useful.

If anyone has further thoughts, advice or opinion on any of the above, please comment!

Further reading I found useful:

(Google for these, because apparently I can’t include links in my post.)

  • “Battle testing ZFS, Btrfs and mdadm+dm-integrity”

  • “github khimaros raid-explorations”

  • The comment section here: “github MawKKe cryptsetup-with-luks2-and-integrity-demo.sh”
3 Likes

It might not be that rare. Kioxia, Western Digital, and Seagate have all published literature about T10-PI.

The various enterprise Intel Optanes I collected also support it—usually 512-byte or 4-kibibyte sectors plus 8 to 128 metadata bytes for T10-PI and other application-specific uses. Interestingly, it didn’t matter whether I formatted the NVMe namespaces with or without support for metadata; I got the same total capacity after tallying up the LBAs. It’s as if the underlying device already reserved storage for exclusive use by metadata. :smiley:

This may be the key difference between dm-integrity and real T10-PI. Even though it bills itself as emulating T10-PI, there is one important thing it cannot do: catch errors between issuing the write command and the physical device media. The idea is that in-transit errors may cause bad data to be committed to a sector and T10-PI can be utilized by the drive itself to prevent that before you’ve lost your only good copy of the data. But I have not found a way to verify that T10-supporting drives actually do the check.

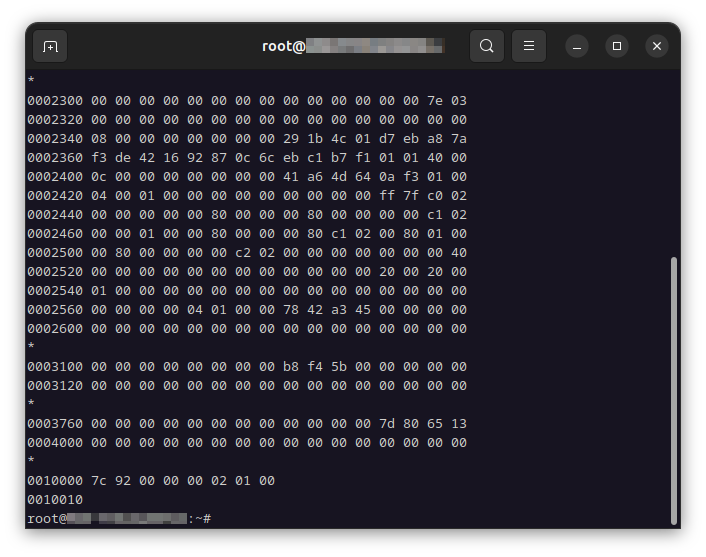
In any case, yesterday, I started testing how well-supported T10-PI was in a Linux environment. I created an emulated NVMe device using QEMU backed by an image on the host file system, formatted it as FAT in the guest (to keep it simple), and kept the image open in a hex editor running on the host to observe live changes.

My immediate findings were that:

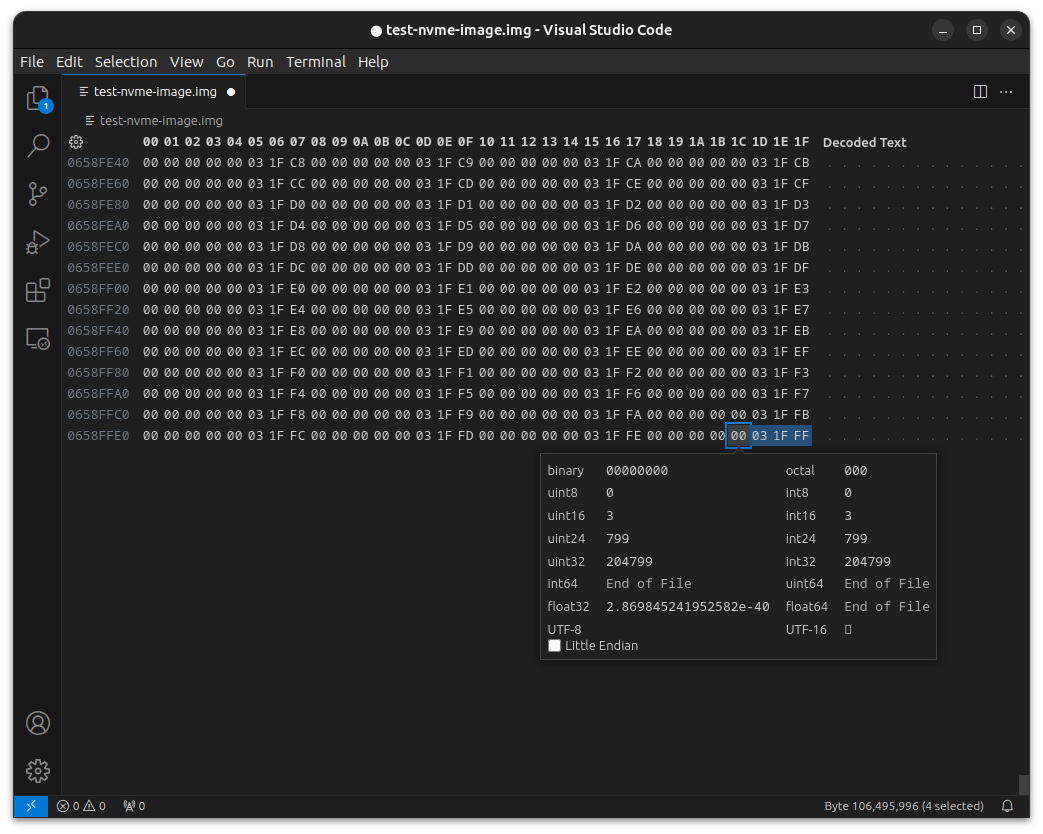
  1. Any writes to the block device in the guest resulted in T10-PI being written as well. (They were written at the end of the image after all the data.)
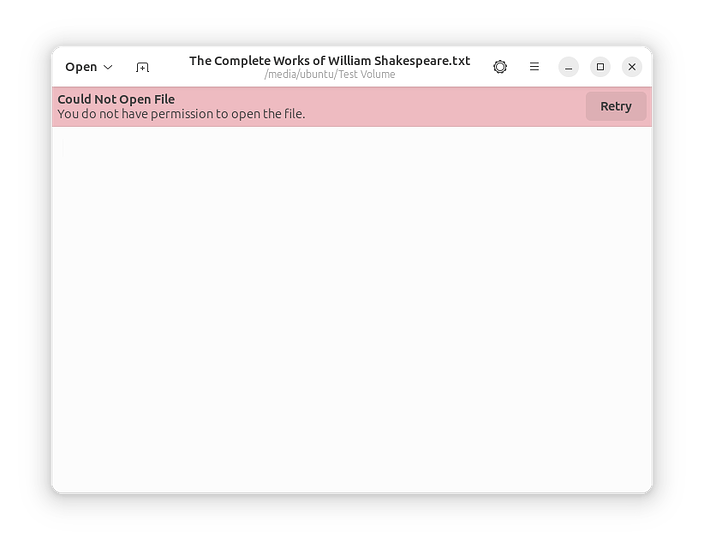
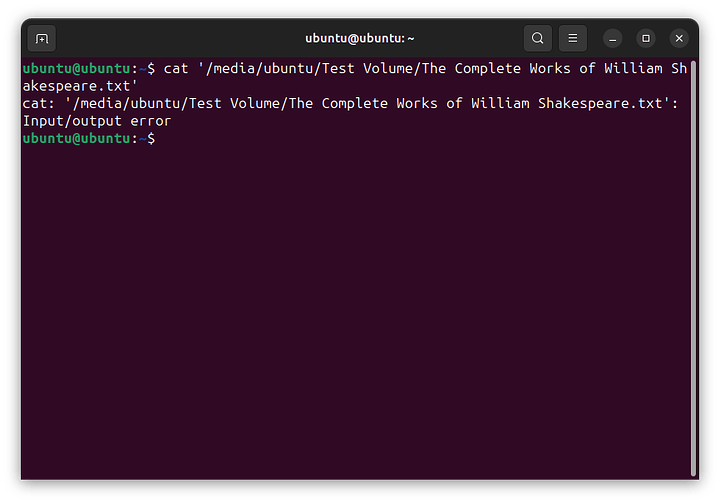
  2. If I edited the contents of a file in the host, the check sums would be invalidated, causing I/O errors in the guest. Reverting the changes immediately remedied the errors.
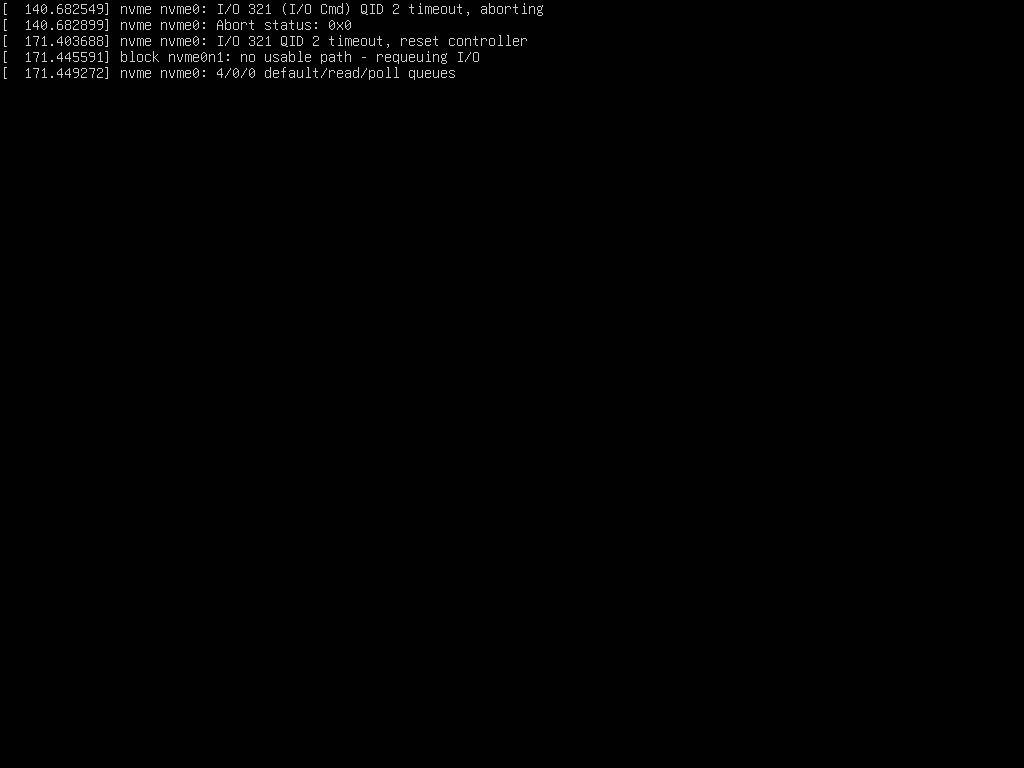
  3. Filling the image with random bytes and then starting the guest could cause the NVMe device to be detected, but inoperable (e.g., no formatting, writing, or even reporting the device size).
  4. In some cases, extensive corruption while the guest was running caused the operating system to simply crash.

So, it seems that T10-PI works in Linux and is doing its job. :smiley: Assuming a T10-supporting SSD is a drop-in replacement for the emulated one I used for testing, my current takeaway is that with T10-PI support in the hardware, all of the overhead and headaches of using dm-integrity goes away. You could put RAID directly on top of the physical disks.

2 Likes

The system could crash for any number of reasons, including the types of crashes could would interrupt the sending of data and metadata writes in such a way that the power-loss-protected drive would write the data but never receive the corresponding metadata (i.e., the protection information). Thus, in that situation, that block would be corrupt and there wouldn’t be any way to roll back to the clean state unless the higher block layers or file system provides such facilities.

2 Likes

Wow, there are some great replies here! I was tempted to go through and respond to every single point but I’ll instead focus on the things where I have something meaningful to add.

@tamas

SAS controllers have data integrity features built in on the controller level (or maybe driver level? not sure), while SATA controllers are more prone to communication errors. The difference is significant. A good article: Google for “Davide Piumetti Data integrity in the Enterprise environment”.

I had a look through this article. It does seem like SAS has a reliability advantage, at least according to manufacturer specs. However, I’m currently administrating a large storage node (about 60 disks) and I do see I/O errors somewhat frequently. I think there’s something odd going on electrically, but the point is, that box is hooked up via SAS and I’m still having issues. In my case, ZFS is handling the sporadic issues so it’s not really a big deal, but in this particular case, it does not feel like a plain SAS controller + basic RAID + xfs (or whatever) would catch this issues, and I would probably be losing data. I guess my point is that while SAS appears to be more reliable than SATA, I can anecdotally say that it’s not always reliable enough. IMO something more is needed. My interest in integrity was to see if there’s an alternative to ZFS (for end-to-end data integrity validation) that’s actually enterprise stable. I still find zfs on linux to be flaky when it comes to updates. If you’re very careful and vigilant you can prevent breakage usually, but in my experience it’s usually pretty easy to get into a situation where you have to fall back to an older kernel or whatever.

@LiKenun

Thanks very much for doing those tests! So it sounds like not only does the linux nvme driver support T10-PI, but qemu’s NVME emulation does as well! If you have time, could you repeat the test with mdadm raid (e.d. raid1) and see if it actually repairs the corrupt area? If you don’t have time to do that, no problem, I can have a go at it. If you have any details (e.g. qemu command line invocation, hex edit automation) which would help me with replicating your tests, please let me know.

2 Likes

I’m going to be doing that next—probably around the weekend when I have time to journal my actions (pun intended :wink:) as I try to reproduce them.

The NVMe specs are an interesting read in the meantime: https://nvmexpress.org/wp-content/uploads/NVMe-NVM-Command-Set-Specification-1.0a-2021.07.26-Ratified.pdf. See 5.2. They provide for 16-bit CRCs, 32-bit CRCs, and even 64-bit CRCs. And it’s on top of the 32-bit ECRC (end-to-end CRC) and 32-bit LCRC (link CRC) of PCI Express. So theoretically, your data is afforded up to 128-bits of CRC protection depending on what your hardware supports.

2 Likes

Sweet. I’m looking forward to your update!

Also interesting re: the nvme spec, I will have a look. Though, are CRCs weaker than the hash functions used by e.g. zfs?

Do you get READ or WRITE errors, or CKSUM errors? If you get READ / WRITE errors, those are just normal Unrecoverable Read Errors, which normal Raid would correct too by trying to re-read the data, or reading a duplicate copy and re-allocating the block. To my understanding, with those errors, no incorrect data was returned. Instead, no data was returned. I.e. either the drive itself or the controller caught the error, or the block on the disk become unreadable. If you have a data integrity problem on the drive or controller level, you should get CKSUM errors.

I think it can get a bit confusing with these ZFS error types. I’m not even sure whether I’m understanding it correctly. I found this question useful on Stackexchange:

Search for: “Understanding the error reporting of ZFS (on Linux)”

There are links to the original ZFS documentation in that Stackexchange question too.

(By the way, why can’t I insert links in my posts? It’s very annoying.)

My interest in integrity was to see if there’s an alternative to ZFS (for end-to-end data integrity validation) that’s actually enterprise stable. I still find zfs on linux to be flaky when it comes to updates. If you’re very careful and vigilant you can prevent breakage usually, but in my experience it’s usually pretty easy to get into a situation where you have to fall back to an older kernel or whatever.

This is a valid reason, and I can understand. Thanks for sharing this experience. Stability, reliability and predictability are very high on my priority list too, so it’s useful to know. In fact, this is not the first time I’m hearing this. I’m not following the whole ‘licencing issue’, and why ZFS will never be an integral part of Linux. All I know is that currently there are issues, and this affects usability somewhat. ‘Somewhat’ is relative. There is a reason why folks are looking for alternative solutions on Linux, and your experience is an example of that.

1 Like

Do you get READ or WRITE errors, or CKSUM errors?

All of the above. Usually the symptom is a whole bunch of write errors and a few read errors all at once, and then a commensurate number of checksum errors during the next scrub.

Not sure why you can’t insert links, I definitely can. Maybe your account needs to be at least X days old? If a moderator sees this, please chime in.

This is a valid reason, and I can understand. […] All I know is that currently there are issues, and this affects usability somewhat.

I should mention that my experience using ZFS on linux on computers which are dedicated disk servers has been more positive, because those are typically not connected directly to the internet, and not updated as frequency. I still much prefer FreeBSD for that application, but I’ll concede that the ZFS on Linux friction is less applicable here.

Where the ZFS on Linux friction is felt the most IMO is when using it on workstations, since those tend to get updated more frequently, and it’s virtually always during an update that something related to ZFS goes wrong. There are lots of cases where a workstation needs to hold a good chunk of data and where losing it or having it silently corrupted without noticing would be bad. Even though workstations typically do get backed up to disk servers or something else, I’d prefer to know that the correct data is actually getting read and written…

1 Like

Alright, so some corrections after some additional testing. Some observations seem to have been limitations of Linux.

Setup

I’ll preface with the relevant details of my test environment:

The hardware is not capable of everything that NVMe allows for, and doing an nvme format is incredibly slow, so virtual machines with QEMU emulated NVMe devices were to speed up test cycles. I will test this on T10-PI-capable hardware another day.

Setting up a virtual machine with an emulated NVMe device is fairly simple. I use the Virtual Machine Manager to create the VM, and I add the XML:

  <qemu:commandline>
    <qemu:arg value="-device"/>
    <qemu:arg value="nvme-subsys,id=test-subsys-0,nqn=subsys0"/>
    <qemu:arg value="-device"/>
    <qemu:arg value="nvme,serial=TESTNVME1,subsys=test-subsys-0,bus=pcie.0,addr=14"/>
    <qemu:arg value="-drive"/>
    <qemu:arg value="file=/test-nvme-image.img,if=none,format=raw,id=test-nvme-drive-0"/>
    <qemu:arg value="-device"/>
    <qemu:arg value="nvme-ns,drive=test-nvme-drive-0,nsid=1,physical_block_size=4096,logical_block_size=4096,ms=8,mset=1,pi=1"/>
  </qemu:commandline>

The namespace is defined at the root (xmlns:qemu="http://libvirt.org/schemas/domain/qemu/1.0").

That definition defines an NVMe device with one controller and one namespace with a physical and logical block size of 4096 bytes, metadata size of 8 bytes (ms=8) using extended LBAs (mset=1), and protection information type 1 (pi=1).

Notice that I placed the NVMe device’s backing image at /test-nvme-image.img. One of the first issues I ran into making this work was SELinux. The trick was to add security_driver = "none" to /etc/libvirt/qemu.conf and then run service libvirtd restart.

The other parameters of the NVMe device were set according to this documentation: NVMe Emulation — QEMU documentation

The full definition of my VM right now
<domain xmlns:qemu="http://libvirt.org/schemas/domain/qemu/1.0" type="kvm">
  <name>nvme-test-machine</name>
  <uuid>24e01f55-e0b8-4941-9cc4-37cc8665a596</uuid>
  <metadata>
    <libosinfo:libosinfo xmlns:libosinfo="http://libosinfo.org/xmlns/libvirt/domain/1.0">
      <libosinfo:os id="http://ubuntu.com/ubuntu/23.10"/>
    </libosinfo:libosinfo>
  </metadata>
  <memory unit="KiB">16777216</memory>
  <currentMemory unit="KiB">16777216</currentMemory>
  <vcpu placement="static">4</vcpu>
  <os>
    <type arch="x86_64" machine="pc-q35-7.2">hvm</type>
    <boot dev="cdrom"/>
  </os>
  <features>
    <acpi/>
    <apic/>
    <vmport state="off"/>
  </features>
  <cpu mode="host-passthrough" check="none" migratable="on"/>
  <clock offset="utc">
    <timer name="rtc" tickpolicy="catchup"/>
    <timer name="pit" tickpolicy="delay"/>
    <timer name="hpet" present="no"/>
  </clock>
  <on_poweroff>destroy</on_poweroff>
  <on_reboot>restart</on_reboot>
  <on_crash>destroy</on_crash>
  <pm>
    <suspend-to-mem enabled="no"/>
    <suspend-to-disk enabled="no"/>
  </pm>
  <devices>
    <emulator>/usr/bin/qemu-system-x86_64</emulator>
    <disk type="file" device="cdrom">
      <driver name="qemu" type="raw"/>
      <source file="/var/lib/libvirt/images/ubuntu-23.10.1-desktop-amd64.iso"/>
      <target dev="sda" bus="sata"/>
      <readonly/>
      <address type="drive" controller="0" bus="0" target="0" unit="0"/>
    </disk>
    <controller type="usb" index="0" model="qemu-xhci" ports="15">
      <address type="pci" domain="0x0000" bus="0x02" slot="0x00" function="0x0"/>
    </controller>
    <controller type="pci" index="0" model="pcie-root"/>
    <controller type="pci" index="1" model="pcie-root-port">
      <model name="pcie-root-port"/>
      <target chassis="1" port="0x10"/>
      <address type="pci" domain="0x0000" bus="0x00" slot="0x02" function="0x0" multifunction="on"/>
    </controller>
    <controller type="pci" index="2" model="pcie-root-port">
      <model name="pcie-root-port"/>
      <target chassis="2" port="0x11"/>
      <address type="pci" domain="0x0000" bus="0x00" slot="0x02" function="0x1"/>
    </controller>
    <controller type="pci" index="3" model="pcie-root-port">
      <model name="pcie-root-port"/>
      <target chassis="3" port="0x12"/>
      <address type="pci" domain="0x0000" bus="0x00" slot="0x02" function="0x2"/>
    </controller>
    <controller type="pci" index="4" model="pcie-root-port">
      <model name="pcie-root-port"/>
      <target chassis="4" port="0x13"/>
      <address type="pci" domain="0x0000" bus="0x00" slot="0x02" function="0x3"/>
    </controller>
    <controller type="pci" index="5" model="pcie-root-port">
      <model name="pcie-root-port"/>
      <target chassis="5" port="0x14"/>
      <address type="pci" domain="0x0000" bus="0x00" slot="0x02" function="0x4"/>
    </controller>
    <controller type="pci" index="6" model="pcie-root-port">
      <model name="pcie-root-port"/>
      <target chassis="6" port="0x15"/>
      <address type="pci" domain="0x0000" bus="0x00" slot="0x02" function="0x5"/>
    </controller>
    <controller type="pci" index="7" model="pcie-root-port">
      <model name="pcie-root-port"/>
      <target chassis="7" port="0x16"/>
      <address type="pci" domain="0x0000" bus="0x00" slot="0x02" function="0x6"/>
    </controller>
    <controller type="pci" index="8" model="pcie-root-port">
      <model name="pcie-root-port"/>
      <target chassis="8" port="0x17"/>
      <address type="pci" domain="0x0000" bus="0x00" slot="0x02" function="0x7"/>
    </controller>
    <controller type="pci" index="9" model="pcie-root-port">
      <model name="pcie-root-port"/>
      <target chassis="9" port="0x18"/>
      <address type="pci" domain="0x0000" bus="0x00" slot="0x03" function="0x0" multifunction="on"/>
    </controller>
    <controller type="pci" index="10" model="pcie-root-port">
      <model name="pcie-root-port"/>
      <target chassis="10" port="0x19"/>
      <address type="pci" domain="0x0000" bus="0x00" slot="0x03" function="0x1"/>
    </controller>
    <controller type="pci" index="11" model="pcie-root-port">
      <model name="pcie-root-port"/>
      <target chassis="11" port="0x1a"/>
      <address type="pci" domain="0x0000" bus="0x00" slot="0x03" function="0x2"/>
    </controller>
    <controller type="pci" index="12" model="pcie-root-port">
      <model name="pcie-root-port"/>
      <target chassis="12" port="0x1b"/>
      <address type="pci" domain="0x0000" bus="0x00" slot="0x03" function="0x3"/>
    </controller>
    <controller type="pci" index="13" model="pcie-root-port">
      <model name="pcie-root-port"/>
      <target chassis="13" port="0x1c"/>
      <address type="pci" domain="0x0000" bus="0x00" slot="0x03" function="0x4"/>
    </controller>
    <controller type="pci" index="14" model="pcie-root-port">
      <model name="pcie-root-port"/>
      <target chassis="14" port="0x1d"/>
      <address type="pci" domain="0x0000" bus="0x00" slot="0x03" function="0x5"/>
    </controller>
    <controller type="sata" index="0">
      <address type="pci" domain="0x0000" bus="0x00" slot="0x1f" function="0x2"/>
    </controller>
    <controller type="virtio-serial" index="0">
      <address type="pci" domain="0x0000" bus="0x03" slot="0x00" function="0x0"/>
    </controller>
    <interface type="network">
      <mac address="52:54:00:31:1e:46"/>
      <source network="default"/>
      <model type="virtio"/>
      <address type="pci" domain="0x0000" bus="0x01" slot="0x00" function="0x0"/>
    </interface>
    <serial type="pty">
      <target type="isa-serial" port="0">
        <model name="isa-serial"/>
      </target>
    </serial>
    <console type="pty">
      <target type="serial" port="0"/>
    </console>
    <channel type="unix">
      <target type="virtio" name="org.qemu.guest_agent.0"/>
      <address type="virtio-serial" controller="0" bus="0" port="1"/>
    </channel>
    <channel type="spicevmc">
      <target type="virtio" name="com.redhat.spice.0"/>
      <address type="virtio-serial" controller="0" bus="0" port="2"/>
    </channel>
    <input type="tablet" bus="usb">
      <address type="usb" bus="0" port="1"/>
    </input>
    <input type="mouse" bus="ps2"/>
    <input type="keyboard" bus="ps2"/>
    <graphics type="spice" autoport="yes">
      <listen type="address"/>
      <image compression="off"/>
    </graphics>
    <sound model="ich9">
      <address type="pci" domain="0x0000" bus="0x00" slot="0x1b" function="0x0"/>
    </sound>
    <audio id="1" type="spice"/>
    <video>
      <model type="qxl" ram="65536" vram="65536" vgamem="16384" heads="1" primary="yes"/>
      <address type="pci" domain="0x0000" bus="0x00" slot="0x01" function="0x0"/>
    </video>
    <redirdev bus="usb" type="spicevmc">
      <address type="usb" bus="0" port="2"/>
    </redirdev>
    <redirdev bus="usb" type="spicevmc">
      <address type="usb" bus="0" port="3"/>
    </redirdev>
    <memballoon model="virtio">
      <address type="pci" domain="0x0000" bus="0x04" slot="0x00" function="0x0"/>
    </memballoon>
    <rng model="virtio">
      <backend model="random">/dev/urandom</backend>
      <address type="pci" domain="0x0000" bus="0x05" slot="0x00" function="0x0"/>
    </rng>
  </devices>
  <qemu:commandline>
    <qemu:arg value="-device"/>
    <qemu:arg value="nvme-subsys,id=test-subsys-0,nqn=subsys0"/>
    <qemu:arg value="-device"/>
    <qemu:arg value="nvme,serial=TESTNVME1,subsys=test-subsys-0,bus=pcie.0,addr=14"/>
    <qemu:arg value="-drive"/>
    <qemu:arg value="file=/test-nvme-image.img,if=none,format=raw,id=test-nvme-drive-0"/>
    <qemu:arg value="-device"/>
    <qemu:arg value="nvme-ns,drive=test-nvme-drive-0,nsid=1,physical_block_size=4096,logical_block_size=4096,ms=8,mset=1,pi=1"/>
  </qemu:commandline>
</domain>

Steps

In the virtual machine, I tested the NVMe device by varying the block size, metadata size, and whether the metadata was communicated using a separate buffer (mset=0) or an extended LBA (mset=1). In the virtual machine, I would:

  1. In the VM, Check whether the device was recognized by Linux.
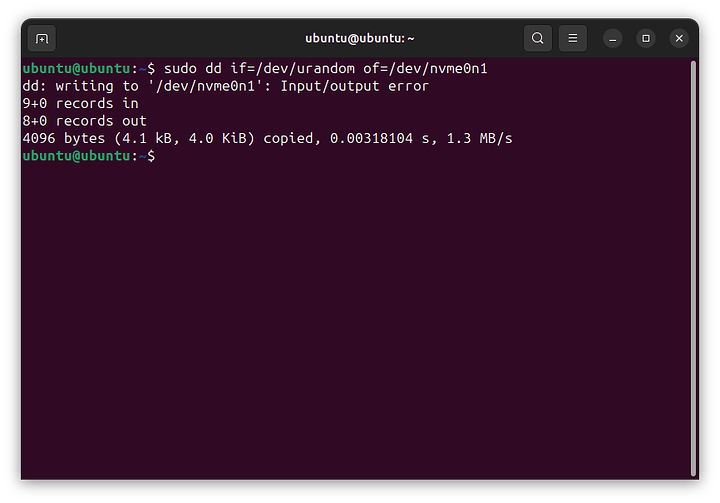
  2. In the VM, format the device and/or try to write to it using dd if=/dev/urandom of=/dev/nvme0n1.
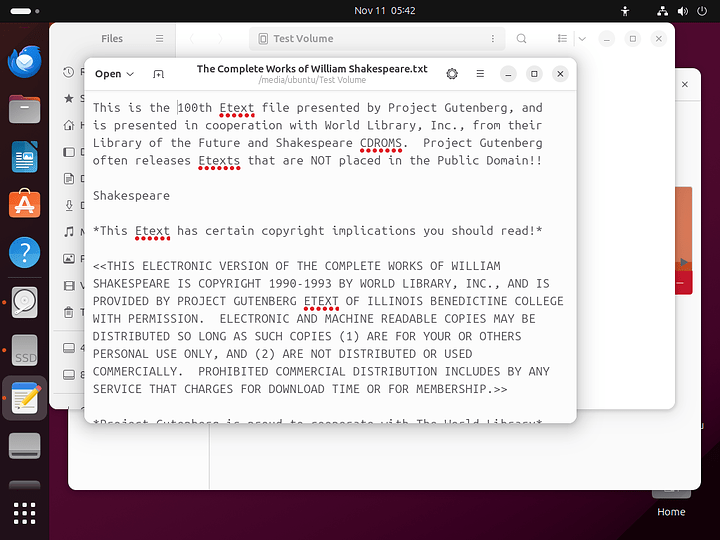
  3. In the VM, create a text file with the Complete Works of William Shakespeare.
  4. In the host, check the end of the image to see if any T10-PI was written.
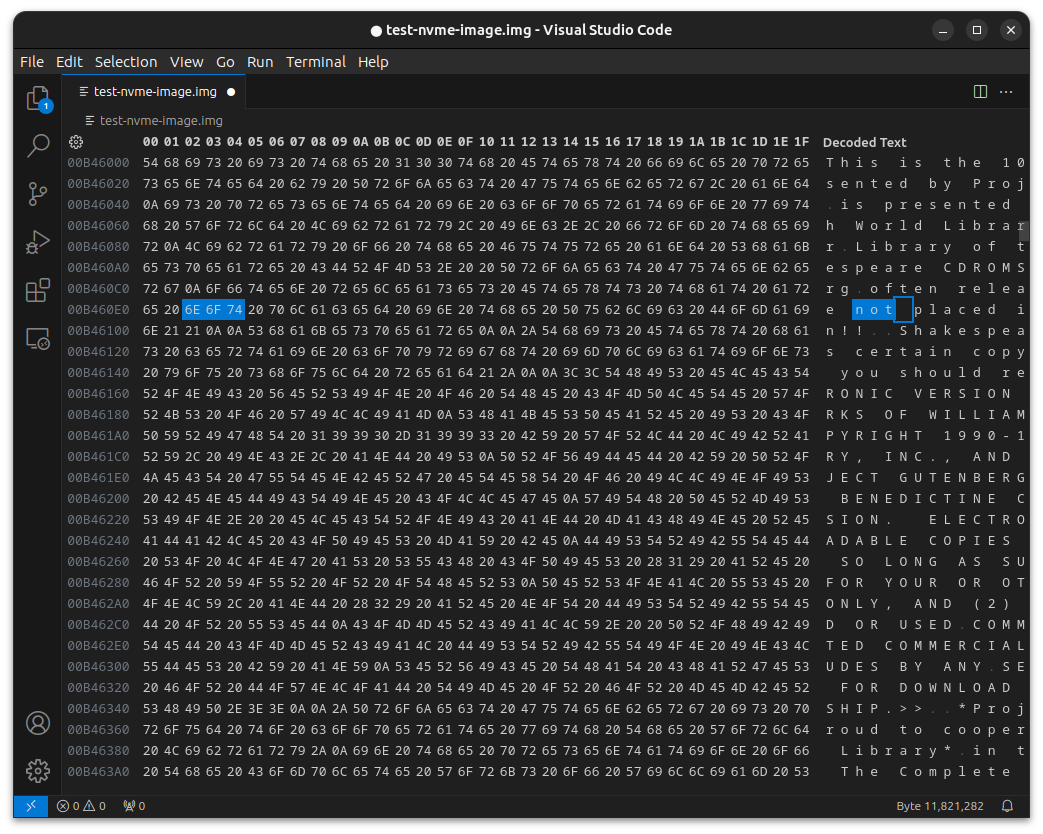
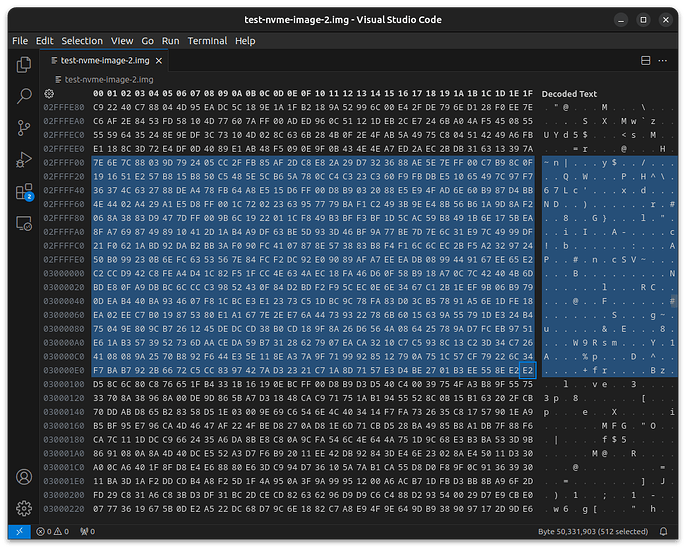
  5. If it was written, edit a few bytes of text in the hex editor.
  6. Reboot the VM and then try to open the text file and/or cat.
  7. Shutdown the VM, clear the image (truncate -s 0 test-nvme-image.img; truncate -s 106496000 test-nvme-image.img), and adjust the parameters for the next round.
    • Zeroing out is important! When the parameters change, the contents of the image are invalidated and that is sufficient to trigger I/O errors on even writes.

Data

Here’s what really happens with each combination:

  • 512+8 (separate): device recognized, file system formatted, but unable to save file
    • I’ve circled back to this a second time after trying the rest and was able to reproduce this problem.
  • 512+8 (extended): device recognized, file system formatted, file saved, T10-PI written, corruption successfully detected
  • 512+16 (separate): device recognized, file system formatted, file saved, but no T10-PI written
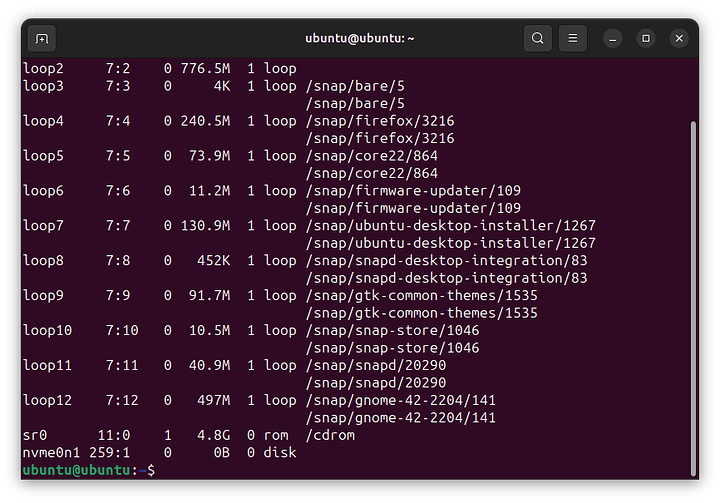
  • 512+16 (extended): no media detected
  • 4096+8 (separate): device recognized, file system formatted, file saved, T10-PI written, corruption successfully detected
  • 4096+8 (extended): device recognized, file system formatted, file saved, T10-PI written, corruption successfully detected
  • 4096+64 (separate): device recognized, file system formatted, file saved, but no T10-PI written
  • 4096+64 (extended): no media detected

Screenshots

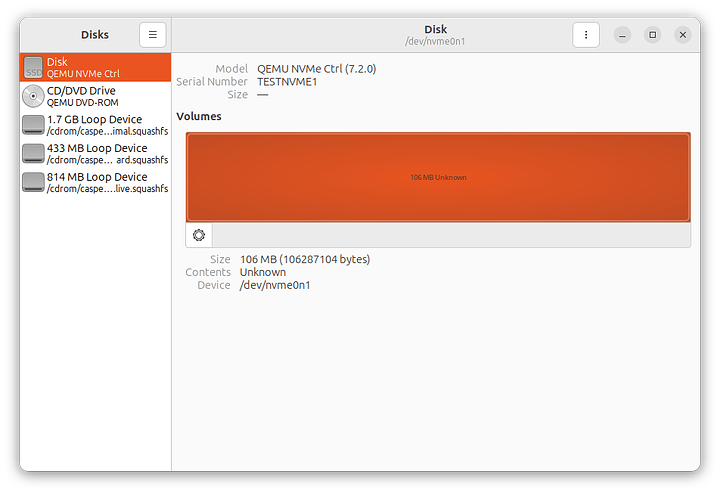
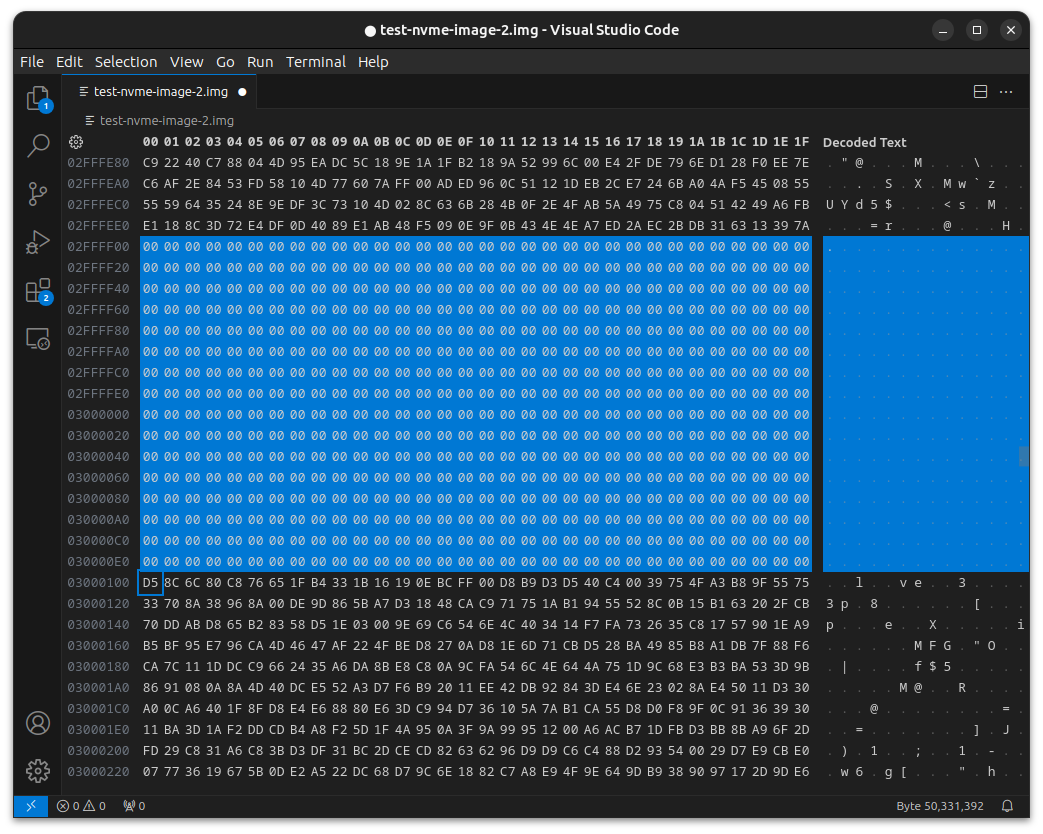
When Linux recognizes the device


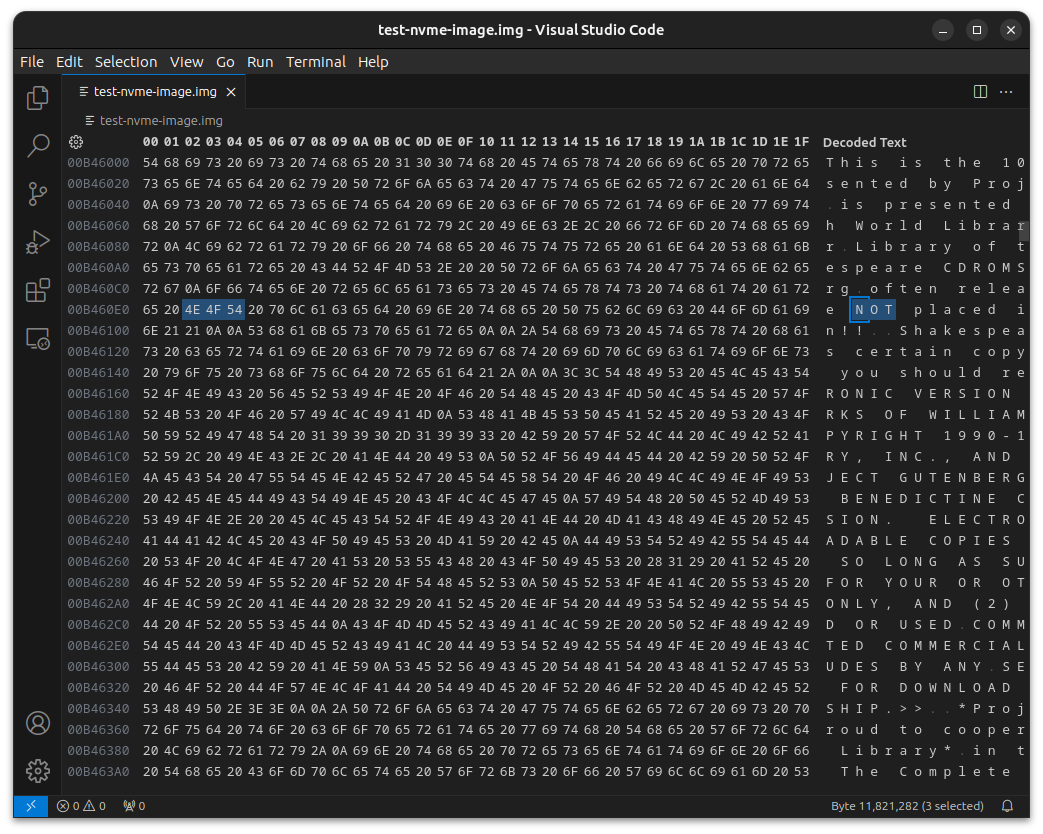
Data modified in hex editor

T10-PI information stored end-to-end at the very end of the disk image

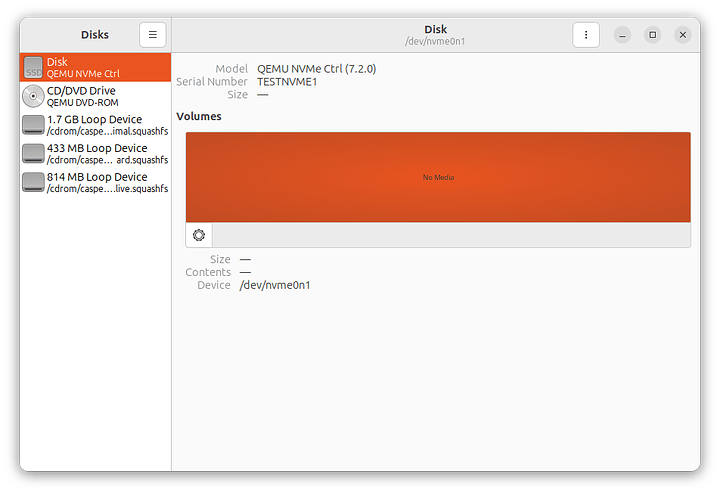
When Linux does not recognize the device


When Linux recognizes the device but cannot write to it

Disks, failing to format the device

I/O error caused by detected corruption


Conclusions

  • T10-PI is only written and verified with 8-byte metadata.
  • For metadata lengths greater than 8 bytes, extended LBA mode is unsupported.

Next Steps

To be sure, I’m going to try to identify whether T10-PI is written to real hardware. I have both the Intel Optane P4800X and Intel Optane P5800X, which support variable-sized sectors, and I only just figured out how to do a low-level format of the P4800X. After repeatedly hitting time-out errors with nvme format (didn’t honor the -t/--timeout option), I switched to Intel’s Memory and Storage (MAS) CLI tool to do the job.

nvme id-ns /dev/nvme1n1 -H
NVME Identify Namespace 1:
nsze    : 0x15d50f66
ncap    : 0x15d50f66
nuse    : 0x15d50f66

nlbaf   : 6
flbas   : 0x15
  [6:5] : 0	Most significant 2 bits of Current LBA Format Selected
  [4:4] : 0x1	Metadata Transferred at End of Data LBA
  [3:0] : 0x5	Least significant 4 bits of Current LBA Format Selected

mc      : 0x1
  [1:1] : 0	Metadata Pointer Not Supported
  [0:0] : 0x1	Metadata as Part of Extended Data LBA Supported

dpc     : 0x11
  [4:4] : 0x1	Protection Information Transferred as Last 8 Bytes of Metadata Supported
  [3:3] : 0	Protection Information Transferred as First 8 Bytes of Metadata Not Supported
  [2:2] : 0	Protection Information Type 3 Not Supported
  [1:1] : 0	Protection Information Type 2 Not Supported
  [0:0] : 0x1	Protection Information Type 1 Supported

dps     : 0x1
  [3:3] : 0	Protection Information is Transferred as Last 8 Bytes of Metadata
  [2:0] : 0x1	Protection Information Type 1 Enabled

LBA Format  0 : Metadata Size: 0   bytes - Data Size: 512 bytes - Relative Performance: 0x2 Good 
LBA Format  1 : Metadata Size: 8   bytes - Data Size: 512 bytes - Relative Performance: 0x2 Good 
LBA Format  2 : Metadata Size: 16  bytes - Data Size: 512 bytes - Relative Performance: 0x2 Good 
LBA Format  3 : Metadata Size: 0   bytes - Data Size: 4096 bytes - Relative Performance: 0 Best 
LBA Format  4 : Metadata Size: 8   bytes - Data Size: 4096 bytes - Relative Performance: 0 Best 
LBA Format  5 : Metadata Size: 64  bytes - Data Size: 4096 bytes - Relative Performance: 0 Best (in use)
LBA Format  6 : Metadata Size: 128 bytes - Data Size: 4096 bytes - Relative Performance: 0 Best

Seem to have gotten hardware encryption going on it too:

# IFS= read -rsp 'Password: ' password < /dev/tty && echo && IFS= read -rsp 'Confirm:  ' confirmed_password </dev/tty && echo && [ "$password" = "$confirmed_password" ] && sedutil-cli --initialsetup "$password" /dev/nvme1; unset -v password; unset -v confirmed_password
Password: 
Confirm:  
takeOwnership complete
Locking SP Activate Complete
LockingRange0 disabled 
LockingRange0 set to RW
MBRDone set on 
MBRDone set on 
MBREnable set on 
Initial setup of TPer complete on /dev/nvme1

If T10-PI is good to go, this setup is pretty much a high-performance replacement for one using dm-integrity and dm-crypt.

3 Likes

@LiKenun thanks so much for doing this and for journaling (:slight_smile:) your work so thoroughly! This is really interesting information. I spent a few hours poking around datasheets trying to determine what devices do and do not support T10 protection information, and while it seems like most vendors claim some support on their U.2 enterprise SSDs and SAS SSDs, I see basically no M.2 devices that claim support. I’m considering starting a separate thread to see if the community can put together a list of devices that definitely do support it…

Another thing which would be interesting to investigate is which hardware RAID cards correctly support T10-PI. I know that hardware raid has a bad reputation around here, but the literature from LSI suggests that many of their RAID cards do support it. A solution like that isn’t fully end-to-end between the flash and the OS, but it’s better than nothing IMO.

2 Likes

The Intel Optane P4801X series should. They are the M.2 variants of the P4800X series. Beware that they are all 110 mm long.

EDIT:
@hsnyder: they exist :slightly_smiling_face:

  • NETLIST N1552 [$237.97, minimum quantity of 10]
    • M.2 2280 form factor
    • AES 256-bit SED (no OPAL)
    • T10 DIF (types 0 through 4)
    • Variable sector sizes (512, 4096, 512+8, 4096+8, 4096+64)
    • Power loss protection
    • 1 to 9 DWPD over 5 years (achieved through over-provisioning)
  • Smart Modular DC4800
    • M.2 22110
    • TCG OPAL 2.0
    • T10 DIF/DIX
    • Variable sector sizes (512, 520, 4014, 4096, and 4160)
    • SR-IOV (15VF/PF)
    • Up to 256 namespaces
    • Zoned namespaces
    • Power loss protection
    • 1 DWPD over 5 years
  • Solid State Storage Technology Corporation EP7
    • M.2 22110
    • T10 DIF/DIX
    • Zoned namespaces
    • Power loss protection
    • 1.3 DWPD over 3 years
  • Fastro MS570
    • M.2 22110
    • TCG OPAL 2.0
    • T10 DIF/DIX
    • SR-IOV
    • 128 namespaces
    • Power loss protection
    • 27 DWPD over 5 years

How one would get their hands on one of them is a more difficult question. That last one approaches Optane levels of latency, and it’s a shame that it only comes in 22110 form factor.

CRC is definitely weaker—especially since the at-rest T10-PI is only 16 bits. But there’s the question of what you are protecting your data from.

I should throw in a correction about my previous statement; it’s wrong. LCRC only protects the data between PCIe links, so along the entire length of the data path, there will be dips where the total CRC bits can only add up to 96 max. PCIe ECRCs are also optional, so the only other end-to-end protection you would have is T10-PI and/or the application layer checks (e.g., dm-integrity, ZFS, …).


Anyway… onto hardware probing. I just recovered what I thought was a very expensive bricked Optane. :sweat_smile: Unfortunately, my primary test system (ASRock Taichi X670E) has no support for TCG encrypted SSDs and putting one in causes an infinite boot loop that prevents even the BIOS from being accessed.

1 Like

@LiKenun, again, thank you! Interesting that the examples you found are all from brands that I hadn’t heard of before. These don’t seem easy to get.

I’m looking forward to seeing the results of your hardware experiments.

I will try to find the time to check how md RAID handles corruption reported by either T10-PI or dm-integrity. I’m very curious if it will do the right thing and rewrite the bad blocks. That would be very cool…

Just attempted it with 2 emulated NVMe devices and basic RAID-1 setup on top of them.

VM definition:

<domain xmlns:qemu="http://libvirt.org/schemas/domain/qemu/1.0" type="kvm">
  <name>nvme-test-machine</name>
  <uuid>24e01f55-e0b8-4941-9cc4-37cc8665a596</uuid>
  <metadata>
    <libosinfo:libosinfo xmlns:libosinfo="http://libosinfo.org/xmlns/libvirt/domain/1.0">
      <libosinfo:os id="http://ubuntu.com/ubuntu/23.10"/>
    </libosinfo:libosinfo>
  </metadata>
  <memory unit="KiB">16777216</memory>
  <currentMemory unit="KiB">16777216</currentMemory>
  <vcpu placement="static">4</vcpu>
  <os>
    <type arch="x86_64" machine="pc-q35-7.2">hvm</type>
    <boot dev="cdrom"/>
  </os>
  <features>
    <acpi/>
    <apic/>
    <vmport state="off"/>
  </features>
  <cpu mode="host-passthrough" check="none" migratable="on"/>
  <clock offset="utc">
    <timer name="rtc" tickpolicy="catchup"/>
    <timer name="pit" tickpolicy="delay"/>
    <timer name="hpet" present="no"/>
  </clock>
  <on_poweroff>destroy</on_poweroff>
  <on_reboot>restart</on_reboot>
  <on_crash>destroy</on_crash>
  <pm>
    <suspend-to-mem enabled="no"/>
    <suspend-to-disk enabled="no"/>
  </pm>
  <devices>
    <emulator>/usr/bin/qemu-system-x86_64</emulator>
    <disk type="file" device="cdrom">
      <driver name="qemu" type="raw"/>
      <source file="/var/lib/libvirt/images/ubuntu-23.10.1-desktop-amd64.iso"/>
      <target dev="sda" bus="sata"/>
      <readonly/>
      <address type="drive" controller="0" bus="0" target="0" unit="0"/>
    </disk>
    <controller type="usb" index="0" model="qemu-xhci" ports="15">
      <address type="pci" domain="0x0000" bus="0x02" slot="0x00" function="0x0"/>
    </controller>
    <controller type="pci" index="0" model="pcie-root"/>
    <controller type="pci" index="1" model="pcie-root-port">
      <model name="pcie-root-port"/>
      <target chassis="1" port="0x10"/>
      <address type="pci" domain="0x0000" bus="0x00" slot="0x02" function="0x0" multifunction="on"/>
    </controller>
    <controller type="pci" index="2" model="pcie-root-port">
      <model name="pcie-root-port"/>
      <target chassis="2" port="0x11"/>
      <address type="pci" domain="0x0000" bus="0x00" slot="0x02" function="0x1"/>
    </controller>
    <controller type="pci" index="3" model="pcie-root-port">
      <model name="pcie-root-port"/>
      <target chassis="3" port="0x12"/>
      <address type="pci" domain="0x0000" bus="0x00" slot="0x02" function="0x2"/>
    </controller>
    <controller type="pci" index="4" model="pcie-root-port">
      <model name="pcie-root-port"/>
      <target chassis="4" port="0x13"/>
      <address type="pci" domain="0x0000" bus="0x00" slot="0x02" function="0x3"/>
    </controller>
    <controller type="pci" index="5" model="pcie-root-port">
      <model name="pcie-root-port"/>
      <target chassis="5" port="0x14"/>
      <address type="pci" domain="0x0000" bus="0x00" slot="0x02" function="0x4"/>
    </controller>
    <controller type="pci" index="6" model="pcie-root-port">
      <model name="pcie-root-port"/>
      <target chassis="6" port="0x15"/>
      <address type="pci" domain="0x0000" bus="0x00" slot="0x02" function="0x5"/>
    </controller>
    <controller type="pci" index="7" model="pcie-root-port">
      <model name="pcie-root-port"/>
      <target chassis="7" port="0x16"/>
      <address type="pci" domain="0x0000" bus="0x00" slot="0x02" function="0x6"/>
    </controller>
    <controller type="pci" index="8" model="pcie-root-port">
      <model name="pcie-root-port"/>
      <target chassis="8" port="0x17"/>
      <address type="pci" domain="0x0000" bus="0x00" slot="0x02" function="0x7"/>
    </controller>
    <controller type="pci" index="9" model="pcie-root-port">
      <model name="pcie-root-port"/>
      <target chassis="9" port="0x18"/>
      <address type="pci" domain="0x0000" bus="0x00" slot="0x03" function="0x0" multifunction="on"/>
    </controller>
    <controller type="pci" index="10" model="pcie-root-port">
      <model name="pcie-root-port"/>
      <target chassis="10" port="0x19"/>
      <address type="pci" domain="0x0000" bus="0x00" slot="0x03" function="0x1"/>
    </controller>
    <controller type="pci" index="11" model="pcie-root-port">
      <model name="pcie-root-port"/>
      <target chassis="11" port="0x1a"/>
      <address type="pci" domain="0x0000" bus="0x00" slot="0x03" function="0x2"/>
    </controller>
    <controller type="pci" index="12" model="pcie-root-port">
      <model name="pcie-root-port"/>
      <target chassis="12" port="0x1b"/>
      <address type="pci" domain="0x0000" bus="0x00" slot="0x03" function="0x3"/>
    </controller>
    <controller type="pci" index="13" model="pcie-root-port">
      <model name="pcie-root-port"/>
      <target chassis="13" port="0x1c"/>
      <address type="pci" domain="0x0000" bus="0x00" slot="0x03" function="0x4"/>
    </controller>
    <controller type="pci" index="14" model="pcie-root-port">
      <model name="pcie-root-port"/>
      <target chassis="14" port="0x1d"/>
      <address type="pci" domain="0x0000" bus="0x00" slot="0x03" function="0x5"/>
    </controller>
    <controller type="sata" index="0">
      <address type="pci" domain="0x0000" bus="0x00" slot="0x1f" function="0x2"/>
    </controller>
    <controller type="virtio-serial" index="0">
      <address type="pci" domain="0x0000" bus="0x03" slot="0x00" function="0x0"/>
    </controller>
    <interface type="network">
      <mac address="52:54:00:31:1e:46"/>
      <source network="default"/>
      <model type="virtio"/>
      <address type="pci" domain="0x0000" bus="0x01" slot="0x00" function="0x0"/>
    </interface>
    <serial type="pty">
      <target type="isa-serial" port="0">
        <model name="isa-serial"/>
      </target>
    </serial>
    <console type="pty">
      <target type="serial" port="0"/>
    </console>
    <channel type="unix">
      <target type="virtio" name="org.qemu.guest_agent.0"/>
      <address type="virtio-serial" controller="0" bus="0" port="1"/>
    </channel>
    <channel type="spicevmc">
      <target type="virtio" name="com.redhat.spice.0"/>
      <address type="virtio-serial" controller="0" bus="0" port="2"/>
    </channel>
    <input type="tablet" bus="usb">
      <address type="usb" bus="0" port="1"/>
    </input>
    <input type="mouse" bus="ps2"/>
    <input type="keyboard" bus="ps2"/>
    <graphics type="spice" autoport="yes">
      <listen type="address"/>
      <image compression="off"/>
    </graphics>
    <sound model="ich9">
      <address type="pci" domain="0x0000" bus="0x00" slot="0x1b" function="0x0"/>
    </sound>
    <audio id="1" type="spice"/>
    <video>
      <model type="qxl" ram="65536" vram="65536" vgamem="16384" heads="1" primary="yes"/>
      <address type="pci" domain="0x0000" bus="0x00" slot="0x01" function="0x0"/>
    </video>
    <redirdev bus="usb" type="spicevmc">
      <address type="usb" bus="0" port="2"/>
    </redirdev>
    <redirdev bus="usb" type="spicevmc">
      <address type="usb" bus="0" port="3"/>
    </redirdev>
    <memballoon model="virtio">
      <address type="pci" domain="0x0000" bus="0x04" slot="0x00" function="0x0"/>
    </memballoon>
    <rng model="virtio">
      <backend model="random">/dev/urandom</backend>
      <address type="pci" domain="0x0000" bus="0x05" slot="0x00" function="0x0"/>
    </rng>
  </devices>
  <qemu:commandline>
    <qemu:arg value="-device"/>
    <qemu:arg value="nvme-subsys,id=test-subsys-1,nqn=subsys1"/>
    <qemu:arg value="-device"/>
    <qemu:arg value="nvme,serial=TESTNVME1,subsys=test-subsys-1,bus=pcie.0,addr=14"/>
    <qemu:arg value="-drive"/>
    <qemu:arg value="file=/test-nvme-image-1.img,if=none,format=raw,id=test-nvme-drive-1"/>
    <qemu:arg value="-device"/>
    <qemu:arg value="nvme-ns,drive=test-nvme-drive-1,nsid=1,physical_block_size=512,logical_block_size=512,ms=8,mset=1,pi=1"/>
    <qemu:arg value="-device"/>
    <qemu:arg value="nvme-subsys,id=test-subsys-2,nqn=subsys2"/>
    <qemu:arg value="-device"/>
    <qemu:arg value="nvme,serial=TESTNVME2,subsys=test-subsys-2,bus=pcie.0,addr=15"/>
    <qemu:arg value="-drive"/>
    <qemu:arg value="file=/test-nvme-image-2.img,if=none,format=raw,id=test-nvme-drive-2"/>
    <qemu:arg value="-device"/>
    <qemu:arg value="nvme-ns,drive=test-nvme-drive-2,nsid=1,physical_block_size=512,logical_block_size=512,ms=8,mset=1,pi=1"/>
  </qemu:commandline>
</domain>

Initial steps in the VM:

# mdadm --create --verbose /dev/md0 --level=mirror --raid-devices=2 /dev/nvme0n1 /dev/nvme1n1
mdadm: Note: this array has metadata at the start and
    may not be suitable as a boot device.  If you plan to
    store '/boot' on this device please ensure that
    your boot-loader understands md/v1.x metadata, or use
    --metadata=0.90
mdadm: size set to 101376K
Continue creating array? (y/n) y
mdadm: Defaulting to version 1.2 metadata
mdadm: array /dev/md0 started.
# mkfs.ext4 -b 4096 /dev/md0
mke2fs 1.47.0 (5-Feb-2023)
Discarding device blocks: done                            
Creating filesystem with 25344 4k blocks and 25344 inodes

Allocating group tables: done                            
Writing inode tables: done                            
Creating journal (1024 blocks): done
Writing superblocks and filesystem accounting information: done

# mv /home/ubuntu/Downloads/heic0602a.jpg /media/ubuntu/f2046595-5c5b-4e66-9a09-6d1287933c2b/
# sha256sum /media/ubuntu/f2046595-5c5b-4e66-9a09-6d1287933c2b/heic0602a.jpg
9c9bd6f4492312aa695f4a5119df9cb926b30eef7542f082e38e1d187394a12c  /media/ubuntu/f2046595-5c5b-4e66-9a09-6d1287933c2b/heic0602a.jpg

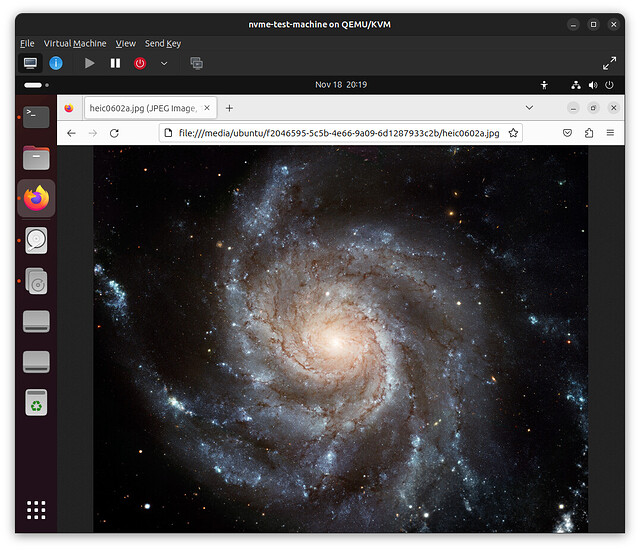
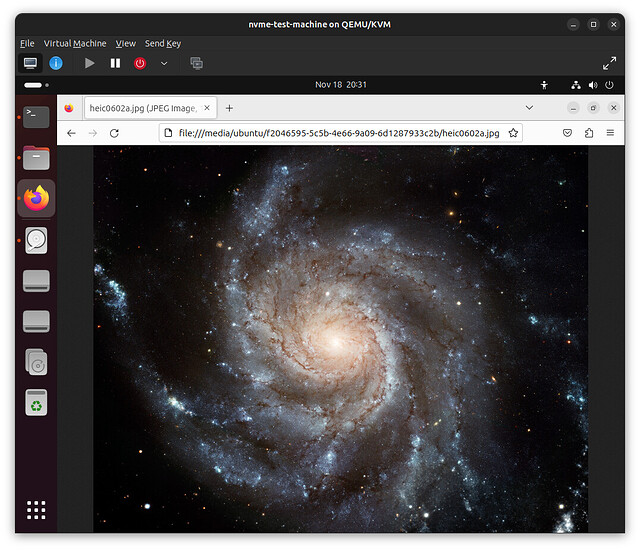
File written to the device: heic0602a.jpg (Source: European Space Agency & NASA; size: 62.1 MiB)


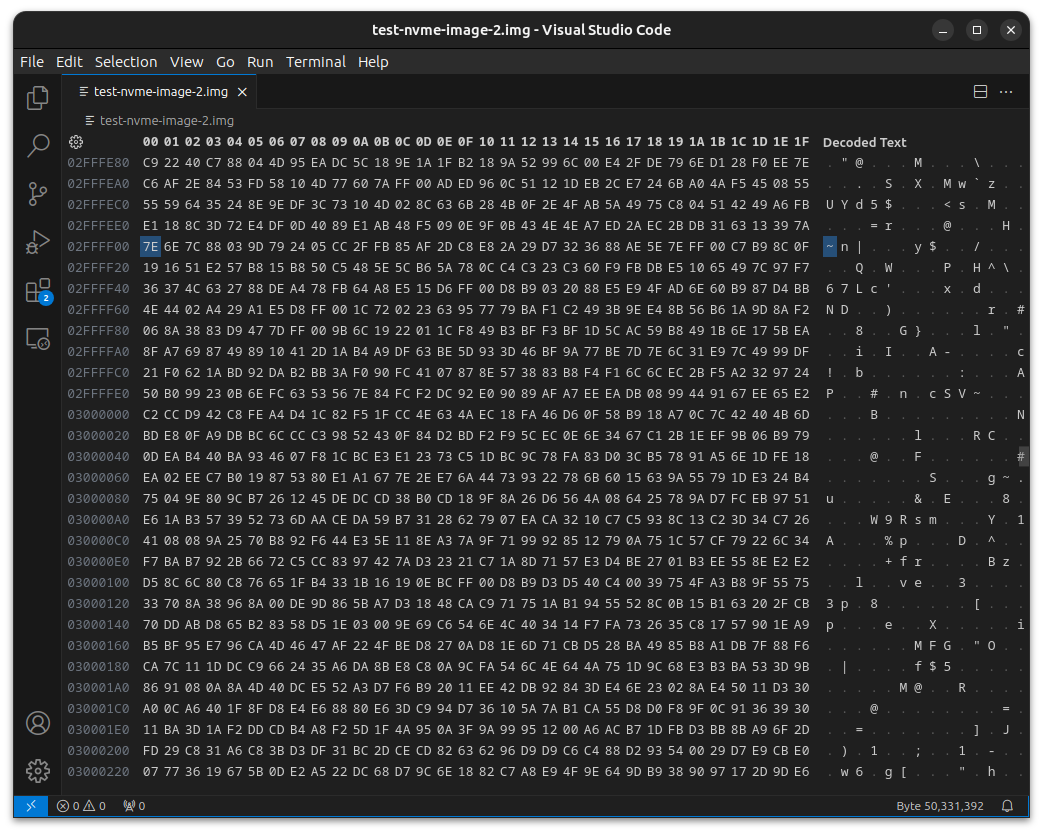
Then performed some routine data corruption on one of the devices… :wink:

Confirmed errors on the device:

# dd if=/dev/nvme1n1 of=/dev/null
dd: error reading '/dev/nvme1n1': Input/output error
98296+0 records in
98296+0 records out
50327552 bytes (50 MB, 48 MiB) copied, 0.146356 s, 344 MB/s

Remounted the RAID-1 device and opened the image in Firefox again…

# sha256sum /media/ubuntu/f2046595-5c5b-4e66-9a09-6d1287933c2b/heic0602a.jpg
9c9bd6f4492312aa695f4a5119df9cb926b30eef7542f082e38e1d187394a12c  /media/ubuntu/f2046595-5c5b-4e66-9a09-6d1287933c2b/heic0602a.jpg

No errors reading the RAID-1 device either:

# dd if=/dev/md0 of=/dev/null
202752+0 records in
202752+0 records out
103809024 bytes (104 MB, 99 MiB) copied, 0.250493 s, 414 MB/s

The RAID-1 device seem to have caught them and worked around the errors.

# mdadm --detail /dev/md0
/dev/md0:
           Version : 1.2
     Creation Time : Sat Nov 18 19:58:05 2023
        Raid Level : raid1
        Array Size : 101376 (99.00 MiB 103.81 MB)
     Used Dev Size : 101376 (99.00 MiB 103.81 MB)
      Raid Devices : 2
     Total Devices : 2
       Persistence : Superblock is persistent

       Update Time : Sat Nov 18 20:30:37 2023
             State : clean 
    Active Devices : 2
   Working Devices : 2
    Failed Devices : 0
     Spare Devices : 0

Consistency Policy : resync

              Name : ubuntu:0  (local to host ubuntu)
              UUID : f5ee4201:330bcd7f:251cd01b:7cb1cdc8
            Events : 17

    Number   Major   Minor   RaidDevice State
       0     259        3        0      active sync   /dev/nvme0n1
       1     259        1        1      active sync   /dev/nvme1n1
# grep raid1 /var/log/syslog
2023-11-18T19:58:05.907158+00:00 ubuntu kernel: [  549.452535] md/raid1:md0: not clean -- starting background reconstruction
2023-11-18T19:58:05.907172+00:00 ubuntu kernel: [  549.452538] md/raid1:md0: active with 2 out of 2 mirrors

A repair fixes things :slightly_smiling_face::

# echo repair > /sys/block/md0/md/sync_action
# dd if=/dev/nvme1n1 of=/dev/null
204800+0 records in
204800+0 records out
104857600 bytes (105 MB, 100 MiB) copied, 0.239977 s, 437 MB/s


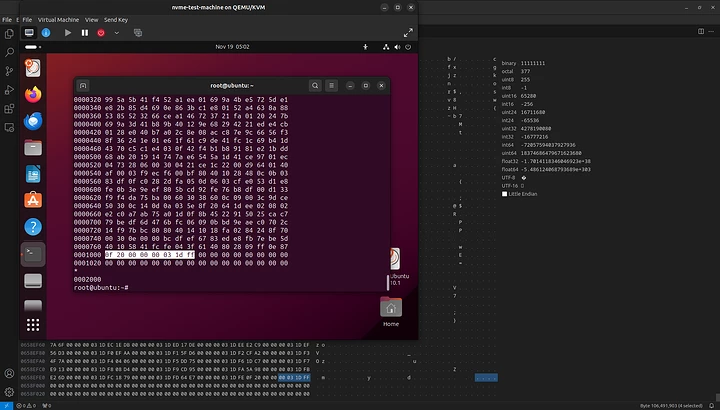
Using a command like nvme read /dev/nvme0n1 -s 12345 -c 0 -z 4104 | od -t x1 allows for reading any range of the NVMe device, where -s 12345 is the sector offset, -c 0 is the zero-based count of the blocks to read from that offset, and -z 4104 is the data buffer size. The -z flag is very misleading, because specifying the data size without including the metadata length effectively strips from the output the metadata that the device is actually recording.

I was able to verify this behavior in two ways.

Here is the nvme read command being run within the VM and showing that the output matches the metadata found in the hex editor on the host. (It’s the last 8 bytes.)

After I finally got the Optane P4800X working again, I tried to read a sector that I knew would have data (and thus non-zero metadata if T10-PI was being recorded).

So it’s apparently working on actual hardware although I don’t have a way to deliberately corrupt the data like I could with the emulated NVMe devices (nor would I want to attempt it on this non-disposable hardware :face_holding_back_tears:).

3 Likes

@LiKenun amazing work, again!

I’m happy to report that I was able to reproduce a similar situation but using dm-integrity instead of T10-PI. MD RAID1 was able to detect and fix the minor corruption that I injected. This isn’t surprising in light of your experiments but it is reassuring.

Here’s what I did to set up my experiment. These commands were run in a Fedora 39 VM with two small virtual disks attached (separate from the boot disk), vdb and vdc

fdisk /dev/vdb # created a GPT partition table, made a single partition
fdisk /dev/vdc # same
integritysetup format /dev/vdb1 --sector-size 4096
integritysetup format /dev/vdc1 --sector-size 4096
integritysetup open /dev/vdb1 int1
integritysetup open /dev/vdc1 int2
mdadm --create /dev/md0 -n 2 -l 1 /dev/mapper/int[12]
mkfs.ext4 /dev/md0
mount -t ext4 /dev/md0 /mnt
echo "THIS IS A TEST OF DM-INTEGRITY ON RAID0 ON LINUX" > /mnt/test.txt
sync

Then the actual experiment: I stopped the raid array and closed the dm-integrity devices. I used xxd, vim, xxd -r to change the first two letters of the string in that file to their next ascii counterparts. Then I re-opened the integrity devices, and re-assembled the RAID array. I could cat the text file and the content came back correct. I saw a checksum mismatch message in dmesg, from dm-integrity.

Not being super familiar with md, I did the same thing that you did: echo repair > /sys/block/md0/md/sync_action. I powered off the VM some time later, and inspecting the two virtual disks, the corruption that I injected was fixed. I don’t know if it was the repair command that I issued or if md automatically fixed the corrupt section when I read it, I foolishly didn’t check in between performing the two actions.

But it looks like this whole setup works with dm-integrity too!

2 Likes

TL;DR from this whole thread:

  • Both dm-integrity and T10-PI work correctly in Linux, including in conjunction with md RAID1, to provide end-to-end data checksumming.
  • If you use dm-integrity, you don’t need any special devices, but keep journalling on and accept the ~50% hit to write performance (-> use NVME for less pain)
  • If you use T10-PI, you need devices that support it, and do your own tests if not using the “4096+8” configuration (see @LiKenun’s post above)… we’re not sure at the moment whether the issues in other configurations were the fault of Linux or of qemu.

I checked the raw disk image a few times, and MD-RAID doesn’t write the correction to the corrupt disk. Only after echoing 'repair' to the block device’s ./md/sync_action did I see the patch of 0s get fixed.

You’d have to make this repair a cronjob to keep the disks in tip-top shape, or it’d snowball into something unrecoverable.

1 Like