Welcome to my blog. It’s in progress and the project is not finished yet. Mainly because I lack in parts and china is far away… .
So the motivation behind this project is replacing an old power hungry radio “tower” for a modern internet radio with touchscreen and remote control. There is also Plex server music streaming which I will be using.
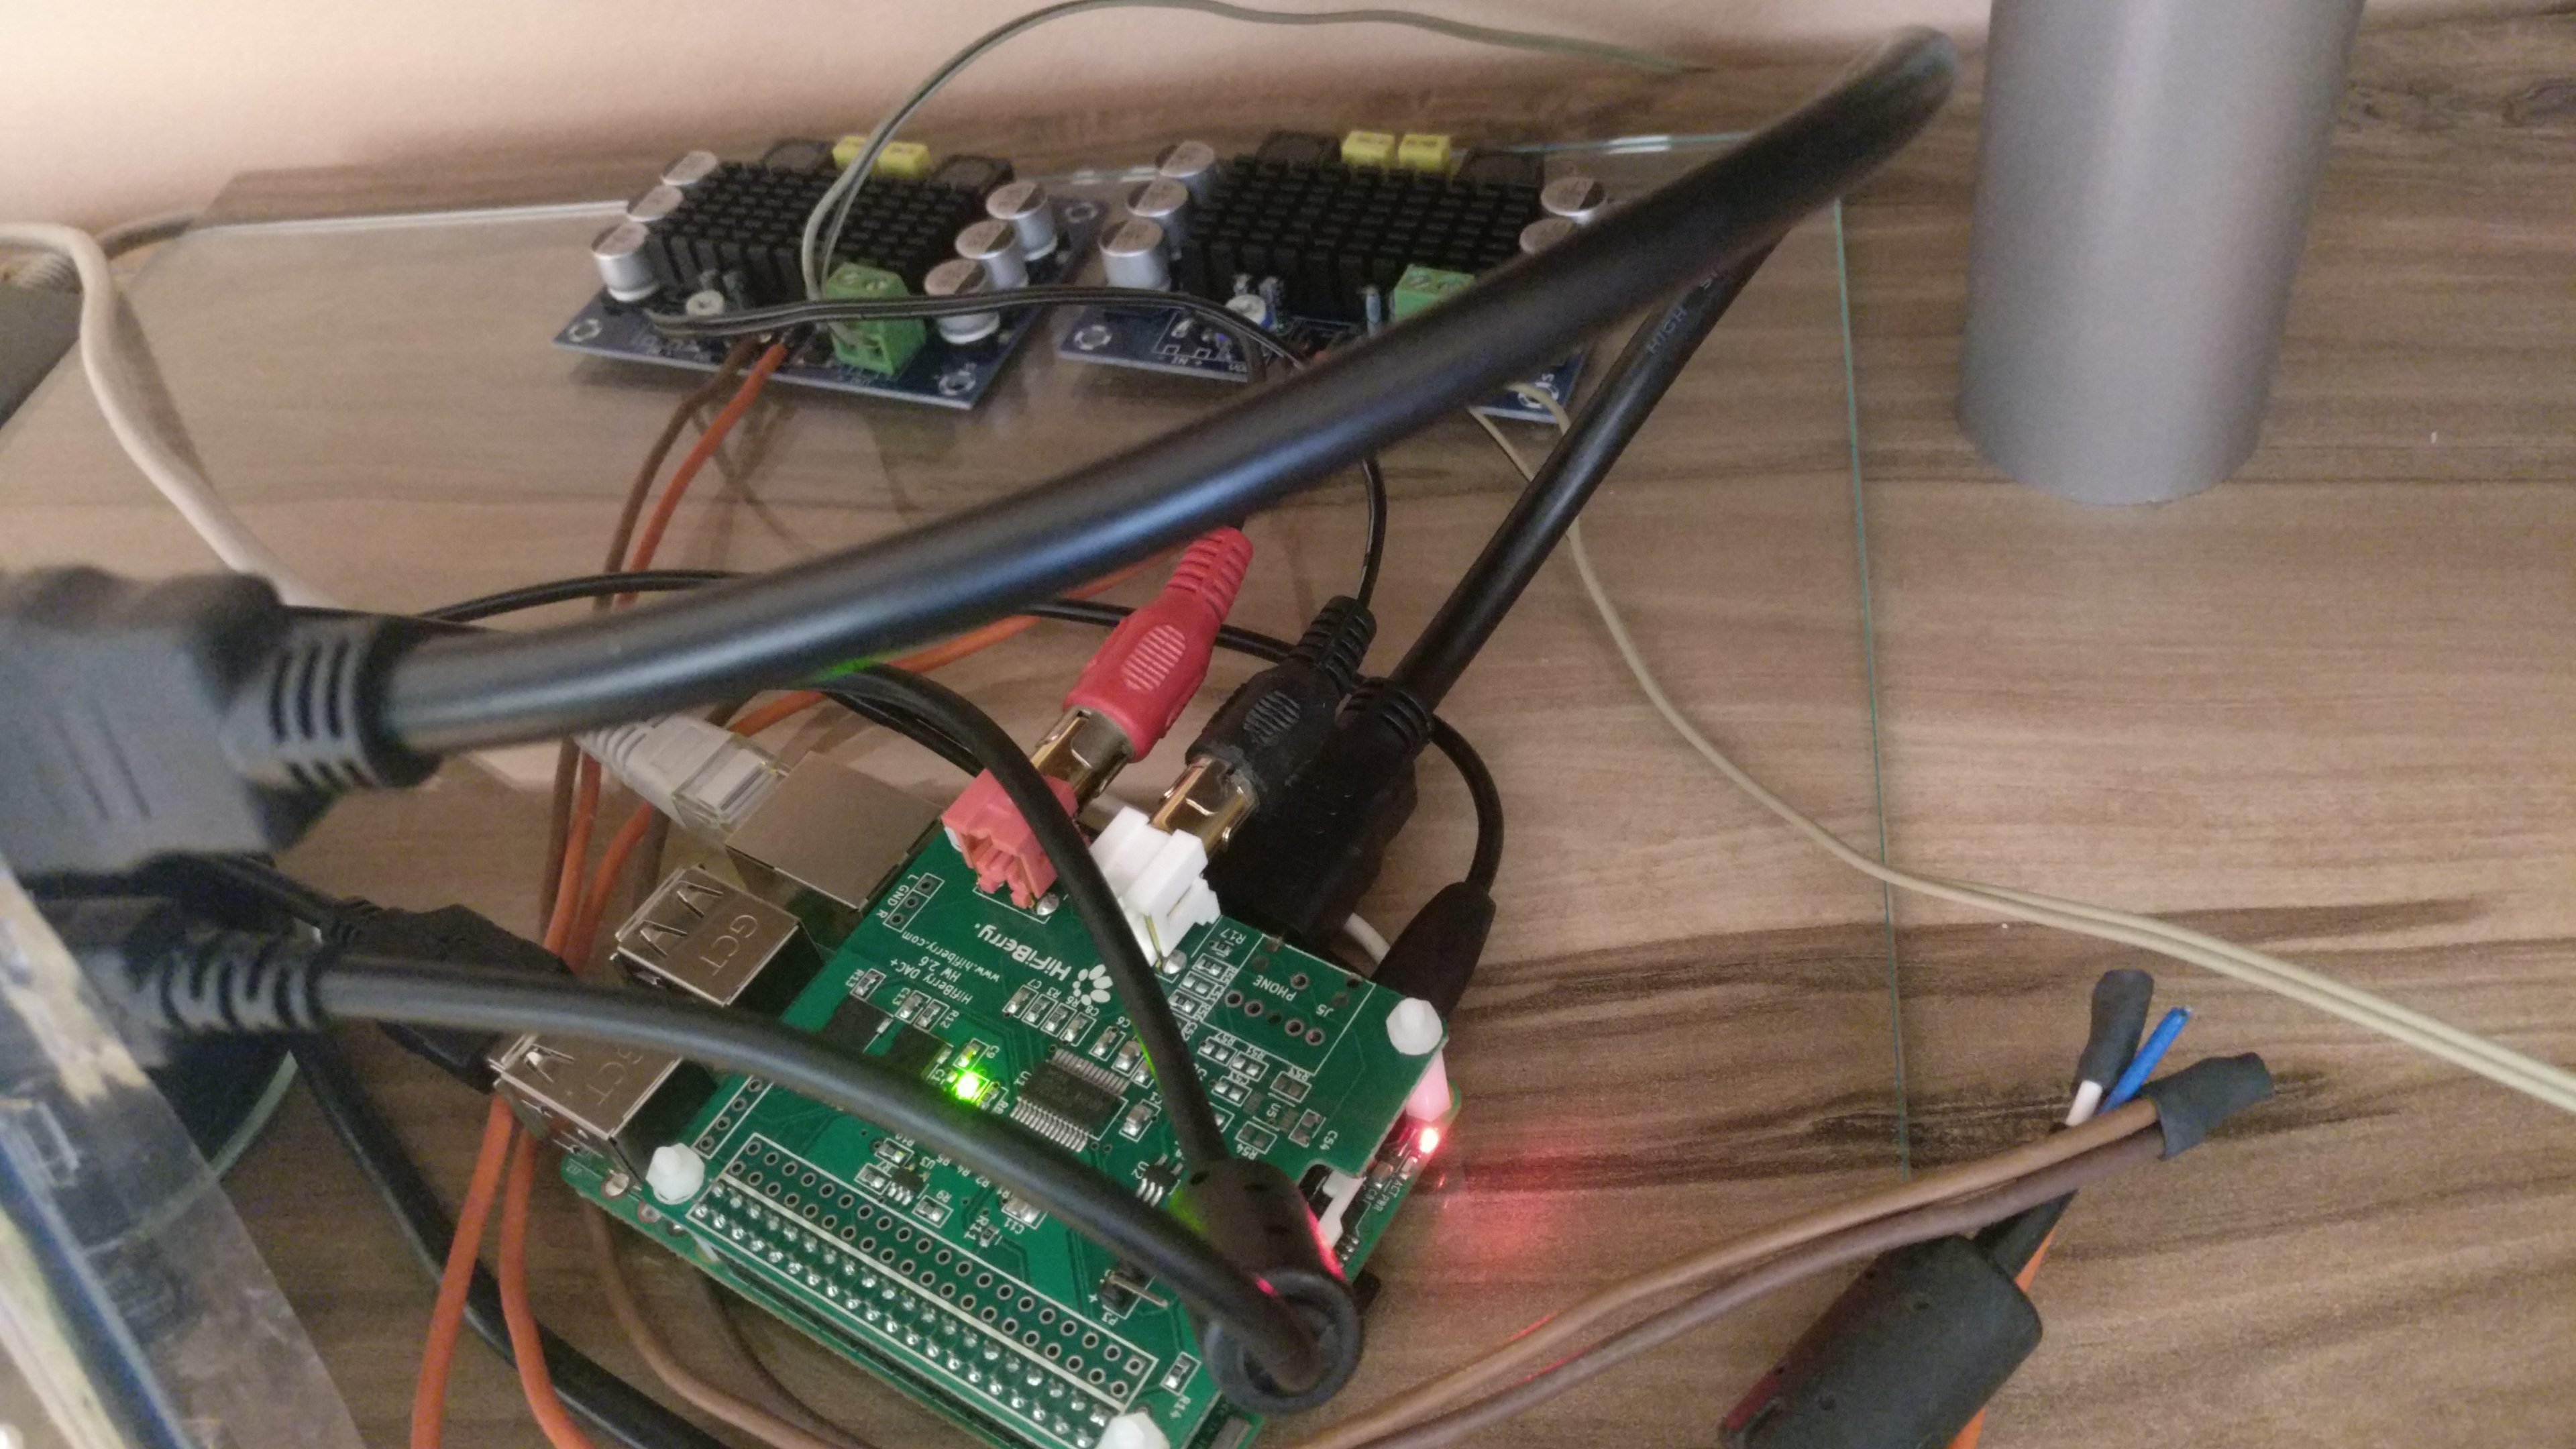
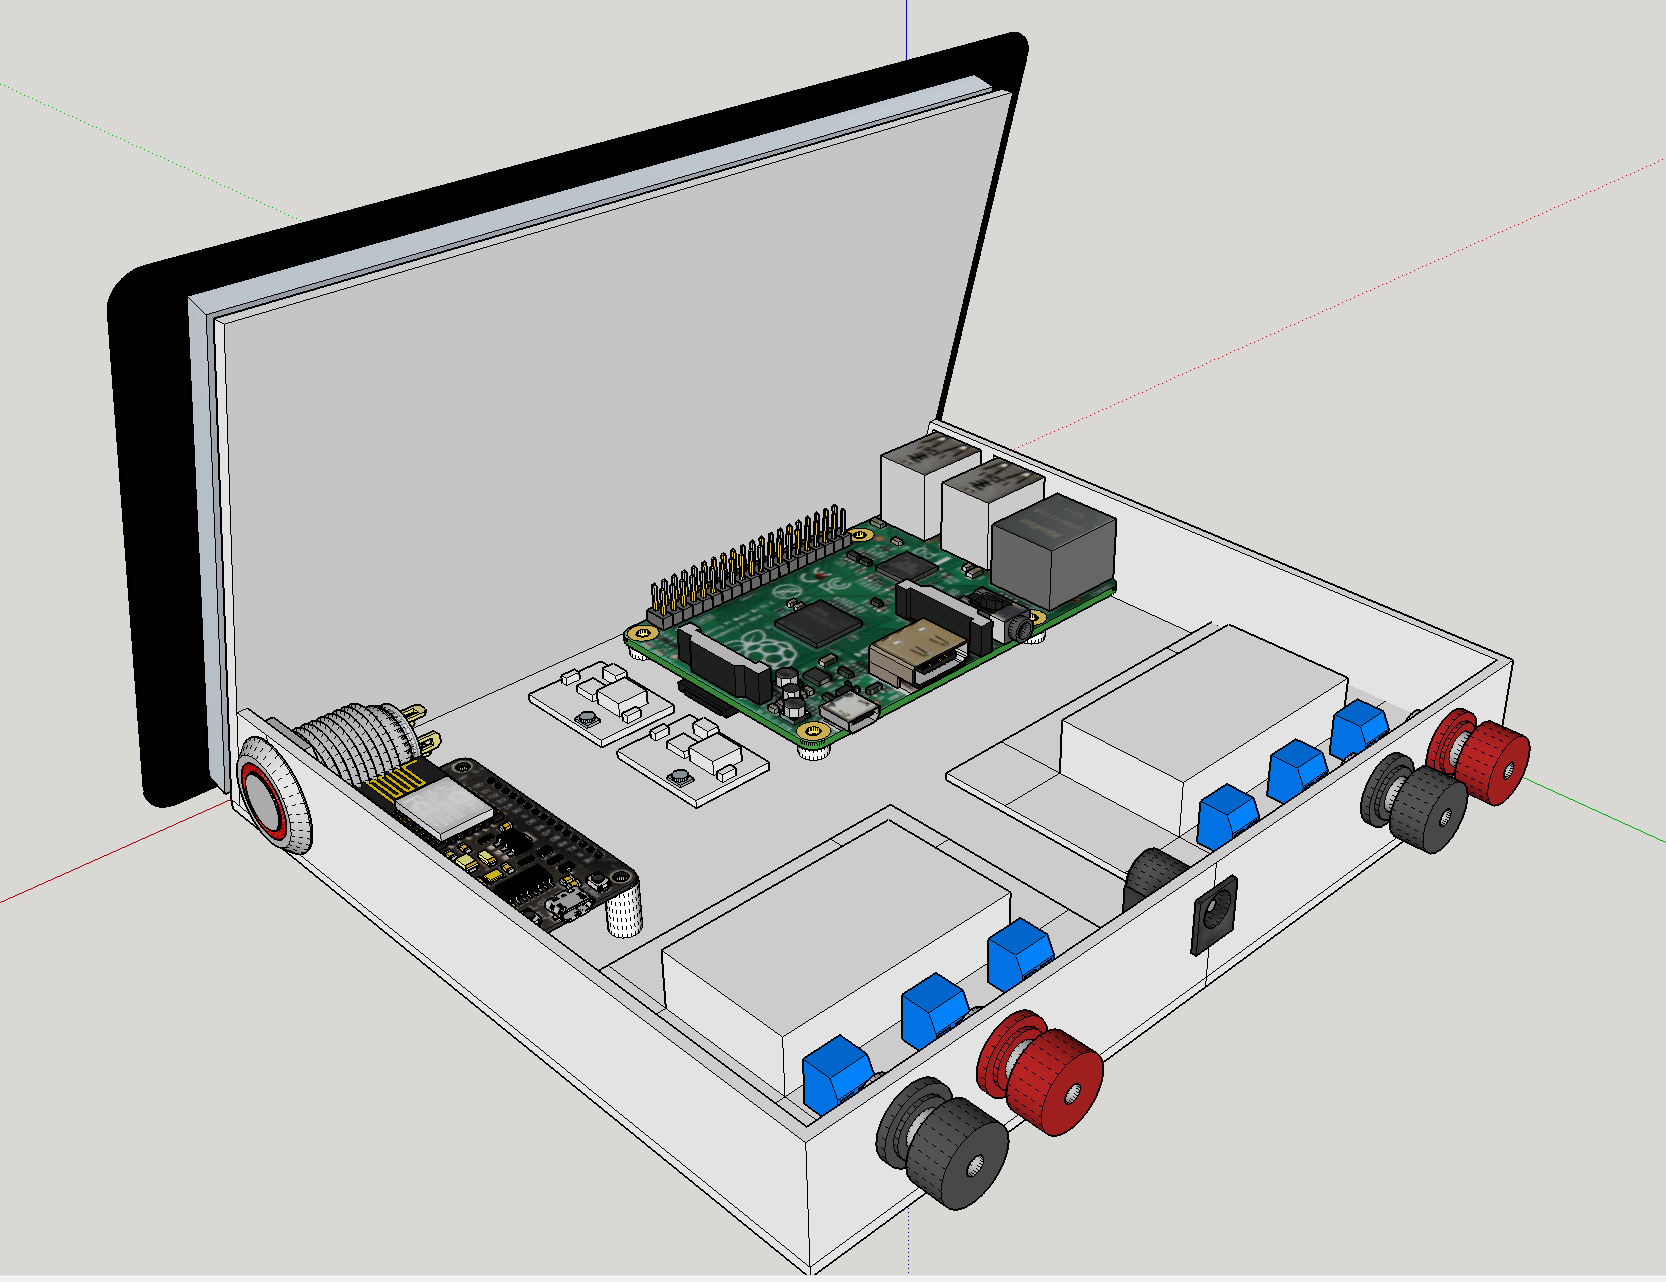
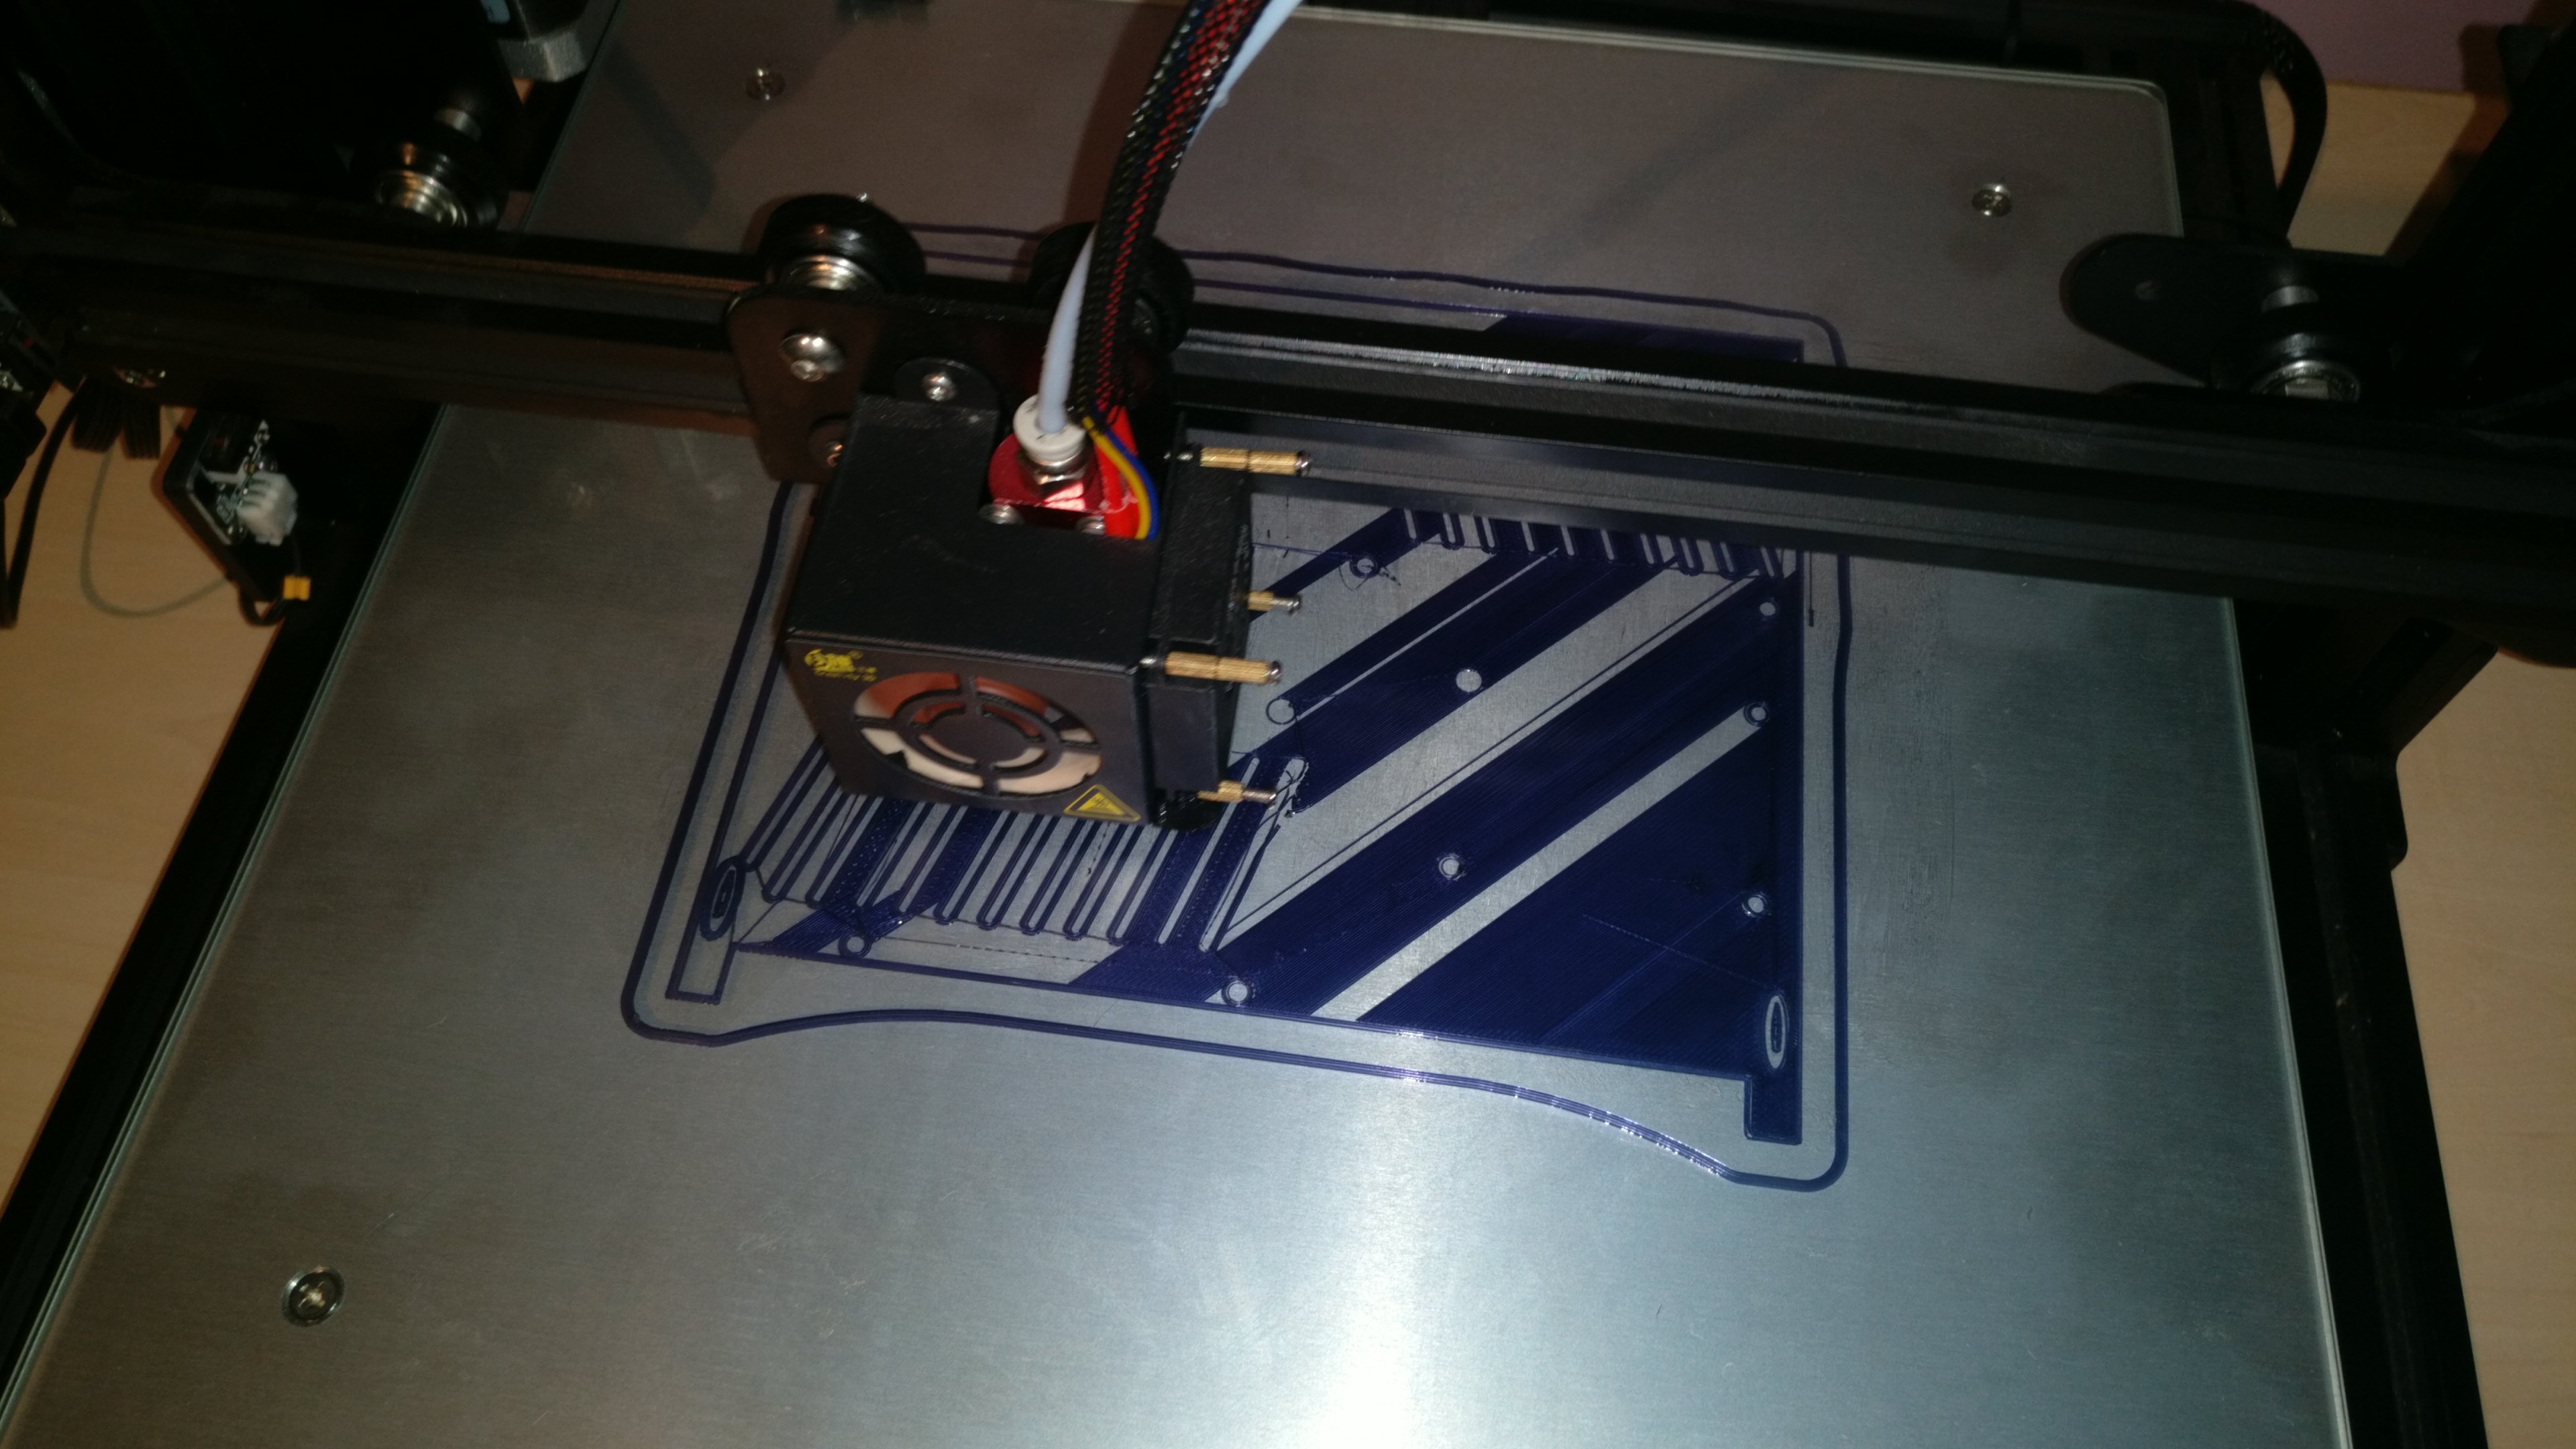
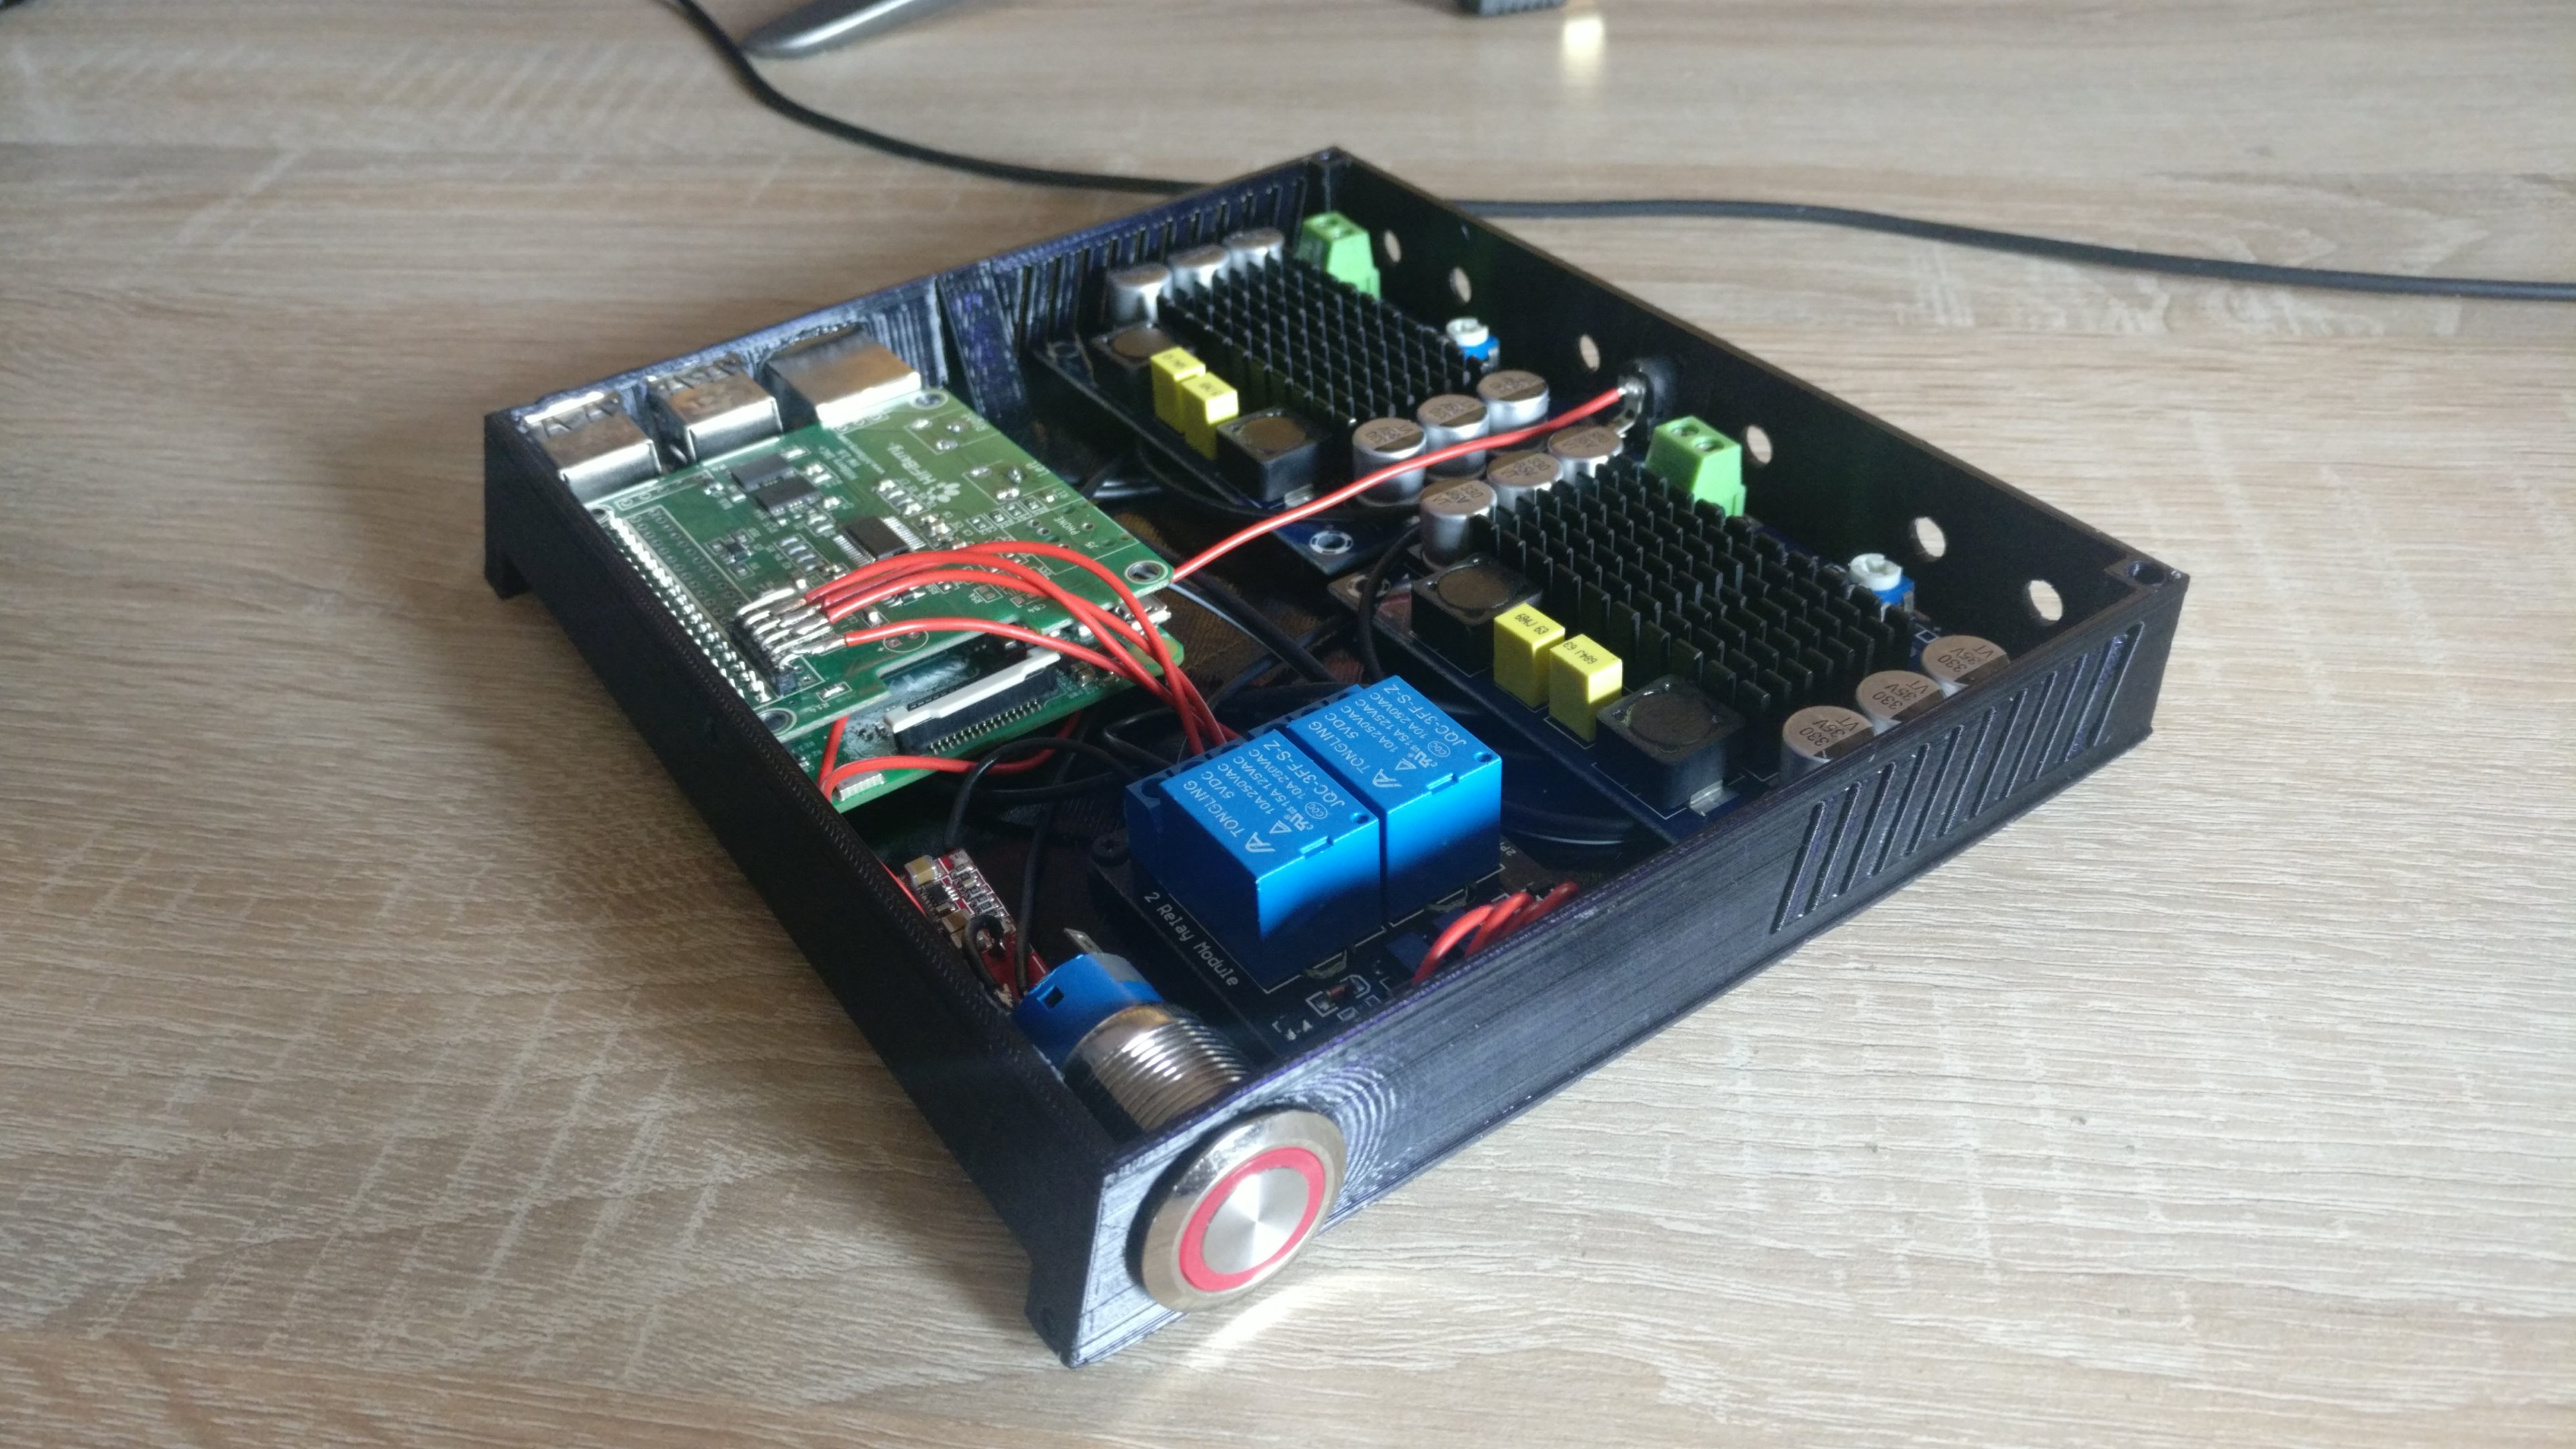
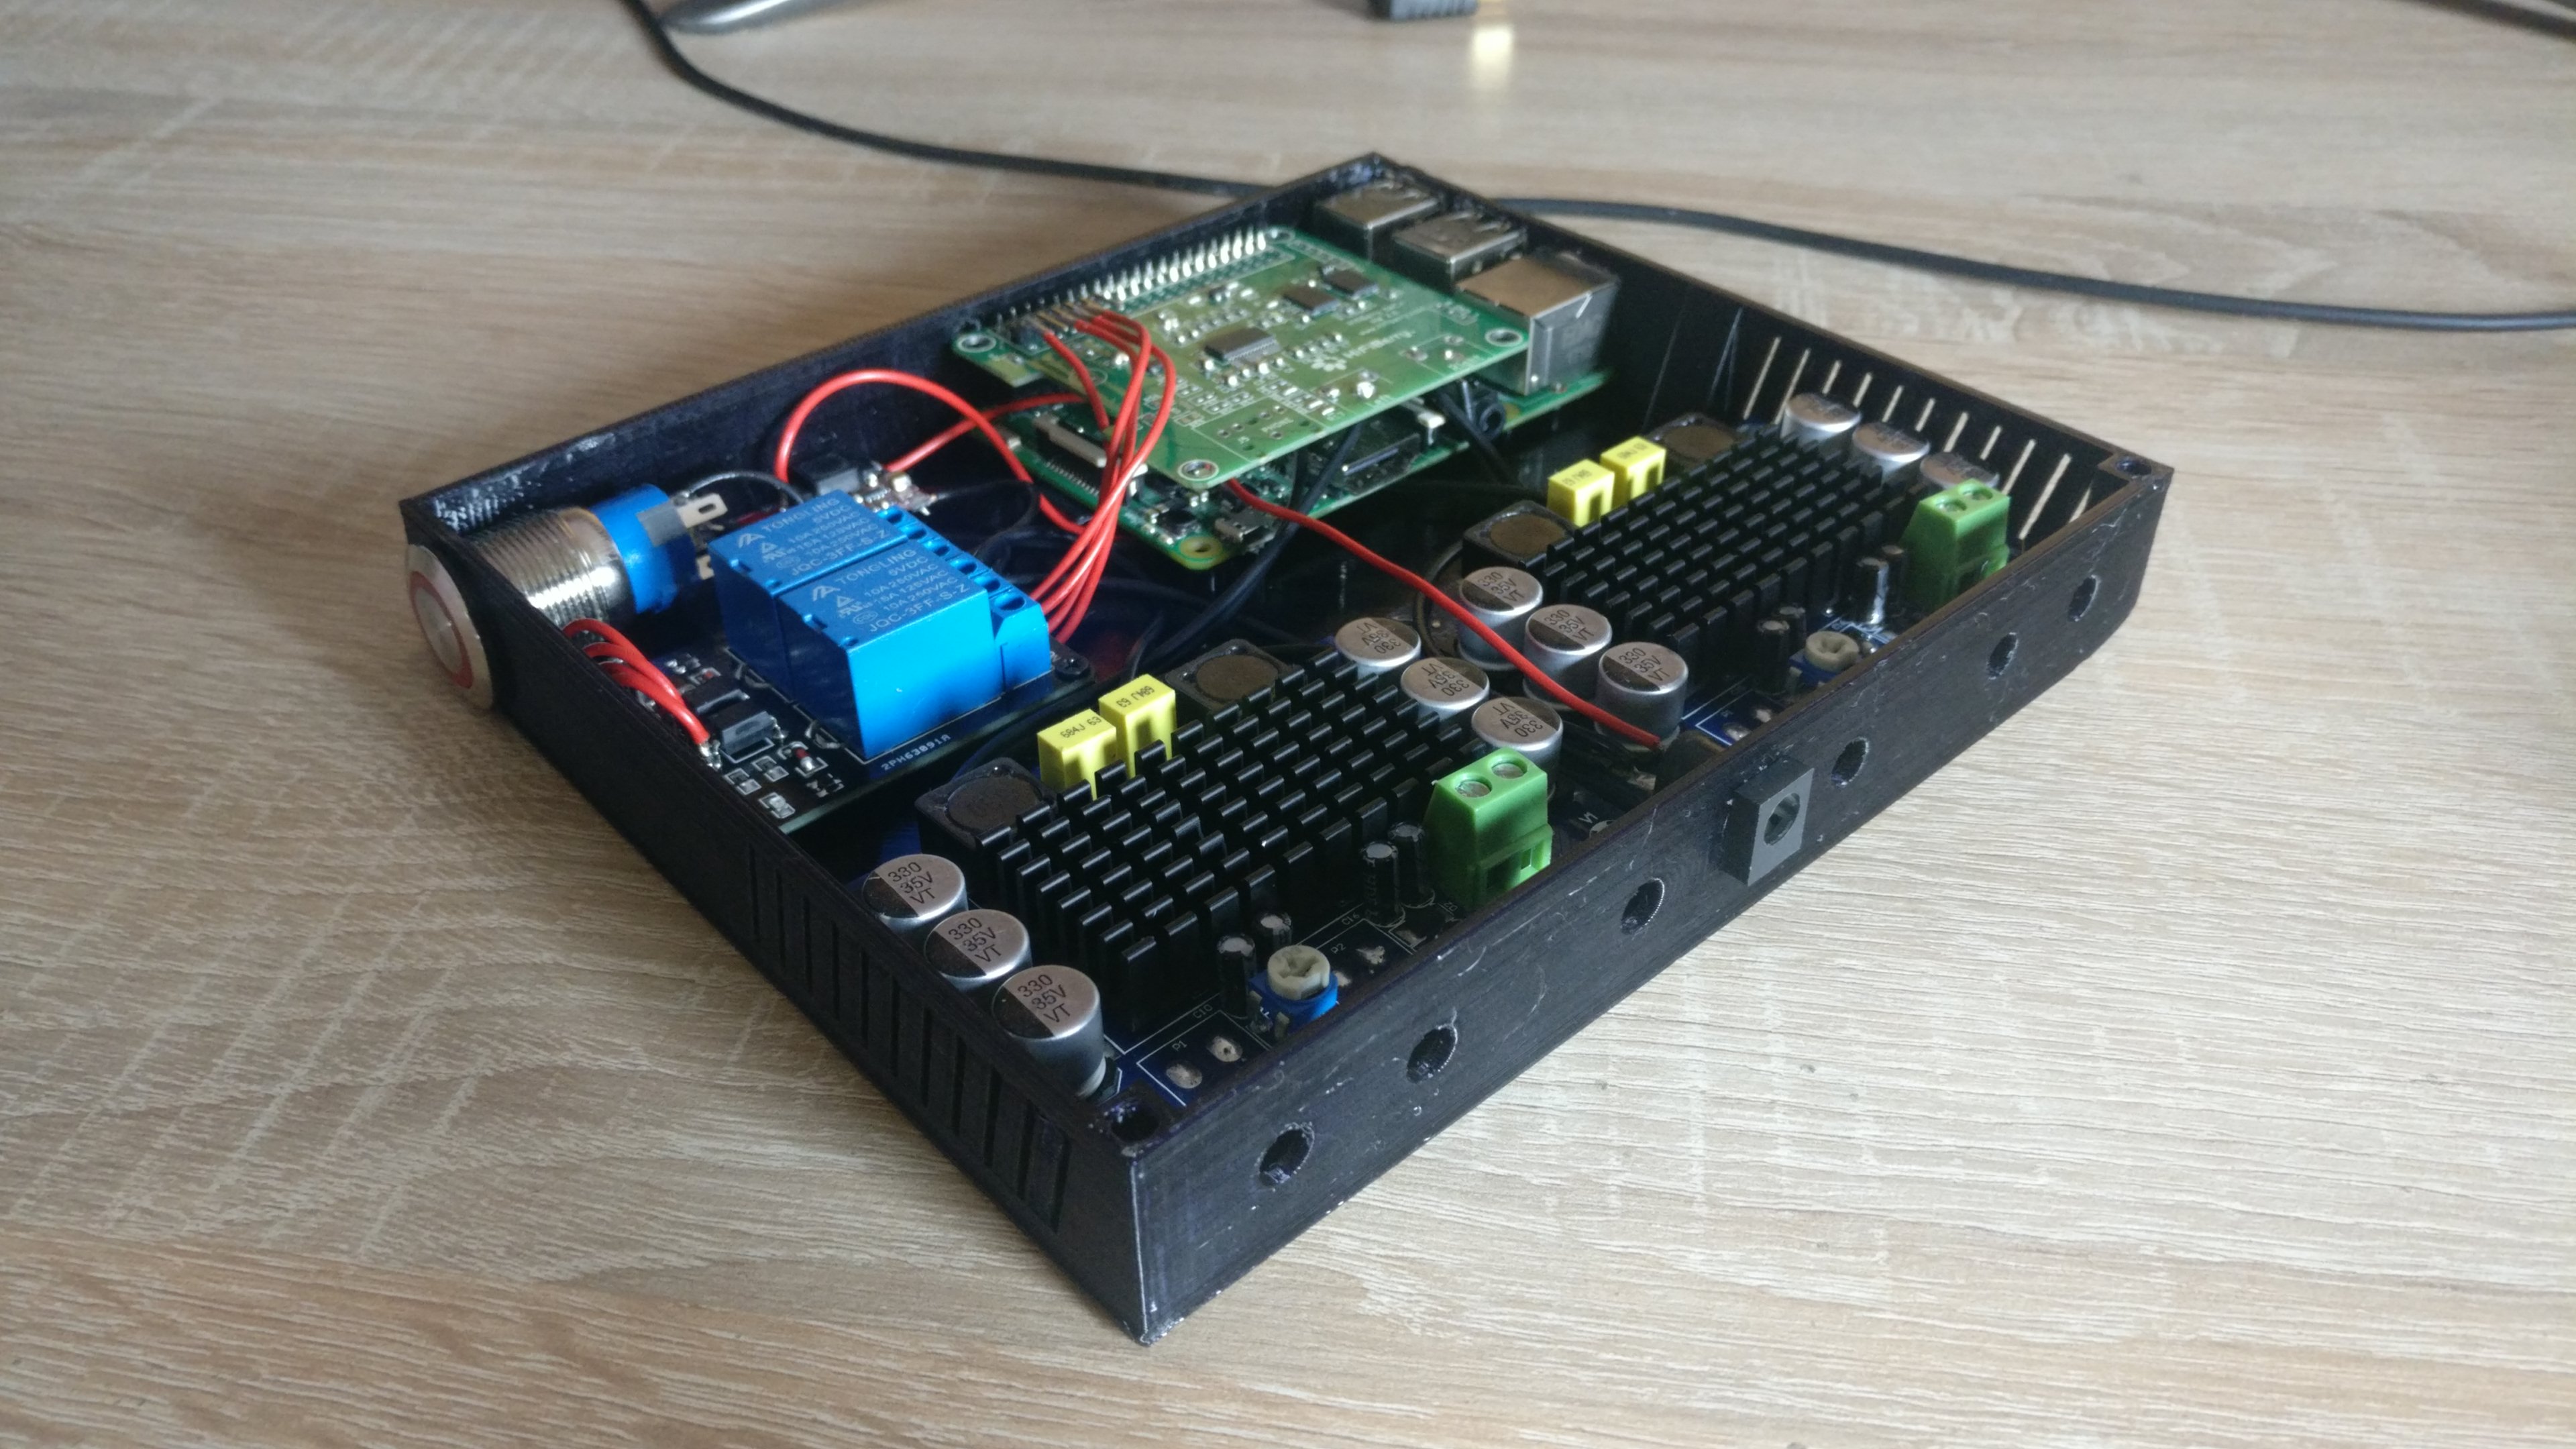
I am actually far into the project. Everything is already connected and works. But it’s just a mess because I can’t print the housing without measuring the connectors first (Banana, RCA, Power, Button switch…).
What I have:
Raspberry Pi 3
HiFiBerry DAC+ pro
NodeMCU
Waveshare 7 inch 1024x600 Capacitive
2x TPA3116 D2 TPA3116DA DC 12V-24V 100W Mono Channel
Well stuff still didn’t arrived so I threw in my cheap stepdown converter to test out. I have to say to myself this looks good. I am thinking of putting plexiglass on top to show the internals. Only part that I am worried is the HDMI cable. I bought an angled ribbon connector and cable. It’s slim and small but the worst case scenario is cutting the top to get the ribbon cable through if it can’t be squeezed inside. The next update will probably be the finished product. Hopefully soon.
I am planning a project out right now that is damn near identical. Awesome. I havent ordered anything yet. Might just copy yours if you dont mind, i am going for a case that i am making out of Mahogany, Teak, and Mango (all trees in my yard), already have the boards cut. Thats as far as I have got though. Keep it up, looking great! Will post with more details soon.
Case is printed and again everything works wired up buuut the 24v to 5v step down converter even though rated at 3A is such garbage to the point the rpi 3 is starting to lag and has under voltage warnings. I bought a new one hope it’s gonna work:
When It arrives sadly probably a month from now, I will update and upload everything so that it’s easy to follow.
I encourage copying wholeheartedly. That’s my intent.
Hello there! Did a very similar project. I used a HiFiBerry AMP2 along with a LEICKE 90W Power supply , a standard raspberrypi touch display and two old JBL control one. Also used Volumio, had some setup troubles there. Be careful with your updates and remember to choose the right driver (if anyone has troubles I will look it up, but I remember it didn’t seem awfully logically to me).
Just for encouragement: It sounds much better than most available standard internet radios and is easily loud enough for 30 qm² or so.
As a bonus, I used the light switch for turning it off and on. It takes a minute or so to boot, at least we’re not stuck with our mostly shitty (edit: local) stations.
I have three Internet radios. One died. One intermittently refuses to connect to WiFi and only one is reliable … for the time being. Nice sounding off the shelf Internet radios don’t really seem to be a thing anymore.
Been down exactly the same road, that’s why I chose to go with a diy-solution.
The most important decision is probably whether you want to use the built-in 3,5" jack of the raspberry and the usb power connection (it’s good enough for a bathroom or similar) or you want to use passive speakers.
For the latter, you’ll need to consider which speakers and which power supply to use.
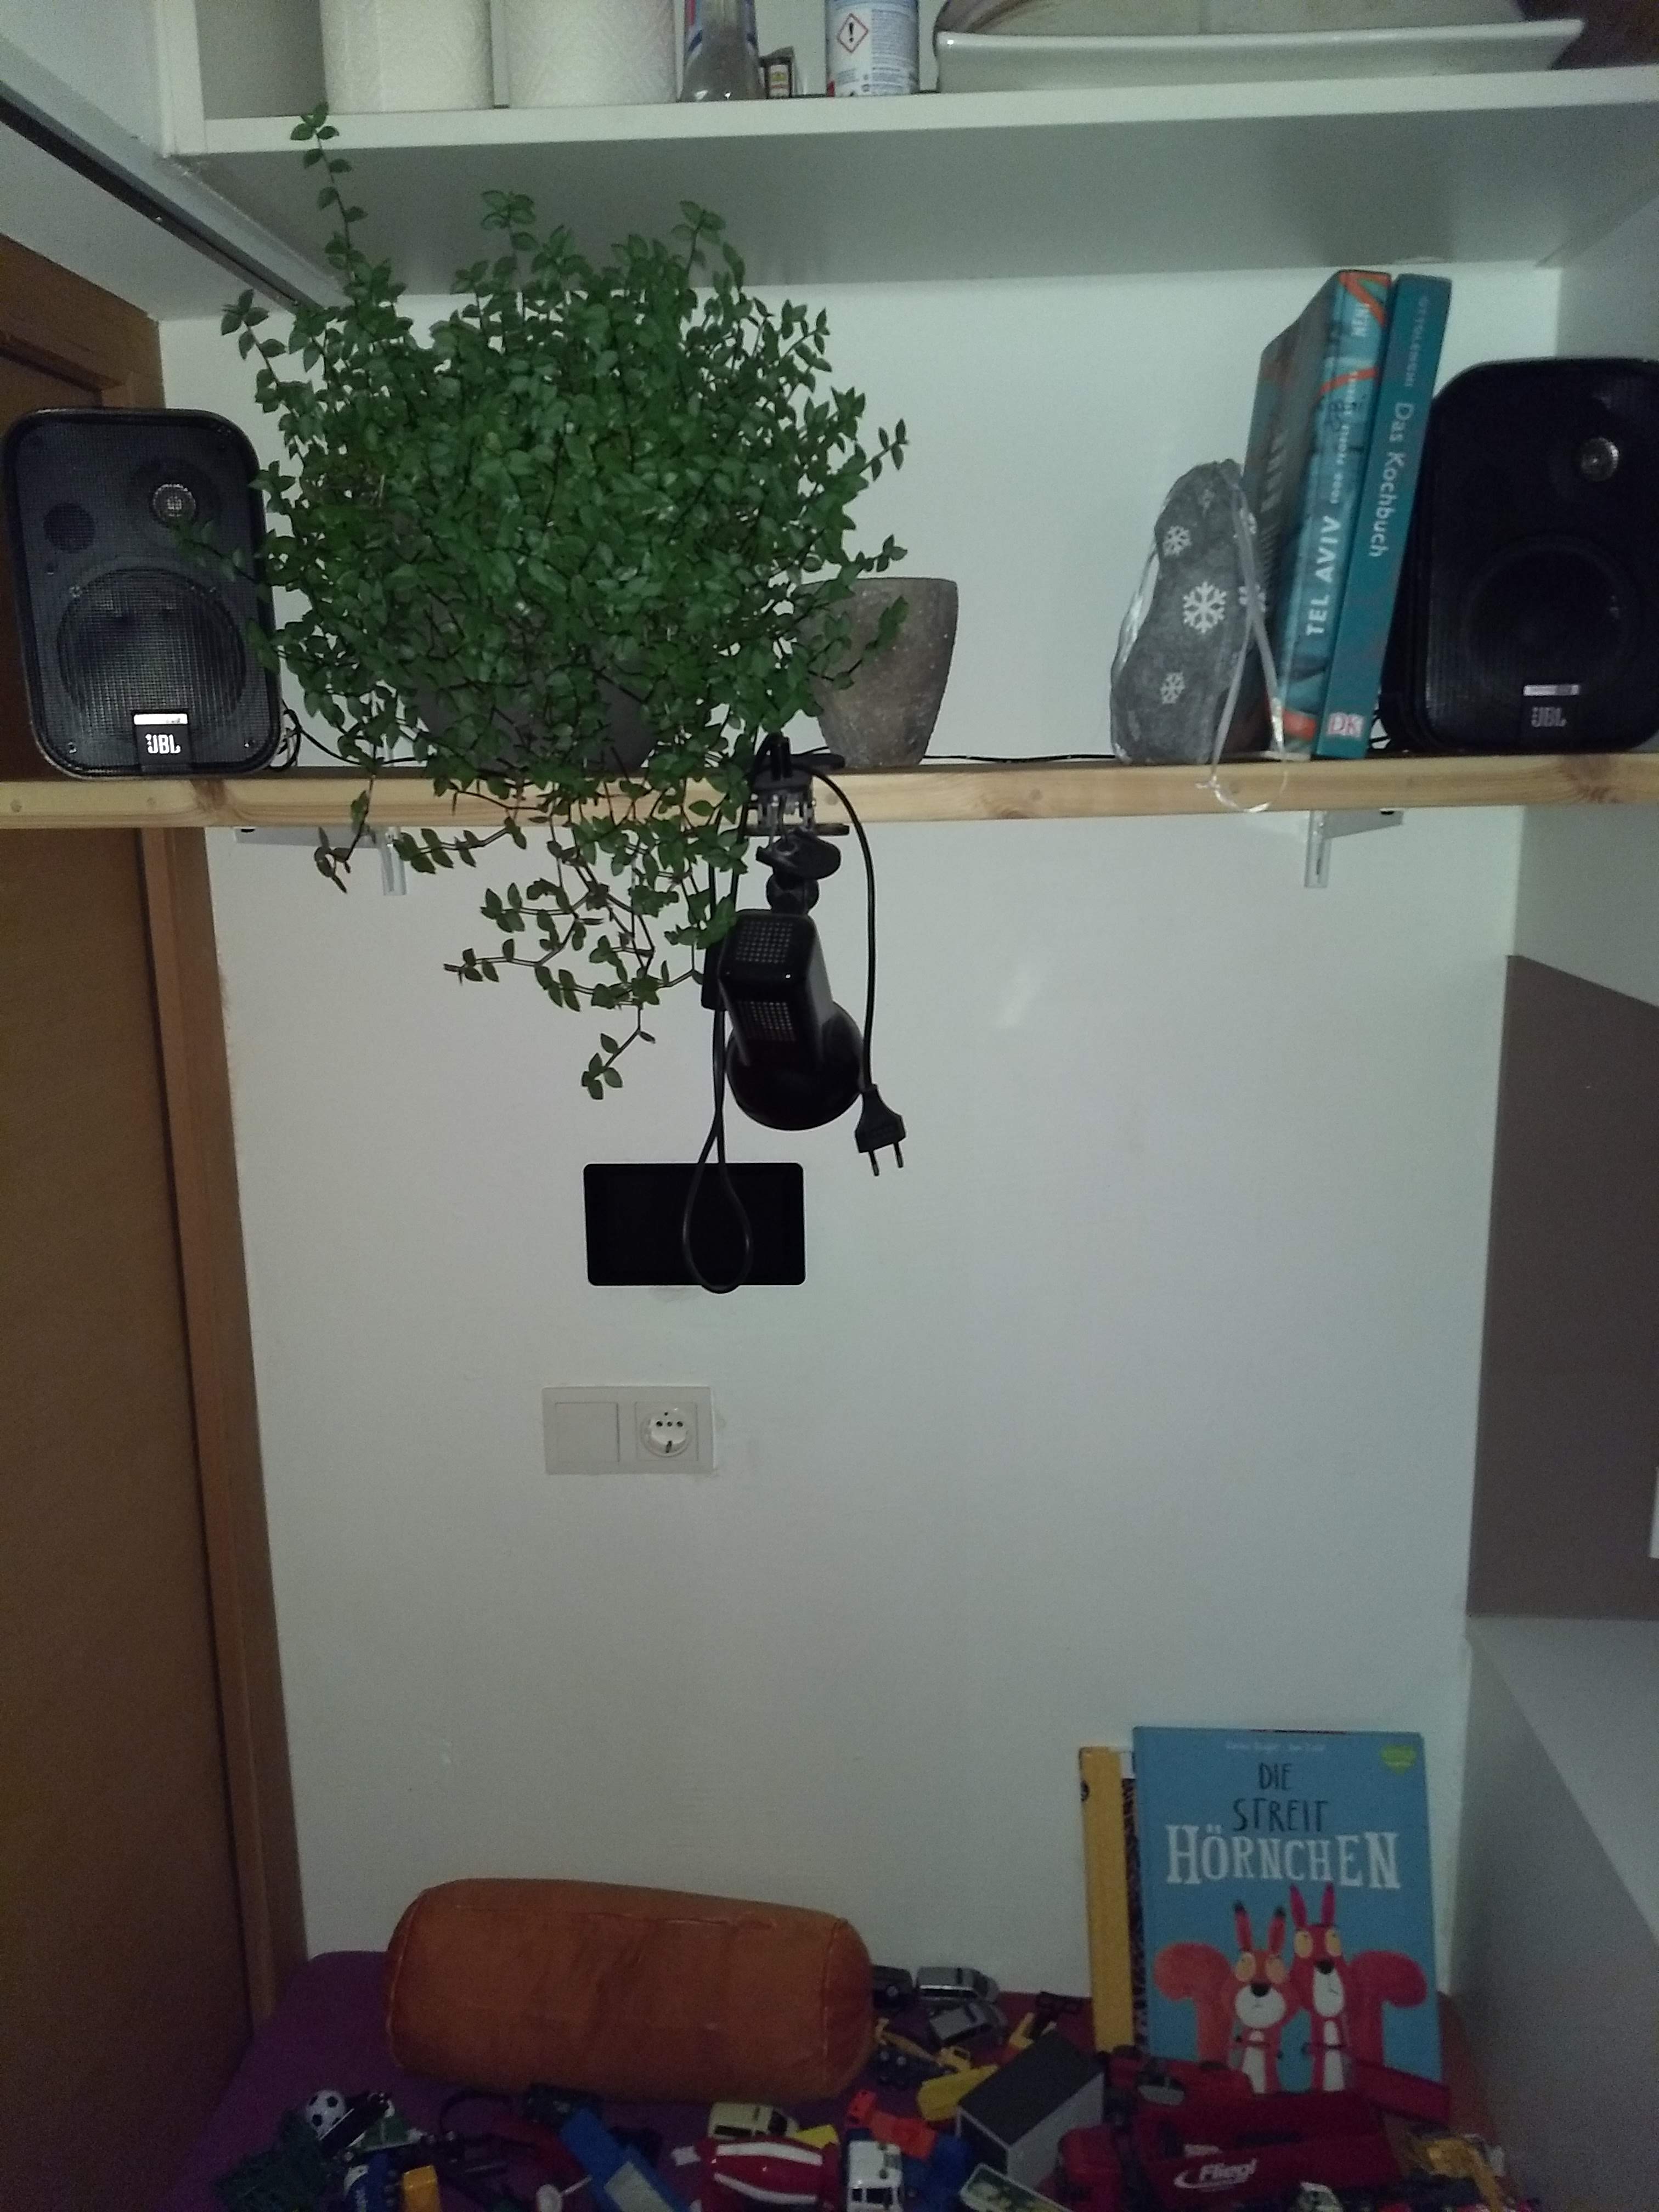
Also the housing might be an issue, I just drilled a hole out of the wall and put the raspberry and the amp in there. Should anyone care about the inner workings, I’ll post a new photo. I used magnets to fix the pi along with the display to a plastic case sitting inside the wall.
Nice setup there. I just need to get this god damn stepdown converter, an angled hdmi ribbon cable and a day of work to get everything together. But the way things are being delivered from china it’s gonna take at least another week.
Also any suggestions what speakers I can buy? I am from Europe. Again this is now a 100W stereo amp.
Klipsch, Polk, and Yamaha are usually good speakers. Edifier is good, but I don’t know if they make passive speakers. Wharfedale is good too, but can be pricey.