Didn’t think I would ever do 1 loop, let alone 2, but the moment I finished Lucid Visions, I said “Why did I do this to myself and when can I do it again?!” I also told myself I was skipping this generation of Threadripper since it needed it new motherboard. I saw a deal on a complete system with a 3970X and Zenith II Extreme for cheaper than buying the components themselves and jumped on it. Pulled the board and chip, bought the Enthoo 719, and here we are.
PC Parts:
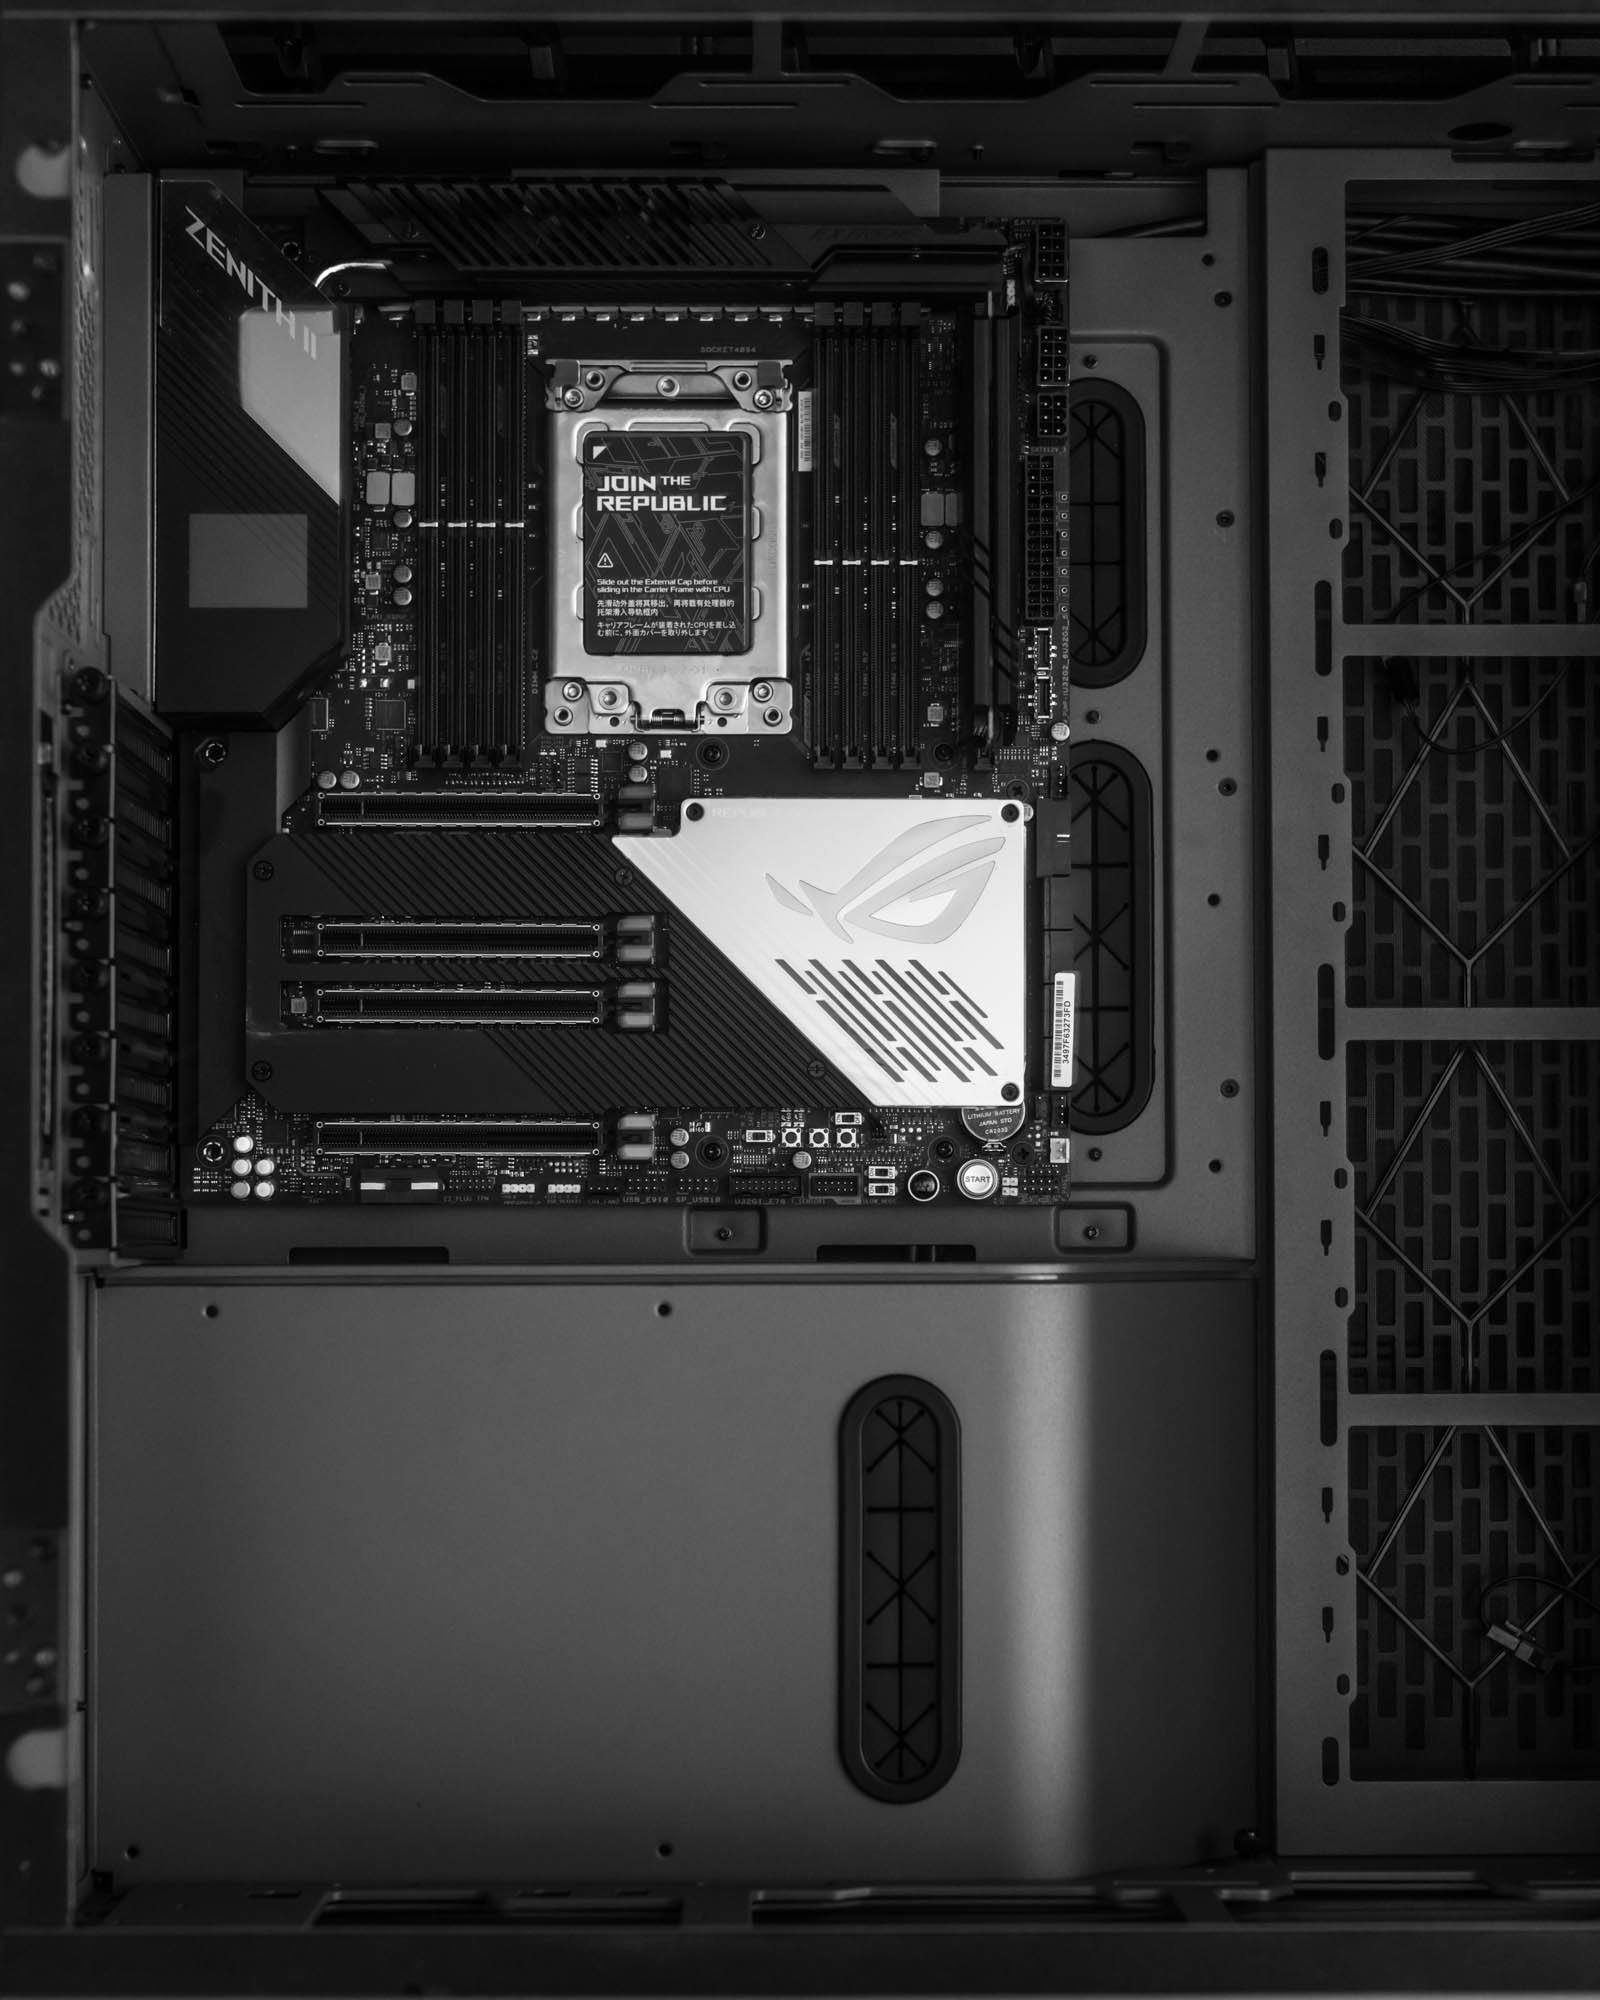
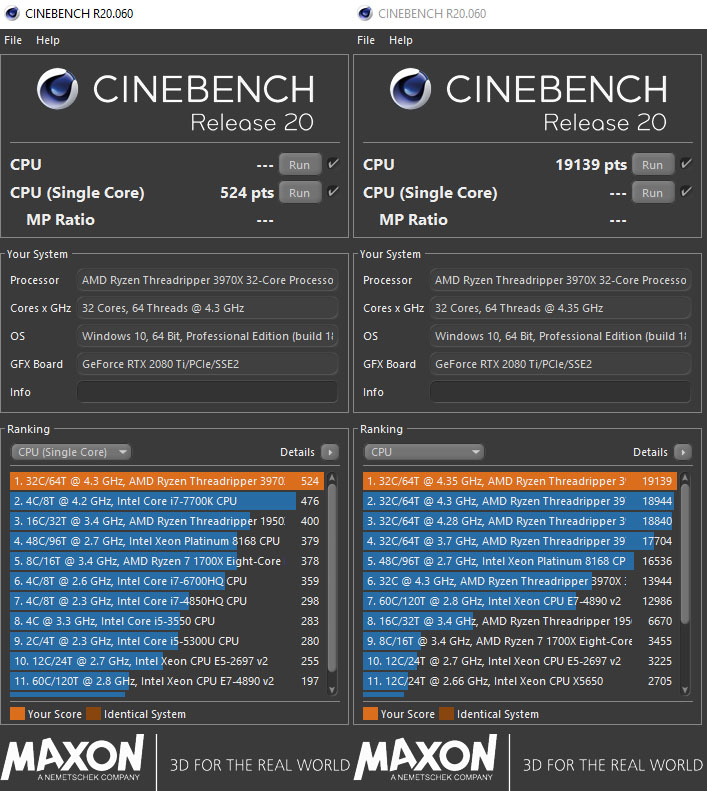
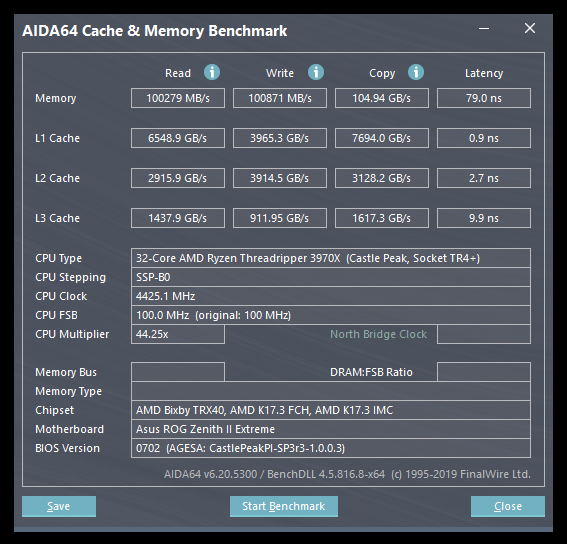
AMD Ryzen Threadripper 3970X 32-Core
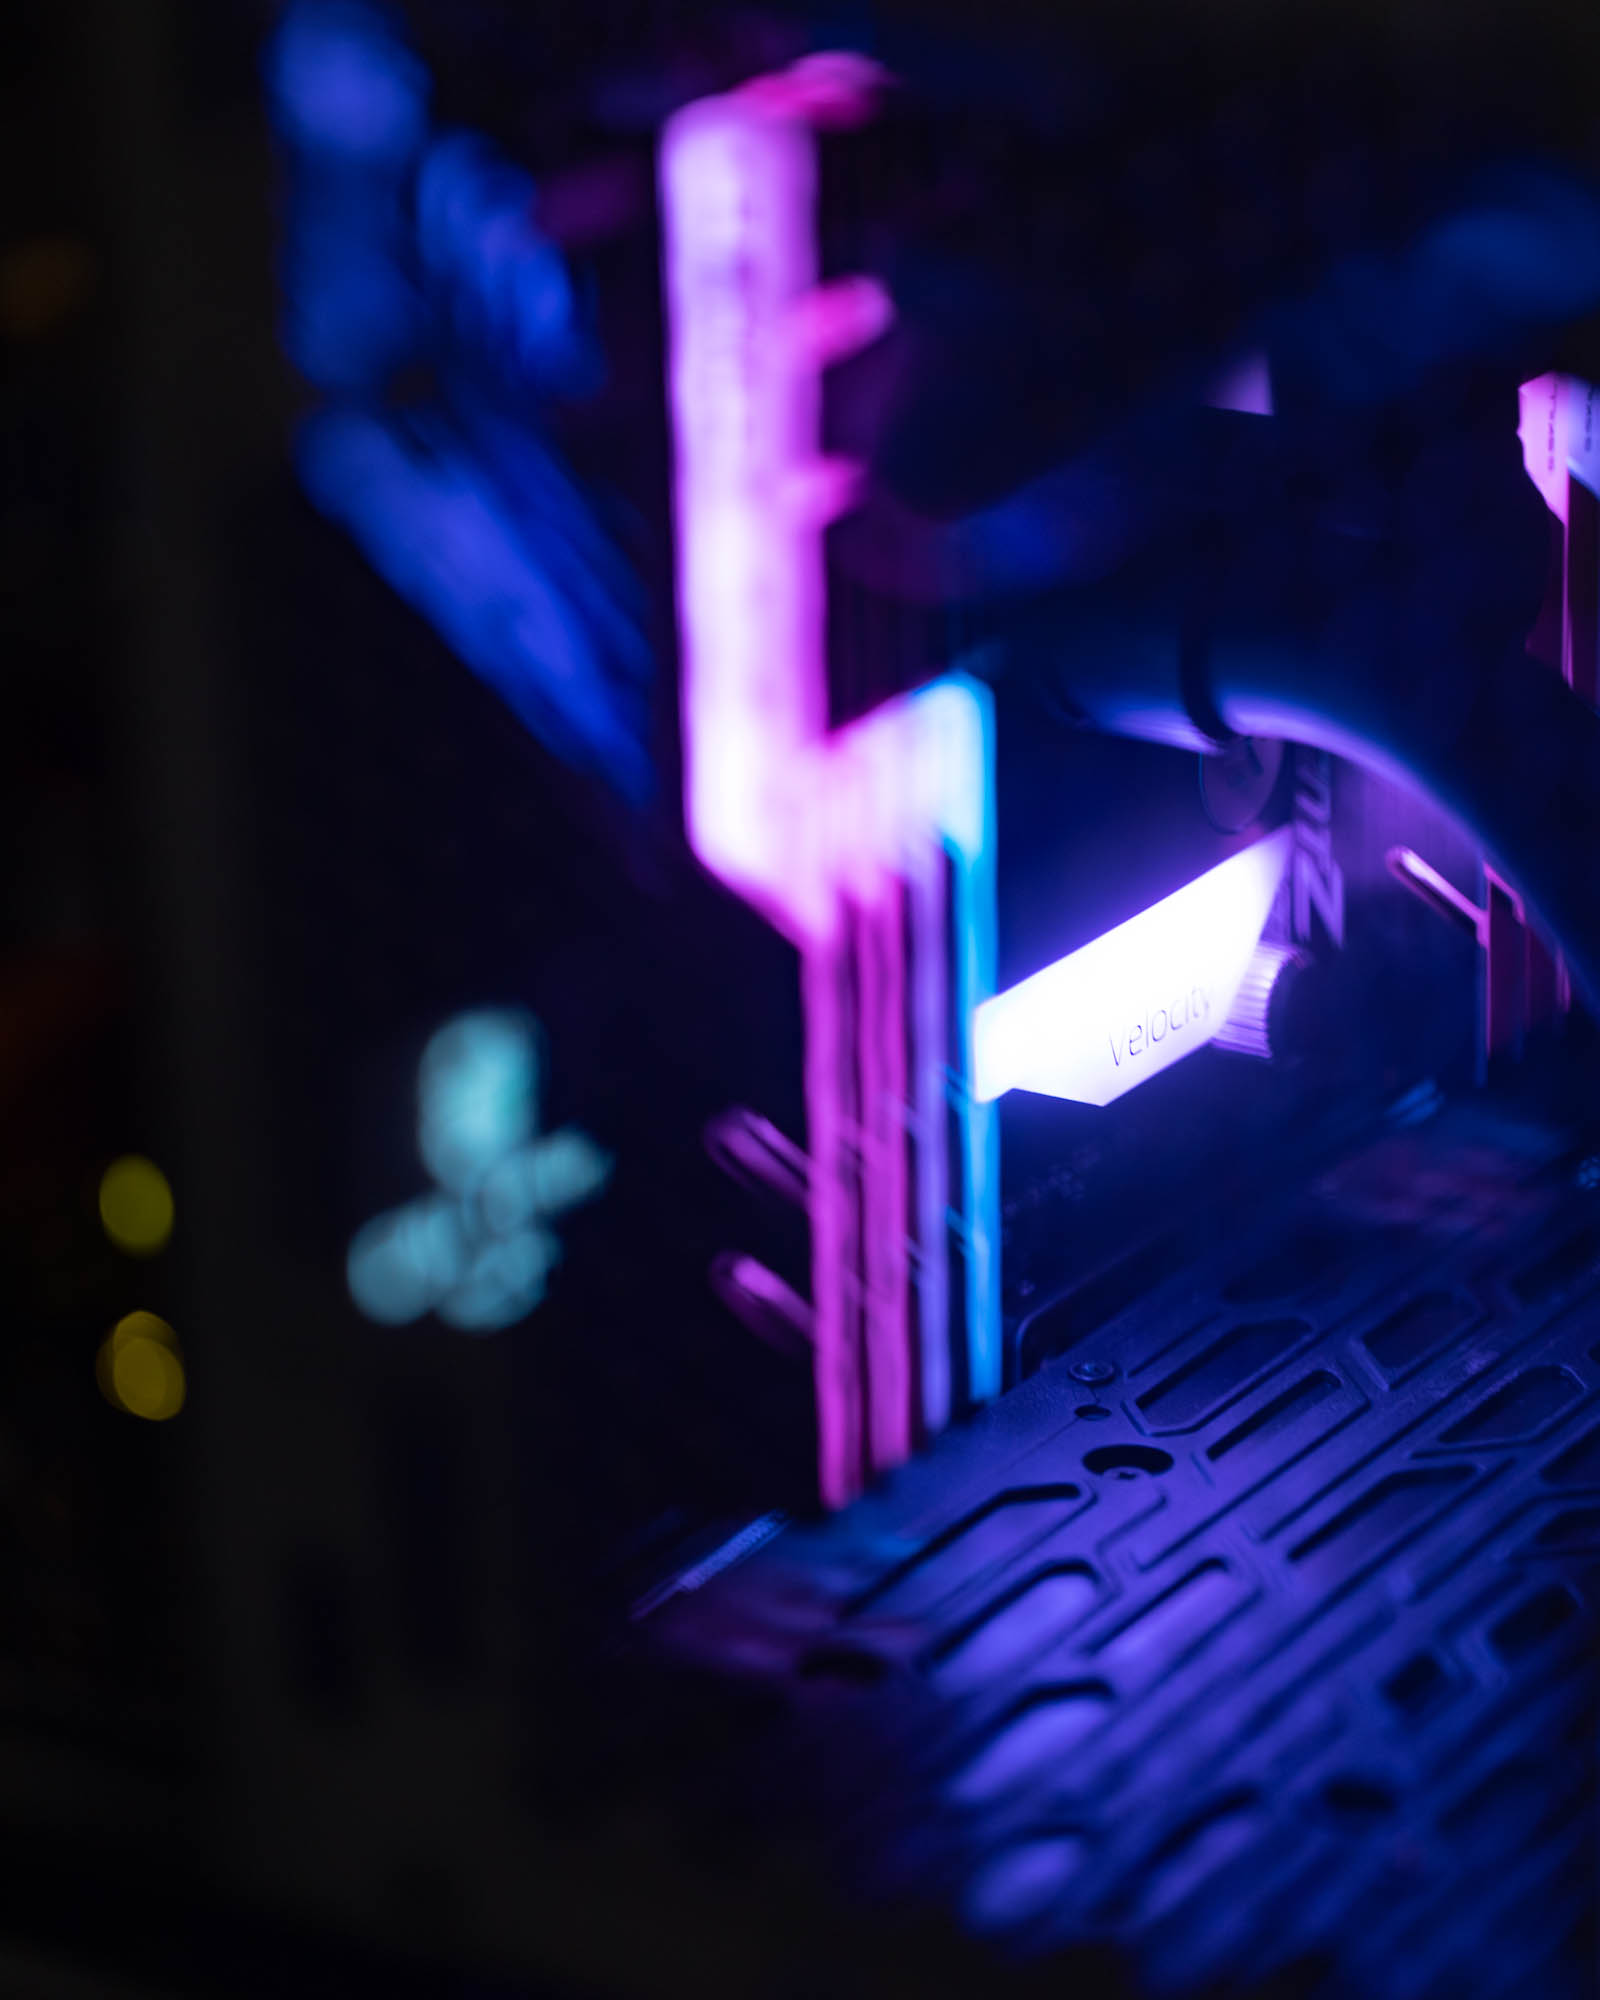
ASUS ROG Zenith II Extreme E-ATX TRX40
256GB (8x32GB) G.Skill Trident Z Neo @ 3200MHz CL16
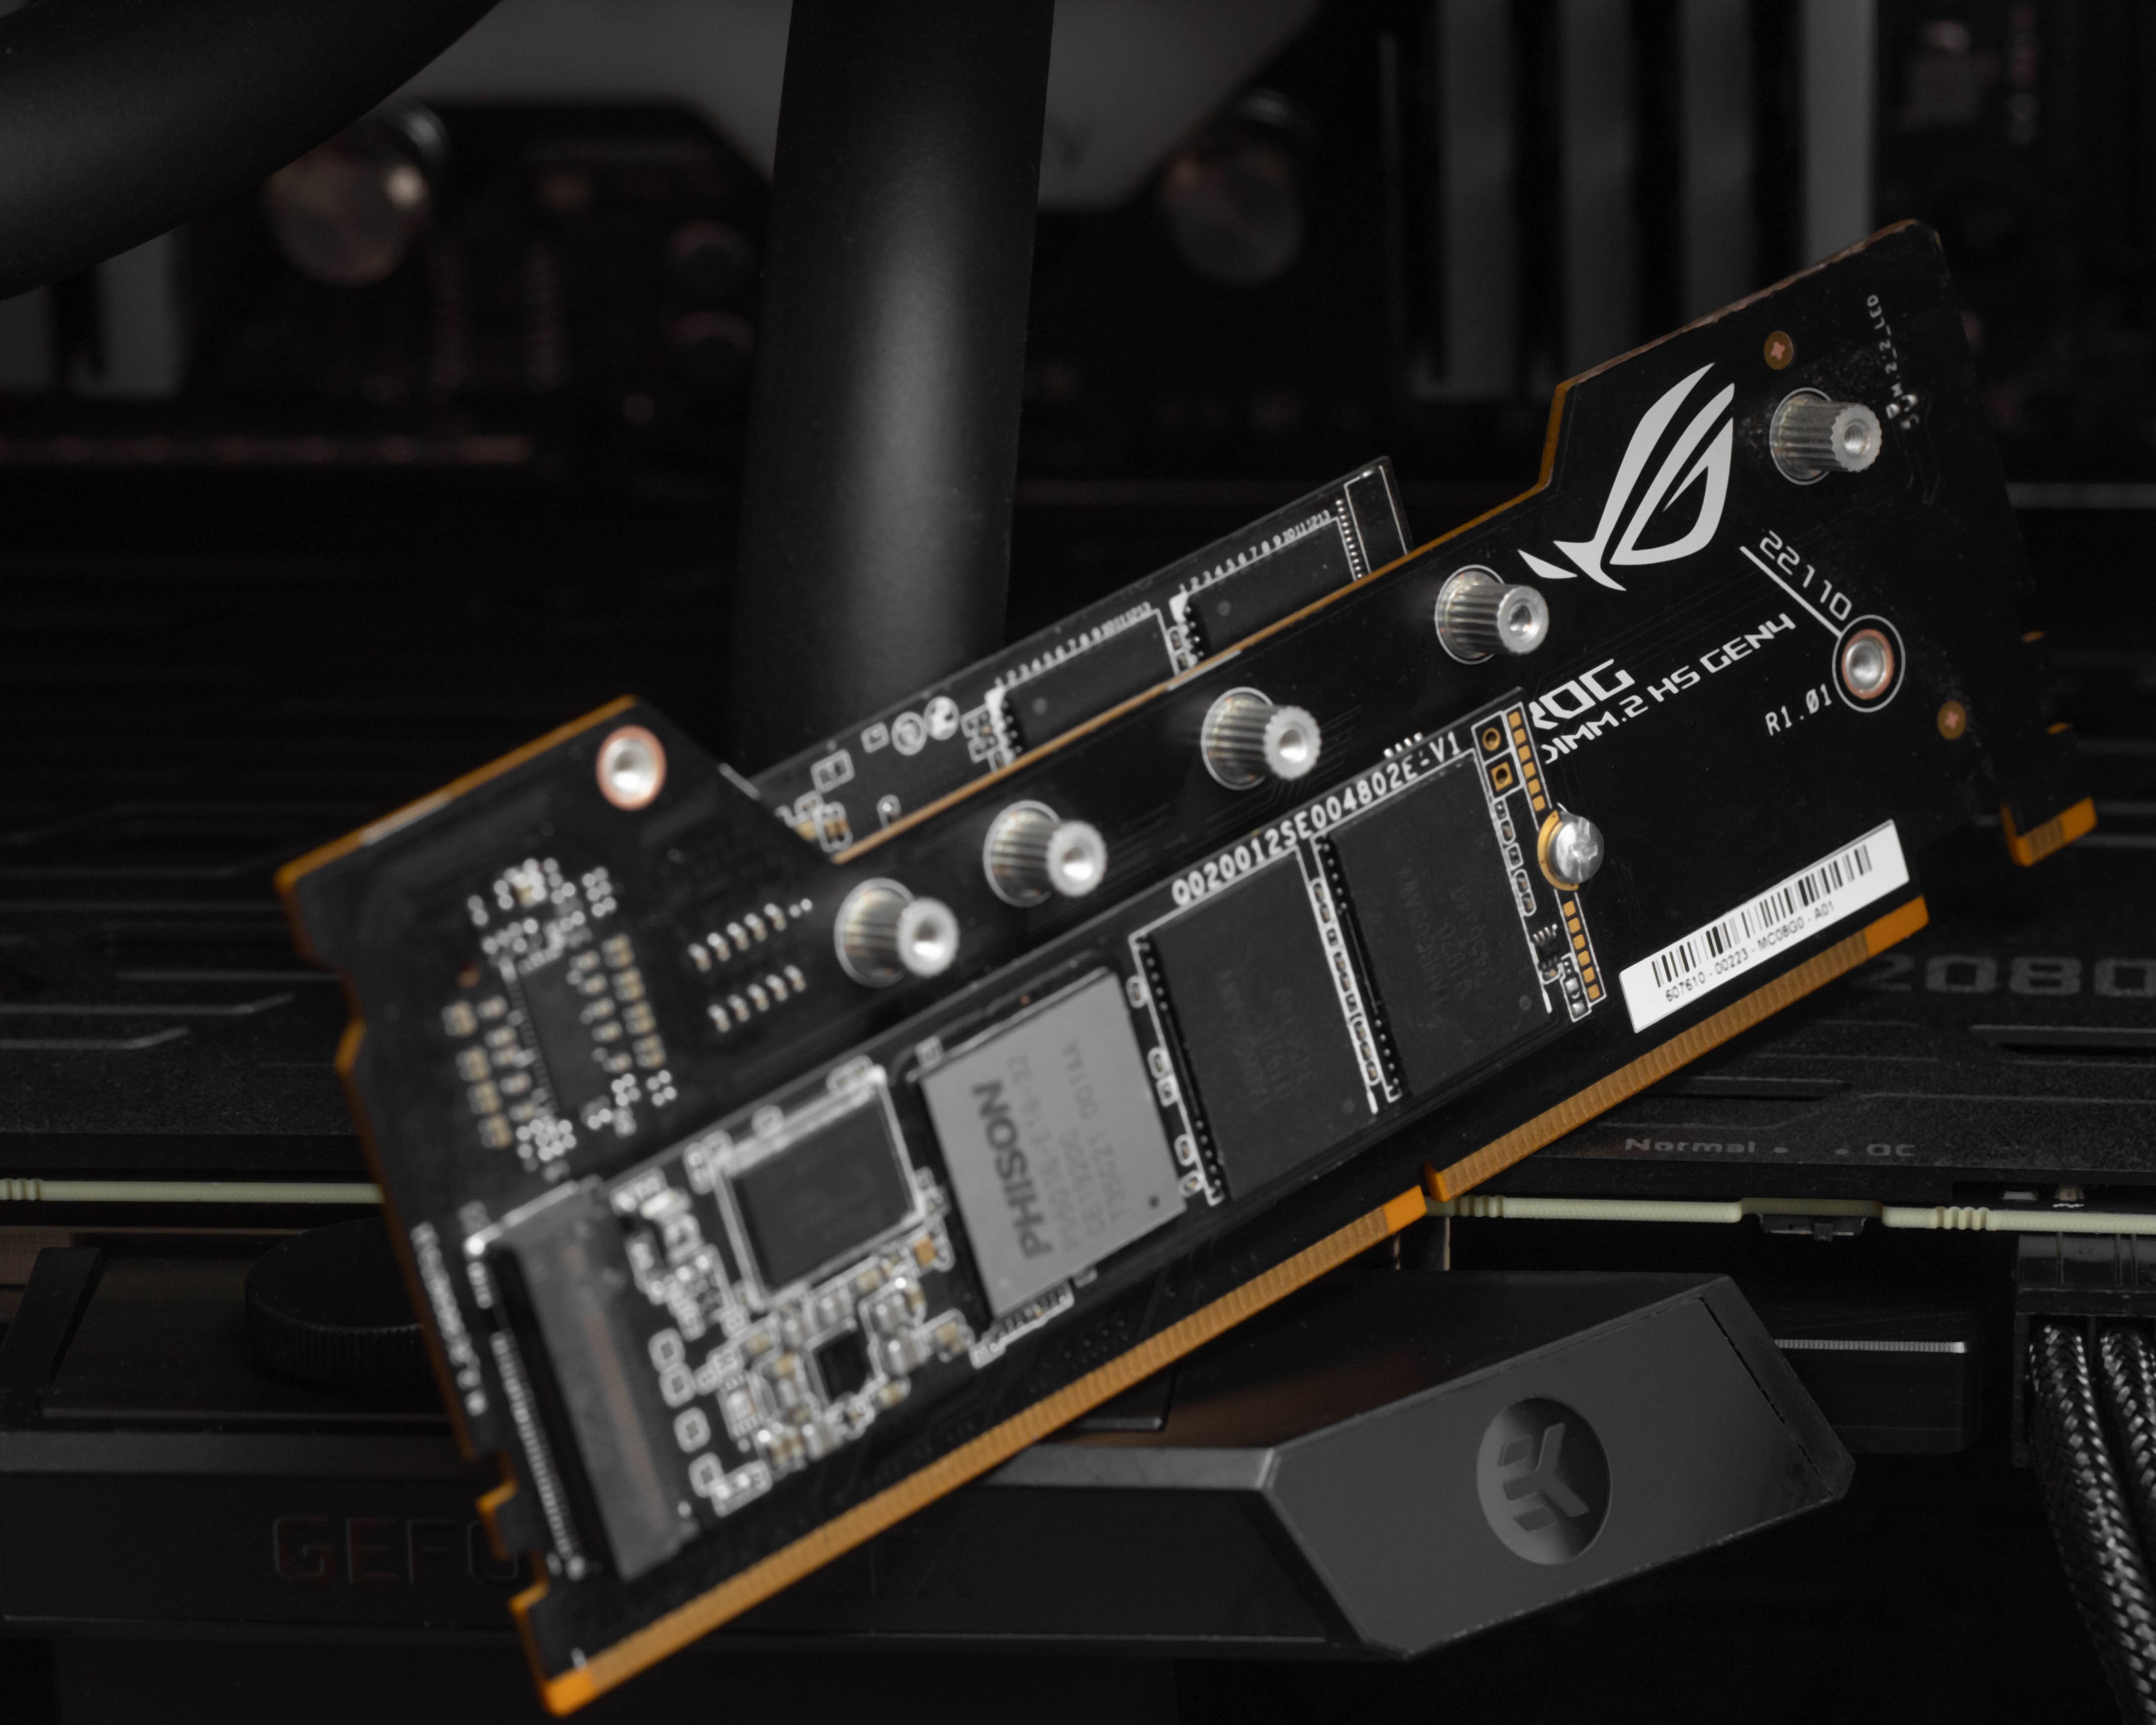
1TB Corsair Force MP600 NVMe PCIe Gen4 SSD (2x)
1TB Gigabyte Aorus NVMe PCIe Gen4 SSD (2x)
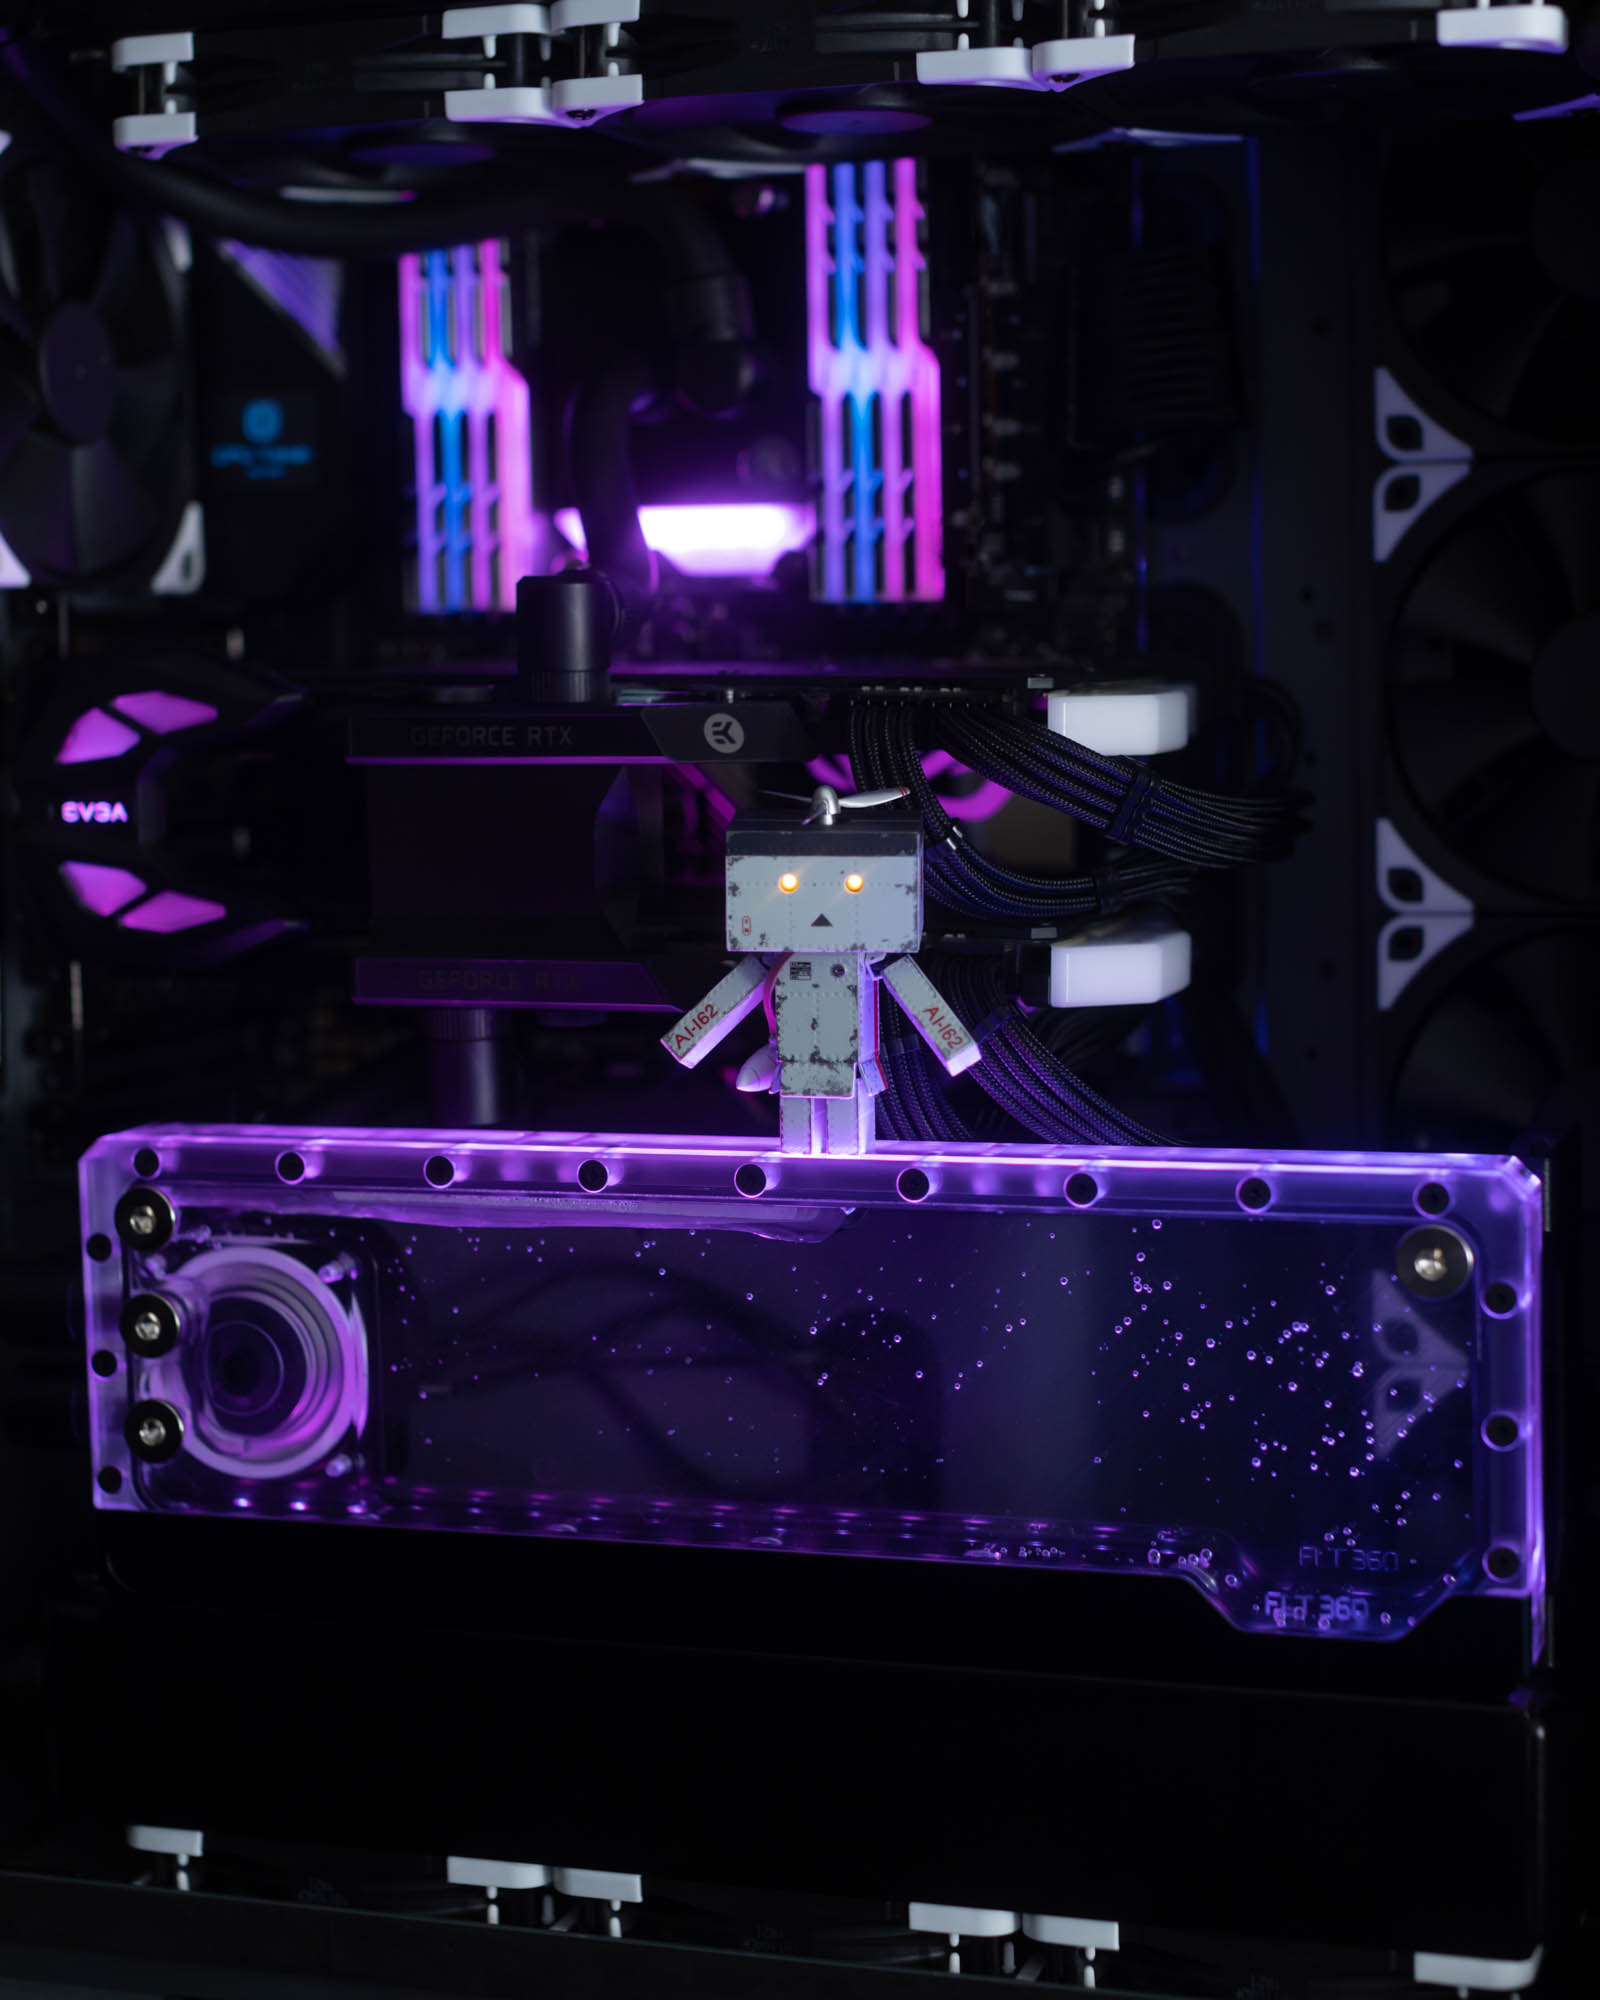
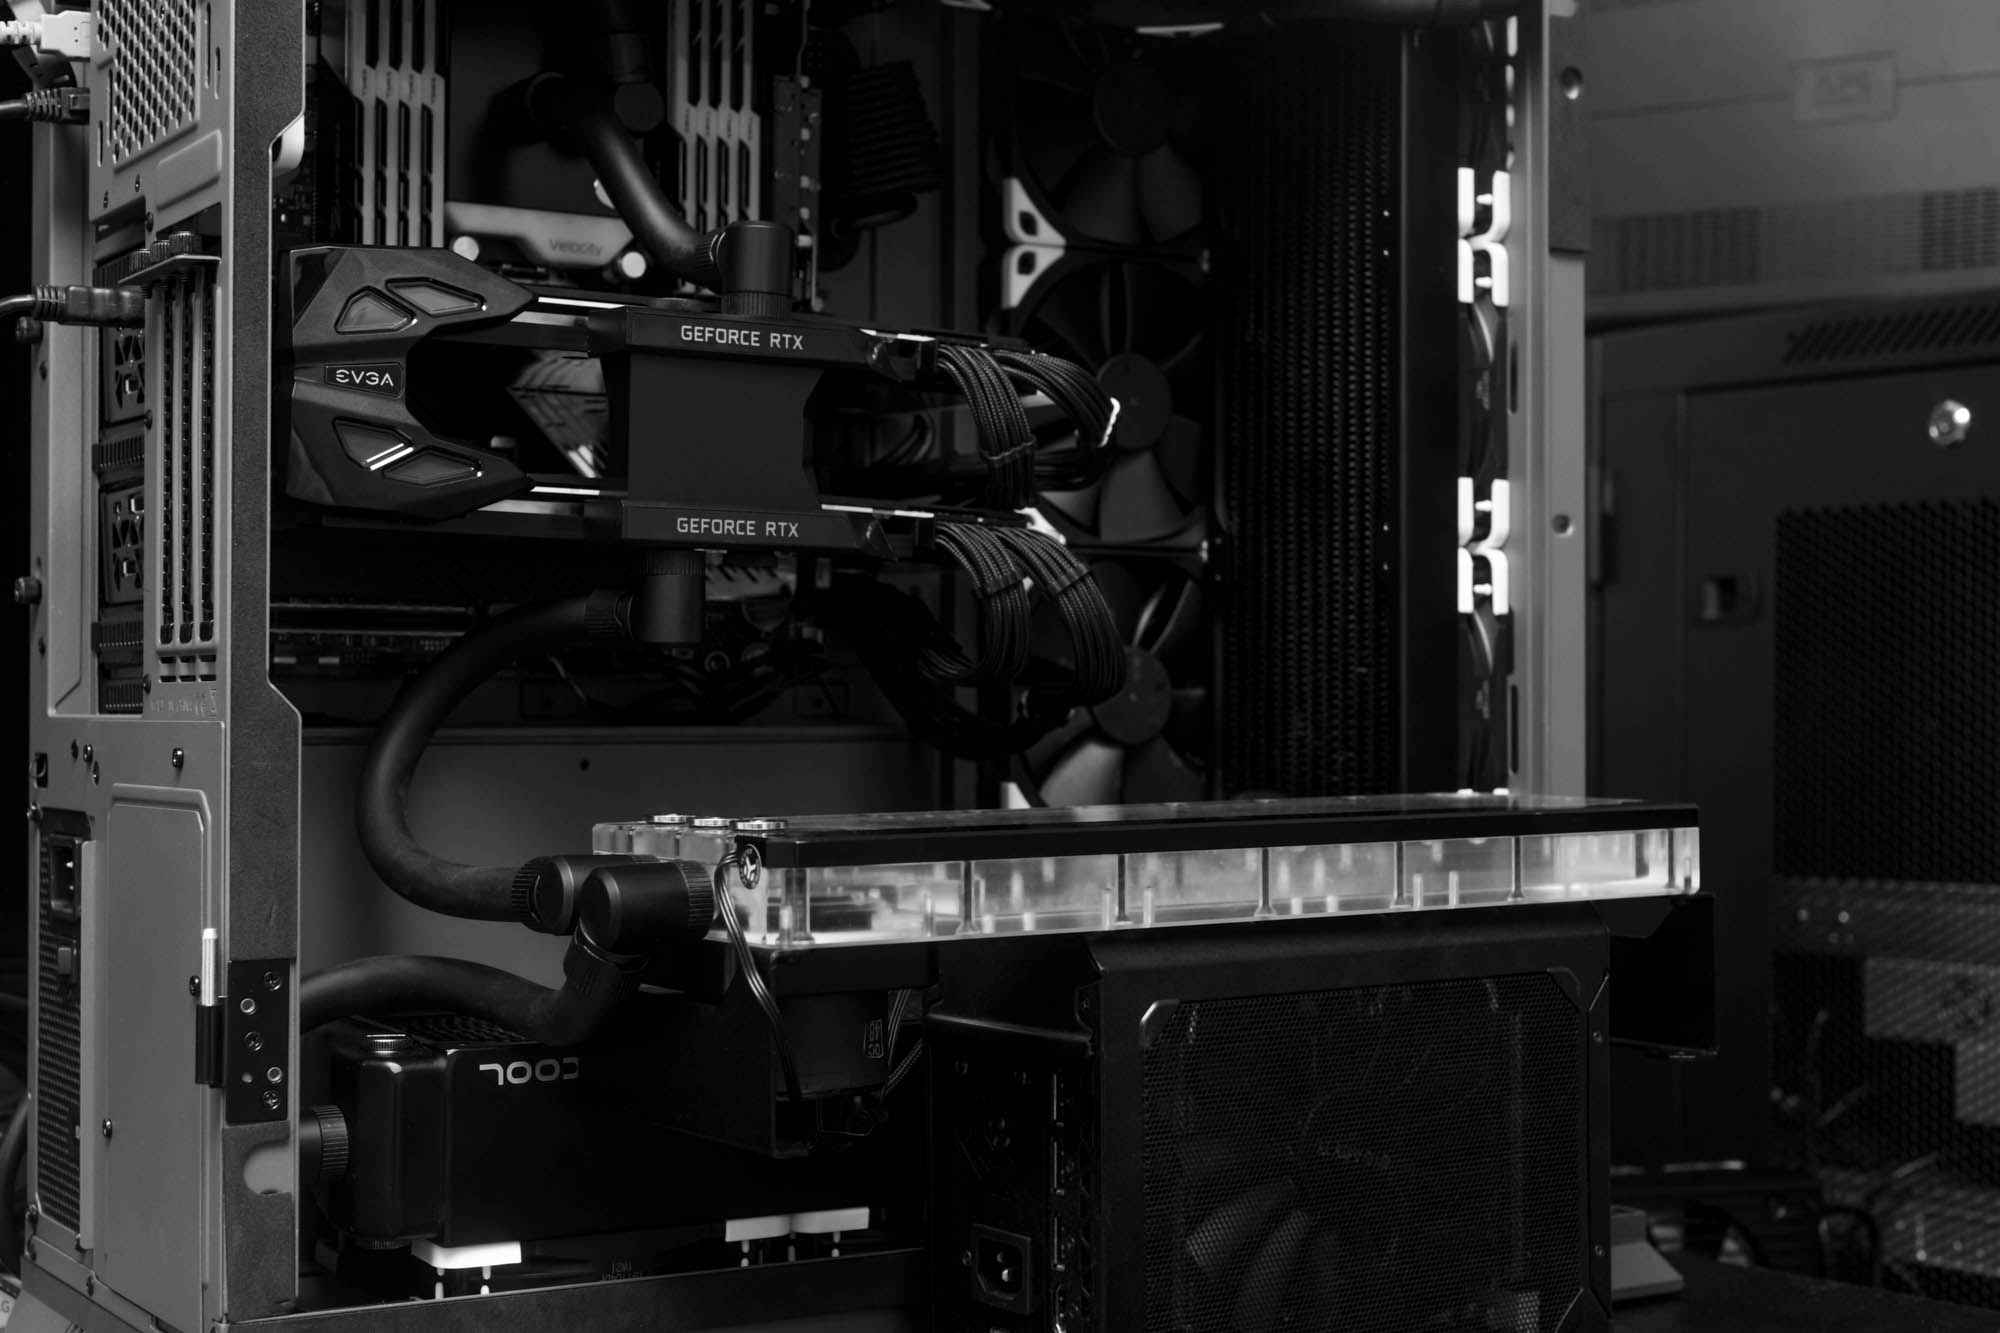
EVGA Geforce RTX 2080 Ti FTW3 Ultra (2x)
EVGA 3-Slot NVLink Bridge
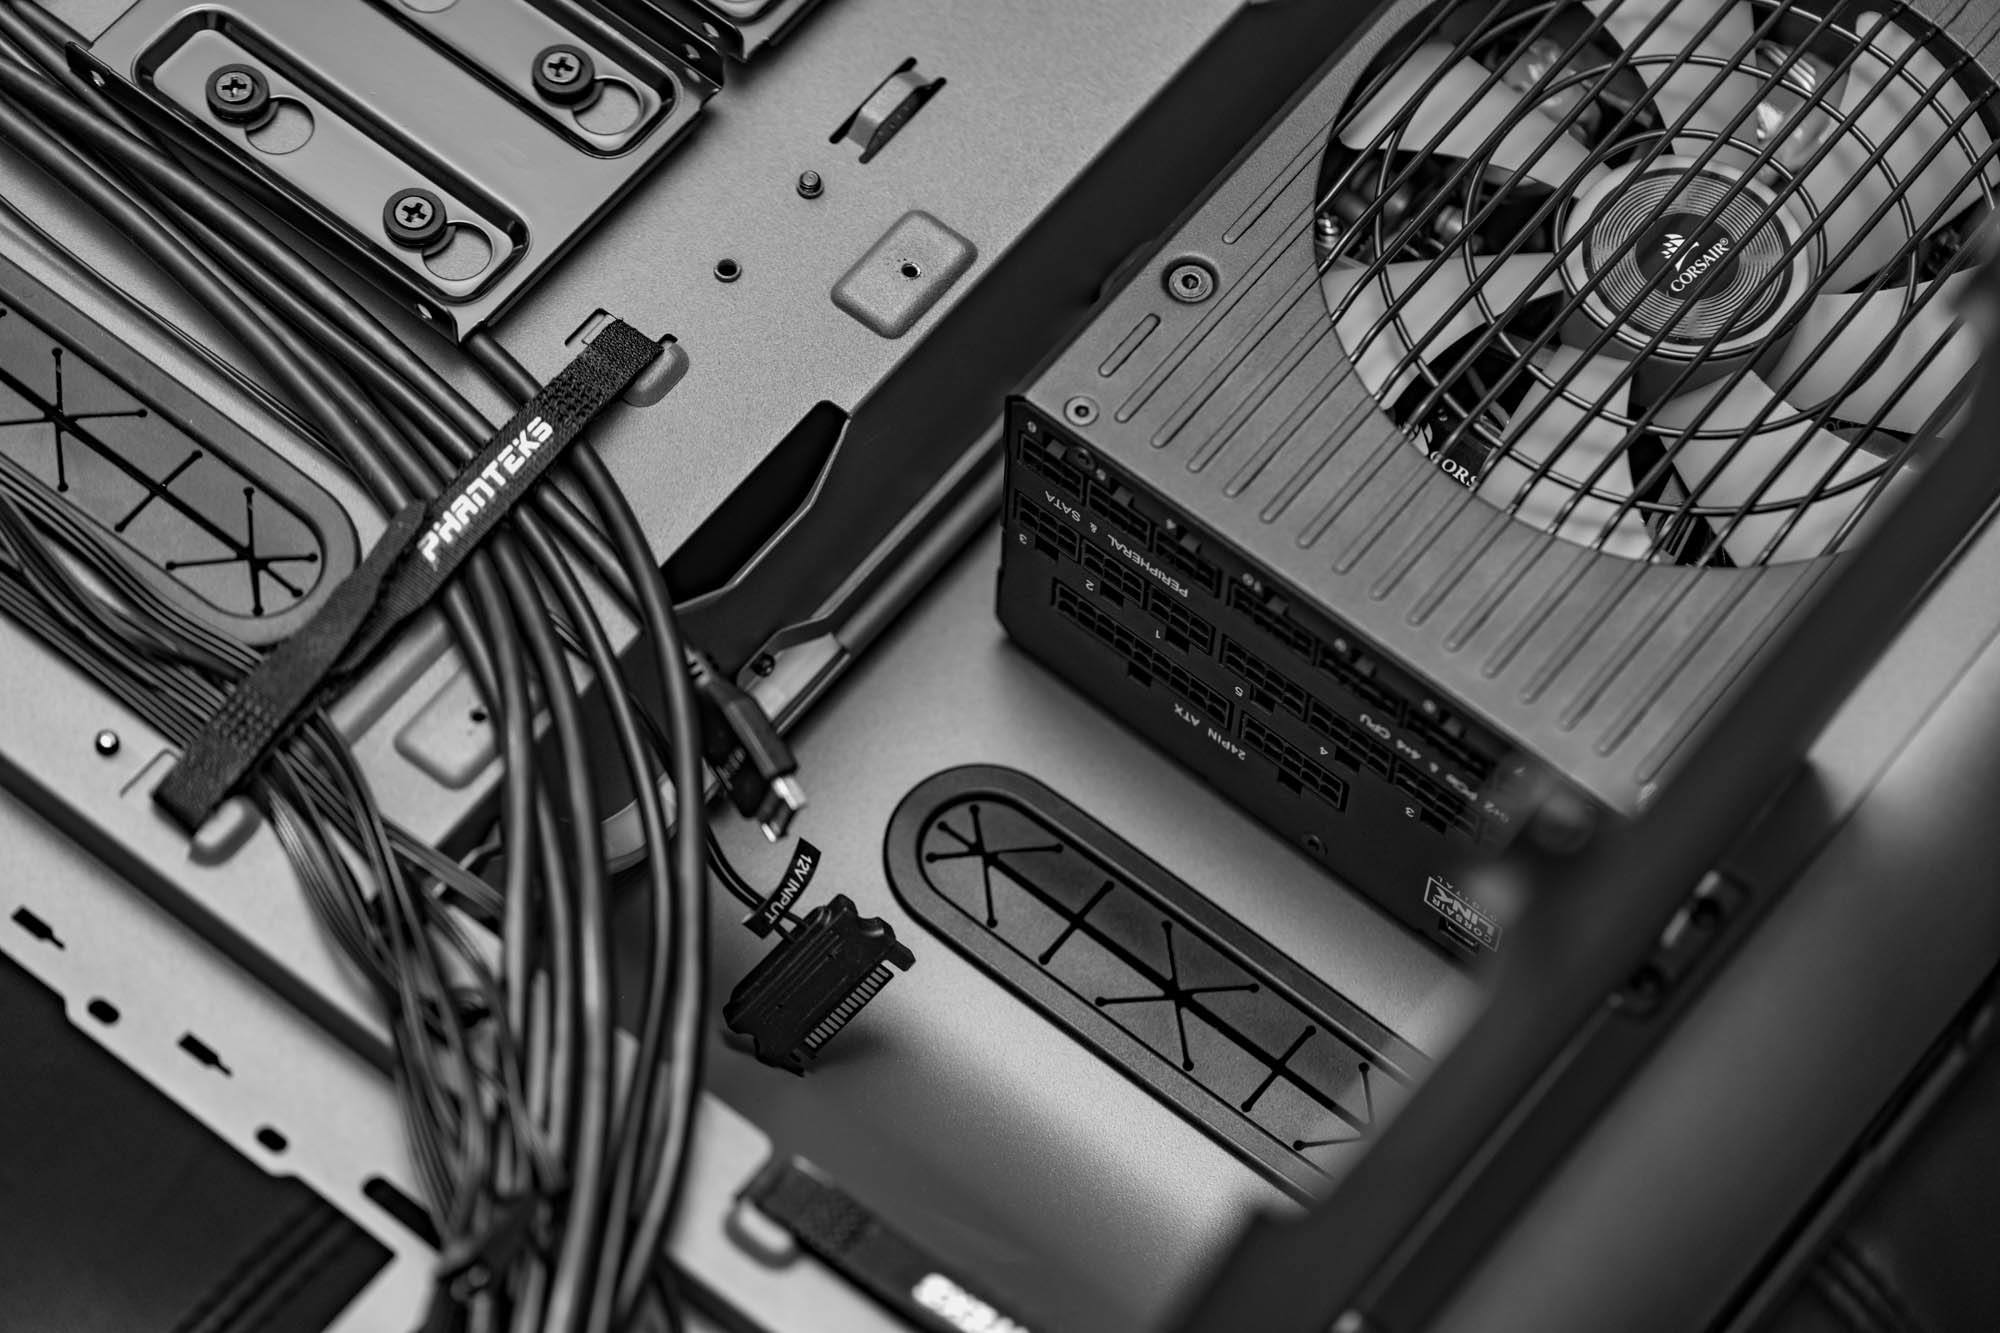
Corsair AX1600i 1600 Watt 80+ Titanium PSU
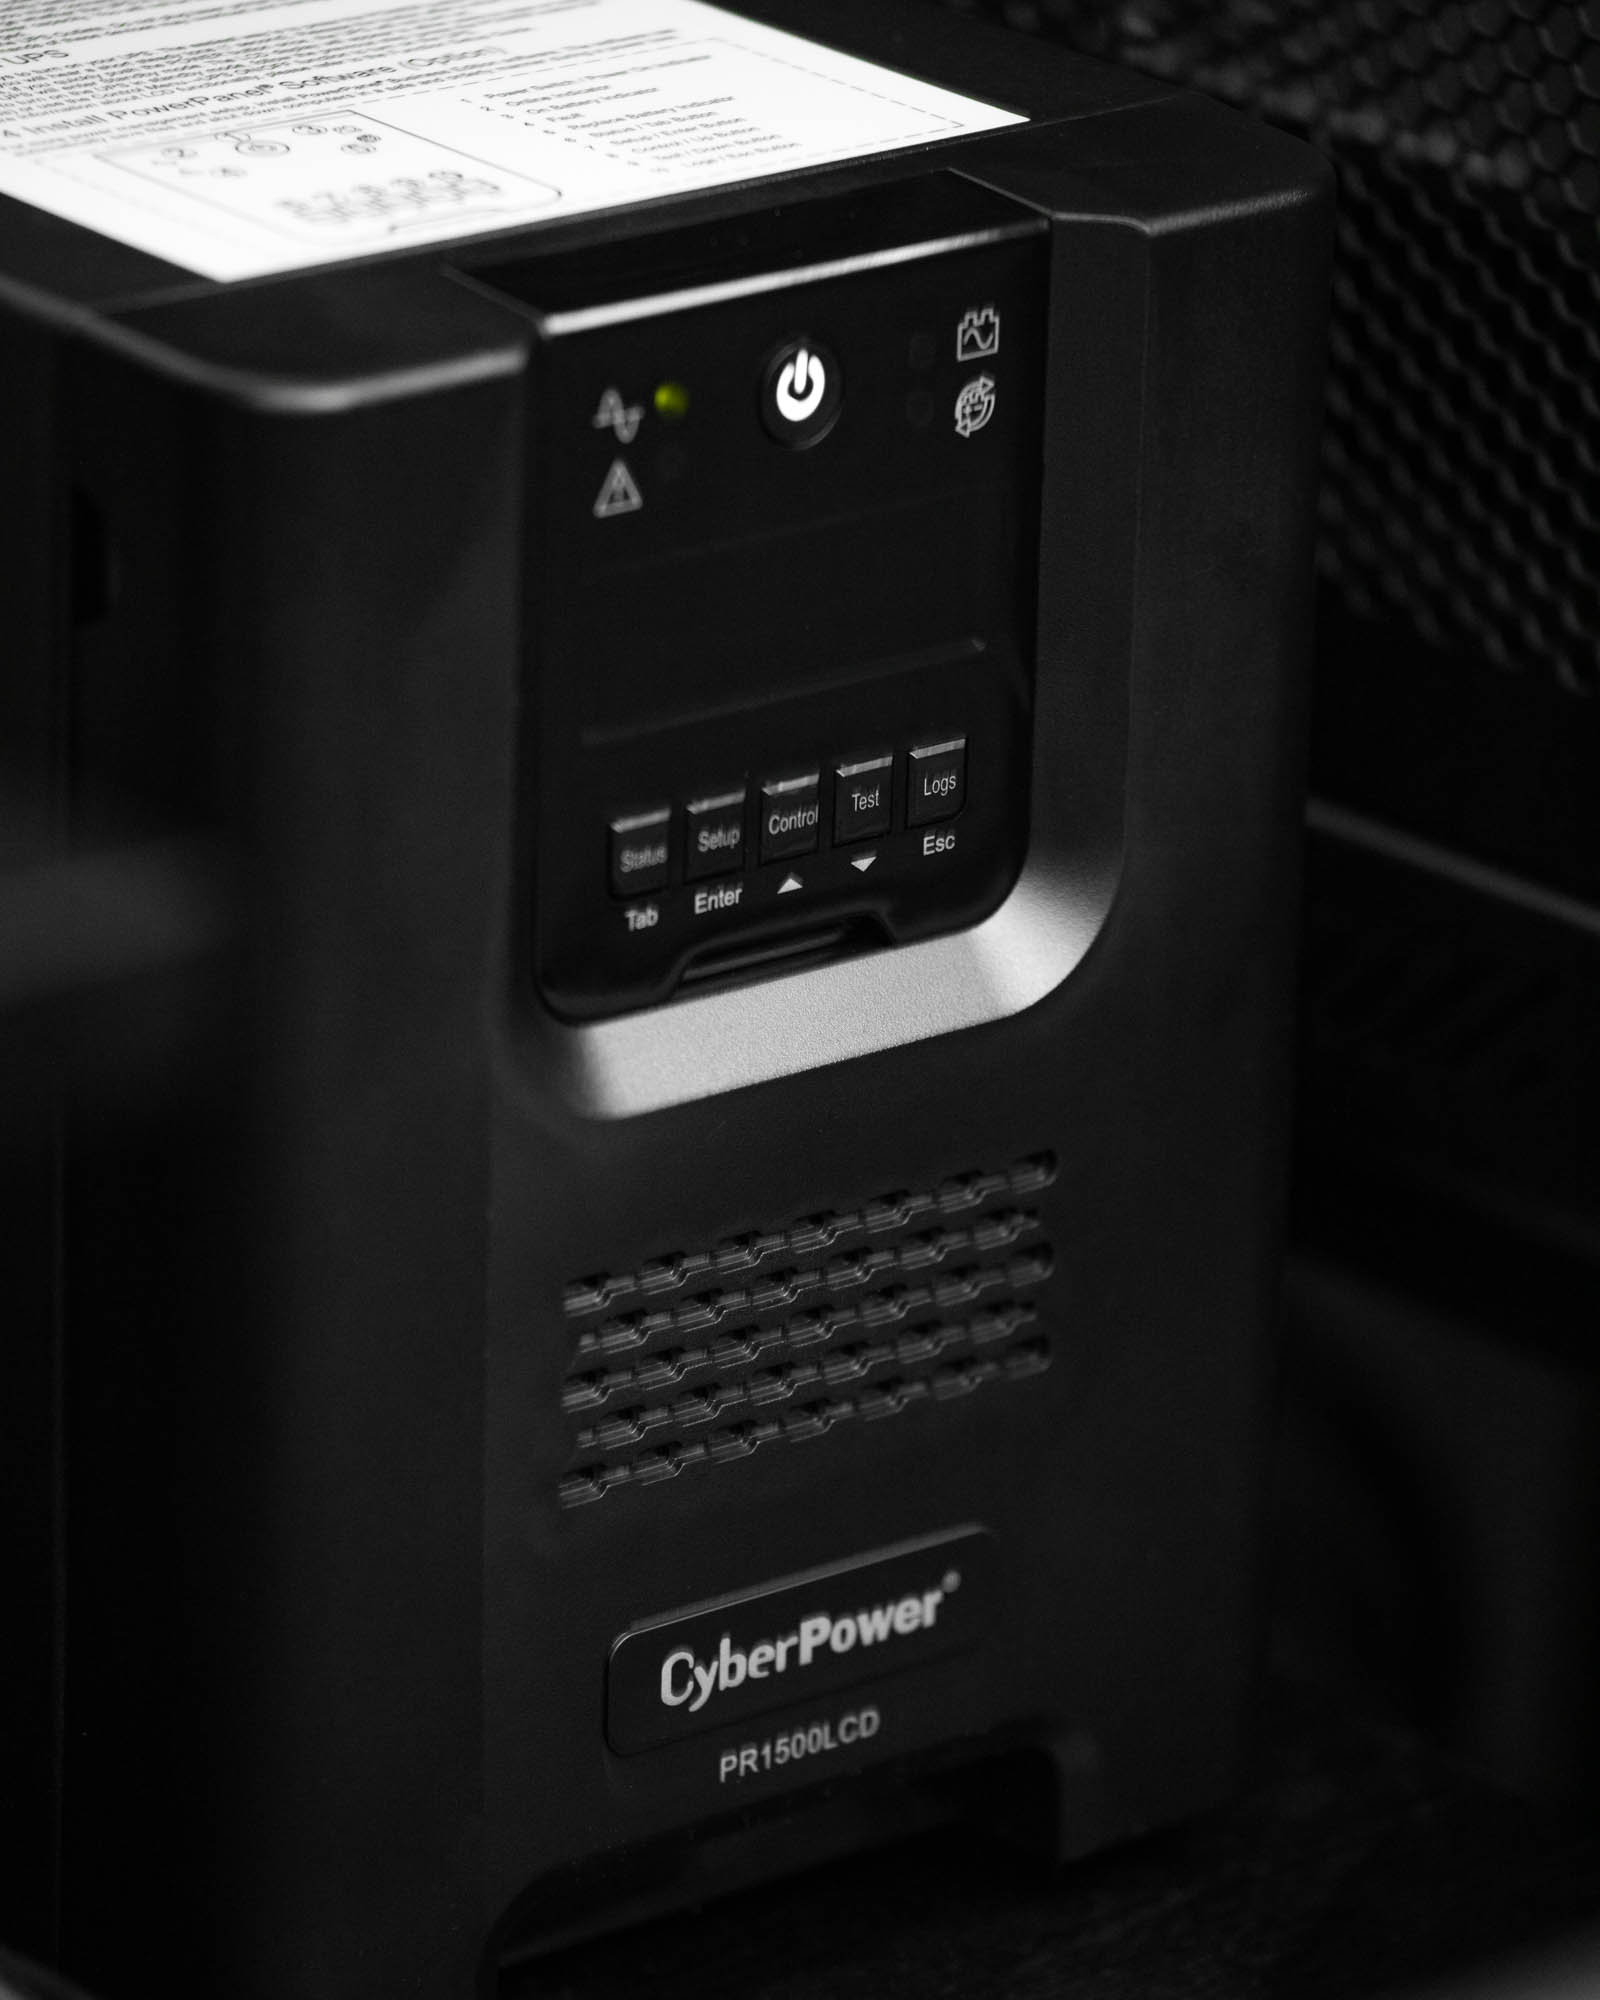
Phanteks Enthoo 719 (Gray)
Noctua NF-F12 PWM chromax.black.swap (14x)
Custom Loop Parts:
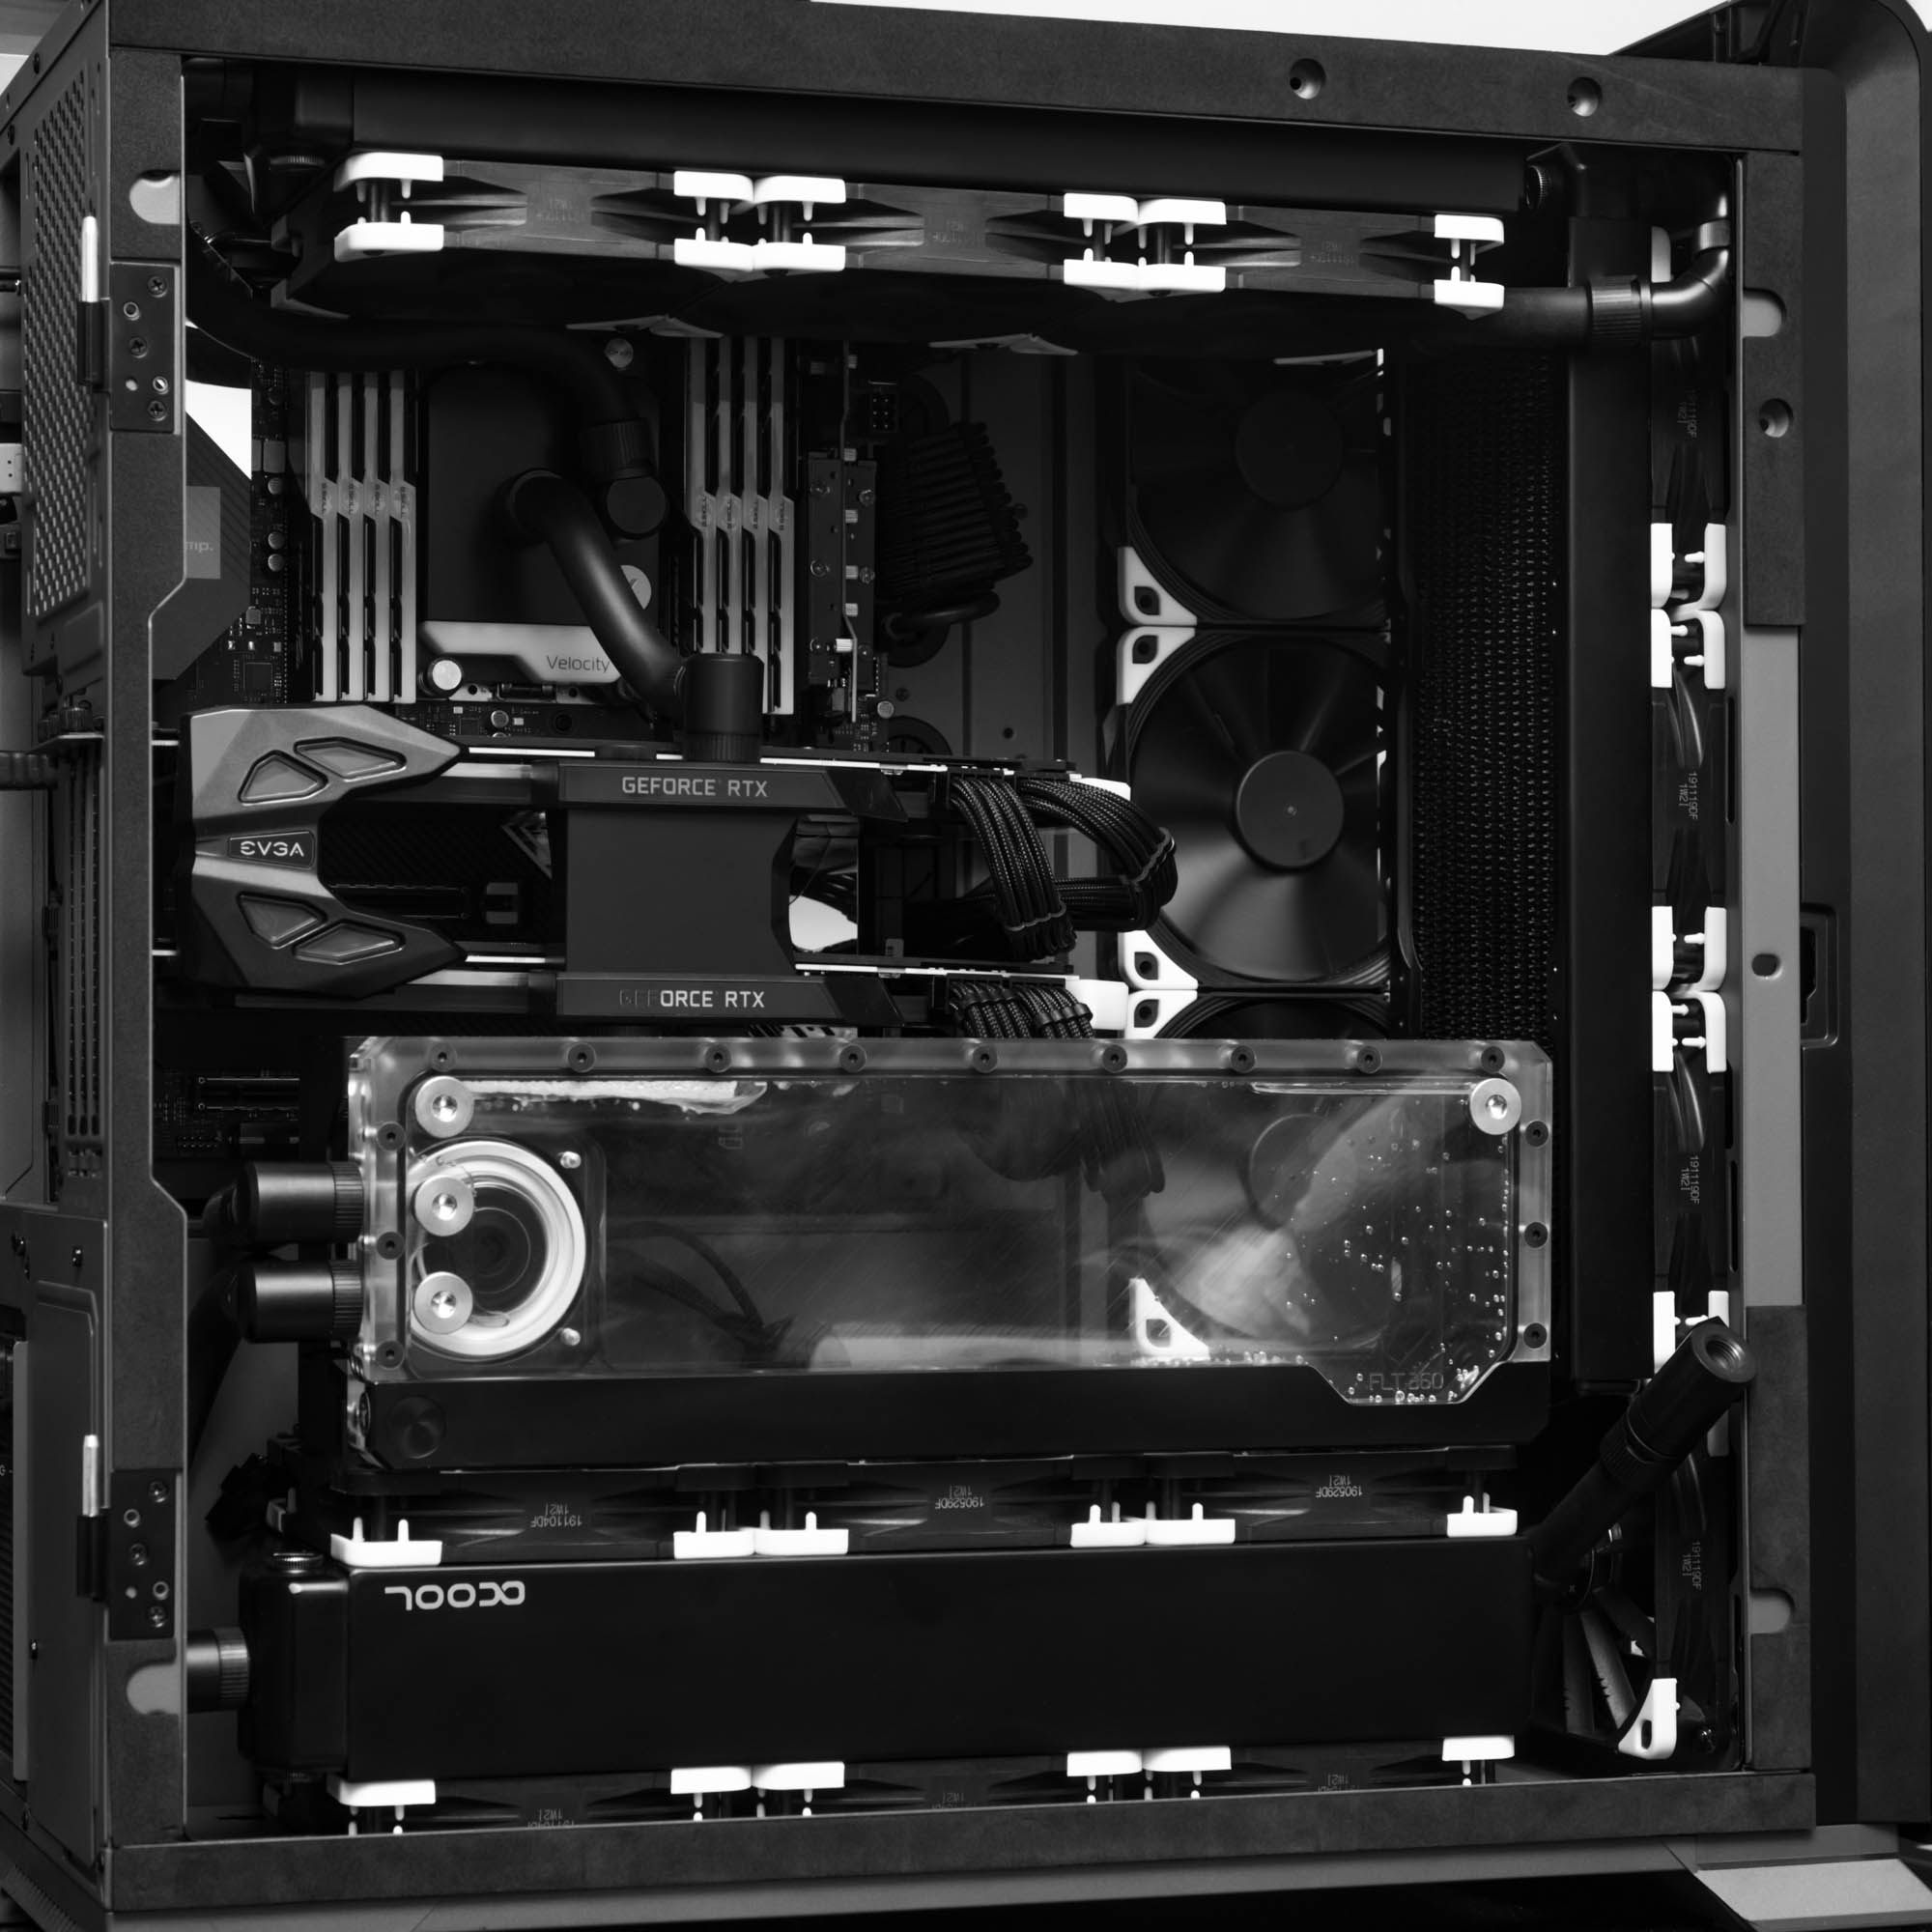
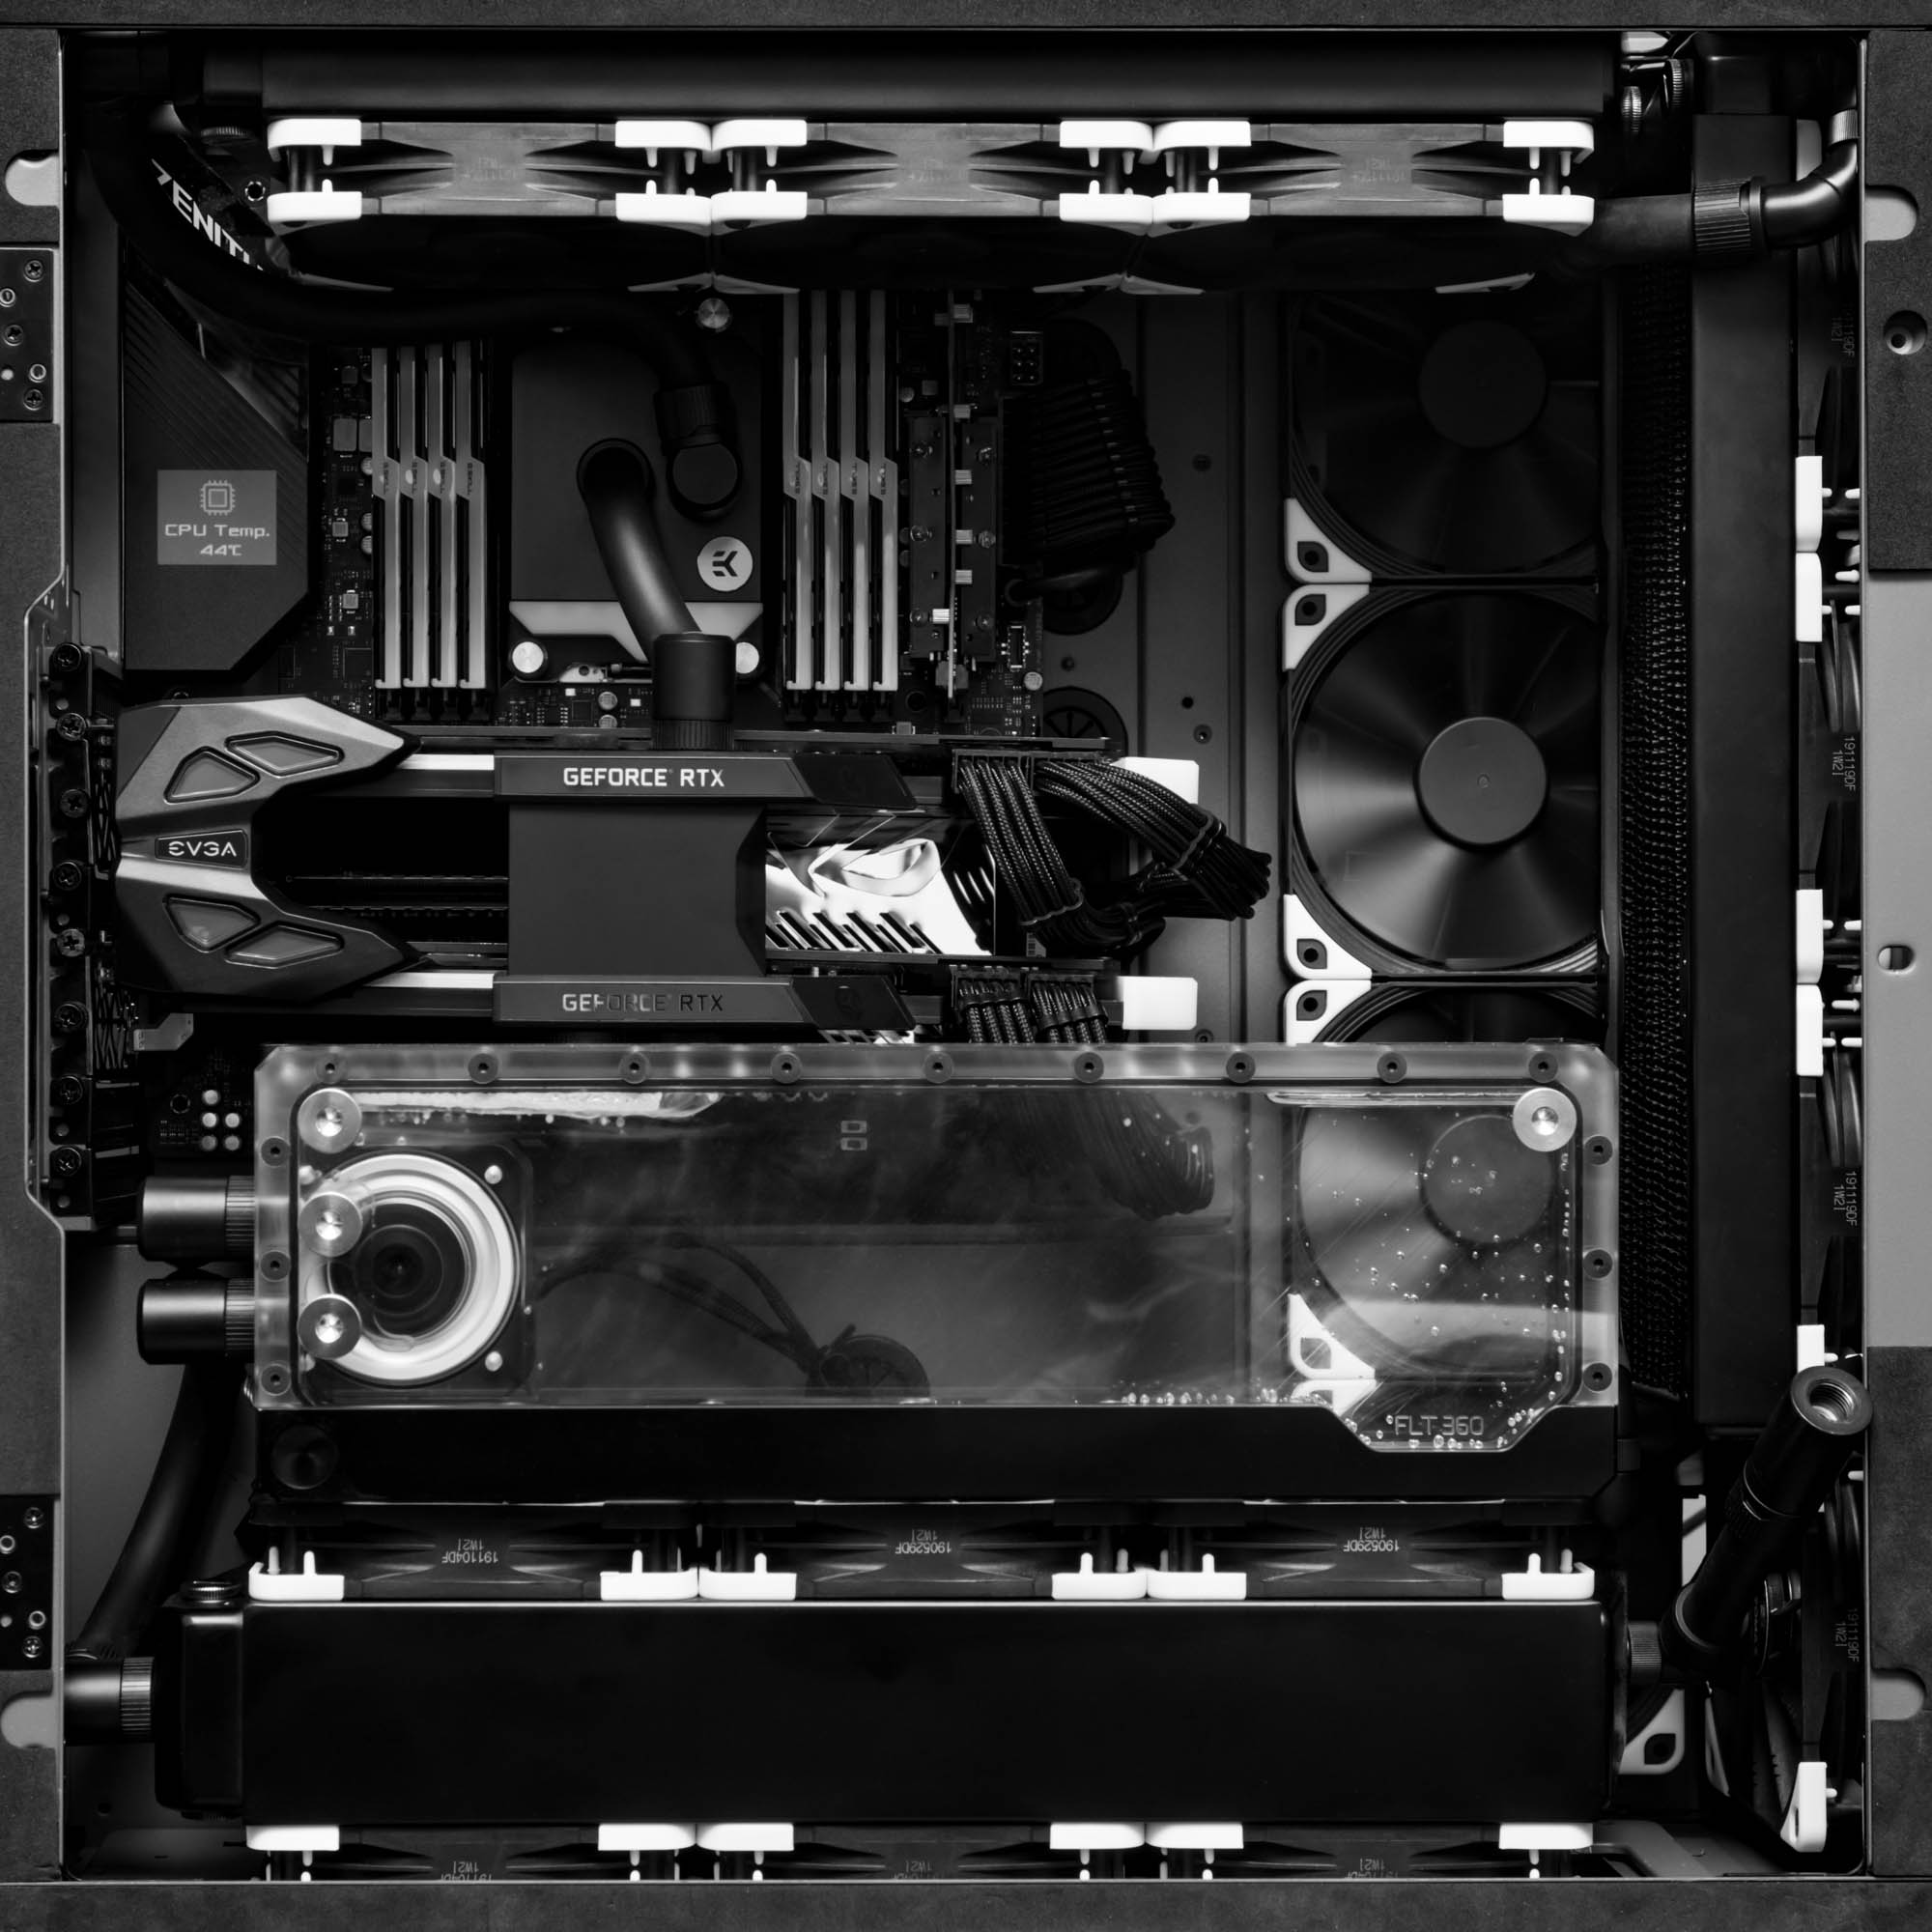
Alphacool - NexXxoS ST30 360mm Full Copper X-Flow
Alphacool - NexXxoS UT60 360mm Full Copper X-Flow
Alphacool - NexXxoS XT45 360mm Full Copper X-Flow
EK-Quantum Kinetic FLT 360 D5 PWM D-RGB – Plexi
EK-Quantum Vector FTW3 RTX 2080 Ti D-RGB - Nickel + Acetal (2x)
EK-Scalar Dual 3-slot Terminal – Acetal
EK-AF Ball Valve G1/4 Drain (10mm) (Black)
EKWB - EK-Torque STC-10/16 Soft Tube Fittings – Black (12x)
EK-Torque Angled 90° (Black) (8x)
EK-Tube ZMT (Zero Maintenance Tubing)
Thermal Grizzly Kryonaut Thermal Paste
CableMod PRO Cable Extension Kit (Black)
Things I loved about the build:
-
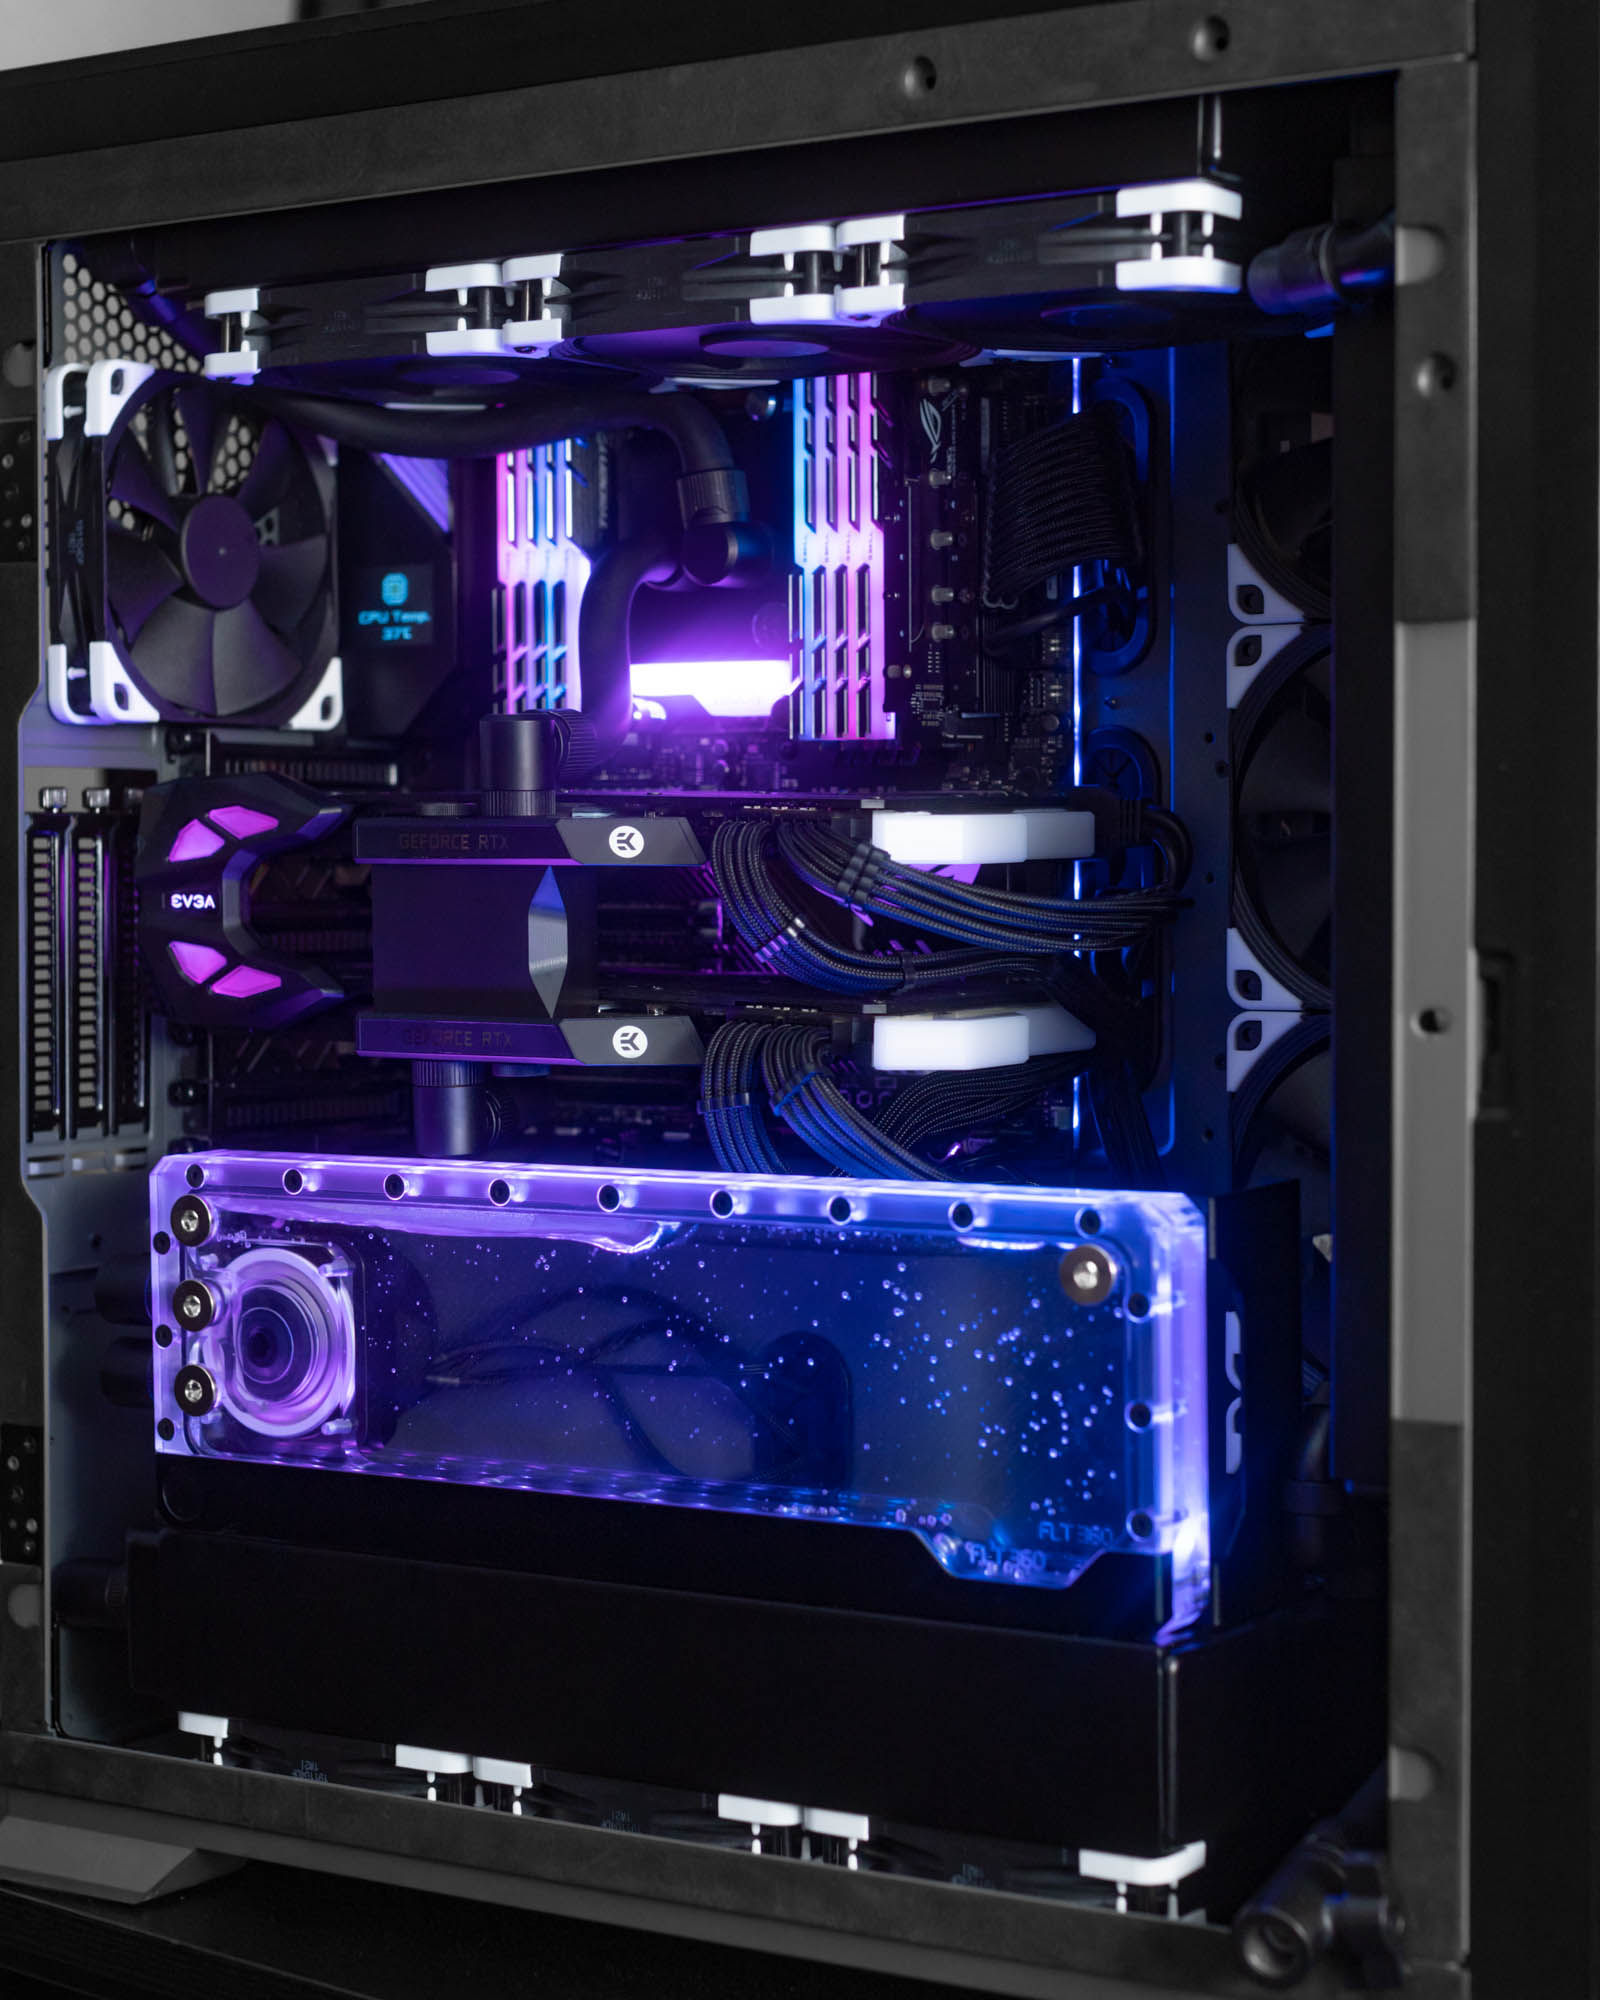
The Custom Loop Adventure – The first go around, I experienced just how creative one could get with just about everything in a loop. After I was done, I re-watched just about all the water cooling build I could. There were so many things that I could relate to the second time around. This made me want to do another build, and soon. I wanted the full experience. I was kind of bummed I only used 1 radiator in my first build. A sane person would have just redone that loop, but well… here we are. Also wanted the full experience of tearing down a card and installing a block. The Liquid Devil was great for ease of installation and a full warranty, but it also felt a bit like cheating. I did get the adventure I wanted in the end, and I absolutely love how it turned out.
-
Zero Maintenance Tubing – My first build was PETG. Always loved the look of hard-line builds but knew if I was going to do my main rig, I would need something that was easy to maintain. This meant I would need to use soft tubing. Can’t say I was much of a fan of the look. That is, until I saw a few builds that used ZMT. I noticed 2 things about it. 1. The matte black tubing looks really nice. 2. Runs are noticeably tighter. This seems to be because the walls of the tubing are MUCH more rigid than clear tubing thanks to the Ethylene-Propylene-Diene-Monomer material. After working with the stuff, I can say it takes A LOT to kink it. This leads to some rigid tube-like bends.
-
Puzzles – Cross flow radiators. The absolute only way that fitting all of this was possible. The 719 looked like a massive case until I dry fit everything. Boy did I run out of room quickly. When I was planning the runs on paper, I ran them by a few experienced friends and concluded that U flow was a no-go. There just wasn’t enough room for all that tubing. I also don’t really like the look of long soft tube runs, so this did a ton or minimize the amount. Most of the runs aren’t visible since there’s so much hardware. The EK FLT res fills it all out so nice. There’s almost no wasted space.
-
Drain Port! – With the 1 radiator in my first build and two ports on the res, I couldn’t really find a place for a drain. It wasn’t too bad to drain from the spare GPU port, so I just left it at that. In this build, however, I was able to use the bottom port on the bottom res. Just about the lowest point you can get in the system. When I had to drain to swap that bad rotary fitting out, it was drained, swapped, and re-filled in 10 mins! This gives me a lot of faith that I won’t have a ton of down time should something happen in the future.
-
Working with a Phanteks Case –I’ve liked a few in the past but haven’t come across one that fit my needs at the time of building. I must admit that this wasn’t my first choice of case, but the Enthoo Pro II (same, but mesh) had no release date in sight when I was looking. The 719 was a joy to build in. I had some clearance issues with cross flow radiators (mainly the 480), but that was my own inexperience not accounting for the extra port height. This case won me over with small details. The screw box was a fantastic touch. The dividers make it easy to quickly locate screws when installing components. No need to feel around in inception levels of tiny plastic bags. The GPU anti-sag bracket was also brilliant. Dust filters were plentiful, easy to install/remove, and the fine mesh was minimally destructive to airflow. It wasn’t all fun and games. The metal for the top rad/fan mount is very flimsy. I had an instance or two where it bent, and the radiator screw slipped through. Not sure how this would hold up to multiple rebuilds in the same case. Clearance in front of the dual system mount are is VERY tight. It was a challenge to get the bottom bracket in since even the width of fan cables makes it necessary to squeeze it in. You’d think it was minor since you only have to do it once, but I ended up removing and re-installing that bracket a number of times while mocking up radiator and reservoir placement.
-
Raw Power – I thought for sure I was skipping this generation. I was feeling all jaded about having to buy a new motherboard, then finding out the CPU jumped up in price significantly. Then the performance numbers came out and… wow. I found a deal I could not pass up and never looked back. I shuffled around some builds and traded to end up with identical FTW3 cards, so no new money was spent on that. Just the blocks.
-
Cool and Quiet – 14 (maybe 15 if I can work in rear exhaust) Noctua Chromax fans. Fourteen! I’m mildly obsessed with Noctua in both looks (yes, I even love the brown ones to death) and performance. While my Lucid Visions build has 4 Prisma 140mm fans and with 10 more fans, this build is still quieter. Truly amazing stuff. Not to mention it looks great. Those signature anti-vibration corners really pull the black with white accents look together magnificently.
Challenges & Mistakes:
-
Things Beyond your Control – This happened to me twice. My UT60 Alphacool radiator had 1 port that was completely smooth/untapped. Of course, I didn’t notice until after I had installed it, but this taught me to inspect every port. The 2nd setback was a bad rotary fitting. The center portion of the fitting was either missing an o-ring, or something was wrong with it. This led to an extraordinarily slow leak. An easy drain and swap, but still a headache.
-
Zero Maintenance Tubing – As much as I love it, I can’t say it’s without its challenges. If you’re interested in the stuff, just note that it’s a lot less forgiving that traditional clear tubing. This meant using 90-degree fittings was necessary in a few cases. I don’t count this as a negative, because the EK Torque 90s are very nice, but just a warning since it’s added cost. The second challenge was the difficulty level of screwing in compression fittings. It takes a decent amount more effort. Not a big deal until you’ve done it for the 30th time. My thumbs are still sore. Again, nothing too bad, just noting my experience.
-
Overall Complexity – My first loop was rigid tubing, but I found it relatively straightforward. The GPU block was pre-installed, there was 1 radiator, and everything was as standard as you can get in terms of components. Turns out adding 2 more radiators, a nontraditional flat reservoir, and a massive case makes for a very interesting puzzle. The most challenging part of this build was surprisingly, finding a case. I absolutely refused to use an O11 XL. This is partially because everyone, their brother, and their 2nd cousin twice removed is using that or the regular O11. I used it in my last build and I’m just a little tired of it. Great case though! Was easy to work in and I know first-hand why it’s so popular. My Journey brought me to the 719. I was apprehensive since I had no need for a second system and it was be jarring to leave the bottom empty, but then I remember Matt from Cablemod telling me about the EK FLT res. I figured I could find a way to vertical mount it on top of a 60mm thick 360 and that would fill it. The outcome couldn’t have been more perfect.
-
Initial Confusion – So you’ll notice a few photos where the tube runs are different. I accidentally used the info from my C7H monoblock as a reference for the inlet port, so I had to adjust twice. I also ran into an issue with my 480mm radiator. While the case supports it, it does not support cross flow. I would need to cut the bottom bracket out and that would leave me juuuust enough clearance to fit it, but routing tubes and a drain port would be seriously tight fits.
-
Leak Testing with Air – As much as I loved the EK leak tester, it is not without its challenges. As I mentioned previously, I had a bad rotary fitting. Getting to the point where I knew this was a problem was a pain. With air, it’s not completely obvious where the leak was. This meant I had to fill the loop to really find out. Does this make the leak tester useless? No. Not at all. I was able to narrow down the area where the leak was, but I used a bunch of fittings to get from one close radiator to another. It was just a matter of finding the bad fitting. For other minor things such as a fitting that wasn’t tightened well enough, there was an audible hiss. At the end of the day, I didn’t have to lay down a ton of paper towel and leaving the system running for 24 hours to find the issue, so I would say it’s more than worth having it in your arsenal if you build a lot. It was pricier than the Dr. Drop, but the added comforts to the EK model make it worth the $10 more.
Planned changes and considerations:
-
Solid White Fluid – The initial plan was to fill the loop with EK Solid Cloud White coolant. It’s literally only for the benefit of the res, but after seeing how it looks with just distilled water, I MUST. I know solid fluids present clog risks, but I wouldn’t run it for very long before switching to clear. I’m running plain water right now, so I must do this soon.
-
MAAAYBE Mesh Front – I wanted the Enthoo Pro II when I saw it at CES. That is generally what steered me toward the 719, but there wasn’t even a hint of a release date. I am hoping the panel will be swappable, but also setting the expectation that it won’t be.
-
3D Printed NVLink Cover – I’d like to design and print a cover for the bridge. The Nvidia version seems sold out indefinitely. Most of the AIB versions of the bridge are either ugly or only make sense if you left the stock cooler on the card.
Conclusion:
Let’s get this out of the way… do I need this much power? No. Is it nice to have? Absolutely. I will do everything in my power to push this system to the limit. I’m getting into a lot of things this year, and main rig virtualization is one of them. I much prefer Linux these days to the data mining/advertising platform that is Windows 10, but I live and die by the Adobe Suite. Sure, I can get away with alternatives, but one thing people don’t consider when they say you don’t need [insert software here] is workflow. The dollar amounts you could place on workflow if you really sat down and figured it out, would be very high. Most of my usage is muscle memory at this point, and re-learning alternatives is just something I don’t care to make time for.
Photos: