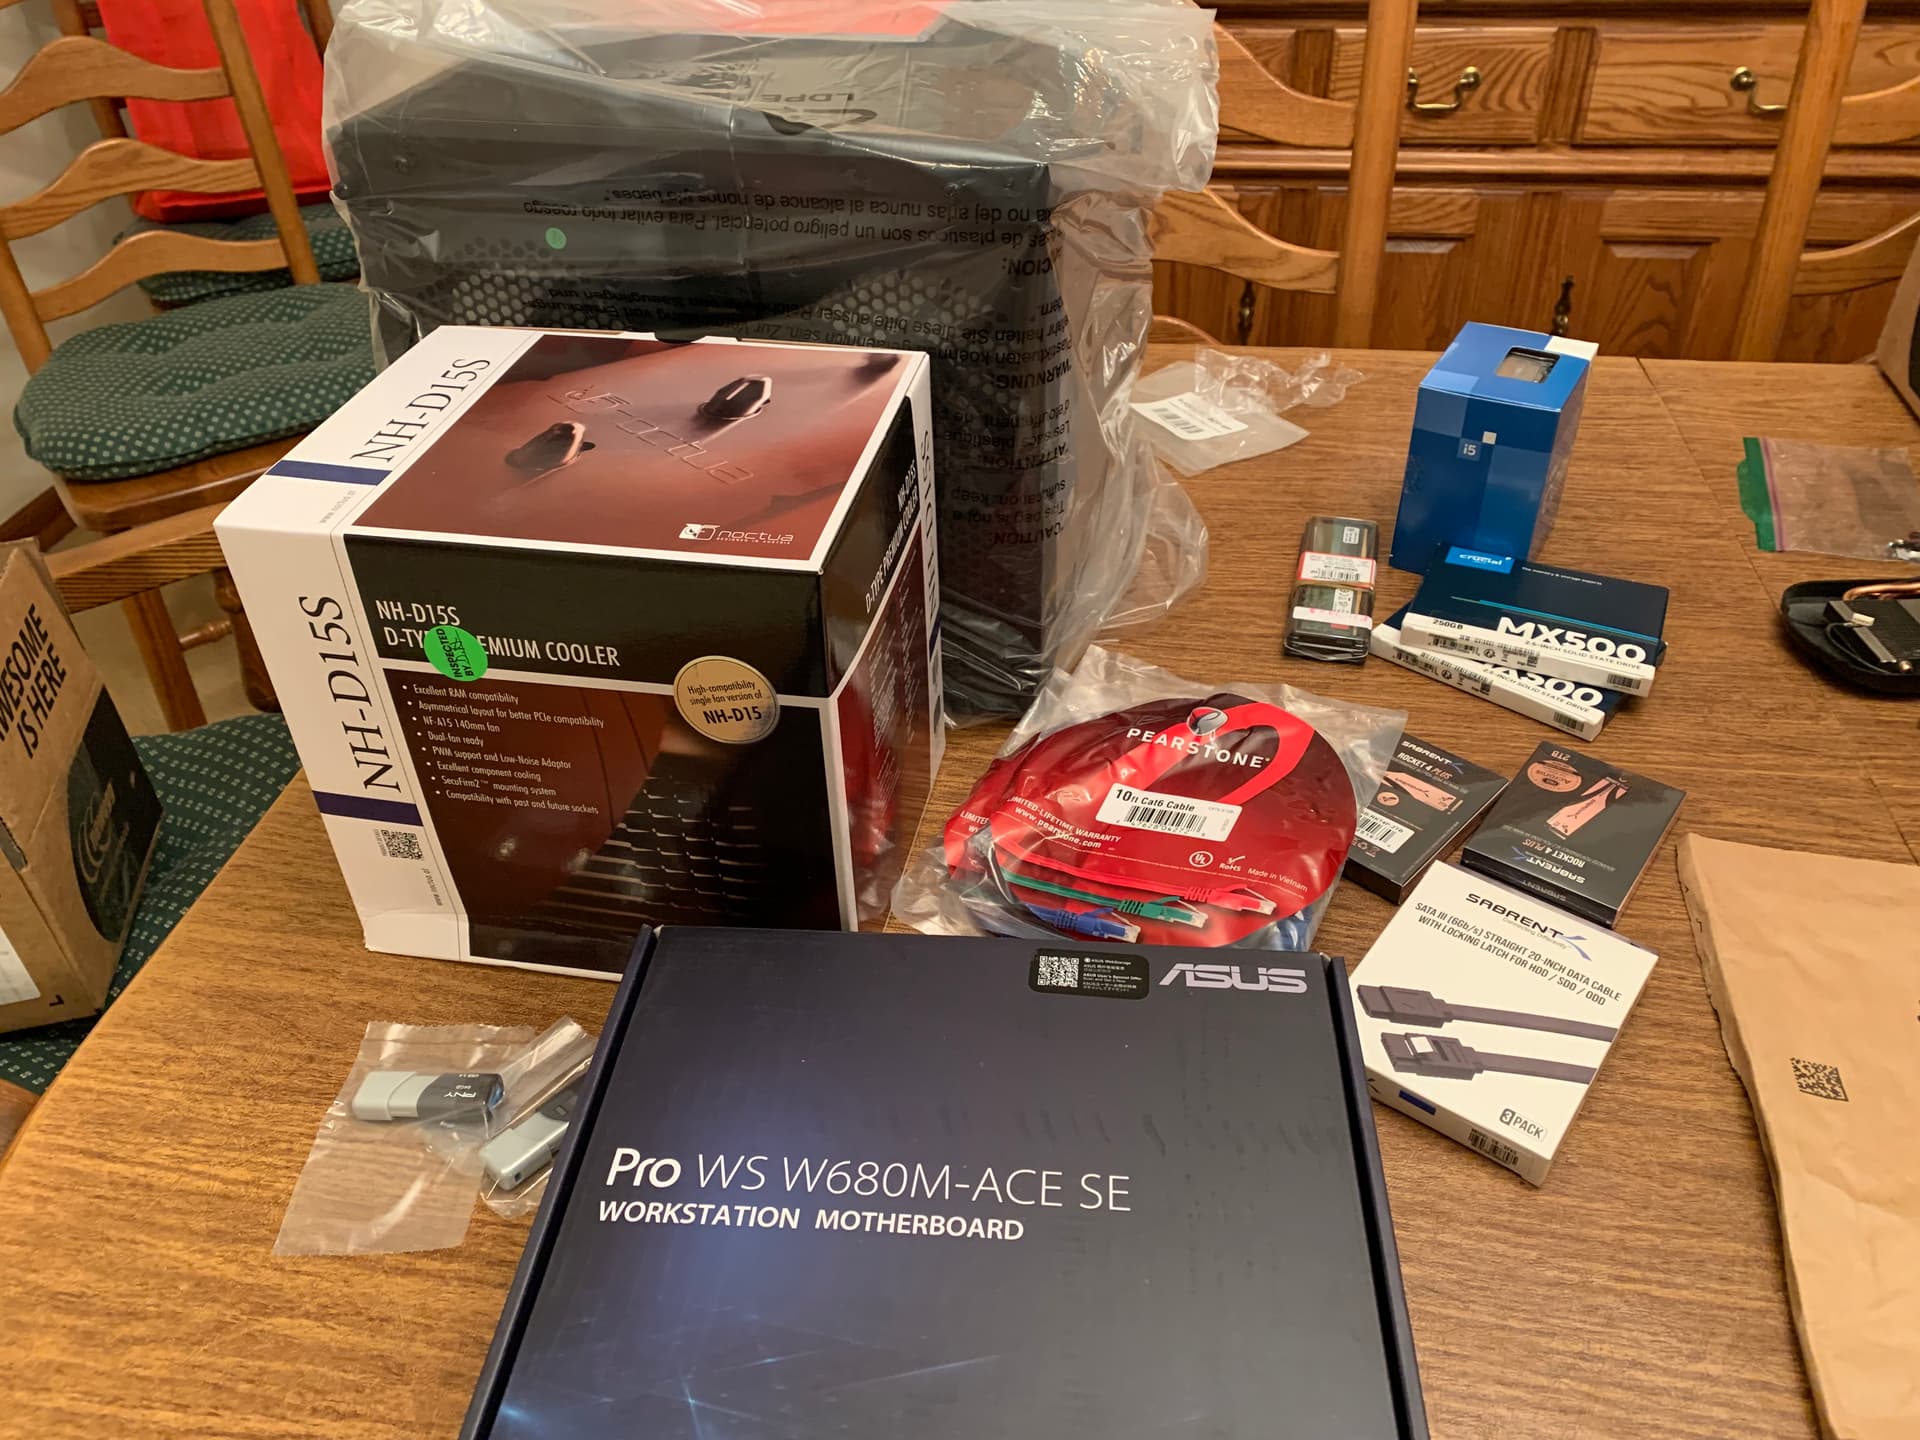
1almond's blog

8gytd8

After a long time lurking, and watching a plethora of L1, LS, and NC videos, I’ve got the bug to build a server. After plenty of research, and asking some questions on this forum, I settled on LGA1700 + W680 for ECC support, and the node804 for small-ish form factor. (really because I hate lifting heavy things.)

This blog will detail the journey of building out a homeserver on W680 in the mATX form factor on the ASUS PRO W680m ACE SE motherboard.

There’s not a ton of people using W680 in this form factor, nor this board specifically, so hopefully this blog can be helpful for those looking to set up their own server in this form factor.

The build starts tomorrow~

8 Likes

Unboxing everything and getting ready to go, here’s the parts and the reasons why I chose what I chose:


Processor: Intel i5 13500
Once I decided to go ECC RAM, viewing intel ARK, it was either this or the 12500 for the minimum CPU that supported ECC RAM. The 13500 gives you E-cores, and the price difference between the two when I orded was nominal, about $20. Having built a 13500 + NHD-15S in ATX, I know they idle pretty well and since this server is going to be idle outside of a scrub or software update (My other 13500 ATX build in a Corsair 4000D Airflow idles at 25C to 30C in my office which is kept at 23C.)

Motherboard: ASUS WS 680M PRO ACE SE
This one was a tough decision. It was down between this and the ASROCK INDUSTRIAL IMB-X1314, or going to the full sized ATX version in a different case, but I’ll talk about that in the case section. The IMB-X1314 has way more sata ports, an attractive PCIE layout with 2x16 slots, and ECC DDR4 support. What’s not to like, right? Well, the board itself bordered on unobtainable when ordering parts for one. Also, the DDR4 is not your standard run of the mill DDR4, it’s LONG RAM. If you thought the motherboard was unobtainable, just try finding ECC DDR4 LONG RAM! Lastly, many anecdotal reports of instability, and general issues of the asrock industrial w680 boards veered me away from the Asrock industrial boards. (That, and if RAM or the motherboard had to be replaced, it’d be difficult to get a replacement.)

That’s not to say that the W680M PRO ACE SE is perfect either. Its CPU Socket is kinda weird coming from building gaming pcs. It’s rotated 90 degrees, along with the ram placement. The PCIe slots are kinda meh as well-- you’ve only got a single 16x slot to work with. There also have been reports of the onboard IMPI interfering with iGPU passthrough, but also reports that it’s possible to get it to work. Look forward to that here.

One last thing about the motherboard, I picked mine up from B&H Photo for $370. Sadly, the B&H page for it is an absolute mess. The title says it’s ‘ASUS Pro WS W680M-ACE SE LGA 1700 ATX Motherboard’, even though the ‘M’ in the sku indicates mATX. The picture is of the full sized ATX board. The Specs say micro atx! Seriously, what a mess. I’ve messaged B&H about this a few weeks ago and they still haven’t corrected it. If you are looking for the mATX board, this is the listing you want, despite the ATX in the title. You can also find it on amazon, along with reviews of people saying they got one with bent pins, so I went with B&H whom which I have a good track record with; they actually ship things with air bags!

RAM: Kingston KSM48E40BD8KM-32HM x2
It was on the motherboard QVL list, and available from newegg. Confusingly, it’s listed as ‘Registered’ ECC RAM on newegg, but unregistered on both kingston’s website and on the memory QVL for a board that doesn’t support registered ECC RAM. The lone review on newegg says it works with the sisterboard to the W680M-ACE SE, the ATX W680 PRO, so we shooould be good. If it works, I’ll be buying an extra 64 gigs in the future to hit 128GB.

PSU: Corsair RM 750x
It was available when ordering parts. It would’ve been better to go for a 500 watt PSU from a reputable company, but they were all sold out or being sold second hand by Ferengi for outrageous prices when I was shopping for parts. As a happy little side effect of the larger PSU, there should have headroom for a GPU in the future, if I want to add some AI capabilities to this build.

CASE: Fractal Design Node 804
The big choice here was between a full ATX case like the Fractal Design Define R5 or this one at mATX. The weight difference without components in them is about 10 lbs. I ended up going for the mATX form factor after having vietnam style flashbacks of carrying my old NZXT Tempest EVO case up four flights of stairs with a compliment of HDD’s inside. Not fun times I’d like to relive again, especially with 1+ moves in the future. If you’re building W680, full ATX will give you access to more PCIe physical slots, so if you can lift 30-40 lbs fully loaded, maybe it’s worth it to you.

Speaking to this case specifically, it has air vents on the top, some foam on the top to dampen sound, two removable drive cages, support for a slim CD Drive, and it can fit an NH-D15S inside! Sign me up.

OS Storage: 2x 250GB Crucial SSD’s
These guys were cheap, and two of them will let me mirror TrueNAS. Since nothing else can fit on the OS drive (or should go on the OS drive), size really isn’t an issue since the extra space will be wasted.

Fast Storage: 2x Sabrent Rocket 4 Plus 2TB NVME drives
They’re really fast. I have these in my main Gaming/AI rig and they are super! I might try that hardware partitioning that wendell talks about a lot in his videos, with these in a mirror and half of them devoted to speeding up truenas directory listing / small file storage, and half devoted to VM’s.
Edit from future me: They only support 1 NVME namespace, so they will be fully devoted to VMs.

Bulk Storage: 2x WD Red Pro 20TB drives
The plan here is to put them in a mirror, that way I can expand by adding more drives in the future, if need be. I missed out on a sale for these while debating which platform to go for, but I’ll be adding them as soon as I get them.

The build

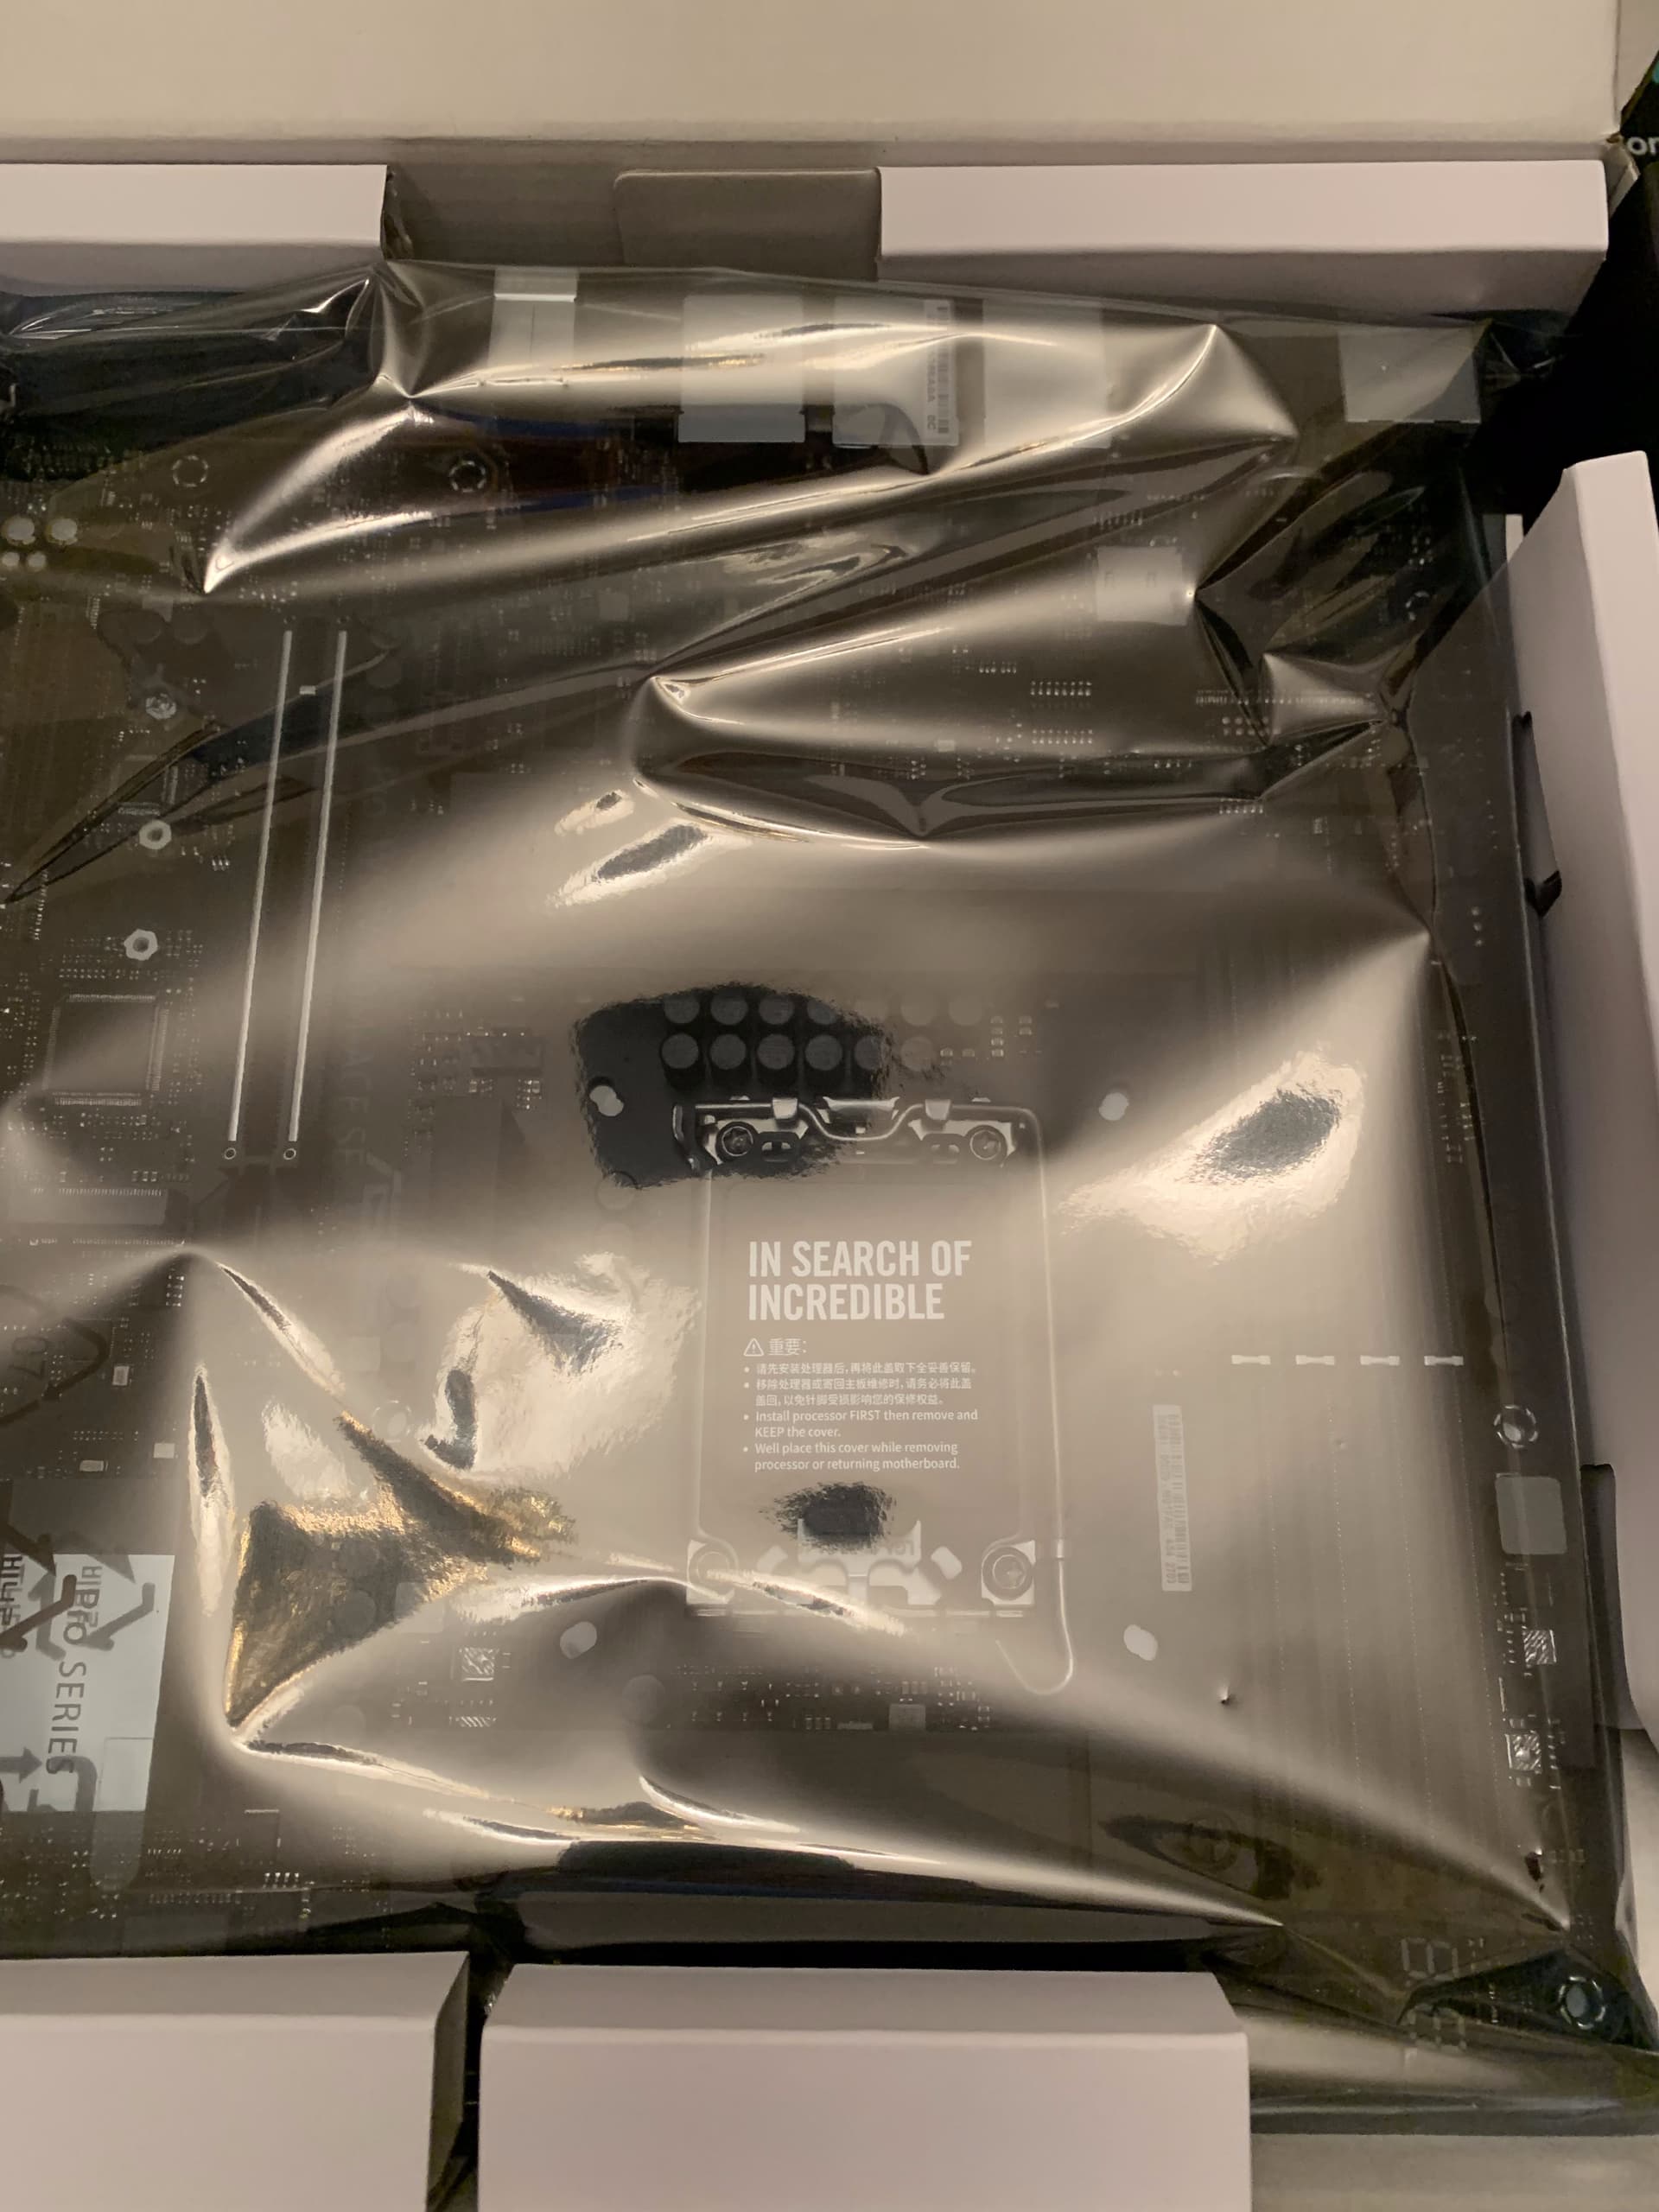
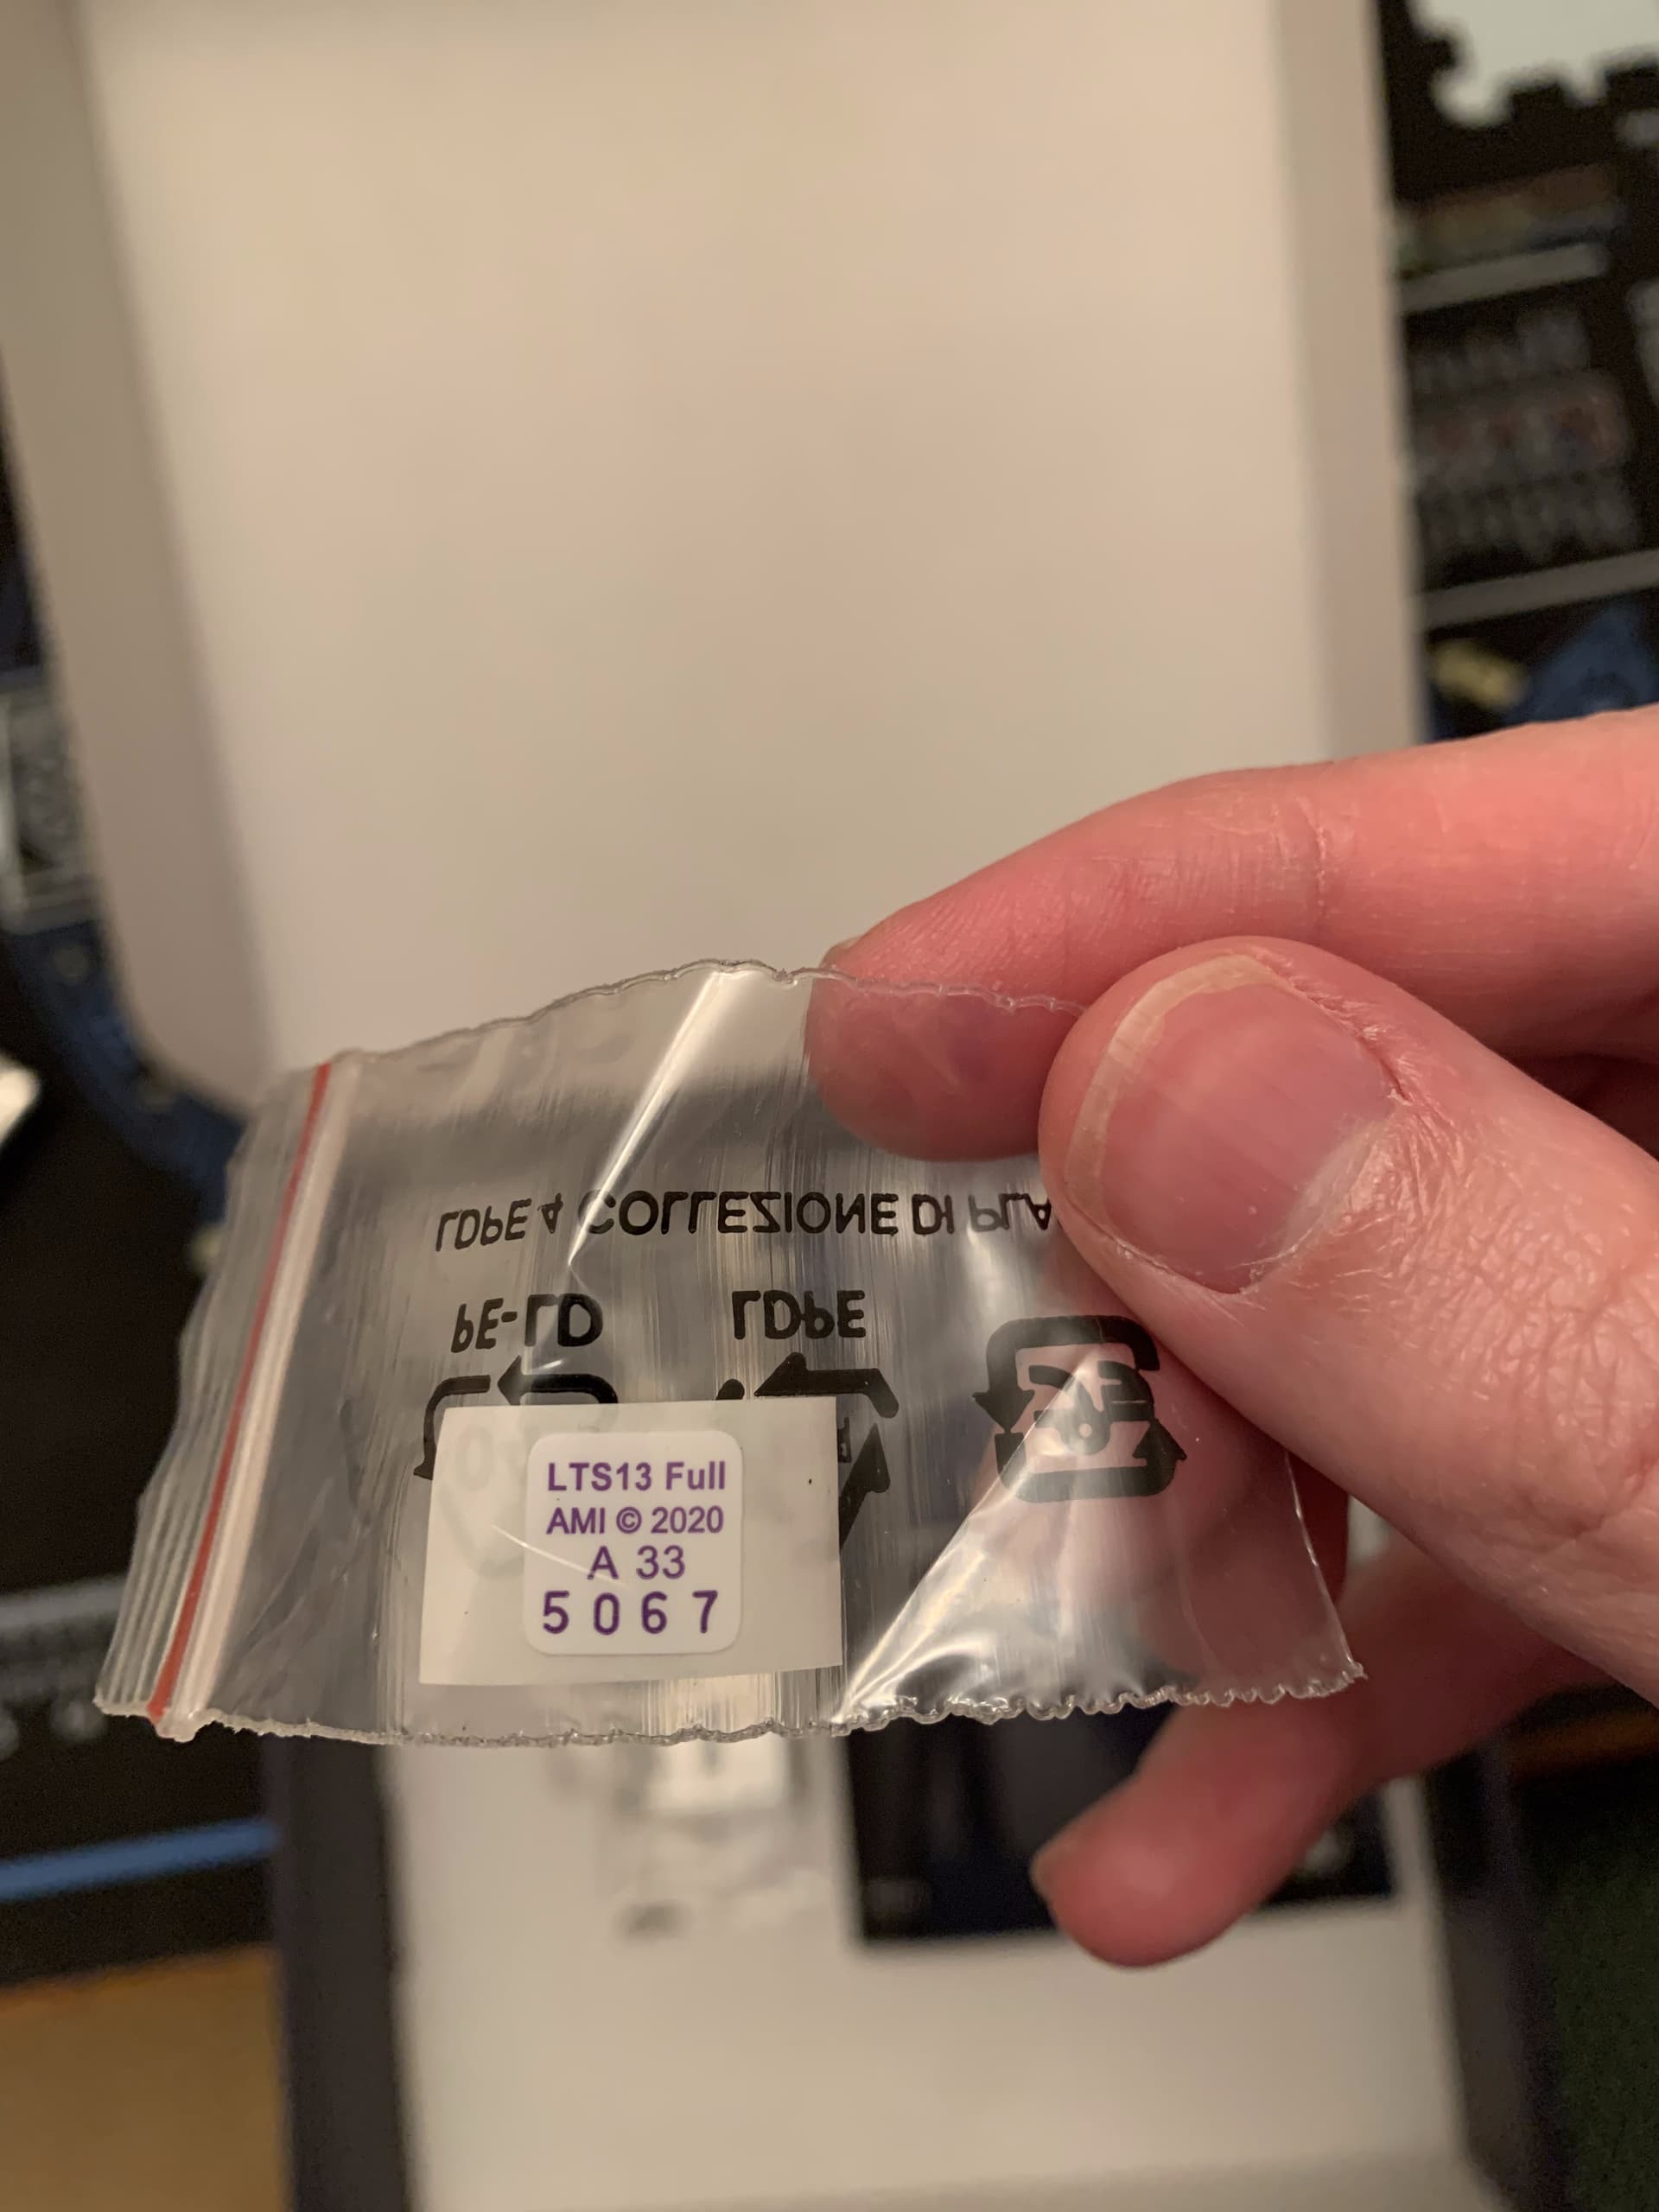
Opening up the motherboard first, it came in an antistatic bag. There was also this really weird, sticker?

Not sure what A33 5 0 6 7 means… perhaps it’s a QC thing? If anyone has a guess, leave a comment. For all I know, it could be the combo to someone’s luggage at ASUS.

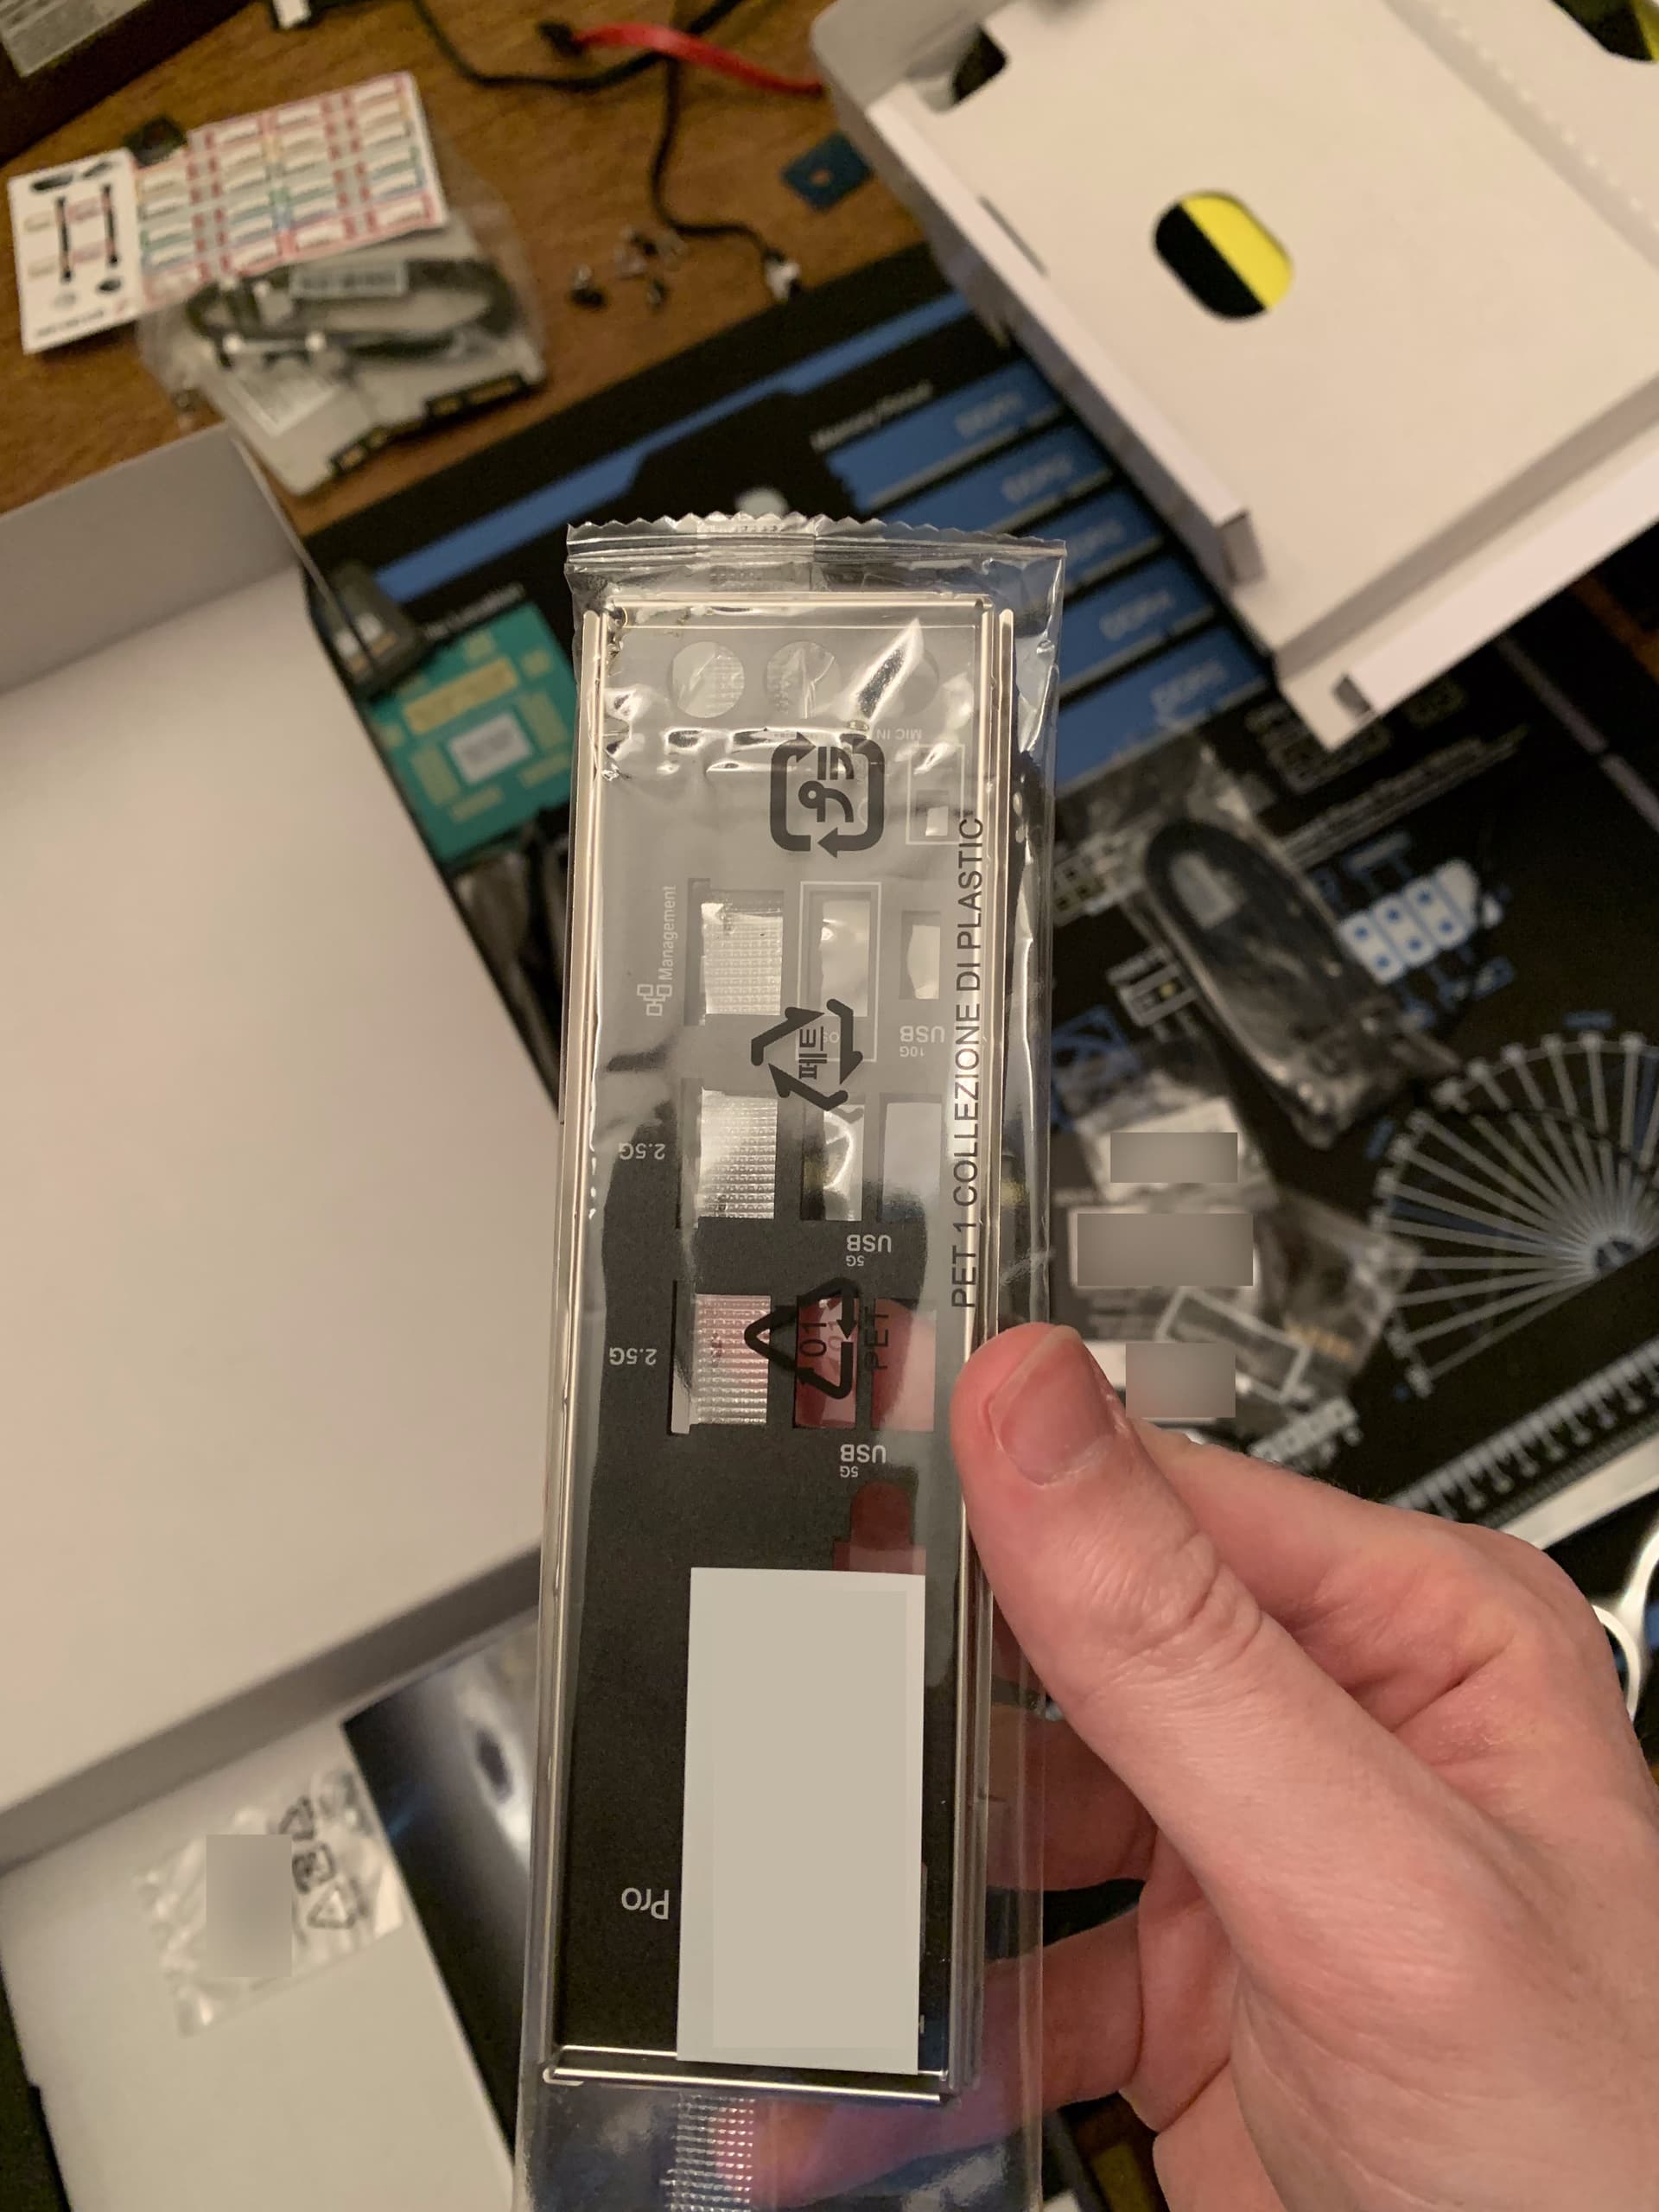
The motherboard also came with the I/O shield.

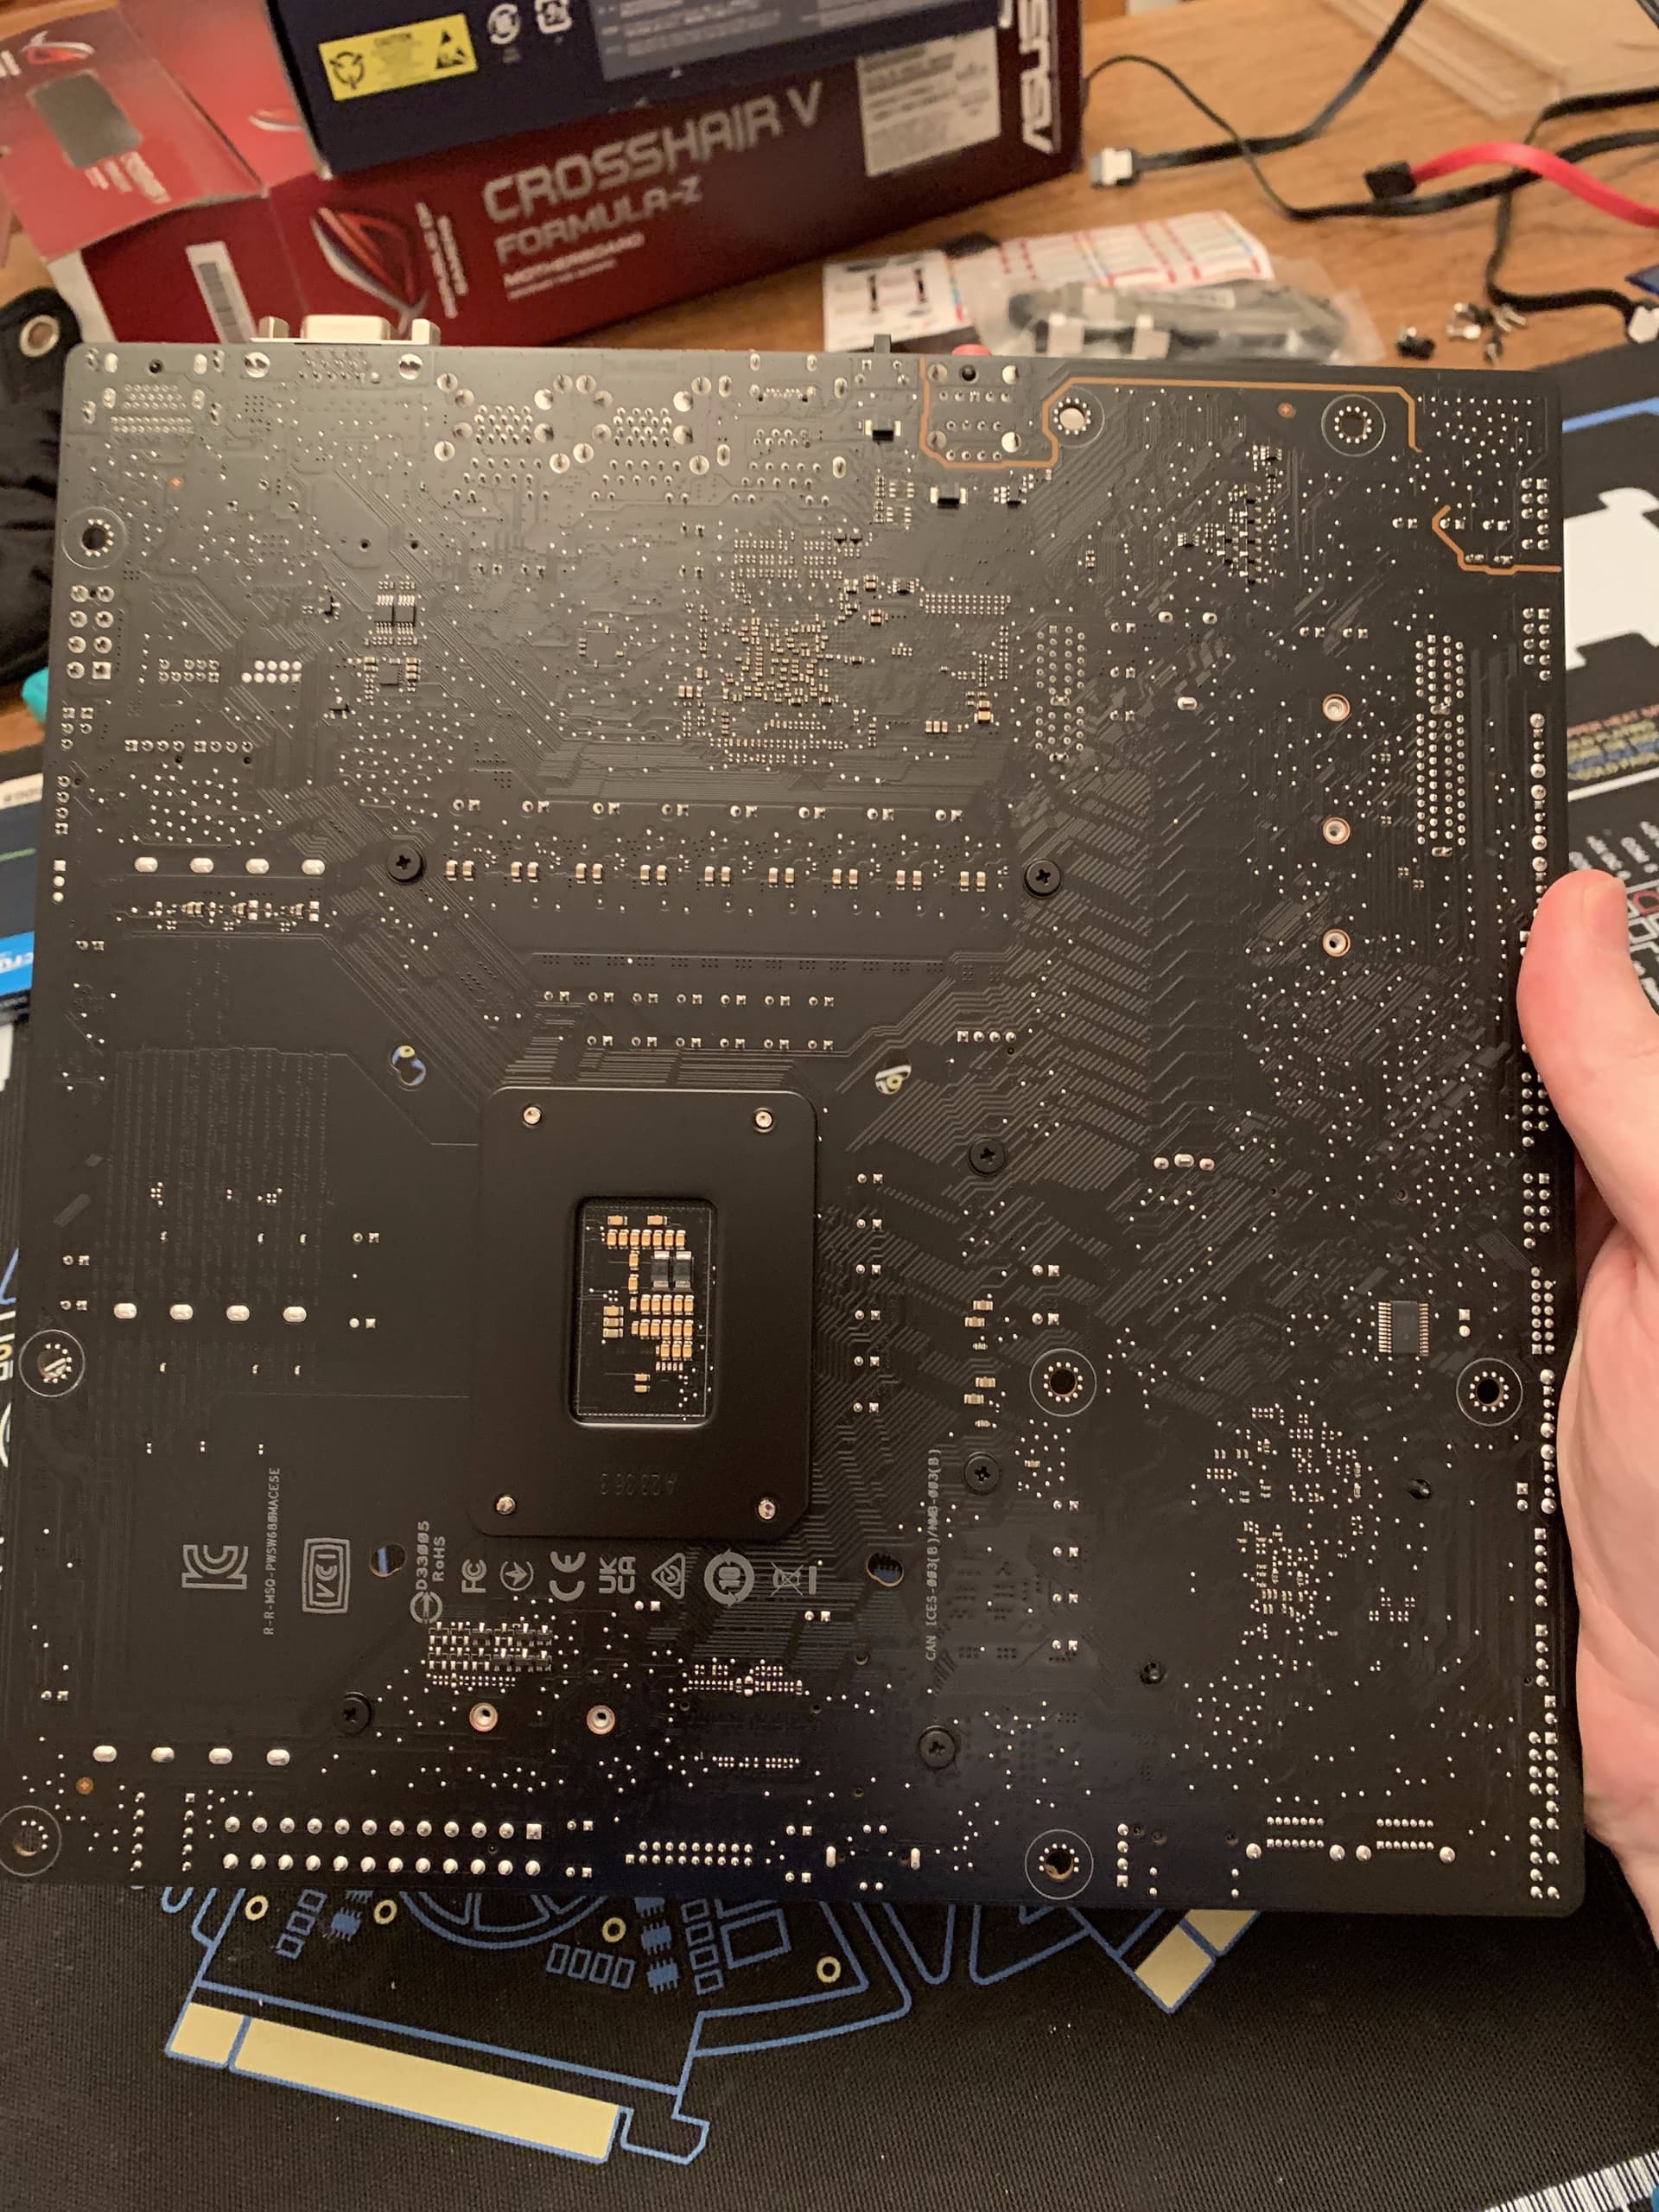
For a $370 motherboard in 2023, it’s a bit disappointing that it doesn’t come pre-installed.

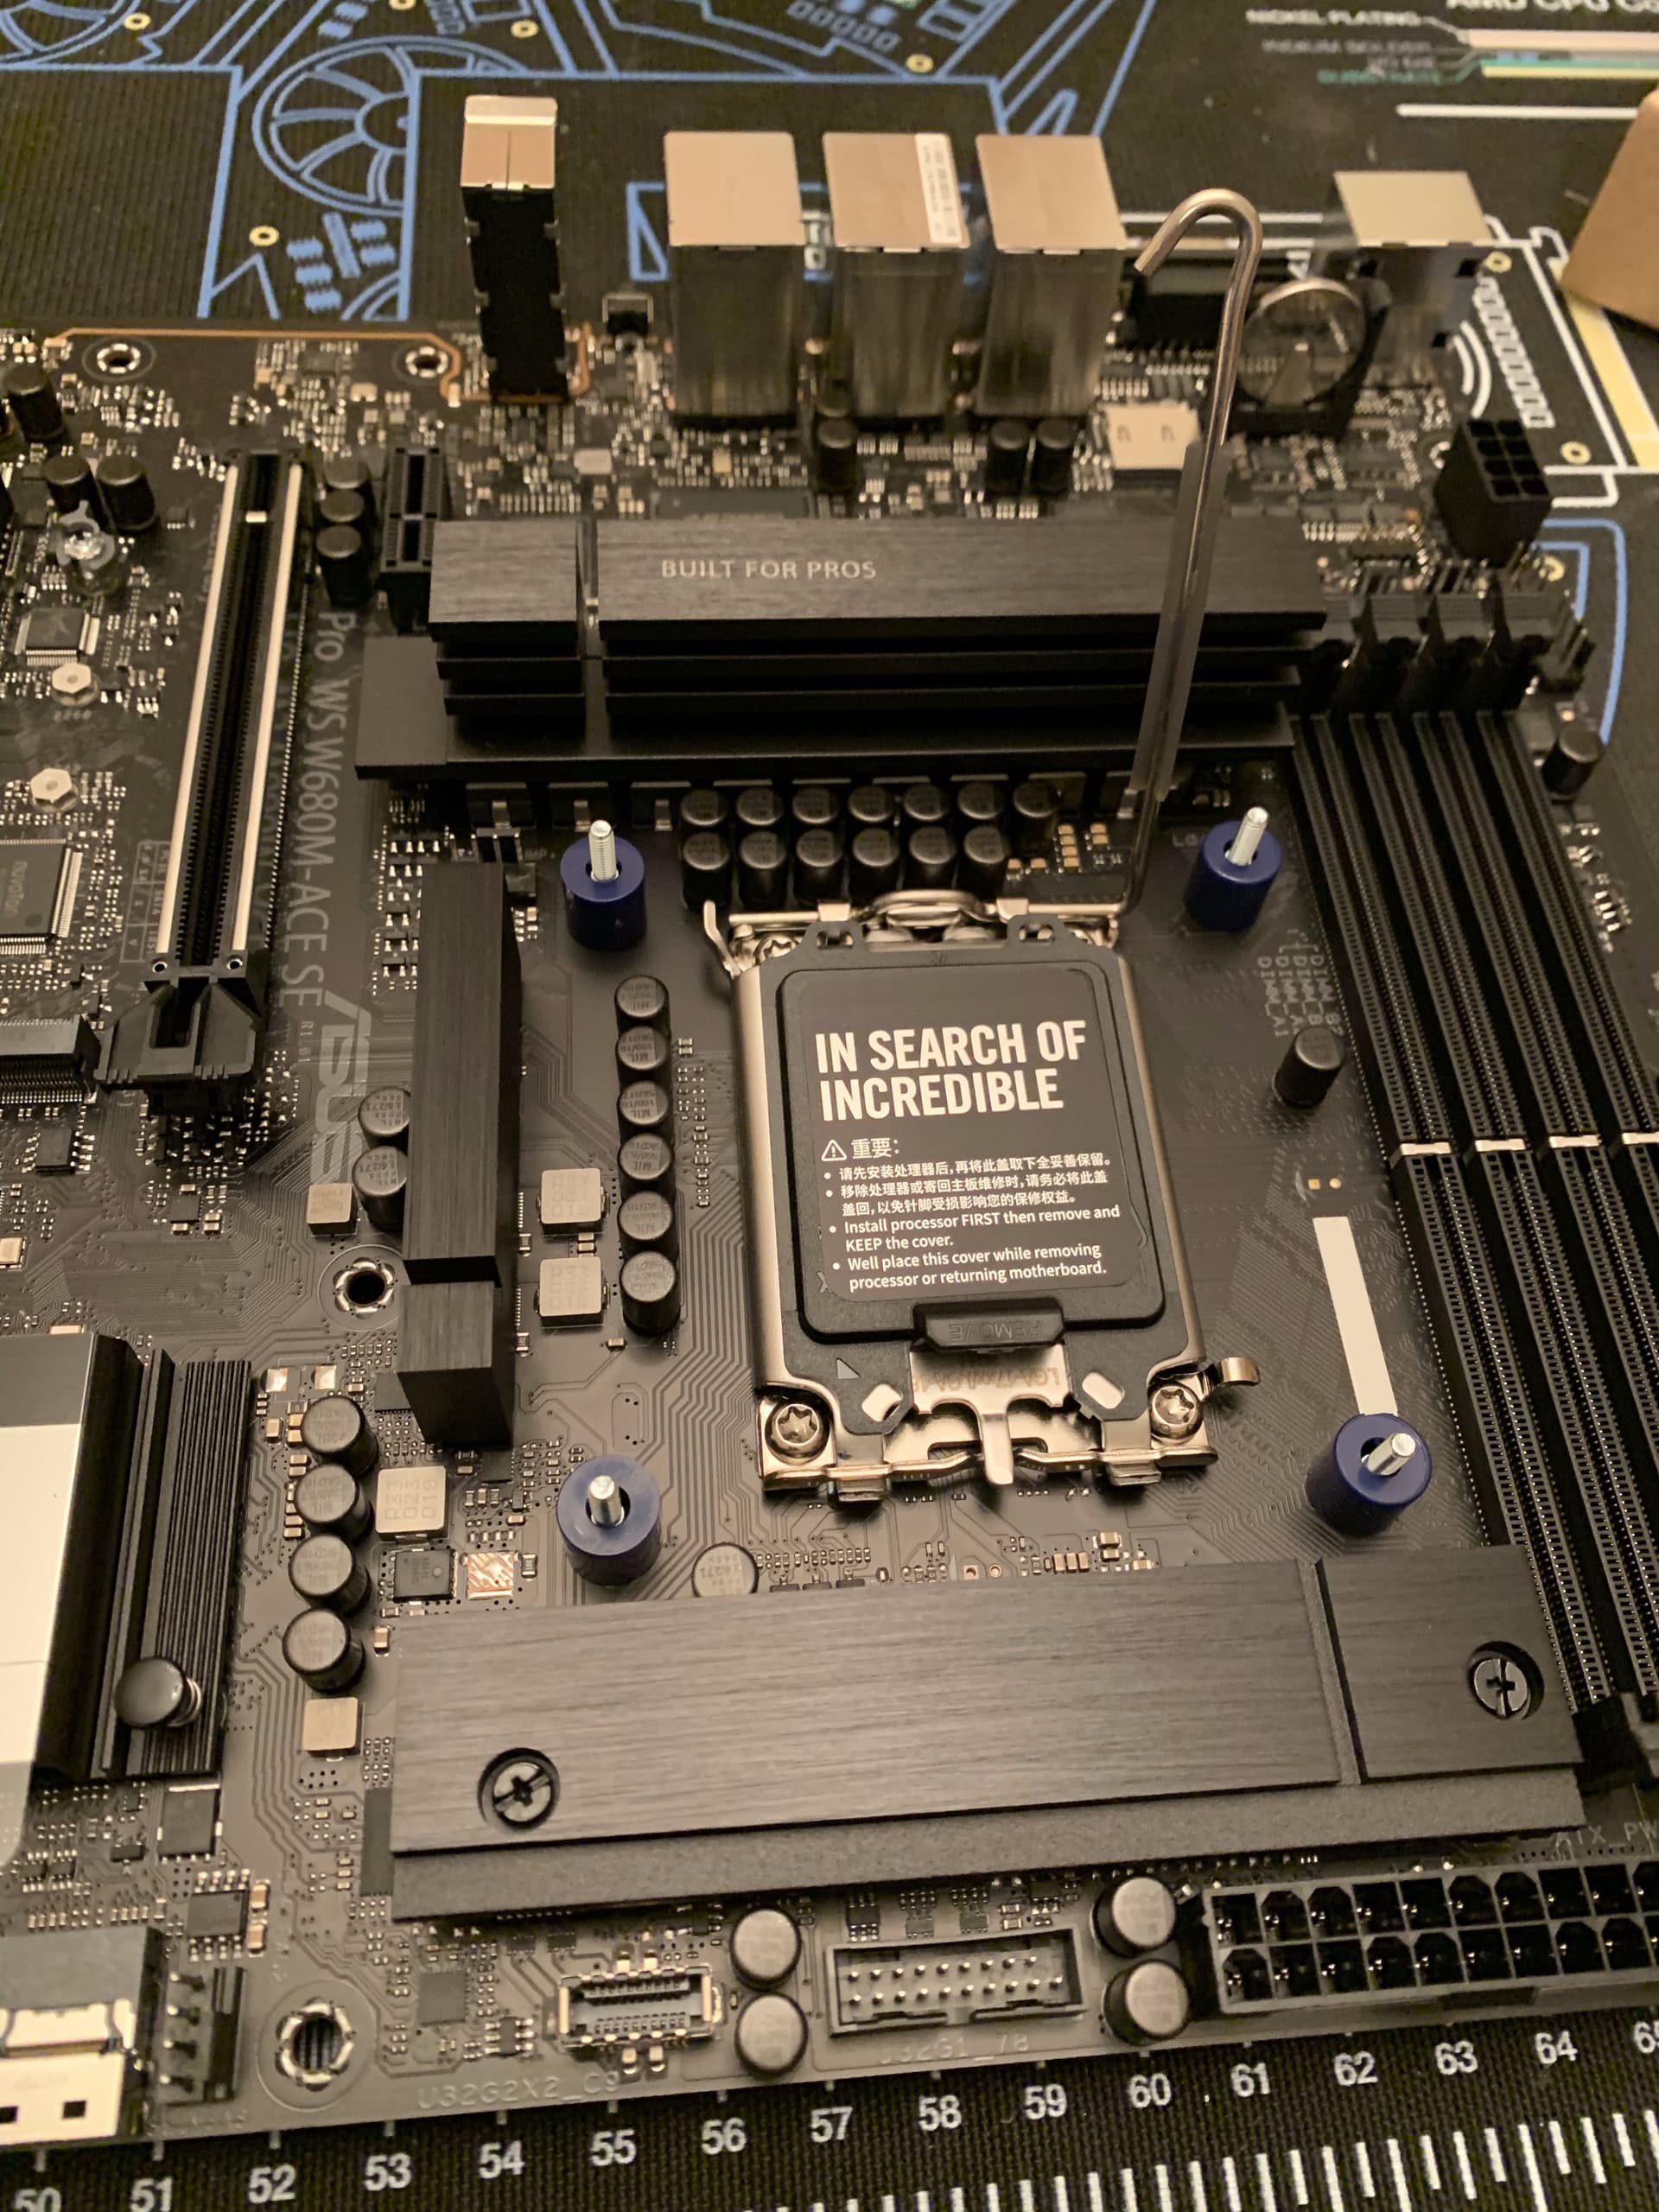
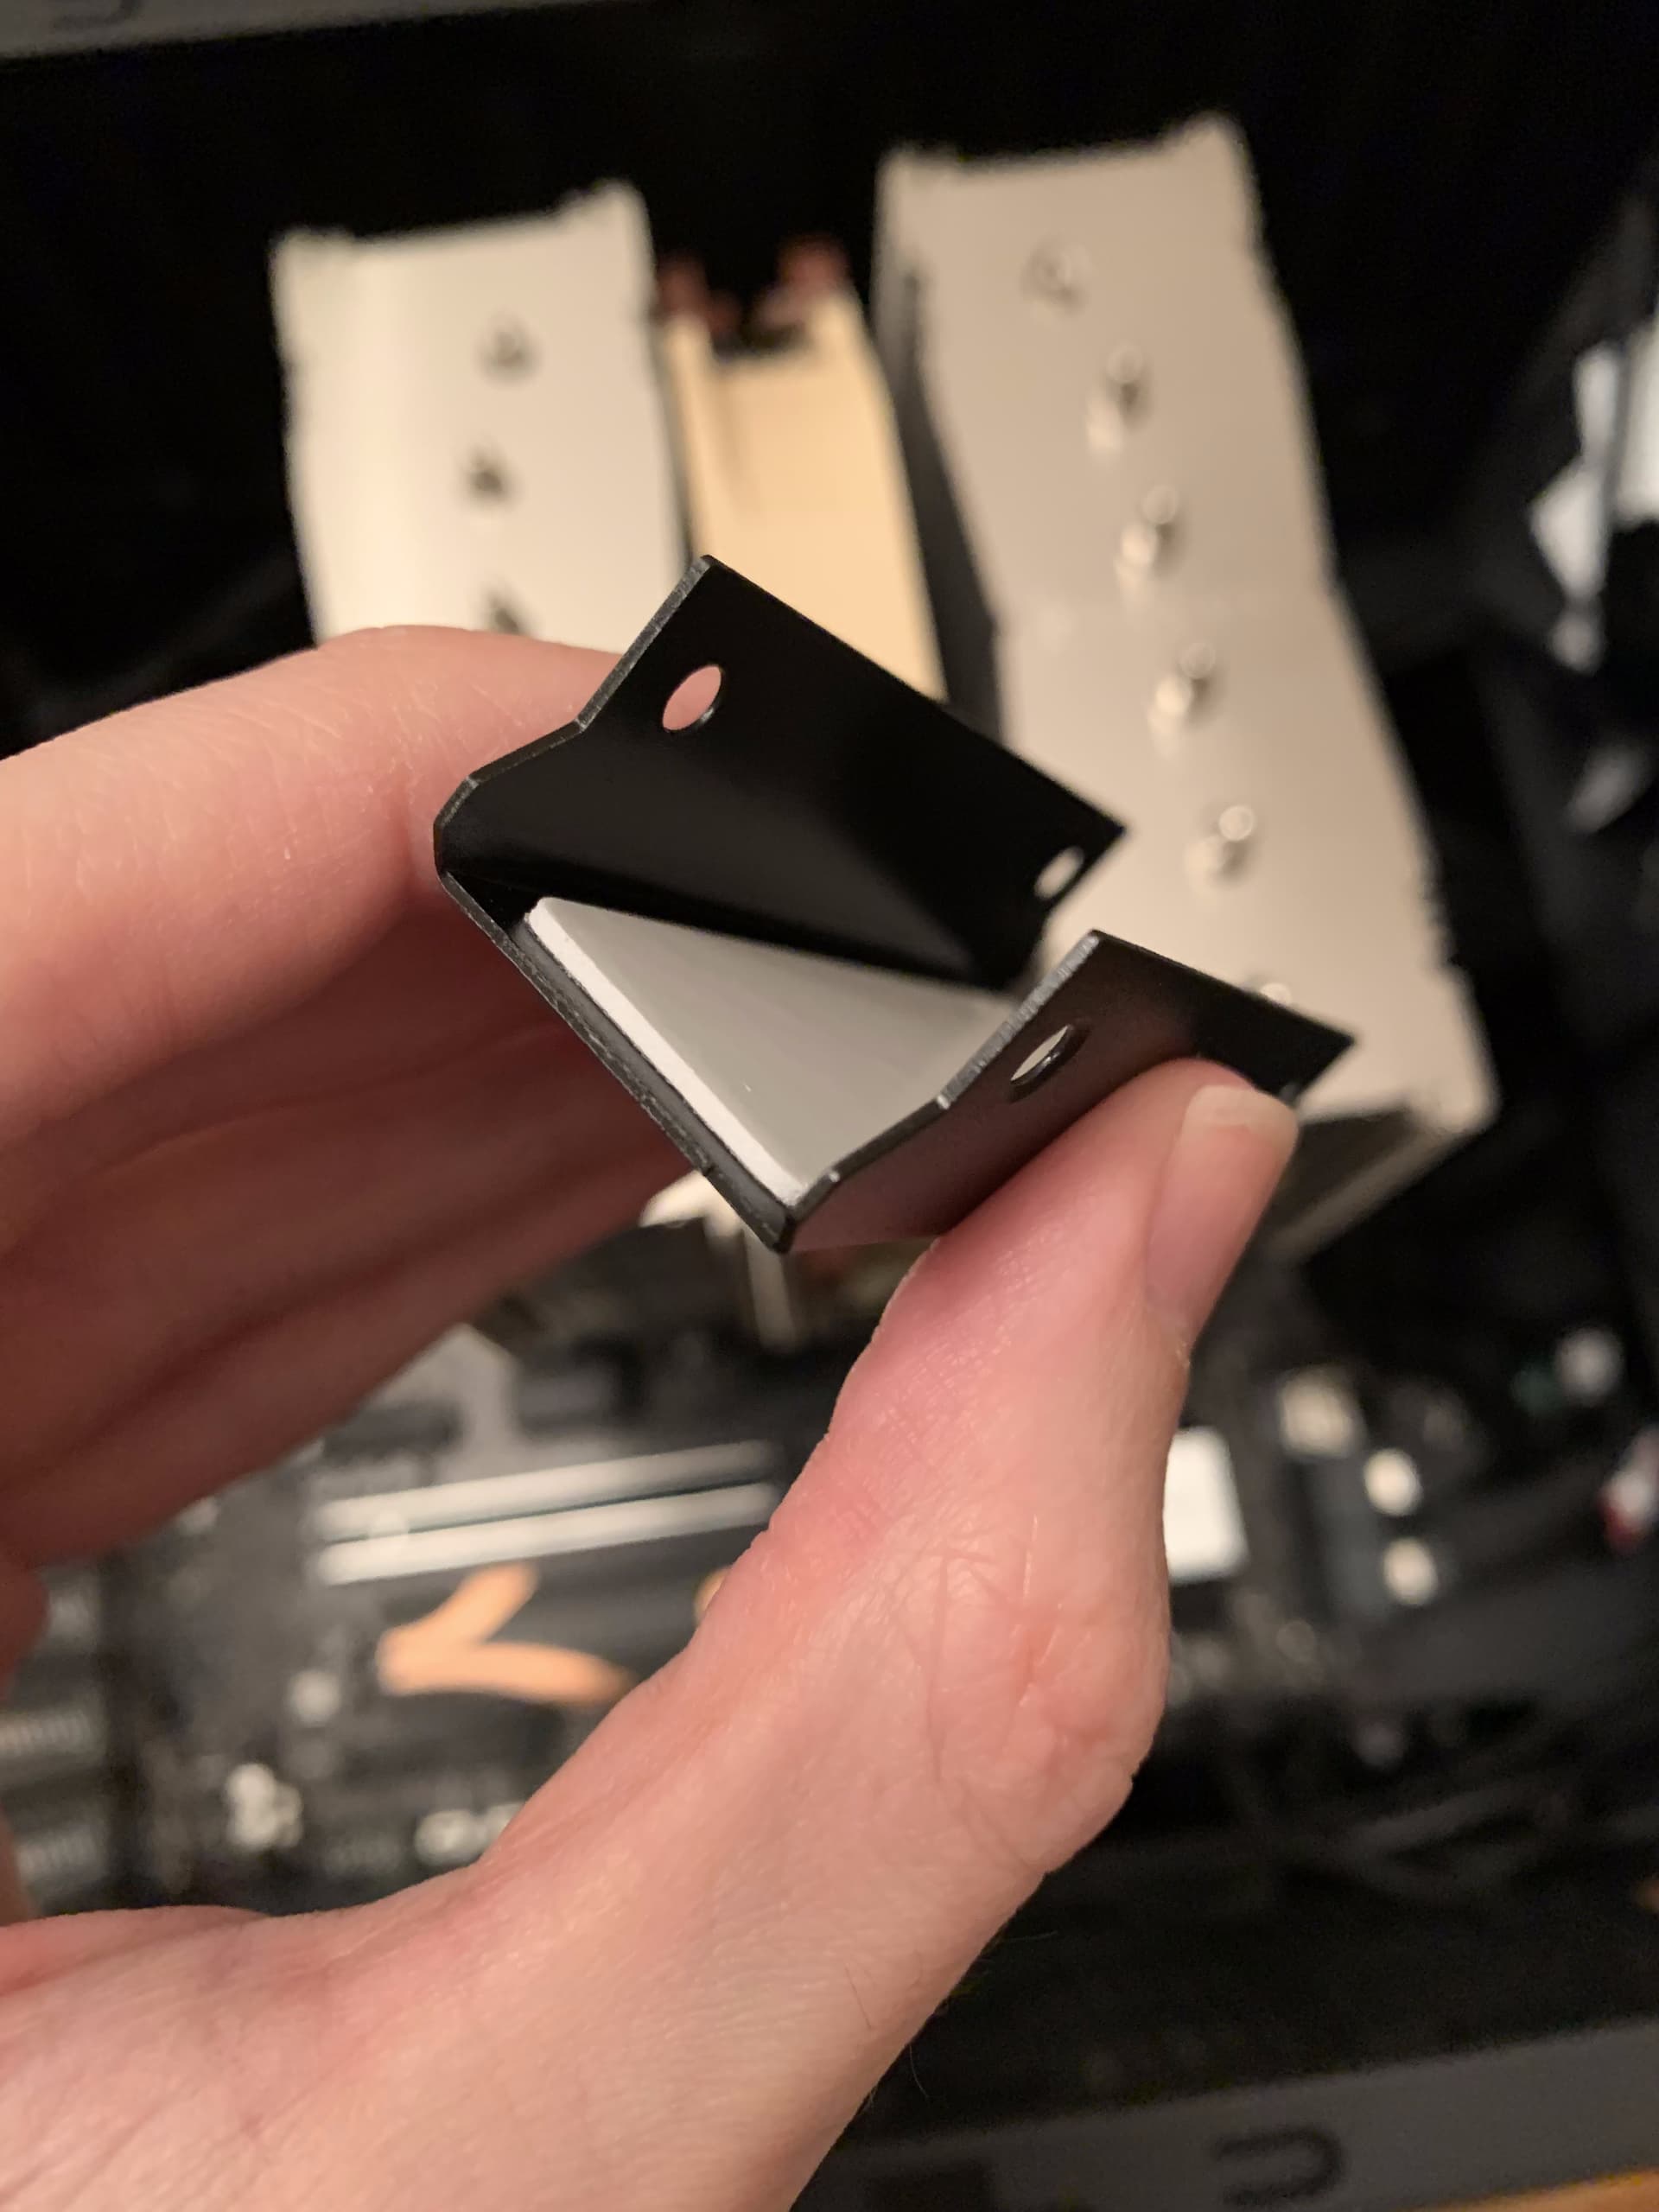
Since I’m going to be doing the LGA1700 bracket mod, here’s a picture of the back of the motherboard. The part of the CPU bracket that faces away from the motherboard is black:

You might be wondering, why even note this? When doing the mod on my main rig, I put the backplate on backwards, so I take pics of them every time now.

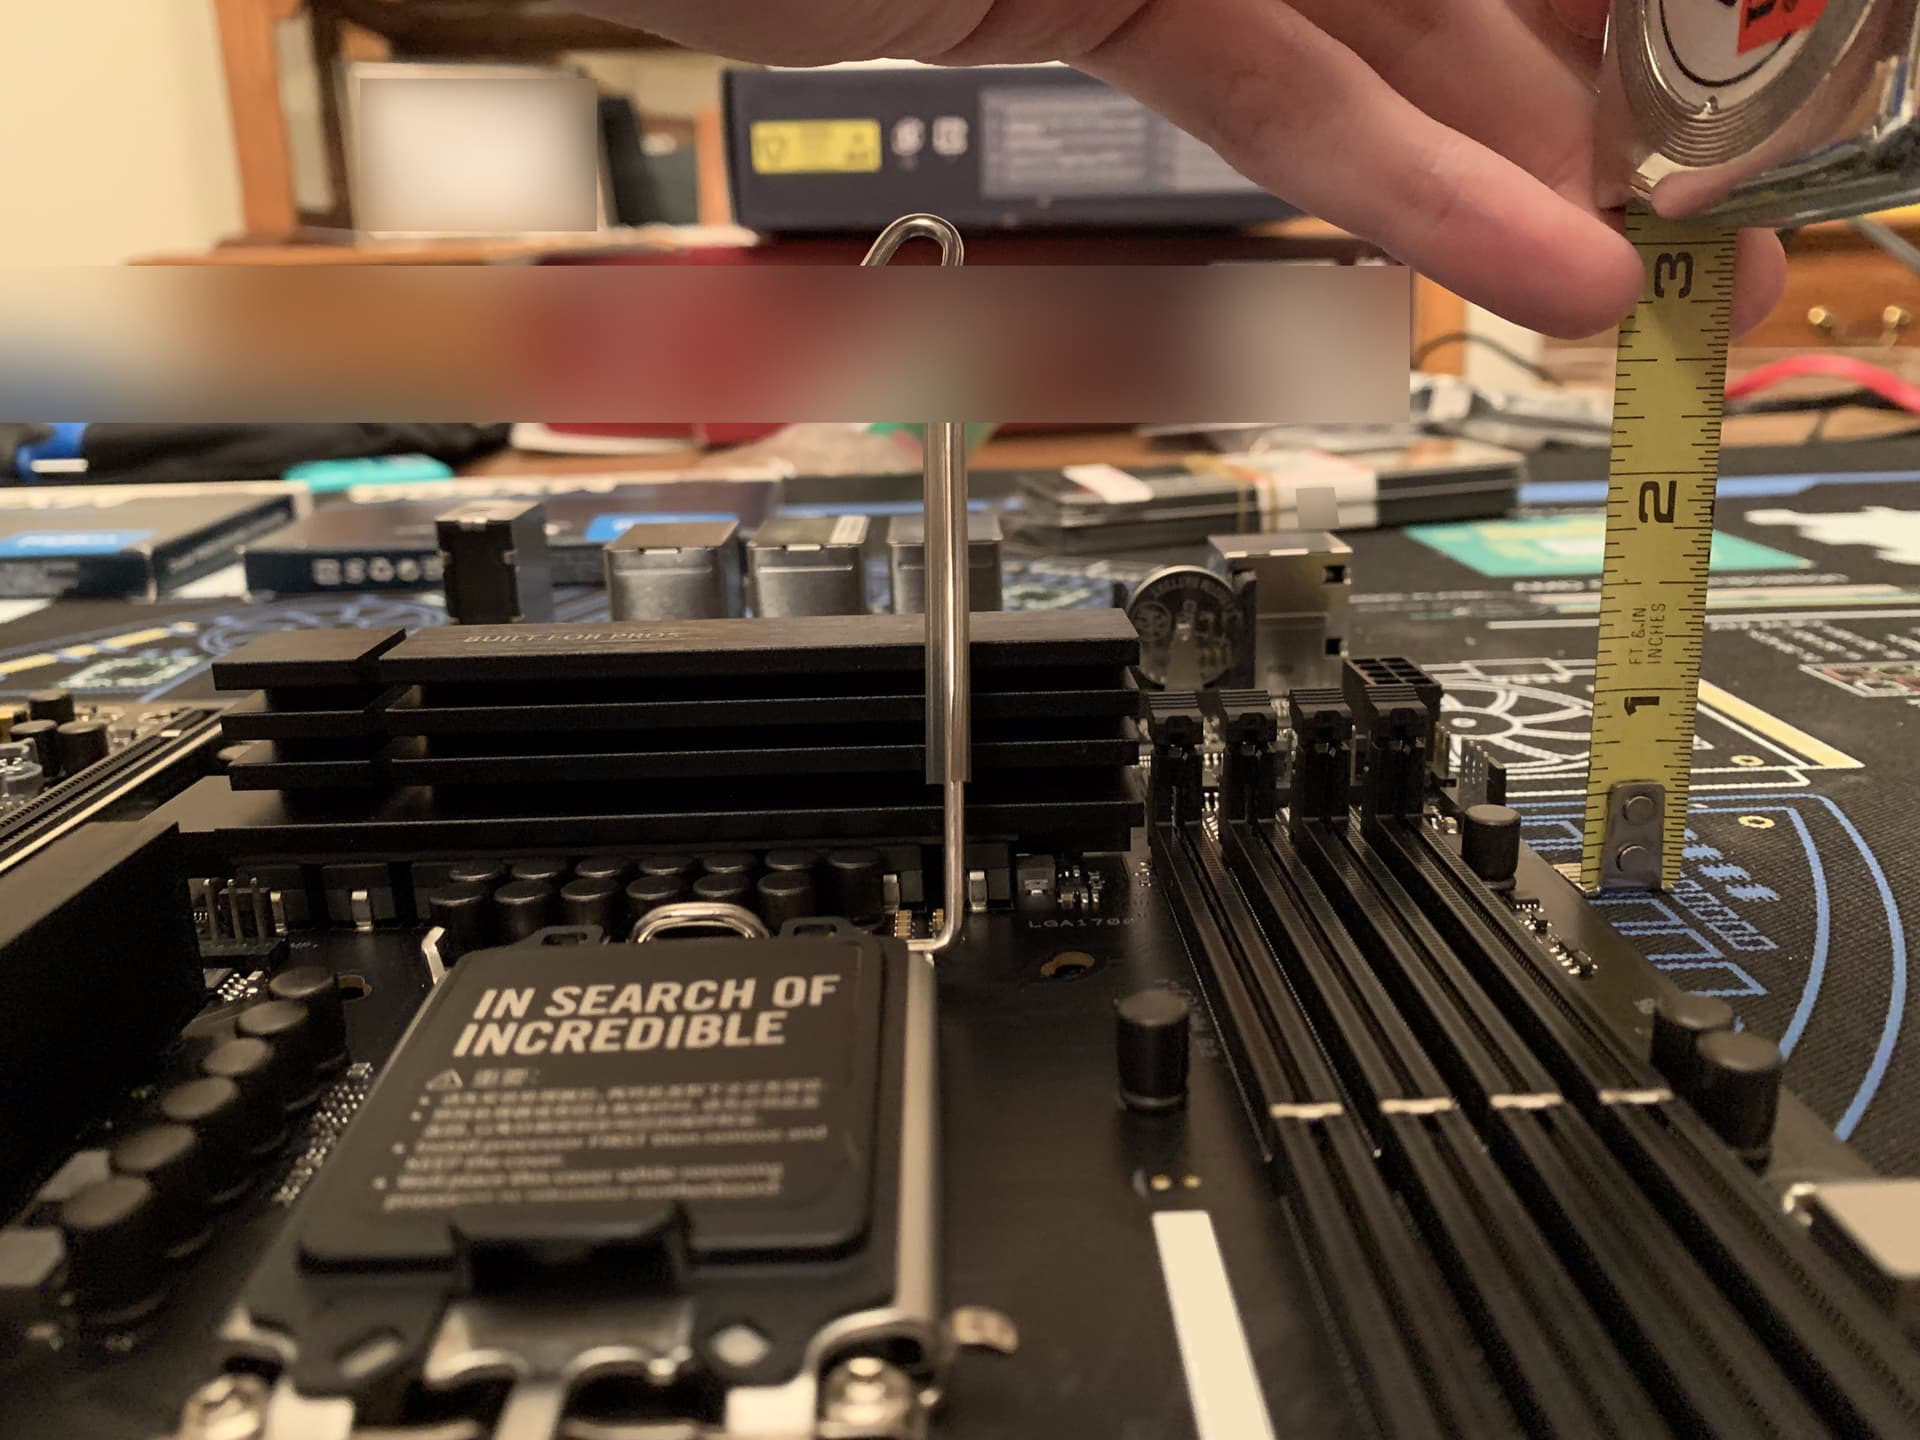
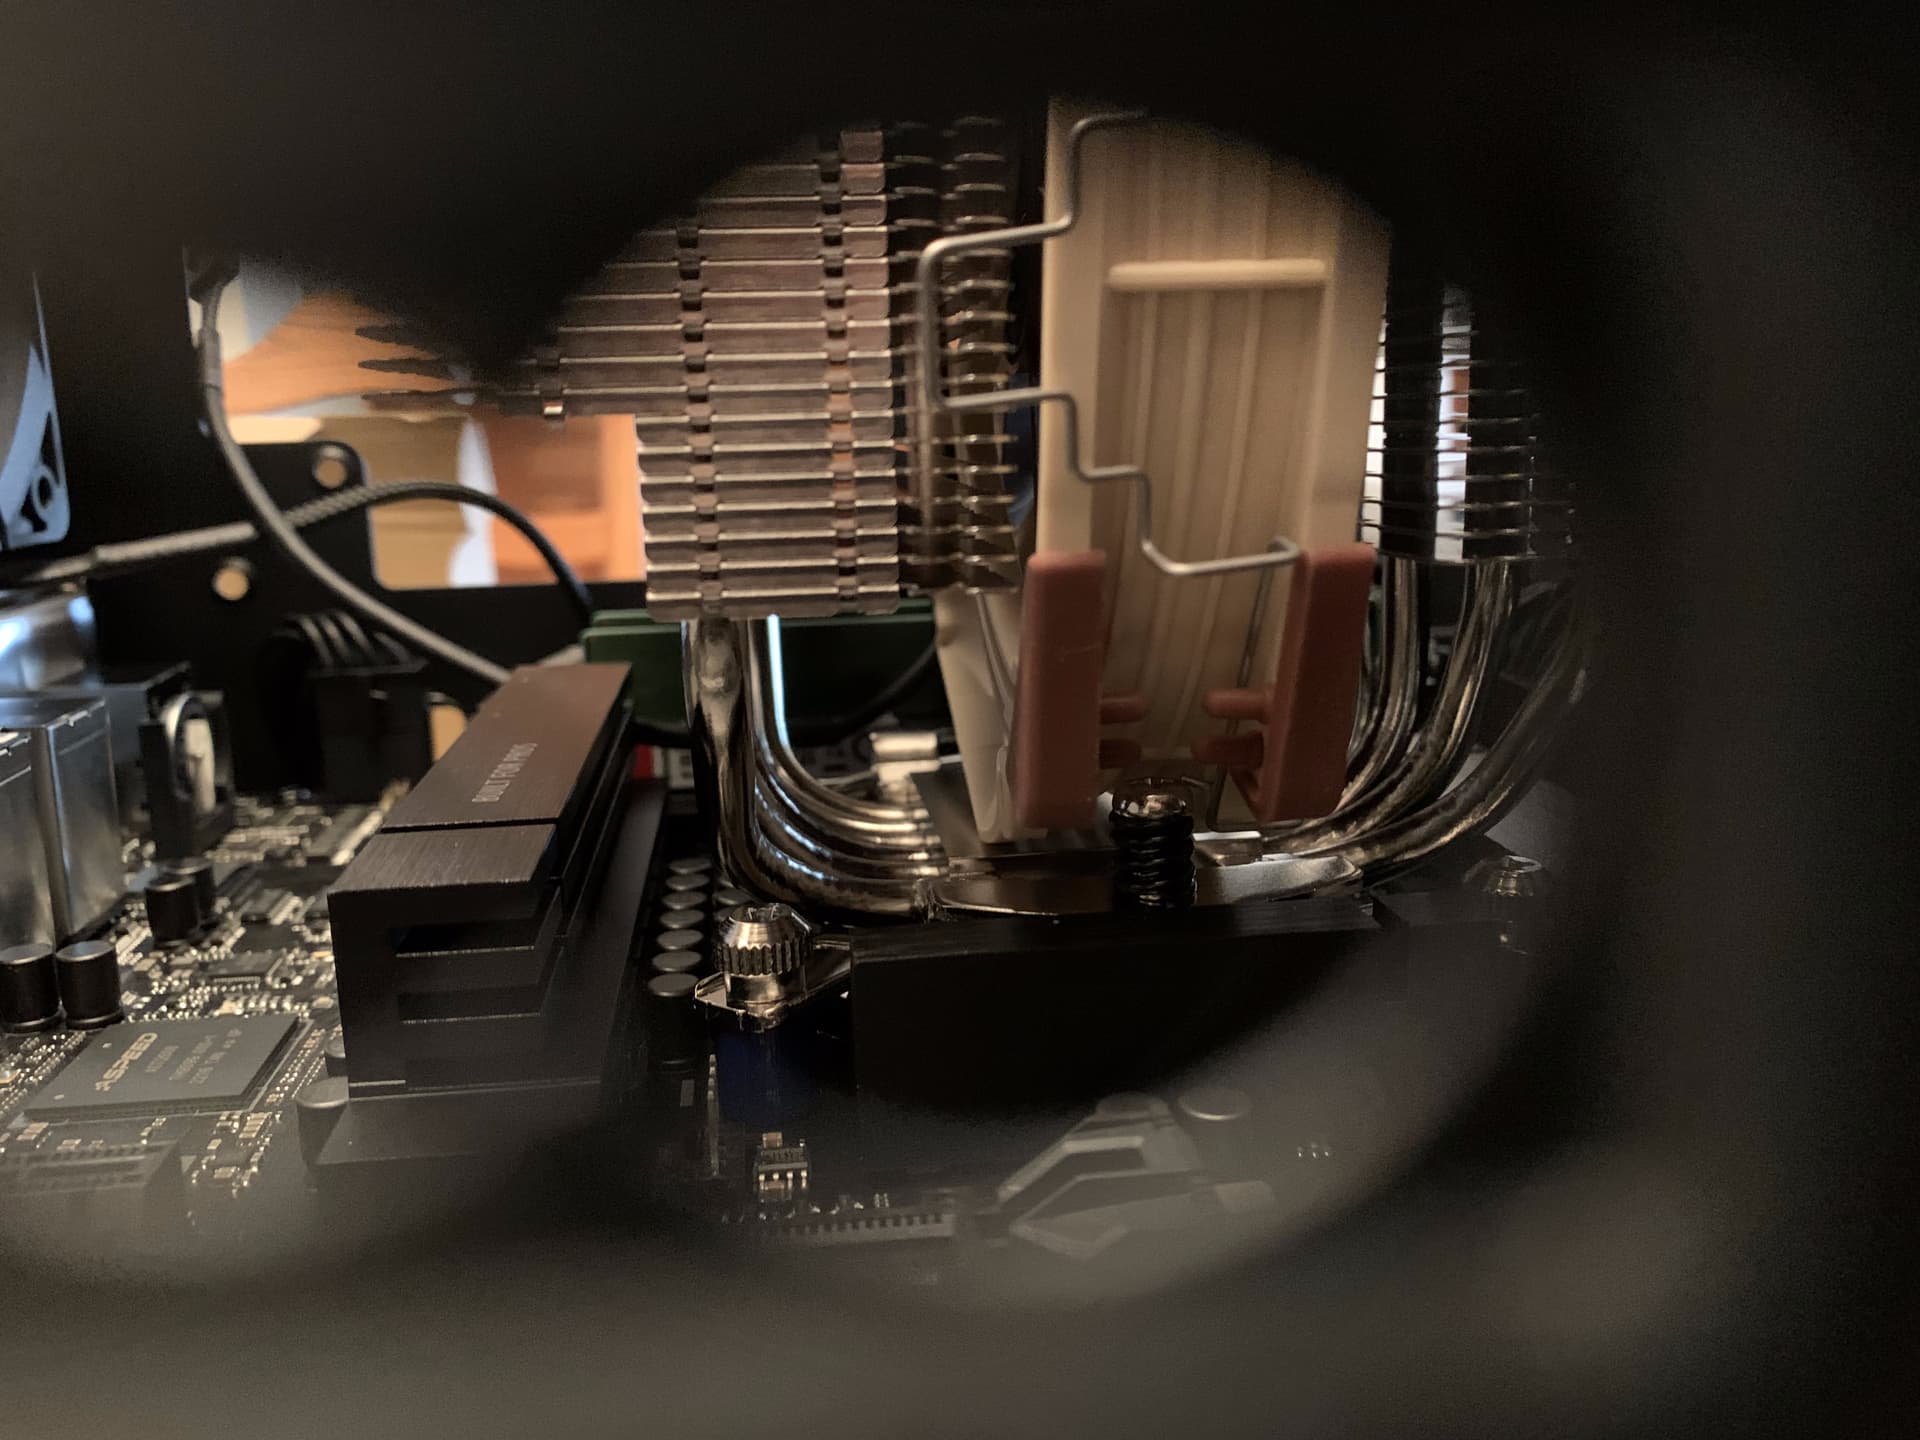
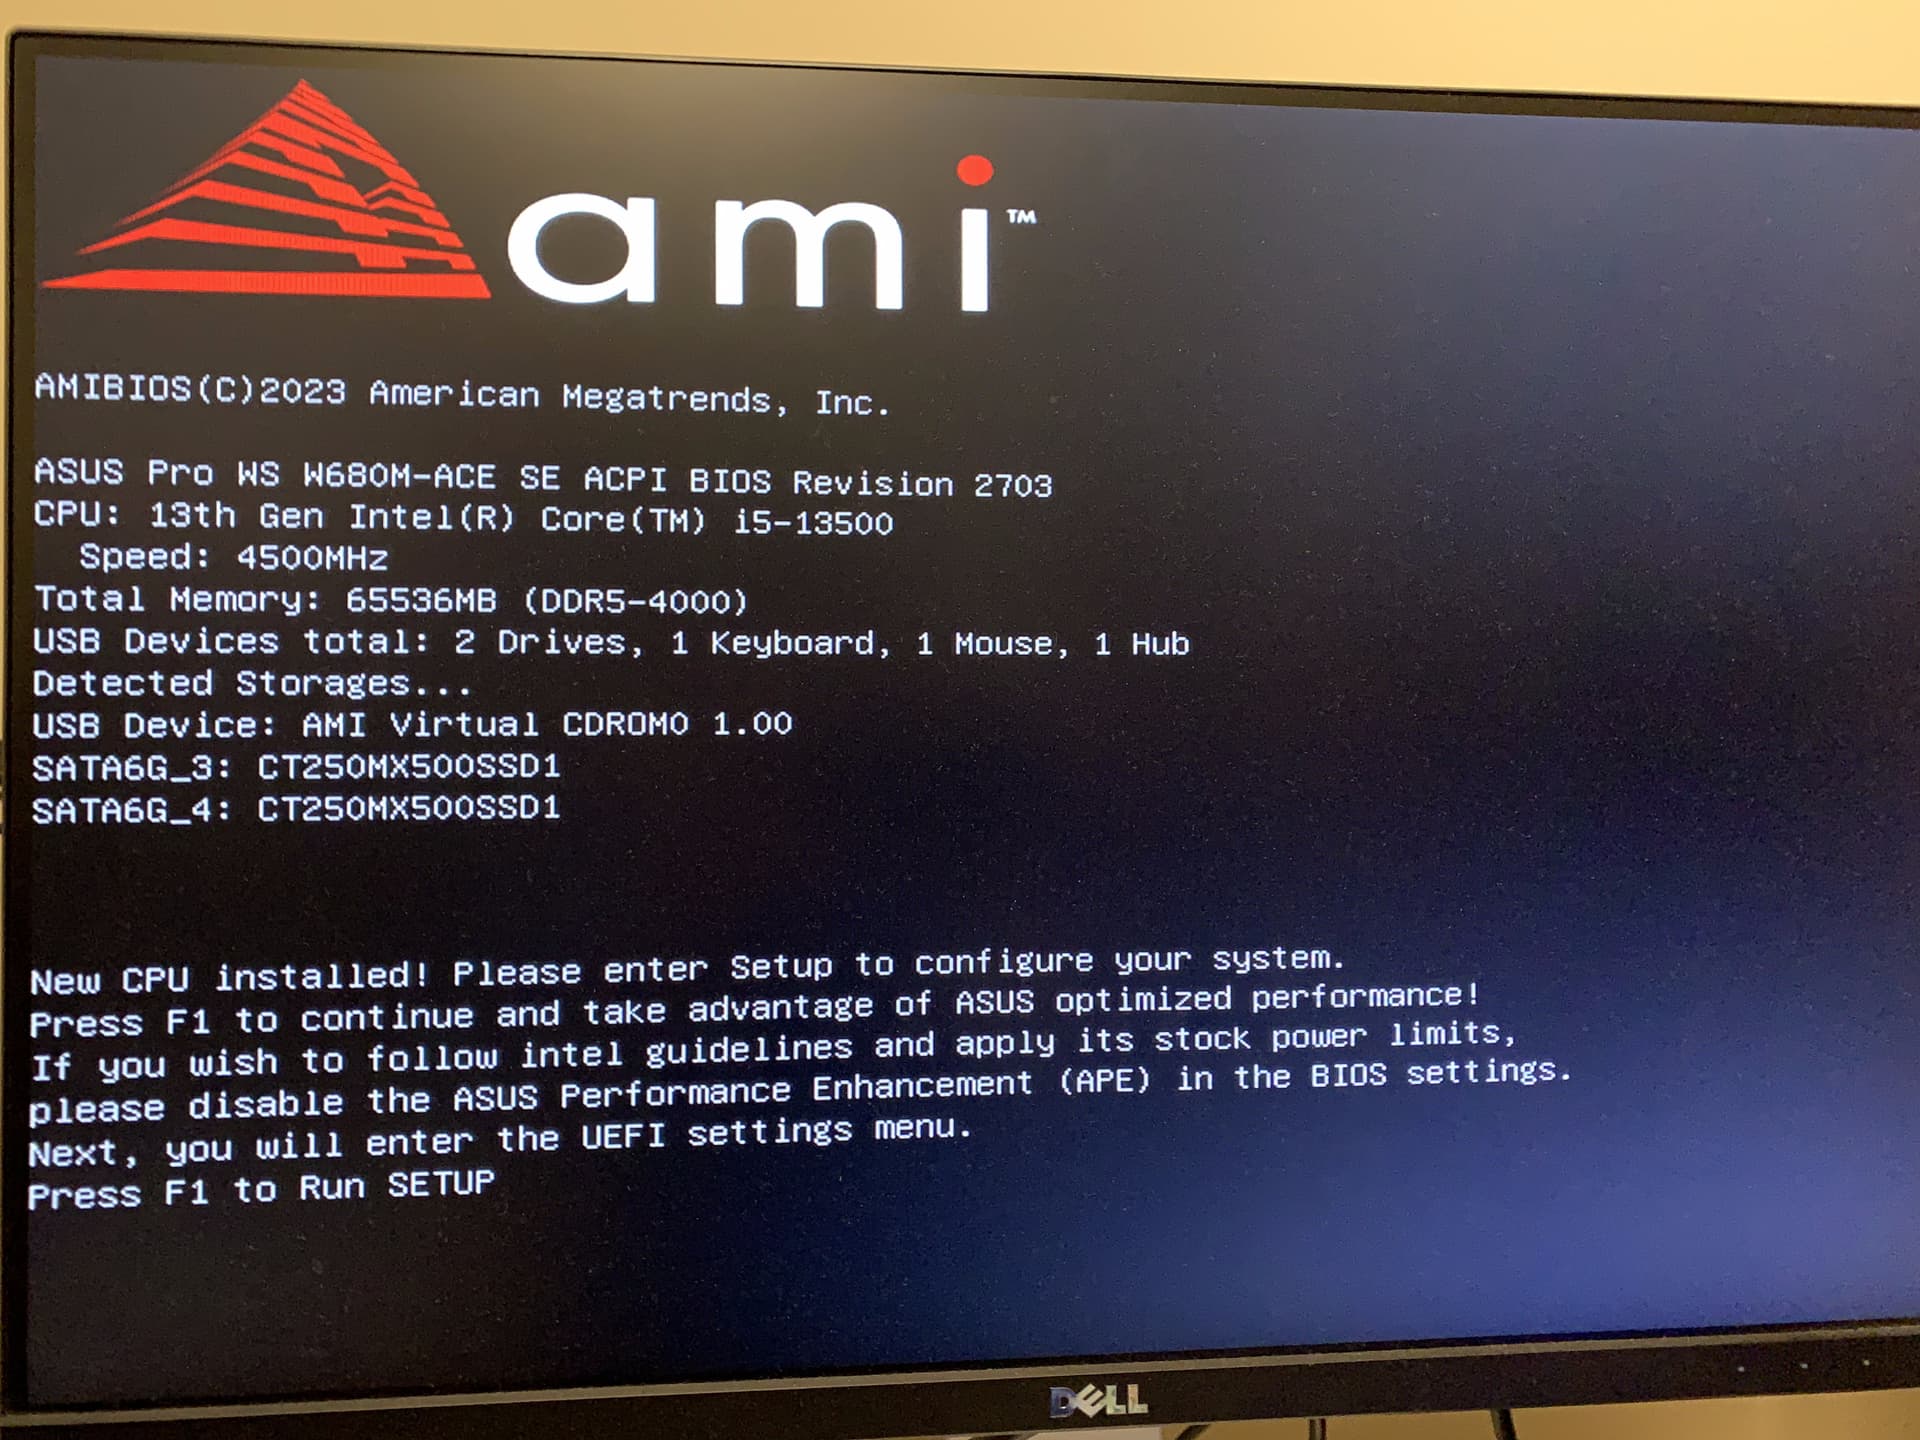
One thing that has always worried me about this build was the lack of information about the heatsink height. I’ve asked ASUS Support about this, and the only answer I get is something along the lines of “Thank you for contacting us. I’ve elevated this ticket and will get back to you in 2 to 3 days.” for the past few weeks. ASUS must have a really, really tall tower.

While not super scientific (or precise) here’s a rough measure of the height of the heatsink next to the CPU:

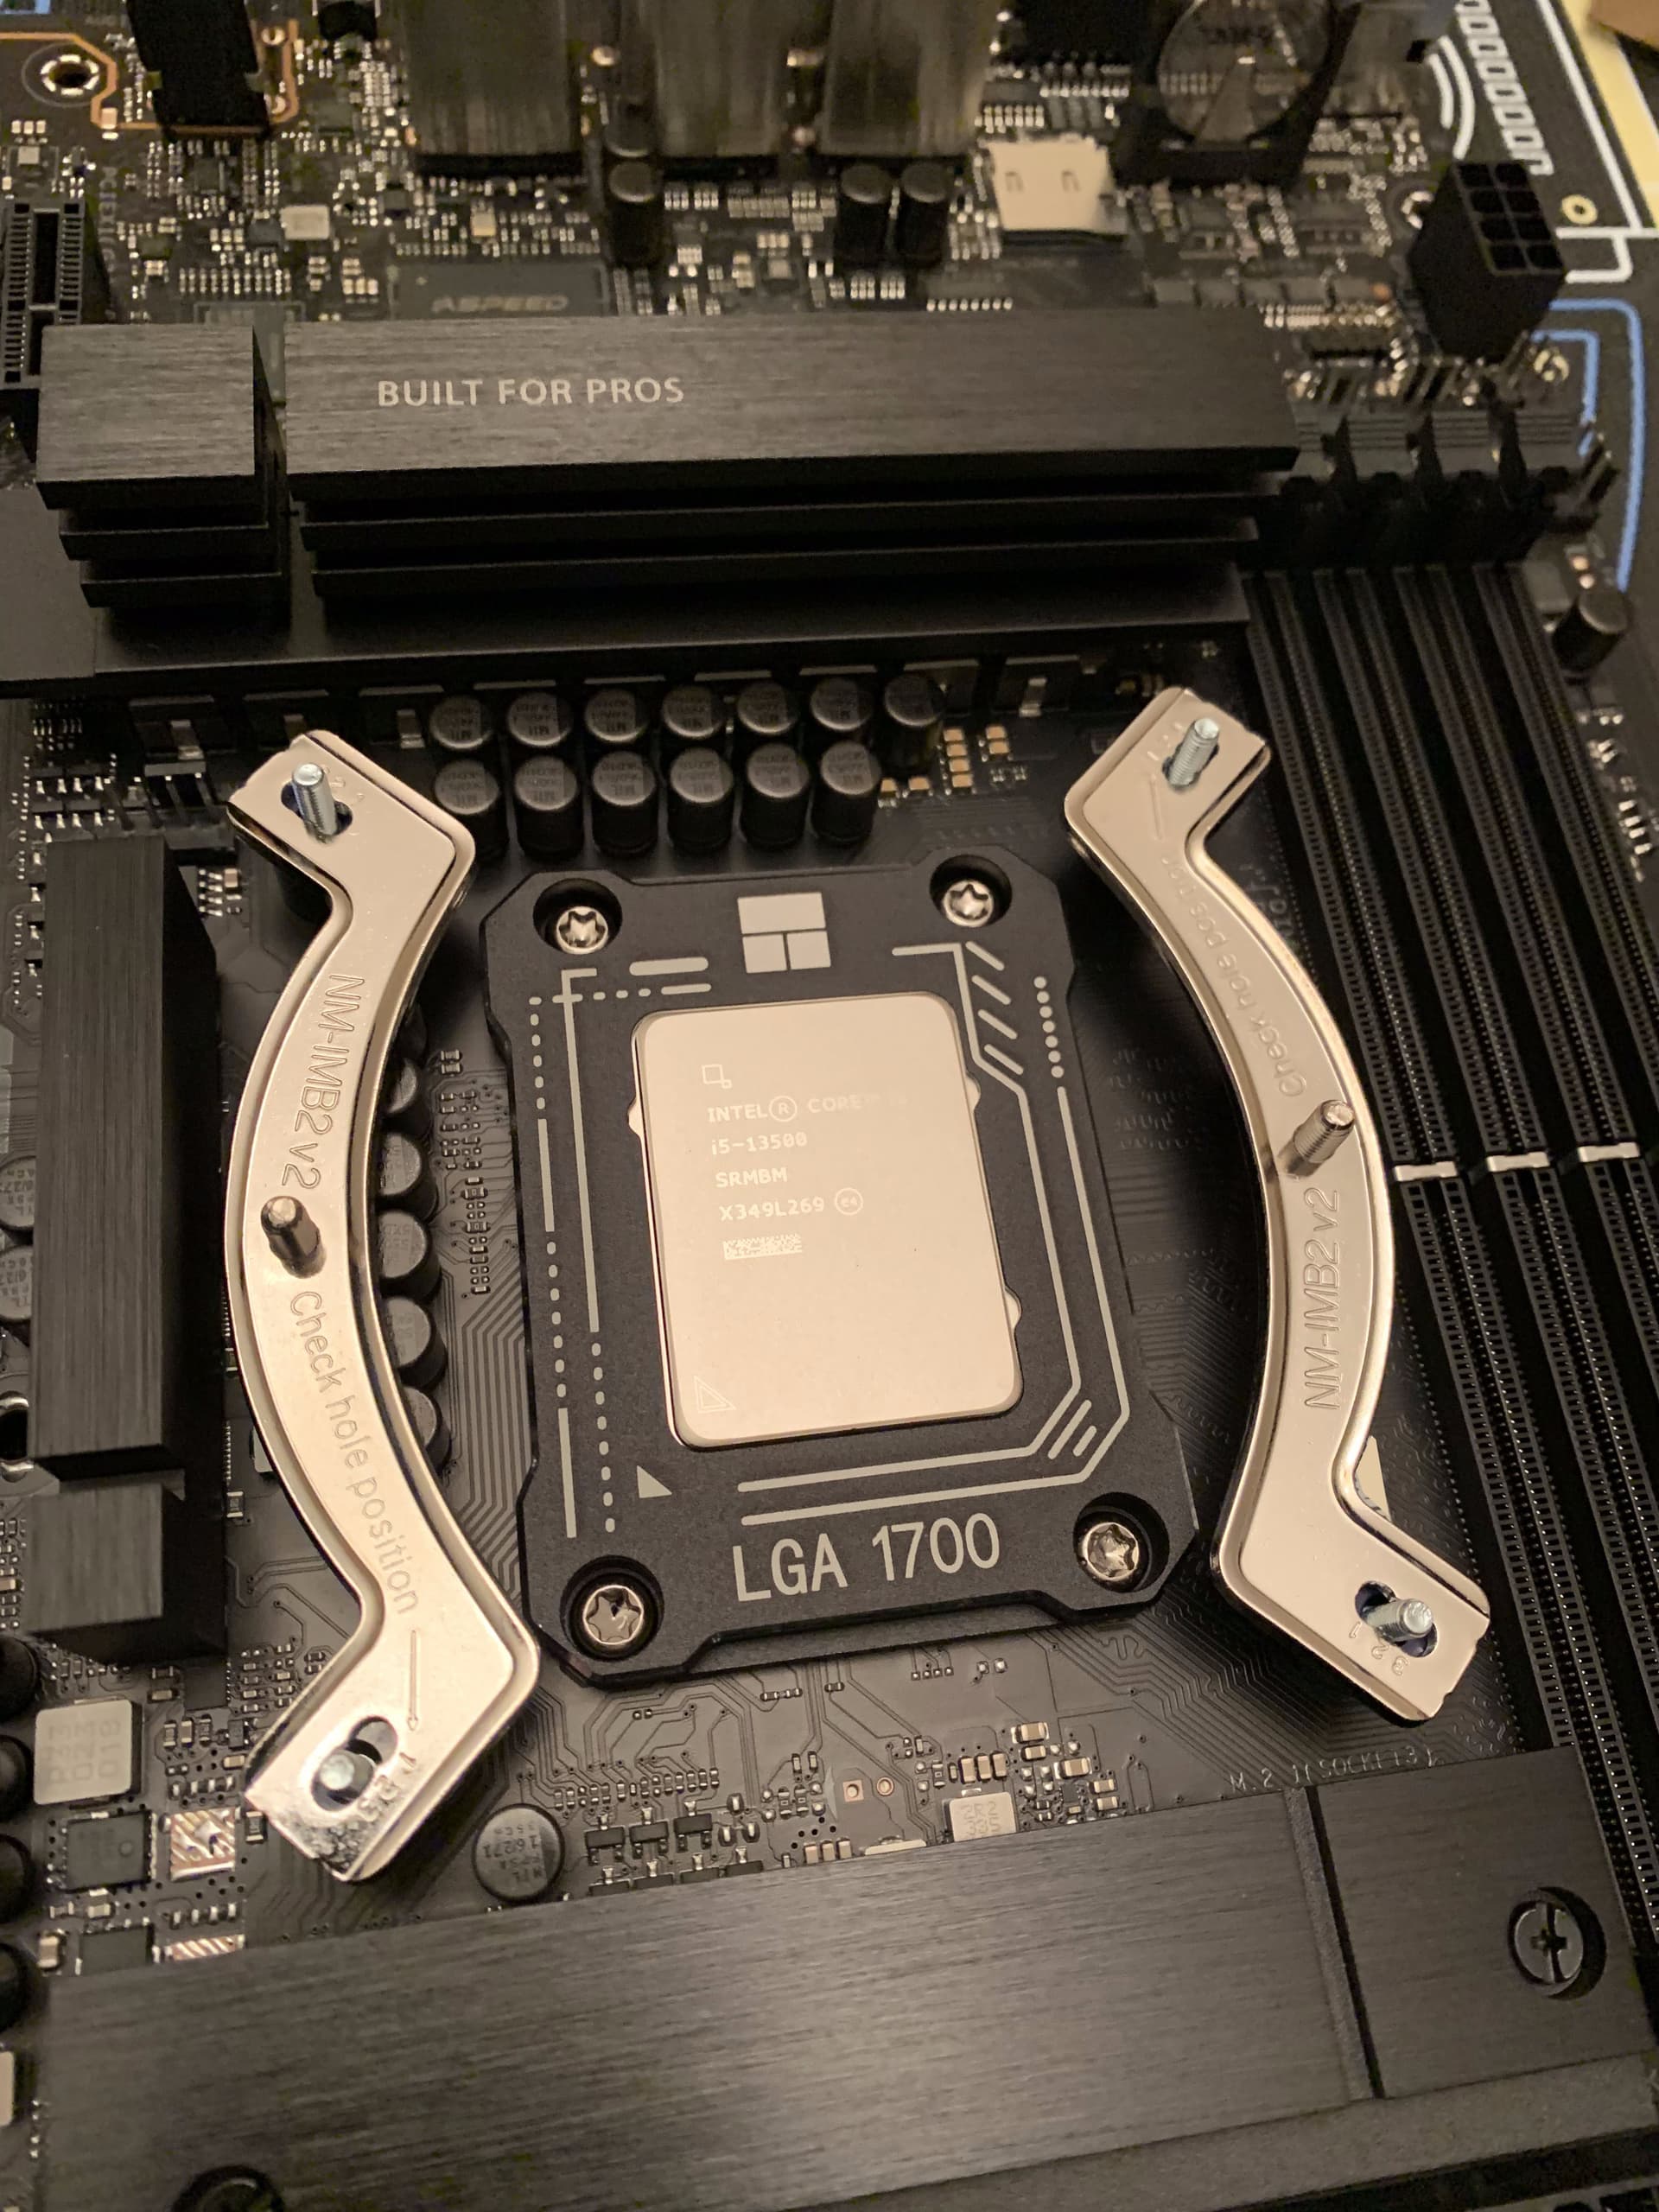
When installing the anti-bend frame on my main gaming PC, the backplate fell off. To prevent that this time, I installed the secu-firm blackplate and screws for my DH-15S first this time, to see if they’d hold it into place. (They did)

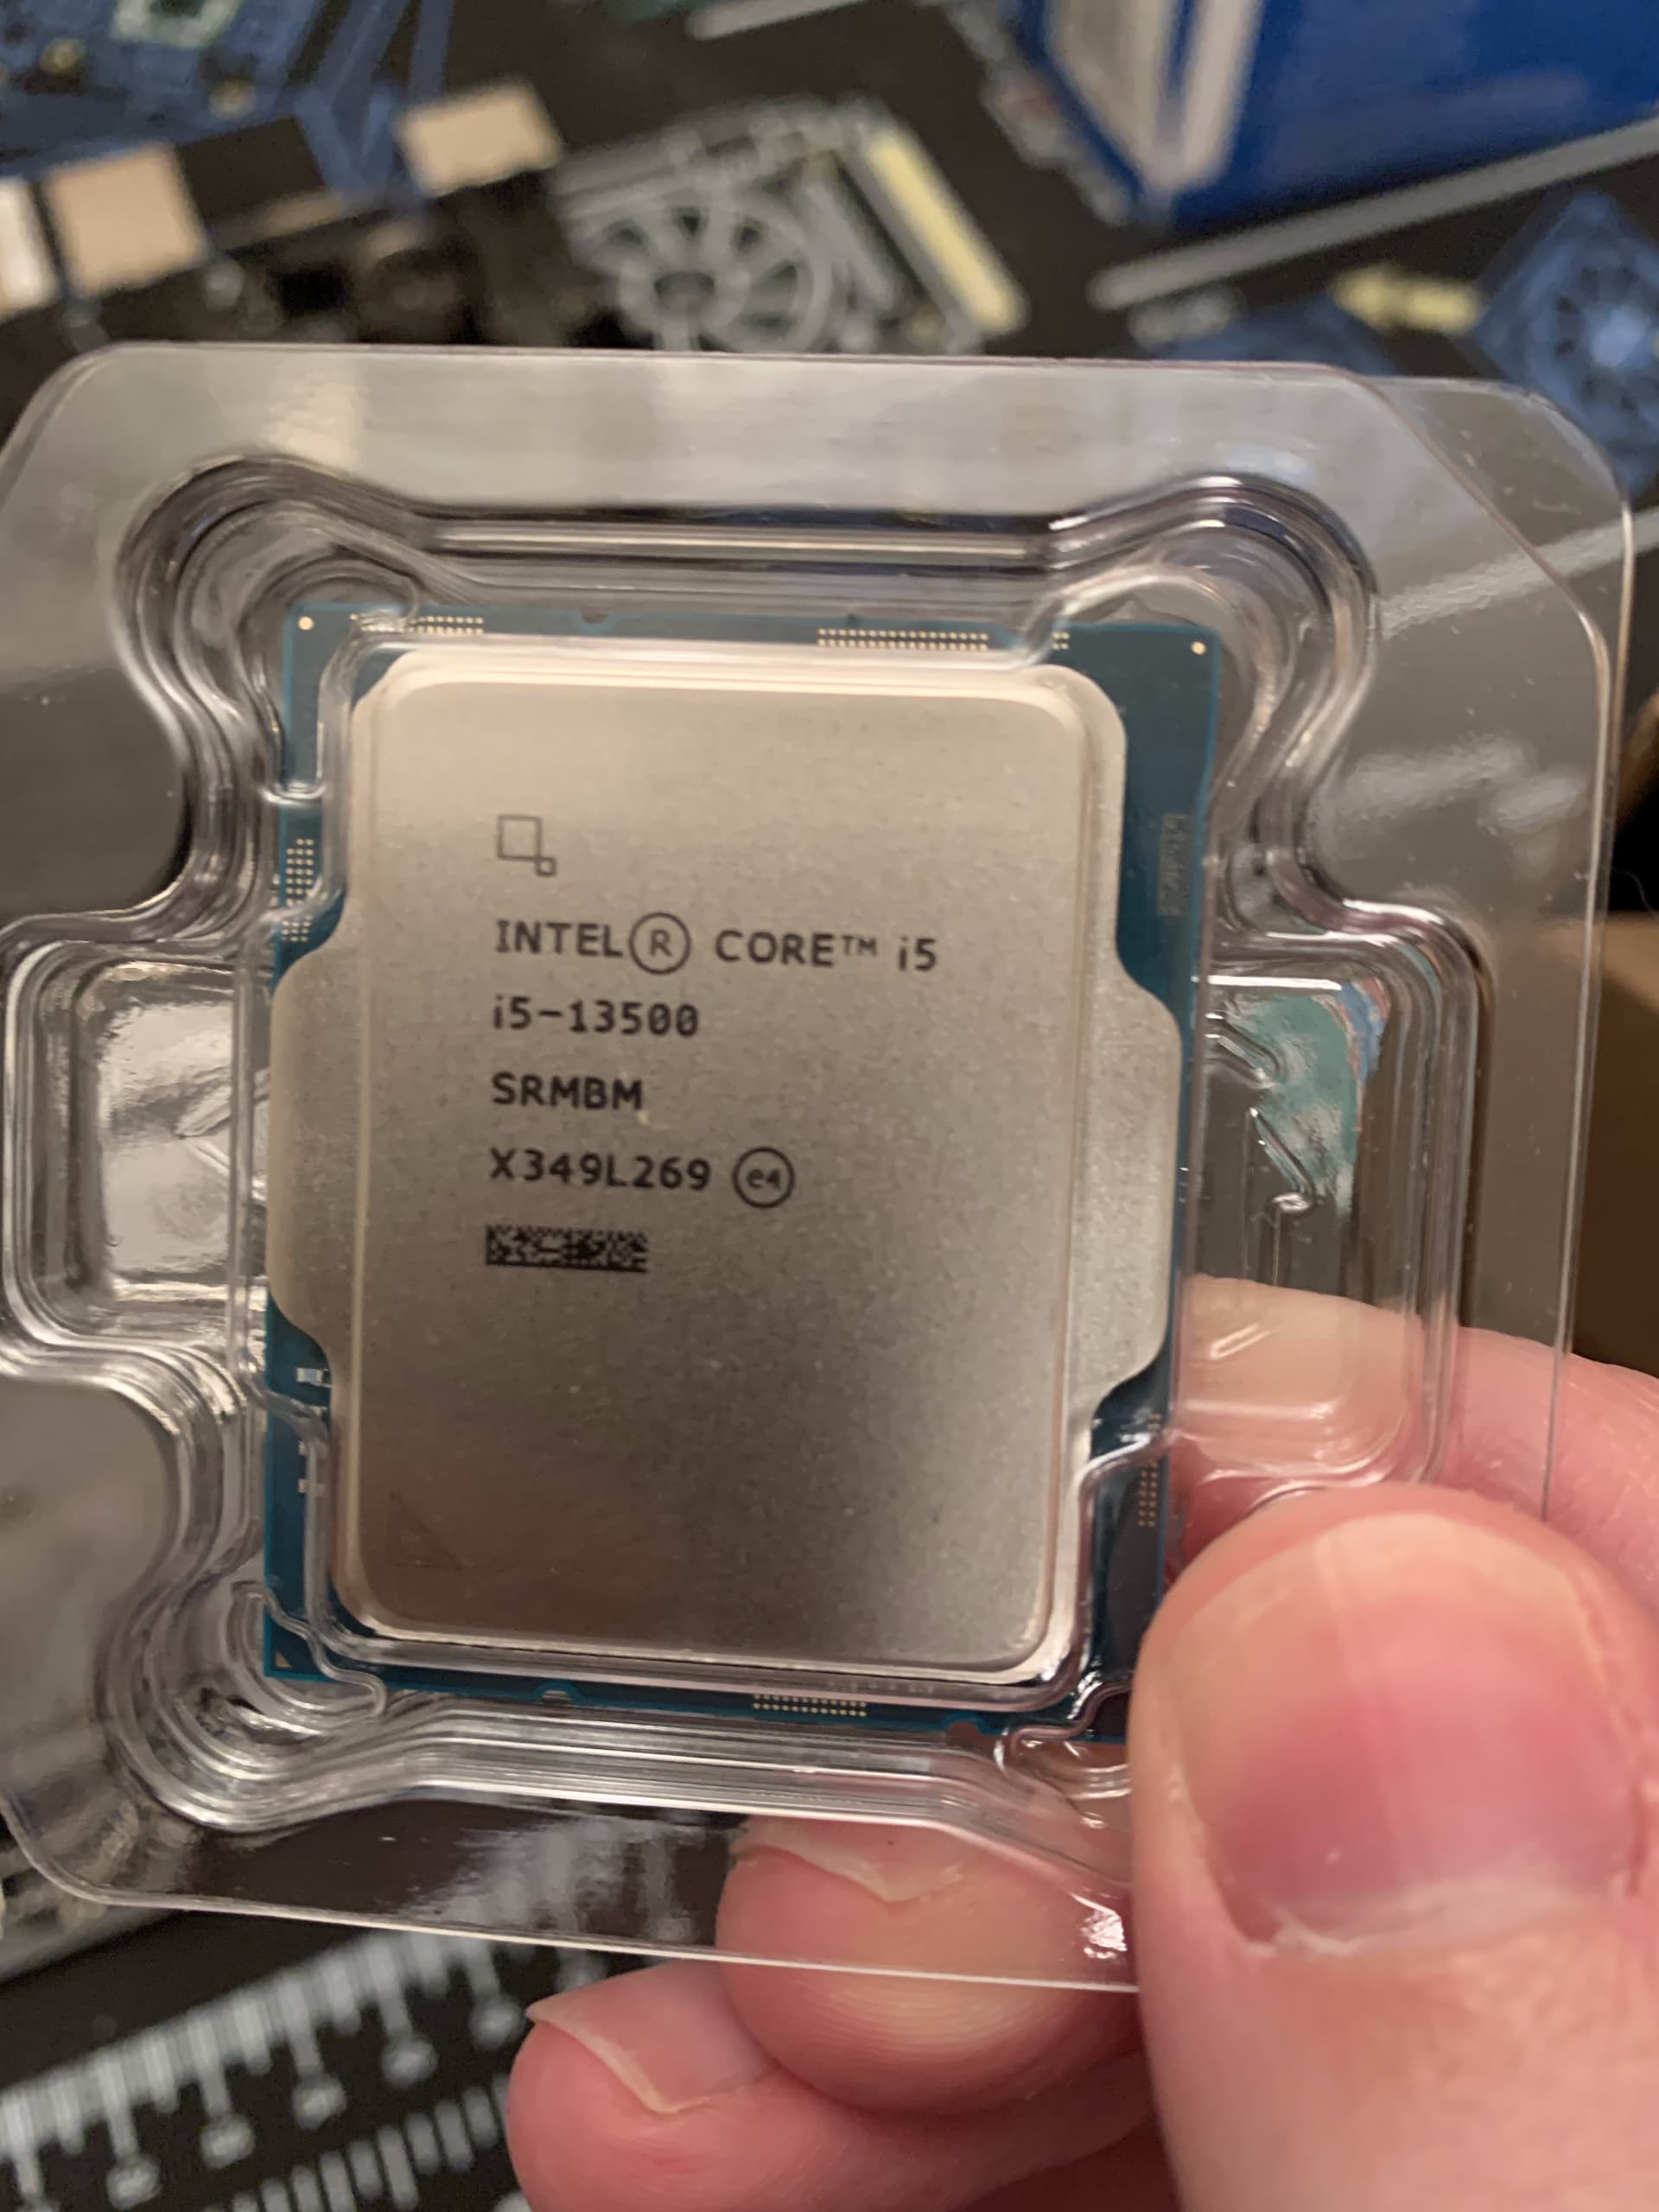
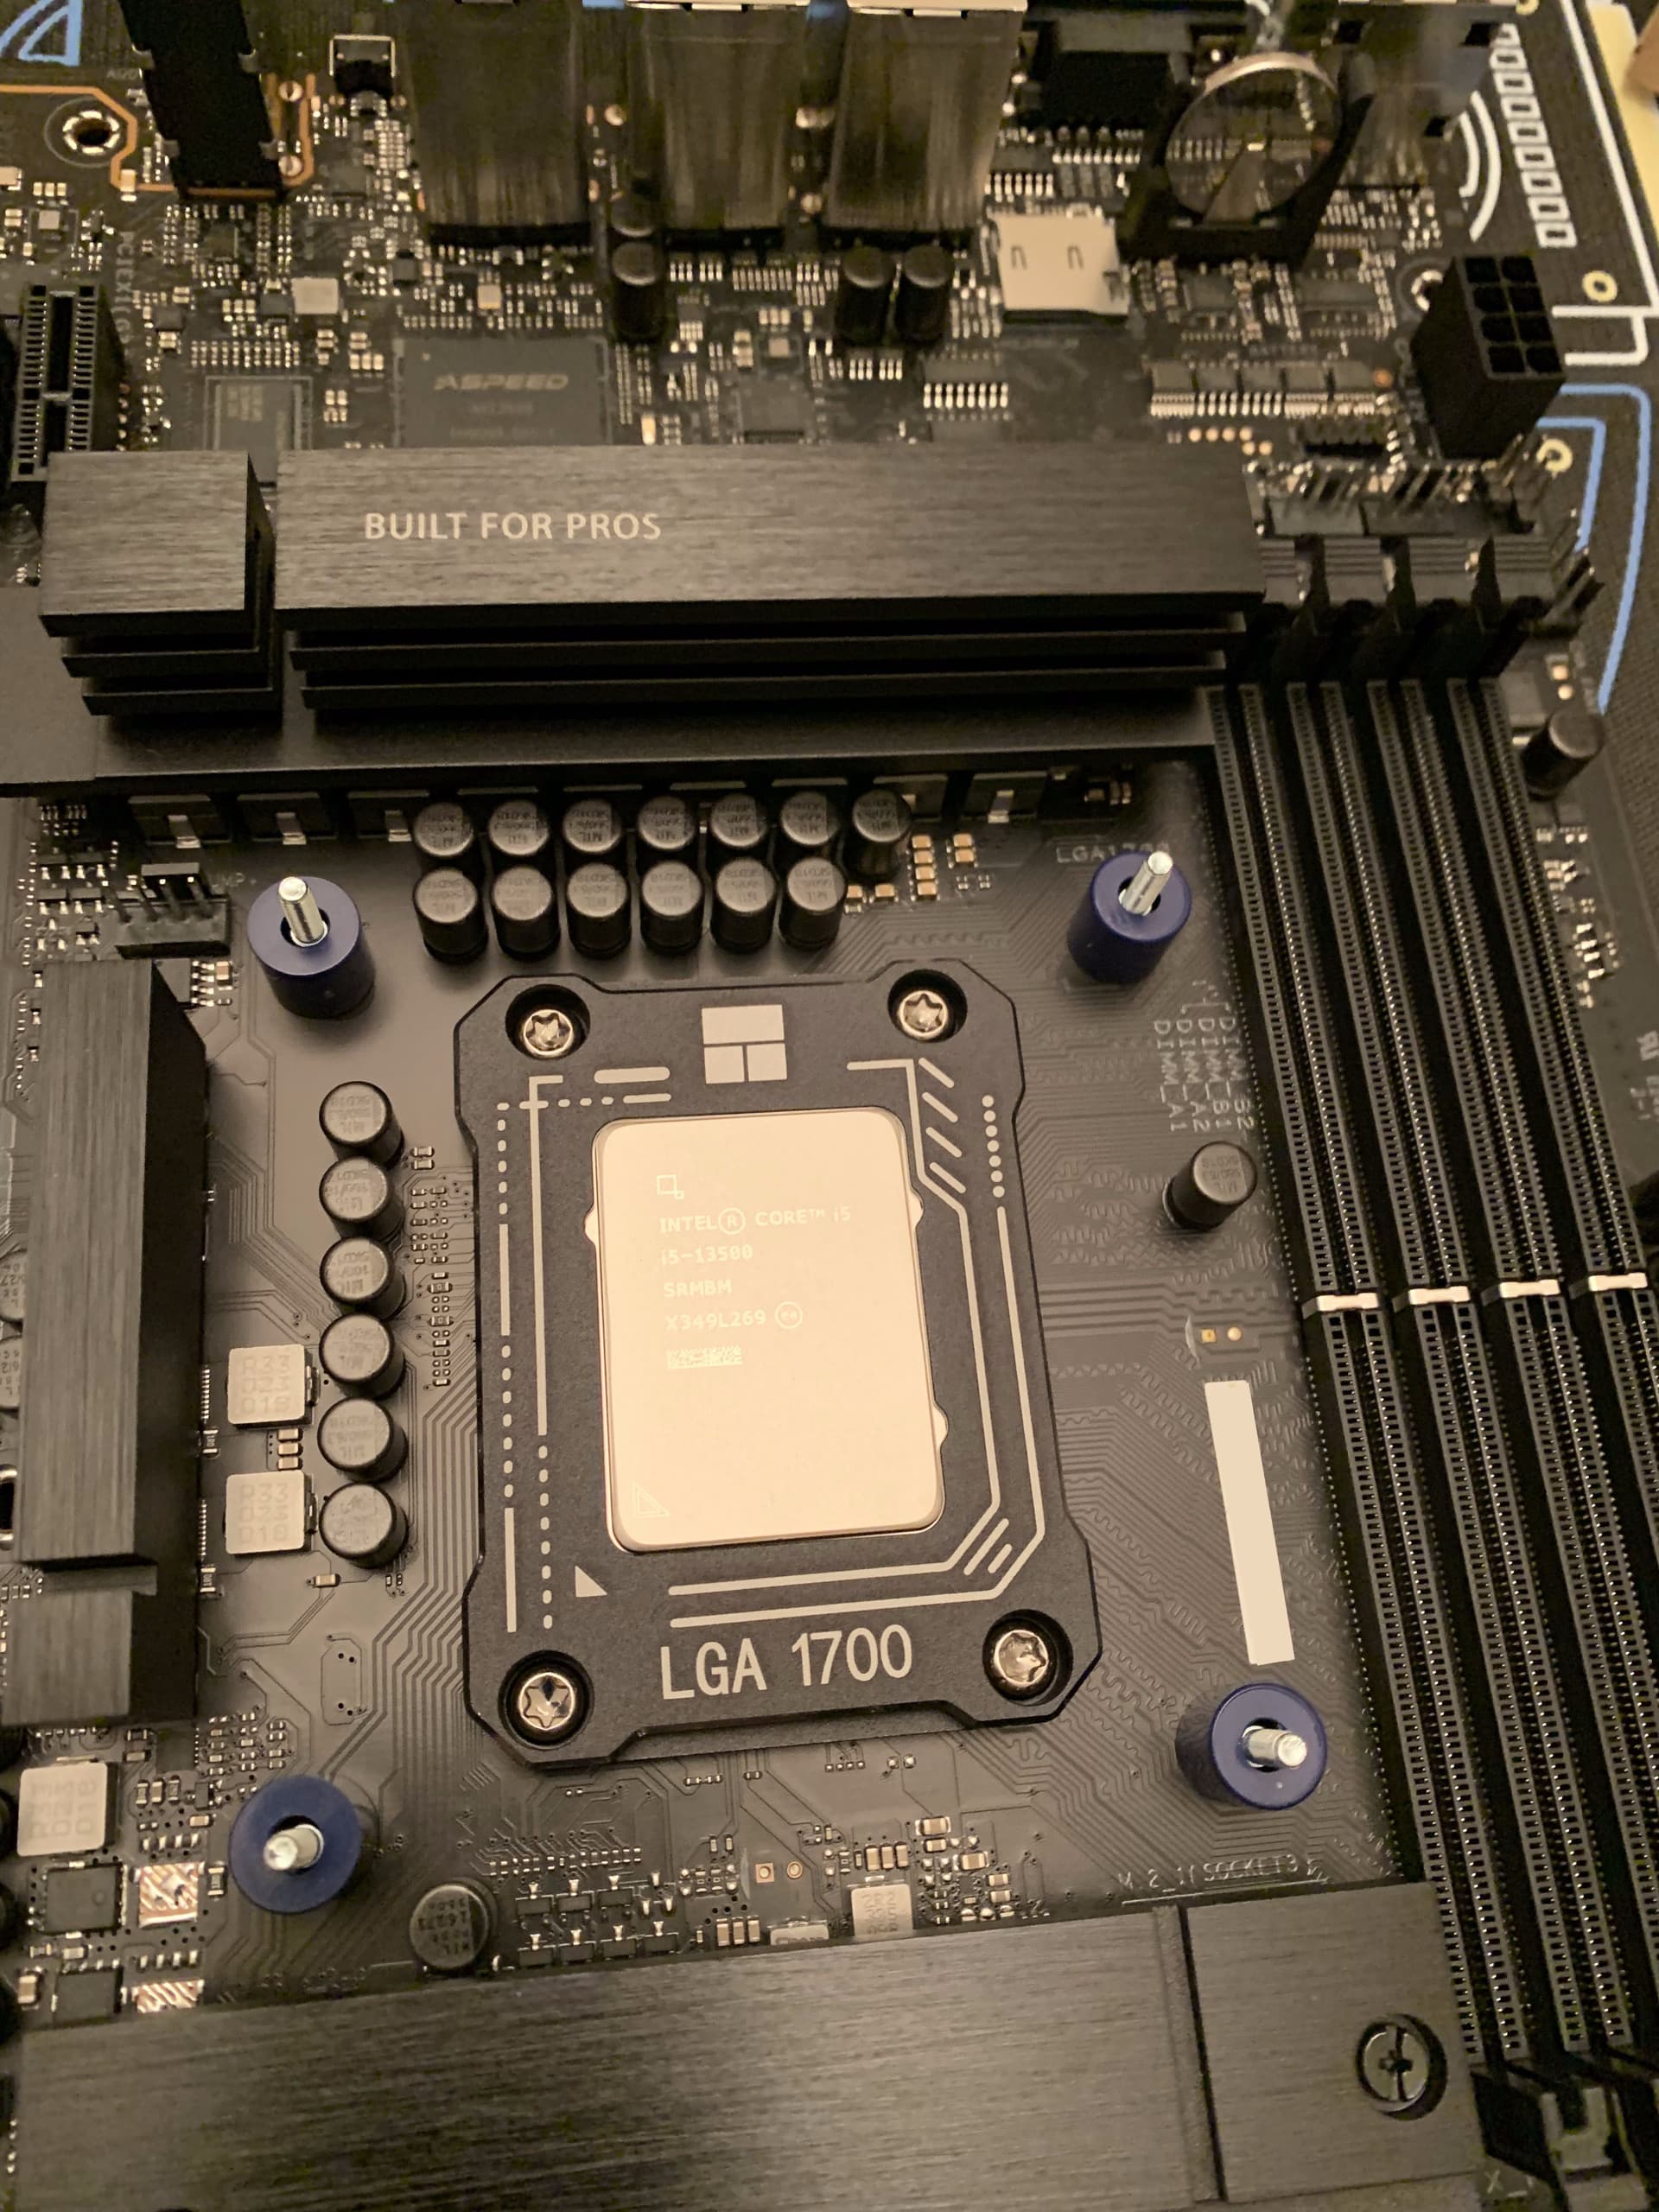
After that, I lifted up the lever like you normally would for installing a CPU. I completely forgot if it’s install the CPU and lower the arm for the bending frame or take the ILM off without lowering the lever, so for those of you with bad memory like me:

When installing the LGA1700 frame, lift the lever, place the CPU in the socket, give a little jiggle to make sure it’s secure, then with the lever still up, unscrew each of the ILM screws.

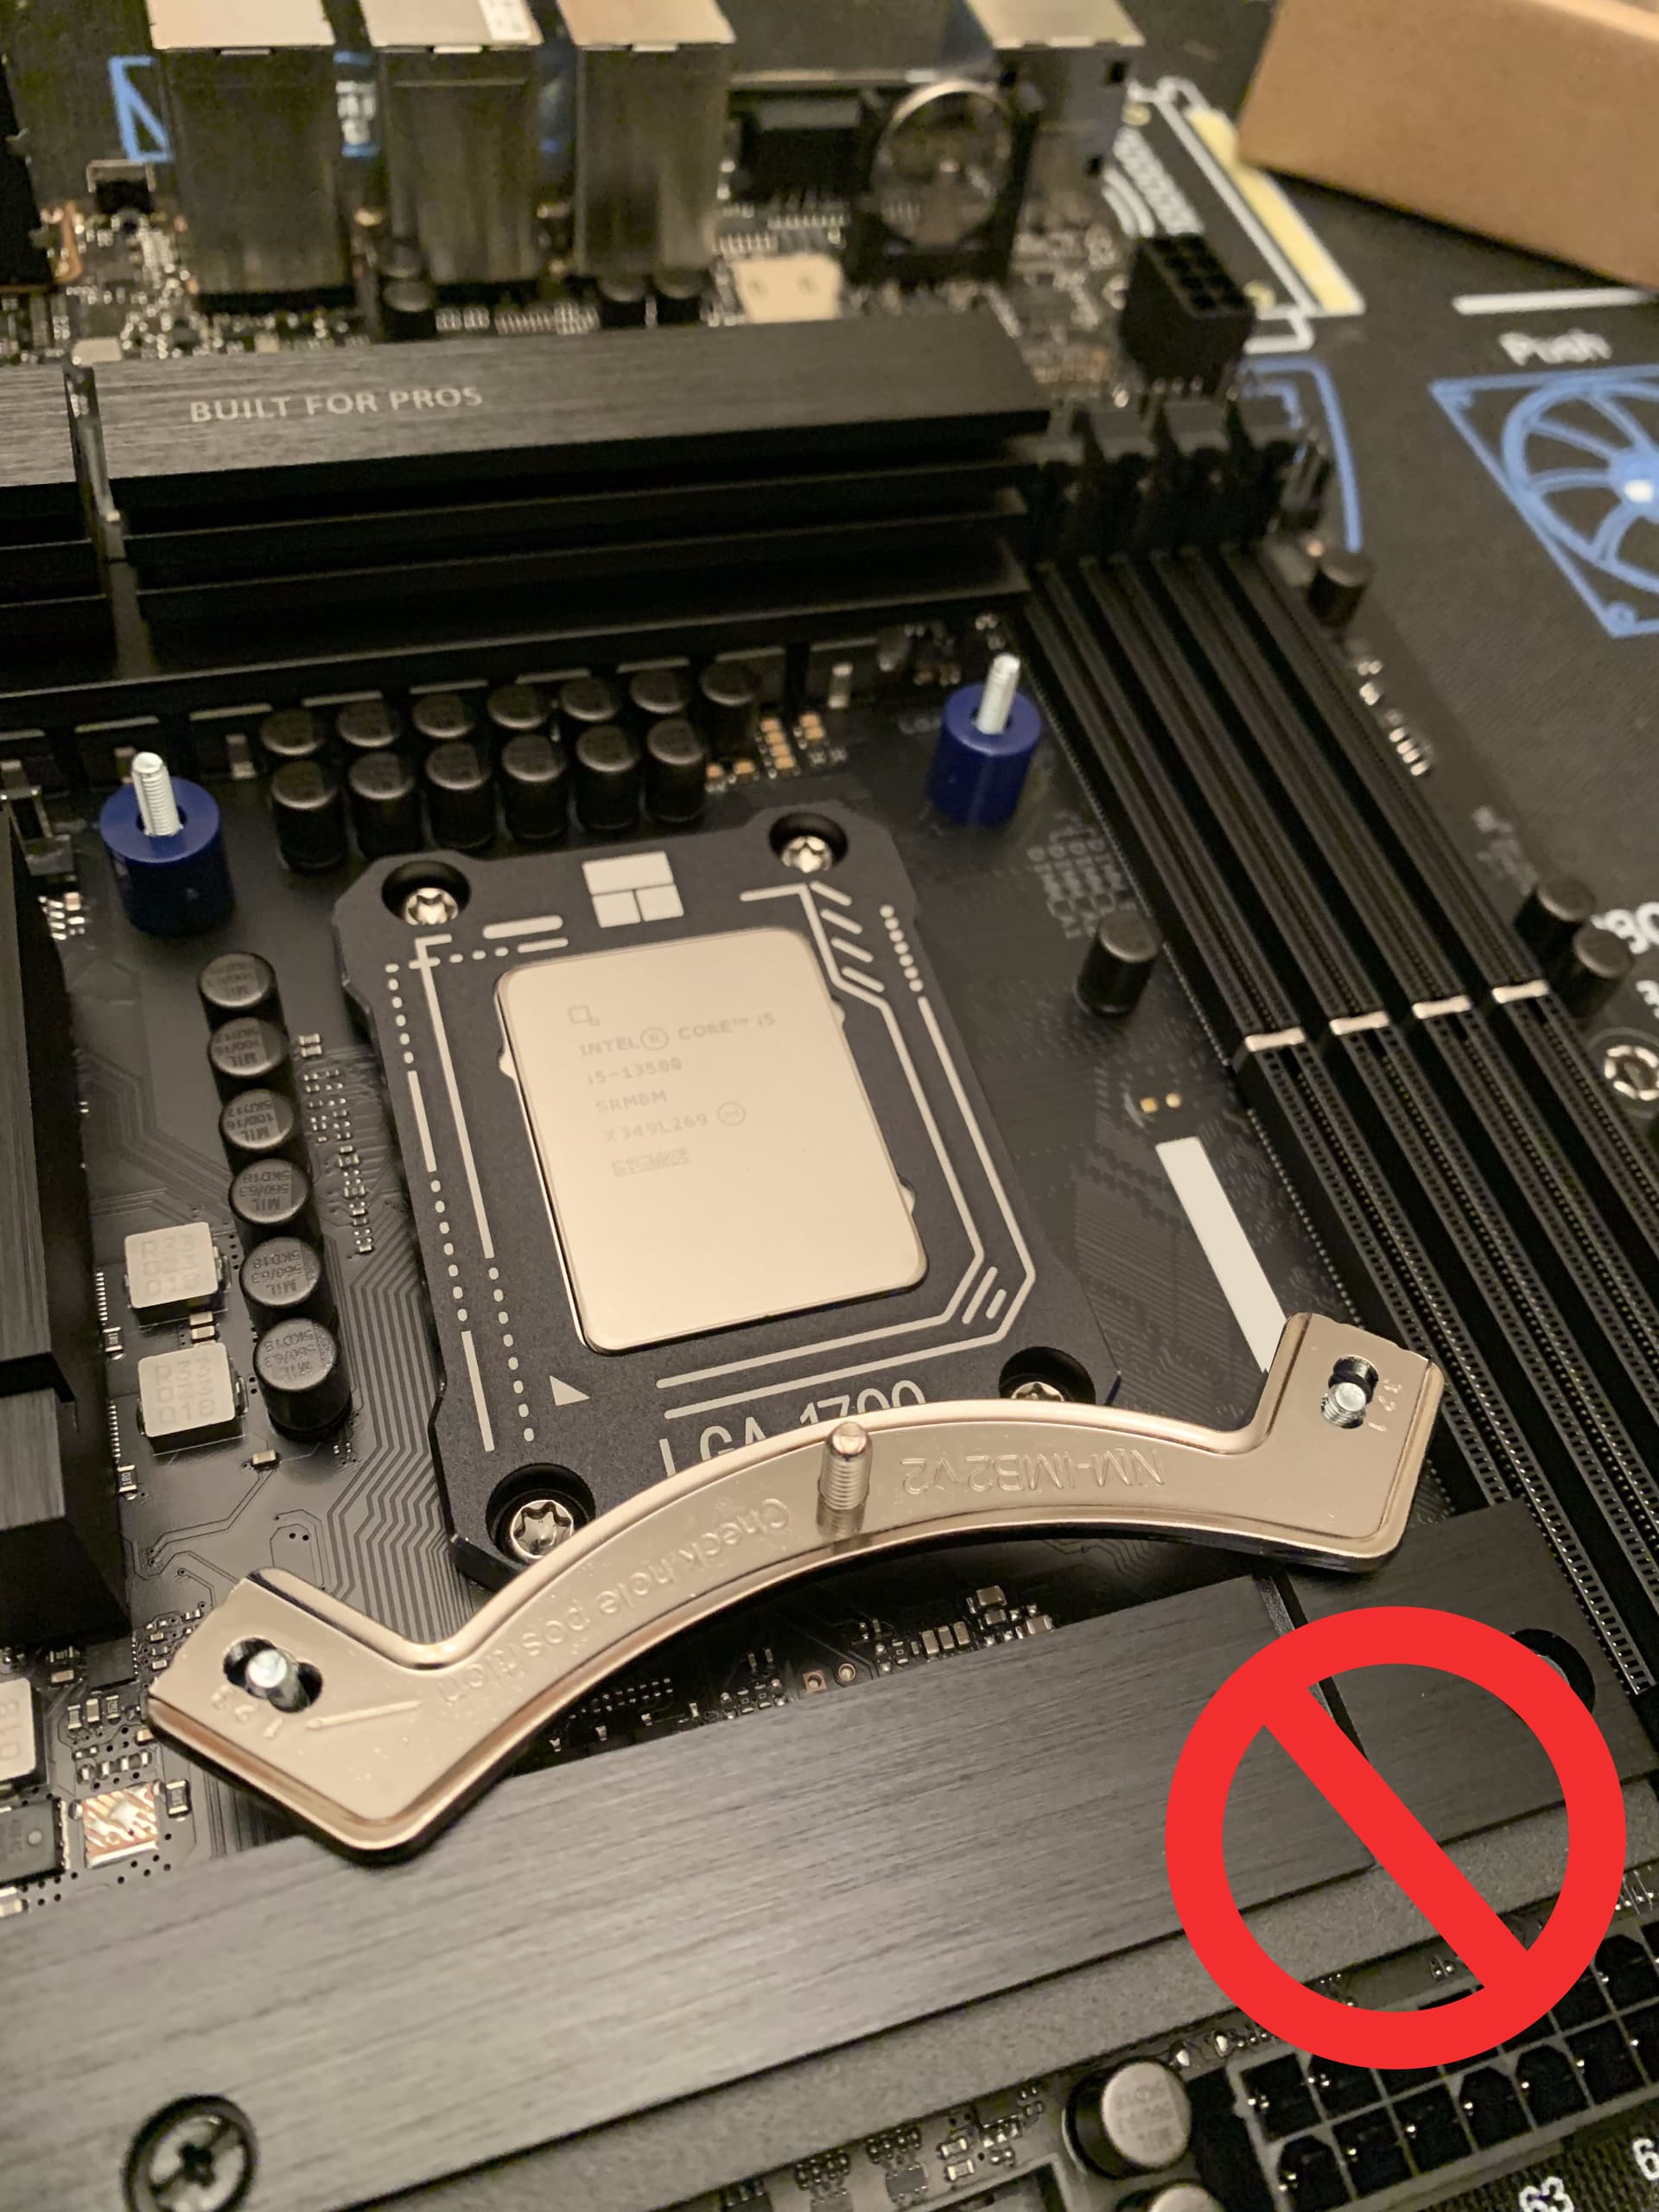
You then put the contact frame over the socket, and insert the screw into each hole. You want to reverse the screws in each hole until they make a ‘click.’ Then, from the position they made the click in, screw 90 degrees in the opposite direction (Instead of unscrewing them, you’re now screwing them in.) You do this diagonally, and keep going until you can’t screw it in gently.

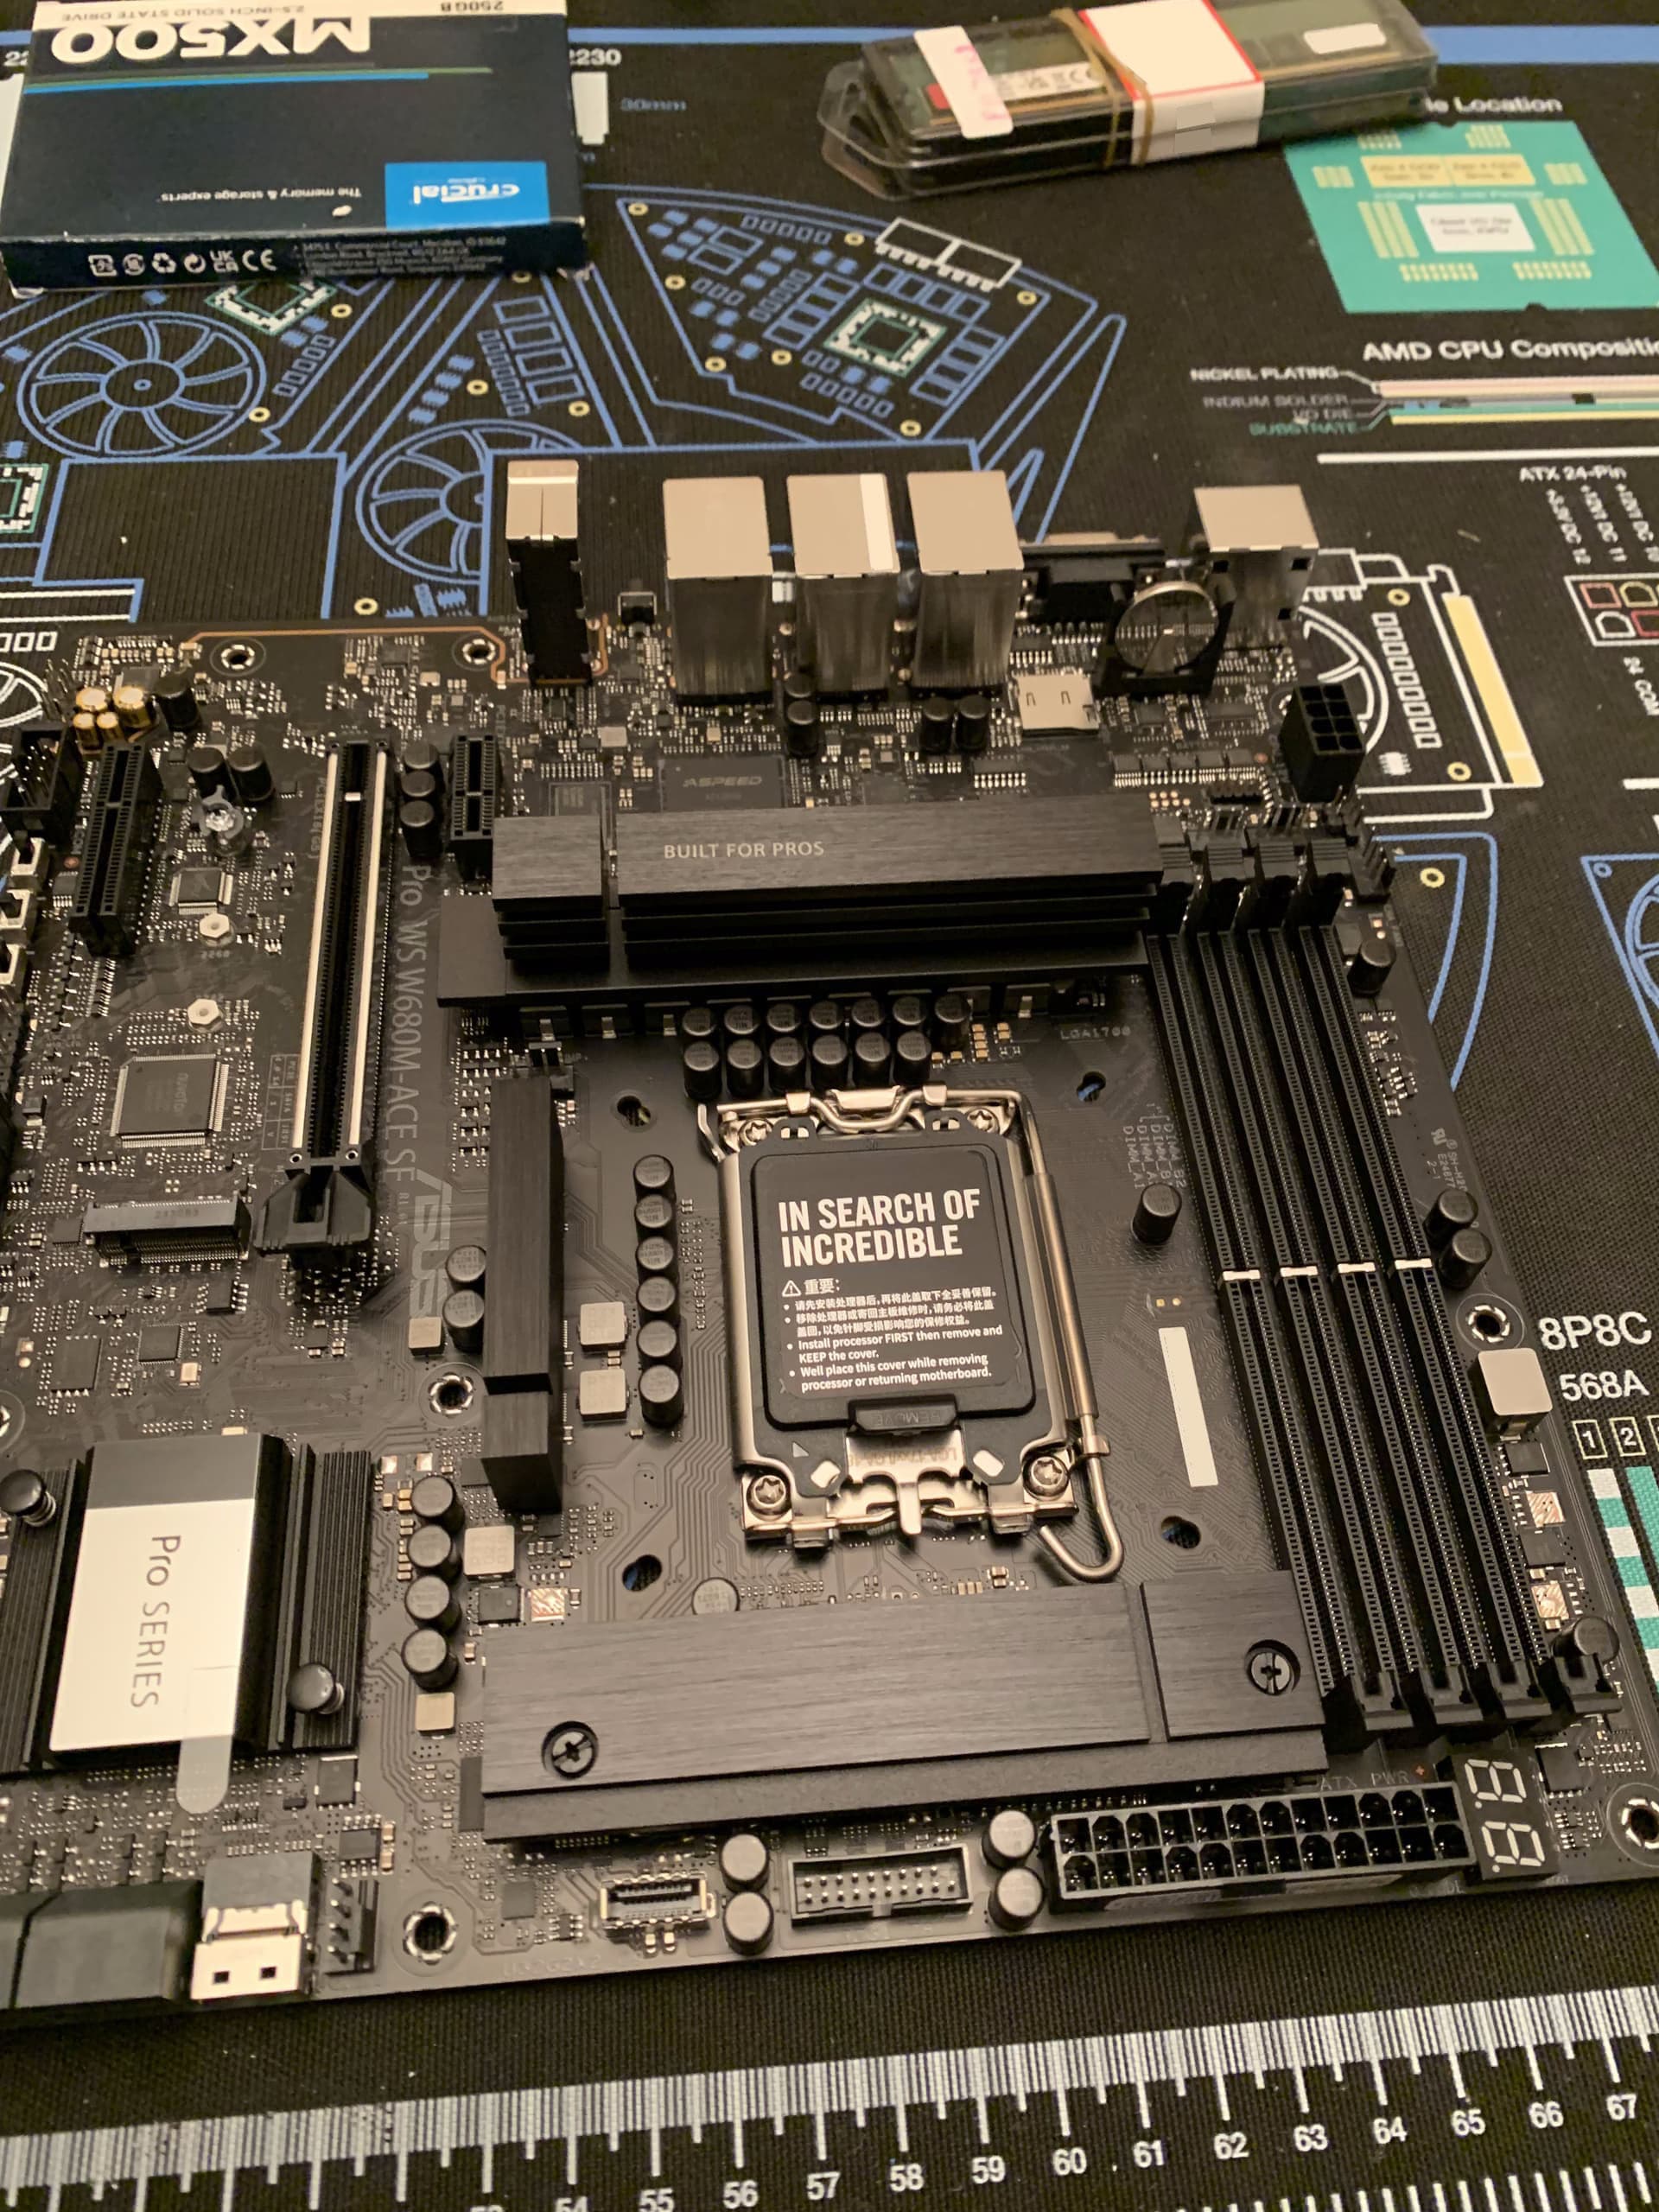
When planning out this build, I was pretty frightened that the CPU cooler would exhaust out the top, and screw with airflow. However, when putting the secufirm brackets on the top, they would not lay flat when mounted in this position:

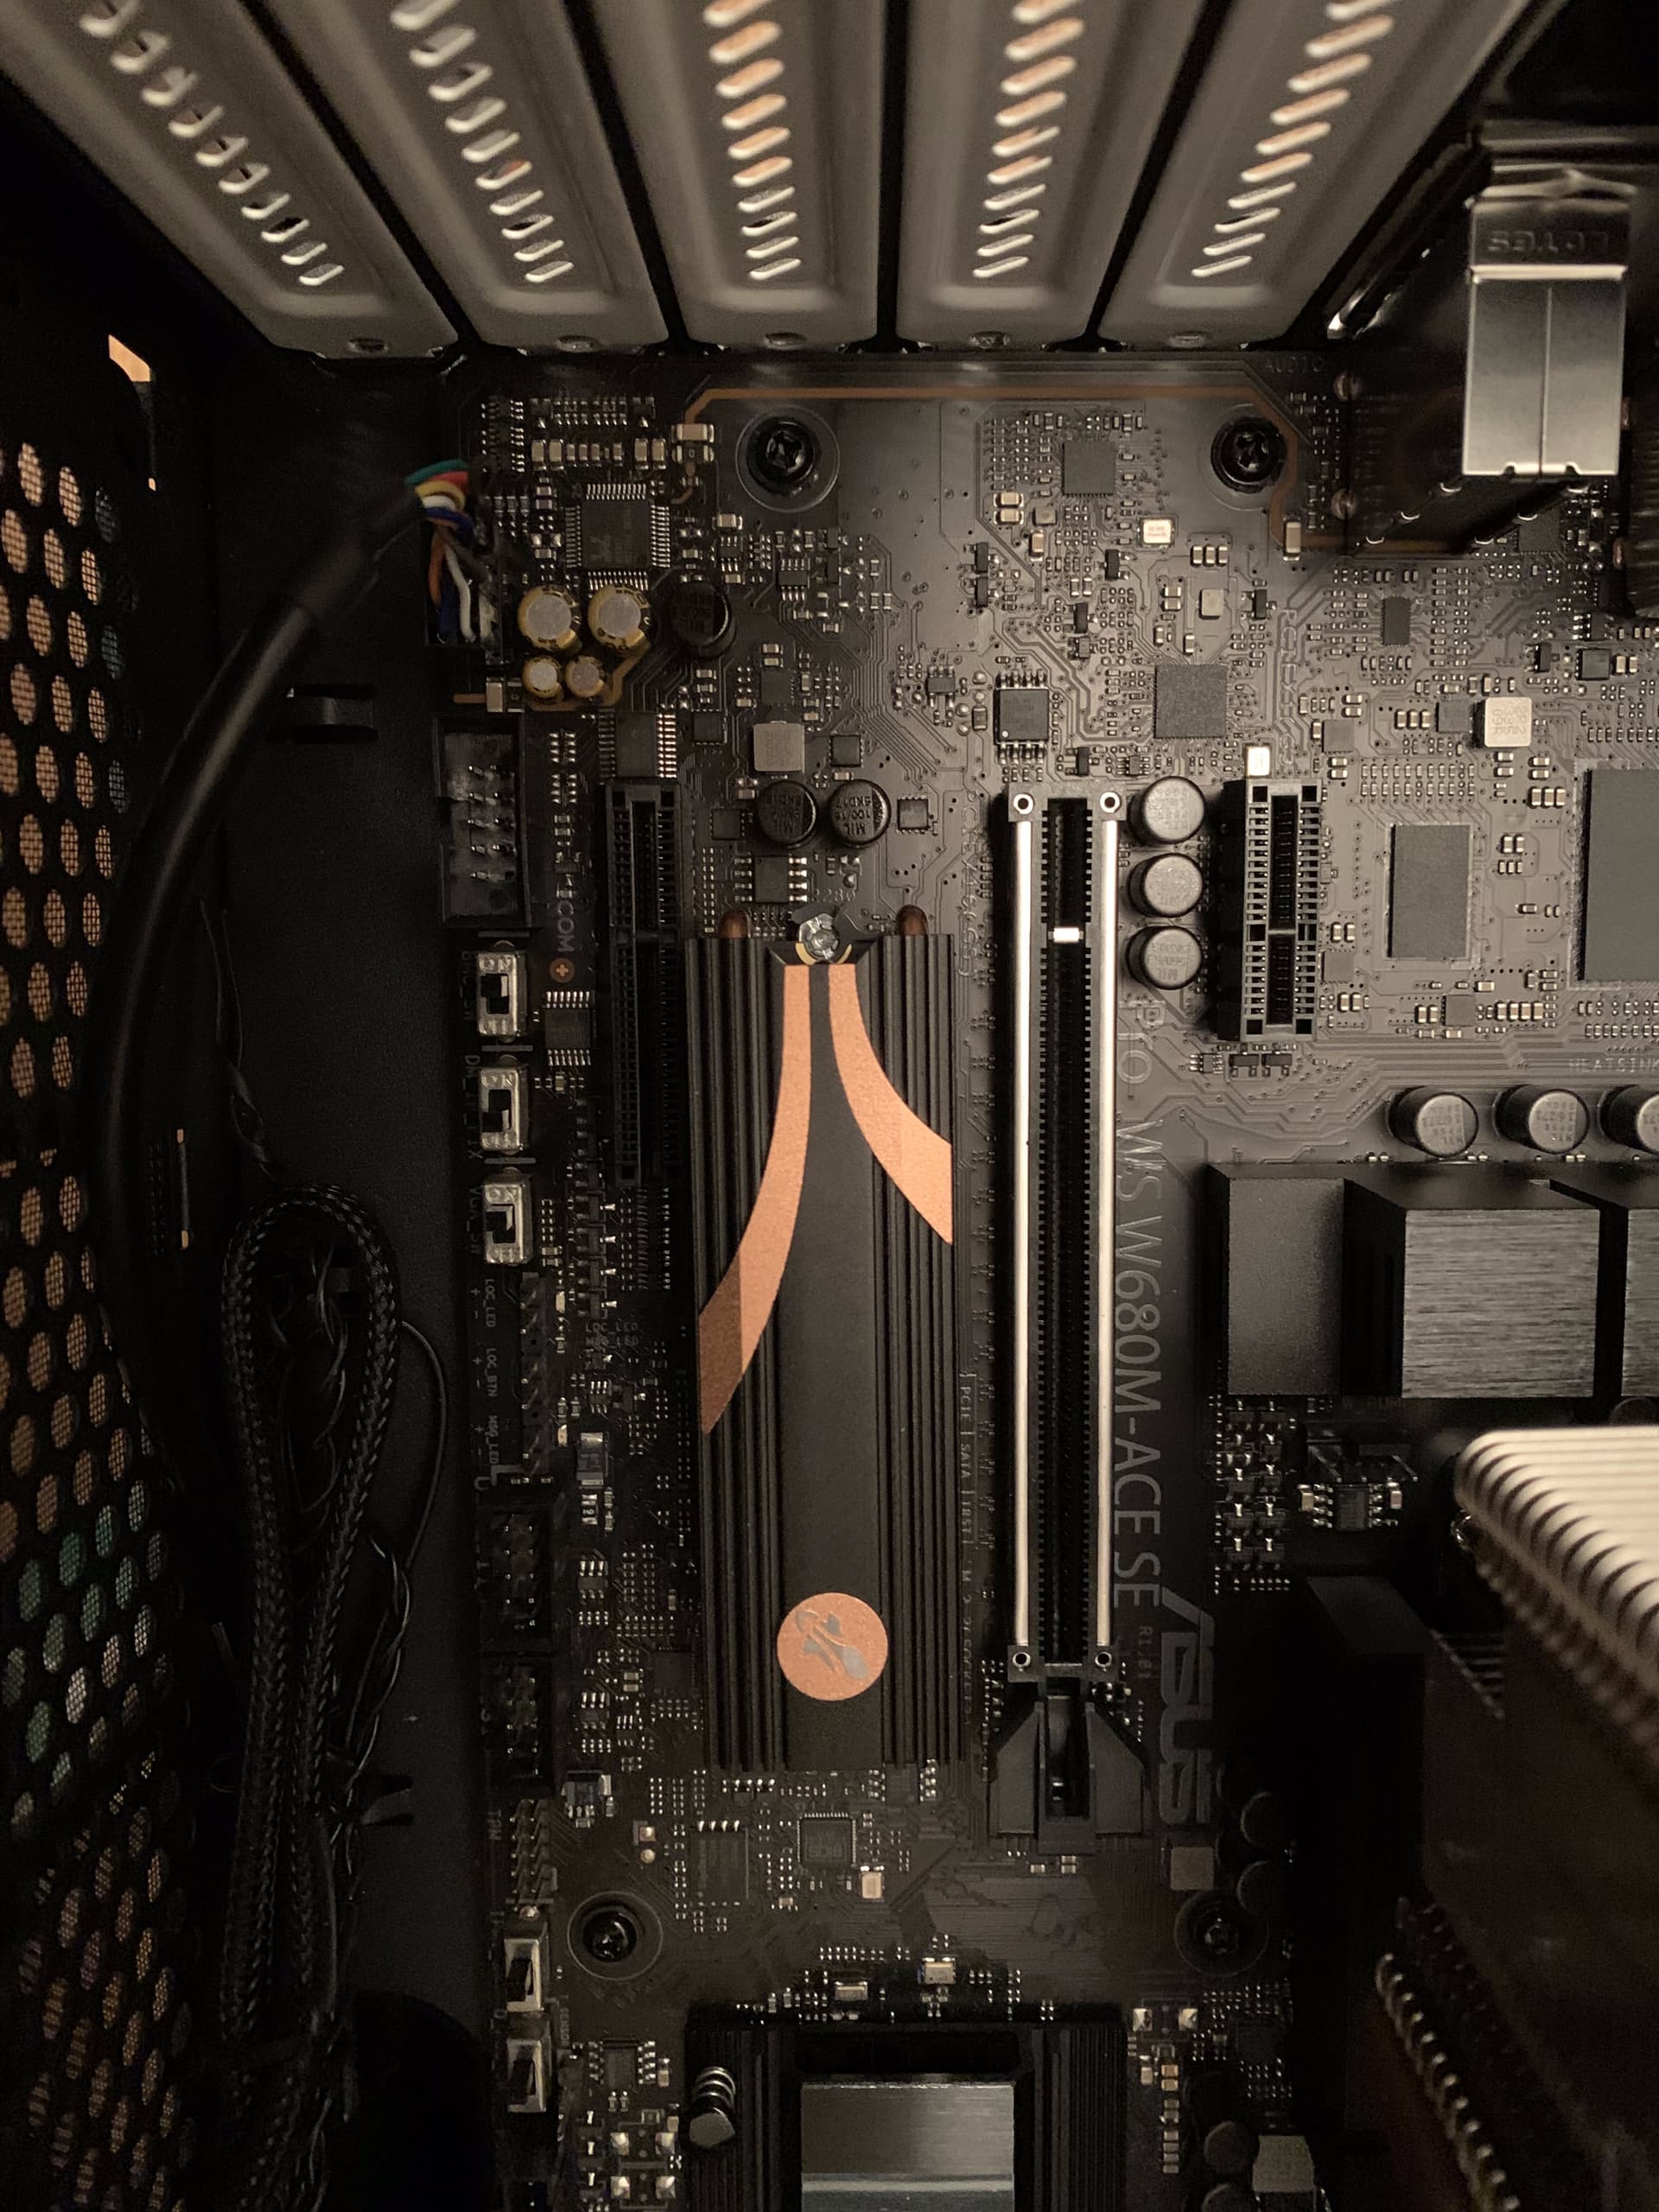
That pesky m.2 heatsink is in the way. You might be able to have the heatsink in this awkward position without it, but I do intend on using both m.2 slots.

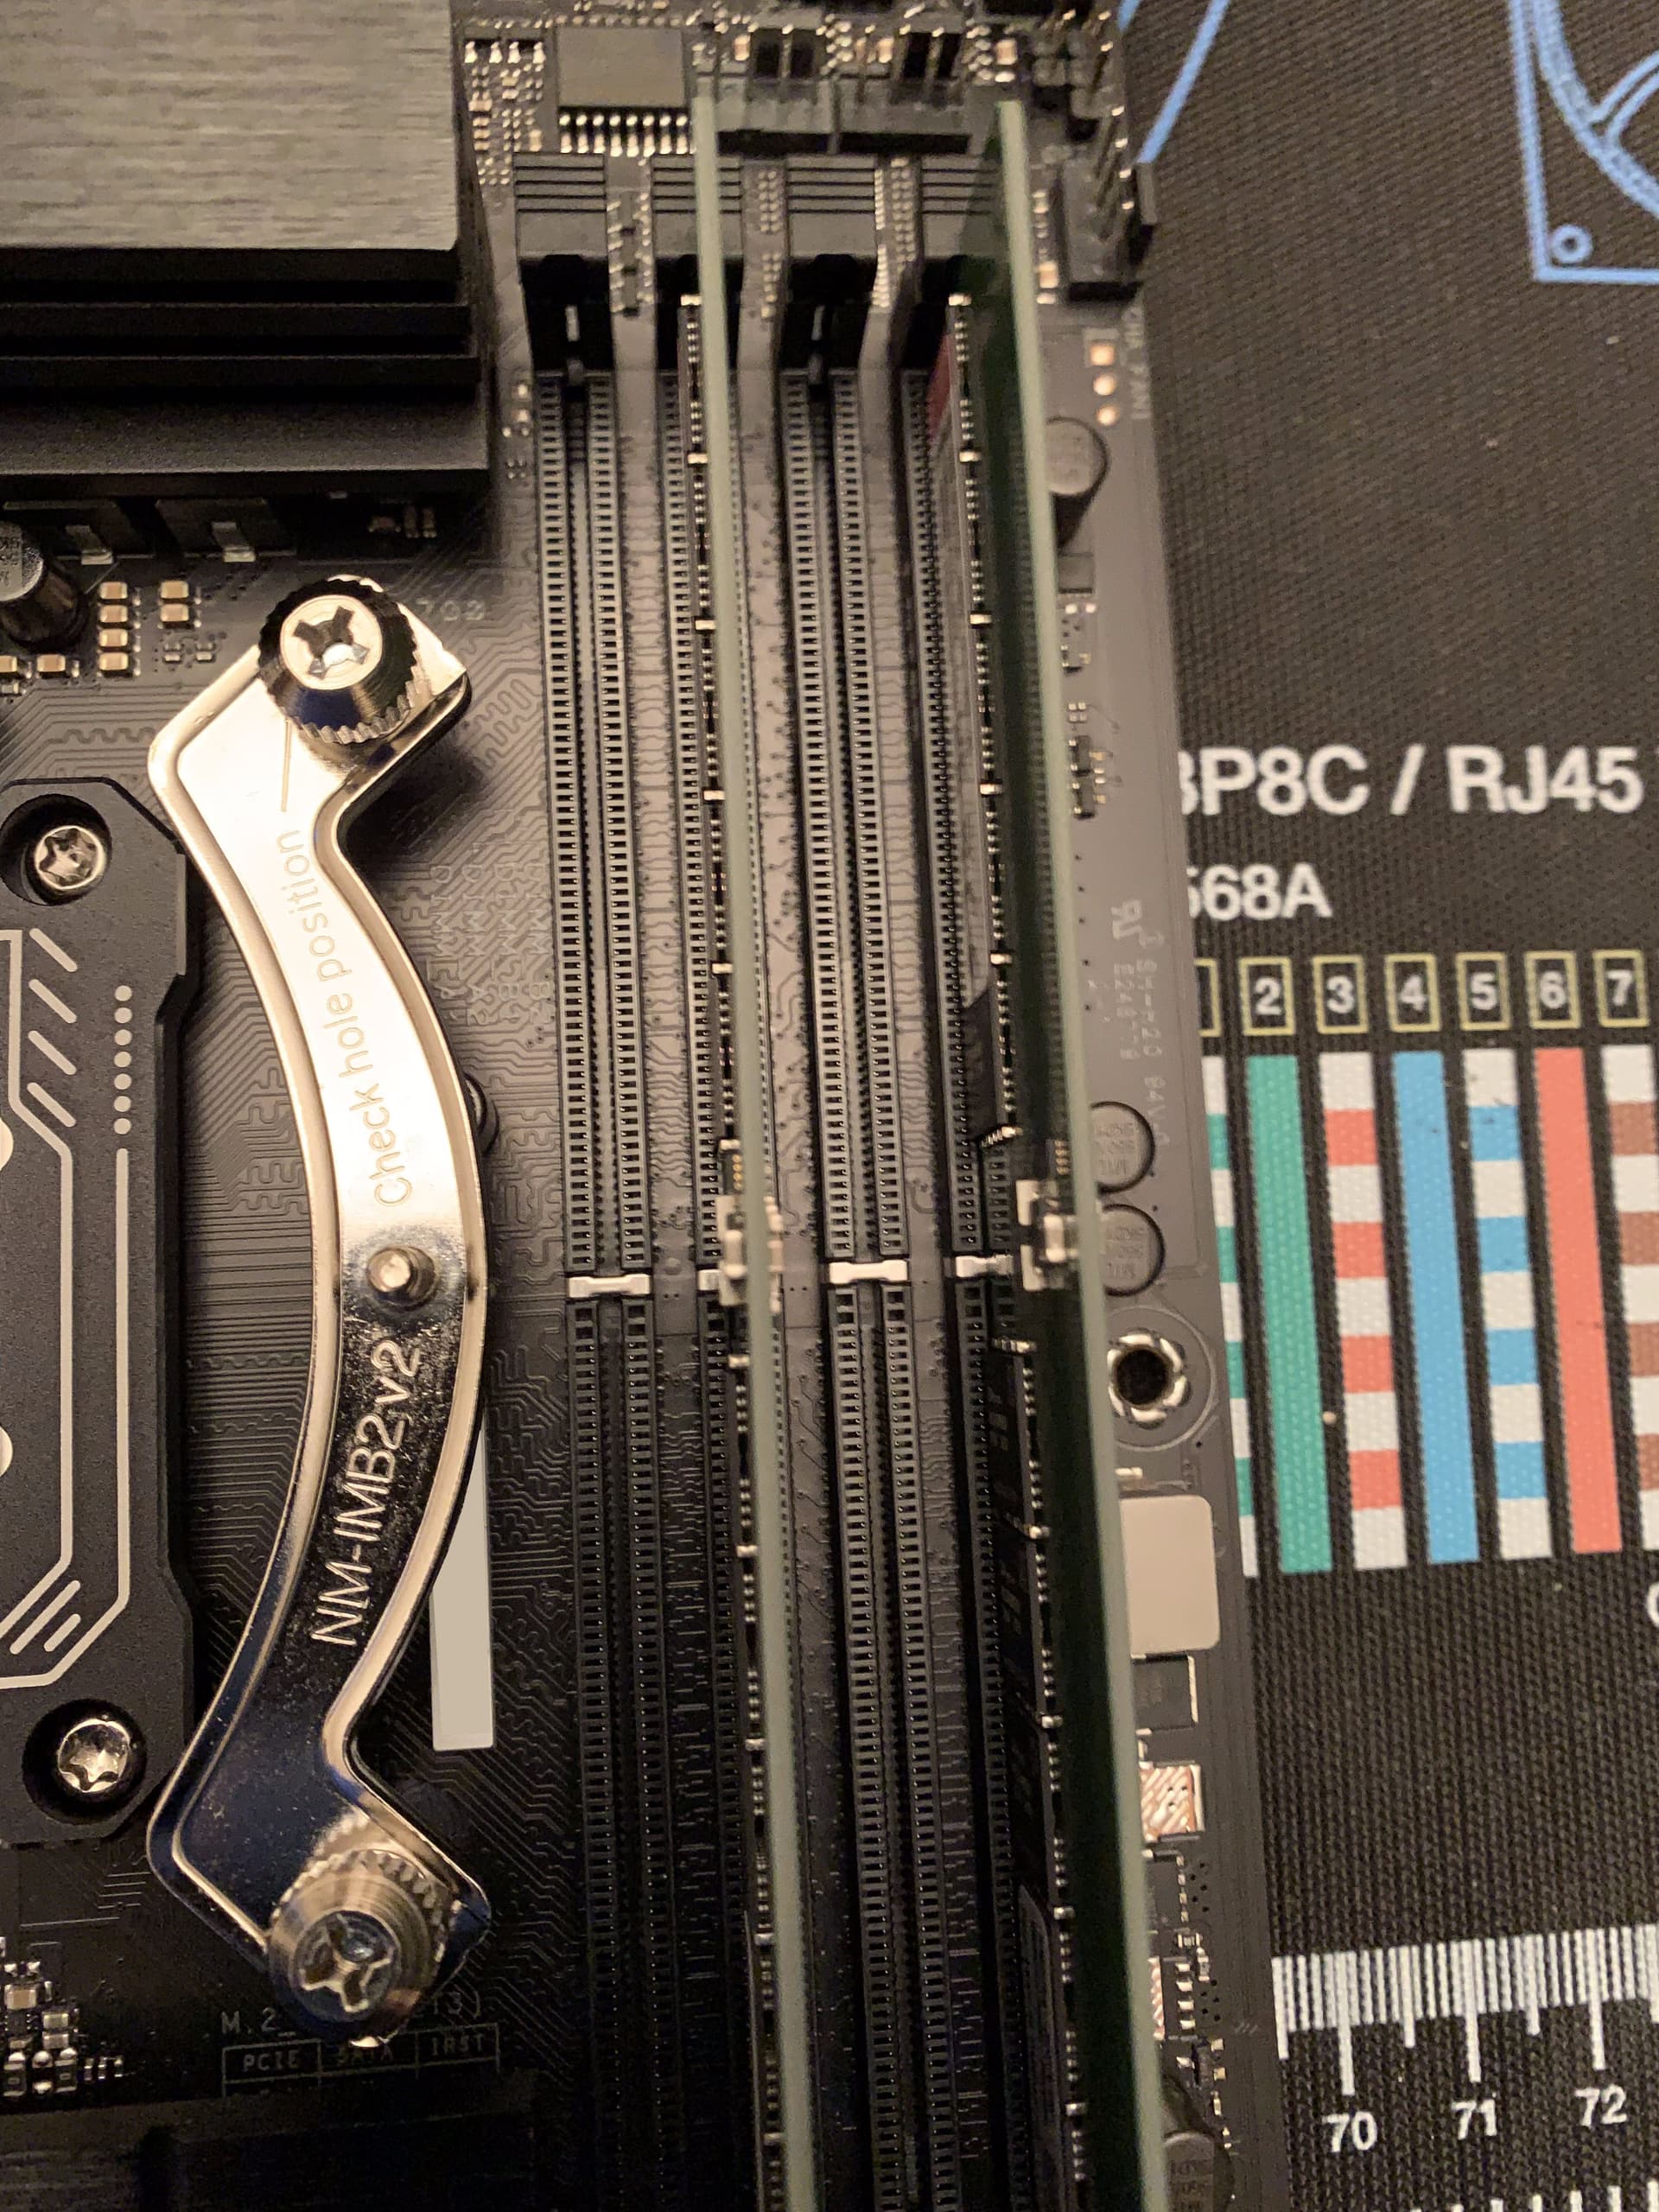
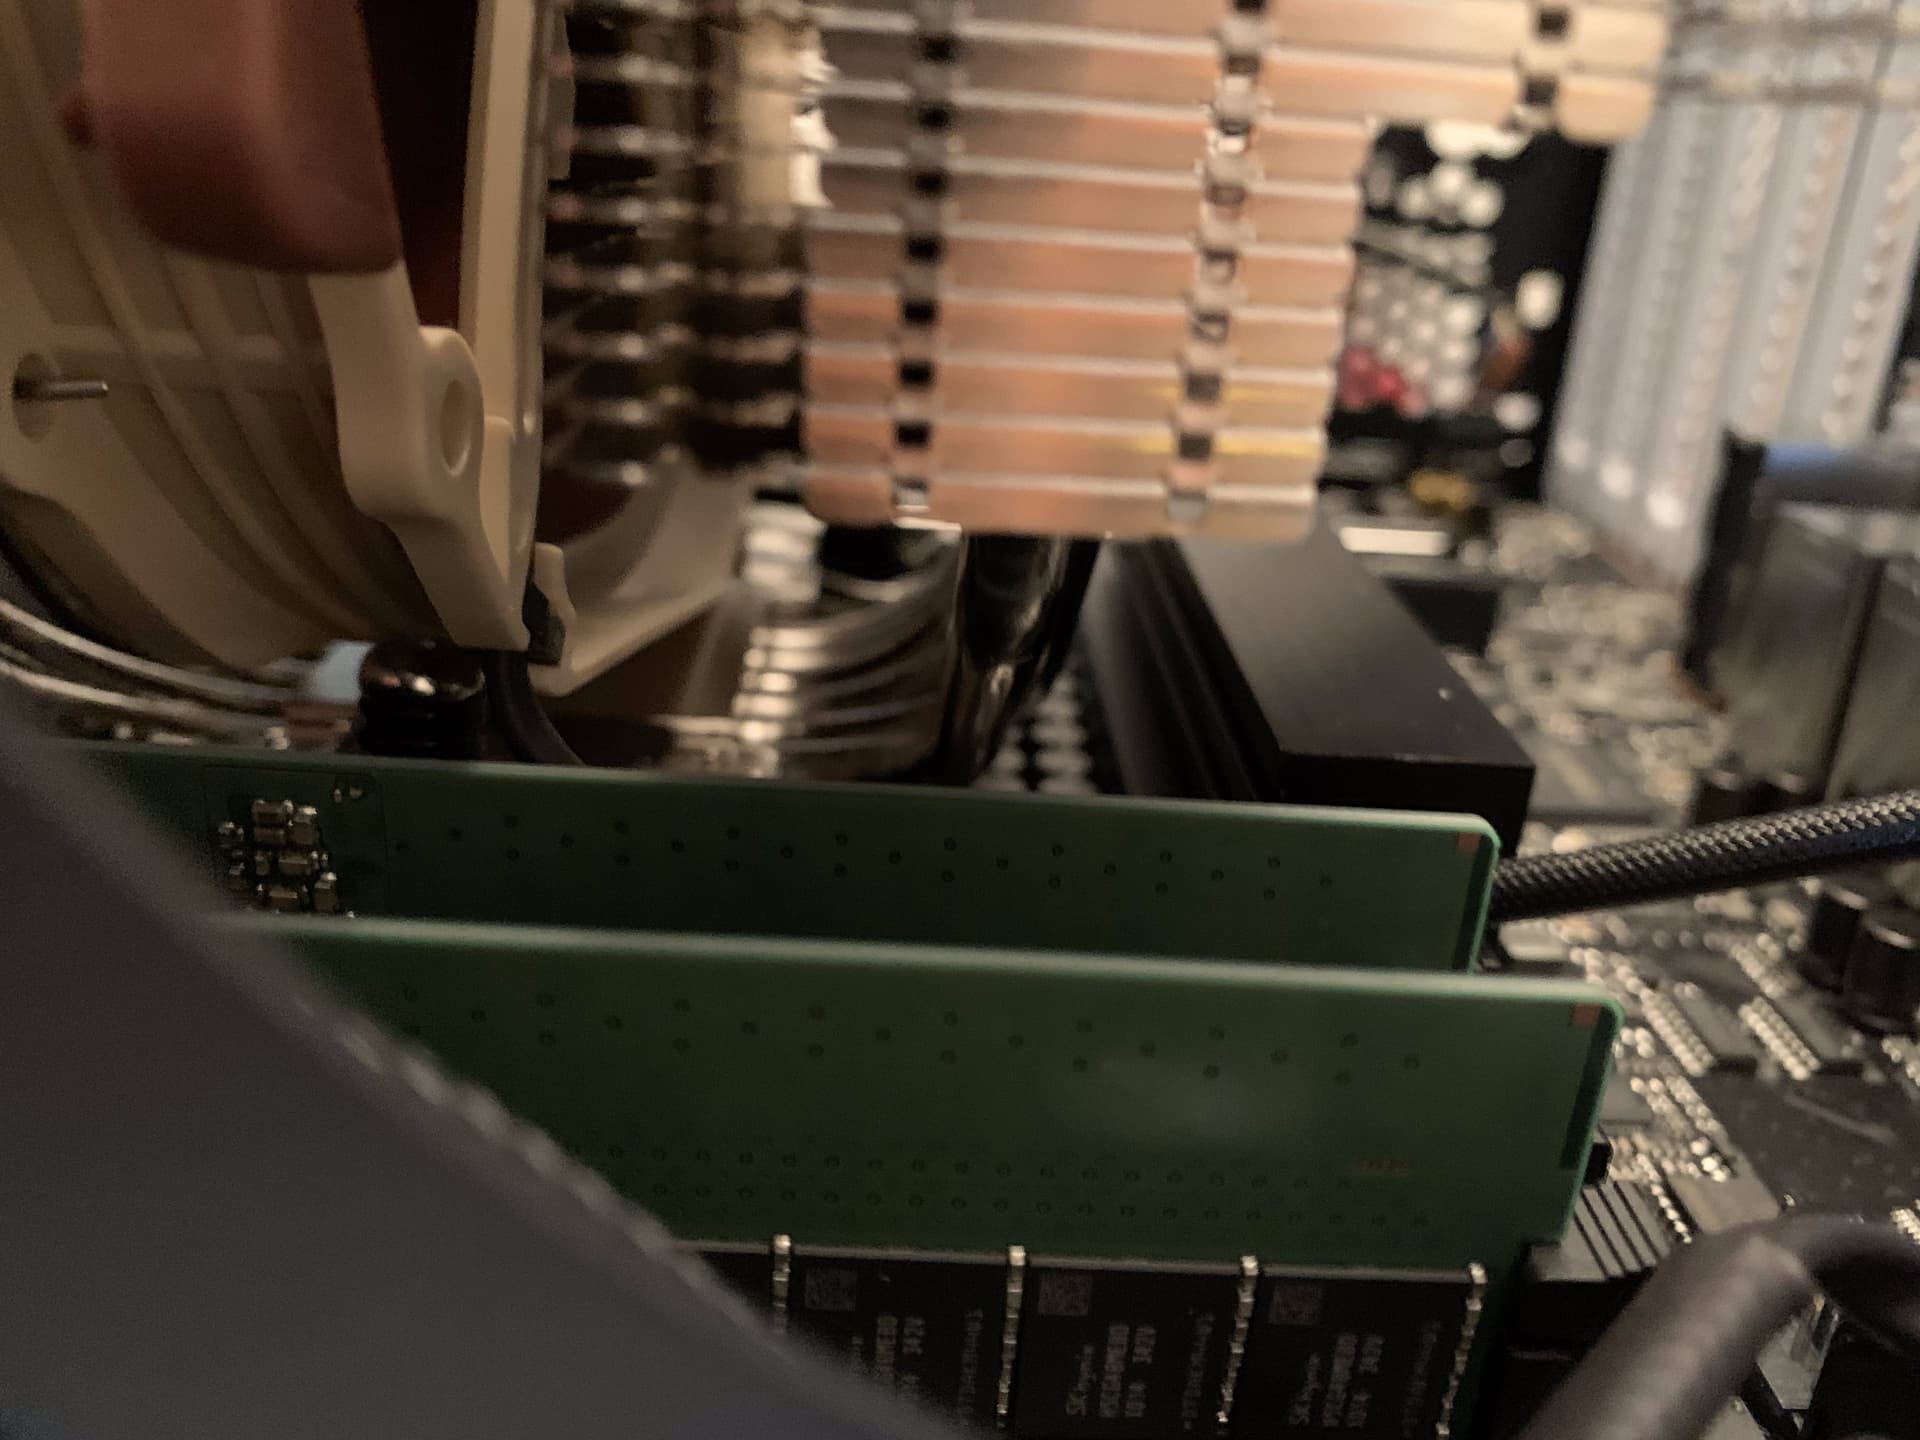
Putting in ECC RAM was kinda strange, coming from building gaming PC’s in the past: Without the heatsink, it’s kinda awkward to push down from the top. What did work was grabbing the sides and pushing down that way. On this motherboard, with 2 sticks of RAM, you’ll want to use slots A2 and B2 like so:

It would’ve been nice for this $370 motherboard in 2023 to have levers on both sides of the RAM slot, but you’ll only have it at the top.

The NVMe drive was installed to the slot right next to the CPU. There’s this small thermal square that ASUS recommends for single sided NVMe drives, but not dual sided. For the Sabrent Rocket 4 Plus drives, the 1TB is the only single sided NVMe, so I didn’t install the additional thermal square.

Here’s one spot where I goofed: The motherboard doesn’t include a heatsink for the second NVMe drive, so I’ll be ordering a sabrent heatsink or something like that to cover it. I sound like a broken record at this point, but surely for a $370 motherboard in 2023, it would have been nice to include it.

With just about everything installed on the motherboard, sans the NH-D15S, which I’ll install in the case later, it’s time to move on to the case.

The Case:

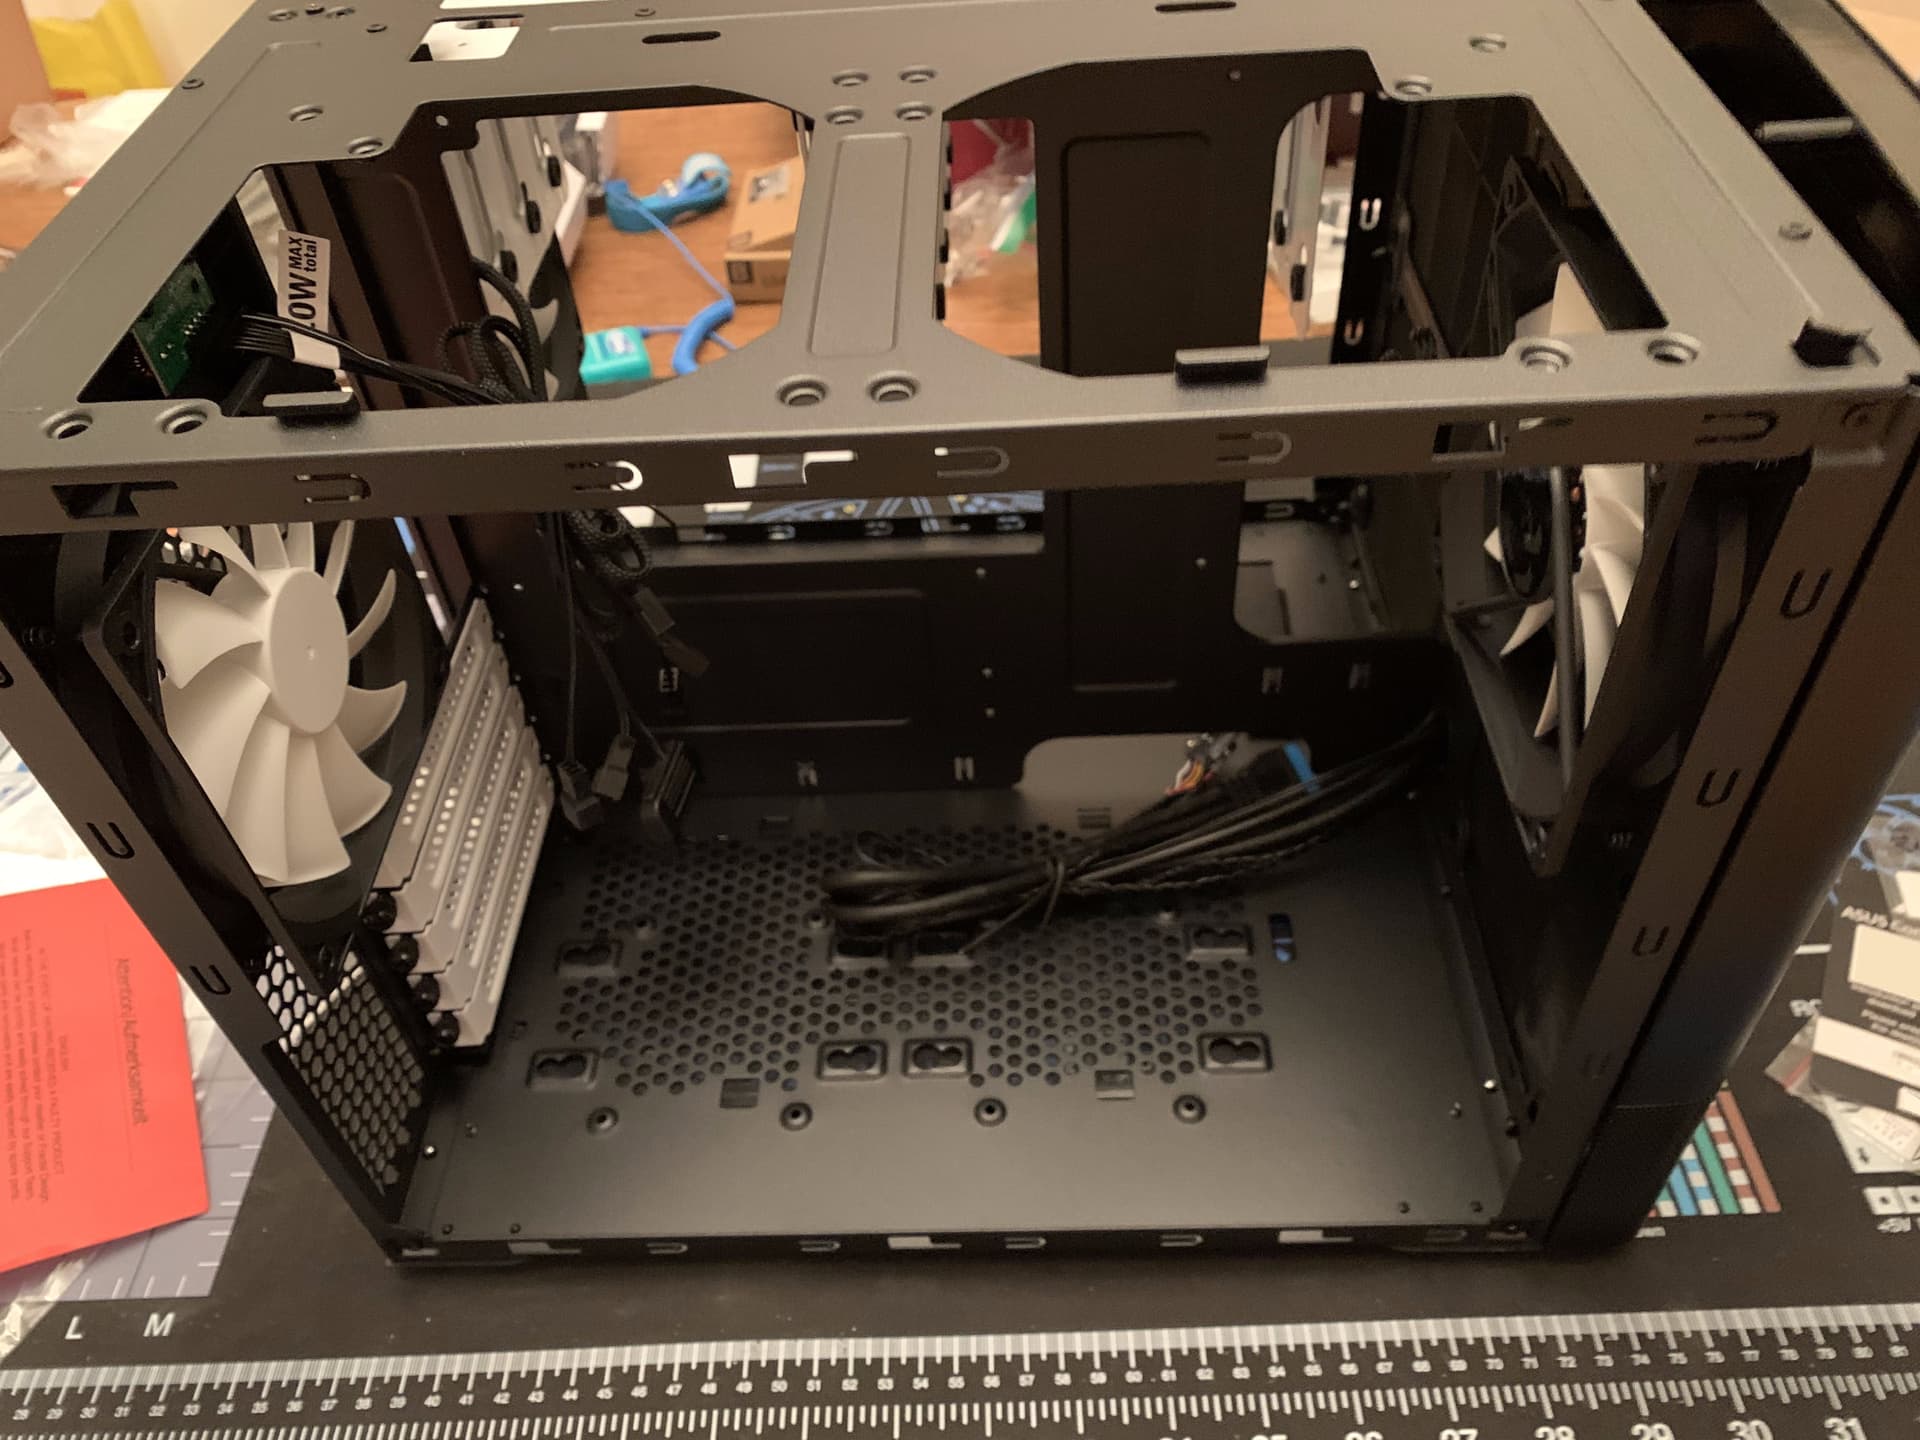
The Node804 has two main compartments. The first that you see above is where the motherboard sits, and the one in the back is where the bulk storage goes. Each compartment has room for 2 intake fans at the front, a fan at the back, and spots on the top for more cooling. (Though in the storage side, the usefulness is questionable with the drive brackets in the way.)

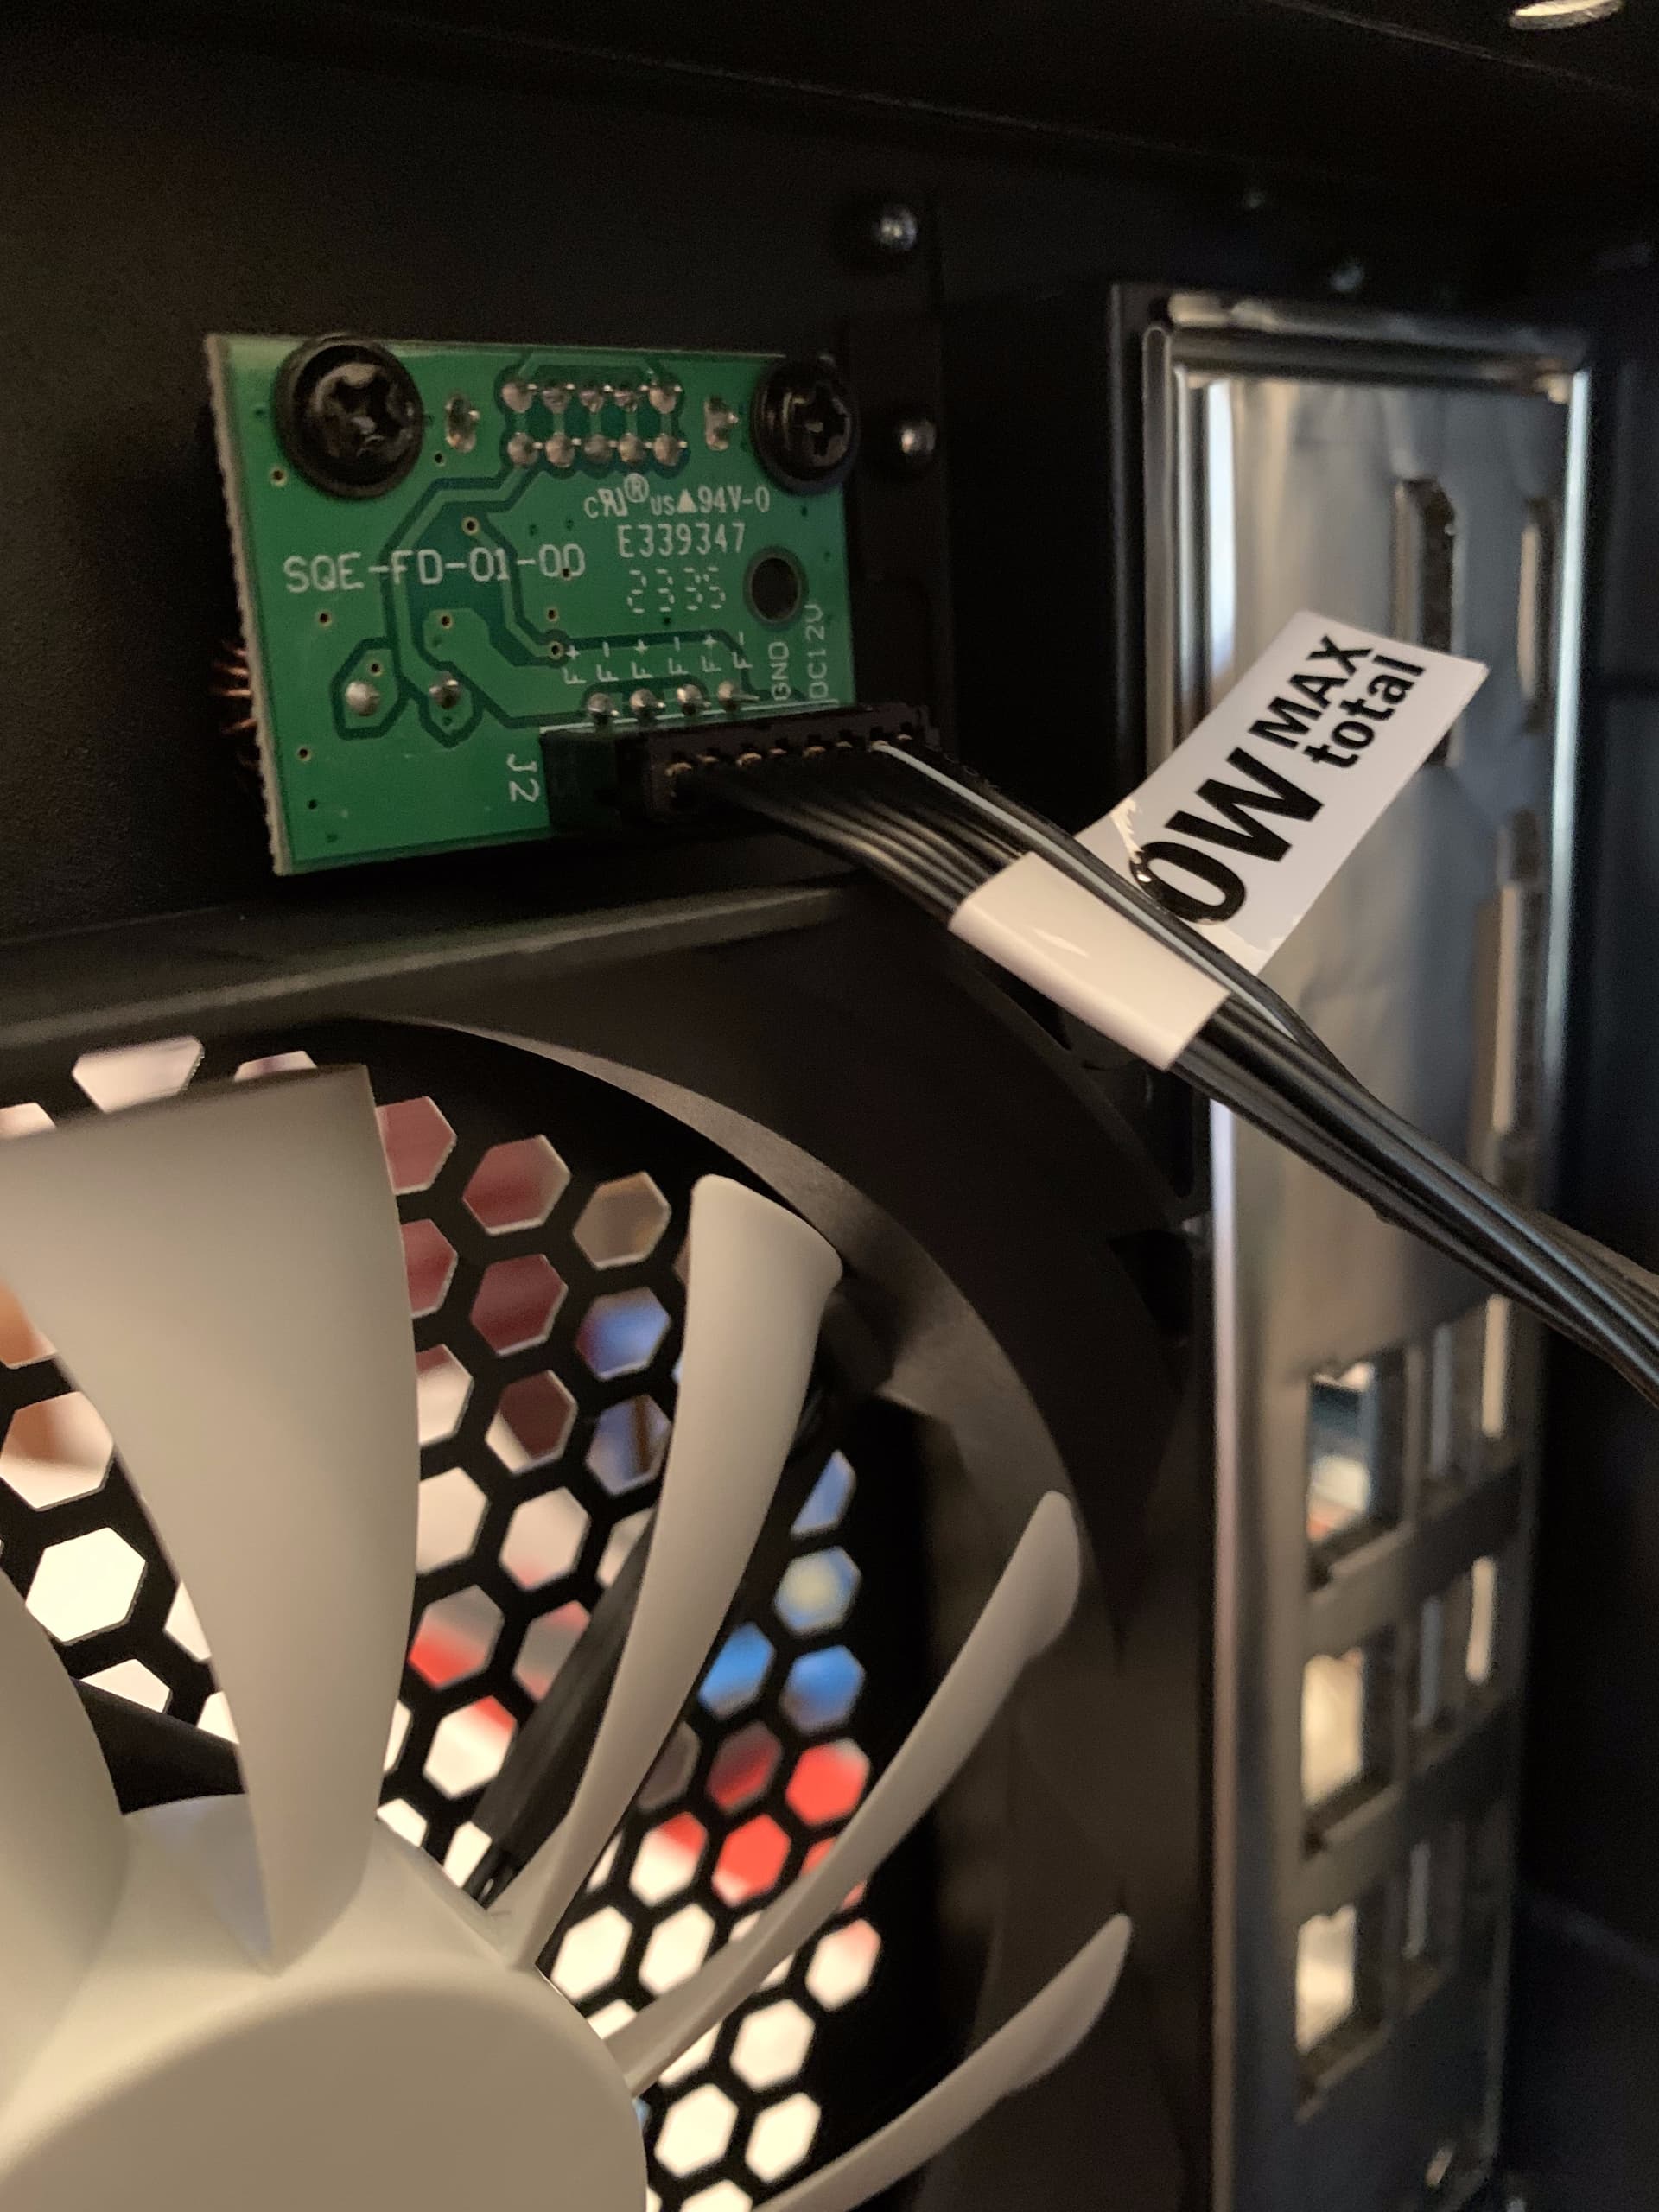
The included fans seem to be hooked up to a fan controller, which you can switch from low speed, medium speed, and high speed with a physical switch.

Since I’m going to control the fans in software, I was happy to see that the cable can be disconnected from the controller fairly easily by hand.

Next came installing the motherboard standoffs, the PSU, and doing some basic cable labeling. The Node 804 has 2 places to mount sata SSD’s but they both have some caveats.

The first position is at the front of the case, which makes cable management tricky, along with replacement in the future should one of them kick the dust.

The second position is on the floor of the cpu compartment of the case. However, the SATA power cables make this difficult as the drives are lifted off of the bottom by the sata power cable.

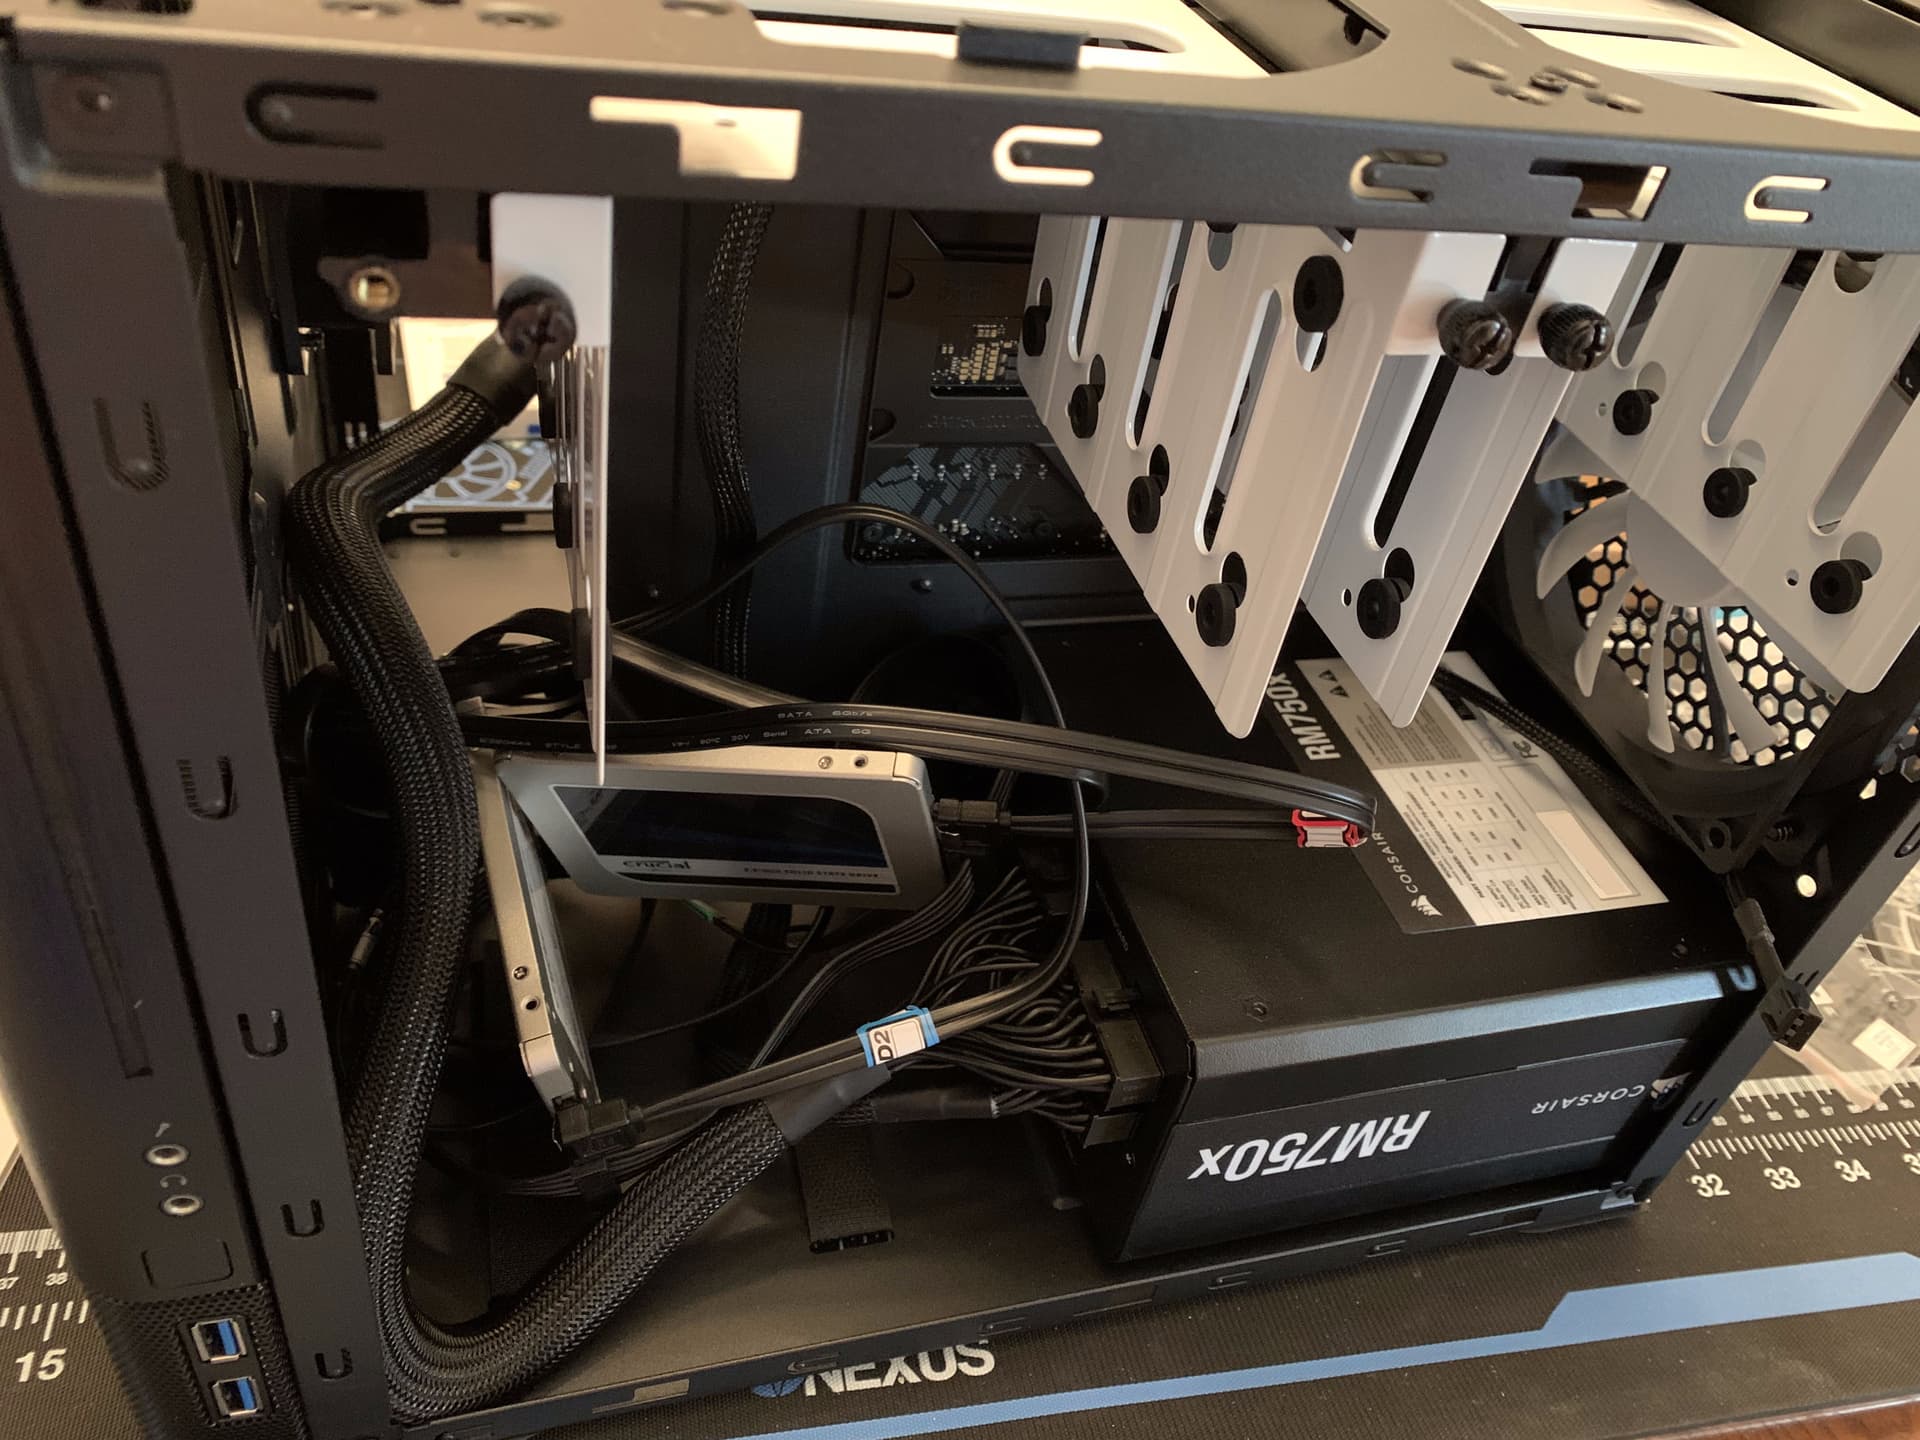
In the end, I chose the route of least resistance:

Yeah, it’s not pretty, but no one will see it. While we’re back here, lets talk actual cable management. I’ve found that you can tuck the CPU power cable behind the two HDD cages, by taking them out first, and then routing it through the top of the case. There’s even a tie down point up here. At the end, you end up with something that looks like this:

I’ve screwed in the HDD cages all the way and have removed them again to check for any scratches or dents in the CPU power cabling, but haven’t been able to see any, so it should be good to go. (Your mileage may vary with this one depending on how thick your cables are.)

Since I don’t have my bulk storage in yet, there’s nothing in this compartment that needs extraordinary cooling, so the exhaust fan on this side was moved to the cpu side of the case to help out as intake. Here’s what it looks with some amateur cable management right now:

OK, time to put on the CPU cooler. I’m going with the NH-D15S, since I heard that it can work on this motherboard, and because it’s scientifically proven that owls are the coolest birds.

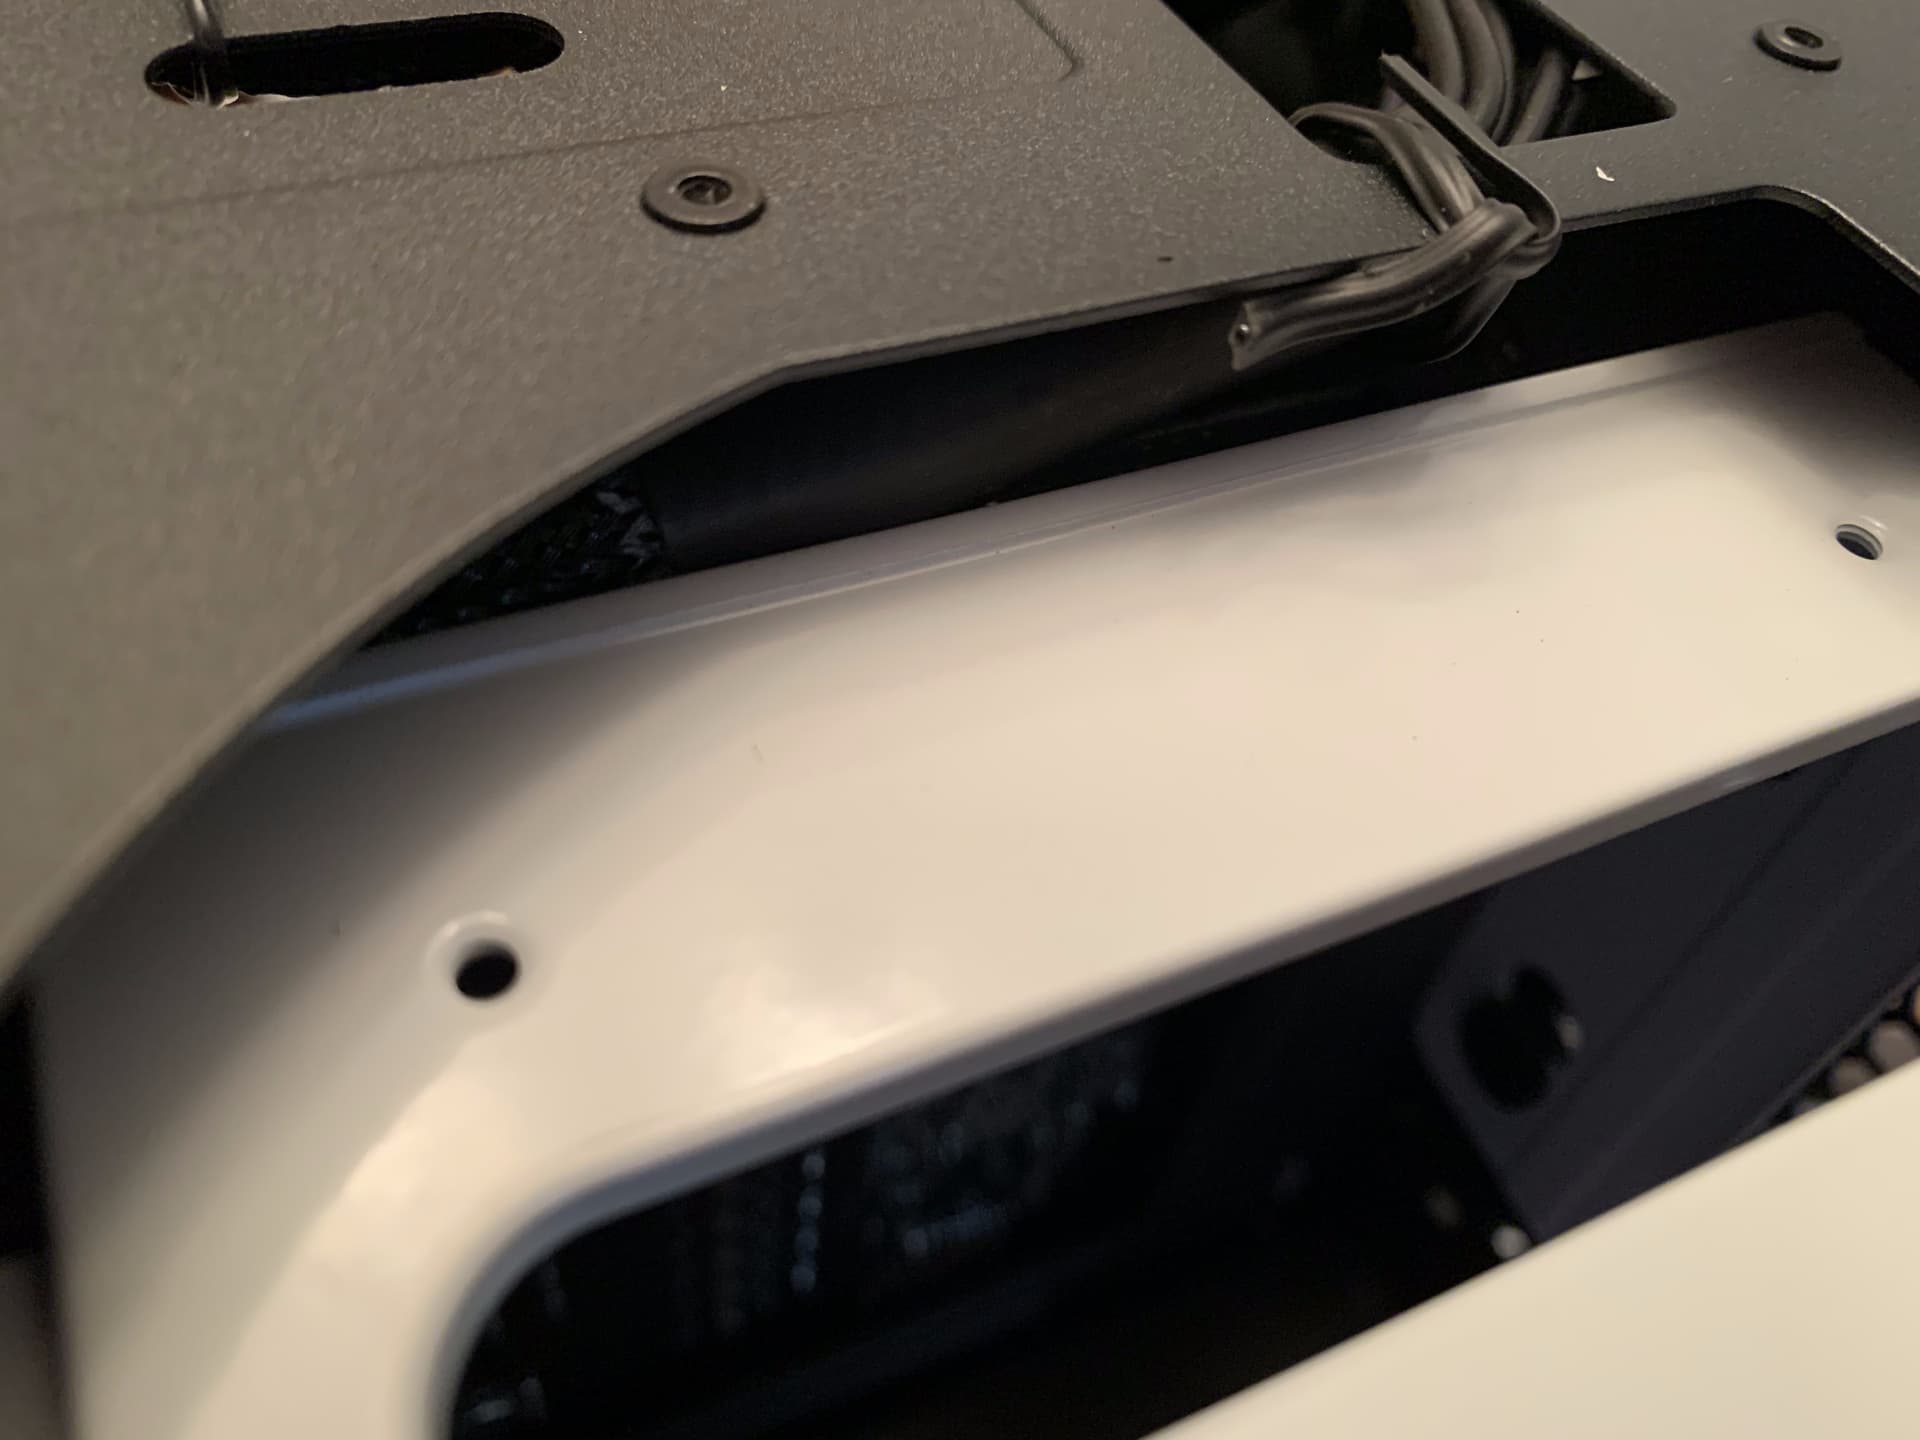
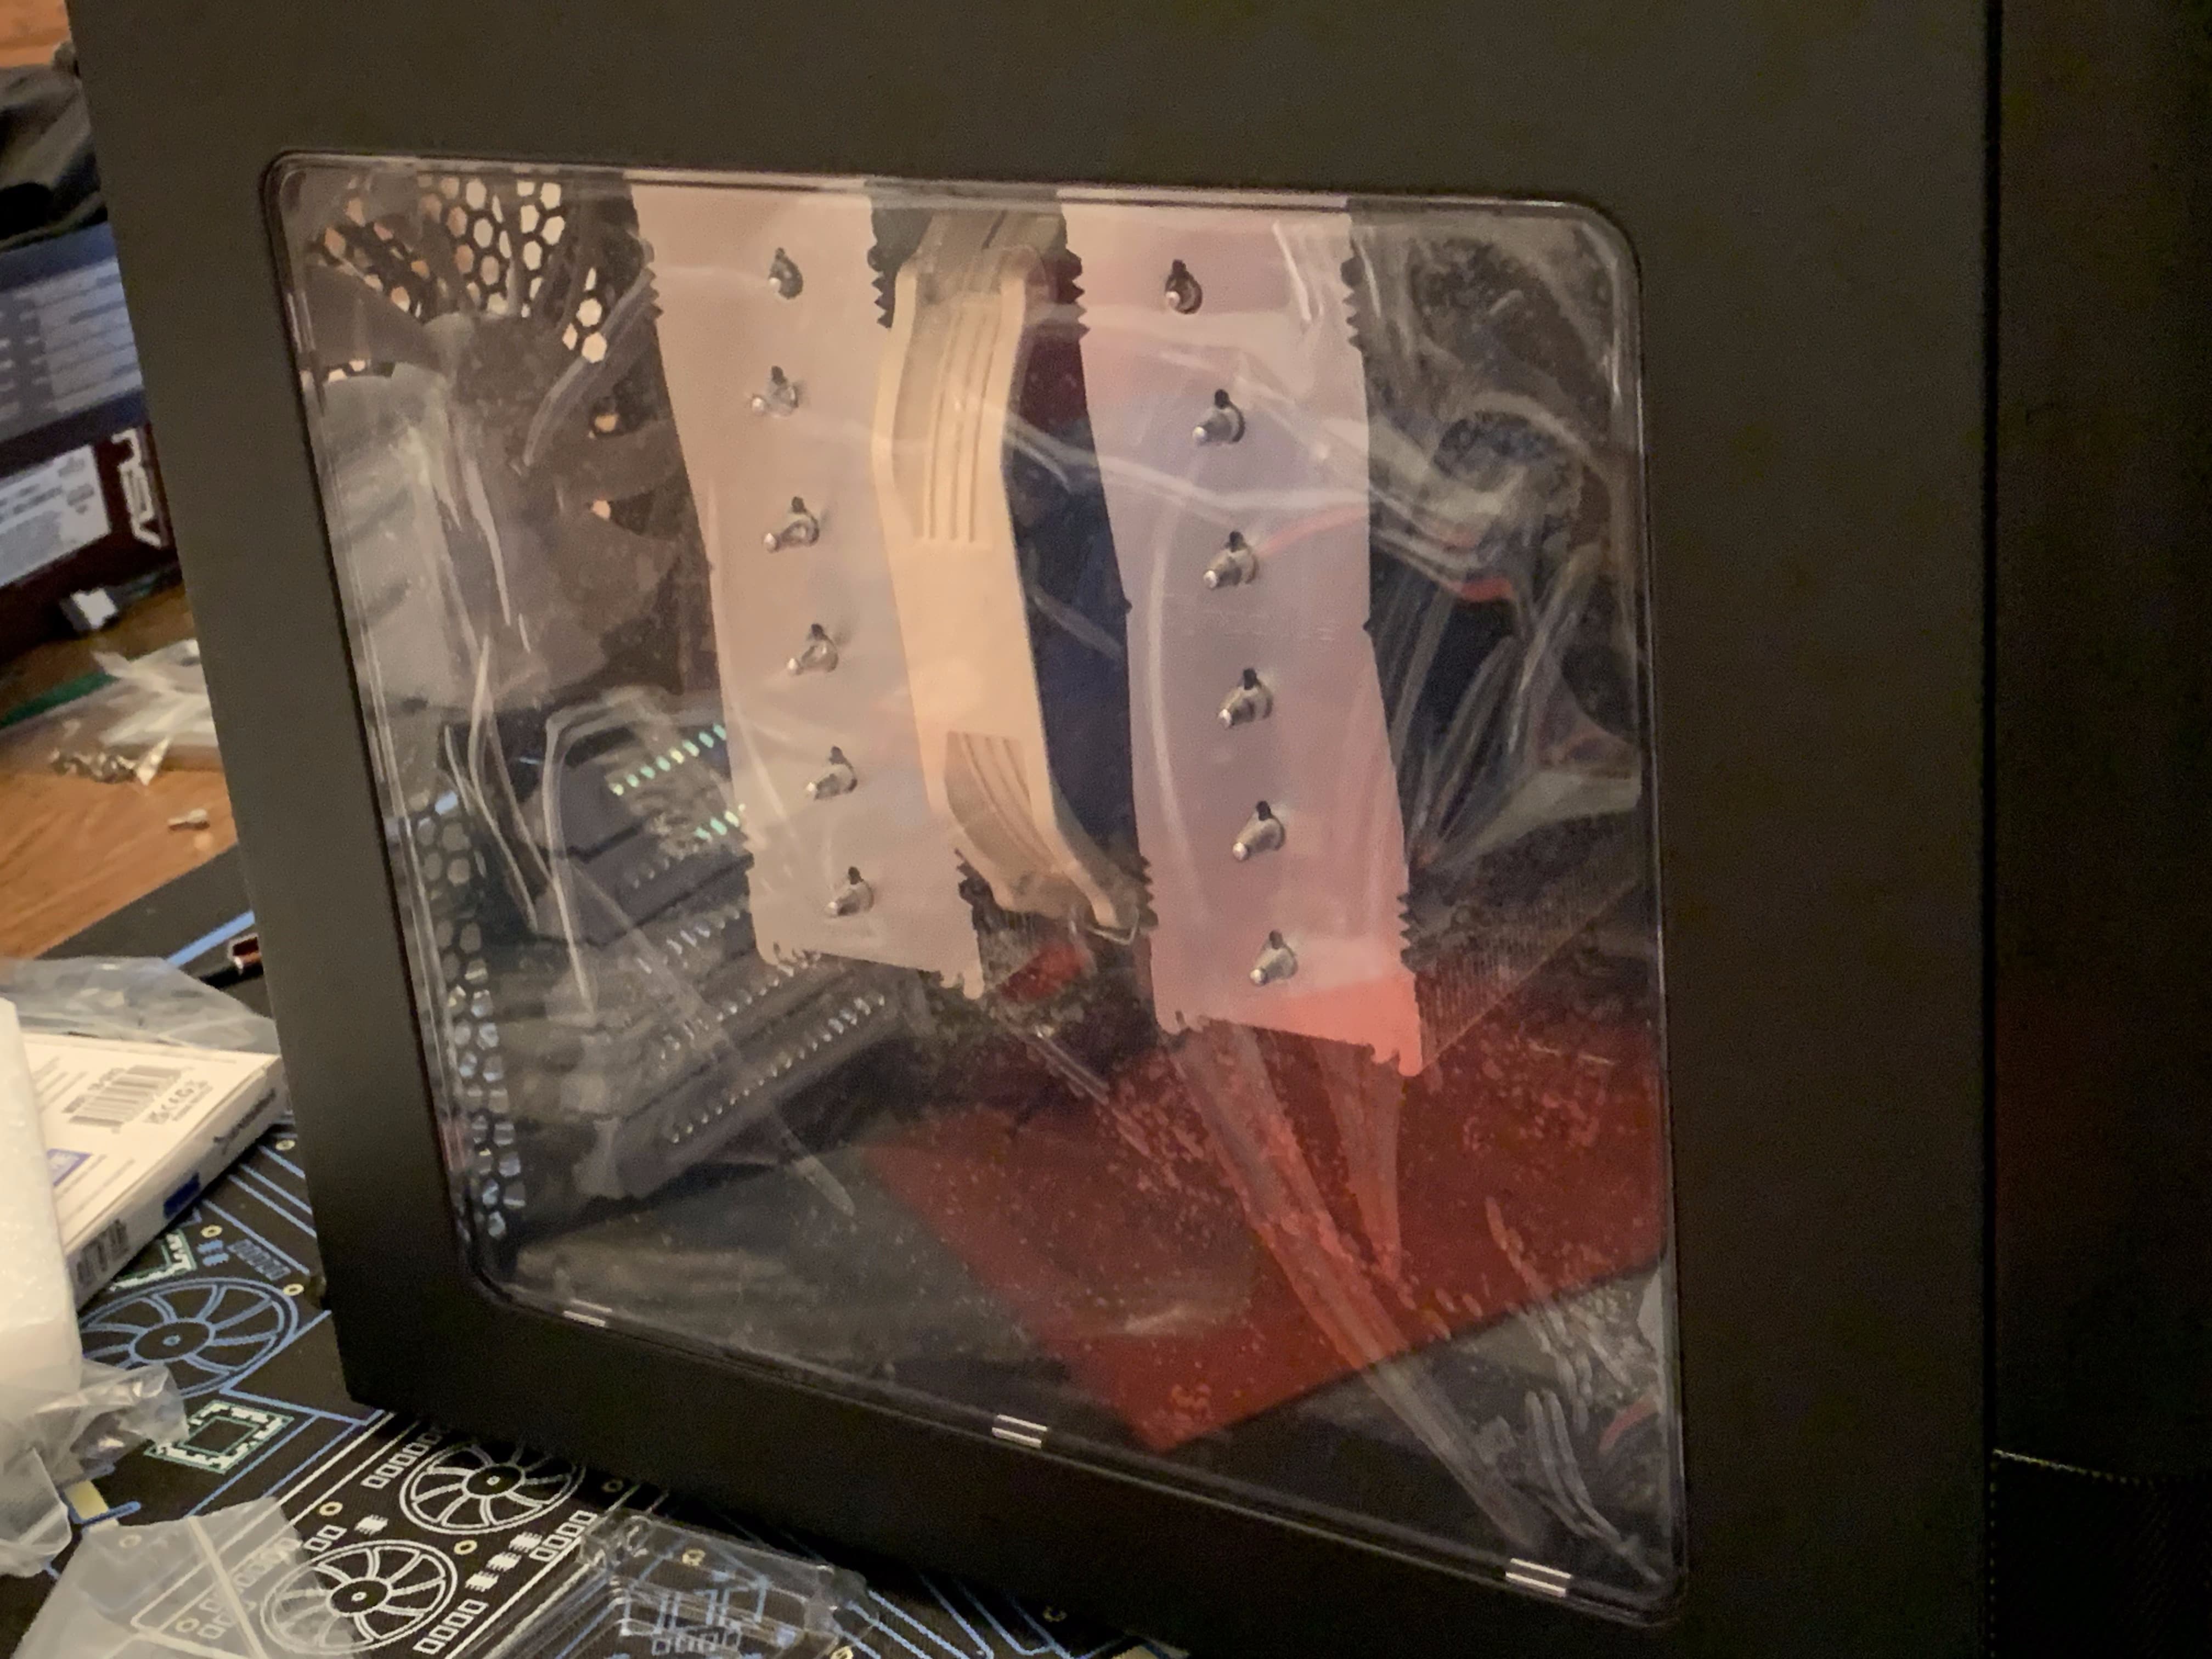
Here’s some guerilla-style photography to show how much clearance there is with the NH-D15S:


And here’s what it looks like from the window of the case. There’s about maybe 3/4 of an inch between it and the window.

Whew! That was a lot of typing :laughing:

Next time I’ll be going over how the initial setup went and any pitfalls encountered. For now, time to get some sleep!

4 Likes

Initial Motherboard Setup

Just time for a quick post before work – The system posts!

Here’s what the UEFI bios looks like for this board:

Running memtest86 pro like I usually do for a new build, it doesn’t detect the ECC RAM!

If you run into this, don’t panic. (Or maybe panic a little, but then calm down and keep reading.) After doing some research, ASUS didn’t add ECC support for 13th gen until December, and your BIOS is likely older than that.

Thankfully, there’s BIOS flashback on this board. Go to the Support section for this motherboard on ASUS’ Website and find the latest bios:

I also downloaded the MEUpdateTool, but I’m not sure exactly how they expect you to run MEUpdateTool on a new PC with no operating system on it yet (yet alone how to run it on linux, because the downloaded tool is a .exe file)

Why yes, ASUS, I'll run this .exe file on a pc with no OS /s

Just skip it for now.

One thing that you shouldn’t skip is using their converter program to rename the file properly: it shows up as an ‘image’ in windows, and not a disk image but an image image. After using the tool to rename it, and going to the flash tool in the motherboard, you’re greeted to this screen:

It took about 5 minutes to do it’s thing. Afterwards, it rebooted into the UEFI, where I made the following adjustments:

  • Setup User & Admin Accounts
  • Disabled Armory Crate Installation on Boot
  • Disabled ASUS Extreme Tuning Boost thing (The CPU one.)

Saving and rebooting into MemTest86 Pro, ECC is now detected and working properly! :man_dancing:

Time to let this run for a while and start work.

4 Likes

Installing TrueNAS was really easy.

You simply decide if you want core or scale (going scale here since I want linux.) and then follow the appropriate guide

I did find this blog for looking at nvme namespaces.

Unfortunately, running the command to list nvme namespaces shows that the sabrent rocket 4 plus drives only support 1 namespace :confused: Guess They’ll just be a really fast full disk for VM’s.

# nvme id-ctrl /dev/nvme0 | grep ^nn
nn        : 1

I did order my NVMe heatsink and some additional noctua fans for when the drive compartment has drives in it, looking forward to getting them in tomorrow.

1 Like

Sabrent NVMe heatsink came in! Installing it was kind of a mess. ASUS has a ‘Q’ screw that ‘helps’ install NVMe drives. However, the sabrent heatsink has a bottom section that helps wick heat from the bottom of the NVMe drive:

Normally , on their own these would be helpful things. Together, they do not work so well. In order to get the Q screw to actually hold down the NVMe, drive, I had to omit the bottom part of the heatsink for now: still doing some research on if it’s possible to remove the Q screw and substitute it for a regular nvme M screw.

So, right now the NVMe drive is installed with the Q screw, and the top of the heatsink is being held on by the thermal pads, and its weight. Not the best, but it’s functional. (It does operate 10C hotter than the top NVMe)


Back to software, I was able to install truenas scale’s cobia update! It went very smoothly!

Something that didn’t go very smoothly was setting up a debian 12 VM with iGPU passthrough - I think this could be the issue people were talking about on the unraid forums with the onboard IPMI, I’ll let you all know if I find a solution for it.

What would happen is when setting up the VM with iGPU passthrough, during the last step, the GUI would throw a ‘too many concurrent calls.’ error and the VM would be created, but trying to start the VM would cause the infinite spinning circle of death :ghost:! As a fun side bonus, the VM would attempt to start when booting the server, so the only solution was to reinstall truenas core fresh; thankfully, the configuration import/export button exists and was a lifesaver here!

So, for now, instead of doing GPU passthrough, I followed @wendell 's guide with video hand holding and do have some good news to report! No creating a bridge, no black magic, was required atleast on truenas scale cobia, this w680 motherboard, and a debian12 VM in order to allow the VM to ping the host!

I even managed to get a palworld server installed :smiley:

Still, there are a few things I need to figure out:

  1. Can the ASUS W680M PRO ACE SE’s Q screw be replaced?
  2. The W680M PRO ACE SE has 2x2.5GbE, but the TrueNAS Boot shows only 2x1000MiB. Where is this set?
  3. How can I safely allow my friends to connect to the palworld server?
  4. iGPU passthrough issues

See y’all next post.

3 Likes