If you have or want to get a SATA III PCIe expansion card to your PC or server when you’re out of SATA ports, and then try to install Windows on it, you’ll quickly find out that it just straight up doesn’t work and it causes the installer to BSOD if it uses the ASMedia ASM106x controller.
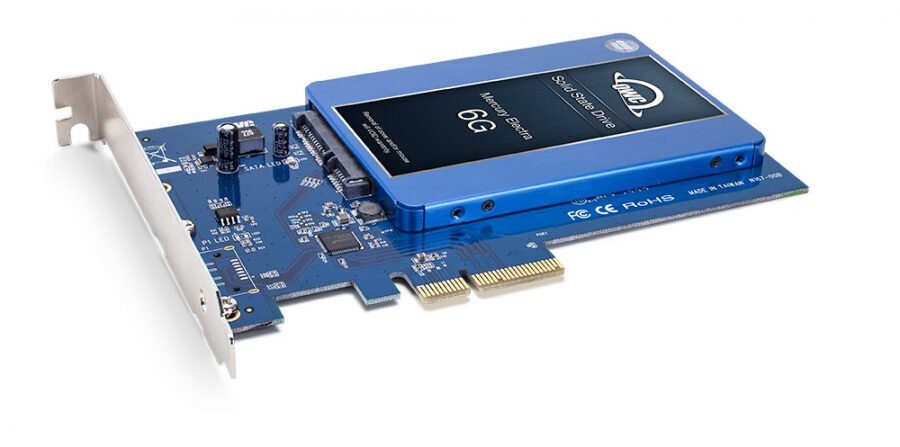
So I got myself two OWC Accelsior S cards that look like this:
They work great with Mac hardware, XServe hardware or anything Linux when you want to use them as a boot drive, but the moment you try to use them with Windows, you get WHEA_UNCORRECTABLE_ERROR BSOD even before you manage to get to setup.
You can also find people complaining about the same thing under the Amazon reviews.
What’s the catch to getting it to work? Drivers.
Lets fix that.
Obtaining the drivers
Okay this one is kind of bad. ASMedia does not release their drivers publicly so you have to scavenge them from third party sites.
The correct way is to trying to contact ASMedia directly and requesting the Windows driver for the specific firmware version of the card you have
You can see the firmware version of the card during boot if you’re in BIOS mode.
Then there’s the bad way:
Disclaimer: I am not responsible if you malwarize your system or set your house on fire with these drivers. Getting drivers from 3rd party sites is ALWAYS A BAD IDEA and you should always try getting it from the manufacturer. Continue ONLY if you know what you’re doing and understand the dangers associated with it!
By Googling ASMedia 106x SATA Controller Drivers you should view the TechPowerUp’s Latest driver and firmware for ASMedia ASM106x series and OEMDriver’s ASMedia 106x SATA Controller Drivers Download results. I refuse to direct link to the sites unless the mods are ok with it.
I used OEMDriver’s driver with success with the OWC Accelsior S card.
Please be aware that there are two versions of the ASMedia ASM106x controller! One is for onboard controller on motherboards and one is for PCIe addon cards!
Injecting drivers into Windows Setup
First, create a folder somewhere with subfolders drivers, ISO and mount, then obtain a Windows ISO and either flash it onto USB or extract its contents into the ISO folder. This tutorial uses E:\OWCINJECT\ as the folder that contains those subfolders.
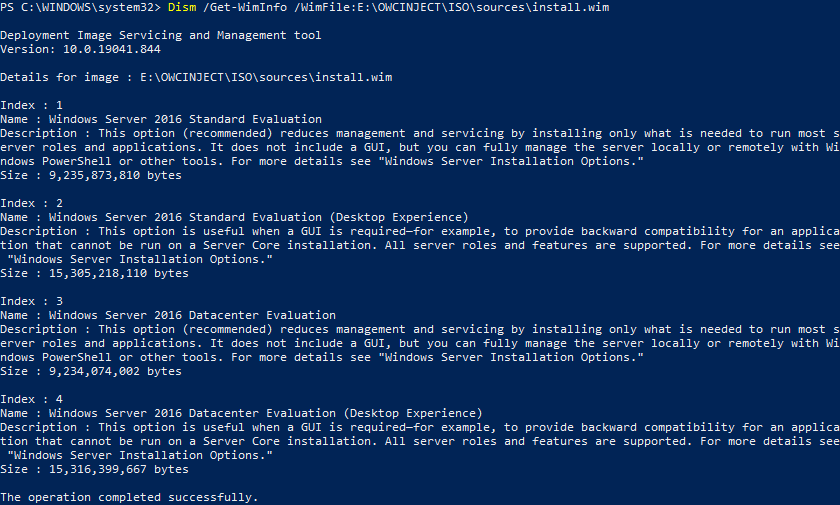
Now open up Powershell or Command Prompt as admin and get the index of the version of Windows you want to inject drivers into.
Dism /Get-WimInfo /WimFile:E:\OWCINJECT\ISO\sources\install.wim
With Windows Server 2016, you should get something like this
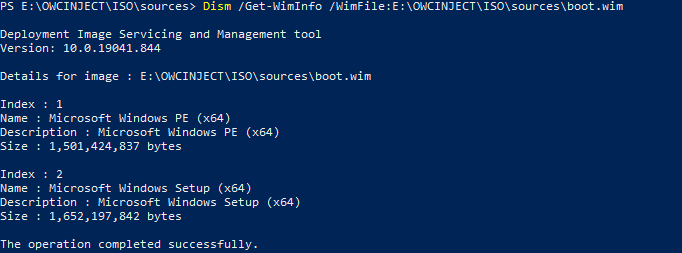
Do the same with boot.wim as we will have to modify that as well:
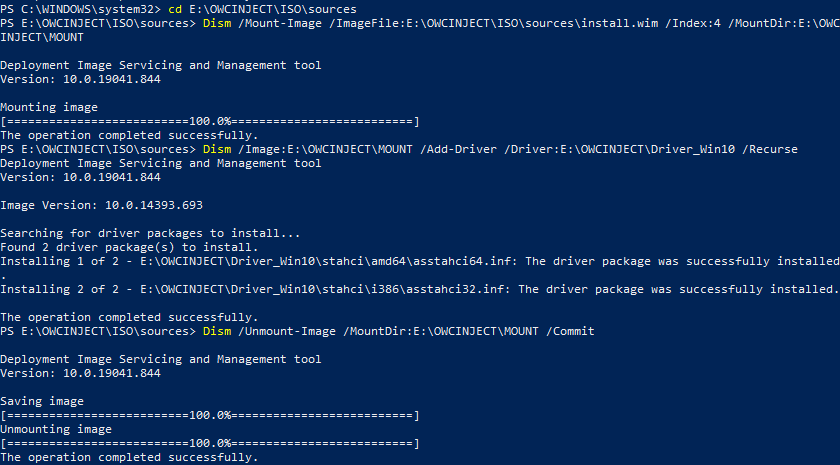
Now mount the edition of Windows you want. Preferably you should do it with every index/version. This command mounts the Windows Server 2016 Datacenter Evaluation (Desktop Experience) image.
Dism /Mount-Image /ImageFile:E:\OWCINJECT\ISO\sources\install.wim /Index:4 /MountDir:E:\OWCINJECT\MOUNT
Then inject the drivers into the image. This command will recursively install all files in the folder
Dism /Image:E:\OWCINJECT\MOUNT /Add-Driver /Driver:E:\OWCINJECT\Driver_Win10 /Recurse
Once the driver installation is done, unmount the image and commit changes
Dism /Unmount-Image /MountDir:E:\OWCINJECT\MOUNT /Commit
Now do the same thing for BOTH INDEXES for boot.wim to inject the drivers into WinPE and WinSetup images!
If you modified the WIM files on the USB stick and did not extract the ISO to a folder, you should be good to go to USB boot with the added drivers.
If you want an ISO for flashing onto multiple USB sticks or want to mount it as virtual media, continue with the next steps.
Modify the Windows ISO
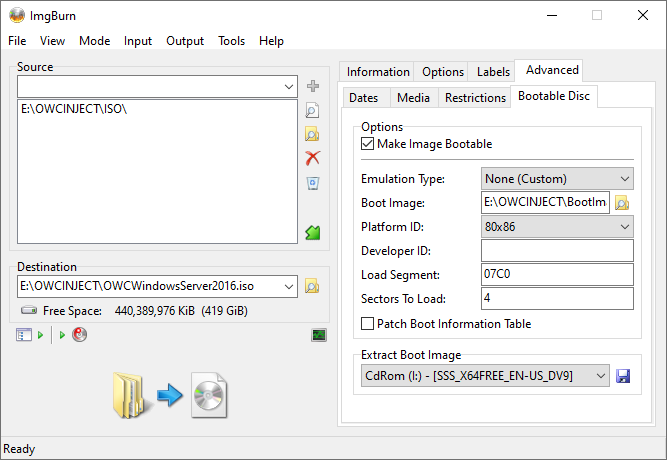
Get and install imgBurn and then mount the UNMODIFIED ISO file with Windows Explorer. Start imgBurn and click on Create image file from files/folders.
Once the menu pops up, select the Advanced and then Bootable Disc tabs.
- Toggle
Make Image Bootable - Select the
Sourcethe folder containing the files from the ISO - Destination is self explanatory
- Under
Extract Boot Image, select the mounted ISO and save the.imafile somewhere. Then load the.imafile underBoot Image.Load SegmentandSectors To Loadwill autopopulate.
Once you get the Confirm Volume Label just click yes as this is inrelevant. imgBurn should auto-adjust the ISO filesystem to bootable UDF ISO image. Just click Yes:
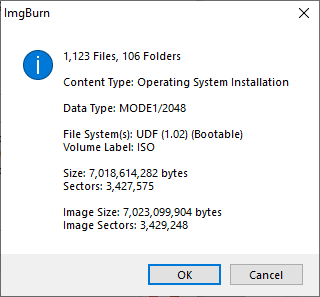
Now you should have a bootable image that you can flash onto USB/Burn to DVD/Mount as virtual media:

Please also remember that these cards will only work under UEFI mode and will not be able to boot under BIOS mode.
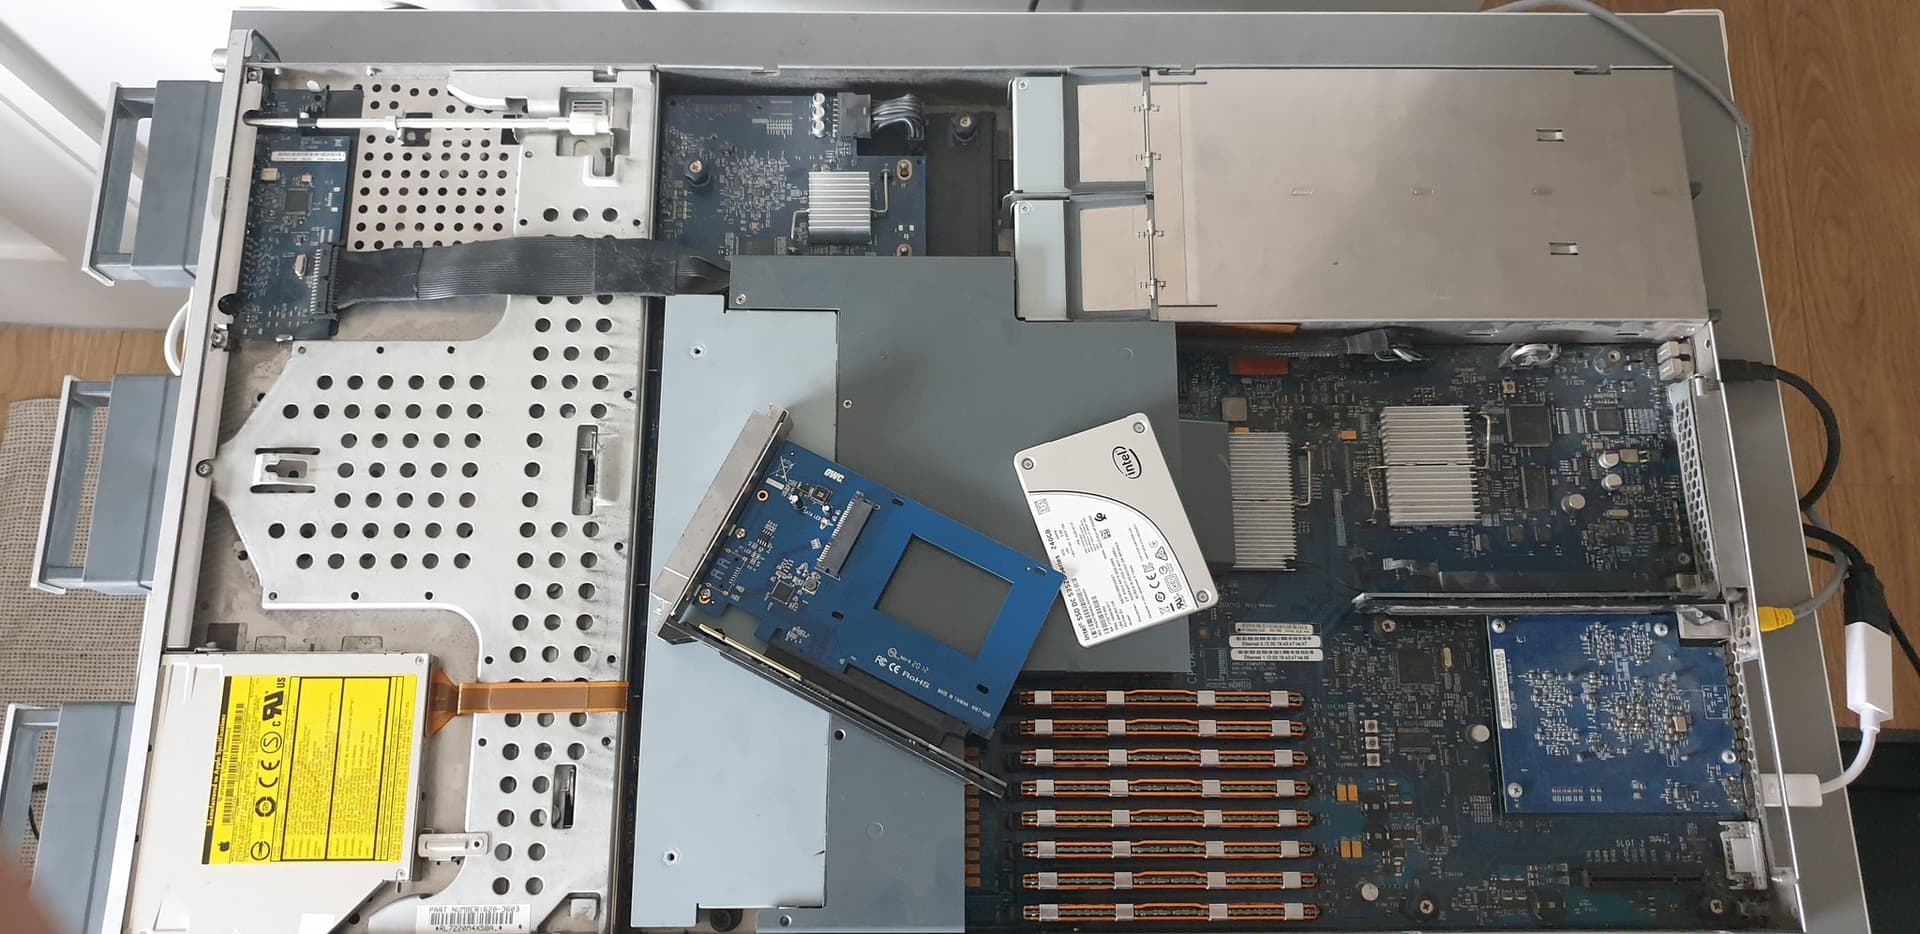
Tested with two OWC Accelsior S cards and Dell PowerEdge T140