Hello All,
I thought I should just write up this guide for those who might pick up the MSI x299 Raider board and are having so many difficulties trying to set up Proxmox on it for VGPU on a Tesla.
The biggest issues I have encountered were errors when installing the GPU regarding VGPU VFIO.
ERROR: Unable to load the 'nvidia-vgpu-vfio' kernel module
Or worst of all, the board goes into a bricked state and you have to switch to BIOS #2 and recover BIOS #1 (Thanks MSI for including that)
Requirement
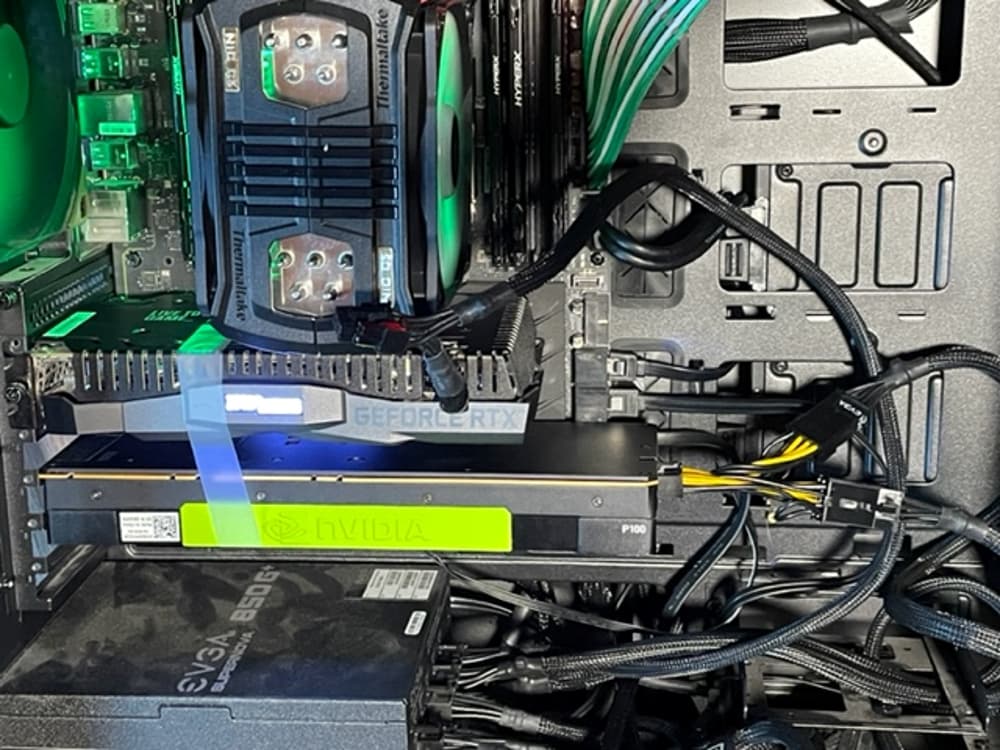
Since this board has no onboard graphics, you will need a GPU Card sadly. Can’t have it headless to get full Tesla functionality so it will run at 8X PCIE Speed with i7 CPUs. I don’t believe you need a full UEFI ( I only gotten it to work with a 20 series card) Compatible GPU but you will need a GPU in the top slot regardless, The worst that can happen is that you just don’t have any video output from the card, and the system still boots to Proxmox. The reason is, if the board can’t find a graphics output on the top PCIE Slot, it will come back with this error (See image below). Since I had no way to see it, it was showing this message to the Tesla (which has no Outputs). As of 10-22-2022, this board has no way to exclude the GOP policy.

Another thing, DON'T EVEN THINK OF USING A RAID CARD FOR THIS BOARD ONCE ENABLING ABOVE G4 DECODING. Board gets stuck in a no GPU detected state and you have to switch to BIOS #2 to recover BIOS #1 with a reflash. Such a pain, but there are 8 SATA ports on this board with hotplug function when enabled which is a plus.
**Guide**
-
Set up a bootable USB for Proxmox using Balena Etcher.
-
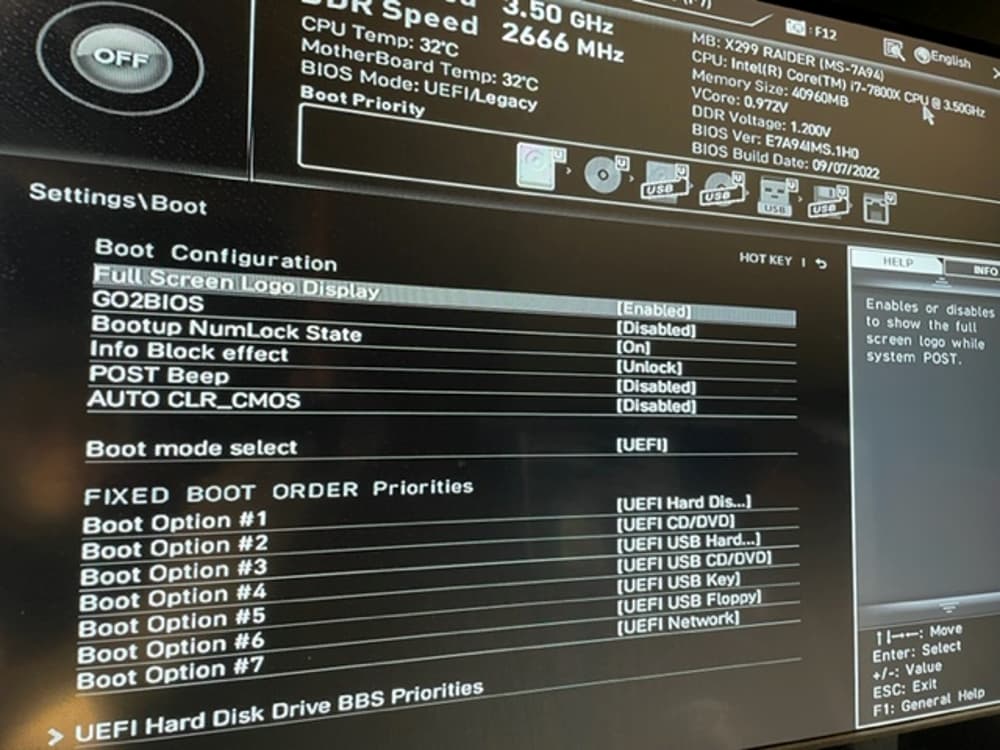
Go to the Board’s BIOS (F7 is to enter advanced mode then select the settings button on the left side) and set Boot mode to UEFI
Settings\Boot
-
Install Proxmox like normal
-
Go into the Proxmox OS CLI and do your updates then shut down.
-
Update BIOS 1 to the latest BIOS
-
Go into the BIOS. (F7 is to enter advanced mode then select the settings button on the left side)
-
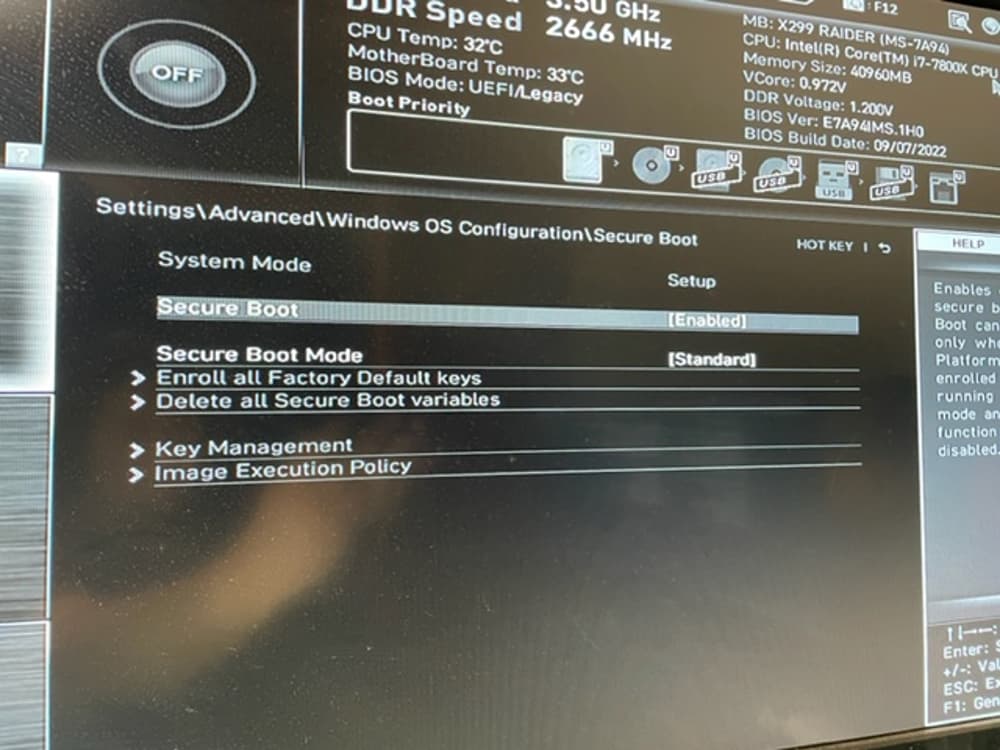
Go enable the secure boot setting (leave mode at standard). You may get a warning, click ok.
Settings\Advanced\Windows OS Configuration\Secure Boot
- Go to the CPU Features menu to enable Intel Virtualization Tech and Intel VT-D Tech. (You will find the CPU Features menu in the Overclocking Menu)
Overclocking\CPU Features
-
If you want to make sure you have a sanity check that everything is still working, save all BIOS settings and make sure your Proxmox install boots fully then go back into BIOS. If the Board is booting fine but doesn’t boot Proxmox, Go back to step 6 and check your boot mode. If the board is not Booting, Remove the Tesla Card and flip the BIOS switch to BIOS #2. Then go to BIOS flashing Mode to recover BIOS 1. Then put the Tesla card back in.
-
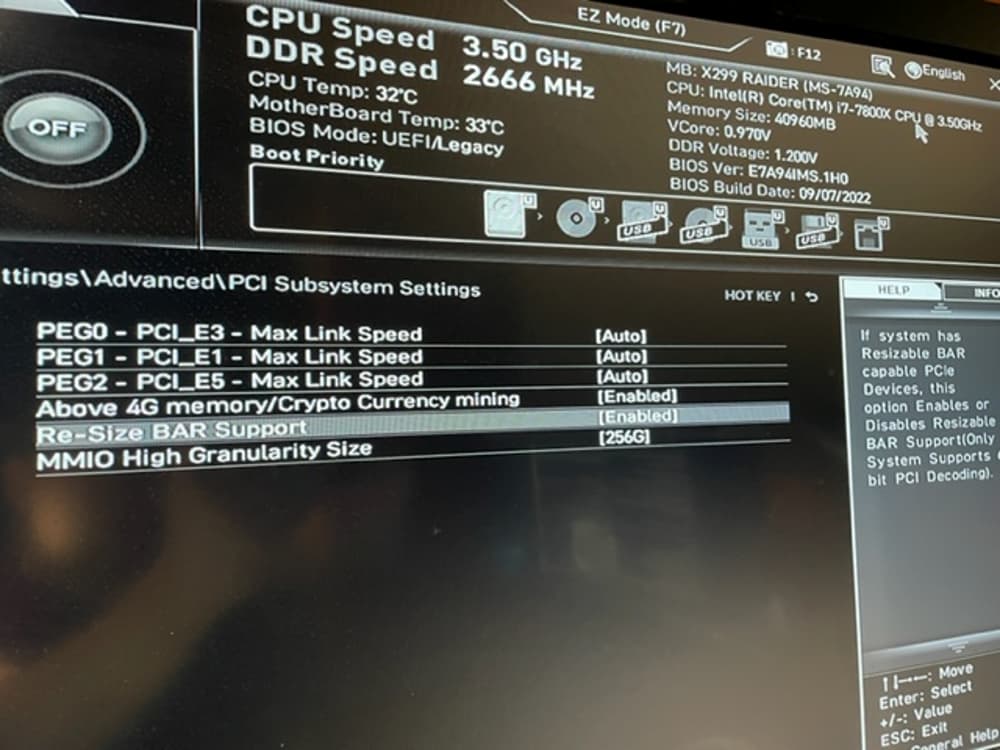
Go to the PCI Subsystem Settings menu, then enable both Above 4G Memory and Re-Size BAR Support (I know it doesn’t make sense why Re-Size Bar Support needs to be on, but it does for this board)
Settings\Advanced\PCISubsystem Settings
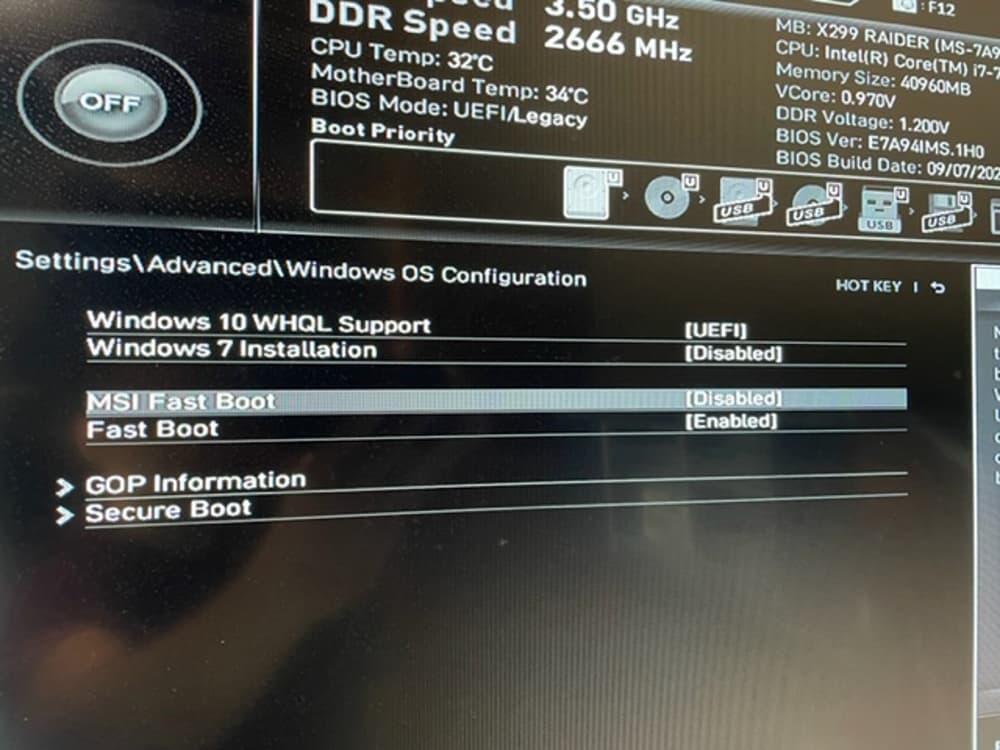
- Go Check the Windows 10 WHQL Support setting back in Windows OS Configuration. It should auto switched to UEFI
Settings\Advanced\Windows OS Configuration\
- Sanity check #2, save changes and reboot with your Video output card installed alongside the Tesla. If the system Boots to Proxmox, we are in the clear
 . If your board is not booting up, make sure you have your video out GPU on the topmost PCIE Slot and put the Tesla in PCIE Slot 3 (16x slot that is 3rd down from the top). If you are stuck with a VGA fault LED and rebooting doesn’t clear, see step 8 for what to do and reflash your board to the latest BIOS again for BIOS #1.
If you install your drivers now, and do nvidia-smi, you should now see your tesla appear in the list of gpus.
Hope it helps some people!