Ubuntu 24.04 + Dual Quadro VFIO quick start

Introduction

TODO Ubuntu 24.04 current install as of 2024-06-29.

Pre-setup

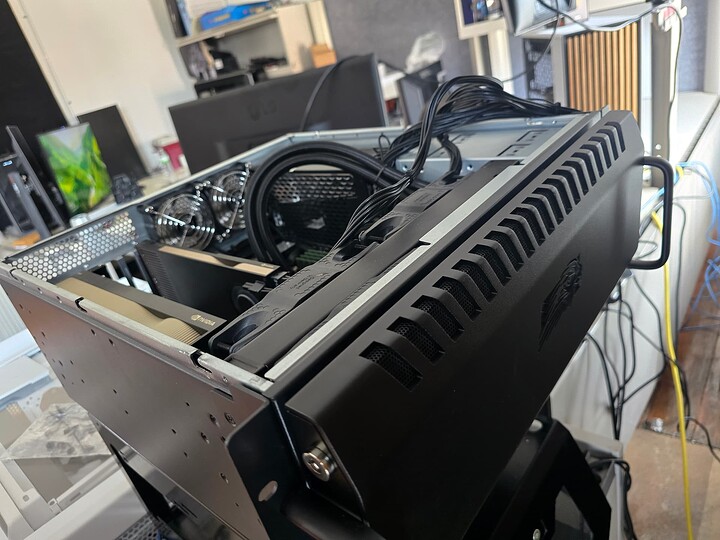
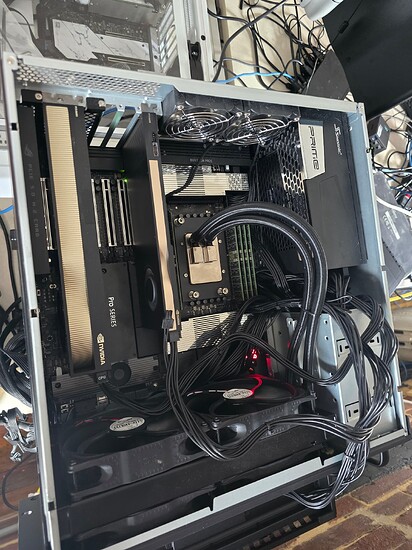
I love my Falcon Northwest 96 core Threadripper system! It is based on the ASUS WRX90.

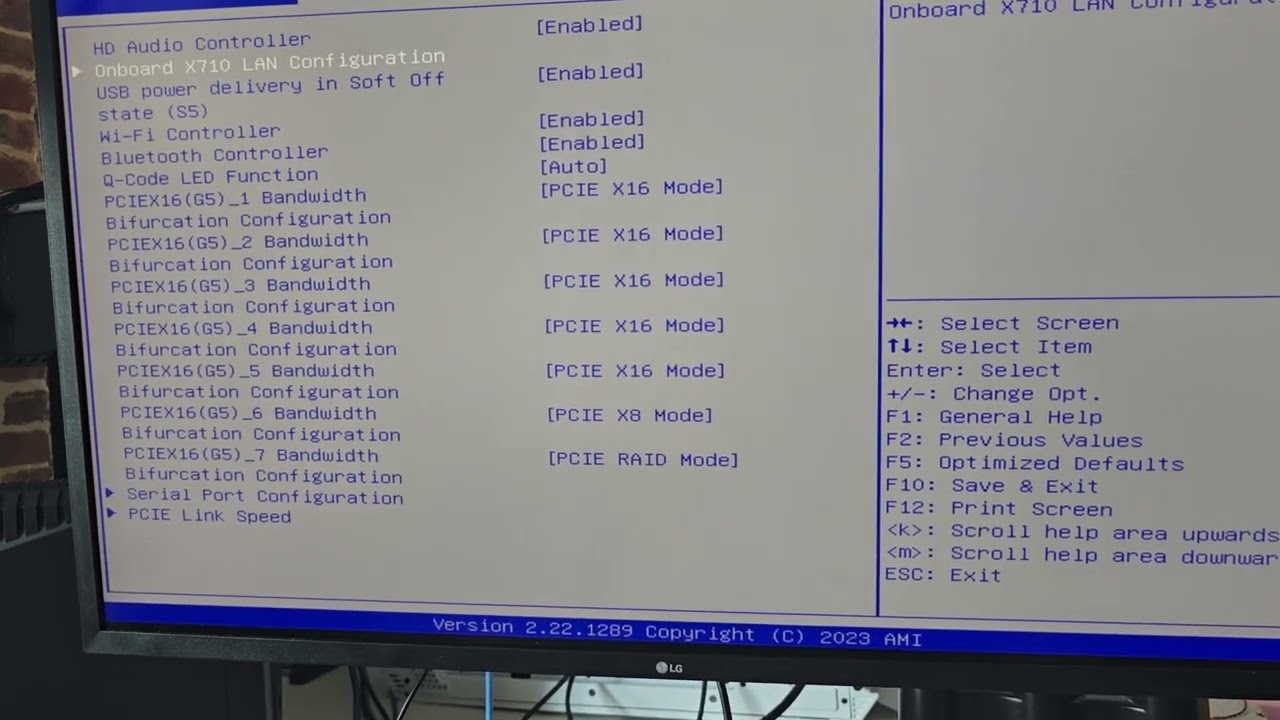
Here is a video of the bios settings I changed on the WRX90. Note this bios is the ancient 2023 version, which has a lot of bugs and suffering. Asus hasn’t updated the bios in all of 2024 at the time of this writing.

Step 1

Install Ubuntu 24.04 and make sure the installation is fully up to date. (One can use the gui or use apt update && apt upgrade -y

Reboot.

Step 2

Identify the card(s) that will passthrough to a windows VM using lspci. In the case of Quadro cards, such as the A6000 I am using for this how-to, there are sub functions and audio functions. It is necessary to identify the PCI IDs, then update the kernel command line, then ensure that the vfio modules are available on the initial ramdisk in order to bind at boot time.

Identifying cards to pass through

lspci -vnn gives a listing of devices and their [ device : id ]

In my case I have an RTX A6000 and an RTX A4000 in the same system.

c1:00.0 VGA compatible controller [0300]: NVIDIA Corporation GA102GL [RTX A6000] [10de:2230] (rev a1) (prog-if 00 [VGA controller])
        Subsystem: NVIDIA Corporation GA102GL [RTX A6000] [10de:1459]
c1:00.1 Audio device [0403]: NVIDIA Corporation GA102 High Definition Audio Controller [10de:1aef] (rev a1)
        Subsystem: NVIDIA Corporation GA102 High Definition Audio Controller [10de:1459]
e1:00.0 VGA compatible controller [0300]: NVIDIA Corporation GA104GL [RTX A4000] [10de:24b0] (rev a1) (prog-if 00 [VGA controller])
        Subsystem: NVIDIA Corporation GA104GL [RTX A4000] [10de:14ad]
e1:00.1 Audio device [0403]: NVIDIA Corporation GA104 High Definition Audio Controller [10de:228b] (rev a1)
        Subsystem: NVIDIA Corporation GA104 High Definition Audio Controller [10de:14ad]

The numbers such as 10de:2228b and 10de:14ad are the PCIe device IDs.

I used these IDs to modify the file at /etc/default/grub and update the GRUB_CMDLINE_LINUX_DEFAULT= line to

GRUB_CMDLINE_LINUX_DEFAULT=" iommu=1 amd_iommu=on vfio_pci.ids=10de:2230,10de:1459,10de:1aef,10de:1459 vfio_iommu_type1.allow_unsafe_interrupts=1 "

Once that’s done, it is necessary to update grub with this commandline

# update-grub2

is the command to run.

Initial Ramdisk

The initial ramdisk has to have the vfio modules. Modify /etc/initramfs-tools/modules to include the modules we need. On a fresh install this is what I came up with:


# List of modules that you want to include in your initramfs.
# They will be loaded at boot time in the order below.
#
# Syntax:  module_name [args ...]
#
# You must run update-initramfs(8) to effect this change.
#
# Examples:
#
# raid1
# sd_mod
vfio
vfio_iommu_type1
vfio_pci
vfio_virqfd
vhost-net

Once that’s done it is necessary to update the initial ramdisk.


root@wFNWtr:~# update-initramfs -u
update-initramfs: Generating /boot/initrd.img-6.8.0-36-generic

… and then reboot.

Note: depending on your system it may be necessary to physically arrange the cards so that the card that is initalized first is the graphics card to be used by the host, and not the guest. Ideally, anyway. Sometimes it is possible to control this via bios, sometimes the bios is buggy, way out of date and needs a lot of love… so you just have to re-arrange your GPUs.

To verify everything went according to plan try

cat /proc/cmdline 

BOOT_IMAGE=/boot/vmlinuz-6.8.0-36-generic root=UUID=7782b3f2-2f20-49bc-805e-1fa250000101 ro iommu=1 amd_iommu=on vfio_pci.ids=10de:2230,10de:1459,10de:1aef,10de:1459 vfio_iommu_type1.allow_unsafe_interrupts=1

This shows that the changes made earlier have taken effect.

lspci -vvvvn |less

can be used to verify that driver-in-use is the vfio driver for the devices in question.

c1:00.1 0403: 10de:1aef (rev a1)
        Subsystem: 10de:1459
        Control: I/O- Mem+ BusMaster+ SpecCycle- MemWINV- VGASnoop- ParErr- Stepping- SERR- FastB2B- DisINTx-
        Status: Cap+ 66MHz- UDF- FastB2B- ParErr- DEVSEL=fast >TAbort- <TAbort- <MAbort- >SERR- <PERR- INTx-
        Latency: 0, Cache Line Size: 64 bytes
        Interrupt: pin B routed to IRQ 49
        IOMMU group: 19
        Region 0: Memory at b3080000 (32-bit, non-prefetchable) [size=16K]
        Capabilities: [60] Power Management version 3
                Flags: PMEClk- DSI- D1- D2- AuxCurrent=0mA PME(D0-,D1-,D2-,D3hot-,D3cold-)
                Status: D0 NoSoftRst+ PME-Enable- DSel=0 DScale=0 PME-
        Capabilities: [68] MSI: Enable- Count=1/1 Maskable- 64bit+
                Address: 0000000000000000  Data: 0000
        Capabilities: [78] Express (v2) Endpoint, MSI 00
                DevCap: MaxPayload 256 bytes, PhantFunc 0, Latency L0s unlimited, L1 <64us
                        ExtTag+ AttnBtn- AttnInd- PwrInd- RBE+ FLReset- SlotPowerLimit 75W
                DevCtl: CorrErr+ NonFatalErr+ FatalErr+ UnsupReq+
                        RlxdOrd+ ExtTag+ PhantFunc- AuxPwr- NoSnoop+
                        MaxPayload 256 bytes, MaxReadReq 512 bytes
                DevSta: CorrErr- NonFatalErr- FatalErr- UnsupReq- AuxPwr- TransPend-
                LnkCap: Port #0, Speed 16GT/s, Width x16, ASPM L0s L1, Exit Latency L0s <512ns, L1 <4us
                        ClockPM+ Surprise- LLActRep- BwNot- ASPMOptComp+
                LnkCtl: ASPM Disabled; RCB 64 bytes, Disabled- CommClk+
                        ExtSynch- ClockPM+ AutWidDis- BWInt- AutBWInt-
                LnkSta: Speed 2.5GT/s (downgraded), Width x16
                        TrErr- Train- SlotClk+ DLActive- BWMgmt- ABWMgmt-
                DevCap2: Completion Timeout: Range AB, TimeoutDis+ NROPrPrP- LTR-
                         10BitTagComp+ 10BitTagReq+ OBFF Via message, ExtFmt- EETLPPrefix-
                         EmergencyPowerReduction Not Supported, EmergencyPowerReductionInit-
                         FRS- TPHComp- ExtTPHComp-
                         AtomicOpsCap: 32bit- 64bit- 128bitCAS-
                DevCtl2: Completion Timeout: 50us to 50ms, TimeoutDis- LTR- 10BitTagReq+ OBFF Disabled,
                         AtomicOpsCtl: ReqEn-
                LnkSta2: Current De-emphasis Level: -6dB, EqualizationComplete- EqualizationPhase1-
                         EqualizationPhase2- EqualizationPhase3- LinkEqualizationRequest-
                         Retimer- 2Retimers- CrosslinkRes: unsupported
        Capabilities: [100 v2] Advanced Error Reporting
                UESta:  DLP- SDES- TLP- FCP- CmpltTO- CmpltAbrt- UnxCmplt- RxOF- MalfTLP- ECRC- UnsupReq- ACSViol-
                UEMsk:  DLP- SDES- TLP- FCP- CmpltTO- CmpltAbrt- UnxCmplt- RxOF- MalfTLP- ECRC- UnsupReq+ ACSViol-
                UESvrt: DLP+ SDES+ TLP- FCP+ CmpltTO+ CmpltAbrt- UnxCmplt+ RxOF+ MalfTLP+ ECRC- UnsupReq- ACSViol-
                CESta:  RxErr- BadTLP- BadDLLP- Rollover- Timeout- AdvNonFatalErr-
                CEMsk:  RxErr- BadTLP- BadDLLP- Rollover- Timeout- AdvNonFatalErr-
                AERCap: First Error Pointer: 00, ECRCGenCap- ECRCGenEn- ECRCChkCap- ECRCChkEn-
                        MultHdrRecCap- MultHdrRecEn- TLPPfxPres- HdrLogCap-
                HeaderLog: 00000000 00000000 00000000 00000000
        Capabilities: [160 v1] Data Link Feature <?>
        Kernel driver in use: vfio-pci
        Kernel modules: snd_hda_intel

Configure Virt manager and setup windows VM

On my system I issued two commands:

apt install virt-manager
and
usermod -a -G username libvirt

the first installs virt manager. Once virtmanager and dependencies are installed, several new virtualization groups are added. I added my username to the libvirt group.

Relogin (or reboot) after installing these.

Install Windows

From here, create a virtual machine and install windows. I chose windows 11 pro to be setup from an ISO.

This step should normally be carefully considered, with best practices and max performance chosing a separate nvme to pass through to the VM. I skipped those steps for now.

DO NOT pass through the GPU, yet.

Pass through GPU

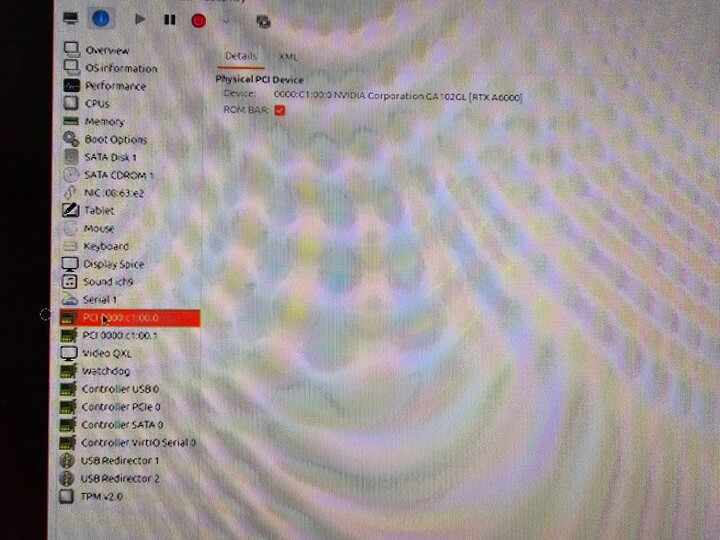
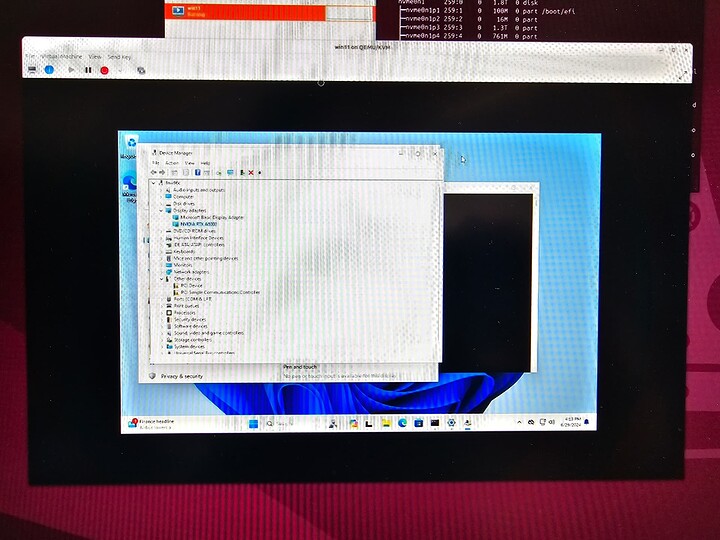
Next, pick the GPU and its audio device in “Add hardware” in the virt manager configuration gui (when the VM is not running. Mine looks like:

From there, the device should show up in device manager in windows. Install the normal windows drivers. They should work immediately, no code 43 warning presented.

I did not have to touch ``virsh edit``` or do any of the usual configuration shenanigans – everything Just Worked. I suspect it was because I used vfio to bind to the root and sub devices and because I passed through both the graphics and audio devices.

Todo more in a sec
5 Likes

Tip:
lspci -vvvvn
This will give you a lot of info on your system. The less tool certainly helps scrolling through that, but you may want to redirect it to a text file for later reference or simply use a GUI-based search of the file:
lspci -vvvvn > lspci.txt
The file name is arbitrary, as long as it makes sense to you, you can name it after your cat, the S.O., a Greek philosopher, a native tribe in Wyoming or pretty much anything else you can think of.

You can also use the /etc/initramfs-tools/modules file to give the vfio-pci the device IDs, like

vfio_pci ids=10de:xxxx,10de:xxxx

if you’re not running grub/dislike adjusting the kernel boot params.

3 Likes
$ cat /etc/modprobe.d/vfio.conf 
softdep nvidia pre: vfio-pci

This lets you avoid having to modify the initramfs

2 Likes

I believe this should be usermod -a -G libvirt username

2 Likes

After upgrading to Mint 22, my existing Windows VM wouldn’t start, but my KDE one still worked fine. Recreated it and am back up and running. I also switched from using an initscript for vfio to defining my passthrough GPU in /etc/initramfs-tools/modules as described above. I’m used to deleting the Spice Server and QXL video, but the GUI would no longer allow me to do this, so I just set Spice Server type to ‘None’. I also had previously defined evdev keyboard and mouse under <qemu:commandline>. These entries had to be removed and they are now defined under <devices> as described in the Arch wiki.

If you’re using a custom qemu binary, apparmor changes go in a different place now. You’ll also likely have to rebuild the custom binary. In my case the libxenctrl library was no longer linked correctly.

/etc/apparmor.d/local/abstractions/libvirt-qemu

# Custom QEMU binary rules
/usr/local/bin/qemu9.0.2-system-x86_64 rmix,
/usr/local/share/qemu/** r,

/etc/apparmor.d/local/usr.sbin.libvirtd

# Custom QEMU binary rule
/usr/local/bin/qemu9.0.2-system-x86_64 PUx,

Though VM performance still seems snappy, curiously, I get the following error claiming my 3900X doesn’t support hyperthreading:

2024-07-28T14:41:22.559306Z qemu9.0.2-system-x86_64: warning: This family of AMD CPU doesn't support hyperthreading(2)                                  │
Please configure -smp options properly or try enabling topoext feature.

While performance is fine, the time it takes from starting the VM to having any video output is longer.

I copied over my existing CPU pinning and hugepages lines. Here’s my full config. If you see anything unnecessary or sub-optimal, please let me know. :slight_smile:

<domain type='kvm' xmlns:qemu='http://libvirt.org/schemas/domain/qemu/1.0'>
  <name>win10-new</name>
  <uuid>6e2552d0-13ca-4665-9ce2-c08441d93687</uuid>
  <metadata>
    <libosinfo:libosinfo xmlns:libosinfo="http://libosinfo.org/xmlns/libvirt/domain/1.0">
      <libosinfo:os id="http://microsoft.com/win/11"/>
    </libosinfo:libosinfo>
  </metadata>
  <memory unit='KiB'>33554432</memory>
  <currentMemory unit='KiB'>33554432</currentMemory>
  <vcpu placement='static' current='18'>24</vcpu>
  <vcpus>
    <vcpu id='0' enabled='yes' hotpluggable='no'/>
    <vcpu id='1' enabled='yes' hotpluggable='yes'/>
    <vcpu id='2' enabled='yes' hotpluggable='yes'/>
    <vcpu id='3' enabled='yes' hotpluggable='yes'/>
    <vcpu id='4' enabled='yes' hotpluggable='yes'/>
    <vcpu id='5' enabled='yes' hotpluggable='yes'/>
    <vcpu id='6' enabled='no' hotpluggable='yes'/>
    <vcpu id='7' enabled='no' hotpluggable='yes'/>
    <vcpu id='8' enabled='yes' hotpluggable='yes'/>
    <vcpu id='9' enabled='yes' hotpluggable='yes'/>
    <vcpu id='10' enabled='yes' hotpluggable='yes'/>
    <vcpu id='11' enabled='yes' hotpluggable='yes'/>
    <vcpu id='12' enabled='yes' hotpluggable='yes'/>
    <vcpu id='13' enabled='yes' hotpluggable='yes'/>
    <vcpu id='14' enabled='no' hotpluggable='yes'/>
    <vcpu id='15' enabled='no' hotpluggable='yes'/>
    <vcpu id='16' enabled='yes' hotpluggable='yes'/>
    <vcpu id='17' enabled='yes' hotpluggable='yes'/>
    <vcpu id='18' enabled='yes' hotpluggable='yes'/>
    <vcpu id='19' enabled='yes' hotpluggable='yes'/>
    <vcpu id='20' enabled='yes' hotpluggable='yes'/>
    <vcpu id='21' enabled='yes' hotpluggable='yes'/>
    <vcpu id='22' enabled='no' hotpluggable='yes'/>
    <vcpu id='23' enabled='no' hotpluggable='yes'/>
  </vcpus>
  <iothreads>2</iothreads>
  <cputune>
    <vcpupin vcpu='0' cpuset='6'/>
    <vcpupin vcpu='1' cpuset='18'/>
    <vcpupin vcpu='2' cpuset='7'/>
    <vcpupin vcpu='3' cpuset='19'/>
    <vcpupin vcpu='4' cpuset='8'/>
    <vcpupin vcpu='5' cpuset='20'/>
    <vcpupin vcpu='6' cpuset='0'/>
    <vcpupin vcpu='7' cpuset='12'/>
    <vcpupin vcpu='8' cpuset='9'/>
    <vcpupin vcpu='9' cpuset='21'/>
    <vcpupin vcpu='10' cpuset='10'/>
    <vcpupin vcpu='11' cpuset='22'/>
    <vcpupin vcpu='12' cpuset='11'/>
    <vcpupin vcpu='13' cpuset='23'/>
    <vcpupin vcpu='14' cpuset='1'/>
    <vcpupin vcpu='15' cpuset='13'/>
    <vcpupin vcpu='16' cpuset='3'/>
    <vcpupin vcpu='17' cpuset='15'/>
    <vcpupin vcpu='18' cpuset='4'/>
    <vcpupin vcpu='19' cpuset='16'/>
    <vcpupin vcpu='20' cpuset='5'/>
    <vcpupin vcpu='21' cpuset='17'/>
    <vcpupin vcpu='22' cpuset='2'/>
    <vcpupin vcpu='23' cpuset='14'/>
    <emulatorpin cpuset='0,12'/>
    <iothreadpin iothread='1' cpuset='1,13'/>
    <iothreadpin iothread='2' cpuset='2,14'/>
  </cputune>
  <os firmware='efi'>
    <type arch='x86_64' machine='pc-q35-9.0'>hvm</type>
    <firmware>
      <feature enabled='no' name='enrolled-keys'/>
      <feature enabled='yes' name='secure-boot'/>
    </firmware>
    <loader readonly='yes' secure='yes' type='pflash'>/usr/share/OVMF/OVMF_CODE_4M.secboot.fd</loader>
    <nvram template='/usr/share/OVMF/OVMF_VARS_4M.fd'>/var/lib/libvirt/qemu/nvram/win10-new_VARS.fd</nvram>
  </os>
  <features>
    <acpi/>
    <apic/>
    <hyperv mode='custom'>
      <relaxed state='on'/>
      <vapic state='on'/>
      <spinlocks state='on' retries='8191'/>
      <vpindex state='on'/>
      <synic state='on'/>
      <stimer state='on'/>
      <reset state='on'/>
      <frequencies state='on'/>
    </hyperv>
    <vmport state='off'/>
    <smm state='on'/>
  </features>
  <cpu mode='host-passthrough' check='none' migratable='on'>
    <topology sockets='1' dies='1' cores='12' threads='2'/>
  </cpu>
  <clock offset='localtime'>
    <timer name='rtc' tickpolicy='catchup'/>
    <timer name='pit' tickpolicy='delay'/>
    <timer name='hpet' present='no'/>
    <timer name='hypervclock' present='yes'/>
  </clock>
  <on_poweroff>destroy</on_poweroff>
  <on_reboot>restart</on_reboot>
  <on_crash>destroy</on_crash>
  <pm>
    <suspend-to-mem enabled='no'/>
    <suspend-to-disk enabled='no'/>
  </pm>
  <devices>
    <emulator>/usr/local/bin/qemu9.0.2-system-x86_64</emulator>
    <disk type='file' device='cdrom'>
      <driver name='qemu' type='raw'/>
      <source file='/home/seamonkey/Win10_22H2_English_x64v1.iso'/>
      <target dev='sda' bus='sata'/>
      <readonly/>
      <address type='drive' controller='0' bus='0' target='0' unit='0'/>
    </disk>
    <controller type='usb' index='0' model='qemu-xhci' ports='15'>
      <address type='pci' domain='0x0000' bus='0x01' slot='0x00' function='0x0'/>
    </controller>
    <controller type='pci' index='0' model='pcie-root'/>
    <controller type='pci' index='1' model='pcie-root-port'>
      <model name='pcie-root-port'/>
      <target chassis='1' port='0x10'/>
      <address type='pci' domain='0x0000' bus='0x00' slot='0x02' function='0x0' multifunction='on'/>
    </controller>
    <controller type='pci' index='2' model='pcie-root-port'>
      <model name='pcie-root-port'/>
      <target chassis='2' port='0x11'/>
      <address type='pci' domain='0x0000' bus='0x00' slot='0x02' function='0x1'/>
    </controller>
    <controller type='pci' index='3' model='pcie-root-port'>
      <model name='pcie-root-port'/>
      <target chassis='3' port='0x12'/>
      <address type='pci' domain='0x0000' bus='0x00' slot='0x02' function='0x2'/>
    </controller>
    <controller type='pci' index='4' model='pcie-root-port'>
      <model name='pcie-root-port'/>
      <target chassis='4' port='0x13'/>
      <address type='pci' domain='0x0000' bus='0x00' slot='0x02' function='0x3'/>
    </controller>
    <controller type='pci' index='5' model='pcie-root-port'>
      <model name='pcie-root-port'/>
      <target chassis='5' port='0x14'/>
      <address type='pci' domain='0x0000' bus='0x00' slot='0x02' function='0x4'/>
    </controller>
    <controller type='pci' index='6' model='pcie-root-port'>
      <model name='pcie-root-port'/>
      <target chassis='6' port='0x15'/>
      <address type='pci' domain='0x0000' bus='0x00' slot='0x02' function='0x5'/>
    </controller>
    <controller type='pci' index='7' model='pcie-root-port'>
      <model name='pcie-root-port'/>
      <target chassis='7' port='0x16'/>
      <address type='pci' domain='0x0000' bus='0x00' slot='0x02' function='0x6'/>
    </controller>
    <controller type='pci' index='8' model='pcie-root-port'>
      <model name='pcie-root-port'/>
      <target chassis='8' port='0x17'/>
      <address type='pci' domain='0x0000' bus='0x00' slot='0x02' function='0x7'/>
    </controller>
    <controller type='pci' index='9' model='pcie-root-port'>
      <model name='pcie-root-port'/>
      <target chassis='9' port='0x18'/>
      <address type='pci' domain='0x0000' bus='0x00' slot='0x03' function='0x0' multifunction='on'/>
    </controller>
    <controller type='pci' index='10' model='pcie-root-port'>
      <model name='pcie-root-port'/>
      <target chassis='10' port='0x19'/>
      <address type='pci' domain='0x0000' bus='0x00' slot='0x03' function='0x1'/>
    </controller>
    <controller type='pci' index='11' model='pcie-root-port'>
      <model name='pcie-root-port'/>
      <target chassis='11' port='0x1a'/>
      <address type='pci' domain='0x0000' bus='0x00' slot='0x03' function='0x2'/>
    </controller>
    <controller type='pci' index='12' model='pcie-root-port'>
      <model name='pcie-root-port'/>
      <target chassis='12' port='0x1b'/>
      <address type='pci' domain='0x0000' bus='0x00' slot='0x03' function='0x3'/>
    </controller>
    <controller type='pci' index='13' model='pcie-root-port'>
      <model name='pcie-root-port'/>
      <target chassis='13' port='0x1c'/>
      <address type='pci' domain='0x0000' bus='0x00' slot='0x03' function='0x4'/>
    </controller>
    <controller type='pci' index='14' model='pcie-root-port'>
      <model name='pcie-root-port'/>
      <target chassis='14' port='0x1d'/>
      <address type='pci' domain='0x0000' bus='0x00' slot='0x03' function='0x5'/>
    </controller>
    <controller type='sata' index='0'>
      <address type='pci' domain='0x0000' bus='0x00' slot='0x1f' function='0x2'/>
    </controller>
    <controller type='virtio-serial' index='0'>
      <address type='pci' domain='0x0000' bus='0x02' slot='0x00' function='0x0'/>
    </controller>
    <input type='mouse' bus='ps2'/>
    <input type='keyboard' bus='ps2'/>
    <input type='evdev'>
      <source dev='/dev/input/by-id/usb-1bcf_USB_Optical_Mouse-event-mouse'/>
    </input>
    <input type='evdev'>
      <source dev='/dev/input/by-id/usb-Dell_Dell_USB_Keyboard-event-kbd' grab='all' grabToggle='ctrl-ctrl' repeat='on'/>
    </input>
    <tpm model='tpm-crb'>
      <backend type='emulator' version='2.0'/>
    </tpm>
    <graphics type='spice'>
      <listen type='none'/>
      <image compression='off'/>
    </graphics>
    <audio id='1' type='spice'/>
    <video>
      <model type='qxl' ram='65536' vram='65536' vgamem='16384' heads='1' primary='yes'/>
      <address type='pci' domain='0x0000' bus='0x00' slot='0x01' function='0x0'/>
    </video>
    <hostdev mode='subsystem' type='pci' managed='yes'>
      <source>
        <address domain='0x0000' bus='0x03' slot='0x00' function='0x0'/>
      </source>
      <boot order='1'/>
      <address type='pci' domain='0x0000' bus='0x03' slot='0x00' function='0x0'/>
    </hostdev>
    <hostdev mode='subsystem' type='pci' managed='yes'>
      <source>
        <address domain='0x0000' bus='0x28' slot='0x00' function='0x0'/>
      </source>
      <address type='pci' domain='0x0000' bus='0x04' slot='0x00' function='0x0'/>
    </hostdev>
    <hostdev mode='subsystem' type='pci' managed='yes'>
      <source>
        <address domain='0x0000' bus='0x36' slot='0x00' function='0x0'/>
      </source>
      <address type='pci' domain='0x0000' bus='0x06' slot='0x00' function='0x0'/>
    </hostdev>
    <hostdev mode='subsystem' type='pci' managed='yes'>
      <source>
        <address domain='0x0000' bus='0x36' slot='0x00' function='0x1'/>
      </source>
      <address type='pci' domain='0x0000' bus='0x07' slot='0x00' function='0x0'/>
    </hostdev>
    <hostdev mode='subsystem' type='pci' managed='yes'>
      <source>
        <address domain='0x0000' bus='0x2a' slot='0x00' function='0x0'/>
      </source>
      <address type='pci' domain='0x0000' bus='0x08' slot='0x00' function='0x0'/>
    </hostdev>
    <hostdev mode='subsystem' type='pci' managed='yes'>
      <source>
        <address domain='0x0000' bus='0x29' slot='0x00' function='0x0'/>
      </source>
      <address type='pci' domain='0x0000' bus='0x09' slot='0x00' function='0x0'/>
    </hostdev>
    <hostdev mode='subsystem' type='usb' managed='yes'>
      <source>
        <vendor id='0x8087'/>
        <product id='0x0029'/>
      </source>
      <address type='usb' bus='0' port='1'/>
    </hostdev>
    <hostdev mode='subsystem' type='pci' managed='yes'>
      <source>
        <address domain='0x0000' bus='0x08' slot='0x00' function='0x0'/>
      </source>
      <address type='pci' domain='0x0000' bus='0x0a' slot='0x00' function='0x0'/>
    </hostdev>
    <hostdev mode='subsystem' type='pci' managed='yes'>
      <source>
        <address domain='0x0000' bus='0x06' slot='0x00' function='0x0'/>
      </source>
      <address type='pci' domain='0x0000' bus='0x0b' slot='0x00' function='0x0'/>
    </hostdev>
    <redirdev bus='usb' type='spicevmc'>
      <address type='usb' bus='0' port='2'/>
    </redirdev>
    <redirdev bus='usb' type='spicevmc'>
      <address type='usb' bus='0' port='3'/>
    </redirdev>
    <watchdog model='itco' action='reset'/>
    <memballoon model='virtio'>
      <address type='pci' domain='0x0000' bus='0x05' slot='0x00' function='0x0'/>
    </memballoon>
  </devices>
  <qemu:commandline>
    <qemu:arg value='-fw_cfg'/>
    <qemu:arg value='opt/ovmf/X-PciMmio64Mb,string=65536'/>
  </qemu:commandline>
</domain>
2 Likes

Noticed this section from the Arch wiki relevant to the hyperthreading error:

Starting with QEMU 3.1 the TOPOEXT cpuid flag is disabled by default. In order to use hyperthreading (SMT) on AMD CPUs you need to manually enable it:

 <cpu mode='host-passthrough' check='none'>
 <topology sockets='1' cores='4' threads='2'/>
 <feature policy='require' name='topoext'/>
 </cpu>

I’ve run into a strange situation - probably apparmor related. I’m able to run virsh start win10-new and virsh edit win10-new and both work. I’m also able to start win10-new from virt-manager. However, if I attempt to open the configuration from the GUI, it throws Host does not support domain type kvm with machine pc-q35-9.0[…]. However, if I change the binary from /usr/local/bin/qemu9.0.2-system-x86_64 to /usr/bin/qemu-system-x86_64 and machine type back to pc-q35-8.0, I’m able to open the config from the GUI.

Another permissions issue that I’m not sure how to resolve is that virsh edit win10-new works at the local machine, but when run over ssh, it requires sudo.

1 Like

One last update and I’ll quit spamming this thread. Previously, I followed this guide for building and using the latest qemu. After the new issues popping up with virt-manager described above, I decided to ignore the instructions to manually copy the binary and pc-bios folder and instead simply ran sudo make install after the build process. After that, I just had to update /etc/apparmor.d/local/abstractions/libvirt-qemu and /etc/apparmor.d/local/usr.sbin.libvirtd again to point to /usr/local/bin/qemu-system-x86_64. This fixed my issue, and it seems more sane to not rename the manually built qemu binary, as it will allow you to build and install the latest version without having to update apparmor definitions every time.

1 Like