Ubuntu 19.10 Server KVM ZFS performance issue

Hello everyone,

I have tried to setup a server for our small company using a Ryzen 7 2700X, ASUS ROG Crosshair VI Hero, 64GB DDR4-2666 C16, 256GB SAMSUNG 970 Pro (boot drive), 4x 4TB WD Gold (zpool) and Ubuntu Server 19.10.
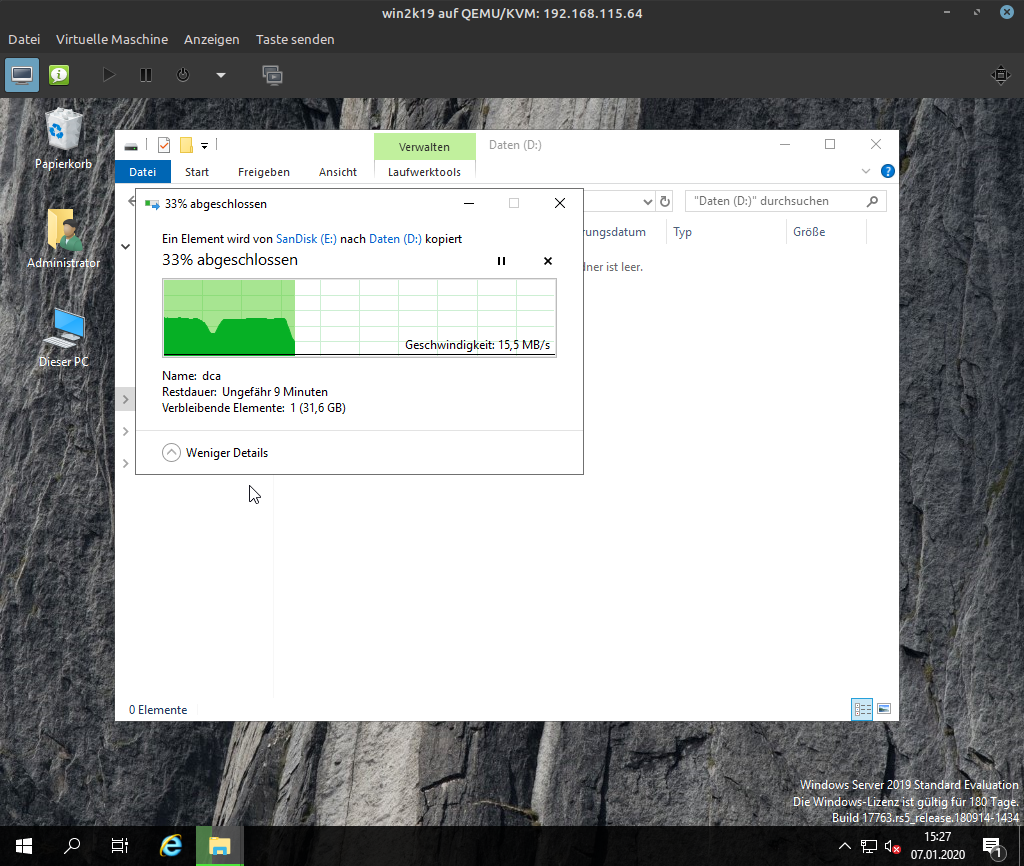
KVM QEMU is the hypervisor and I have a standard qcow2 in a dataset of the pool with virtio interface for the VM drive. However performance is kinda bad. I have passed through the Zeppelin USB host controller and I tried to copy a large file in the VM. The write performance at first is kinda good an consistent but at about 18GB it starts to go way down from about 300MB/s to 20MB/s or worse. I already tried changing the buffer mode and using a RAW file instead of qcow2. I also tried adding cache and log devices to the pool but it doesn’t change. Maybe if someone has gone through this already, you could help me out or give me a hint on what I am doing wrong. Here is my pool configuration. Thank you very much in advance :slight_smile:

pool: zpulse
state: ONLINE
scan: none requested
config:

NAME                                     STATE     READ WRITE CKSUM
zpulse                                   ONLINE       0     0     0
  mirror-0                               ONLINE       0     0     0
    ata-WDC_WD4003FRYZ-01F0DB0_V6JZ829R  ONLINE       0     0     0
    ata-WDC_WD4003FRYZ-01F0DB0_V6JZ840R  ONLINE       0     0     0
  mirror-1                               ONLINE       0     0     0
    ata-WDC_WD4003FRYZ-01F0DB0_V6JZGJYR  ONLINE       0     0     0
    ata-WDC_WD4003FRYZ-01F0DB0_V6JZT0YR  ONLINE       0     0     0

errors: No known data errors

swap in use?

As far as I can tell, it isn’t in use. here is my free -h

              total        used        free      shared  buff/cache   available
Mem:           62Gi        15Gi       1.7Gi       1.0Mi        45Gi        46Gi
Swap:         8.0Gi       3.0Mi       8.0Gi

edit: How do I make blocks like that good and readable?

How does your hypervisor allocate the space for the VM disk? Is it set to some sort of thin provisioning where the VM only uses the amount of space that it actually takes up, or is it possible to allocate all the space for the VM disks before hand?

When I ls -l the directory I see the full sizes I have set. But zfs list reveals it’s not actually using that space. I left everything on default at creating the qcow2 file.

Could you try to do some fio/dd tests on the filesystem where you store the VM disks? On the hypervisor itself, not via a VM, just to check if the issue is on the filesystem layer or the VM layer. Maybe it could point us in the right direction?

1 Like

Is there a specific reason you went with 19.10? If its just that ZFS has support prior to 20.04, why not use something like Debian?

@cloudstone I am currently doing dd tests with /dev/urandom and /dev/zero … it just takes some time.

@FaunCB On Debian 10.2 and Ubuntu Server 18.04.3 the Windows Server 2019 VM just gives me BSODs and doesn’t run. I don’t know why. So I tried Ubuntu Server 19.10 and I didn’t have a single issue.

Huh. Weird.

@cloudstone Looks good to me so far

dd if=/dev/urandom of=test bs=64k status=progress count=781250
51172147200 bytes (51 GB, 48 GiB) copied, 686 s, 74.6 MB/s 
781250+0 records in
781250+0 records out
51200000000 bytes (51 GB, 48 GiB) copied, 686.367 s, 74.6 MB/s

This “low speed” i normal for AMD Ryzen systems. I have no idea why it is so low compared to Intel systems, but I have seen it like this since the launch in 2017.

dd if=/dev/zero of=test0 bs=64k status=progress count=781250
51078299648 bytes (51 GB, 48 GiB) copied, 272 s, 188 MB/s
781250+0 records in
781250+0 records out
51200000000 bytes (51 GB, 48 GiB) copied, 272.576 s, 188 MB/s

Looks perfectly fine to me.

is the ashift value correct?

1 Like

Oh wow, it isn’t!!!

zpool get ashift zpulse
NAME      PROPERTY  VALUE   SOURCE
zimpulse  ashift    0       default

Now I did this and will do tests again …

zpool set ashift=12 zpulse

@nx2l It still behaves the same

you are supposed to set ashift when you create a vdev… i dont think changing it after the fact will do anything,… and why did you select the value 9?

1 Like

Ok, let me nuke the whole pool then and do it on creation time. I thought it’s 512 but it actually is 4096 so I chose 12 now. Let me destroy and resetup the pool.

9 is one half of the funny number duh
/s

1 Like

did you check the actual sector size of your drives… or are you guessing?

lsblk -o NAME,MOUNTPOINT,PHY-SEC
NAME        MOUNTPOINT      PHY-SEC
loop0       /snap/lxd/12631     512
loop1       /snap/lxd/12211     512
loop2       /snap/core/8268     512
loop3       /snap/core/7917     512
sdb                            4096
├─sdb1                         4096
└─sdb9                         4096
sdc                            4096
├─sdc1                         4096
└─sdc9                         4096
sdd                            4096
├─sdd1                         4096
└─sdd9                         4096
sde                            4096
├─sde1                         4096
└─sde9                         4096
sdf                            4096
├─sdf1                         4096
└─sdf9                         4096
sdg                            4096
├─sdg1                         4096
└─sdg9                         4096
sdh                            4096
├─sdh1                         4096
└─sdh9                         4096
nvme0n1                         512
├─nvme0n1p1                     512
└─nvme0n1p2 /                   512
2 Likes

Please use the code brackets in future.

.[.code]
.[/.code]

without the dots

Makes things easier to find / read

Thank you very much. I asked in a post above how I can do that. I just didn’t know how to. I will use it from now on.

1 Like