Intro
GPU support is not available with the latest Tensorflow for Windows. You can only use CPU. The work around for this, is to leverage WSL as the interpreter for Visual Studio Code. You can do this sort of thing in PyCharm, but only if you have the professional edition (boo).
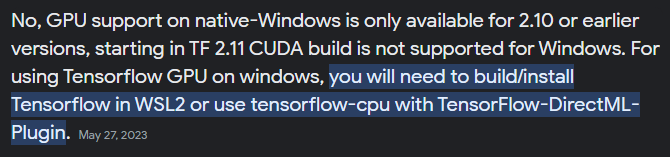
Source: https://discuss.tensorflow.org
I’m writing this because, well, it’s not a straight forward process at all lol and there’s a lot of incorrect information I’ve run across.
This article is pretty much a different flavor of Wendell’s machine learning video, and pairs quite nicely:

Optionally for all of this, you can use the Windows Terminal app, which I quite like.
I used WSL w/Ubuntu for this:
wsl --install -d unbuntu
Install Anaconda3
wget https://repo.anaconda.com/archive/Anaconda3-2023.09-0-Linux-x86_64.sh
bash Anaconda3-2023.09-0-Linux-x86_64.sh
You’re going to press enter to get through all the terms and conditions, type yes afterward, and then yes again to the followup.
Use “conda --version” to check:
conda --version
conda 23.7.4
Install Cuda Repositories
I read somewhere that you’re supposed to use this command first here:
sudo apt-key del 7fa2af80
^ This command is outdated. I used it and it worked so I’ll put it in here, but it may or may not actually be doing anything.
wget https://developer.download.nvidia.com/compute/cuda/repos/ubuntu2004/x86_64/cuda-ubuntu2004.pin
sudo mv cuda-ubuntu2004.pin /etc/apt/preferences.d/cuda-repository-pin-600
sudo apt-key adv --fetch-keys https://developer.download.nvidia.com/compute/cuda/repos/ubuntu2004/x86_64/3bf863cc.pub
sudo add-apt-repository "deb https://developer.download.nvidia.com/compute/cuda/repos/ubuntu2004/x86_64/ /"
sudo apt-get update
sudo apt-get -y install cuda
Install cuDUNN
wget https://developer.download.nvidia.com/compute/cuda/repos/wsl-ubuntu/x86_64/cuda-wsl-ubuntu.pin
sudo mv cuda-wsl-ubuntu.pin /etc/apt/preferences.d/cuda-repository-pin-600

sudo apt-key adv --fetch-keys https://developer.download.nvidia.com/compute/cuda/repos/ubuntu2004/x86_64/3bf863cc.pub
sudo apt-key adv --fetch-keys https://developer.download.nvidia.com/compute/machine-learning/repos/ubuntu2004/x86_64/7fa2af80.pub
Download WSL2 CUDA Toolkit Repository
sudo add-apt-repository "deb https://developer.download.nvidia.com/compute/cuda/repos/wsl-ubuntu/x86_64/ /"
Install Libraries
sudo apt-get install libcudnn8
sudo apt-get install libcudnn8-dev
sudo apt-get update && sudo apt-get upgrade
Create Conda Environment for Tensorflow
conda create -n tf python=3.9 -y
conda activate tf
Install Tensorflow
pip install tensorflow==2.10
python
>>> import tensorflow as tf
>>> len(tf.config.list_physical_devices('GPU'))
The 3 “>>>” are from shift + enter
Connect WSL to Visual Studio Code
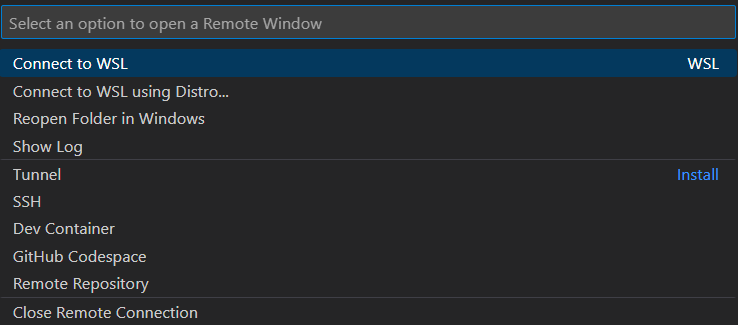
In the bottom left, there’s a green box. Click it . You’ll see a drop down where the top option is “Connect to WSL”
Here, you will be able to create a new project. I created a folder in WSL called “python_scripts” to use for this.
Make sure you’re in the conda environment for tensorflow.
Should look like this:
(tf) a@AMBERSPC:~/python_scripts$
Not this:
(base) a@AMBERSPC:~/python_scripts$
If yours doesn’t say (tf), run this in the Visual Studio Code “Terminal” tab:
conda activate tf
Working!
Once you have WSL connected and have created a new project, add the folder you created in WSL. You can do this easily by finding it File Explorer. This was “python_scripts” for me.
Create a file and end the extension with “.py”
Once you’ve done that, copy and paste the sample code below into your new file and try running it:
import tensorflow as tf

mnist = tf.keras.datasets.mnist

(x_train, y_train), (x_test, y_test) = mnist.load_data()
x_train, x_test = x_train / 255.0, x_test / 255.0

model = tf.keras.models.Sequential(
    [
        tf.keras.layers.Flatten(input_shape=(28, 28)),
        tf.keras.layers.Dense(128, activation="relu"),
        tf.keras.layers.Dropout(0.2),
        tf.keras.layers.Dense(10),
    ]
)

loss_fn = tf.keras.losses.SparseCategoricalCrossentropy(from_logits=True)
model.compile(optimizer="adam", loss=loss_fn, metrics=["accuracy"])

model.fit(x_train, y_train, epochs=5)
Output – success:
1875/1875 [==============================] - 5s 2ms/step - loss: 0.2928 - accuracy: 0.9141
Epoch 2/5
1875/1875 [==============================] - 4s 2ms/step - loss: 0.1418 - accuracy: 0.9579
Epoch 3/5
1875/1875 [==============================] - 4s 2ms/step - loss: 0.1075 - accuracy: 0.9680
Epoch 4/5
1875/1875 [==============================] - 5s 2ms/step - loss: 0.0881 - accuracy: 0.9724
Epoch 5/5
1875/1875 [==============================] - 5s 3ms/step - loss: 0.0725 - accuracy: 0.9773
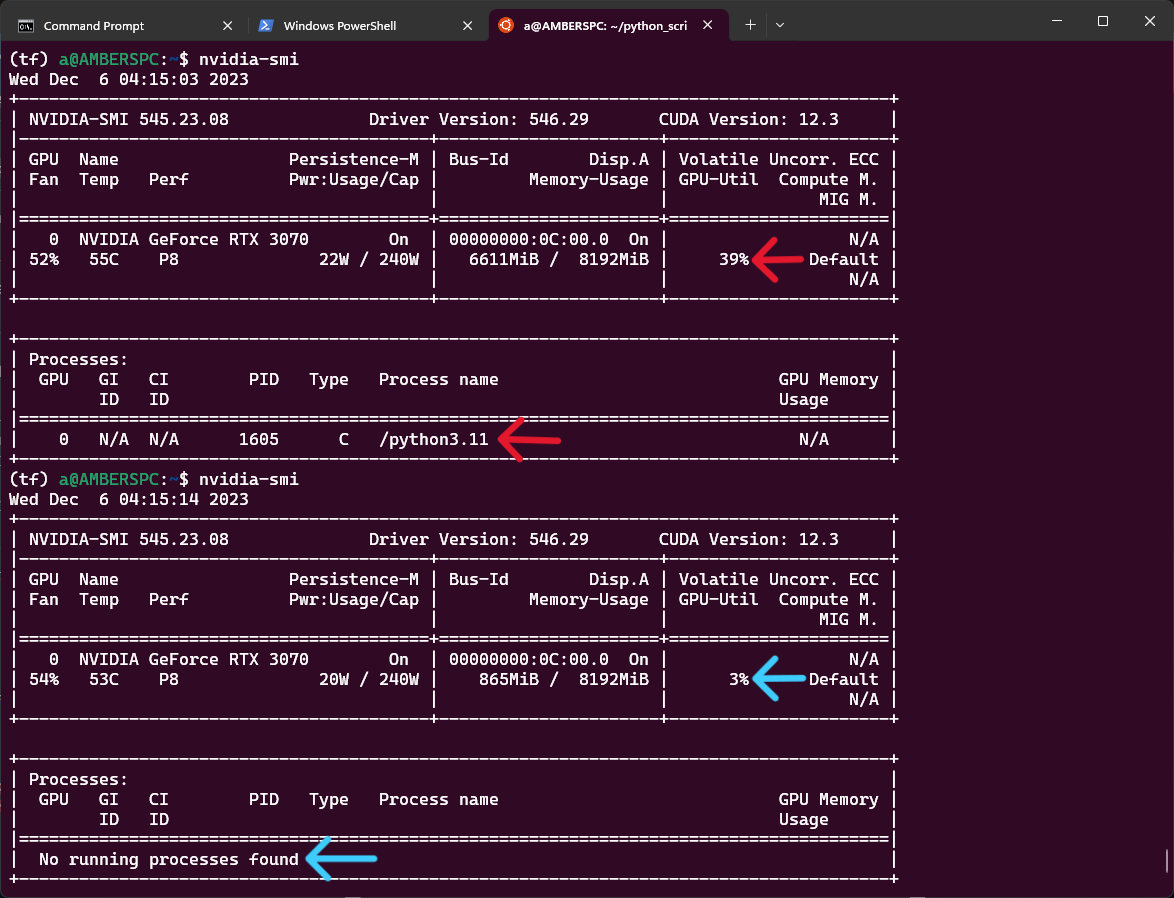
GPU Usage
Now that I have this setup to use my GPU, I can use a command to check and make sure my GPU usage is actually going up as this test program runs:
nividia-smi
Troubleshooting
If you get this error:
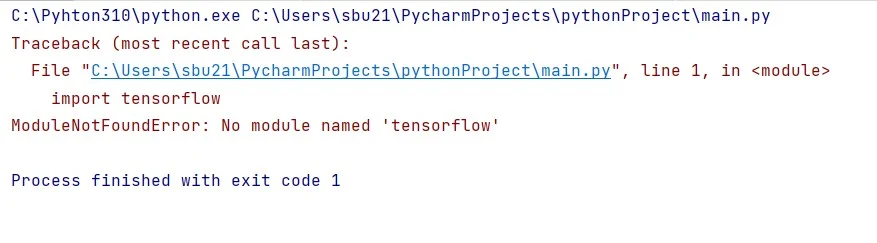
As you can probably tell, this means it can’t find/open Tensorflow. This is probably because your interpreter is trying to access the incorrect Python install. Click on the python version in the bottom right of the window. It’s apart of the bottom blue info bar. You’ll get a drop down in the middle of the screen with different python locations to select. The location that worked for me is in:
~anaconda3/bin/python
This was not the default for me so be sure to check this!
That’s pretty much it! Enjoy~