Space 4X Strategy Game - Devember 2019

I am creating a Space 4X Strategy Game similar in style to VGA Planets. I will be using Unity3D for development.

I only have a few of the details worked out at the moment for making it different, so to start thing off I will mostly be making a clone and implementing the base features of the game. Where things go from there, only the coding gods know. :slight_smile:

Devember.Init ();
while (Devember.isDevember) {
    // Do Devember related tasks.
11 Likes

And here I thought I sawe somethitg about space x4. Oh well lol.

There is optimistic, there is ambitious, and then there is you…
4X space strategy in 1 month. Hope you don’t waste your time with stuff like sleeping, or job, or food…

Who needs food or sleep when I can sustain myself from the life giving radiation of my monitor? :smiley:

In all seriousness though, I should have been a little more clear. It will most likely be an on going project after Devember, but the over all goal will be to have a good solid foundation in place with the basics implemented. Should be able to get a good start on this for the next couple days since the first decent snow storm is on the way, and will not have anything else to do besides feed the wood stove.

On that note, off to coding for Day 1.

2 Likes

We can share demos whenever we have something playable.
Game Dev buddies… God that sounds so bad when you imagine immature prick like me saying it…

1 Like

My last Devember project is still running. Focusing on it for a month straight month made me more committed to completing and maintaining it. I did eventually complete it.

3 Likes

DAY 1:

First task, doing the initial project setup. Creating a Main object which will have the main script attached to it and will be the parent of all other objects. Removing the skybox from the default camera, setting it to a nice black background, and making it the child of Main.

I am going back and forth on whether to use a square or hexagon grid for the map. Not sure if hexagon will be awkward in a space setting. Either way I will need to port over some of my geometry classes from c++ to c#, which should be fairly straight forward.

Hex Resource

For anyone interested, the Hex class I will be using is based on some articles from, https://www.redblobgames.com/ which is a great resource that I have been using for at least 20 years now.

The porting of the geometry code was a little more involved than expected. Put together a basic demo to see if it was producing the correct results and also to see if I liked square or hex better.

That is the stopping point for the day. Tomorrow will likely be getting some of the data classes setup (Map, Player, Planets, Star Bases, Ships, etc).

9 Likes

DAY 2:

Most of the progress for today has been setting up the data classes. Primary focus has been on the Map class since it will contain all the other objects in the universe.

Decided since the Hex/Quad versions are both available than the map should be able to use both, have it be a selectable option during universe creation. Created a base Map class that a HexMap and QuadMap class can inherit from. Will need some type of data structure to store what is at a particular point, so created a Tile class to hold that data. The Hex/Quad will function as a generic coordinate to a Tile, so created a Dictionary to hold/manage that relationship. Added an InitMap function that is called upon creation to populate the universe with Tiles. It can be given a radius and a center void radius, later will probably want to have a Number of Planets parameter.

devember_day_02_pic1

That is a good start for the Map related code, but need to fill the emptiness with something. Figure this would be a good time to make a basic Planet class. It will need to have a reference to where it is in the universe and the Tile class is where it will be. That should be all that is needed for now for the constructor, nice and simple. The Tile class is going to need a way to set a planet, so added a SetPlanet function to it. Added a MakePlanet function in the Planet class to create the actual visual object of the planet, for now just a blank white. Back in the Map class, made it so it would spawn the same number as the size of the universe (radius of 20 = 20 planets), and made sure there was a minimum distance of 5 between planets.

5 Likes

DAY 3:

For today want to get the Input class started, so can start interacting with the Universe and the objects within it. I will likely want to get an initial UI class going as well, that way I can dynamically pull debug info during run time and display it on screen.

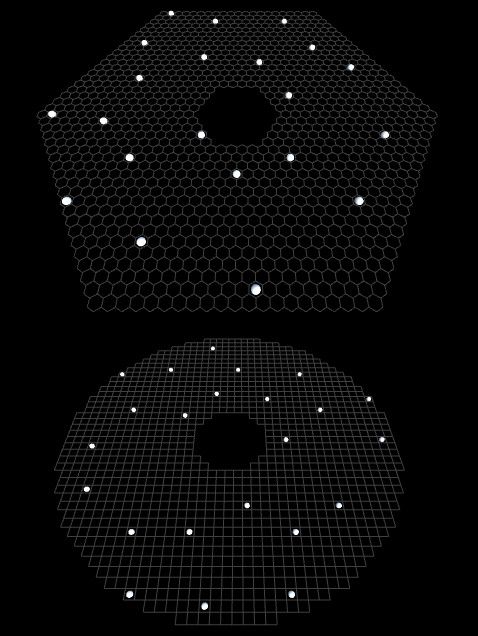
For the Input class, already have most of the code written to handle the Mouse/Tile stuff from the demo on Day 1. The basics of it are creating a Plane along the X, Z axis and raycasting against it to find the mouse world coordinate. From there can use the Hex/Quad class to convert from world space to Hex/Quad space.

Mouse Plane Raycasting
Plane mouse_plane = new Plane (Vector3.up, 0.0f);
Ray mouse_ray = Camera.main.ScreenPointToRay (Input.mousePosition);
float mouse_ray_distance = 0.0f;
Vector3 mouse_point = Vector3.positiveInfinity;

if (click_plane.Raycast (mouse_ray, out mouse_ray_distance)) { 
	mouse_point = mouse_ray.GetPoint (mouse_ray_distance); 
}

object obj = main.map.GetTileFromWorldPoint (mouse_point);

Would also like to be able to move/zoom the camera. Will be able to use WASD, Arrows, or Mouse Drag for movement and -. +, or scroll wheel for zoom. For the mouse dragging part, checking if the mouse has moved a minimum distance before the drag begins to be able to handle clicks as well. Also using some multipliers to scale how much is moved depending on the zoom level, being farther away should cause the camera to move/zoom more.

Camera Movement/Zooming
Vector3 camera_move_direction = Vector3.zero;
float camera_min_distance = 5.0f;
float camera_max_distance = 100.0f;

Vector3 mouse_drag_start = Vector3.zero;
Vector3 mouse_drag_current = Vector3.zero;
bool mouse_dragging = false;

float mouse_move_sensitivity = 10.0f;
float mouse_move_multiplier = 2.0f;
float mouse_scroll_multiplier = 2.0f;

if (Input.GetKey (KeyCode.UpArrow) || Input.GetKey (KeyCode.W)) { camera_move_direction.z = 1.0f; }
if (Input.GetKey (KeyCode.DownArrow) || Input.GetKey (KeyCode.S)) { camera_move_direction.z = -1.0f; }
if (Input.GetKey (KeyCode.LeftArrow) || Input.GetKey (KeyCode.A)) { camera_move_direction.x = -1.0f; }
if (Input.GetKey (KeyCode.RightArrow) || Input.GetKey (KeyCode.D)) { camera_move_direction.x = 1.0f; }

// Check Mouse Down State
if (Input.GetMouseButtonDown (0)) { 
	mouse_drag_start = Input.mousePosition; 
	mouse_drag_current = Input.mousePosition;
}

// Check Mouse Down (Actively) State, Handle Mouse Movement
if (Input.GetMouseButton (0)) {

	if (mouse_dragging) {
		camera_move_direction.x = (mouse_drag_current.x - Input.mousePosition.x) / mouse_move_sensitivity;
		camera_move_direction.z = (mouse_drag_current.y - Input.mousePosition.y) / mouse_move_sensitivity;
	}

	else {
		if (Vector3.Distance (mouse_drag_start, mouse_drag_current) > 3.0f) {
			mouse_dragging = true;
		}
	}

	mouse_drag_current = Input.mousePosition;
}

// Check Mouse Up State, Handle Clicks and Ending Mouse Movement.
if (Input.GetMouseButtonUp (0)) {

	if (mouse_dragging == false) {
		if (mouse_ray_distance > 0.0f) {
			Debug.Log ("Clicked - " + mouse_point);
			Debug.DrawLine (mouse_point - Vector3.up, mouse_point + Vector3.up, Color.yellow, 5.0f);
		}
	}

	mouse_drag_start = Vector3.zero;
	mouse_dragging = false;
}

// Zooming Controls, Keyboard
if (Input.GetKey (KeyCode.Plus) || Input.GetKey (KeyCode.KeypadPlus)) {
	camera_position.y = camera_position.y - (1.0f * (mouse_scroll_multiplier * camera_position.y) * Time.deltaTime);
	if (camera_position.y < camera_min_distance) { camera_position.y = camera_min_distance; }
}

if (Input.GetKey (KeyCode.Minus) || Input.GetKey (KeyCode.KeypadMinus)) {
	camera_position.y = camera_position.y - (-1.0f * (mouse_scroll_multiplier * camera_position.y) * Time.deltaTime);
	if (camera_position.y > camera_max_distance) { camera_position.y = camera_max_distance; }
}

// Zooming Controls, Mouse
if (Input.mouseScrollDelta.y != 0.0f) {
	camera_position.y = camera_position.y - (Input.mouseScrollDelta.y * (mouse_scroll_multiplier * camera_position.y) * Time.deltaTime);
	if (camera_position.y < camera_min_distance) { camera_position.y = camera_min_distance; }
	if (camera_position.y > camera_max_distance) { camera_position.y = camera_max_distance; }
}


// Update Camera Position
camera_position = camera_position + (camera_move_direction * (mouse_move_multiplier * camera_position.y) * Time.deltaTime);


// Check Escape / End
if (Input.GetKeyDown (KeyCode.Escape)) { Application.Quit (); }

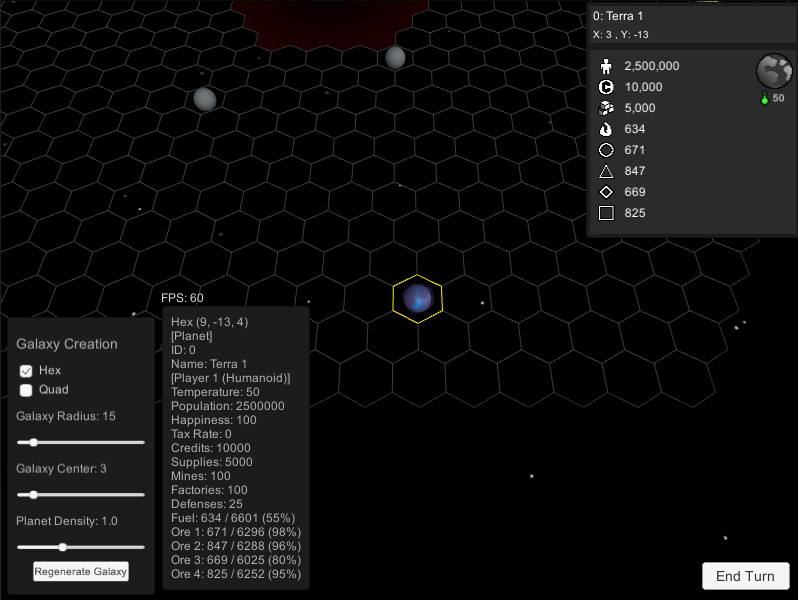
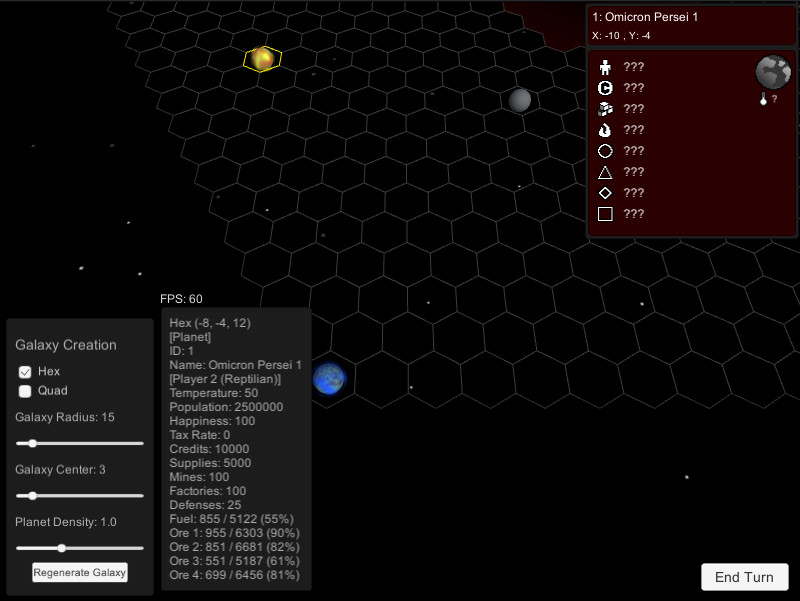
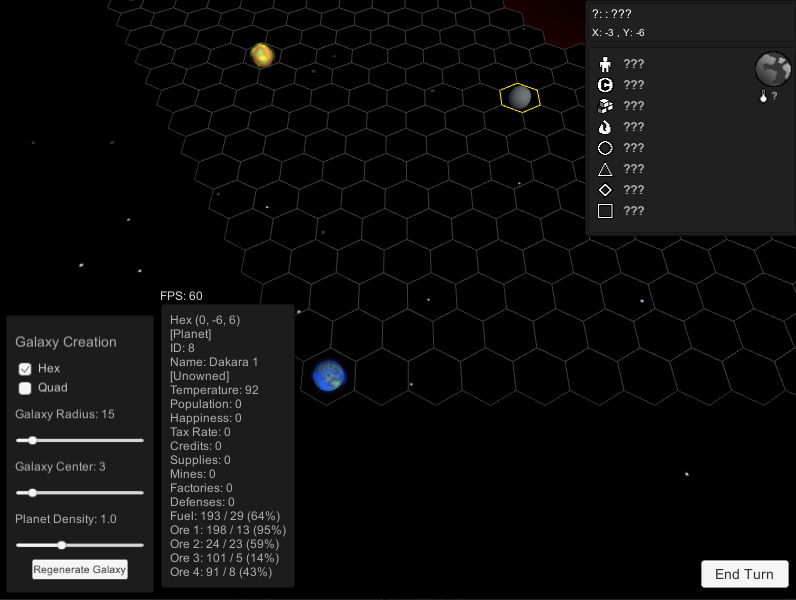
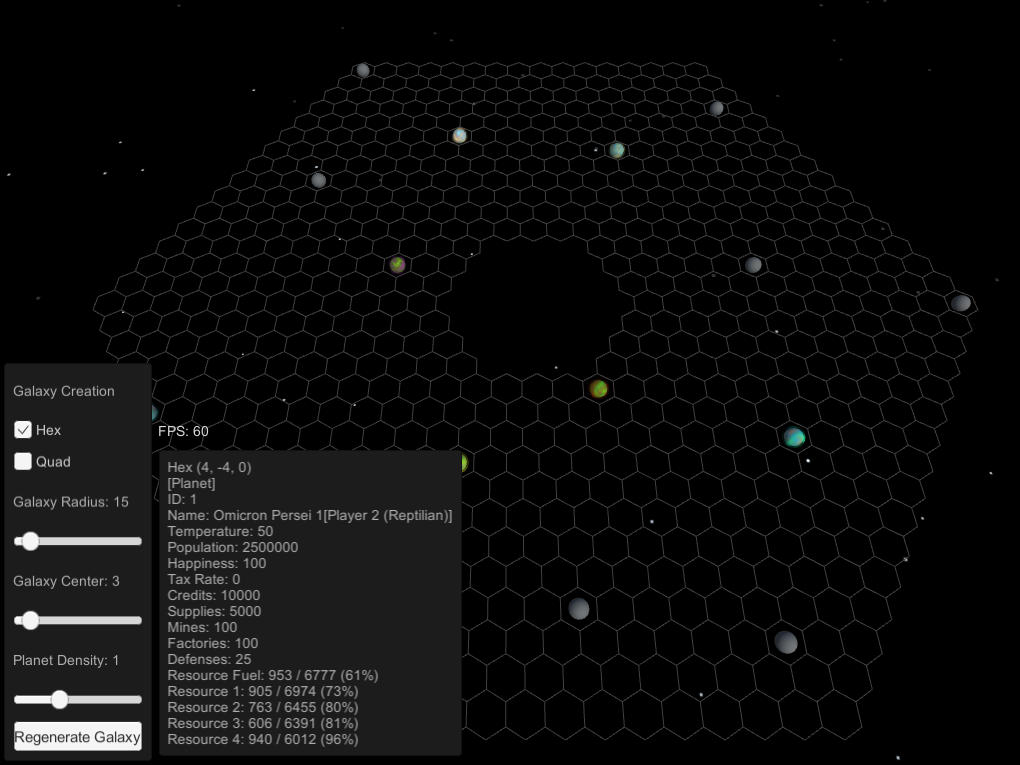
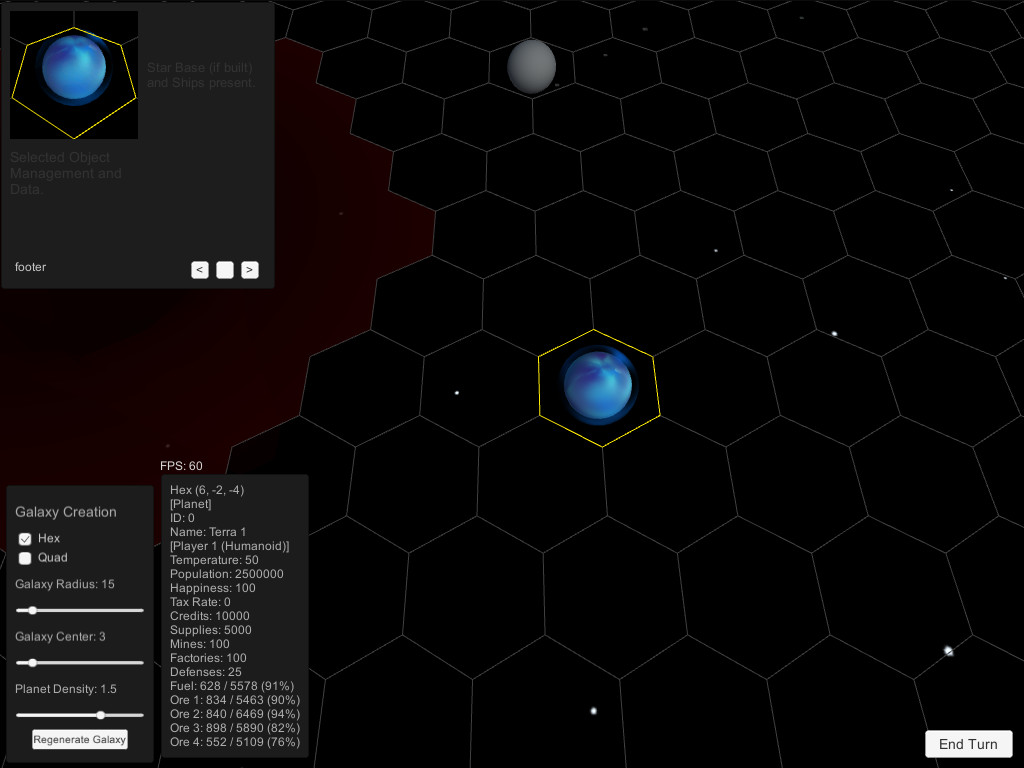
At this point I would like to start adding the UI and getting some debug info of the tile the mouse is over. I have never been a big fan of Unity3D’s newer UI system, but for the sake of Devember will attempt to learn to use it better, or at the very least not dislike it as much. :slight_smile:

Decided to spice up the background a little with some distant stars/galaxies before finishing up for today. Can make this more efficient later by building a single mesh, but for now it makes the background a little more interesting.

Stars Background
public class StarsBackgroundScript : MonoBehaviour {

	public Material[] StarMaterial;
	List<GameObject> Stars;

    void Start() {
        
		Stars = new List<GameObject> ();

		for (int i = 0; i < 500; i++) {
			GameObject go = GameObject.CreatePrimitive (PrimitiveType.Quad);
			go.transform.parent = this.transform;
			go.transform.position = new Vector3 (Random.Range (-200.0f, 200.0f), Random.Range (-50.0f, -10.0f), Random.Range (-200.0f, 200.0f));
			go.transform.rotation = Quaternion.Euler (90.0f, 0.0f, 0.0f);
			go.transform.localScale = new Vector3 (0.5f, 0.5f, 0.5f);
			go.GetComponent<MeshRenderer> ().sharedMaterial = StarMaterial[Random.Range (0, StarMaterial.Length)];
			Destroy (go.GetComponent<MeshCollider> ());
			Stars.Add (go);
		}

    }

}

7 Likes

This is very pleasing to the eyes.

3 Likes

I just have to ask… Is there any particular reason why is it doughnut shaped with the hole in the middle or have I just skipped that part…

galactic center?

Star?

Because it makes it delicious.

2 Likes

Supposed to be the Galactic Center. The InitMap section can skip that part and just have a solid map. Also, think I keep saying Universe when I mean Galaxy. oops. :slight_smile:

Because you gave me a good set up for this clip, I will share it…

3 Likes

First thing would like to accomplish for today is to take some time to go back over what I have written up to this point. Since I have been rushing things a bit, I am sure there are things that could be done better, are just plain sloppy, or creating some fundamental flaw that will come back to bite me later on.

One of the things I have been questioning is the decision to make the map class generic, it is seeming more like I went the wrong way about it. It should actually be the Hex/Quad’s that are based off some sort of generic Shape class that the map will use. This way the map and all the objects in it will not need to know the specific shape. This worked out well, but took most of my allotted time for the day to accomplish.

I want to at least add something else for today that shows some progress, figured would add something visual to the planets. Used perlin noise to generate a random texture, chose 2 random colors and lerp’ed them based on the noise value. Put an atmosphere on the planet also, did almost the same thing as the surface texture, but used clear as one of the colors. Added a simple rotation script to the planet and atmosphere. Added some more data to the Planet class that will be needed later also.

Random Planet Texture
Material mat_planet = new Material (Resources.Load<Material> ("Materials/PlanetSurface"));
Material mat_atmosphere = new Material (Resources.Load<Material> ("Materials/PlanetAtmosphere"));

go_planet.GetComponent<MeshRenderer> ().material = mat_planet;
go_atmosphere.GetComponent<MeshRenderer> ().material = mat_atmosphere;

Texture2D tex_planet = new Texture2D (256, 256);
Texture2D tex_atmosphere = new Texture2D (256, 256);

List<Color> colors_planet = new List<Color> ();
List<Color> colors_atmosphere = new List<Color> ();

Color c1 = new Color (Random.Range (0.0f, 1.0f), Random.Range (0.0f, 1.0f), Random.Range (0.0f, 1.0f), 1.0f);
Color c2 = new Color (Random.Range (0.0f, 1.0f), Random.Range (0.0f, 1.0f), Random.Range (0.0f, 1.0f), 1.0f);
Color c3 = new Color (Random.Range (0.0f, 1.0f), Random.Range (0.0f, 1.0f), Random.Range (0.0f, 1.0f), 1.0f);

float offx = Random.Range (0.0f, 1024.0f);
float offy = Random.Range (0.0f, 1024.0f);

float scale_planet = Random.Range (16.0f, 64.0f);
float scale_atmosphere = Random.Range (32.0f, 64.0f);

for (int y = 0; y < 256; y++) {
	for (int x = 0; x < 256; x++) {
		float h = Mathf.PerlinNoise ((x / scale_planet) + offx, (y / scale_planet) + offy);
		float h2 = Mathf.PerlinNoise ((x / scale_atmosphere) + offy, (y / scale_atmosphere) + offx);
		colors_planet.Add (Color.Lerp (c1, c2, h));
		colors_atmosphere.Add (Color.Lerp (Color.clear, c3, h2));
	}
}

tex_planet.SetPixels (colors_planet.ToArray ());
tex_planet.Apply ();

tex_atmosphere.SetPixels (colors_atmosphere.ToArray ());
tex_atmosphere.Apply ();

mat_planet.mainTexture = tex_planet;
mat_atmosphere.mainTexture = tex_atmosphere;

Decided I would try to start putting the WebGL builds on my website each day for anyone that wants to try it out as Devemeber goes.

Main page
https://www.dac3.net
or
https://www.dac3.net/data/Space4X/

5 Likes

As someone who fell into this trap like a billion times, I can give you one advice - cut it down. Like everything. The size is way too large. Make 3-4 planets work. Then add the rest of the universe. You don’t need this huge universe. Have 50 tiles and make them work. If they work properly, when you build the universe everything will work properly.
The large size gives the feeling of making progress, and you still are, but you are building a huge galaxy now when all you really need us a small corner with 5 planets…
Will keep track of your progress :wink:

DAY 5 - Sick of Turkey edition:

Trying to make up some ground today from yesterdays time spent cleaning up and refactoring.

Thinking it would be a good time to get the Player class in place. This class will be used to hold/manage each players data and will need…

  • which Planets they own
  • which Planets they have visited/scanned
  • which Ships they own
  • which Star Bases they own
  • what they can currently see (what is in sensor range).

There may be other things it will need in the future. For now this will be enough to move forward.

Now that there is a way to assign ownership, made a few helper functions to create home worlds for players. These will assign the ownership and initialize them with some fairly high values. For testing purposes made it so clicking on an unowned planet will assign it to the first player.

Visually things have not changed much, but the Debug data shows there is a lot more going on in the background now. Also added in a way to regenerate the Galaxy at run time, so I do not need to keep manually changing the variables in code.

7 Likes

DAY 6:

Taking some time today adding and updating comments in the code.

Tweaking the UI a little bit and getting the new UI Elemenets that are going to be needed in place. Still dislike Unity’s UI system, but becoming a little more tolerable. Started to get the Selection system in place to feed the new UI Elements with data. This will allow the Player to manage the things they own, or to view known information on unowned things.

Overall a rather boring update, mostly just a lot of connecting up objects in the background. Hopefully getting to a point soon to start showing some of those things in action.

5 Likes

DAY 7 - Fighting the UI edition:

Continuing along with the UI system, which it is just a complete nightmare to use Unity3D’s UI system. The amount of work to implement it is a bit on the outrageous side. Going to try looking up any additional information / pro tips to see if I can streamline this some.

Just sitting here bludgeoning the UI with a sledge hammer until it works the way I want. :crazy_face: There really has to be a better way to do this. :crazy_face:

devember_day_07_01

Wasted most of my allotted time on this today. Have some more free time later, so may be able to get some more done.

4 Likes

DAY 7.5:

After spending some time experimenting with all the possible settings of the UI Layout Elements, I began to see how to make things work the way I wanted. Still a very time consuming process, but a lot less trial and error going on using it. Got the first half mostly complete, which is the mouse over information box. Pointing at something you own will show you the relevant information, while enemy and unowned planets will only show information that you have previously acquired.

6 Likes