[SOLVED BY RISK] Using Wake On LAN, but not using the port as a connection?

Hey all,

I hope everyone is enjoying another year, may it be a hell of a lot better than 2020-2021! :mask:

Before you read on, compared to you lot, my skills don’t extend to complicated scripts or spending 12 hours learning something new to do a 5 minute job…I have tried in the past, but time is limited these days! :slight_smile:

So, I used to use Wake on LAN to boot my server when needed (it isn’t on all the time yet), it was very helpful (using WakeMeOnLan). Before I got a UPS, I used a smart plug to boot.

Thing is, I’ve switched to SFP+ and of course it doesn’t work now. I plugged the original 1G ethernet back in and the network really didn’t like that.

So I’m wondering, I have a Home Assistant instance running on a Pi (within 3 feet of server) , perhaps I can simulate a keyboard/mouse press to boot the machine? I believe that’s a function, or may be I can somehow send the wake signal but not use the LAN port, but I would need an IP address for it.

If it’s helpful to know:

“Server” Motherboard: Asus X99E WS
Server UPS: Yes
Server OS: TrueNAS
Network Switch: PoE enabled Netgear Prosafe GS110TP
Raspberry Pi 3 B

Thanks! :+1:

Honestly i have found WOL to be a pain in the ass… The most reliable setup ive ever had is the smart plug with the bios set to auto boot on power loss lol

3 Likes

If you are wanting your WoL feature back, it may be worth looking into this a little more.

What do you mean “didn’t like that?” Typically I would expect the network to see them as two separate end points. However when the machine boots up, it will see both are on the same network, and that’s where your machine might get confused about where to send traffic.

Assuming it’s a server, you setup static IPs, My initial check would be to ensure they are not the same.

It’s unlikely WoL will work on SFP+ alone as when the machine is in a low power state, the SFP+ doesn’t get power, I find gigabit Ethernet cards drop to 100mbit when in this mode to help reduce their power needs.

1 Like

Can you configure the 1gbps nic as disabled in TrueNAS?

Wake on LAN doesn’t need to know anything about IP addresses, the NIC doesn’t need an IP.

3 Likes

Connect the GPIO pins on the Pi to the POWER switch header on the motherboard?

Takes a few bucks for a few electrical components, some trivial soldering, some really basic programming, and you learn stuff that will let you switch/control other things as well.

Step-by-step video (27 minutes long at a relaxed pace):

3 Likes

Hello again Josh :+1:

Oddly WoL has been very reliable for me, perhaps it’s a board quality thing? Like I said, I did do the smart plug for a while, but now I have UPS, it’s no so straight forward, especially as the UPS is doing quad duty (Server 1 and 2, 2 x Network switches). Ho hum!

It’s strange, I had experience of double connections before, it broke the LAN (no devices could connect, internet access dead). I did try having both connected and in TrueNAS I config’d both LAN connections to have separate IP addresses. That seemed fine, then I thought I might give a jail it’s own dedicated network with fixed and unoccupied IP and that’s when it fell down.

May be I’ll have another go, perhaps not associate the LAN port with any jails and see what happens. Thanks!

I might be able to, I’m going to try doing it again, but not associating it with a jail.

Thank you for this @level1 , I’m going to look into that if the above doesn’t work, thanks! :+1:

2 Likes

Ah yes… my UPS has regular power points on the back of it so i can continue as normal lol… but if yours is IEC or something similar yeah, you can’t do that any more :frowning:

1 Like

Yeah I think it is IEC lol, doh!! :slightly_smiling_face: Took a while to find one that ‘spoke’ to the TrueNAS, but got one in the end.

1 Like

Question: are you sending the WOL message to an IP address, or the MAC address? The physical MAC shouldn’t change, even if there is an ip conflict.

Level1’s suggestion of a pi boot device looks cool, without the hassle of going full pi kvm…

1 Like

Good question, it seems to be the IP address I’m calling.

Thanks for endorcing @level1’s suggestion :+1:

At one point I was going to use LAG (network switch is compatible), but I wasn’t sure if it was possible to nominate a primary port - obviously don’t want to have an SFP+ connection and not use it!

1 Like

You don’t really need WakeMeOnLan either…

how it works is that the network card is just listening on a “Magic Packet” to appear on the network:

reference:


Here’s a shell snippet that uses the ancient netcat to broadcast the magic packet on lan:

$ MAC=11:22:33:44:55:66
$ echo -e $(echo $(printf 'f%.0s' {1..12}; printf "$(echo $MAC | sed 's/://g')%.0s" {1..16}) | sed -e 's/../\\x&/g') | nc -w1 -u -b 255.255.255.255 4000

from stack overflow


On windows, you can use powershell (don’t even need netcat or socat), example: https://www.pdq.com/blog/wake-on-lan-wol-magic-packet-powershell/

I don’t know if there’s anything special you need to do to make this be a clickable icon on desktop, or in Start Menu (not sure what security settings Windows is configured with out of the box).


Some devices require a “password” which is an additional magic string embedded in the packet, there’s tiny tool called “etherwake” that’s written in C that implements that, … chances are you probably don’t need it.

3 Likes

So OP (chris) could change the MAC to the NIC’s MAC, and then save the snippet as a bat file to his desktop?

Then just launch the bat to wake the computer?

(not sure if bat files are even a thing anymore)

1 Like

Yes.

PiKVM DIY ATX style of controls is wonderful, but not really necessary if wake on lan is all that’s needed.

pikvm DIY ATX details ... if you want a remote motherboard reset button

from: GitHub - pikvm/pikvm: Open and cheap DIY IP-KVM based on Raspberry Pi

1 Like

Thanks for that @risk , I’ll certainly look into that. I am looking for a simple method, I like how I do it right now, it’s just open 1 app, then right click and ‘wake’. It looks like that avenue is quite involved to produce a similar experience/ease of use, but I will note it! :+1:

I think tonight I’m going to see if I can plug the cat cable back in, may be if I don’t try to use it for a jail it’ll be ok quietly sitting there. We’ll see! Thanks again guys :+1:

Well, I eventually got round to it.

Connected the ethernet back up, assigned it an unoccupied IP, and it seemed to sit well on the network.

interesting though, if I go to transfer a file (Windows to TrueNAS) using Network → TrueNAS machine → share. It Transfers using the 1G connection (assigned x.x.x.123)

If I transfer a file typing in \x.x.x.23 (the TrueNAS server) → share. It uses the 10G connection.

Just an interesting observation, easily explained by someone that knows more than me (most people!).

This is what I was trying to avoid by

… and explaining you don’t need an IP address for Wake On Lan… and that insisting on having one just because dumb wake on LAN software asks you for a target IP is just dumb… - target MAC address is all you need.

Are you using TrueNAS Core (FreeBSD) or TrueNAS Scale (Linux)?

1 Like

I’m sorry Risk, I’m sure people like me cause frustration. It’s just stepping into someone else’s playground takes some getting used to. Being a dumb user, I found the easiest dumb solution (WoL) and thought that was the end of that. It’s a shame the S/W doesn’t suggest alternative methods, though I guess they’d get slightly fewer users.

I’ve deleted the 1G NIC from TrueNAS Core now, but did take a note of the MAC. I’m going to re-read comments on this thread and tackle it in a less WoL way. Thank you again :+1:

I have really looked into this now - do bear in mind that some of this is like getting inside a car for the first time and not having a clue what any of the knobs, button and big wheel do! I have tried though, if I could figure a way to have a Windows 1 double click icon that would be great, but it seems I have a learn a whole lot about powershell as well as various other things. I might halt for now as I feel for the time to resolve this way, is equal to the time I could have just used with my current known working way. Bit sad, but hey ho!

so … It’s been 2 months since I fired up my windows computer

how come?

(my significant other uses the monitors that are on the same KVM my windows machine is for her work, so I need her to not be working and the christmas new years is the time of the year she’s most busy… excuses, excuses, anyway).

this means I can test some stuff above on windows, see how it works.

1. Notepad

Open a new file, and paste in the following:

# source: https://www.pdq.com/blog/wake-on-lan-wol-magic-packet-powershell/
$Mac = "38:D5:47:02:50:2F"
$MacByteArray = $Mac -split "[:-]" | ForEach-Object { [Byte] "0x$_"}
[Byte[]] $MagicPacket = (,0xFF * 6) + ($MacByteArray  * 16)
$UdpClient = New-Object System.Net.Sockets.UdpClient
$UdpClient.Connect(([System.Net.IPAddress]::Broadcast),7)
$UdpClient.Send($MagicPacket,$MagicPacket.Length)
$UdpClient.Close()

I took the mac address from one of your screenshots above, no idea if that’s the right one you have written down from before – maybe you want to try replacing.

save as:

File name: C:\Users\Chris\wake_chris_machine.ps1
Save as type: All Files

Basically save it somwhere, not the desktop, desktop will contain a launch shortcut.

You need both a file and a shortcut because that makes windows more secure or something (I don’t know - there’s probably experts who know the real reason)


2. Make a shortcut on desktop

Right click on the desktop, click “New Shortcut”

for “Location of the item” use the following long string:

C:\Windows\system32\WindowsPowerShell\v1.0\powershell.exe -ExecutionPolicy Bypass -File C:\Users\Chris\wake_chris_machine.ps1

Replace Chris / last part with a path to the file you just saved.

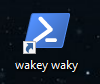
it’ll ask you for a name, … type anything - “wakey wakey” maybe? You’ll get something that looks like this, but you can change the icon to whatever.

image

When you double click it, it will run powershell and send the magic wake on lan packet.

How will you know it works … ? try it.

3. Profit … probably (or debug and profit more)

If you double click, it should just work, but if it doesn’t, you can install wireshark.

and compare your packets to that of the funky software.

what to do in wireshark to debug, with screenshots

Wireshark captures network packets – so you can look at what that software is sending.

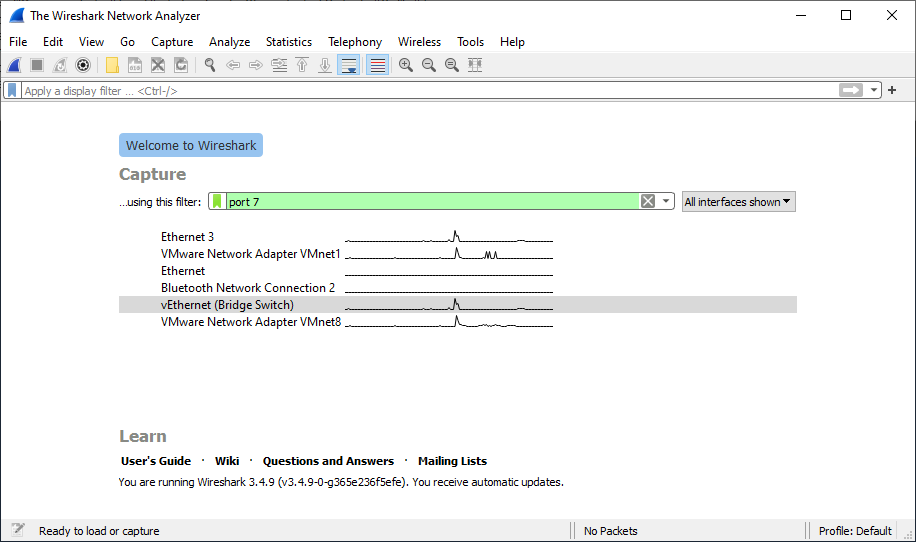
Here’s the first screen where you can setup a filter:

I typed in port 7 in the filter above … and click the blue shark fin icon in the top left to start the capture.

When I click the wakey waky shortcut on desktop I get a packet in the top list … when I click it, I get details.

Hopefully this works for you, maybe it’s useful to someone else too.

3 Likes