This is a follow-up of my installation guide of XCP-ng on OVH/SYS and basically a fix for my complaint about it not being secure. Also Wendell kind of asked for more XCP-ng stuff on the L1L channel a month ago, so here’s some of my insanity.
Strap in, this is going to get weird…
One of my complaints about XCP-ng is that management interface is exposed to WAN and you have no utilities such as fail2ban to prevent bruteforce attacks on your host via SSH or the XenAPI. But XCP-ng has Iptables available, so lets try to create some weird moster of a setup. With some modification, this can also work with ProxMox in a public DC
This guide is mainly OVH centric for WAN configuration, so sorry about that!
VERY BIG DISCLAIMER IN RED: You should only do this if you have a way of reaching the console of your host like through IPMI virtual console or IPMI SOL through your provider and have two or more public IPs!
Now that thing is out of the way…
pfSense Setup:
I have a host with one IPv4 address that comes with the host by default, and I have purchased additional 4 IP addresses that I will be routing my VMs through:

All of the management is going through the default IP address that is assigned to the host, and NOT through the additionally purchased IP addresses. This is the address that you currently access XOA/Management through. Mark this IP down as this will be your Management WAN IP Address.
A firewall VM sitting between your other VMs and WAN with VPN capability is a must for this to work. In my case I use pfSense with OpenVPN. If you are using OVH/SYS servers, I’d heavily recommend the Configuring pfSense network bridge guide from OVH.
For the pfSense VM, make sure to also toggle this in XOA so you don’t screw yourself over once you reboot:
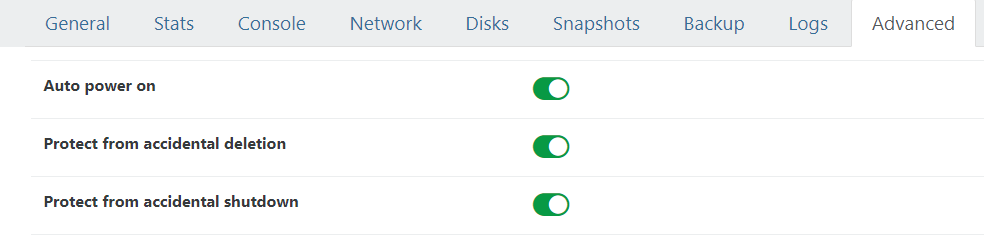
If you don’t turn on “Auto power on”, once you reboot the hypervisor you will get locked out as the pfSense will not come up.
After you install the pfSense VM, make sure to install Guest Utilities and disable TX Checksum offloading.
As the guide is for ProxMox, here are the specific XCP-ng parts for that OVH guide:
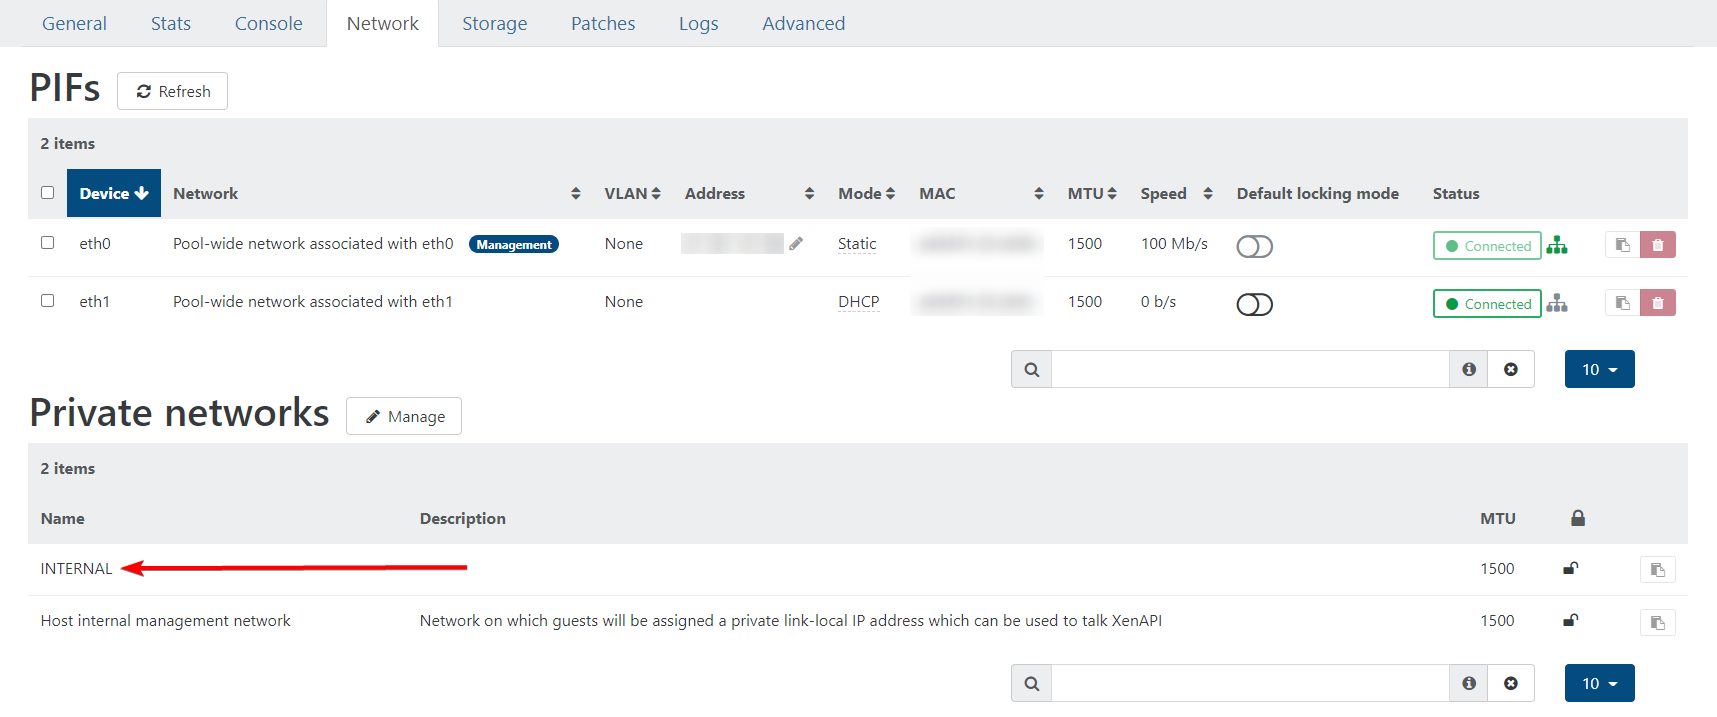
Create a new internal network for the firewall and the VMs:
For the pfSense VM, attach both eth0/WAN and the internal network to it. The WAN interface should have vMAC:

Then for each VM, just put it onto the internal network only as you will be doing the NATing/port forwarding via the firewall.

OpenVPN setup on pfSense:
Lawrence has a great video on setting up OpenVPN on pfSense and I highly recommend you to watch it:

Ensure that “IPv4 Tunnel Network” and “IPv4 Local network(s)” is entered correctly as this is important.
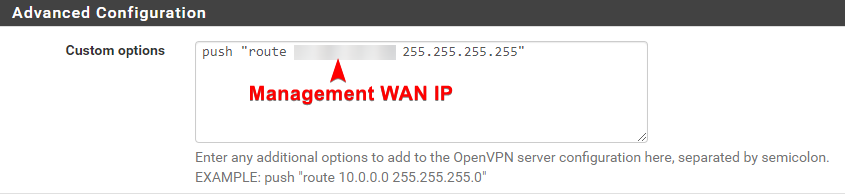
Once that’s done, under OpenVPN Server settings, add this into custom options and save:
push "route <Management WAN IP> <Management WAN Netmask>"
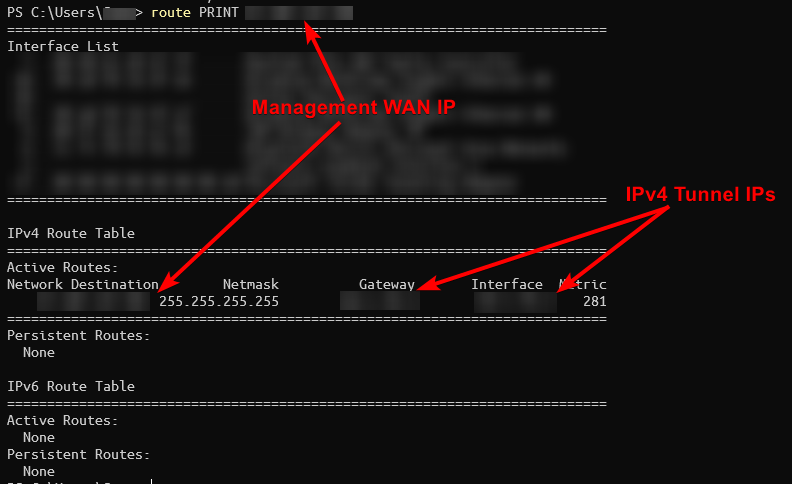
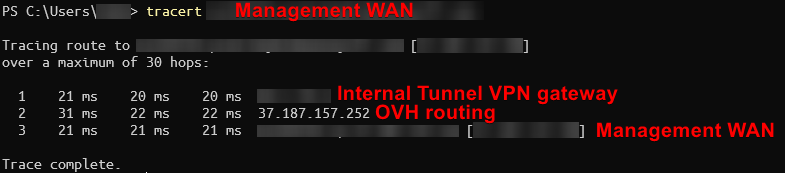
Verifying that your VPN connection works
Honestly you should really doublecheck this stuff. Connect to the VPN and verify that the management WAN IP is being routed through pfSense.
Configuring Iptables
Once you verified your VPN and Internal network is configured correctly, ssh into your XCP-ng host and create a backup of your current iptable config, and then use this one that basically doesn’t permit anything:
iptables
# Generated by iptables-save v1.4.21 on Mon Jul 12 23:52:20 2021
# HA not working with this Iptables config
*filter
:INPUT ACCEPT [0:0]
:FORWARD ACCEPT [0:0]
:OUTPUT ACCEPT [6477:2967969]
:RH-Firewall-1-INPUT - [0:0]
-A INPUT -j RH-Firewall-1-INPUT
-A FORWARD -j RH-Firewall-1-INPUT
-A RH-Firewall-1-INPUT -i lo -j ACCEPT
-A RH-Firewall-1-INPUT -p icmp -m icmp --icmp-type any -j ACCEPT
# Zabbix
#-A RH-Firewall-1-INPUT -p tcp -m tcp --dport 10050 -j ACCEPT
-A RH-Firewall-1-INPUT -i xenapi -p udp -m udp --dport 67 -j ACCEPT
-A RH-Firewall-1-INPUT -m conntrack --ctstate RELATED,ESTABLISHED -j ACCEPT
-A RH-Firewall-1-INPUT -p tcp -m tcp --dport 21064 -j ACCEPT
-A RH-Firewall-1-INPUT -p udp -m multiport --dports 5404,5405 -j ACCEPT
# Access from internal LAN
-A RH-Firewall-1-INPUT -s <WAN IP that pfSense uses>/32 -p tcp -m tcp --dport 443 -j ACCEPT
-A RH-Firewall-1-INPUT -s <WAN IP that pfSense uses>/32 -p tcp -m tcp --dport 22 -j ACCEPT
-A RH-Firewall-1-INPUT -j REJECT --reject-with icmp-port-unreachable
COMMIT
# Completed on Mon Jul 12 23:52:20 2021
iptables.backup, in case you nuke it by accident:
# sample configuration for iptables service
# you can edit this manually or use system-config-firewall
# please do not ask us to add additional ports/services to this default configuration
*filter
:INPUT ACCEPT [0:0]
:FORWARD ACCEPT [0:0]
:OUTPUT ACCEPT [0:0]
:RH-Firewall-1-INPUT - [0:0]
-A INPUT -j RH-Firewall-1-INPUT
-A FORWARD -j RH-Firewall-1-INPUT
-A RH-Firewall-1-INPUT -i lo -j ACCEPT
-A RH-Firewall-1-INPUT -p icmp --icmp-type any -j ACCEPT
# Zabbix
#-A RH-Firewall-1-INPUT -p tcp --dport 10050 -j ACCEPT
# DHCP for host internal networks (CA-6996)
-A RH-Firewall-1-INPUT -p udp -m udp --dport 67 --in-interface xenapi -j ACCEPT
-A RH-Firewall-1-INPUT -m conntrack --ctstate ESTABLISHED,RELATED -j ACCEPT
# Linux HA hearbeat (CA-9394)
-A RH-Firewall-1-INPUT -m conntrack --ctstate NEW -m udp -p udp --dport 694 -j ACCEPT
-A RH-Firewall-1-INPUT -m conntrack --ctstate NEW -m tcp -p tcp --dport 22 -j ACCEPT
-A RH-Firewall-1-INPUT -m conntrack --ctstate NEW -m tcp -p tcp --dport 80 -j ACCEPT
-A RH-Firewall-1-INPUT -m conntrack --ctstate NEW -m tcp -p tcp --dport 443 -j ACCEPT
# dlm
-A RH-Firewall-1-INPUT -p tcp -m tcp --dport 21064 -j ACCEPT
-A RH-Firewall-1-INPUT -p udp -m multiport --dports 5404,5405 -j ACCEPT
-A RH-Firewall-1-INPUT -j REJECT --reject-with icmp-host-prohibited
COMMIT
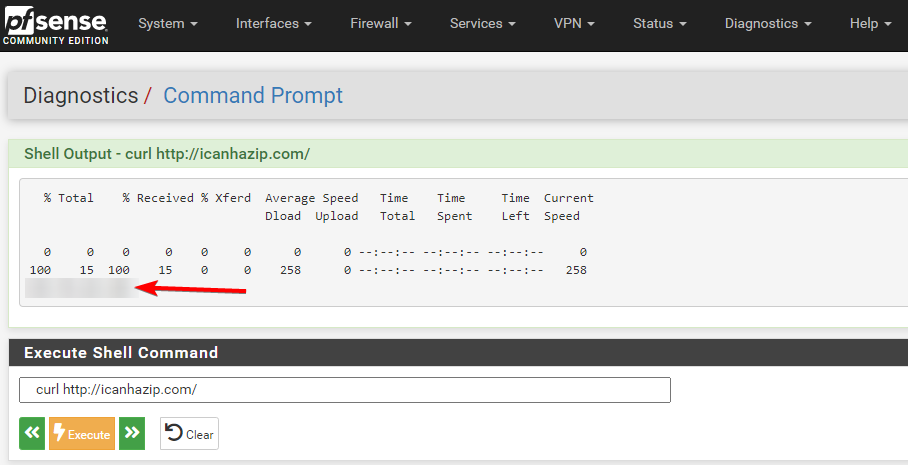
If you use more than 1 public IP address going out of pfSense, you can use icanhazip:
Now you should have both iptables and iptables.backup files
Once done, restart Iptables service using systemctl restart iptables and verify that its running with systemctl status iptables
Now you should be protected from whatever script kiddie is trying to instagib you by bruteforcing SSH.
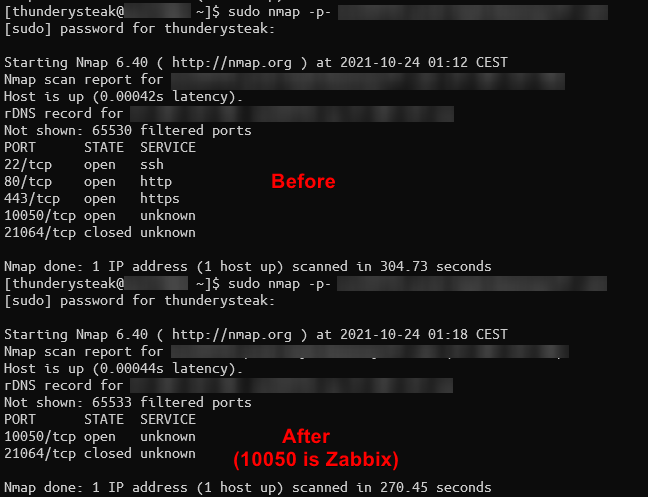
This also prevents the “fat” Windows client from connecting unless you’re on a VPN.
Recovery after you lock yourself out or pfSense stops functioning:
Oops! You just broke pfSense and your VPN or routing doesn’t work anymore.
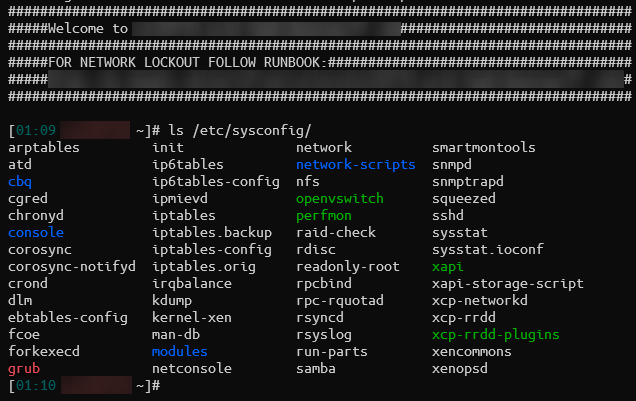
Open an IPMI console connection to your server and open a new local command shell:
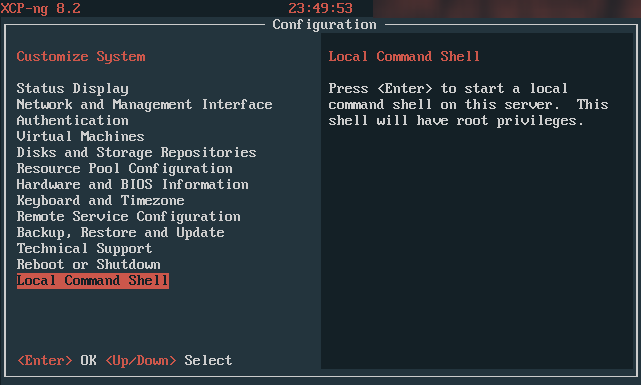
And then:
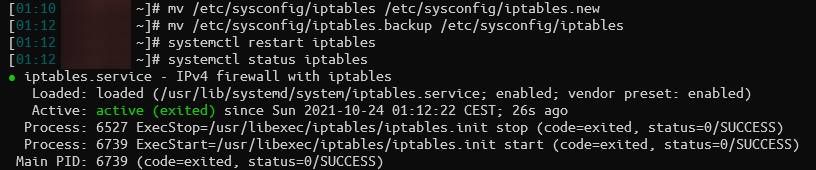
- Rename
/etc/sysconfig/iptablesto/etc/sysconfig/iptables.new - Copy
/etc/sysconfig/iptables.backupto/etc/sysconfig/iptables - Run
systemctl restart iptablesto make the server open wide
Once you’re finished fixing pfSense and everything works correctly, don’t forget to revert back to your iptables config and restart the service!
Not going to lie, this might be janky af and some points might be confusing, but I wrote this in a very tired and caffeinated state and tried to remember the process from July.
If you find some issues or better ways of making this work, please let me know!