I spent a LOT of time on this. As in, all day, every day for 7 days straight. But it worked!
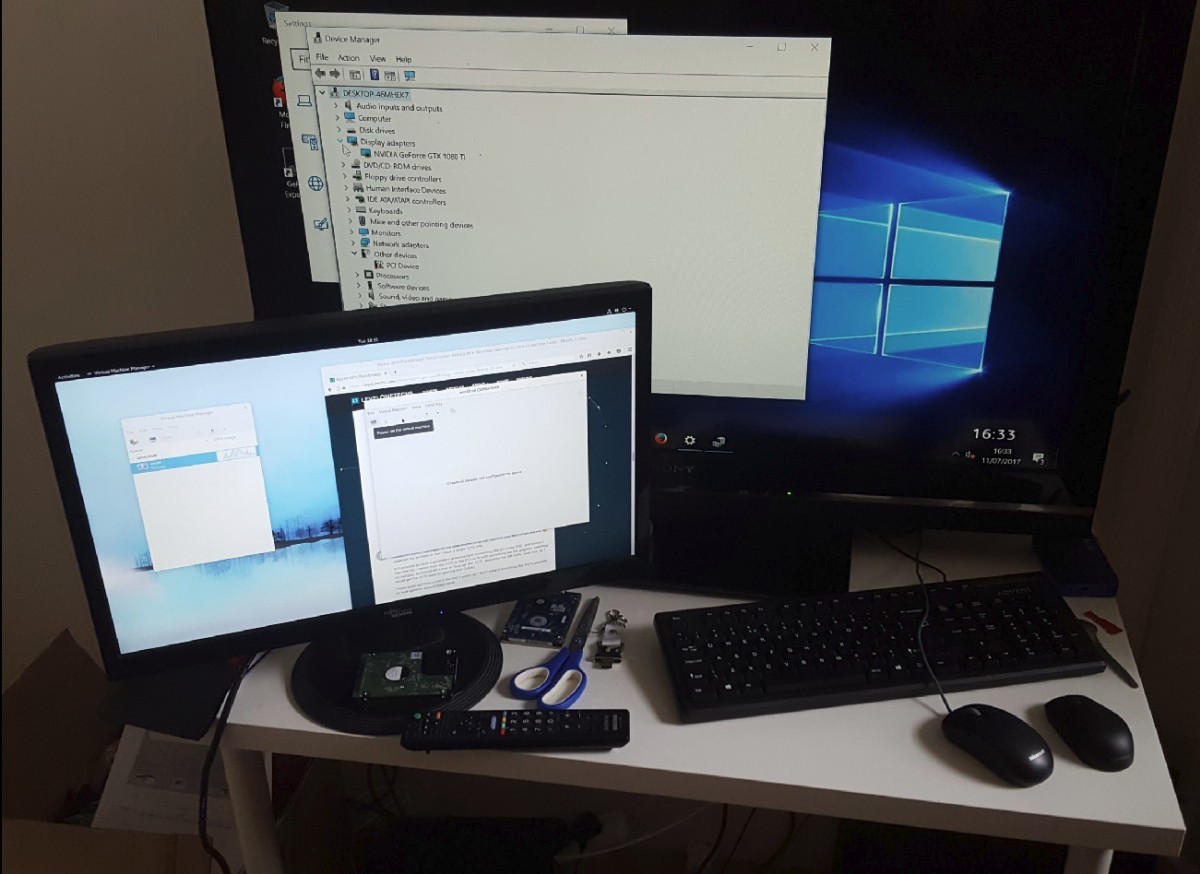
I now have a Fedora host with a Windows 10 virtual machine running smoothly and reliably on a Ryzen processor with Nvidia Geforce 1080ti passthrough. With this setup I can boot natively into Windows and utilize the 1080ti graphics card, or launch it within Fedora as a virtual machine... And still utilize the full power of the 1080ti graphics card!
Hardware:
- Ryzen 7 1800x
- Asrock X370 Gaming K4 (Fatal1ty AM4) Motherboard
- Samsung 960 EVO M.2 SSD 500GB - For Fedora host.
- Sandisk Ultra 2 240GB SSD - For Windows 10 client.
- Nvidia Geforce GT710 1GB Graphics Card for Host - In primary PCI slot.
- EVGA Black Edition SC Nvidia Geforce GTX 1080TI Graphics Card for Client Passthrough - In secondary PCI slot.
- Corsair Vengeance 32GB 3000MHz DDR4 Memory
- Second Keyboard and Second Mouse
- Two HDMI monitors
Software
- Fedora 26 Beta for Host (Update 2017-07-12: Fedora 26 is now out, all still working well after upgrade) - Virtualization tools (@Virtualization) / Nvidia driver 375.66 for GT710 Host graphics card (not the passthrough one!)
- Windows 10 N Pro iso - Latest Nvidia Driver for 1080ti installed by booting natively into the Sandisk SSD after Windows installation as per Nvidia website.
Instructions - Parts to change are in bold:
Part A: Install Fedora 26 in UEFI mode
Step 1. Use the Fedora Media Writer tool to write the Fedora 26 image to a bootable USB drive.
Step 2. Boot your computer while hitting F11 or whatever your motherboard uses to launch the boot menu if it's different.
Step 3. Make sure you boot the USB drive in EFI mode - the option will usually be there. You should come to a Fedora menu with a BLACK background, not a blue one, otherwise this will not work.
Step 4. Install Fedora.
Step 5. Open terminal and run:
sudo dnf update
Step 6: Reboot, then open terminal and run:
sudo dnf install @virtualization
Part B: Bind your pass-through GPU to the VFIO-PCI driver:
Step 1. Commands to edit the Grub bootloader to turn on IOMMU and load the VFIO-PCI driver early enough to grab your card:
sudo -i
vi /etc/default/grub
Edit this file:
GRUB_TIMEOUT=5
GRUB_DISTRIBUTOR="$(sed 's, release .*$,,g' /etc/system-release)"
GRUB_DEFAULT=saved
GRUB_DISABLE_SUBMENU=true
GRUB_TERMINAL_OUTPUT="console"
GRUB_CMDLINE_LINUX="rd.lvm.lv=fedora/root rd.lvm.lv=fedora/swap iommu=1 amd_iommu=on rd.driver.pre=vfio-pci"
GRUB_DISABLE_RECOVERY="true"
Step 2. Now you want to take note of the vendor & device ID pairs for the graphics card you are passing through to the virtual machine:
lspci -nn
Then look for your graphics card and it's sound device and write down the two sets of codes e.g. [10de:1b06] for each of those two devices.
Add this to configure the graphics card and its associated audio device - change the two pairs of codes to those of your graphics card and attached sound device - then save:
First create/open the file to edit:
vi /etc/modprobe.d/vfio.conf
Then add the following line:
options vfio-pci ids=10de:1b06,10de:10ef
Step 3. Now you want to edit the linux initial ramdisk to add the VFIO drivers with the following commands:
vi /etc/dracut.conf.d/vfio.conf
Then add the following line:
add_drivers+="vfio vfio_iommu_type1 vfio_pci"
Step 4. Edit kvm.conf:
vi /etc/modprobe.d/kvm.conf
There should be a pound (#) sign at the start of both lines to comment them out as these technologies are a bit unstable at the moment:
options kvm_intel nested=1
options kvm_amd nested=1
Step 5. Create a file in modprobe.d called blacklist.conf in order to blacklist the nouveau driver that will automatically grab your passthrough graphics card and your host graphics card if they're Nvidia, in turn preventing the vfio-pci driver from binding to your passthrough gpu:
vi /etc/modprobe.d/blacklist.conf
Add this to the file and save:
blacklist nouveau
blacklist lbm-nouveau
options nouveau modeset=0
alias nouveau off
alias lbm-nouveau off
Step 6. Update the initial ramdisk so vfio-pci driver loads up early:
sudo dracut -f --kver `uname -r`
Step 7. Update the grub bootloader:
sudo grub2-mkconfig > /etc/grub2-efi.cfg
Once you've executed everything without errors, reboot your system.
Step 8. Verify that vfio-pci has bound to your passthrough graphics card. You should see that the current driver for your graphics card says vfio-pci:
lspci -nnv
Part C: Install your host (not the passthrough) graphics card if Nvidia:
Follow the full guide to manually install it at https://www.if-not-true-then-false.com/2015/fedora-nvidia-guide/
Part D: Fire up Virtual Machine Manager
Step 1. Create a new virtual machine using the GUI.
Step 2. Choose the option to use local install media (iso) and choose your Windows 10 iso file - I downloaded mine to my Fedora installation's Downloads folder.
Step 3. Follow the wizard, select how much RAM to give the VM, choose the size of your virtual disk (I chose 30GB as this is only a temporary disk, we'll delete it later). Just before finalizing the install, select the "configure before install" checkbox.
Step 4. Now, in the overview tab, change the firmware to UEFI, remove Graphics and Video devices and, after plugging in a second USB keyboard and mouse into your computer, go to Add Hardware, go to USB controllers, and add the second USB keyboard and second USB mouse you have plugged in - these will be used to control the second HDMI monitor that will be running your Windows VM. Then go to PCI controllers and add your passthrough graphics card and it's associated audio device.
Step 5. Click install to launch the Windows installation. At this point, with your host monitor plugged into the host graphics card and your client monitor plugged into the passthrough graphics card, you should see a TIanocore logo appear on the client monitor. Hit any key when you're prompted to boot from CD (the iso you selected earlier) and install Windows to the virtual drive. If for any reason you end up at a shell, type exit and it should take you to a page where you can select boot manager and fire up the virtual DVD-rom drive.
Step 6. Once that's done shut down Windows, the virtual machine should be powered down in Virtual Machine Manager, then back in Fedora open a terminal and type:
sudo -i
cd /etc/libvirt/qemu
virsh define win10.xml
virsh edit win10
Step 7. Your file should look similar to the following. The important step is changing the virtual hard drive to your extra blank physical SATA drive onto which a fresh install of Windows will go (i.e. my Sandisk Ultra 2 drive), as well as the very first line, and the last 5 lines of the document below, which ensures that Nvidia cards don't throw up an error 43 in your VM:
<domain type='kvm' xmlns:qemu='http://libvirt.org/schemas/domain/qemu/2.0'>
  <name>win10</name>
  <uuid>b461a6d9-cac1-419d-950e-c9710e93d0eb</uuid>
  <memory unit='KiB'>8388608</memory>
  <currentMemory unit='KiB'>8388608</currentMemory>
  <vcpu placement='static' current='1'>8</vcpu>
  <iothreads>4</iothreads>
  <cputune>
    <vcpupin vcpu='0' cpuset='0'/>
    <vcpupin vcpu='1' cpuset='1'/>
    <vcpupin vcpu='2' cpuset='2'/>
    <vcpupin vcpu='3' cpuset='3'/>
    <vcpupin vcpu='4' cpuset='4'/>
    <vcpupin vcpu='5' cpuset='5'/>
    <vcpupin vcpu='6' cpuset='6'/>
    <vcpupin vcpu='7' cpuset='7'/>
    <iothreadpin iothread='1' cpuset='0-1'/>
    <iothreadpin iothread='2' cpuset='2-3'/>
    <iothreadpin iothread='3' cpuset='4-5'/>
    <iothreadpin iothread='4' cpuset='6-7'/>
  </cputune>
  <os>
    <type arch='x86_64' machine='pc-i440fx-2.9'>hvm</type>
    <loader readonly='yes' type='pflash'>/usr/share/edk2/ovmf/OVMF_CODE.fd</loader>
    <nvram>/var/lib/libvirt/qemu/nvram/win10_VARS.fd</nvram>
    <boot dev='hd'/>
  </os>
  <features>
    <acpi/>
    <apic/>
    <hyperv>
      <relaxed state='on'/>
      <vapic state='on'/>
      <spinlocks state='on' retries='8191'/>
    </hyperv>
    <kvm>
      <hidden state='on'/>
    </kvm>
    <vmport state='off'/>
  </features>
  <cpu mode='host-passthrough' check='none'>
    <topology sockets='1' cores='4' threads='2'/>
    <feature policy='disable' name='smep'/>
  </cpu>
  <clock offset='localtime'>
    <timer name='rtc' tickpolicy='catchup'/>
    <timer name='pit' tickpolicy='delay'/>
    <timer name='hpet' present='no'/>
    <timer name='hypervclock' present='yes'/>
  </clock>
  <on_poweroff>destroy</on_poweroff>
  <on_reboot>restart</on_reboot>
  <on_crash>destroy</on_crash>
  <pm>
    <suspend-to-mem enabled='no'/>
    <suspend-to-disk enabled='no'/>
  </pm>
  <devices>
    <emulator>/usr/bin/qemu-kvm</emulator>
    <disk type='block' device='disk'>
      <driver name='qemu' type='raw'/>
      <source dev='/dev/sda'/>
      <target dev='vdb' bus='sata'/>
      <address type='drive' controller='0' bus='0' target='0' unit='0'/>
    </disk>
    <disk type='file' device='cdrom'>
      <driver name='qemu' type='raw'/>
      <source file='/home/msamy/Win10_1703_N_English_x64.iso'/>
      <target dev='hdb' bus='ide'/>
      <readonly/>
      <address type='drive' controller='0' bus='0' target='0' unit='1'/>
    </disk>
    <controller type='usb' index='0' model='ich9-ehci1'>
      <address type='pci' domain='0x0000' bus='0x00' slot='0x03' function='0x7'/>
    </controller>
    <controller type='usb' index='0' model='ich9-uhci1'>
      <master startport='0'/>
      <address type='pci' domain='0x0000' bus='0x00' slot='0x03' function='0x0' multifunction='on'/>
    </controller>
    <controller type='usb' index='0' model='ich9-uhci2'>
      <master startport='2'/>
      <address type='pci' domain='0x0000' bus='0x00' slot='0x03' function='0x1'/>
    </controller>
    <controller type='usb' index='0' model='ich9-uhci3'>
      <master startport='4'/>
      <address type='pci' domain='0x0000' bus='0x00' slot='0x03' function='0x2'/>
    </controller>
    <controller type='pci' index='0' model='pci-root'/>
    <controller type='ide' index='0'>
      <address type='pci' domain='0x0000' bus='0x00' slot='0x01' function='0x1'/>
    </controller>
    <controller type='sata' index='0'>
      <address type='pci' domain='0x0000' bus='0x00' slot='0x07' function='0x0'/>
    </controller>
    <interface type='network'>
      <mac address='52:54:00:02:51:4d'/>
      <source network='default'/>
      <model type='rtl8139'/>
      <address type='pci' domain='0x0000' bus='0x00' slot='0x02' function='0x0'/>
    </interface>
    <input type='mouse' bus='ps2'/>
    <input type='keyboard' bus='ps2'/>
    <hostdev mode='subsystem' type='pci' managed='yes'>
      <source>
        <address domain='0x0000' bus='0x0d' slot='0x00' function='0x0'/>
      </source>
      <address type='pci' domain='0x0000' bus='0x00' slot='0x04' function='0x0'/>
    </hostdev>
    <hostdev mode='subsystem' type='pci' managed='yes'>
      <source>
        <address domain='0x0000' bus='0x0d' slot='0x00' function='0x1'/>
      </source>
      <address type='pci' domain='0x0000' bus='0x00' slot='0x05' function='0x0'/>
    </hostdev>
    <hostdev mode='subsystem' type='usb' managed='yes'>
      <source>
        <vendor id='0x1a2c'/>
        <product id='0x2124'/>
      </source>
      <address type='usb' bus='0' port='1'/>
    </hostdev>
    <hostdev mode='subsystem' type='usb' managed='yes'>
      <source>
        <vendor id='0x17ef'/>
        <product id='0x608b'/>
      </source>
      <address type='usb' bus='0' port='4'/>
    </hostdev>
    <redirdev bus='usb' type='spicevmc'>
      <address type='usb' bus='0' port='2'/>
    </redirdev>
    <redirdev bus='usb' type='spicevmc'>
      <address type='usb' bus='0' port='3'/>
    </redirdev>
    <memballoon model='virtio'>
      <address type='pci' domain='0x0000' bus='0x00' slot='0x06' function='0x0'/>
    </memballoon>
  </devices>
  <qemu:commandline>
    <qemu:arg value='-cpu'/>
    <qemu:arg value='host,hv_time,kvm=off,hv_vendor_id=null'/>
  </qemu:commandline>
</domain>
Step 8. Once you've edited that file hit ESC to go out of Insert mode, then press Shift+Z+Z to save and exit. Type:
virsh define win10.xml
once more and you're ready to move on.
Step 9. Go back to Virtual Machine Manager and in your virtual machine conguration GUI, go to the Boot tab and make sure the DVD/CD rom drive is the boot device. With your blank SATA drive connected, start the VM again, and you'll either get a "press any key" prompt, which should launch Windows installer, or a shell, where again, you'd type exit and then manually choose the virtual DVD-rom drive to boot from. In the Windows installer, go to custom install, choose your SATA drive and install Windows.
Step 10. Shut down that Windows installation and ensure the virtual machine goes into powered down state in Virtual Machine Manager on your Fedora host. Then shut down Fedora and press F11 or your equvalent to go to the host's boot menu. Choose the SATA drive you just installed Windows on and boot from that. Install your Nvidia drivers. Once successful, reboot into Fedora, start your VM up through Virtual Machine Manager, and your VM should now be running Windows 10 with up to date passthrough GPU drivers.
Disclaimer: I am a novice myself, so can't guarantee the reliability of the information I've provided on this web page. I don't accept any responsibility or liability for any damage or injury or any other event that occurs as a result of following my guide above. Use at your own risk, and to your own peril if anything goes wrong!