I made my first case out of 3mm alu sheet. Damn that thing is heavy and feels like it could survive nuclear blast. 
3 Likes
Damn that thing looks gorgeous! I would like to build something quite similar, but in smaller scale.
I would have liked to make it more compact, the problem is finding monitors that small.
2 Likes
Update
Have to cut the holes by hand. So a lot of saw action, sweat/tears/blood and file work to clean it up again.
Will probably only take pictures of test fits.
Expect declaration of total defeat or victory and completion by friday.
A very pissed off MazeFrame rant
At my uni, there are some things that are good, others that are bad. And one thing that pisses me of on a daily basis.
That thing is when you “test the waters” for a project, basically get the ones who have access to tools to know you and interested in a project it is all “no problem” and “when do you want to start?”
When you then get going, get plans and drawings made, are one step before project kicks into gear, there is a big fat “who are you peasent that you dare speak to me?” Not just once, not just on this project where access to heavy machinery would help, but on EVERY FUCKING OCCASION I or someone tries to get things moving. My uni is a fucking mess that should be embarrassed at their garbage tier internal communication and organization, at least I hope for them that it is that and not them lying about all the “possibilities” they “offer” (as in they don’t) to their students.
You have done so much, defeat is not an option. You can do it !
(Epic music in the background)
I will do it!
I am going to spend money on tools I only need this one time (a hole saw 24mm, maybe a Dremel and a few attachements, maybe a 120mm hole saw).
I got 0 tries, no test pieces, no chance of backup arriving on time.
I either commit and fail or I commit and win (the prefered outcome).
1 Like
Do not hesitate no matter at what part of the process. Measure twice cut once.
Lightspeed and don’t forget to share the results good or bad.
4 Likes
This. Mark the cut lines clearly, and if you are not happy, wipe them of and redo them.
And before you start cutting, try to think the whole process step by step in your head from start to finish before doing anything. It helps a lot when you have a plan in your head and know what you are going to do next.
Good luck and remember to share the results 
2 Likes
Update
My uni got me a helping hand in preparing the front panel:

Side pieces:
I had my hopes up to get them cut on a waterjet. Big fat nope!
So had to diy them at home.
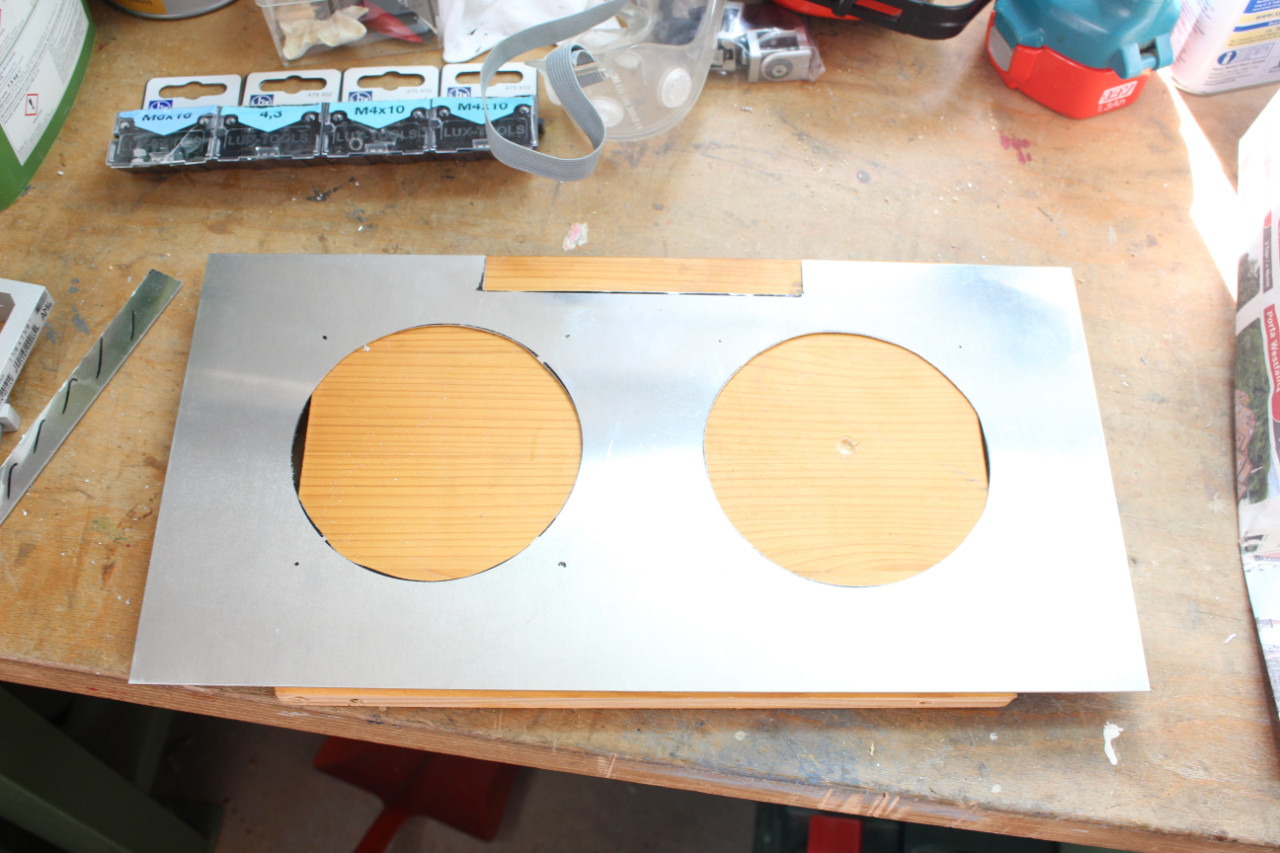
Marked:

Cut outs done (huge thanks to my dad and his skills):
Holes drilled and fan grills test fit:
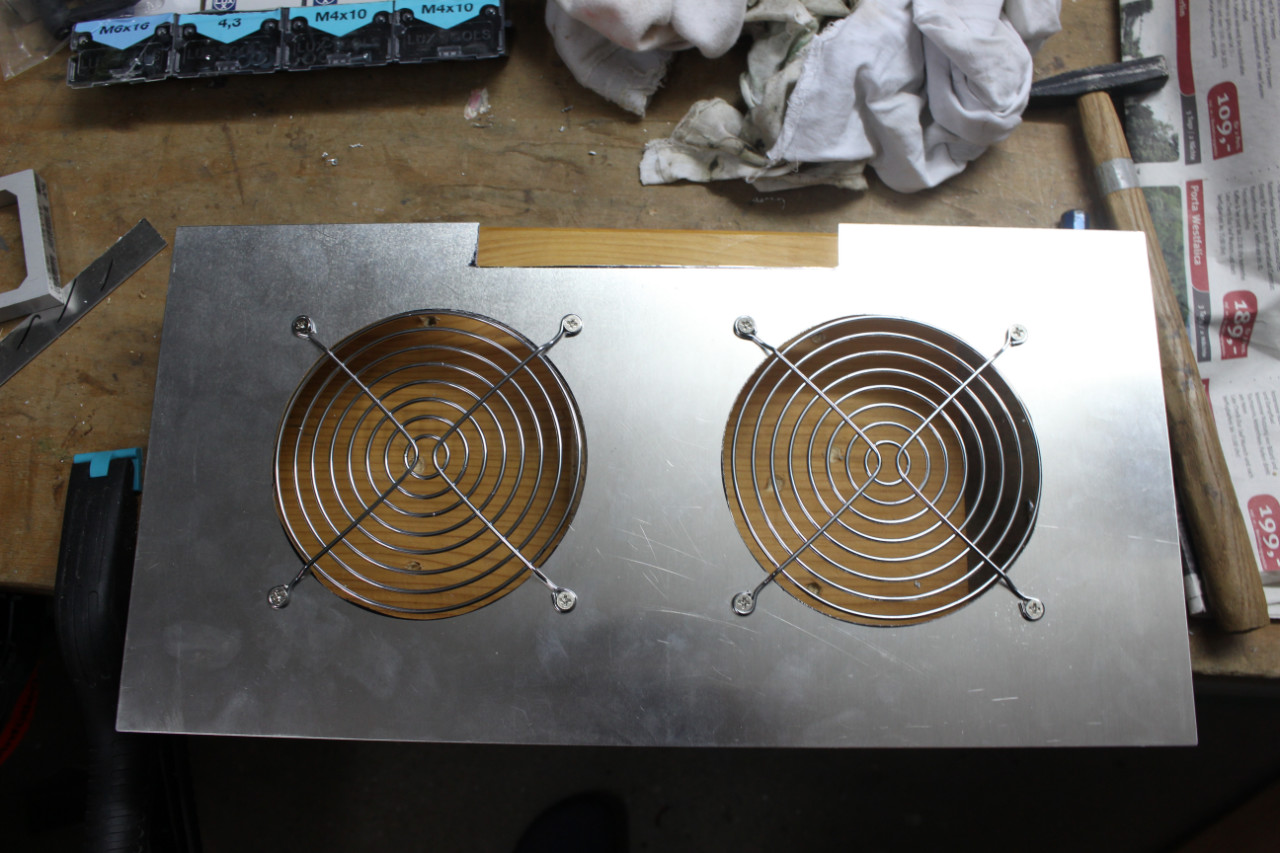
Fans mounted, ready to install the side panels:

I got 4 more days to get this done (and dusted. Can’t have aluminium dust blowing through a computer).
Tasks list
36/54 holes drilled
7/10 alu sheets ready for installation
7/10 alu sheets installed
PSU mount 
Mount mobo-plate:
0/6 holes drilled in acrylic
Cable management: 
Final assembly: in progress
6 Likes
Wow, that’s really cool - I enjoyed reading through your progress. I’m sure you’re already aware, but those extrusions will definitely hold up - we use them to literally build furniture at work (modular, for special events) - like 8’ bar frames that support heavy 1.5"-2" thick mdf/formica tops. The connectors wear over time with stress, but they are cheap/replaceable - and it’s likely you’ll prevent drunk 300lb men from leaning on it anyhow. We just insert acrylic panels/etc in the extrusion grooves as you noted you could have done, but affixing to the outside should give a more finished look. Good show!
1 Like
Update
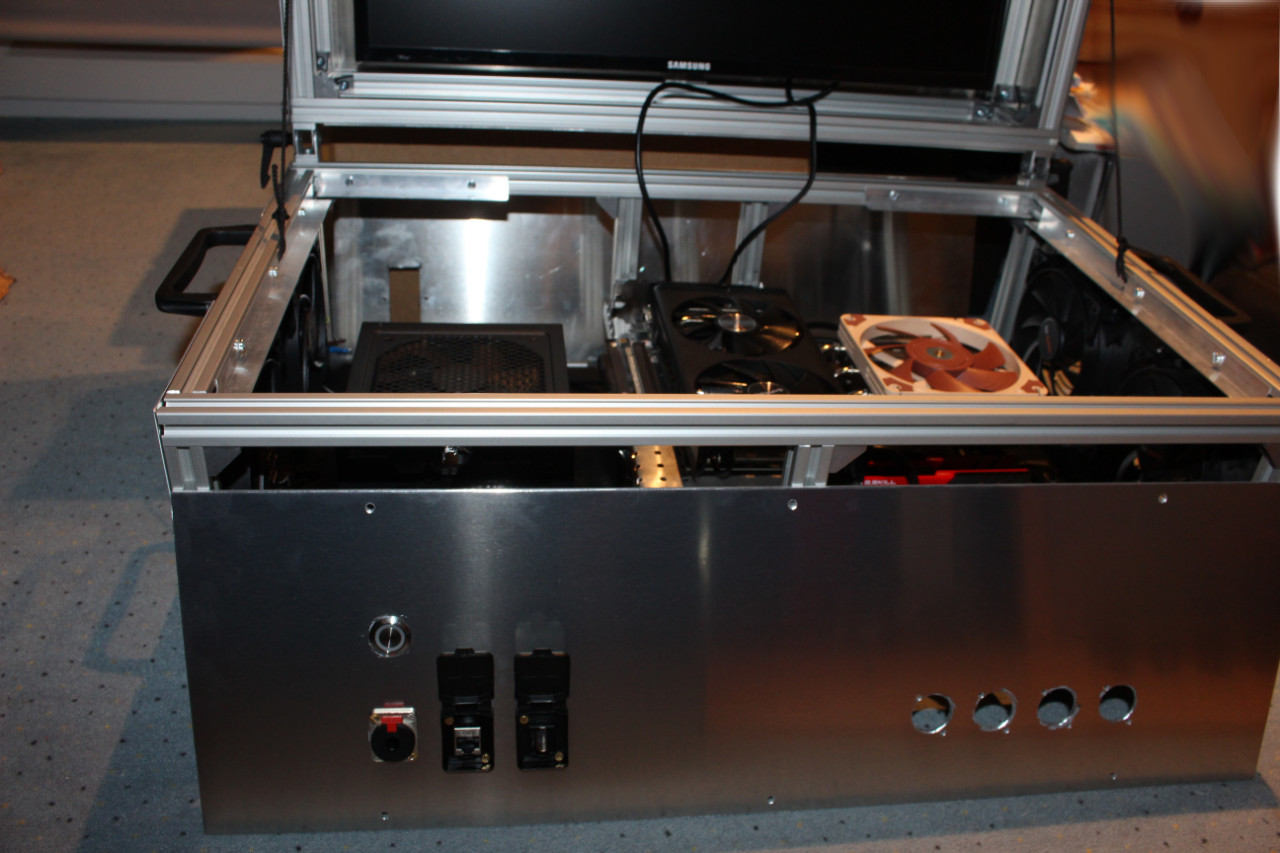
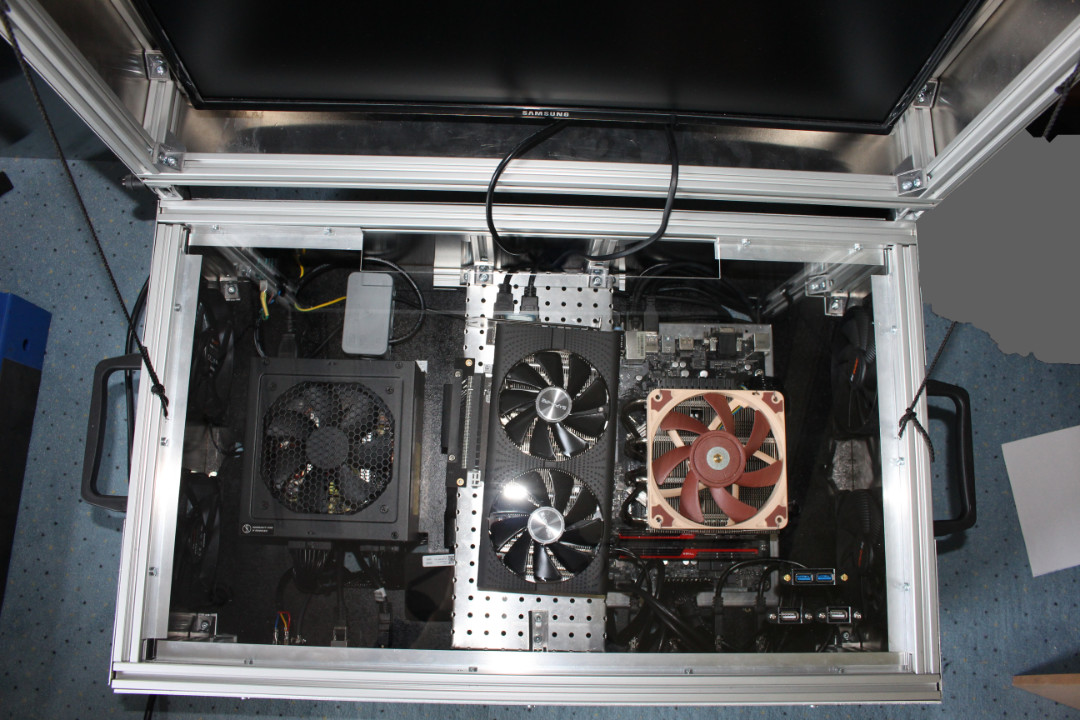
Final assembly is in progress.
PSU is mounted, mobo plate is mounted (with zip ties, for better or worse). What you see in the following picture, is how I kept the GPU-holder plate from crashing on the mainboard (yes, that is a 32mm socket, has the perfect hight).

Bottom frame complete, GPU in place (need to figure out how to hold it down), monitor PSU in place. Hidden from sight, the powerbutton and fan splitter for the intake fans are hooked up.

Lid assembly is complete. I may or may not have overlooked the need of the monitor mount to have one screw put it. Why that is a problem?
Because to take out the monitor, I need to remove no less than 17 screws.
A simple fix would be to drill one 10mm hole, problem is that I need to remove 16 screws to do that…

7 Likes
Damn boi that’s sexy af…
Congratulations!
I might’ve overlooked some posts but here’s a question: how about peripherals?
Will the mouse and keyboard stay on top of the acrylic? Wireless or wired?
1 Like
Will be wired.
4 USB 3.0 Ports go in the front panel (I hope to get that done this evening) and 2 more go in the acrylic.
And you missed the front panel right at the start 
I saw it, but still was curious about other things, like when you said about LAN parties, that you’ll carry this baby around.
Will you put the keyboard and mouse on the acrylic top? Or will you alwas need table space?
Oh, that is what you meant. For transport I will put them on the acryl, for use, depends.
1 Like
Update
Did not have time to update this, so you now get 3 days worth of effort in one final build log part of this thread.
I will report in on Sunday directly from field testing.
The 58 parts (I think) of the front panel:
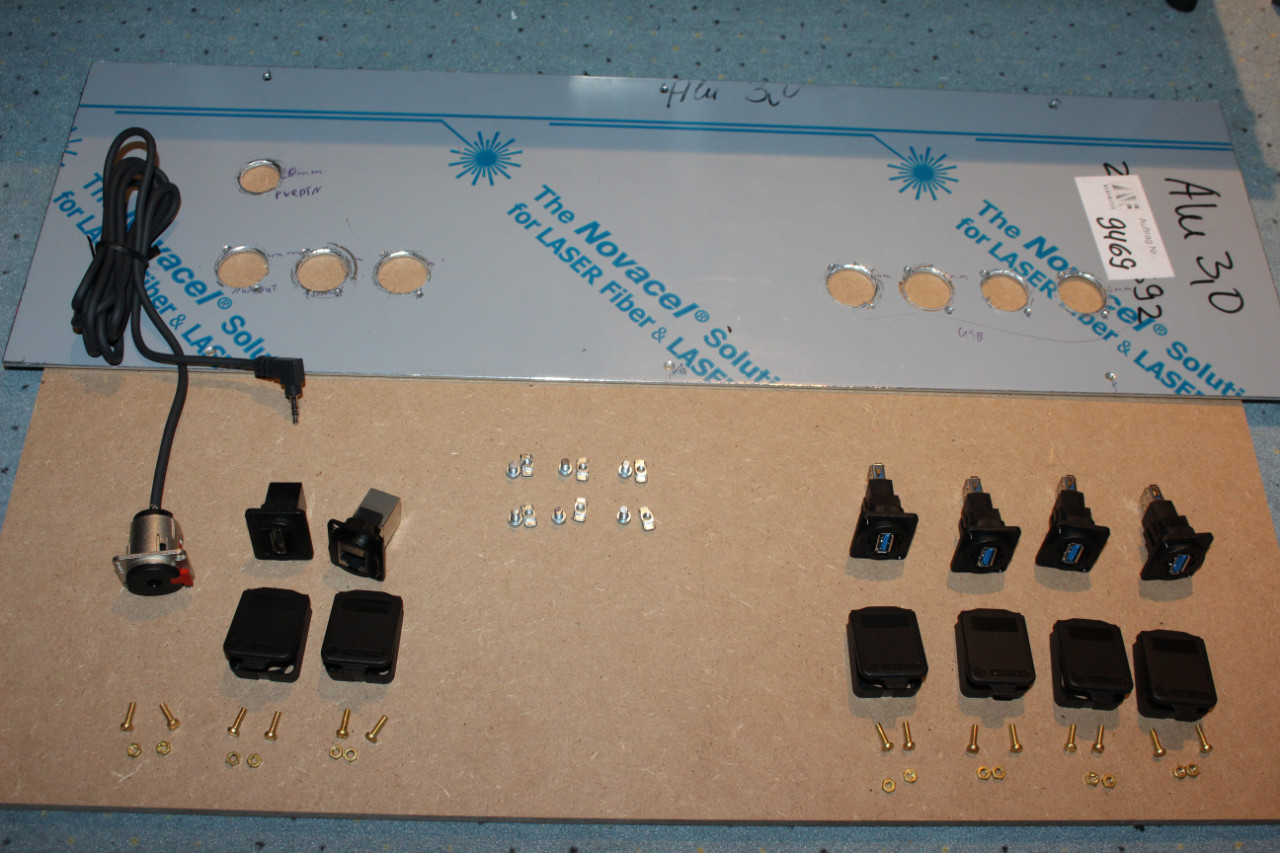
Partially assembled:
All connectors, covers and the button in place:
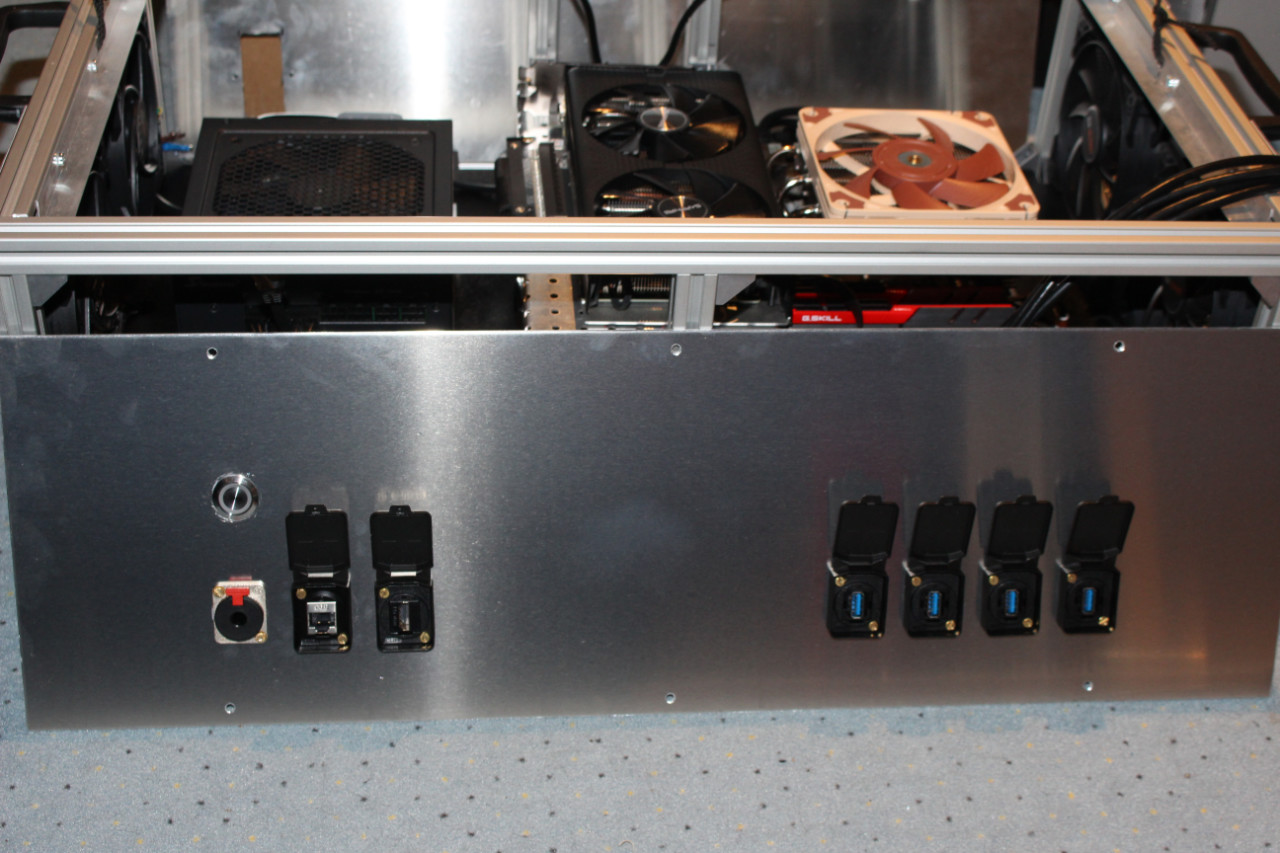
Cable mess before:
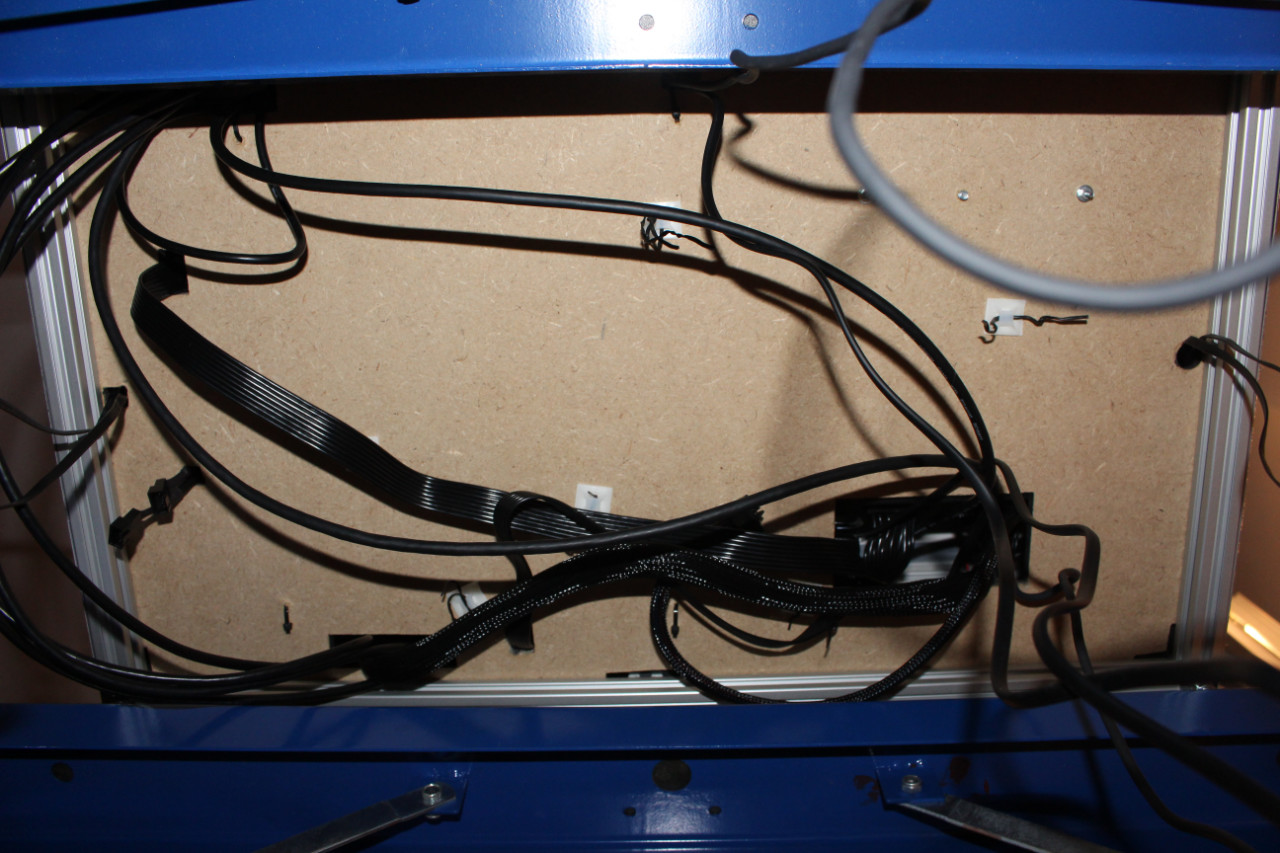
The somewhat organzied chaos now:
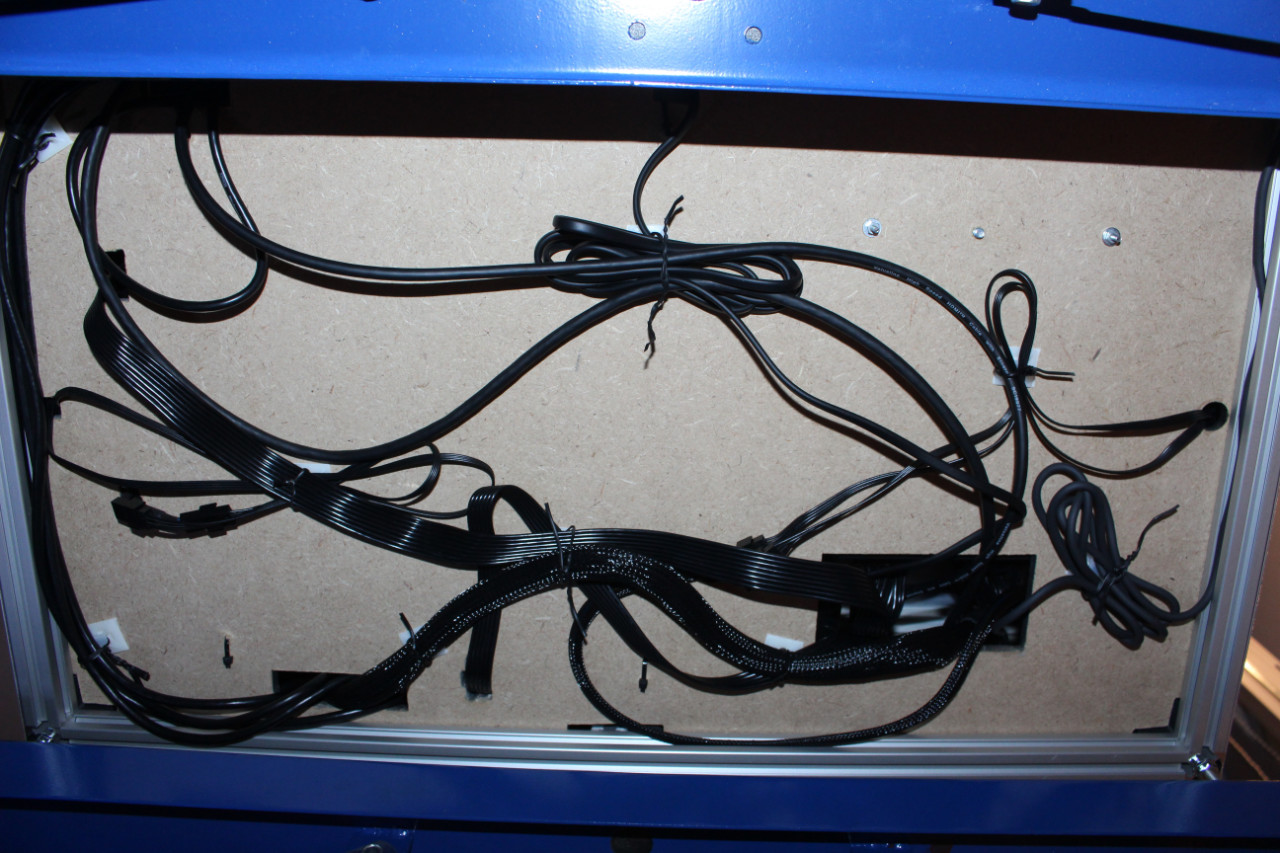
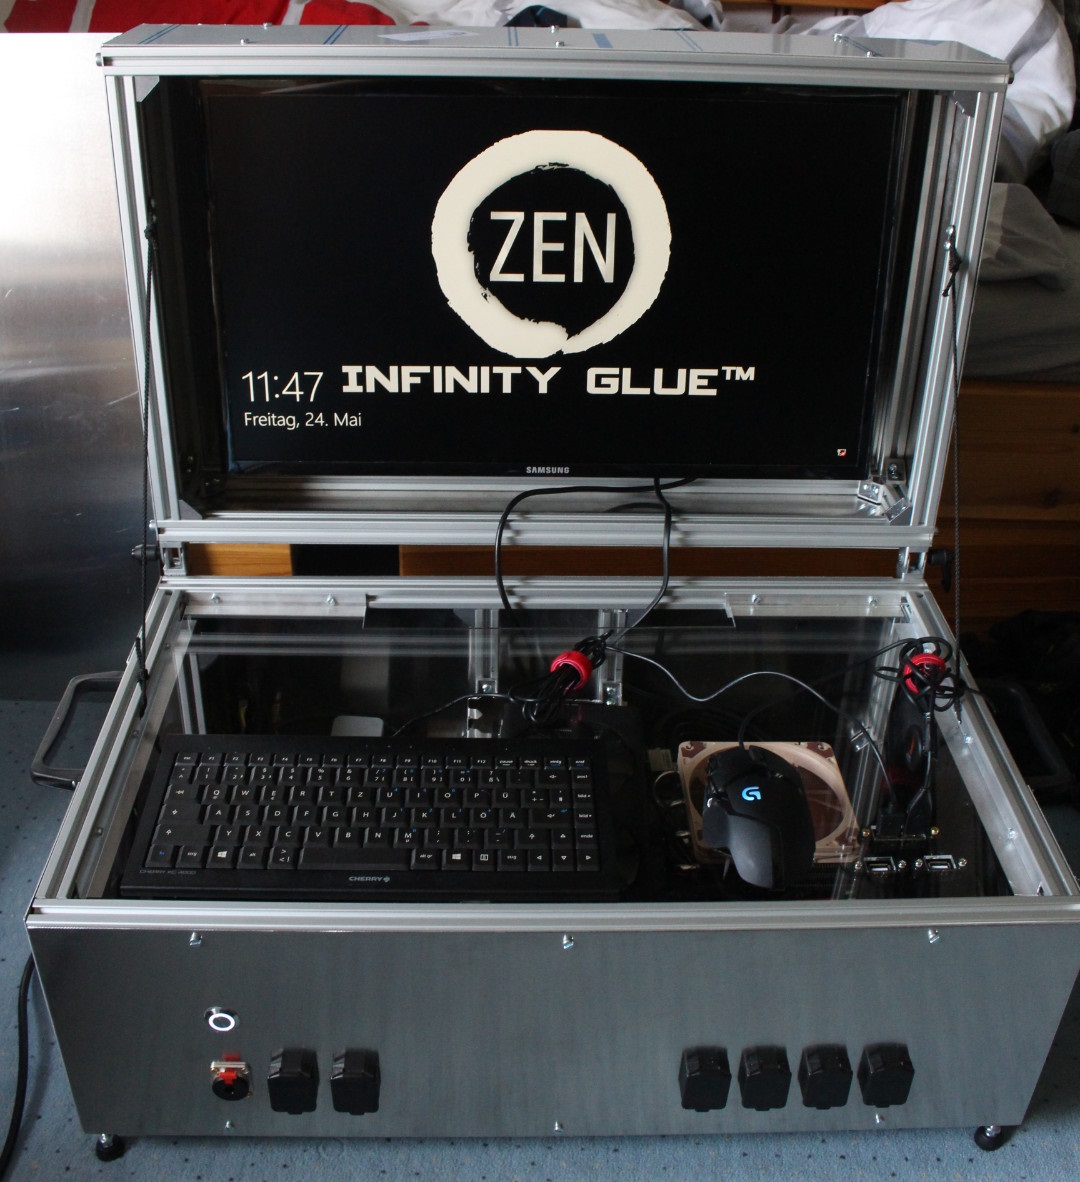
And the complete thing:
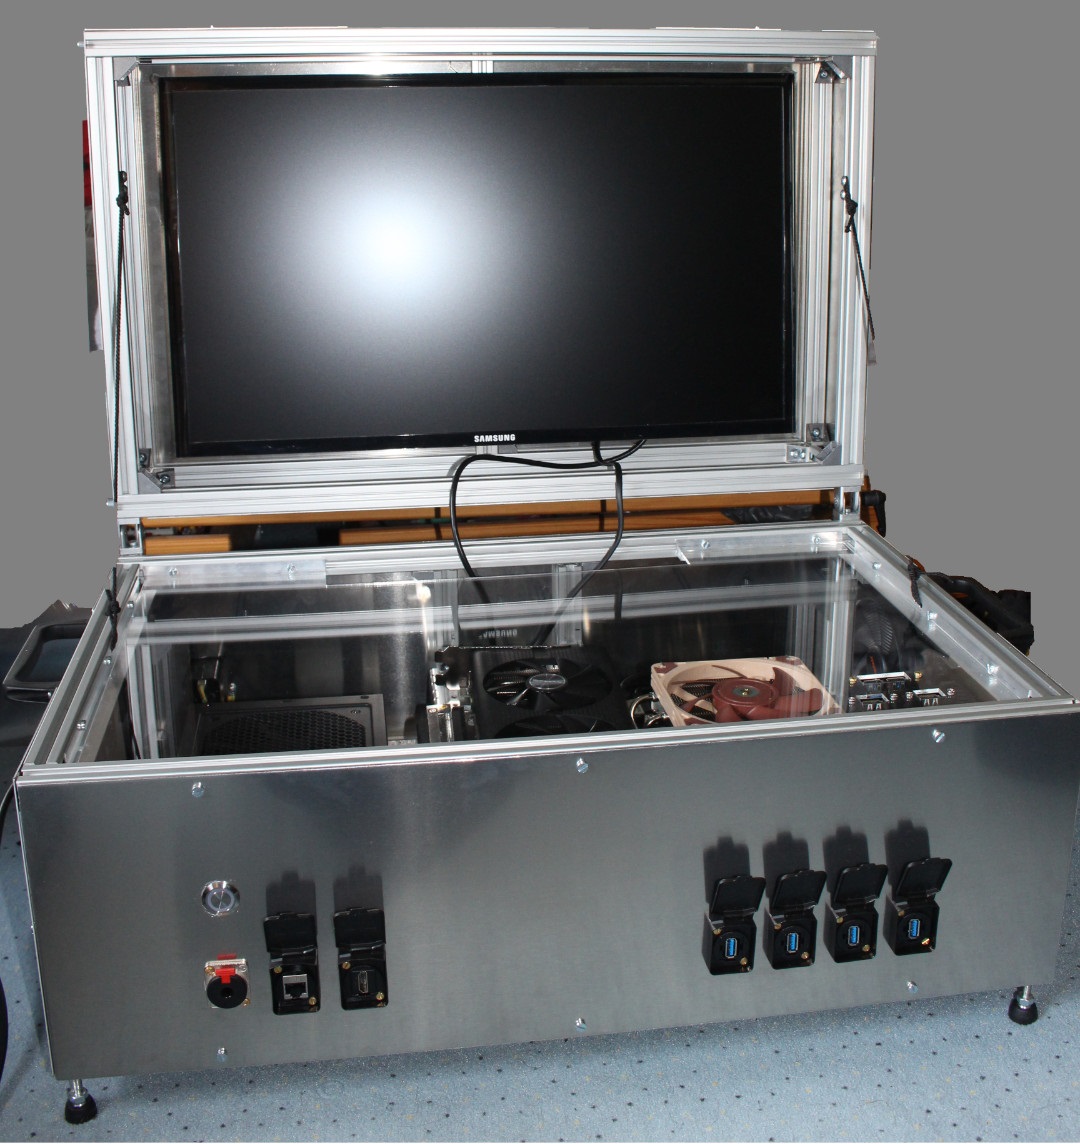
I like my lock screen:
Features
- 6.3mm front audio jack (that is it)
- User replaceable fuse
- Supports up to 24 inch monitors
- User serviceable parts inside and out
- To remove the monitor non-destructively, you need to remove 17 screws
- The front panel consists of 58 parts, 41 of wich are screws or nuts
- 4 Front panel USB 3.1 Gen1 (aka USB 3.0) connections
- To remove the mainboard, you need to remove all lower panels (28 screws)
- No RGB
- To remove the PSU, you need to remove the lid partially and the rear panel
- Can store Keyboard, Mouse and Mousepad in it
- Will probably break your fingers should the lid fall shut
- adjustable feet to prevent wobble
- Only 24.6 kg
- To take out the SSD, you need to remove the GPU
- 45 dBc idle (5 less than my main battle station…)
17 Likes
Project ryzen in a fox.
Sorry.
XD infinity glue
This is fuckin dank dude
2 Likes
Reporting in from LAN.

Everything is working, the clothes chest sized computer gets a lot of looks, questions and compliments.
No problems with stability (BIOS > Zen Options > Global C-States = OFF), temps are as expected:
Idle: 35°C CPU / 46°C GPU
Load (GRIP: Combat Racing and SC2): 50°C CPU / 60°C GPU)
Can’t really comment on noise as there are noisy PCs, Servers and Switches arround me. All I can say is: I can not hear my machine XD
The one thing I overlooked: Untreated aluminium is a finger print magnet. So I might degrease and clear coat the thing or wire brush (I’d rather not).
Also: The fact it is a somewhat closed setup with input filtering before PSUs and the internal audio cable beeing good quality running inside the alu extrusions means I have 0 audible noise on the headphones.
3 Likes
Notes
- The system worked as intended, job done.
- I did a few measurements, and at where I was sitting in front of it on the LAN, 45dBc (wich is 5dBc quieter than my main rig).
- Having 8GB RAM and 8GB VRAM makes it really long lasting, not bad for 600€ worth of PC.
- The front panel is absolutely perfect
- The rear panel could use 2 more screws
Part and Price List
Total: ~1360€
PC: ~675€
| Name | Count | Price |
|---|---|---|
| Ryzen 5 2600 | 1 | 153€ |
| ASRock B450M Pro4 | 1 | 74€ |
| Noctua NH-L12S | 1 | 50€ |
| GSkill TridentZ 2800 CL15 2x4GB | 1 | 62€ |
| Sapphire RX580 8GB | 1 | 200€ |
| SeaSonic M12II 520 Evo | 1 | 60€ |
| WD Blue SataM.2 500GB | 1 | 74€ |
Case ~370€
| Name | Quantity | ∑ Price | Note |
|---|---|---|---|
| 20x20 Typ6 Alu Extrusion | 10 Meters | 47€ | |
| Angles | 44 | 93,20€ | |
| Handle | 2 | 6,40€ | |
| Feet | 4 | 10,40€ | |
| Hinge | 2 | 30,80€ | |
| Profile Nuts | 24 | 8,40€ | |
| Laser Cut Acryl | 1 | 37€ | |
| Neutrik Locking TRS Jack | 1 | 6€ | |
| 3.5mm TRS silicone cable | 1 | 2,70€ | |
| M3 5mm Standoff | 9 | 1€ | |
| Neutrik D-Form Cover | 6 | 8€ | |
| HDMI cable 1m | 1 | 1€ | |
| HDMI cable 1m 90° | 1 | 4€ | |
| USB3.0 A-A | 4 | 12€ | |
| Cliff RJ45 Throughpanel | 1 | 7,15€ | |
| C14 Connector with noise filter and fuse holder | 1 | 12€ | |
| CAT 7 1m | 1 | 2€ | |
| SchuKo to C13 Cable 5m | 1 | 5€ | |
| Cliff HDMI throughpanel | 1 | 6,30€ | |
| DeLock USB3.0 | 1 | 6€ | |
| Cliff USB3.0 A-A | 4 | 31€ | Throughpanel USB3.0 |
| Ergotron NeoStar ULD | 1 | 16€ | Monitor mount |
| Distribution Box | 1 | 3€ | |
| Wago Screwless terminals | 1pack | 10€ |
Misc: ~323€
| Name | Quantity | ∑ Price |
|---|---|---|
| USB 2.0 Extension | 1 | 2,80€ |
| bequiet PureWings2 PWM 1500RPM | 4 | 31€ |
| Cooltek Fangrill | 4 | 6,52€ |
| DeLock USB 2.0 headers | 1 | 4,90€ |
| Dimas Tech MicroATX Tray | 1 | 23,60€ |
| Nanoxia PCIe Riser 20cm | 1 | 35€ |
| Noctua 2x Y-Cable 4pin | 1 | 6€ |
| Phobya Switch | 1 | 10€ |
| Phobya Cable | 1 | 3€ |
| Startech Screw kit | 1 | 24€ |
| Samsung LS24F350HUXEN | 1 | 125€ |
| 5A Fuse | 1 | 0,18€ |
| Cherry KC4000 | 1 | 25€ |
| M4 Screws | A lot | ~20€ |
| M5 Screws | 2 | 0,10€ |
| M6 Screws | Forgot | 2€ |
Closing Thoughts
I am making a note here, huge success.
Would I do it again? For myself, I can just swap hardware.
For others? Only in exchange for money.
7 Likes
This is fucking neato
5 Likes