Google is awe- I mean sucks right? Why not unlock these by default 
So we are probably all familiar with the google camera right? Well its an exceptionally powerful piece of software if you can tweak its values. You may not know this but there is an entire page dedicated to GCam ports. I tested the stock version of the camera and compared it to open camera. I decided I liked google camera better. See the thread: Open Camera vs Google Camera (Software that makes or breaks the camera)
I dont want to repeat everything on that page so check it out for yourself
Device:
Pixel 3 XL
ROM
Lineage OS 17.1 (base) (I havent compiled 18.0 from source yet) (I compile my own ROMs)
GCam Mod:
Cstark 7.2 (latest) (8.1 crash)
What is the lib patcher?
Libpatcher - is a custom setting where you can set all the settings to your liking
Radius Temporal changes the graininess of the image by affecting noise, the higher the image is more blurry and less noise, the lower the more noisy, but more detail
Tone Curve is where you can adjust dark points, white points, shadows, highlights. It is recommended to enable and leave the default values or tweak them (advanced users)
Sharpness allows you to control the sharpness of the image. Zoom in for low-light shots, and zoom out for selfies.
Luminance Noise Reduction is what controls the “graininess” in images caused by high ISO. Decrease it to get more detail at the expense of high noise, or increase it if the noise is unacceptable to you
Color Noise Reduction: Controls color spots. There is usually no need to adjust it as this will not improve the quality, but you can increase it slightly if you see colored spots in the dark. Too much chroma noise can cause a decrease in saturation. Also known as color noise. Be careful with this setting it can mess with the fine details of an image.
Contrast settings allow you to control the contrast of the image. Increase it if you want darker shadows, and decrease it to make it brighter is the general idea. This is again a personal preference
Saturation is what allows you to control the saturation of the image. Increase it if you want more saturated colors in your photos. Obviously decrease if your HDR is getting too saturated. This is again a personal preference
Now there are some advanced settings. These affect the morphological processing (Image Processing Topic - More info here) Naturally thats a very basic overview. I took the course while finishing up my engineering degree. It was difficult stuff past the basic level. I wont get into what these settings do beyond a decent generalization.
Warning to all these settings can absolutely have a drastic negative effect on your images. A lot of testing would be necessary by the end user 
Luminance noise reduction levels
Level 1 (Detail) changes the photo very slightly, slightly smoothing out small elements in the image.
Level 2 (Rough Surfaces) seriously alters the image by smoothing grain
Level 3 (Edges) doesn’t change much. Smooths edges slightly
Level 4 (Smooth Surfaces) radically alters the image by making it posterized by smoothing out large areas of the same color. Avoid magnification over 1.0
Color noise reduction levels
Level 1 (Detail) fine textures, but the same applies to rough details
Level 2 (Rough surfaces) fine textures, but the same applies to rough details
Level 3 (Edges) Edges are mainly defined by the contrast between one object and another
Level 4 (Smooth Surfaces) Smooth surfaces are generally uniform areas of the image. Like wallpaper with few small details
My Settings
Now I have done A LOT of testing on my phone, with my case (affects light angles coming in slightly) and just about everything I can to nail these in for my device and my tastes so please dont just copy and paste. This is more of an informative post.
Libpatcher Switches:
Force System Noise Model (I tweaked the tweaked one but I cant post that code (license issues)) ON
Disable Dehave ON
Sharpness: 1.13
Saturation: 1.21
Global Chroma Denoise: Set to wavelet
Global Luma Denoise: Set to wavelet
Wavelet Luma Denoise Settings:
Level 1 - 0.875
Level 2 - 0.875
Level 3 - 1.0
Level 4 - 1.125
Wavelet Chroma Low Frequency Denoise Settings: (556 THz - 792 THz)
Level 1 - 1.0
Level 2 -1.0
Level 3 - 1.1
Level 4 - 1.2
Wavelet Chroma High Frequency Denoise Settings: (403 THz - 555 THz)
Level 1 - 0.875
Level 2 - 1.0
Level 3 - 1.0
Level 4 - 1.3
Those work far better for me and ive noticed my pictures have less sports
Tips:
If you notice a certain color of spots on your low light photos. Check its frequency spectrum. Look where its at in the photo and go to the specific wavelet reduction setting and tweak it. See if you can remove it. More often than not these settings are used to improve astrophotography, low light and high detail images.
My sensor has more higher frequency color noise than others. Ive seen some XDA users where they had to turn down denoise. It really all depends on a lot of stuff. Its fun to tweak and squeeze out what you can.
YMMV
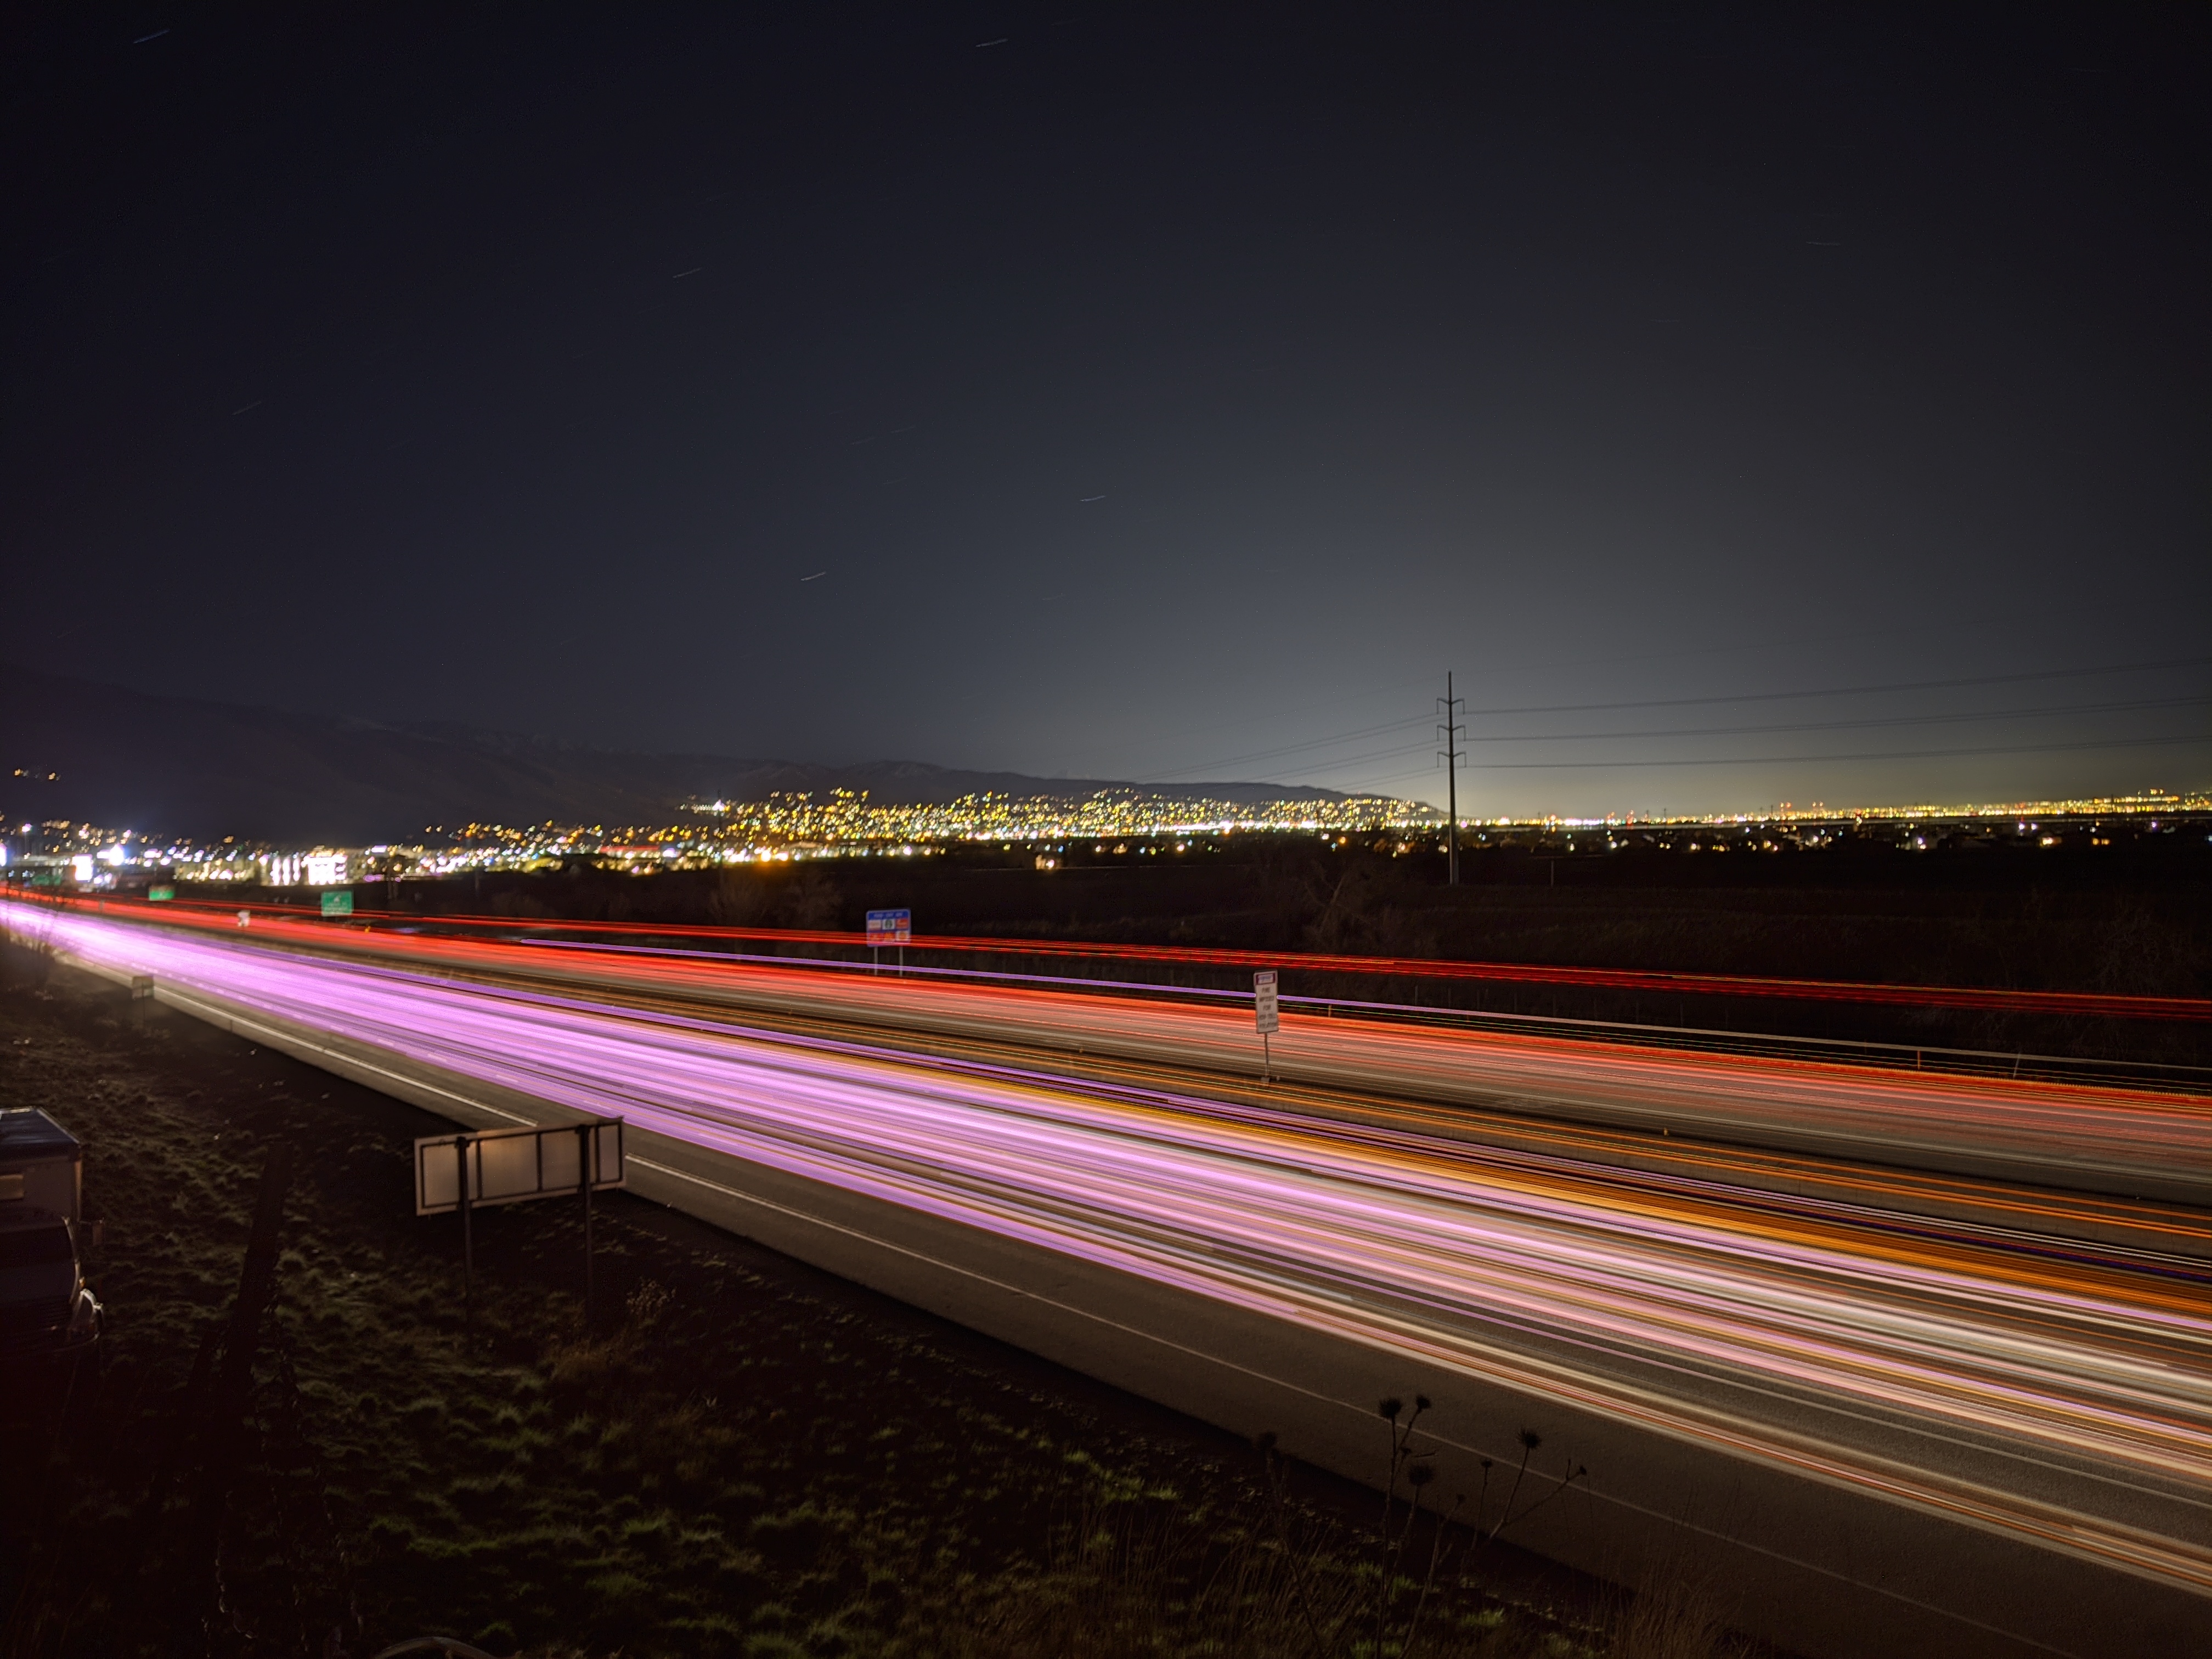
Will post occasional pics displaying some of the modded apps performance on occasion
Why didnt your wavelet settings work for me
- Factors that affect settings
- Your phone
- When it was made
- The chip itself
- The silicon in your sensor
- Ambient weather conditions
- The image processing firmware on the Pixel Visual Core
- Other properties of silicon unique and intrinsic to your device
FAQ
Why are your colors listed as frequencies?
- Light is an electromagnetic phenomenon and as an RF engineer its easier for me to refer to spectra as a frequency but one could easily refer to it in wavelengths or color (but color wont be accurate as thats up to perception)
What the f**k are wavelets?
- A wavelet is how we define a center frequency and some deviation. We use wavelets because a color is not just one frequency its a range see here : Spectral color - Wikipedia Its also an entire subset of mathematics used by anyone who works with the spectrum (i.e RF engineers, optical engineers (fiber stuff), biomedical engineers). They are helpful because we can take the average of a color spectrum (say blues) and convolve it with the signal to find the center frequency of blue or the blues in a subset (image). It basically the magic behind the IM processing math.
Do I need to understand light/color physics aka Photonics to do this?
- LOL no but a basic informative overview is a good thing to have when tweaking.
Why did you do this?
- For fun