Ohai :3 i’m Platypussy; I’m half pink, half cat, half platypus, and half Chief of security Odo (DS9) …yes, four halves, for the double dose of ridiculousness.
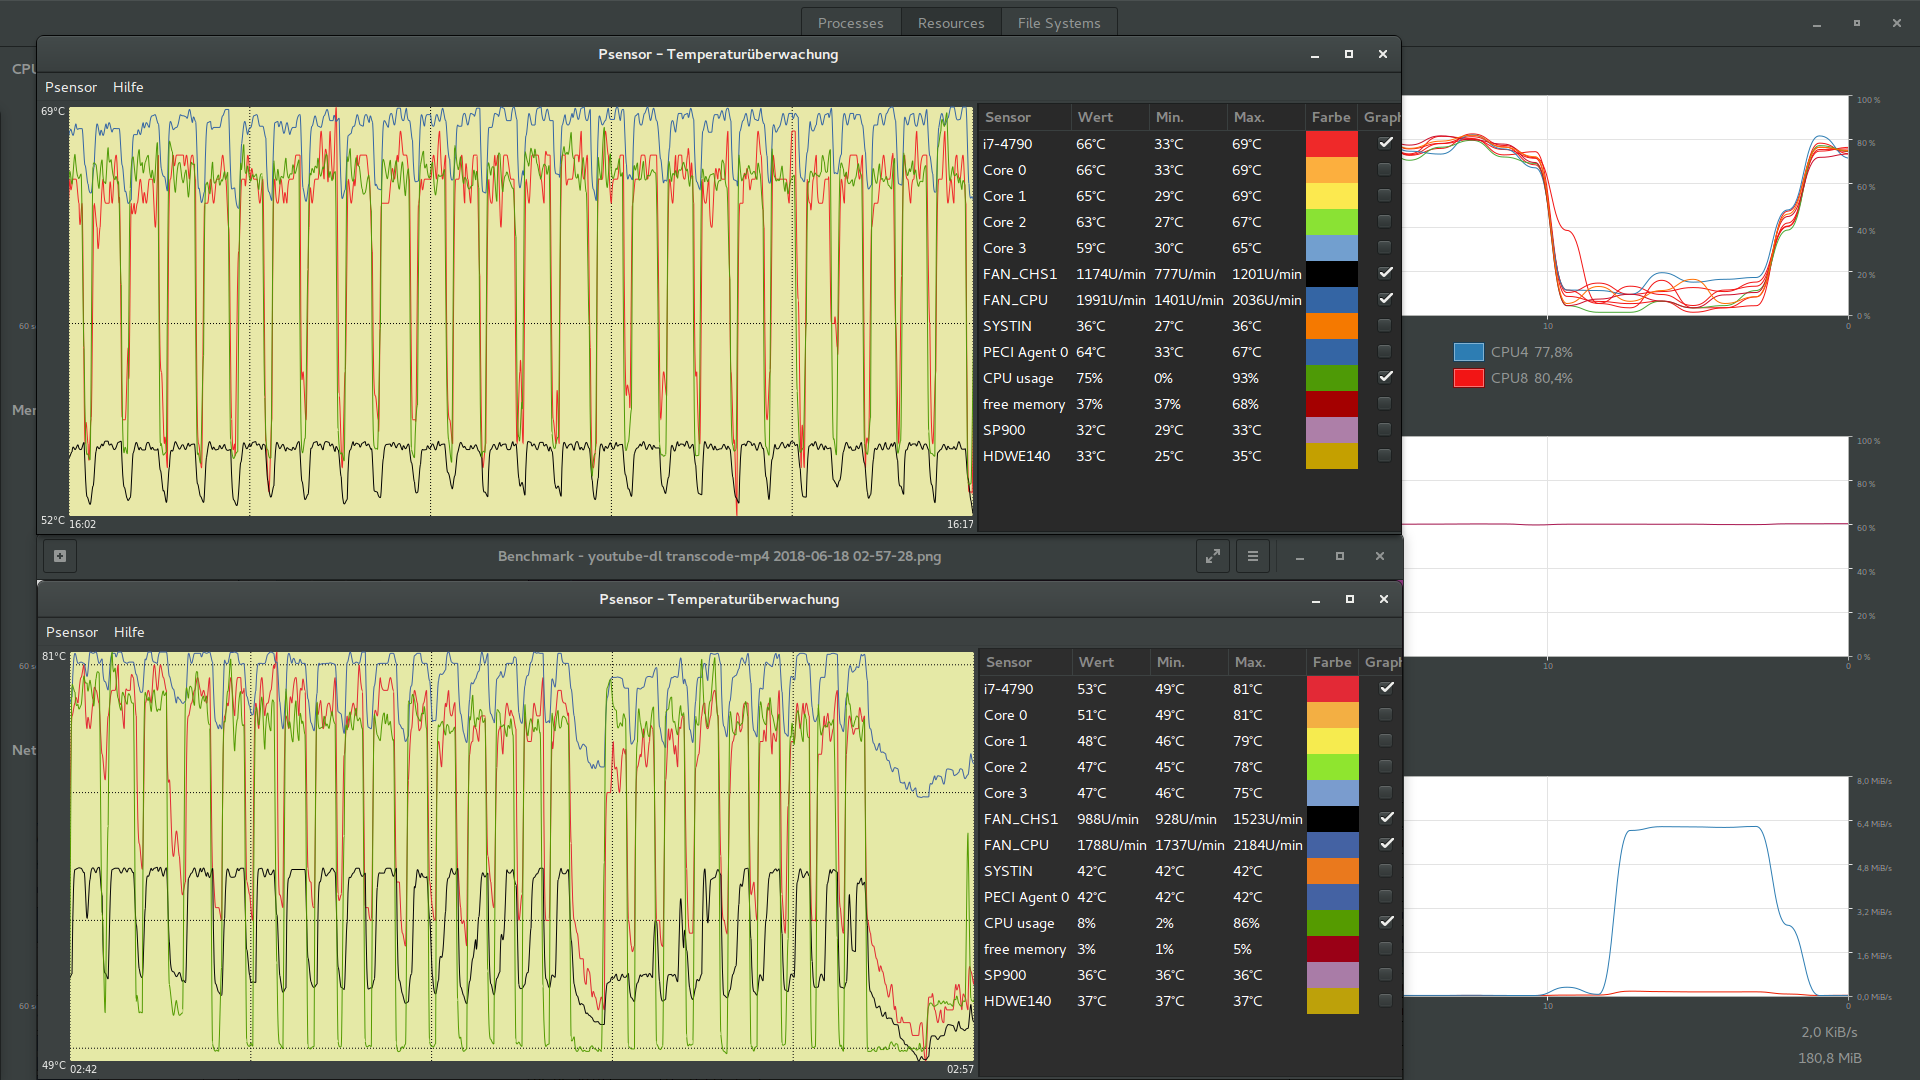
Here’s my problem: workloads like transcoding to mp4 (e.g. “youtube-dl --recode-video mp4”, multithreaded) regularly pushed my 4790 over the 80°C mark:

…I’m on a very tight pensionist budget, so every €uro counts  …this is what i did:
I bought a Mercury-free Galinstan-fever-thermometer (Galinstan is a liquid metal alloy, patented by the German “Geratherm” company [afaik{?}]; it’s GALlium+INdium+STANnum[Tin]) …and some left-over high temp silicone glue from some guys on ebay
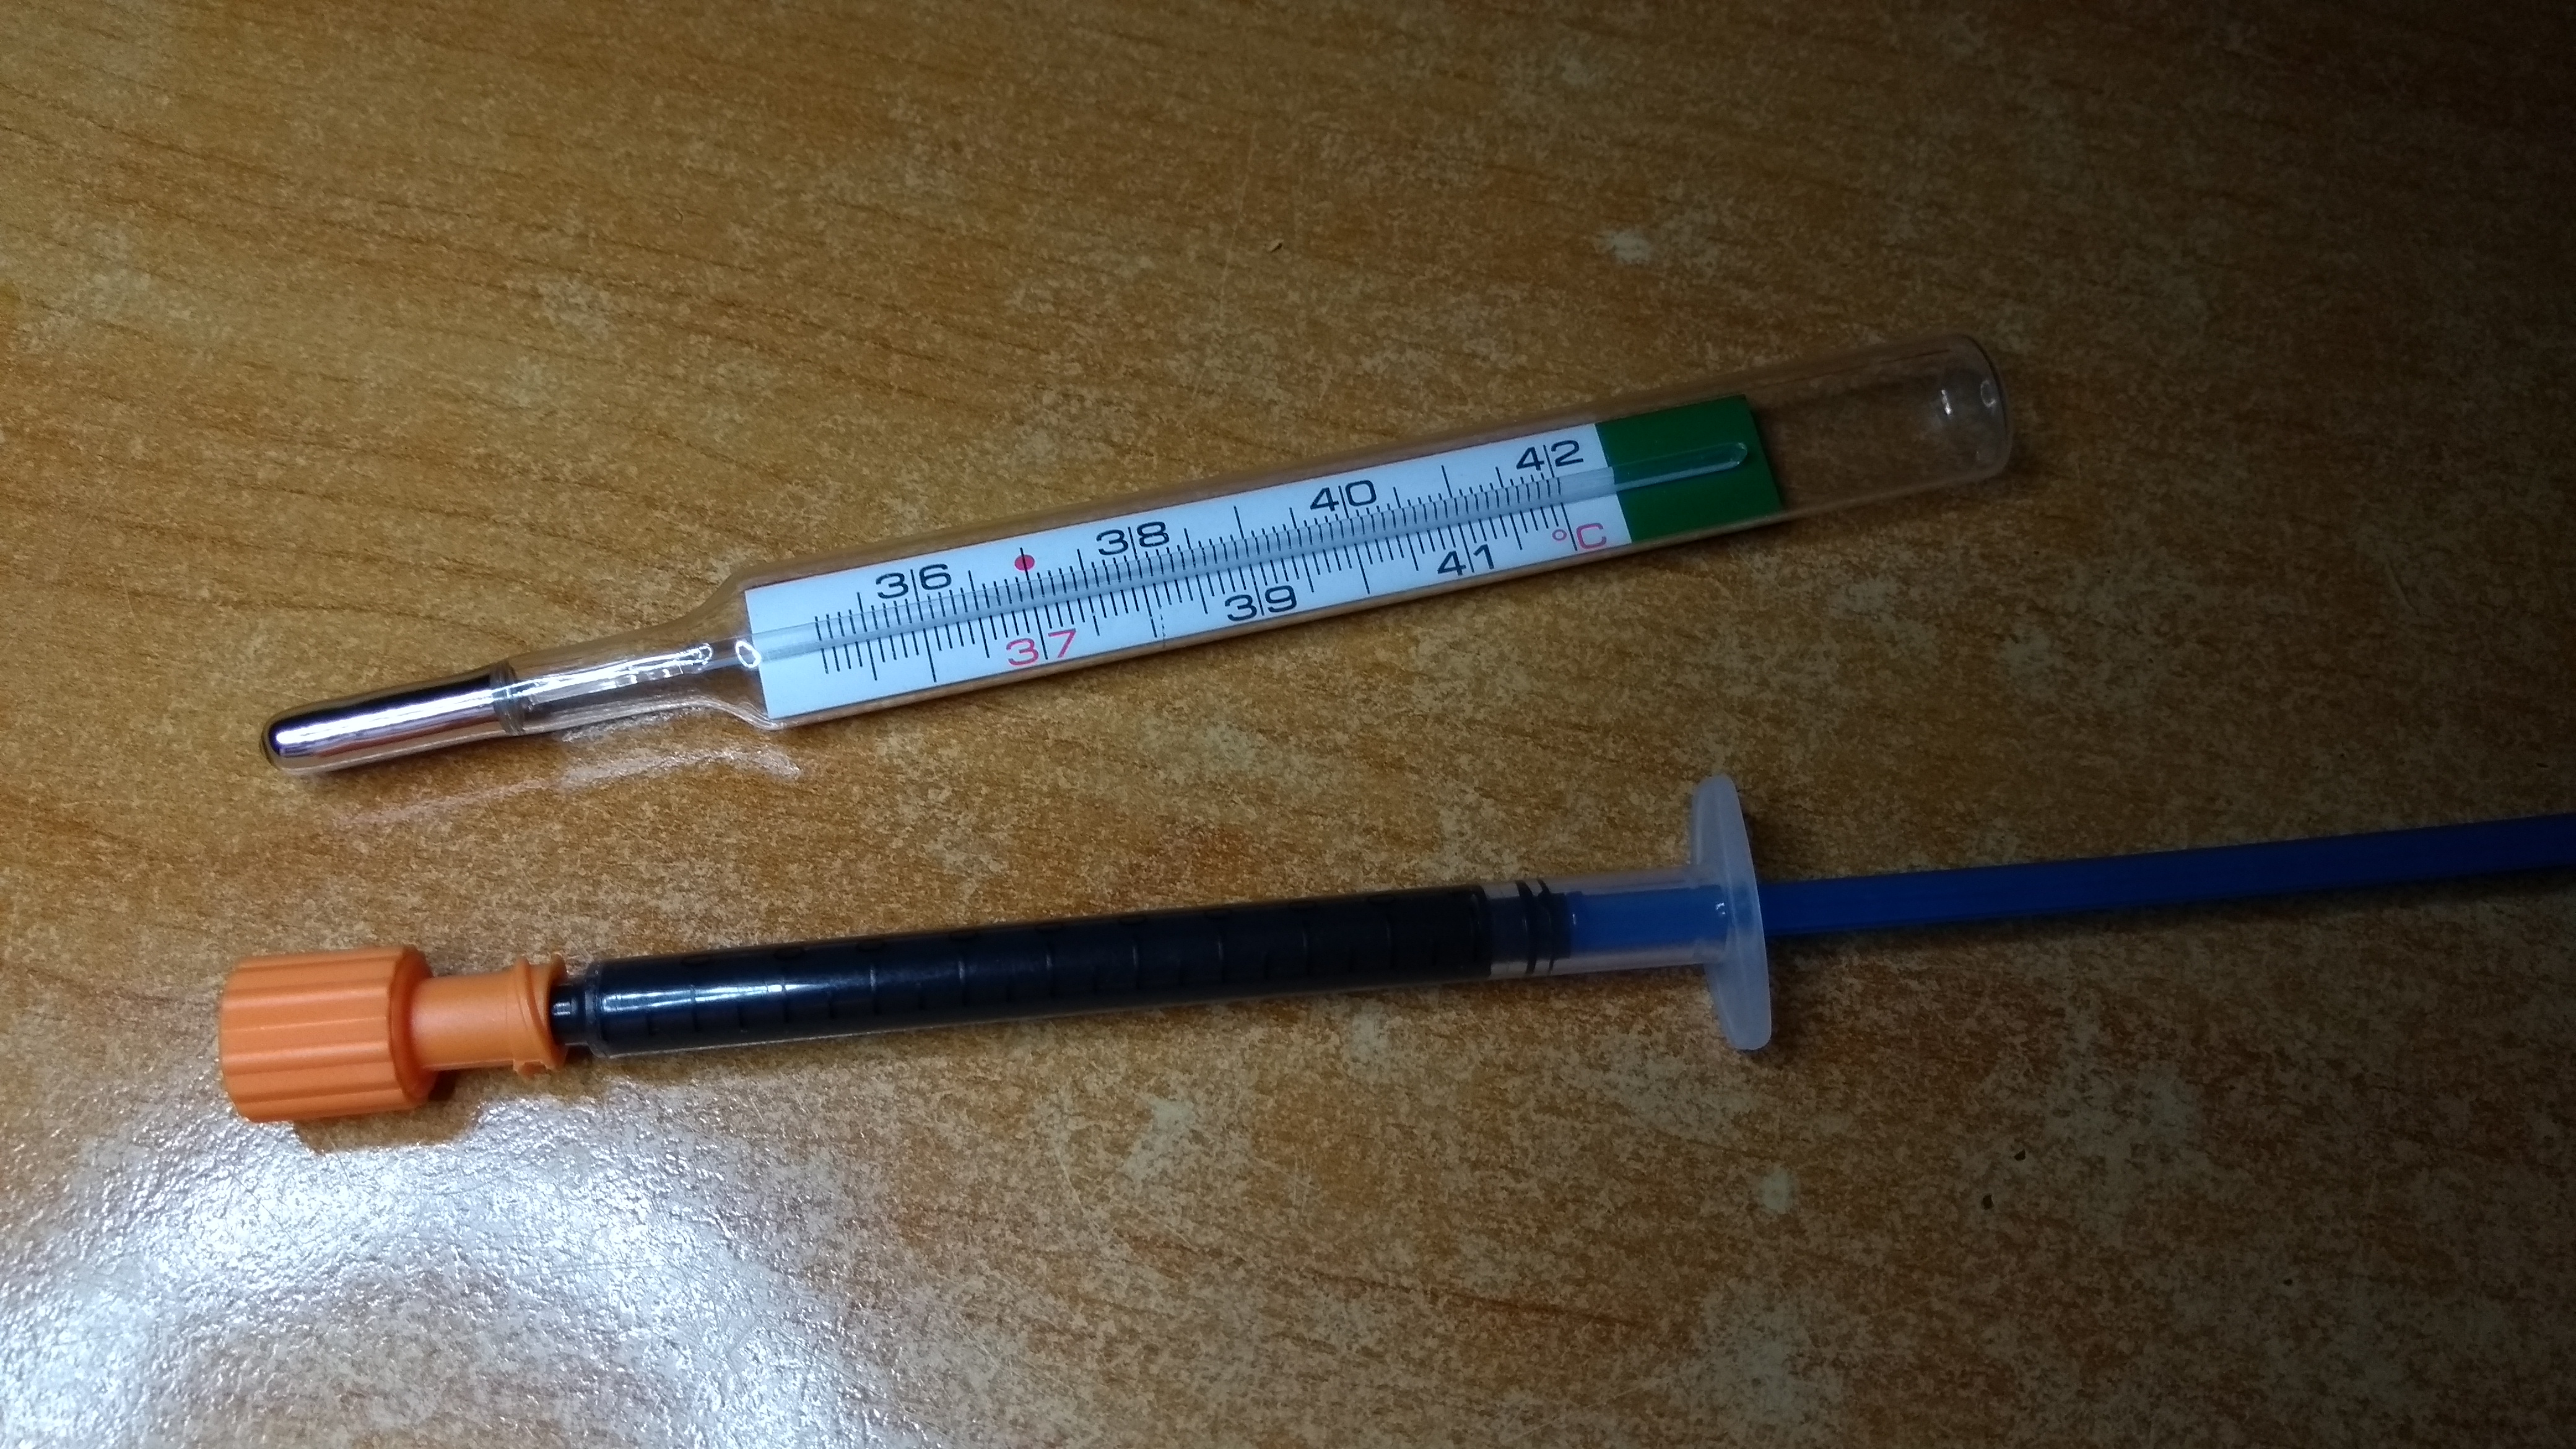
I carefully cracked the thermometer and extracted the liquid metal alloy with a syringe and a blunt needle


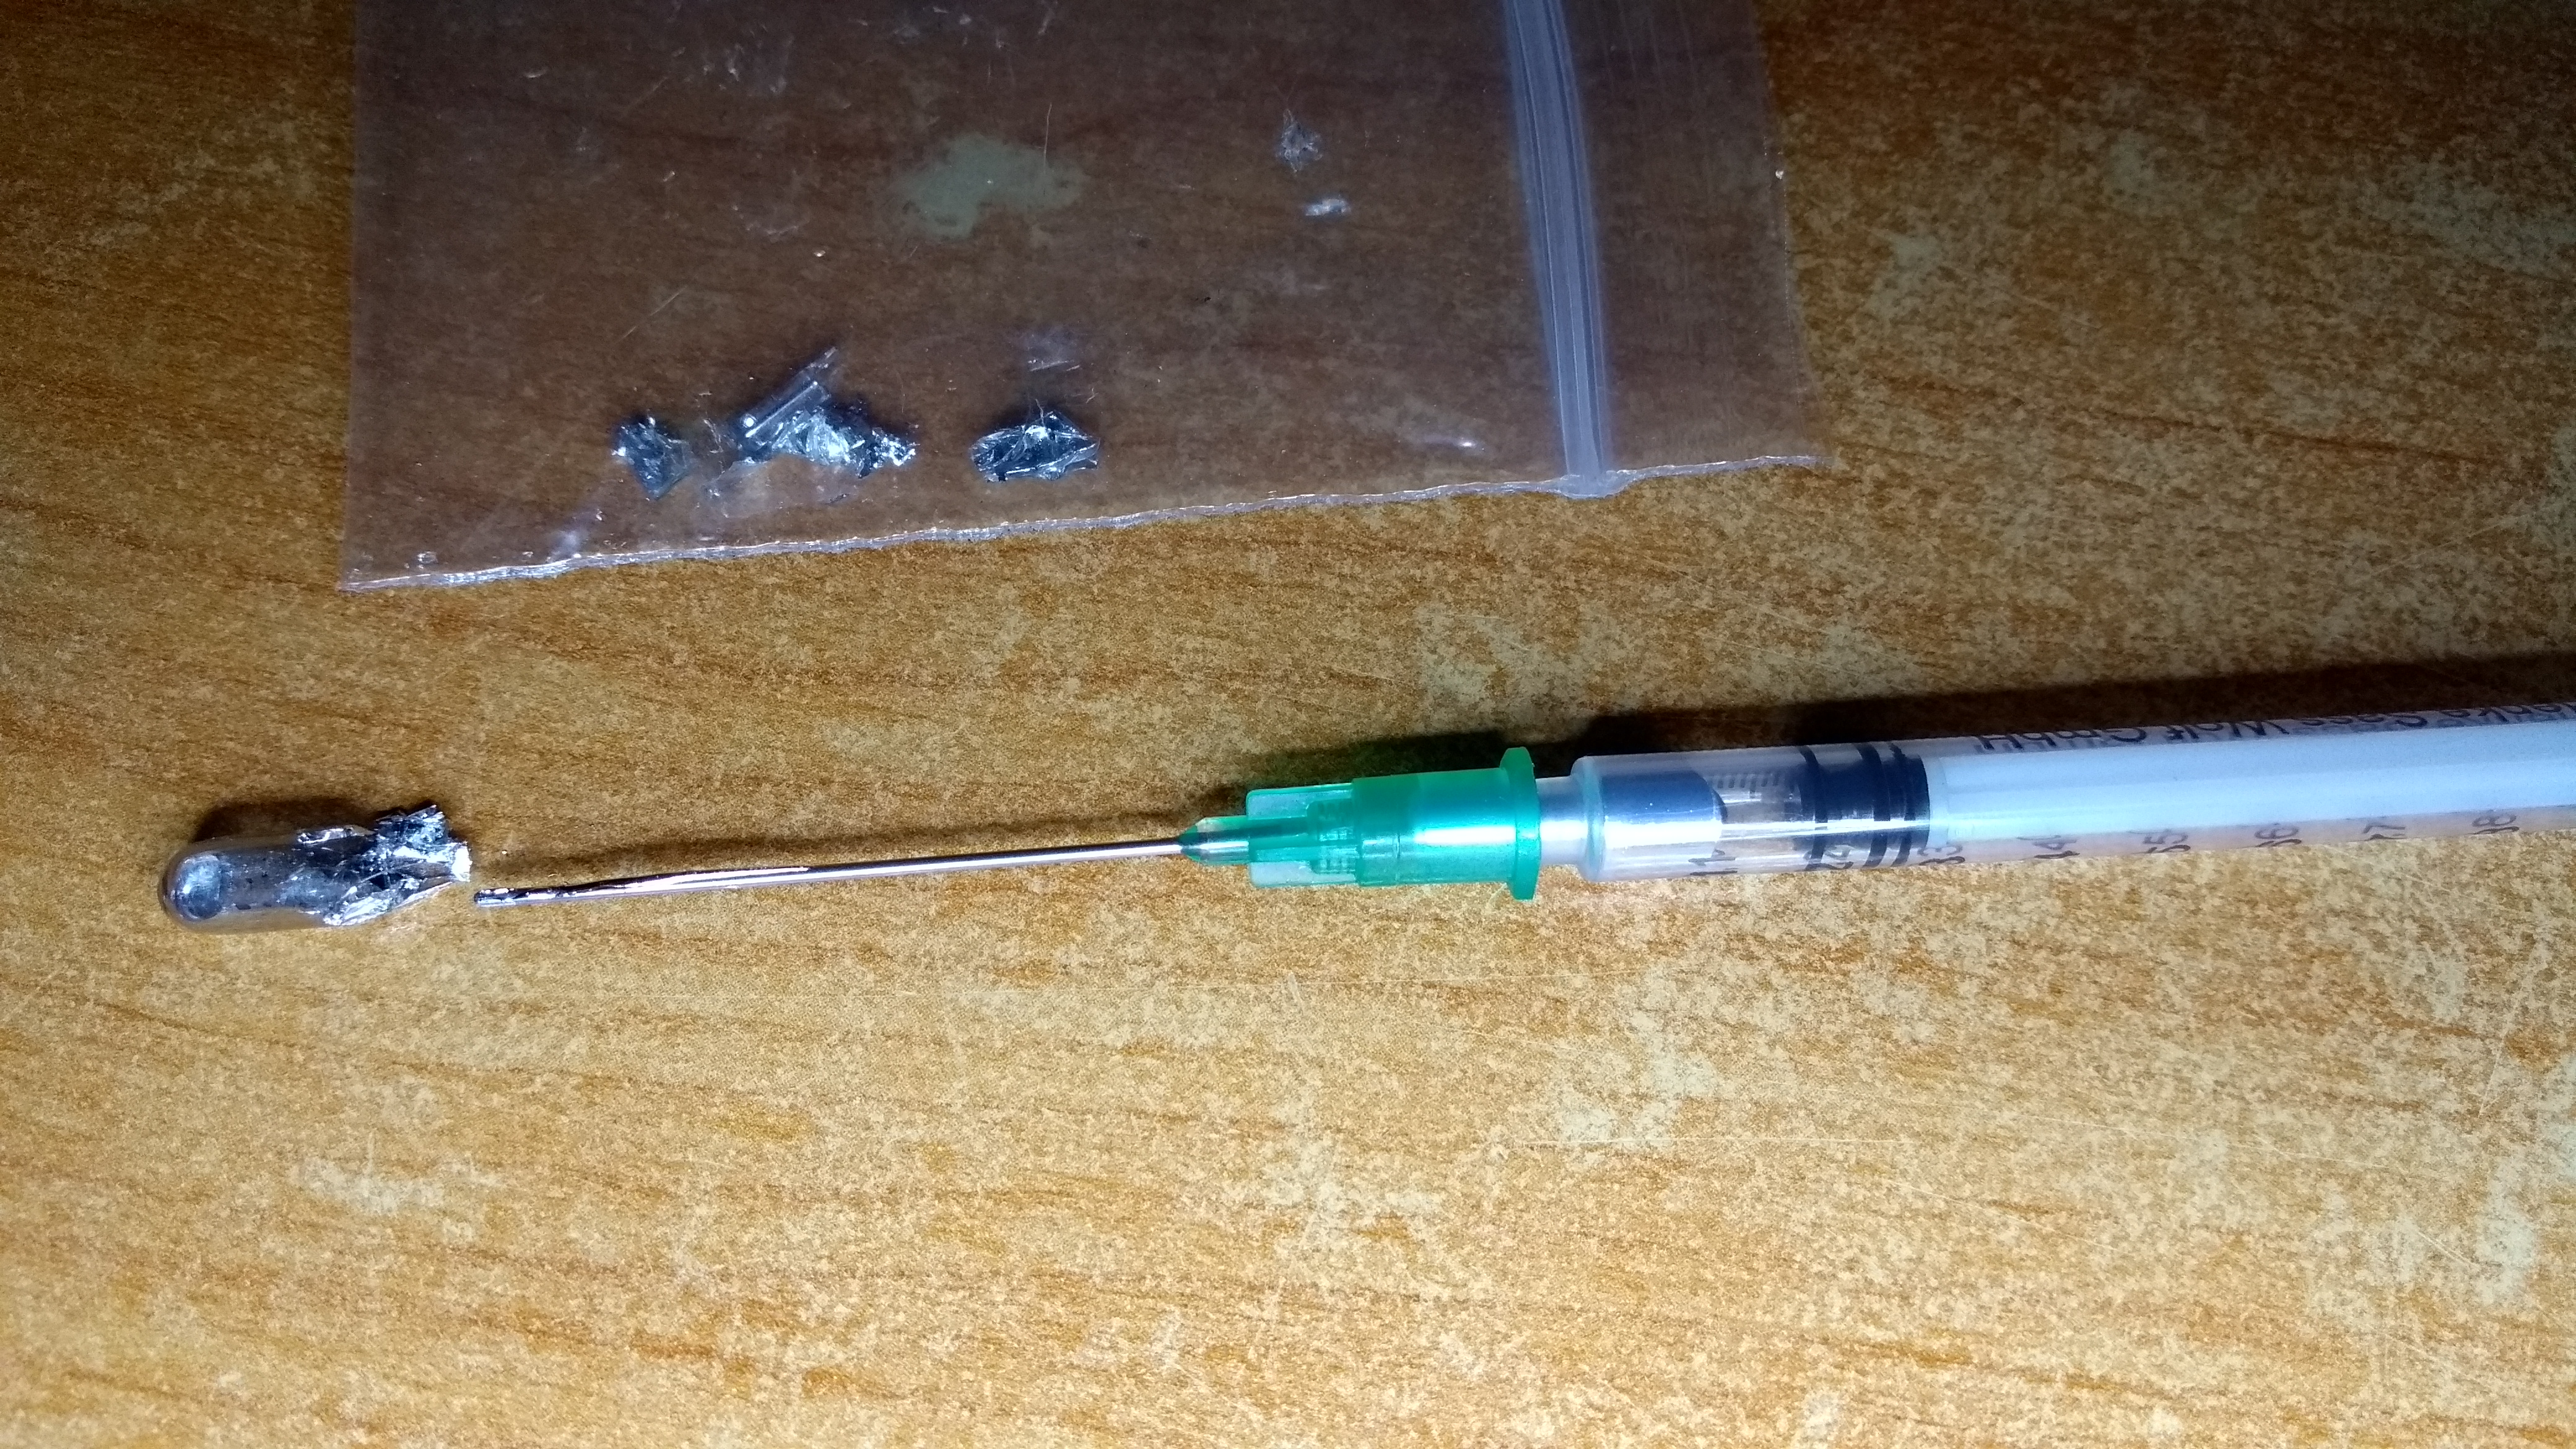
…i extracted about 0.15ml of Galinstan alloy from that thermometer …and thanks to the wisdom of the metric system, yeah, guess what …that’s exactly 0.15cm³ …its density is about 6.44g/cm³ …voila, that’s about 1 gram, and 3 € cheaper than * cough…Conductonaut…cough *
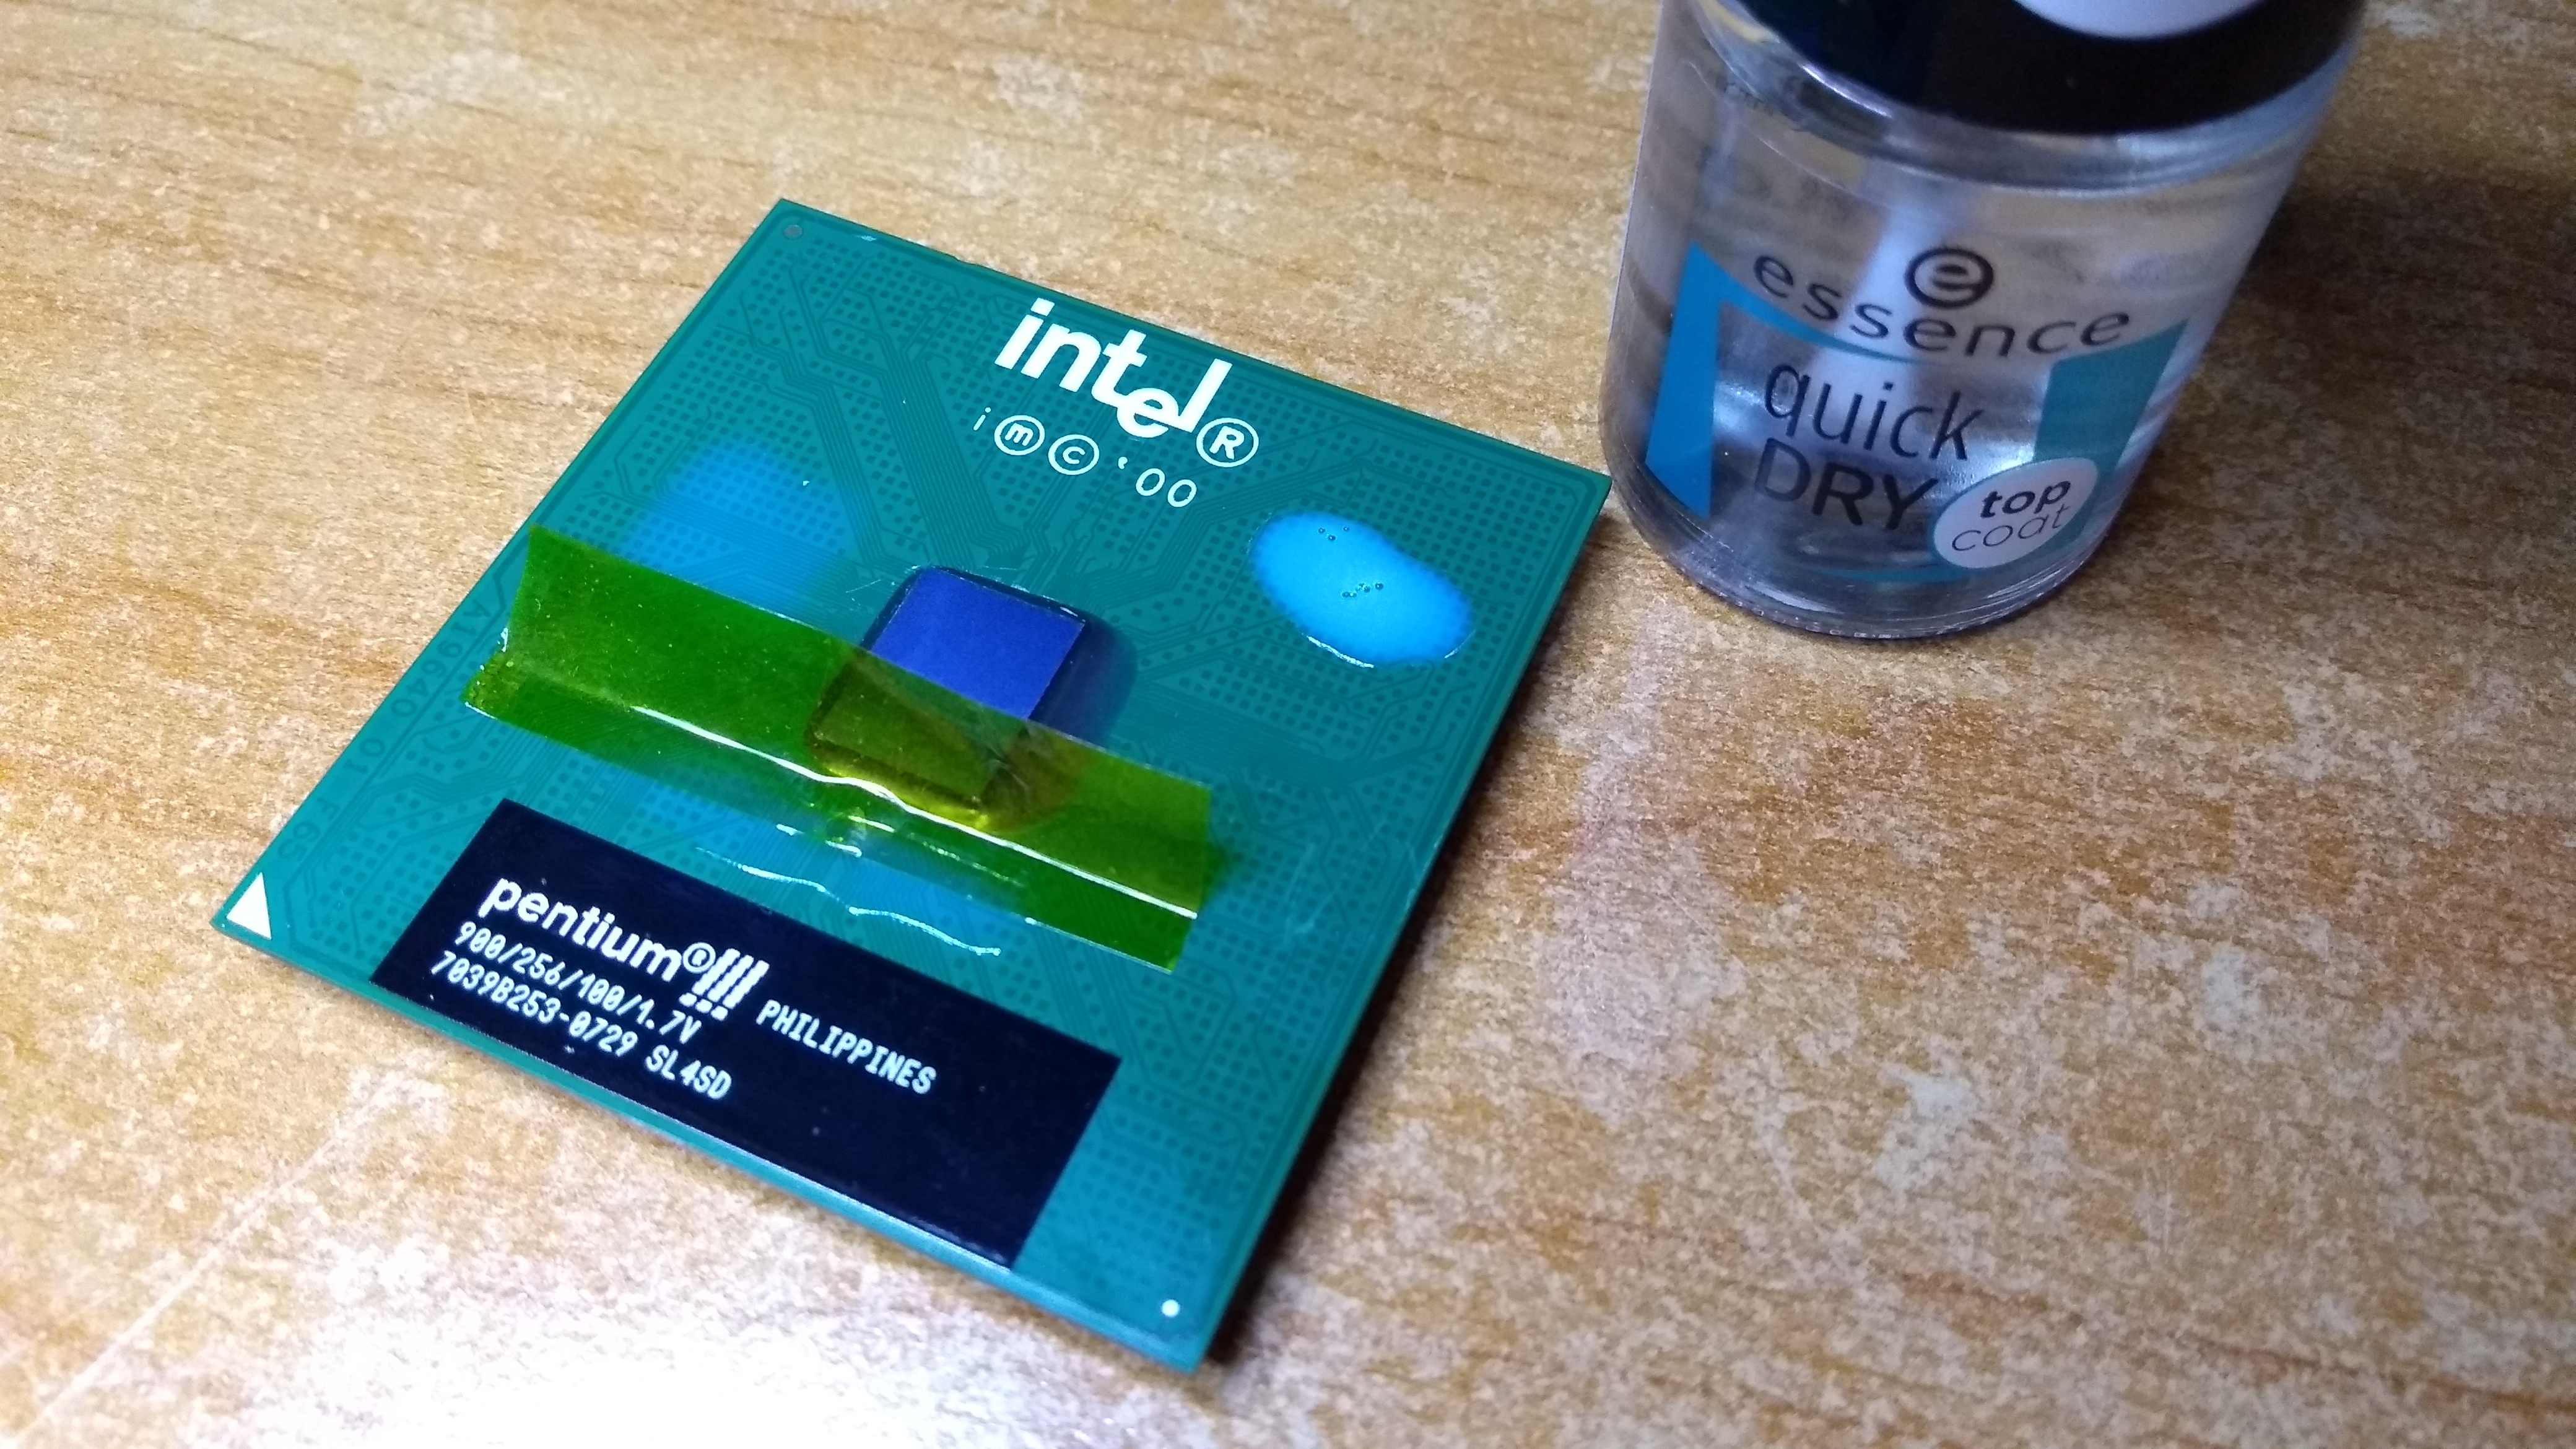
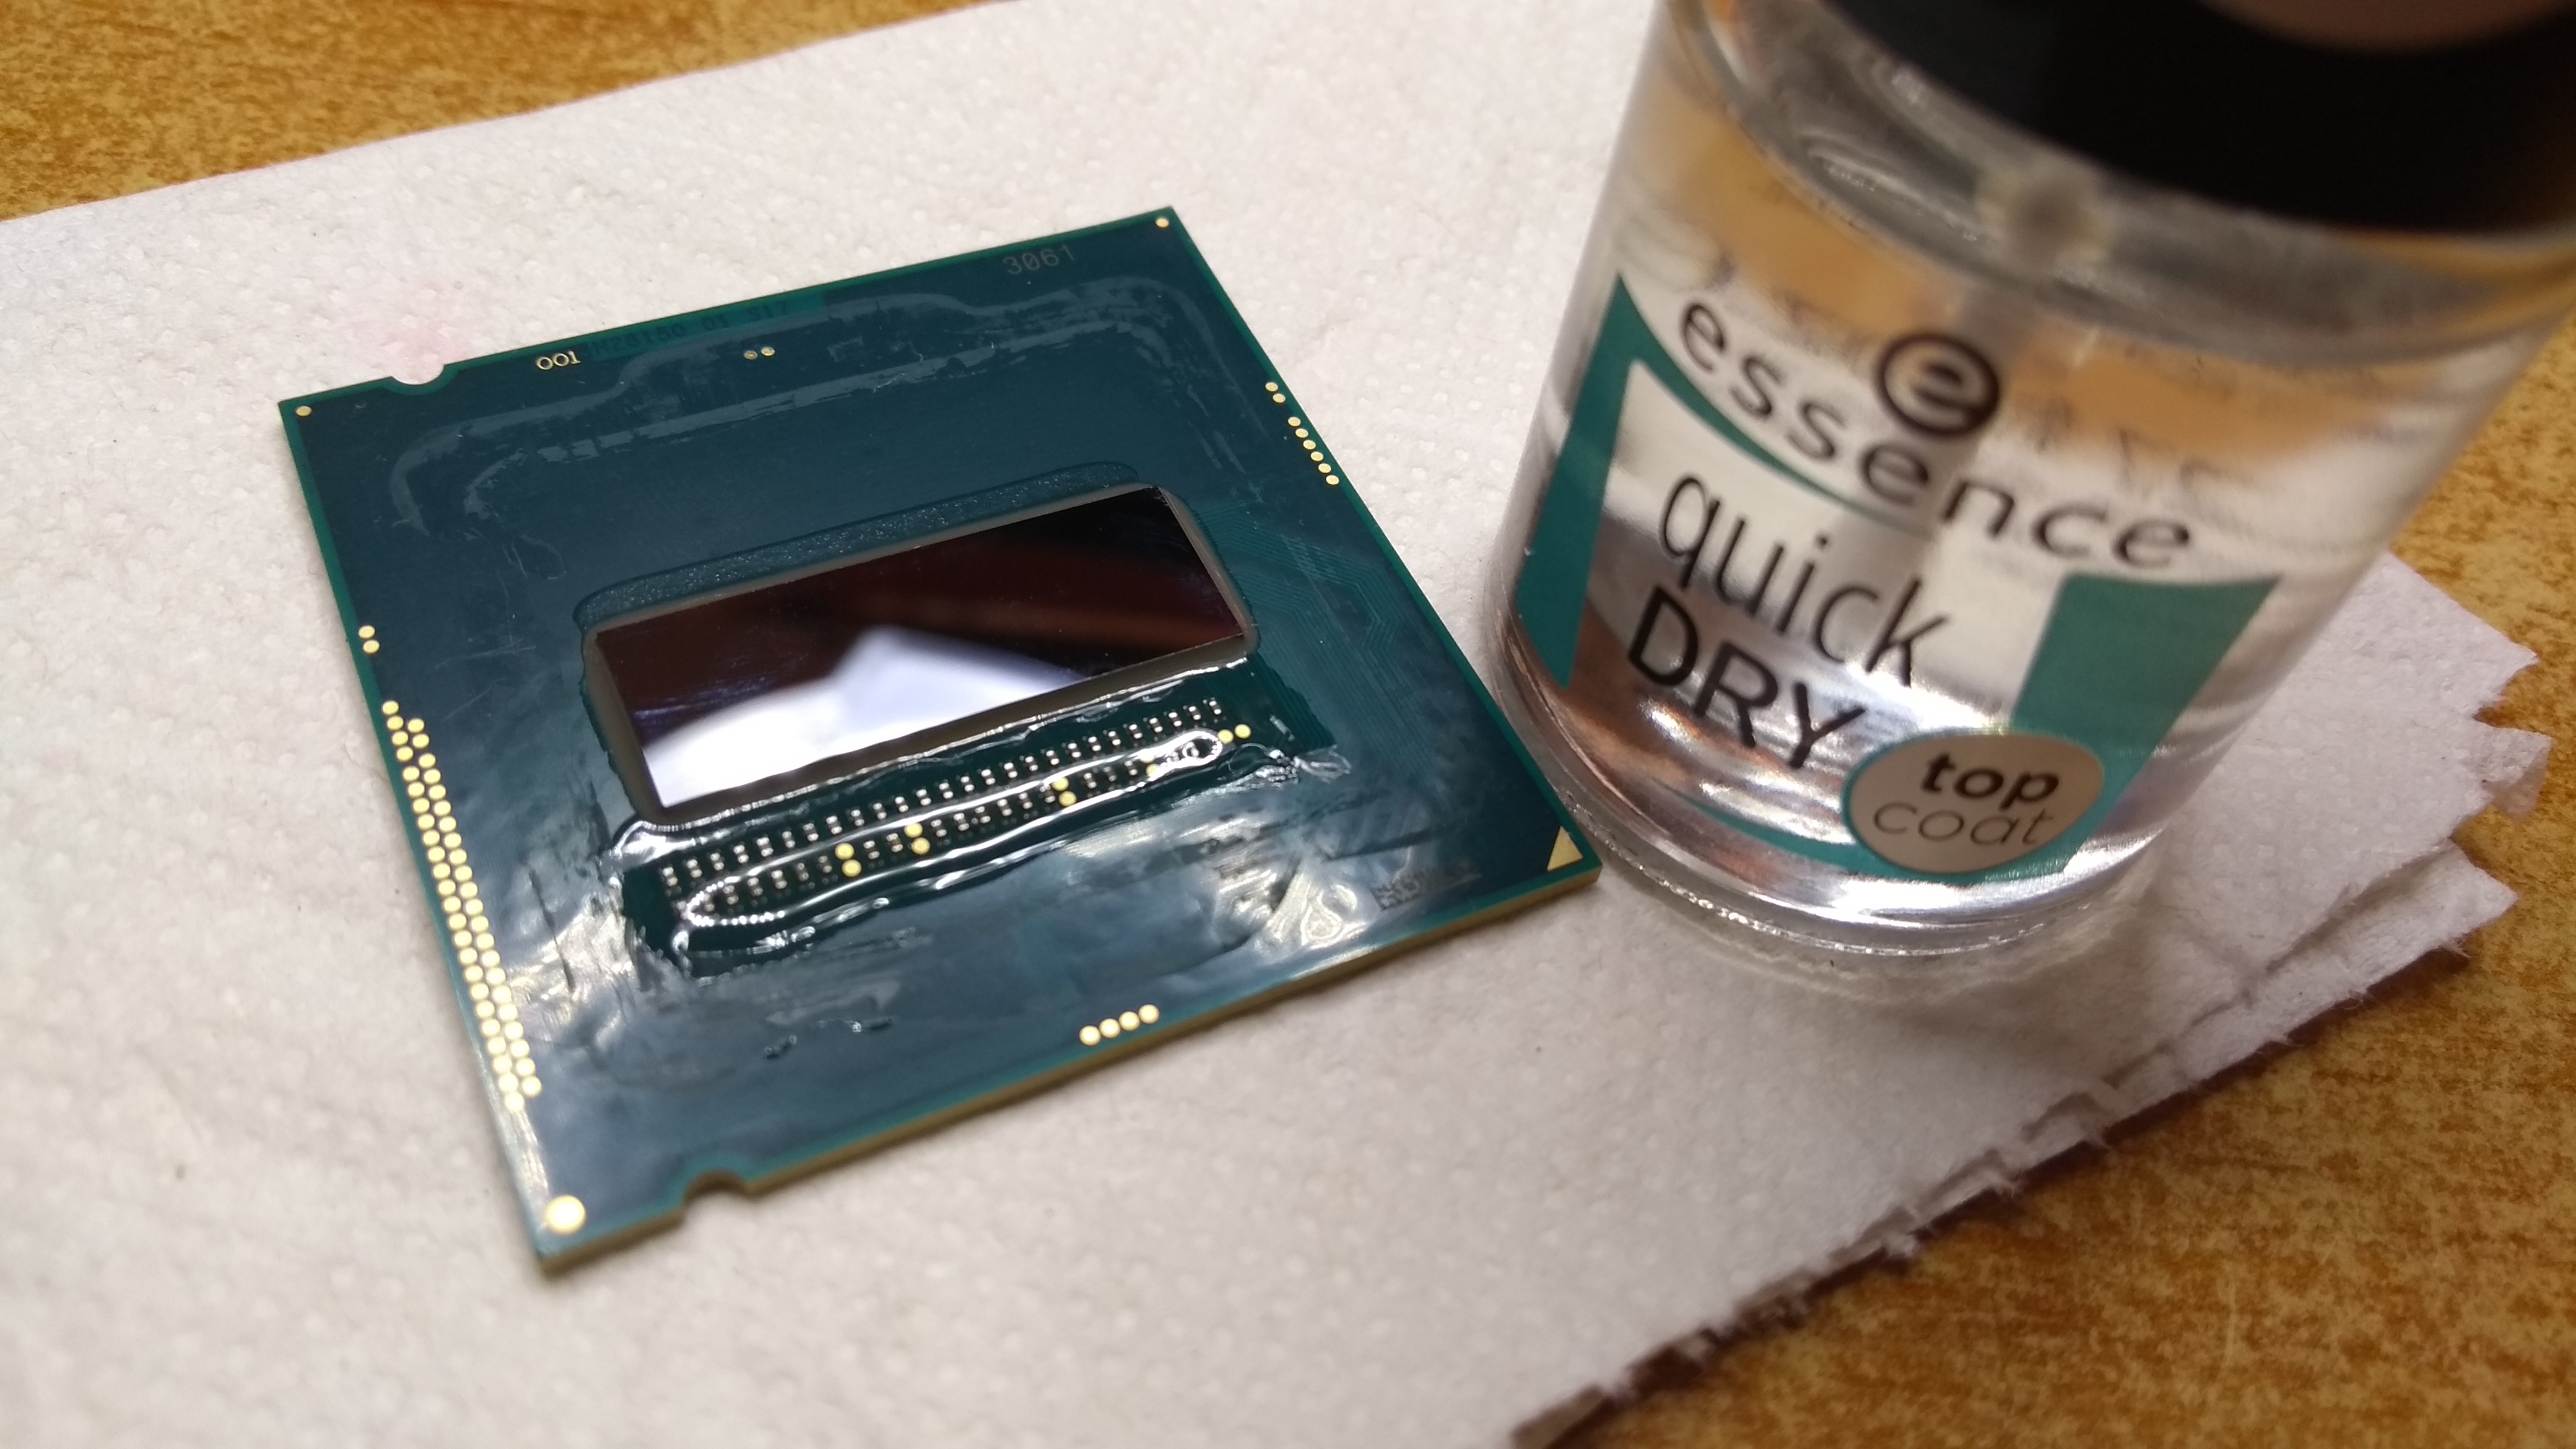
I tested several scenarios of protecting the tiny SMDs against liquid metal spills - yeah, you guessed it, liquid METAL is conductive. Clear nail polish is what i tested on an old Pentium 3. The stuff i used turned out to be non-conductive, and i’ve tested it with a multimeter in resistance mode: OL/Open Line = infinite resistance = no worries  (afaik) …but this particular product is certainly not “quick dry” …took about 1h per coat, multiply by 3 coats.
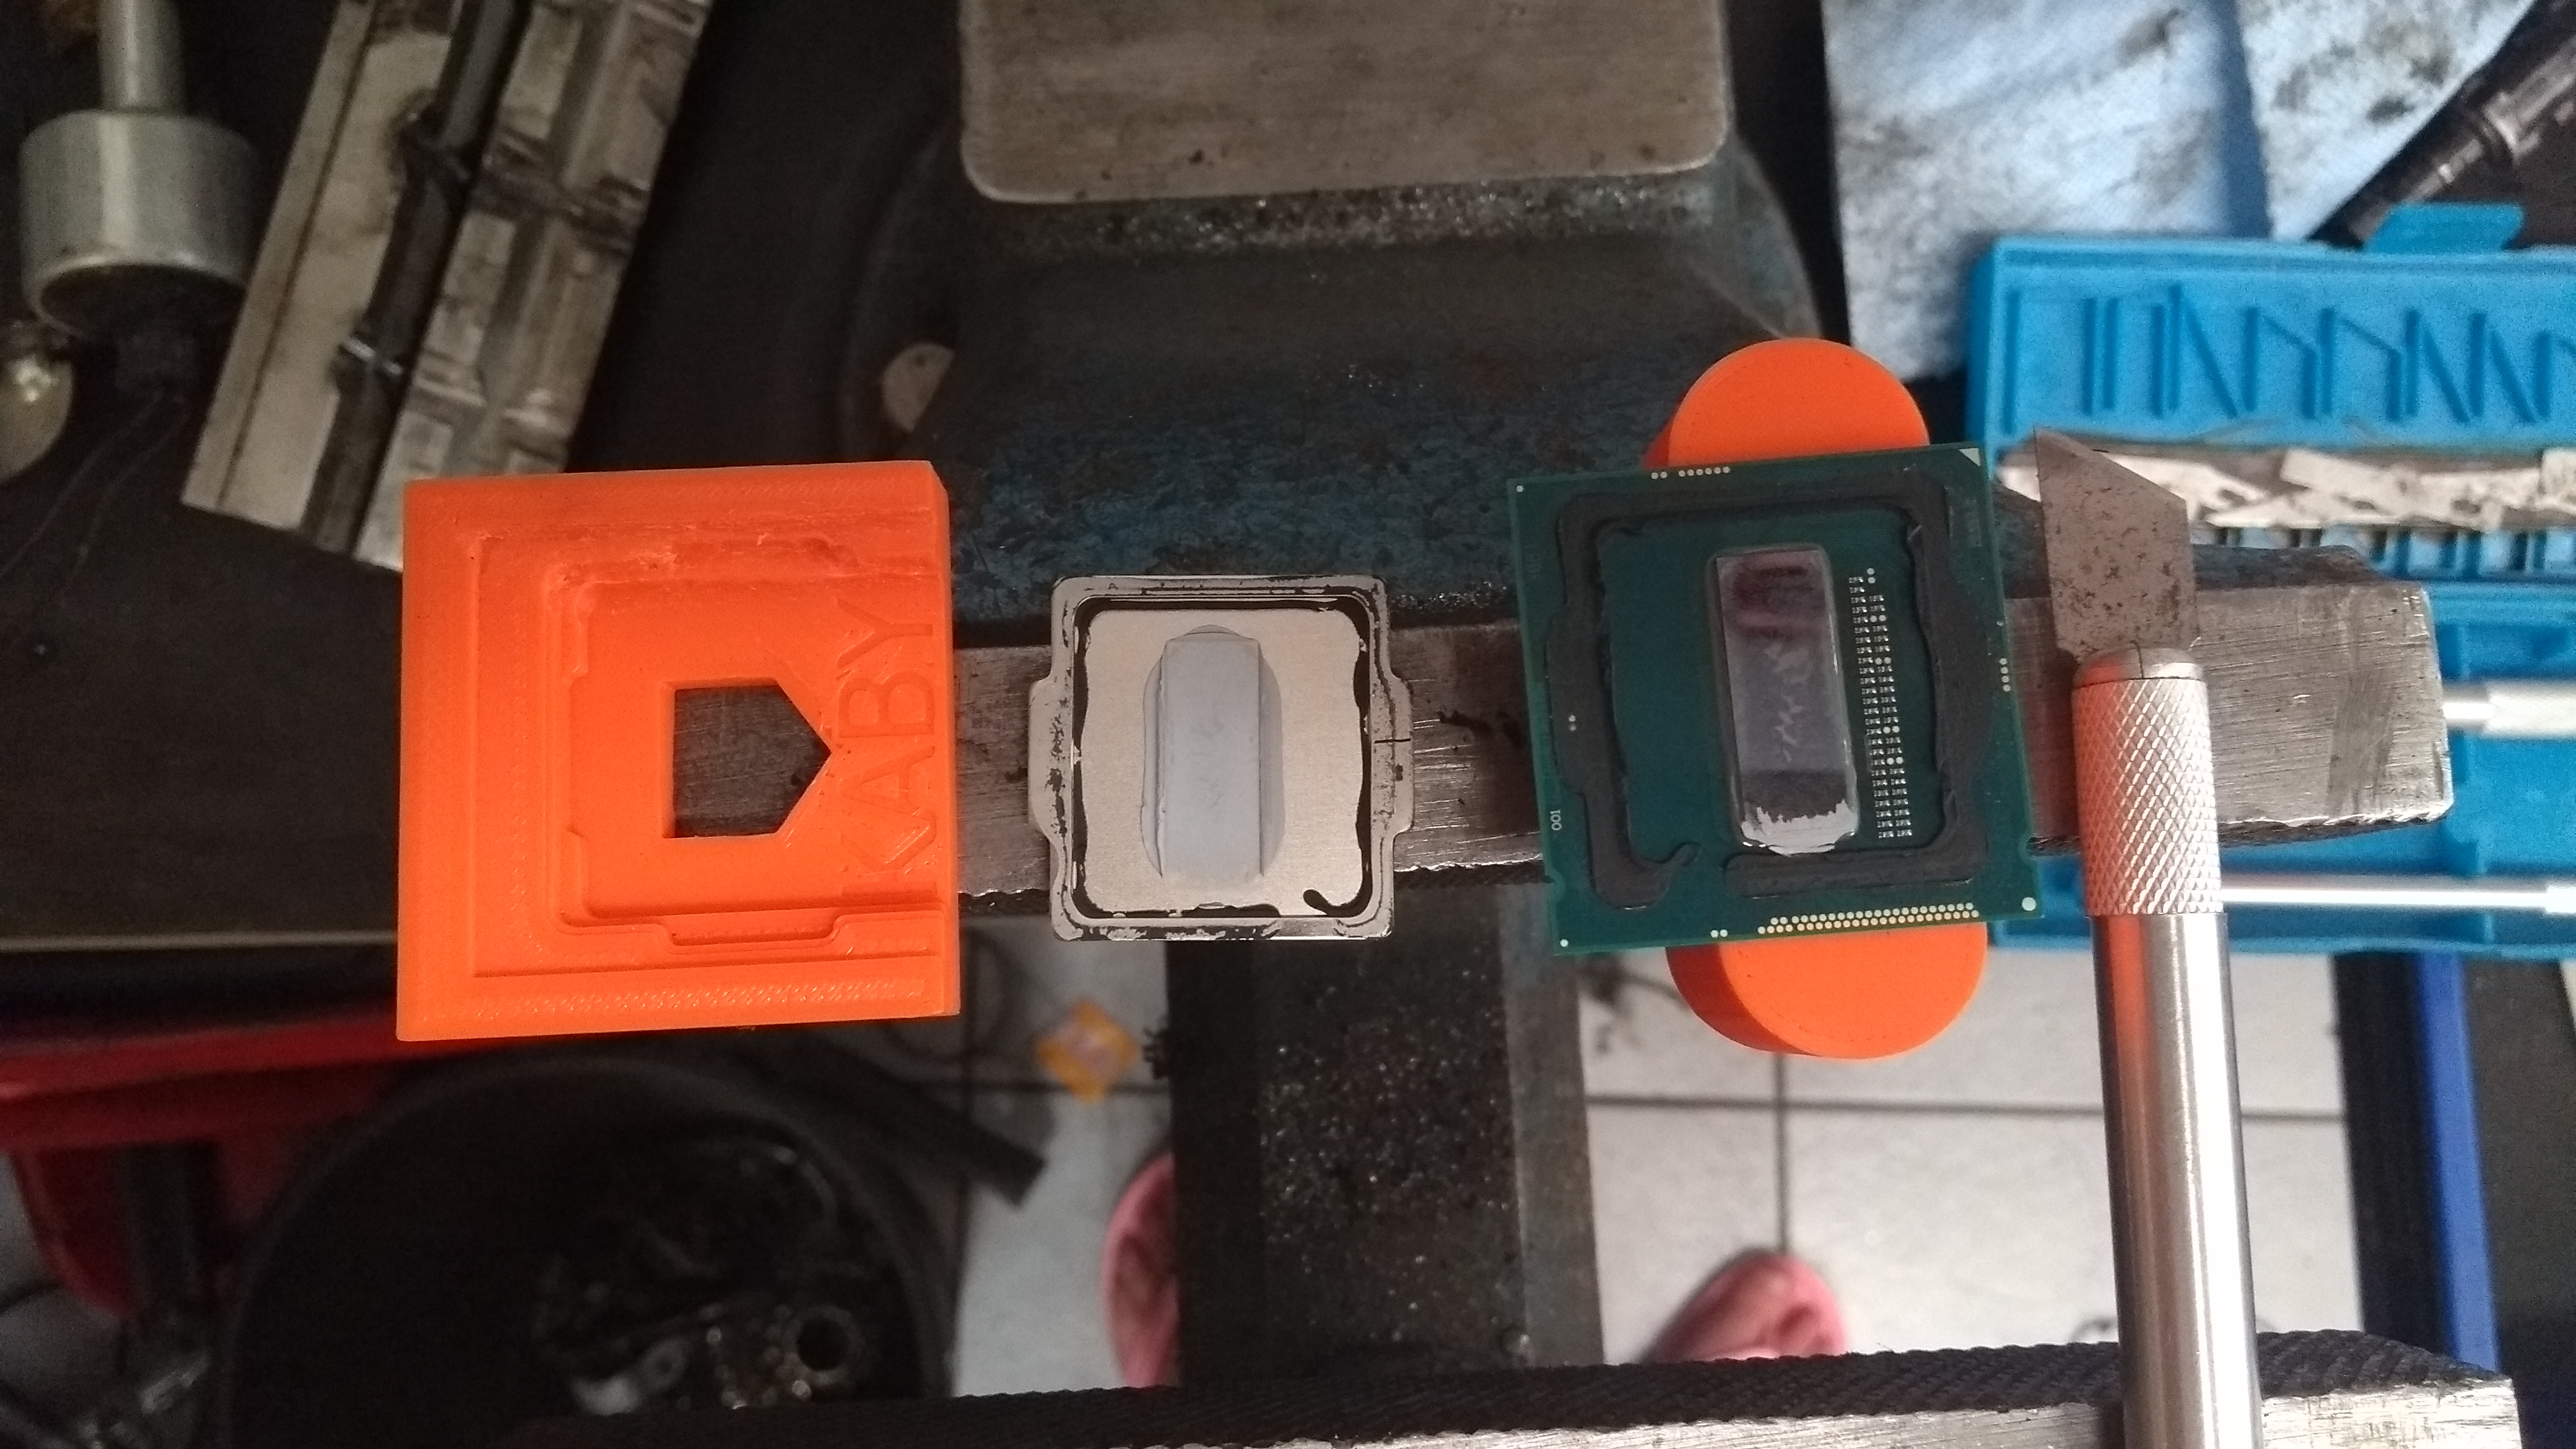
Then, i bought a DIY / 3D-printed delid / relid tool from another random guy on ebay.

…the frelling ting was 1mm too tight! The seller said something like “thanks for notifying me …but tough luck, your batch was bad …however, i’ve calibrated my 3D printer now, so future buyers will receive a properly fitting tool” 

…oh well, i just shaved a millimetre off…
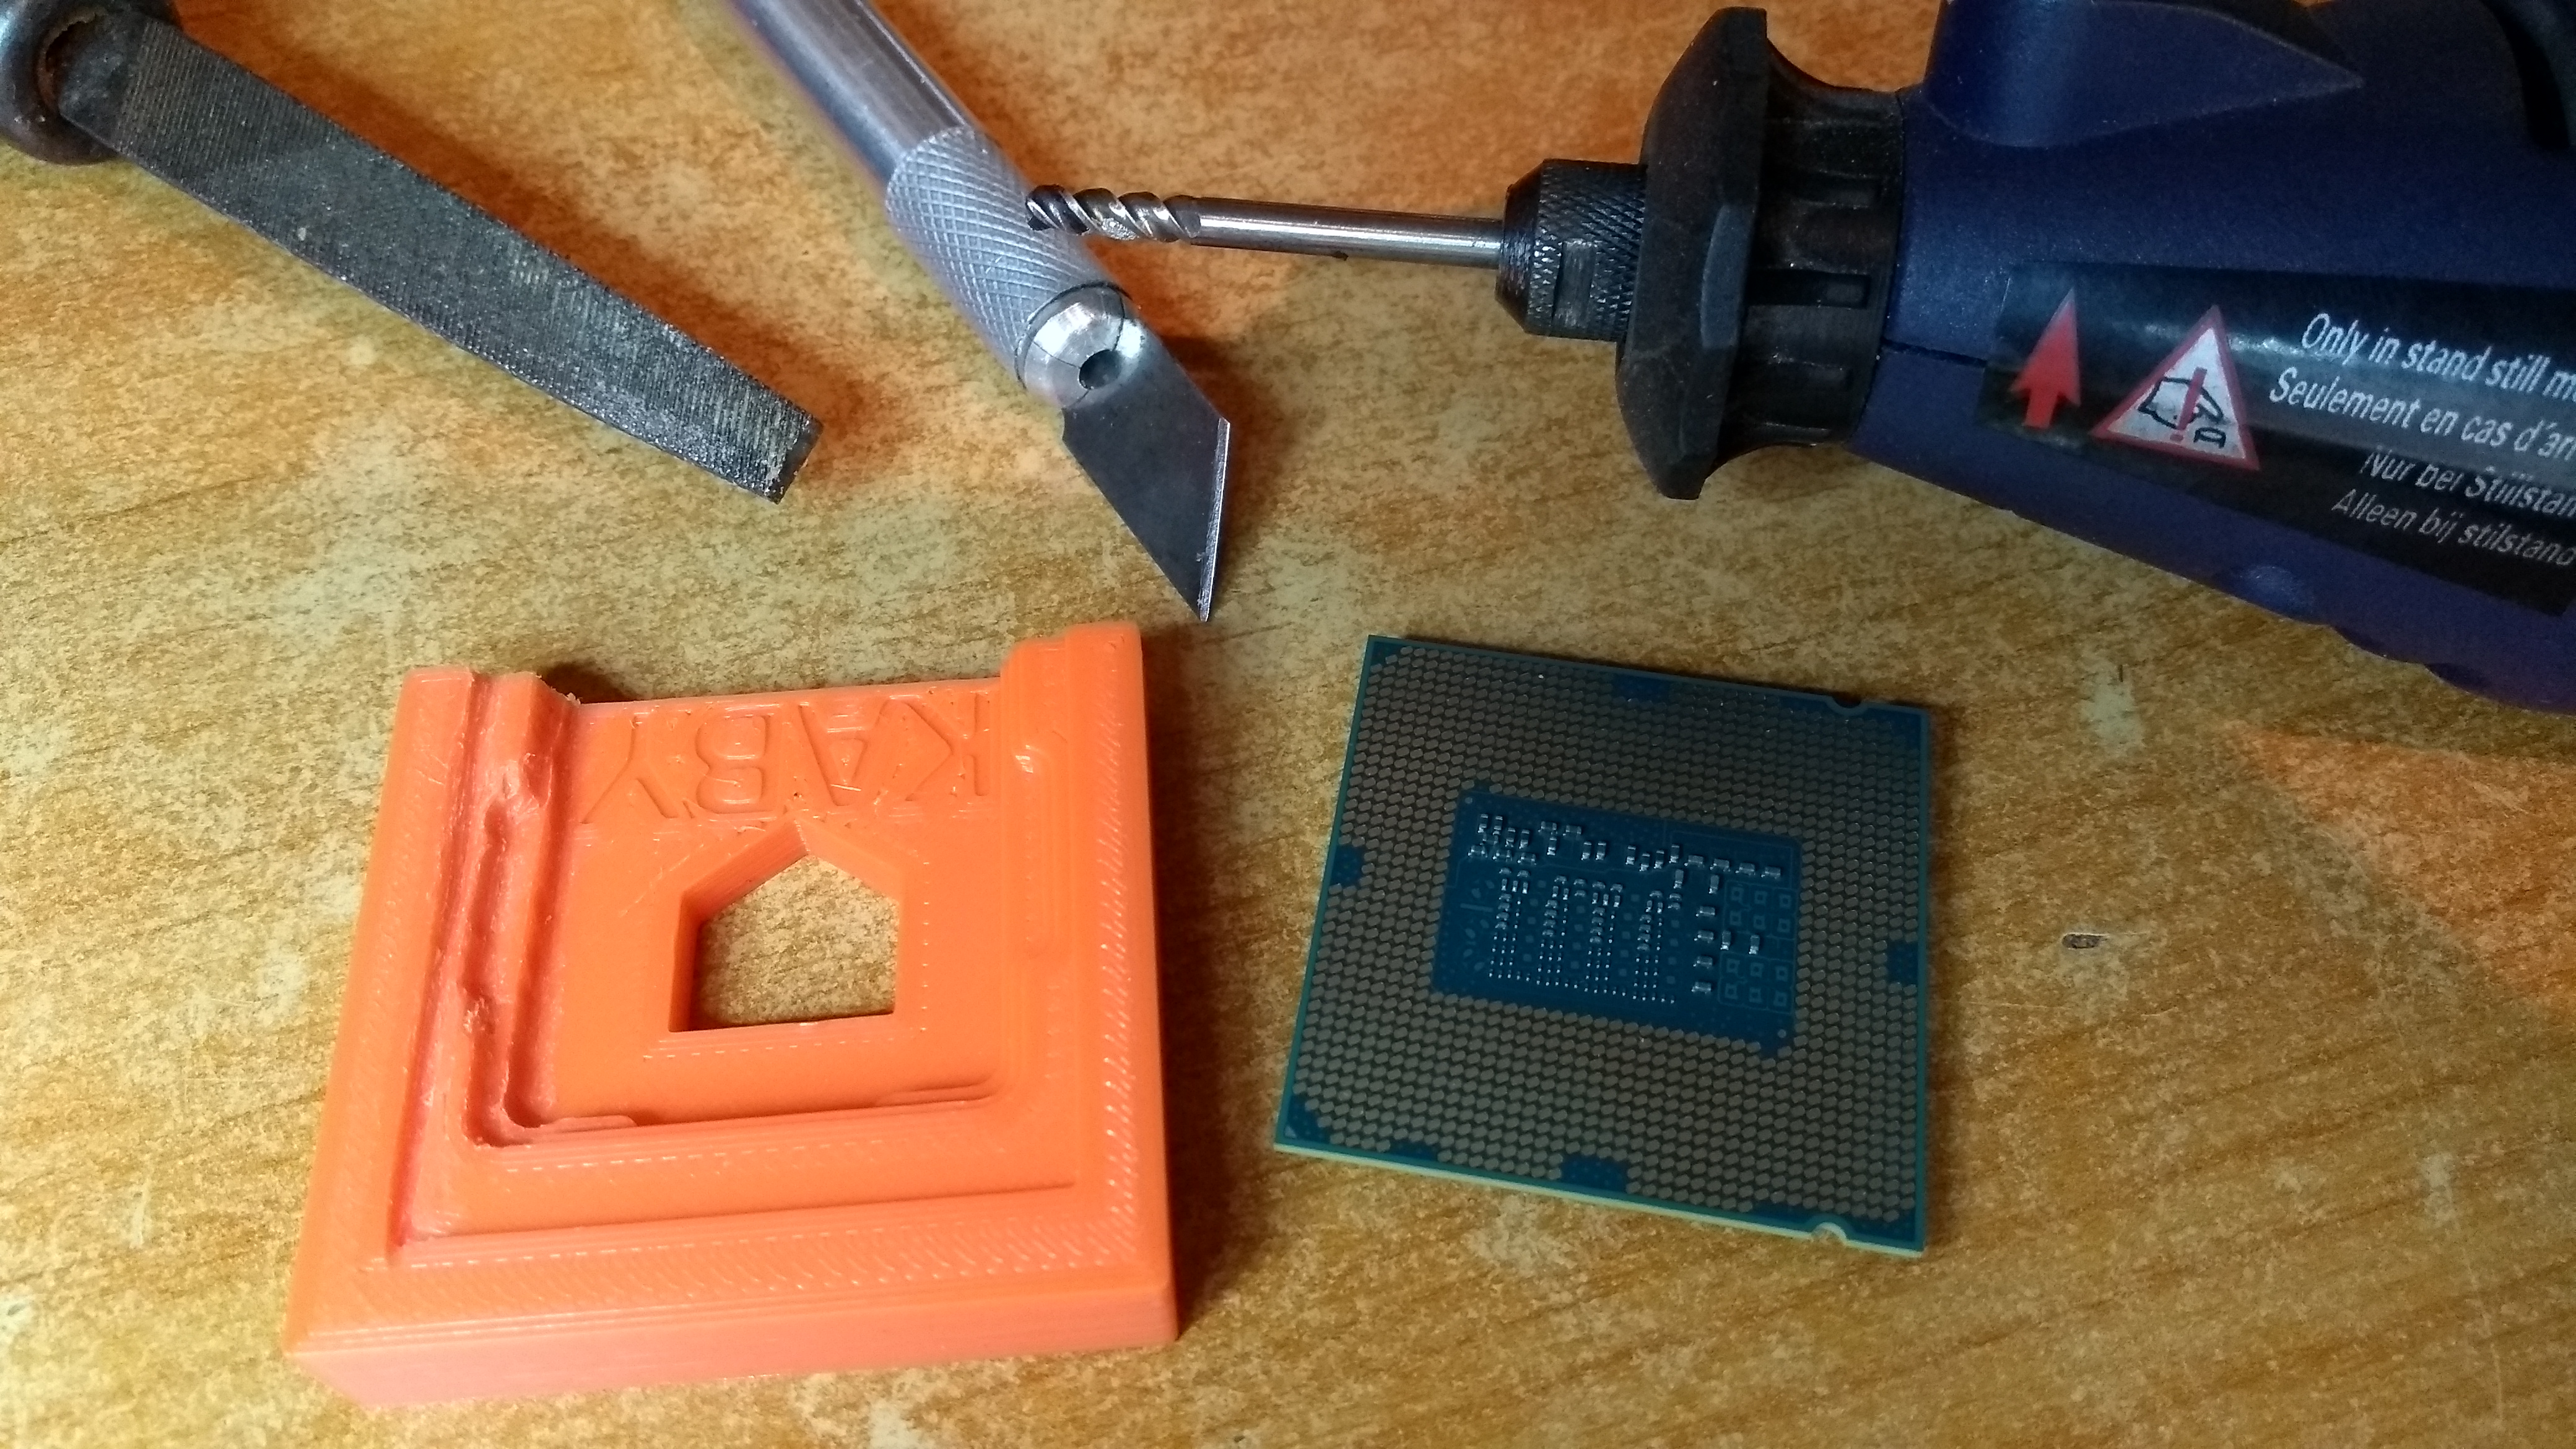
…* record scratch *…FFWD>>>…of course, the vise method …be gentle, and go slowly, you’ll feel the pop (it doesn’t actually “pop”, it’s a sudden decrease in resistance …then you know it “popped”)

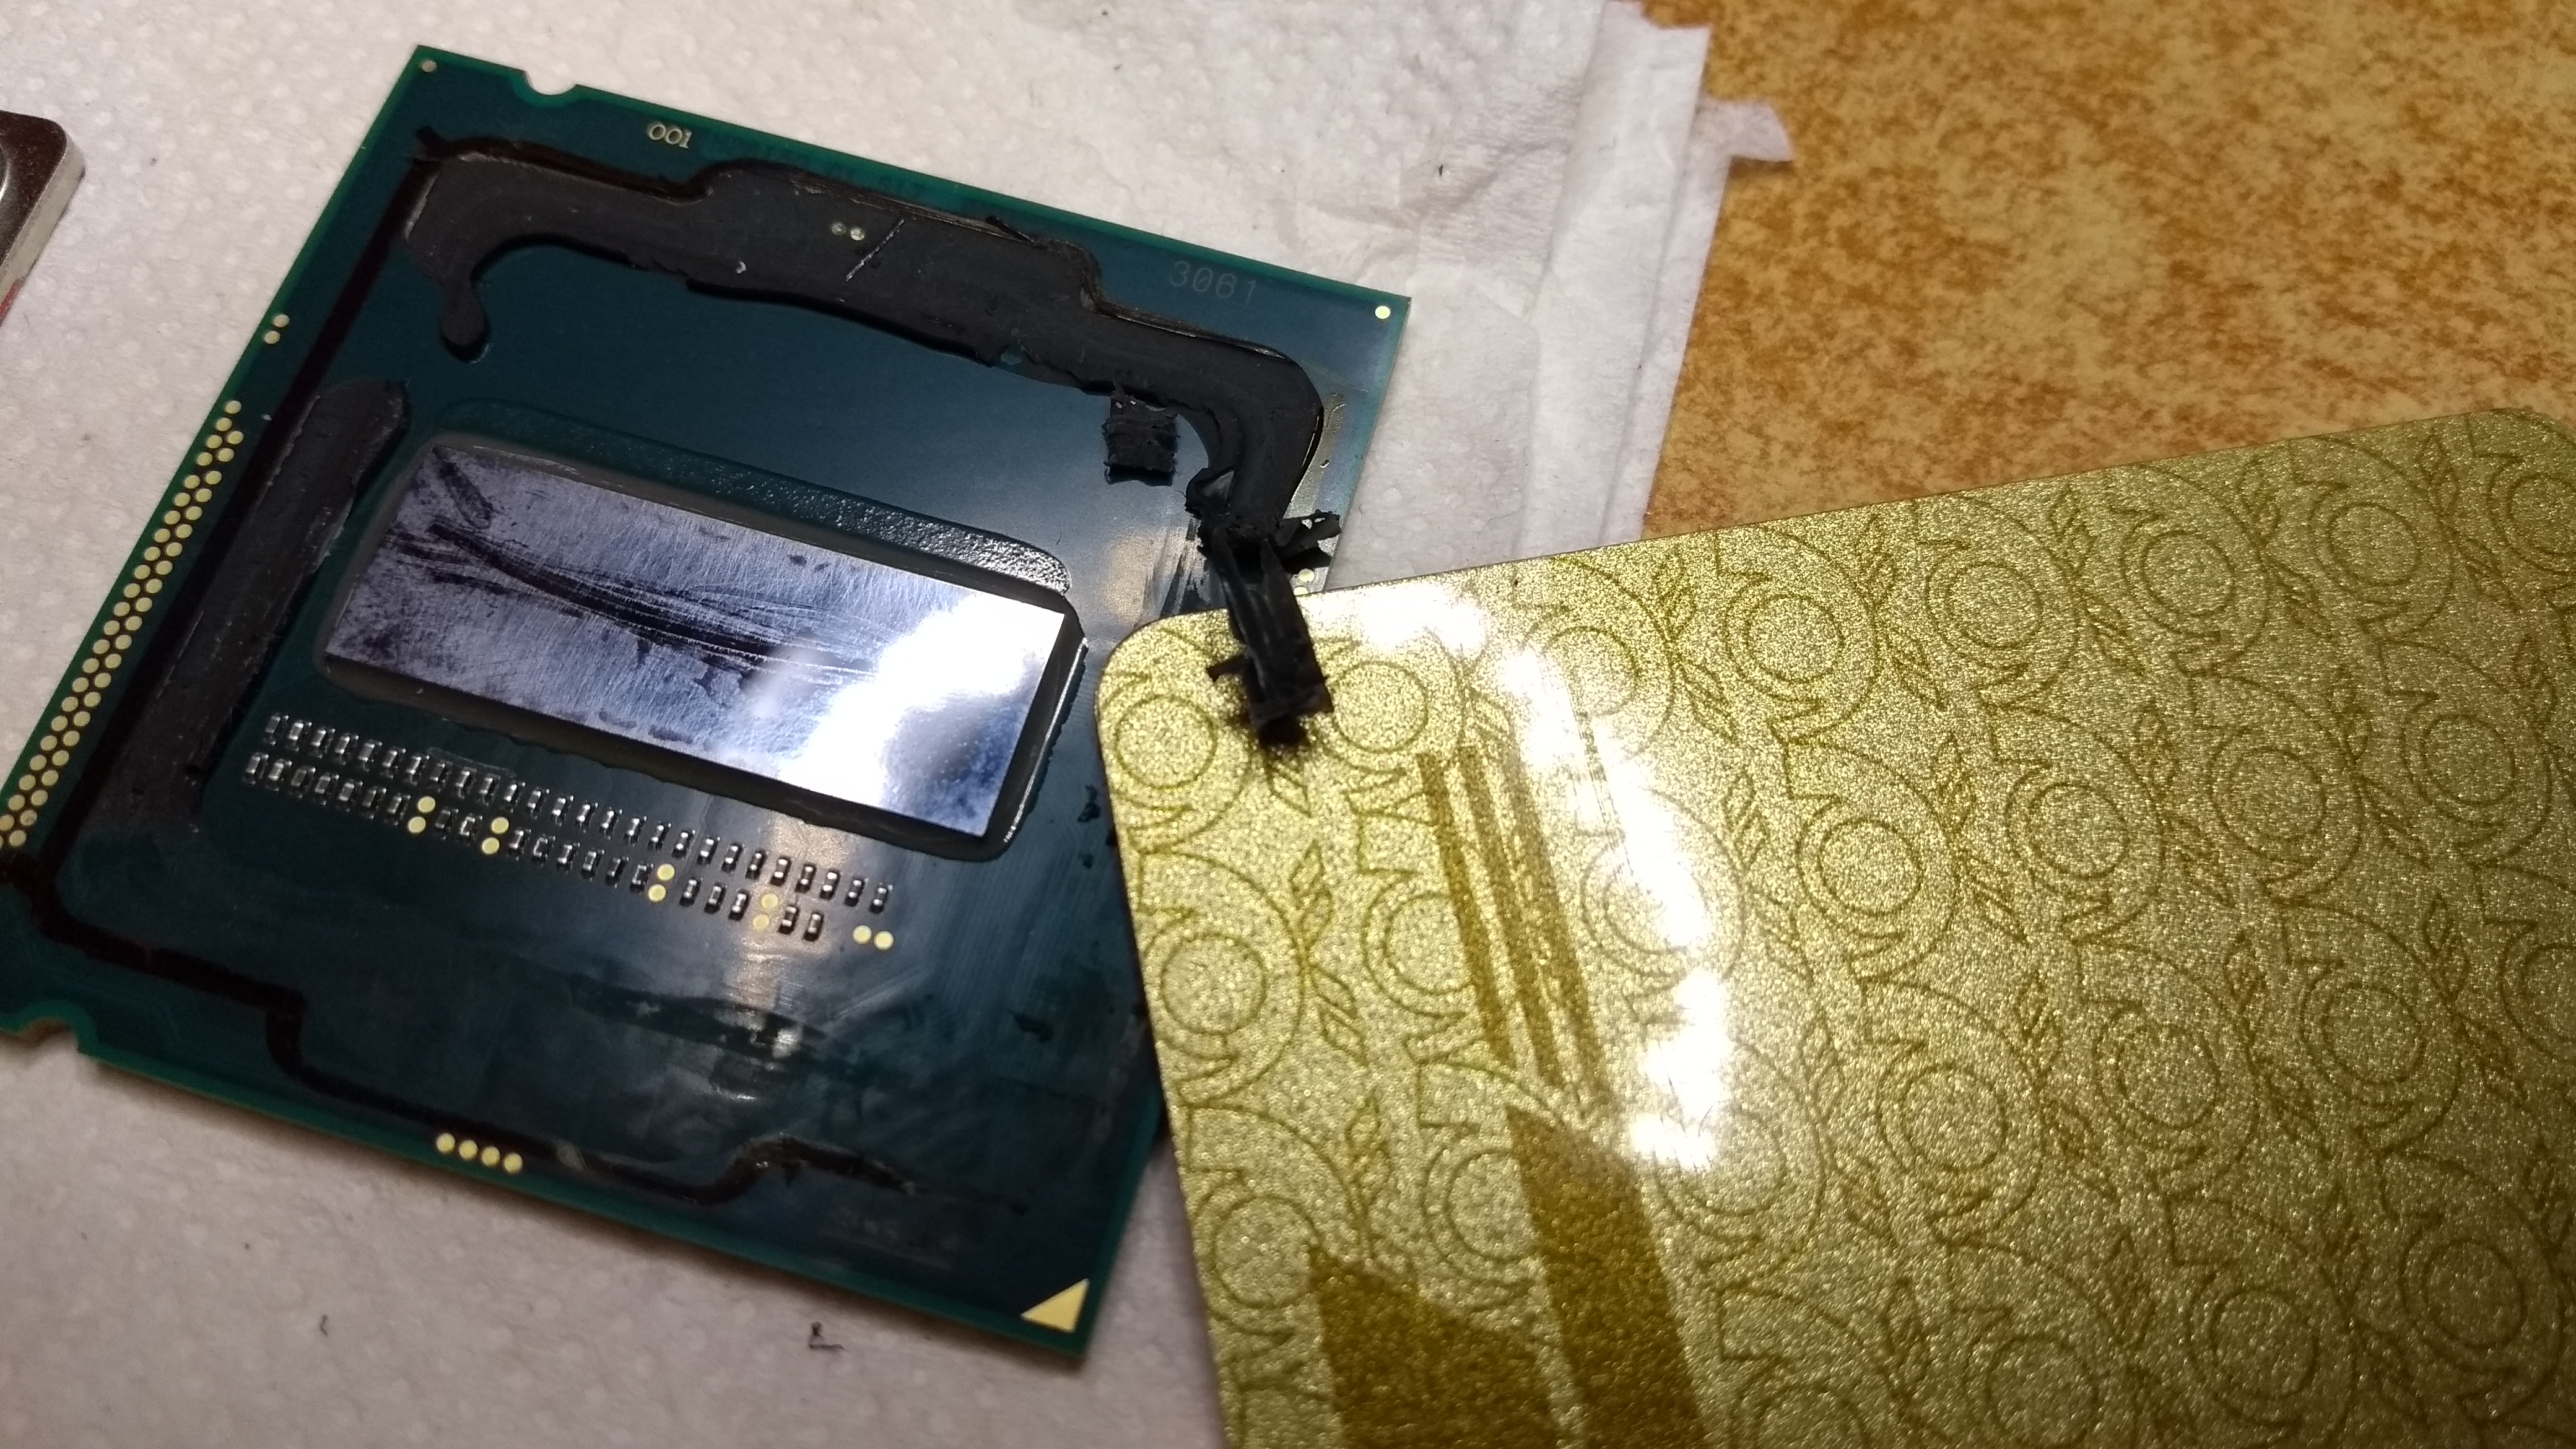
…AND NO! You don’t give it “just a little bit more, for good measure”! When it’s popped, it’s popped! Don’t sheer off those tiny SMDs, or damage your Die. …lever the IHS off the PCB with an “exacto knife”(?, carving / crafting knife) …something thin and blade-like tool …a screw driver, if you’re desperate …don’t use the PCB’s surface as a leverage point → use its edge …be aware that there are thin traces under the “solder mask” (the green paint stuff) - don’t try too hard / don’t sever those traces …it’ll be a royal pain in the rear to micro solder / fix those.
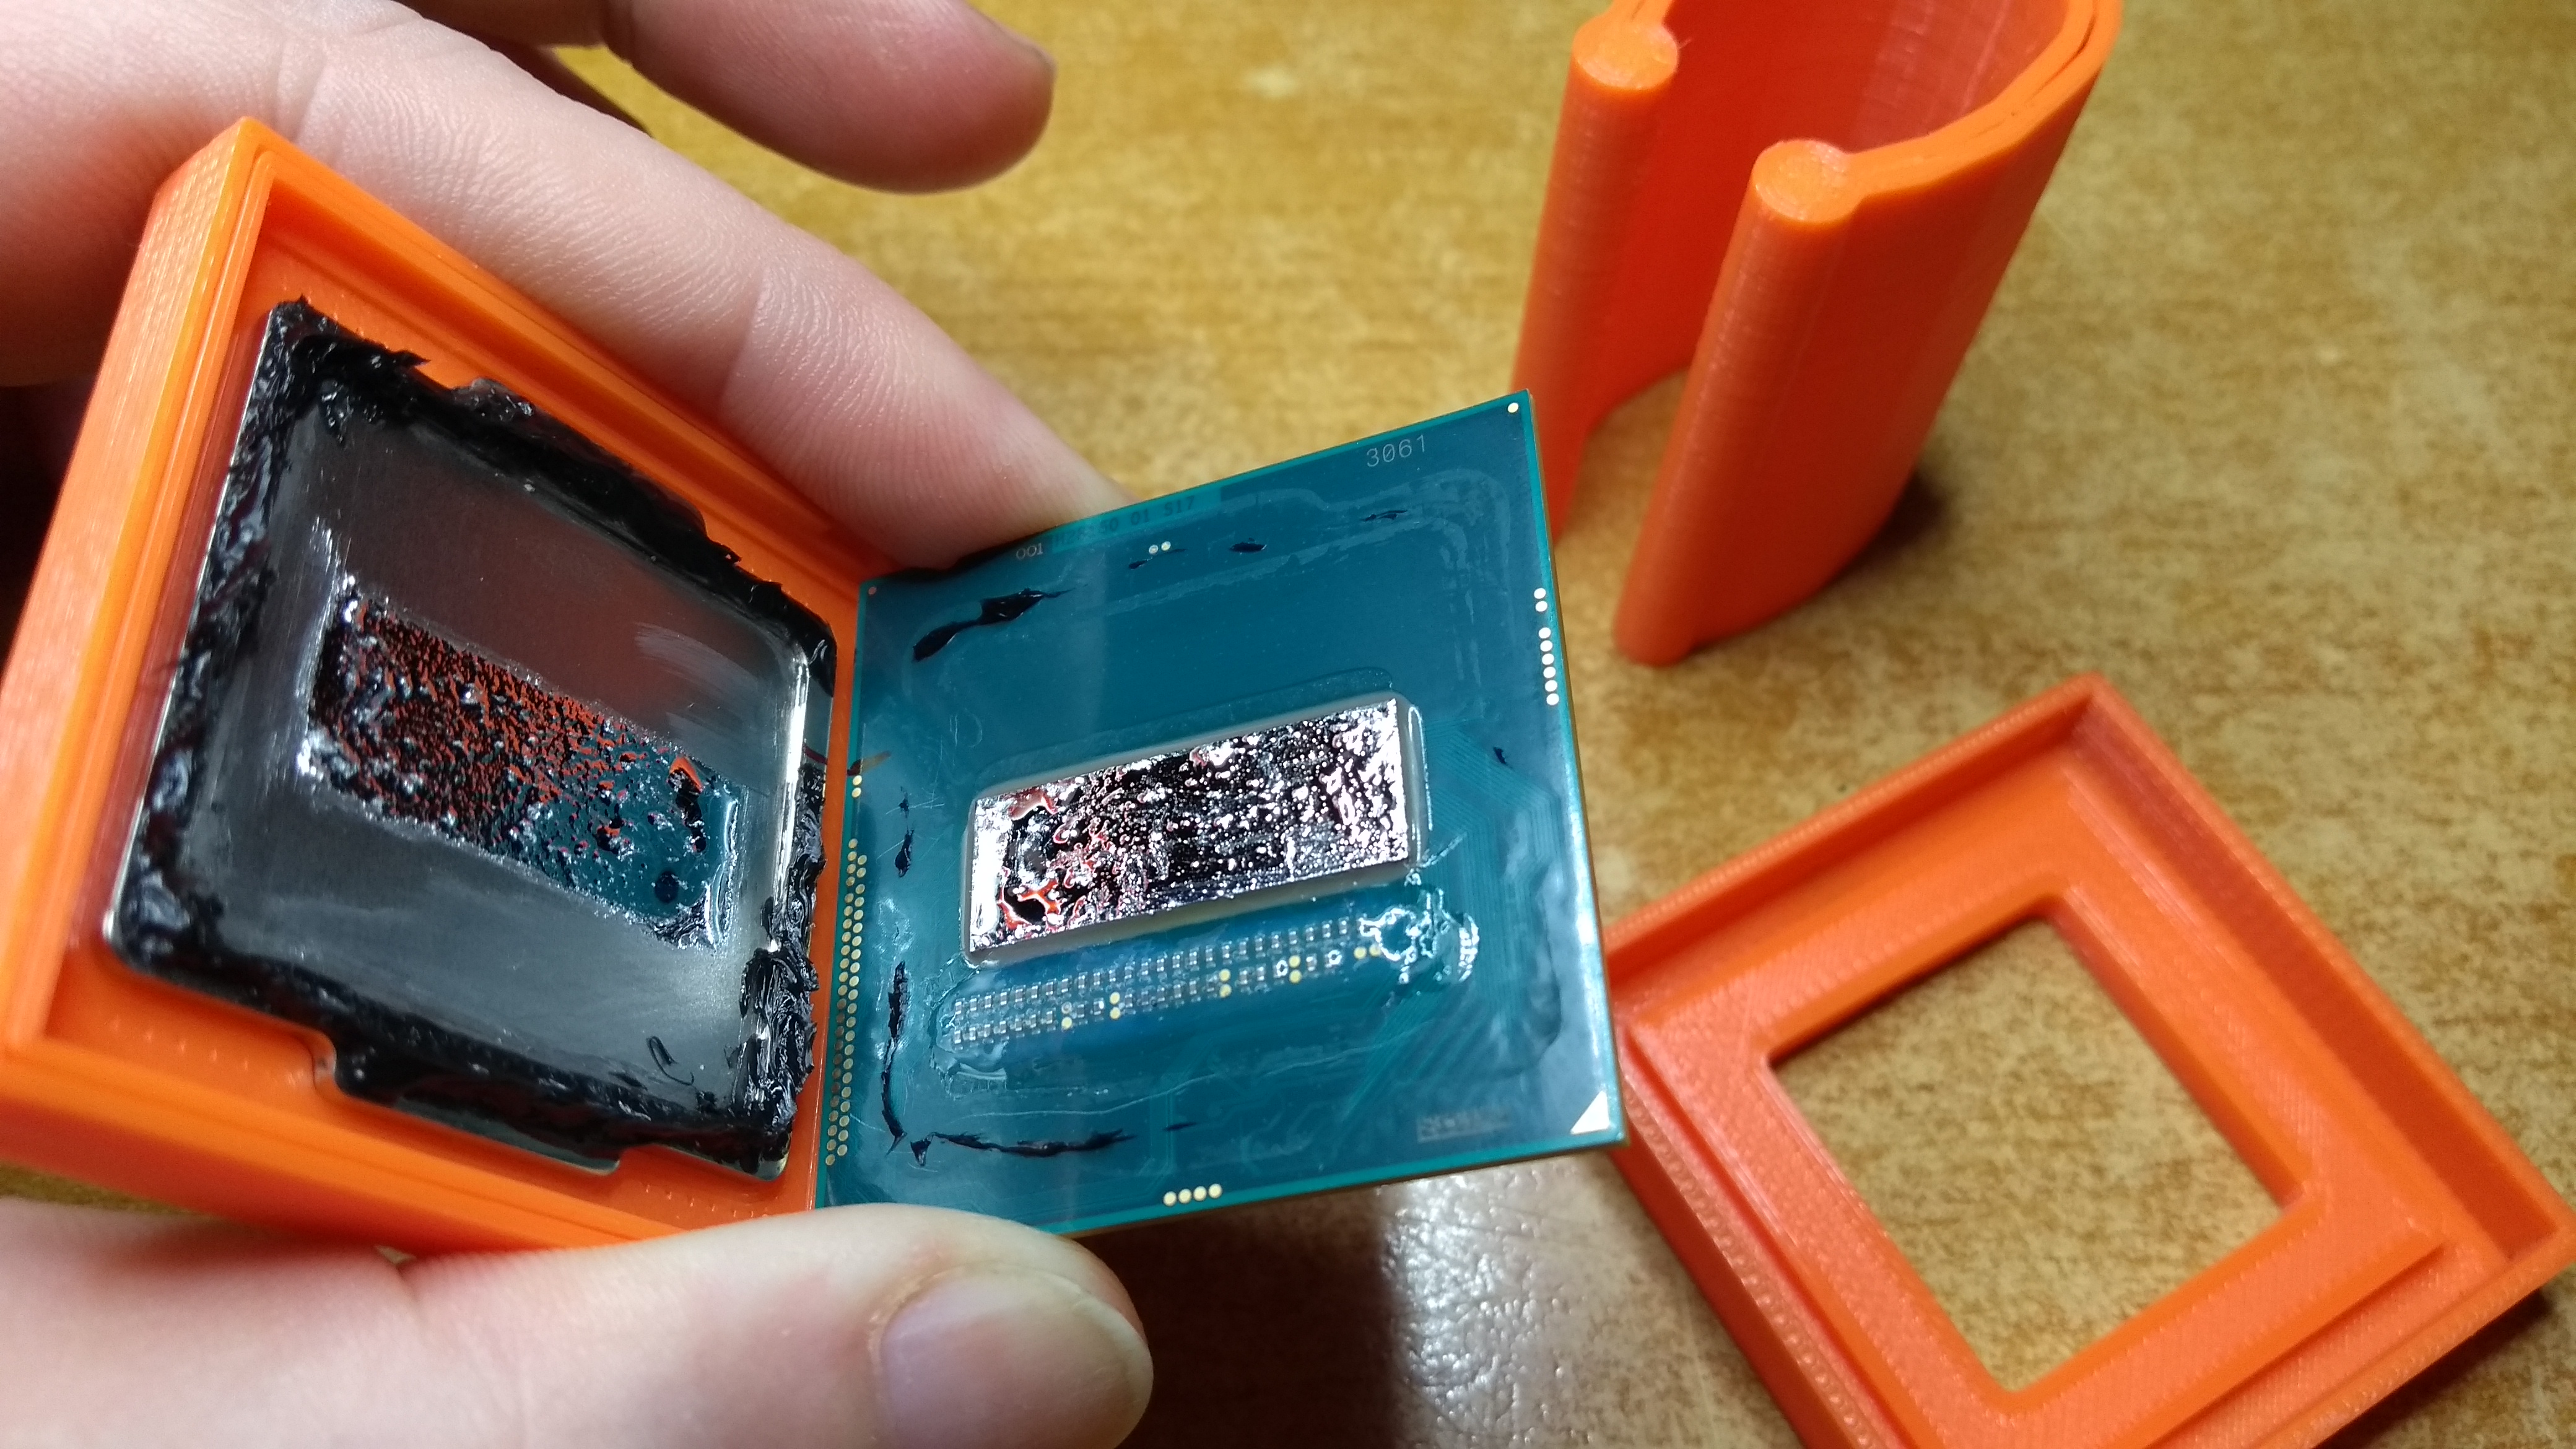
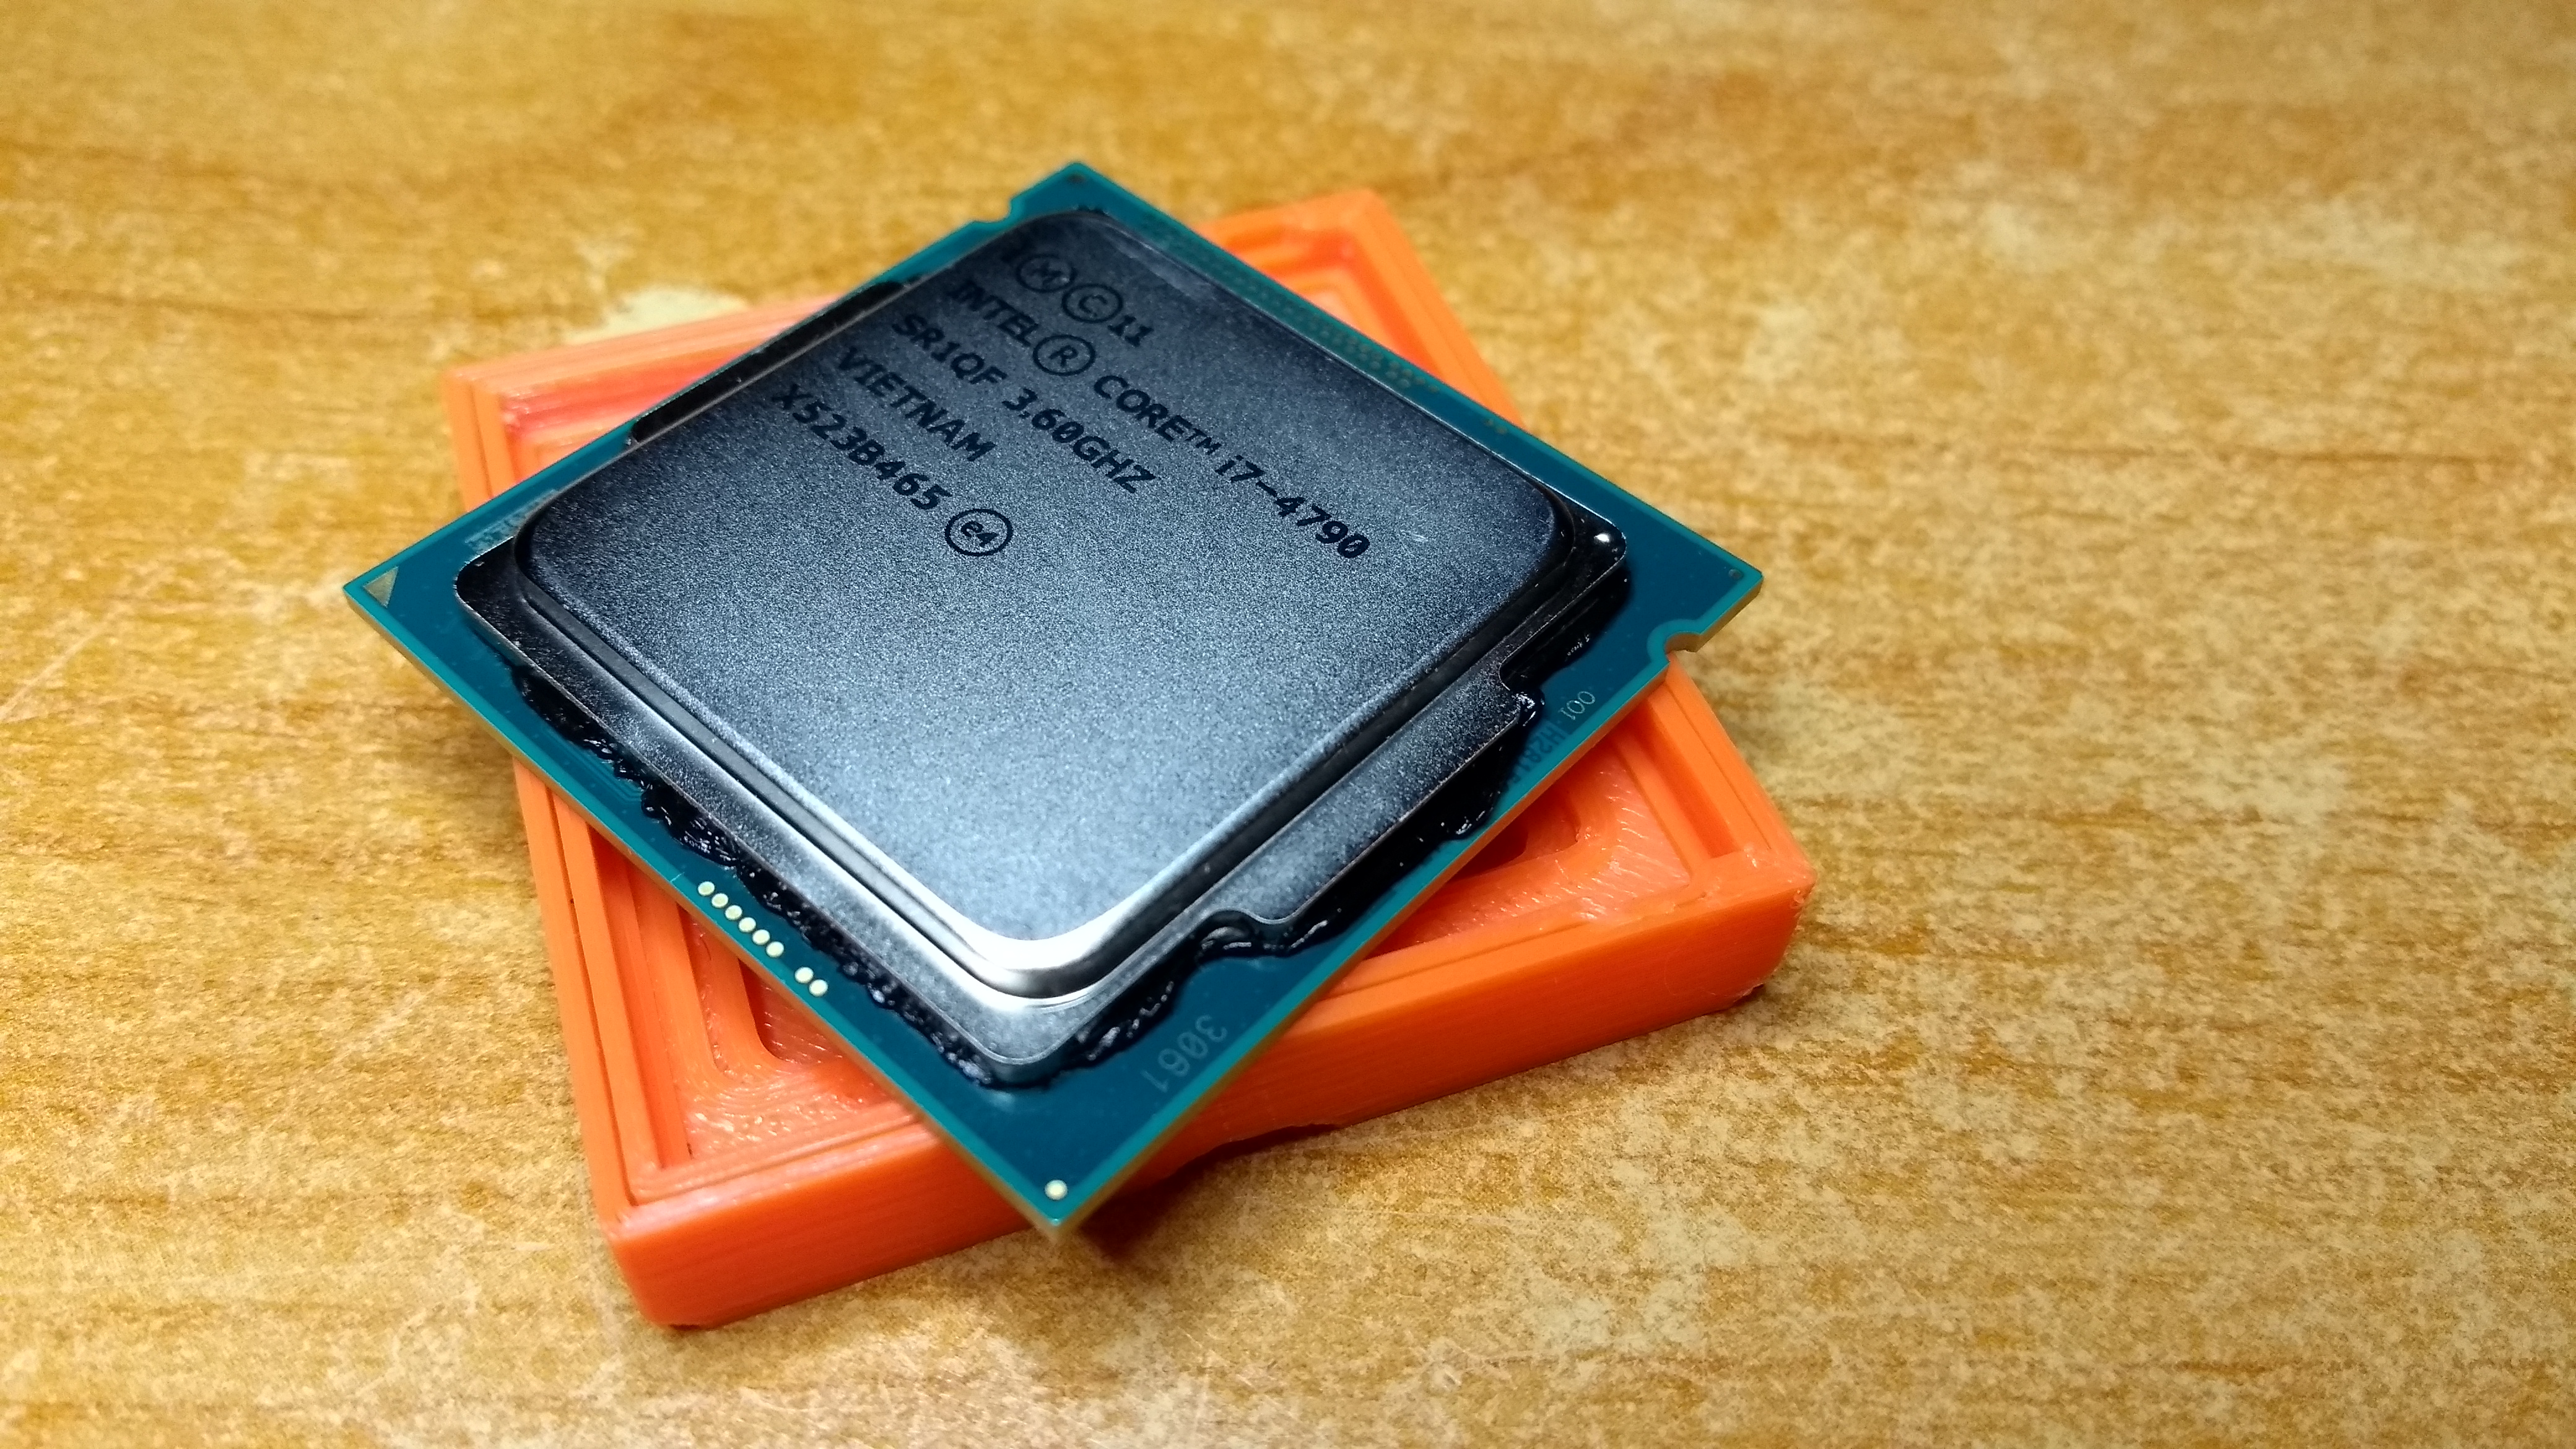
This is what an i7-4790 looks like under the hood …under the IHS …not much difference to the K-variant

…some scraping, cleaning, and 3 coats of clear nail polish later
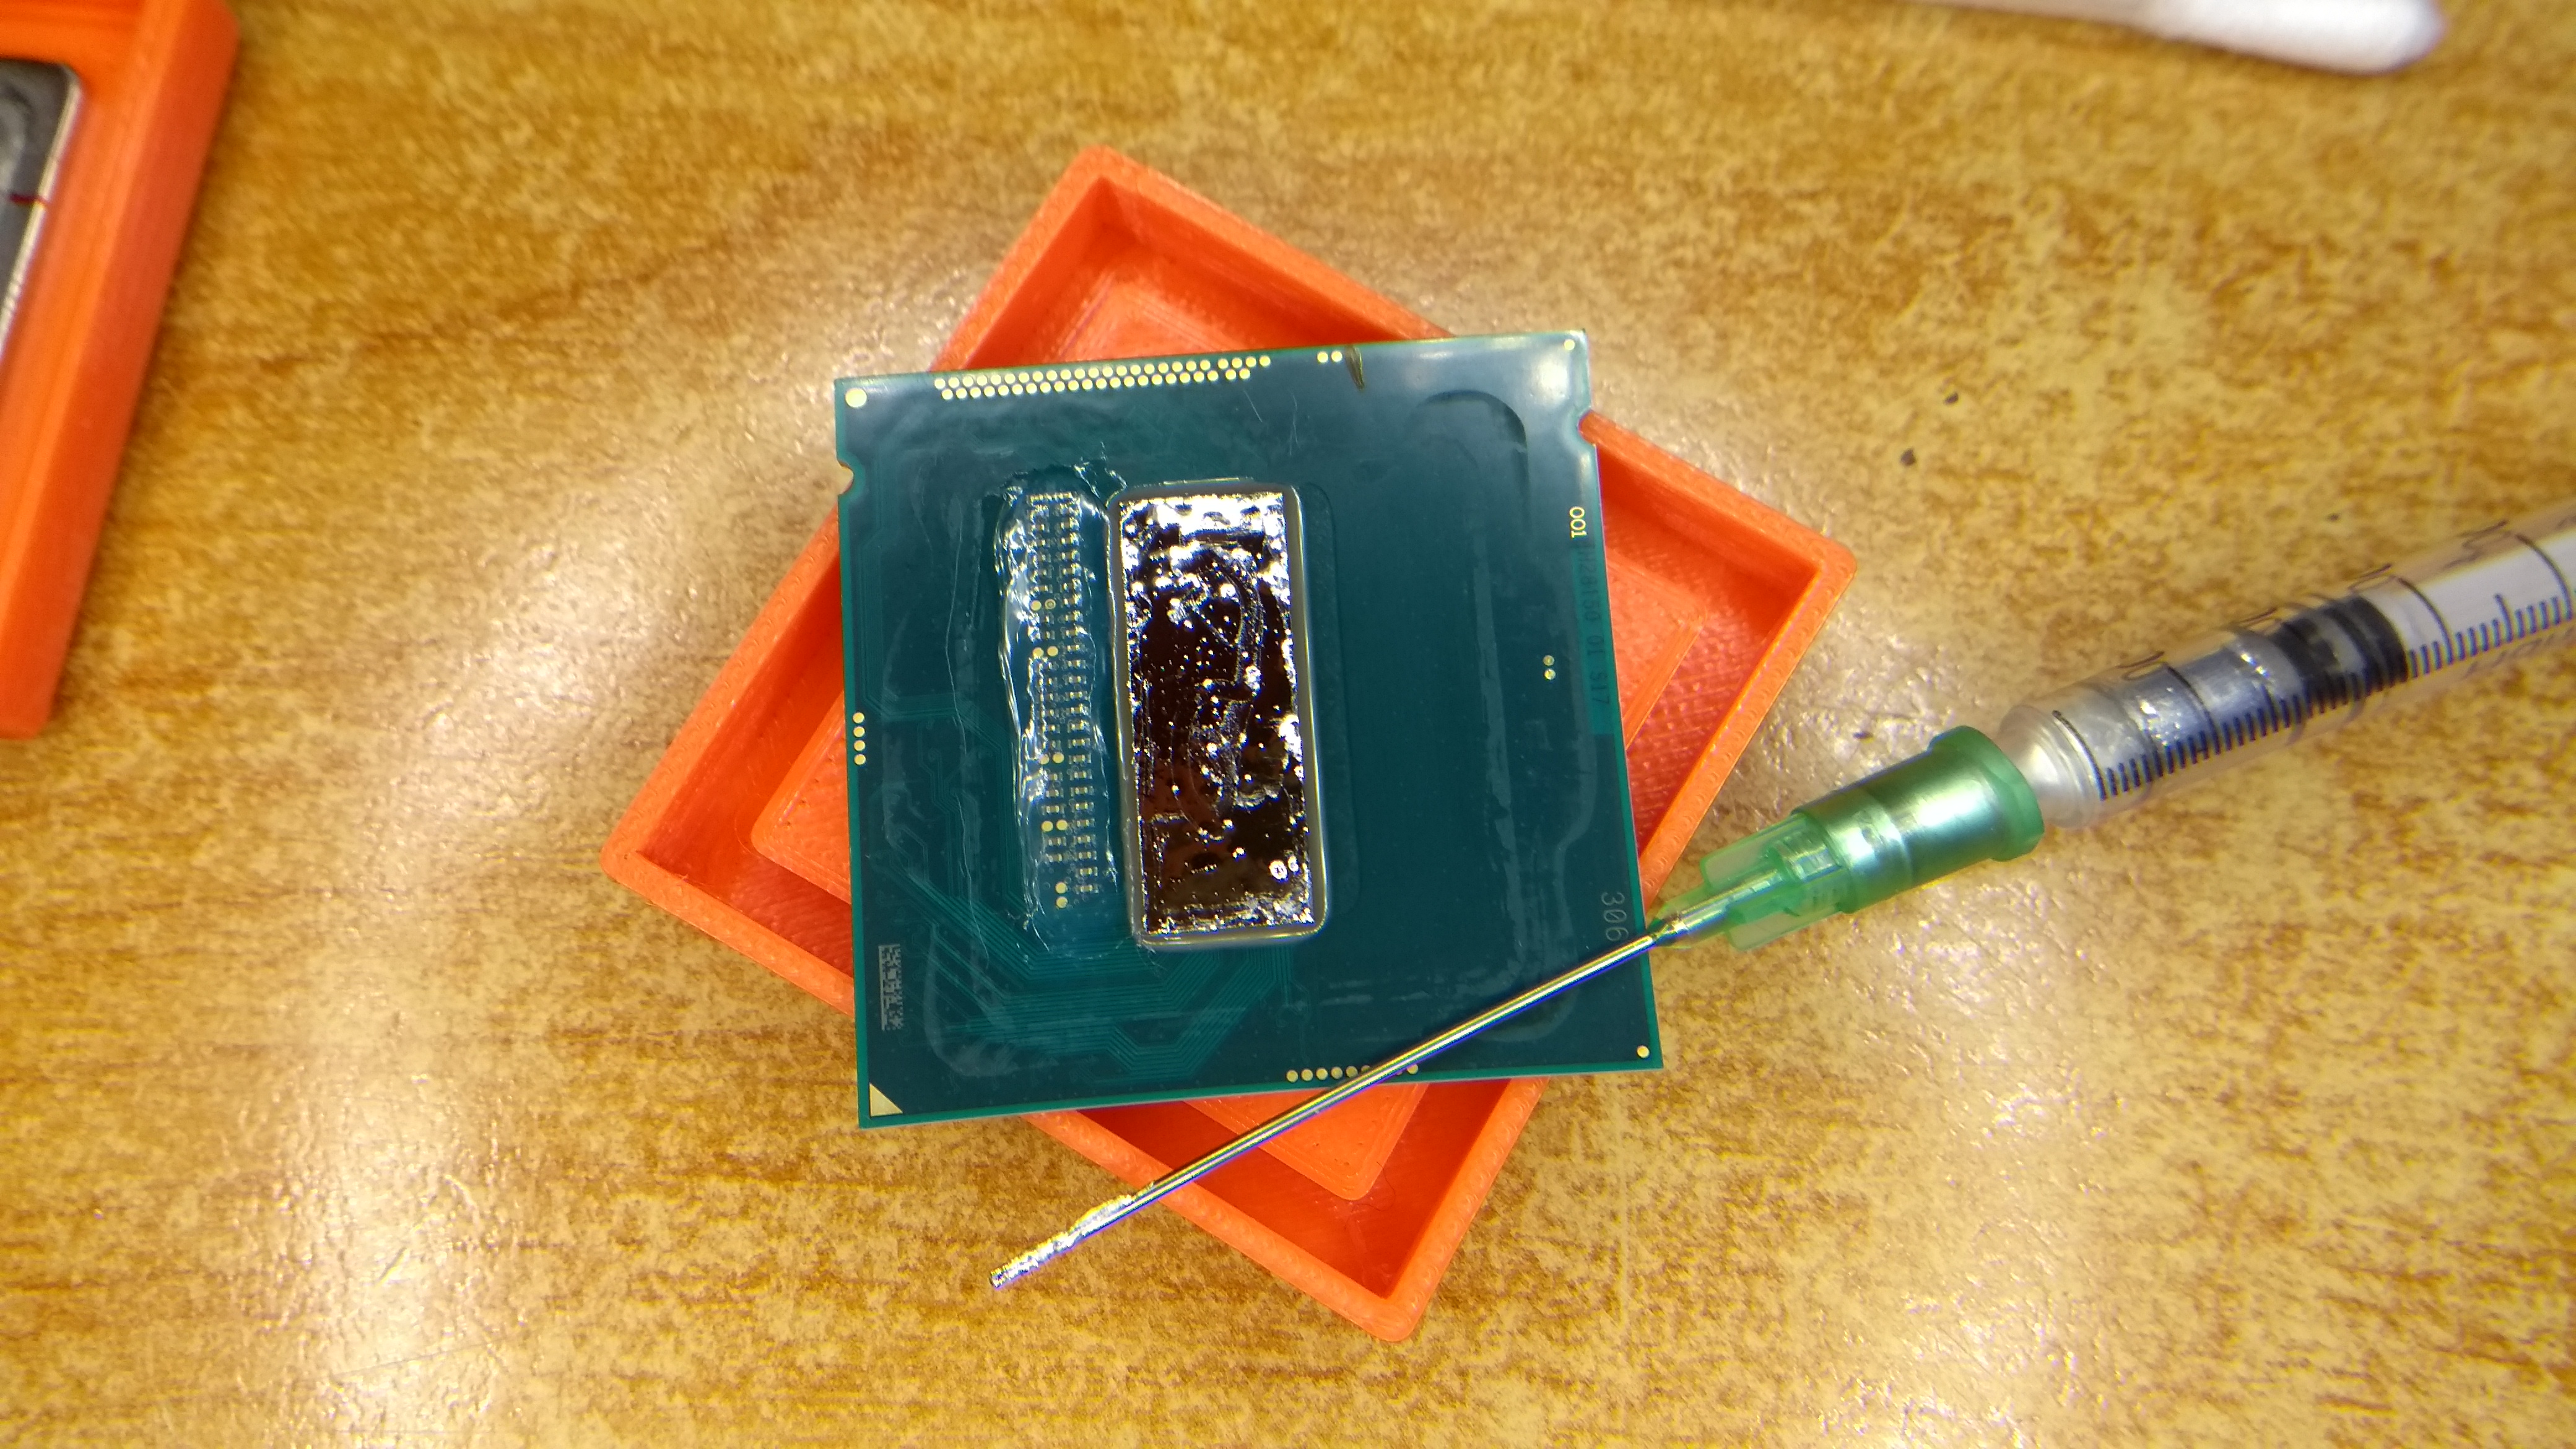
The Die wets quite easily …lust apply a tiny bit (half a wheat grain) of alloy and move it around with the blunt needle …you can smear the stuff around with the shaft(not the tip) …piece of cake
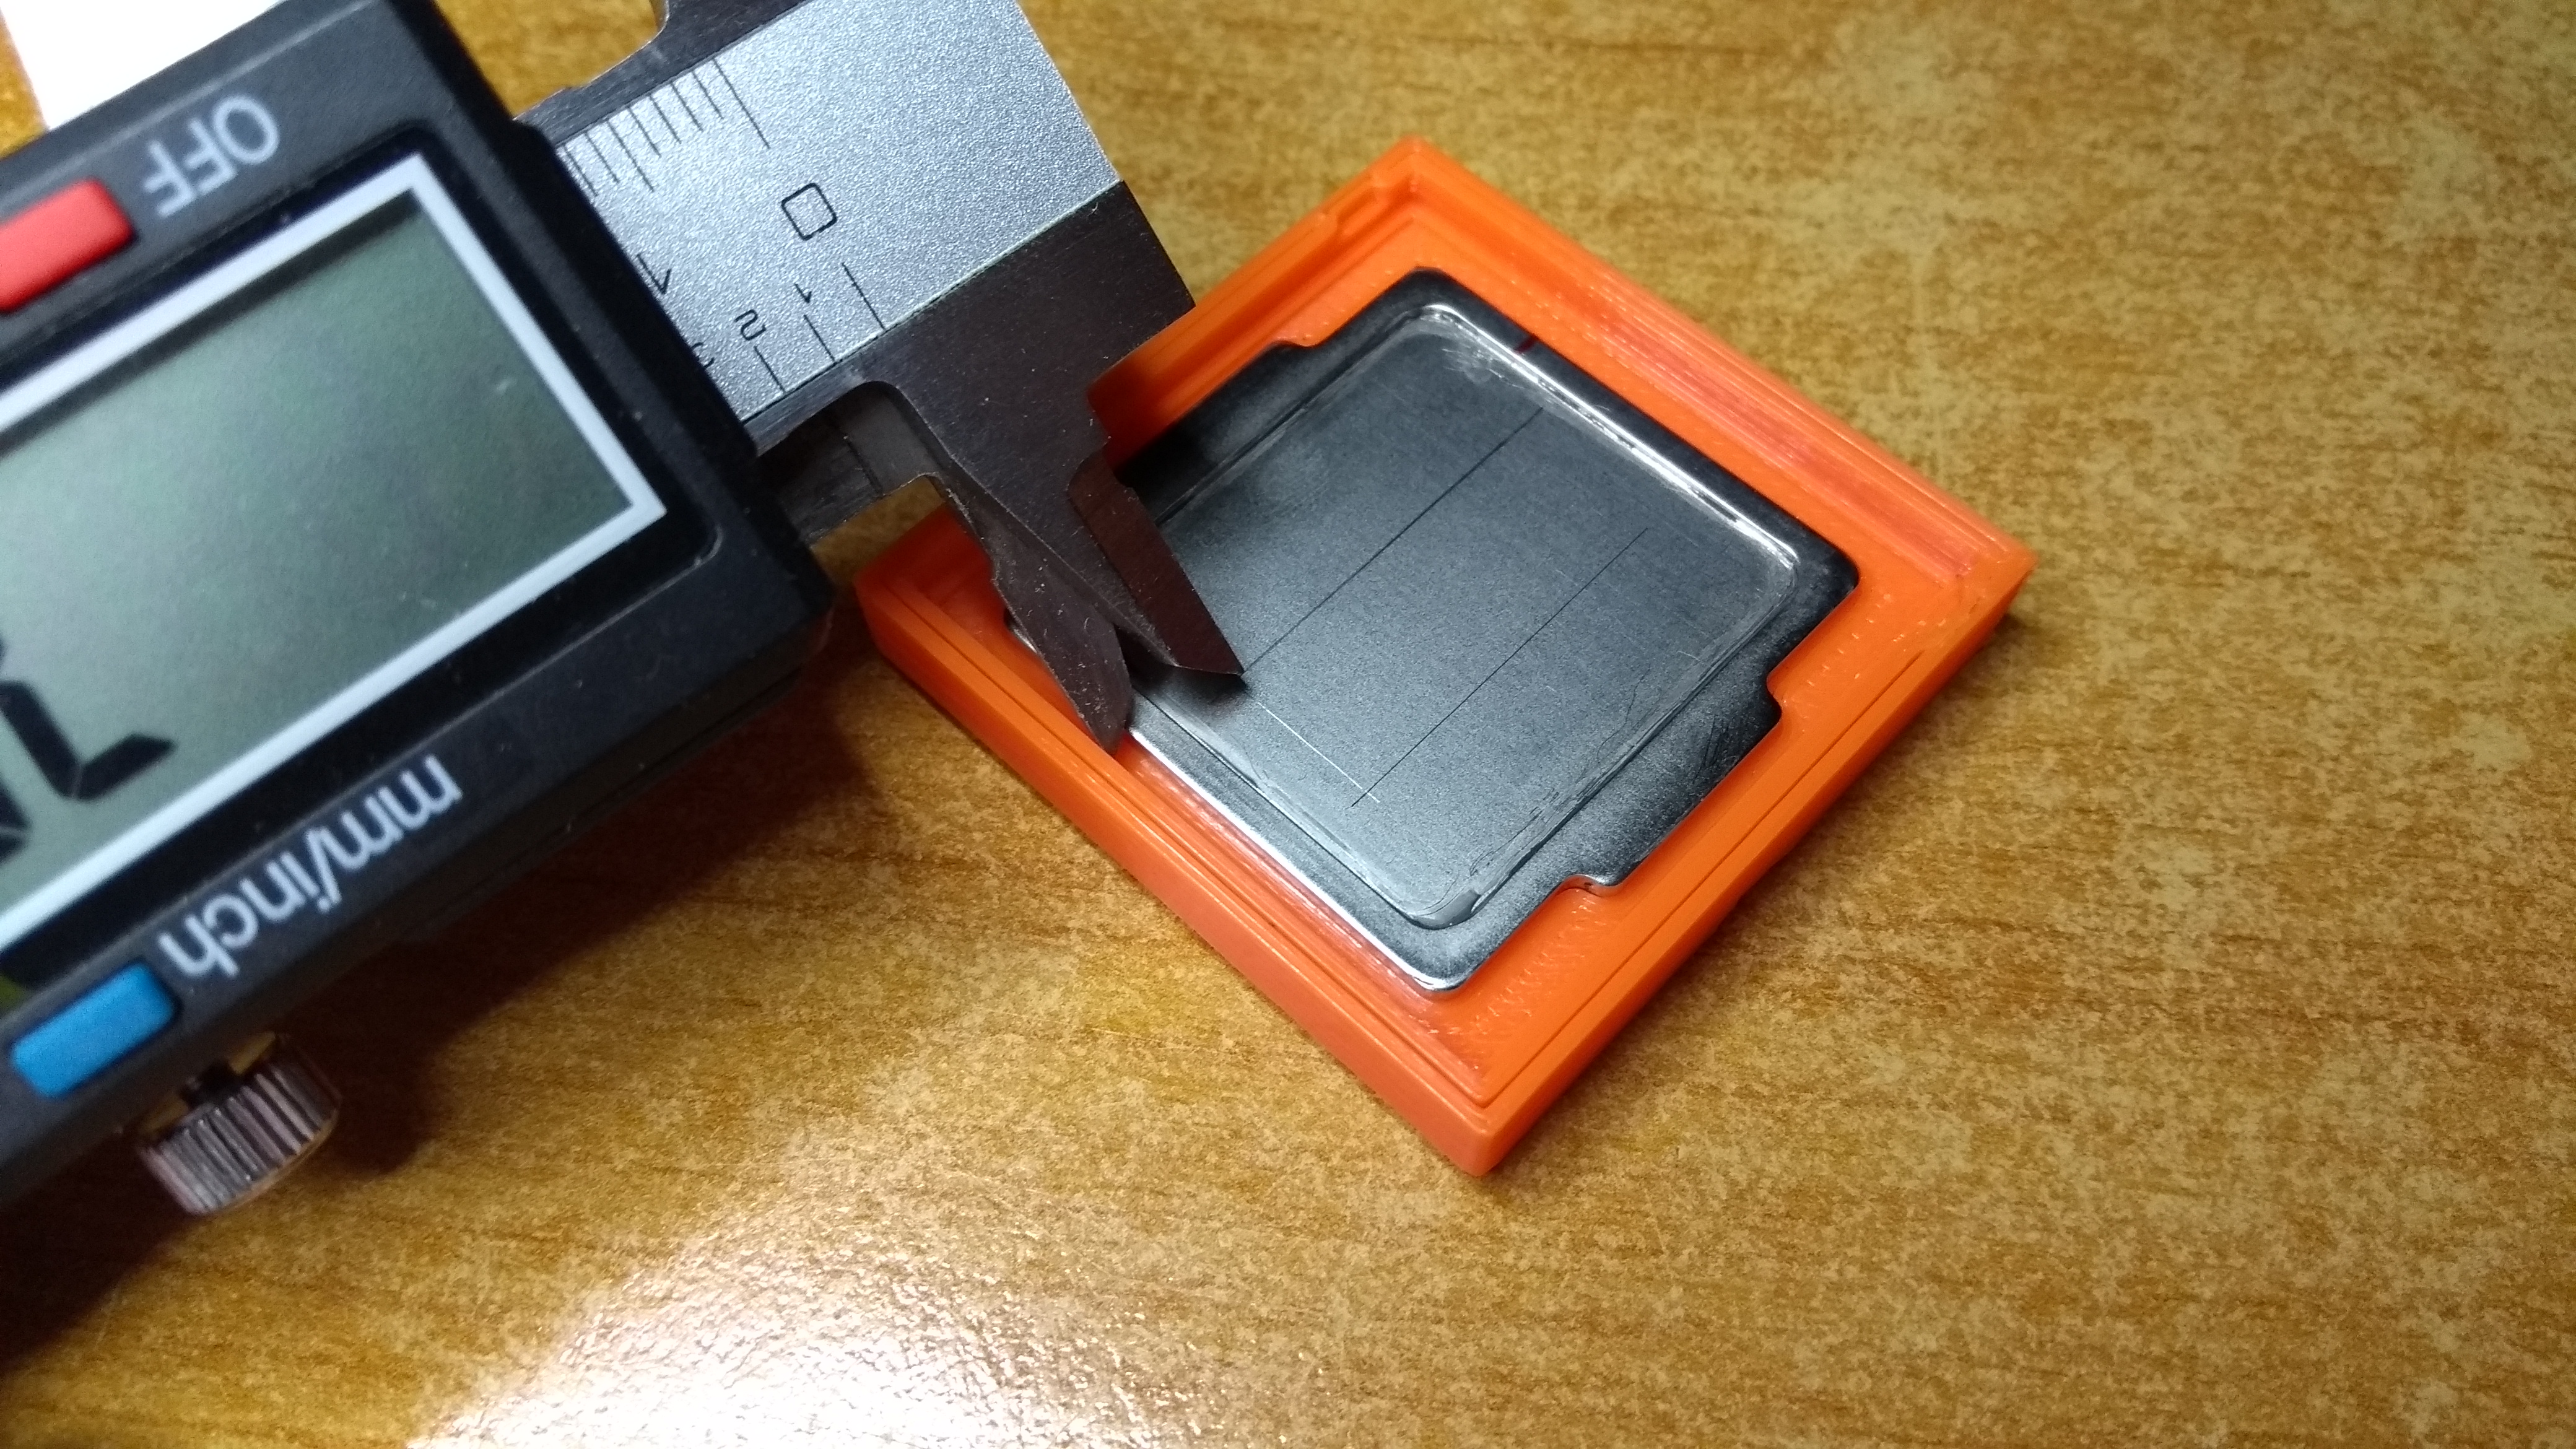
…i measured the PCB and transferred the Die location onto the IHS, in order to mark the contact area …yes (well, it depends on the quality of your relid tool), the PCB fits snugly to all edges of the relid tool, so i used its edges as a reference …then slightly scraped the die outline onto the IHS’ surface …see also, “how to use calipers”  (pro tip: if you buy calipers, choose ones that have a thumb-wheel, like mine, a thumb-fine-adjust …if you can afford heirloom grade ones, buy Mitutoyo)

…the Nickel(?) plating didn’t wet easily, but a cotton swab did the trick

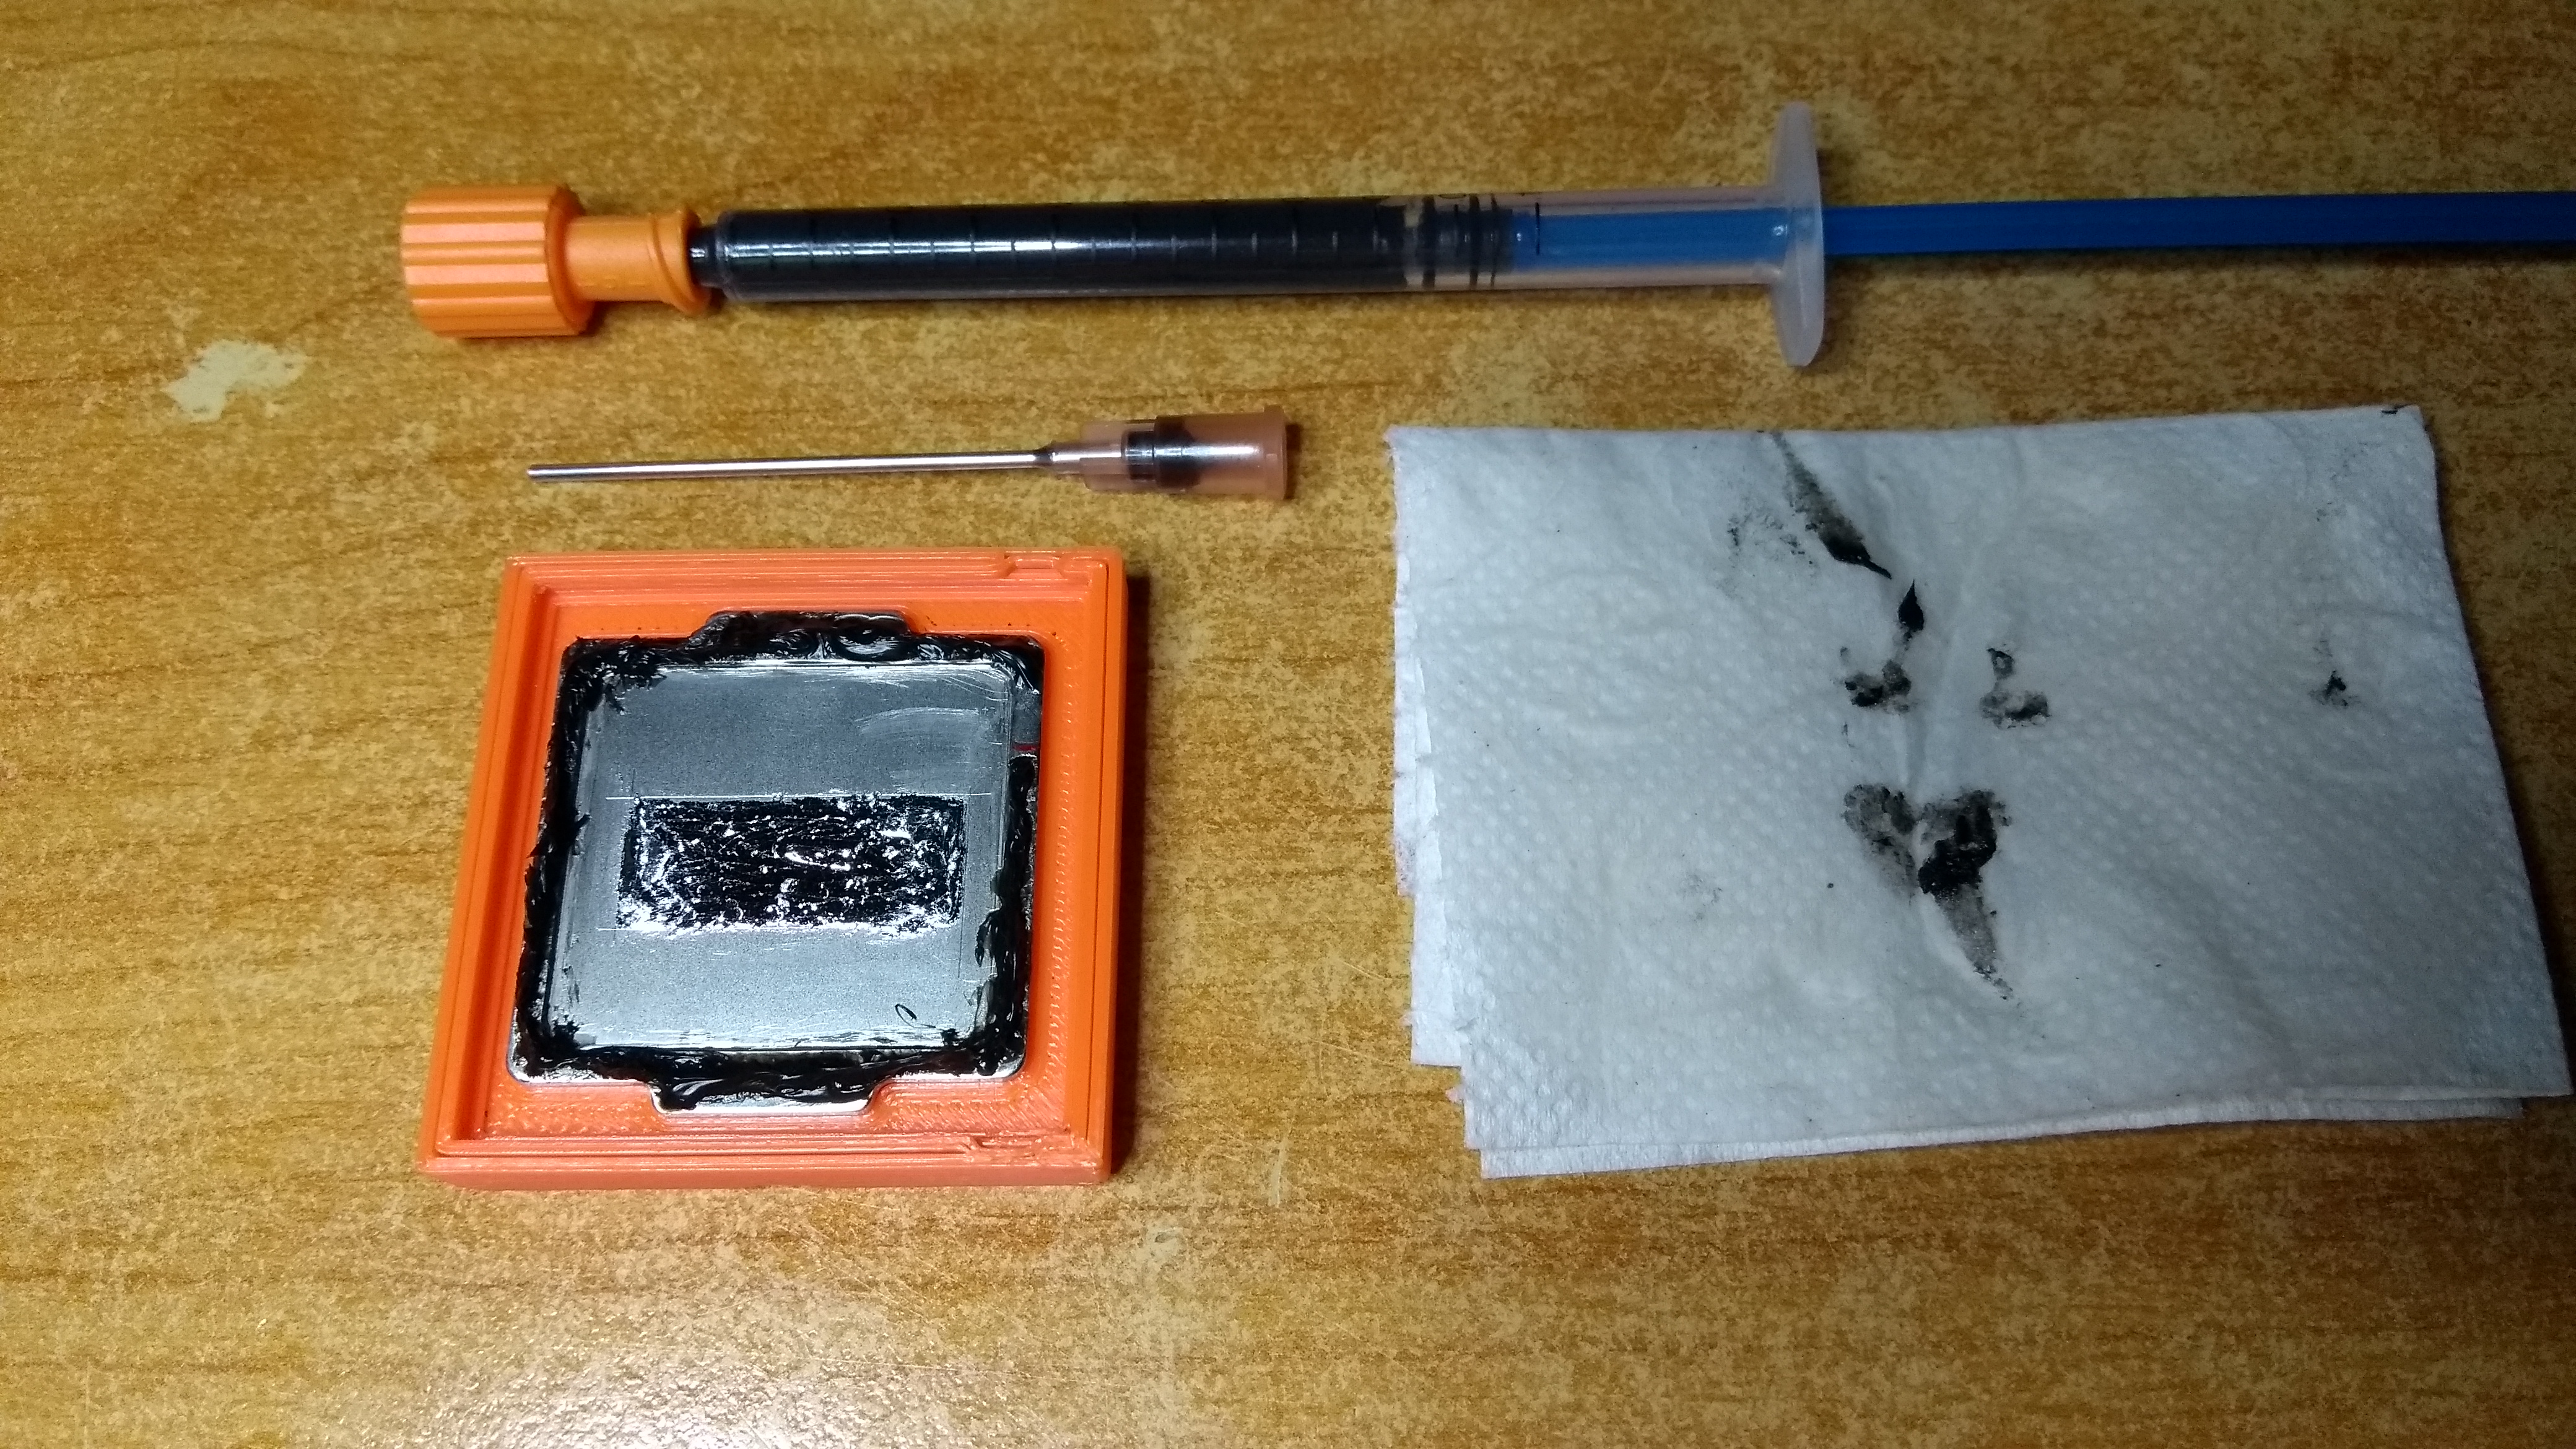
…almost done; next step is applying high temp silicone glue, in order to affix the IHS firmly back onto the PCB …lesson learned; don’t try to squeeze that thick stuff through a (blunt) needle - it’ll resist until you fail to apply the goo within comfortable parameters (required force), and with proper precision(strain induced shaking) …notice the red marking; that’s where Intel left a gap in their stock glue, for venting / thermal expansion of air (that’s why Pentium 4 have a hole in the IHS )
…fold it like a book. The alloy will, through the magic of cohesion 

 , automagically form a solid bond …push the PCB into the mould, until flush (notice the red mark on the PCB) …put the 2nd half, and the clamp on …also, you can barely see it on the photo, there’s a notch in the tool, by my index finger, actually 2 notches, one on either side - those line up with the notches in the PCB …of course, your experience may vary, based on the 3D model used for printing the tool
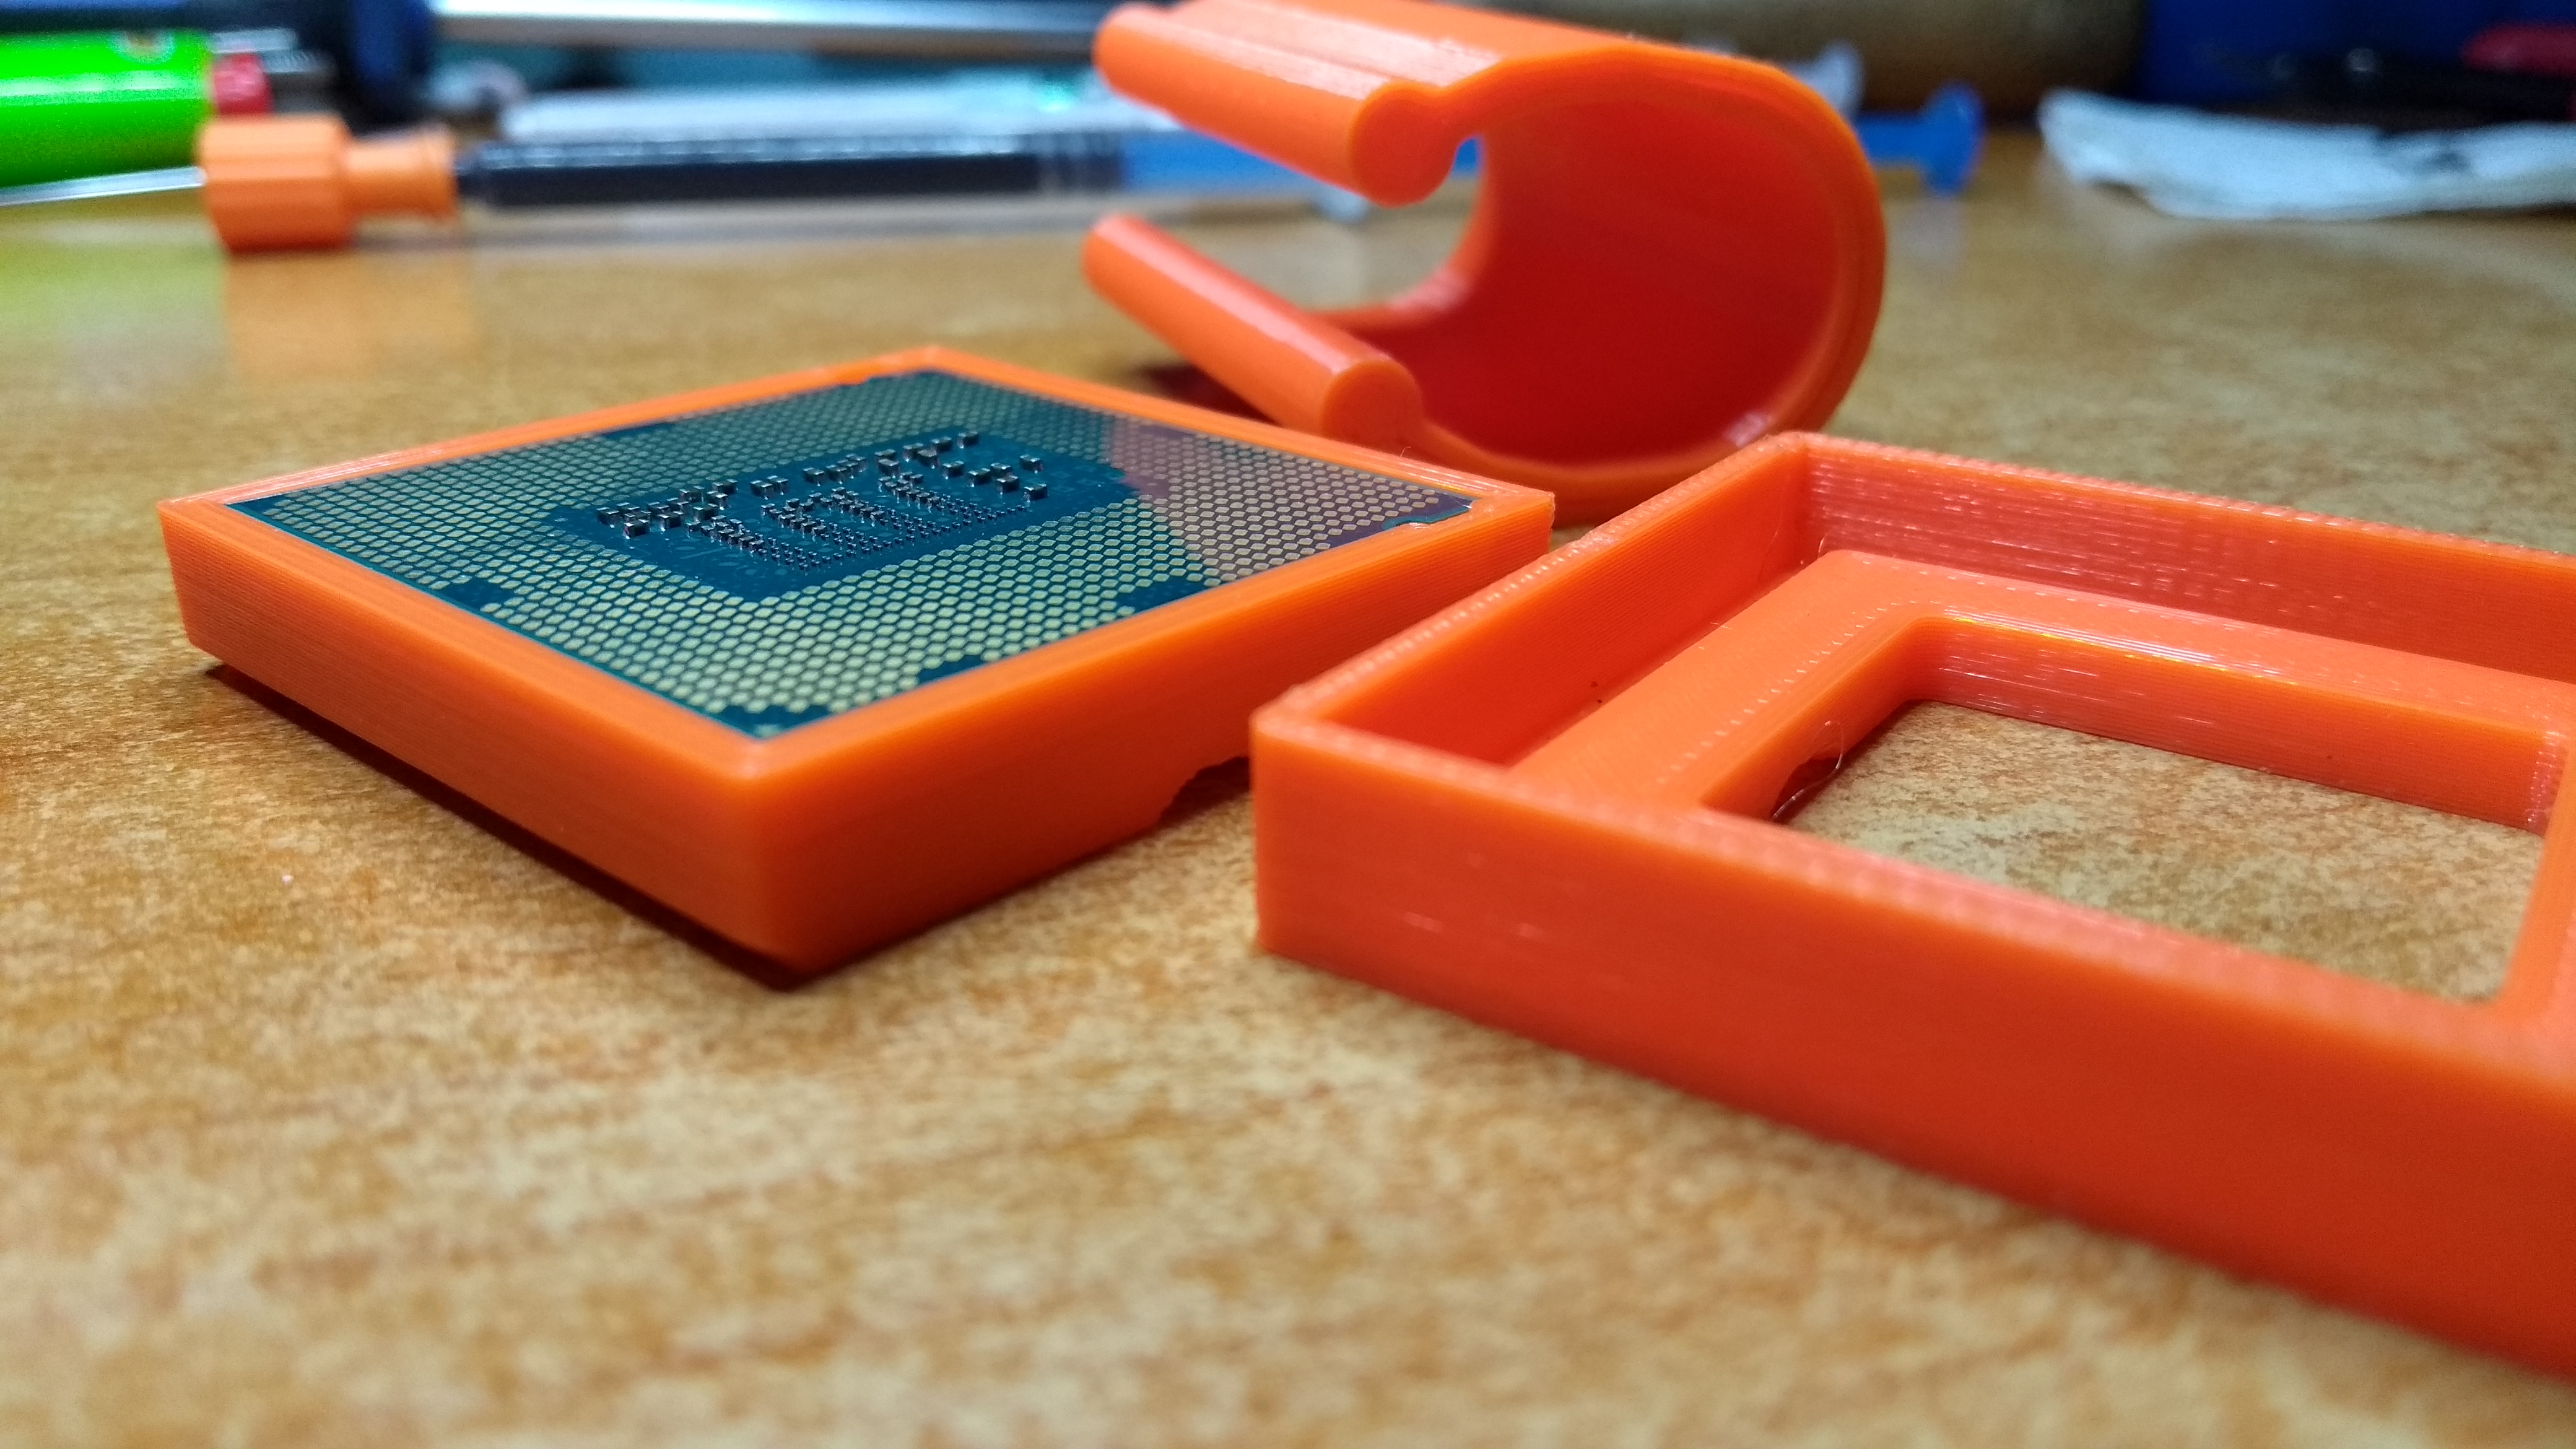

Now you wait, several hours, until the silicone glue is cured …i started at about noon, disassembly of the PC, preparation, tool mods, this and that, letting 3 coats of nail polish cure, applying alloy, applying silicone …by then it should be evening and time to sleep a healthy 8 hours …then you wake up, push your puppy out of the relid tool …and then you see this
NOW, YOU ARE PROUD AS…uhm…as a very proud person!
…BECAUSE teh 8100dy frelling ting actually still boots …LOL! Congratulations, you didn’t ruin your 300 €uro CPU 
…AND you achieved a 12°C reduction in temps, with the same multithread workload (and a slightly dusted full-copper-heatsink [Cooltek / Thermolab LP53] …and fresh MX-4 between IHS and LP53)
QAPLA’!
(Klingon; Success!)
edits: some minor enhancements in detail, some adjustments while proof-reading, grammar, and stuff …added a few jokes …nothing major …i don’t like changing content, people already attached their “i like this” flag to, however, the spirit of the original has been preserved.
