TODO Video Link
Introduction - Adventure Time
In collaboration with server part deals,
![]()
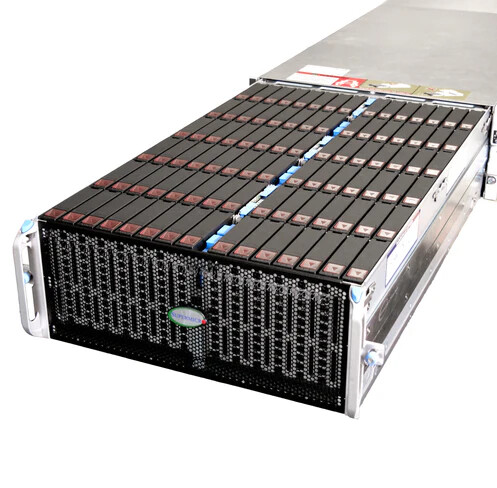
check out this awesome → 90 bay disk shelf
from supermicro . 90 bays! 28.8 gigabytes/sec interface throughput!
Overview
This is a disk shelf. It is a modern (for 2025) disk shelf. If you followed our adventures for a long time, you know that we love/loved the NetApp disk shelves because they were so standard, so easy to get parts for and so bulletproof. The problem, in 2025, is they are kind of old now. They have a lot of mileage. They are kinda slow, even if you find upgraded IOM components.
This shelf has none of those problems and plenty of room to grow. Whereas the netapp might still make sense for home lab… this THIS is a 10 year solution.
Why disk shelf and not a server with a lot of bays? Longevity and upgradability. This disk shelf can live through two? three? four? major server upgrades. It’s initial role can be archival, online bulk storage… then as it ages out it can be re-used for nearline or backup storage. In this way businesses can enjoy a double lifetime out of it.
They are popular, and they are easy to get parts for.
The Setup
This has 90 bays but only 24 SAS 1.2 channels. Each channel can manage 1.2 gigabytes/sec and the total bandwidth the chassis could possibly support is 28.8 gigabytes per second. As a practical matter the usable bandwidth is much lower.
The configuration in the video has a single IO module, but it is possible to configure both dual path and dual I/O modules.
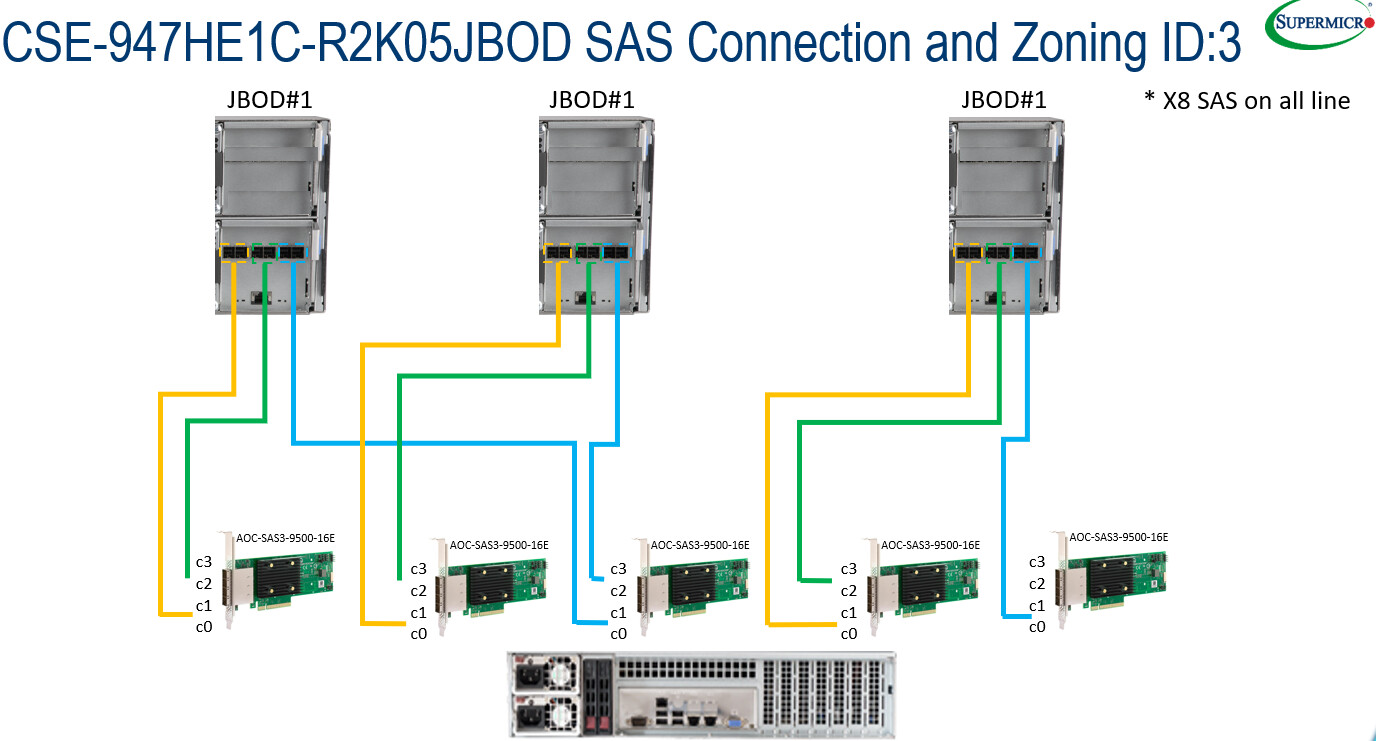
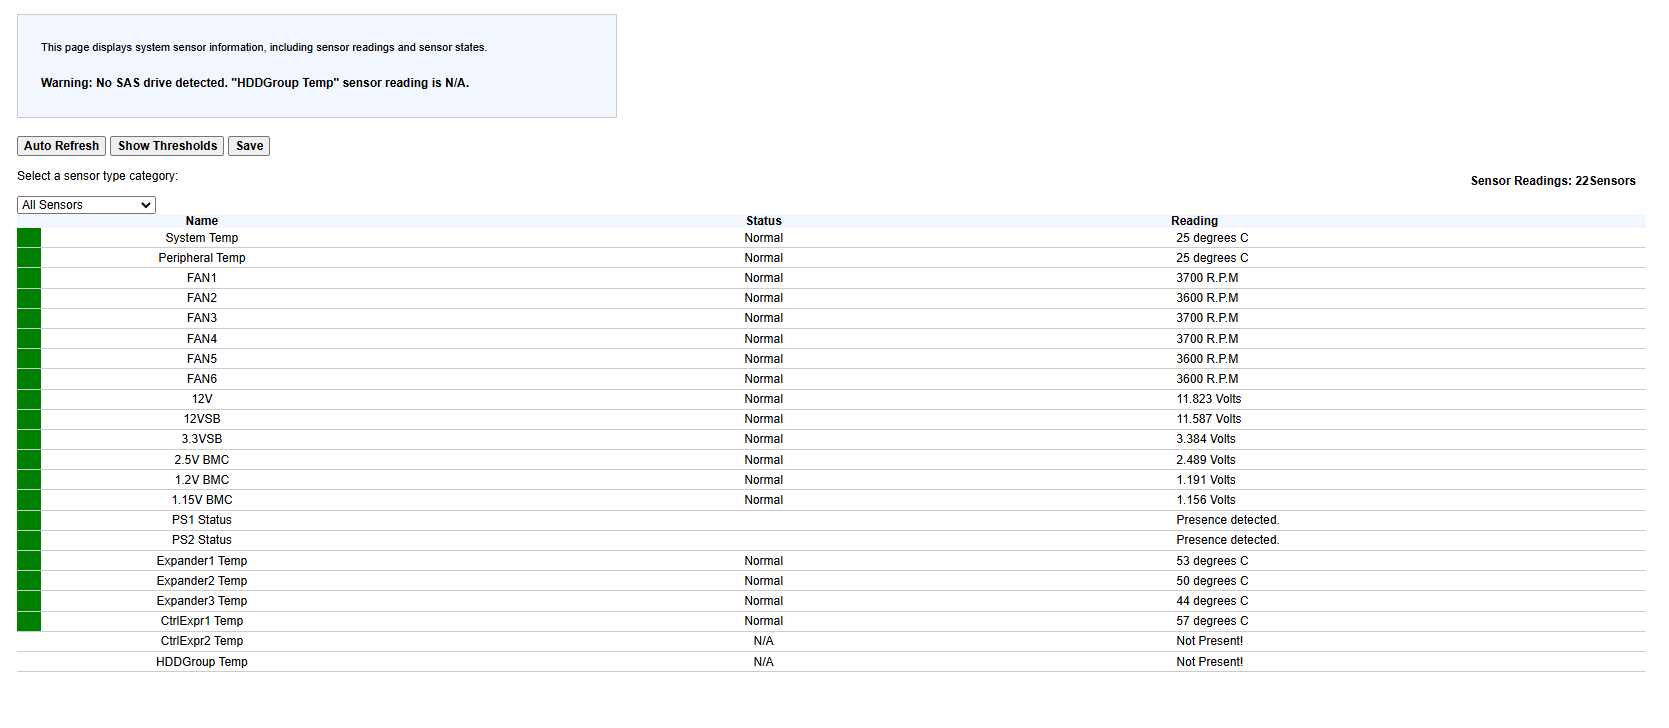
Even though this is a JBOD it has its own IPMI/out of band management. Manging 90 drives across just 24 SAS channels represents more than a 3:1 SAS mux and that can have bandwidth and cabling implications.
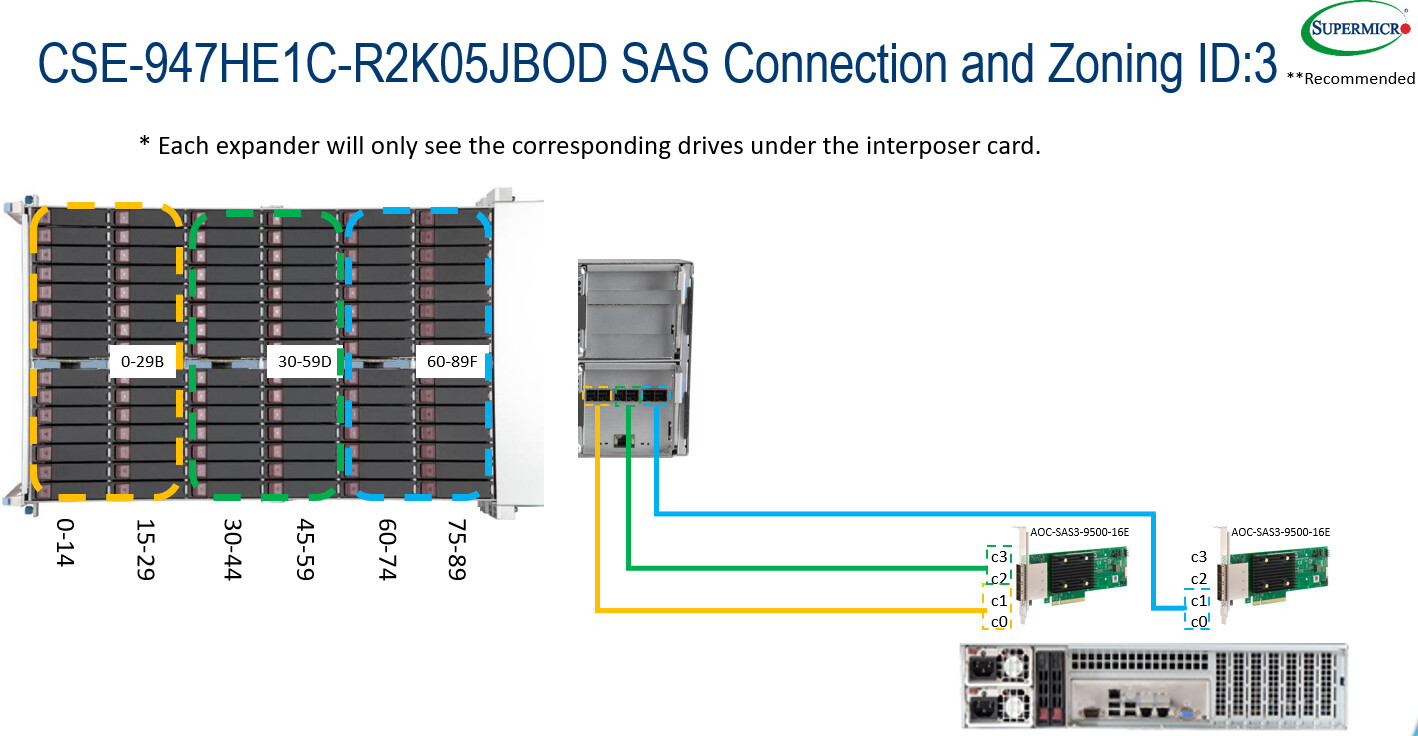
Zone ID: 3 is what we used for the video configuraiton. To give you an idea of the possibilities:

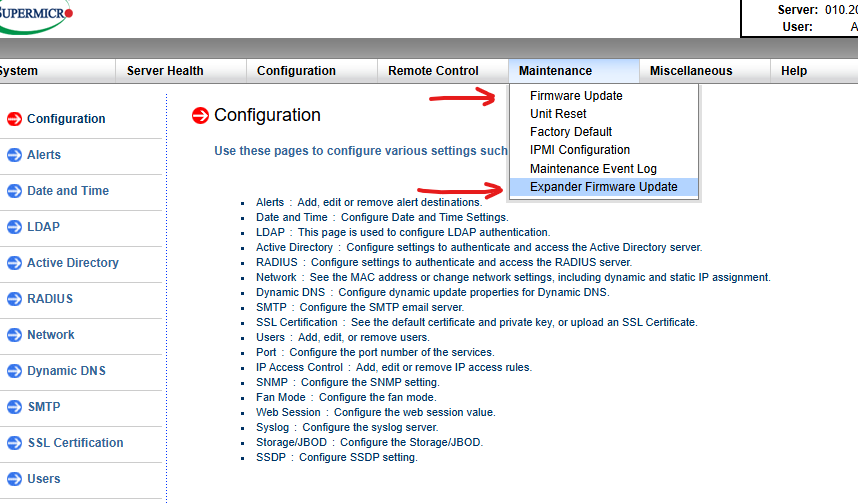
Firmware
It is critically important to get updated expander firmware, and IPMI firmware
-
www.supermicro.com - /wdl/Firmware/JBOD/SC947S_SC947H Top Load JBOD/Expander/
-
www.supermicro.com - /wdl/Firmware/JBOD/SC947S_SC947H Top Load JBOD/IPMI/
Special thanks to Jake from LTT – the first time I worked on one of these was a while back with Jake from LTT and he had some good notes about what they ran into when they were using it and Iwas able to apply it here.
IPMI
storage mode 3 for max performance, mode 1 is the default. Mode 0 used to be auto, but this jbod was bad at Doing The Right Thing consistently. So it requires manual selection.
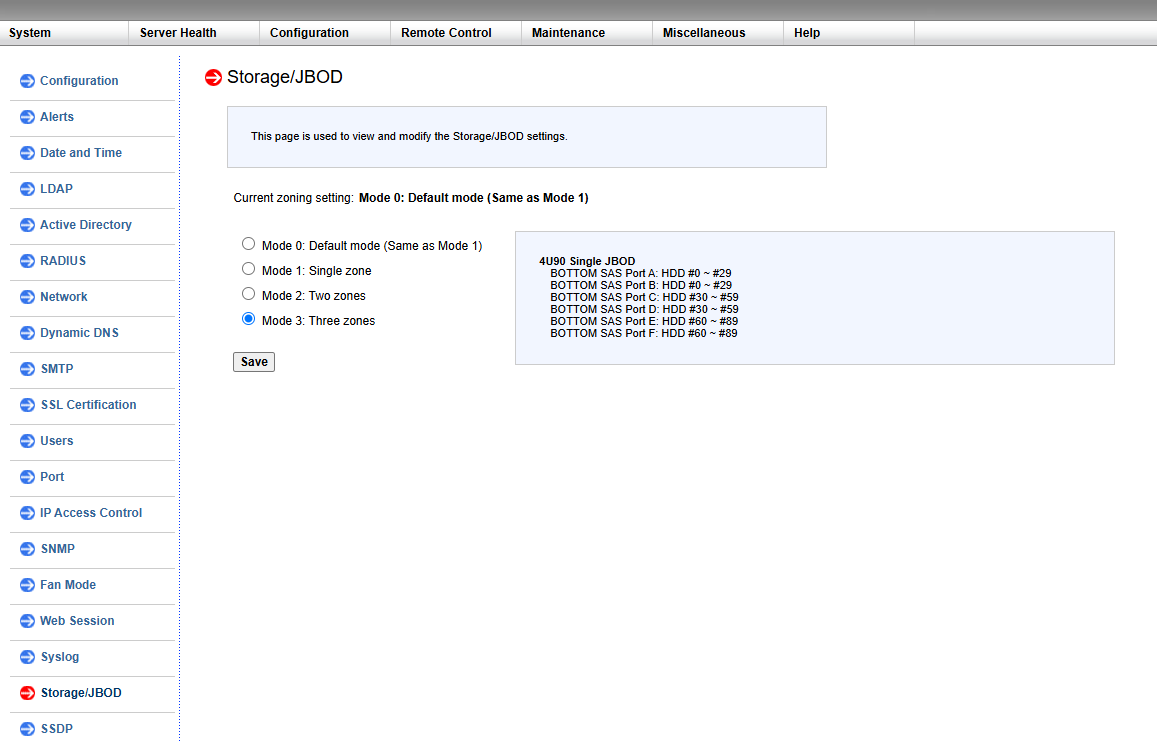
NOTE: After changing zoning you MUST pull both power cords for 5+ minutes to be sure the zoning change takes effect.
Fans and Sensors via IPMI / snmp
The JBOD does support different zoning configurations, but this one makes the most sense. And based on the zoning diagram and how many SAS channels you’re using back to your host, you can decide on whether you want to spread drives across channels (“Zones”) or if you want to minimize the number of connections back to the host you need.
ZFS Benchmarks
Let’s get wild and crazy with vdevs! Spoiler: DRAID makes the most sense with this many drives, probably. Pro Tip Go ahead and designate at least one or two hot spares for ZFS. That way if a drive dies, a spare is immediately available. If you want to run without spares please reserve at least one empty drive slot. As a general best-practice I always recommend adding a new drive before removing any malfunctioning drives from the array.
As you might imagine the three “zones” for disk configuration gives us some options when we want to maximize safety or speed. If you’re especially interested in safety/redundancy, I’d recommend picking up another IO module as well as more expanders to add internally.
And if 2.5pb+ per shelf isn’t enough for you… it is possible to deploy a setup 7.5 pb in a single system with 3 JBOD. Goodness!
TODO paste here from the video