TR: Adding excess to excess (Excess² ?)
I am wrapping up my substantially overbuilt 9985wx build and thought I would share.
Background
I am the AI Security Principal (aka ‘expert’)’ for a Fortune 500 and a fair amount of the work I do is not permitted to be ran on the corporate network and/or cloud providers (think AI red teaming type activities). As result, I build my own systems to perform these activities.
My current machine died when I decided to reroute a water cooling hose ‘real quick’ when I was waiting on a dataset to download in prep for swapping in a 5090. Let’s just say that the process didn’t go well as one of the quick connects stuck open and sprayed EVERYTHING with GL50 (Glycol based coolant) why it was running. Motherboard… DEAD, Processor… Dead. Most other parts were ok, but were old enough that I’m saving them for a build for my son.
I also play games on a 5K2K monitor (demanding resolution to push at higher frame rates), competitively crack passwords (HashMob / CMIYC / etc), and am an water cooling enthusiast who competes on 3DMark (Currently in the top-100 leader-boards several times and the top-10 once ![]() ).
).
FYI: I have 256GB DDR4-3600 (8 32GB sticks) that came out of this build that I could part with VERY cheaply. If anyone has a need send me a DM and I’m sure I can set you up.
Sweet, you got work to pay for your rig?
Sadly no, this is out of pocket but it should pay for itself over time through work bonuses if it helps me meet goals… and it’s one hell of a gaming rig.
To keep this from being a sprawling mess, I’m using collapsible sections below, so I you see the following click the triangles
This is a description of a section
Tada magic I tell you ![]()
Details would be here
The Build
Parts
Main PC:
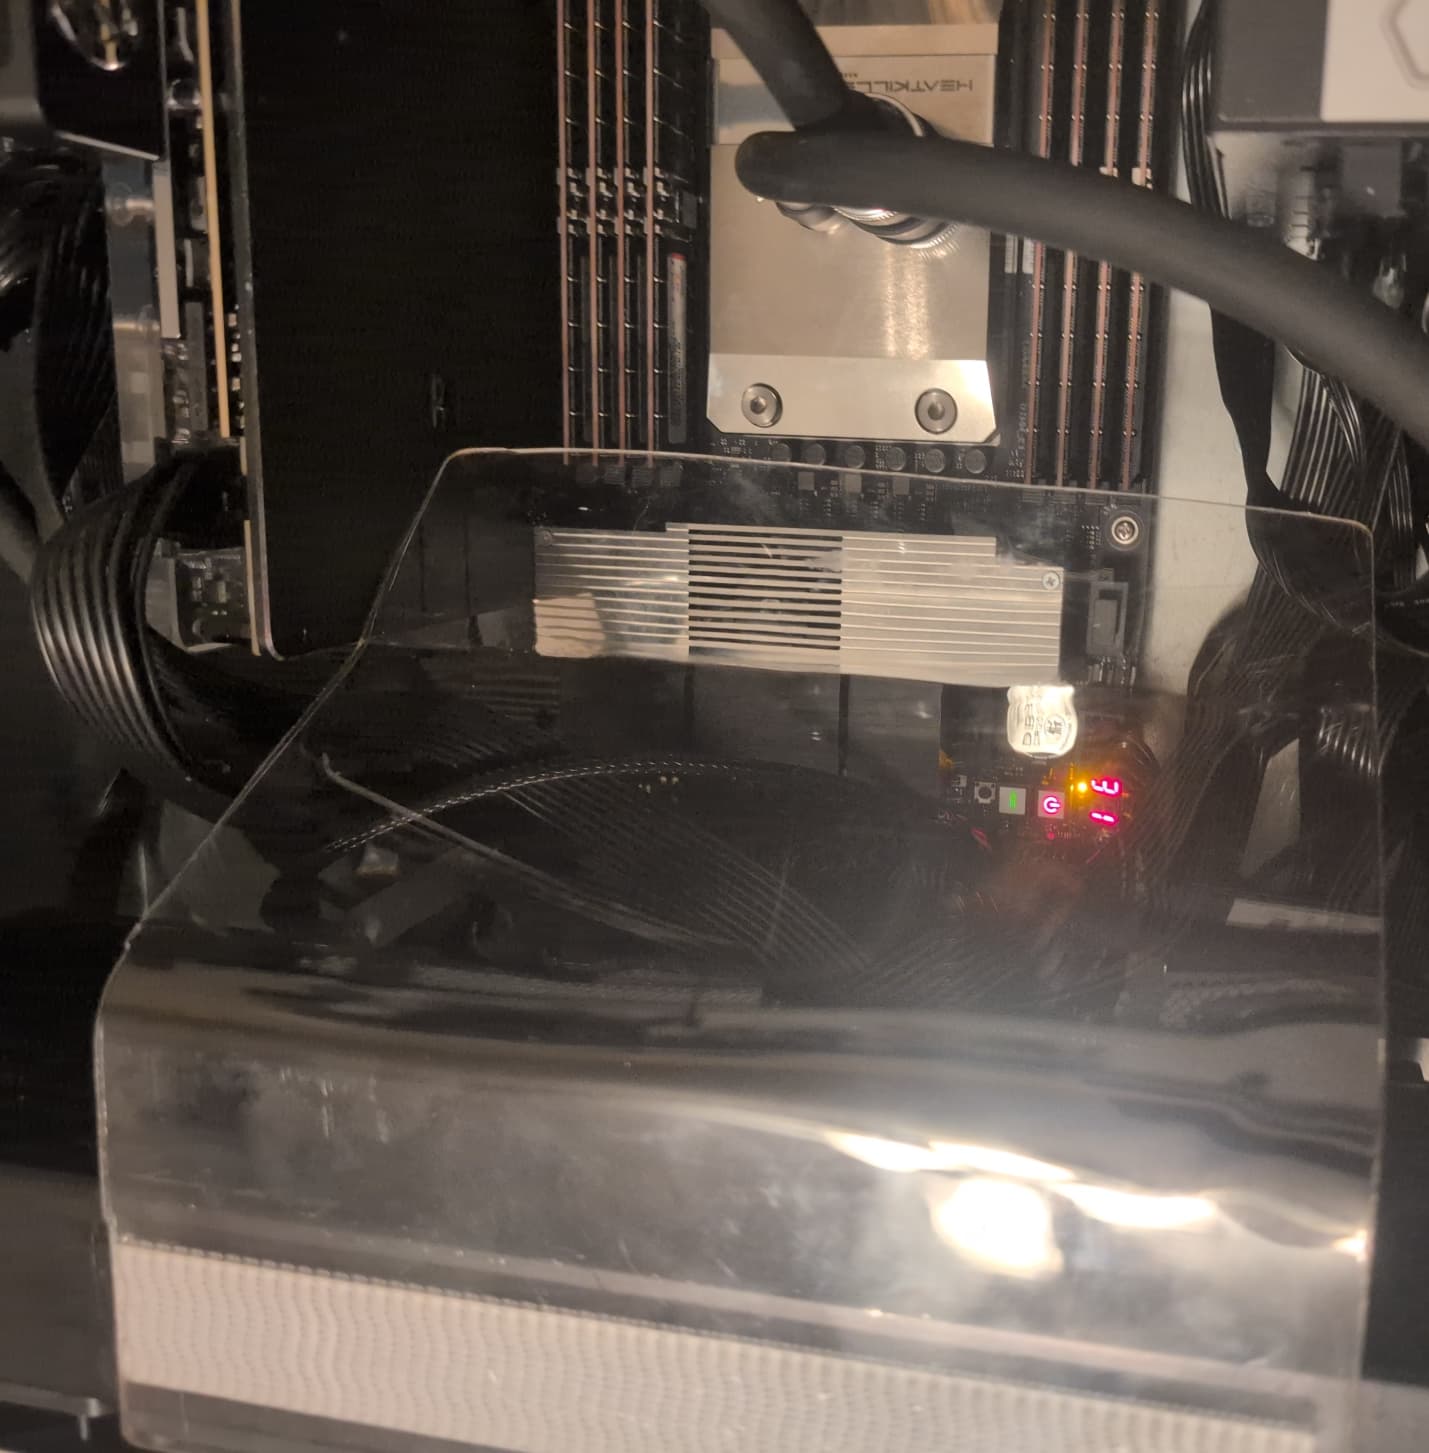
This is the actual PC itself with some of the parts of the water cooling loop
Component Details
| Part | Model | Notes |
|---|---|---|
| Case | SilverStone RM-52 | Product Link |
| Power Supply | Silverstone HELA 2050R Platinum | Product Link On a dedicated 20A 240v port on my UPS |
| Motherboard | Asus Pro WS WRX90E-SAGE SE | Product Link |
| Processor | AMS T PRO 9985WX | Product Link |
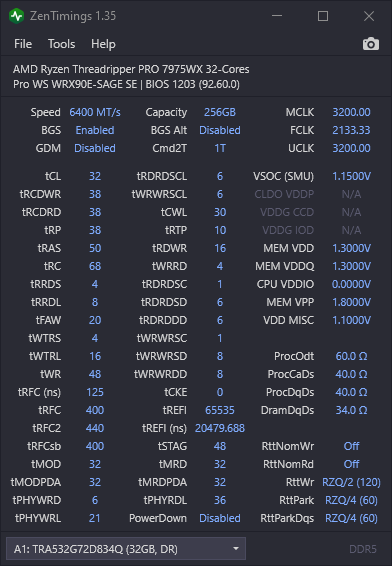
| Memory | VColor DDR5 OC R-DIMM | Part#: 46942730354855 Product Link |
| GPU | Asus Astral 5090 OC | Product Link |
| Storage | 6 x 4TB Samsung 9100 NVME M.2 | Product Link |
| Storage ‘Adapter’ | IcyDock ExpressSlot Slide | 2 x Part # MB204MP-B Product Link |
| Network | Nvidia Mellanox ConnectX-4 (2x100GB) | Part #: MCX416A-CCAT Specs End of Life, already had this on hand |
Cooling Components
Note: Cooling related components will be covered in more detail in the next section.
| Part | Model | Notes |
|---|---|---|
| CPU WaterBlock | Watercool HeatkILLER IV Pro | Product Link |
| GPU Waterblock | Alphacool Core | Product Link |
| Radiators | Alphacool NexXxoS HPE-45 (360) | 2 radiators Product Link |
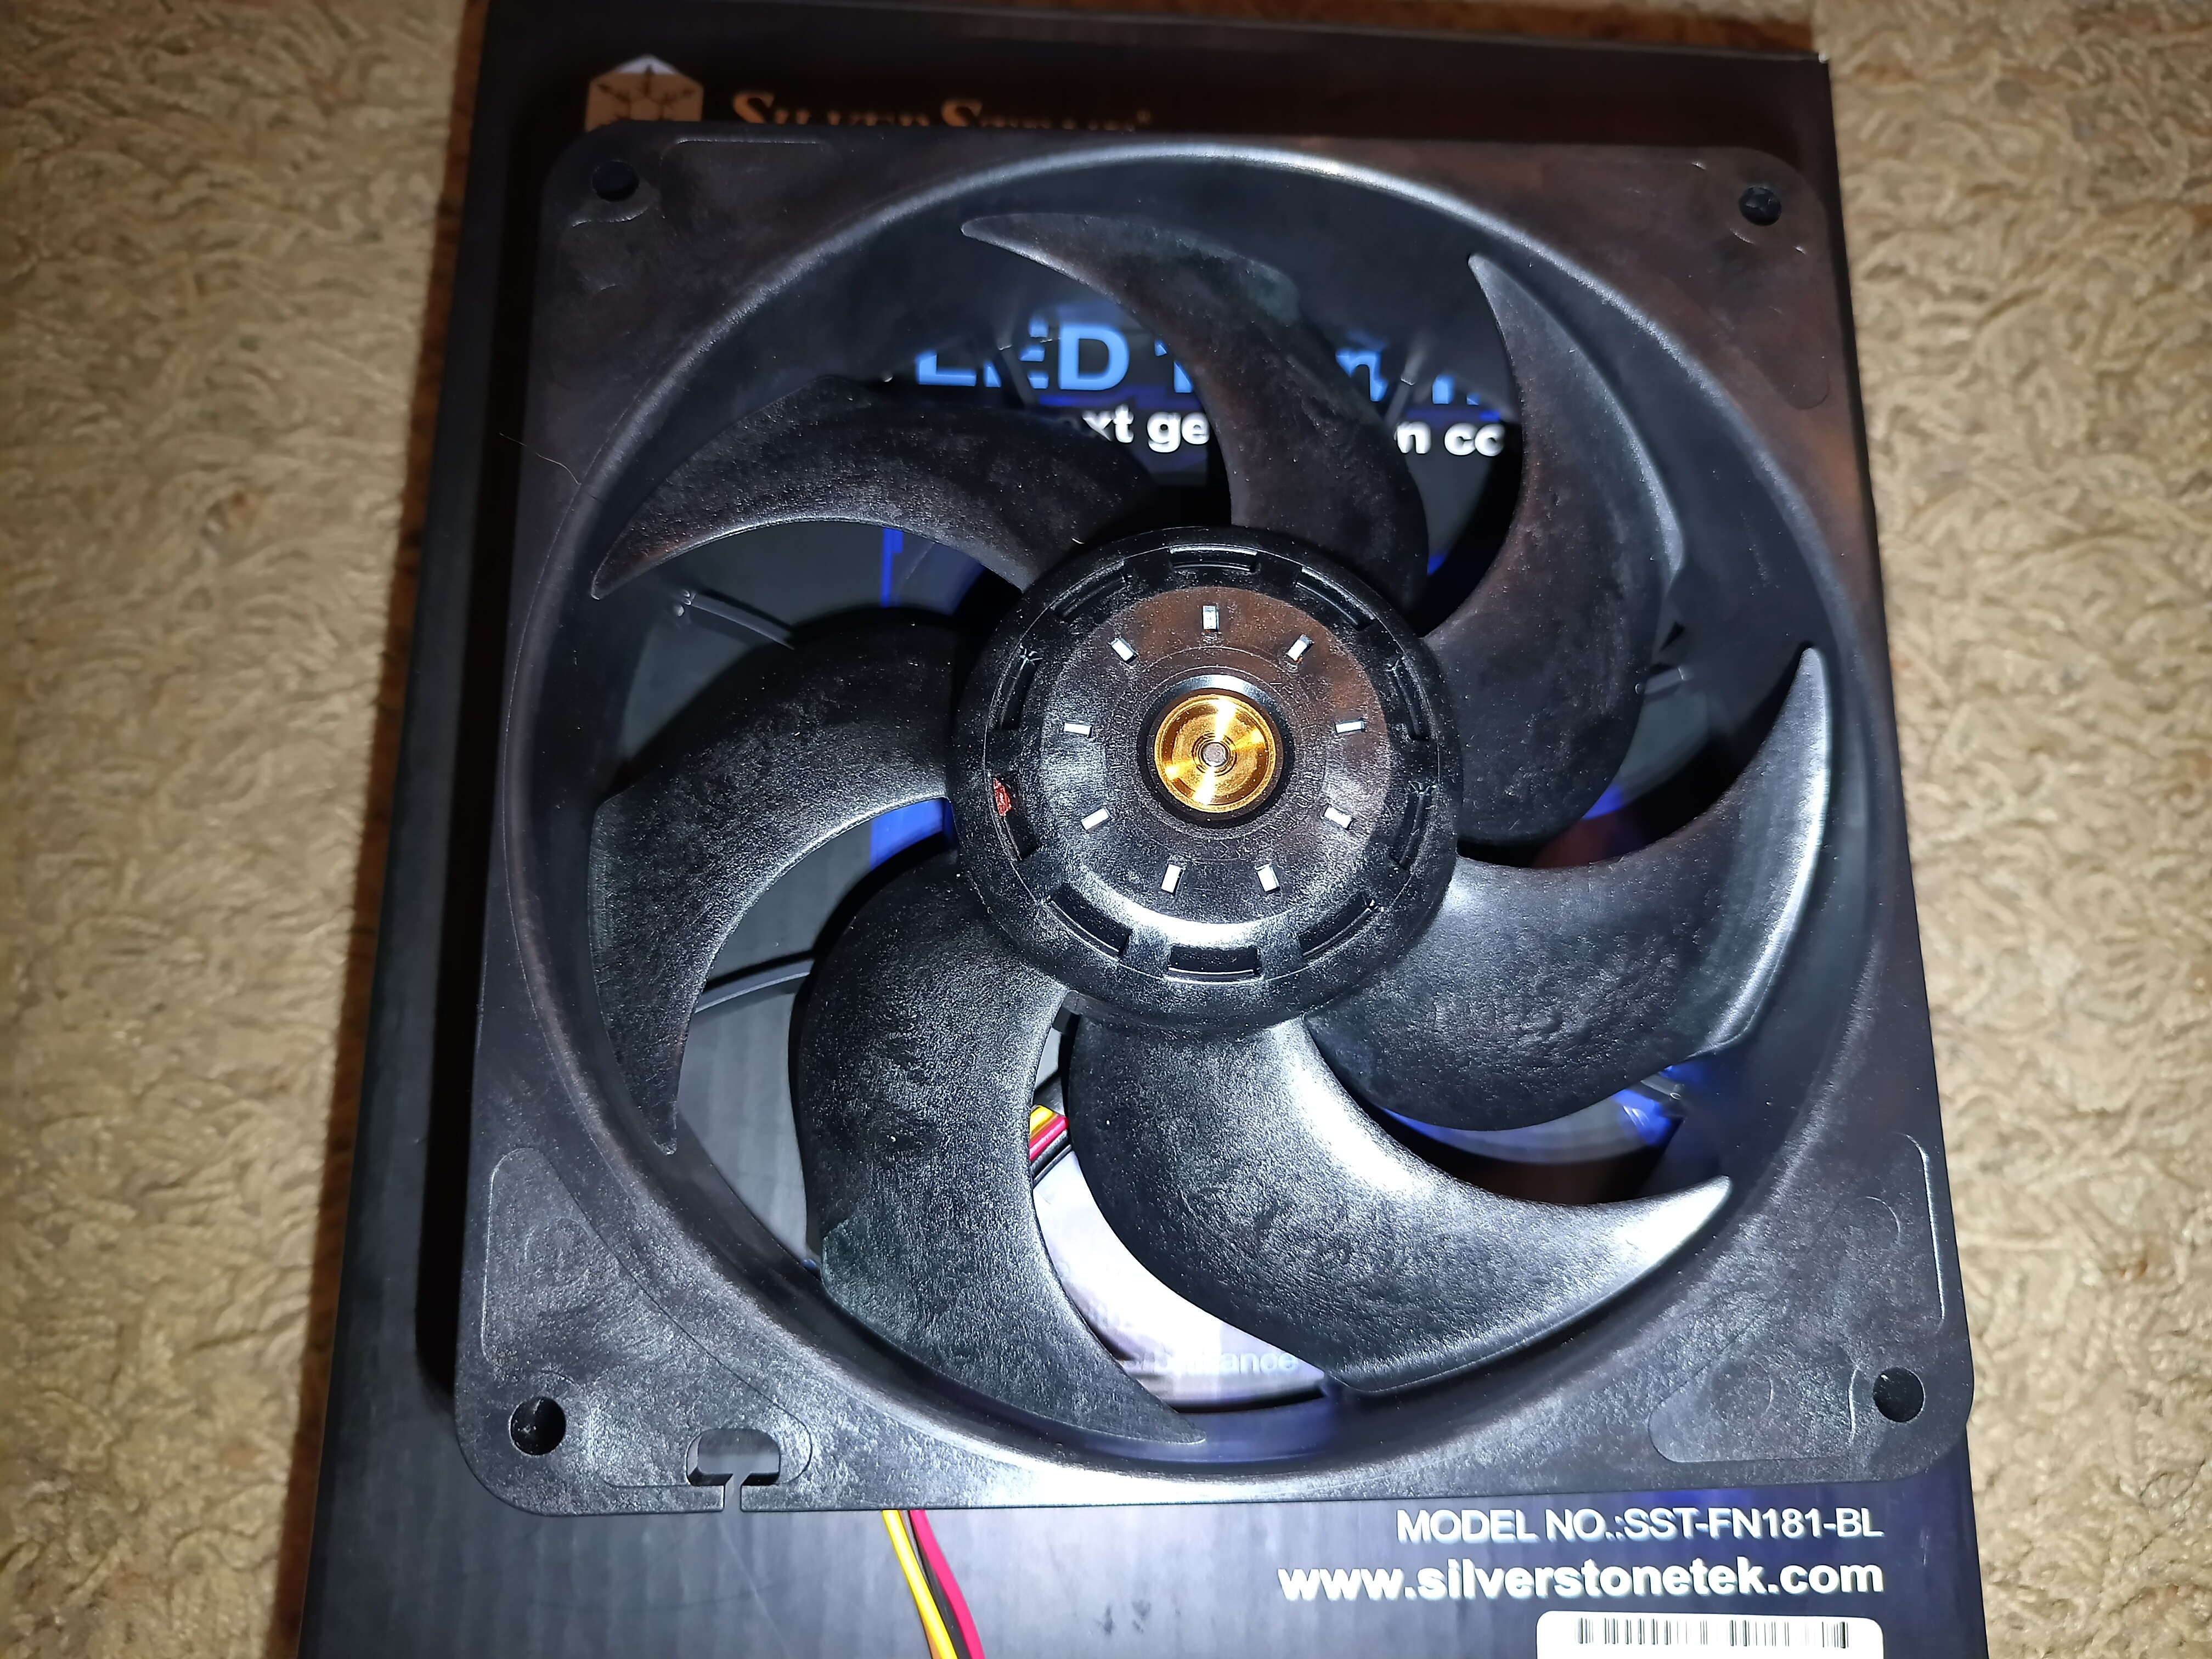
| Radiator Fans | Sanyo Denki SanAce 120 | 6 x Model 9RA1212P4G0011 120mm @ 4500RPM (130CFM | 12MM H20) Product Link |
| Exaust Fan | Sanyo Denki SanAce 140 | 1 x 9WL1412P5G001 140mmx51mm @7500RPM (318 CFM | 66mm H2O) Product Link |
| Fan Controller | Alphacool ES Guardian | 2 x Product Link |
| Flow/Temp Sensor | Alphacool ES flow and temperature | Product Link This is connected to the CPU Fan header to shutdown the PC in case the cooler unit has a failure. |
Cooling Unit
This is the unit that houses the majority of the watercooling loop components
Water cooling Unit Component Details
| Part | Model | Notes |
|---|---|---|
| Case | SilverStone RM-52 | Product Link |
| Power Supply | Silverstone Gemini 900A Gold | Product Link On a PDU fed by a 30A 240v port on my UPS |
| Radiator: Front | Alphacool NexXxoS Monsta 180mm Dual | Product Link |
| Radiators: Mid & Rear | Alphacool NexXxoS XT45 Full Copper 180mm Dual | Product Link |
| Radiator Fans | Orion Fans OD180APL Series | 4 x Model OD180APL-12HB 180mm x 65mm @ 3375RPM (460CFM | 28MM H20) Product Link |
| Exaust Fan | Sanyo Denki SanAce 140 | 1 x 9WL1412P5G001 140mmx51mm @7500RPM (318 CFM |
| Pump Tops | Alphacool Eisdecke D5 Dual Brass Top | 2 x Product Link |
| Pumps | Alphacool VPP Apex Pump | 4 x Product Link These are D5 footprint, but 12V optimized |
| Reservoir | AquaComputer aqualis ECO 450 ml | Product Link |
| System Monitor | AquaComputer aquaero 6 PRO | Product Info |
| Flow / Temp Sensors | AquaComputer High Flow 2 | 2 x Product Link |
| Power Button | APIELE 22mm Latching Switch 12V | Product Link |
Misc components
Components used in the build that don’t fit elsewhere
Miscellaneous components
| Part | Model | Notes |
|---|---|---|
| Thermal Paste | Thermal Grizzly Duronaut | Product Link |
| Watercooling Fittings | Alphacool HF Metal | G 1/4 Product link 90 Degree Product link |
| Watercooling Quick Connects | Alphacool ES Quick Release | Female Product Link Male Product Link Bulkhead Product Link |
| Fluid | Alphacool ES Liquid GL50 | Product Link |
| Power connector for 3A+ fans | Spectrum IC3 (60A rated) | Male Product link Female Product link |
| Air guide | Custom bent polycarbonate | Procuct Link |
ASSEMBLY
Main PC
Assembly notes
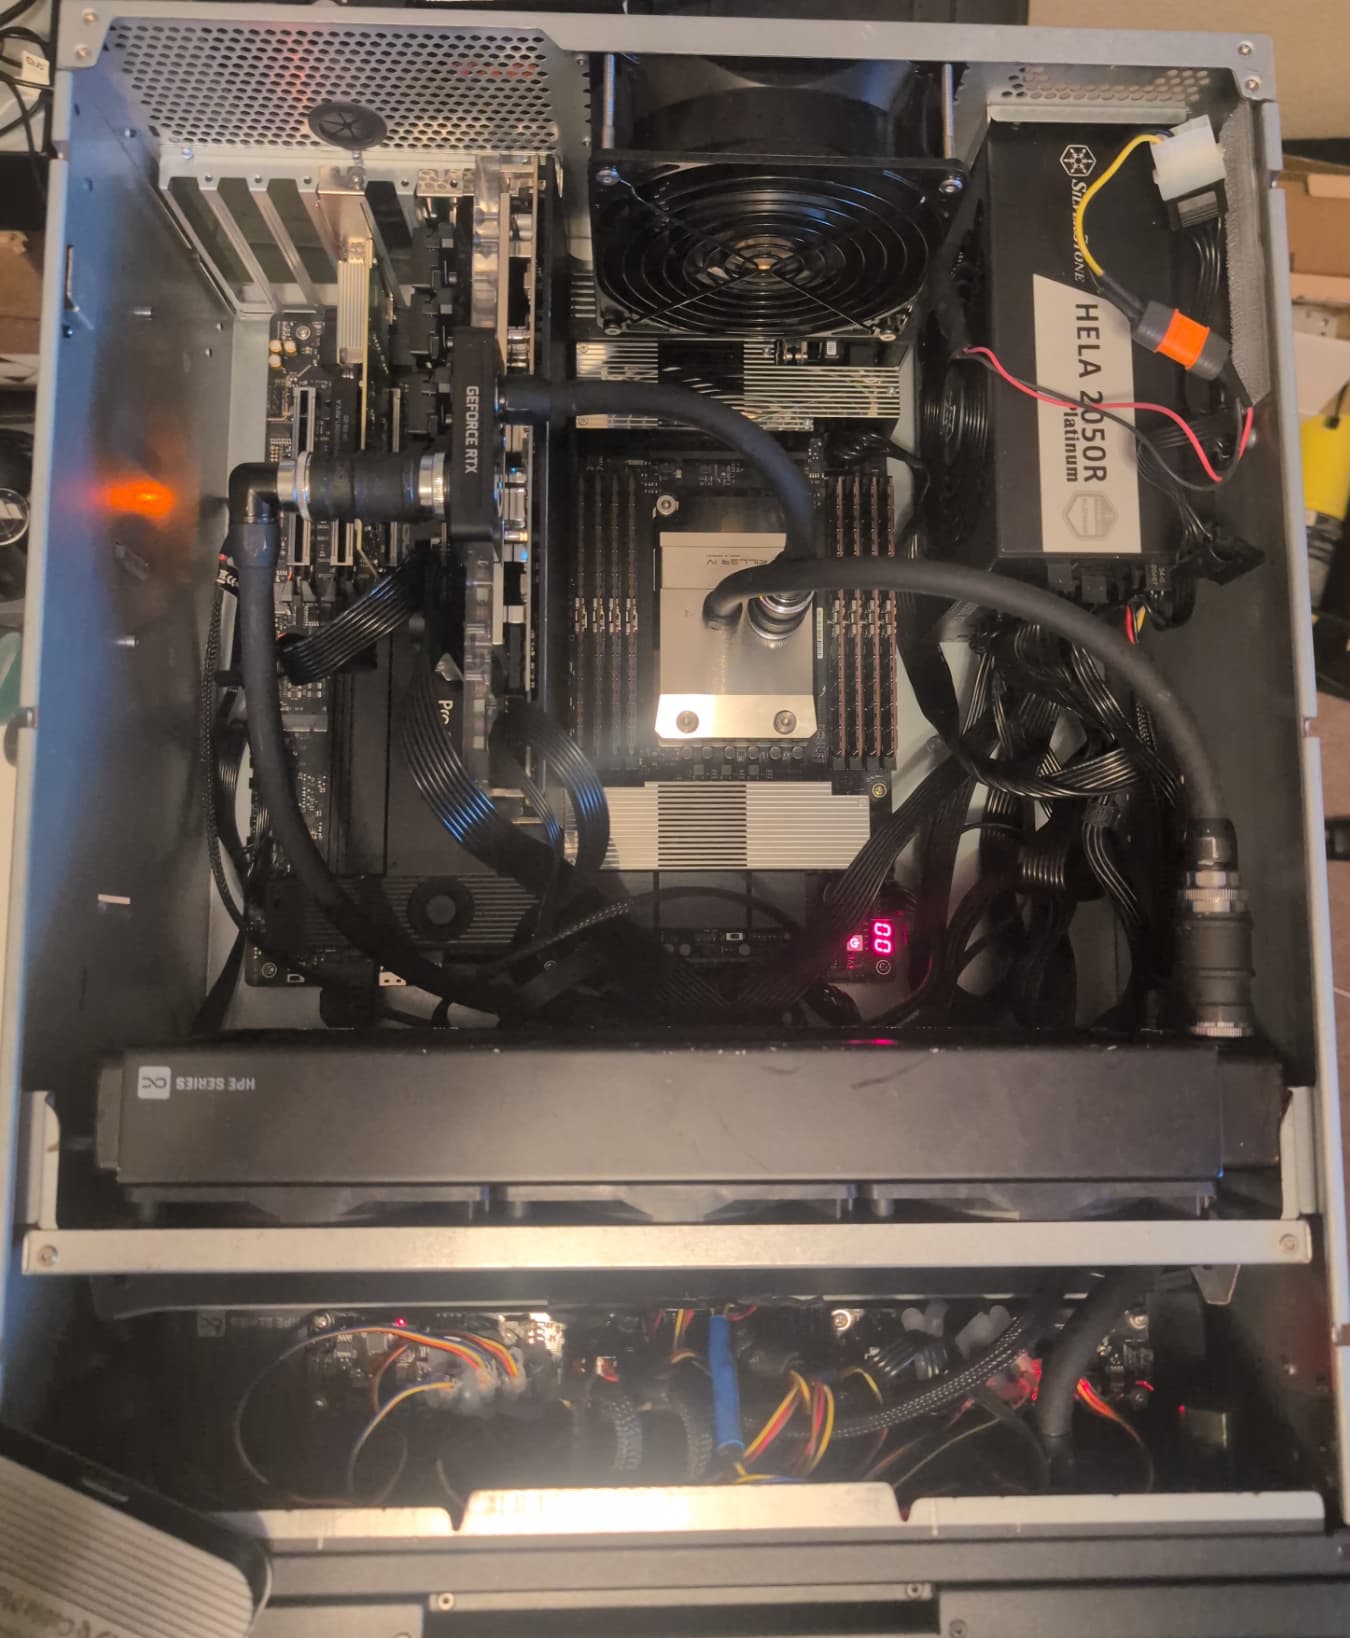
The Main PC went together the way a typical rack mount chassis would. This chassis was repurposed and already had the radiators and fans (listed above), otherwise I would likely have skipped these radiators and put in another pair of the Orion 180MM fans for even higher airflow over the RAM and 100G NiC.
NOTES:
- All storage is in PCIe slot based hot swap NVME cards
- 4 x 4TB Samsung 9100 NVME for linux (mdadm RAID-10 - FAR2 layout) for 8TB usable
- 1 x 4TB 9100 used for VM storage
- 1 x 4TB 9100 for a Windows 11 Dual boot
- The Fans took too much power for the mainboard headers, thus the two fan controllers in the front (bottom of image) one per radiator
- There are Quick Connectors allowing me to remove the CPU and/or GPU without draining the loop
- The Rear (top) fan is using the IC3 connector that was soldered onto a PCIe extension cable (12v & Ground pins - Rated at 75W per pin)
- The second radiator is under the fan controllers
- The hot glue on the fan connectors is pretty common on non-serviceable Server parts and I did it here to ensure secure connections. I can’t think of the last time a fan of this class failed.
- There are no pumps or reservoirs in the PC case, external fluid flow is required
- I connected the Flow Meter to the CPU fan header so the system will shut down if it is not receiving flow (simulates CPU fan failure)
- This is the air guide I made to force air over the RAM
Water Cooling Chassis
Assembly notes
This is where I went a little crazy. I decided that if two 360 rads work, then adding 3 more 360mm x 180mm would b better any why I was at it, PC fans didn’t flow enough air for how I wanted to set it up, so lets go bigger.
I wanted this to be resilent to single points of failure, so I used a redundant power supply, and designed the loop in a way that no single component failure (barring a leak) should cause a cooling failure.
Fans
The fan’s I used (listed in the parts section above) push 460 CFM each and being rated at 50.4w each, I used the IC3 connectors and was able to get 3 connectors per 8pin PCIe extension.
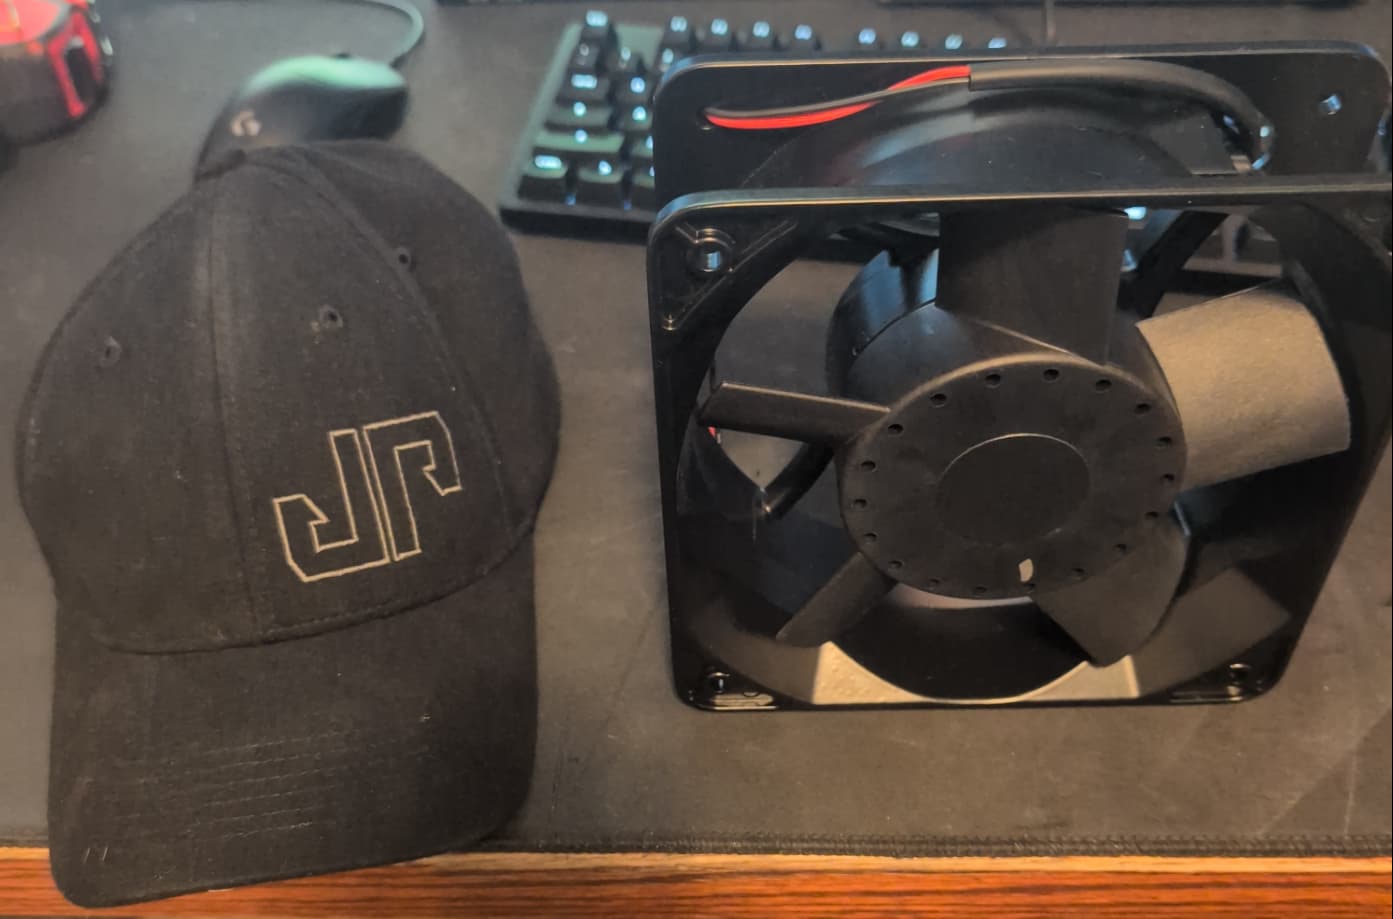
There are four of these fans and one of the same 140mm fans in the main chassis for a theoretical max airflow of 2,158 CFM ![]() . When these ramp up, it is no joke and move as mich air as 2 of the magnum backpack blowers from Stihl. Here is a short of me testing the wiring; I’m not directly in the airflow, but you can hear the wind whipping around my office.
. When these ramp up, it is no joke and move as mich air as 2 of the magnum backpack blowers from Stihl. Here is a short of me testing the wiring; I’m not directly in the airflow, but you can hear the wind whipping around my office.

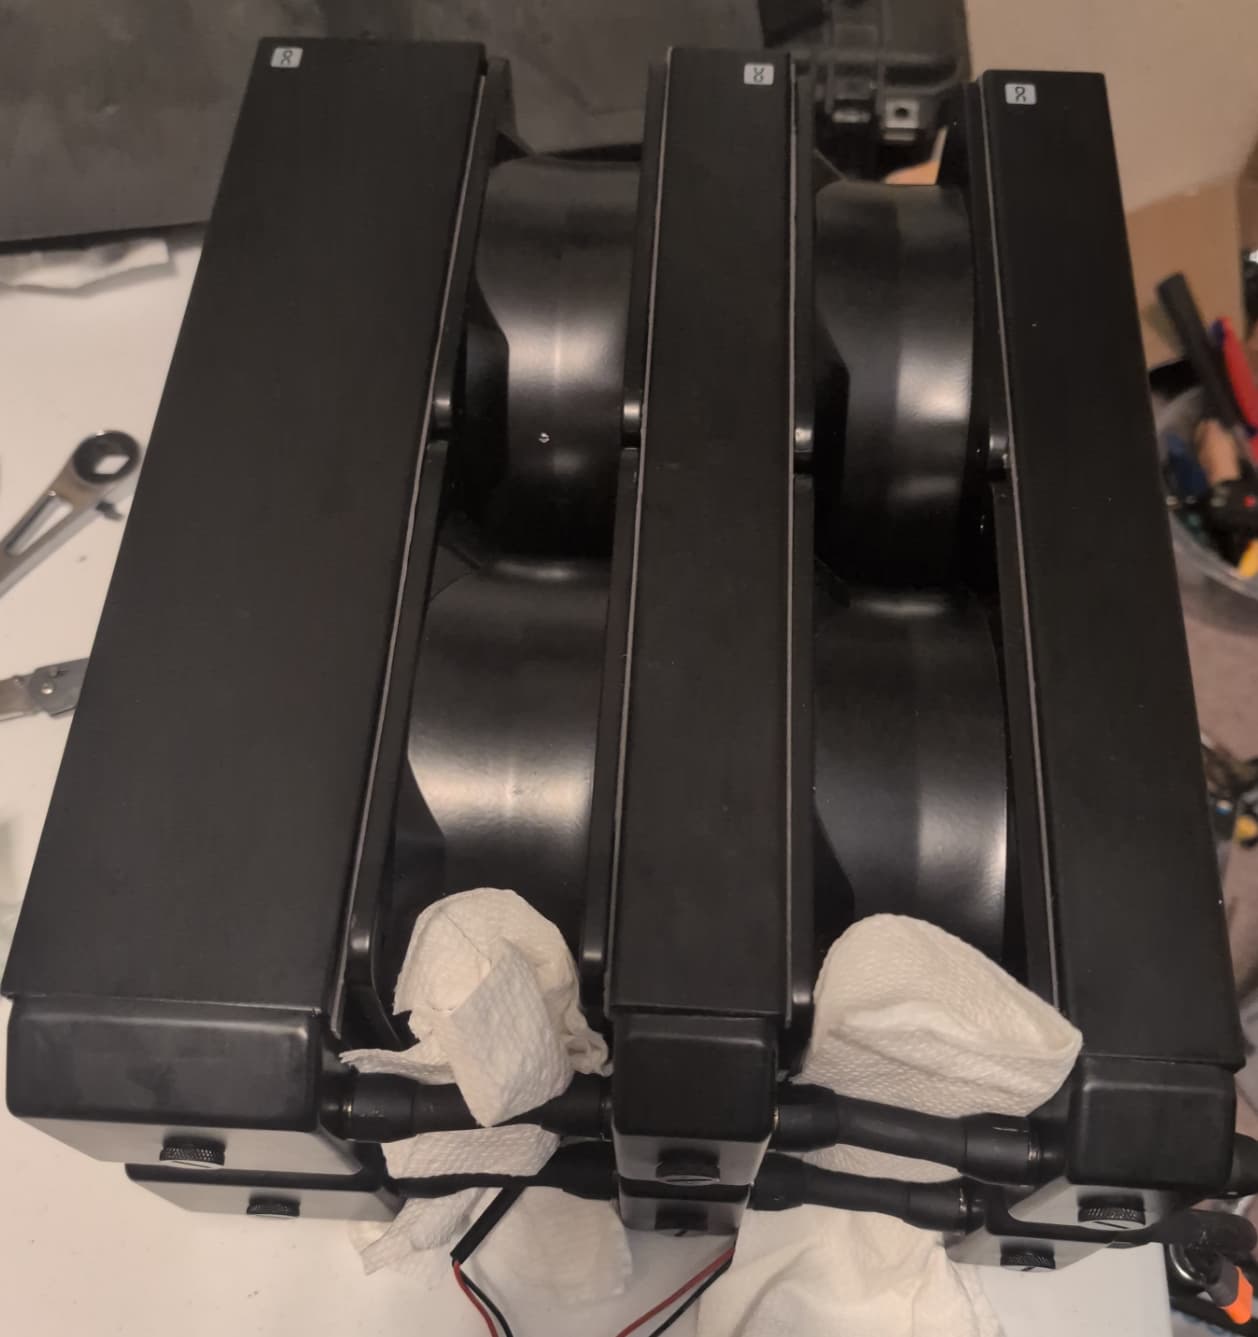
Radiators
As listed above, there are 3 radiators in this chassis all of the 180mmx360mm class. To protect my fingers as well as clothing and loose objects from the fan blades of destruction, I sandwiched them between rads. These ARE in a parallel configuration, but with a flow in excess of 200l/h and enough airflow that it may qualify as a self-propelled craft ![]() the lower flow resistance outweighed the stacked radiator inefficiencies which are mostly theoretical in this setup…
the lower flow resistance outweighed the stacked radiator inefficiencies which are mostly theoretical in this setup…
Pumps
There a 2 dual pump (2 x VPP D5 variant each).
- The first pair is fed by a 440ml reservoir
- The output feeds the rads
- The output of the Rads feed the second pair of pumps, which ‘boost’ the flow rate before going to the front bulkhead ‘out’ fitting
- After going through the PC itself, it is returned to the ‘in’ bulkhead that feeds the reservoir. The PC flow order is:
a. In bulkhead → Reservoir 1 → Reservoir 2 → CPU → GPU → Out Bulkhead
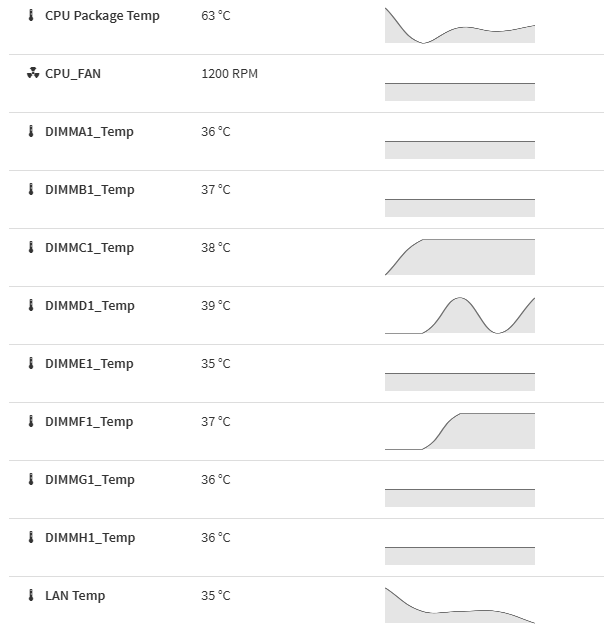
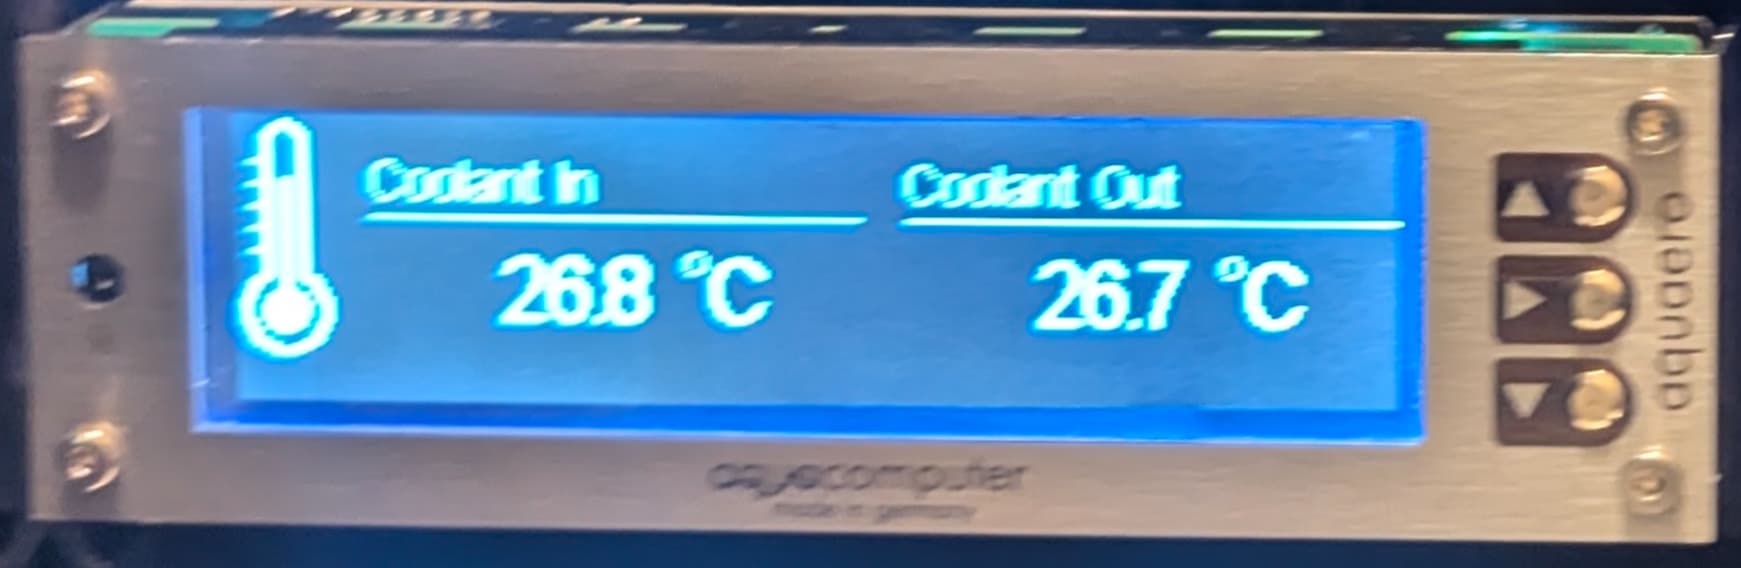
Control
This system is relatively dumb; give it power and it does it’s thing. To have visibility into how everything is functioning, the Acquero 6 monitors temps and flow rates

The Sum of its parts:
Pulling it all together, the end product is tightly packed but all fits, I even cut out unneeded grilled areas of the case:

All together now
Installed setup
When you stack everything together, it is a pretty clean package. In retrospect, I would swap the in/out bulkheads in one of the units to avoid crossing the tubes between the units, but they were a pain to get tightly installed and I can live with the current setup:

How do you think with all that noise?
Noise Management
I have installed the machine in a server closet about 50ft from my office. In that room I have built a custom sound deadening 25U enclosure that weighs 1200LB empty. This Rack receives air conditioned house air at ~ 72f/22c and vents hot air into the attic, which has two 10in AC infinity fans (~1000 CFM Each at MAX) ducted to the top of the rack enclosure pulling hot air from the rack. These are the fans with an older version of the controller unit . Let me know if there is any interest in more details here.
Wrapping Up
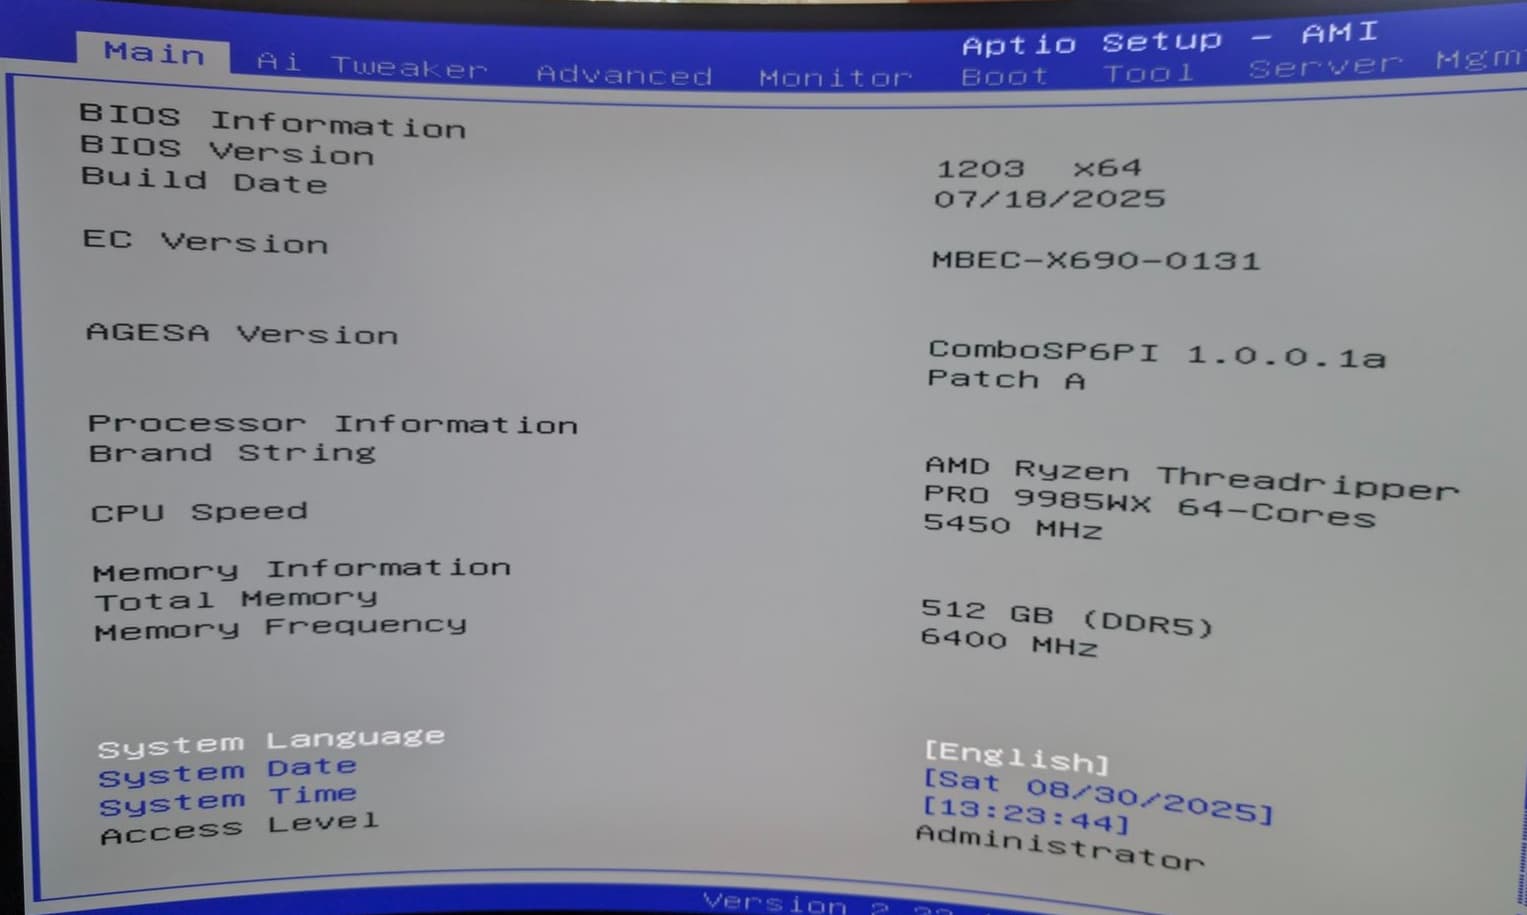
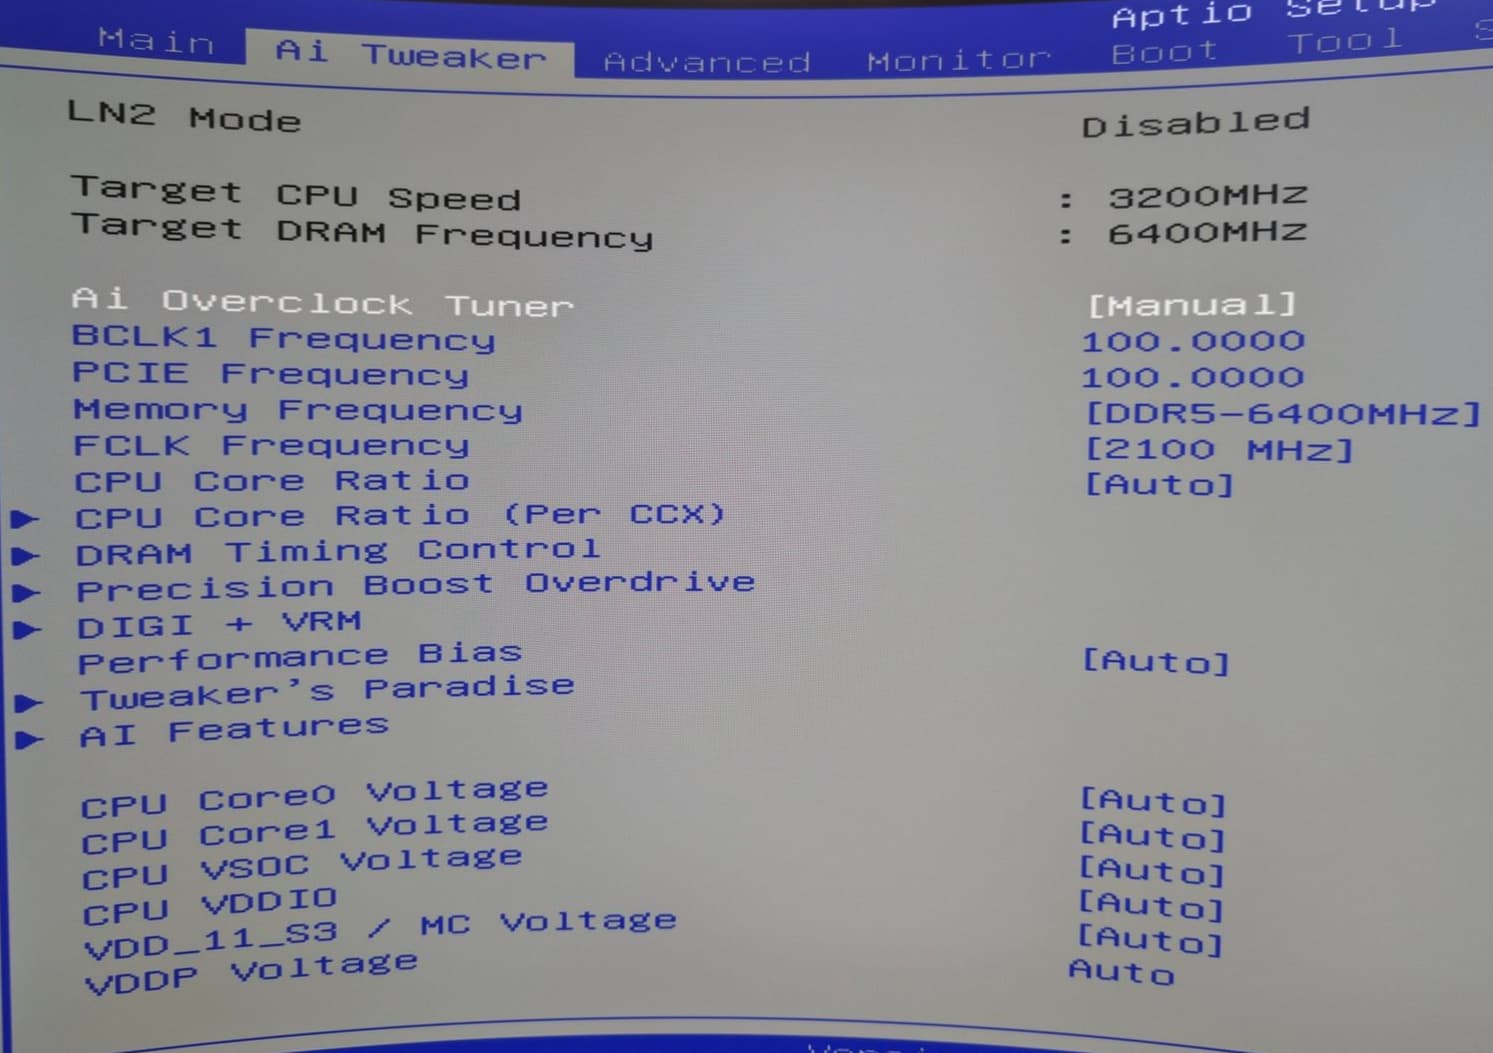
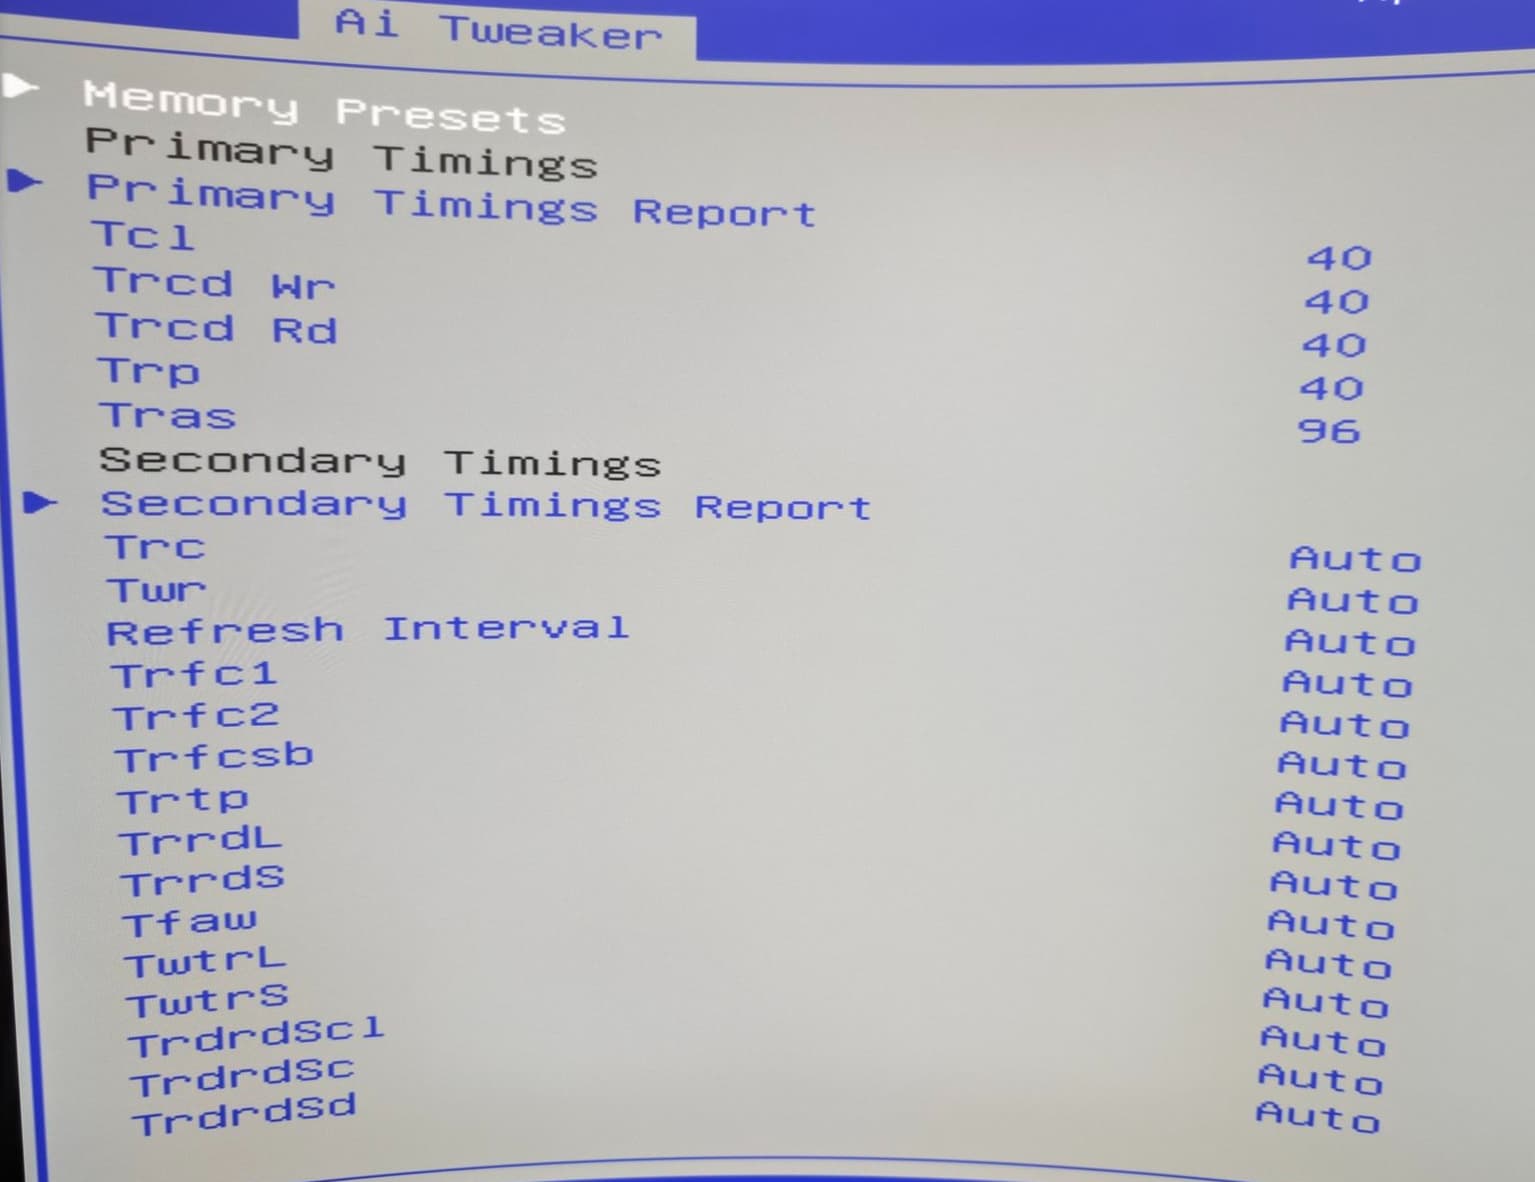
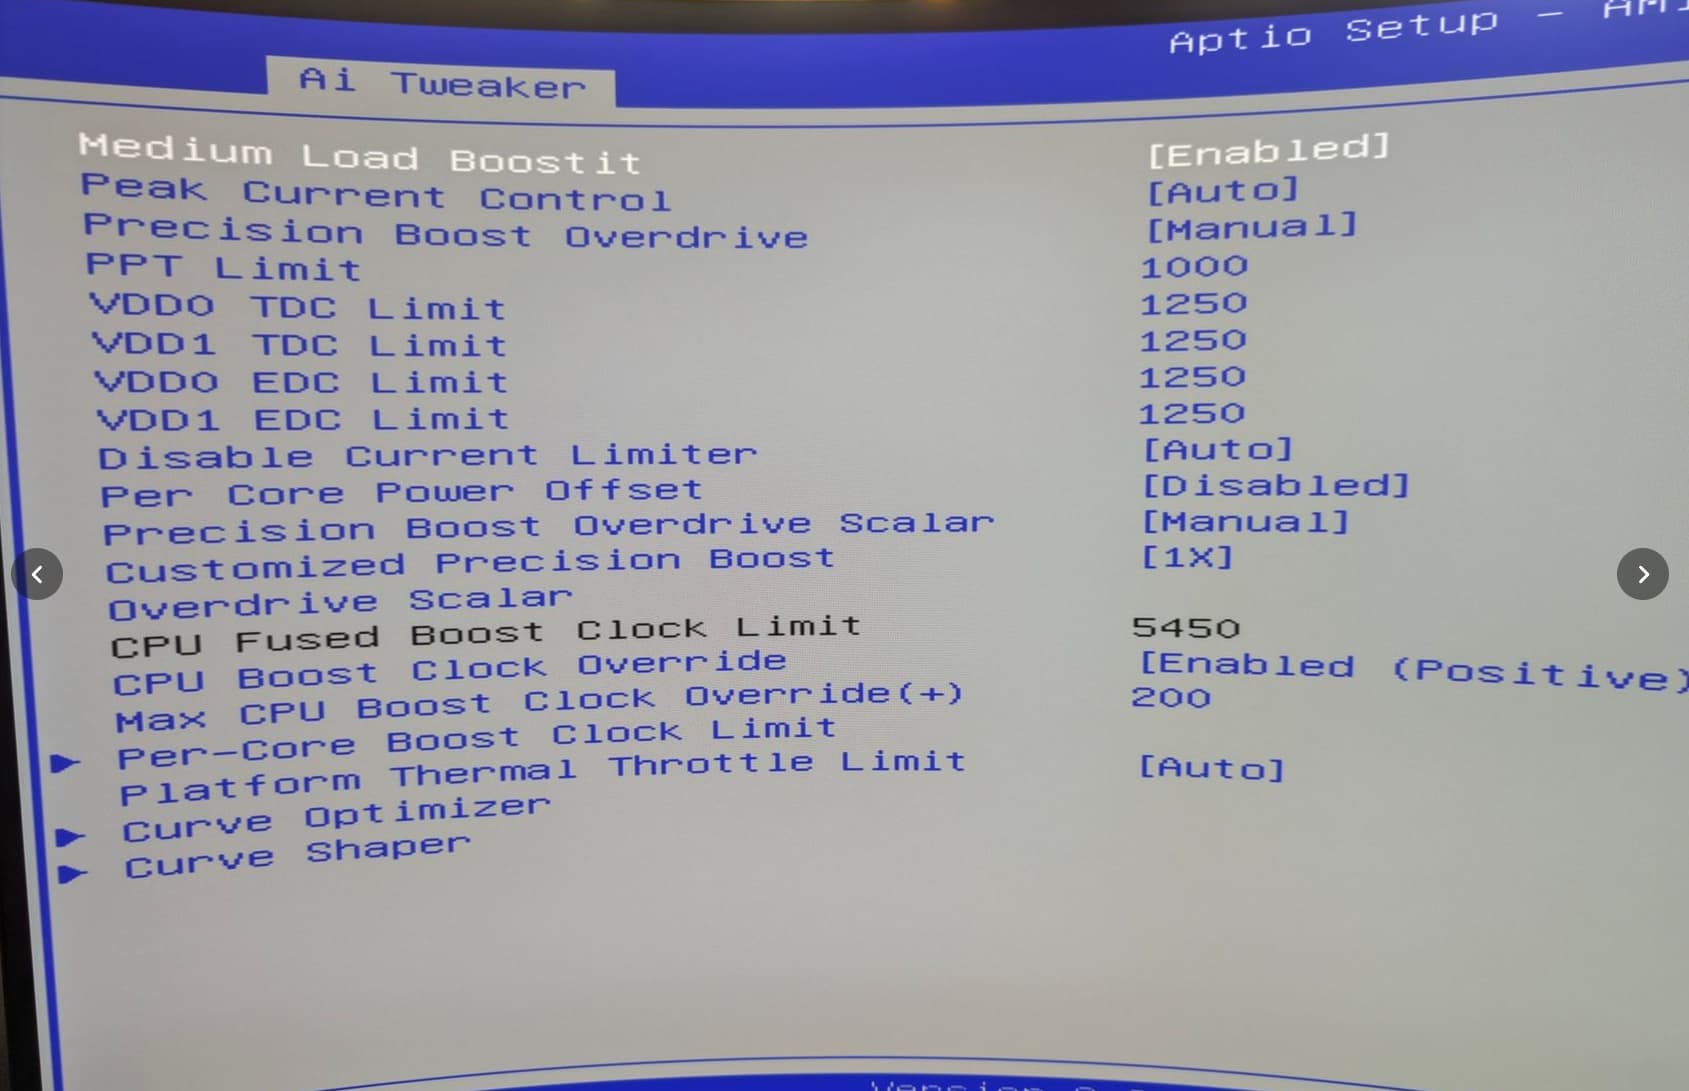
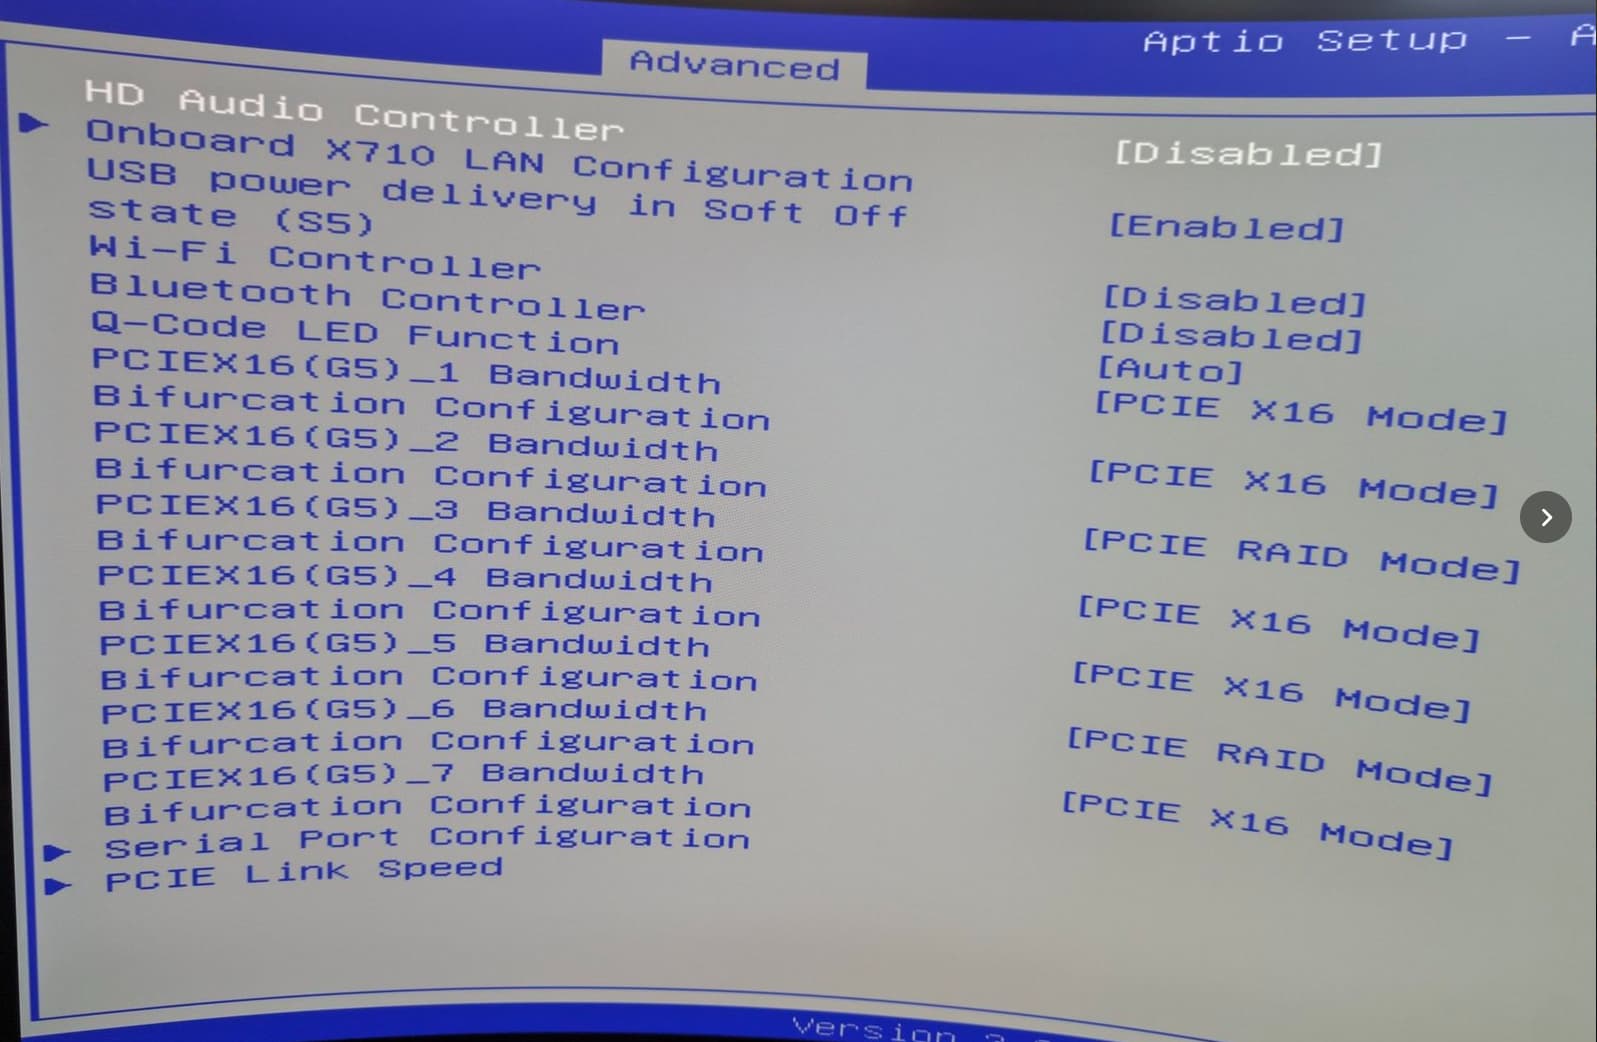
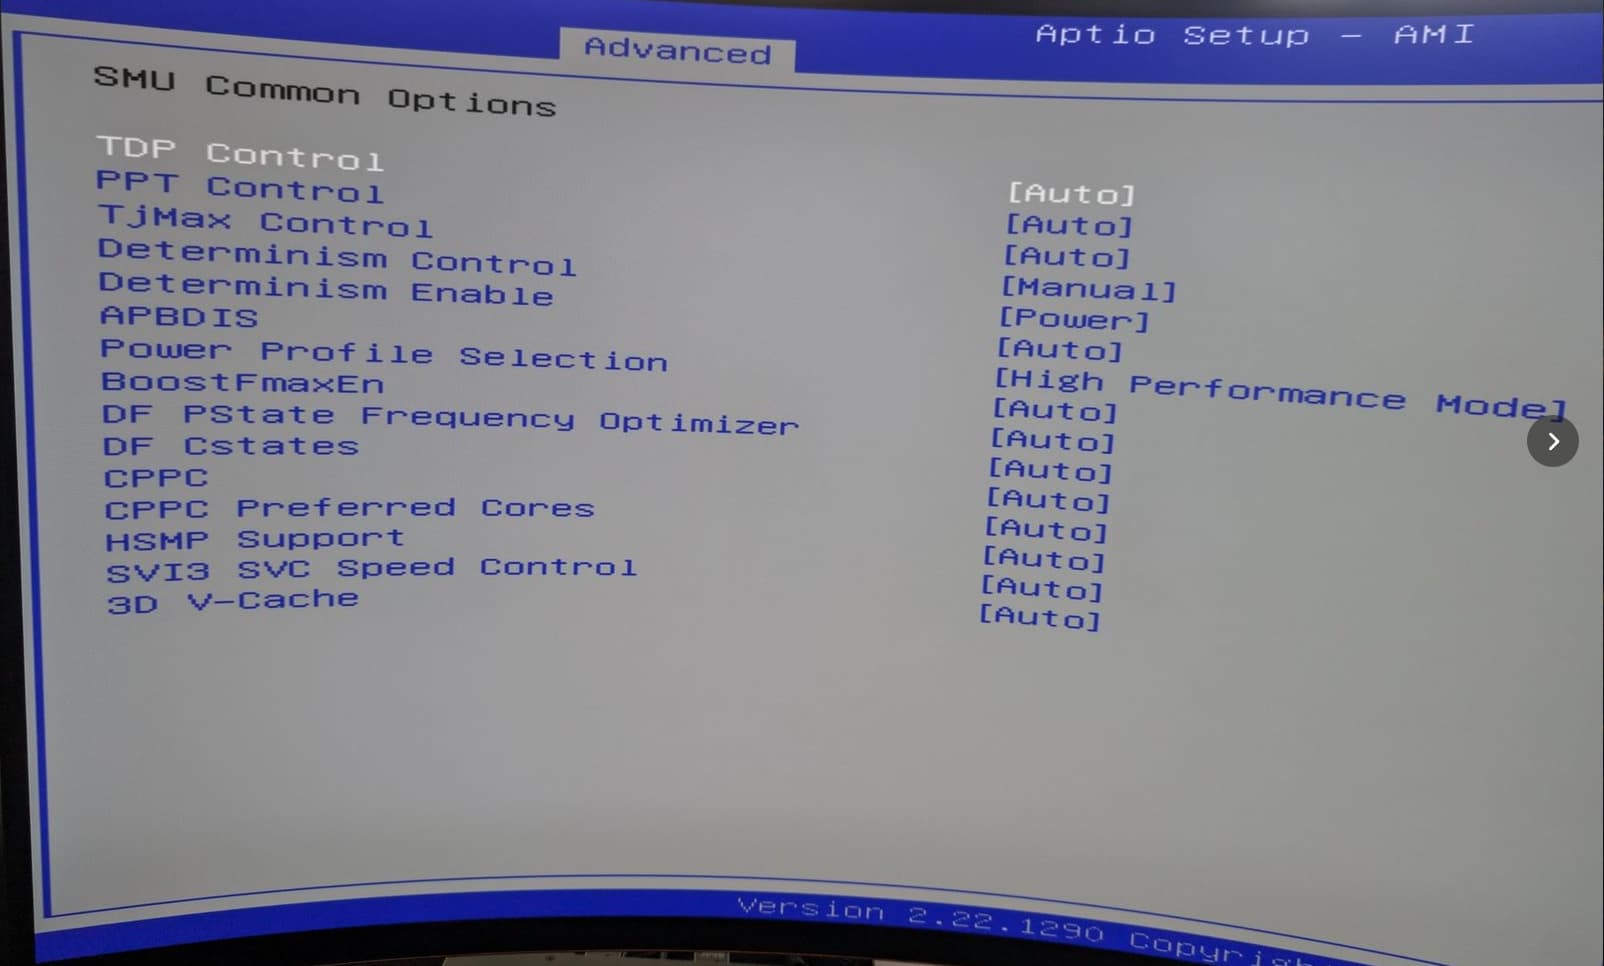
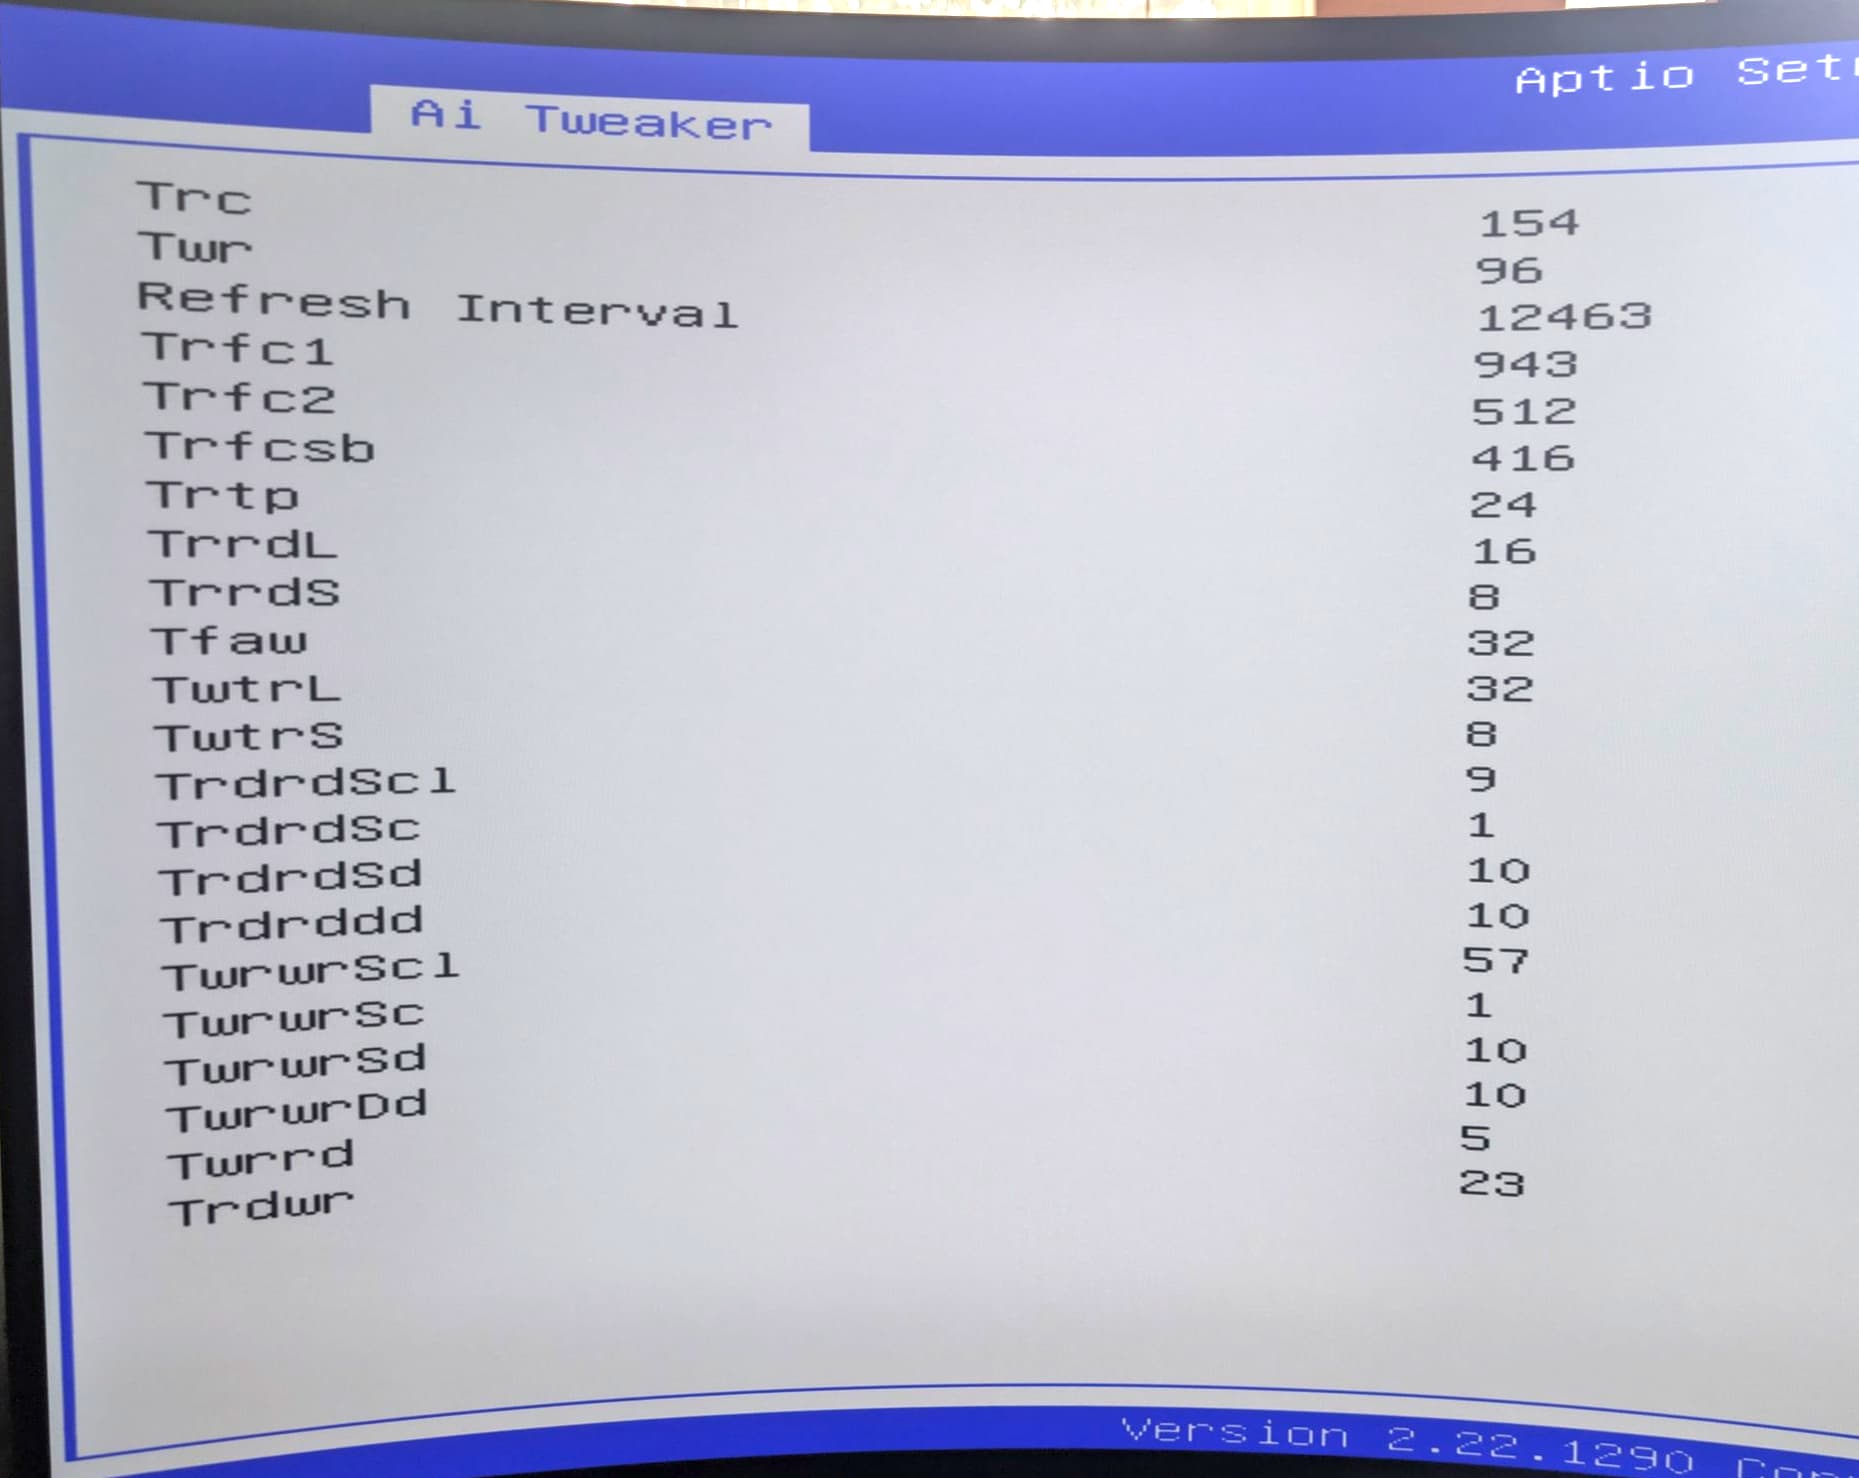
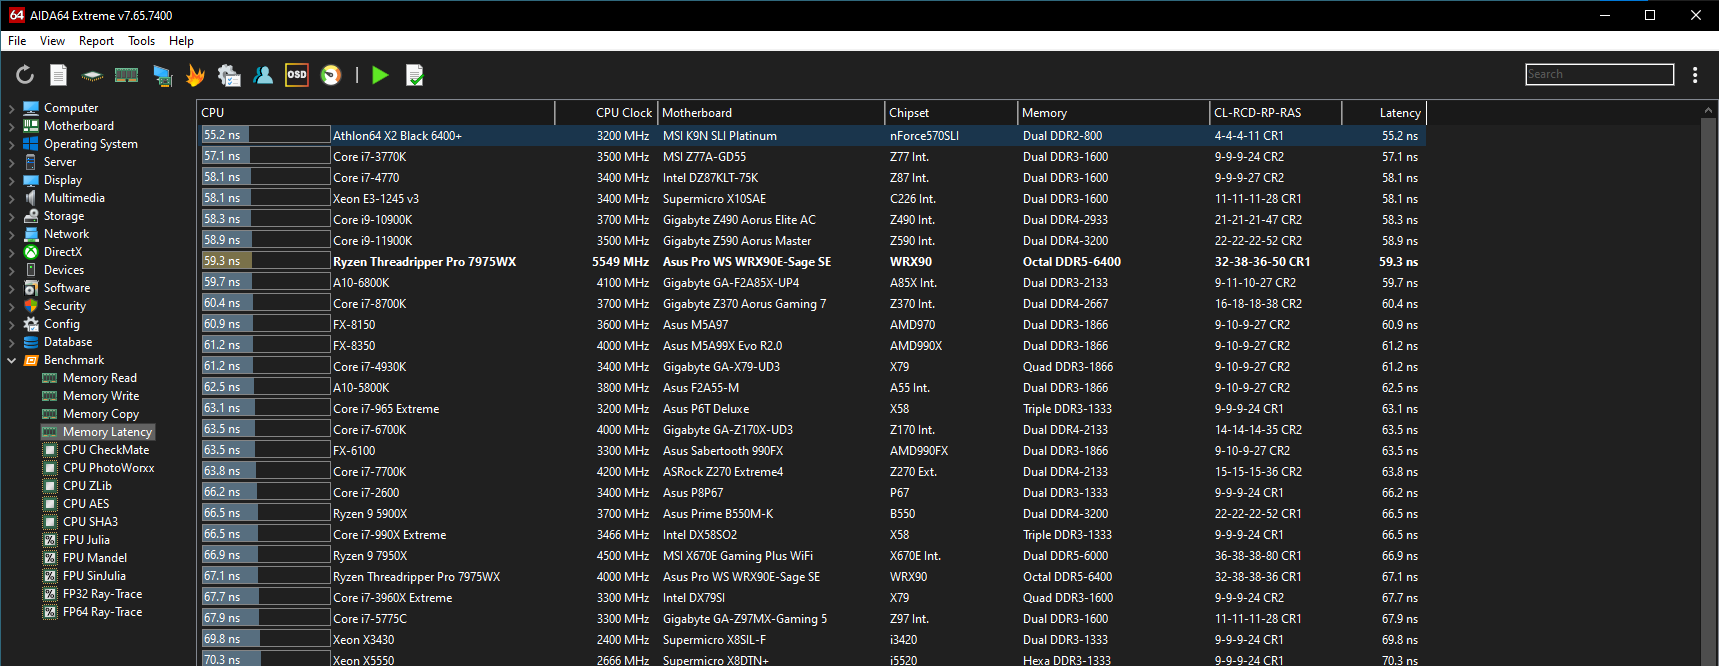
I’ll follow up soon with some performance data, bios info, etc. but I’ll say I’m stable:
- PBO all core of 5.2Ghz (all 64 cores/128 threads)
- PBO single core of 5.65 Ghz
- I’m in several 3dmark top 100 lists already, with no hardware mods to the 5090 or sub-ambient cooling
Let me know if you have any questions or have any specific tests you would like me to run.
Brian