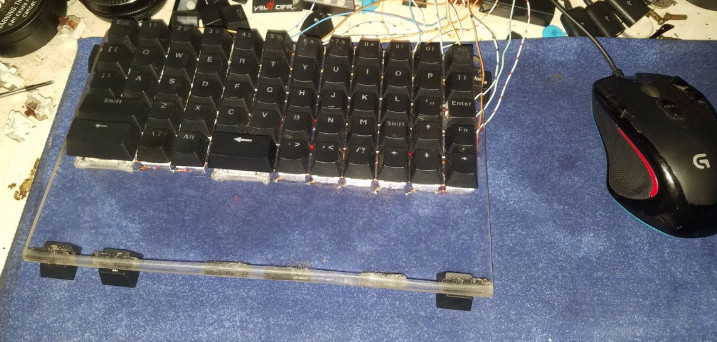
I made this for gaming and wanted it about as small as possible. The first was hand wired. I designed a PCB and should have it made soon enough. I wired it up the same as the OLKB Preonic so it can be flashed using easy AVR as if it were a Preonic. Mine will have back lit font; I’m not messing with blank key caps.
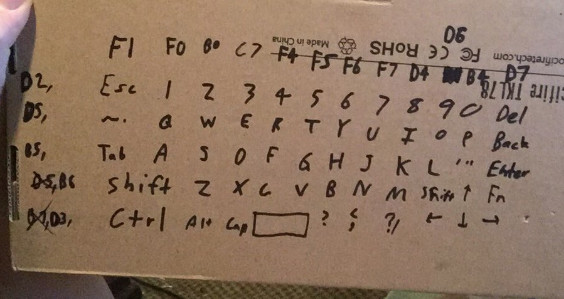
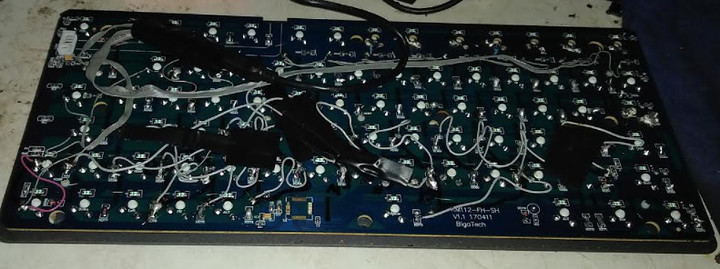
The cardboard shows how the key matrix is wired to the Teensy.
I repurposed key caps from a Velocifire TKL 78. Plus an extra backspace key. Evgentually I’ll have to get some sort of custom keys (I plan to make and sell many).
I used a Teensy 2.0. I just flashed it with Easy AVR. Easy AVR has a Preonic customization setting/profile, and this is same size as a Preonic. I acually settled on a 5x12 size before I even realized that. I basically copy pasted shit that was already done.
Where did you get the PCB made?
Was it expensive?
Minimum order?
Have you designed PCBs before?
How long do it take to create?
How did you integrate the LEDs?
Did you make the plates yourself or had them made?
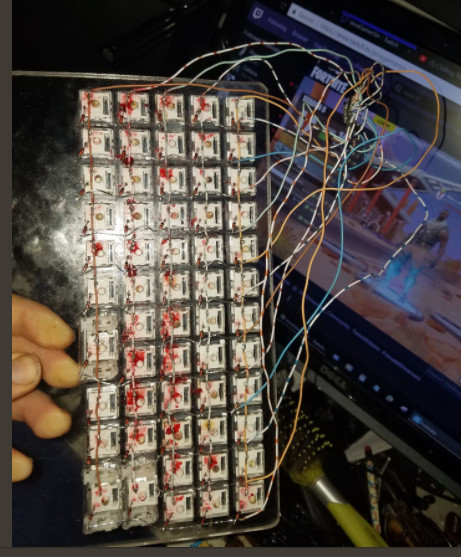
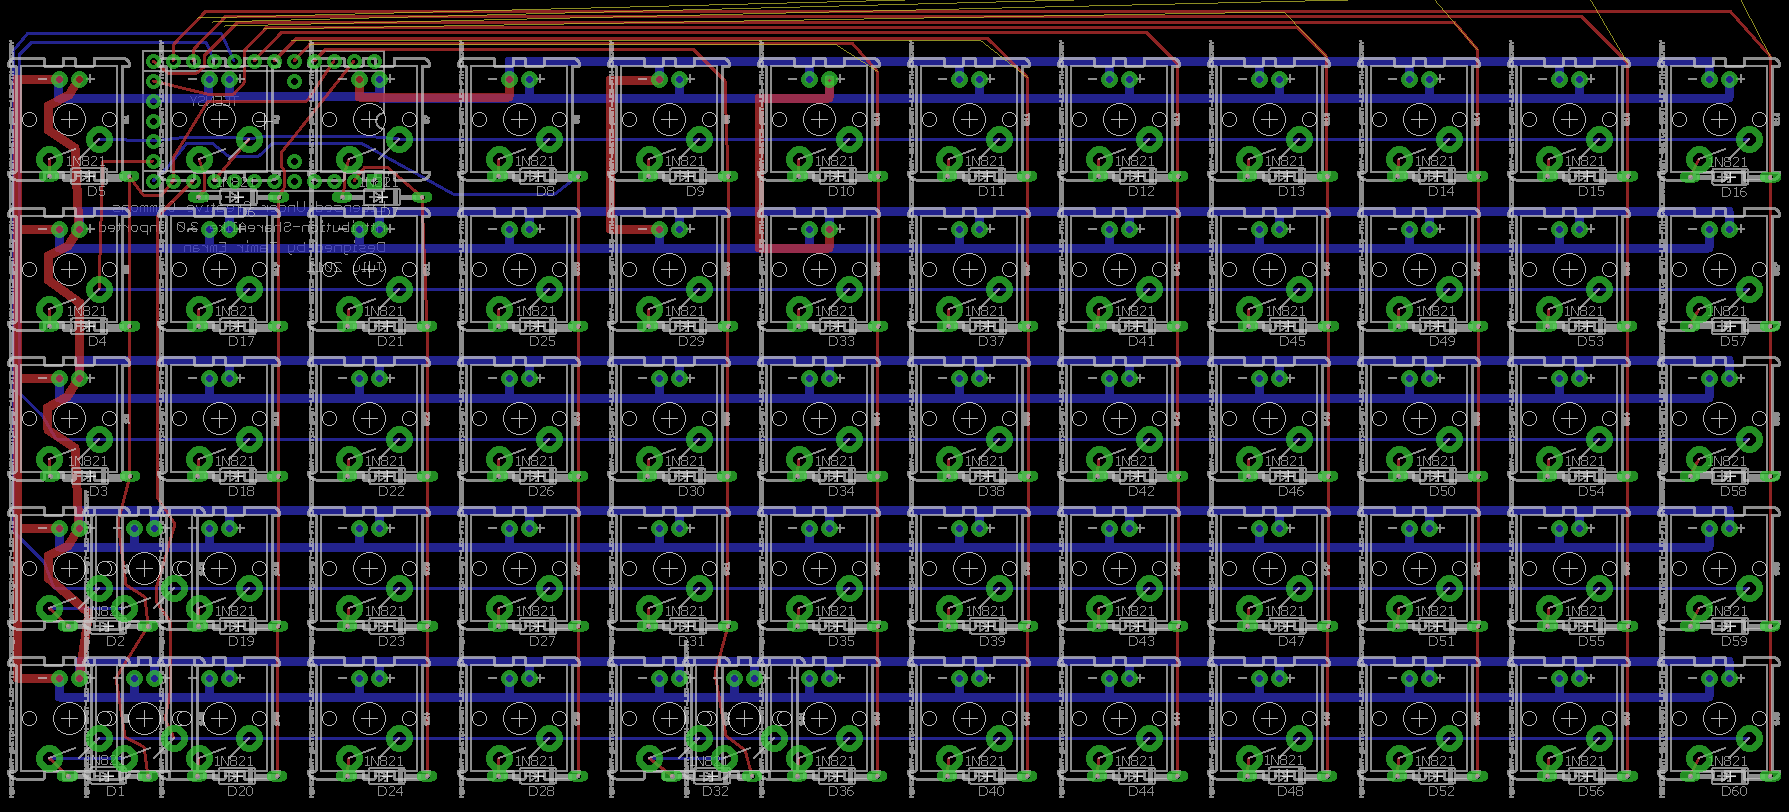
I have access to a lazer cutter to cut plates; it can’t do metal, hence the plexi plate. I have designed but not made the PCB. Took 4 hours to CAD the PCB. The one I Have now is hand wired; I added a picture of it from the back side.
The LEDs will just be on a toggle switch; on any keyboard I’ve had, I only fucked with the dimmest settinng… I’ll just use dimm LEDs, all I need. Some keyboards look like they have a 30fps strobe to them on their dimmest setting; I won’t have to worry about that.
I’m going to try etching one myself.