Since wendel mentioned in the emacs hub thread, that a vim <-> emacs video is an option, if we can deliver the content, i wanted to shine a little light on my daily vim setup. I decided to put this into it’s own post, as i expect this to get a little longer. Plus i have the option to talk about my setup, vim in general and some options in more detail with you guys.
With all of that out of the way, let’s take a look at what our endresult can be:
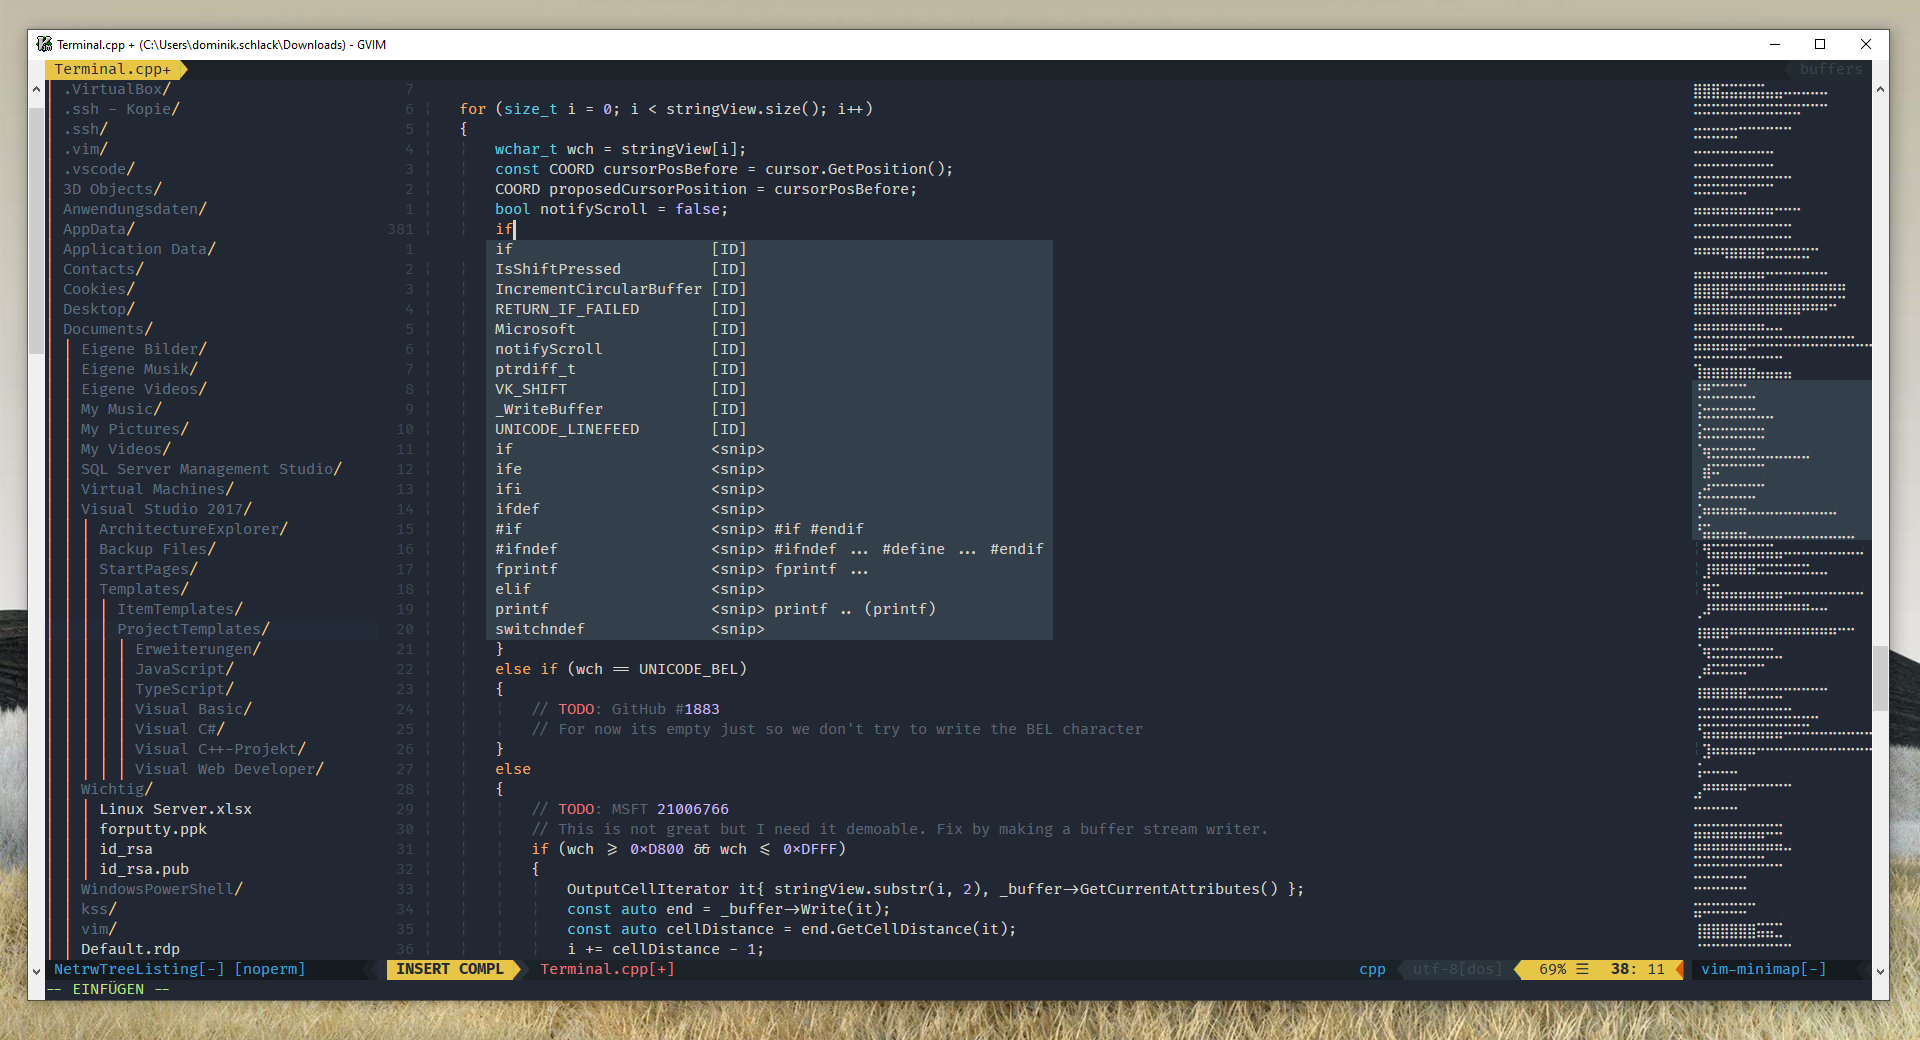
There is a bunch of configuration coming from plain gVim:
For anyone already familiar with vim and just interested in the specifics of my setup, here is my vimrc:
For anyone else, i’ll try to break this down bit by bit. This won’t be a huge “How-To VIM” tutorial. It’s primarily about functionality and looks.
Preamble: Configuring Windows
Some things to make this easier: Vim will, by default, look for User Configuration in $HOME. This Environment Variable wasn’t set for me and it defaultet to one of my Network Drives. So, go ahead and set something like your My Documents folder as HOME in your WIndows Environment Variables. After that, you can create an empty file .vimrc in that folder. And yes, even under Windows this filename is lead with a period.
Step 1: Let’s get those colors right
So, with most things in VIM, you can just try them when you have vim open, or add them to your .vimrc File.
Start of by typing :colorscheme and the hit Tab. This will cycle through some of the options that are available by default. Of the defaults, i personally like darkdesert a lot, but the choice is yours.
My example above is using the ayu mirage colorscheme. This isn’t available by default. You can find the repository here: https://github.com/ayu-theme/ayu-vim
To install this, you have two options:
- Download the repository as a ZIP File and unzip it to
C:\Program Files\Vim\vim81 - Use A Plugin Manger. More on that later.
Now, you might have noticed, that all those changes don’t persist. For that to happen, we need to add any changes we want to use to the earlier created .vimrc file.
The relevant lines here are:
colorscheme ayu
let ayucolor="mirage"
This will take care of setting your colorscheme on all new VIM Instances.
Step 2: The Font
Similar to the colorscheme, the font gVim uses is easily customized. But there are some pittfalls.
If you don’t have a clue what’s available, just type :set guifont=*. This will open a font chooser for you, allowing you to easily set a new font.
But, as with colorschemes, this won’t persist restarts of vim. To make that happen, you’ll again need to add a line to your vimrc:
set guifont=Fira\ Code:h11
This line already has a lot of the Problems taken care of:
- you can set the fontsize by appending
:h12, or any other hsize - Font Names with Spaces need to have each space escaped with
\
Feel free to use any Font you like. Fira Code is my personal choice because of it looking clean, having proper ligatures and some Powerline Symbols we might later need.
For Fonts to render nicely with ligatures, some other options are needed:
set renderoptions=type:directx
set encoding=utf-8
Step 3: All the little built in features
Linenumbers
The big one here is linenumbers. Vim comes with some options for those. As you do a lot of editing by prefacing commands with linenumbers, having realtive linenumbers enabled is really helpful. Luckily we can have our cake and eat it too, as vim also can put the current line at Cursor Position. For this to happen, you’d want to add this to your vimrc
set number relativenumber
This will take care of that.
Tabstops
Another personal preference is tabstops. I know that there is a holy tabstop vs spaces war going on that i won’t get into. Use what ever you want and how ever many. My personal preference is having tab input spaces (and 4 at that) and having actual tabstops display 4 characters wide, to be consistent in code i didn’t create. For that to be the case, add
set expandtab
set shiftwidth=4
set softtabstop=4
set tabstop=4
to your vimrc.
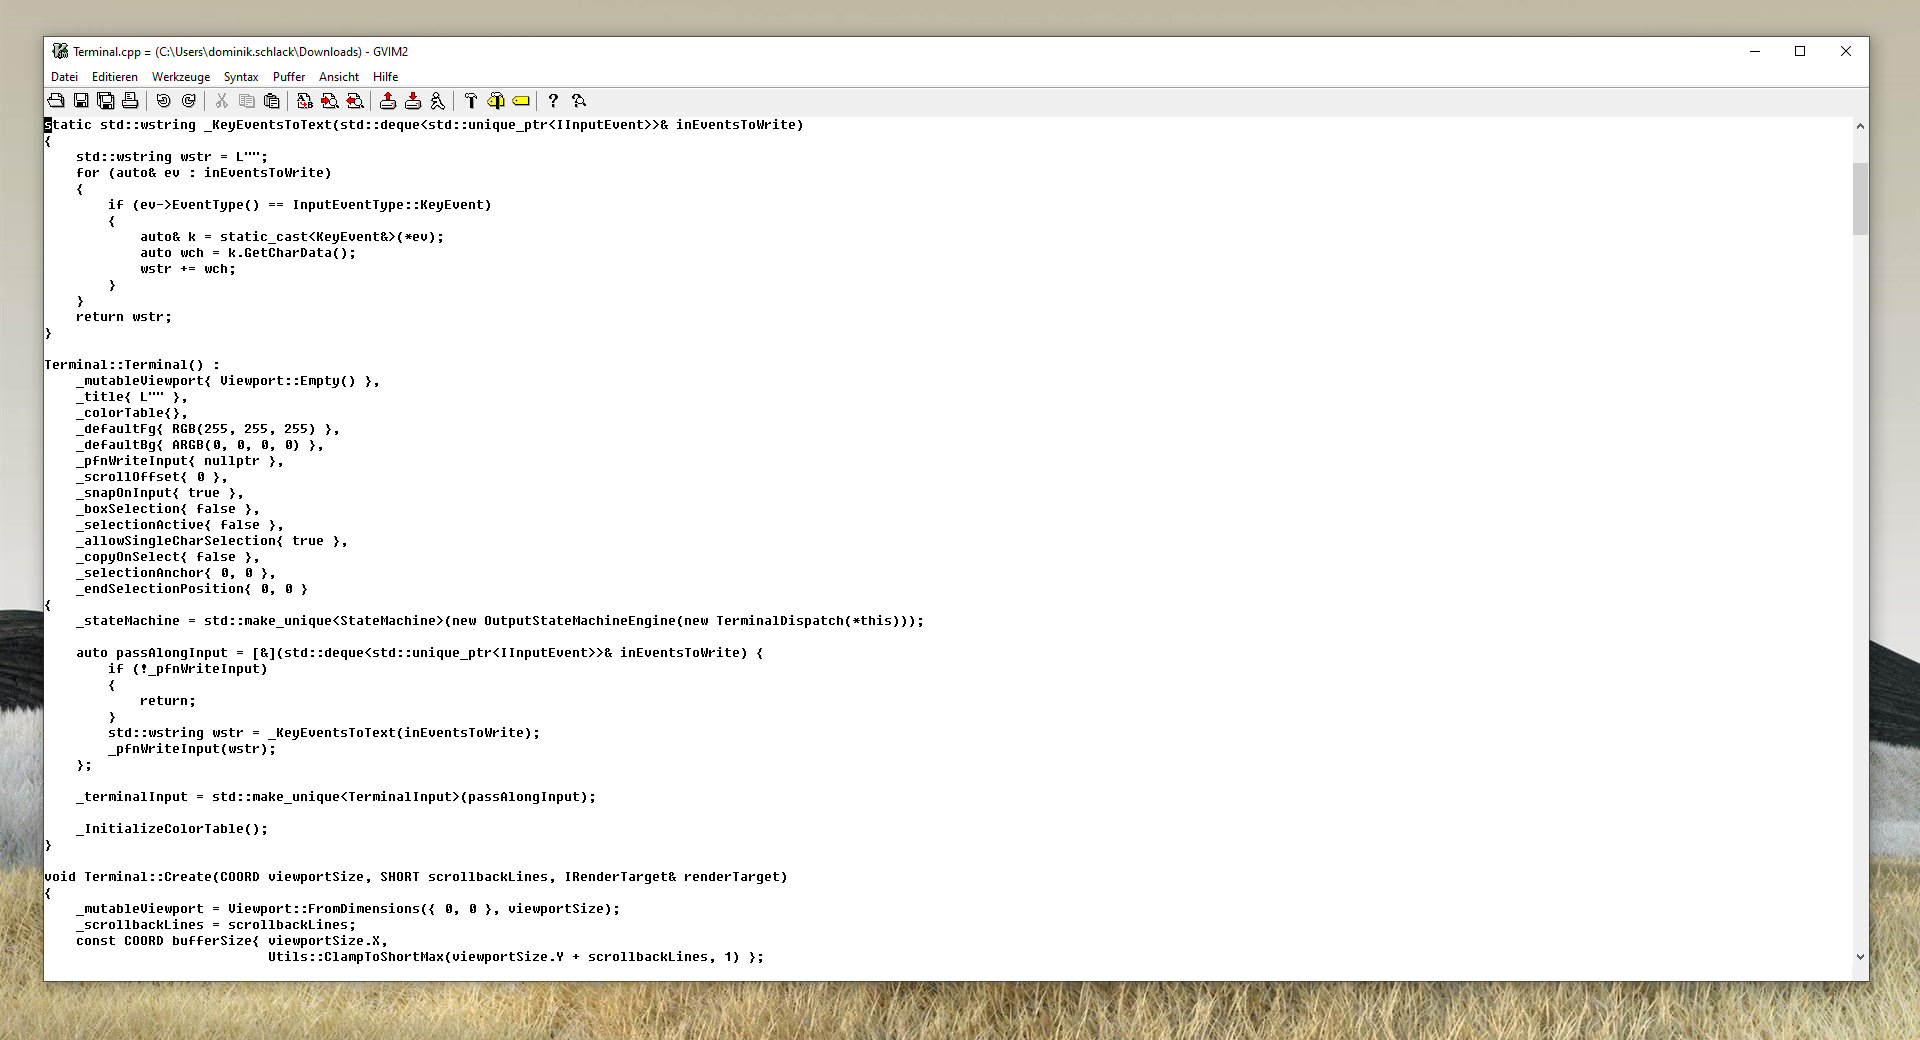
Getting rid of Menus and Toolbars
Even in GUI vim is still primarily a keyboard driven Editor for me. Therefore i never use the Toolbar buttons or menus. So why not get rid of them:
set guioptions -=m
set guioptions -=T
Step 4: netrw
Netrw is a build in File explorer in vim. You can see it on the left side in the pictures above. You can get to it through the :explore, :Vexplore and Hexplore commands. Though it looks a little different by default.
Netrw comes with a TON of customization options. Feel free to look the up. What i use is this
let g:netrw_liststyle = 3
let g:netrw_banner = 0
let g:netrw_browse_split = 4
let g:netrw_winsize = 18
let g:netrw_altv = 1
This get’s rid of the useless header, sets the width/height to a reasonable size and defaults the view to a nicer treeview. But again, that’s all customizable and personal preference.
Step 5: Remapping Shortcuts
Some things are hard to get to by default. Navigating Splits is one of those things i do really often, and isn’t as quick as i’d want out of the box. luckily, there’s a fix for that:
nnoremap <C-J> <C-W><C-J>
nnoremap <C-K> <C-W><C-K>
nnoremap <C-L> <C-W><C-L>
nnoremap <C-H> <C-W><C-H>
This maps Ctrl+H/J/K/L to moving between Splits.
With nnoremap you can map ANYTHING you can do by hand to ANY Keycombination. It keeps track of modes and has all the features. You can do really elaborate stuff here.
Step 6: Plugin Manager
So far, we have done all of this without a single Plugin. And you might be done here. There is no need to go further, if you feel vim does enough for you out of the box.
If you want to dive deeper though, there are a lot of awesome plugins out there. You could manage those by hand, but that’s timeconsuming and no fun. Enter Vundle.
Vundle is a Plugin Manager for vim. It allows you to write the Plugins you want to have in your vimrc and takes care of the rest.
Setup under Windows is a bit involved. The Windows Setup Documentation here is great though.
The biggest tip i can give you is: Use chocolatey. You’ll need to install git and curl as well as potentially python in a specific version later. And all of those need to be correctly in your path. Chocolatey takes care of all of that for you.
Other than that, it’s just like with the colorscheme. Download the repo as ZIP and unzip it to C:\Program Files\Vim\vim81. Add this
filetype off


set rtp+=$HOME/.vim/bundle/Vundle.vim
call vundle#begin('$HOME/.vim/bundle/')

Plugin 'VundleVim/Vundle.vim'


call vundle#end()
filetype plugin indent on
to your vimrc. And your done. Now you can just add Plugins after call vundle#begin. After you’ve added a Plugin, restart vim and type in :PluginInstall. This will take care of all that is to do to make that Plugin available to you. By default, Vundle downloads the current Version of itself. Most Plugins will come with instructions of what to enter for Vundle.
Step 7: Vim-airline
That’s those nice Powerline style things at the top and bottom. Not only usefull but also nice looking. Since we’ve set up Vundle already, installation is a piece of cake. Add
Plugin 'vim-airline/vim-airline'
After your other plugins in your vimrc, restart vim, type :PluginInstall and restart vim again. That’s it. Now you can customize airline a bit if you want:
let g:airline_powerline_fonts = 1
let g:airline#extensions#tabline#enabled = 1
let g:airline_theme='ayu-mirage'
makes it look like my picture above.
Step 8: Finishing it off with some plugins
First off, i really like Vim Awesome. It’s a great website to discover new Plugins. Take a look at what’s out there. It’s incredible!
Some select few i personally use:
Plugin 'valloric/youcompleteme'
Plugin 'chriskempson/base16-vim'
Plugin 'ayu-theme/ayu-vim'
Plugin 'Yggdroot/indentLine'
Plugin 'severin-lemaignan/vim-minimap'
Plugin 'tpope/vim-surround'
youcompleteme will add some autocomplete functionality to vim. It’s language aware and document aware. So it tries to recommend usefull stuff like variable or function names etc. It’s also pretty extendable.
vim-minimap adds the minimap to the right. It needs python (i might get into this later). You can activate it with typing :Minimap and get rid of it with :MinimapClose. I’m still not sure if i find it terribly usefull, but since Atom it’s all the rage, so there you’ve got it.
IndentLine displays lines besides Idents (duh). It’s often helpfull to keep track of complicated “IF-Then-Else” Setups.
vim-surround allows you to easily add, change and delete surrounding characters from words (or lines, blocks etc.). Ever wanted to change a whole html block from <div> to <p>, or change doublequotes to singlequotes? This has you covered.
Closing thoughts
This just about does it for now. I’ve not gotten to the whole snippets thing yet. I’ll do that later, as it’s really powerfull. Look up Ultisnips if you want to.
I’ve also not talked about <leader> at all, which i’ll probably add later. This isn’t meant to be a comprehensive vim tutorial. More of a guidline for newcomers to get a feel for what’s possible.
Feel free to hit me with any Problems you face, errors i made or anything else. I’m happy to help and learn.
Also, Feel free to share your personal setup (gVim or Vim, WIndows, Mac or Linux). I’d really like to see what others do. Especially if you programm a lot more than i do 