I like to run my main partition on a RAID0 in the interest of speed. With RAID0 each bit is written to an alternating drive, thus almost doubling the bandwidth.
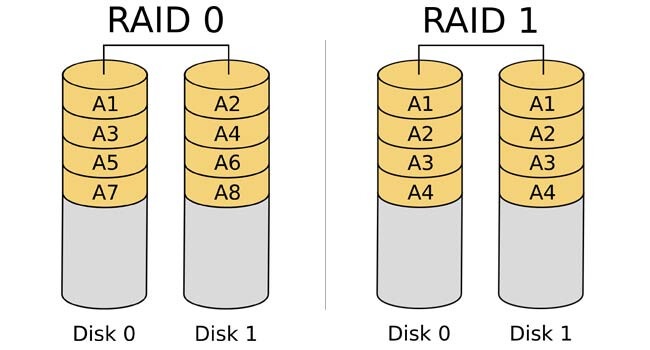
There is no redundancy, in fact it is probably more dangerous, as one drive failing means all your data is lost. Personally I have hourly differential snapshots being run onto a RAID1 of spinning rust using backintime (but soon hopefully restic).
I was very surprised at how easy this was to setup with PopOS 21.04 and mdadm so thought I would make a thread in case others wanted to do the same.
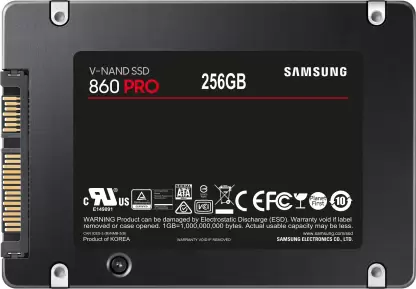
The SSDs
I am starting with 2 Samsung 860 Pro SSDs. They are each 256GB, so the resulting RAID0 partition should be around 500GB.
Load into the PopOS boot drive
Write the PopOS image to your USB drive and boot off it to get into the demo instance.
Identify the drives you want to RAID
Now looking in /dev we can see what devices are available:
$ ls /dev/sd*
sda
sdb
sdc
sdd
I know the drives are sda and sdb. This can be checked with ye olde hdparm:
$ sudo hdparm -I /dev/sda

/dev/sda:

ATA device, with non-removable media
	Model Number:       Samsung SSD 860 PRO 256GB
	Serial Number:      S5GA2NS230BEEFN90611173EX2X
	Firmware Revision:  RVM02B6Q
Both drives do not even have a partition table yet.
Add partitions
Using gparted which is available in the PopOS demo instance, we need to add a GPT type partition table to the drive. Select your drive from the dropdown on the top left:

Then choose Device > Create Partition Table and choose GPT in the resulting dialog.
Now create 2 partitions:
- a 1GB partition at the start, this will be the boot drive
- a partition that takes up the rest of the drive, this will become part of the RAID space
You can leave filesystem as the default - it will be formatted by the installer later.
On the second drive add a GPT partition table and then add just a single partition that takes up the whole drive. This will also become part of the RAID space
Change the partition type to linux RAID
I was unable to select the partition type as linux RAID autodetect, so instead I opened the terminal and ran fdisk:
sudo fdisk /dev/sda

Command (m for help): p
Disk /dev/sda: 238.47 GiB, 256060514304 bytes, 500118192 sectors
Disk model: Samsung SSD 860
Units: sectors of 1 * 512 = 512 bytes
Sector size (logical/physical): 512 bytes / 512 bytes
I/O size (minimum/optimal): 512 bytes / 512 bytes
Disklabel type: gpt
Disk identifier: 0

Device       Start       End   Sectors   Size Type
/dev/sda1     2048   2099198   2097151  1024M Linux filesystem
/dev/sda2  2099200 500117503 498018304 237.5G Linux filesystem
Now at the fdisk command prompt, we need to type the following:
-
tto change type -
2to select partition 2, -
raidas the type (linux raid autodetect) - Finally
wwill write the changes to the partition table.
Repeat that for the second disk, but use 1 instead of 2 for the partition.
Setup the RAID array
Now for the fun part, we can create the RAID array, and add a partition to it. To create the array simply do:
sudo mdadm --create -n 2 --level=0 /dev/md0 /dev/sda2 /dev/sdb1
Then checking mdstat should show it is active and running:
$ cat /proc/mdstat
md0 : active raid0 sda2[0] sdb1[1]
      498802688 blocks super 1.2 512k chunks
We should now see a file has been created called /dev/md0. So back to fdisk in order to create the actually partition that PopOS would be installed to:
$ sudo fdisk /dev/md0

Command (m for help): p
Disk /dev/md0: 475.7 GiB, 510773952512 bytes, 997605376 sectors
Units: sectors of 1 * 512 = 512 bytes
Sector size (logical/physical): 512 bytes / 512 bytes
I/O size (minimum/optimal): 524288 bytes / 1048576 bytes
Disklabel type: dos
Disk identifier: 0x6e853144

Command (m for help):
Real simple, just type:
-
nto create a new partition and push enter until you are back at the Command (m for help) prompt - Then type
tto set the type as83(linux filesystem) - Then type
wto write those changes to disk.
You will now see a file called /dev/md0p1` has appeared. That’s our new partition.
Do the actual installing of the OS
Now we can install the PopOS. Run the installer program and navigate through until you get to the screen that says asks to install in simple or custom/advanced mode.
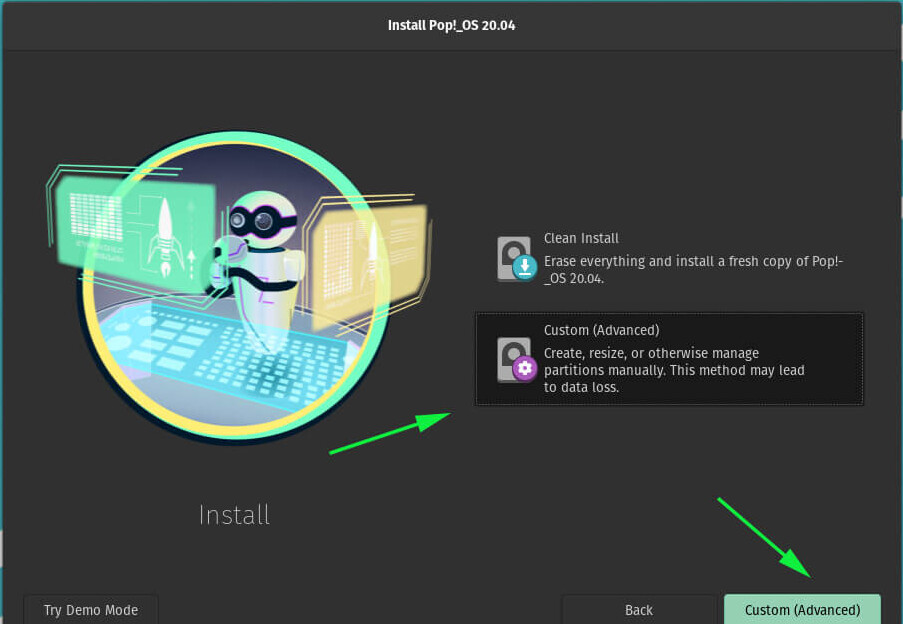
Choose the latter, which will take you a screen that shows the available drives. Clicking on the various partitions will allow you to select what do with that partition.
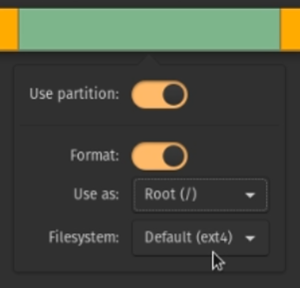
In this case we are doing to select:
-
/dev/sda1as the boot drive -
/dev/md0p1as the Root (/) drive.
Continue through the installation and reboot, and you should be booted into your new OS, and see blazing RAID0 speeds. Remember you can always check the status of your RAID array by checking mdstat.
When mine booted up, I found the drive letters had changed ,but since we set the partition type to RAID autodetect, the array still gets built OK.
md0 : active raid0 sda2[0] sdc1[1]
      498802688 blocks super 1.2 512k chunks
I would not recommend running this for long without getting good backups/snapshots going. You are sacrificing safety for speed with this setup. Backintime has been around for a while, has a GUI configurator and does differential backups, meaning it only stores what changed since the last snapshot.
Does anyone else run RAID0 for their root drive?
 Thank you