There's a chance that you are still running LGA775 platform with dual core CPU.
If you find your processor to be a bottleneck but don't have a few hundred bucks to spend on upgrading whole platform, struggle no more as there are some good news.
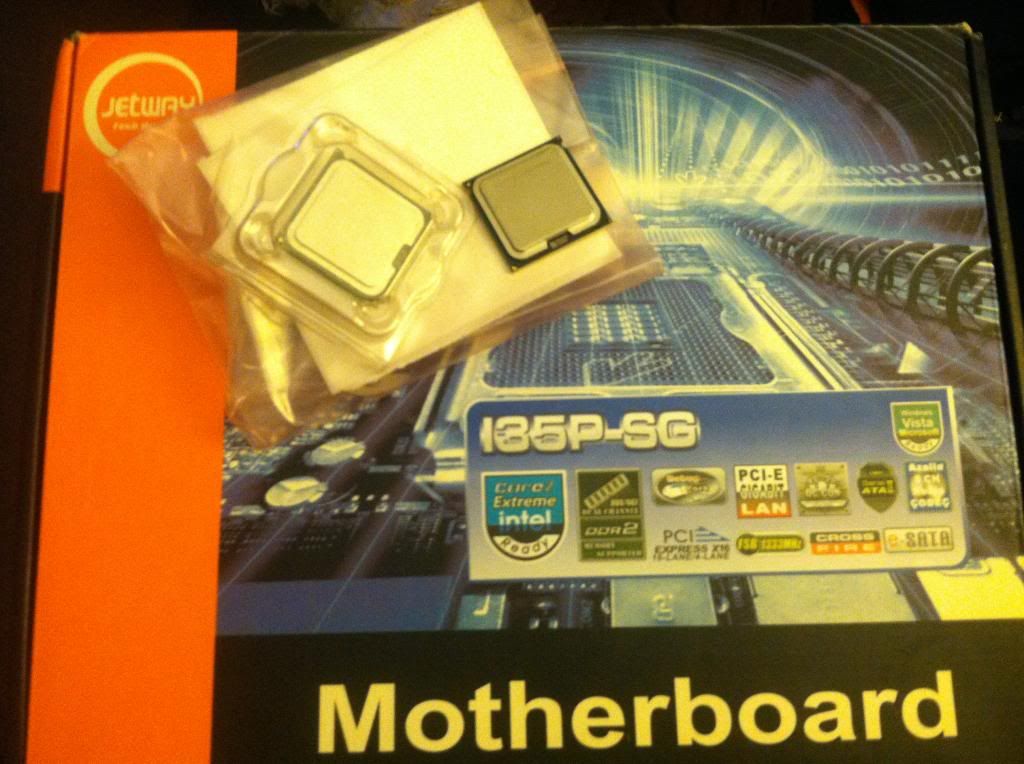
Thanks to greatness of the great Internet there's been made a discovery that LGA771 Xeon CPUs can be used in LGA775 motherboards in order to improove your computing experience.
It is not unusual to acquire quad core Xeon for just a half (or less) of the price of equivalently clocked desktop Core 2 Quad CPU.
The mod involves sticking a sticker on your CPU and cutting off 2 tabs from the mobo's 775 socket preventing form seating a 771 Xeon.
A Harpertown Xeon clocked above 3GHz would be more or less equivalent to the newest i3 and not hugely slower to 1st gen. mainstream desktop i5 (eg. i5 750).
For a bit more or the same money one would pick up a Harpertown LGA771 Xeon one could also find Westmere-EP/Gulftown LGA1366 Xeon L56xx/E56xx (32nm) which would be a quite huge upgrade from C2Q even, but the point is that it also would require changing the whole platform (motherboard and RAMs), ending up spending a lot more (which wouldn't make much sense as for again a bit extra one could get brand new 4th gen. quad i5 with mobo and some DDR3s).
So if you are able to control movement of your limbs with precision greater than a small child can and willing to take the risk of damaging your motherboard by incidentally breaking some of the pins in the socket (though having faith in your manual skills), hesitate not as this modification could bring a much needed relief.
The mod's been around for some time now and no wonder it attracted a lot of attention.
Please refer to the following links should you wish to acquire more knowledge about mentioned modification:
I really wanted to do this a while ago but both of my 775 mobos only support up to a 65W tdp and neither of them overclock, but now I think I am back on board and searching craigslist.
yeah 1366 is still kicking but you'll need to spend a bit more, no 20$ boards like 775 or 771, its all more than 60 for a x58 or workstation board and most of those are a weird form factor
Well, you could go with L54xx with 65W TDP if your board supports equivalent C2Qs. I bought mine because 2 cores really weren't enough and I wanted to squeeze a bit more from what I've got. BF3 on E8400 was really struggling (both cores 100% all the time) to feed 8800GT with GPU util. about ~50-60% pushing up to 50fps with heavy variations on minimal framerate. Now i get all 4 cores somewhat evenly stressed around 90% and GPU isn't bottlenecked anymore with 90-100% util. resulting in up to 100fps with minimal being around 60. I'm really happy with that. The OS seems to work a little bit faster as well but this might just be a placebo effect i suppose.
I just purchased an X5460 for $45. The adapter ran me around $5. I have a Gigabyte EP45T-UD3LR. The list on the Overclock.net post had the EP45T-UD3R as compatible, so it should work providing I don't bend any pins. I'll post an update when I receive the CPU and do the mod.
Just shove them beauties in there. Just not them both at the same time.
Or not. Please not. Be gentle.
I lately updated my BIOS with microcodes for Xeons as I found that missing SSE4.1 and VT-x instruction sets reported. Took a while to find sufficient information about the process but it turns out to be a really simple procedure. And for anyone struggilng with updating microcodes i will be posting a little guide for Gigabyte's Award/Phoenix BIOS. Cheers.
Can anyone give me any numbers on the performance difference I'd expect to see between a Q6600 @ 3.0ghz and something like a Xeon 5460? I can get my hands on a 5460 for ~50$. I'm using a Gigabyte G41 chipset mobo which FSB walls at ~340 mhz so I won't be able to get higher than the 5460's default 3.16 Ghz ( its 333 x 9.5). So I'm wondering what uarch differences there are between the kentsfield 65nm Q6600, and a pernyn 45nm X5460. Considering that Pernyn is a die shrink I'm guessing it can't be much right?
This micro tutorial about updating microcodes the hard way does not include flashing part. This you have to figure out by yourself. Also this is targeted mainly towards Gigabyte motherboards users but it also complies with other brands like Asus (although for AMI BIOS used in Asus mobos there is an easy to use tool so I'd recommend using that instead).
Disclaimer
I do not take any responsibility for bricked motherboards. You perform the modification at your own risk.
I. Gather the pieces:
BIOS file (doesn't matter whether you download latest from the website or backup the one that lives inside your motherboard to your disk);
microcode.dat actual microcodes for Intel chips (latest from 2014.04.30 but it doesnt really matter as the ones you'd need for 775 Xeon are from ~2010 anyway);
microdecode.exe to unpack microcodes form downloaded .dat file;
cbrom195.exe to manipulate your BIOS file (you can download newer version alhough I haven't tried it yet).
II. Find out what your Xeon CPUID is.
Get AIDA64 and find your CPUID (Motherboard>CPUID>CPUID Revision) for eg. 0001067Ah (h at the end is irrelevant).
Unpack unzipped earlier microcode.dat file by dragging it onto microdecode.exe. A bunch of .bin files will pop up in the same directory.
Search for adequate microcode file by typing in the search field: cpuYOURCPUID. For eg. let's say my CPUID is 0001067Ah, so to match the naming pattern of the files I type in the search field: cpu0001067A, and from all the files these will pop out:
The end number of the [...]plat000000xx[...] part of the name is corresponding with appropriate sockets like Socket J (LGA771), Socket T (LGA775) and some other. Unfortunately I don't know what number represents what platform so let's just copy all these found files to some separated folder.
III. Get it done:
First off you'd want to create a folder directly on some partition (doesn't have to be C:) like X:\pot or something. This way it'll be much easier to navigate to with command prompt.
Copy your BIOS file, cbrom.exe and microcode .bin files matching your CPUID to that very directory.
Run Command Prompt as an Admin (Start>Accesories>RMB on Command Prompt>Run as Admin). Navigate to your directory by typing cd PATH like cd x:\pot or adequately to what you did.
Now create an empty .bin for cbrom to work with, where the microcodes extracted from the actual BIOS of your mobo will be stored:
type NUL > NCPUCODE.BIN
Having an empty file to work with now tell the cbrom to extract the microcodes from your current BIOS (where BIOS.BIN is name and extension of your BIOS file like for eg. EP43S3L.F9c):
cbrom195.exe BIOS.BIN /nc_cpucode NCPUCODE.BIN
Note the size of NCPUCODE.BIN and it's contents inside your BIOS image before manipulating the file. That way you will know if there is a change after you're done.
cbrom195.exe BIOS.BIN /d
Change name of the NCPUCODE.BIN file inside your directory to something else like NCPUCODE_STOCK.BIN.
Now merge the microcode files from original BIOS and those you found earlier matching to your CPU with command copy /b NCPUCODE_STOCK.BIN + NAME_OF_EVERY_cpu000[...]FILEALONG_WITH_ITS_EXTENSION + NCPUCODE.BIN (at the end there is a name of the final file which will be composed from all files before it's name) for eg.:
After that there should be a new NCPUCODE.BIN file which size should be a sum of NCPUCODE_STOCK and all microcode files you merged with it. Now change the attributes of NCPUCODE.BIN file to read only by:
attrib +R NCPUCODE.BIN
Finally you can put updated NCPUCODE.BIN you have just finished working with back into your BIOS image (the program will swap old NCPUCODE.BIN with new one - remember to make NCPUCODE.BIN read only first):
cbrom195.exe BIOS.BIN /nc_cpucode NCPUCODE.BIN
Just to be sure check again your now updated with new microcodes BIOS. NCPUCODE.BIN should weigh more and new entries should appear on the list of CPUID codes:
cbrom195.exe BIOS.BIN /d
That's IT. Your BIOS is ready to flash.
Cheers.
PS. Mine, before and after updating the microcodes.
I haven’t posted on this forum in a long time, but I figured I’d update ya’ll. I gave the computer I upgraded with the 771 Xeon to my brother and it’s still working to this day!
I think this is the most acceptable thread necro on this forum, ever. Awesome to hear it’s still going! There’s something to be said about the longevity of those old Core 2 era systems. Absolute tanks.