I915 SR-IOV on i9-13900H (Minisforum MS-01) Proxmox PVE Kernel 6.5 - Jellyfin Full Hardware Accelerated LXC

Here’s my notes and steps I took on my MS-01 to get fully-functional Hardware Acceleration on the iGPU on my i9-13900H, including Tone Mapping.

I don’t claim to be perfectly competent in all of these things, I’m just hoping to share the things I’ve learned and cobbled together from youtube videos, forum posts, and other how-to’s spattered all over the internet, and thought it’d be valuable to share the things I learned in a way that hopefully is search-friendly enough for others to find and maybe contribute to.


Notes

Problem: X710 NIC dislikes bridge VLAN awareness

Flood of “Error I40E_AQ_RC_ENOSPC, forcing overflow promiscuous on PF” in dmesg.

Solution:

Reduce the number of VLANs set up for the Intel X710 NIC

  • If you’re using a VLAN aware bridge note that by default it sets the filters for vlans 2-4096 - please adapt the needed VLANs in /etc/network/interfaces

https://bugzilla.proxmox.com/show_bug.cgi?id=256

I set the vlan range in etc/network/interfaces to 2-180, since I only need vlans locally in the first hundred or so. Some users in the linked thread seem to imply that there’s a hardware limitation on the number of VLANs supported, but I couldn’t find an actual answer in the datasheets for what that limitation is on the X710 NICs that are in the MS-01.

Problem: MeshCommander can’t stay connected to vPro

This is an annoyance that seems to stem from the NIC (i226-LM) that’s vPro enabled not maintaining a DHCP lease independently of the OS. In my environment, I’m using that NIC on a separate management VLAN and don’t want Proxmox and things running on that one specifically.

Solution:

Set the IP address statically in the vPro configuration
Network Settings → IPv4 state → Static IP address.

Setup of Proxmox on the MS-01 - Enabling VFIO for the iGPU

  1. Install Proxmox VE 8.1.4 - Kernel Linux 6.5.11-8-pve
  2. Using EFI with ZFS mirrored SSDs as MS-01 Storage, with Secure Boot enabled
    • EFI + Secure Boot + ZFS → Bootloader is GRUB
  3. BIOS Changes
    • Ensure all virtualization things (SR-IOV, etc.) are enabled
    • Set onboard devices > video Hybrid
  4. Follow these instructions https://www.derekseaman.com/2023/11/proxmox-ve-8-1-windows-11-vgpu-vt-d-passthrough-with-intel-alder-lake.html to setup the i915-sriov-dkms driver, set up the GRUB configuration, and PCI configuration
    • NOTE: I wasn’t actually seeing the correct output from dmesg | grep i915 until I cleaned up the flood of Error I40E_AQ_RC_ENOSPC in my dmesg output from boot. But I did successfully see the virtual functions when I ran lspci | grep VGA
    • My GRUB config:
       GRUB_DEFAULT=0
       GRUB_TIMEOUT=5
       GRUB_DISTRIBUTOR=`lsb_release -i -s 2> /dev/null || echo Debian`
       GRUB_CMDLINE_LINUX_DEFAULT="quiet intel_iommu=on iommu=pt i915.enable_guc=3 i915.max_vfs=7"
       GRUB_CMDLINE_LINUX=""
      
      Make sure to update GRUB and initramfs.
  5. Back to Wendel’s post here Intel i915 sr-iov mode for Flex 170 + Proxmox PVE Kernel 6.5
    • Set up the PCIe devices as Resources in the Datacenter section. Not sure if that mattered or not for getting this working, but it seems like a good practice.

Jellyfin on Proxmox via LXC

So getting Jellyfin running in docker inside a VM inside Proxmox didn’t work for me, but I suspect there was some driver funkiness happening that caused me issues, and by the time I figured all that out, I had set up Jellyfin as an LXC and got that working WITH hardware transcoding and Tone Mapping!

Initial Good State

After installing the LXC container using the script from the proxmox helper scripts, and using all the defaults, I bumped the settings for the container to 50GB disk, 4GB of RAM, and left it with 2 cores, since it’s plenty fast on a i9-13900H. The larger disk is necessary because of the space needed for the transcode cache - While transcoding a very large and long film, I accidentally filled my container’s storage (it’s default was 8GB) - at which point it became completely unresponsive.

It’s also running in a privileged container, which I hope to maybe restrict somewhat.

I modified the LXC configuration as well, to change the passed through render device (though it seems like, since it’s privileged, I’m not sure if this matters). On my machine renderD128 should be the root iGPU device, and 129-134 are the 7 Virtual Functions (VFs). The idea here that I’m trying to achieve is that the LXC only has access to one of the GPU VirtIO functions, rather than the whole card.

lxc.mount.entry: /dev/dri dev/dri none bind,optional,create=dir
lxc.mount.entry: /dev/dri/renderD129 dev/dri/renderD129 none bind,optional,create=file

While transcoding a 2K HDR10 video, I get about 100FPS. A 4K HDR10 video transcodes at around 83FPS. Non-HDR and/or standard 1080p goes at 300+FPS, so it’s pretty good from that perspective.

Fixing the OpenCL Failure - Update intel-opencl-icd!

Initially, once normal transcoding was working, I still couldn’t get anything that needed tone mapping (HDR) to transcode without an error in Jellyfin. In the logs, the last few lines of the FFmpeg log showed:

Transcode log:
[AVHWDeviceContext @ 0x55f4ad1088c0] Failed to get number of OpenCL platforms: -1001. Device creation failed: -19. Failed to set value 'opencl=ocl@va' for option 'init_hw_device': No such device Error parsing global options: No such device

This was a hard one to crack, since it seems that we’re on the leading edge of software drivers and support for using this kind of hardware in this way. But on the Jellyfin documentation here: Intel GPU | Jellyfin I more closely read point #6:

“For the latest products like N95/N100 and Arc A380, support is provided in 23.xx.xxxxx and newer. Otherwise install from Intel compute-runtime repository.”

I was using version 22.xx - which seems like it’s insufficient for the Raptor Lake i9-13900H, and the LXC repositories (Ubuntu 22.04.4 LTS) didn’t have an update. I followed the instructions for the installation on the linked github release page to install version 22.09.28717.12. After installing that, running the command below, I no longer had any red text around OpenCL!

/usr/lib/jellyfin-ffmpeg/ffmpeg -v verbose -init_hw_device vaapi=va:/dev/dri/renderD129 -init_hw_device opencl@va
:point_up_2: note to specify the correct render device

This should print:

ffmpeg version 5.1.4-Jellyfin Copyright (c) 2000-2023 the FFmpeg developers
  built with gcc 11 (Ubuntu 11.4.0-1ubuntu1~22.04)
  configuration: --prefix=/usr/lib/jellyfin-ffmpeg --target-os=linux --extra-libs=-lfftw3f --extra-version=Jellyfin --disable-doc --disable-ffplay --disable-ptx-compression --disable-static --disable-libxcb --disable-sdl2 --disable-xlib --enable-lto --enable-gpl --enable-version3 --enable-shared --enable-gmp --enable-gnutls --enable-chromaprint --enable-libdrm --enable-libass --enable-libfreetype --enable-libfribidi --enable-libfontconfig --enable-libbluray --enable-libmp3lame --enable-libopus --enable-libtheora --enable-libvorbis --enable-libopenmpt --enable-libdav1d --enable-libsvtav1 --enable-libwebp --enable-libvpx --enable-libx264 --enable-libx265 --enable-libzvbi --enable-libzimg --enable-libfdk-aac --arch=amd64 --enable-libshaderc --enable-libplacebo --enable-vulkan --enable-opencl --enable-vaapi --enable-amf --enable-libmfx --enable-ffnvcodec --enable-cuda --enable-cuda-llvm --enable-cuvid --enable-nvdec --enable-nvenc
  libavutil      57. 28.100 / 57. 28.100
  libavcodec     59. 37.100 / 59. 37.100
  libavformat    59. 27.100 / 59. 27.100
  libavdevice    59.  7.100 / 59.  7.100
  libavfilter     8. 44.100 /  8. 44.100
  libswscale      6.  7.100 /  6.  7.100
  libswresample   4.  7.100 /  4.  7.100
  libpostproc    56.  6.100 / 56.  6.100
[AVHWDeviceContext @ 0x55ecaa3d14c0] libva: VA-API version 1.20.0
[AVHWDeviceContext @ 0x55ecaa3d14c0] libva: Trying to open /usr/lib/jellyfin-ffmpeg/lib/dri/iHD_drv_video.so
[AVHWDeviceContext @ 0x55ecaa3d14c0] libva: Found init function __vaDriverInit_1_20
[AVHWDeviceContext @ 0x55ecaa3d14c0] libva: va_openDriver() returns 0
[AVHWDeviceContext @ 0x55ecaa3d14c0] Initialised VAAPI connection: version 1.20
[AVHWDeviceContext @ 0x55ecaa3d14c0] VAAPI driver: Intel iHD driver for Intel(R) Gen Graphics - 24.1.1 (f5f09c4).
[AVHWDeviceContext @ 0x55ecaa3d14c0] Driver not found in known nonstandard list, using standard behaviour.
[AVHWDeviceContext @ 0x55ecaa3ff280] 0.0: Intel(R) OpenCL Graphics / Intel(R) Iris(R) Xe Graphics
[AVHWDeviceContext @ 0x55ecaa3ff280] Intel QSV to OpenCL mapping function found (clCreateFromVA_APIMediaSurfaceINTEL).
[AVHWDeviceContext @ 0x55ecaa3ff280] Intel QSV in OpenCL acquire function found (clEnqueueAcquireVA_APIMediaSurfacesINTEL).
[AVHWDeviceContext @ 0x55ecaa3ff280] Intel QSV in OpenCL release function found (clEnqueueReleaseVA_APIMediaSurfacesINTEL).
Hyper fast Audio and Video encoder
usage: ffmpeg [options] [[infile options] -i infile]... {[outfile options] outfile}...

Use -h to get full help or, even better, run 'man ffmpeg'

Success!

Monitoring iGPU from Proxmox Host

Running intel_gpu_top without any flags leads to a segmentation fault. Make sure to put in the -d sriov flag.

root@proxmox1:~# intel_gpu_top -d sriov

That seems to do the trick.

Jellyfin Playback Settings

Hardware Acceleration: Intel QuickSync (QSV)
Enabled decoding: Everything except VP8
:white_check_mark: Prefer OS native DXVA or VA-API hardware decoders
:white_check_mark: Enable hardware encoding
:white_check_mark: Enable VPP Tone mapping
:white_check_mark: Enable Tone Mapping

Everything else at the defaults.

Hardware Setup

  • RAM: Crucial CT48G56C46S5.M16B1 48 GB x2 Kit @ 5200MT/s - total 96GB
  • Disk: ZFS Mirrored Crucial CT2000P2SSD8 2TB nvme
  • HDMI Dummy Plug installed - this was like $3 on amazon and I figured it couldn’t hurt, since I wanted to make sure I can use the remote vPro console since I’m running this machine headless.

Everything else is basically stock.


I hope that this proves useful to folks. I’ll answer questions and provide updates if / as I learn more. My overall plan is to migrate all my containers off my Synology and onto this, as well as my LibreNMS VM from there, too - hopefully that all goes more smoothly than moving Jellyfin.
11 Likes

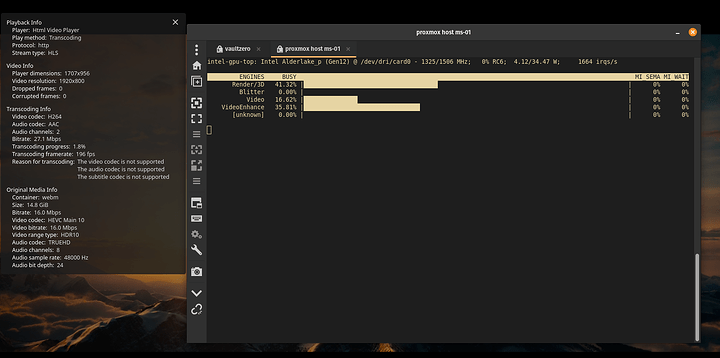
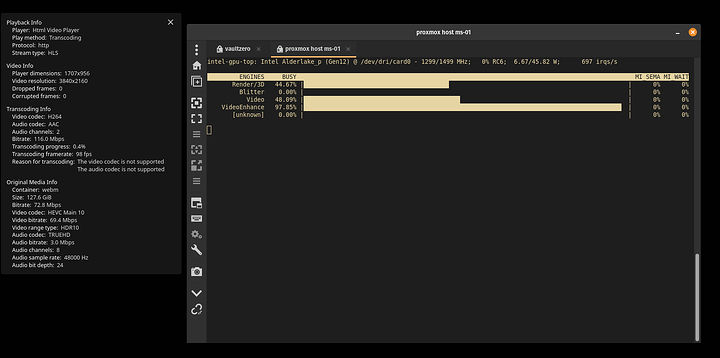
Some screenshots with intel_gpu_top running on the host, and Jellyfin streaming to Firefox.

6 Likes

Mvp hero award thanks for posting

5 Likes

I’d be interested to know whether tone mapping will work with SR-IOV iGPU inside a VM.

1 Like

I expect that it would work, if you install the correct drivers as I did to the container. (*I’m not really super familiar with Proxmox - setting it up and getting this going on my MS-01 has been my first foray into Proxmox - professionally I’m more familiar with Hyper-V and vmware).

I can spin up a quick VM, install Jellyfin and see if I can get it working. I’ll get back to you with what I find.

1 Like

Thanks for sharing!

I recently installed Proxmox on a Erying 11800ES and spent what felt like a week trying to get Jellyfin set up on a unprivileged LXC with iGPU transcoding. When I finally got it working I almost cried haha!

2 Likes

I know the feeling! Any different notes to what I’ve got here in your experience?

Also \o/ congrats!

2 Likes

one other thing is that if you want the latest ffpmeg you need to uninstall the jellyfin-ffmpeg package and instead use jellyfin-ffmpeg6

2 Likes

So I tried replicating this with a VM, or at least getting the VM to load the appropriate driver and get it all running, but over the last couple days I haven’t had success getting the passed in i915 driver within the VM to load in and work.

Yesterday I went as far as compiling a custom kernel, but uh, that ran into some issues as well - mostly that I accidentally ran out of disk space on the VM (make sure you have at least 40GB if you wanna do a custom kernel, lol). But after getting that resolved, I still couldn’t install the custom kernel anyway.

I think that the problem is that I tried installing the i915-sriov-dkms driver first (before the custom kernel) and now that the kernel is changing, there’s incompatibility there? I haven’t played with the Linux Kernel on this level ever before, so I’m not really sure what I’m doing.

I’m still interested in figuring this out, but so far haven’t had success. Time is definitely a limiting factor here, but I wanted to report back with my experience so far.

I might nuke this VM and start over with something clean and see where I get.


Notes:

Replicating the LXC experience:

Tried installing the linux intel driver as in the LXC container above

Resulted in the driver not being able to load. I can see a device at /dev/dri/RenderD128, but it doesn’t initialize.

Kernel Build

(github) strongtz/i915-sriov-dkms:Readme#Linux-guest-installation-steps

During installation of the linux kernel compiled with the

CONFIG_INTEL_MEI_PXP=m
CONFIG_DRM_I915_PXP=y

parameters set as described, it fails to install. The output (truncated):

make -j4 KERNELRELEASE=6.1.76-sriov -C /lib/modules/6.1.76-sriov/build M=/var/lib/dkms/i915-sriov-dkms/6.1.0-20/build KVER=6.1.76-sriov...............(bad exit Status: 2)
Error! Bad return status for module build on kernel: 6.1.76-sriov (x86_64)
Consult /var/lib/dkms/i915-sriov-dkms/6.1.0-20/build/make.log for more information.
Error! One or more modules failed to install during autoinstall.
Refer to previous errors for more information.
dkms: autoinstall for kernel 6.1.46-sriov failed!

VM Info:

  • Debian 12 (bookworm) base from 12.5.0 ISO disk
  • 4GB ram, not ballooning
  • 4 cores (kernel building seems to only use a single thread, so it’s not speed limited)
  • q35
  • UEFI, Secure boot in Proxmox UEFI BIOS turned OFF
1 Like

Does the release of proxmox 8.2 and kernel 6.8 have any affect on this? my understanding is the current dkms is only for kernels 6.1-6.5

Maybe! I’m not really sure about kernel 6.8 at the moment. What I am sure is:

Kernel 6.1 doesn’t work

Lots of issues, even after compiling a custom kernel a few times myself, I just couldn’t get the i915-sriov-dkms module to install correctly. (see previous notes here)

Debian 12 Stable (at least the one I have) is still on kernel 6.1.

Kernel 6.6.15-amd64 works almost too easily

On a whim today, I decided to see if I could just skip up to a more recent kernel, since I’ve been having success with this on 6.5 on both the host and LXC. I rolled my VM back to it’s clean install state, flipped the /etc/apt/sources.list file to debian testing and then ran a full update / dist-upgrade / upgrade / autoremove cycle and rebooted.

I was thinking I’d need to build a custom kernel to get the
CONFIG_INTEL_MEI_PXP=m and CONFIG_DRM_I915_PXP=y kernel parameters set, but under the 6.6 kernel, they’re already all there. SO, I don’t have to rebuilt the kernel. Yay!

After reboot, I cloned in the strongtx/i915-sriov-dkms git repo to /usr/src edited the dkms.conf file to match my kernel version, installed the needed linux headers (dkms complained that it couldn’t find them) and uh… it just went and autoinstalled itself? Running dkms status in /usr/src/i915-sriov-dkms/ showed that the module just… was installed. Neat.

Updated grub with the “i915.enable_guc” setting GRUB_CMDLINE_LINUX_DEFAULT="quiet i915.enable_guc=3"
and ran update-grub && update-initramfs -u then shut down the VM.

Added in the PCI vfio function to the VM and booted up.

Install Jellyfin (note, you’ll be on Debian “Trixie” (upcoming v13)), so some issues are to be found. I worked through them.

Guide Time - @skittlebrau See here for success!

Debian VM Setup

  1. Install Debian VM - get everything going as normal. All the commands will be run as root, but you can also install sudo and sudo them all.
  2. Make a backup of the default apt sources

cp /etc/apt/sources.list /etc/apt/sources.list.bak

  1. vi /etc/apt/sources.list
    Replace all “bookworm” mentions with “testing”
  2. save+close
  3. apt update
  4. apt -y dist-upgrade && apt -y update && apt -y autoremove
  5. reboot now
  6. check your kernel version - should be 6.6.something
    uname -r
  7. double-check that /boot/config-6.6.XX-amd64 contains the lines CONFIG_INTEL_MEI_PXP=m and CONFIG_DRM_I915_PXP=y - if it does, you’re good.
  8. cd /usr/src/
  9. Clone the i915-sriov-dkms git repo
    git clone https://github.com/strongtz/i915-sriov-dkms.git
  10. cd i915-sriov-dkms
  11. edit dkms.conf so that the lines at the top read something like:
PACKAGE_NAME="i915-sriov-dkms"
PACKAGE_VERSION="6.6.15"

Obviously, replace the VERSION part with the output of uname -r so that it matches whatever kernel version you’re running (this is the testing branch of Debian, so I expect that this’ll change more or less quickly…)
14. run dkms add .
15. cd /usr/src/i915-sriov-dkms-6.6.15/ (or whatever matching version)
16. dmks status should reply with …“added”
17. apt install linux-headers-6.6.15-amd64 This may pick up and automatically install the current module, which is handy. IF NOT:
Run: dkms install -m i915-sriov-dkms -v 6.6.15 -k $(uname -r) --force -j 1 and it should be installed.
18. dkms status should now return “…installed”
19. Edit grub so that the “GRUB_CMDLINE_LINUX” line reads:
GRUB_CMDLINE_LINUX_DEFAULT="quiet i915.enable_guc=3"
20. save the file and then
update-grub
update-initramfs -u
21. Shutdown the VM.

In proxmox, add the pci device and pass through one of the virtual functions, or, if you added them all to a resource group, add the video resource group you created to the VM.

Boot up the VM and check for any dmesg errors or other problems.

Also check the /dev/dri directory and make sure you now have a renderD128 device listed.

Installing Jellyfin on Trixie

So moving to Trixie, the jellyfin scripts don’t work (they want Bookworm). So your choices are semi-manual jellyfin install (where some package dependencies are a little squirrelly and won’t work off the bat) or maybe install docker on the VM, then pass the video render device through to the container and run Jellyfin in there? I chose the harder option because I just wanted to see if FFMPEG would initiate the device correctly and actually, you know… work.

Jellyfin manual install

  1. apt install software-properties-common
  2. double check your sources.list, they should look something like
deb http://deb.debian.org/debian/ testing contrib main non-free non-free-firmware
deb-src http://deb.debian.org/debian/ testing contrib main non-free non-free-firmware

deb http://security.debian.org/debian-security testing-security contrib main non-free non-free-firmware
deb-src http://security.debian.org/debian-security testing-security contrib main non-free non-free-firmware

# testing-updates, to get updates before a point release is made;
# see https://www.debian.org/doc/manuals/debian-reference/ch02.en.html#_updates_and_backports
deb http://deb.debian.org/debian/ testing-updates contrib main non-free non-free-firmware
deb-src http://deb.debian.org/debian/ testing-updates contrib main non-free non-free-firmware

deb https://ftp.debian.org/debian/ testing-backports contrib main non-free non-free-firmware
deb-src https://ftp.debian.org/debian/ testing-backports contrib main non-free non-free-firmware

Honestly, I kinda just threw everything in there.
3. Mostly follow the Jellyfin install guide here
Critical departure:
4. Edit the created /etc/apt/sources.list.d/jellyfin.sources file to read “Suites: Bookworm”
Why? Because it doesn’t like Trixie, but installs anyway (we’ll fix some issues along the way)
5. apt update
6. apt install jellyfin-server jellyfin-web

Warning: jellyfin-ffmpeg6 (and all lower versions, it seems) need libvpx7 - that’s not in Trixie - we need to add back the Bookworm repo to get that… or I guess convince the jellyfin package to accept something else? I don’t know…
7. Add Bookworm repo:
echo "deb http://ftp.debian.org/debian bookworm main contrib" | tee /etc/apt/sources.list.d/bookworm.list
8. apt update again
9. apt install jellyfin-ffmpeg6
10 usr/lib/jellyfin-ffmpeg/ffmpeg -v verbose -init_hw_device vaapi=va:/dev/dri/renderD128 -init_hw_device opencl@va

Success? Still need intel-opencl-icd for Tone Mapping:

Install the intel-opencl-icd package (as above, same deal here)

Following the guide on the intel repo (link here)

  1. cd ~
  2. mkdir neo && cd neo ---- the below is just my bash history, but it downloads the files needed, checks the signature, then installs the .deb packages.
   63  wget https://github.com/intel/intel-graphics-compiler/releases/download/igc-1.0.16510.2/intel-igc-core_1.0.16510.2_amd64.deb
   64  wget https://github.com/intel/intel-graphics-compiler/releases/download/igc-1.0.16510.2/intel-igc-opencl_1.0.16510.2_amd64.deb
   65  wget https://github.com/intel/compute-runtime/releases/download/24.13.29138.7/intel-level-zero-gpu-dbgsym_1.3.29138.7_amd64.ddeb
   66  wget https://github.com/intel/compute-runtime/releases/download/24.13.29138.7/intel-level-zero-gpu_1.3.29138.7_amd64.deb
   67  wget https://github.com/intel/compute-runtime/releases/download/24.13.29138.7/intel-opencl-icd-dbgsym_24.13.29138.7_amd64.ddeb
   68  wget https://github.com/intel/compute-runtime/releases/download/24.13.29138.7/intel-opencl-icd_24.13.29138.7_amd64.deb
   69  wget https://github.com/intel/compute-runtime/releases/download/24.13.29138.7/libigdgmm12_22.3.18_amd64.deb
   70  wget https://github.com/intel/compute-runtime/releases/download/24.13.29138.7/ww13.sum
   71  sha256sum -c ww13.sum
   72  sudo dpkg -i *.deb
  1. Run the command below again:
    /usr/lib/jellyfin-ffmpeg/ffmpeg -v verbose -init_hw_device vaapi=va:/dev/dri/renderD128 -init_hw_device opencl@va
    And you should see all Green!

SUCCESS

Go ahead and celebrate (a little) - and go through all the other Jellyfin setup steps, like creating and mounting your media folders, user account creation, etc. etc.

4 Likes

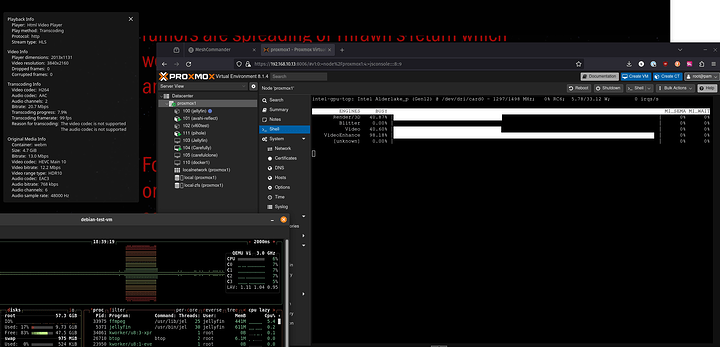
And here’s Jellyfin in my Debian Testing *Trixie Kernel 6.6.15 VM on Proxmox using hardware transcoding and tone mapping.

*Remember folks to enable hardware transcoding in Jellyfin! (that’s why btop for the vm shows 100% usage there… it was bruteforcing it before I switched to hardware transcode)

3 Likes

Thanks for looking into the VM! I’ll give it a go myself on my Intel i5-1240p NUC. Looks like I’ll need to pin the proxmox kernel for now.

1 Like

Thanks for this post. My brand new MS-01 kept giving me X710 promiscuous errors and you shared more info about this here.

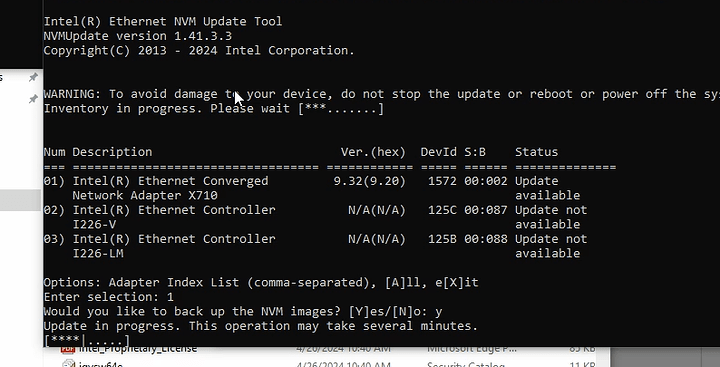
I am going to try something before attempting your fix. Updating the X710 firmware using intel’s tools.

Please let us know how it goes with the firmware update and if that makes the issues go away. If so, I’ll update the post above with instructions on updating the NIC firmware.