Background
Are you in the loop about https://xcp-ng.org/ ? It’s a virtualization platform that, imho, has flown under the radar for many that would be interested in such things. It uses Xen for virtualization RedHat has been investing heavily in KVM and VMware does their own thing (popular misconception: VMware has Linux Bits floating around somewhere – this is entirely untrue. VMware until recently supported some driver compatibility, but that’s it.).
By many accounts, Xen code is mature and solid, especially around enterprise-y things like pcie passthrough, sr-iov and device virtualization.
It offers an esxi-like experience where a lightweight OS runs on bare metal and then a virtual machine running on that virtualization platform provides command-and-control infrastructure of one or more bare metal hosts.
The vernacular is a bit different: dom0 refers to the host.
Unlike VMware ESXi or the free Windows Core HyperV role, the hypervisor is a little more functional and it is more possible to “go off-script” and install other open source things like Ceph,
This can give you some more insight into what you’re getting into if you’ve never heard of XCP-ng and not sure how it fits in feature-wise with other things you may be familiar with such as HyperV or VMware.
The documentation is quite good, and well worth skimming:
https://xcp-ng.org/docs/guides.html#pfsense-opnsense-vm
… as well as some entries on Bounty Source to get an idea of what features folks are after.
https://www.bountysource.com/teams/xcp-ng/issues
What You Don’t Know About XCP-ng
If you just start with the docs, you will install the community edition. That’s fine. The paid version includes support and I’d always recommend having a commercial support plan from someone for anything mission-critical to your business.
However, this is open source. You don’t have to have a commercial license to unlock all the features. XCP-ng as a project and philosophy should be supported, however, and I encourage you to support them monetarily if their hard work is useful to you.
Installation Process (what we did in the video)
- Install XCP-ng from their usb stick (see advanced install if you need advanced features)
- Create an Ubuntu 20.04 VM (other distros supported)
- Follow along with https://github.com/ronivay/XenOrchestraInstallerUpdater.git
- Run the xo-installer.sh in the Ubuntu 20.04vm
Essentially the Ubuntu VM becomes the “controller”
One of the main differences, for me, is the philosophical differences (rather than the technical differences) vs projects like Proxmox, KVM, etc. Some of those choices have led to a different direction than RedHat has gone wrt virtualization. If you like VMware you’ll probably like how XCP-ng does things.
In general, fwiw, I find it a bit less clunky and opinionated vs Proxmox.
Like VMware, the hypervisor-on-bare-metal part is pretty much the same no matter what you want to do – trial/community edition or “DIY Unlocked Features Edition.” For this how-to I’m walking you through the “DIY” option (which isn’t very DIY tbh).
Installing XCP-ng to an advanced Linux MD array
While the installer supports a simple raid-1 auto-creation, it doesn’t support anything more advanced than that. And it needs enough space installing to USB or SD isn’t recommended. The Tyan Transport CX does support multiple m.2 NVMe, but I kind of wish it had a couple sata disk-on-module ports as well.
To install to an advanced MD array hit alt + f2 to get to a command prompt:
cat /proc/mdstat will probably show the current array and what it’s up to.
In my case I wanted to:
- Stop the existing md array
mdadm --stop /dev/md127 - Zero the superblocks
mdadm --zero-superblock /dev/nvme3n1 nvme4n1 nvme2n1 nvme0n1 - Create paritions and raid those, rather than raw devices (need boot and efi partitions) [ not shown ]
- re-create raid array
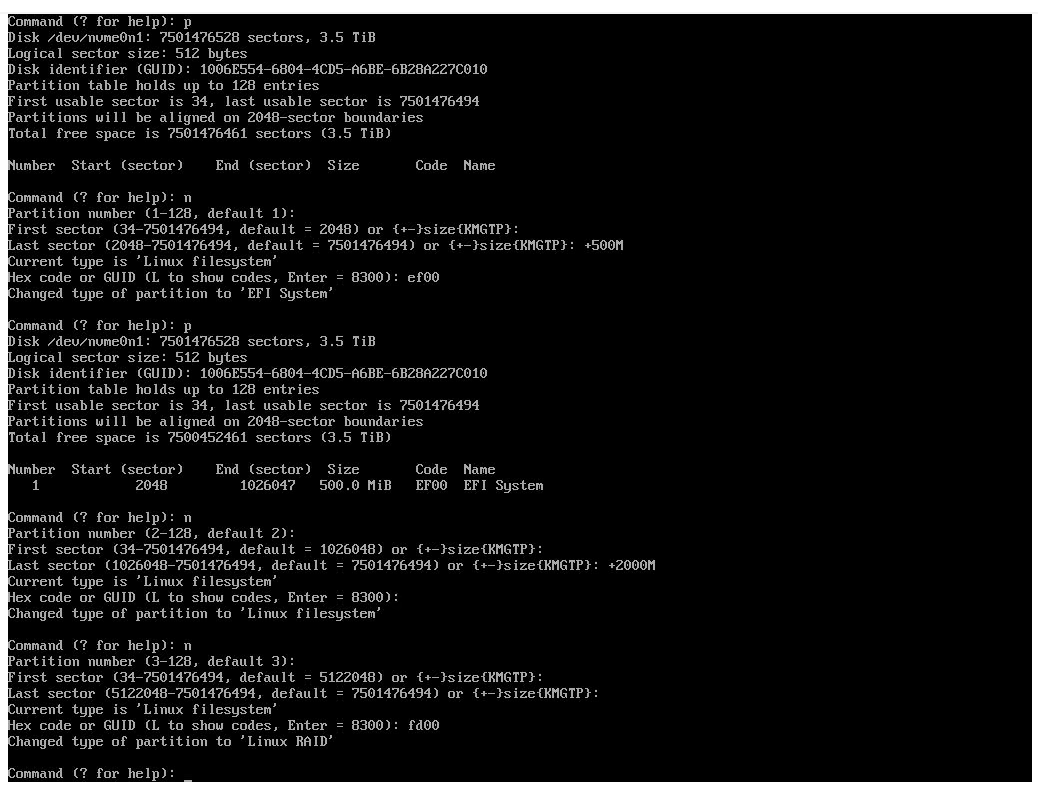
gdisk /dev/nvme0n1

partitions:

1          EFI (type ef00)            500m
2          linux (type 8300)            2000m
3         linux raid (type fd00)  (rest of disk)
finally
# make sure this matches your lsbk nvme devices!
mdadm --create /dev/md127 --level=5 /dev/nvme0n1p3 /dev/nvme1n1p3 /dev/nvme3n1p3 /dev/nvme4n1p3
Finally, click back then next, in the installer so it will re-detect the raid.

But wait, it won’t boot yet !
So the installer isn’t the smartest. While it can handle a simple “raid 1” and get the EFI part of that right, it doesn’t work for raid 5.
The simplest way to “fix” that is to install it to a small 256g + m.2 ssd and the installer will ask where you want VMs. You can tell it md127 in that case. I tried to work around it by copying the EFI data to a real EFI paritition:
# mount the efi parition the installer made
mkdir 1
mount /dev/md127p4 1


# EFI doesn't understand linux MD so that this works with raid1 mirrors is the edge case that happens to work. We need to copy that efi partition to a real efi parition. That's why we made all those partitions before!
mkfs.vfat /dev/nvme0n1p1

 # finally update fstab
umount 1
mount /dev/md127p1 1
blkid /dev/nvme0n1p1
# blkid here was 7D03-1AF1
vi 1/etc/fstab
# and update the boot/efi line to be that efi parition.
… but the problem was that efibootutils from the CLI could not use the efi boot vars at /efi (???) so I’m not sure why that was broken. I booted in EFI mode. Inconvenient!
Next, the Virtual Machine
So rather than fool with the “premade” management appliance, we need to make our own.
If you login to the web gui it’ll make it easy for you to get the limited management vm:
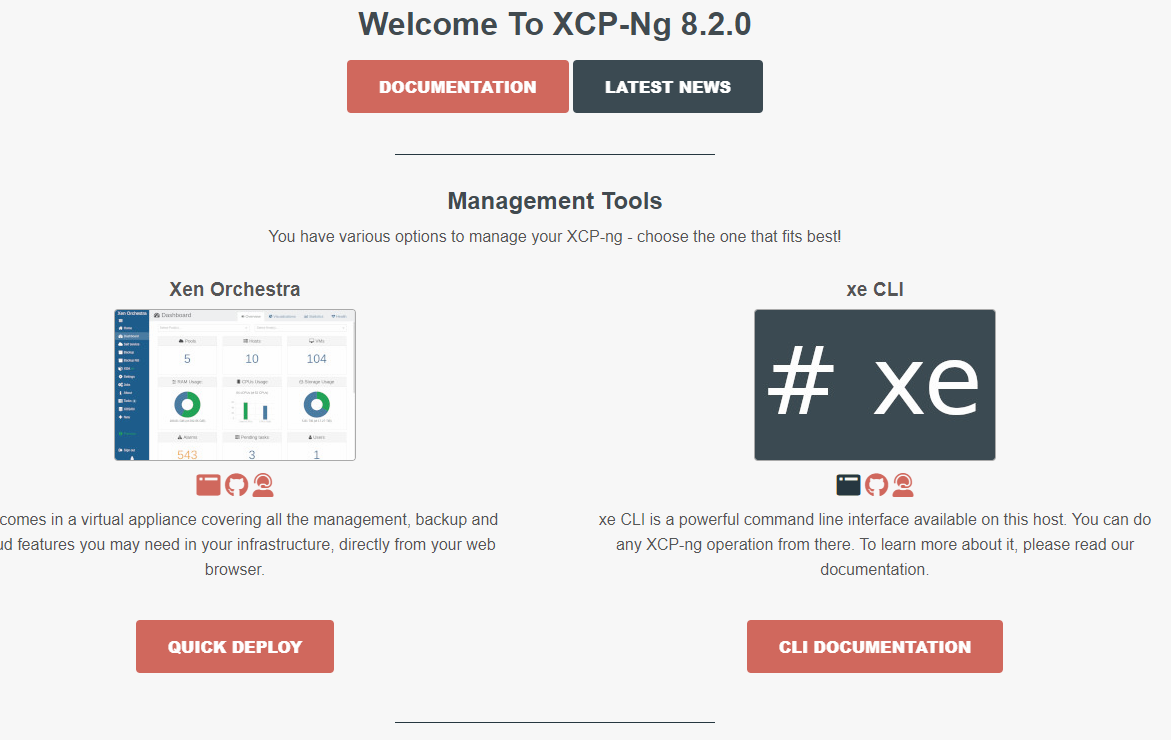
You don’t want this, though. Instead you want to create a VM and then install the stuff you need to manage XCP-ng.
You can download the prebuilt debian VM there, or ssh into xcp-ng and use xe to create a VM from the CLI, boot the Ubuntu 20.04 iso, update it, then git clone the repo and run the installer. Either way is fine. The latter is a good and mostly fun experience that takes a bit longer.
A note about hyperconvergence
Hyperconvergence means sharing and replicating storage across a bunch of machines. Our Tyan Transport CX with four AMD Epyc CPUs is the perfect platform for this and we can support the loss of any one node in our cluster. The big piece that is missing, kinda but not really, from XCP-ng is the storage solution. There is XOSAN … but XOSAN v2 is in the works.
XOSAN v2 has some really cool features! But that’s a how-to for another day. It’s not out yet