[DIY guide] Slim wall-mounted PC case. Project and drawings

Introduction

Hi, I’m a design engineer, gamer, and PC enthusiast.
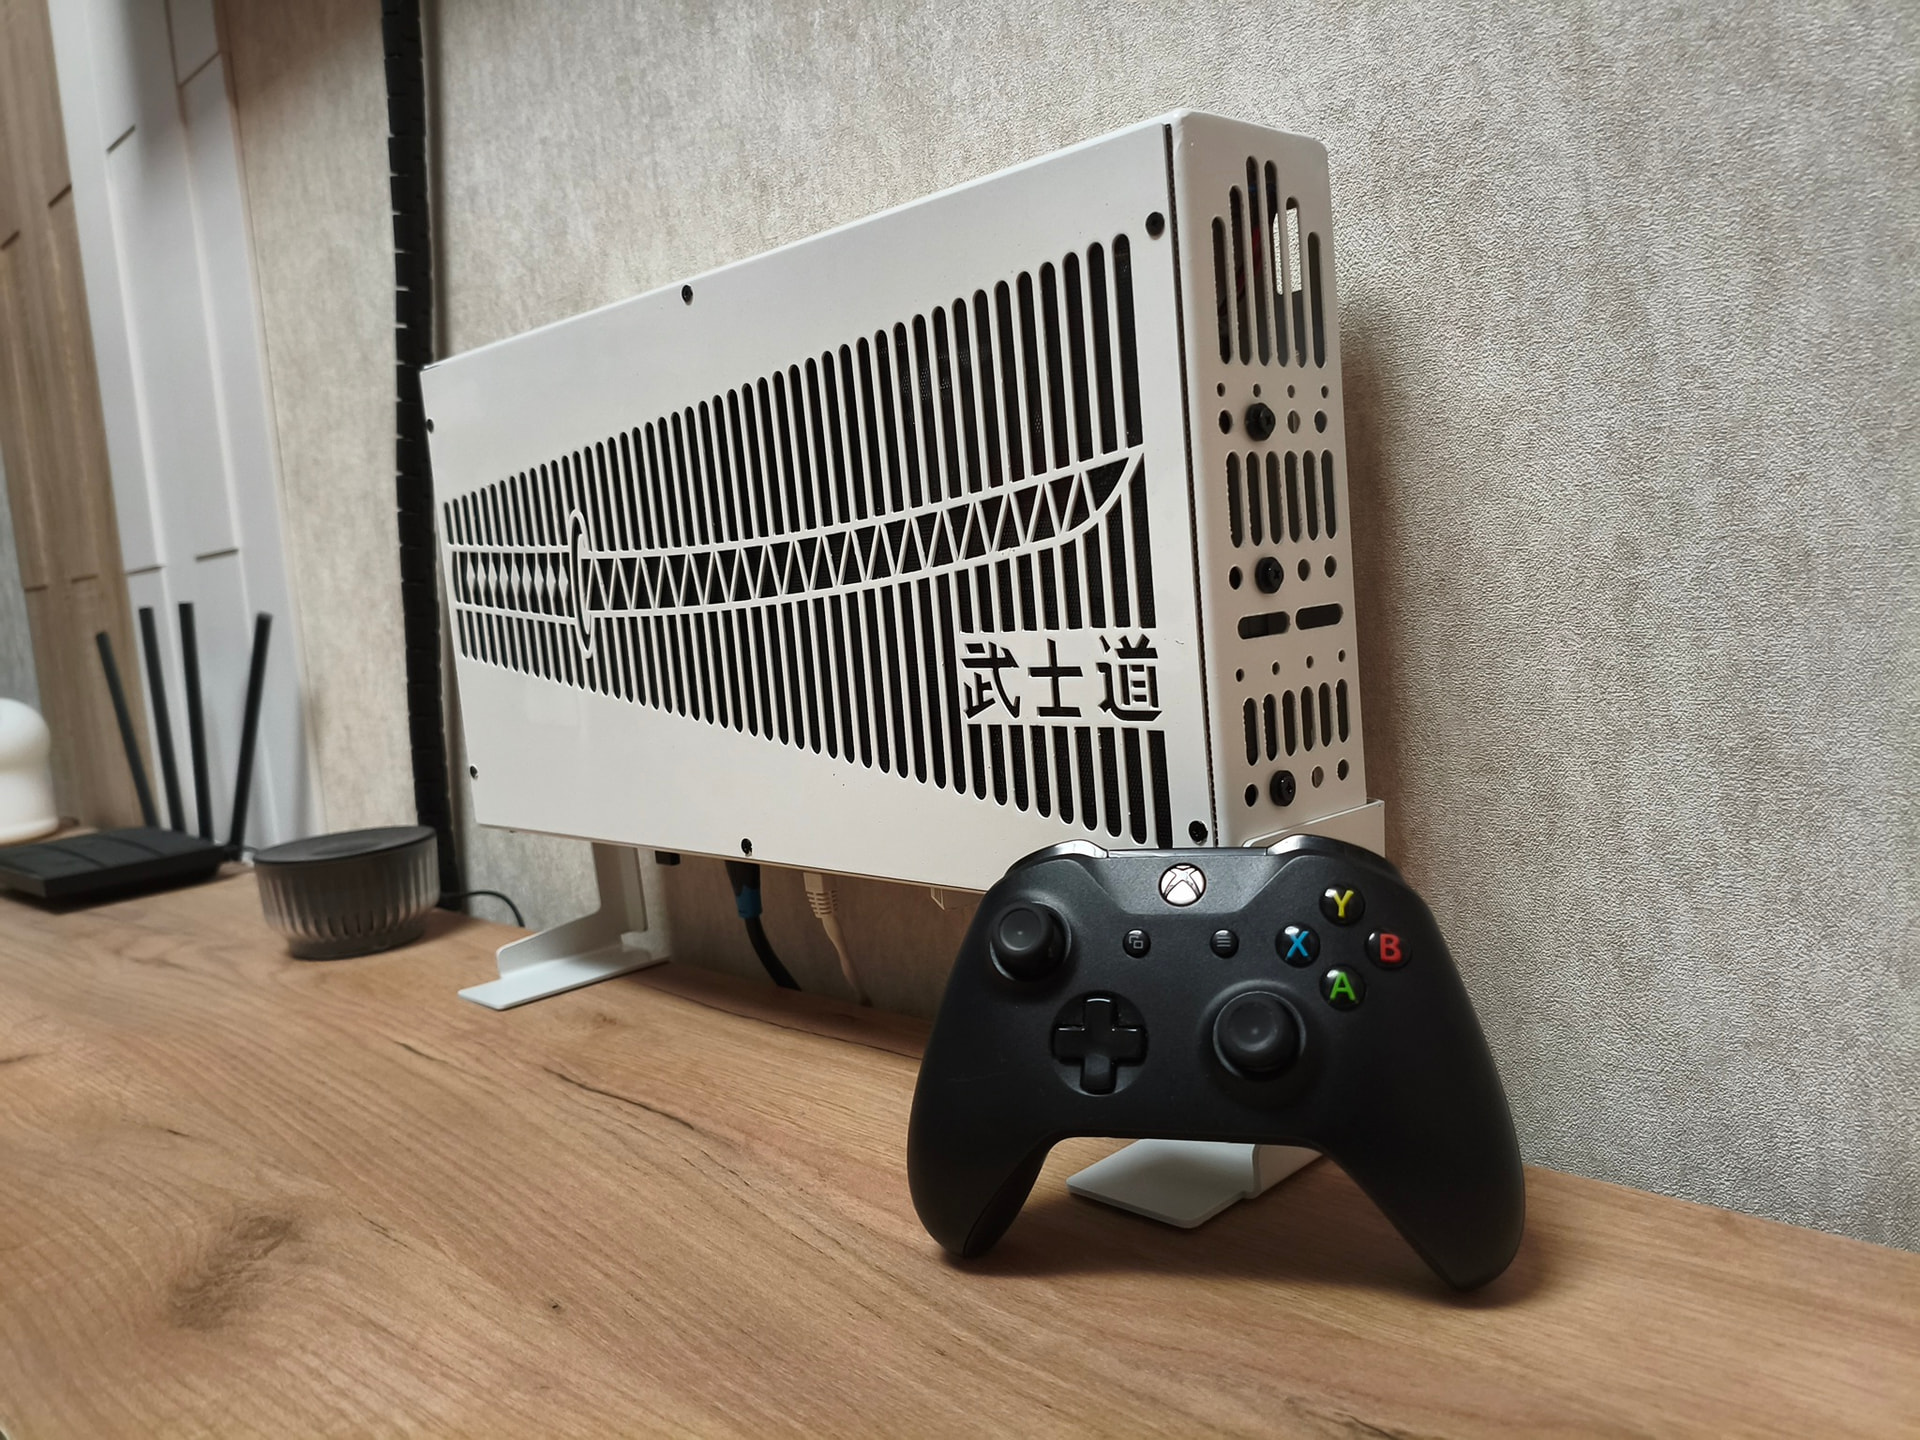
I want to share a project for a closed slim wall-mounted case for a gaming PC with full-size components. I created this project for my TV gaming station because I couldn’t find suitable solutions on the market. Available options are only open stands or cases designed for low-profile graphics cards.

Description

Case dimensions: 345×480×88 mm
Material: 1 mm steel
Mounts flush against the wall
Separated airflow paths
No dust filters — improves airflow and unnecessary at wall-mount height (>1 m), where dust concentration is minimal.

Compatible components

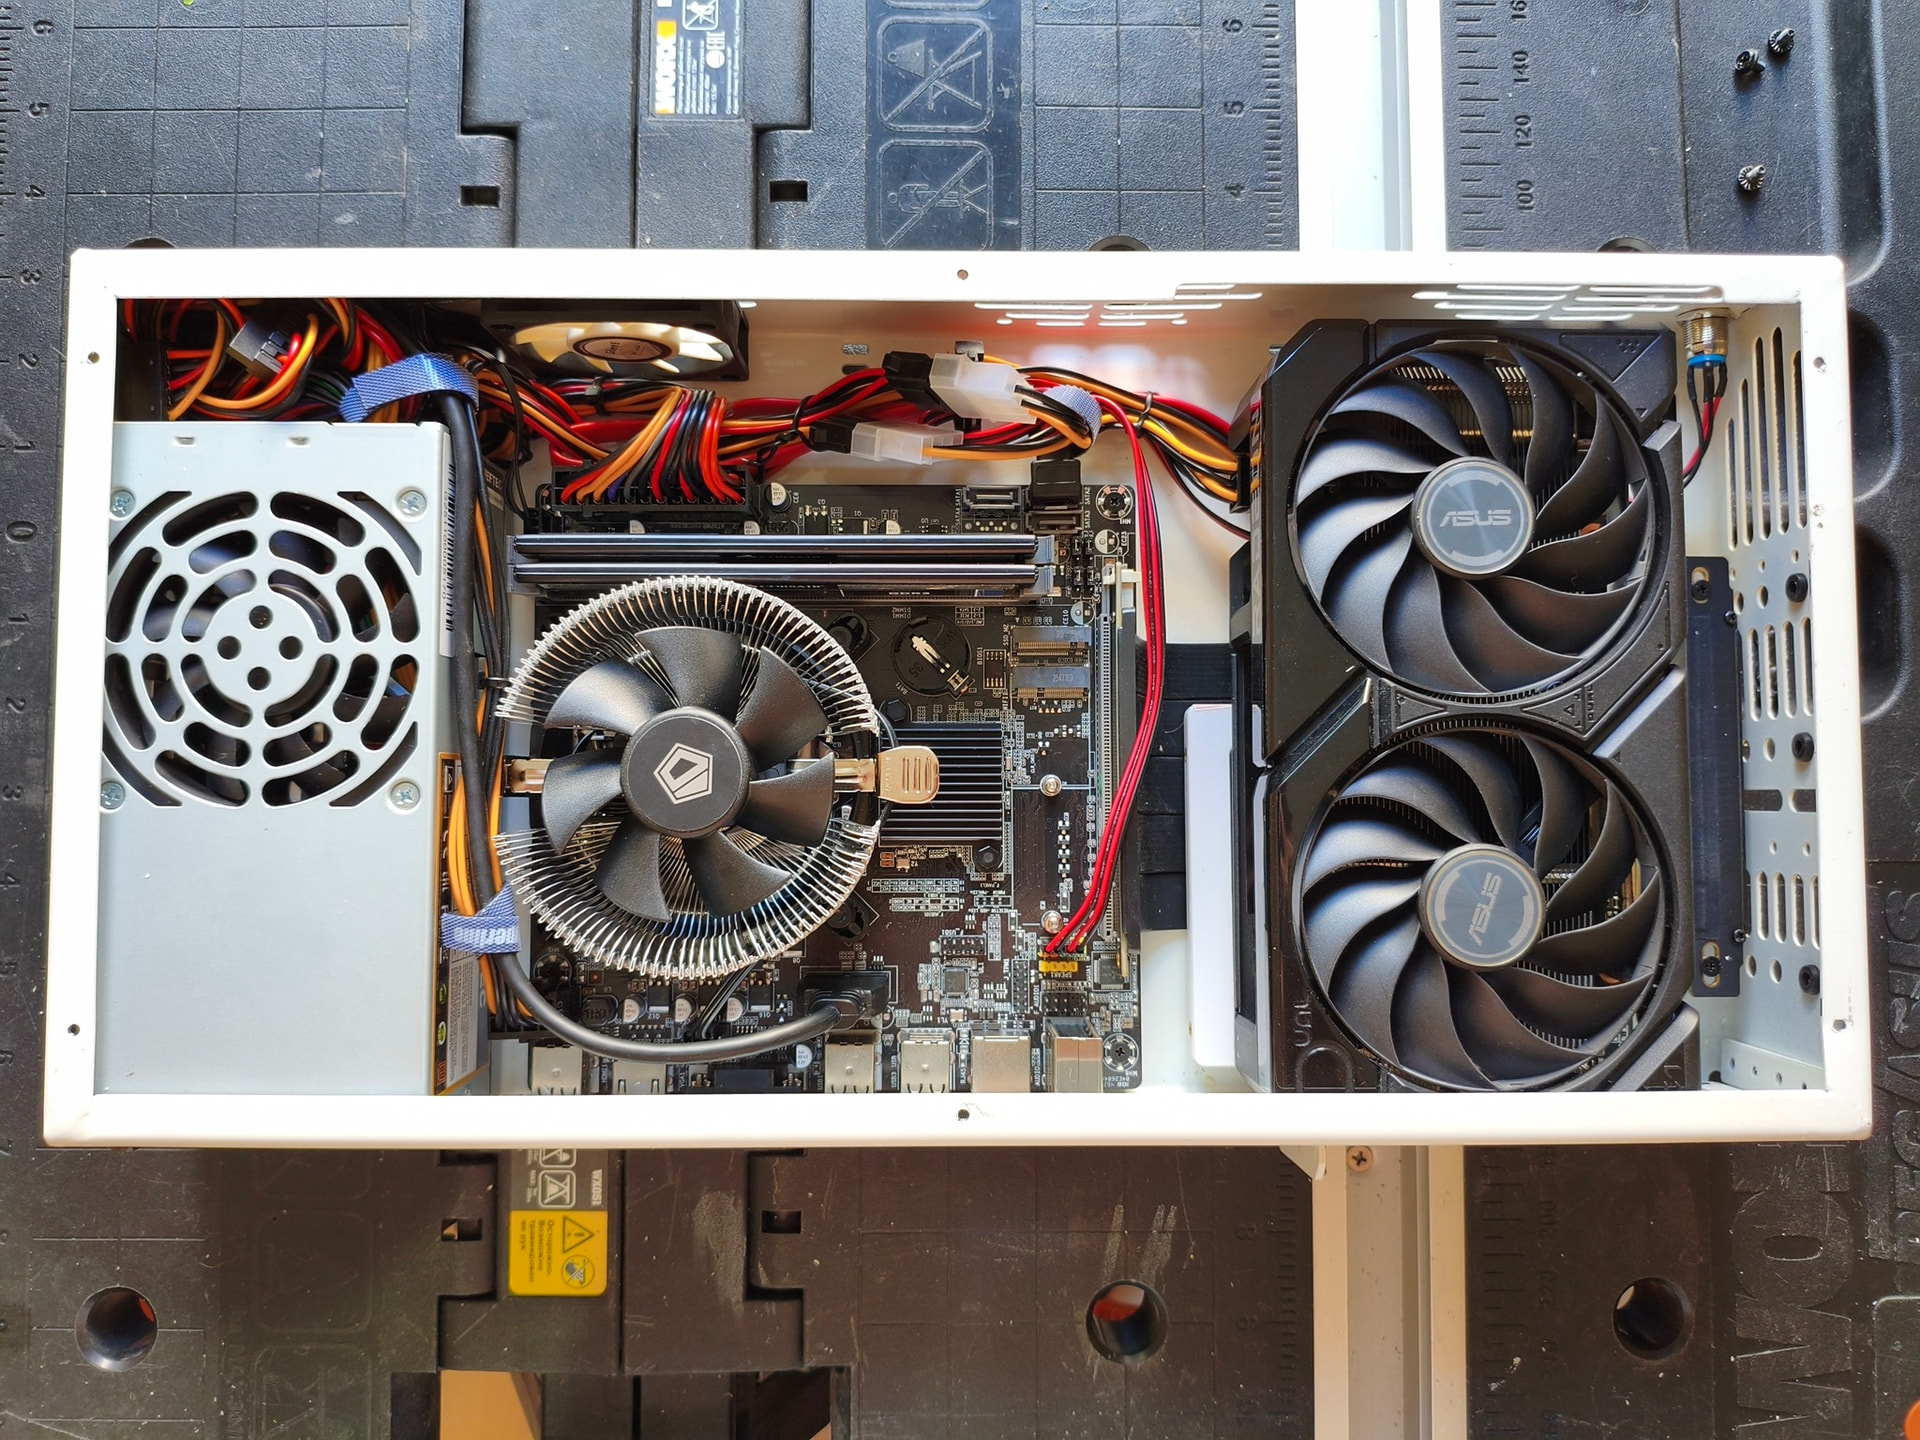
Motherboards: mini-ITX, mATX (up to 200×243 mm)
Graphics cards: length up to ~315 mm, thickness up to ~50 mm (2.5-slot)
Power supply: SFX, SFX-L
Drive bays: 1×3.5’’ + 2×2.5’’ or 3×2.5’’

Fabrication

I ordered fabrication of my case from a local metal shop found via online classifieds. The fabrication cost ended up comparable to a regular mid-range case.
If this service is available to you, provide the attached PDF drawings and DXF files to a fabricator capable of laser cutting, bending, welding, and painting metal. Agree on paint color in advance.

Assembly hardware specification

  • Case parts — one piece per drawing, eccentric - 2 pieces.

  • M3×5 flat-head screws — primary fastener type

  • 6-32 UNC 1/4’’ screws — for 3.5’’ HDD mounting

  • Screws for case fan mounting

  • M3×10 countersunk screws — for mounting the power socket

  • M3 nuts — for mounting the power socket

  • M3×10 female-female standoffs — for motherboard mounting

  • M3×15 female-female standoffs — for riser mounting

  • M3×10 male-female standoffs — for 2.5’’ drive installation

  • 6-32 UNC male-female standoffs — for 3.5’’ drive installation

  • 30 cm 90-degree PCIe riser — for graphics card installation

  • IEC320 C14-C13 power extension cable (single-piece or assembled from two parts) — for PSU connection, check socket orientation on your PSU

  • 12 mm power button

  • Screw-in hooks with wall plug anchors — for wall mounting

Tests

Ryzen 5 8400F + RTX 5060 Ti 16 GB system:
CPU temperature — 83°C (AIDA64)
GPU temperature — 72°C, fans at 50% (FurMark)
Drive temperatures after several hours of gaming: 2.5’’ SSD — <50°C, 3.5’’ HDD — <40°C

Drawings

Download drawings and DXF files:

My original full article about this case:

Alternative use

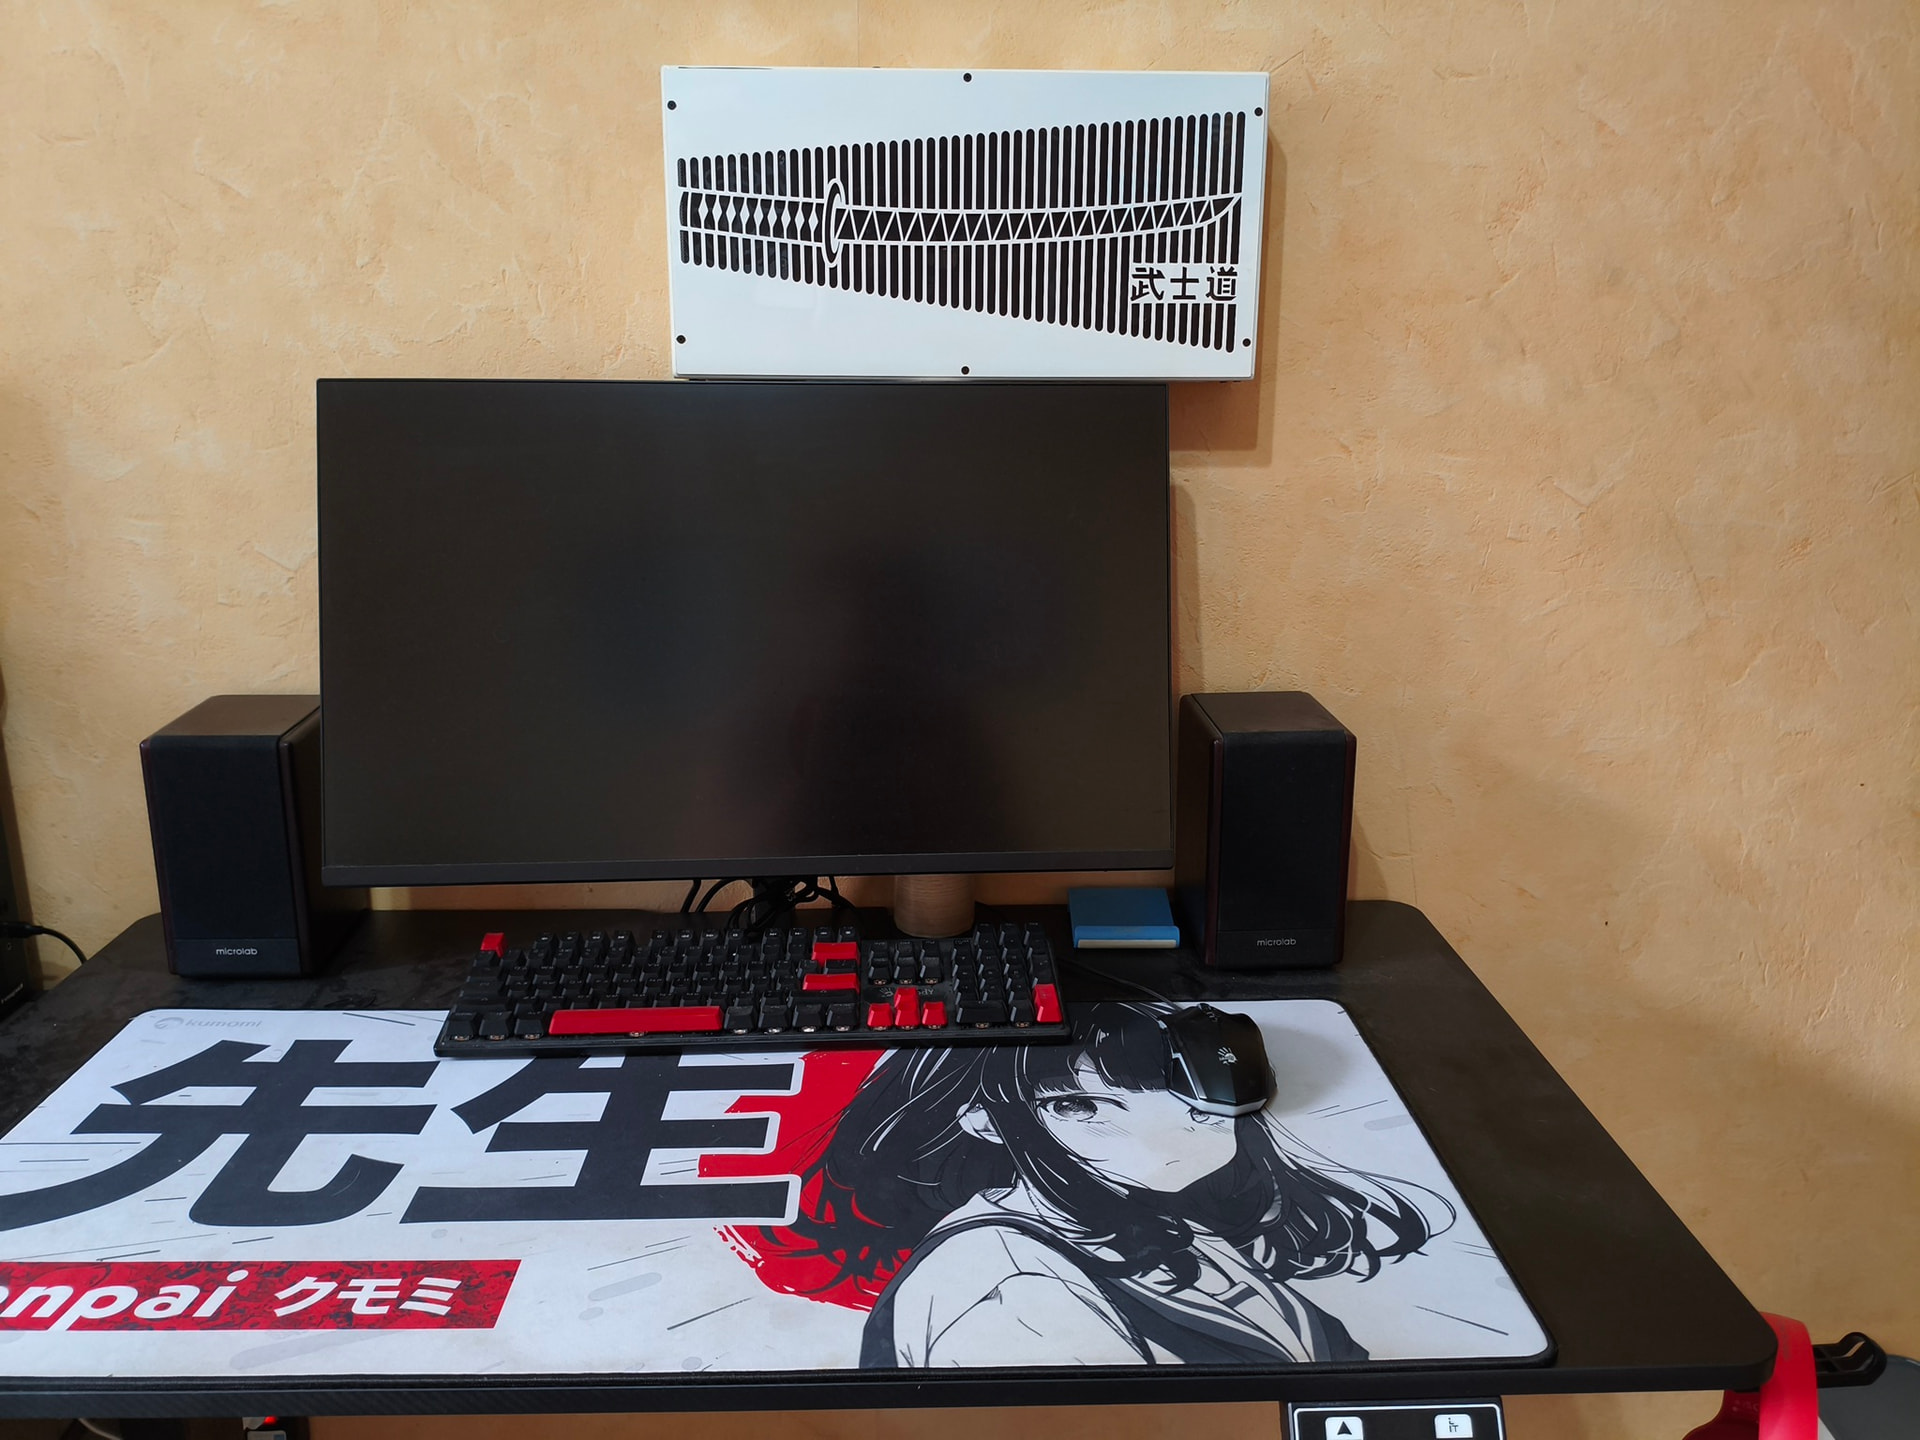
Beyond TV gaming, this case suits compact living spaces where every centimeter counts — without compromising performance. Mount the case, monitor, folding desk, and soundbar on the wall to create a zero footprint workstation.

Photos and diagrams


Case diagram


System installed inside the case


Case mounted on wall


Zero footprint workstation

Thank you for your attention. I hope you found it interesting. If you build this case yourself, I’d be happy to see a photo report.

Update 1.2

I’ve made some improvements to the cooling and assembly process. I updated the files.

3 Likes

My second project

The case is designed for building either a compact gaming system or a small NAS. Due to its horizontal orientation and a flat linear component layout, heat overlap between components is minimized, preventing thermal crosstalk. Thanks to its slim profile and flush-to-wall mounting capability, the case saves massive space in your home setup, offering a near-zero footprint.

Technical Specifications​

  • Dimensions: 220 x 440 x 73 mm

  • Volume: 7L

  • Weight (without feet): 2.0 kg

  • Material: 1.0 mm steel

  • PSU Support: TFX or Flex ATX (if Flex ATX is used, 1 x 2.5" SSD can be installed under it)

  • Cooling: Up to 50 mm CPU cooler height, 3 x 60x15 mm case fans

Hardware Compatibility​

1. Gaming Build​

  • Motherboard: Mini-ITX

  • GPU: Length up to ~205 mm, thickness up to 50 mm (2.5 slots). Requires 18.5 cm double reverse PCIe riser cable.

  • Storage: 1 x 2.5" SSD

2. NAS Build​

  • Motherboard: Mini-ITX or Micro-ATX (mATX) (up to 200×225 mm)

  • Storage: 2 x 3.5" HDD or 4 x 2.5" SSD

UX Solutions​

  • Flush-to-wall mounting (via integrated corner slots on screw-in hooks)

  • Downward-facing external ports

  • Easily removable feet for surface placement

  • Side-mounted USB-C port

  • Additional reversible 3.5" HDD mounting holes for easier cable routing

  • Three optional cover designs (Standard, Wood Slat, Wakizashi)

Manufacturing​

To fabricate the case, provide the PDF drawings and DXF files to a metal shop capable of laser cutting, bending, welding, and painting. Agree on the paint color in advance.
All files and necessary information can be found in the repository: https://github.com/samsonbl4/swmc-db-7l

Testing​

Since I was building a NAS for myself, I was only able to test the assembly of both the NAS and the gaming configuration using the components I had on hand.
I didn’t have a power supply and motherboard to run thermal tests for the gaming setup, so those were not conducted.
The only thing I can share regarding the NAS thermals is that under long workloads, the hard drives stay around 38-41°C with the case fan mounted above them. As for the CPU, the Ryzen 3 2200GE with an AMD Wraith Stealth cooler reaches up to 63°C under AIDA64 stress testing.

3 Likes

Absolutely fantastic cases! I’ve been searching for exactly these setups for a while. Started making my own in CAD but have not found the time to finish then.

You ticked all of my boxes too.

I will dig into these after my current projects (backup server overhaul, main server rebuild).

Here’s a question: how about adding a rear flap or cover, so that the wires can exit the back of the GPU and IO shield, make a turn and go into the wall? That way, those of us with internal wall wires can have a floating box on the wall?

I’m looking to 3DP my cases though. So maybe there can be a compromise with the DXF and STEP files to extract. I found out the sidewalls need to be thick for sturdiness (the panels can be thin and light weight).

1 Like

Thanks. I’m glad you liked it.

I’ve been thinking about a snap-on cover—made of plastic or wood—to hide the cable entries and bundle the cables together at the exit point. If all the cables were recessed into the wall, the final look would be superb.

I’m not very experienced with 3D printing, but the design would require a major overhaul. You will likely need to construct a load-bearing framework for mounting the panels. You will also need to devise a wall-mounting method that ensures effective weight distribution. I’ve just started working on a third wall-mount enclosure design, and I plan to use a standard wall-cabinet mounting rail.

Which of the two existing enclosures do you plan to use as the basis for your 3D-printed version?

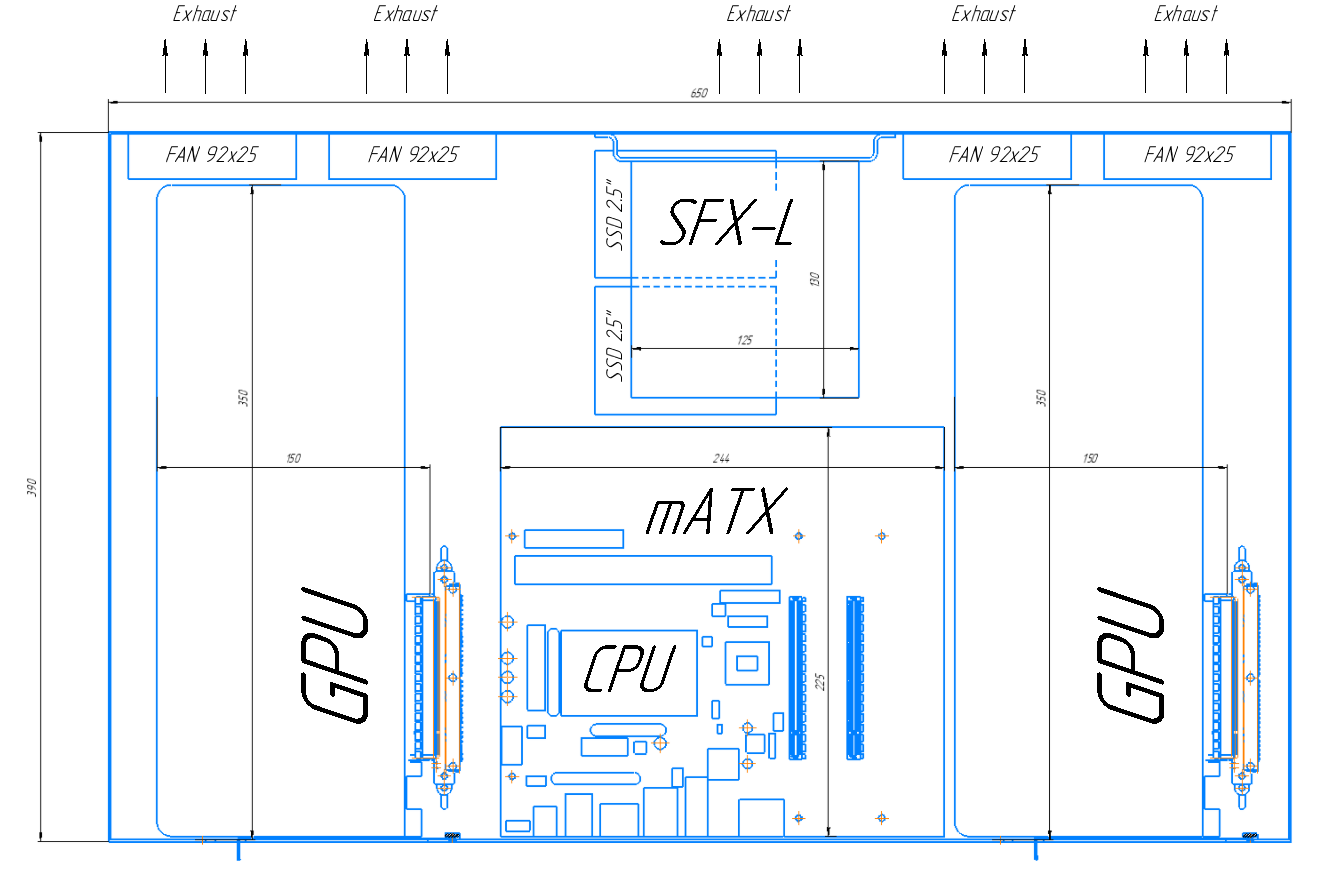
While working on my third case project, an idea came to my mind: what if I try to make a wall-mounted case that fits two large GPUs using round-bundled riser cables (like these PCIe x16 Extension Cable)?

I’ve quickly put together a rough CAD concept. The estimated dimensions are 390x650 mm (almost like the dimensions of a 27-inch monitor) with a thickness of 98 mm.

A few notes:

  • For the left GPU, if it’s large, an angled power adapter will most likely be required.

  • The clearance and routing for the right GPU’s power cable relative to the motherboard will also need to be checked.

  • I’m also thinking about adding an option to install an AIO liquid cooler instead of the left GPU.

  • The PSU will be connected via an extension cable.

  • The case will be mounted using a French cleat (furniture rail) or can be placed on removable feet.

I think a case like this could be an interesting solution for a home AI server. Personally, I don’t do AI myself—I just love designing wall-mounted cases as a hobby.

There are many enthusiasts on this forum who run neural networks at home. I would love to hear your opinion: does a case like this make sense, or is it not a very good idea?

This topic was automatically closed after 273 days. New replies are no longer allowed.