Gooood morning, everyone!
Have you ever wanted to use an awesome, fresh Linux distribution like Solus, but were afraid you wouldn’t have the support you needed? Wanted to kick bubblegum and chew ass, but you’re all out of… 
Anyway, Solus is an operating system for developers BY developers.
“Don’t they all say that?”, yes that’s true. However, with Solus you may find that’s actually the case. Developers aren’t burdened with looking up commands to add repositories or to install their favorite SDKs or IDEs. There is a graphic manager that does it for them, and common environments like Ruby, Node, and OpenJDK are installed by default.
What about Developer Operations?
That part was a tiny bit tricker, and required a little more work. But, let’s be honest, you’re not in DevOps because you’re annoyed with the Terminal 
Chef
Chef was definitely a tough one to figure out. Fortunately, the solution is via .deb packages.
Head over to the Chef DK web site and download the .deb package for the Debian Stretch DK.
Once there, head to your download directory. We’re going to use the ar command to extract the .deb package.
ar vx chefdk_3.2.30-1_amd64.deb
Three packages come out of that. Throw the data.tar.gz into /opt
sudo tar zxvf data.tar.gz -C /opt
You can throw the control.tar.gz in /opt too, but make it a different folder (like ChefAdmin or something).
sudo tar zxvf control.tar.gz -C /opt/chef_admin
Head over to the chef_admin directory and (with sudo) run postinst
cd /opt/chef_admin && sudo ./postinst
You’ll get:
Thanks for installing Chef DK!
Hm… Is it true?
Move on over to where you’ll house your cookbooks. For me, it’s ~/Projects/Scripts/Chef/cookbooks. One thing to remember is you’ll need your .chef directory in the root of where your working (in my case, Chef/.chef). I created the knife.rb file and got my key from the Chef server. If you’re making one from scratch versus downloading one, this is all you need:
current_dir = File.dirname(__FILE__)
log_level 	:info
log_location	STDOUT
node_name	"chris"
client_key	"#{current_dir}/chris.pem"
chef_server_url "https://chefserv/organizations/admindev"
cookbook_path 	["#{current_dir}/../cookbooks"]
Alright, well, let’s test this bad boy out.
chef generate cookbook nginx
No error, let’s see if the upload works
knife upload cookbook cookbooks/nginx

Verify on the Chef Server
Nice 
Terraform
Terraform was the easiest of all tools to setup. Download from the website, extract the archive, and move the executable to /usr/bin or /opt (be sure to create an alias or PATH for the latter).
Test with terraformor terraform version
admindev@battlestation ~ $ terraform
Usage: terraform [-version] [-help] <command> [args]

The available commands for execution are listed below.
The most common, useful commands are shown first, followed by
less common or more advanced commands. If you're just getting
started with Terraform, stick with the common commands. For the
other commands, please read the help and docs before usage.

Common commands:
    apply              Builds or changes infrastructure
    console            Interactive console for Terraform interpolations
    destroy            Destroy Terraform-managed infrastructure
    env                Workspace management
    fmt                Rewrites config files to canonical format
    get                Download and install modules for the configuration
    graph              Create a visual graph of Terraform resources
    import             Import existing infrastructure into Terraform
    init               Initialize a Terraform working directory
    output             Read an output from a state file
    plan               Generate and show an execution plan
    providers          Prints a tree of the providers used in the configuration
    push               Upload this Terraform module to Atlas to run
    refresh            Update local state file against real resources
    show               Inspect Terraform state or plan
    taint              Manually mark a resource for recreation
    untaint            Manually unmark a resource as tainted
    validate           Validates the Terraform files
    version            Prints the Terraform version
    workspace          Workspace management

All other commands:
    debug              Debug output management (experimental)
    force-unlock       Manually unlock the terraform state
    state              Advanced state management
AWS-CLI
This is as hard as you make it. I use Pip to set it up (note, I have an alias for pip to run pip3 – PYTHON 2 IS DEAD TO ME AND I ALWAYS HATED IT SO THERE)
pip install awscli --upgrade --user
After the command completes, check ~/.local/bin for aws. Once you confirm that’s there, export that path to your $PATH via cli or in your ~/.bashrc or ~/.bash_aliases
export PATH=~/.local/bin:$PATH
Check the command:
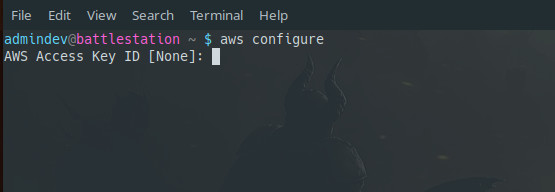
Now, we dance 
I would love to hear the experience you guys had with Solus. Or, if there are any tools you as a community want to see running on Solus, maybe fire up a thread or post here and we can come together to see what works.
@oO.o @'ing you because you said so 
