So, there is a new guy at the office. He has an electronics background, but he is not very familiar with Embedded Linux applications. He is developing a module to communicate a Raspberry Pi via i2c with another chip.
For context, the Raspberry Pi is running Raspbian Lite (so no GUI).
He connected his laptop to the Raspberry Pi’s serial interface using one of those cheap FTDI dongles. In his laptop he opened the Raspberry Pi terminal using the typical screen tty baudrate command.
So far, so good. This is a super convenient way of accessing an Embedded Linux device.
The problem is that he was writing the code of his application in this terminal using nano ![]() .
.
Also, if you are familiar with the screen program, you would know that it has some problems with certain inputs. Every time he scrolled using his mouse wheel, the terminal filled with garbage ![]() .
.
After a couple of minutes of friendly mockery, I showed him how to code his application in his laptop using Netbeans but compiling and running directly in the Raspberry Pi.
I decided to post this simple “tutorial” in case someone finds it useful. I made it for a Raspberry Pi, but it should work with any Embedded Linux device (Or anything running Linux for that matter).
There are four prerequisites:
- You should be able to SSH into your Embedded Linux device.
- Your application should be in C or C++ (if your application is for an embedded system, it should be in C or C++).
- Your Embedded Linux device should have the necessary binaries and libraries to compile your application.
- You need Netbeans (It should be possible with another IDE, but Netbeans is the one I am familiar with).
The first step is to setup your SSH. So connect your Embedded Linux device to your local network and assign a static IP (outside the IP address range that your DHCP server assigns).
Then, from your PC, generate your SSH keys (in case you do not have them already). Open a terminal and type:
ssh-keygen
This command generates two files in $HOME/.ssh/: id_rsa (private key) and id_rsa.pub (public key). The private key should never leave your PC and should never be shared. The public key is meant to be shared and it should be put in your devices and servers to authenticate your login from your PC. Check this document from SSH.com for a detailed description of SSH key pairs.
If you open the id_rsa.pub file with a text editor, you should see something like this:
ssh-rsa afddklfheuldfafhrjdlshf2342345w3452== my_key
id_rsa.pub is basically a CSV file separated by whitespaces of just one record. The first column is the type of key, the second column is the key itself and the third column is a label used to easily identify the key.
The id_rsa file should not be readable by any other user in your PC. SSH will not allow the use of the key if its permissions are “too open”. So restrict them. In the terminal type:
chmod 400 id_rsa
Then, logon into your Embedded Linux device and create the .ssh/authorized_keys file in the main user’s home directory (/home/pi/ in the Raspberry Pi). The purpose of this file is to contain the public keys of those users that will be able to login to this device. So copy the contents of your id_rsa.pub key into the .ssh/authorized_keys file.
If properly done, you should be able to login into your Embedded Linux device from your PC using SSH without the need of entering the device user’s password.
The next step is to setup your project in Netbeans. So create a directory for your project somewhere in your PC (or clone the project repository in case you are using git or something similar).
Assuming you are starting from scratch, inside this directory, create an empty file with the name Makefile. Your project’s directory should look like this:
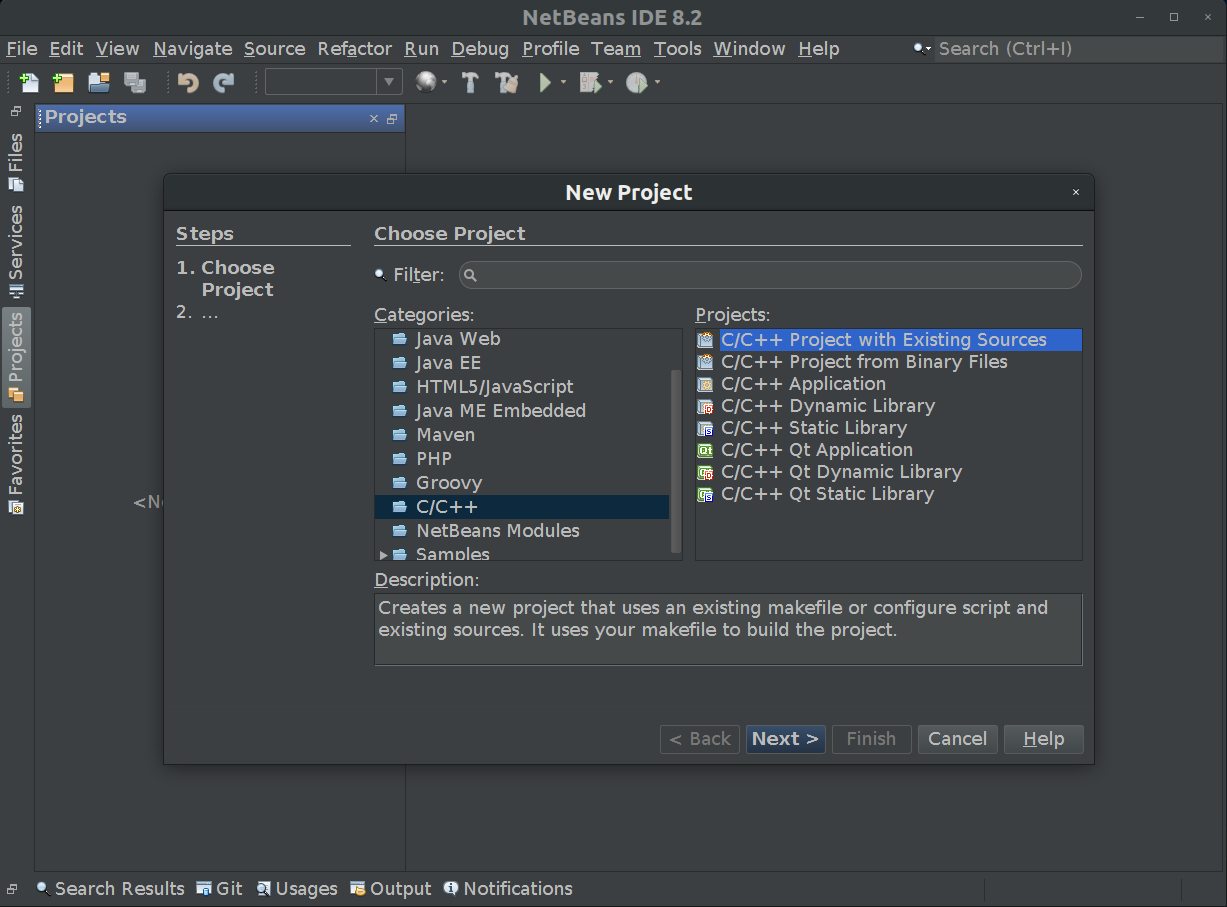
Open Netbeans and create a new project. This project should be C/C++ Project with Existing Sources:
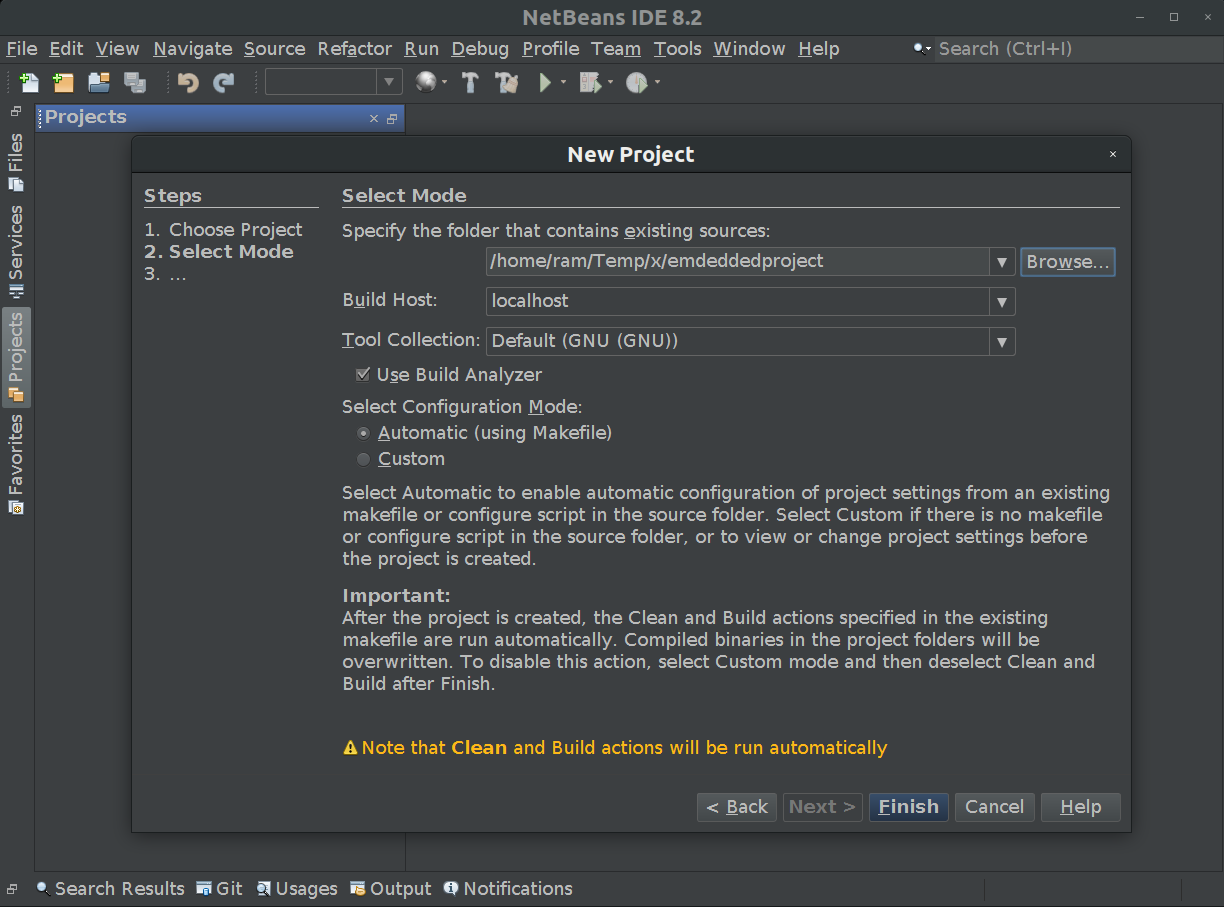
Select the directory that you created before as the source directory and let Netbeans handle the configuration:
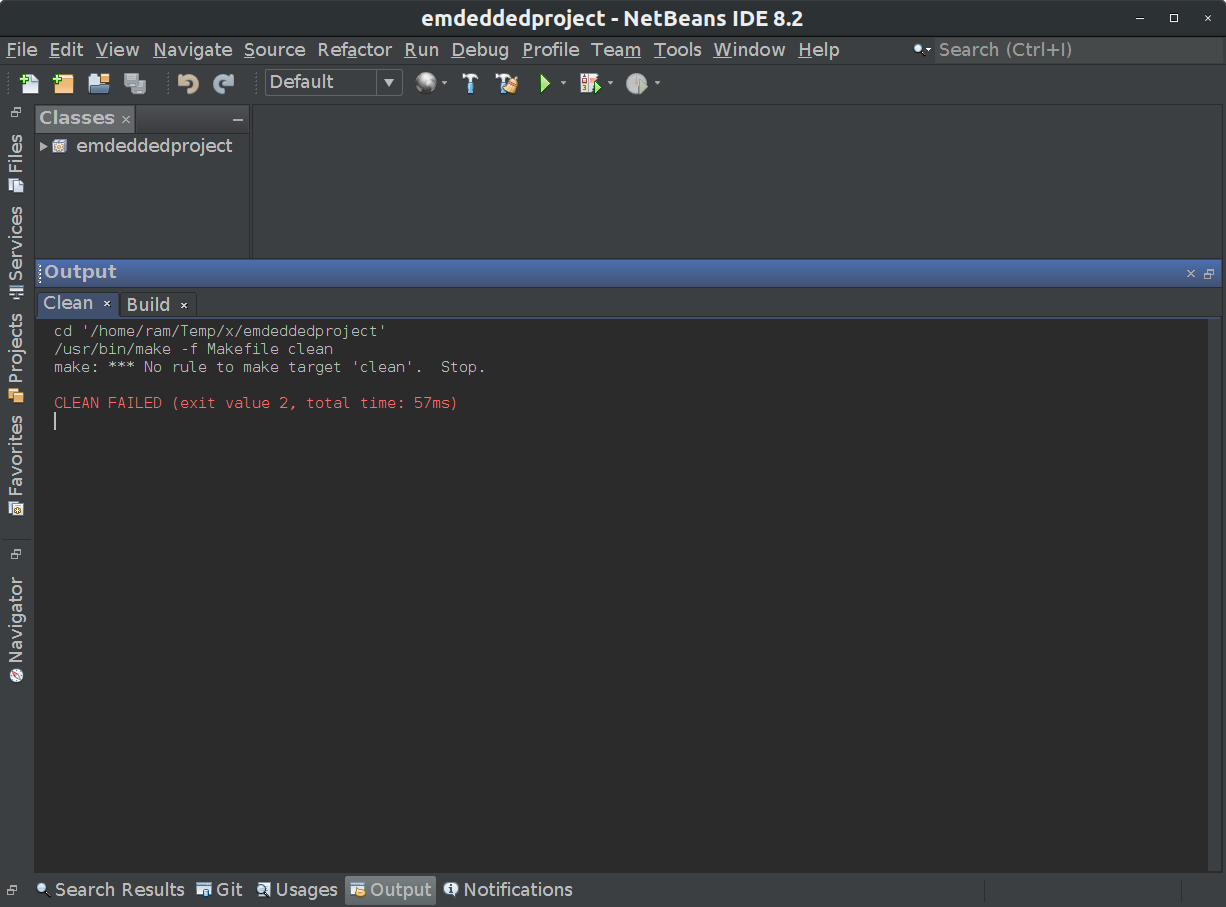
Click Finish. Netbeans will setup the project and try to “Clean and build”. An error will prompt, because the Makefile is empty and there are no source files, but is ok, you will add them later.
Next, in Netbeans, go to the Services section and select C/C++ Build Hosts. By default you should see the localhost host (your PC).
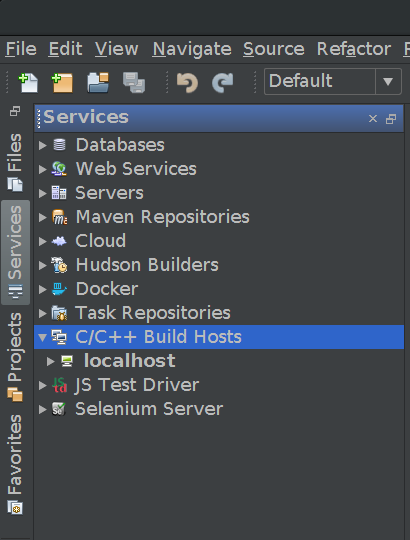
Right click on C/C++ Build Hosts and select Add new host. Enter your Embedded Linux device’s IP (10.255.255.20 in my case) and click Next.

Enter your Embedded Linux device’s username (pi in the Raspberry Pi), select your private key for the SSH authentication and click Next.

On success, a summary dialog will be shown. Netbeans can access the Embedded Linux device files using samba or sftp. Choose sftp, it just works better and you do not need to install anything else in your device.

Now that your Embedded Linux device is a “Build Host”, go to your project properties. In the Build section, select your Embedded Linux device as the Build Host. Click Apply and Ok.

And that’s it. Now just add your source files and edit your Makefile.
Just for reference, I created this main.c file:
#include <stdio.h>
#include <stdlib.h>

int main(int argc, char** argv)
{
    printf("Hello from Linux running in a 2 dollars chip");
    return (EXIT_SUCCESS);
}
And this super simple Makefile:
OBJS=main.o
CC=gcc
DEBUG=-ggdb
CFLAGS=-Wall -c $(DEBUG)
LFLAGS=-Wall $(DEBUG)
BIN=example
SRCDIR=./src

$(BIN) : $(OBJS)
	$(CC) $(OBJS) $(LFLAGS) -o $(BIN)

$(OBJS):
	$(CC) $(CFLAGS) -I$(SRCDIR) $(SRCDIR)/*.c

clean:
	rm -f *.o *~ $(SRCDIR)/*~ $(BIN)
Click Clean and Build and if everything is ok, Netbeans will show something similar to this:

Netbeans, automatically copies the project files to the Embedded Linux device and compiles the project in the Embedded Linux device. It is awesome!
Click Run and you will see something like this:
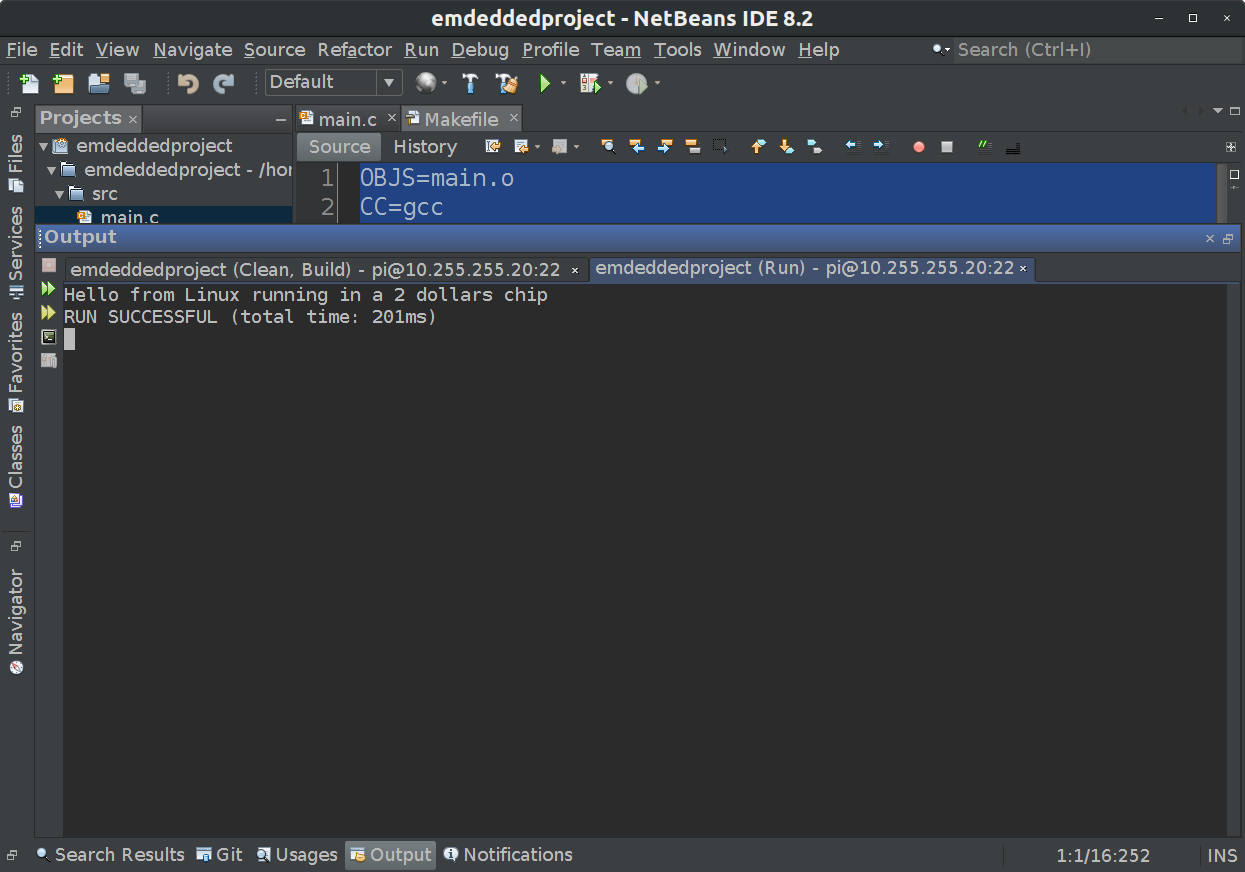
That output comes from the Raspberry Pi.
If you SSH into your Embedded Linux device and run an ls -al in the user’s home directory (/home/pi for the Raspberry Pi), you will see a .netbeans directory:
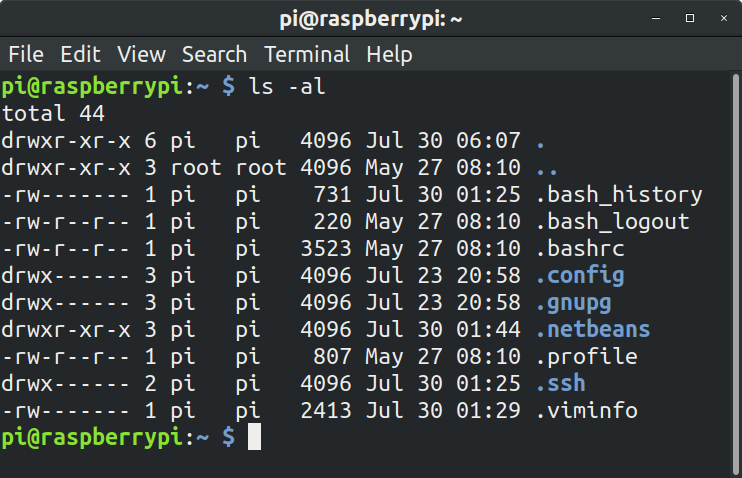
Inside that .netbeans directory are your project files and executable.