dunno which categorie is the correct one, this arrived today ICY IB-565SSK https://www.delock.de/produkt/64211/merkmale.html?setLanguage=en
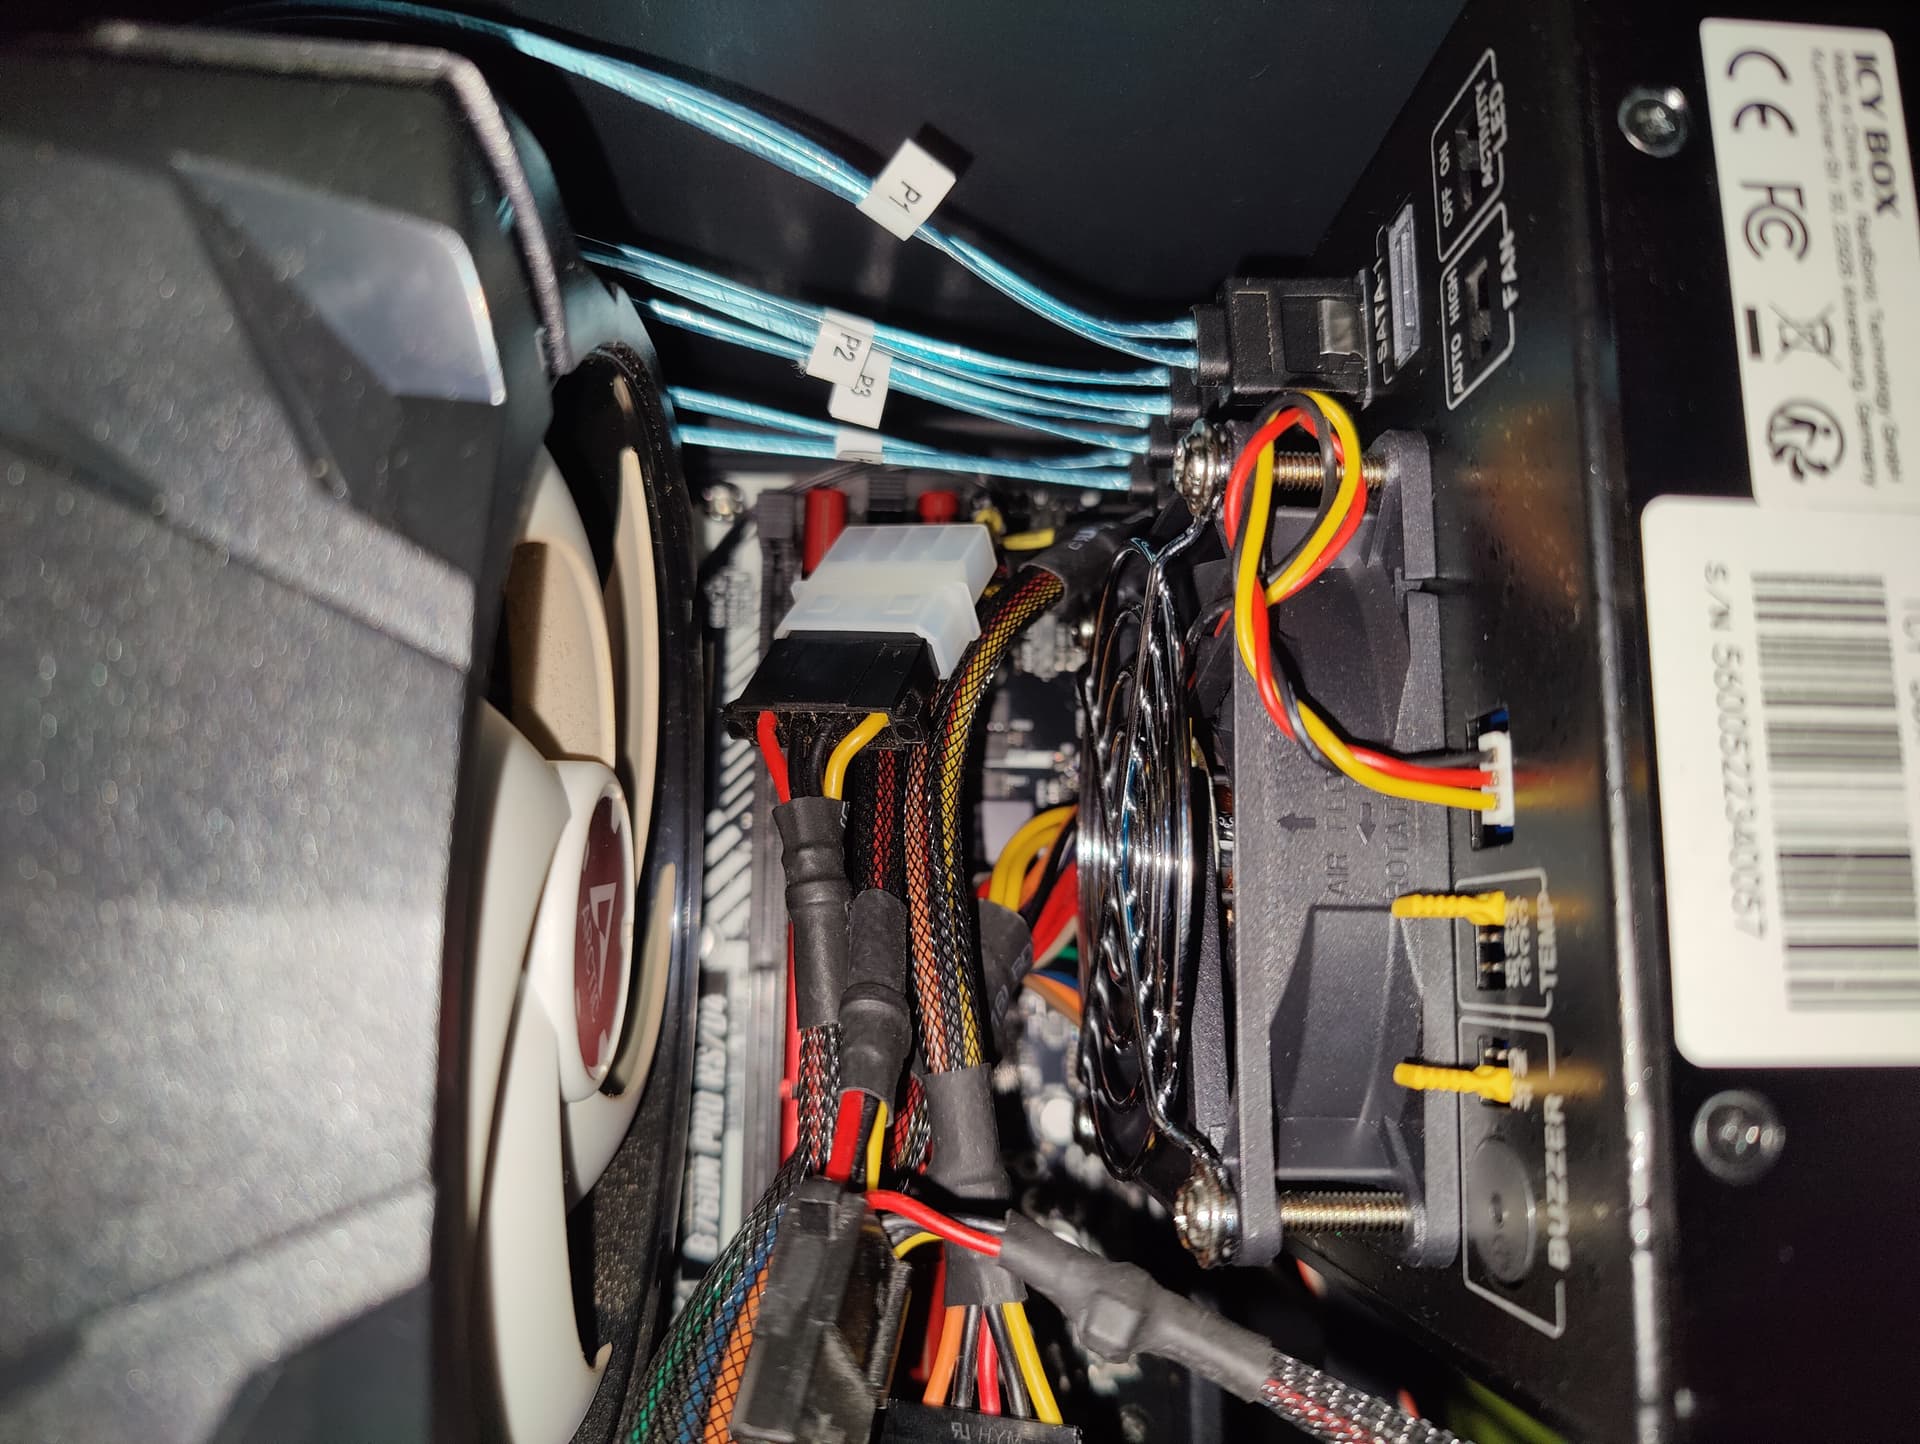
i just struggled to put it into my case, as everytime, smaller cases tend to do problems. i wish i had a much bigger one. for all you ppl, some hardware gore.never had in mind that the atx cable can cause problems in a small case. new meaning of high density storage.
thanks god im a hardware-messy and had a molex to sata connector, i cant use the molex connection for the enclosure cause of the atx-cable, my sata psu cables are to tight together to put them in.
anyway, my problem is, that only 1 hdd is shown in debian 12 atm. bios shows only 1 hdd device in the m2 slot? i tried to put the 2nd hdd in a other slot but it doenst shown either, the activy led on the hdd enclosure doenst show anything. shall i test with the 2nd sf adapter? is there anything to consider with those? never used them before, i know sata can break often and causing a problem for a day.
for those with picture-phobia, its an asrock b760m pro rs/d4 with an i3 12100, running latest debian 12 kernel, updated to the latest bios in february when i build that thing.
one more offtopic questions for psu/sata connections/cases, are there any cases/psu combination working perfectly for hdd slots/sata slots? the spacing between the ports? its always bad to bend them like crazy to fit them into the case.
as for the power supply cables, my power supply came with IDC (punchdown) type sata power connectors commonly misidentified as crimps.
I stole some extras off of an extra PSU and removed the original connectors, then re-punched down the power cables with the exact amount of space plus a little bit of slack. The fractal define R5 is probably my endgame home server case anyways until I move to a rack, so I felt no qualms with modifying the cables. I also removed 3.3V altogether to avoid issues with shucked drives.
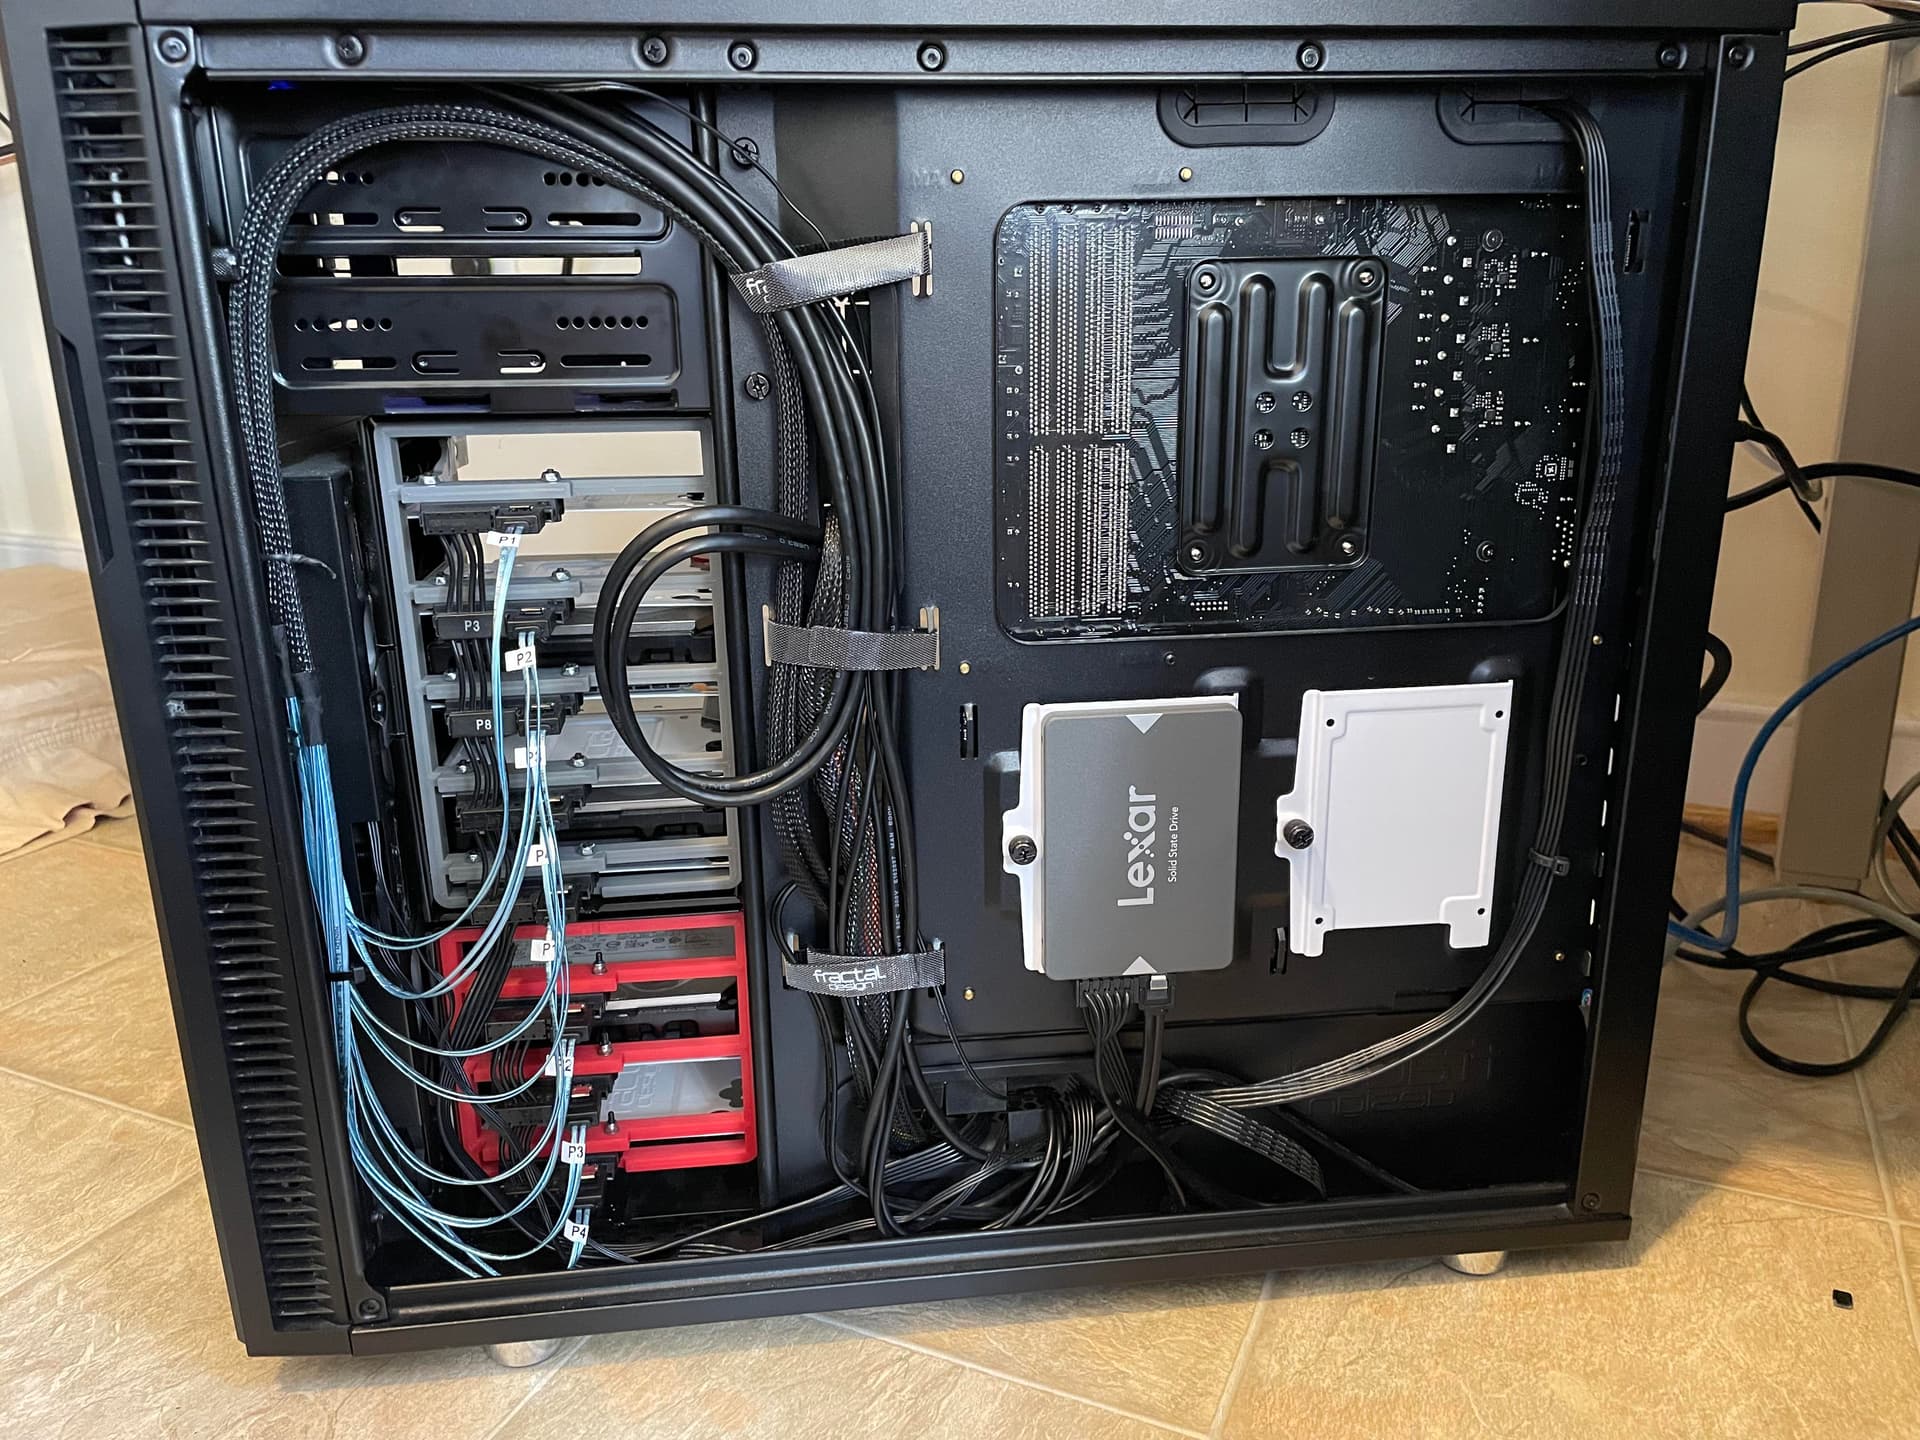
compared to mine its more spacy, but there arent 3x 5.25" bays in front? and the psu sata cables look really slim compared to mine. im to lazy/scared to cut some wires and do more.
looks like you got the same m2/sata adapter?
ive tested a bit, connected the drivers directly to the m2 adapter, they work. tested the hdd enclosure with the onboard sata, looks like its a faulty enclosure dang the fan spinups but stops. maybe i test the jumpers and redo this.
for ppl considering buyin the sharkoon VS4-S, its to small for all this, but it was dirt cheap, paid about 30€ with shipping years ago. now every case ive watched went really up in prices.
//edit
nothing is more dissapointing as getting the stuff delivered on a friday after business hours and its broken.
i just fiddled arround and maybe should have read the manual. sometimes they hdd doenst spinup cause i need to press the powerbutton/led on the enclosure. anyway, it works and im using the molex power connection atm, molex doenst have 3.3v and the enclosure successfully can read a wd whitelabel drive ( wd80emaz - wd elements 8 tb external drive)
i tried to lookup the idt/idc sata power connectors, 17 weeks delivery week, maybe i will sacrifce some cables, need 2 x 3x-sata-power, only found 1 3 sata power cable in my mess atm. which tool u used to punch the cables into the connector? u used new cables or used some ducttape for the “damaged” cables?
I punched them down with a hex screwdriver bit that closely fit the width of the gap between the two sets of punchdown blades.
as for the wires, I used the original wires and did not have to repair or cover any openings in the insulation. for the 5 connector cable, I removed the two connectors at the end of what was a 3 connector cable and left only the connector closest to the supply. then I installed one connector closer to the power supply end and three on the length of wire that was originally between connectors number 1 and number 2. I then trimmed the ends of the wire after the last connector with flush cutters.
for removing the connectors, I used a tiny screwdriver to lift each clip of the cover on the backside of the connector and then pulled the wires by hand. It was surprisingly not that difficult. I think the reliability of these connectors doesn’t come from having one absolutely perfect tight connection, but by having 4 connections to the wire for redundancy. they of course have punch-down tools for these connectors and I considered 3d printing one, but my first attempt got me a good looking result with only leaving a small indent in the insulation that is covered by the back cover of the connector anyways so I wasn’t too worried about it.