Desk v3: "Fairwood"
Basic Overview | Introduction
I needed a new desk after my last move ( among many other things ).So I made a u-ish shaped desk to surround my self with monitors while still having space to still use the desk top for writing laying out book, paperwork, and other related items.
If you wanted to just see the desk. Here it is


- The main top is about 7 long and 32 inches deep.
- the narrow top against the wall is 6 feet long and 2 feet deep.
- the short top is about 3 feet long and 30 inches deep
The negative space center is 3 feet space to allow for a chair to spin with out hitting the desk.
The top is 1.5 inches thick poly maple with a redwood stain.
The monitor stands bases are under the top and protrude threw the top via 1.5" hole for a more clean appearance
Monitors are a Samsung CRG9 1800R 49" inch flanked by some 1440p 27 inches
Index
I will be going over these item in some detail- Design & Considerations
- Wood Procurement
- Panel and Desktop Cuts
- Individual Panel and Desktop Assembly
- Sanding, Staining, Ploy
- Installation
- Finishing
- Monitor Arm Installation
- Cost and Time Commitment
- Lesson Learned
- Final Notes and Comments
Design & Considerations
The two main point that influenced the design of this desk were the room it self and necessary hardware integration need for day to day operations.Room Measurement
So I need to know the space I am working with. So I mapped and mocked up the room in sketch up I have used it before. So I went in an took some measurement of the room to see what I am working with. Using a cheap laser and a tape measurement.
The room is about 15 feet long and 10’ 6" wide. The model is telling me that I have about 160 square feet to play with here of floor space. There are two doors that open into the space that need to accounted for, and two bi-folding doors so that does limit the usable space in this room.
Human movement needs to noted as well I shouldn’t have to squeeze by the desk to sit in. I made this failure in a previous desk that build while also not leaving enough room for a chair to swivel around. So I’ll give 3 feet for both of those. with that being said a “U” shape is preferable to allow for the least amount of physical movement with the most amount of available desk top.
I have a lot of I/O interfaces that needs desktop space the major ones being a CRG9 49 inch wide monitor and it not a thin monitor, then being flanked by two 27 inch monitors in either a landscape or portrait position(ended up on portrait for now)
Odd note, but I need to see the door to the entrance to the room
__

I came up this with design that has a 7.5’ by 32" main top with 2 support tops to either side the longer one being 6 additional long at 2’ deep and the other being 3’ long and 2.5" deep.
The desk top 1.5" thick or two 3/4" piece of ply wood thick. there is a 4 inch lip or over hang over the body of the desk on the out side. to hide my inability to cut things straight with a 1.5" lip on the side with the wall to allow for more things to potentially fit under that side of the desk.
Each body panel gets a 2x6 at the top and bottom of each for support and to increase the surface area of in witch the desk interfaces with the floor. Then two parallel 2x4 studs to support the overhang of the unsupported side of the “interior” part desk.
Monitor Arm Support

Its a 2" x 6" (which is 1.5" X 5.5" in reality ) that that just screwed to the supporting reinforcement from the underside that is 5.5" inches under the top that allows for the base of the monitor arm to attached to that cross member support with the original clamping device.
Wood Procurement
I need 3/4" for the facets (the body of the desk ) and the top is 1.5" which would be two 3/4 inch’s of poly boards screwed together. The rest of the non sheet wood is going to building grade material as most of it will not be all that visible

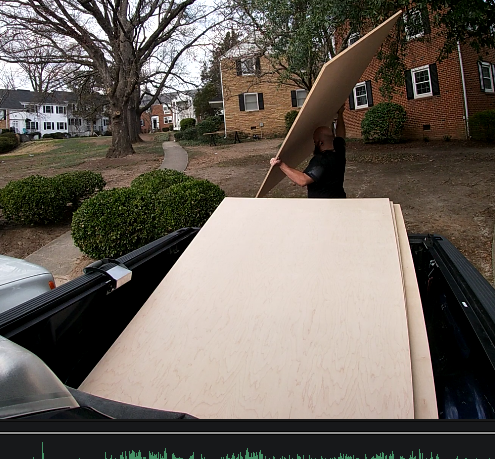
There are a few options for wood available for this desk, but my willingness to pay for it will be rather limited. I would like to go and get good graded form a local wood yard or distributor, but after checking there prices on wood even for domestic wood it’s not cheap so I must do what I must and go to the big box. So there are two options for wood with the big box The Blue Boi and Orange Depot and for those options there is only one real option for wood and that’s the Blue Boi. Blue just has better wood, but I prefer Orange for everything else.

There aren’t to many options at this price point so (Ash, Some type of Burch, and Maple if you can find it)
I’ve worked with Burch and Maple before and they are comparable for the most part I think the maple is a little better looking while both love to have loads of tear out due to it being a plywood.
Cut Planning

So I planned out the cuts for the ply wood in the modeling program to get an idea of how many pieces I need to get.
(number going counter clock wise)


Nothing of note here besides that for S-2 (Side - two). The Long wall side was going to be made into parts(so a cut) cause the length of that was just shy of a full length of ply wood. just incase the sheet was not a full 8 feet cause I would have about 3/8" inch to hope for.
With the model I really did not plan on how I would attach everything together and decided to wing it.
Time to get the wood
Panel and Desktop Cuts
So following the cuts I laid out in the sketch up I proceeded to make the necessary cuts . I think the only straight cuts that were the factory ones.
Using a track saw or sled for the skill saw would have made for better cuts
Individual Panel and Desktop Assembly
Panel Support Assembly

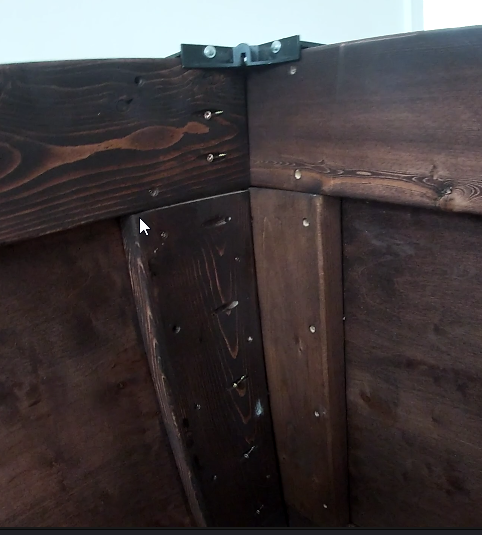
2x6" Panel support was screwed into to the panel it self every few inches after a pre drilling and counter sinking as so to reduce the screws snapping the wood. These go top and bottom of the face piecesDevlop

So this the corner joint the blue being the front panel facing the door and the yellow being the side panel. If you check out the irl photo you see I am using a jig that is clamped down to hold that spacing.
Tops Assembly

The Tops got glued and screwed together to meet the wanted 1.5" thickness

Edge Banding

Edge banding was used to cover up the very noticeable layer plywood to appear like solid wood and not like plywood it applied to an iron and trimmed to meet the desired.
This done for all the sides of the Top that would be visible so all the side besides one facing the wall. It was not applied on the edge where the tops meet together to try and get it a chance of meeting together with a limited gap.
Pocket Holes

So pocket holes were drilled on each of the side panel support that screws would be drilled into front and back panels to connect them to each other.
Sanding, Staining, Ploy
The tops got 80->120->220->320 grit sanding. The support all got 80->120 grit sanding then a stain it was building grade lumber, but it cleans up rather nice for not really something your not going to see. Then all the panels got a satin poly on each of them. While all the supports got a matte poly on them. Make sure your satin and matte polys have been mixed well most of them are just high gloss with additives to take that shiny down.

Installation
Installed the pocket screws at the joints of the panels with aid of a corner clamp and squares
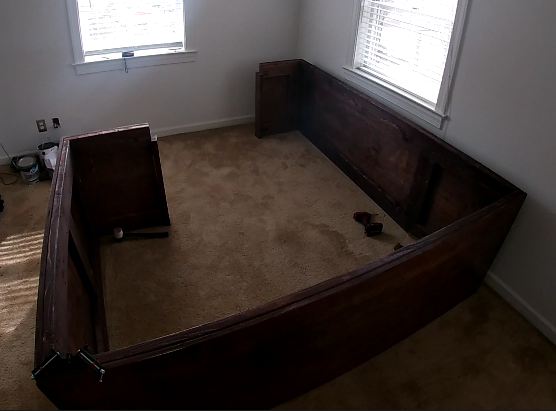
Then I ran support running parallel with the lone side and the short side and connected them to to each end with metal branches(I think they are for roofs)
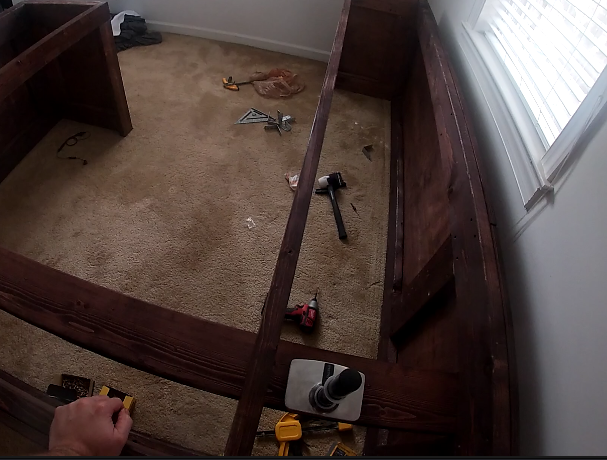
Cross support for the monitor arms bases to attach too.
Finishing

Wanted to add some more layers of satin finish once I got it in the room so some light sanding was done at 320 and a scotch bright pad attached the sander with
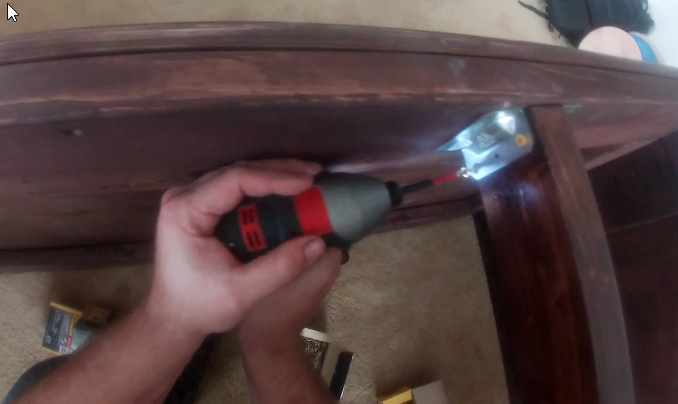
Attaching Desk Together
Each of the tops were placed at their resting spot and tanking a metal brace place at the joint and screws put in joining them together.

At seven locations on the underside of the table top 4 inch wide L brackets were placed and screwed in to attach the top to the body of the desk.

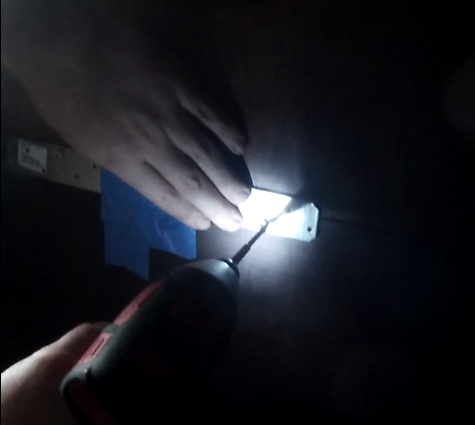
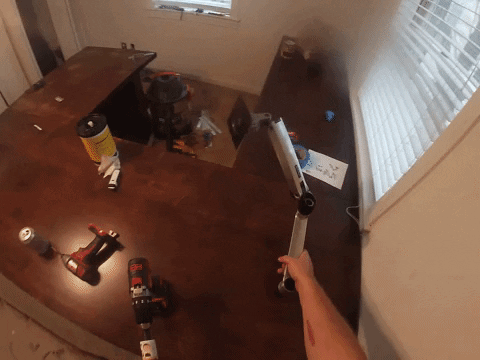
Monitor Arm Installation
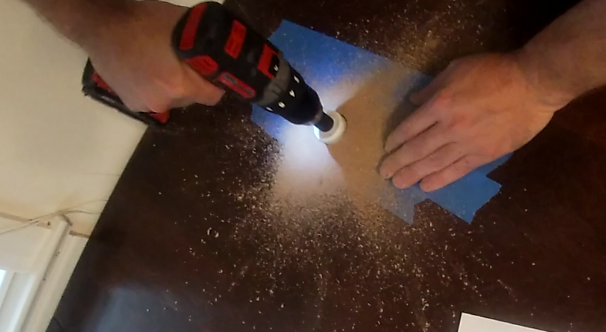
Taking some measurements while and little bit of hope marking out where the hole where the monitor arm pole will go. Blue tape is placed over the area on top of the desk where the drilling will go. A 1.5"(38mm) Hole Drill bit is used for the 35mm pole. It’s just easier to go and by this drill bit and adds some wiggle room.
Cost and Time Commitment
I am going to break down the cost for this desk, I am including 10% sales taxLumber
| Price | Item |
|---|---|
| $562 | 7x 3/4" Maple Plywood |
| $208 | 13x 2"x6"x8’ |
| $36 | 4x 2"x4"x8’ |
| $806 for Lumber |
Lumber Finishing (Sanding, Stain, & Polyurethane)
| Price | Item |
|---|---|
| $33 | 3x 1qt Redwood Stain |
| $44 | 2x 1qt Satin Polyurethane |
| $22 | 1x 1qt Matte Polyurethane |
| $11 | 1x 5" Random Orbital Sanding Disc 15 Pack 80grit |
| $11 | 1x 5" Random Orbital Sanding Disc 15 Pack 120grit |
| $11 | 1x 5" Random Orbital Sanding Disc 15 Pack 220grit |
| $11 | 1x 5" Random Orbital Sanding Disc 15 Pack 320grit |
| $110 for Lumber Finishing |
Hardware
For these items(Besides the screws) when you look online search for metal straps, or in the store go to the roofing section that were I usually find them.| Price | Item |
|---|---|
| $9 | 1x 16oz Wood glue |
| $11 | 1x pound 1-1/4" screws |
| $22 | 2x pounds 1-3/4" screws |
| $5 | 6x 3-1/4" 18-Gauge Galvanized Gusset Angle’ (Connected the stringer supports to the body) |
| $17 | 7x 2"x2"x4" 12-Gauge Angle (Connected top to the body) |
| $11 | 2x 1-3/8"x12" 12-Gauge Strap Tie (Connected tops to each other ) |
| $75 for Hardware |
Total Price for material: $991
Time
Doing the math for the time commit needed for this is little difficult. Cause it took me about 2 weeks to get the desk to useable state(but I didn't work on it everyday due to rain or events, plus I had to redo some the panels or not having the part I needed. Then with the staining I only had 2 sawhorse to work on so that slowed down being able to get stain/poly on the lumber; cause I need it dry before I could move it inside and get other pieces on the sawhorses for finishing. If I had a larger amount of working area I could have got that done closer to 3 days than 7 or 8.Here is an attempt to try and break it down.
(1 day = 6 hours. Unless you do this everyday your gonna tire yourself out doing more)
- 1 day for cutting panels and attaching sheet to make the top
- 1 day for attaching support(2x6s) to panels and sanding the support lumber itself
- 1 day for sanding panels
- 2-3 days for finishing(staining and poly)
- 1 day for assembly plus putting holes in for arms
So I think it can be done in 2-3 weekends max if everything works and is planned out well
Tools
I did not buy any tools for this I have just collected them over the years and I have some construction background that aid in the tool department. This is also my third desk that I have build for myself over the last decade.- 1 - impact drill cordless
- 1 - regular cordless drill cordless
- 1 - miter saw
- 1 - 5" random orbital saw
- 1 - circular saw
- 1 - 3" chisel
- 1 - 6" Stain Brush
- 10x(ish) - 3" Foam Brushes
You could get away with not having a miter and just one drill, but this is what I used.
A table saw (and level ground) would have made those sheet cut much easier and much straighter, but its not something I wanted to throw down for this. In addition portal tables isn’t something I am interested in currently I’d like to have a nice one in a shop.
Lesson Learned
So there are some things that I learned while doing this.
- If your not happy with the panel with the panel on the bench it wont get better when you install it.
- had to redo the front body panel in the room, which is a dirty work sending stain and dust every where.
- Make sure you understand your own plan
- cause the fit of the panels to each other I had for got to add the vertical supports to witch those pocket screws would meet up with.
- poly is best applied with small foam 3 inch brushes using a normal brush leaves brush marks
- wait until the desktop is together before installing the edge banding so you don’t have that gap between them the top pieces
- If you think the colour is off, its off I have one desk top that lighter than other and i wasn’t sure until I applied the poly to it, granted it not that noticeable once I got all my shit on the desk, but still
- Pocket holes aren’t that difficult if you get a good clamp on it
- I will be using this more in the future. I knew what they were but never tried they sell cheap krig jigs and used normal screws. just had to do a couple test run to get to the right depth
- I should have just pocket holes to pull the tops to each other I didn’t think about that until I was finished.
- should have put more poly on the edge banding they are getting nicked up rather easy.
- mixture your stain better next time cause that red wood is like red on top and dark on the bottom even tho I mixed it as the day went on I did not re mix it and got like this light red colour just dipping my brush in as time progressed
- you can make a track sled for your circular saw then have it on the factory side sheet
- I saw a video about this after I had made those sheet cuts and I was like that’s the coolest things I will be trying next I have more than one sheet to cut.
- You mite have to get longer cables once, cause the routing of cables in this desk does eat a lot of those 6ft cables up.
Final Notes and Comments
I am happy with this desk. I know its not some master work that’s ornate or only done with hand tools or whatever hipster wood working thing is cool; but its good size desk that looks alright with integrated monitor arms. Enjoyed making it most of the time. I don’t expect anyone to make this desk, but maybe get some idea for what they want in their desk.
Forward.

