[COMPLETED] LXC everything in my Jellyfin/DVD ripper stack (Full GPU access)

AI Disclosure:
I will use AI rather heavily to review configurations but the entire idea is to write all my steps down, create a repeatable and iterated process because to “just PCI passthrough” was good enough when I was partially on Windows but now I want to figure out some true extensibility of the proxmox platform and the openness of Linux

So AI will assist in editing config files, generating some bespoke scripts.


I technically started this project last week. My Jellyfin server was a full-fat VM with the Intel iGPU passed over PCI Express

Since the DVD drives and the ZFS storage volume live on the same host I wanted to see if it was possible to have them converted to LXC and share a common ZFS volume since it’s the same host.

The migration of Jellyfin went as follows:

  1. Create the LXC
  2. Migrate the 5+ terabytes of library data via rsync from the VM to the LXC.
  3. Retire the VM
  4. Using standard device pass through for the LXC I was able to get the LXC to use Intel quick sync
  5. I had AI generate a synchronization script to confirm the right /dev/dri/renderDNNN device was mapped to the LXC
  6. Create a startup service to enforce the device assignment

I just published a topic in Virtualization about passing through an Nvidia GPU to a privileged LXC and that’s where I have left it for today (10+ hours on this going back and forth)


This is more a “learning with AI” because I want to repeat the steps at least a couple times to make sure I have written “the guide” so someone else can follow or I can replicate on some other project that has these needs

The Jellyfin media host is already showing way less RAM consumption than running traditional VMs and with the price of ram these days maybe it can help someone else.


This LXC with the Nvidia GPU will be responsible for taking the DVD content, transcode to H.265 and move the content to the media library.

I am not entirely confident for the Automatic Ripping Machine so what I am installing is MakeMKV and Handbrake to make sure it works manually.

And sway desktop because why not.

2 Likes

These are the heavy-handed steps to getting a privileged LXC to at least nvidia-smi out on the container side.

Mapping file permissions today, just making a user on the privileged container to match the unprivileged one

root@nvd-jollybee:~# ls -la /jellyfin-media
total 532
drwxrwxr-x  10 101000 101000     13 Nov  7 21:33  .
drwxr-xr-x  19 root   root     4096 Nov  9 15:32  ..
-rwxrwx---   1 101000 101000      0 May 29  2025  .test
drwxrws---  40 101000 101000     46 Oct  6 06:26  Anime
drwxrws---   6 101000 101000      8 Feb 16  2026  Imported
drwxrws--- 229 101000 101000    359 Nov  6 03:00  Movies
drwxrws---  47 101000 101000     47 May 29  2025  Music
drwxrws---  58 101000 101000     58 Aug 17  2025 'Shows and Series'
drwxrws---   2 101000 101000      3 May 29  2025 'VLC Playlists'
-rw-rw-r--   1 101000 101000 703464 Nov  7 00:10  live-tv-eng.m3u
drwxrws---   2 101000 101000      2 May 29  2025  lost+found
-rwxrwx---   1 101000 101000      4 Jun 28  2025  test.txt

And just like that I have a “jellyfin” user in the correct ID group

root@nvd-jollybee:~# groupadd -g 101000 jellyfin
root@nvd-jollybee:~# useradd -u 101000 -g 101000 -M -s /usr/sbin/nologin jellyfin
useradd warning: jellyfin uid 101000 outside of the UID_MIN 1000 and UID_MAX 60000 range.
root@nvd-jollybee:~# ls -l /jellyfin-media
total 516
drwxrws---  40 jellyfin jellyfin     46 Oct  6 06:26  Anime
drwxrws---   6 jellyfin jellyfin      8 Feb 16  2026  Imported
drwxrws--- 229 jellyfin jellyfin    359 Nov  6 03:00  Movies
drwxrws---  47 jellyfin jellyfin     47 May 29  2025  Music
drwxrws---  58 jellyfin jellyfin     58 Aug 17  2025 'Shows and Series'
drwxrws---   2 jellyfin jellyfin      3 May 29  2025 'VLC Playlists'
-rw-rw-r--   1 jellyfin jellyfin 703464 Nov  7 00:10  live-tv-eng.m3u
drwxrws---   2 jellyfin jellyfin      2 May 29  2025  lost+found
-rwxrwx---   1 jellyfin jellyfin      4 Jun 28  2025  test.txt

What I used to do was share via Samba and connect over the network as needed to this Jellyfin media, but since I now have a privileged container, it’s possible to create an NFS export from there if I want network access to this media again.


Some more architecture notes, I made the zfs volume directly within the host shell

Since I have 3x 12TB drives in a RAID Z 1 configuration, it made good sense to host the jellyfin media on an extendable volume here without a full VM

root@proxmox-b:~# zfs list
NAME                       USED  AVAIL  REFER  MOUNTPOINT
radz-a                    5.15T  16.5T   170K  /radz-a
radz-a/media              4.88T  1.12T  4.88T  /radz-a/media
[....]

So the convenience of configuring it this way is to dynamically adjust quota, and have this volume dynamically update to two container hosts.

It creates a common mount point, and as long as I can get the UID and GID to line up or map to a user between each machine this will be fine.

If I wanted overkill, I would actually leverage my FreeIPA instance to handle the user identity mappings and single-sign on capabilities, but as I am still treading new territory, I did not want to introduce a domain Free IPA layer on top of this for now.

Why Free IPA at all?
It replaced Active Directory as my central identity provider, and it provides global sudo powers as long as sudo is installed on the given machine, and it can make setting up machines a bit easier. And it’s better to map file permissions on anything “shared” (internal, external or otherwise) to at least one central identity manager.

If I included Free IPA
I would probably create a Jellyfin service user that would be mapped on the media container, but because it would be recognized on all machines. I could use ACLs to grant more granular file permissions over the media data itself.

Something like:

  • Global permissions for /jellyfin-media
  • Read/Write/Execute ONLY on a sub-folder /jellyfin-media/import for the DVD machine to control access.

The Sway config is here! And we can 3D render stuff!

Make sure the container is off to enable nesting. Enable nesting on the LXC so that you don’t get annoying logind timeouts

pct set 450 --features nesting=1

Step 1: Install sway and components

Since we will use WayVNC to talk to the machine, that will be included, waybar gives us something to click on.

Sway is to give a minimal “desktop” to work with when using UI applications on this LXC.

sudo apt update
sudo apt install -y sway wayland-protocols libgl1-mesa-dri mesa-utils xwayland waybar wayvnc

Why Sway? Initial experiments installing a full desktop environment proved rather complex. While possible, I want to start as small and lean as I can for this particular setup.

Step 2: Grant video,render permissions to iamnotroot

From the previous guide, we set up a user ‘iamnotroot’ just as a user account. We give them permissions on the card and render pipelines.

sudo usermod -aG video,render iamnotroot

Add the correct exports to .bashrc

cat << 'EOF' >> ~/.bashrc

# Set NVIDIA GPU exports for Wayland
export WLR_NO_HARDWARE_CURSORS=1
export LIBVA_DRIVER_NAME=nvidia
export XDG_SESSION_TYPE=wayland
export GBM_BACKEND=nvidia-drm
export __GLX_VENDOR_LIBRARY_NAME=nvidia
EOF

Step 3: Create a super basic waybar and sway config in user space

Pretty straight forward here, by default waybar shows a lot of features that don’t cleanly map to a headless LXC. This is meant to give you a starting place.

Please replace 0.0.0.0 with your actual lan address or tailscale ip.

# Create directory structures
mkdir -p ~/.config/sway ~/.config/waybar

# 1. Sway Configuration
cat << 'EOF' > ~/.config/sway/config
# Headless Sway Configuration for NVIDIA

# Force virtual headless output backend
output * bg #1e1e2e solid_color

# Force a standard virtual resolution for the headless output
output HEADLESS-1 mode 1920x1080@60Hz

# Disable input requirements since it's headless
input * {
    xkb_layout us
}

exec waybar
# Please replace 0.0.0.0 with your actual LAN address
exec wayvnc 0.0.0.0 5900

# Set the modifier key to the Super/Windows key
set $mod Mod4

# Start a terminal (foot)
bindsym $mod+Return exec foot

# Kill focused window
bindsym $mod+Shift+q kill

# Reload the configuration file
bindsym $mod+Shift+c reload
EOF

# 2. Waybar Configuration
cat << 'EOF' > ~/.config/waybar/config
[
  {
    "layer": "top",
    "position": "top",
    "height": 34,
    "modules-left": ["sway/workspaces", "sway/mode"],
    "modules-center": ["sway/window"],
    "modules-right": ["clock"],
    
    "clock": {
      "format": "{:%Y-%m-%d %H:%M}"
    }
  }
]
EOF

# 3. Waybar Styling (Catppuccin Mocha Palette)
cat << 'EOF' > ~/.config/waybar/style.css
* {
    font-family: monospace;
    font-size: 13px;
}

window#waybar {
    background: rgba(17, 17, 27, 0.85);
    color: #cdd6f4;
}

#workspaces button {
    padding: 0 5px;
    color: #6c7086;
}

#workspaces button.focused {
    color: #89b4fa;
    background: #313244;
}

#clock {
    padding: 0 10px;
    color: #89b4fa;
    font-weight: bold;
}
EOF

Step 4: Systemd user service

Sway, by default, runs in a user space, and creates user sessions. Since this is headless, and we aren’t using something like SDDM we want the WayVNC to hook straight into the user session. This does mean authentication will be skipped over WayVNC and you should take steps to minimize risk. This guide will not help minimize it, this is more the “proof of concept”

mkdir -p ~/.config/systemd/user/
nano ~/.config/systemd/user/wayland-desktop.service

And configure as such:

[Unit]
Description=Sway Wayland Compositor (Headless NVIDIA)
Documentation=man:sway(5)
After=graphical-session-pre.target
PartOf=graphical-session.target

[Service]
Type=simple
Environment=WLR_BACKENDS=headless
Environment=WLR_LIBINPUT_NO_DEVICES=1
Environment=WLR_NO_HARDWARE_CURSORS=1
Environment=LIBVA_DRIVER_NAME=nvidia
Environment=XDG_SESSION_TYPE=wayland
Environment=GBM_BACKEND=nvidia-drm
Environment=__GLX_VENDOR_LIBRARY_NAME=nvidia
Environment=XDG_CURRENT_DESKTOP=sway
ExecStart=/usr/bin/sway --unsupported-gpu
Restart=on-failure
RestartSec=3s

[Install]
WantedBy=default.target

Now enable and reload the services.

systemctl --user enable --now wayland-desktop.service

Step 5: Validation

Connect to the VNC view port now and validate

WAYLAND_DISPLAY=wayland-1 glxinfo -B

For my GTX 1660 super, glxinfo gave me everything.

name of display: :0
display: :0  screen: 0
direct rendering: Yes
Memory info (GL_NVX_gpu_memory_info):
    Dedicated video memory: 6144 MB
    Total available memory: 6144 MB
    Currently available dedicated video memory: 5734 MB
OpenGL vendor string: NVIDIA Corporation
OpenGL renderer string: NVIDIA GeForce GTX 1660 SUPER/PCIe/SSE2
OpenGL core profile version string: 4.6.0 NVIDIA 620.70.06
OpenGL core profile shading language version string: 4.60 NVIDIA
OpenGL core profile context flags: (none)
OpenGL core profile profile mask: core profile

OpenGL version string: 4.6.0 NVIDIA 620.70.06
OpenGL shading language version string: 4.60 NVIDIA
OpenGL context flags: (none)
OpenGL profile mask: (none)

OpenGL ES profile version string: OpenGL ES 3.2 NVIDIA 620.70.06
OpenGL ES profile shading language version string: OpenGL ES GLSL ES 3.20

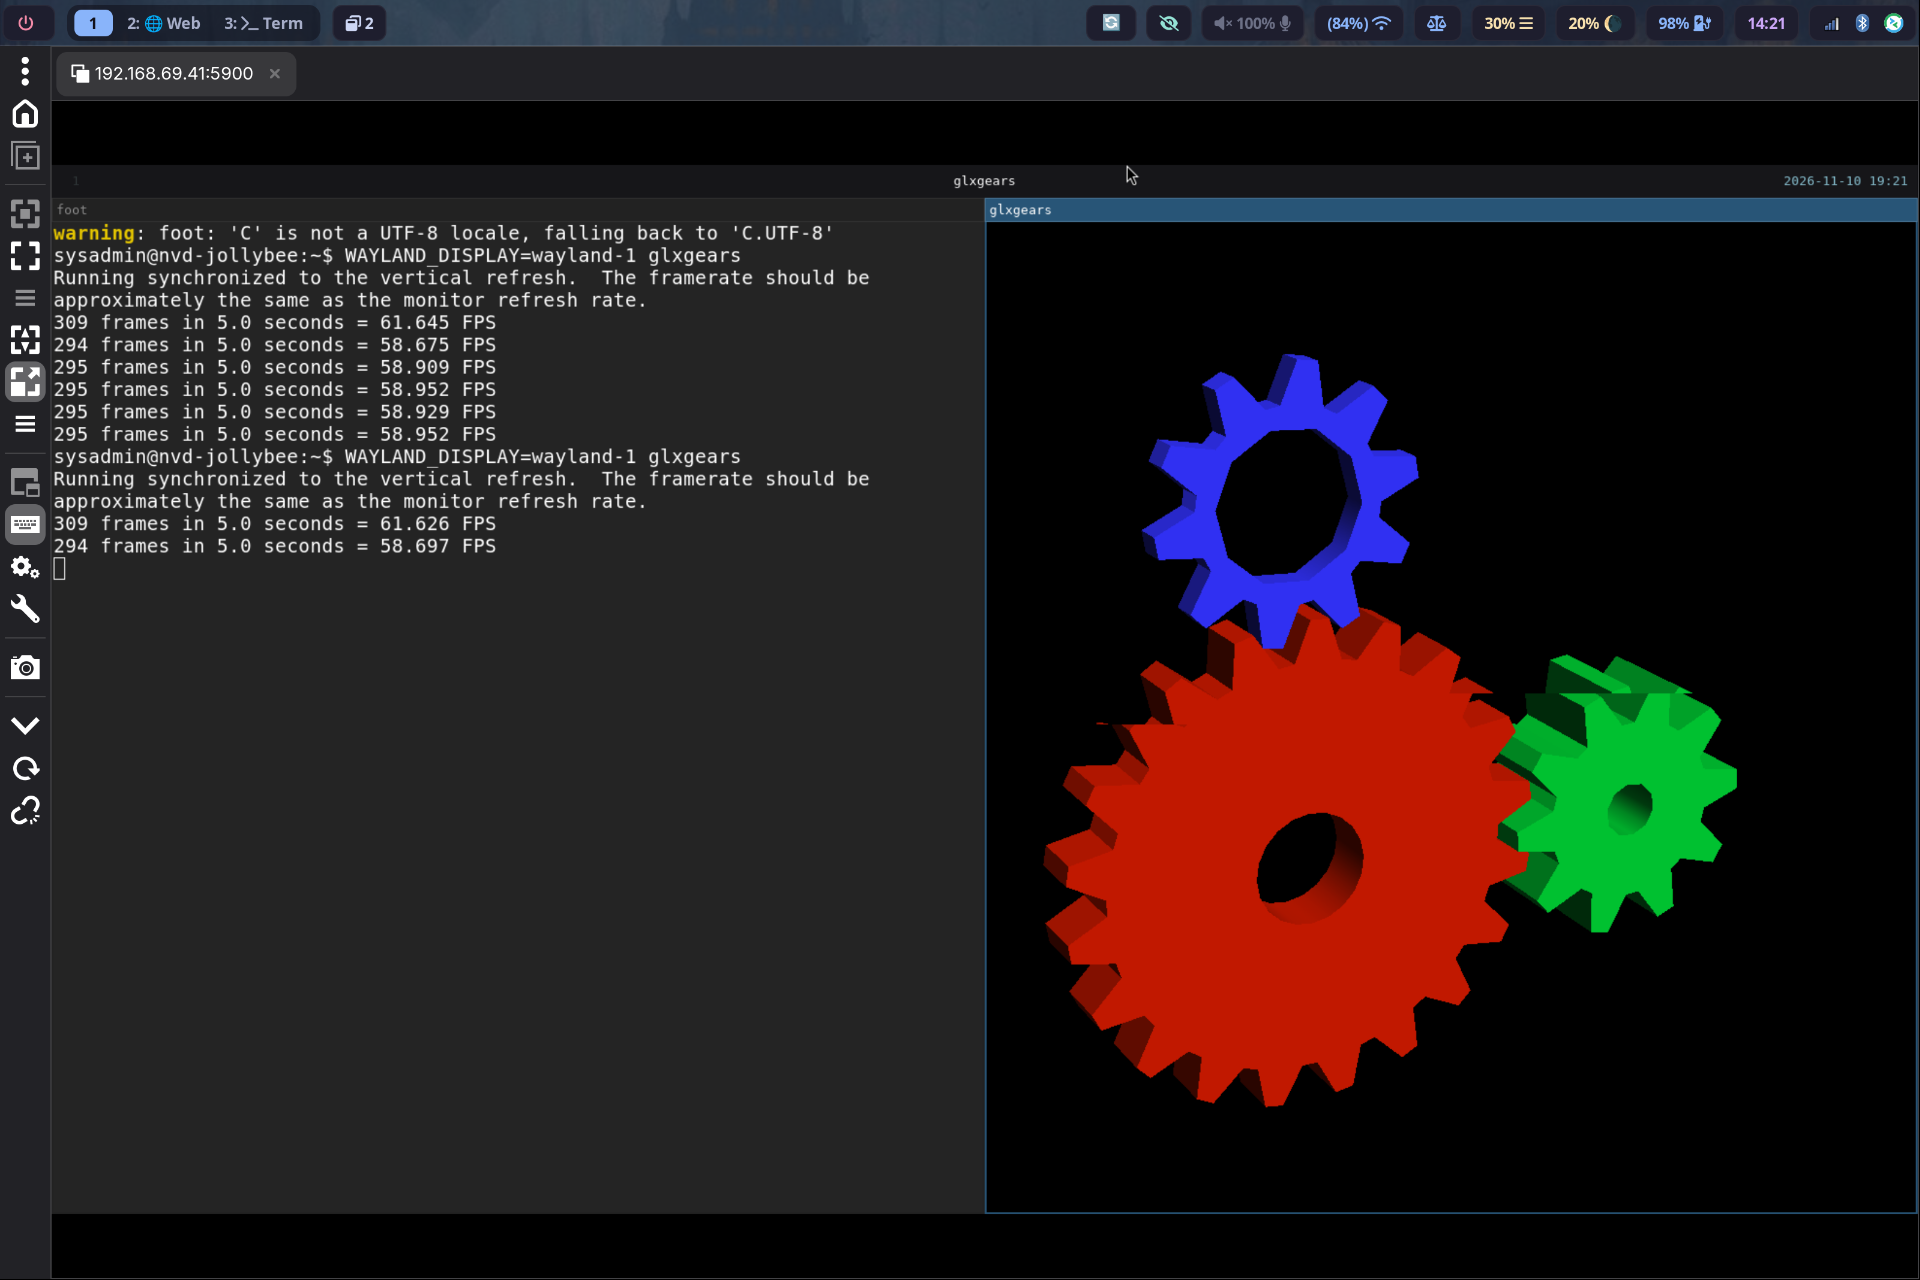
And now check with glxgears (on a separate terminal, SSH into the box and run nvidia-smi to check GPU usage)

WAYLAND_DISPLAY=wayland-1 glxgears

With the gears running, on the SSH session, run nvidia-smi to confirm GPU utilization.
In my case it went from 0% to 24% - A WIN!

NEXT TIME: MakeMKV and Handbrake. Can we use them?

Basically, yours should look like mine :slight_smile:

I would go with dock instead of lxc.

I spent the day researching options for MakeMKV and Handbrake, and the Automatic Ripping Machine only works inside of docker.

Rather than running Docker inside of the LXC, I am building MakeMKV from source as well as Handbrake.

Why not docker? Because it’s a container in a container that needs access to the ZFS point. Also I would be passing through devices through two layers of containers rather than just one

Why not ARM? Because ARM is actually dumber than I thought when it comes to video output. If I pull my DVD collection of I Love Lucy, it doesn’t really detect “oh I should de-interlace this” from a 480i source.

At that point it seems to really only remove one step so I might as well keep the VNC I have.

But wait there’s more…

What if I could get a full desktop environment to run and use something like Sunshine/Moonlight to connect?

What if I just made a lean mean remote work station as a container!?

I did try to install KDE plasma but it seemed to require more configuring than I wanted to give it time for.

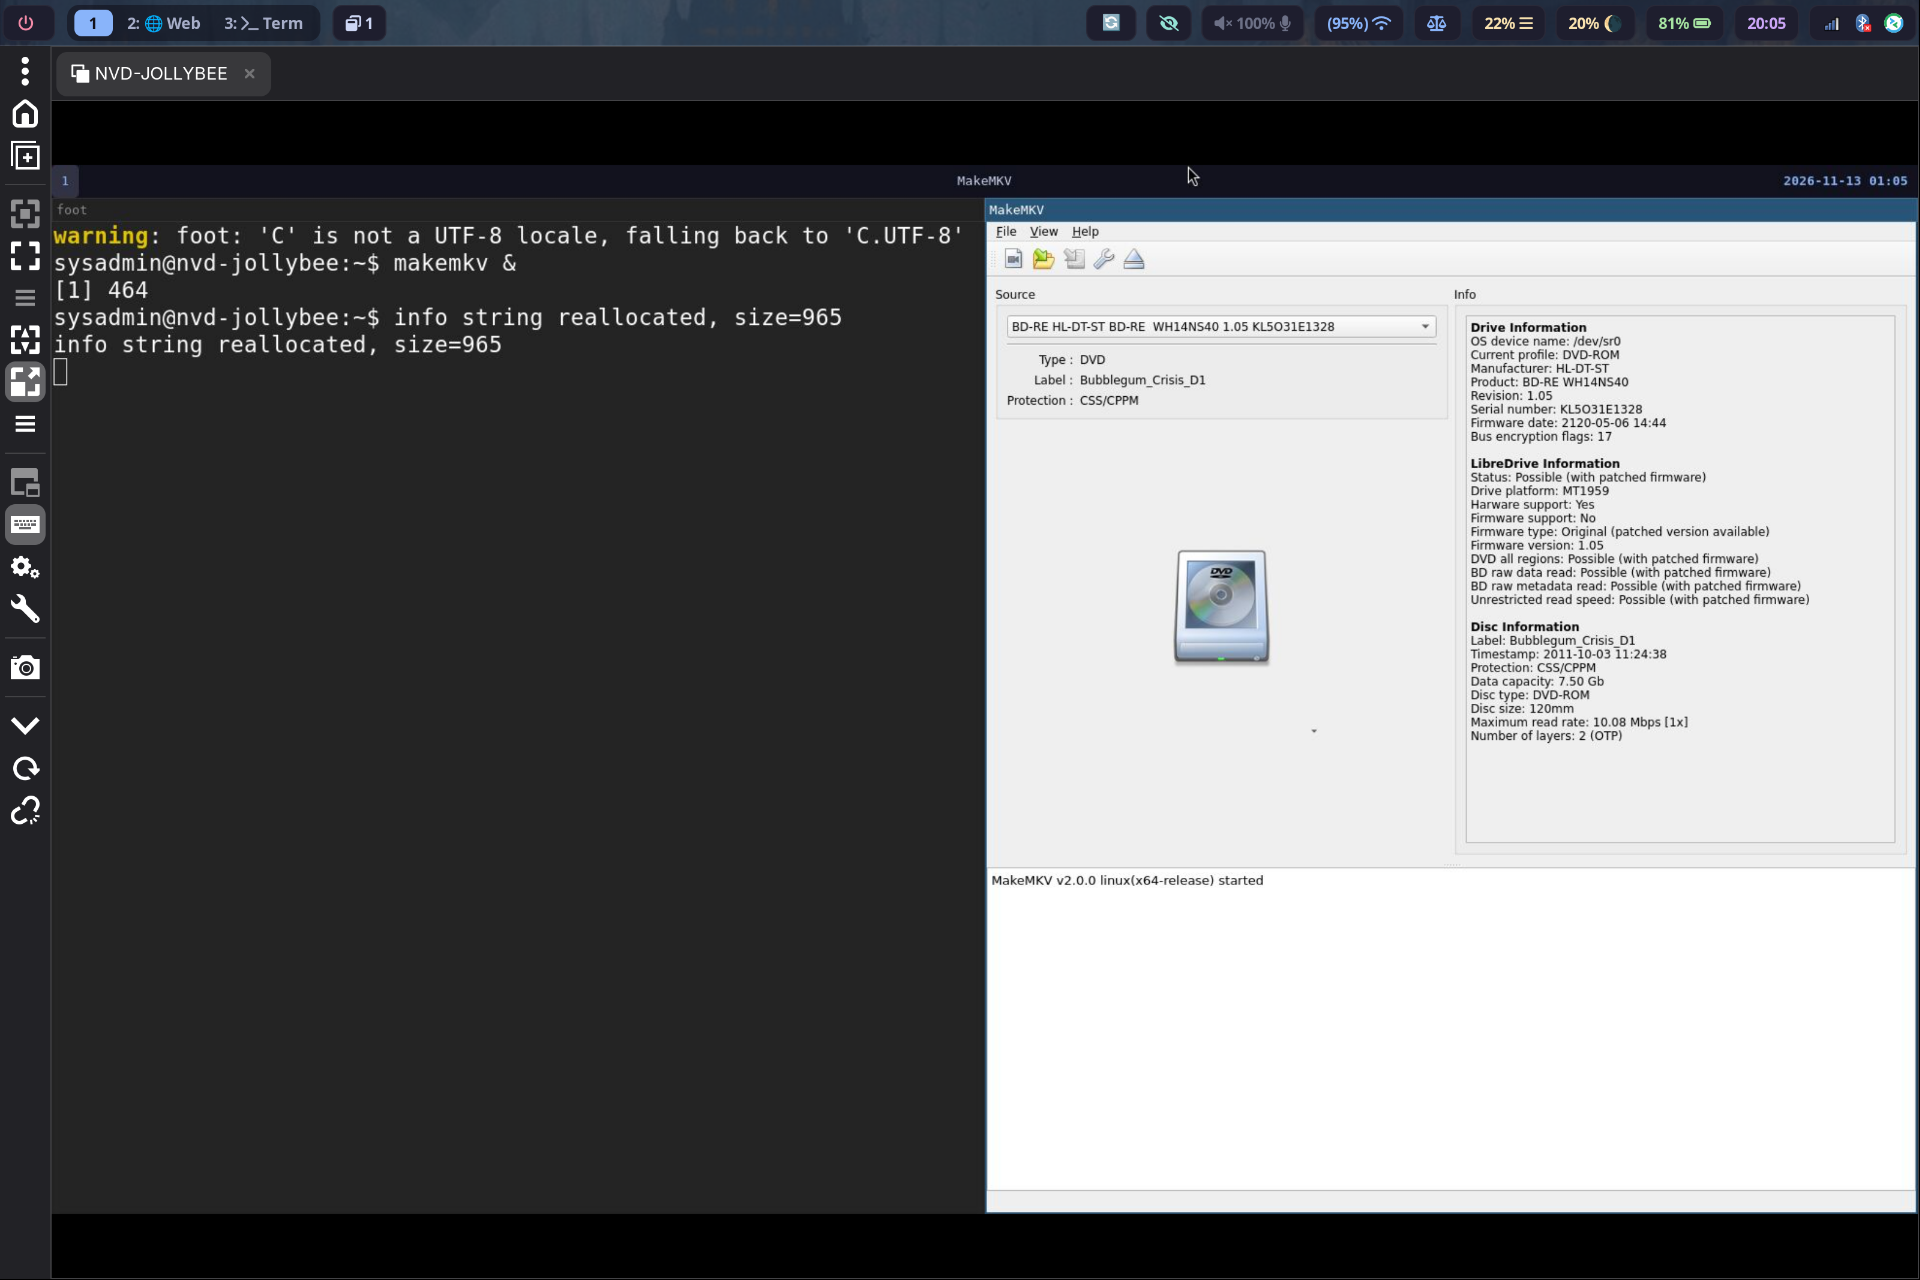
Using MakeMKV GUI

From foot the terminal emulator, the command is:

makemkv &

To create the detached process window.

Since sway is bound exclusively to my user space, I have to give group access to the DVD/CDROM

When running MakeMKV, I needed to sudo the command, but root does not map to the graphical environment. That means my /etc/pve/lxc/450.conf file will have these pass through rules:

dev6: /dev/sr0,gid=24,mode=0660
dev7: /dev/sg0,gid=24,mode=0660
dev8: /dev/sr1,gid=24,mode=0660
dev9: /dev/sg1,gid=24,mode=0660

MakeMKV uses the underlying scsi devices /dev/sg*, but passing through both. Group 24 is cdrom group on the host, and most Debian systems.

From within the container:

usermod -a G cdrom iamnotroot

There also seems to be an issue where my user-space service doesn’t start with the container, meaning I have to ssh in to kick it off before the VNC is available. I’m leaving it this way for now, and if I stop the sway service (I called it wayland-desktop.service in my user config), I close the VNC portal to the machine.


Creating the scratch space for MakeMKV and other tools

Pretty straight forward mount point, enabling ACLs

mp1: team-2tb:vm-450-disk-0,mp=/makemkv,acl=1,backup=1,size=64G

Set regular ownership as the regular user, using ACLs for read/write control

And granting jellyfin the proper rights for when we can finally move some files around, requires the acl package

In the event a folder or file is already made in the mount point, the -R in the second setfacl will correct existing permissions.

chown -R iamnotroot:iamnotroot /makemkv
# Install ACLS
sudo apt install acl
getfacl /makemkv

setfacl -m d:u:jellyfin:rwx /makemkv
setfacl -m d:g:jellyfin:rwx /makemkv
setfacl -R -m u:jellyfin:rwx /makemkv
setfacl -R -m g:jellyfin:rwx /makemkv

Making some Waybar buttons

So all the packages are makemkv (and console line equivalent), mkvtoolnix from the package manager, and handbrake from source.

I wanted to add some buttons to waybar so I can just launch the applications.

Pretty straight forward with the config in ~/.config/waybar/config

[
  {
    "layer": "top",
    "position": "top",
    "height": 34,
    "modules-left": ["sway/workspaces", "sway/mode"],
    "modules-center": ["sway/window"],
    "modules-right": [
        "custom/makemkv",
        "custom/mkvtoolnix",
        "custom/handbrake",
        "clock",
        "tray"
    ],

    "clock": {
      "format": "{:%Y-%m-%d %H:%M}"
    },

    "custom/makemkv": {
        "format": "MakeMKV",
        "on-click": "makemkv",
        "tooltip": false
    },
    "custom/mkvtoolnix": {
        "format": "MKVToolNix",
        "on-click": "mkvtoolnix-gui",
        "tooltip": false
    },
    "custom/handbrake": {
        "format": "HandBrake",
        "on-click": "ghb",
        "tooltip": false
    }
  }
]

Building Handbrake

First, git is required to clone the repo, and then we clone it

sudo apt install git
cd ~
git clone https://github.com/HandBrake/HandBrake.git
git checkout refs/tags/1.11.2

So handbrake doesn’t automatically try to fetch dependencies and Deepseek gave me this list

sudo apt install libass-dev libbz2-dev libfontconfig-dev libfreetype-dev \
libfribidi-dev libharfbuzz-dev libjansson-dev liblzma-dev libmp3lame-dev \
libnuma-dev libogg-dev libopus-dev libsamplerate0-dev libspeex-dev libssl-dev \
libtheora-dev libtool libtool-bin libturbojpeg0-dev libvorbis-dev \
libvpx-dev libx11-dev libx264-dev libxml2-dev zlib1g-dev \
gstreamer1.0-libav libgstreamer-plugins-base1.0-dev libgtk-4-dev

Now we can build Handbrake

./configure --enable-nvenc --launch
sudo make --directory=build install

We win.

So now in this LXC, I have handbrake GUI, and I am using my GTX 1660 Super with the NVENC encoder to encode to H.265 10-bit (NVENC) which is the entire goal of my Devember.

At this point, the project is complete.

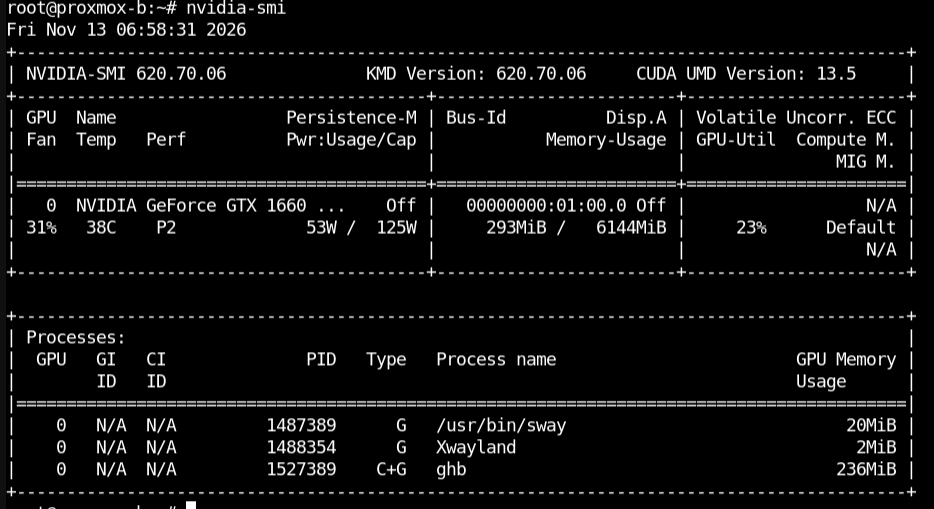
Resource usage with handbrake transcoding