Elders of the internet, let me present to you the ultimate guide to building your own NAS for cheaper than dirt!
1. The Drives
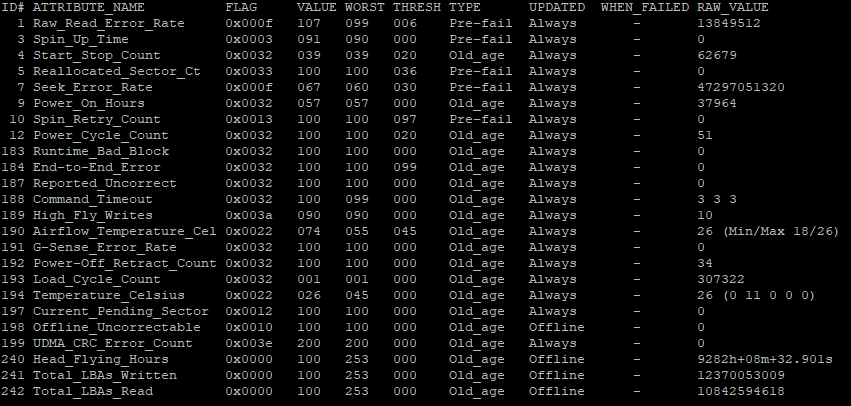
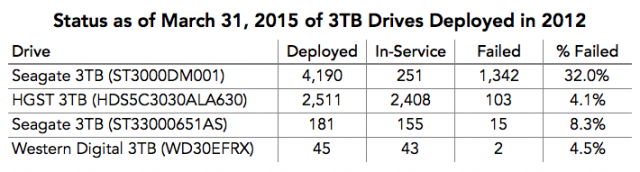
This project spawned after I acquired eight, 3 TB drives for FREE. “How did you acquire them for free”, you might ask? Do you remember those drives from Seagate that had > 32% failure rate? Also, I got them from a business shutting down…
For this reason, the drives will be in a ZFS pool containing 4 vdevs, each containing 2 mirrored drives. Hopefully, the fast resilvering time of this configuration will save me. Everything is backed up to Google Cloud anyways…
2. Space
Cases that support eight drives are expensive. Go check out Amazon and Newegg. We’re talkin $80 and up. On top of that you need a PSU that has eight SATA power cables. That’s just too much money to steal from the beer fund. So, some drunk Googling… and BEHOLD:

Powered by two Molex connectors with eight SATA ports on the back. Now I just gotta figure out some way to support the drives.
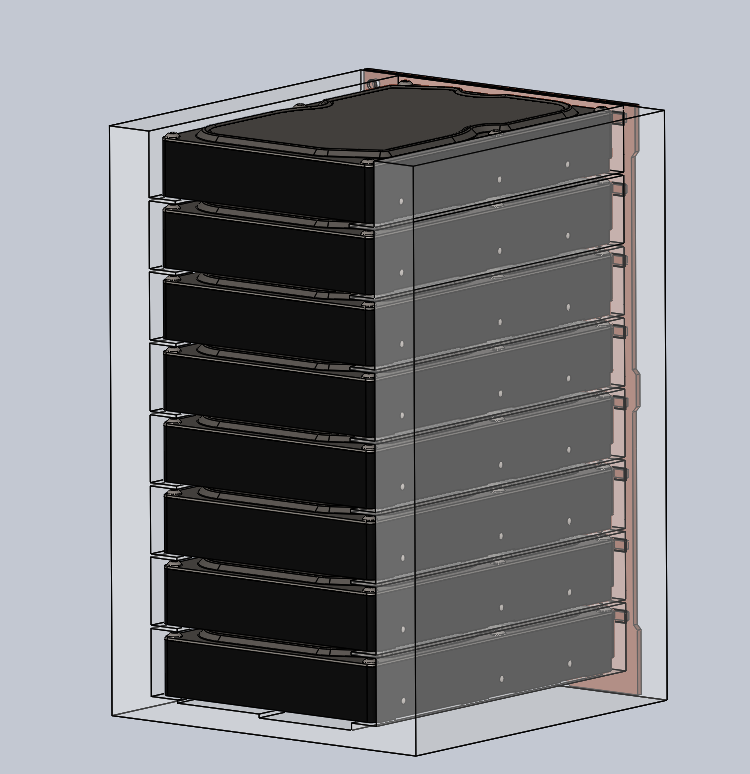
3. Design
Easiest and fastest way to start CADing this was to take it into to work and hit it with the blue laser scanner. I know a lot of people don’t have access to this sort of thing, but to do things on the cheap you gotta utilize anything and everything you have access to. With enough time you could do this with a ruler.

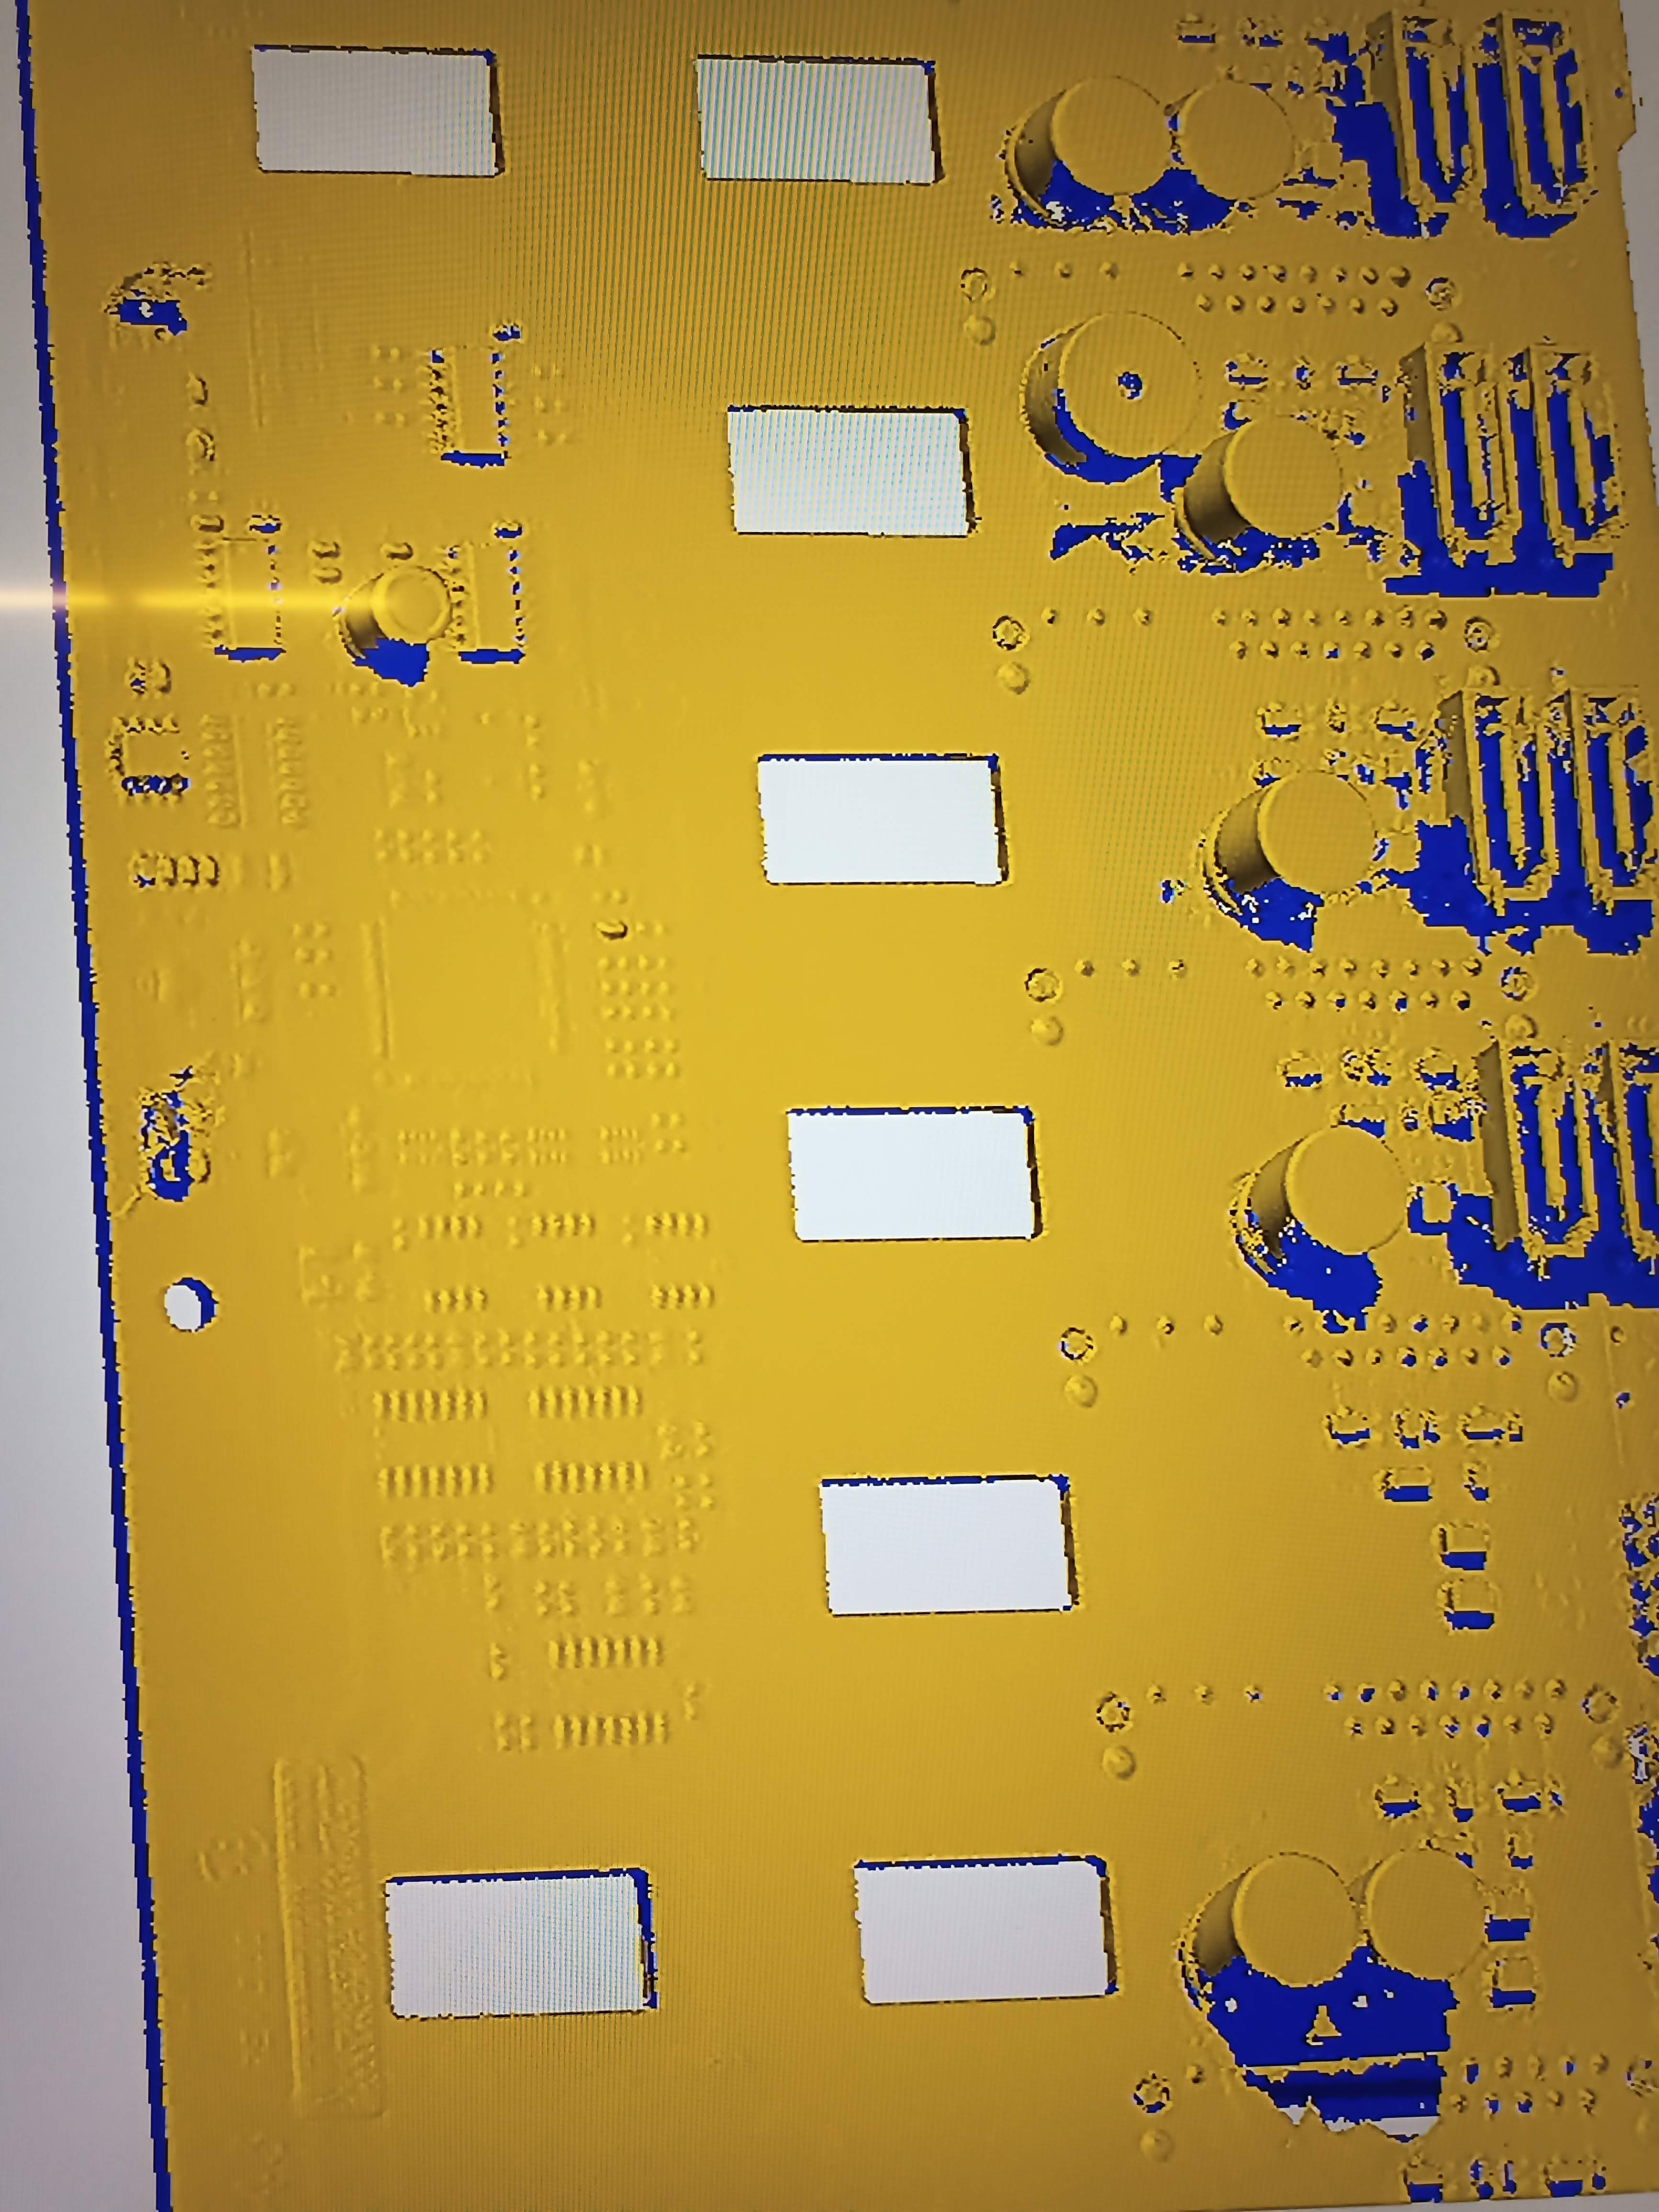
Protip: You can find some free HDD models online. That way you won’t need to 3D print this thing twice.
Here’s the link to all the CAD and cloud points I used. This model just fits a Ender 3. Put that bad mambajamba on warp factor 9 and it should complete in just under two days.
4. Fabrication
This is where the rubber hits the road and boys become men. You can only blame yourself when your design manifests itself into a stinkin turd. I drilled a pilot hole in the front of the 3D print ant affixed it to the case via self-tapping sheet metal screws.
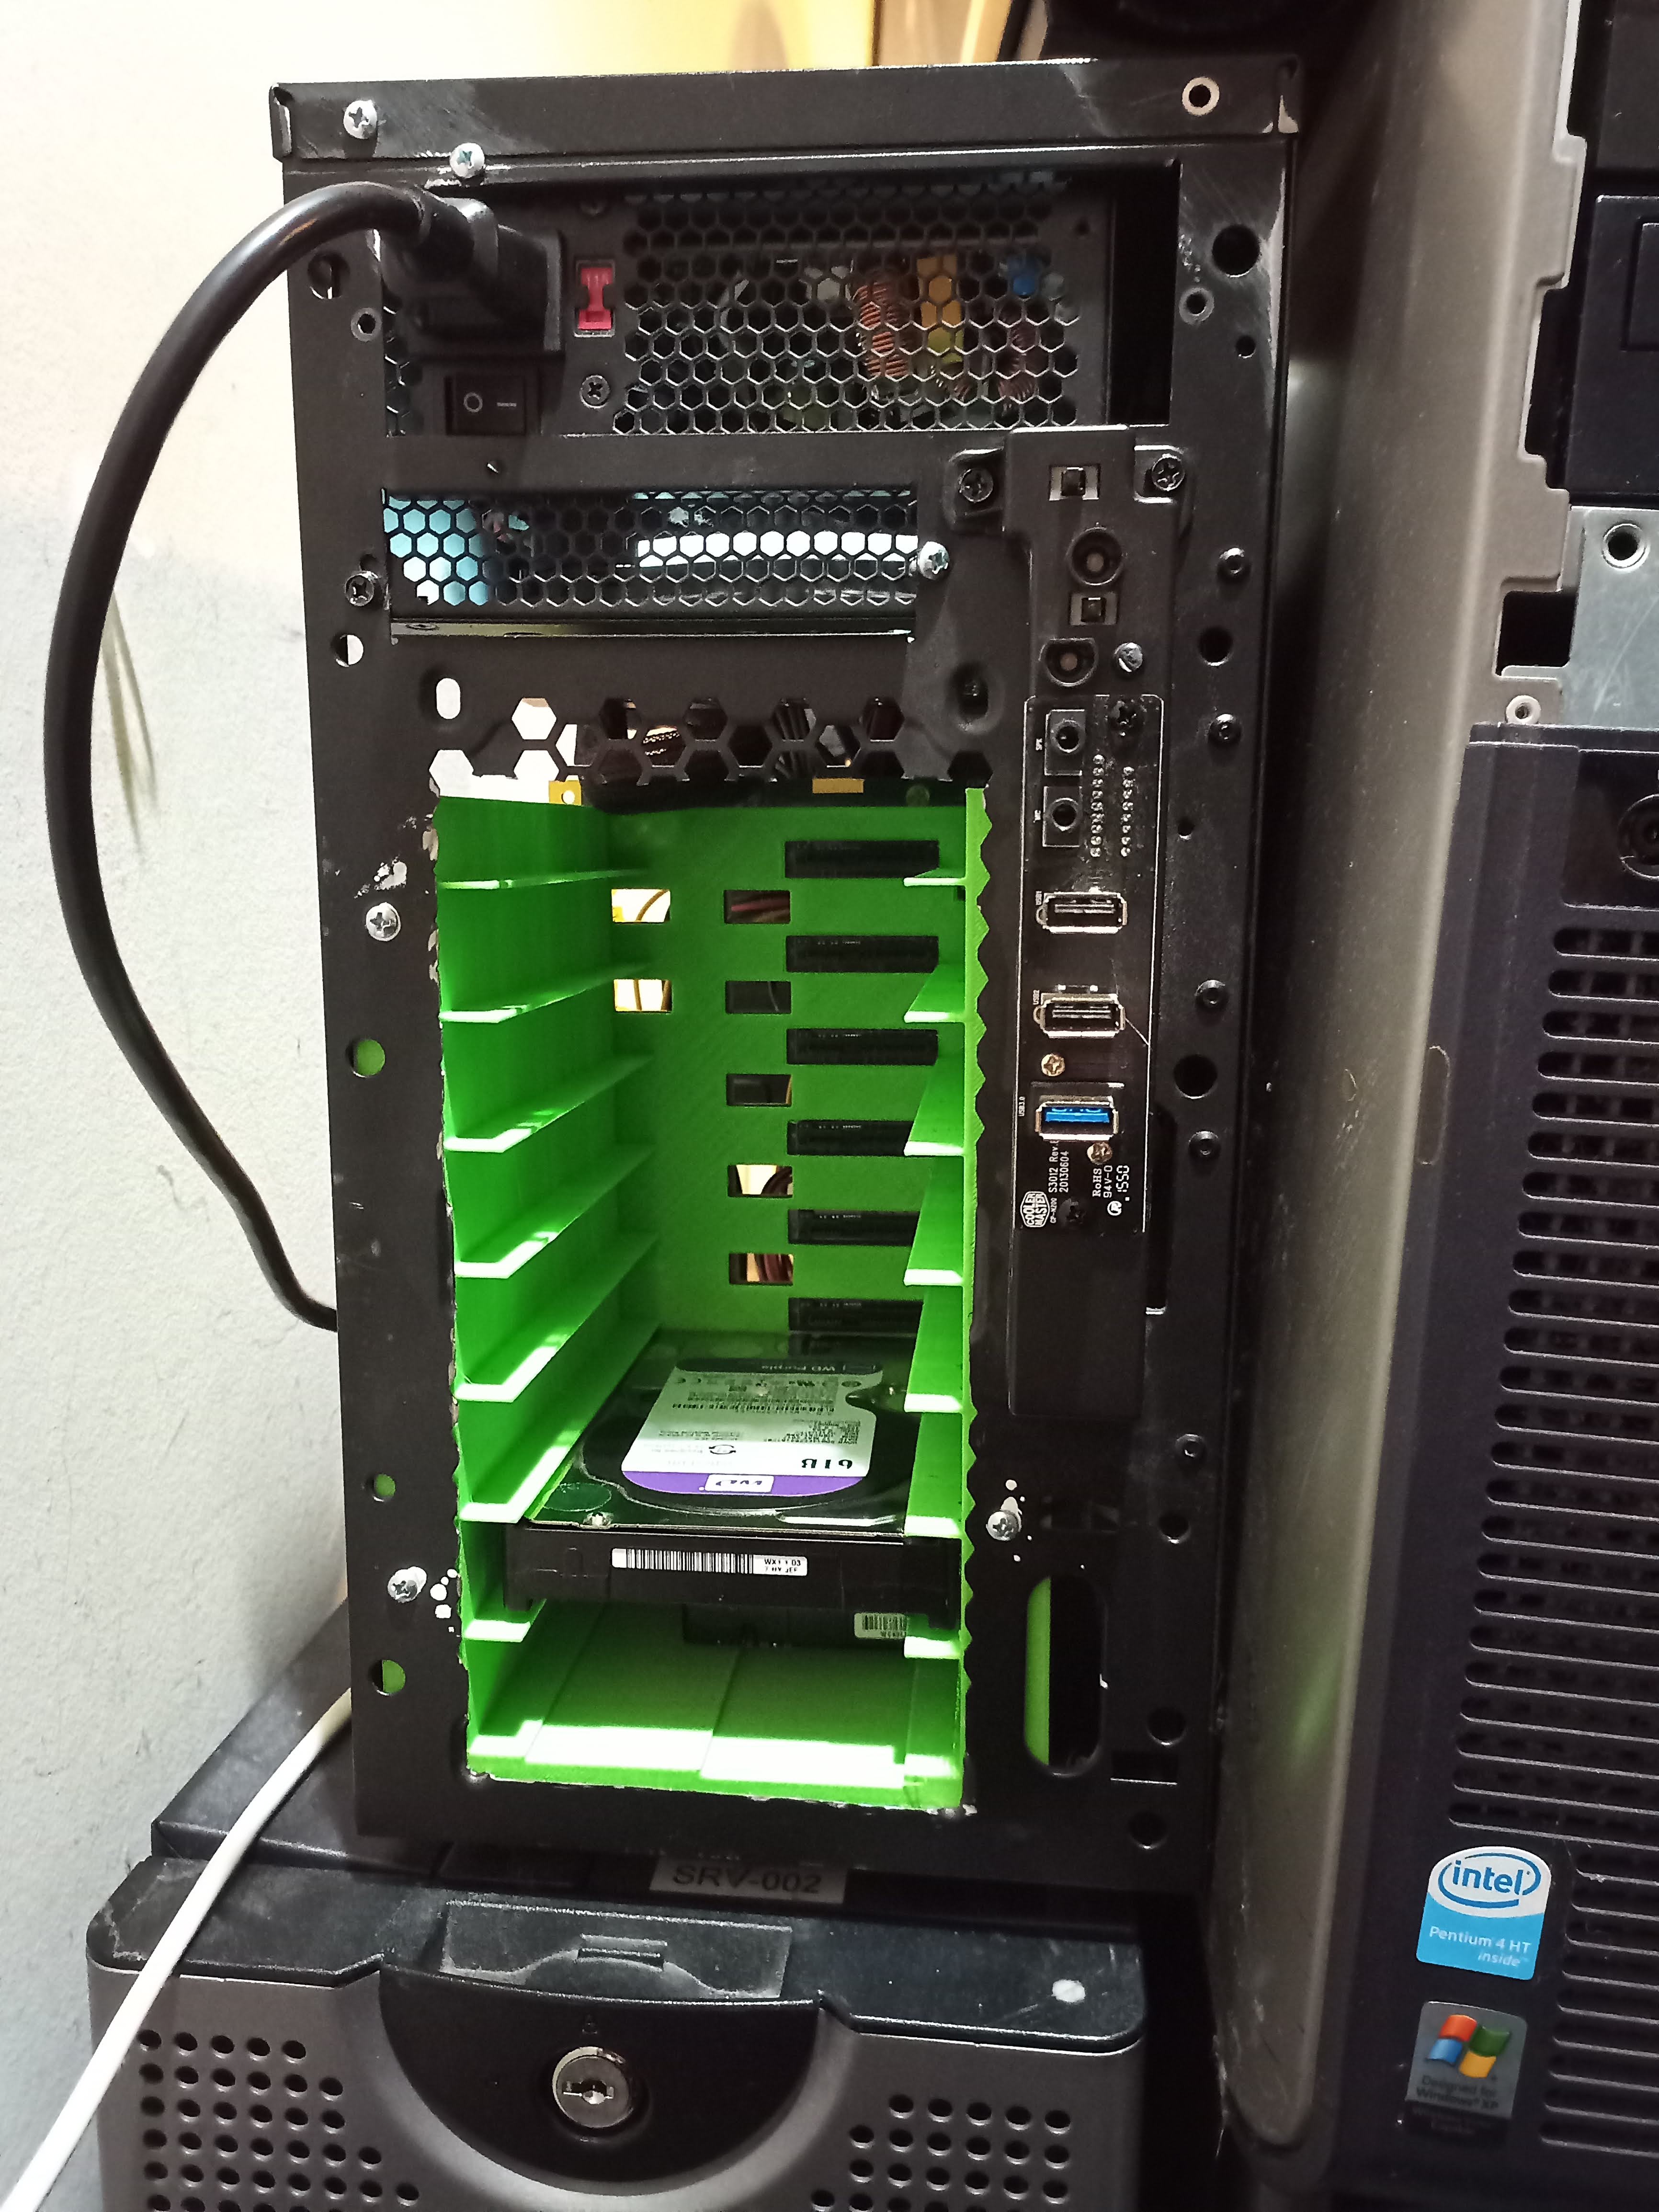
Now the eagle-eyed readers probably noticed that the PSU is now hanging at the front of the case. This would be why:

This small hiccup caused the motherboard to be rotated 90 degrees in the case. Followed by the PSU needing to be moved to where the 5.25" bays were. The way I saw it, If the Good Lord intended for us to only buy PC cases, he wouldn’t have invented the Dremel. For insurance, I Kapton taped the back of the motherboard. A few self-tapping screws later and the NAS was back online with less than two hours downtime!
Right now the NAS is backing up to large HDD top prepare to move to the new drives. I’ll be sure to post again when the new drives start failing.
5. Conclusion
So how is this cheaper than dirt? Well everything that makes up the NAS has been acquired from old, “worthless”, PCs that have been thrown out. That makes the total cost of this NAS a $25 backplane and $10 in PLA.
Maths:
PC: $35 / 25 lbs = $1.40 per lb
Dirt: 25qt ≈ 30lbs. $12 / 30 lbs = $0.40 per lb
Okay, so not quite. You gotta admit, $35 for a 11 TB NAS is not bad.
-
Should I build this?
With a little more planning and diffrent HDDs this is a pretty cheap NAS. -
Has it blown up yet?
Nope, HDD temps rose a bit, but I added a fan. -
What do you use it for?
SMB, Sonnar, Transmission, Plex, FTP, VPN. Love being able to steam 4k movies to any TV in the house.
With that, I bid you adieu. Good luck, we’re all counting on you.