[Build log] DeckStation 1 [DS1] (PS1 X Steam Deck console build)

Here’s me again with a new crazy build! lol

Here’s about a new project that I want to do, and then try to sell it like the last console build I made, Re; Gamecube. But this time I want to define it as a console build, not as a PC build.

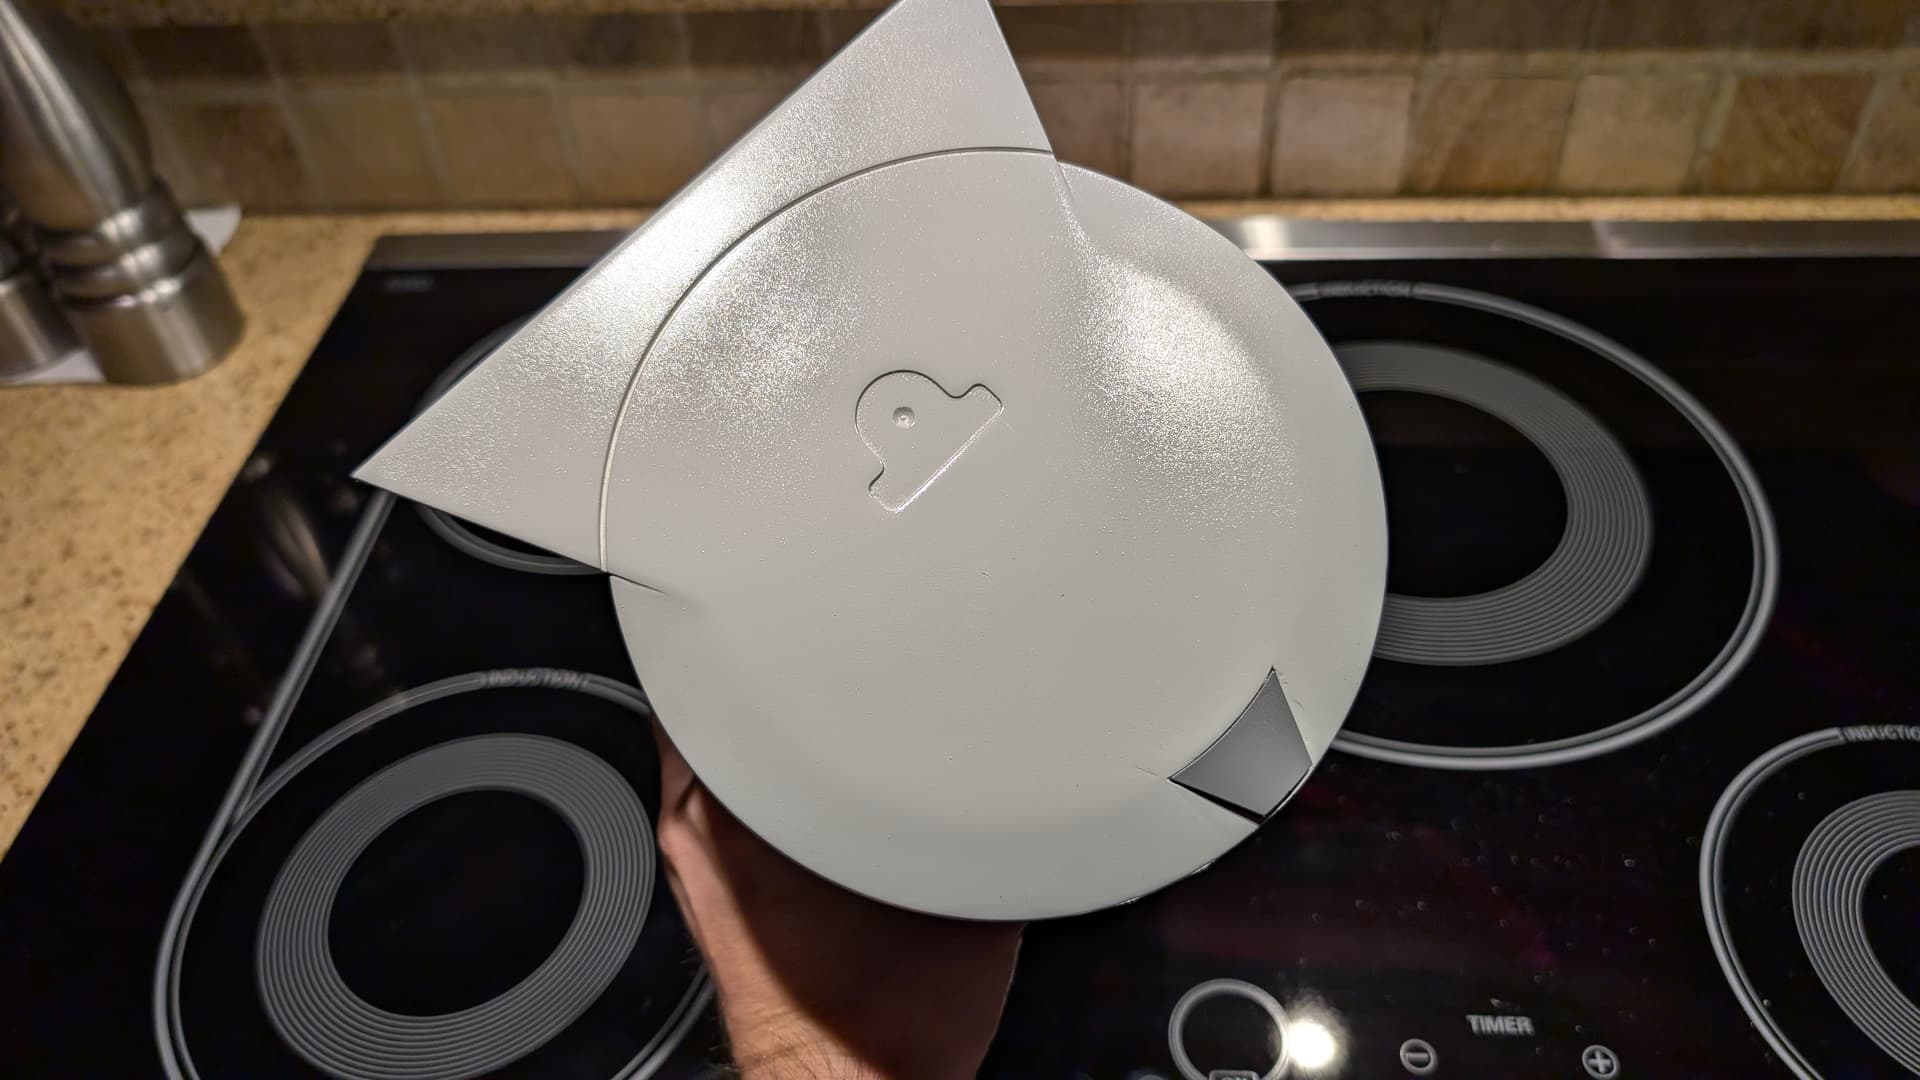
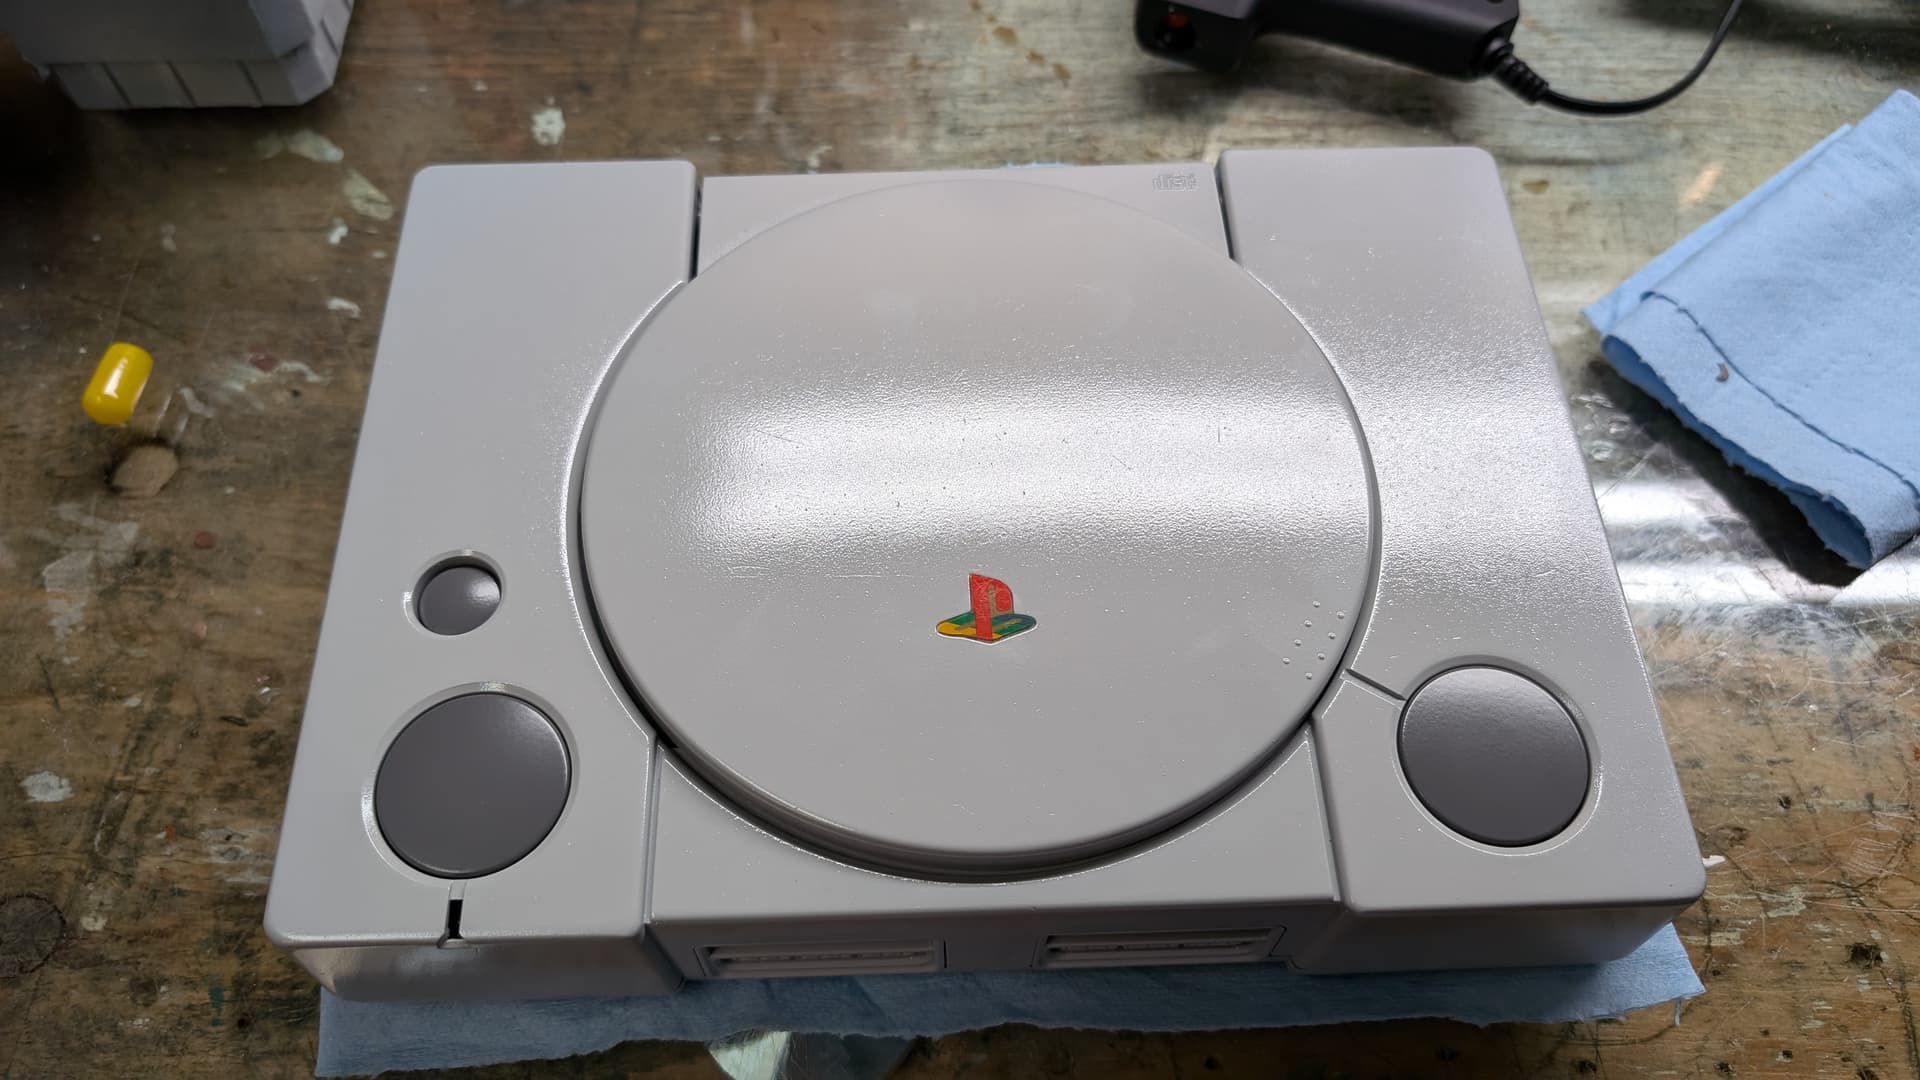
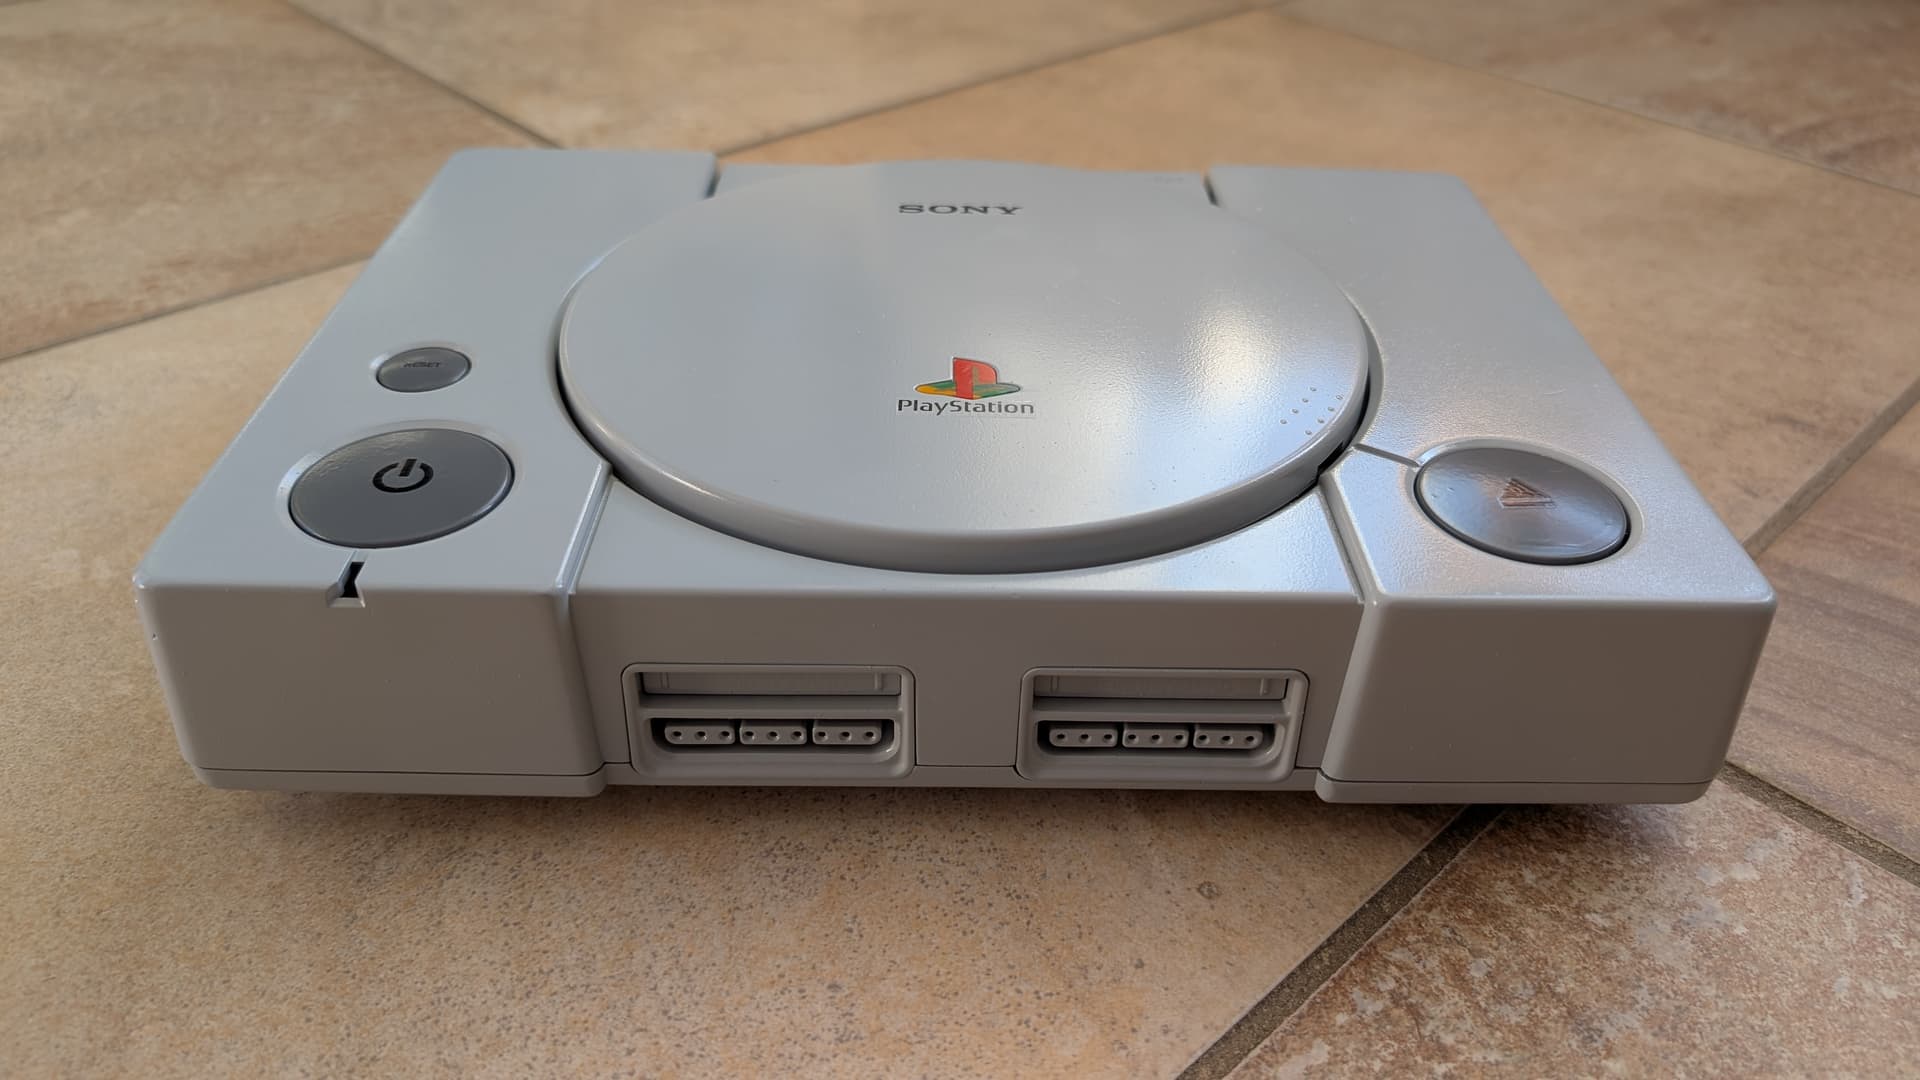
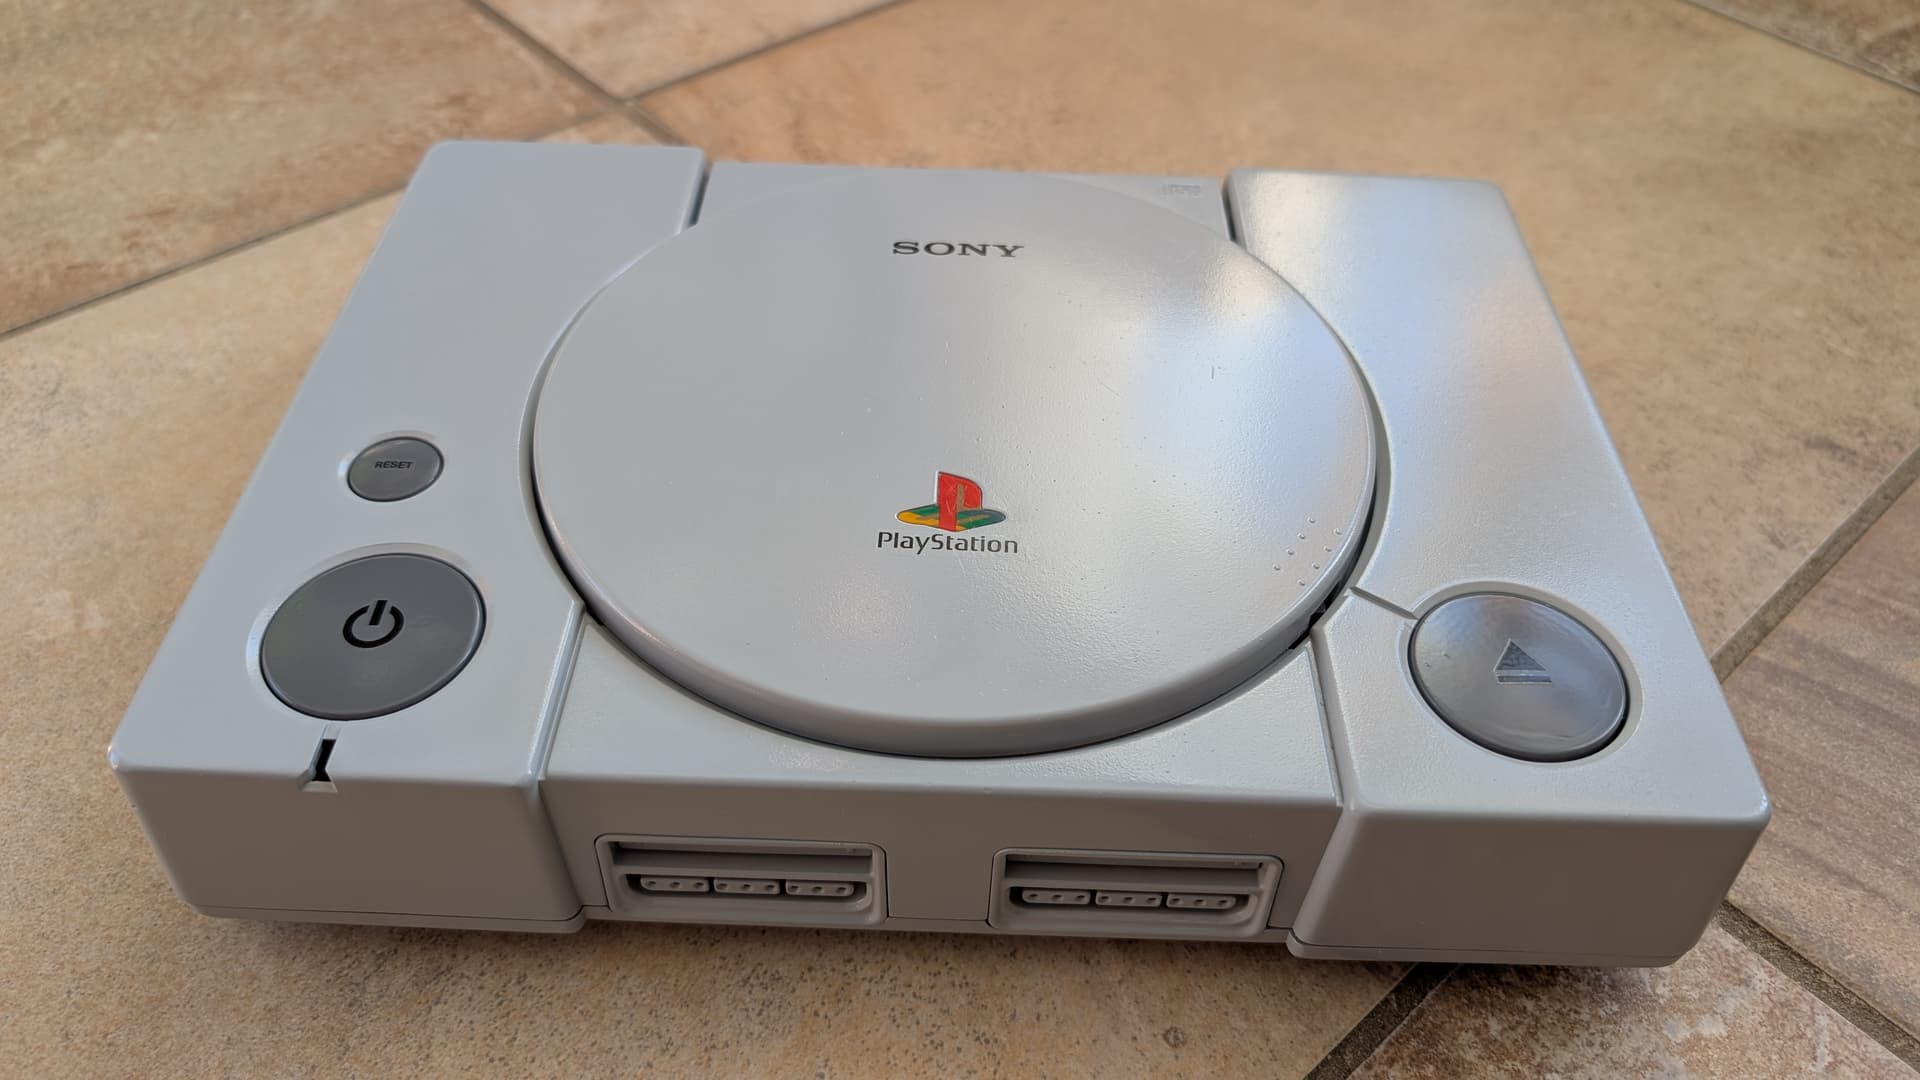
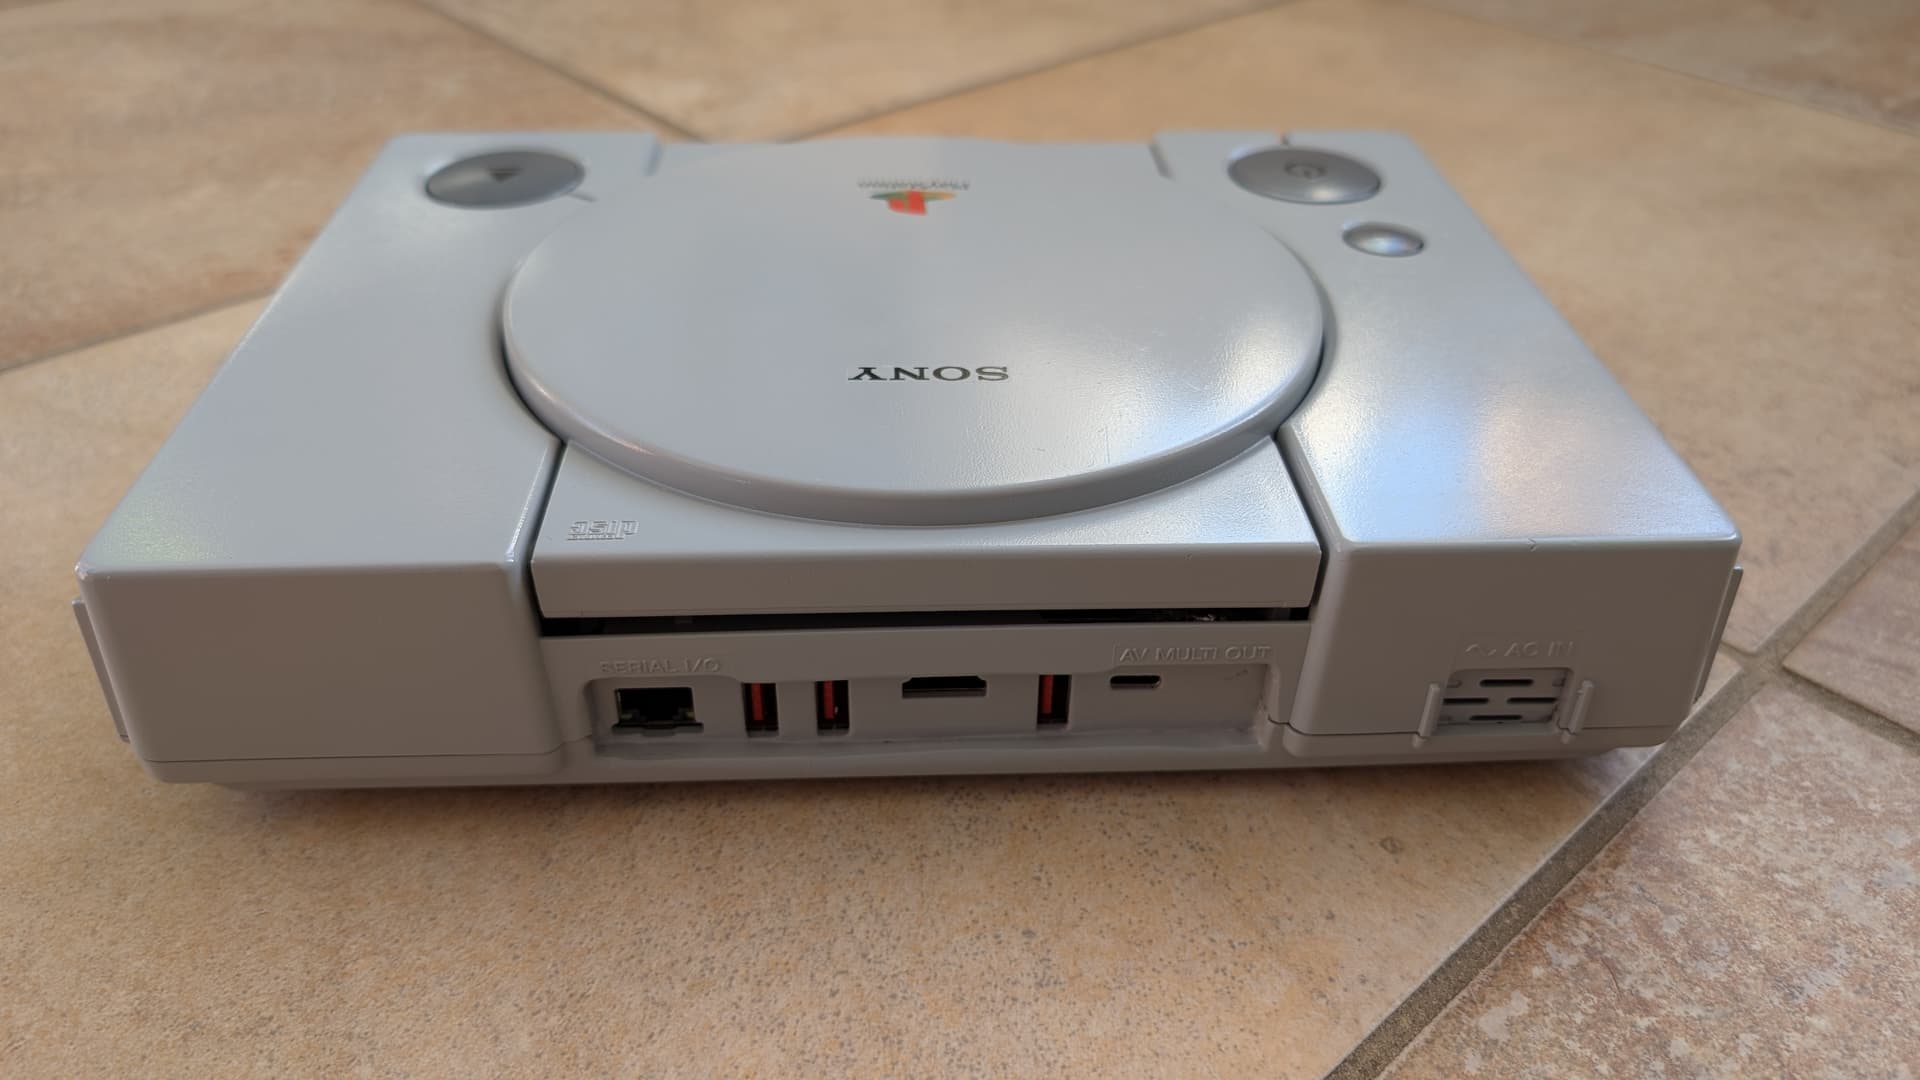
For those who have been following my build logs for quite some time, maybe you remember a minor build I did once, うずめ, a Dreamcast PC.
This is when I wanted to build my PC in Dreamcast shell, but ended building my first and acclaimed Gamecube PC, コンパ.

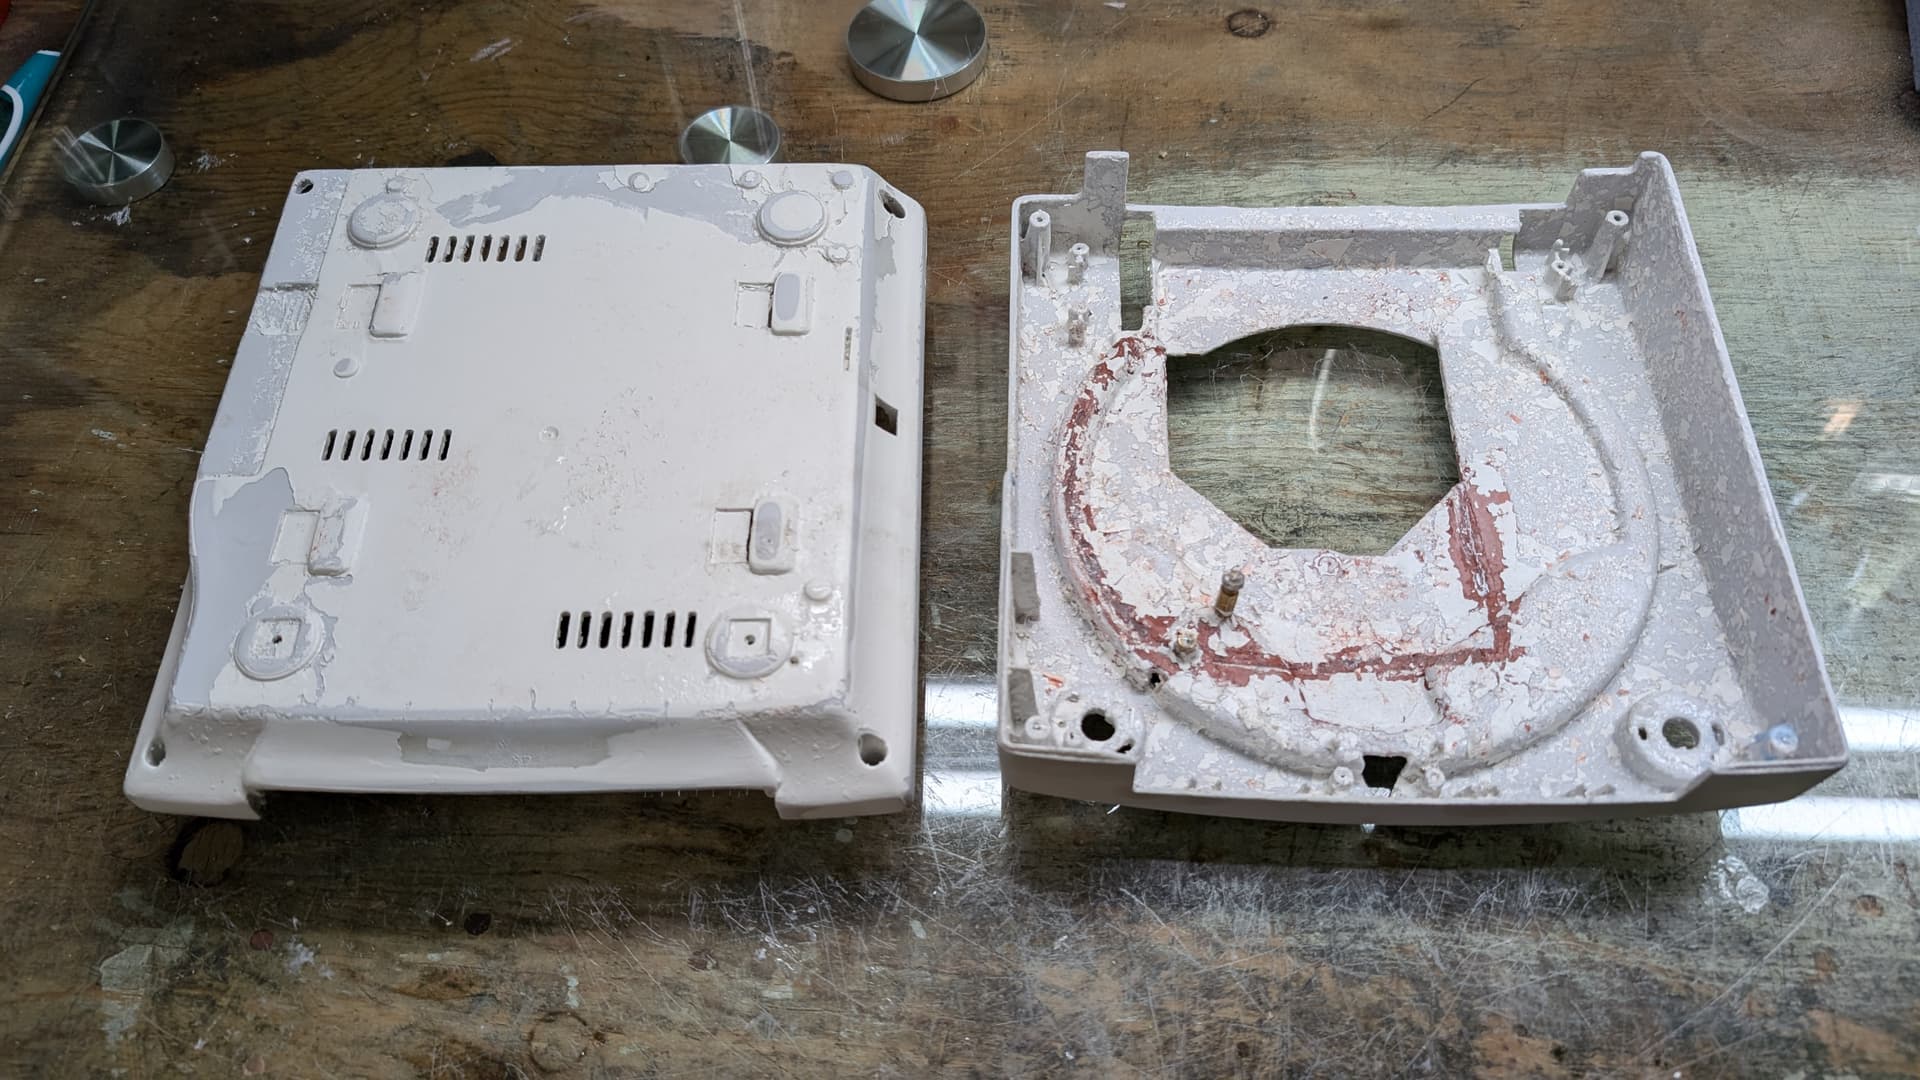
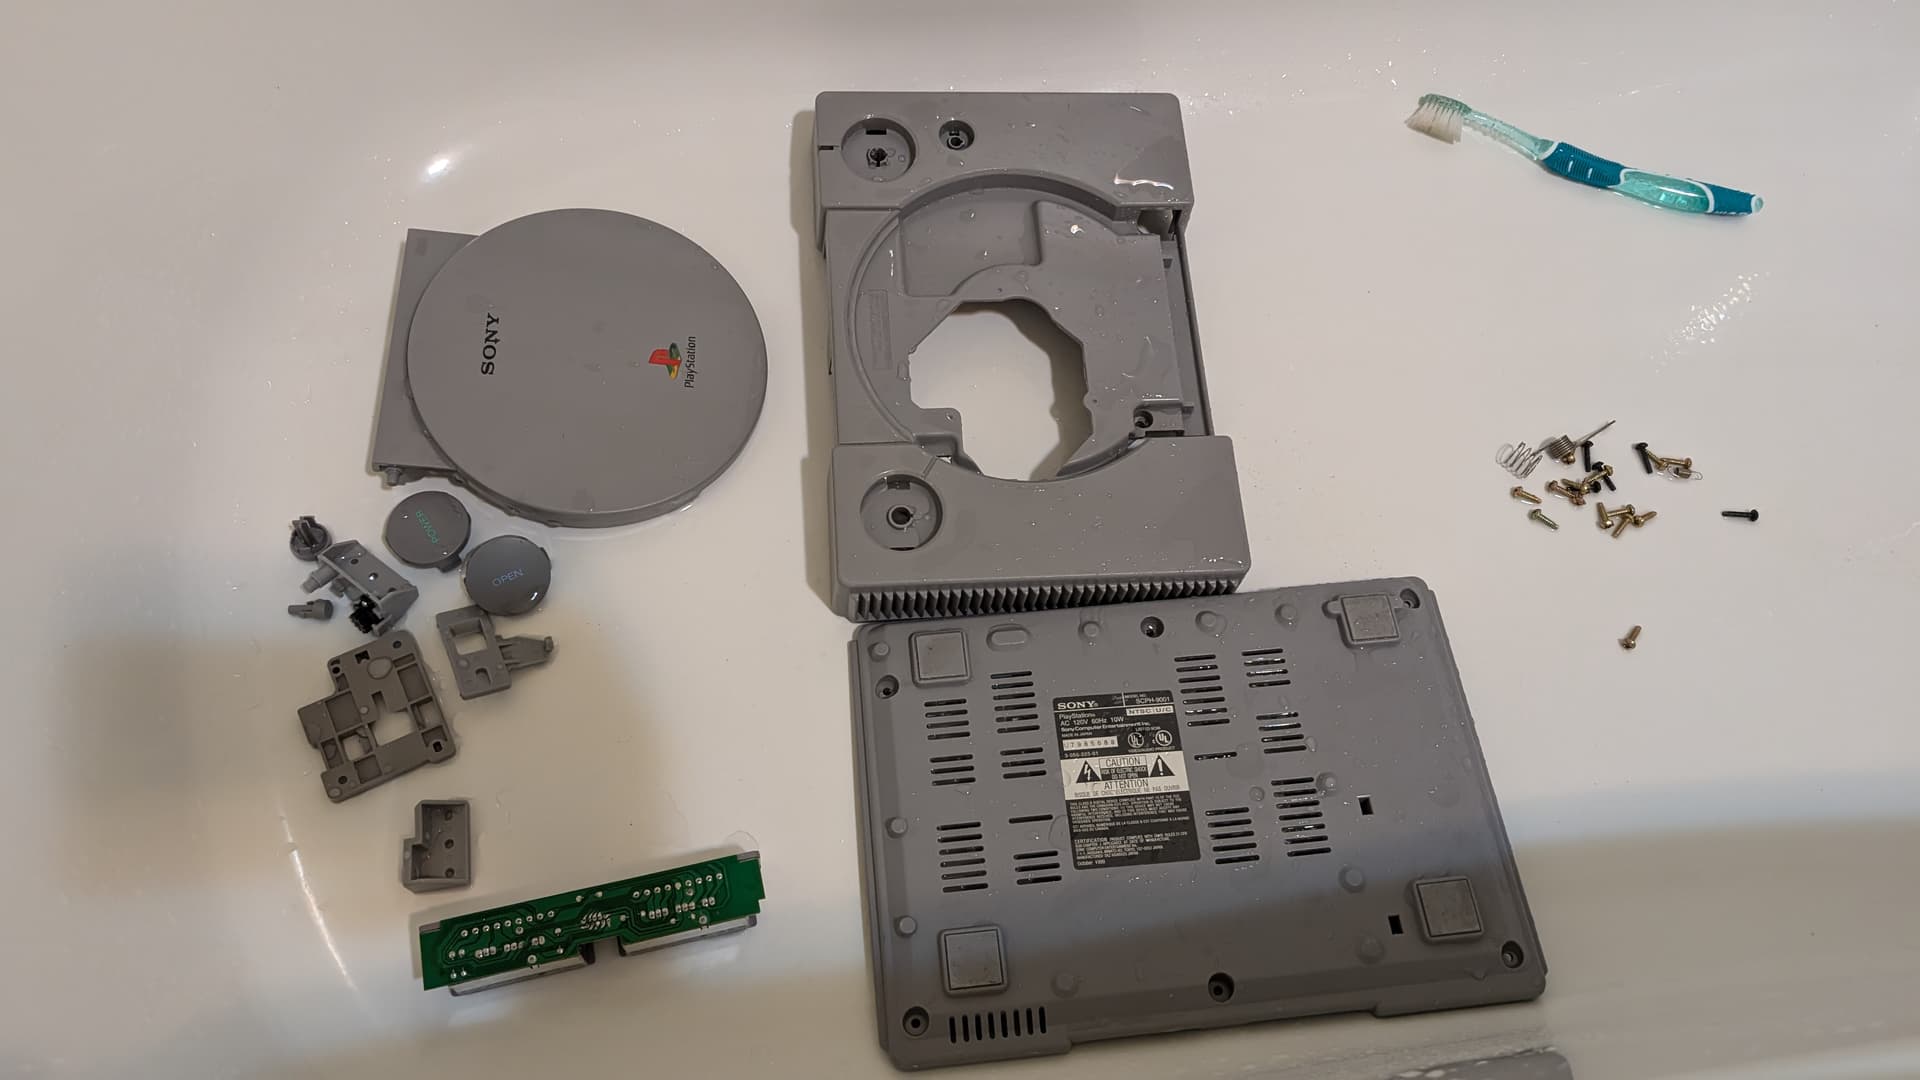
However, after having finished that Gamecube build, I did also ended up building something with the Dreamcast shell and a Deskmini. However, at the end, I didn’t had any use for that PC, and I could not justify keeping it. So I just disassembled it, reassembled the Deskmini, and sold it. At the end I was left with the Dreamcast shell.

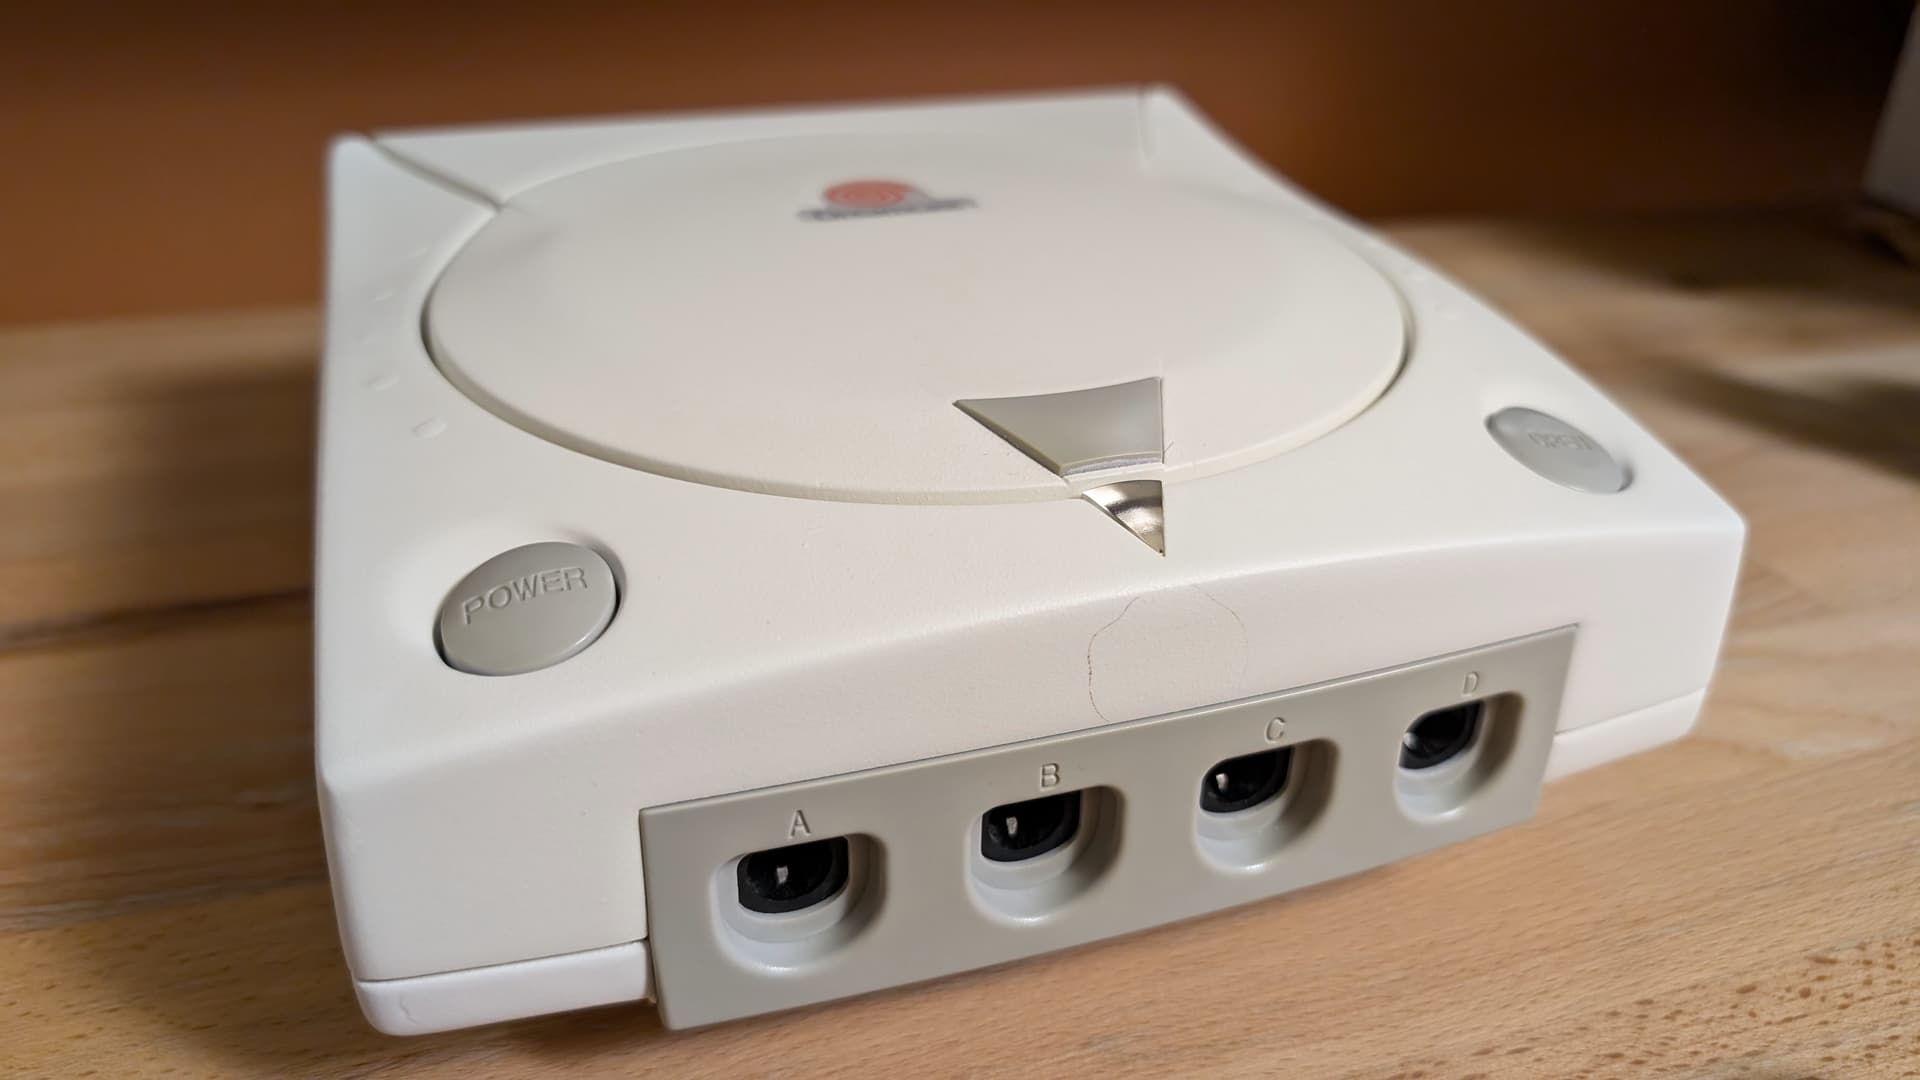
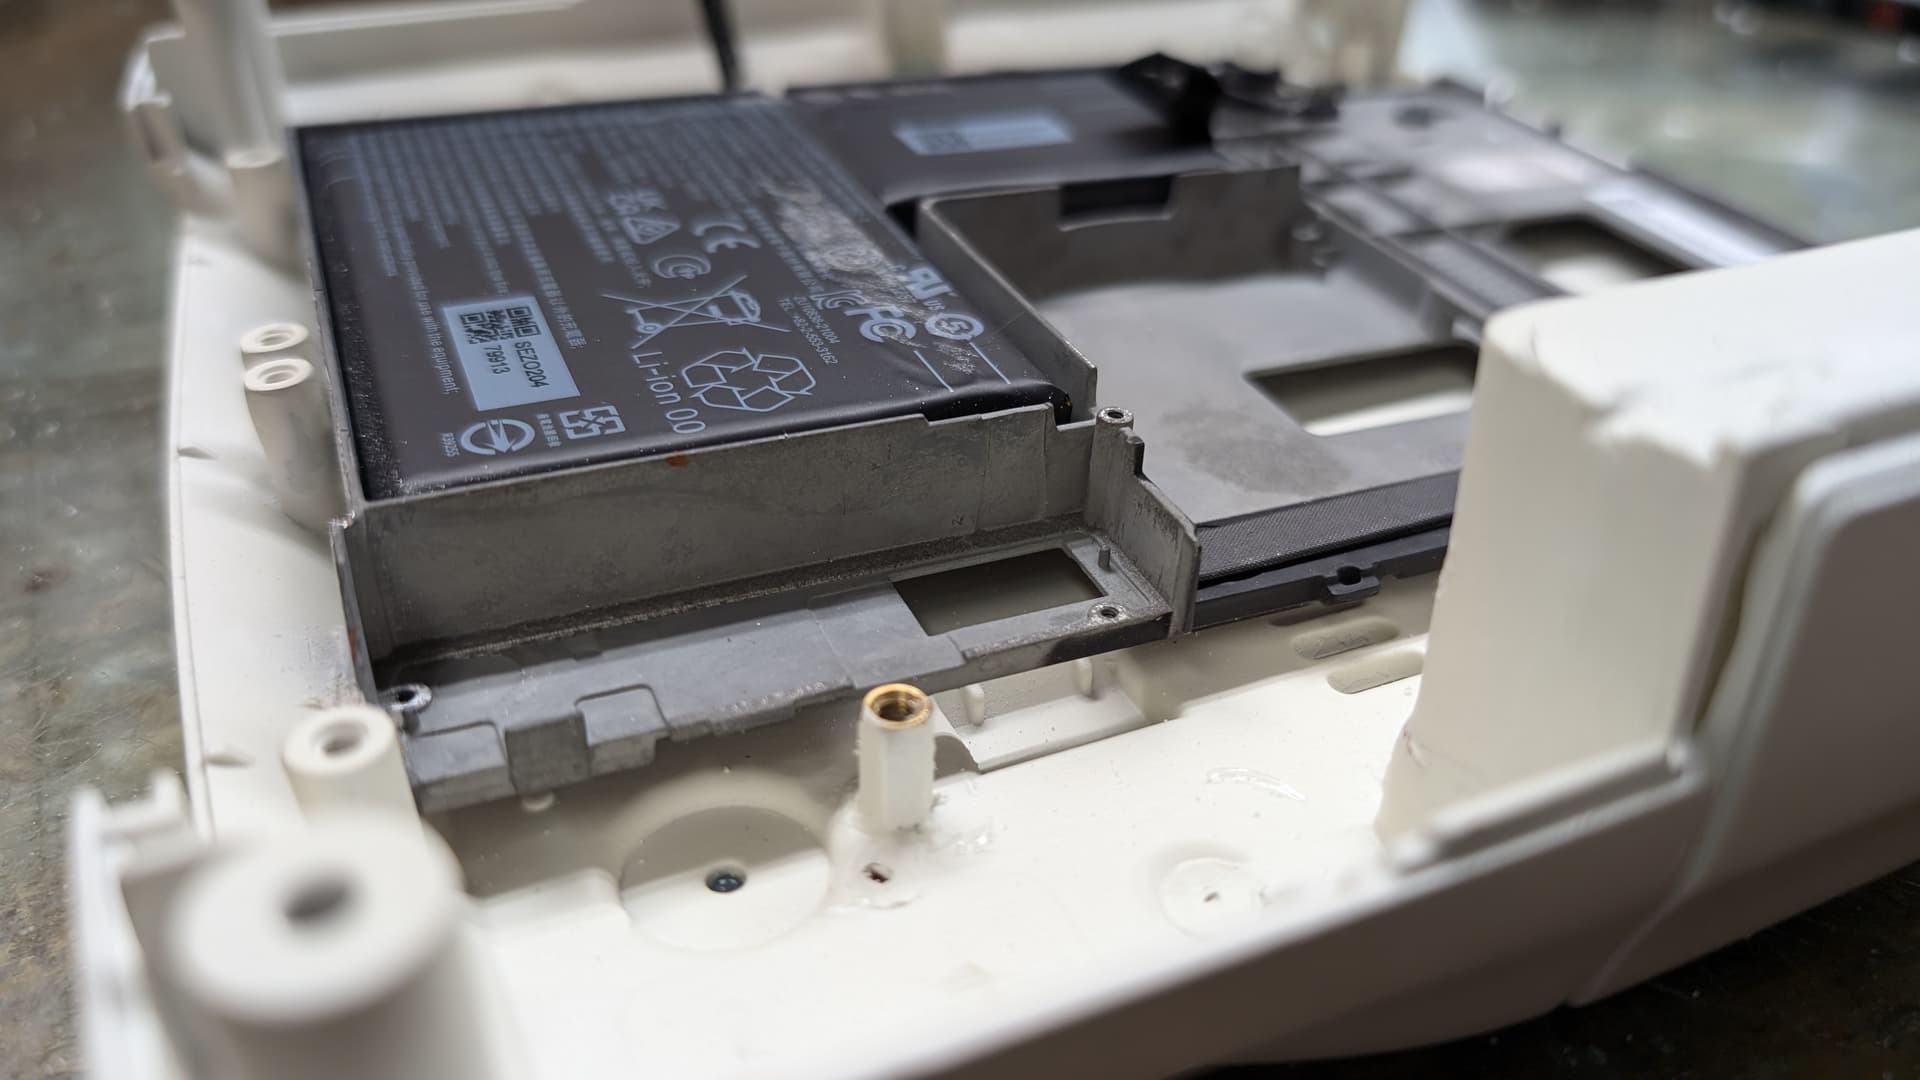
Having that Dreamcast shell in storage did made me want to do something again with it. In part to get rid of it, in part because I like those console builds. However, I cannot spent that much on a mini PC too put inside. I am building with my own money. If I go with an expensive mini PC, it might be difficult be to sell the build after. However, cheap mini PCs, in the 200-300$ range, often are not that good in performance, having 4-5 years old processors.

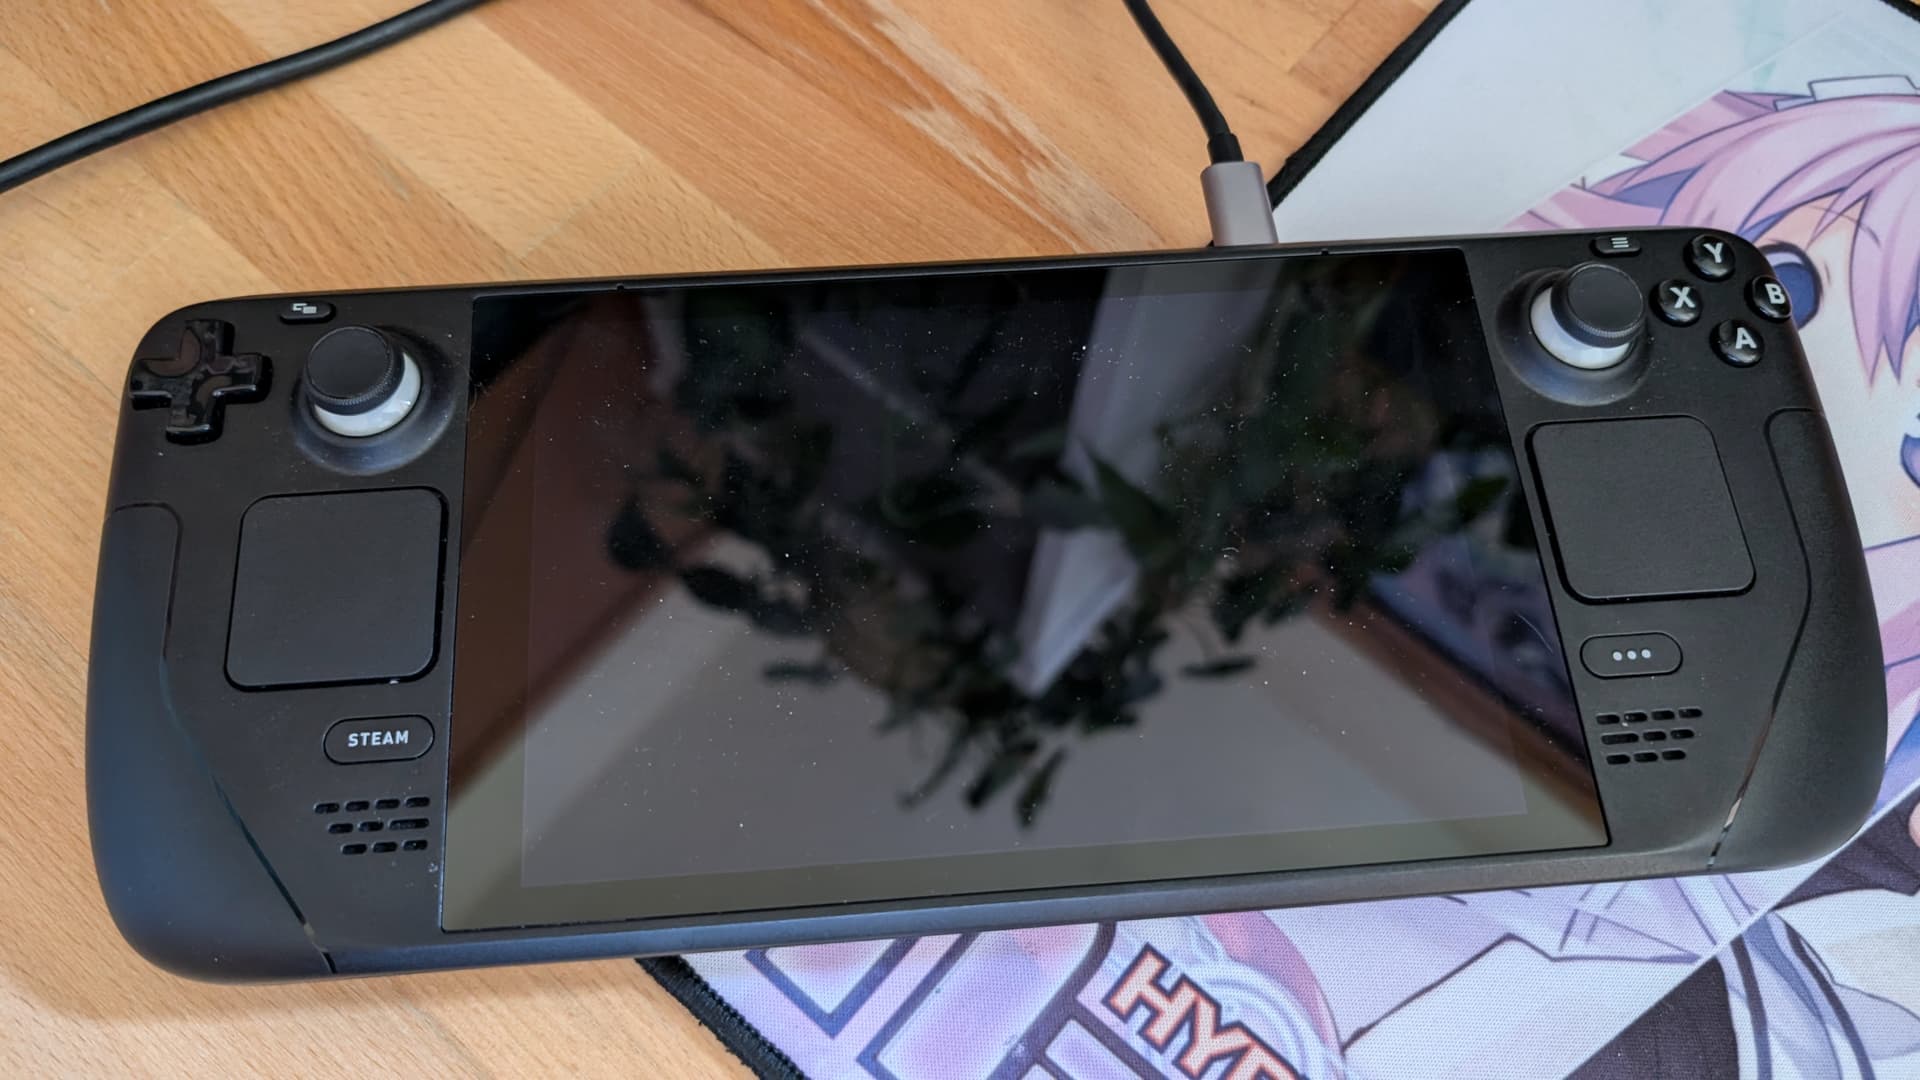
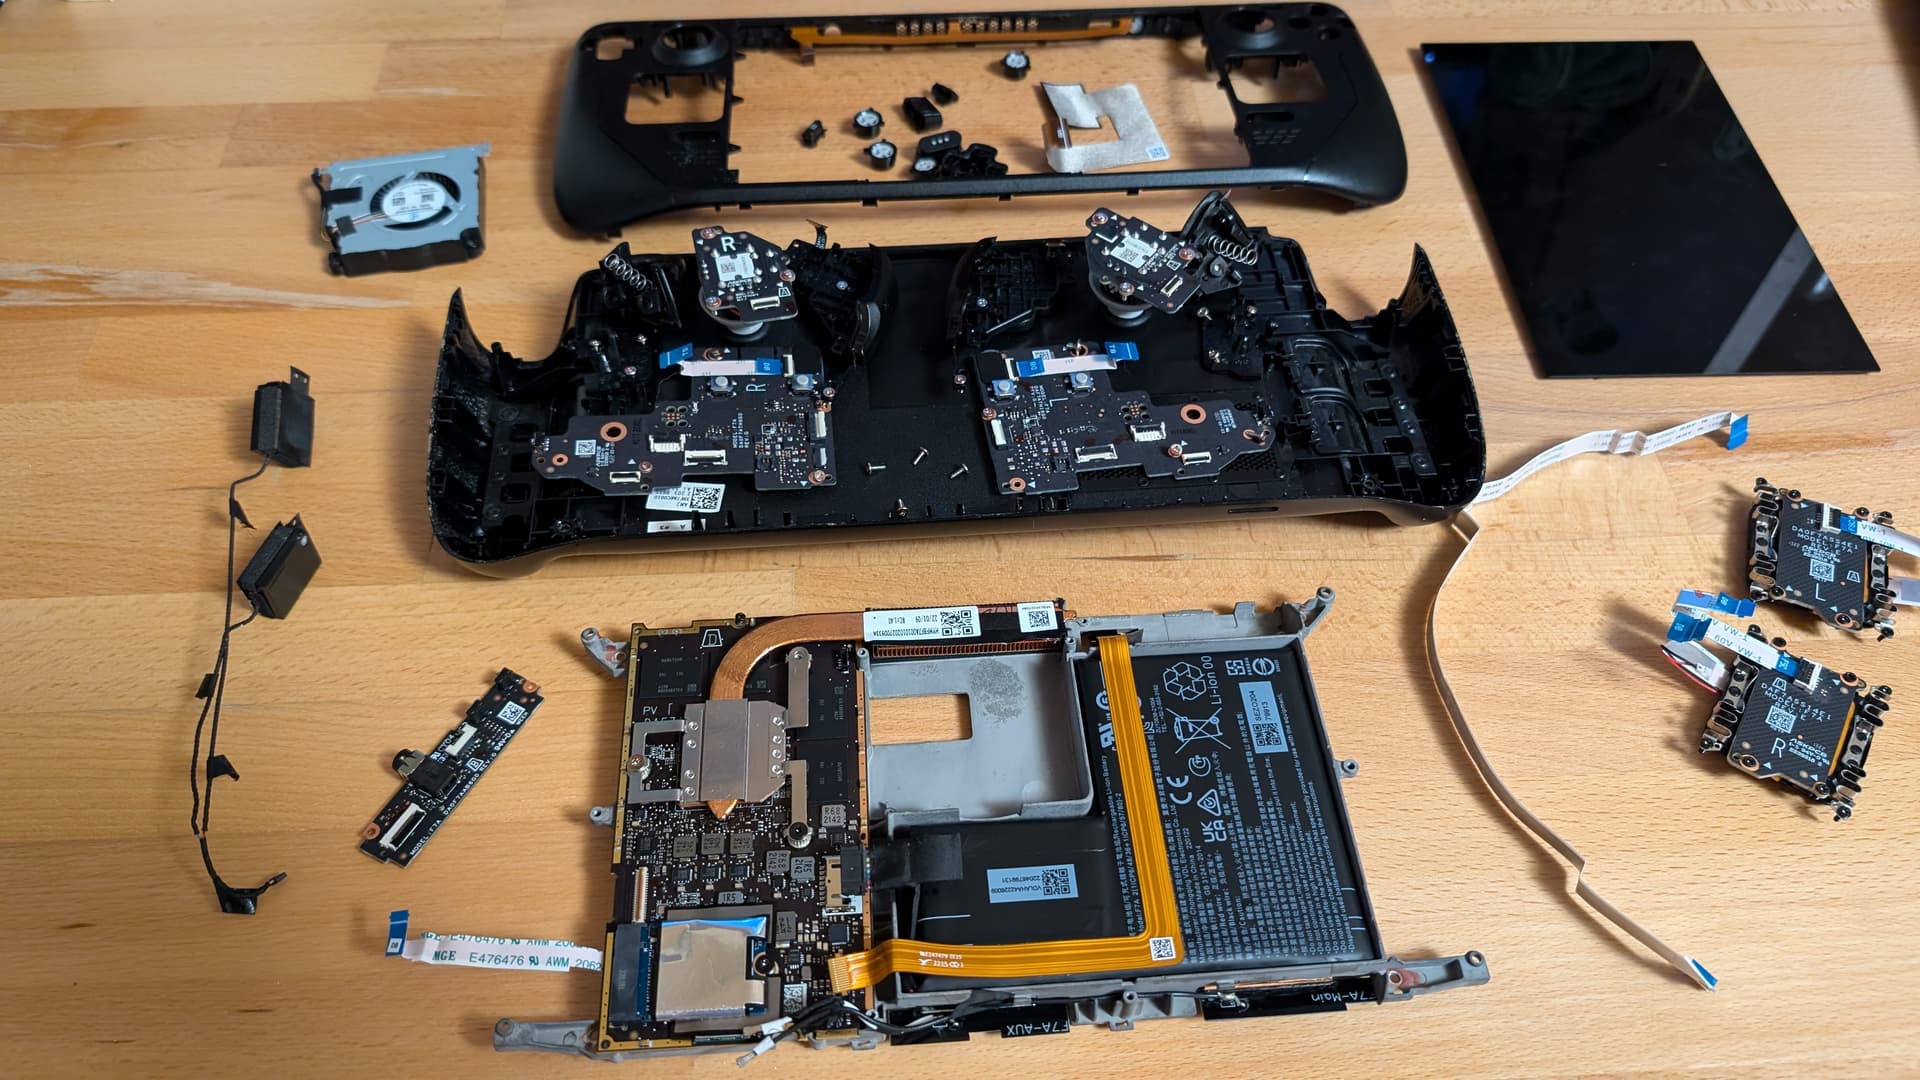
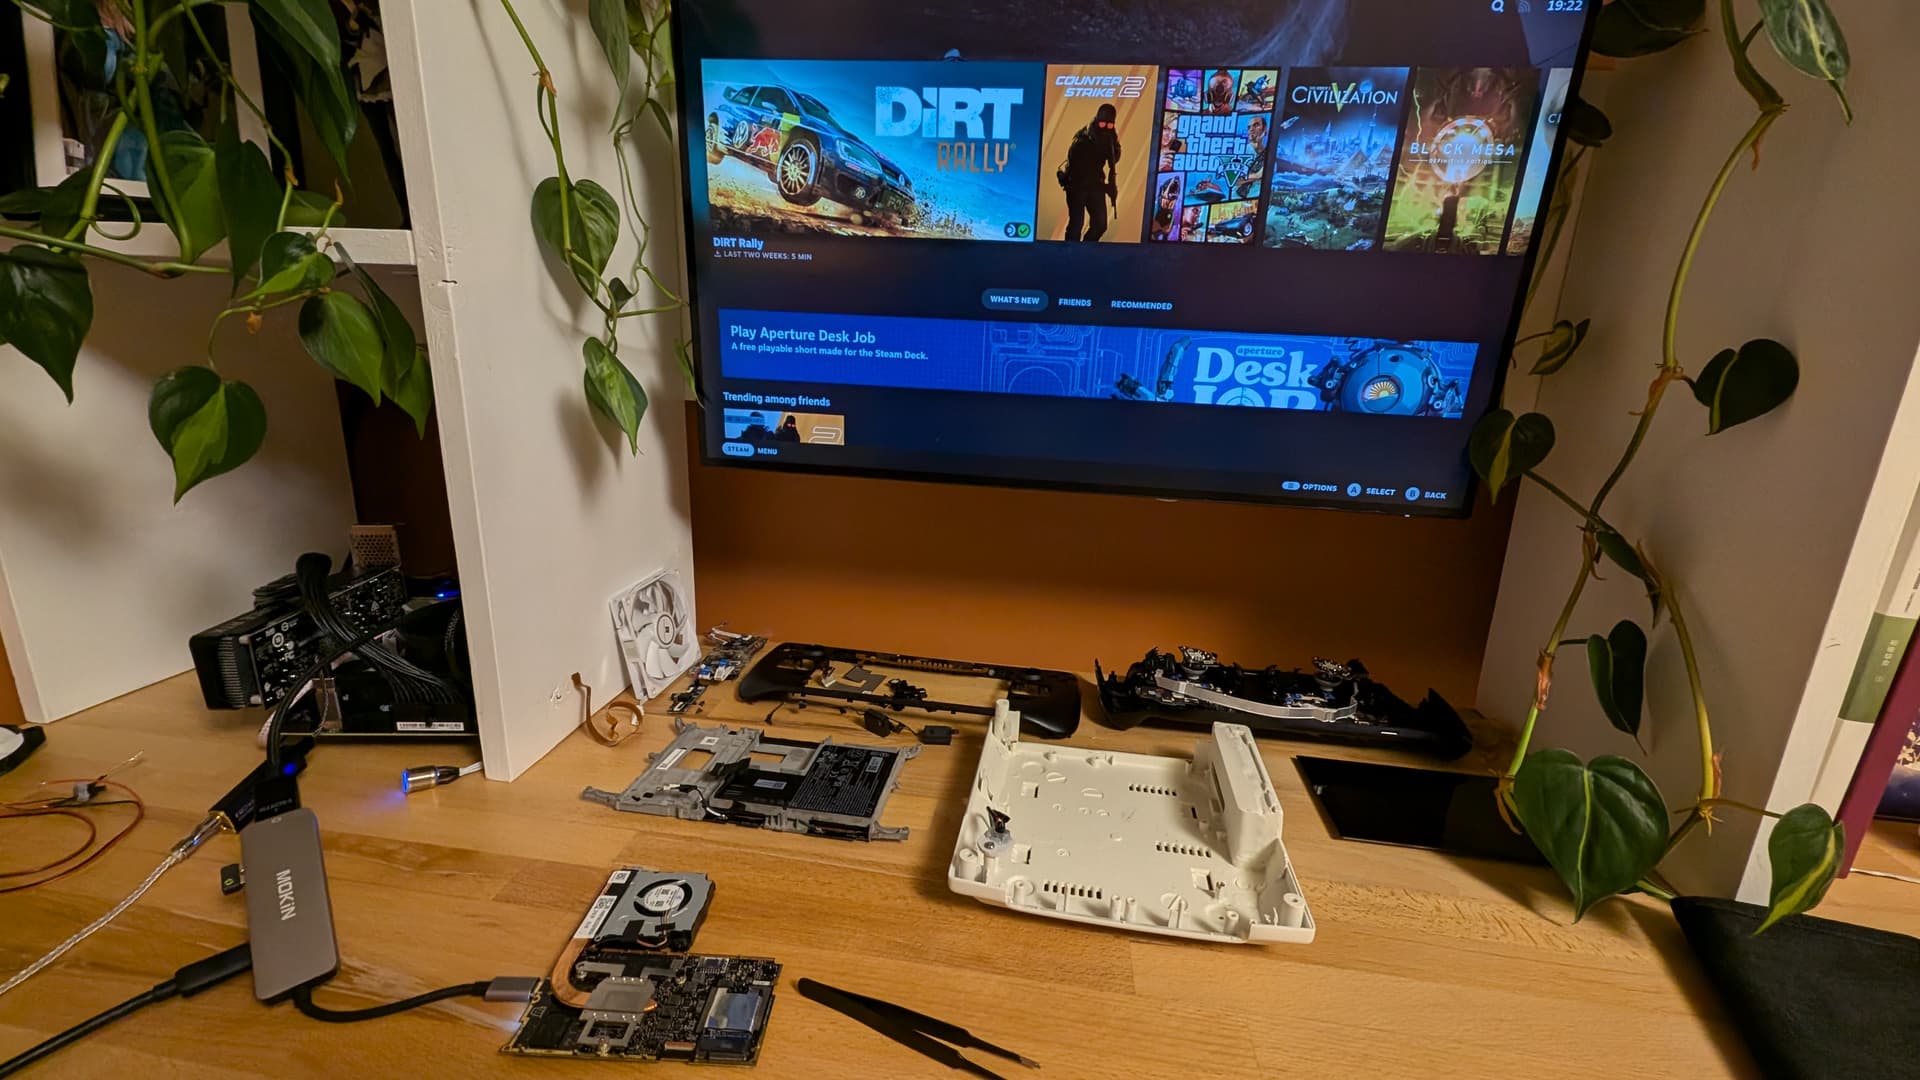
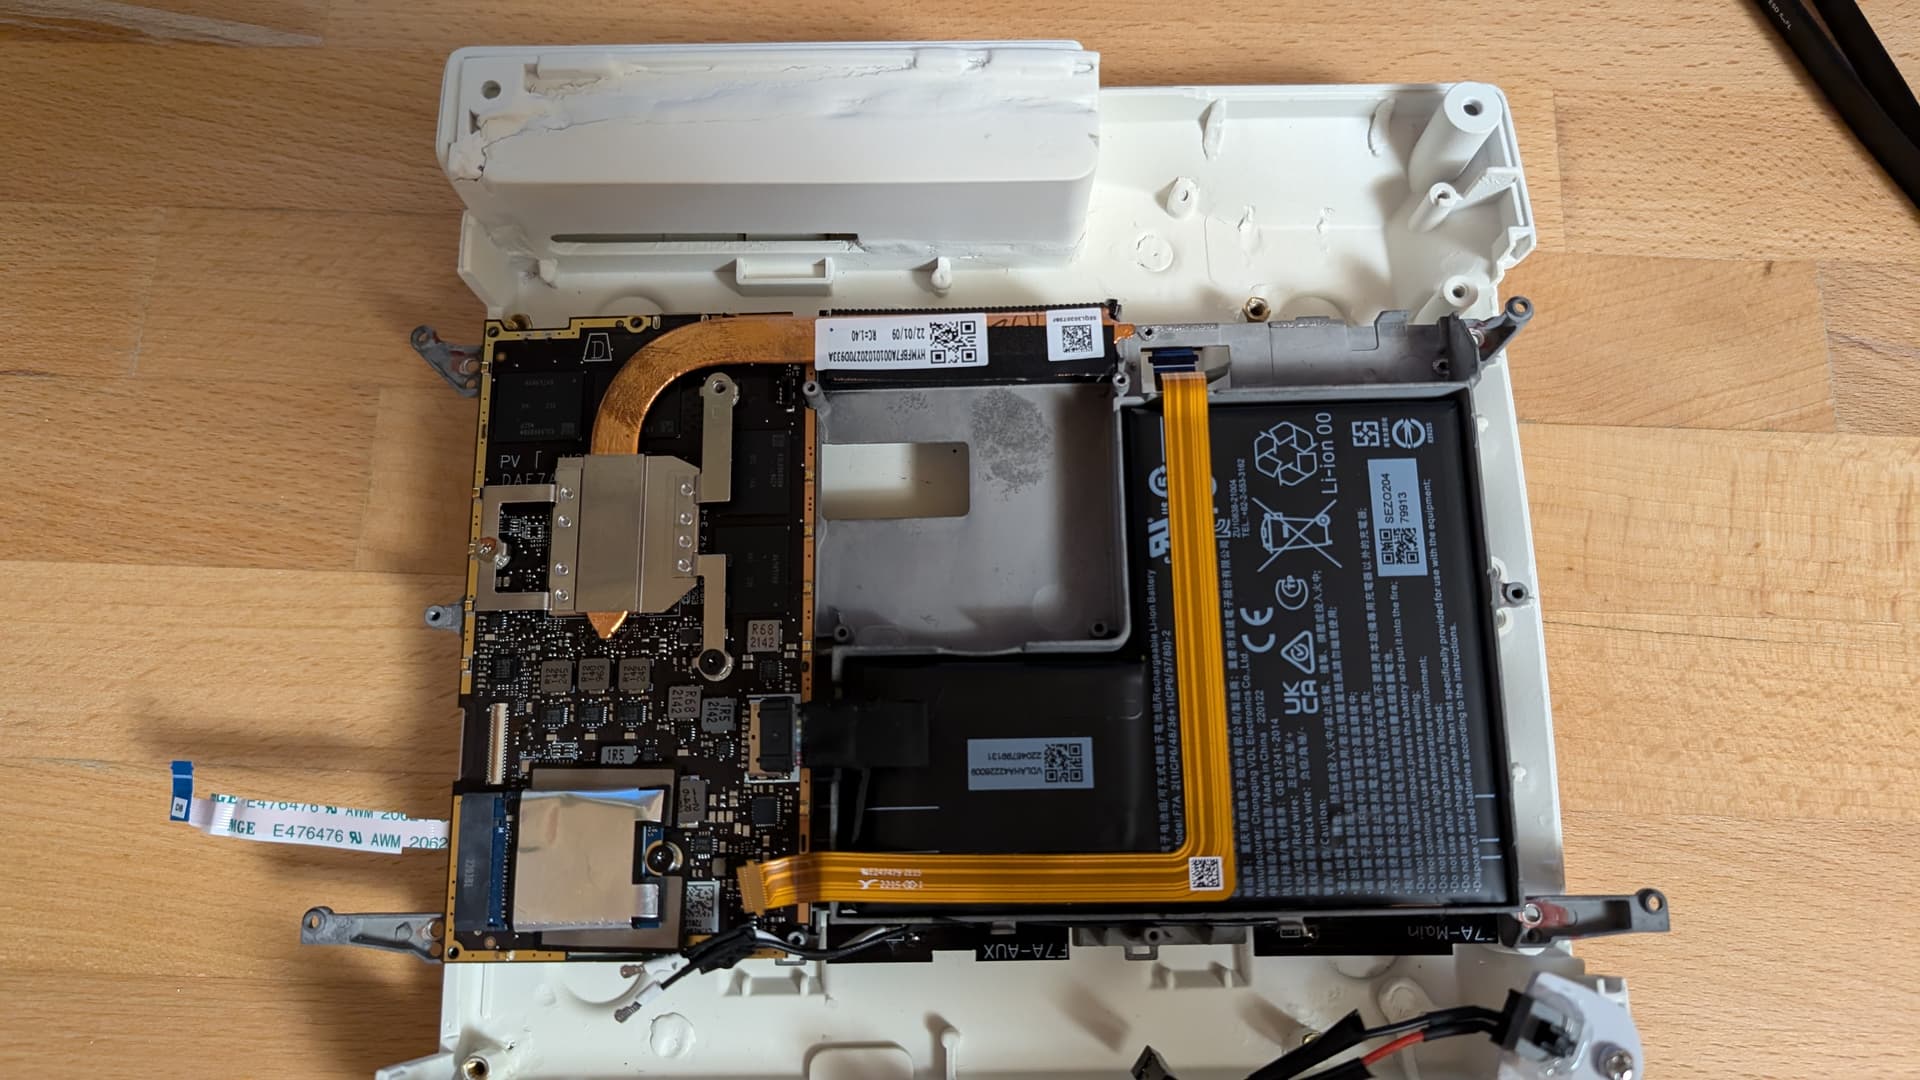
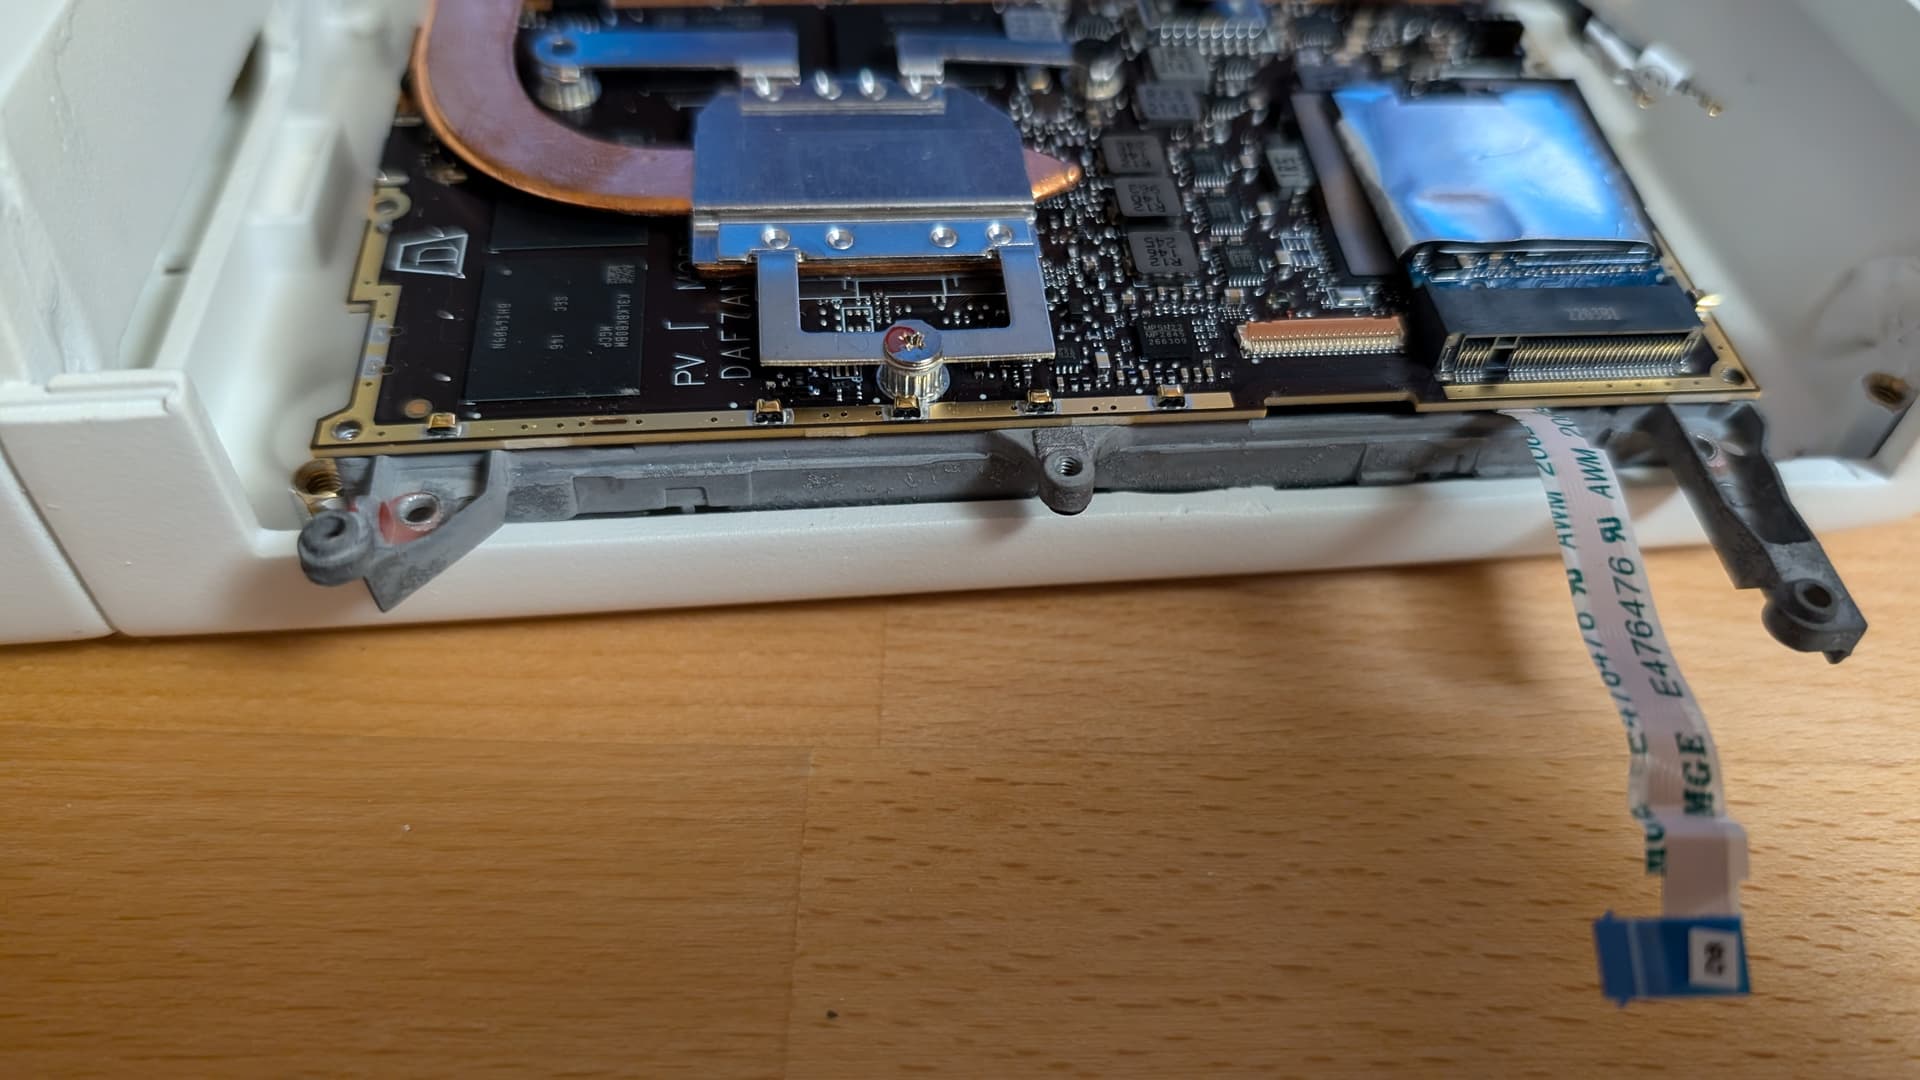
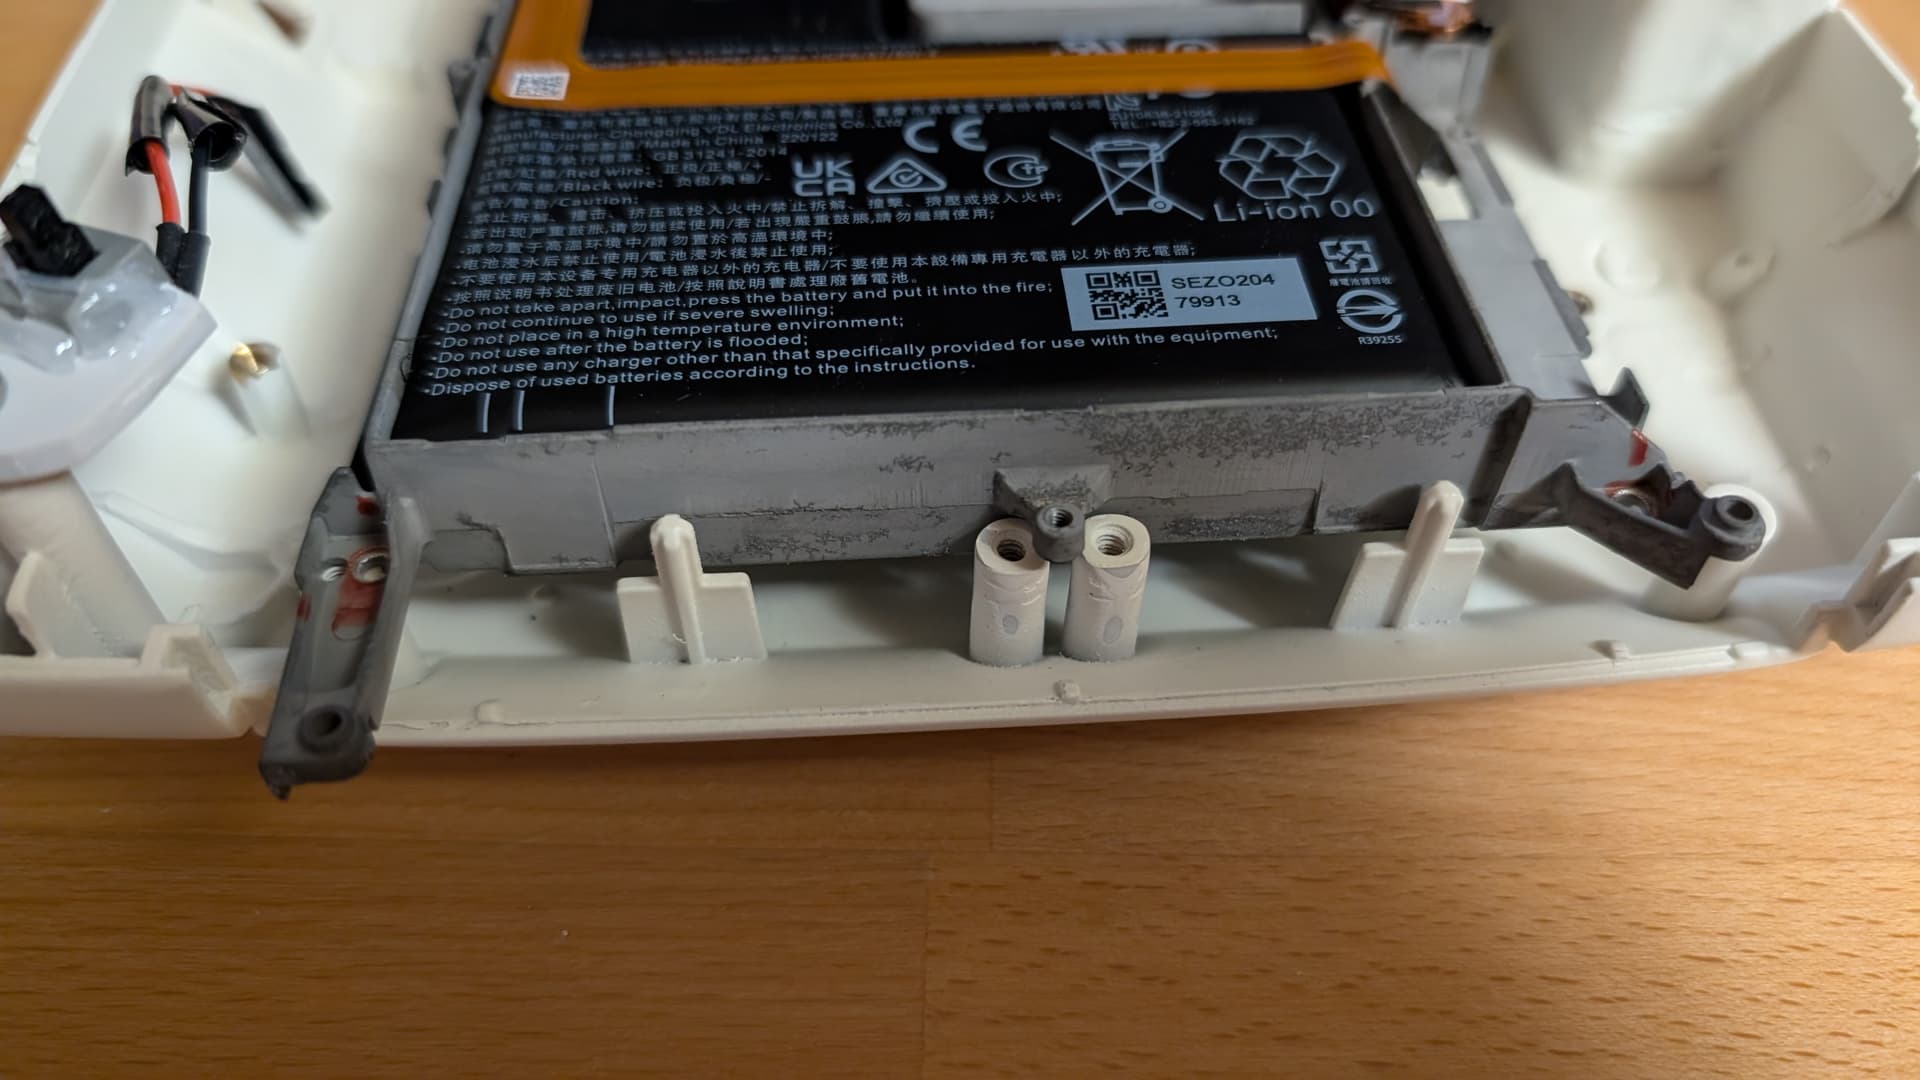
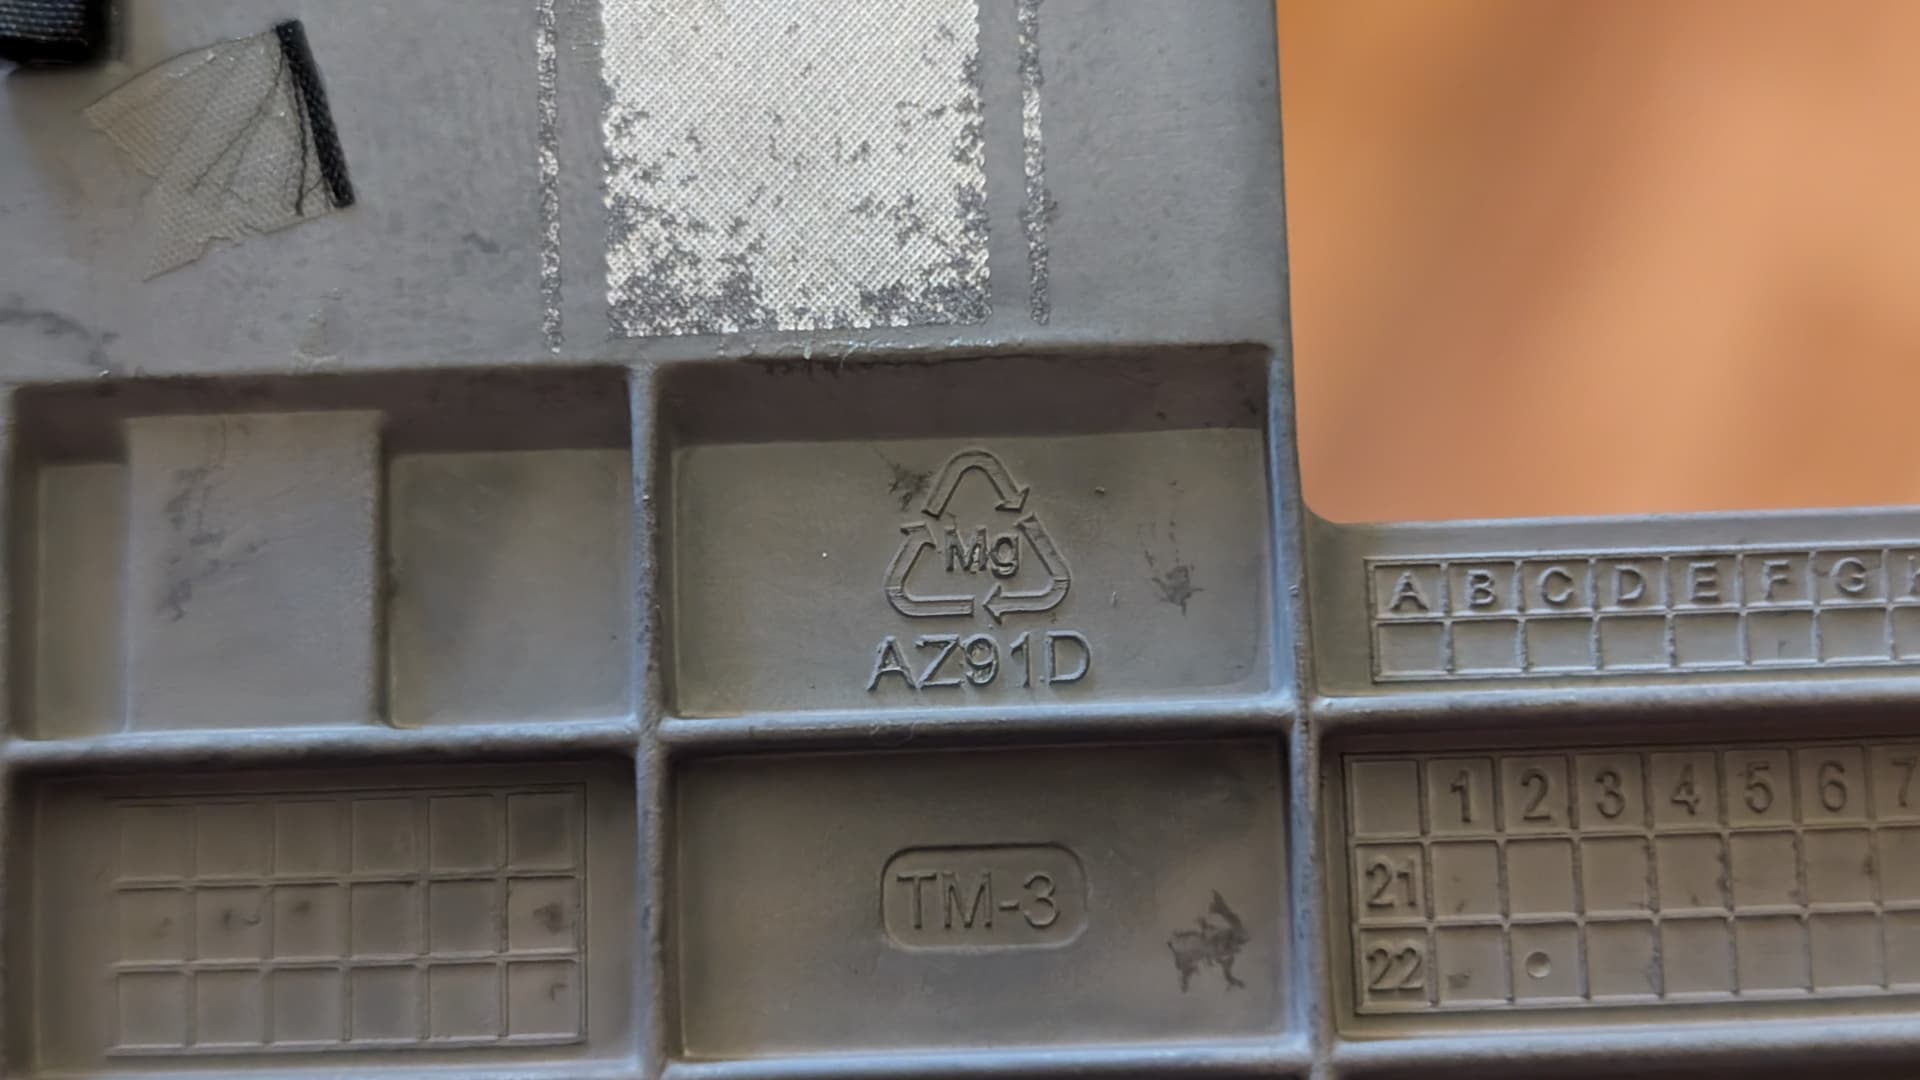
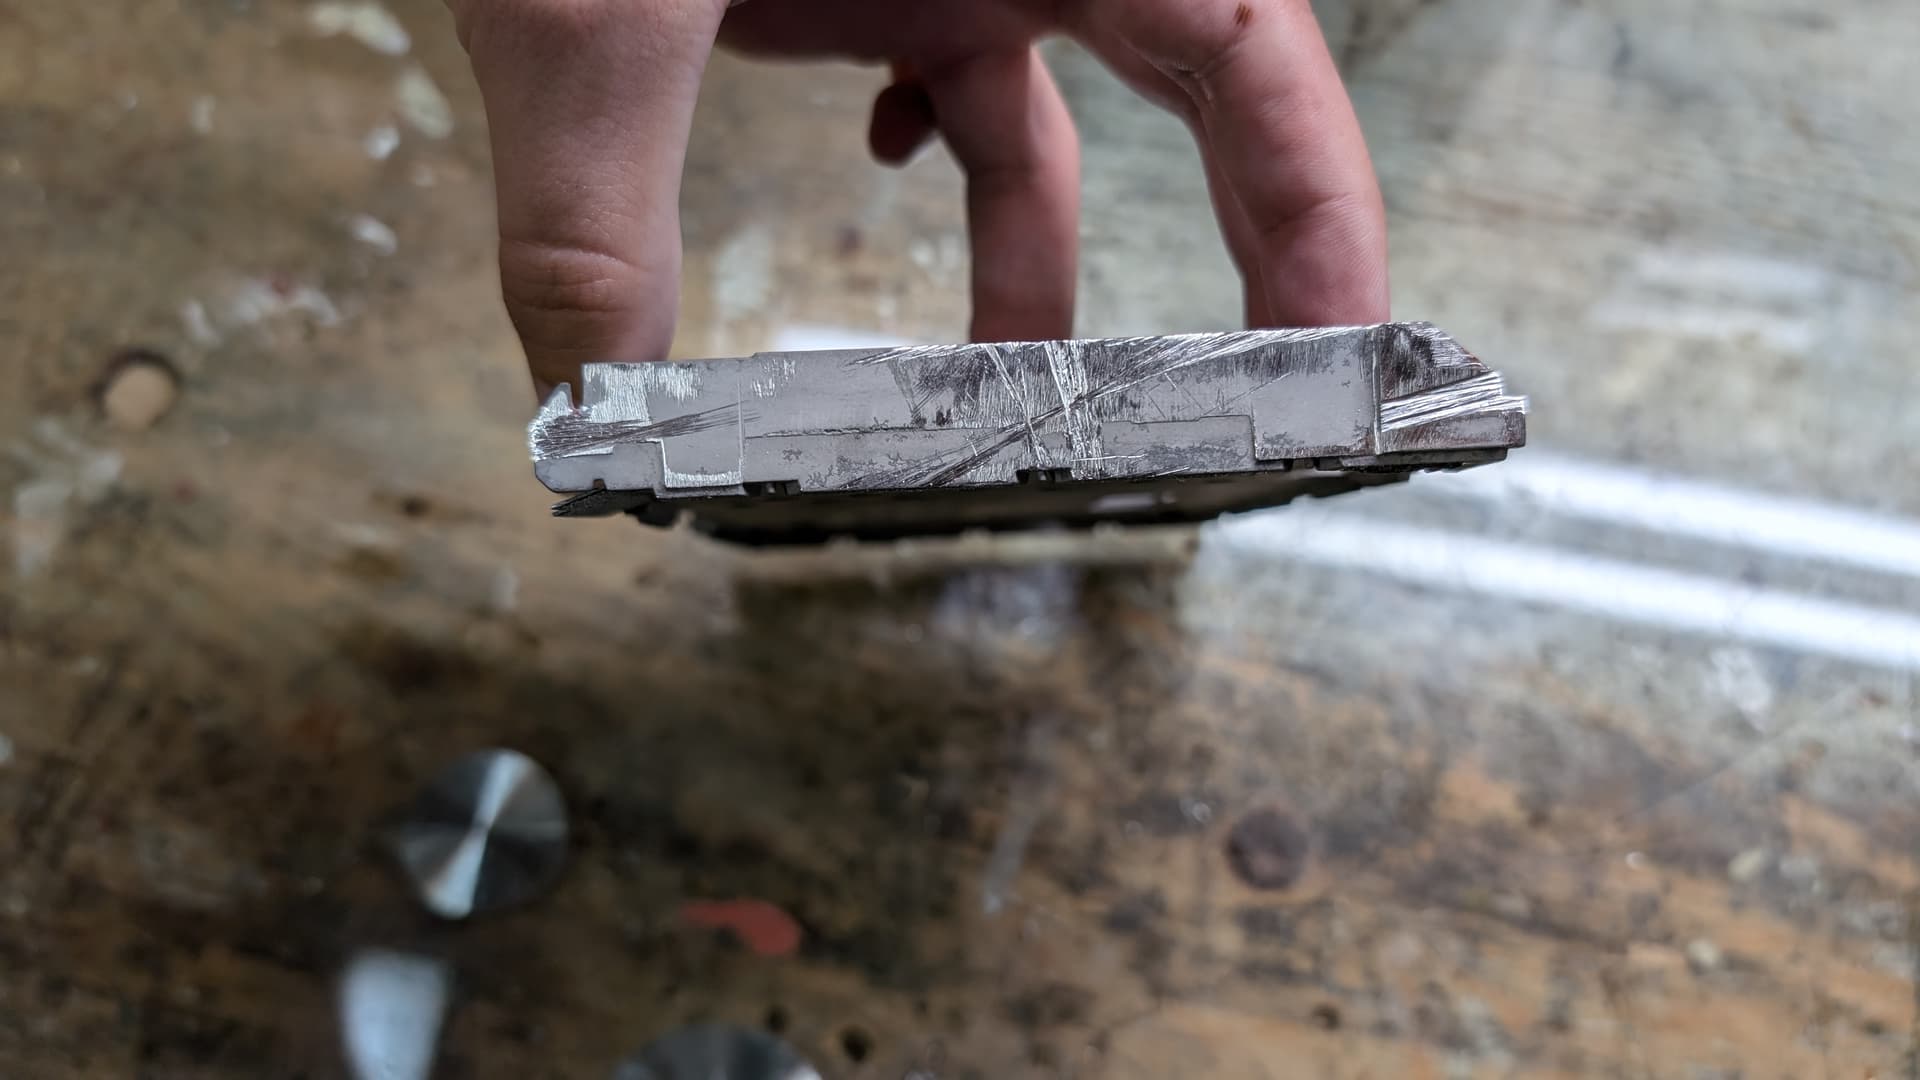
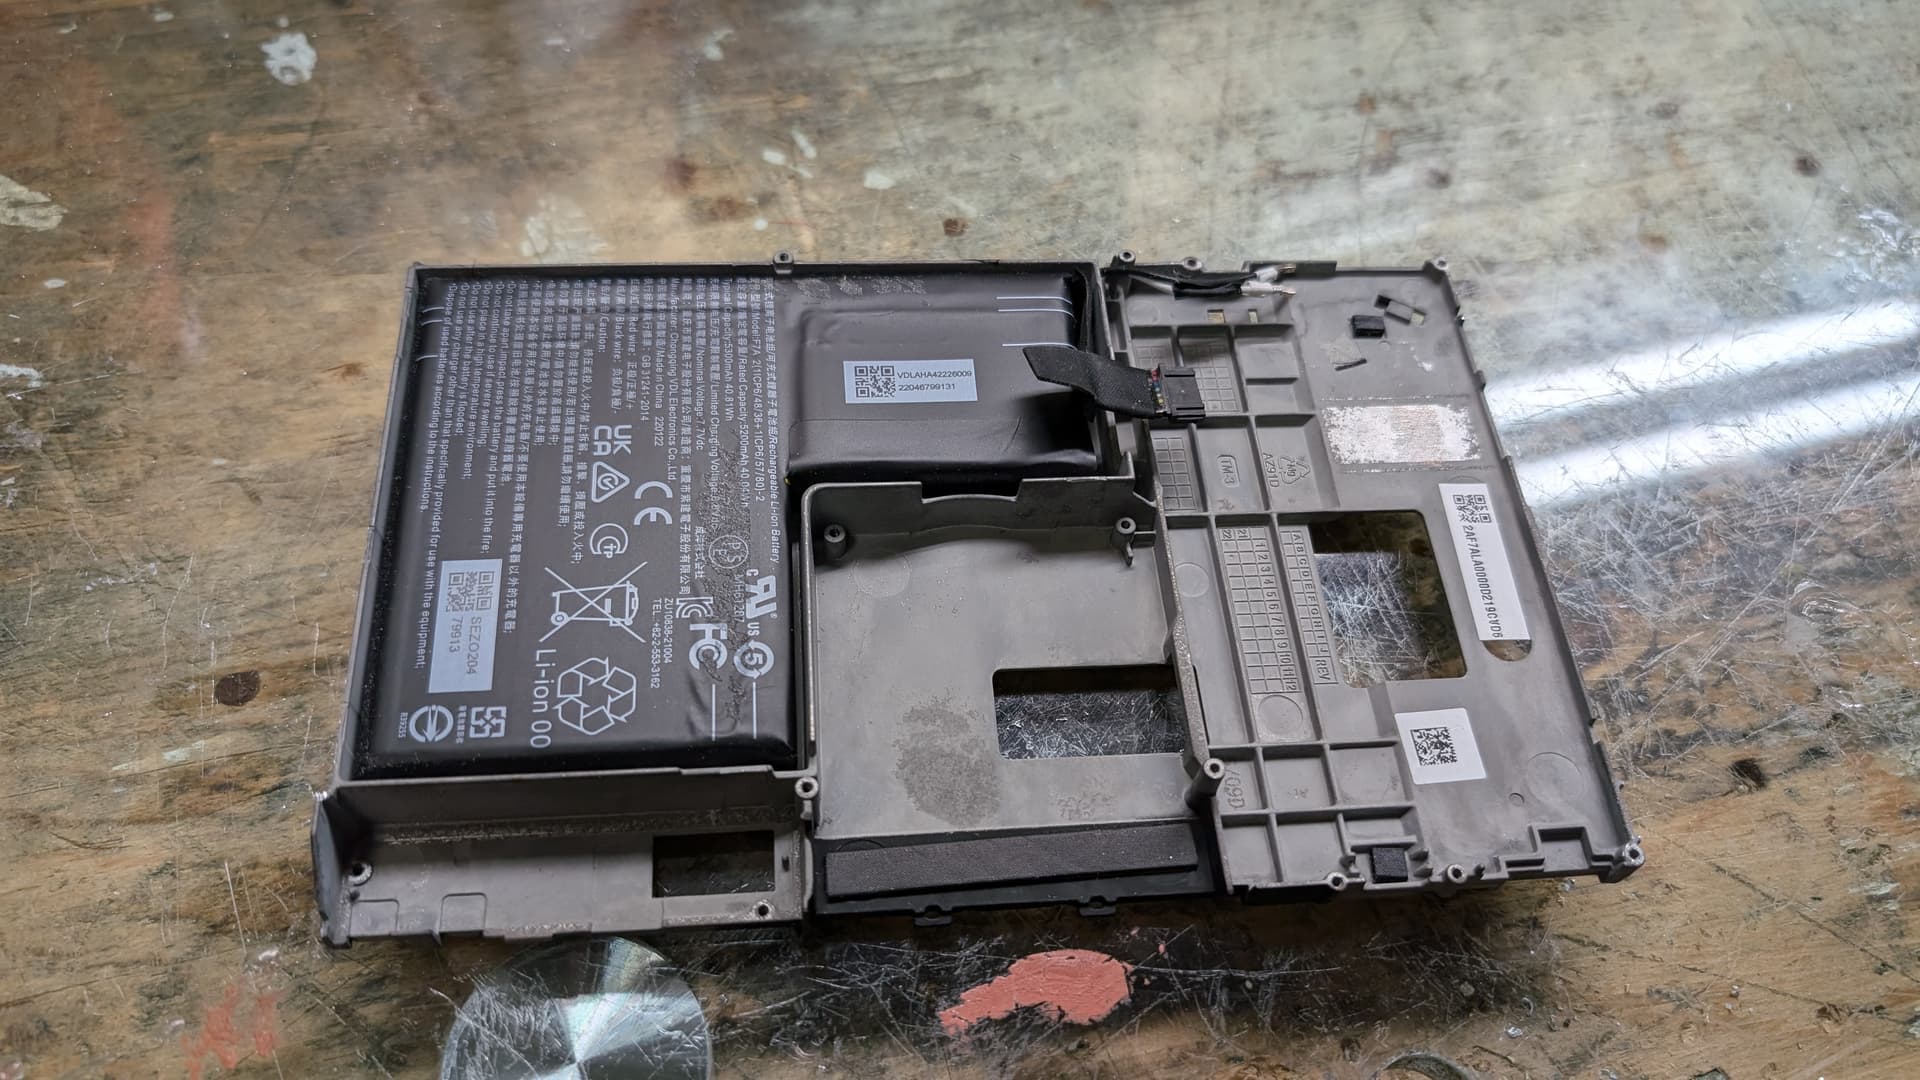
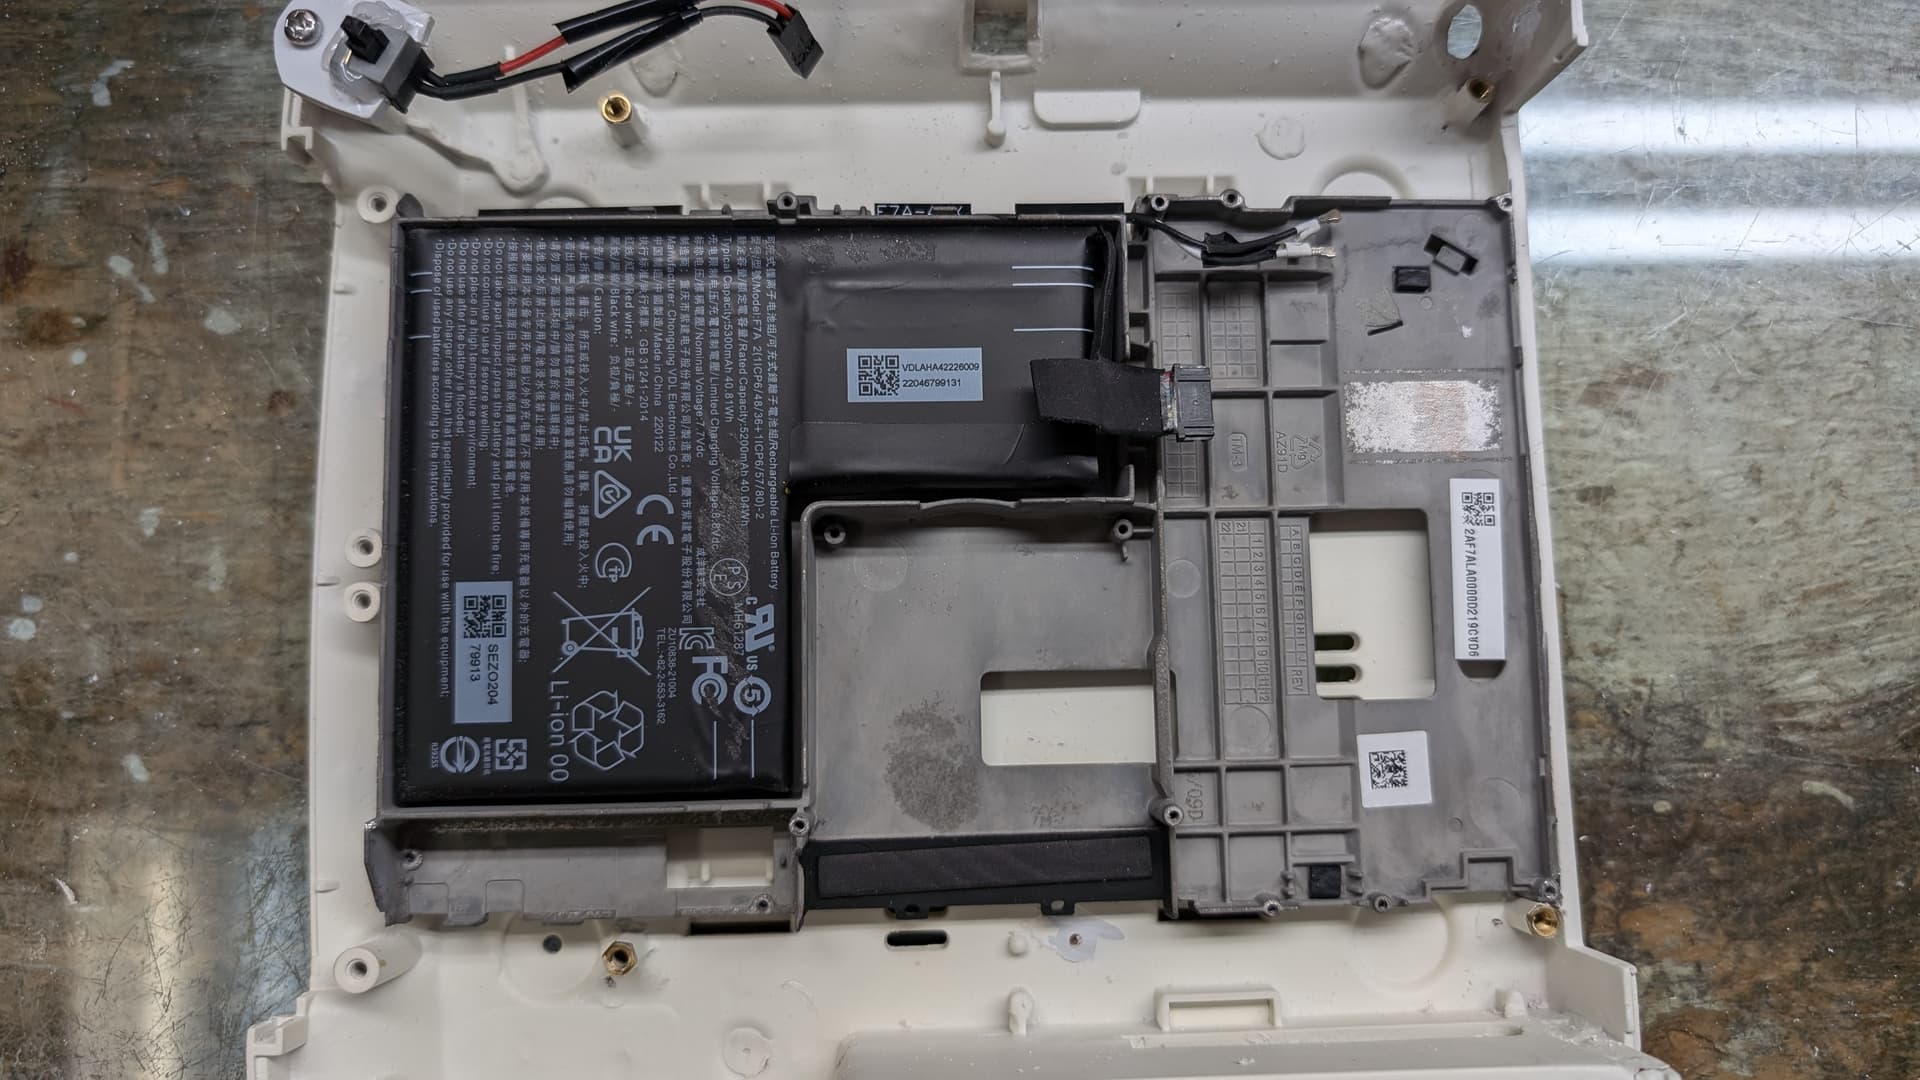
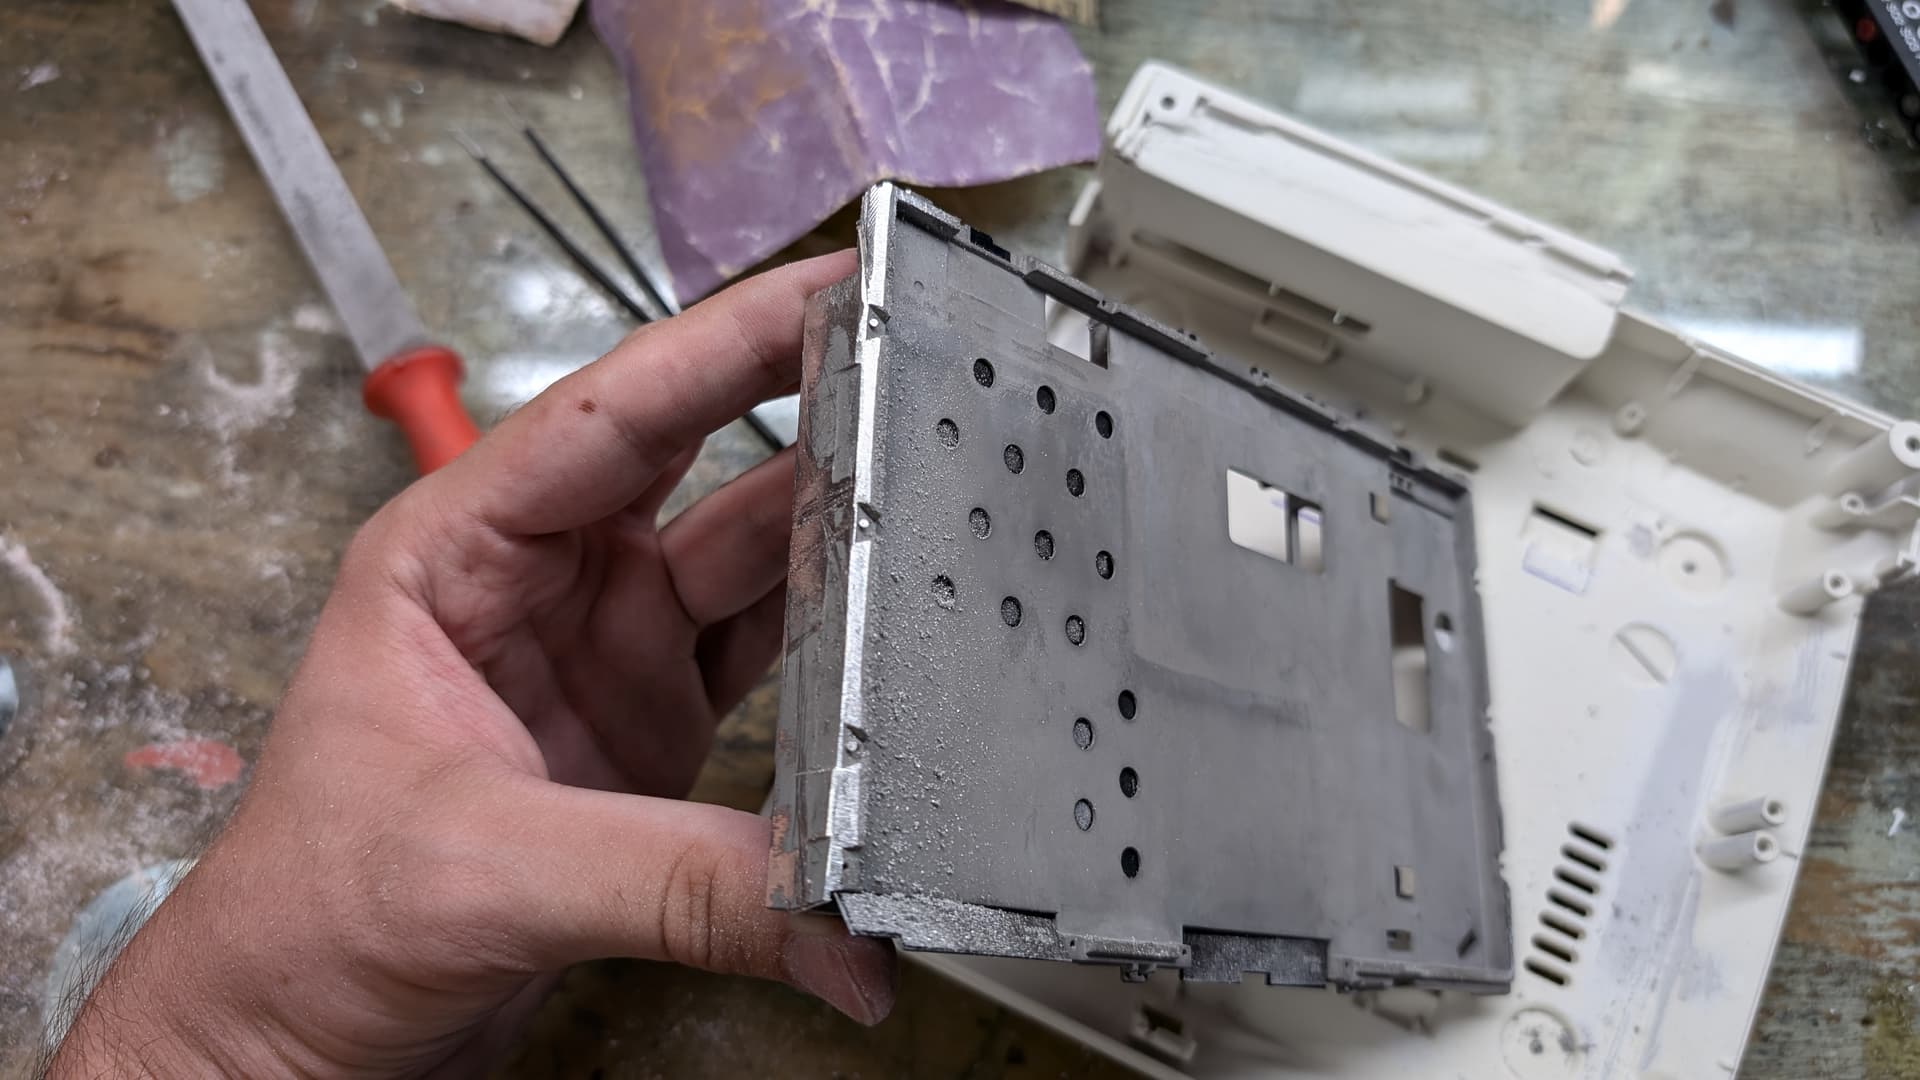
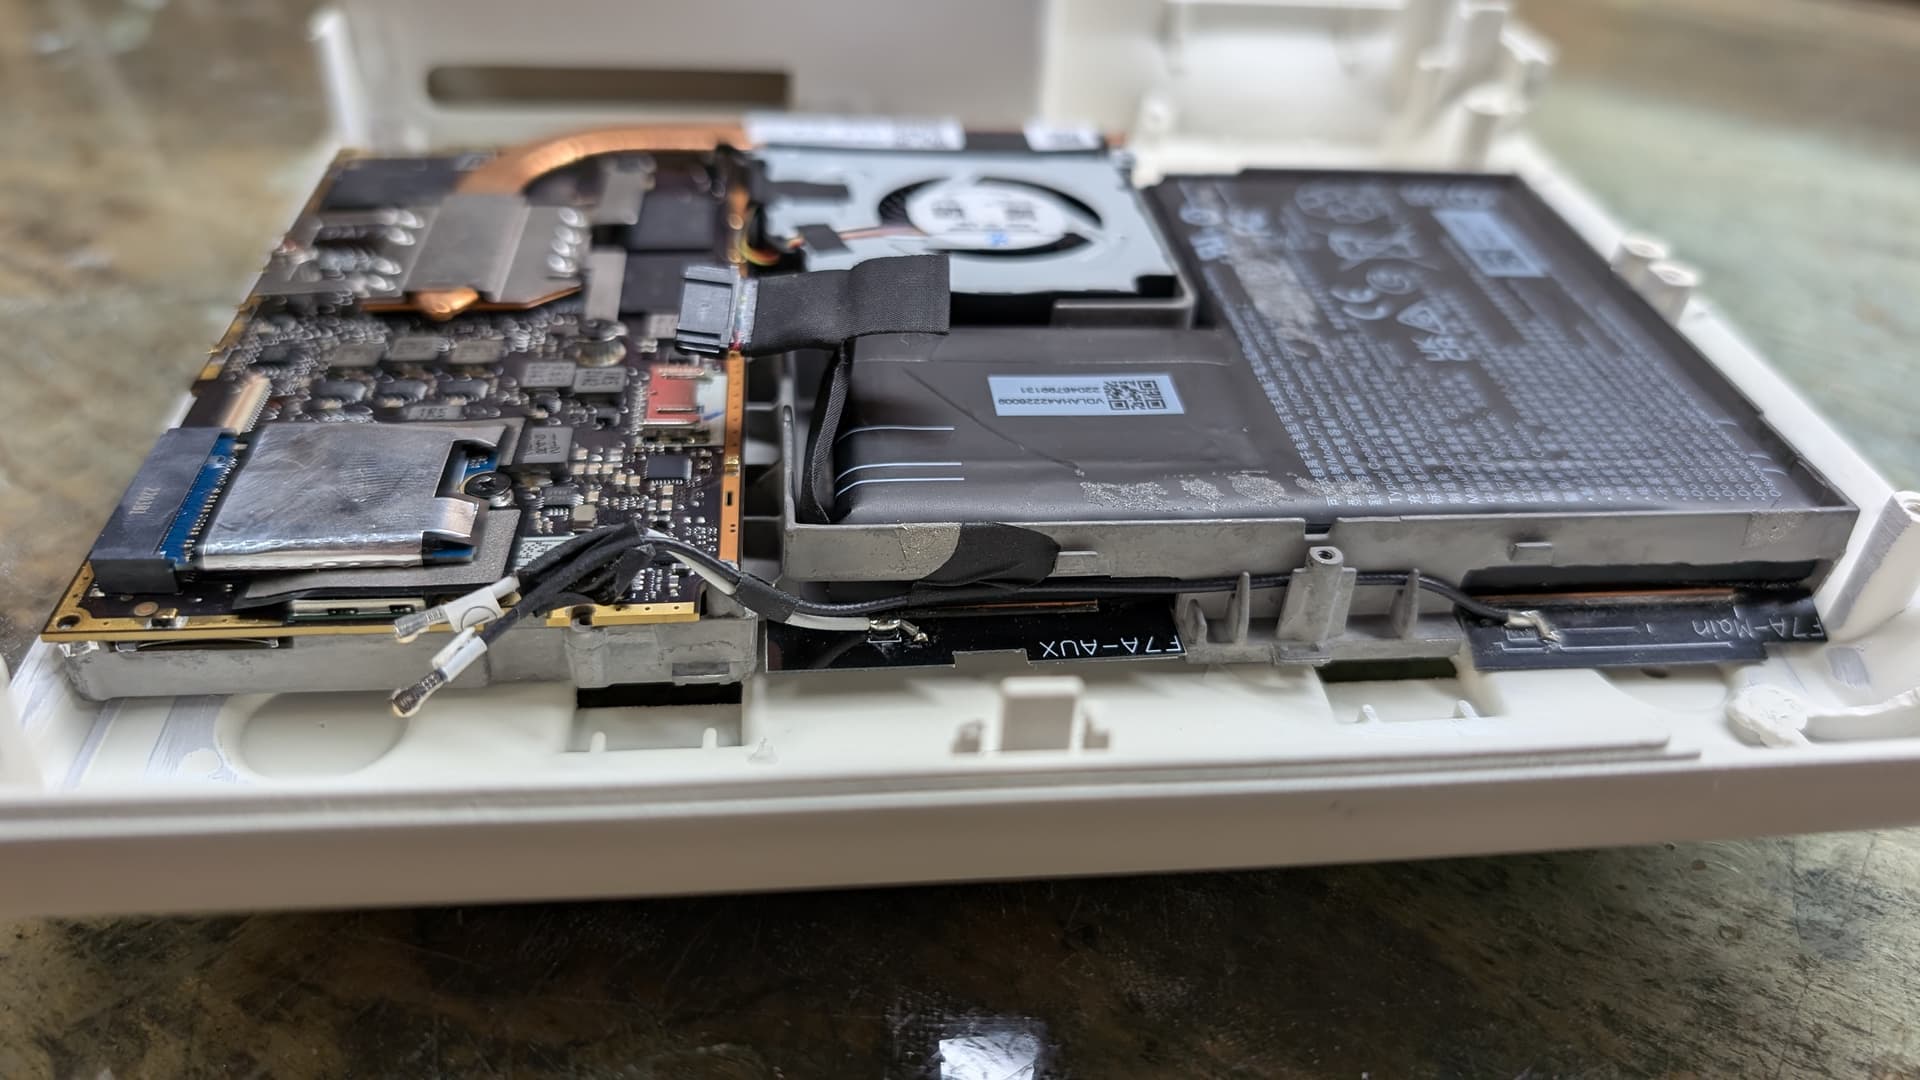
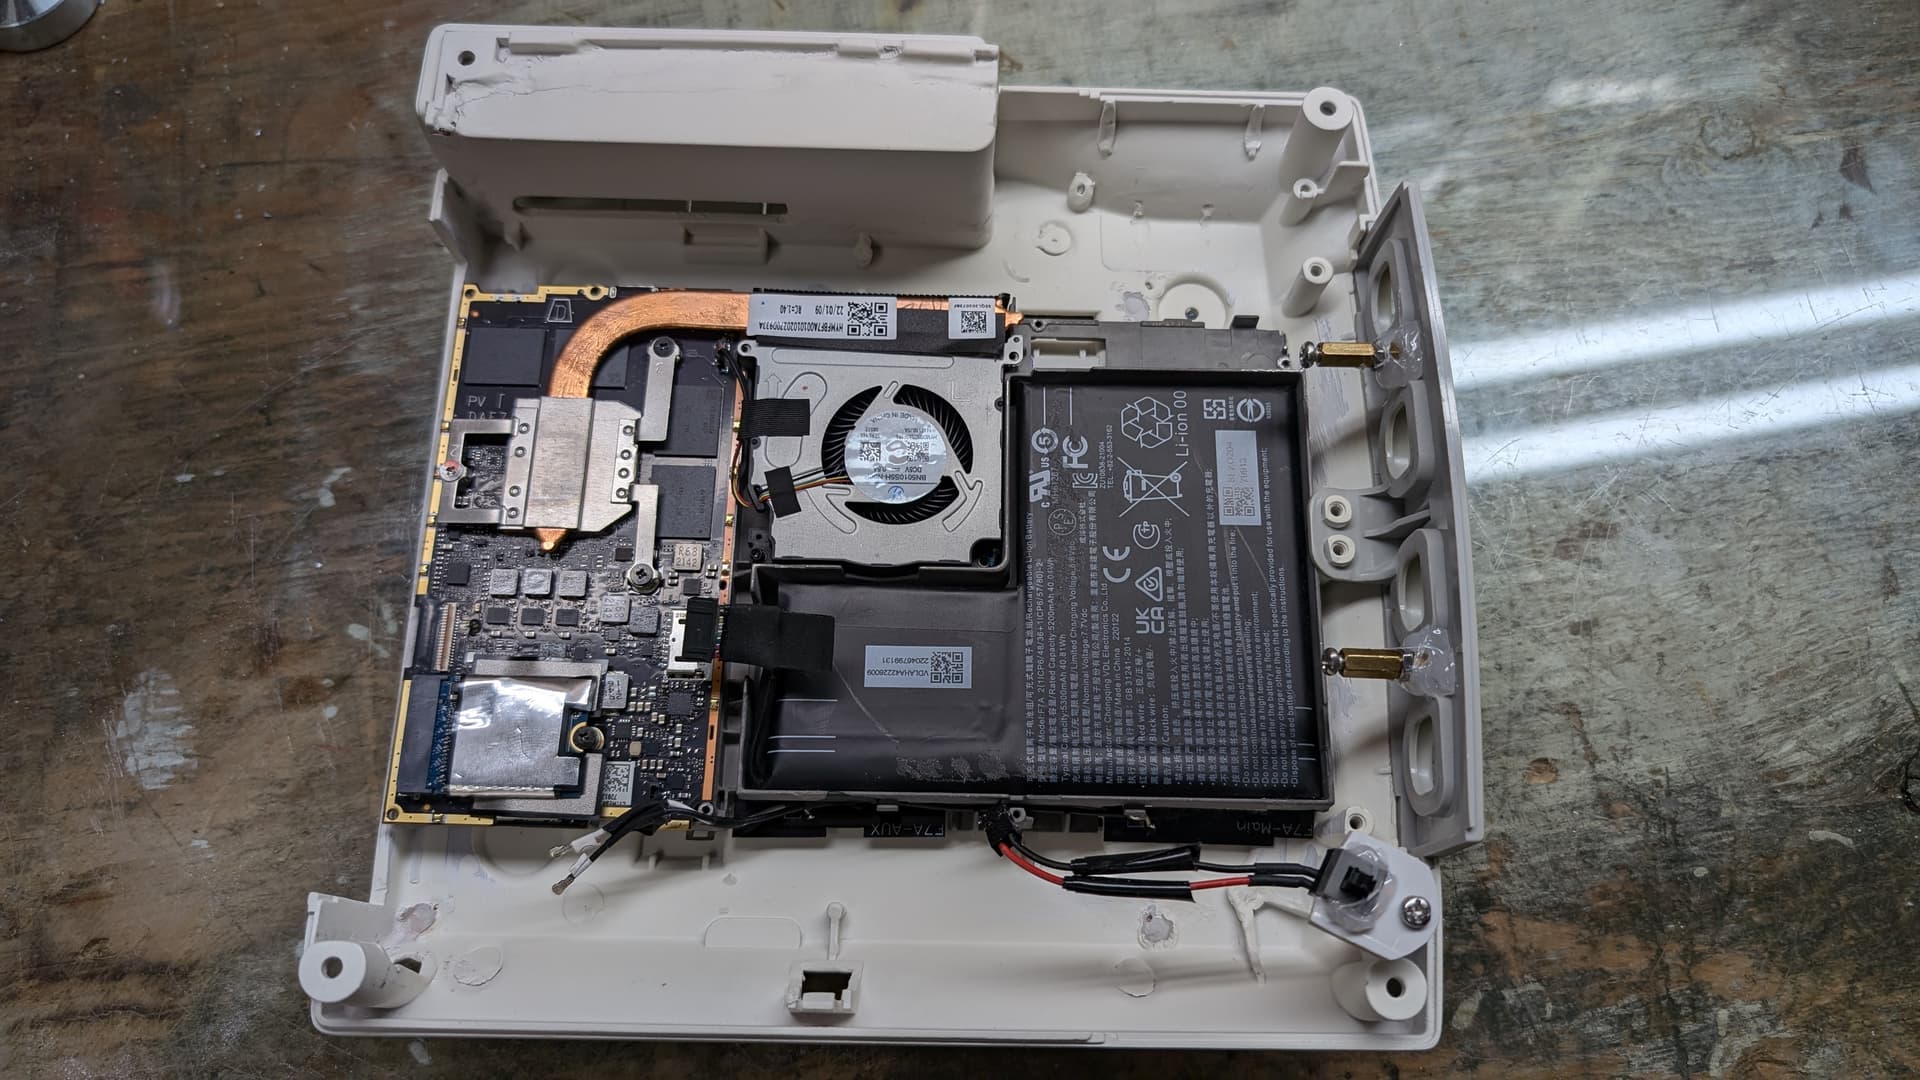
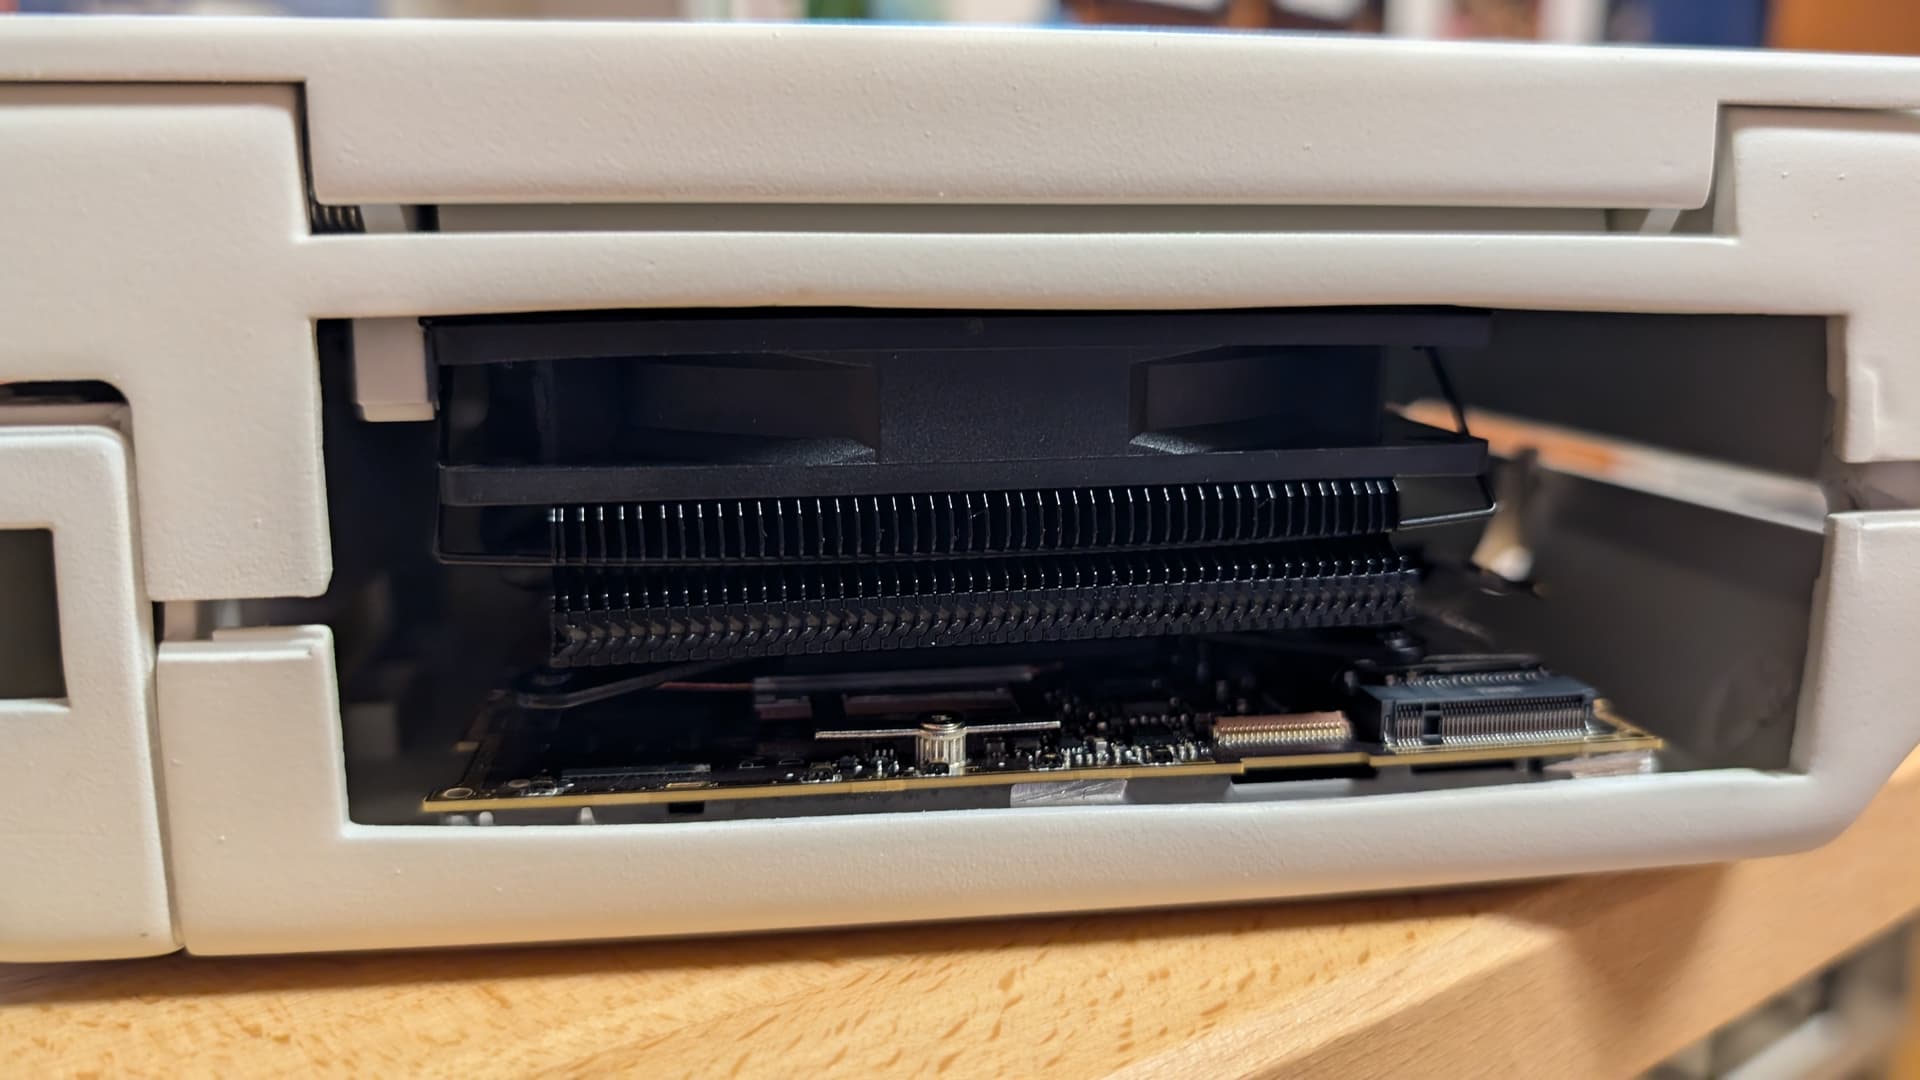
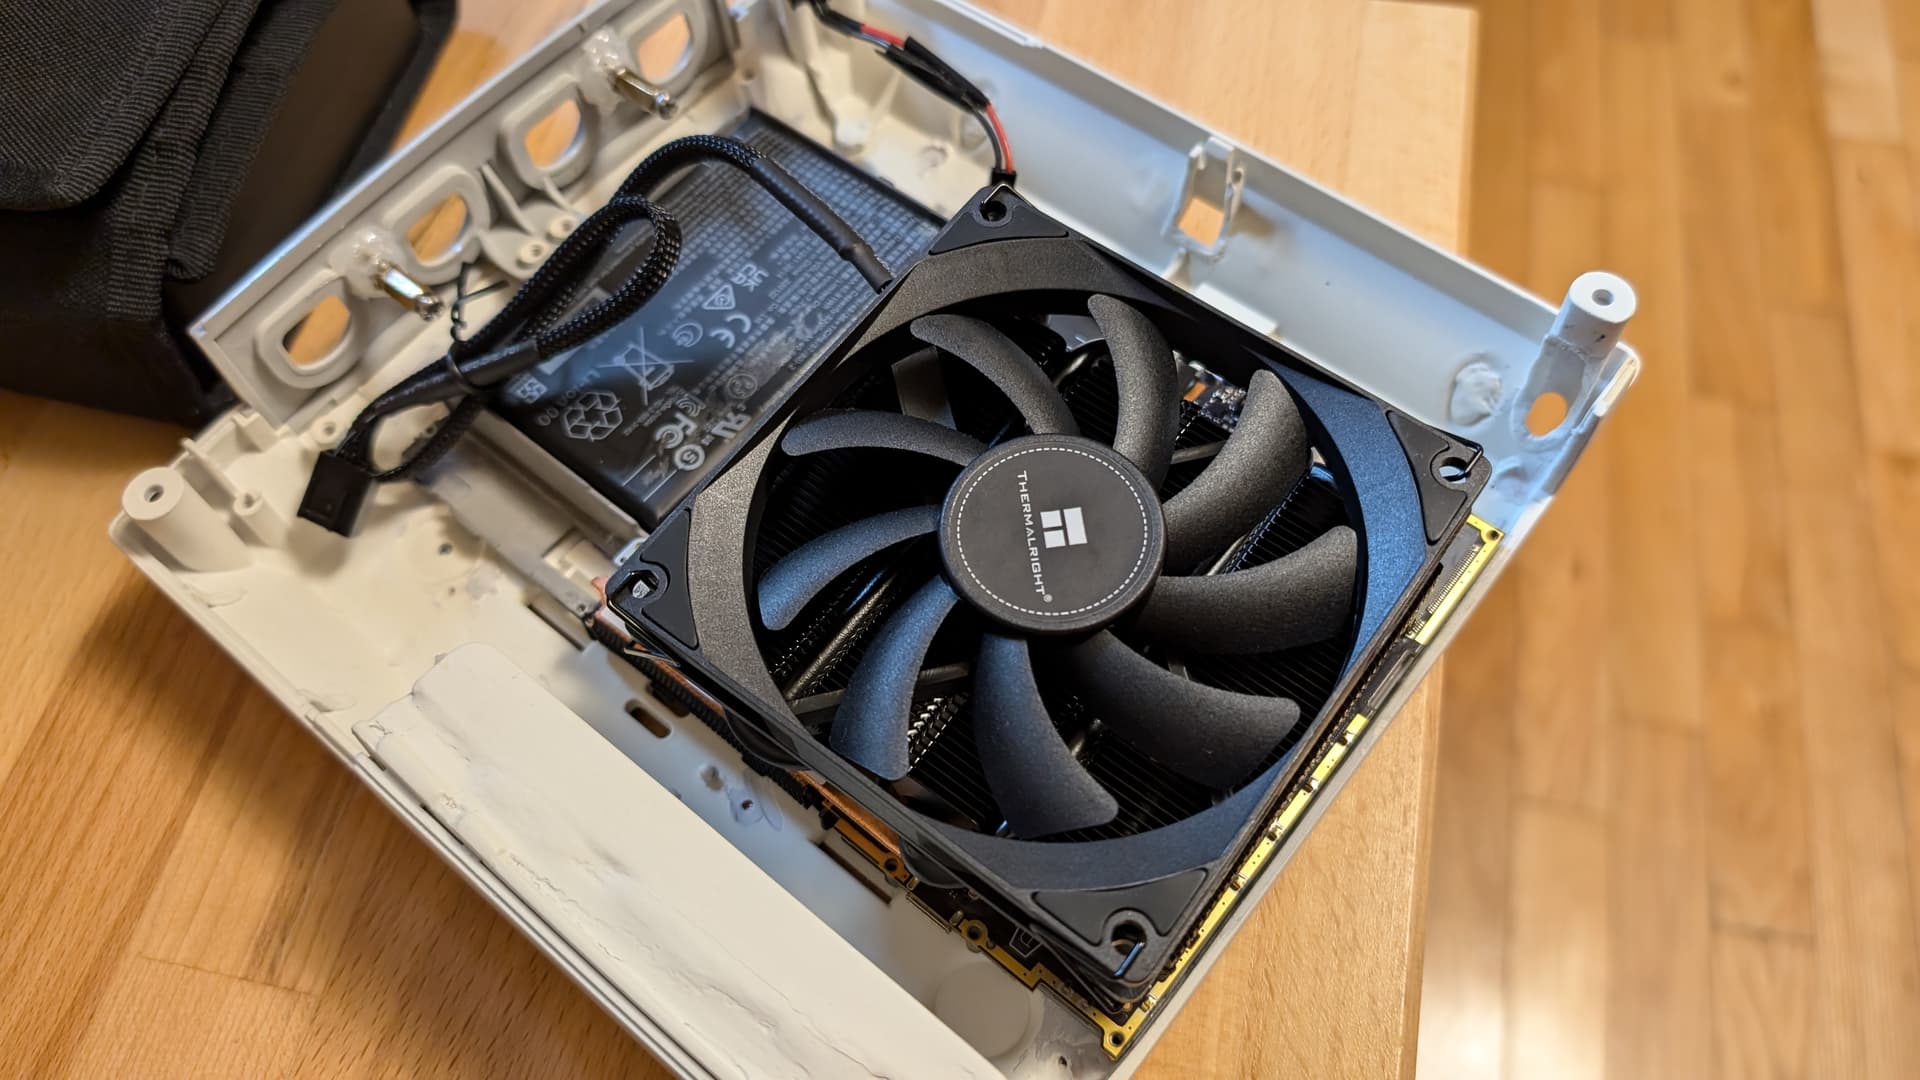
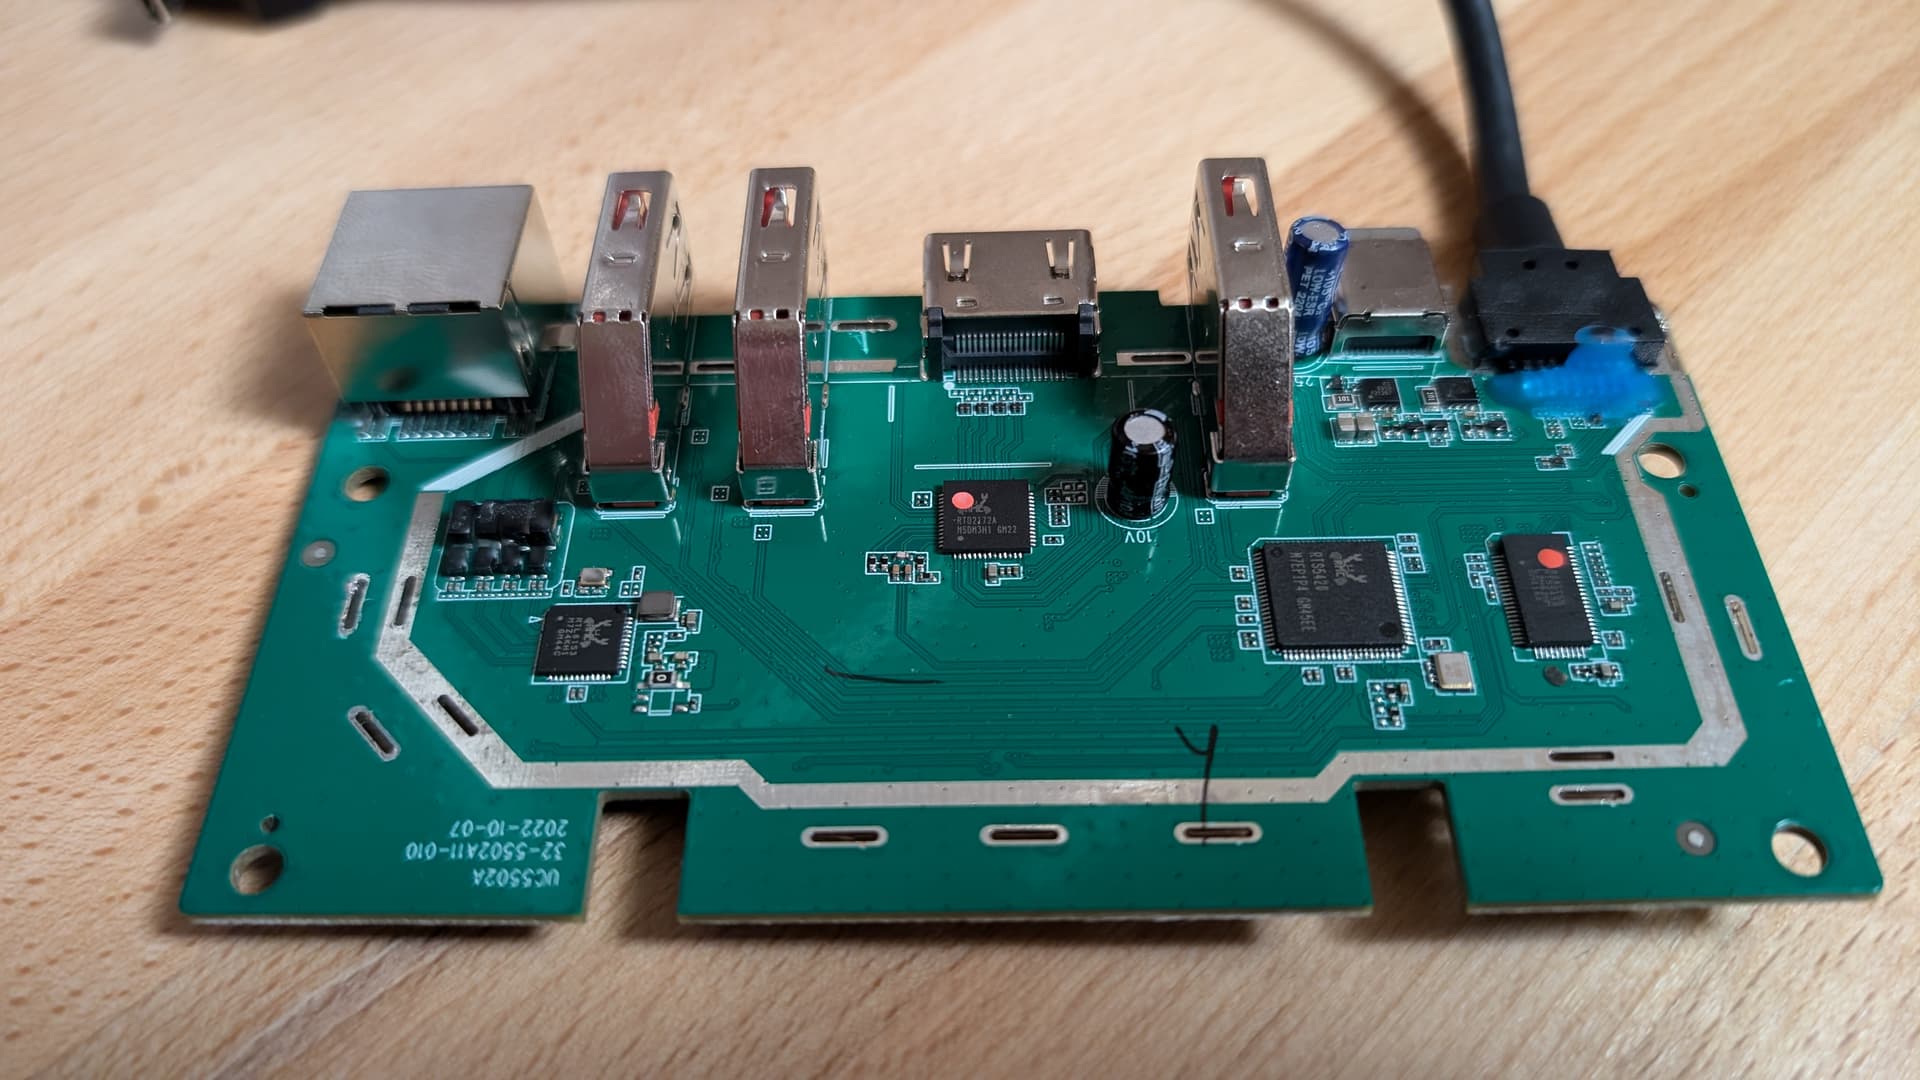
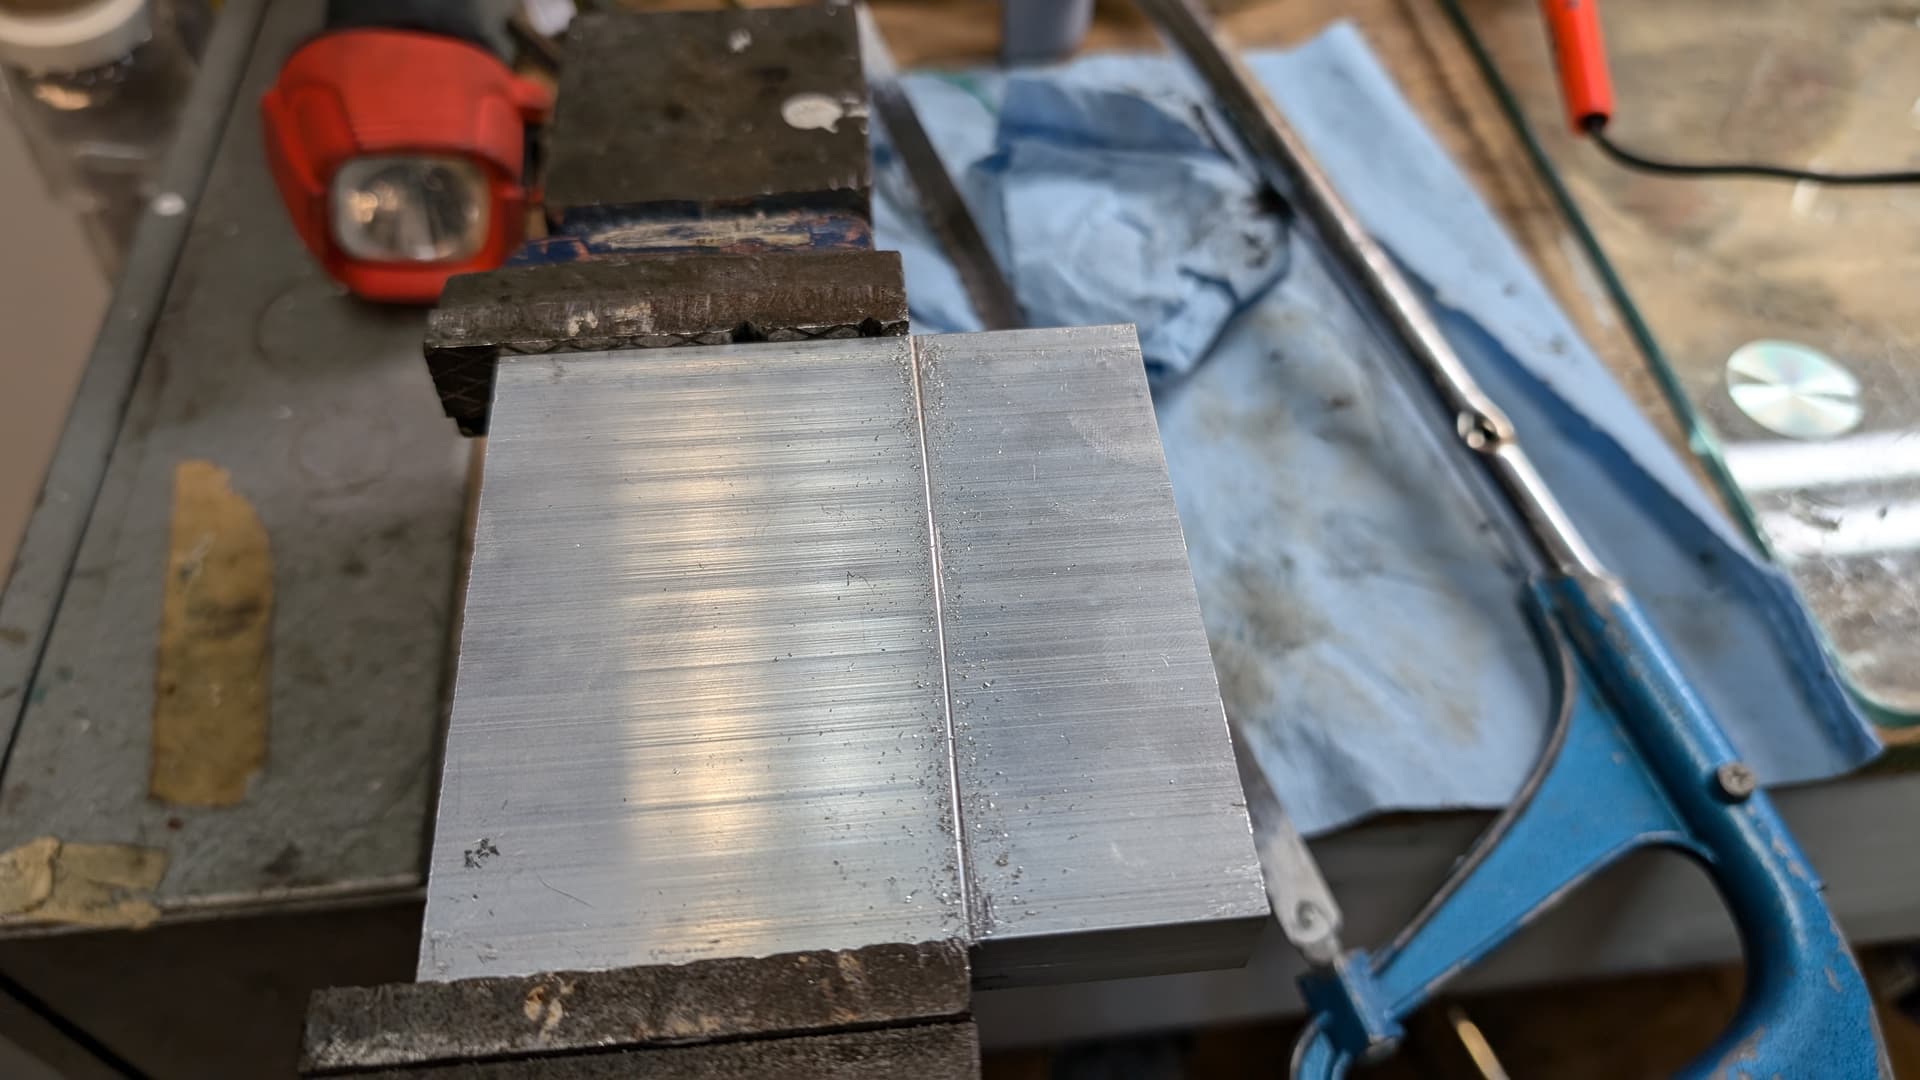
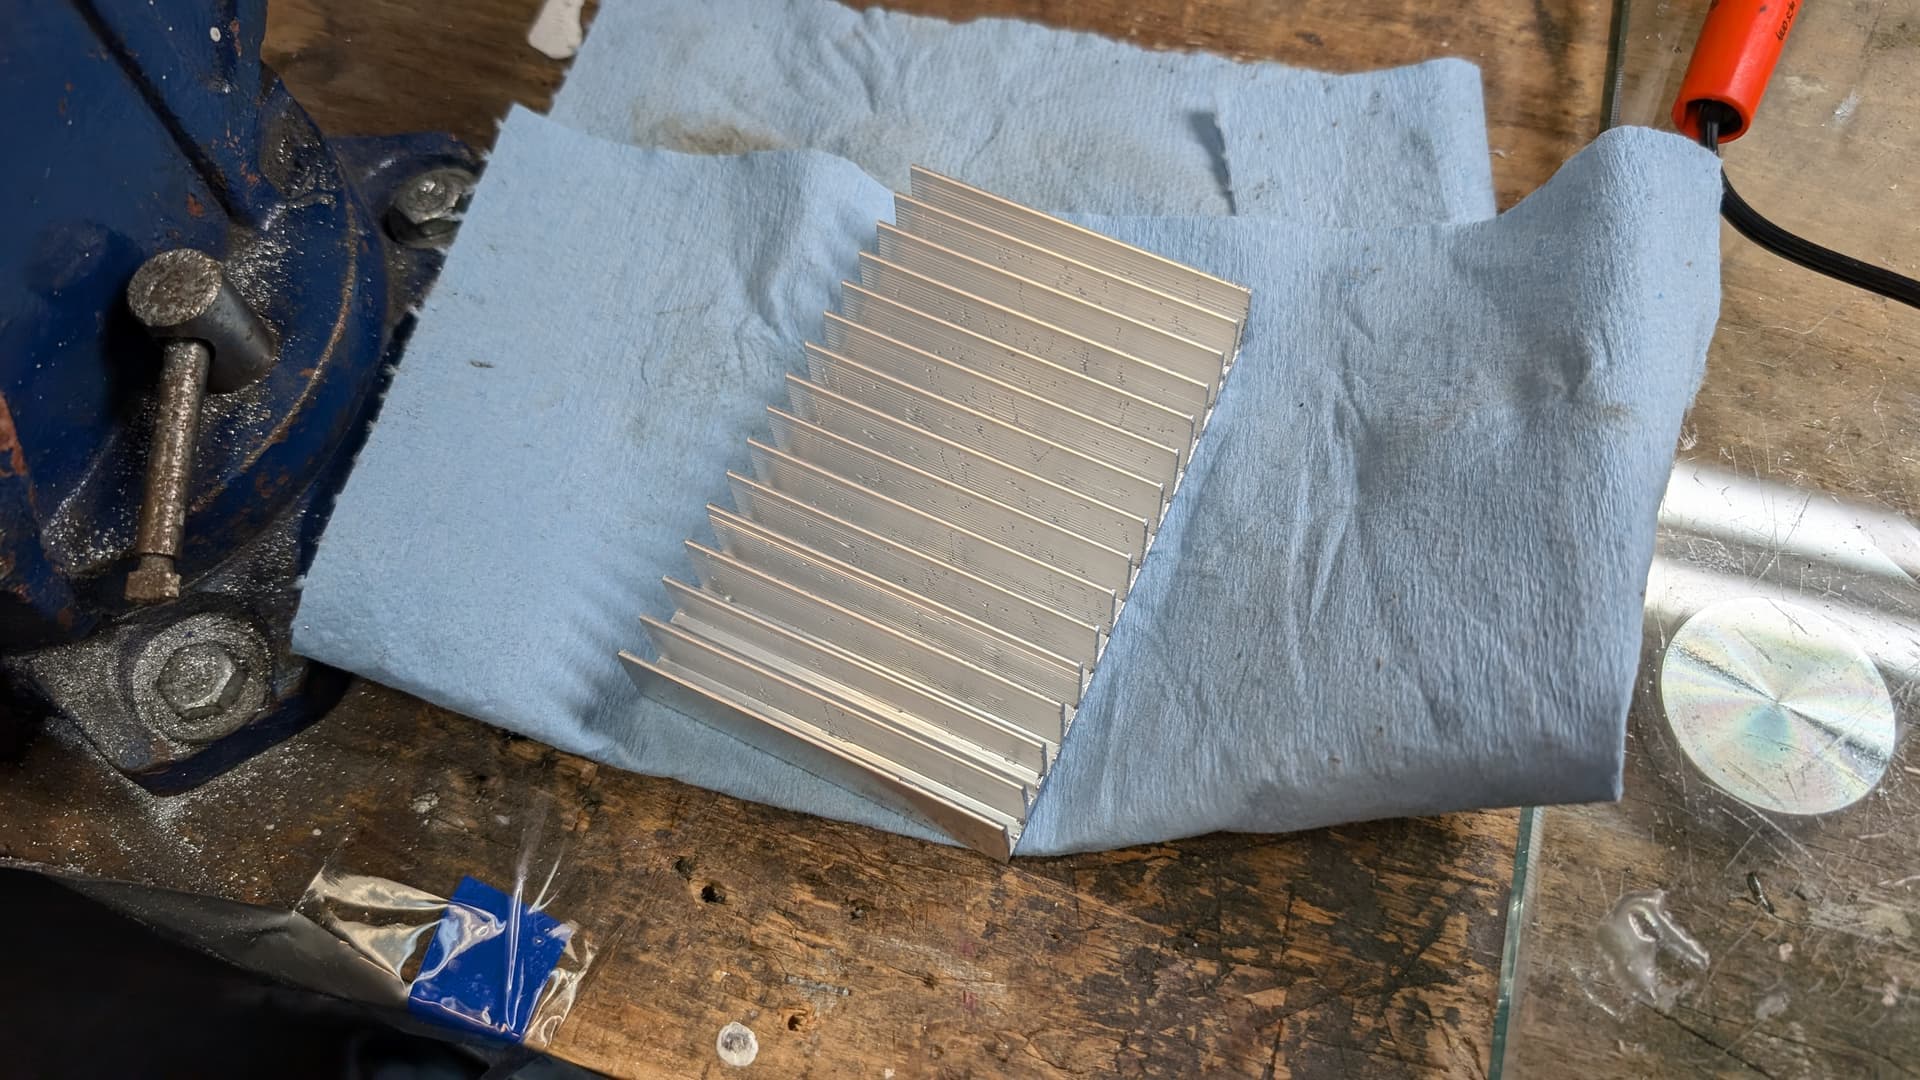
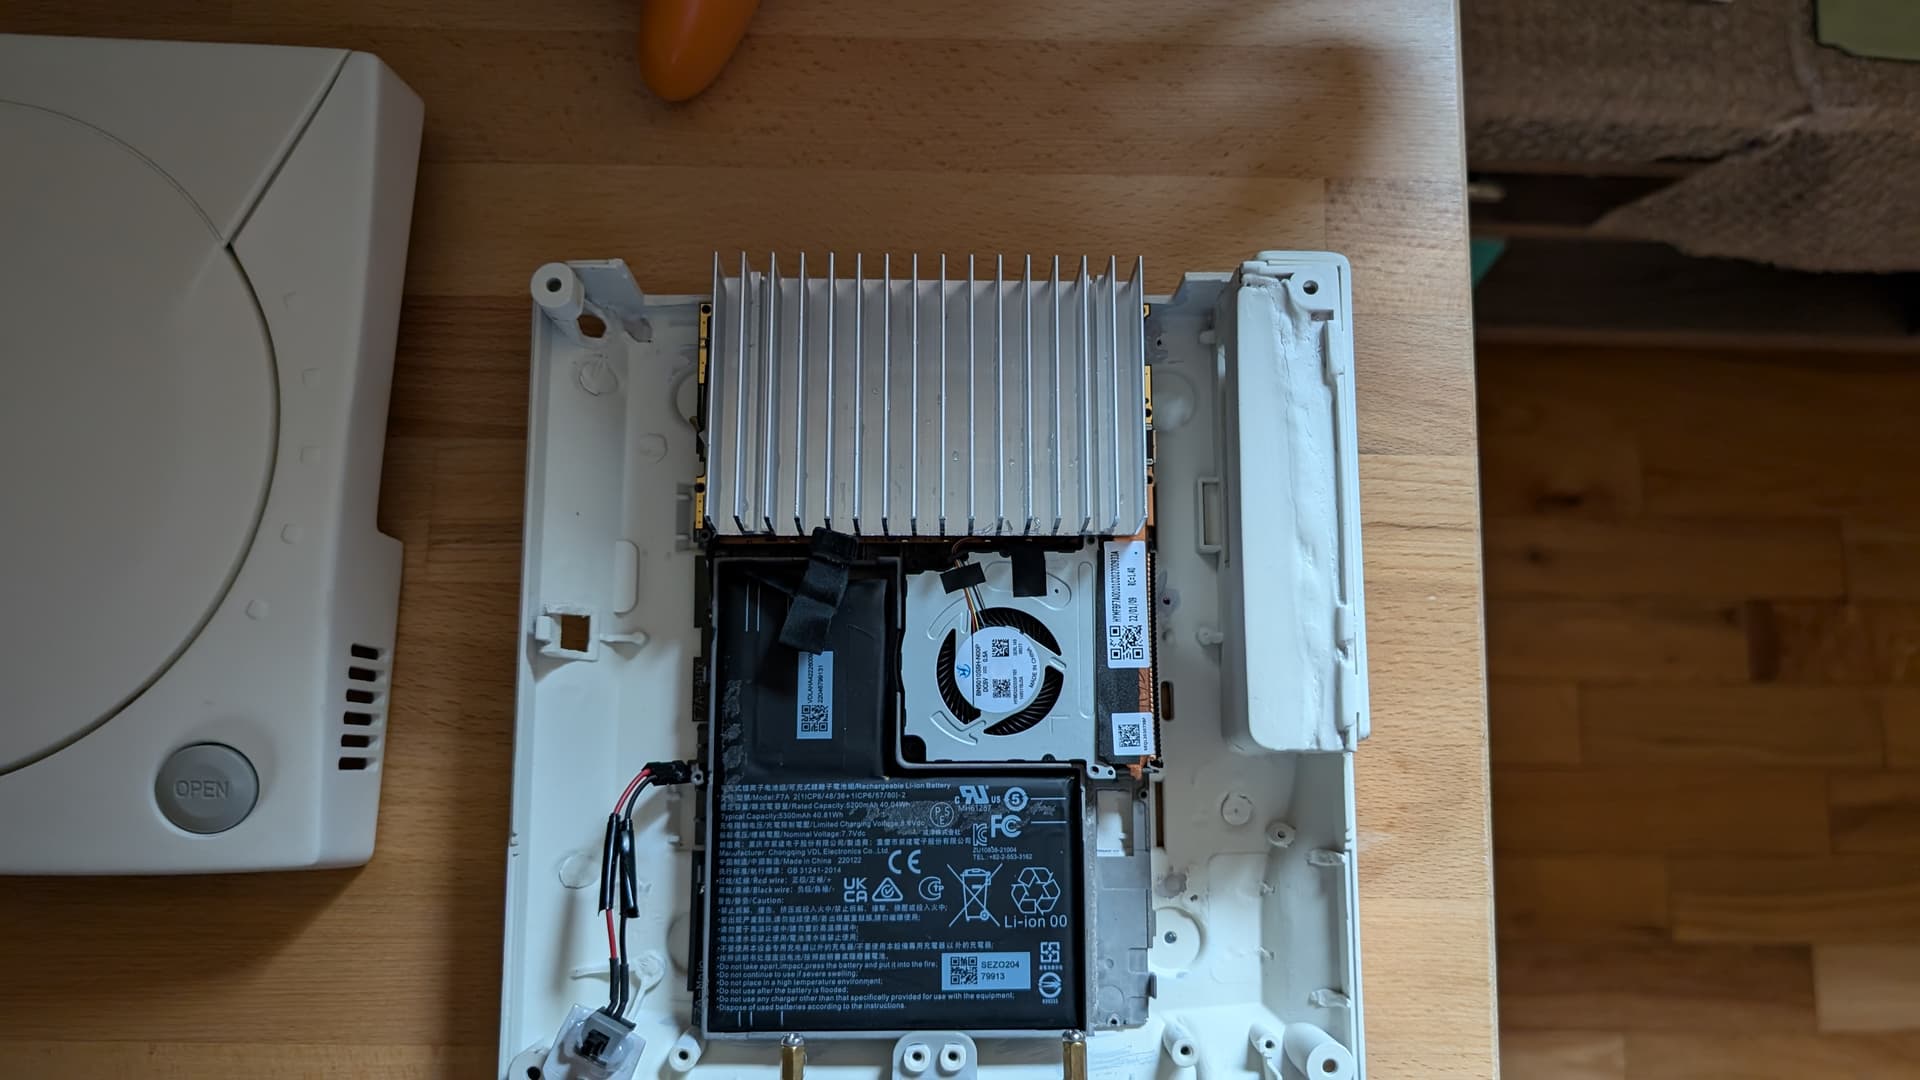
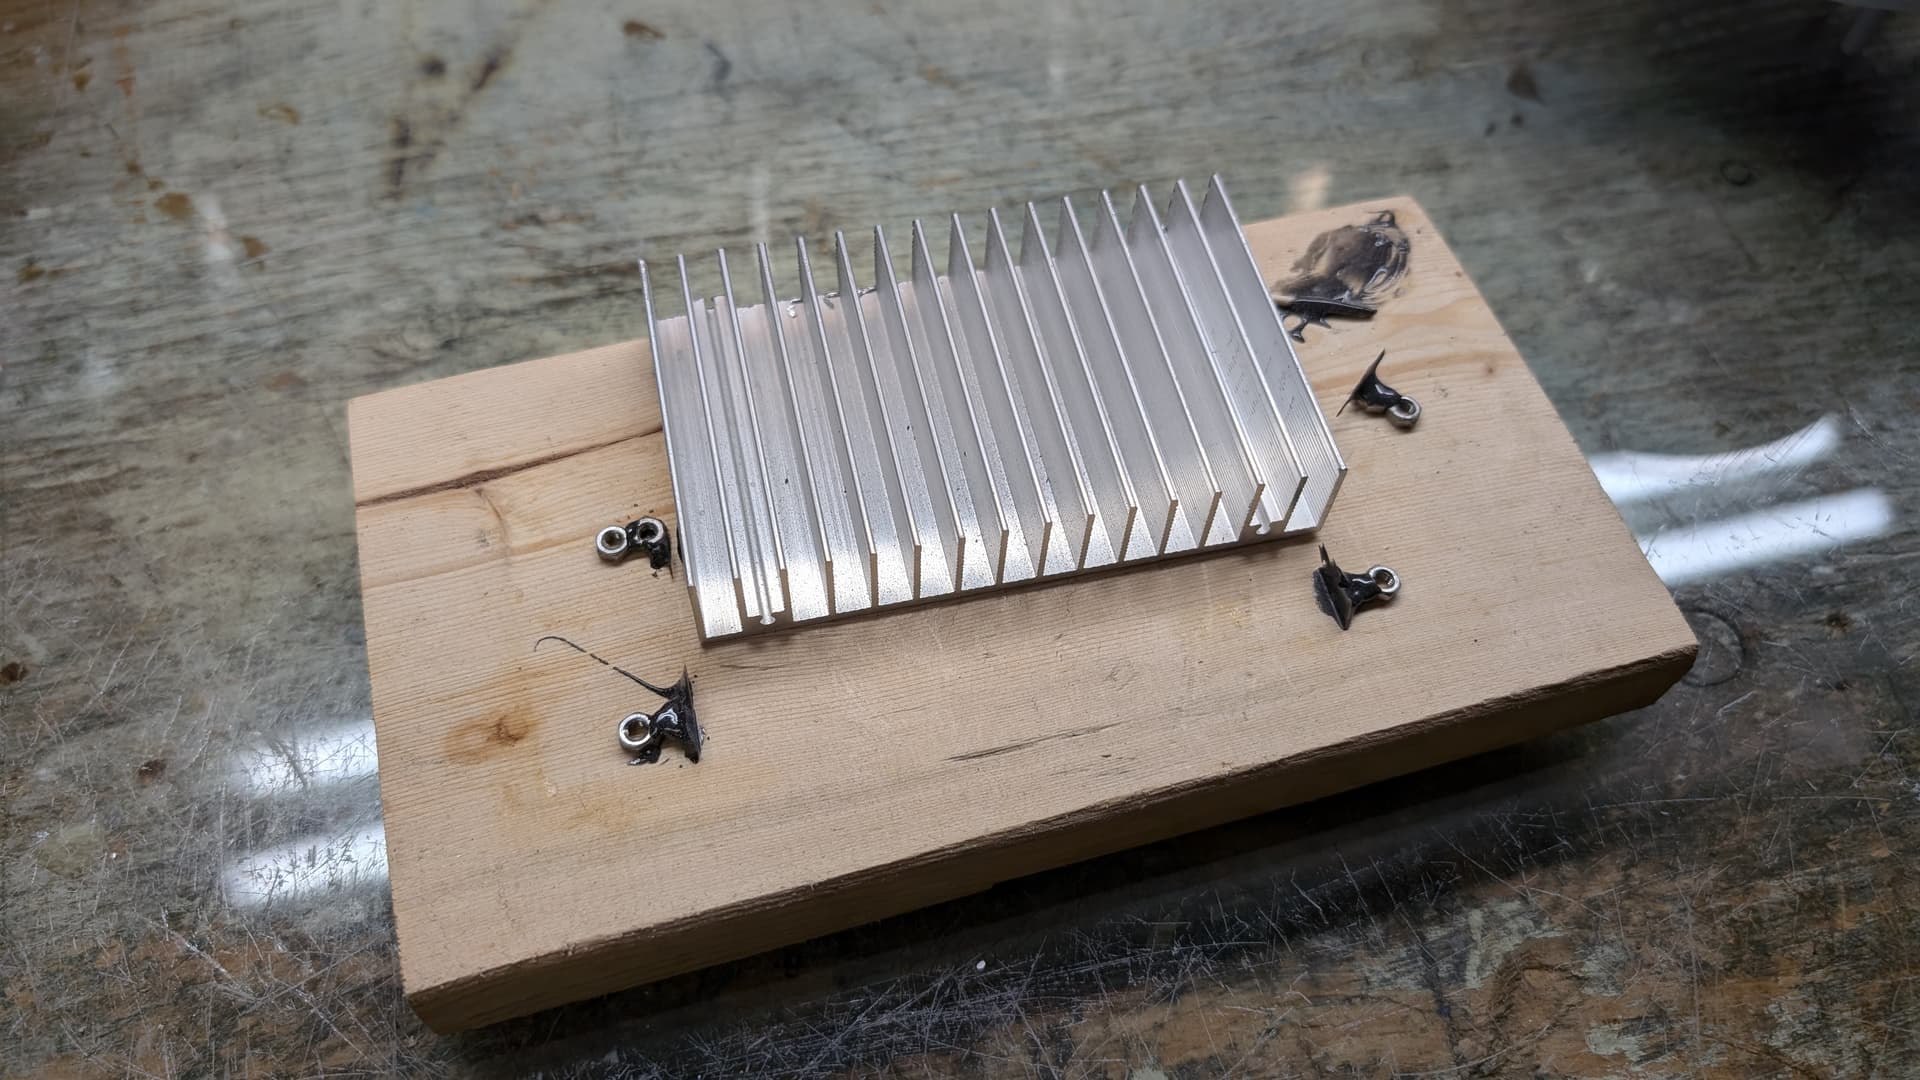
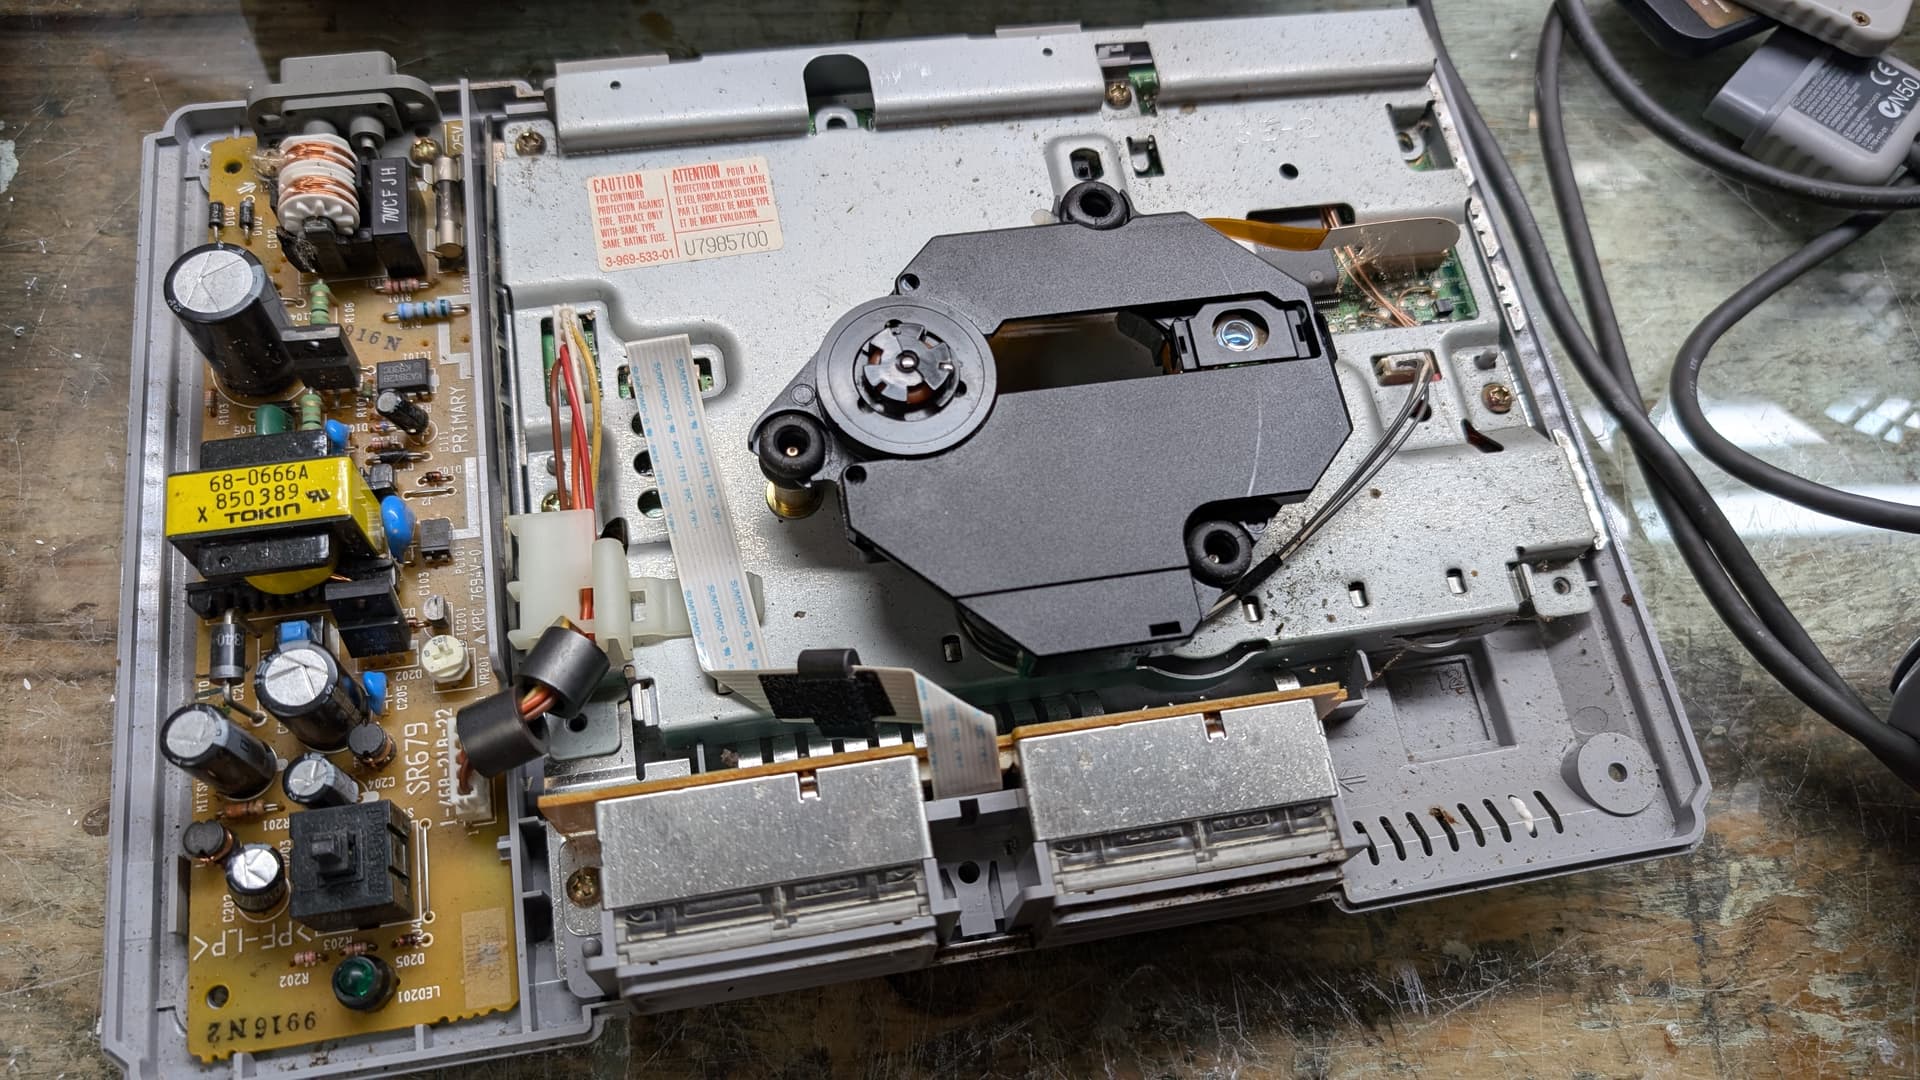
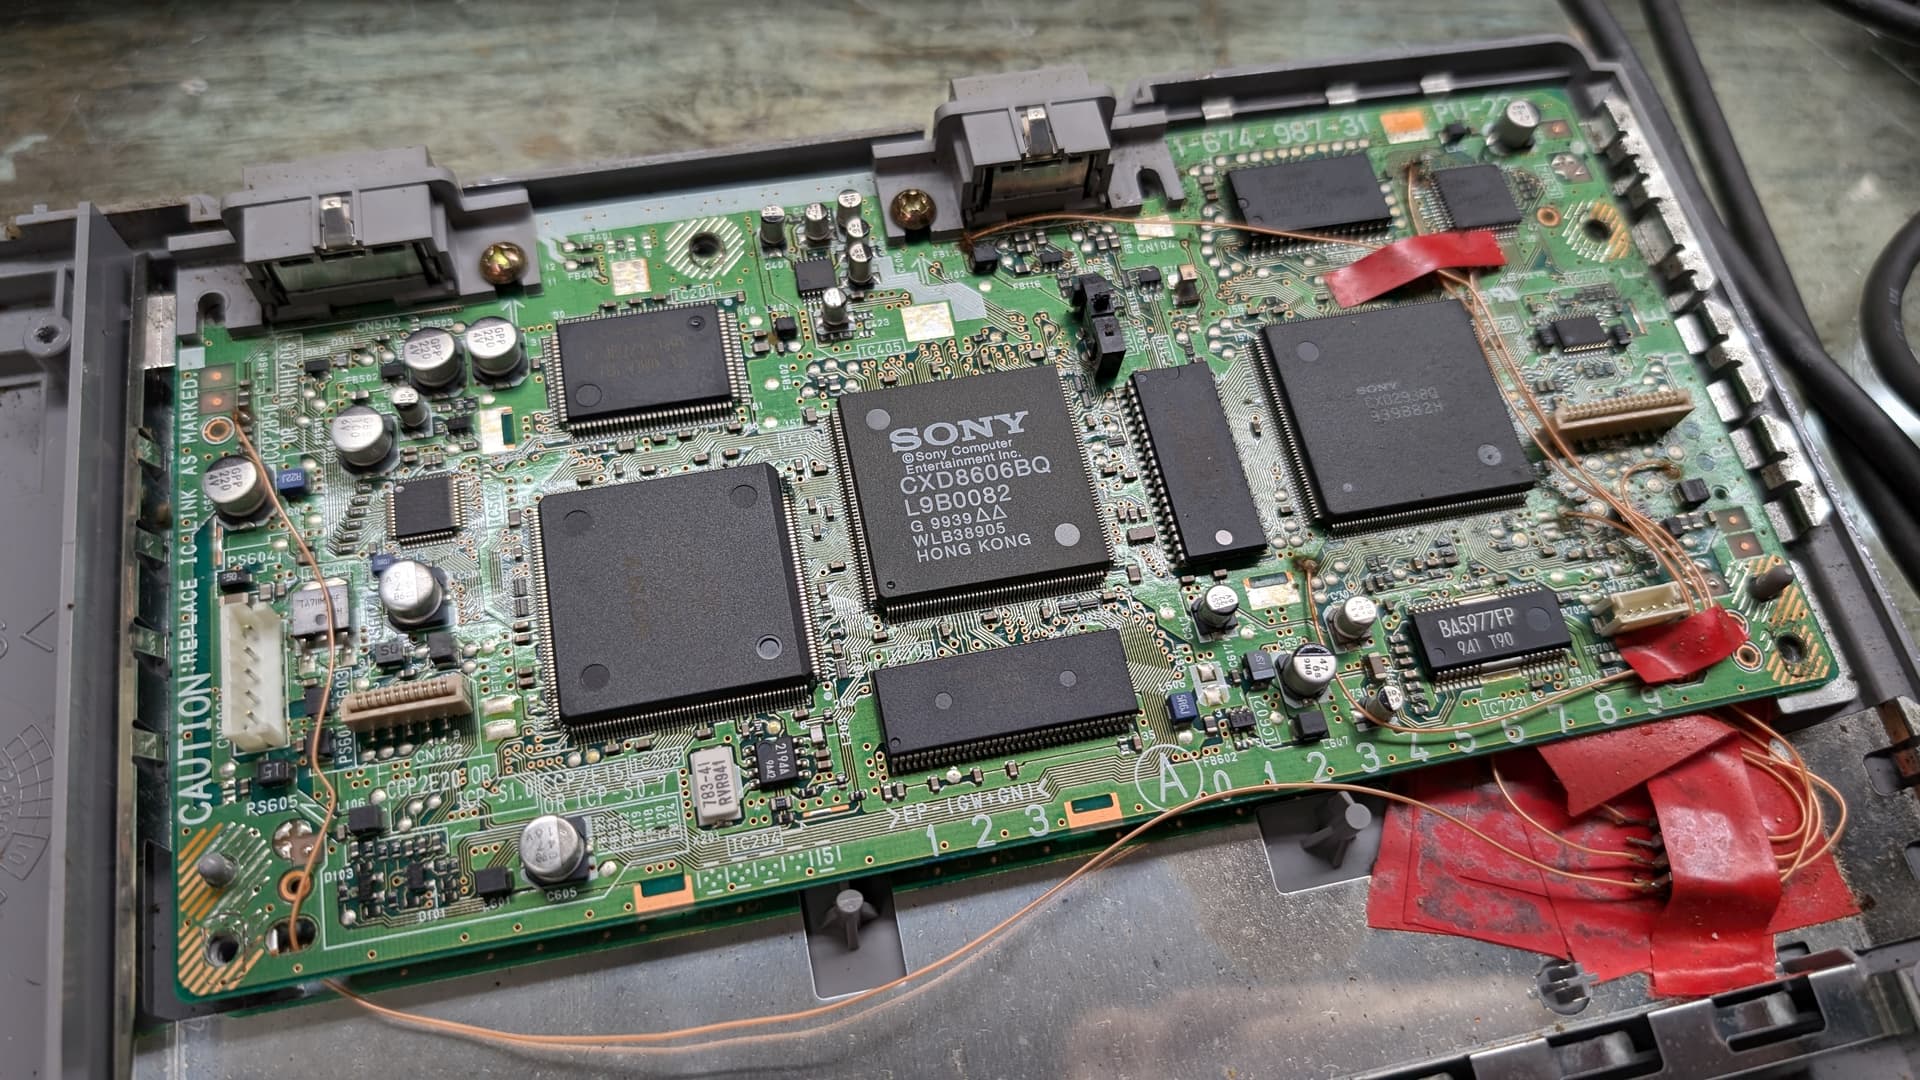
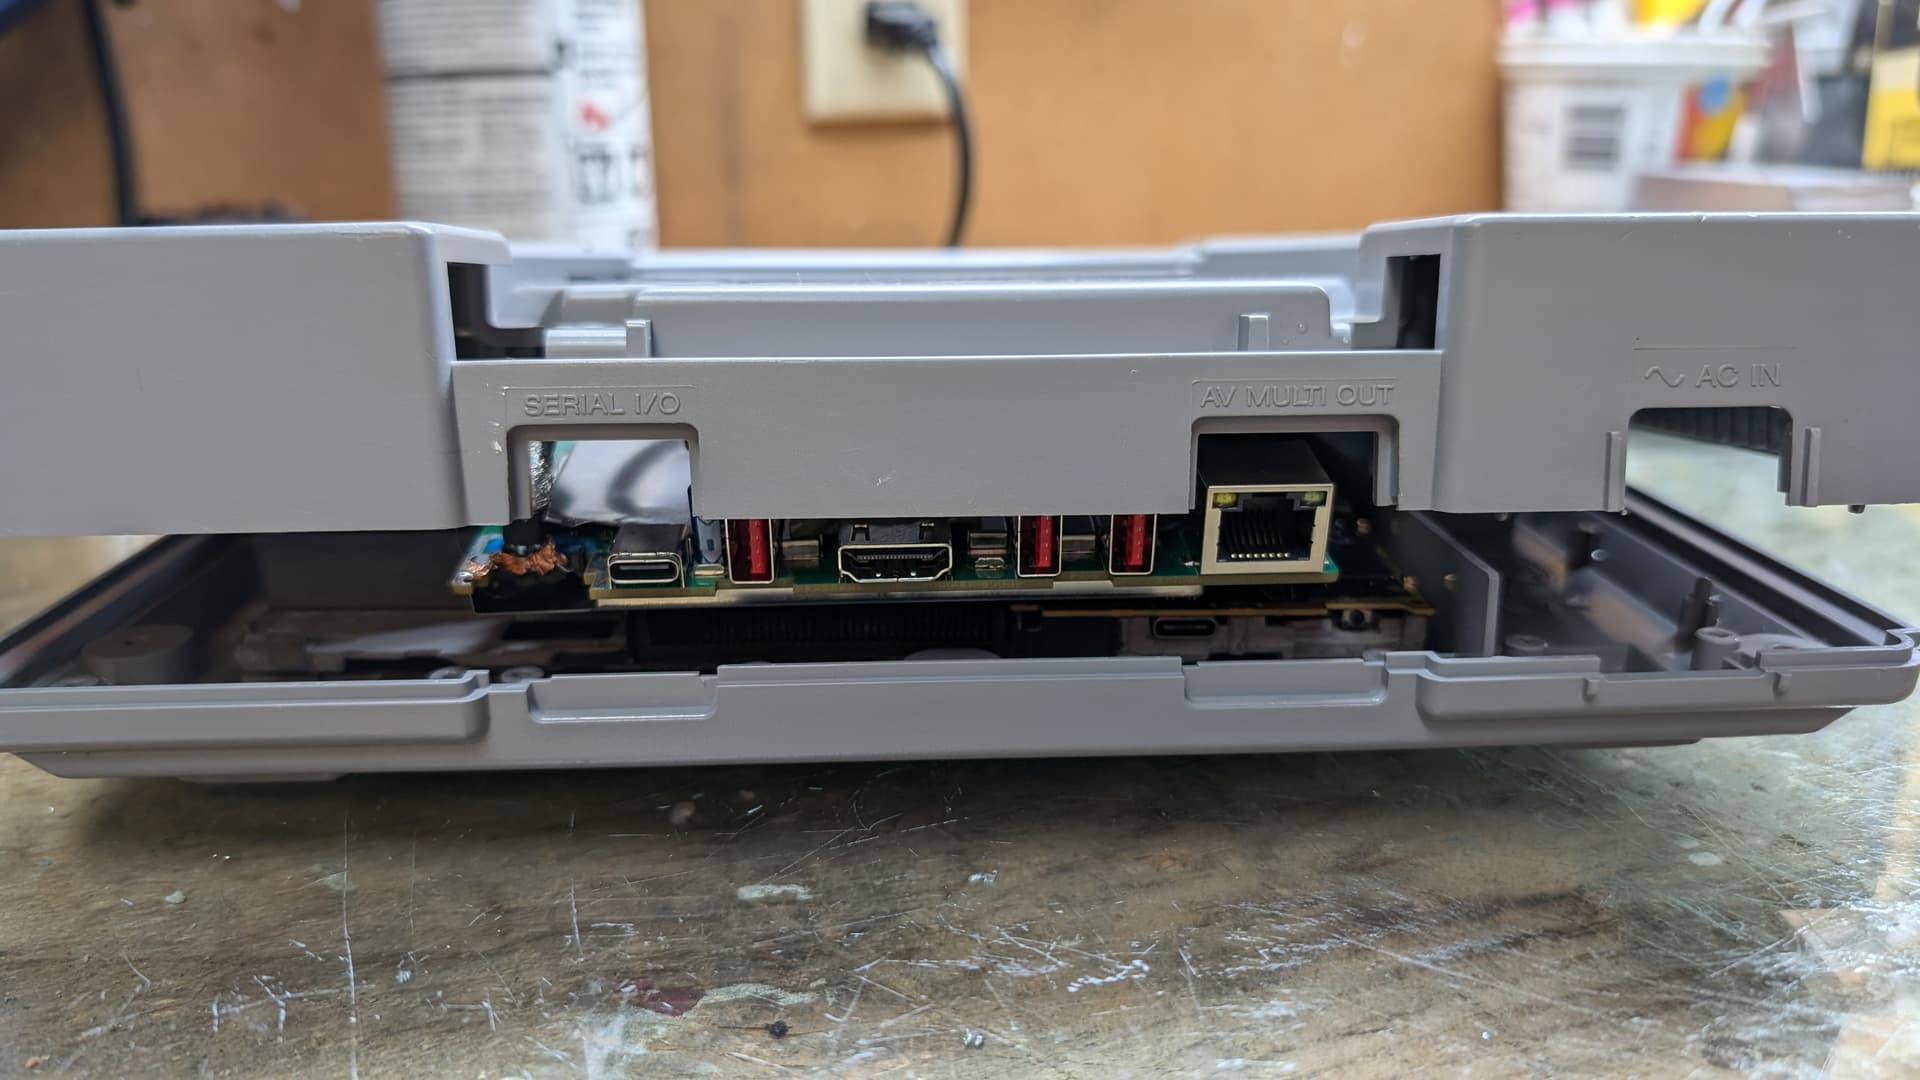
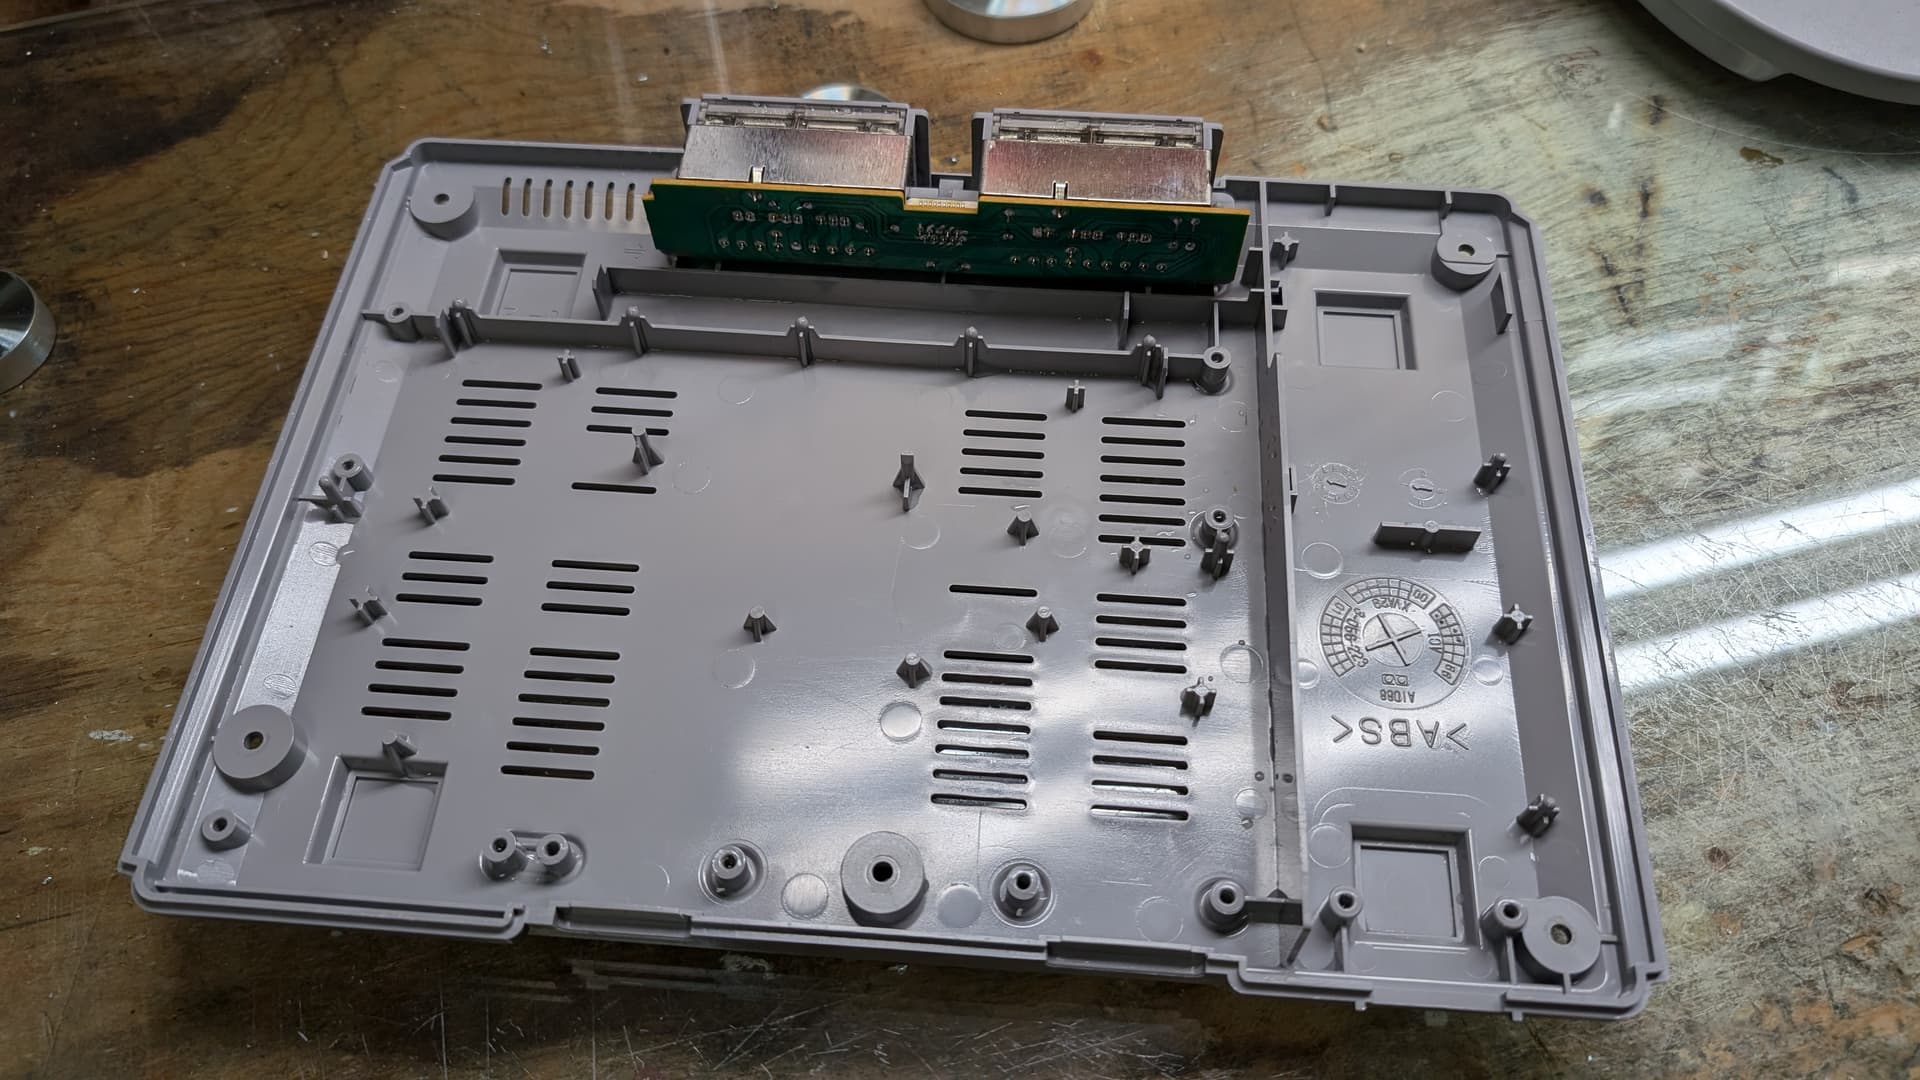
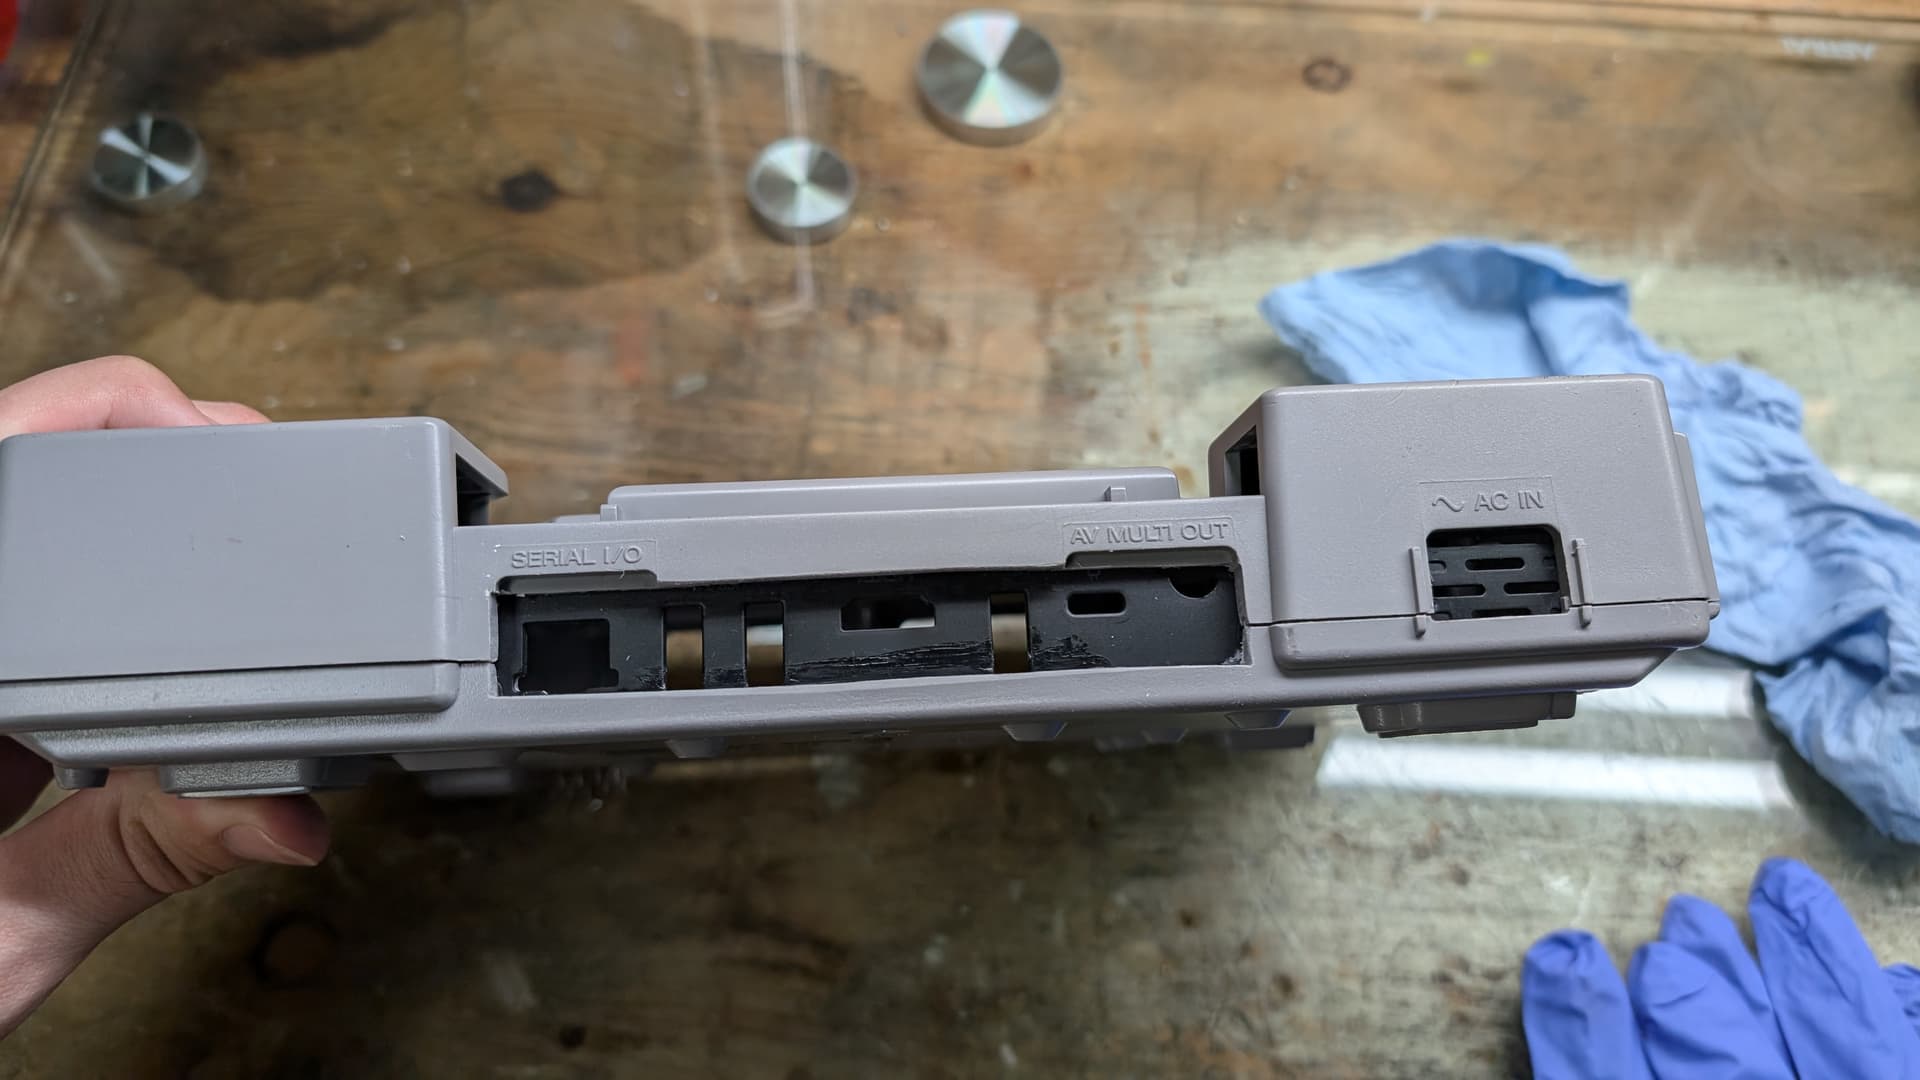
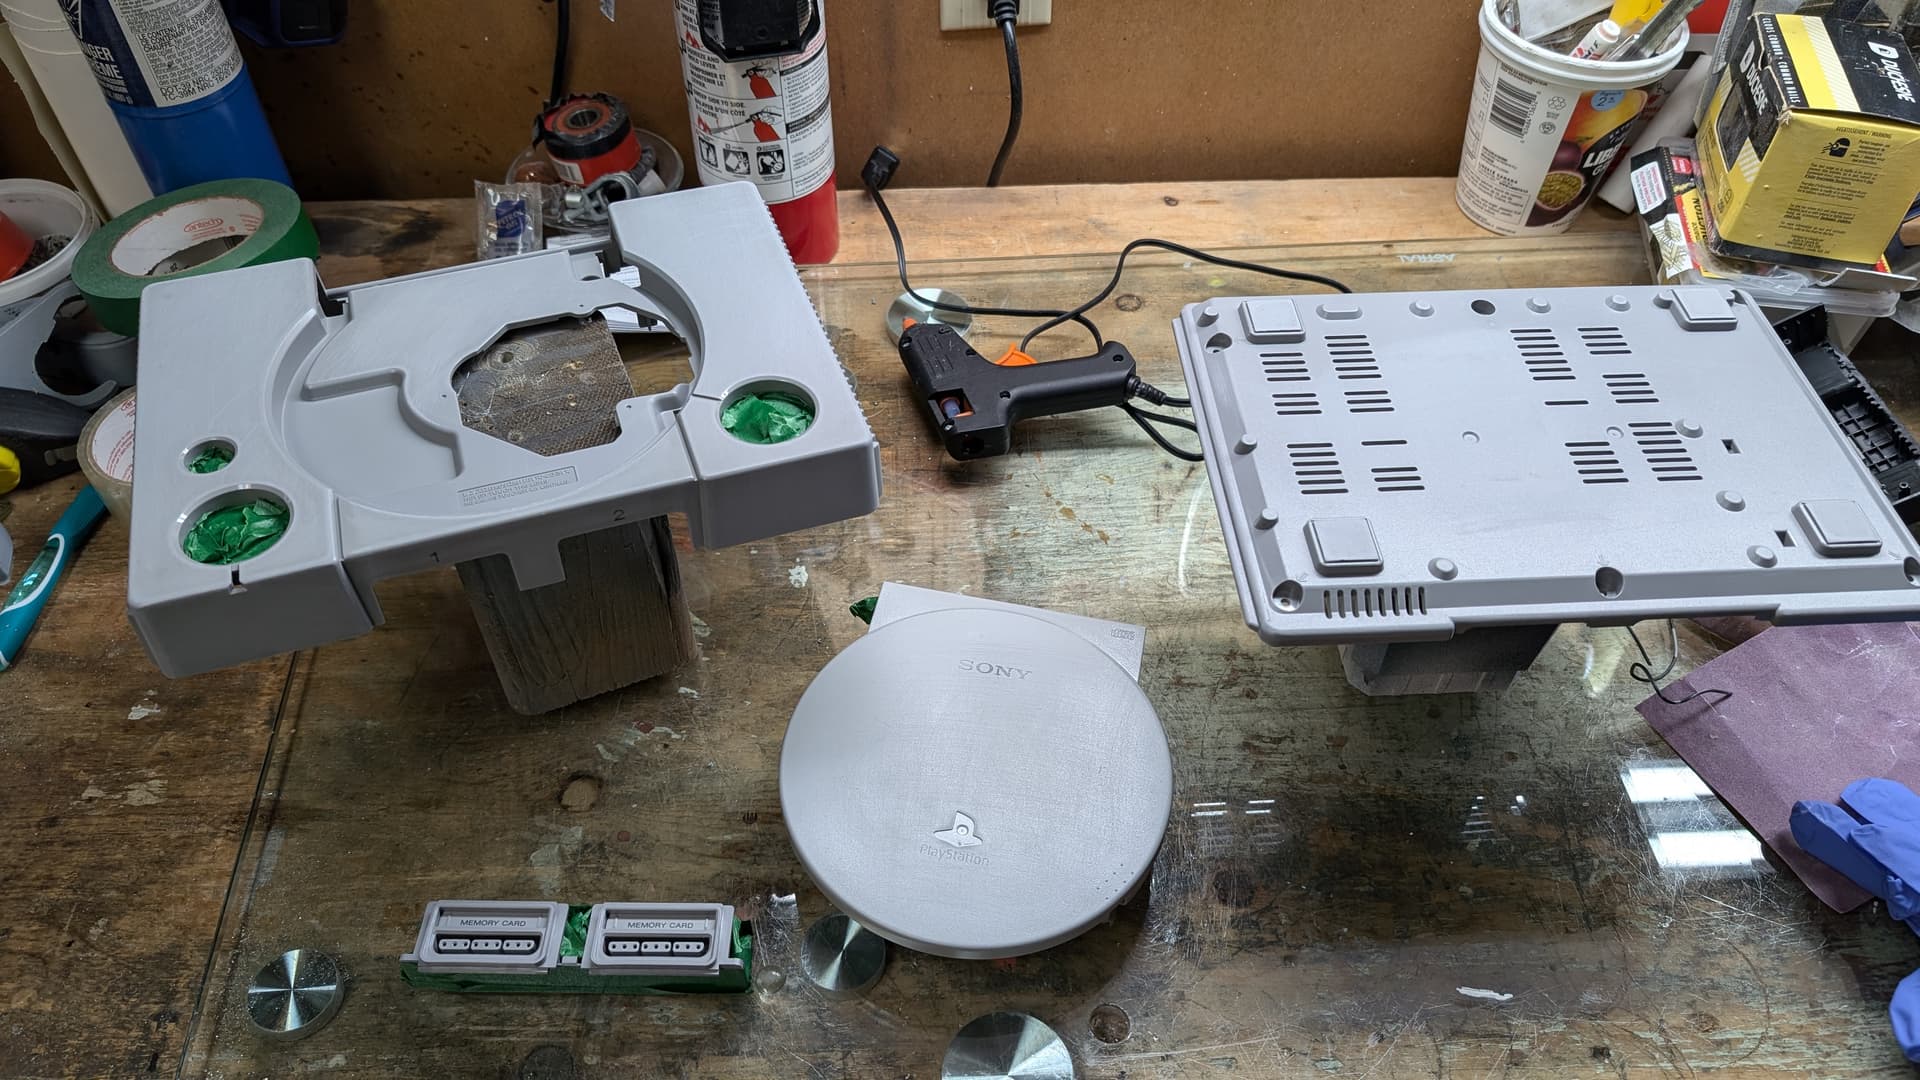
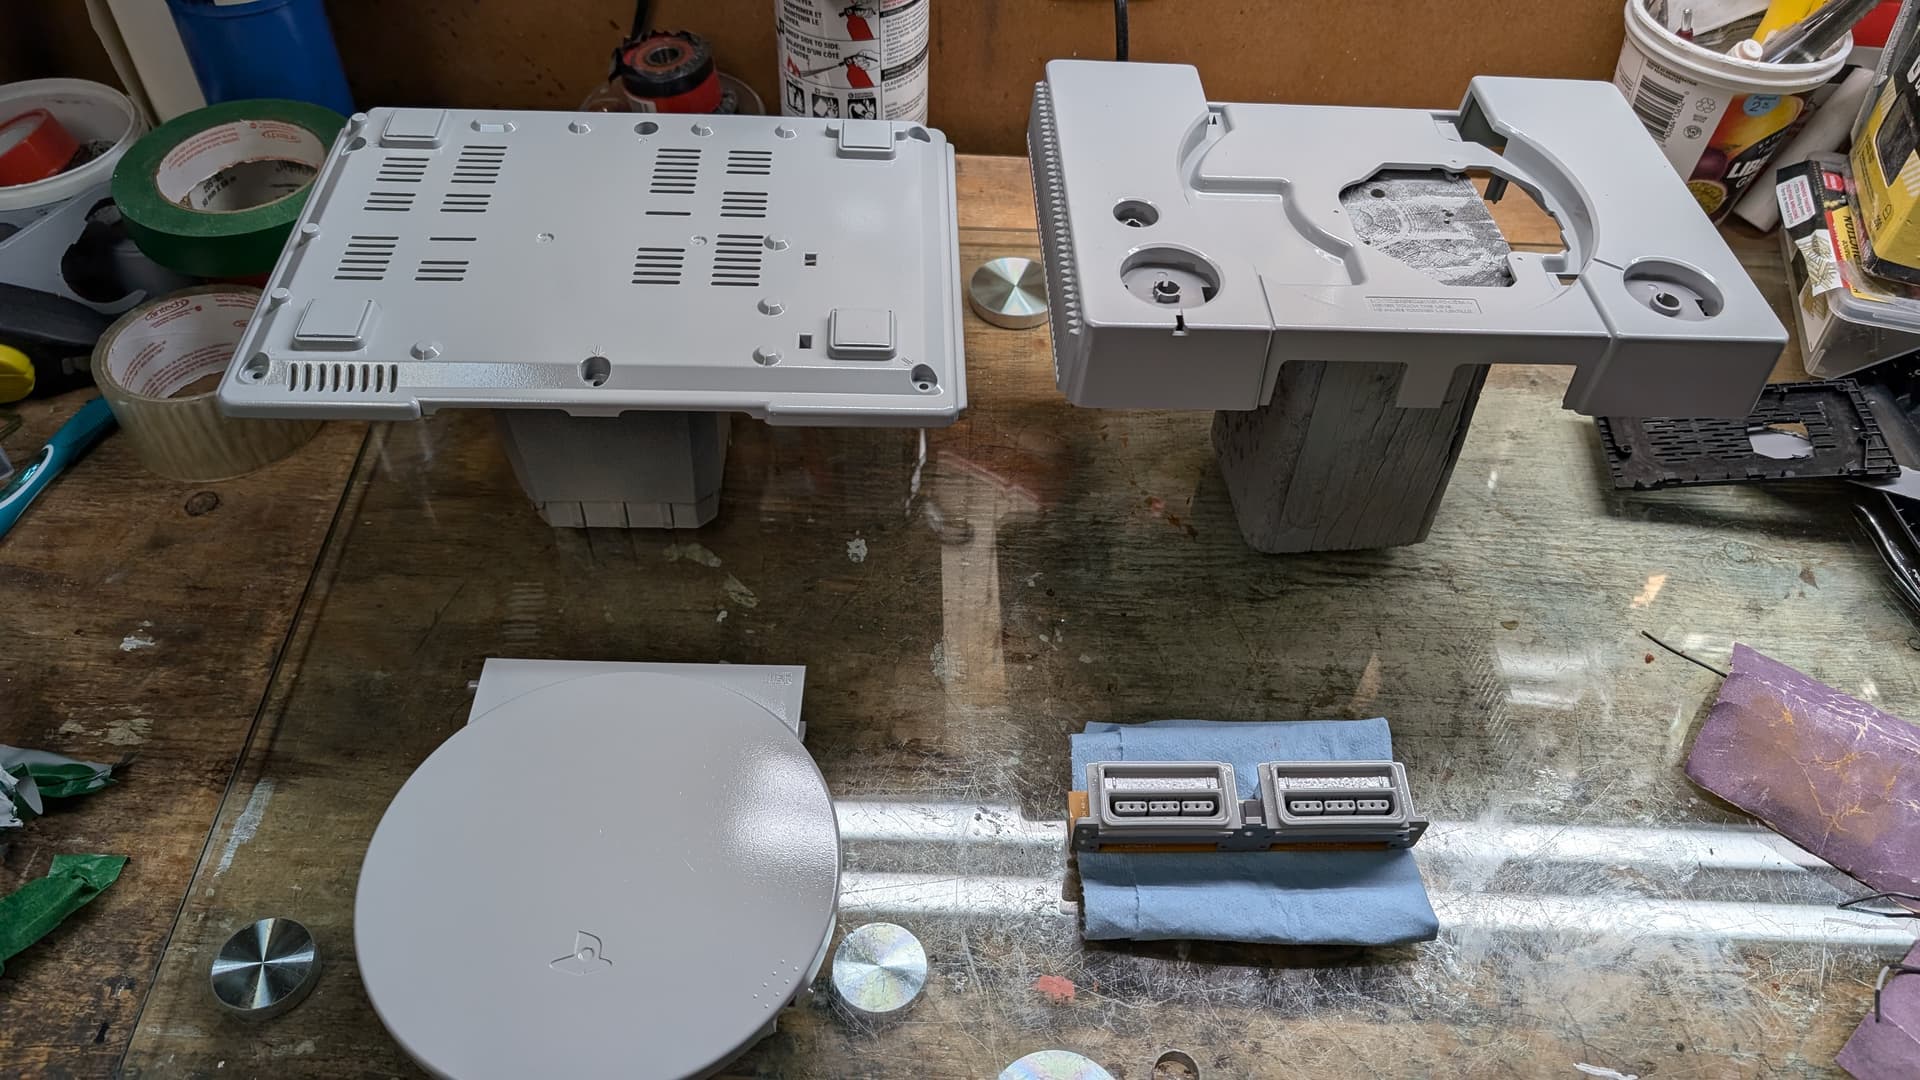
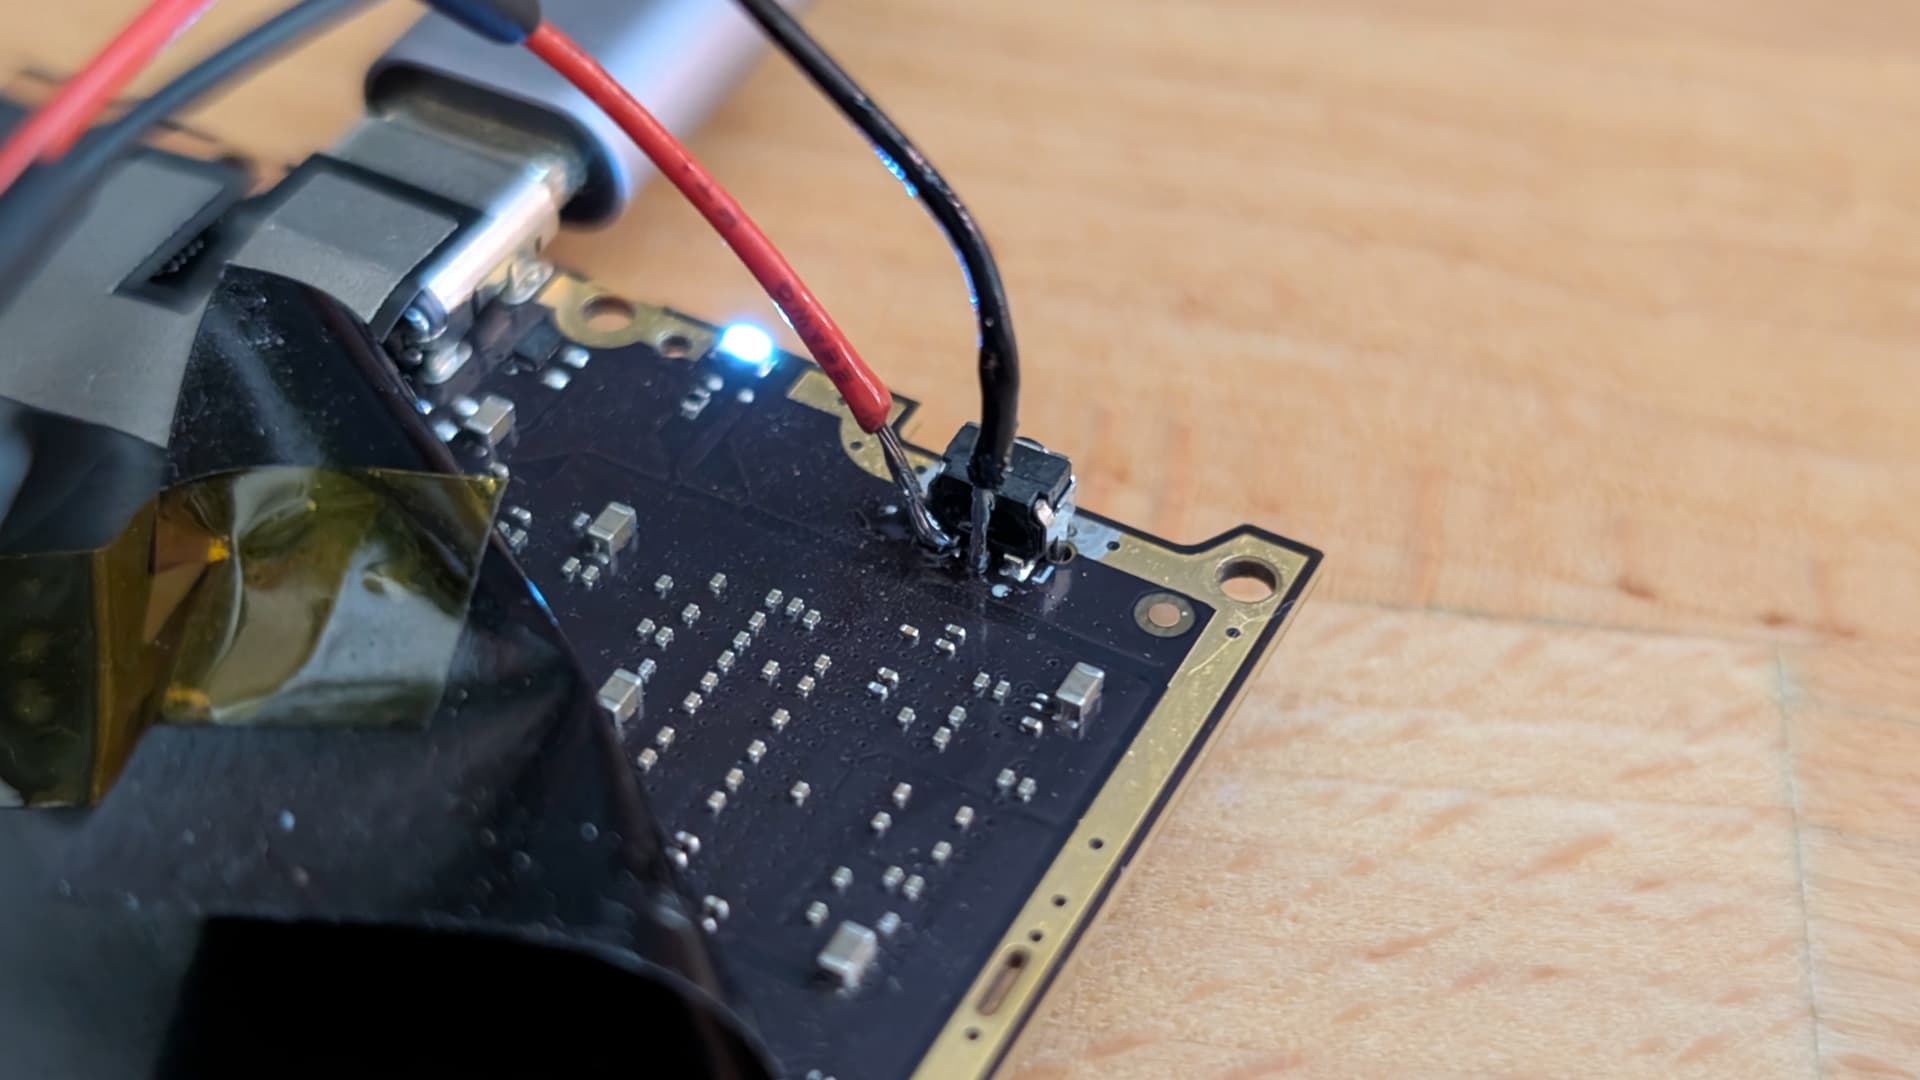
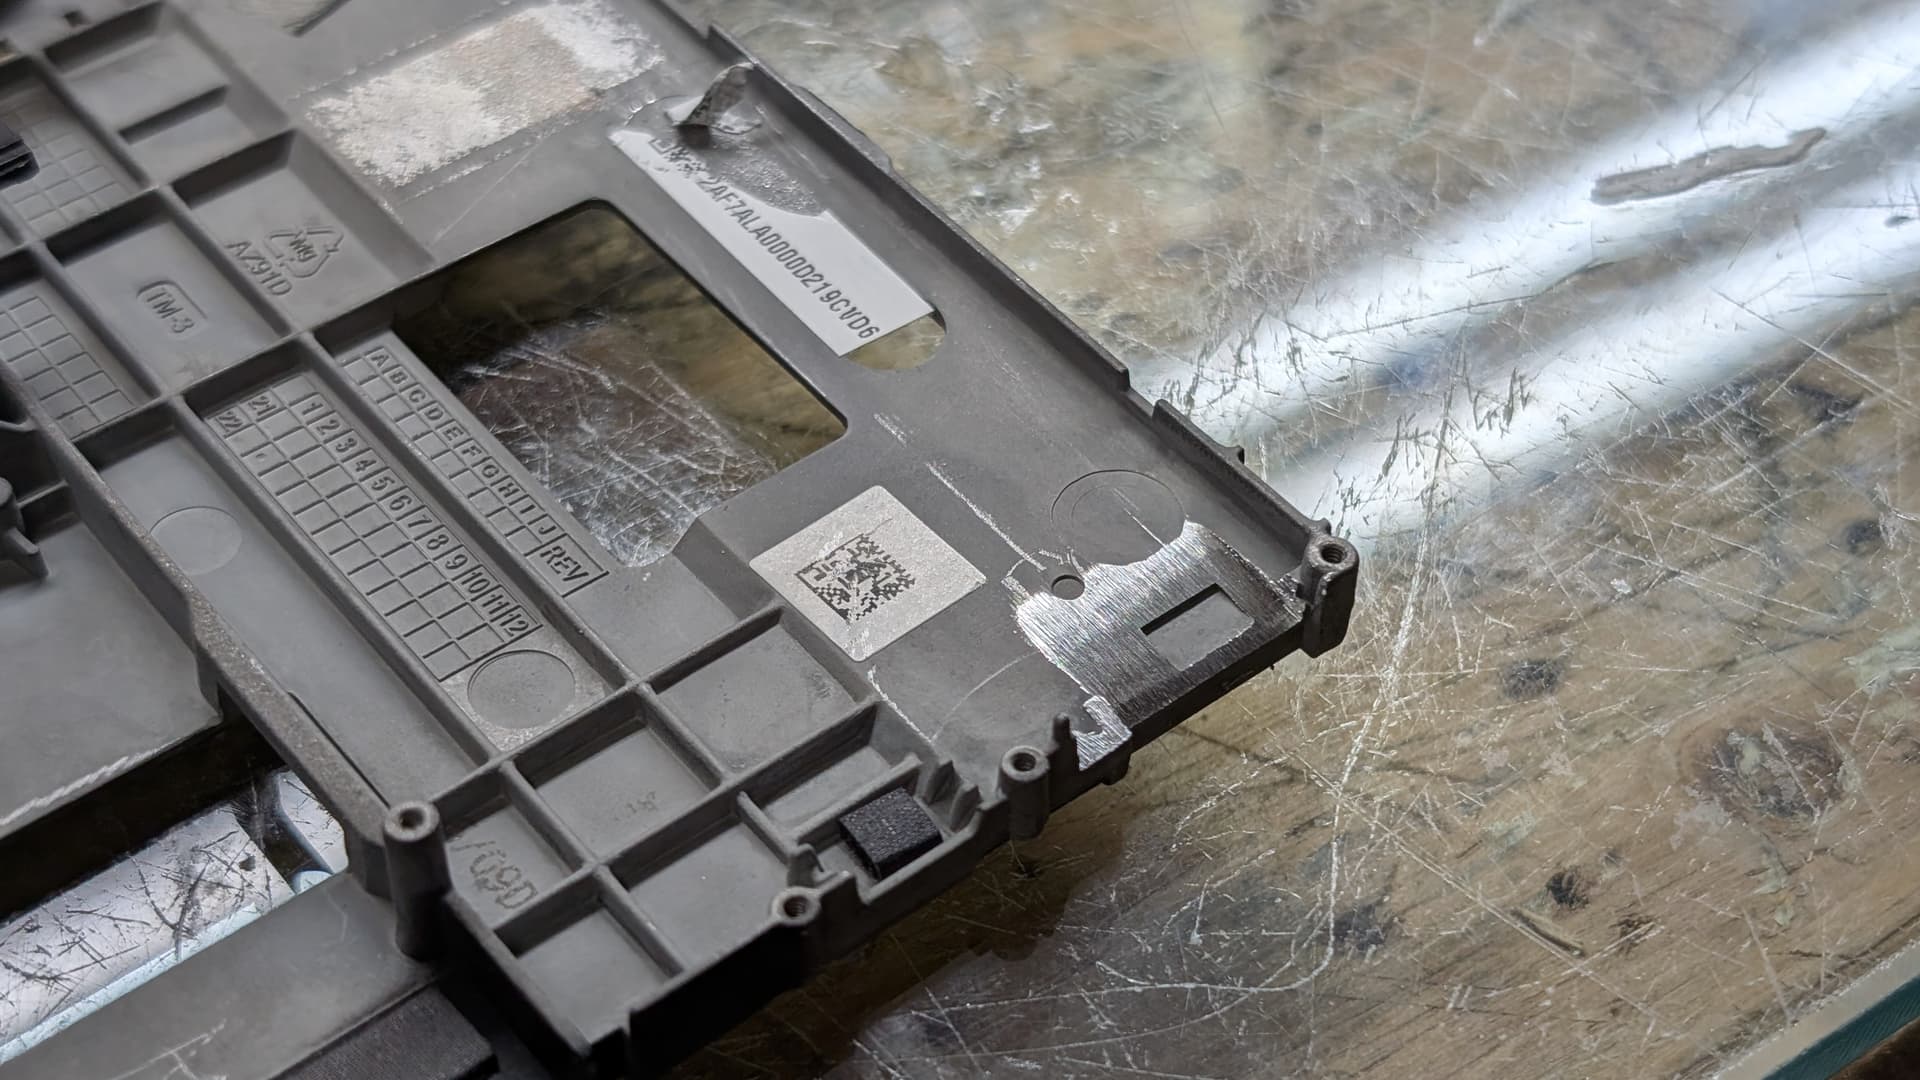
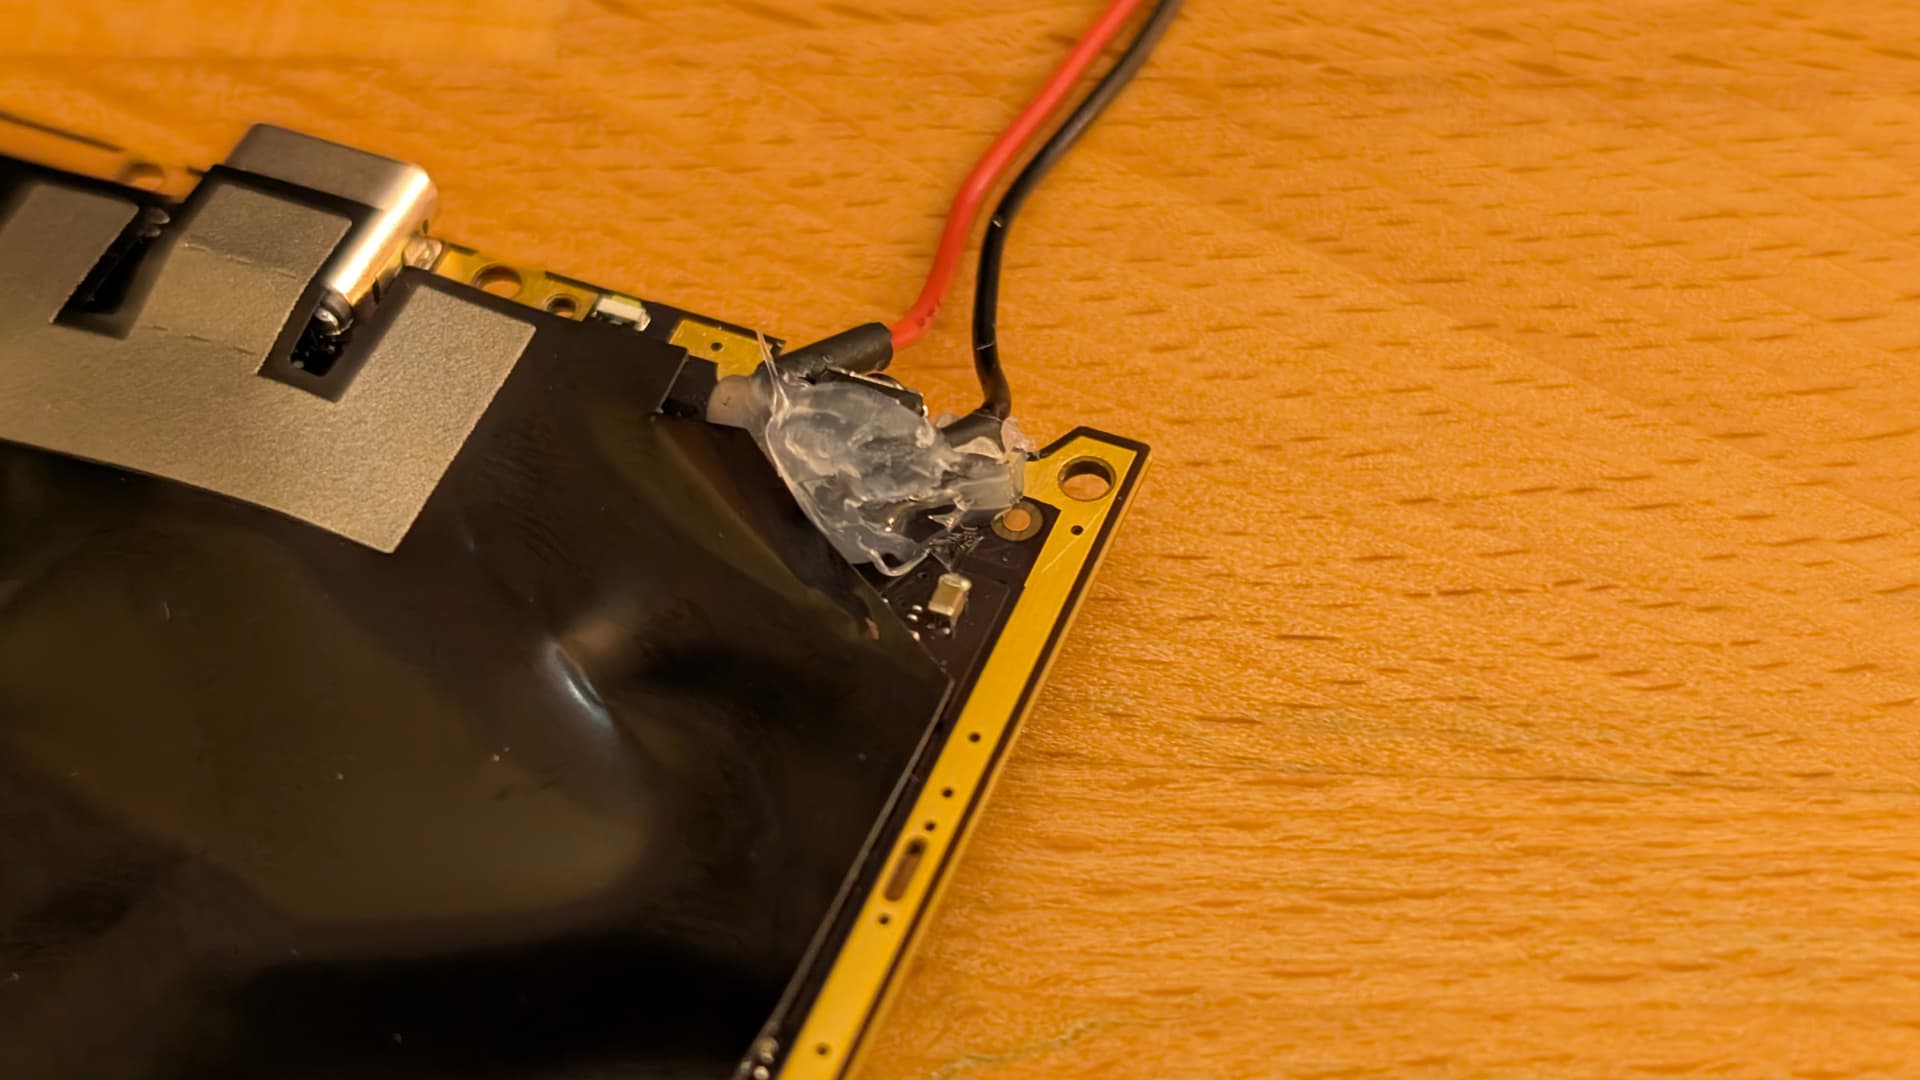
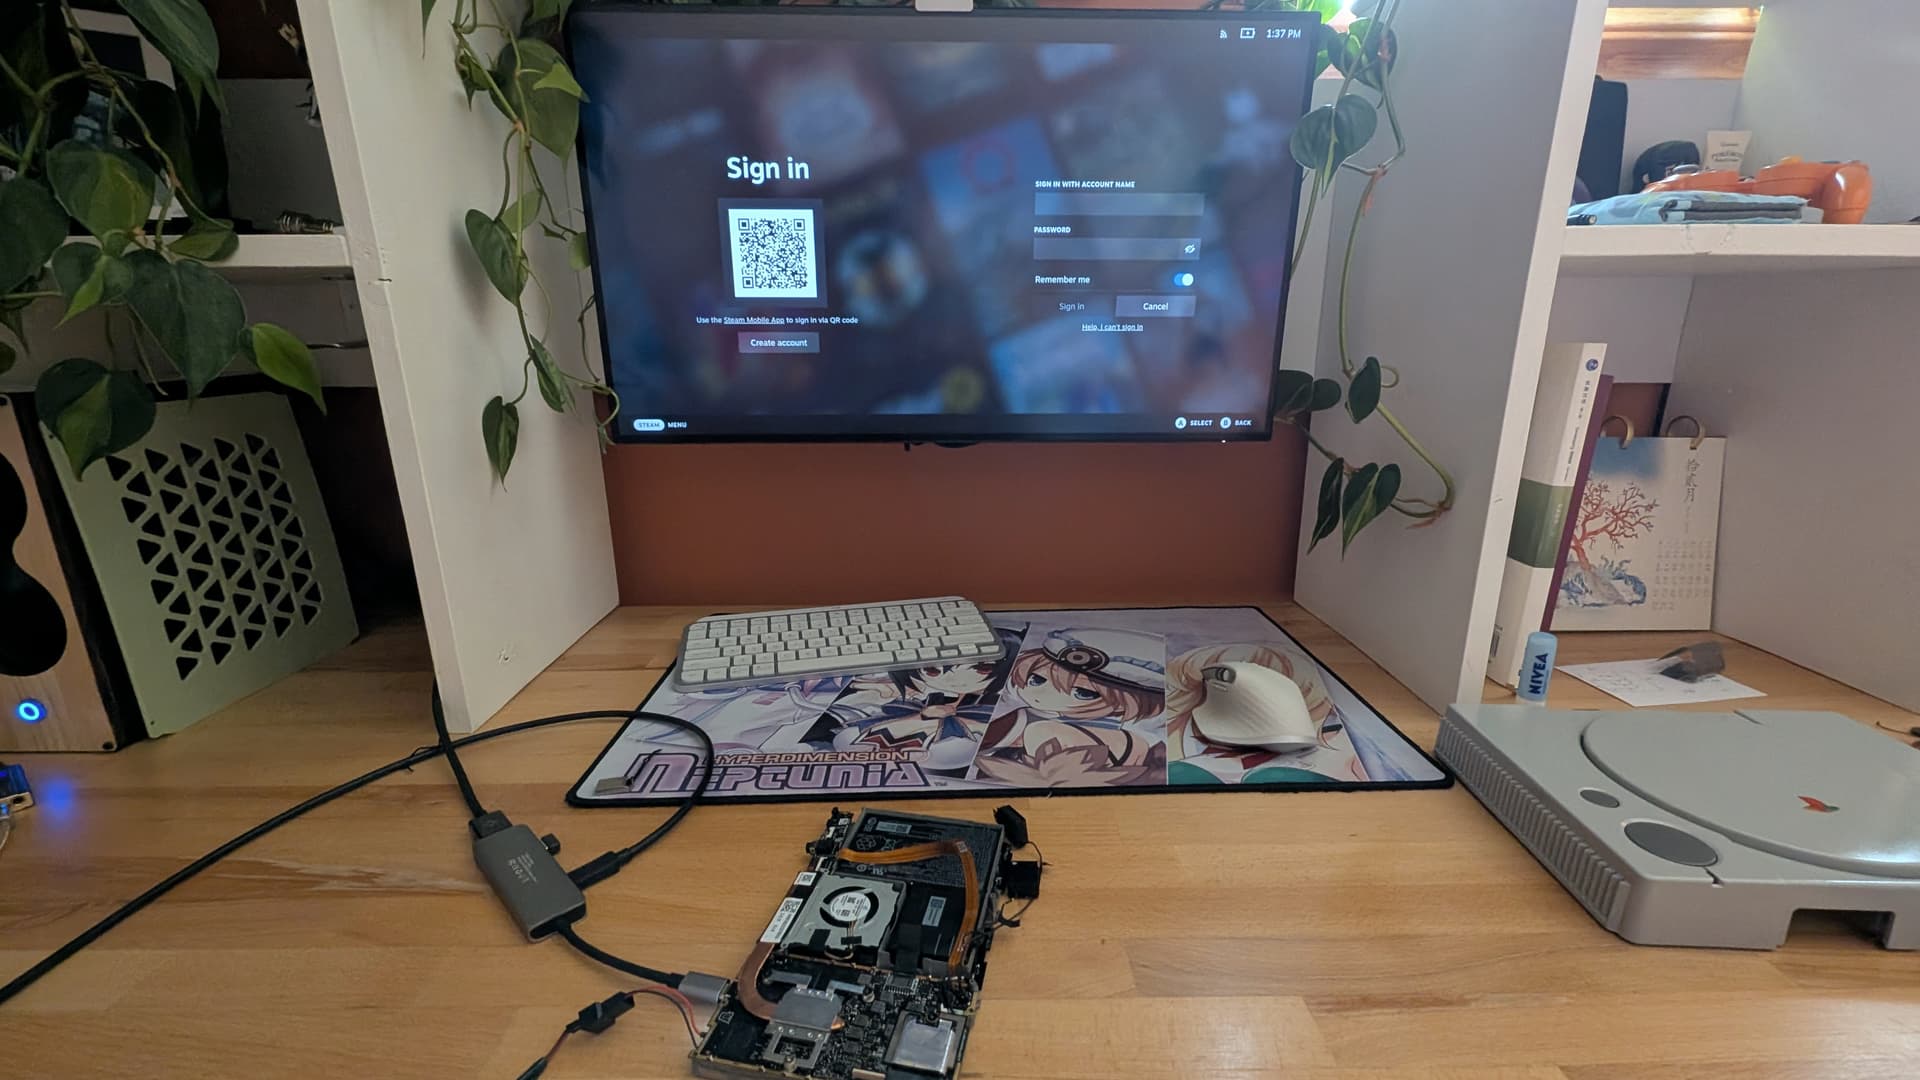
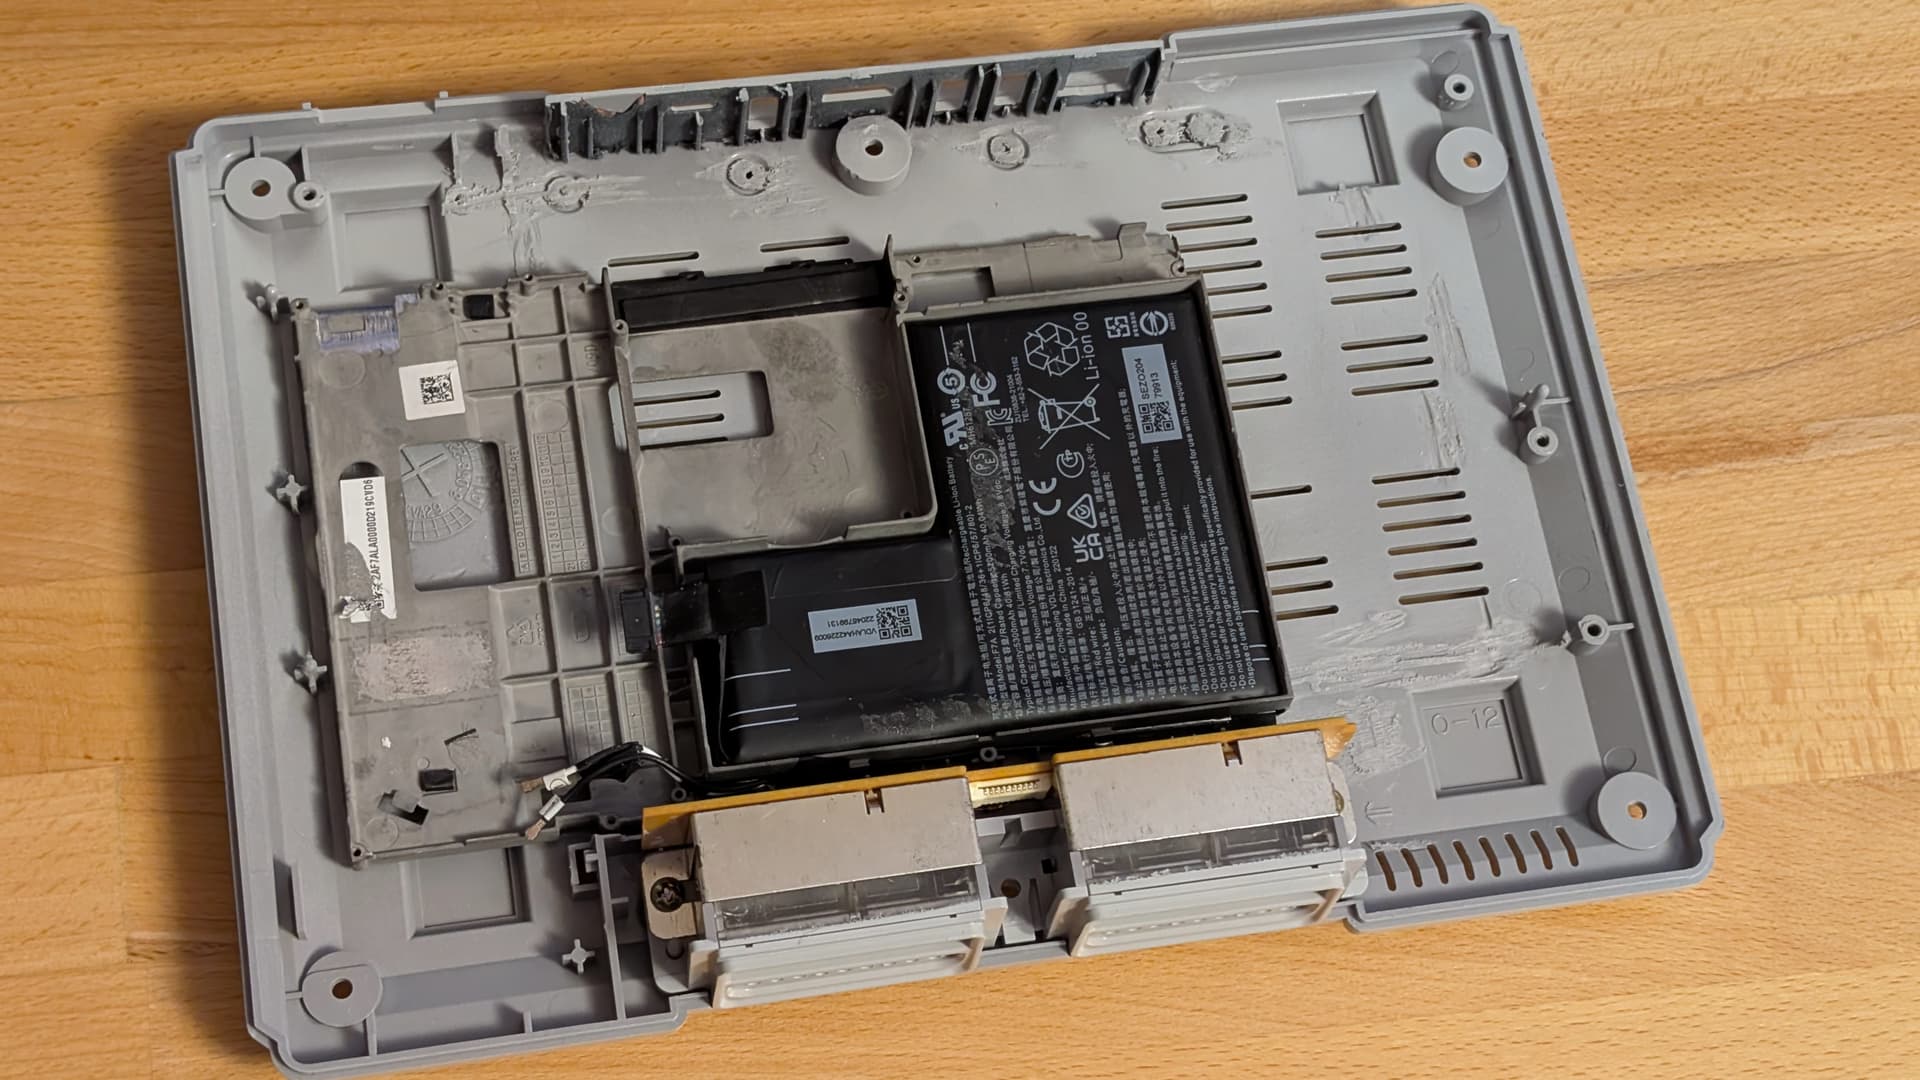
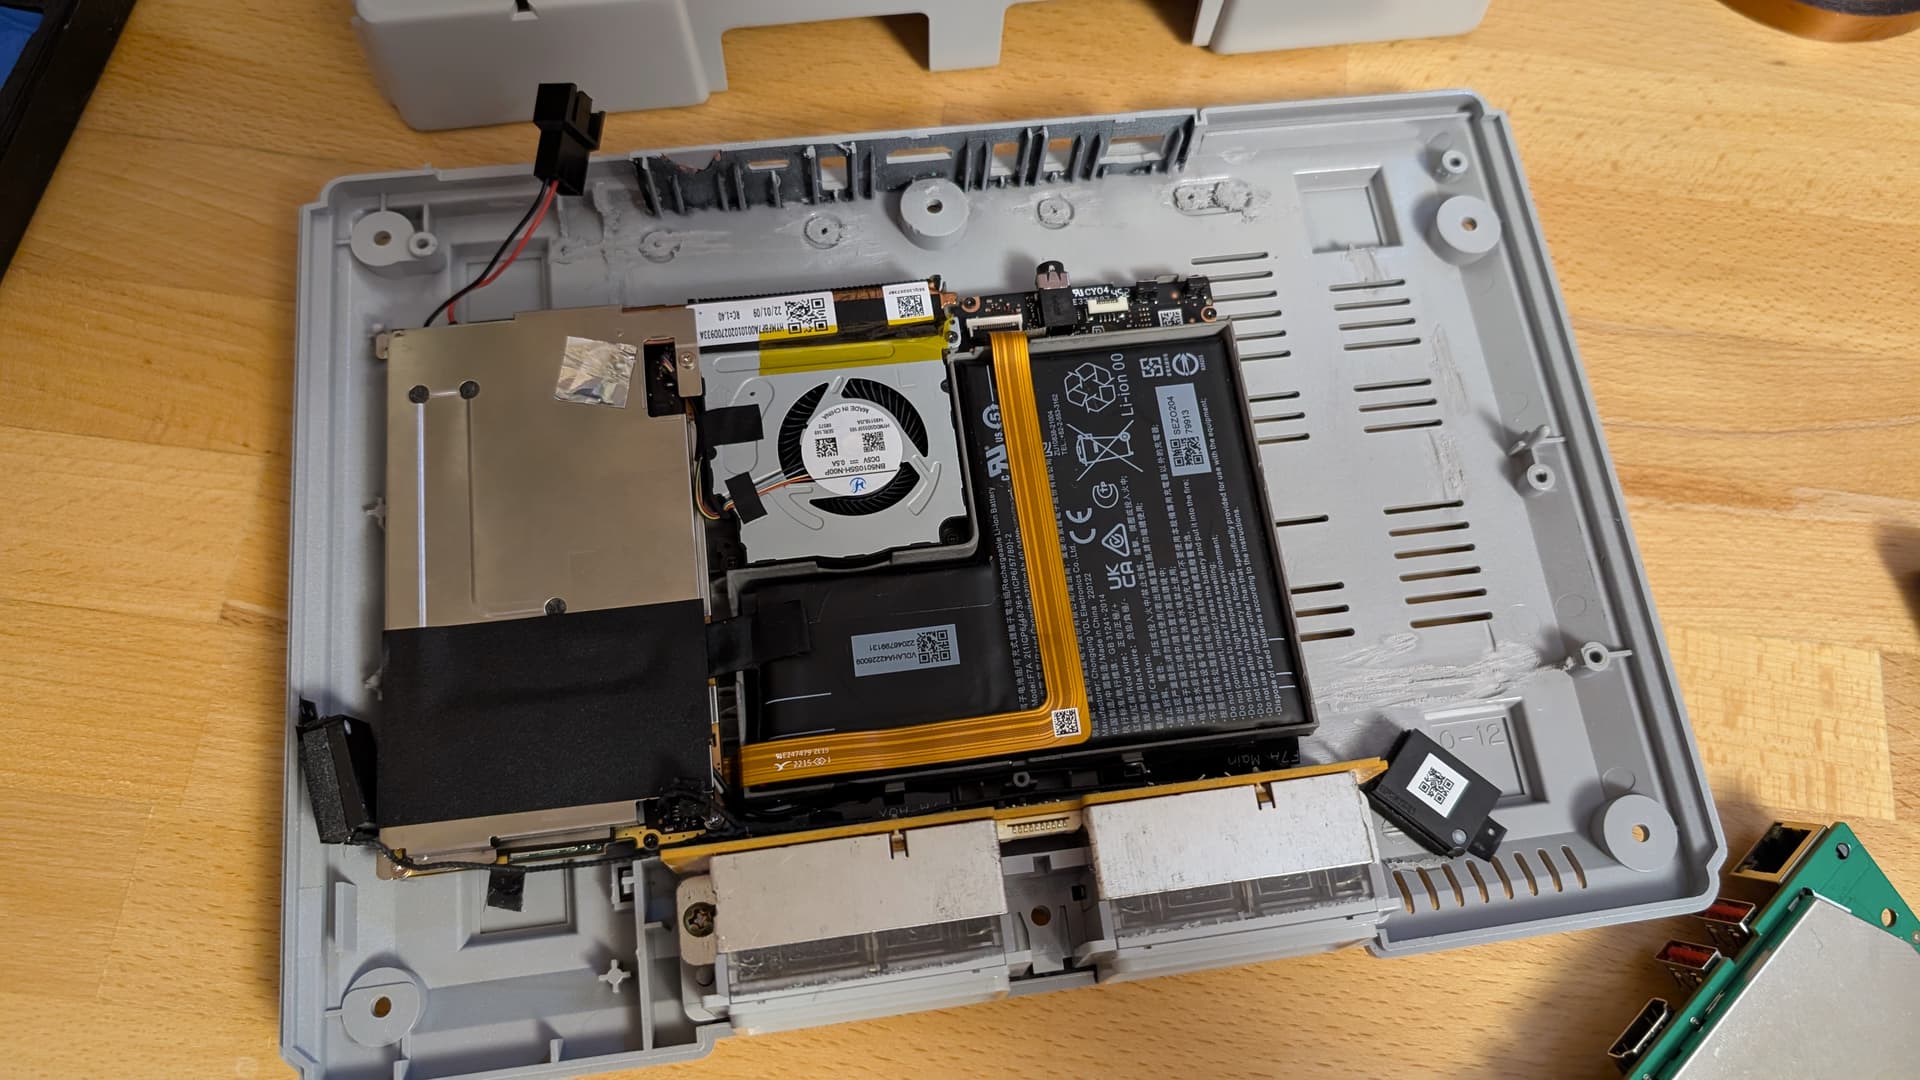
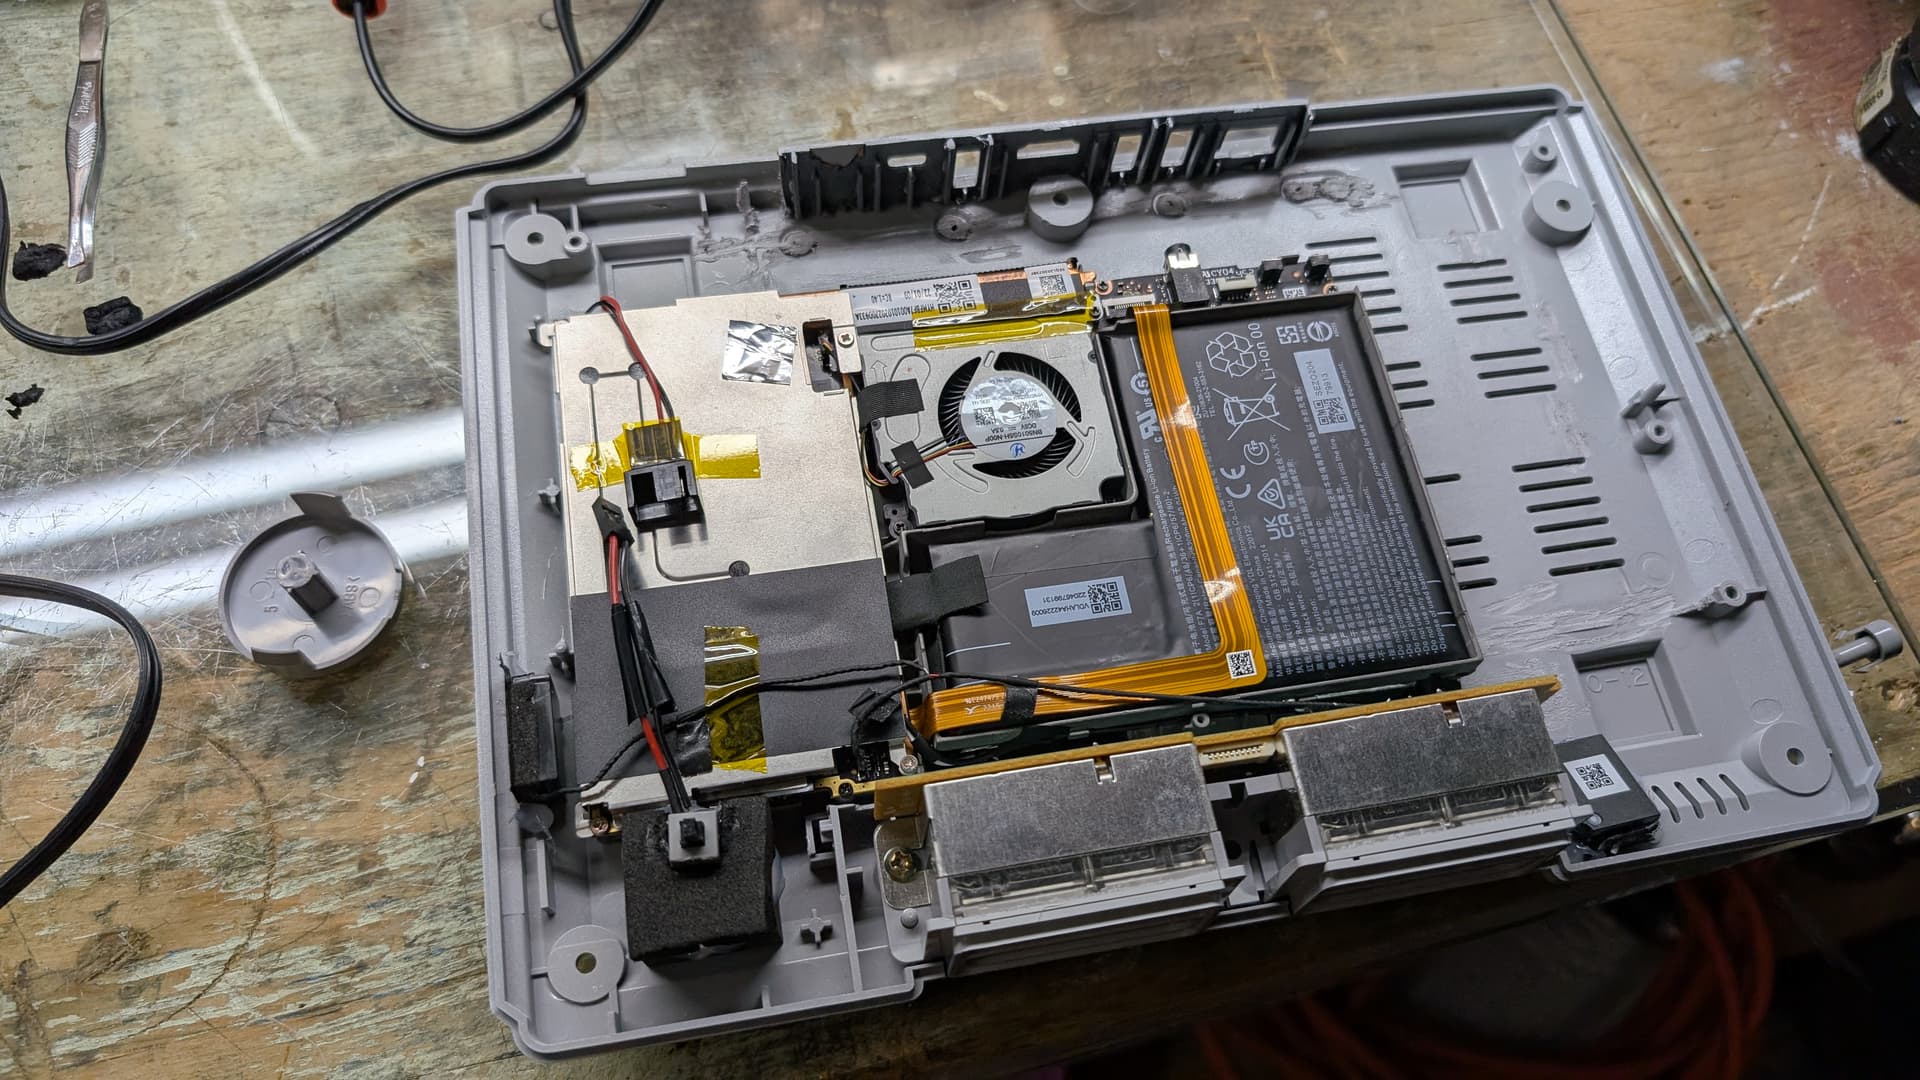
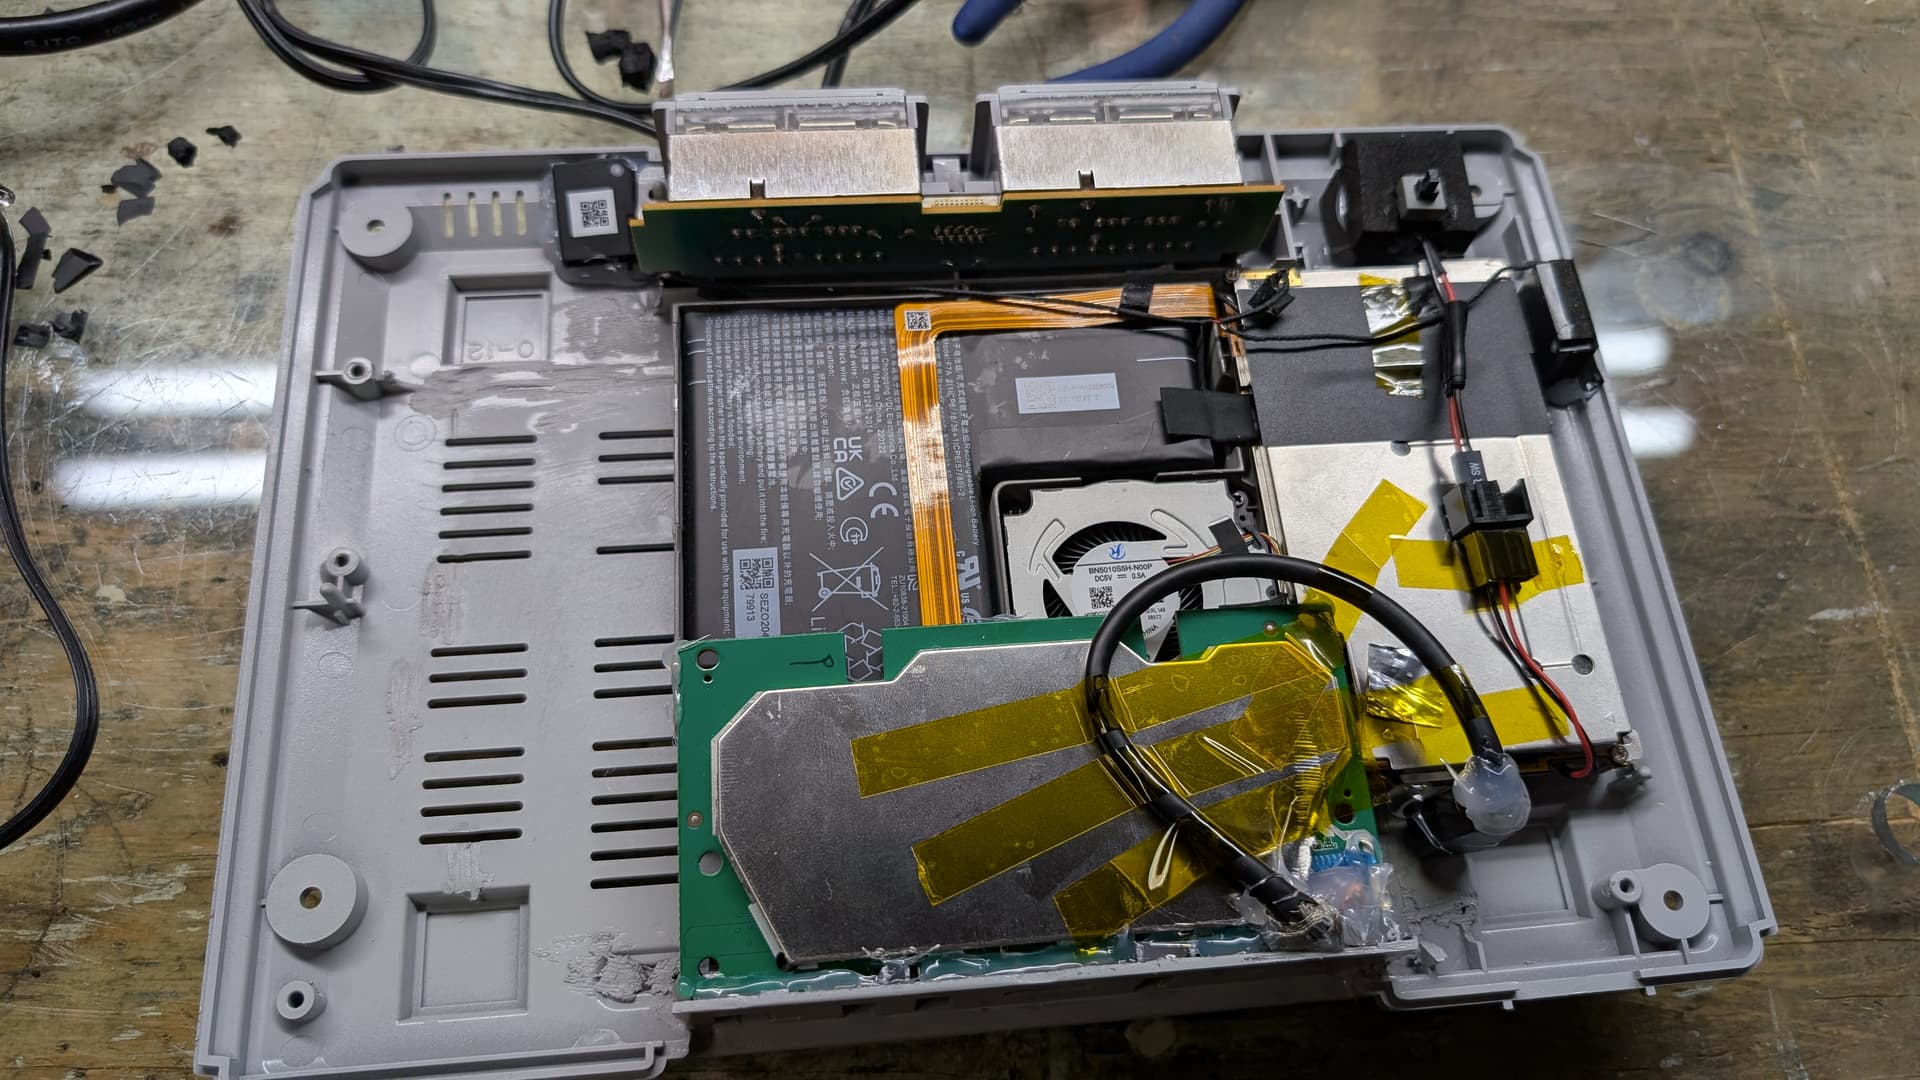
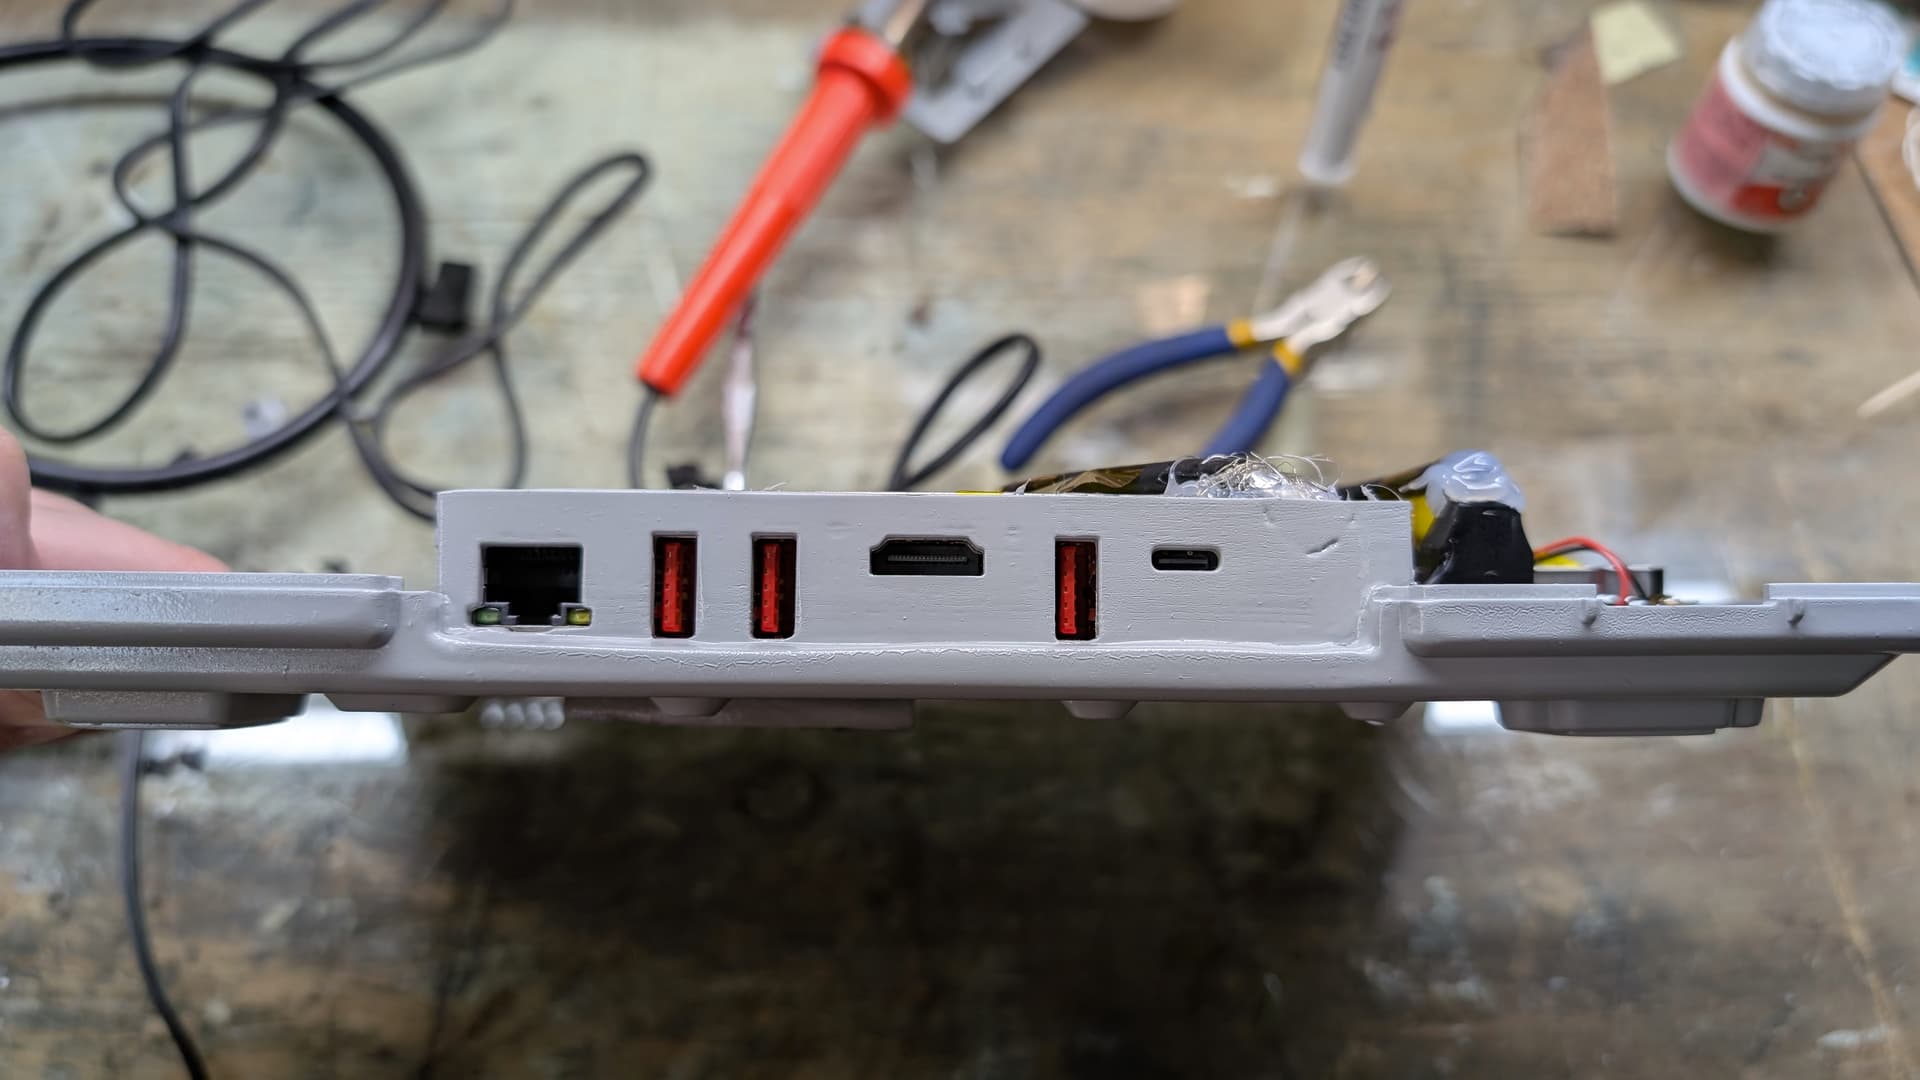
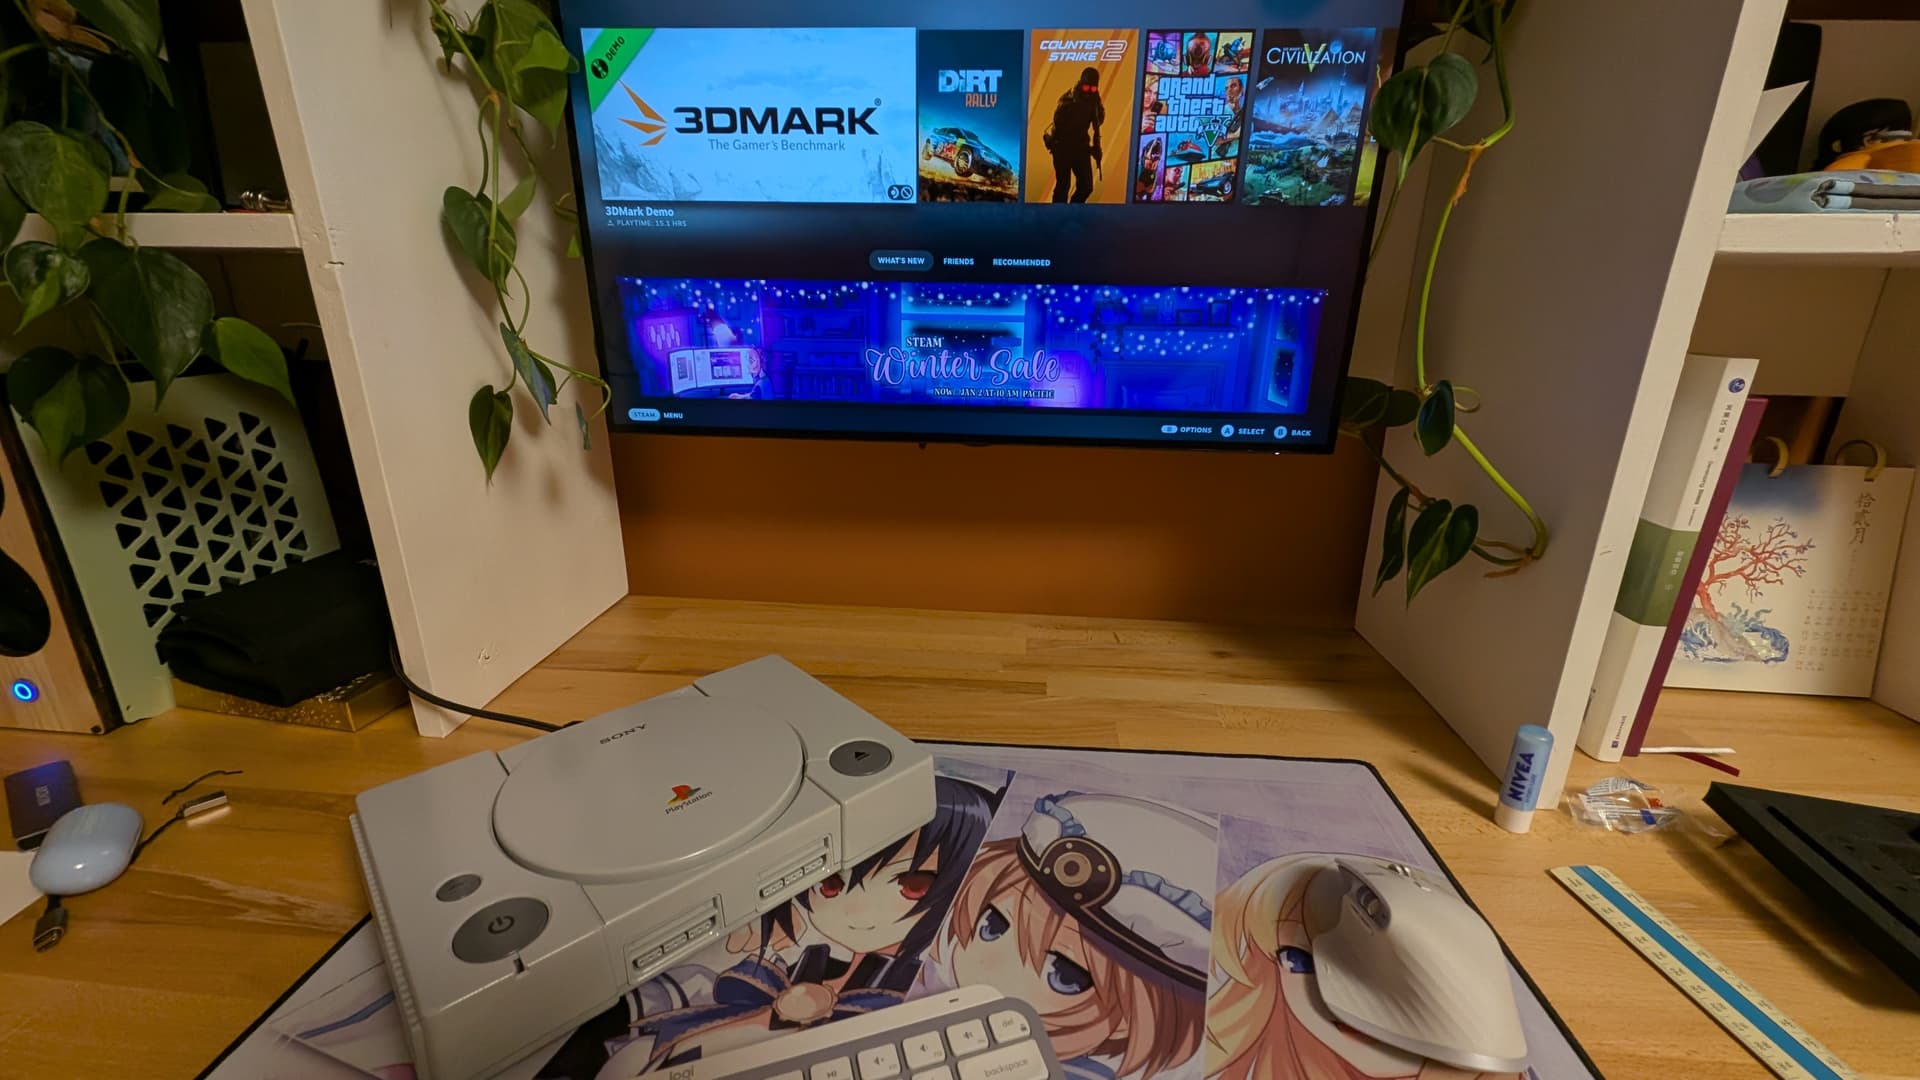
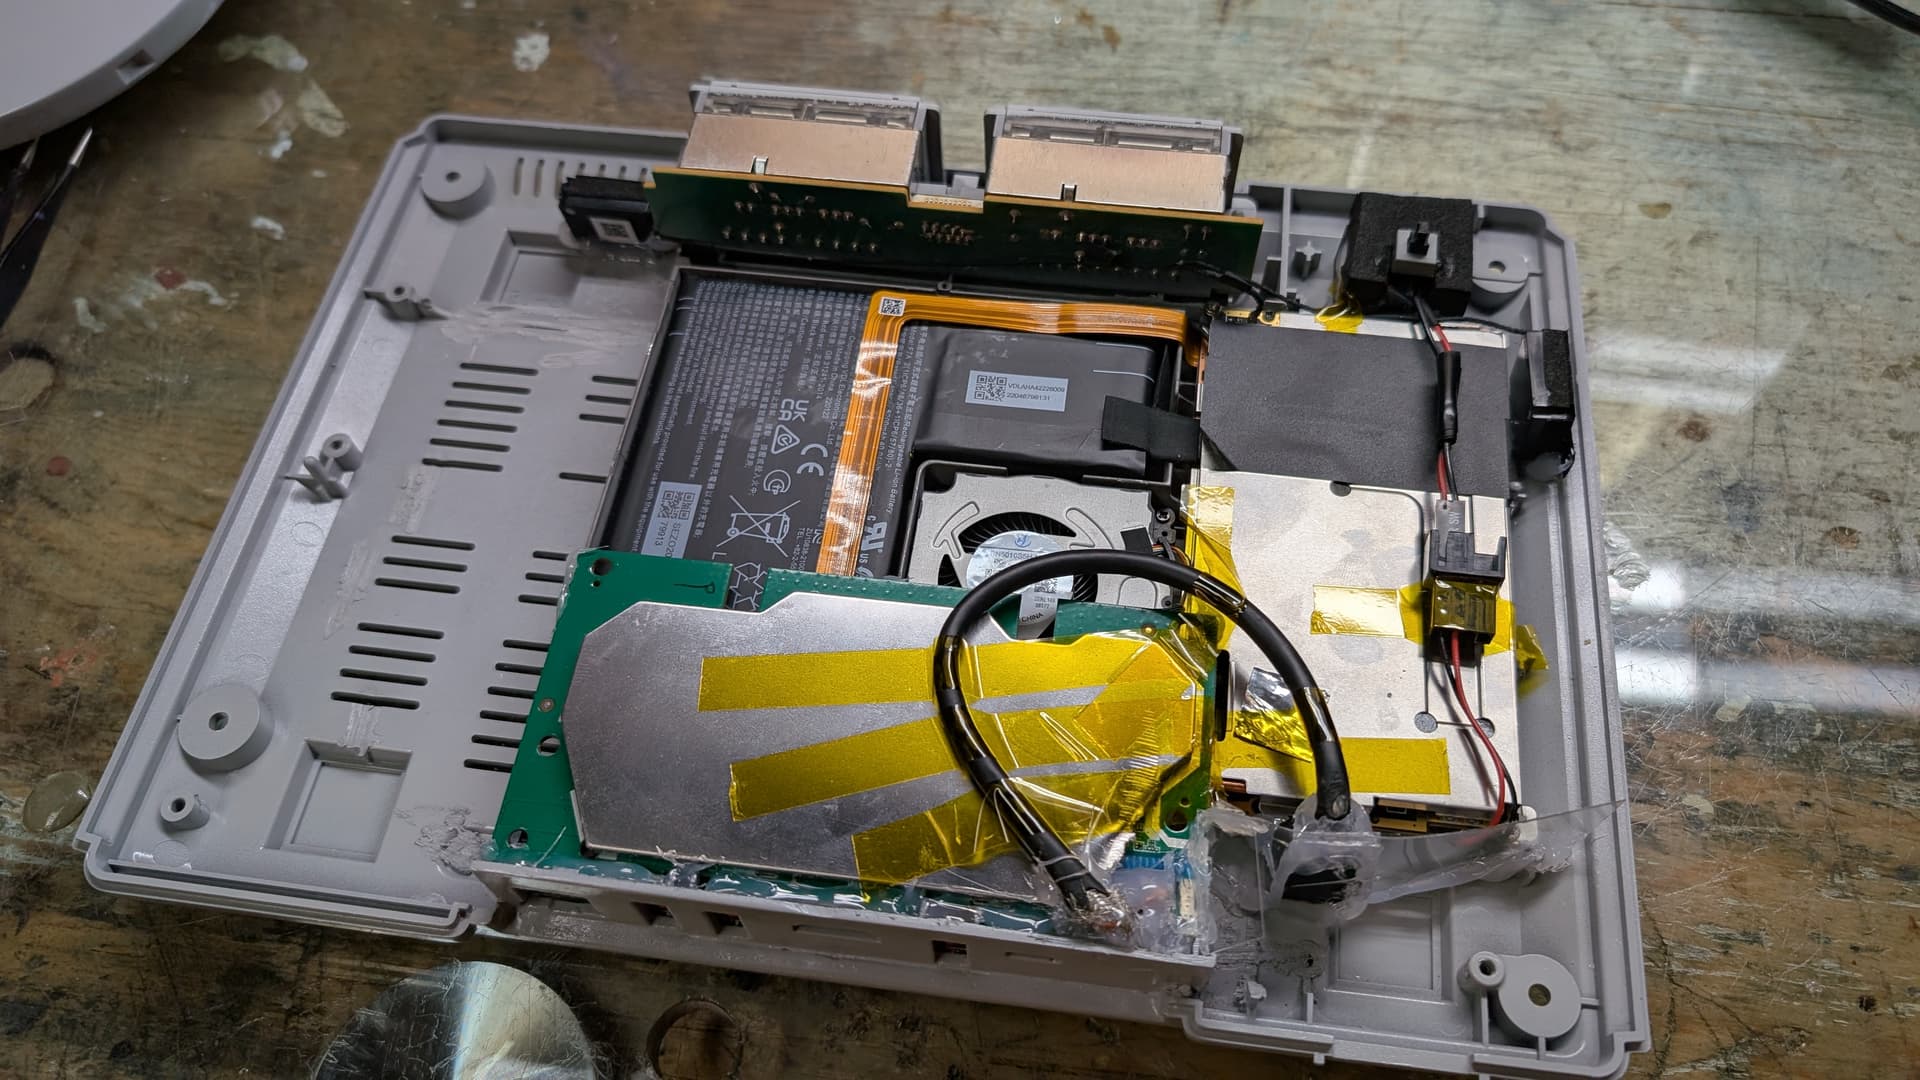
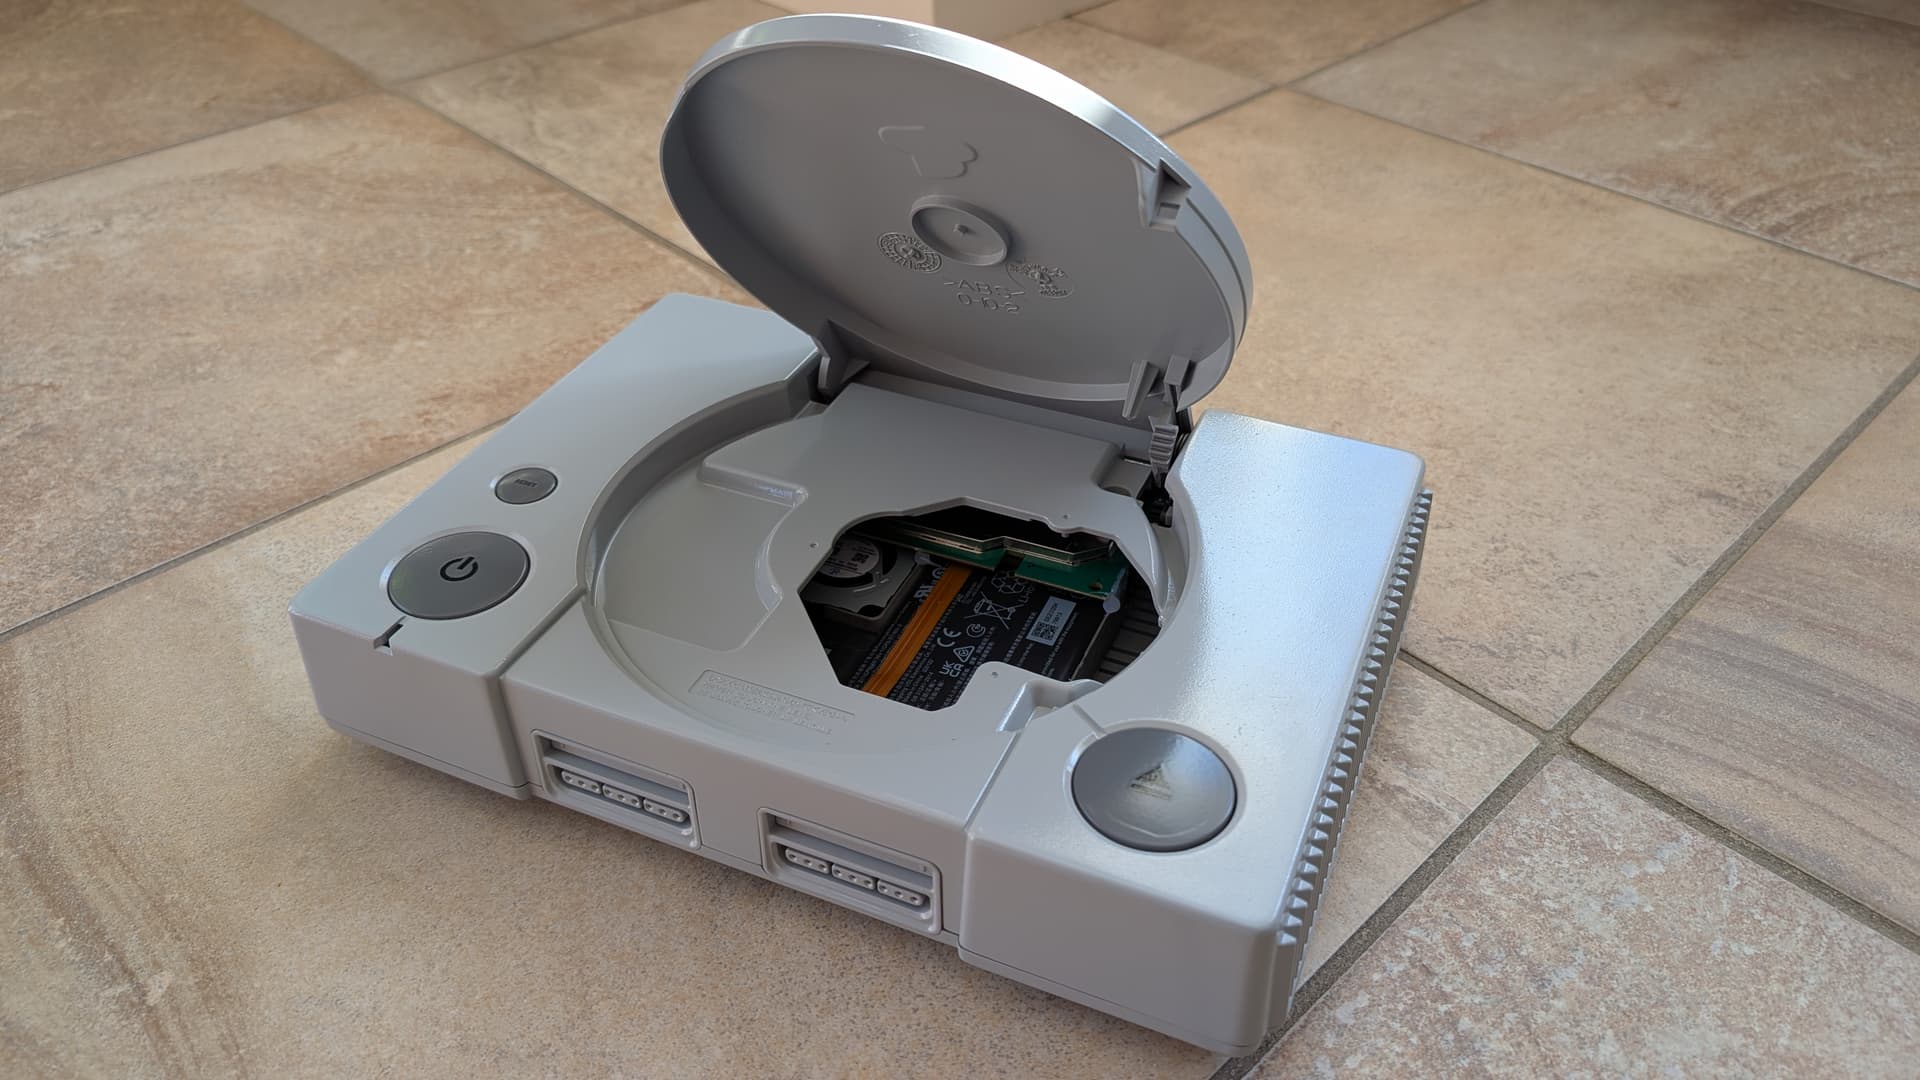
Enter the Steamdeck. Its gaming performance to price ratio is great. And the motherboard is small, so I can fit it easily in the Dreamcast shell (also I could almost put it inside a PS1…). But I would have felt bad to buy a brand new Steamdeck to disassemble it for the project. Well I just got a broken one, with the screen displaying nothing (but touchscreen working though weirdly). But it works beautifully when plugged to a monitor via the USB C. All that I needed to go forward with this project. So follow me as I build this “console” :grin:

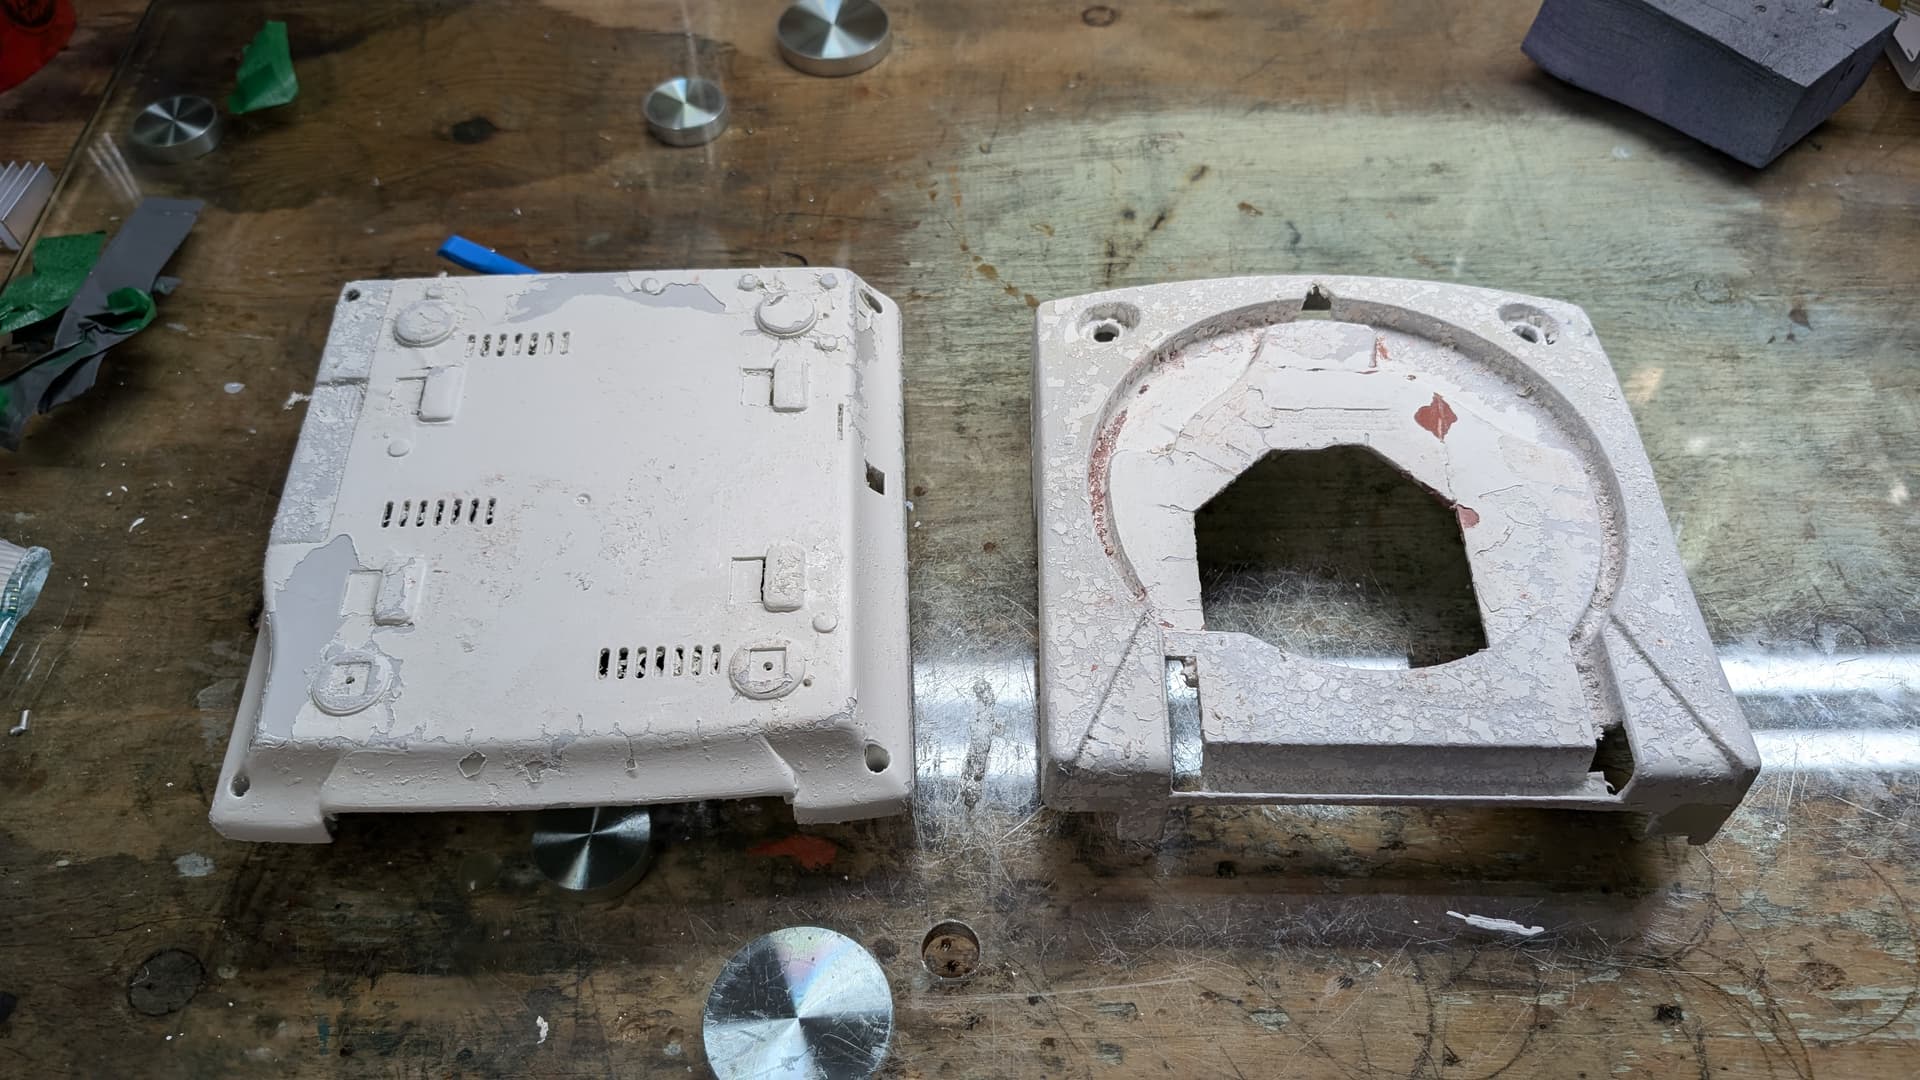
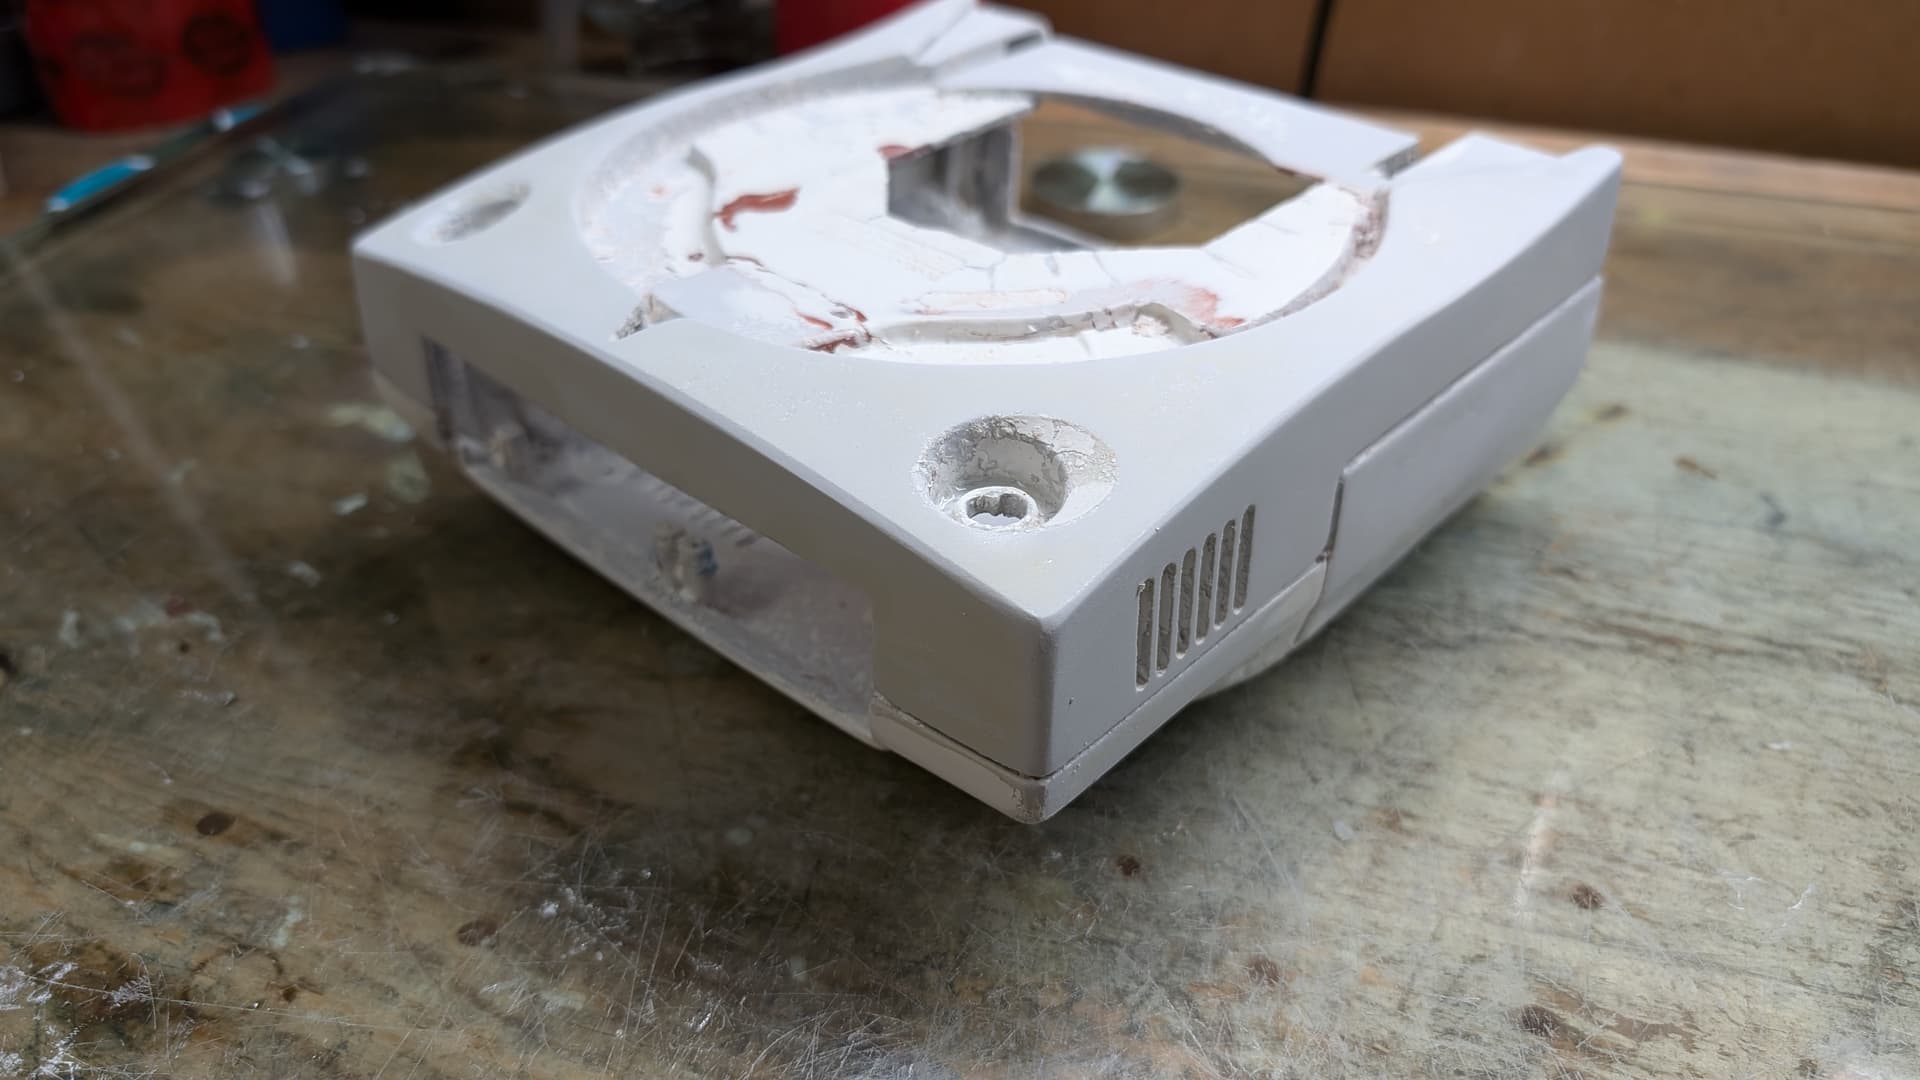
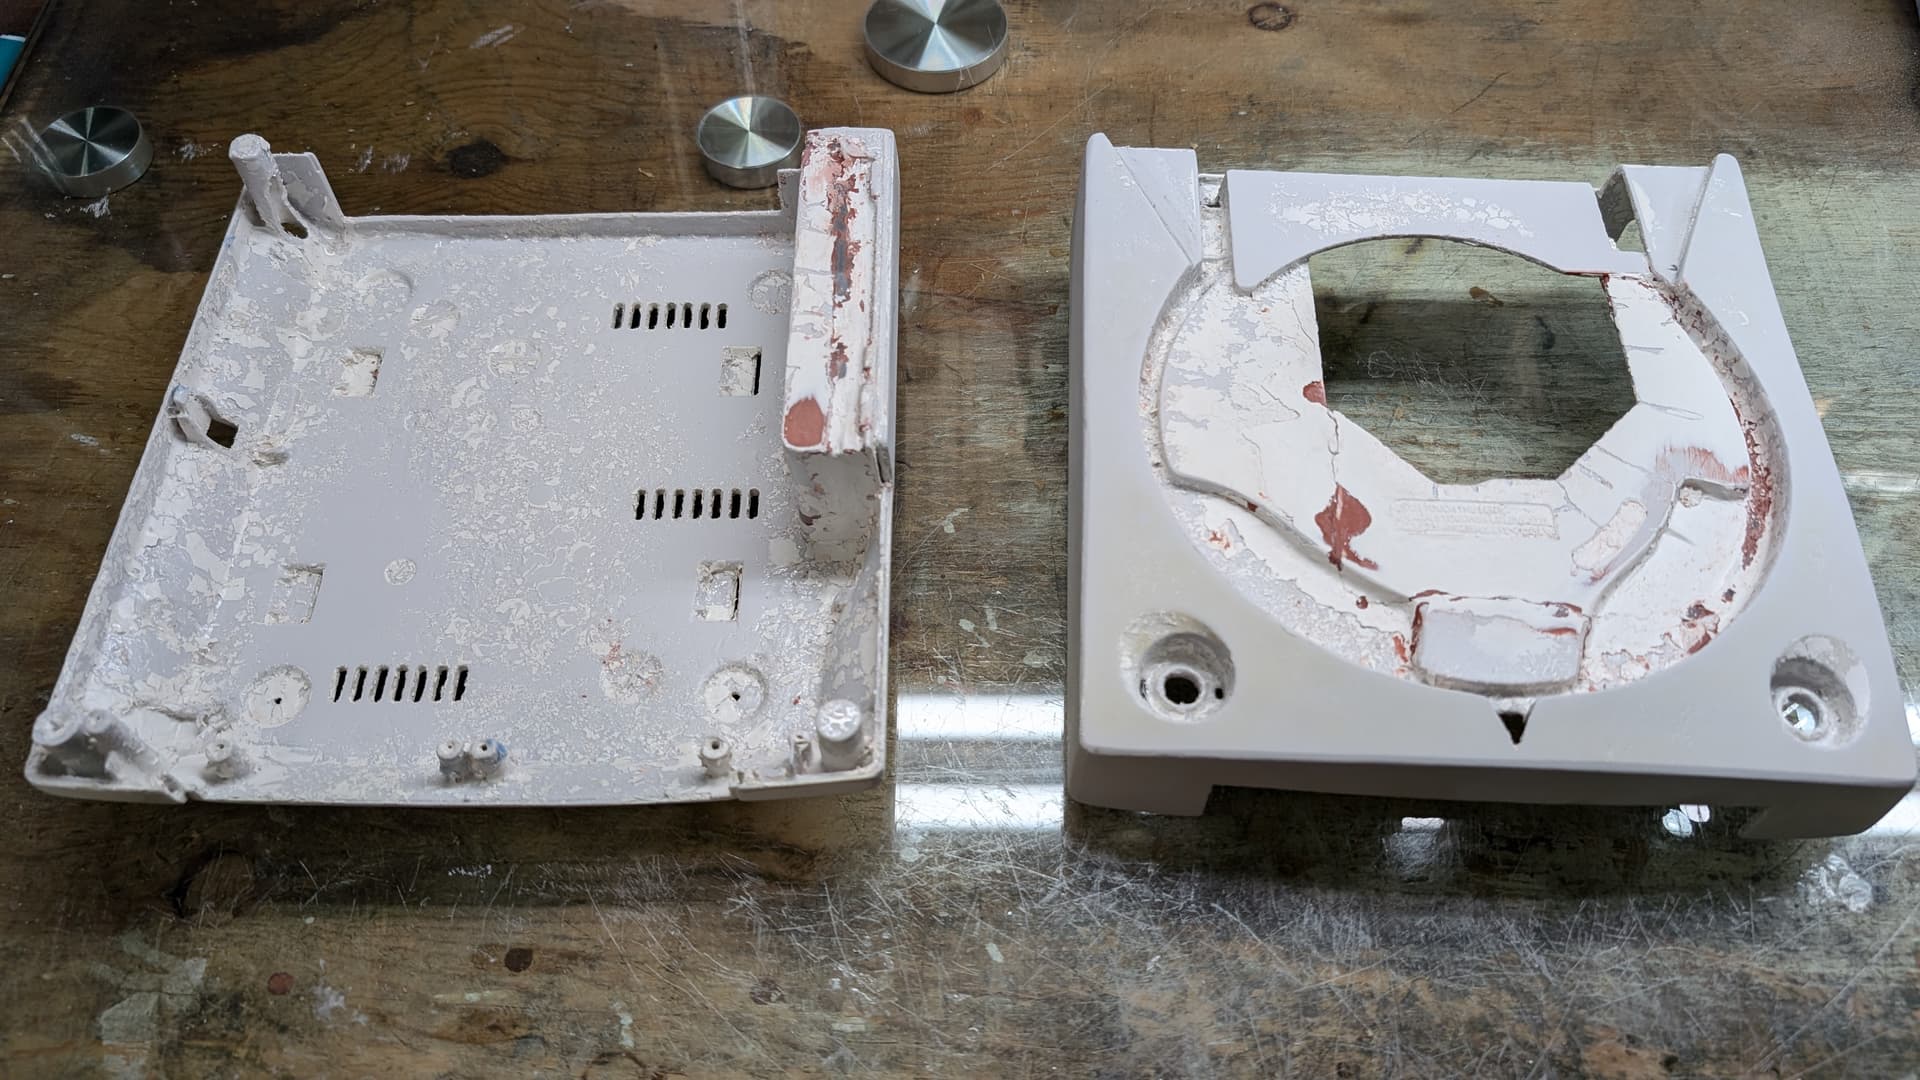
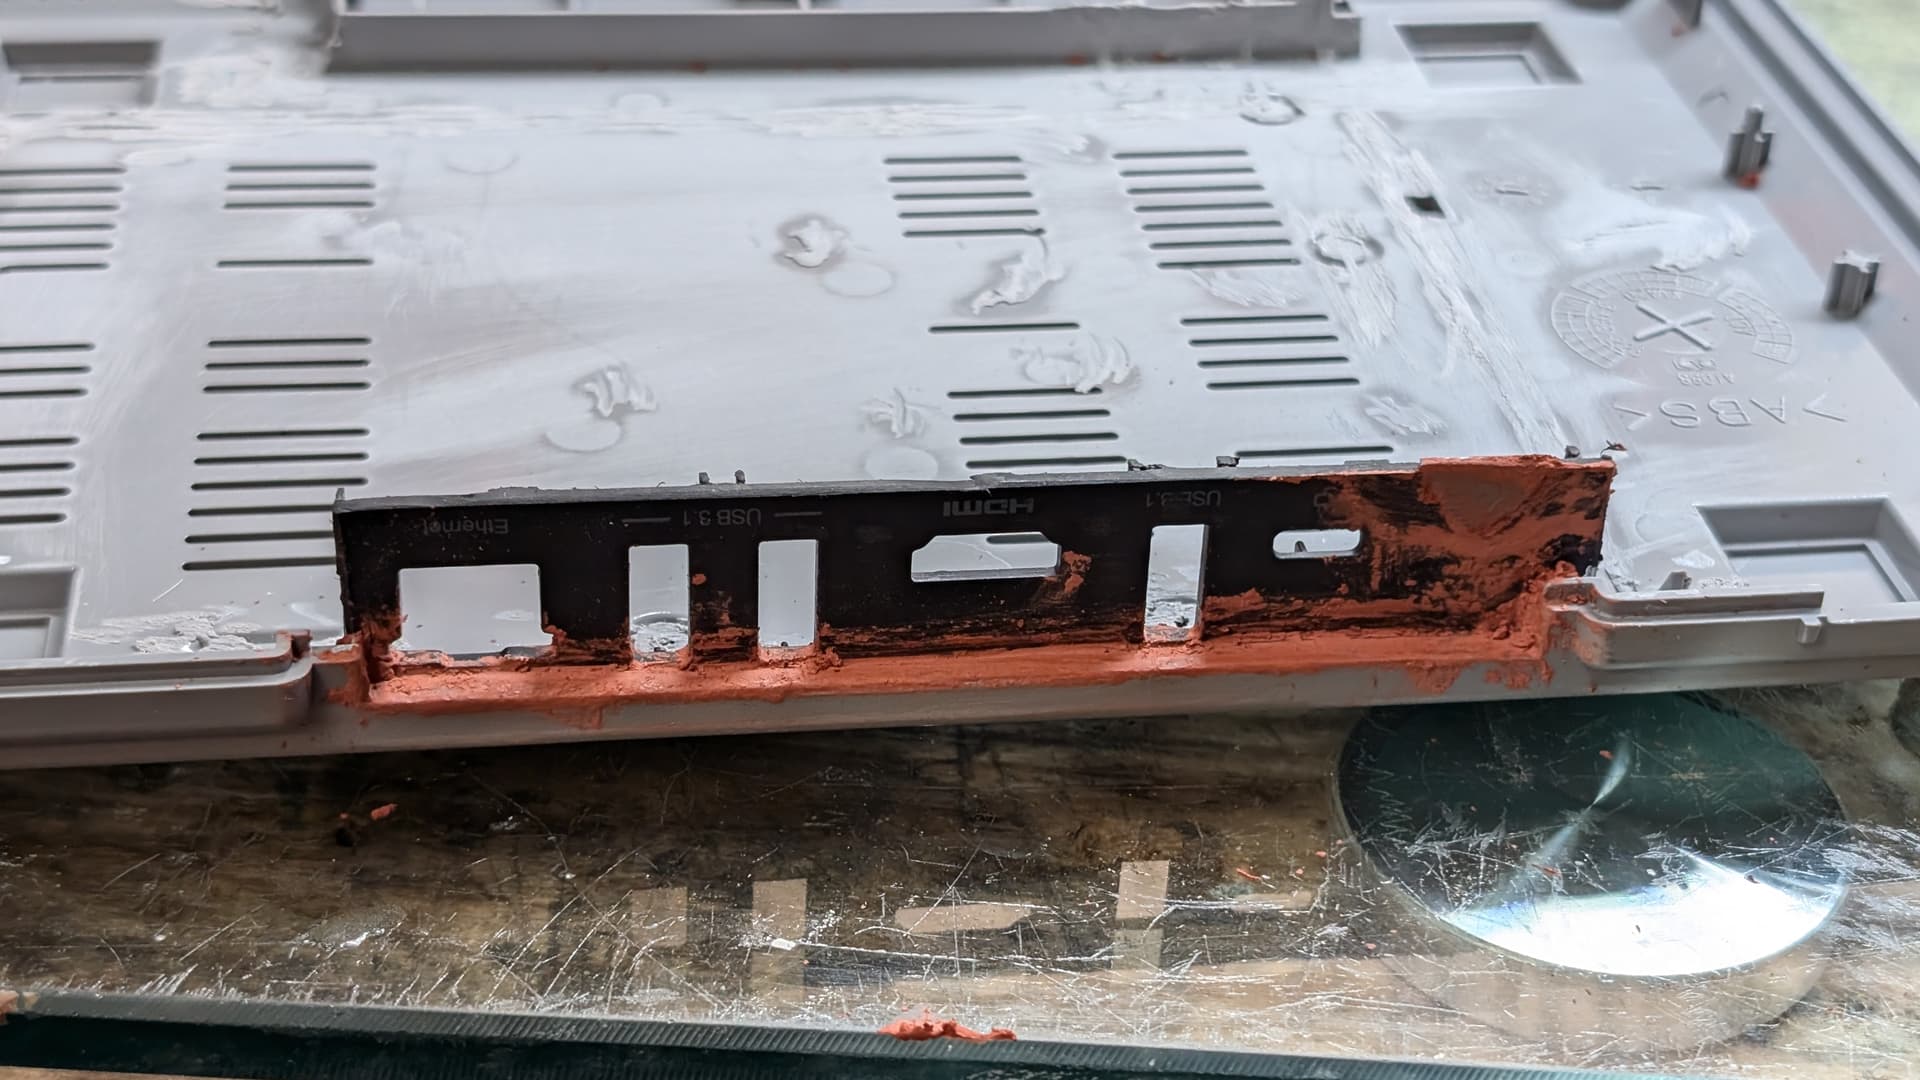
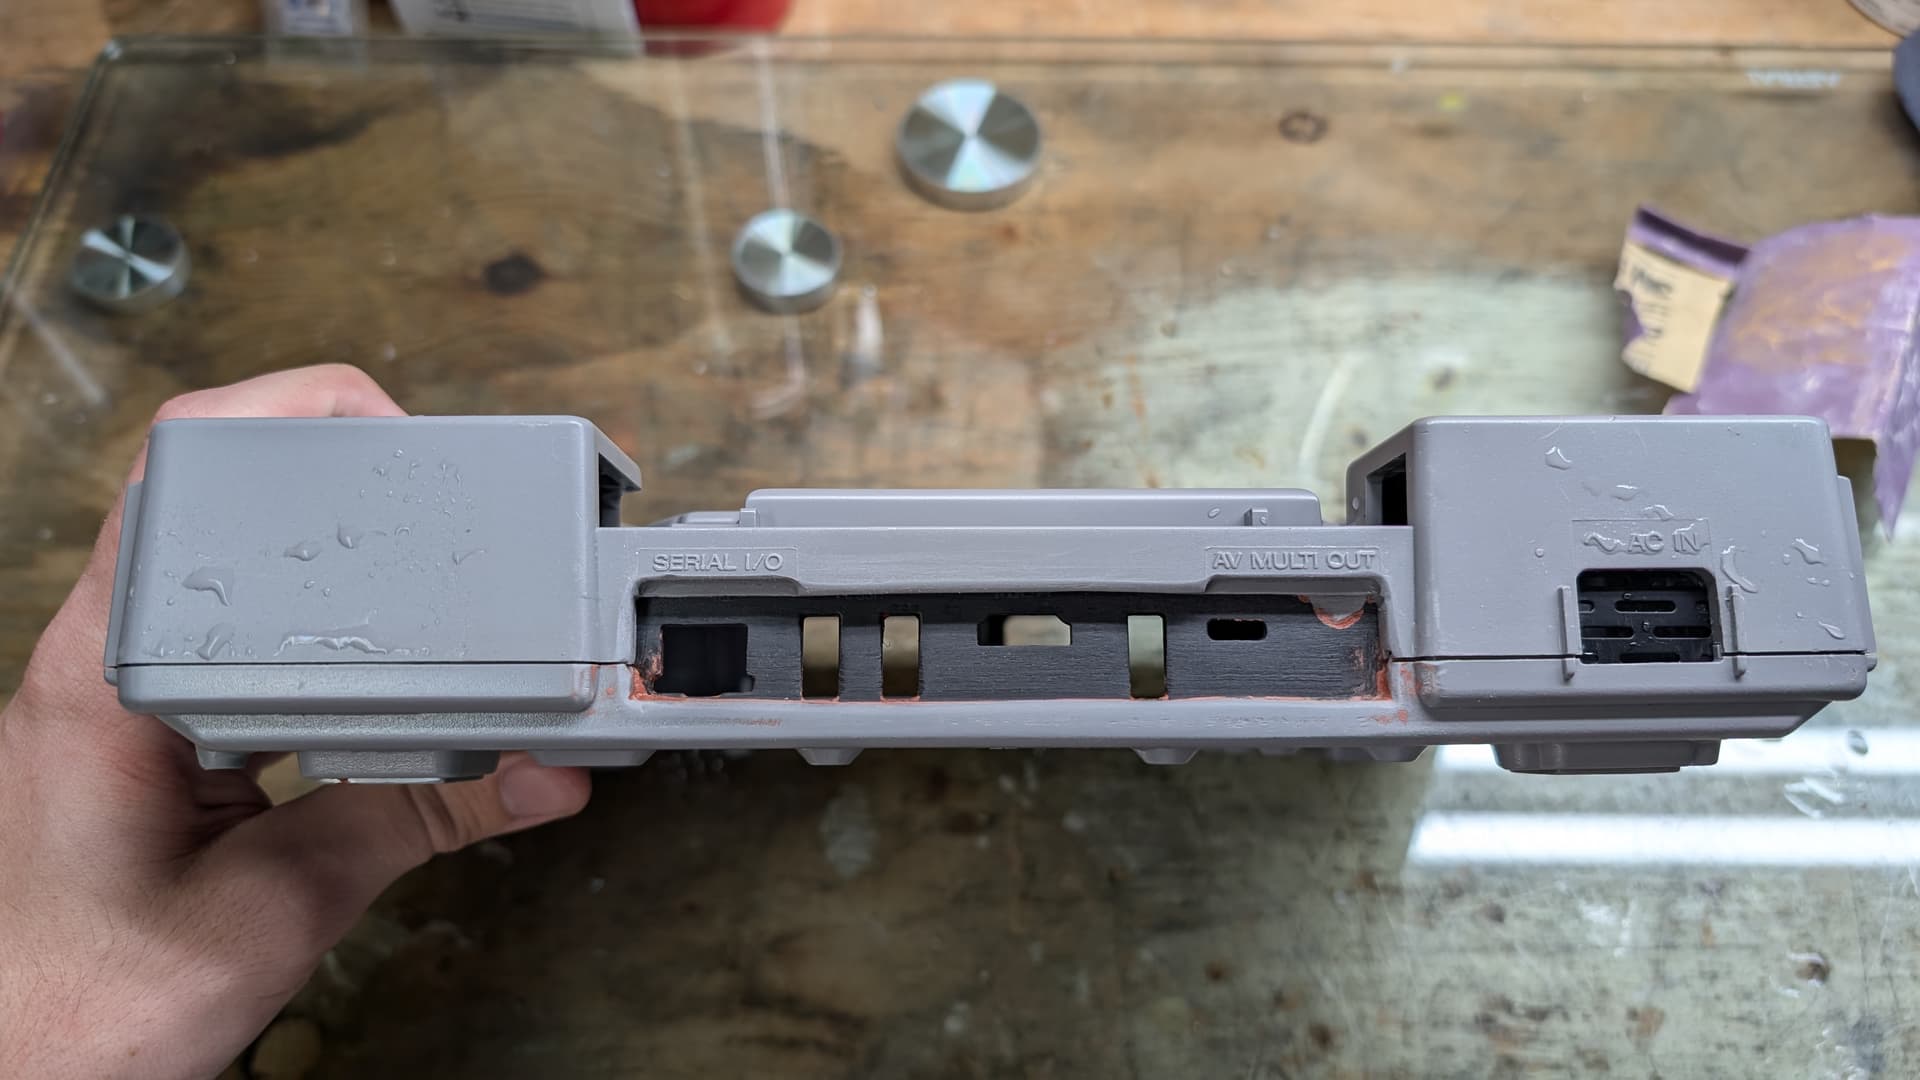
One interesting aspect of the project is the paint job I want to do. I will not do white because it looks too much like it’s yellowed. Plus the unpainted pieces of the Dreamcast shell are yellowed too. So I will paint over everything.

In some LTT videos, including the cutest gaming setup, there’s that wallpaper that is visible. I really dig the colour of that wallpaper, so I’m thinking doing this colour scheme with the project. But also I might be looking to other retro looking paint job, like the PlayStation 5 – 30th Anniversary colour scheme. If you have good ones to recommend to me, let me know.

ii87ri

8 Likes

Is there a high-res version of this wallpaper or is it a wallpaper engine thing?

Edit: Cool, looking forward for the Dreamcast mod and especially for the custom paint-job. Your Gamecube mod inspired to make my own.(although I used a 3D printed modding kit and sourced own PWM fans - the SilverStone Technology FTF 5010 work really fine for this without sounding like a jet engine)

1 Like

I don’t know if there’s an higher version. It’s kind of hard to find any information on it. I think it’s from Tumblr, but to see the version on the original creator page you need to have an account as I think its account is flagged adult content. Without having to go there, this link was where I was able to get the highest resolution

1 Like

So I disassembled the Steamdeck yesterday. I thought at first I could remove the midframe pretty quickly, but no you need to remove everything, including the screen, to be able to finally remove the midframe. Quite a long process with lots of screws to keep track of

Plugged it in and pressed the power button, and after a worrying long moment, the Steamdeck mobo booted as if nothing happenned.

But then I need to think about what I want to do. I initially considered of just putting the midframe as-is inside the Dreamcast shell. I would need to cut the overhanhing parts for it to sit flush, but the problem is that I discovered that midframe of the Steamdeck is made of magnesium. I’m warry to cut magnesium. Anybody has experience cutting magnesium? I just don’t want it to catch of fire lol


Also annoyingly Valve didn’t put any pull-tabs for the battery, and iFixit warn again reusing it when it has been removed. But I want to include it in the build as it would provide some portability and act as a UPS for the console. Should I just go foward, remove the battery, and reuse it anyway? (I’m even less cutting the midframe with battery still attached to it lol)

6 Likes

The magnesium casting likely has a marking to say which alloy it is. For instance, many cars have the bracket that attaches the steering column to the firewall/dash made with AM10 (9.5-10.5% Aluminum, small amount of impurity allowance, remainder magnesium). I couldn’t get a small chip of it to ignite with a torch while sitting on a preheated fire brick.

I would recommend just using a hacksaw since it cut’s easily enough and you wouldn’t have to worry about fire even if it were pure magnesium. For castability purposes I’d bet a penny it’s an alloy. If you don’t have a hacksaw, you can get just a blade and use a heavy glove or tape up one end for a makeshift handle. I can definitely relate to not wanting a project to get out of control with unexpected expenses. I’m personally not a fan of Dremel and similar high speed/negligible torque rotary tools, and definitely wouldn’t use those style of cutoff wheels next to a pouch cell.

I’m so confused by iFixit, they hit the cell with a heat gun from the top? I’d bet another penny it took longer to do it that way than to just take it all the way apart and heat the metal that it’s adhered to. Not to mention safer, although if the cell is drained down then the odds of serious failure is mostly mitigated. Not enough to forego safety measures like working in a noncombustible environment (I built a 52V battery pack on a charcoal grill last week), but given my past experience I would fully expect to be able to do this successfully.

If the cell was in good condition and doesn’t get massively damaged during removal then it is likely perfectly fine, but I wouldn’t tell anyone to expect that. I’d imagine most people replacing the cell are doing so because of degradation or other damage where you wouldn’t want to reuse it anyway. Most cells don’t have problems, and most of the ones that do will have it happen while charging. Again, you can make use of a noncombustible area and run it through a few charge and drain cycles, but for the majority of people I can’t recommend that because people have a habit of neglecting one or more critical safety measures with the potential for catastrophic damage.

Much of this is overblown hype and misunderstandings of the details, but I am not a trusting person so this type of stuff is very much at your own risk. In other words, I am both confident it would work fine yet would never directly instruct another person to do it. That risk assessment is up to the individual. a phrase I once heard was something to the effect of, “Don’t use your best judgement, use the judgement of someone you trust more than yourself.”

Either way, I would set it in a sunny window for a while, metal side up, in a steel pan or something fireproof away from combustibles, and maybe add a bit more heat with a hair dryer or heat gun. I’m thoroughly confident it can be removed without raising the temperature of the cell as much as iFixit did. You already have it out so it isn’t any extra effort.

Your projects are always awesome, so I wish you great luck and can’t wait to see more!

4 Likes

Thanks a lot for your valuable insight.

I did not notice the grade on magnesium would be indicated, I just saw the Mg and I was fearful. But ya it’a AZ91D so 8-9% of aluminium in the alloy, so that’s good to know. I have less apprehension now knowing it’s not pure magnesium, and that with that amount of aluminium I should bot have any problem with cutting it. But I should have guessed it would have some sort of alloy in the first place :sweat_smile:

I wil try cutting off those parts with an hacksaw then. If succesful, I don’t think I will need to remove the battery to remove the protusions near the battery. I will still make sure to not puncture it though lol. But good I will try that, thanks.

4 Likes

So I cut the magnesium with the hacksaw. It worked well, but a bit long at time because I didn’t a good grasp on the midframe (didn’t wanted to put too much pressure on the battery)


However, after that, the mideframe still didn’t fit. There was like maybe a mm or 2 too much.


So I cutted down the small protusions on the battery side at the corners. I filed at angle the bottom of the sides so it would sit better on the front slope inside the Dreamcast. And I removed more material inside the shell. After all that, the midframe fits, and is really thight lol. I would almost not need to secure it down lol.


I don’t intend to put controller ports this time around. For a console to sell, it’s strange to have Gamecube ports with a Dreamcast lol. And Dreamcast controller adapter, there’s only one that exists, and it’s a 1 port adapter. Instead I will just use those opening to include the Steamdeck’s speakers and to have an intake for air

6 Likes

So, I bought a Thermaltake low profile cooler with the expectation of using it to cool the Steam Deck, but now test fitting, no matter how I twist it, it would be hard to fit and too big. Also it doesn’t really allows flow through one side to the other as I want to ceeate a directionnal flow out of the case.


So I will return it and instead buy one of those aluminium heatsink. https://www.amazon.ca/gp/product/B07CWLZ4MV/ref=ox_sc_act_title_2?smid=A28ZWXW3ZSVNZU&psc=1
The fin density is not great, but I’m cooling only a 15W TDP cooler. So I guess with two Noctua NF-A4x20 5V and a duct, it would provide enough airflow to cool it down. I will be able to cover all the components on the board. Also, I will be able to easily drill holes to mount it.

As for the ports, the dock I got as a huge PCB. But using the aluminium heatsink make it less of an issue. The only thing is I don’t want the USB C cable to atick out from the back and to keep it inside the case. After disassembly of the MoKin dock, I’m unsure if I can bend the connection without breaking anything… I don’t want to solder those small wires :sweat_smile:


6 Likes

So I fucked up.

But first the chronological advancements.

Back in September I bought a cheap aluminium heatsink for it to become the cooler. Inspired by Linus’ hot rod mod, I estimated that putting a large instead on top of all the motherboard, with the airflow of two Noctuas 40mm in a duct, would be enough to cool everything with the blower fan removed.

I cut the aceylic with an hacksaw, and then promptly discover soldering aluminium is not easy. I wanted to solder nuts to the sides of the heatsink so I can secure externally the heatsink. So I bould epoxy for metal to bind everything togheter, but even if it was rated for aluminium, it just ended up good for nothing.


Lately the weather has been warming up, so I wanted to use that opportunity to begin to paint. I really like the colour I chose. The small pieces came out beautifully with the dark grey paint


But then the issue began. The main parts of the shell were painted with heavy coats of paint, in part due to the use of white (never gonna paint white again). But I didn’t wanted to sand down the paint because it’s so labour intensive.

So wanted to go the chemicals way. The problem is the white I used is a Krylon Fusion, which is very resilient as paint. WD-40 didn’t had any effect. Didn’t wanted to go to acetone. But the paint thinner seemed to have an effect on the clear coat, which is just run of the mill Krylon paint and became gummy when exposed to the paint thinner.

So for the CD cover I swiped off the the clear coat by putting paint thinner on shop towel. It did took a lot of paper towel and time to remove the clear coat though. I did a light grey paint on it and came out great. I really dig the combo of the light and dark grey


For the two remaining pieces, I wanted to make the process faster. By splashing a bit of paint thinner on the bottom piece so I don’t have to soak the shop towel all the time, I noticed that some of the white paint orange skinned. So the paint thinner was also affecting the white paint. So I proceed to splash more paint thinner on the pieces. Did helped removed some paint, but not all.

So the next day, decided to put the pieces in a ziploc bag with some paint thinner and shake it at least a minute to cover all the parts and hopefully cover all the paint removed it. After I dipped in warm soappy water to remove the paint thinner so it doesn’t affect the plstic. The pieces were king a tacky, but I thought it be because of the clear coat. But, no it kind of affected the plastic…

Sand down a bit with a hand sander to see if I could salvage. I could salvage a bit, but to be realistic it would require way too much labour to bring it to an acceptable state. I really messed up that much


So I don’t know what I will do next. I think I might try instead to find a dirt cheap PS1 or Wii, abandon the idea to do a custom heatsink by using the Steamdeck cooler and blower fan to keep everything simple, and have a finished product at the end that I can sell to at least recoup all the expenses.

5 Likes

Welcome back to the new project
DeckStation 1 (DS1)

So ya, I’m doing now a PS1 build. I got a cheap one for 30$ which include a controller, which will be helpful.

It’s the first time in my life I have a physical PS1 in my hand believe it or not. It’s bigger than I expected. Bigger than the Dreamcast. But anyway.

The PS1 was so dirty, with even spider-webs inside eugh. Also I discovered the previous owner made a jank repair with wires and a new microprocessor lol


But cleaned everything, much nicer now

So the plan is to have the USB dock on the back, with the Steamdeck assembly setted back. This way I can plus the USB dock inside and have nothing show up, just look as a normal back IO. And I will just have to duck the exhaust to make it exit to the back too. So I need to flatten the inside. So I need to buy a new dremel because the current one is dead


Also I need to paint. Speaking of paint, I will not make the front port connectors functionnal. First because I just drowned it in water to clean the disgusting lol. But also because I will just uses the controller that was included, paint it, and make bluetooth with the 8bitdo kit. That would make a nice set to sell.

4 Likes

So I’m trying to do the bodywork as quickly as possible so I can still have the opportunity to paint without issue.

I went the simple route, I took the casing for the deck from which I use the board and cut the IO cutout to use it as the back IO.

Also I do have less height available than thought. So I’m not able to do a vent for the hot air coming from the cooler. So I decided to use the AC port ipening for that purpose. I will need to do a long duct to bring the hot air there.


Now the body job is done. I find it looks not too shabby.


(Also I found out I had a Dualshock controller, which is is not the OG PlayStation controller for which 8BitDo has a mod kit. So I cannot convert the one I have to bluetooth…)

4 Likes

I finished the painting. Looks good I like it. The next part in the aesthtic aide is surely to acquire water decals so I can apply an eject and power sign on the buttons, as well as maybe a “DeckStation” written in PlayStation font.
(Also a stupid fruit fly landed on my tray cover when I was painting it, so I had to sand down a bit and repaint it)


Also I still need to figure out how to use an external switch to turn on the Steamdeck lol. I’m sure I just need to jump two contact points, but I have been lazy still not tried it.

5 Likes

Ok, so my semester is done (that last one was crazy :face_with_spiral_eyes:), and the holiday vacations are here, so I want to fastfoward this project to finish it as quickly as possible. With how weak is the CAD right now, it would also be easier to sell to an American.

So, one of the things that was holding me up was needing to find a way to make the power button functional. The 3 pins of the Steamdeck power button made me wary. But after some readings, I determined the center and left pins were the one I wanted to use (and that the right pin is surely the gate to the light when the Steamdeck is charging). Everything soldered seamlessly and it worked! So the biggest hurdle was cleared.


After I filed the magnesium midframe at the power button location so the protruding wires could fit without colluding with anything.


I also installed the 512GB ssd that was in my Surface Pro X and image SteamOS on it, and that worked too.

So with all that out of the way, it was time to permanently mount the midframe. So I epoxied it to the bottom of the case, hot glued the speakers (because they can be helpful for troubleshooting if ever something is not right) and I made a spot to install the power button.


And at last I installed the USB-c hub. So everything is well and working. It’s great to have that done.


But some small modifications need to be done. By example, the cable of the usb-c hub do interfere a little bit with the upper section of the case, so I need to remove some material from it.

And after I need to do the decals to pimp out the style. Bought a decal paper a while ago, and never did that, so that will be new. I will try first on the rip Dreamcast CD cover before doing it to the PS1. Also I need to do some clear to the decal apparently to transfer it. And it’s cold outside. So I will do the “spray outside for 10 sec and come back inside trick” lol. I kind of want to finish it before Christmas Eve and after stress test it to make sure there’s no issue at all.

I don’t think I will be able to do a power light, because the Steamdeck do not even have one.

5 Likes

So I had to trim way more material than expected. I realized that the CD cover was entering in conflict with the hub. The gear and the stopper more precisely. So I had to cut those. Now the lid cover opens quickly and bounces doing so (she last vid), but just for the fact we can still open yhe lid, I let it as is. It’s just a nice party trick. But the shell can be closed now.

So it was time for the decals. I printed three sheets of decals as I discovered my printer is not the best to print decals. When printing, the printed side faces down and fall on the plastic basket, which is not great for decal paper where the surface is sticky and the ink not dry. Cleared coat the sheets as per the instruction.


Was practicing applying them in the Dreamcast shell

And then on the PlayStation itself. Everything went well!

Just had to clear coat the buttons as those will be touched to seal the decals.

And now everything is working! Just need to build a rudimentary duct for the exhaust to avoid mixing warm air inside the case, maybe adjust the power button (because it doesn’t have a satisfying sound like in my other builds) and test it more extensively.


I think I will sell it at a price slightly higher than the LCD 256GB SteamDeck, like $40 more. At USD $439, I think it would be a fair price.

7 Likes

So here’s my rudimentary duct lol
Sufficient to better redirect the warm air outside

And now zhe sexy pictures. Will do zhe sexy videos later


3 Likes

And some videos of it. The bag gamind is not due to any lattency issue, it’s just me who sucks at gaming lol. Was just trying quick to download game that I didn’t really played a lot.

Oh and fun fact, I did all those videos with the console on the battery. The only physically connected thing was the hdmi cable, which is a really cool thing to do.

6 Likes