I just moved my home server from a standard ATX case to a rackmount 4U chassis. It’s using an older threadripper so I swapped an Arctic Freezer 4u SP3 onto it. Unfortunately, as is documented, it doesn’t fit correctly in many 4u cases.
Here’s the thing, the one or two heat pipes that are too tall are just barely too tall. I can even close the lid with a little bit of effort but obviously that’s not recommended.
I’ve ordered a smaller cooler to have to switch, but it would be preferable to keep the larger cooler.
Is there any reason I can’t just bend the too high heat pipes at the top (where they were pinched and sealed at factory for filling). We’re talking probably 1-2mm.
I’m guessing the answer is no, but I’d like to ask in case it’s really not the worst idea in the world.
If you’ve already ordered a new cooler, I don’t see any reason not to try. As long as you remove it before you do any modifications the worst that can happen is you’re out a cooler and you gain the experience.
This is my thought and plan as well once the new cooler arrives. Definitely plan to take it off first too, haha, but thanks for mentioning it just in case.
if its a multi heat pipe cooler. then you could and i mean try at your own risk as it could cause the pipes to split…
remove the cooler.
put it plate down on a flat surface. get a bit of 6-1 (flat block of wood about 6 inches wide and 1 inch deep)
place it over the top of the pipes and give it a couple of solid taps on each set of heatpipes…
you should be able to get the pipes to bend a little more at the base. rducing the overall high enough to let you fit it.
would i bother as i have a replacement on the way… shit yeah if it works you can send the new one back.
Thank you for the thorough write up and recommendation on how I should go about it. Didn’t realize them splitting was the concern here, good to know.
As for the why? I got this cooler for free, so no return to get, but also no financial loss if it breaks. The new cooler uses a 92mm fan so it would, theoretically, be less performant than the Arctic.
Also, if this works then I can return the new one and money is saved there which is always a good thing.
EDIT: Misread your last line. Realized you were saying bend to return the new one. Right on. Here’s hoping it’s a success. I think it will be.
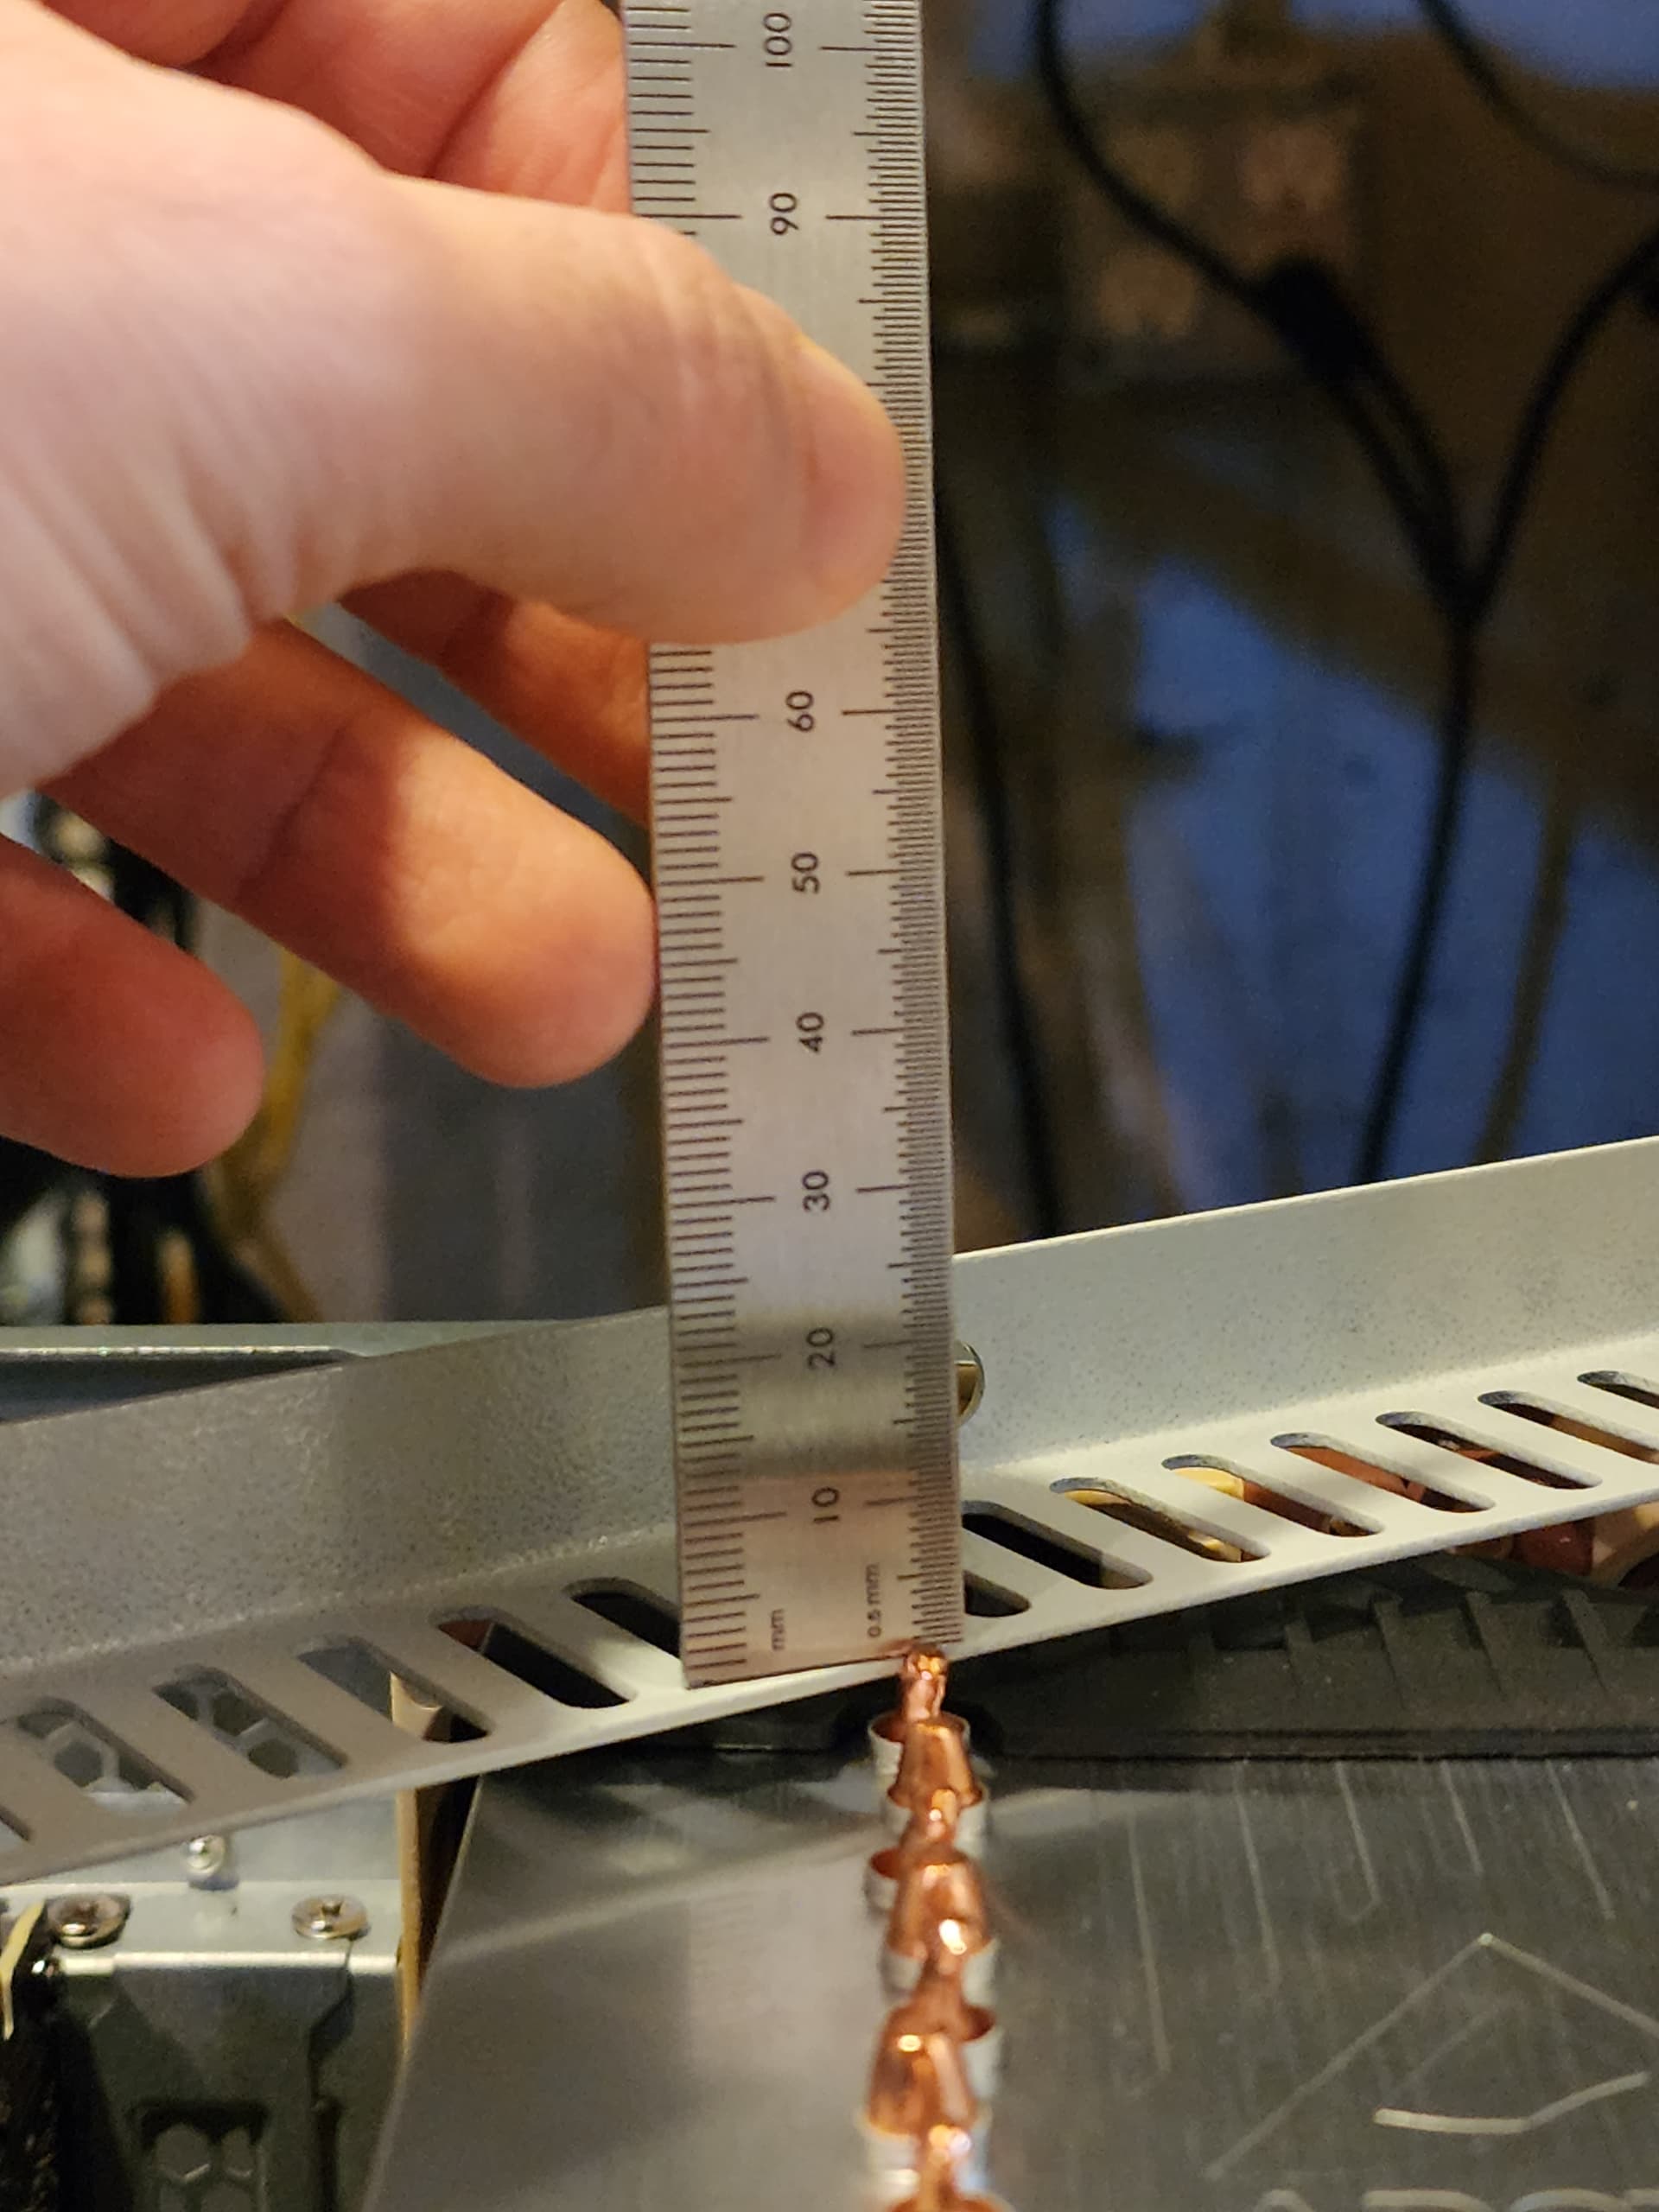
For anyone curious, this is how little clearance I need. I will say as is those heat pipes look like they’d be tough to bend. Could probably peel off the top two fin layers as they practically come right off, and that would give more room to access the ends of the pipes.
I had a similar situation and I took a piece of threaded rod with 2 nuts and washers, stuck the threaded rod with nuts in the middle through the heatpipes, maneuvered it back and forth to get the washers on each end, then spun the nuts outward. This caused the heat pipes to push out a bit and squatted the tower down. Like you I only needed a few millimeters. It was also an old free heatsink that still worked well enough to move to a new low end rig, and it did the job. Of course I’m also the type of person to have spare threaded rod and other hardware on hand.
I wouldn’t dare because being the point where they’re pinched it’s already a stress point in the heatpipe. Even a slight crack in them caused by mechanical action on it will have the fluid evaporate, being slowly or over time. You could try to gently massage them to be lower, but you’ll never know if one will crack or not.
As has been said, if you don’t care about the potential of damage then it’s worth a shot, but I have a feeling that if you aren’t annealing the metal that there will be damage to the heat pipe since you don’t have much material to work with and need to bend it pretty sharply. You could get a microfracture that’s not noticeable to the eye that would cause the fluid to evaporate out over time, and that could potentially cause a lot of damage if condensation were to form on the lid and drip down onto the components while it’s running.
If you are dead set on keeping the larger heatsink, you would be much better off cutting small holes into the lid of the case. You could put a tiny bit of paint on top of the tip of each heat pipe and place the lid on top of it so you can get an exact marking of where you should cut. If the sheet metal is thin, it can be cut with a dremel/rotary tool. Or you could just drill through it with a large enough drill bit to make a hole for each heat pipe.
I was about to suggest the exact method AbsolutelyFree said but he articulated much better than I would be able to. If I went with this method, I would do it in a way extensible to or accommodating other future beefier coolers perhaps.
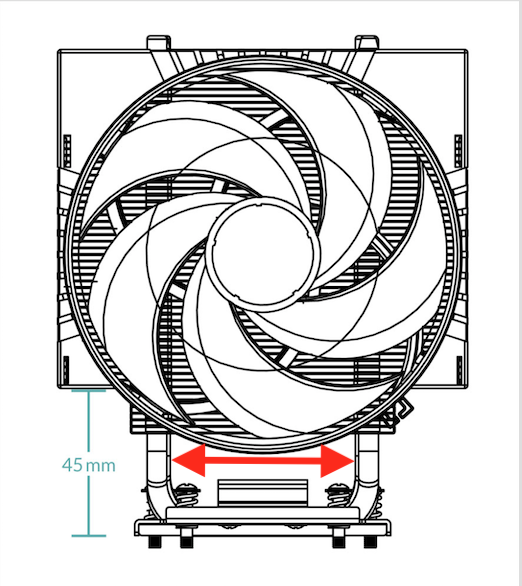
What KleerKut suggested is actually a pretty clever trick! You only need 15mins and be done with the cooler. Do people visualise what he described in words? Look at the illustration below. Basically use whatever tool you have in the hardware toolbox, push (ideally by turning screws in your tool) all the heat pipes outwards (one at a time) along the red arrows as indicated:
Since it only requires a few mils of clearance, I would instead put something on the end of the heat pipes that would transfer onto the cover and then use a flat punch to dent the panel outward. Should be quicker and have less risk of metal getting everywhere.
That’s exactly what I did, took an old Socket 775 Tuniq Tower and fit it in a small case with a Ryzen 2400G. I kinda eyeballed it and the side panel barely clears it. I figured it was a shame to waste what was once a beastly air cooler. I also repurposed a Zerotherm FZ120 and copied the bracket. A pair of new Noctua fans made them in to decent coolers to squeeze several more years out of them.
Sorry for late responses. I had thought about poking holes in the lid, but the problem there is a I believe it might still cause issues once I put another case on top of it.
That said for now I’ve decided not to bend them as when I looked at it better I’m doubtful it would bend without breaking.
I do like the idea of trying to make it squat at the heat pipes below, but not sure I fully understood the method described. New cooler is in though and I’ll be installing it tomorrow.
I rarely have sustained heavy loads on this server so it should do the job, even if at a higher idle than preferred.
What was explain before is actually not bad advices, heatpipes are easy to deform and with the little clearance you need to gain, that may be inviting.
You have 2 main risks when forming heatpipes, one is to pierce a hole in the copper tube, copper is really soft and a heatpipe is vacuum sealed, even the tiniest hole in the copper tube will basically kill that heatpipe. and the wall thickness is about 0.5mm only.
The other risk is to crack the wick structure internally, doing so you break the capillary action inside the heatpipe, but in your case, your cooler is standing upright, so this will not be as bad as it would be if you were working against gravity, here gravity helps you actually.