Hey @Heimdallr here with another tip that I use on my personal systems.
So adblock and ublock collect analytics for good purposes and though their behavior has been trustworthy in contrast to ghostery you still do not like something phoning home from your system. Well Look no further. Here is how to disable the DNS client service on windows 10. Its a one time approach that should fix your system when using a Large Host file for local blocking. Host can be far more useful than a even a firewall if using a singular or standalone system especially a laptop. This is the method I use that has been effective for a very long time.
The upside to using hosts as a method of blocking is that it is a totally local solution that you control. You should only use host files lists that you trust. I have provided a very trustworthy unified hosts file below. This solution is also rather lightweight. You do not need addons or anything of the sort to your already bloated browsers. That being said I do recommend Firefox. Chromium is the slightly more trustworthy cousin of this horrible browser that is google chrome. Need some objective reasons vs hear say? We have a good example on our forum. Head over to this users post.
Need more information on why I do not use browser extensions save privacy badger and noscript?
So lets get started choose your preferred FOSS browser or keep using the one you like. This largely wont matter I just like recommending software that puts you in control
Firefox:
Firefox ESR:
Iridium: (the only chromium you can trust)
Now on windows 10/8.1/8/7 (*Nix and BSD Users may skip this step) there is a pesky piece of software called the DNS client. Now before we disable the dns client, it is important you know what it does. Its purpose to DNS cache all the entries you have been using in order to speed up or provide guard against poor quality ISP DNS servers. Well we dont need to worry about this as we are also going to use a reliable DNS service (Ill propose options).
This is the process of name resolutions on Windows:
DNS name cache > Hosts File > DNS system > NetBIOS name cache > WINS service > Broadcast > LmHosts file
These caches are pointless however we will leave NetBIOS alone as it has some function with local windows machine shares etc. What we are concerned with is external threats.
Pop open an administrator command prompt and make the following registry change to disable the client:
REG add "HKLM\SYSTEM\CurrentControlSet\services\Dnscache" /v Start /t REG_DWORD /d 4 /f
Obtaining the hosts file I use on my machines: (SELECT THE APPROPRIATE VERSION FOR YOUR SYSTEM)
This guy maintains a very well curated file set and he is extremely open about how he does so and which sources he pulls from which does make him rather trust worthy. I update this weekly but its your choice if you want to update this in an automated fashion. For the purposes of this guide I will not be covering how to do this.
Cool so youve obtained the file. For the windows version rename the file from hosts.windows to hosts. Linux users do not need to do this. So depending on your OS this file is located in different places. You will need to place this hosts file in place of your hosts file or merge them.
For Linux based Operating systems place this file at:
/etc/hosts
For MAC OS: (use the linux/unix file) same location as linux. If you are running a *Nix based system and you do not know how to edit the hosts file. I am slightly concerned but thats fine. Open the terminal:
sudo cp (downloaded hosts file path) /etc/hosts
For Windows based systems this is placed at:
C:\windows\system32\drivers\etc\hosts or C:\Windows\System32\drivers\etc\hosts
This will require administrator privledges so do make sure you are doing so with such privledges.
Now onto a decent DNS provider. In order to use this effectively with the DNS Client disabled you have to ditch you crappy ISP provided DNS server especially on comcast (shudders).
Reason: They are usually slow and unrealiable.
But first a list before we get to configuration:
Quad 9 DNS: (I use them)
IPv4: 9.9.9.9 ; 149.112.112.112
IPv6: 2620:fe::fe ; 2620:fe::9
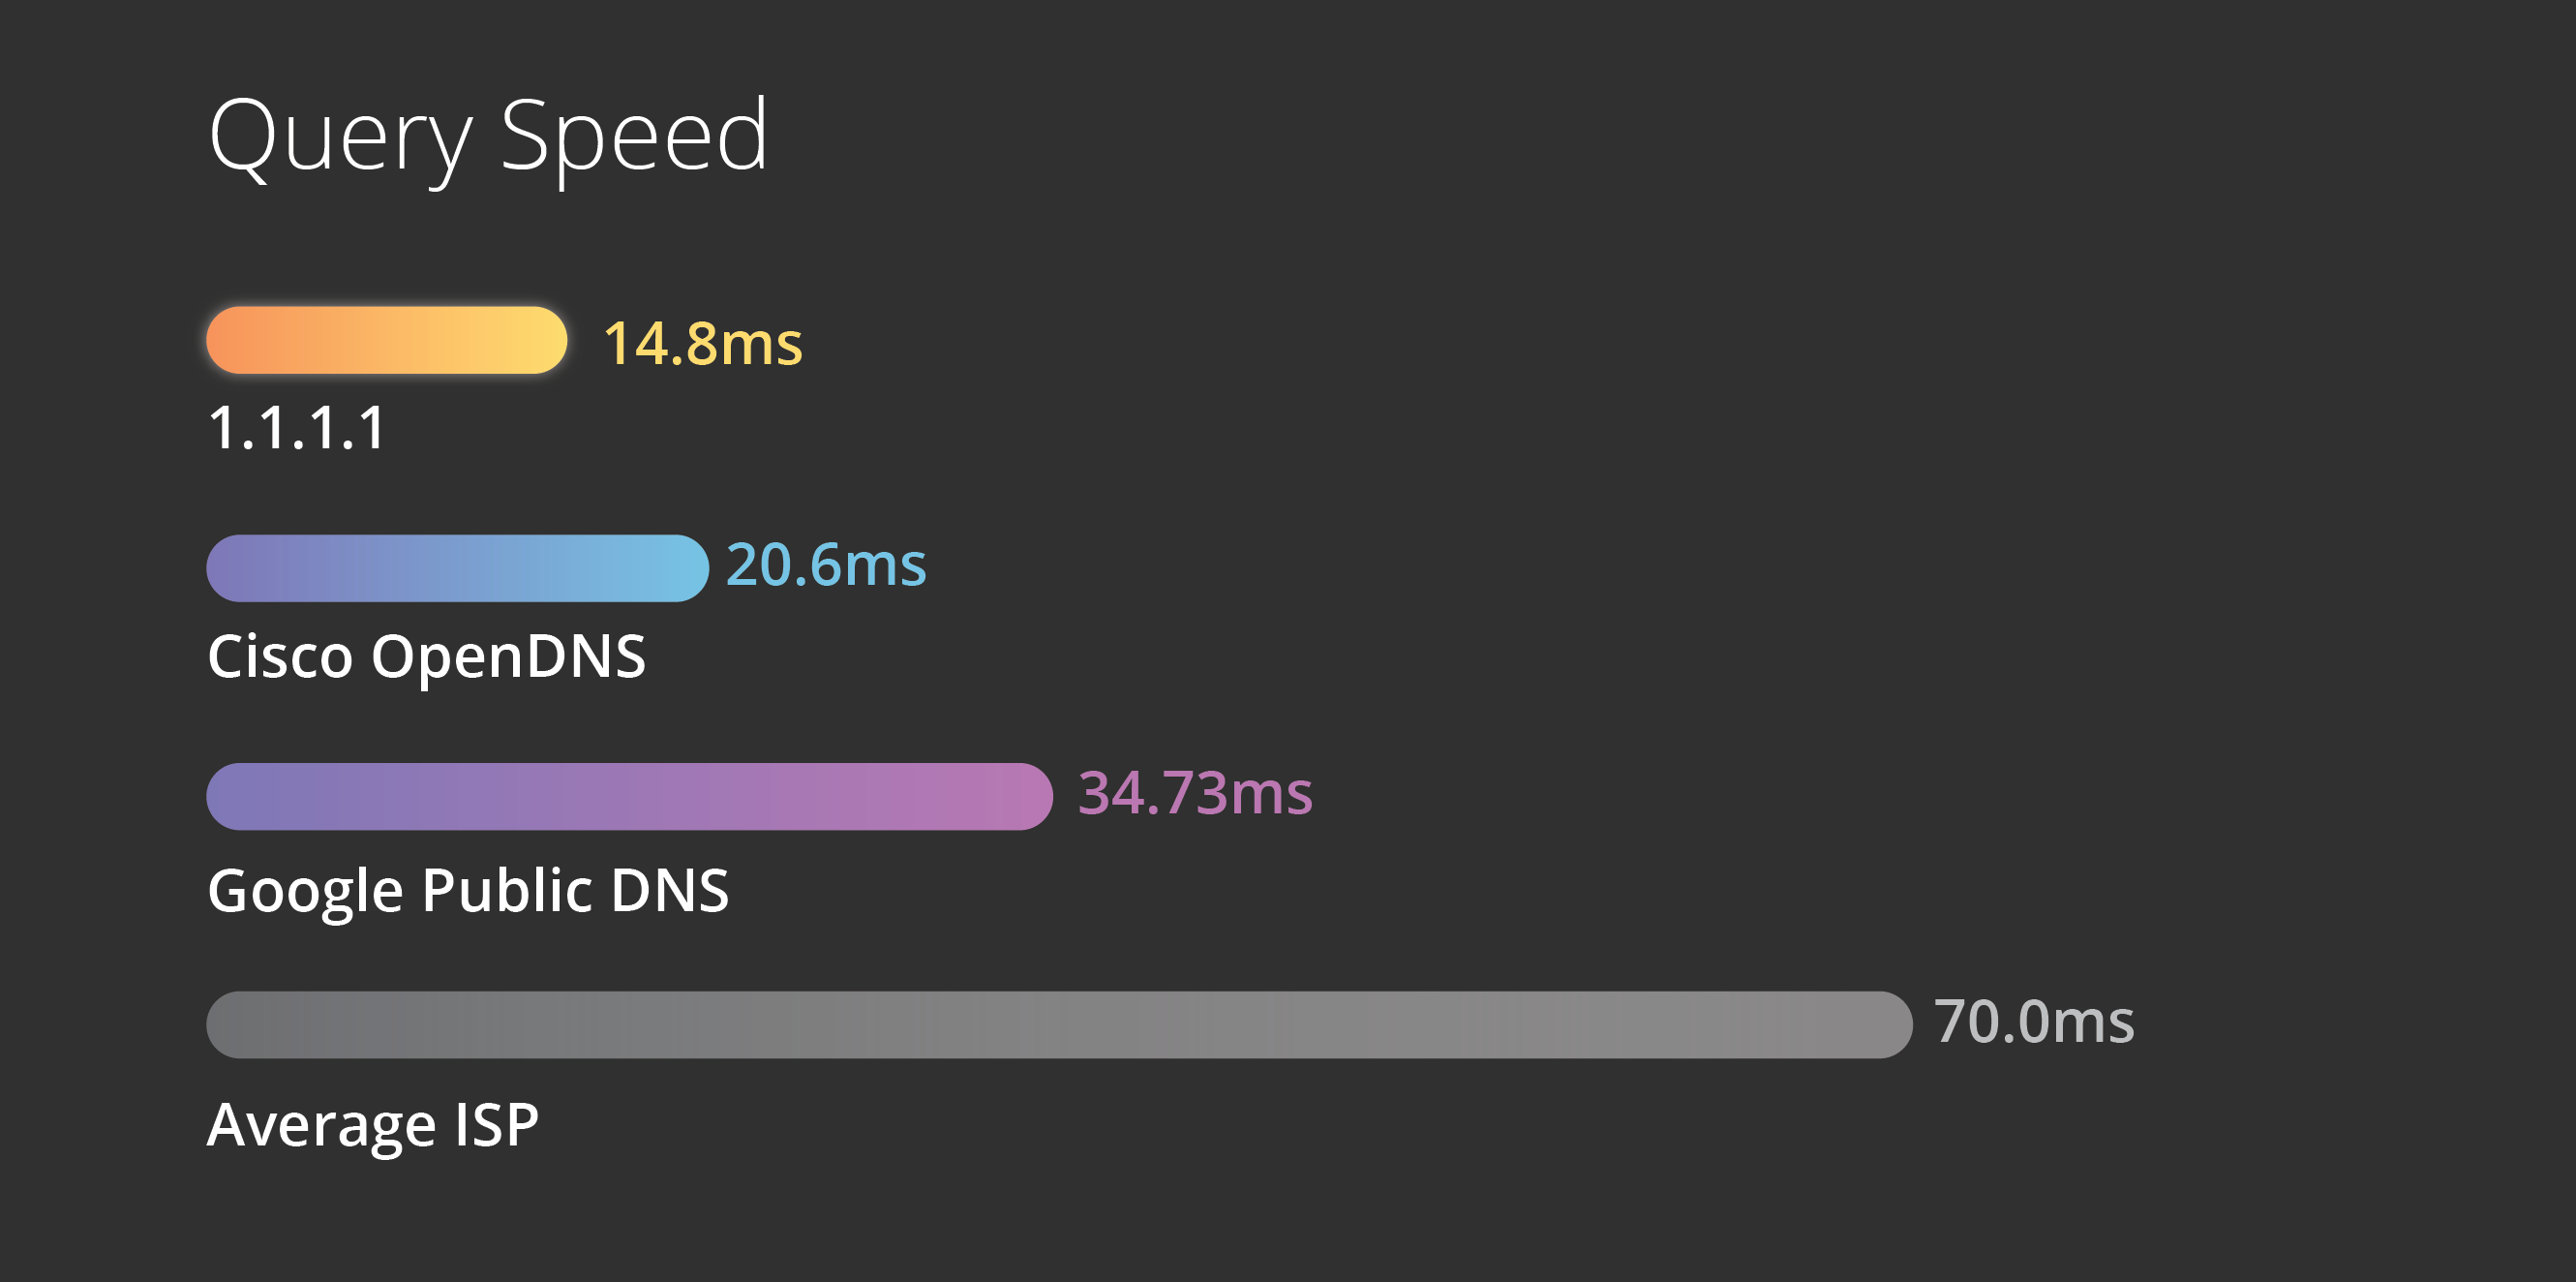
Cloudflare DNS: (Extremely good alternative)
IPv4: 1.1.1.1 ; 1.0.0.1
IPv6: 2606:4700:4700::1111 ; 2606:4700:4700::1001
The last alternative ill ever suggest: (varies)
https://www.opennic.org/
I am very anti other DNS servers like OpenDNS and Google DNS as I dont trust my queries in the hands of a cooperation. This is not a DNSSEC or DNSCRYPT tutorial BUT I do recommend you set that up for yourself and use it.
On Windows this is how you do so: (provided by Quad 9) (All credit is theres and I hope they continue with the wonderful service)
Though these guides use various adapters. This will work on any adapter
Step 1
Open Control Panel, select Network and Internet, and then select Network and Sharing Center. Click Change adapter settings on the left pane.

Step 2
Right-click the network interface connected to the internet and select Properties. Select Internet Protocol Version 4 (TCP/IPv4) from the list and click Properties.
If you are using IPv6 select Internet Protocol Version 6 (TCP/IPv6)

Step 3
Select “Use the following DNS server addresses” and enter 9.9.9.9 into the Preferred DNS server box. For the Alternative DNS server enter 149.112.112.112
If you are using IPv6 enter 2620:fe::fe into the Preferred DNS server box.
Optional: You can add 2620:fe::9 as the alternative in the list.

Step 4
Click OK then Close to save your settings.

On MAC OS: (provided by Quad 9) (All credit is theres and I hope they continue with the wonderful service)
Step 1
Go to System Preferences and select Network Settings.

Step 2
Click Advanced and select DNS.

Step 3
Click the ‘+’ sign and add 9.9.9.9 to the top of the list. Optional: You can add 149.112.112.112 as the second entry in the list.
If you are using IPv6 Click the ‘+’ sign and add 2620:fe::fe
Optional: You can add 2620:fe::9 as a secondary in the list.

Step 4
Click Ok and then Apply.

Linux: LOL lets do this in a distribution agnostic manner.
If you want to override the name servers suggested by the DHCP server, you can configure this in /etc/dhcp/dhclient.conf , eg for ethernet eth0:
interface "eth0" {
    prepend domain-name-servers x.x.x.x, y.y.y.y, ipv6:ipv6:ipv6::ipv6, ipv6:ipv6:ipv6::ipv6;

}
Replace eth0 with your adapter name.
You can also do this from the “Edit Connections” control in the network indicator in in your preferred desktop environment. Of course replace x and y with your favorite primary and secondary DNS string same for ipv6. Of course you can use ipv4 only if this gives you trouble.
Router level:
Tomato Firmware Guide:
A few tweaks to the firmware are mandatory to get this working.
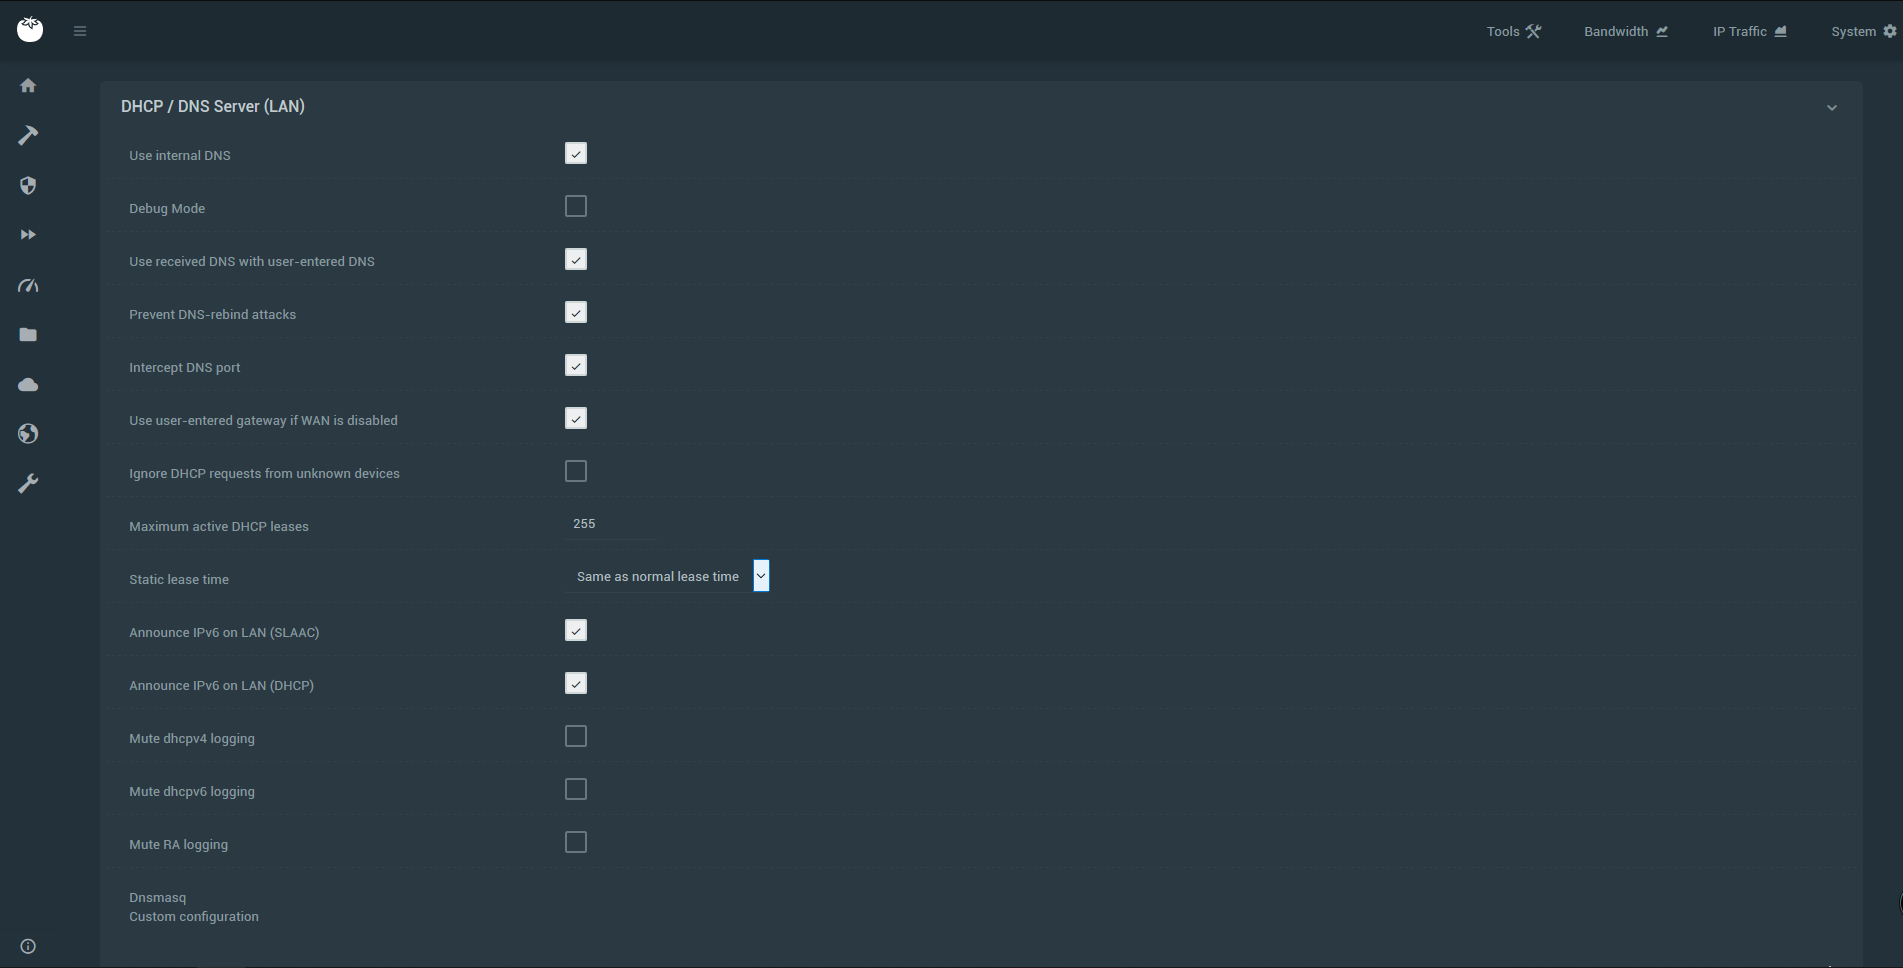
Opening up to my overview page got to the DNS advanced setting area
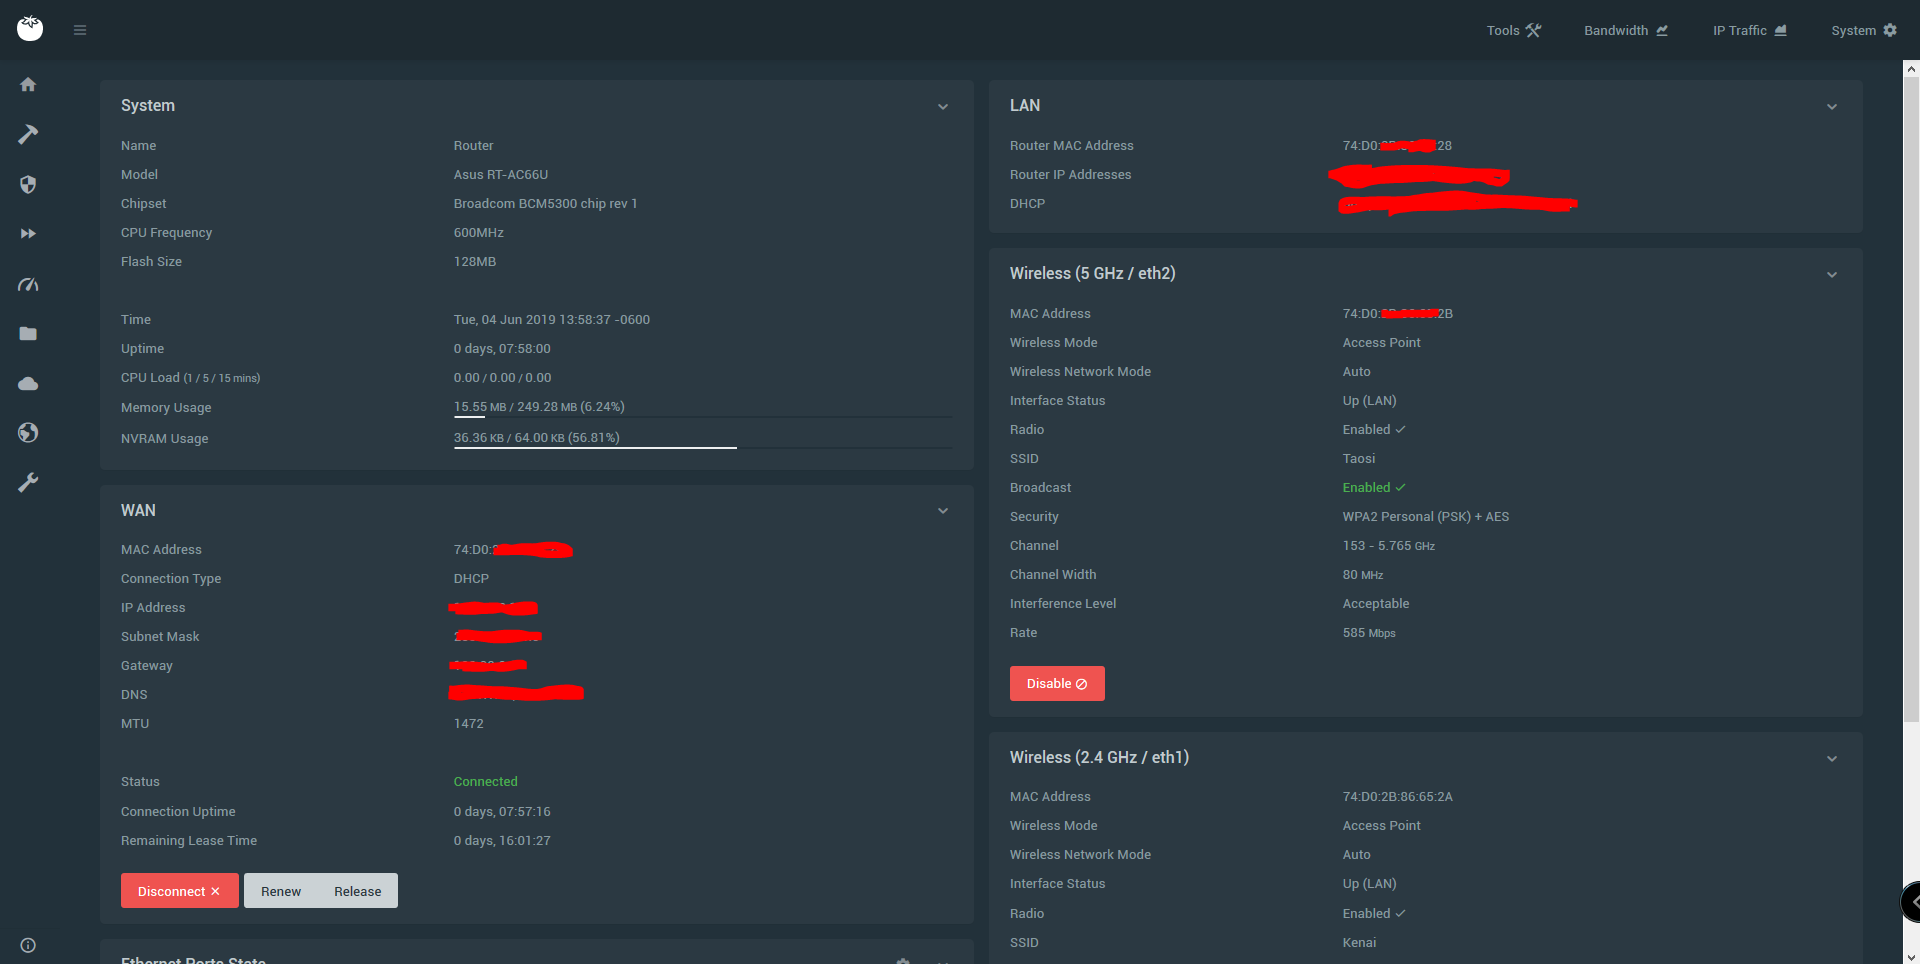
Now mimic these settings and make sure your intercepting the DNS port for this to work. Make sure you hit save and wait for the yellow messages restarting services to disappear

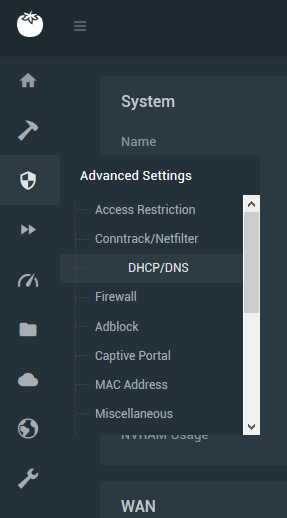
Now move onto the Adblock section in advanced settings:
Insert your lists in 0.0.0.0 hosts file format or URLs to such formats. Then enable and save. This should work:

Now that you have gone through all the trouble. Finally reboot and enjoy
A URL I like is blocked?
Open the hosts file and use the find/replace command in your favorite editor to remove it. Then if your feeling charitable go ahead and let the original provider know so that he may remove it from his list and mark it as good
Does this break stuff?
It has the potential to. So be aware of this when you are using it. The breakage is usually minimal and easy to undo. If it does do something serious. Post below and the forum will likely try to help.
Honorable mentions
@SgtAwesomesauce (his name implies hes awesome): If you need a local method im sure you may already know about this but here you go I hope your investigation into the plugins did not meet a dead end
@MisteryAngel : You live in the EU so your privacy is better protected there but you might find this to your liking. Far better than extensions. Though I still recommend Privacy Badger for Firefox and turning off all the extra studies and what not