Is the LUKS image to be the boot drive of the VM (eventually?)
Could you import the image into another, running VM, and unlock it with the other OS? Like on mount, it should prompt?
Then do the os probe / efibootmgr to add the image as one of the bootable options for the VM.
then boot into the image, and update the efibootmgr / os-prober / update grub? perhaps?
The disk contains an install of Fedora 32, it’s a default install but with LUKS enabled. As far as I know this configuration creates a small unencrypted boot partition and a LUKS partition for everything else so I don’t think it’s an issue of trying to boot from an encrypted partition. But it does looks as if it’s not even finding GRUB which is strange, as if the boot loader doesn’t get copied during the conversion to QCOW2.
The disk was originally running in VirtualBox until I updated to Kernel 5.17.12 which broke VirtualBox so I figured it was a good opportunity to try KVM and Gnome-Boxes again. I thought it would be reasonably straight forward to convert the VDI to QCOW2 and run it but it seems it doesn’t like LUKS partitions.
As a test I created a new Fedora 36 VM in Gnome-boxes and enabled LUKS during installation and found that it also doesn’t boot after the installation is complete, whereas, a fresh install without LUKS works fine, so I am leaning toward an issue with LUKS support.
It’s not a major issue so for the moment I have just moved my VMs to another machine with Kernel 5.17.5 and I’ve gone back to running them in VirtualBox.
Thank you for your suggestions though, I may try that if I the work around stops working or Oracle take too long to resolve the issue with VirtualBox.
I was thinking you were only getting the efi shell, forgetting it already went past that to the boot, then hanged itself
the reason I mentioned about using another VM to import, was in case the virtual box was storing the EFI NVRAM somewhere special.
With EFI / UEFI, the system does not probe drives for boot partitions like it did back in the BIOS days.
Back then, you just needed a bootable partition, and the system would find it.
Now, with UEFI, each OS needs to be registered with teh motherboard (virtual or physical) which is handles by the efibootmgr, and iirc, when you use the app update-grub, it does an os-probe to look for installed OS’s, then runs efibootmgr to register with the mainboard (virtual or physical.)
I could be wrong about this.
Just an observation.
I use Virt-Manager, and it store the efi vnram for it’s machines in a different place to it’s vm set up xml files, so threw me for a loop.
I don’t know how the UEFI system picks up thumb sticks.
And I could be wrong, like, it should boot to an efi shell, and you should have been able to load the FS0: to get the boot partition, then load the grub64.efi file or whatever
Yes it looks like VirtualBox stores the EFI NVRAM in a .nvram file separate to the VDI but the VM I tried to convert was non-EFI so the only files I had were the .vdi the .vbox (just XML VM configuration settings) and I made sure it was a non-EFI VM I tried to boot the image in.
Good information on how update-grub works with efibootmgs though. That might explain something unrelated that I was curious about when I updated my workstation recently, I decided to do a fresh install of Fedora 36 on to a new NVMe drive and this time I did a UEFI install.
I wanted to add my old non-EFI install to the GRUB menu so I could switch between the two while getting the new install up an running but couldn’t figure out why os-probe couldn’t find it, perhaps when it’s running from a UEFI OS it only looks for other UEFI installs. It found my Windows 10 install but no amount of fiddling about could get it to detect the non-EFI Fedora.
The short version: I can’t get IPv6 working with my Proxmox setup.
Longer version
I have a host with two VMs attached to it. For the sake of testing, the VMs are :1::1, :2::1, and the host is :3::1. The host does not need to actually have an address, its just for testing.
I have the host interface used for IPv6 configured like so:
3: eth1@if84: <BROADCAST,MULTICAST,UP,LOWER_UP> mtu 1500 qdisc noqueue state UP group default qlen 1000
    link/ether 82:e8:0d:3c:f0:fb brd ff:ff:ff:ff:ff:ff link-netnsid 0
    inet6 2001:470:ebfe:1::1/64 scope global
       valid_lft forever preferred_lft forever
    inet6 fe80::80e8:dff:fe3c:f0fb/64 scope link
       valid_lft forever preferred_lft forever
I set the gateway of the guest to be the address of the host, but I don’t know that this is necessary either. Would be better to put the address of the router there, but
Neither of the VMs can ping each other or the host. IPv4 works just fine.
Over on the Proxmox Forums
See the thread I posted over there. It has a pretty bare-bones setup.
Anyone seen this before? Any obvious things I missed?
ls -l on /run/mount/imrazor/ shows the mountpoint as owned by imrazor:imrazor
But after issuing a ‘sudo mount -a’ command, attempting to just touch a file on the otherwise empty filesystem generates a ‘permission denied’ message. <mutters obscenity, takes a breath, counts to 10…>
And I eventually realized that ‘sudo mount -a’ was the wrong way to go about it. But even when I mounted as a lowly luser, the disk was still read-only.
Finally I tried ‘chown imrazor:imrazor /run/media/imrazor’. Note 1) the lack of the recursive option and 2) it is the collective mountpoint for removable media, rather than the specific mount point of that filesystem. But some way, somehow, that resulted in a writable volume. I’m half-worried that this is a temporary state of affairs, and after a reboot will just revert to it’s old cantankerous self.
I guess I’ll find out tomorrow morning when I get home from work…
Create the folder RD0-ext4 in the path above. You are basically mounting over your media directory which will cause issues for other devices until that ext4 device is unmounted.
I finally figured out how to connect my new xbox controller to a windows vm in proxmox via the newer wireless adapter connected to the vm through a passed through USB port.
Absolutely needed:
Make sure your adapter is in a passed through USB port…
In the windows vm make sure the adapter shows up as a network device in device manager. If it shows up as usb other as “Xbox acc”, manually update the driver, searching through windows update. Then manually update windows update. At some point it will very quickly install the drivers, but not give you any heads up than a brief text in the update window. Note that even though the adapter shows up in windows, THE ADAPTER LIGHT WILL NOT COME ON. It’s just not gonna work yet.
Install xone on proxmox. For some reason installing this on proxmox is what’s needed for the adapter to actually work in windows.
Might be needed, but not sure right now:
You may need to look at the “optional” updates in windows update, and install the optional Xbox networking package that’s hidden there
In my flailing about trying different things, I blacklisted the xpad and whatever module the usb adapter showed up as in proxmox.
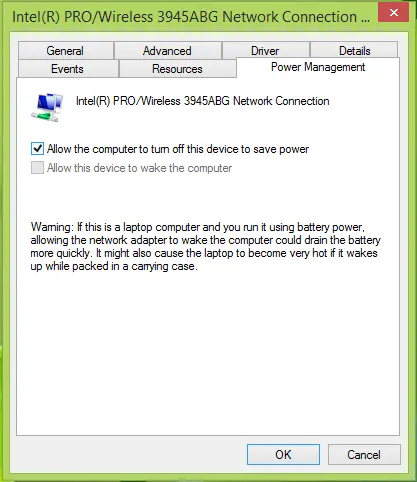
In windows, you may need to set the wireless adapter to not be turned off to save power. This seems to cause some people trouble.
So far seems to work flawlessly. I haven’t tried a wired connection yet. At some point when I blow everything up and redo everything to clean away my cli sins that have built up over the year, I’ll make a proper guide, since this seems to cause trouble for others trying to do the same.
[SOLVED]
Does anyone know how to auto import a network config in Ubuntu Core 22? I’m wanting to seed WiFi credentials into an image so that no console interaction is required. I’ve figured out how to build a custom image and import a system-user assertion but can’t find documentation on how to specify a netplan.yaml file or run a shell script with nmcli commands on first boot.
Edit: For anyone else looking to do something similar, you’ll need to build a custom Gadget Snap and include it in your model assertion when creating your image. I actually found 3 ways of adding the WiFi configuration on first boot, although I only tested two of the methods.
#1 - Add system-wide configuration options to the gadget.yaml file
#2 - Create a Netplan yaml file, include it in your Gadget's Makefile or snapcraft.yaml, and then add a content: section to copy the file to the ubuntu-data partition on first boot.
#3 (Untested) - Someone has made a script called netplan-import that looks for a netplan.yaml file on removable media and automatically imports it. You'd just put the file on the same drive you use for importing your system-user.
#!/bin/bash

# Insert commands to run here
echo "This only runs once"

# Disable the systemd service
systemctl disable firstboot.service

# Optional, remove all trace of the service
rm -rf /etc/systemd/system/firstboot.service
rm -f /root/firstboot.sh
And don’t forget to enable it with systemctl enable firstboot.service. Good luck!
Thank you for the detailed response but unfortunately this doesn’t work on Ubuntu Core as its root filesystem isn’t partitioned or unpacked until first boot. But I think I may have found the solution although I must admit I feel like it shouldn’t be this complicated. It requires building/packaging a custom Gadget snap and then including it in the model assertion when building the image. I’m not sure why I can’t just drop a config file on removable media and auto-import from there… it would be so much simpler. I’ll update my original post with some notes if I’m successful.
If you’re doing this for VMs then cloudinit might be a good solution, it lets you specify a custom config file when booting the image. However it needs hypervisor support, and is a more cloud way of doing customisation.
I can’t manage to get docker working correctly within nspawn containers. Host is arch and so is the guest within nspawn. I followed the directions in the arch wiki but that didn’t solve my issue.
Some basic containers work (e.g. hello-world). But a Dockerfile with just following content FROM maven:3.8.4-amazoncorretto-17 AS MAVEN_BUILD
fails with
[aeny@somehost testimage]$ sudo docker build .
[sudo] password for aeny:
Sending build context to Docker daemon  2.048kB
Step 1/1 : FROM maven:3.8.4-amazoncorretto-17
3.8.4-amazoncorretto-17: Pulling from library/maven
bda57ff2d0d8: Extracting  62.24MB/62.24MB
a11bc4574f67: Download complete
63a4086f3bbd: Download complete
e1765d68ceaa: Download complete
08f943c990d0: Download complete
58ed1a3e0caf: Download complete
failed to register layer: ApplyLayer exit status 1 stdout:  stderr: operation not permitted
I recently switched my Linode over to using an RPM-based distribution (AlmaLinux) to get more experience with them. However, I have run into a slight problem that I do not know how to solve. I cannot login to my regular user. At first I thought it was an ssh problem, but I still cannot login from Linode’s LISH console either. OFC, root login is disabled over ssh, but I am able to access the root account from LISH. So it has got to be a PAM problem. Can you guys help me solve it?
im using kali 5.18
updated form kali 5.16 …
ctrl+v no-longer pastes also zsh nolonger seems to be the default terminal.
i saw zsh had been compromised with an exploit so i get why thats gone.
but ctrl+v? throwing up ^v instead.
its a fresh install as i said of 15.6 with upgrade + update to 15.8.
ive not installed anything nor changed any permissions.
so any ideas whats up or suggestions on how to fix or where to look to fix.???
zsh is a shell, it runs in a “terminal”, and pasting is normally handled by the terminal. In most xterm-like terminals, by default to paste using the keyboard one uses shift-Insert. ctrl-v is (or at least was historically) handled by the tty driver, and it means “lnext”, “take the next key literally”, so ctrl-v enter gives ^M. To get ctrl-v to do a paste needs some key binding or the like.
To exploit the recent zsh vulnerability, “an attacker” has to “control a command output inside the prompt”. I’d have thought the OS could be hosed anyway if the attacker had got that far, but maybe that just shows I’m not a security expert.

