I am in need of a project to do, and lately I have been finding my Dan A4 big for my taste (yes 9.7L is big now). So now I want a sub-5L built
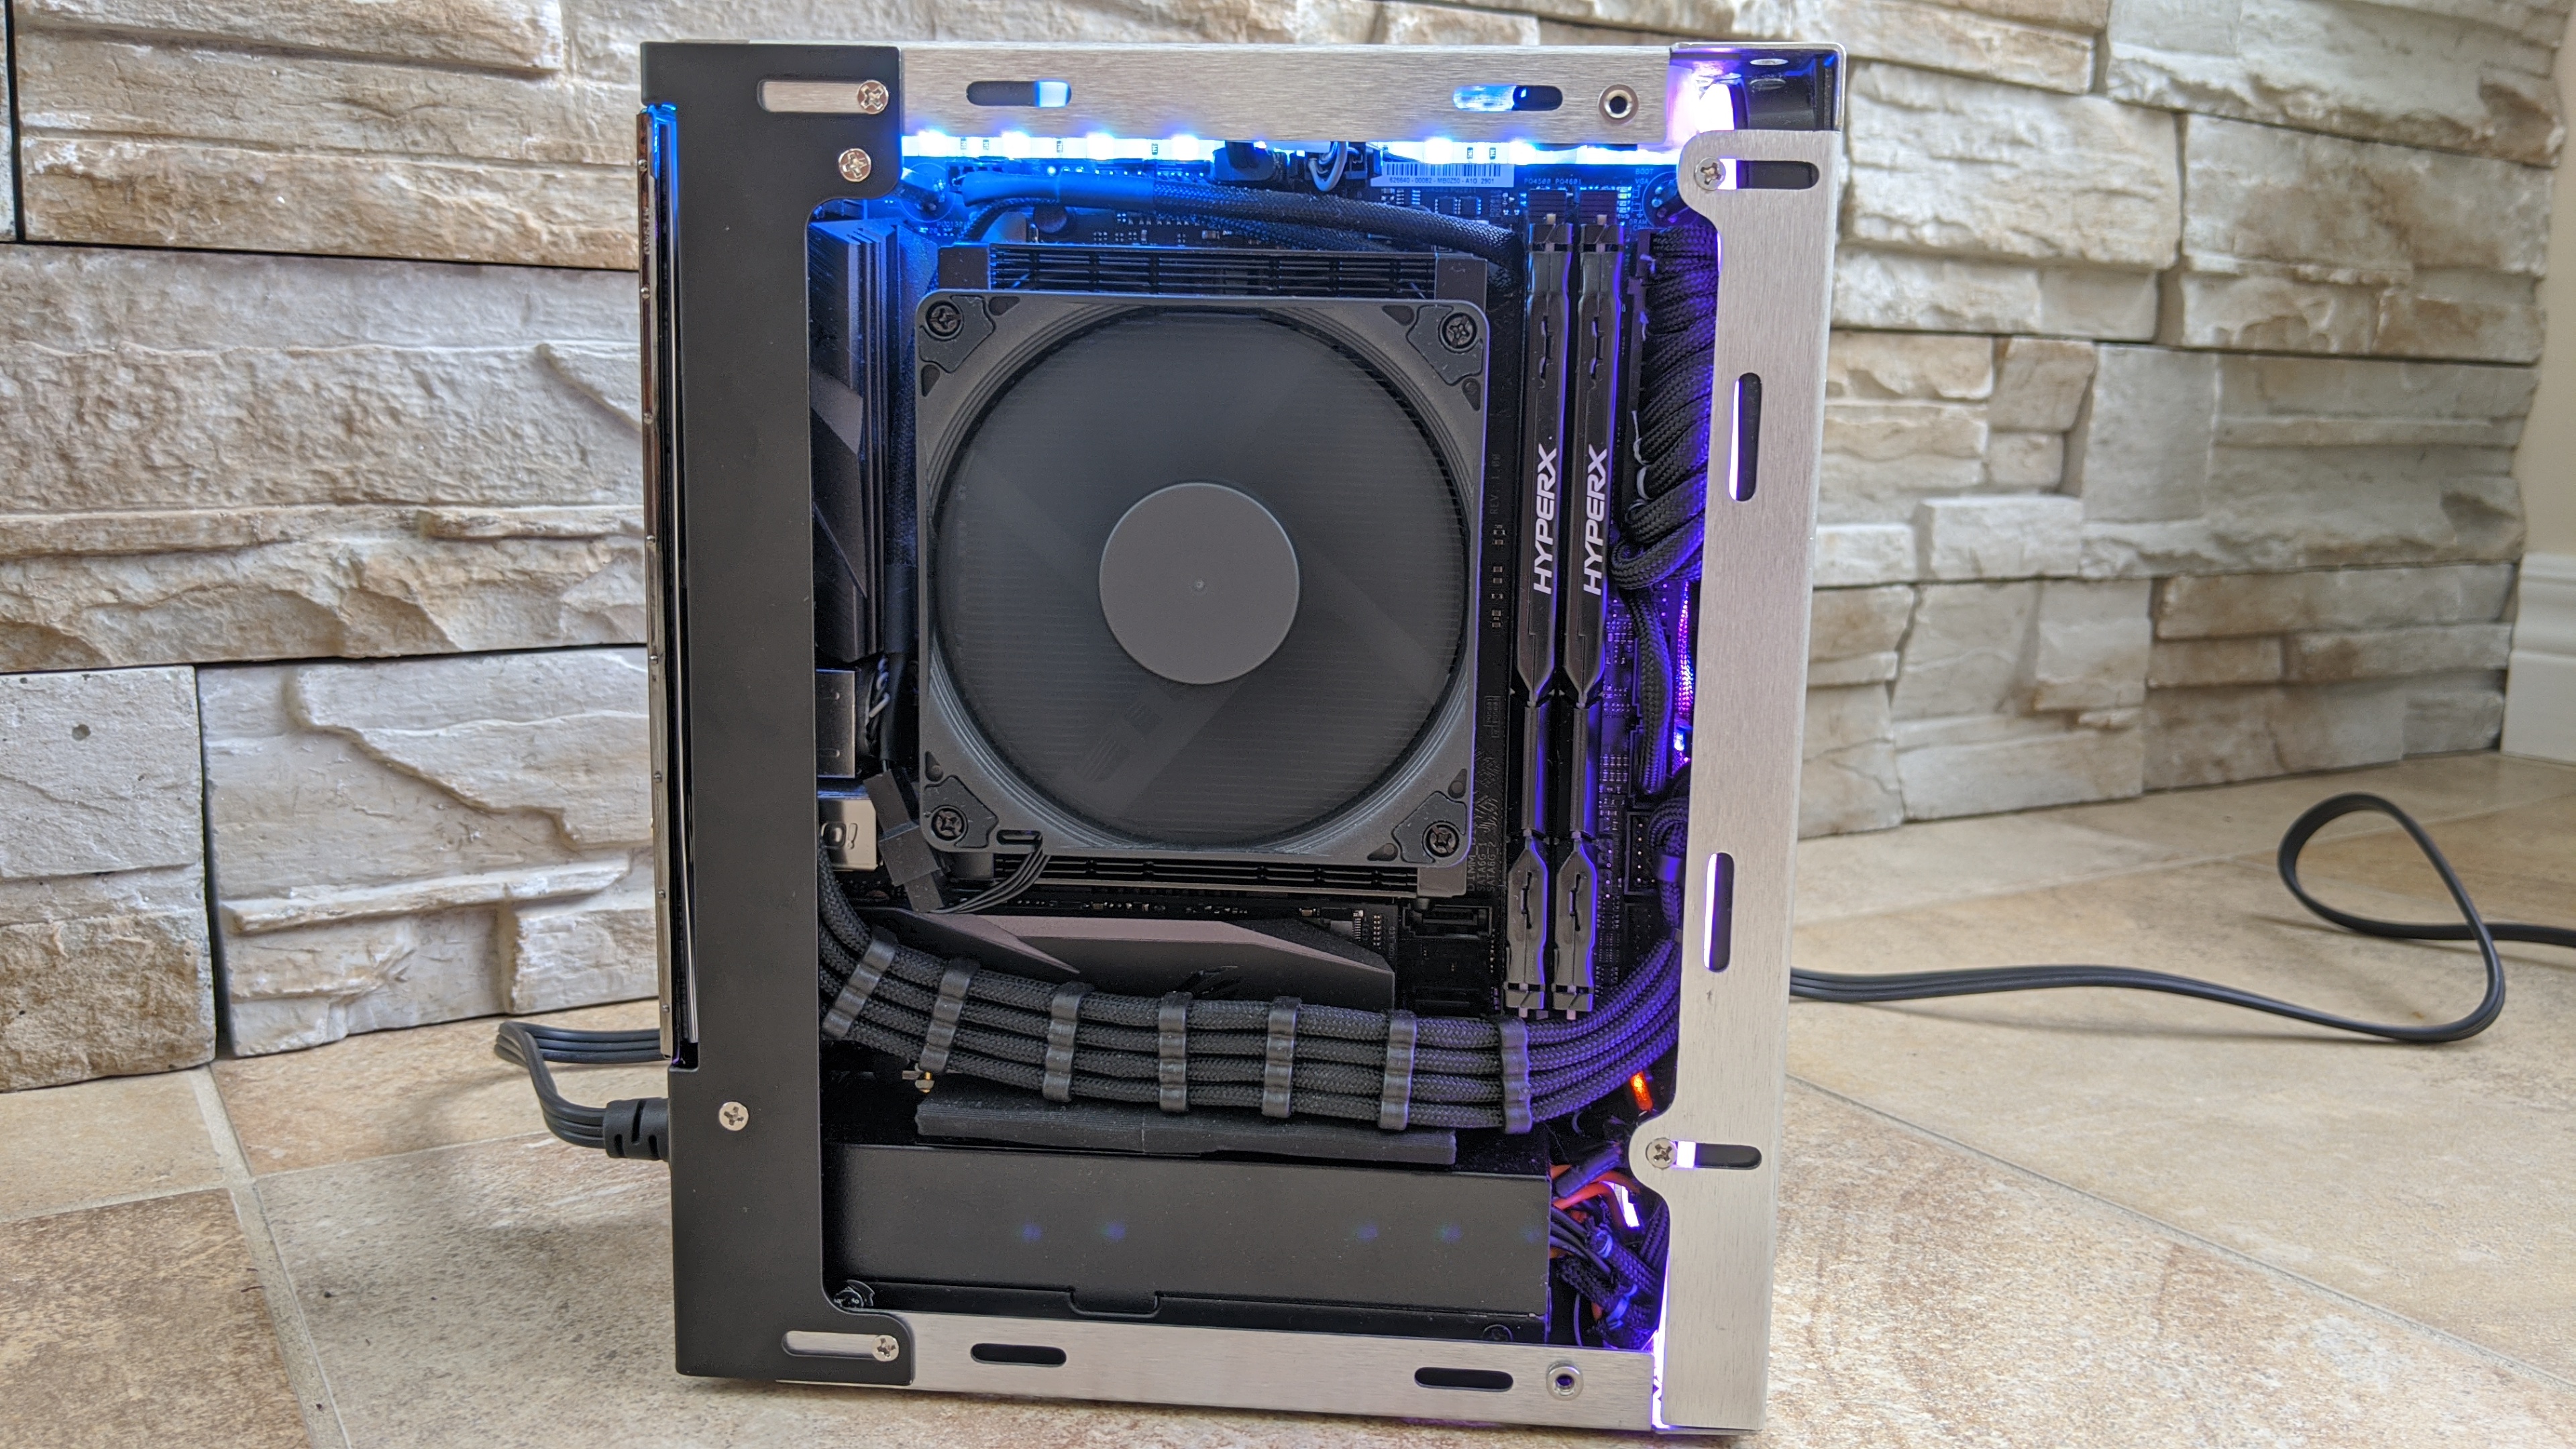
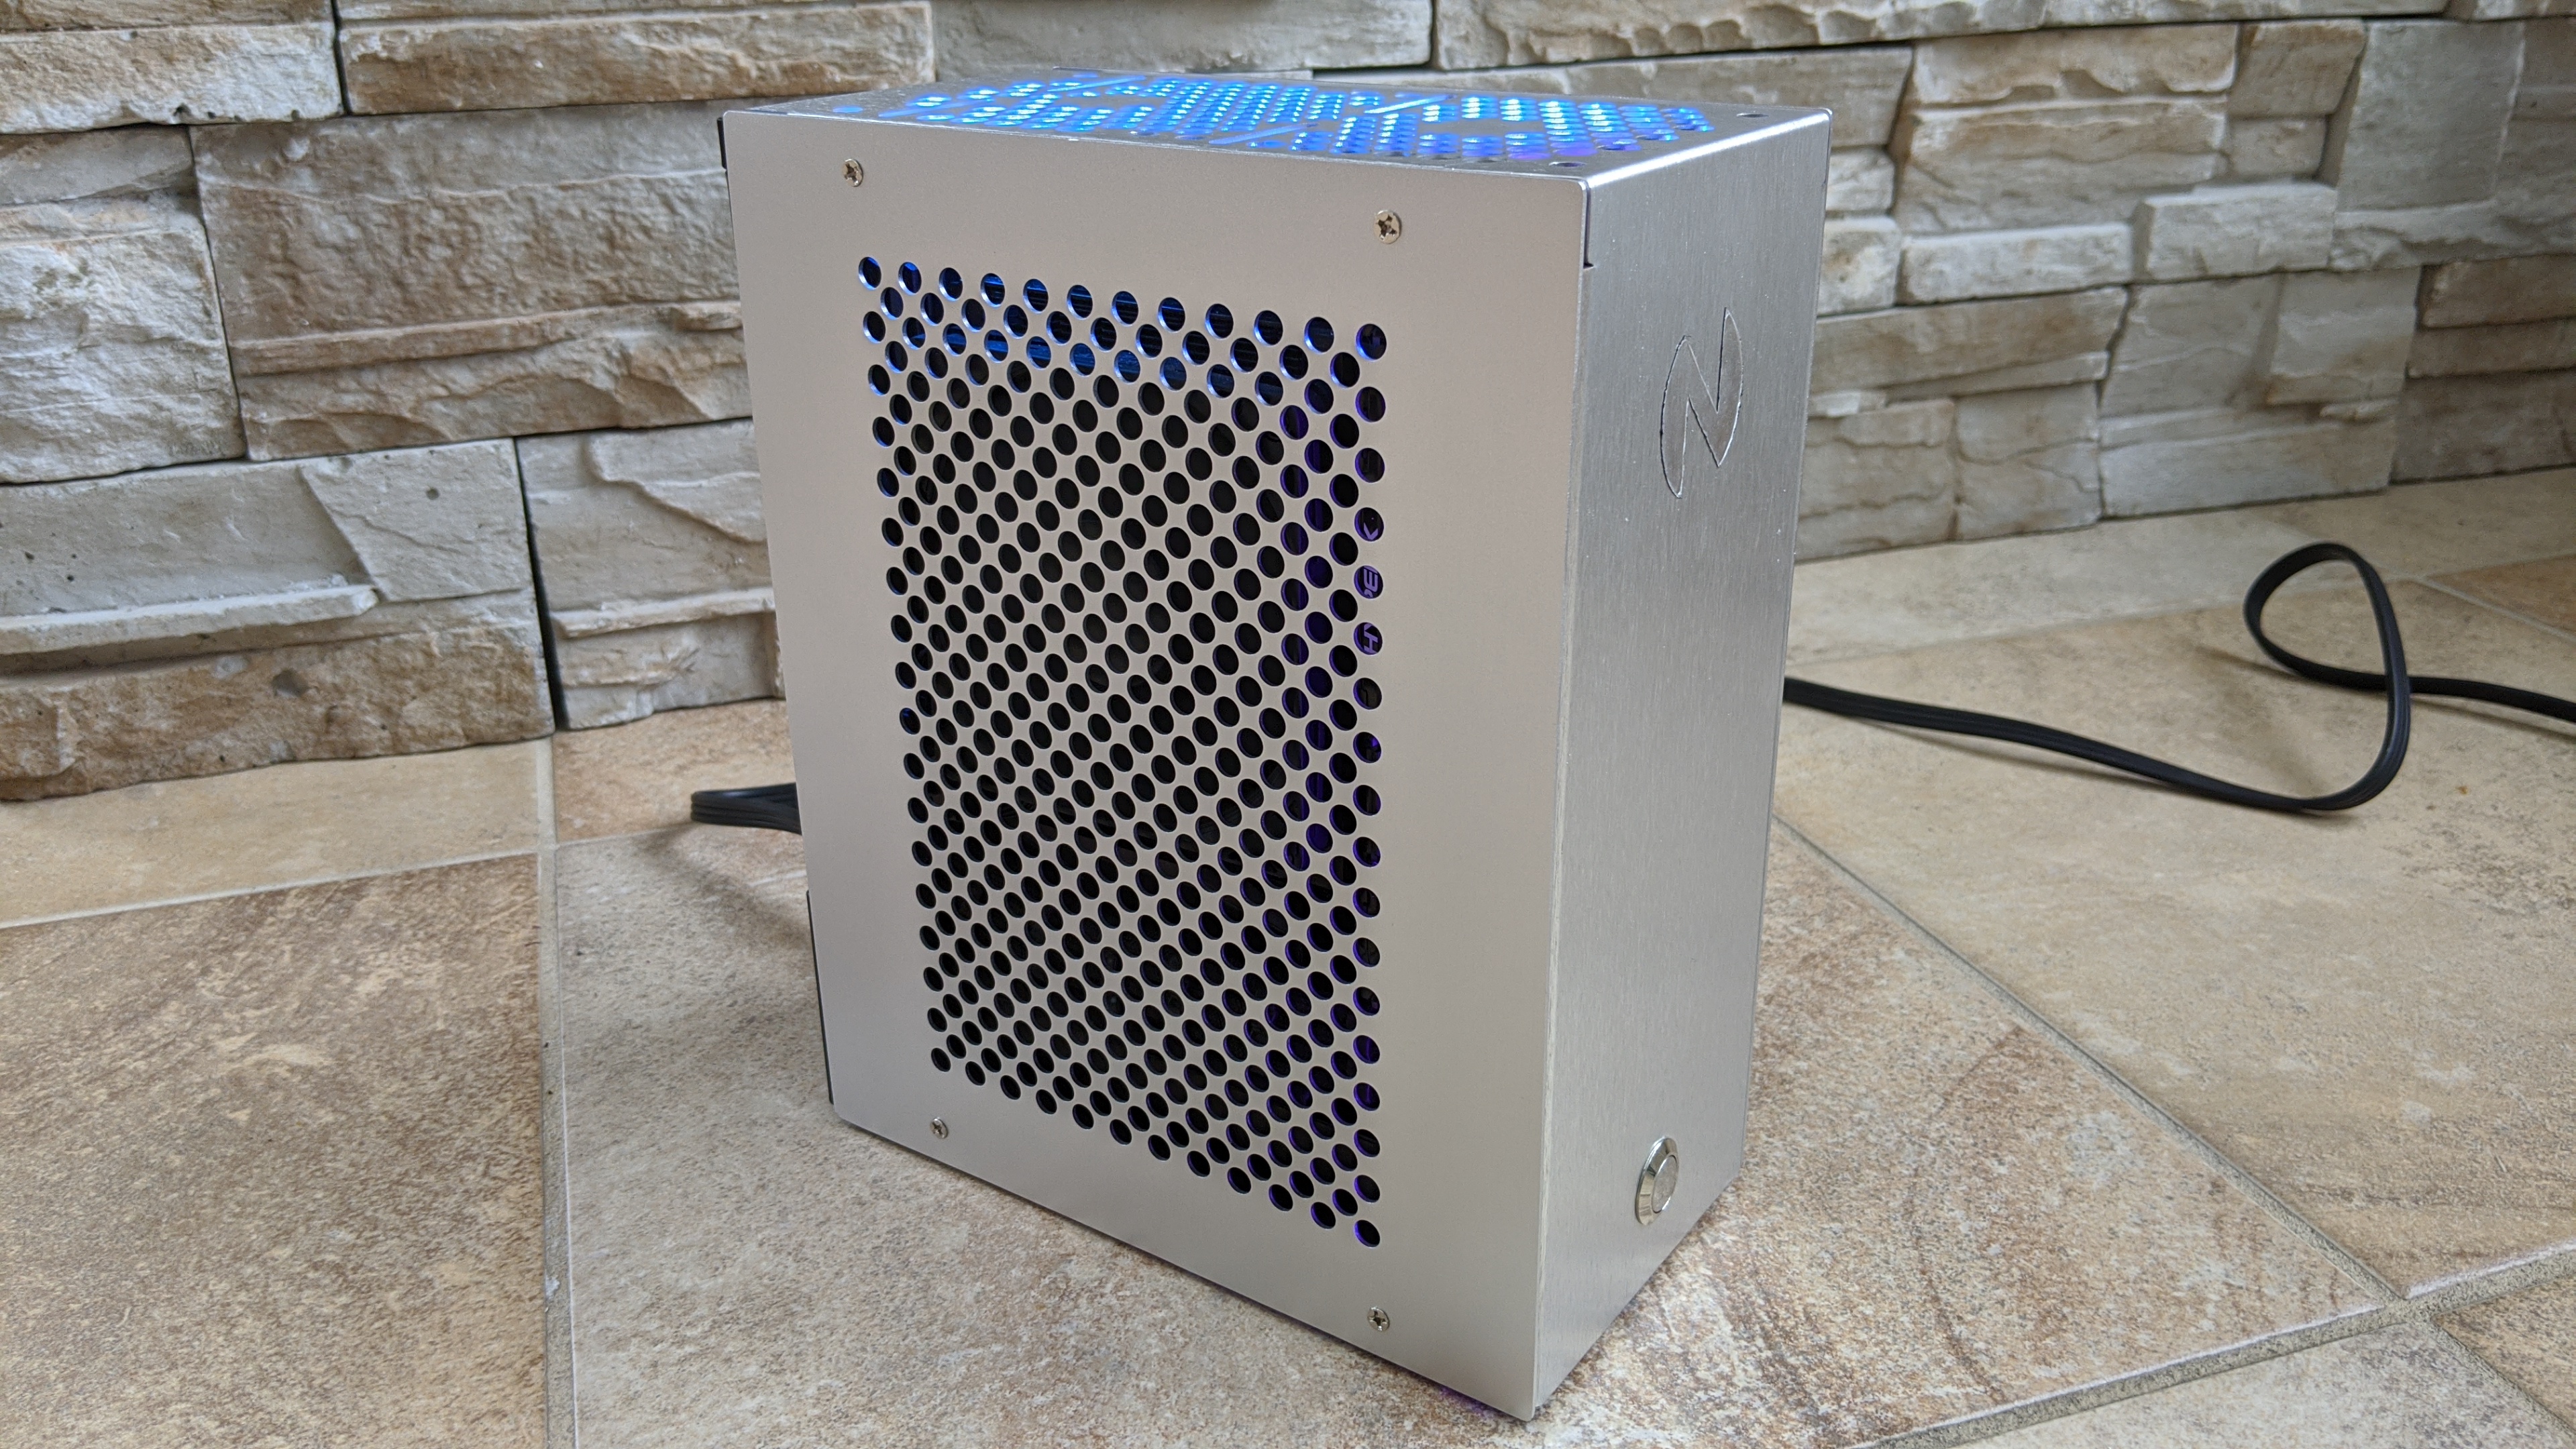
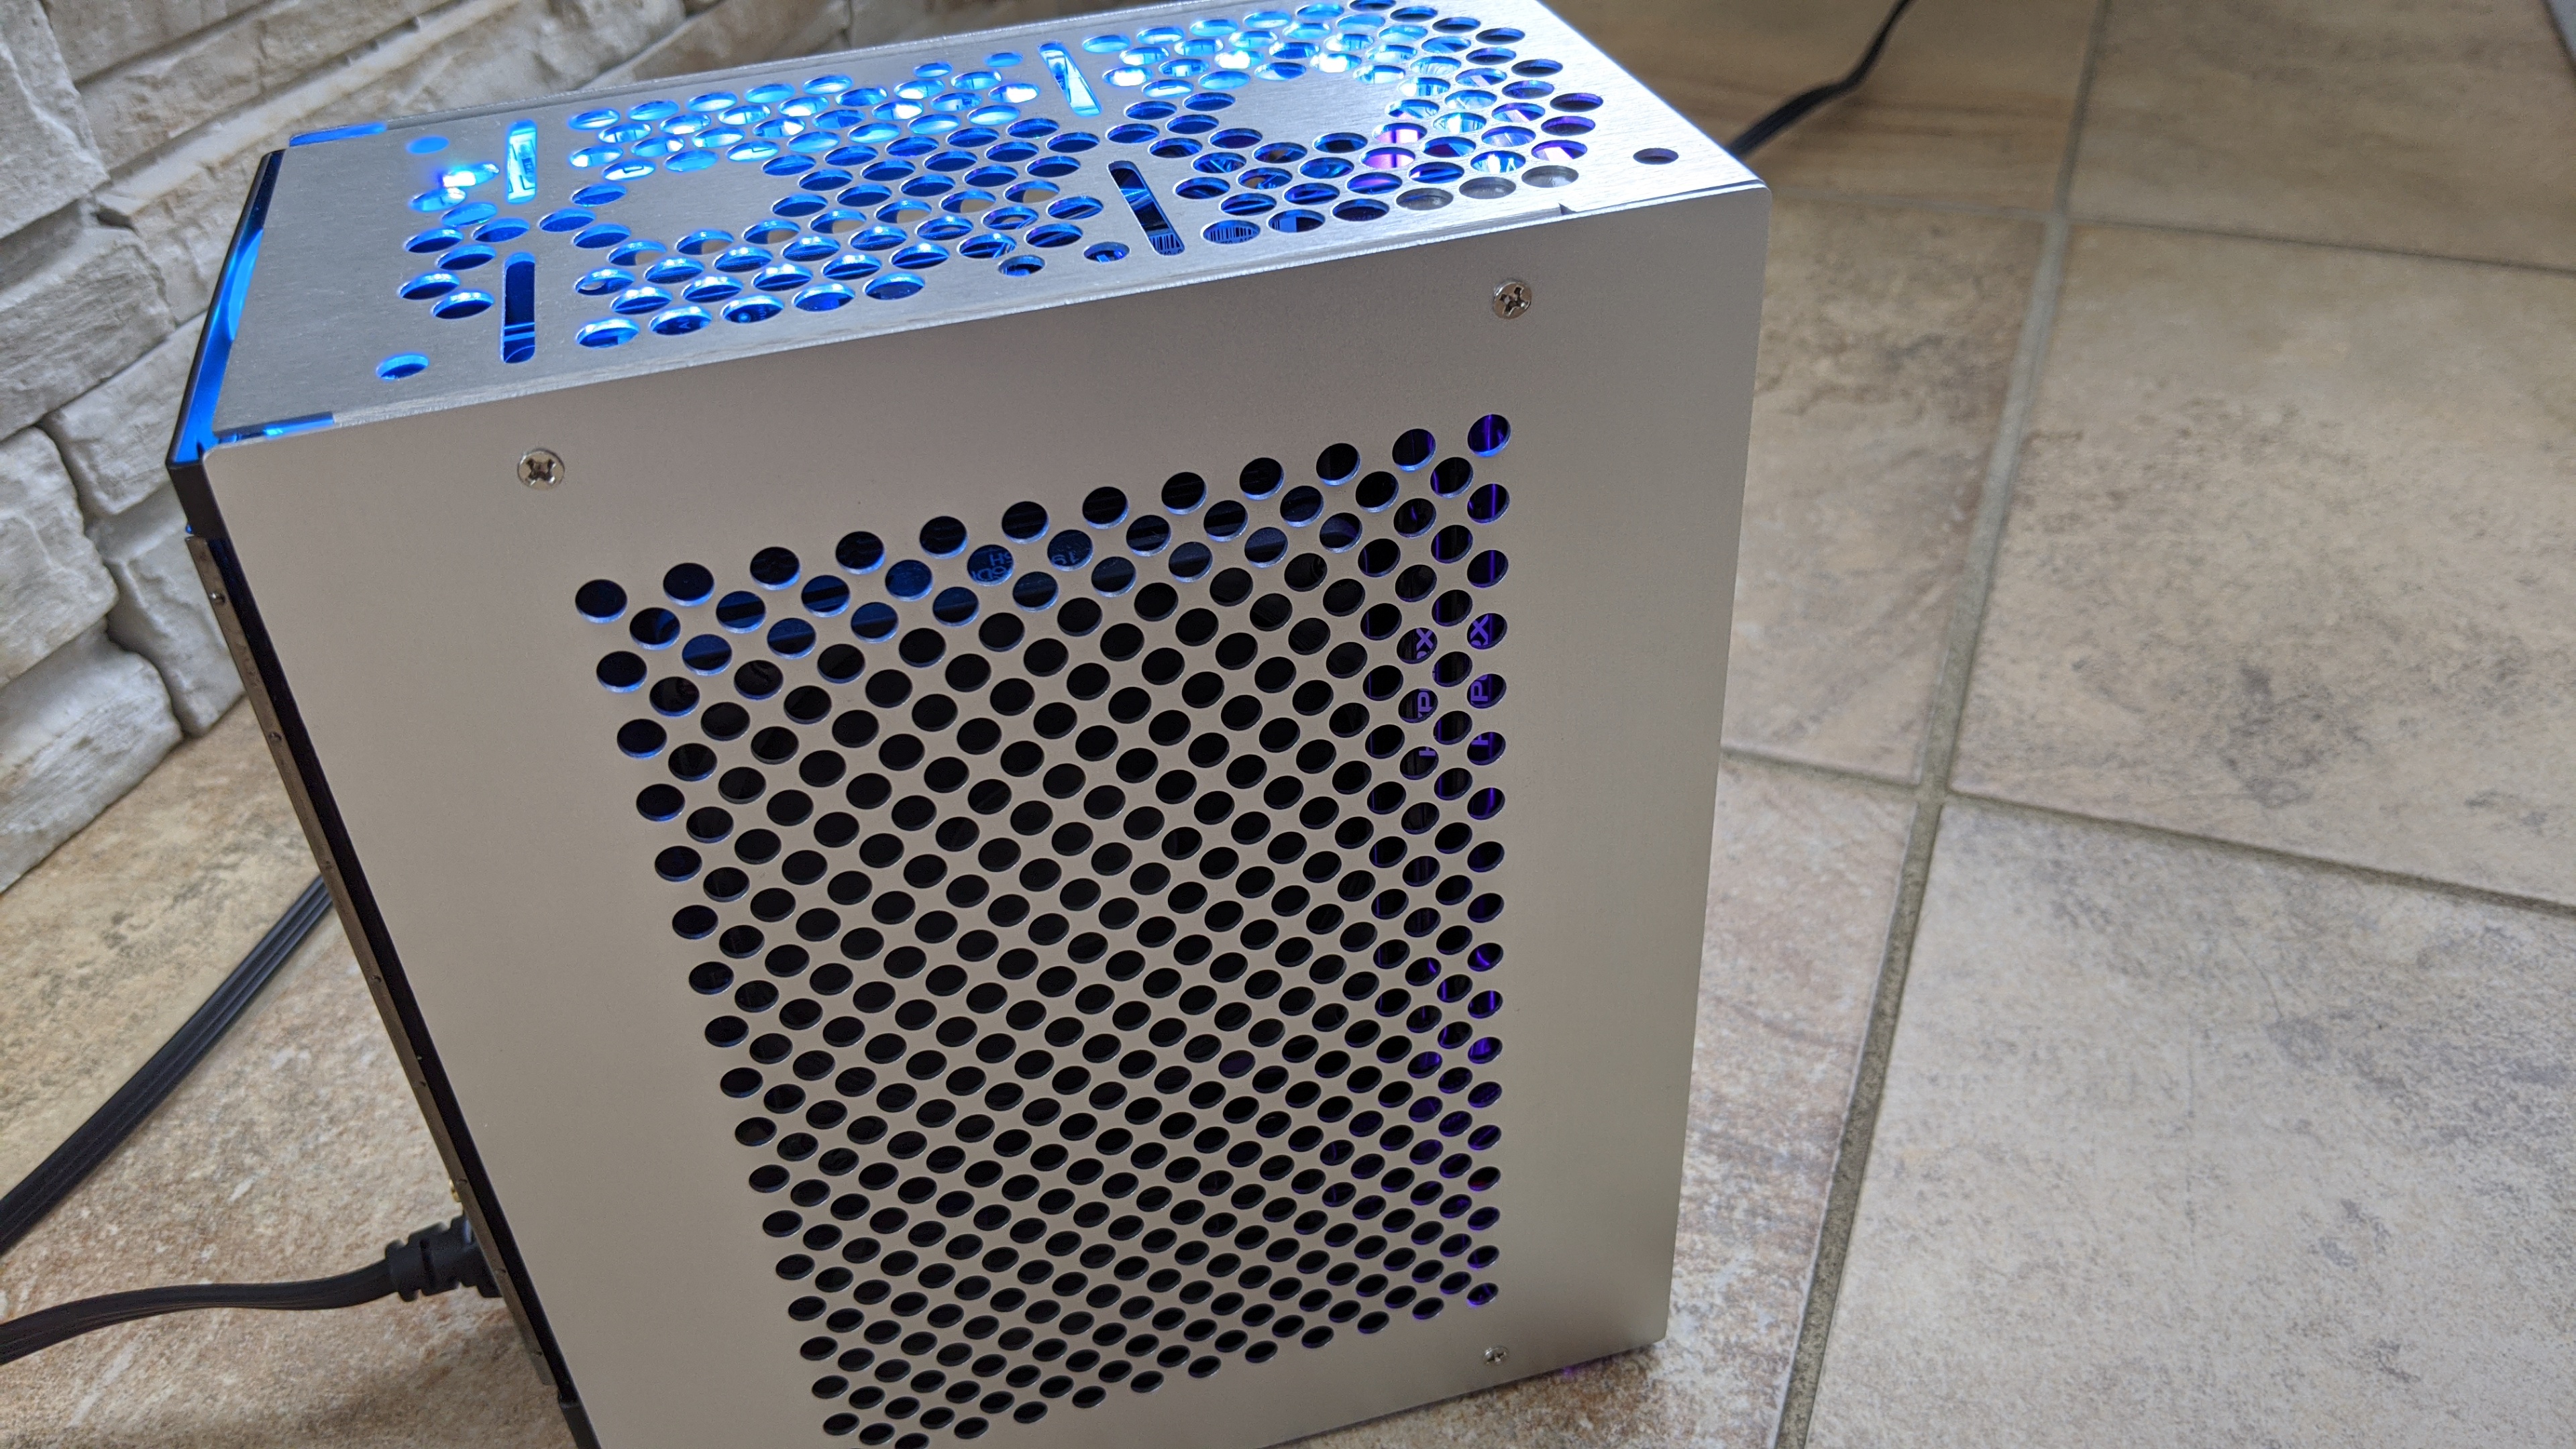
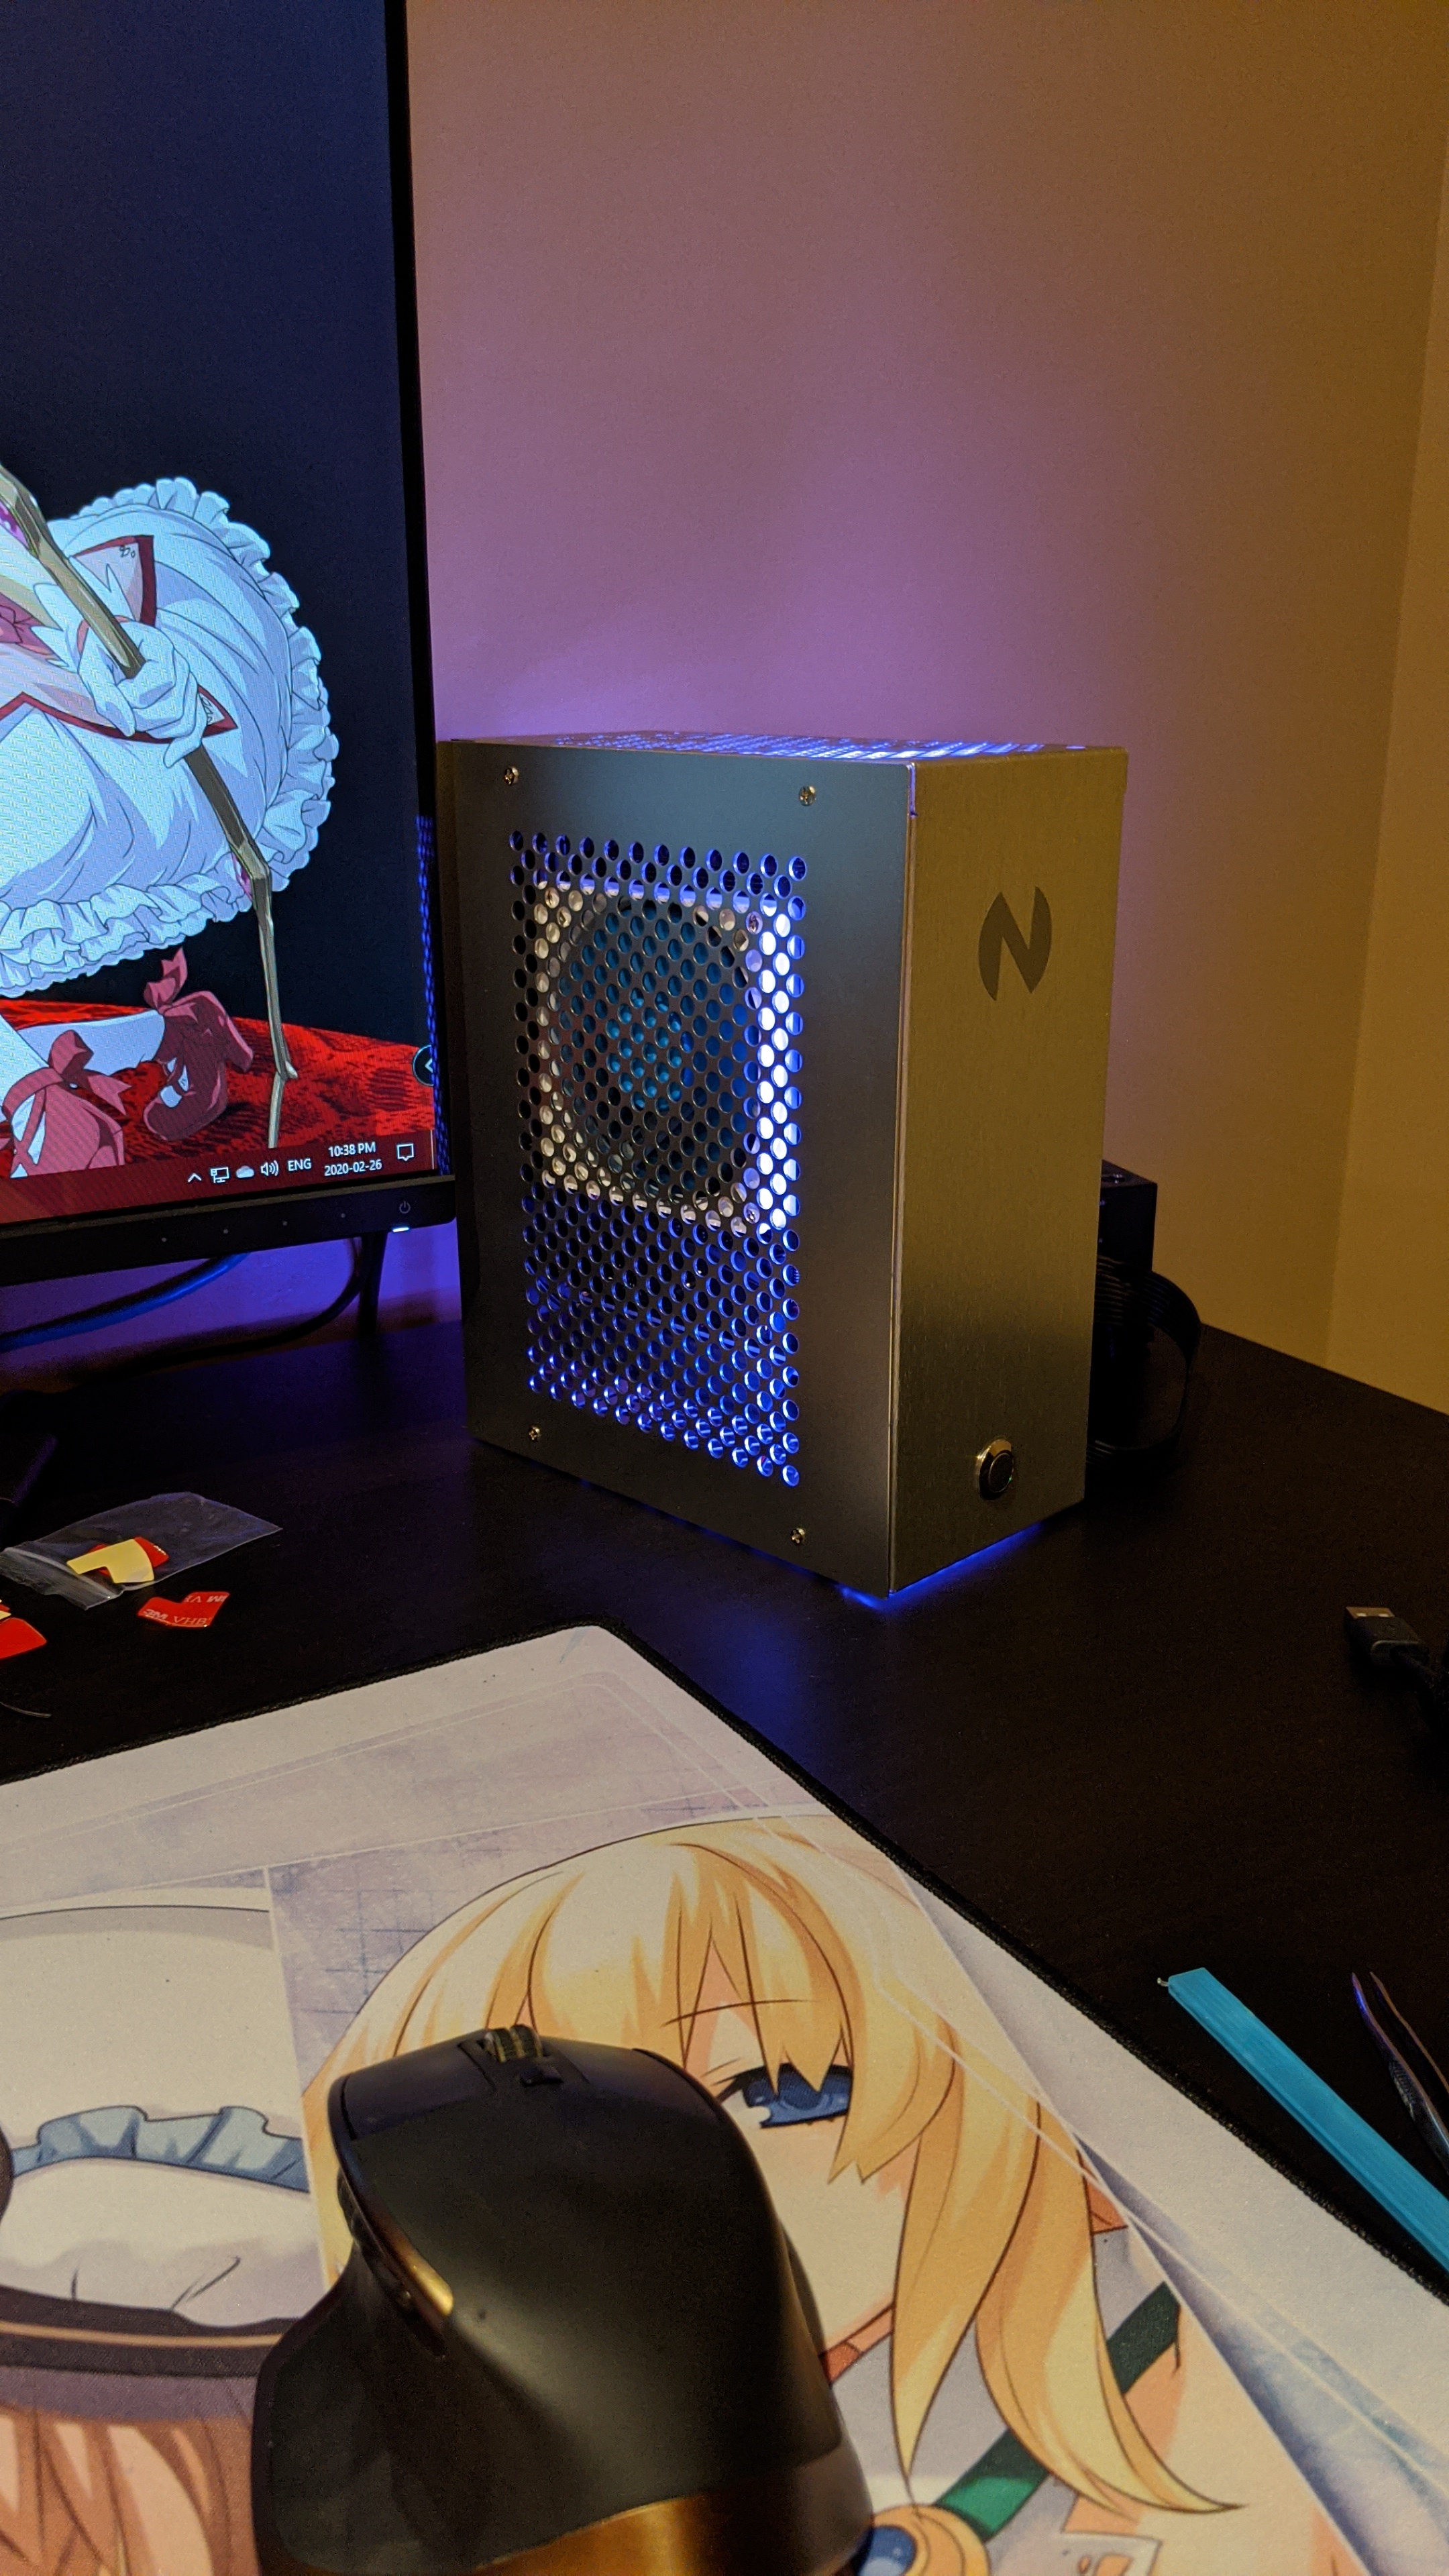
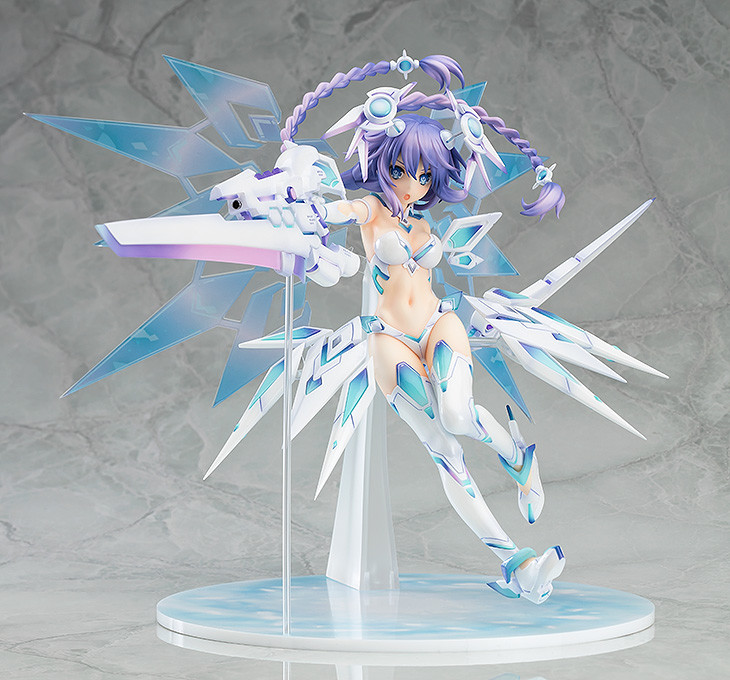
It will be based around Lilac Cool outfit of Purple Heart to respect the goddess and continue the name of my PC. But more importantly it will allow me to go for a silver build as I am beginning to be feed up of how everything black on my setup feel. Still, the inside of the build will be all blacked out with RGB strips inside to be purple and maybe some light blue.
Prices include shipping, taxes, rebates, and discounts
Total
$1208.36
Generated by PCPartPicker 2020-01-31 18:15 EST-0500
I just need to figure out how I will go about the flex PSU and the case. That’s were I need you the guys and gals as right now I’m torn between 3-5 choices.
First choice: Velka 3
It is the case that started it all. It would be 3.7L, pretty much the smallest you can go without having an external power brick. At $79US, the price is good but will be difficult to get due to availability.
Second (and company) choice: Metalfish S3, K39, and Loli1
Chinese versions of the Velka 3. In all case they are bigger, with 5.25 L, 3.9 L and 5.12 L respectively. However, they are readily available and a little bit cheaper at around $100CAD, including the riser. K39 would be the smaller but I would need to find a V1 (second picture) as I don’t like the ventilation slots of the V2 (and even then I’m less a fan of the look than the two others).
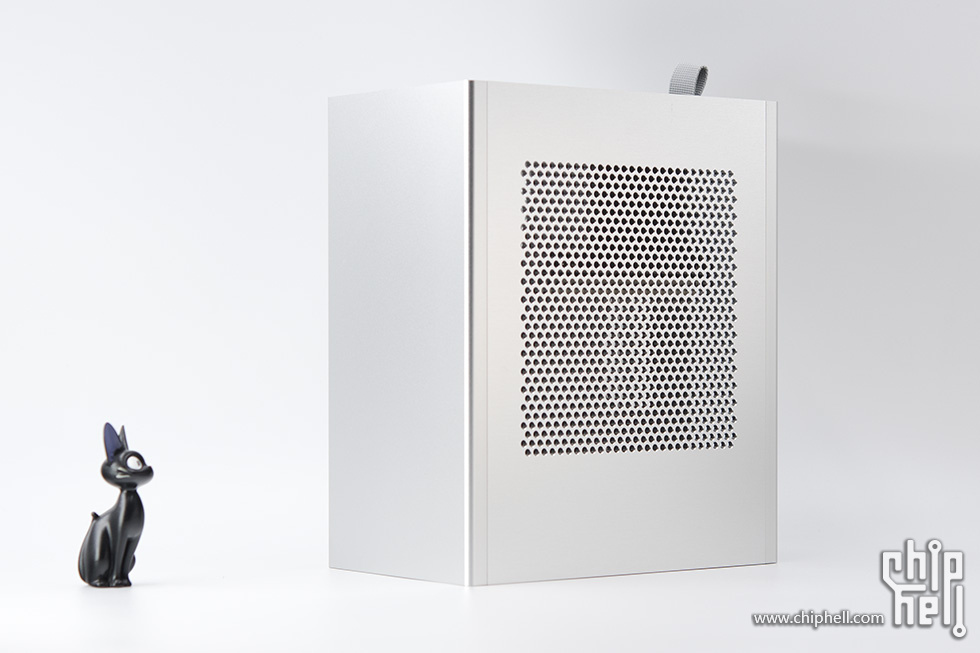
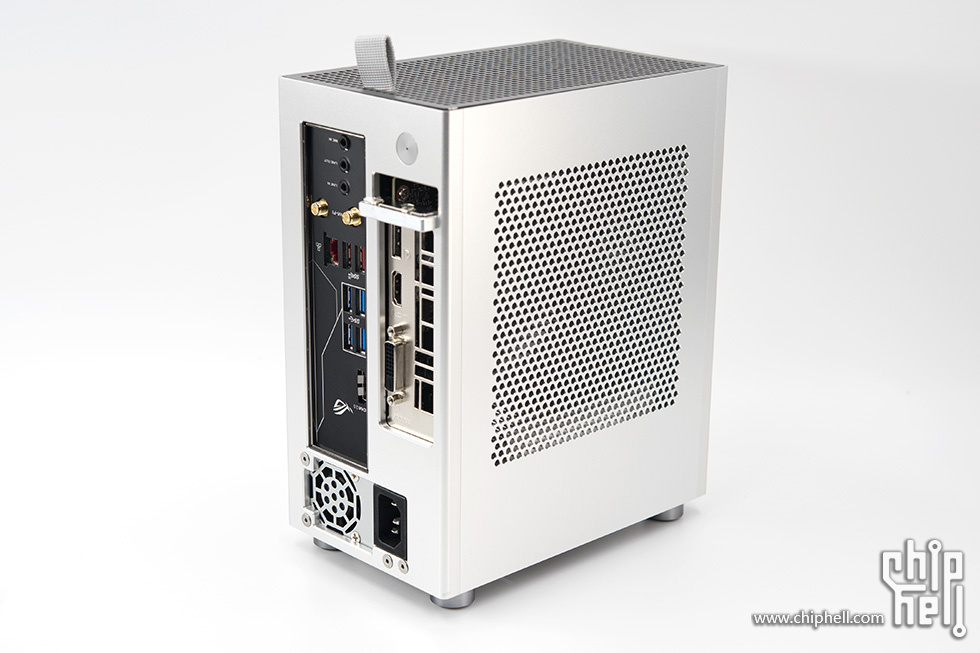
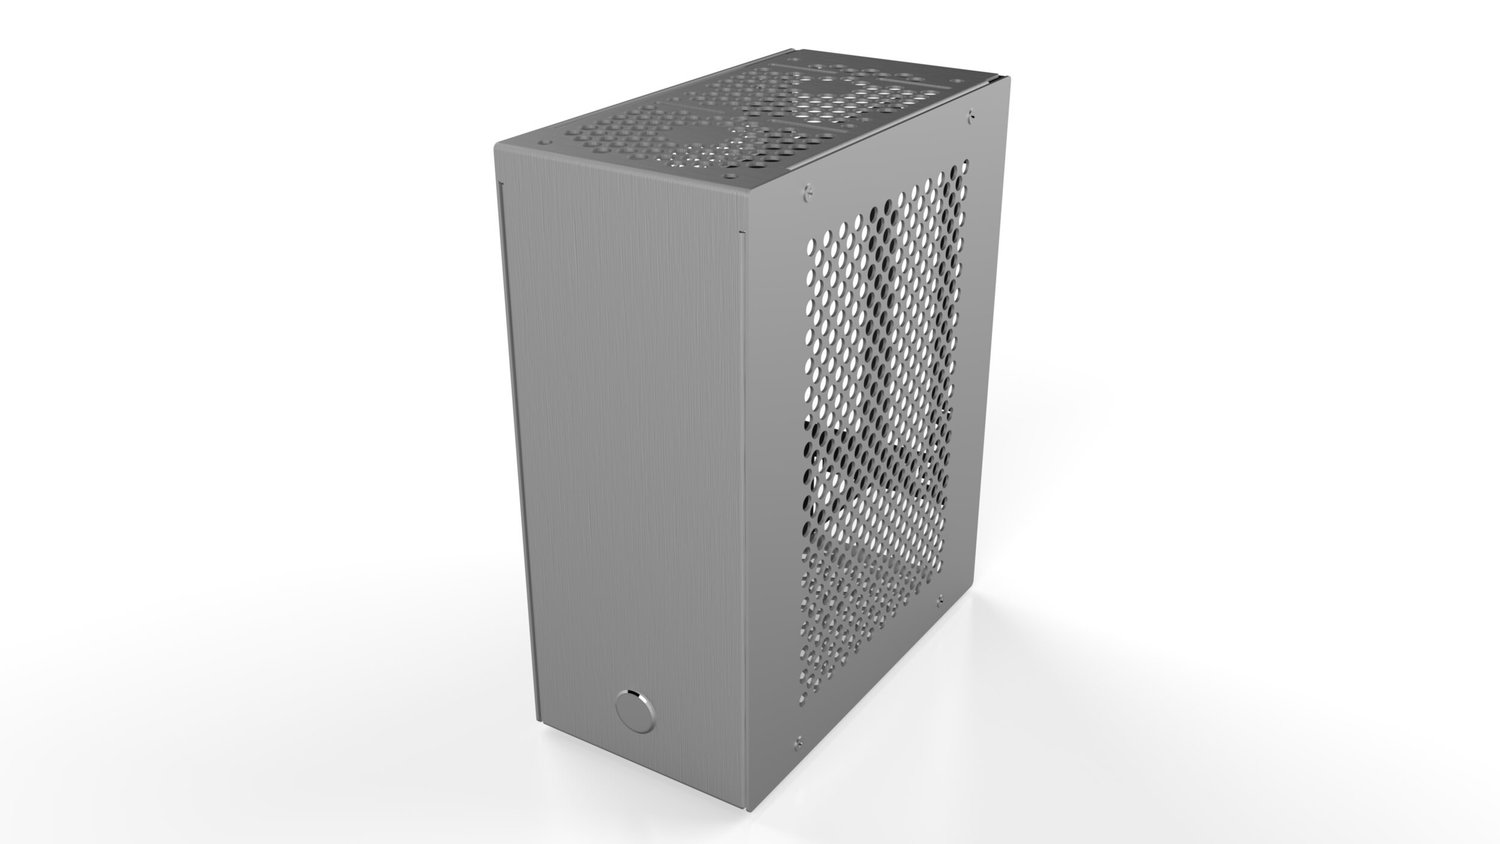
Third choice: Formula 2s
I’m in love with this one . It’s like if the Velka 3 had a baby with the Louqe Ghost S1. It’s gorgeous and appear to be solid built. Silver with a dark grey cover looks really good. It’s 4.58L. Also it’s fucking expensive at $235CAD , plus shipping and the agent so probably $300CAD or more. Ya I bought my Dan case for a lot of money also, but that much and bought directly from China is an hard sell a little bit. But it would be so perfect.
I do prefer how the third one looks, rip wallet, the blank front will look better with any accents you put on the case and may i suggest an ahegao face Neptune?
No a gentleman must remain classy. Although what could be kind of cool is the Neptunia logo in front like the Microsoft logo on Surface product. But that would be like a strech strech goal.
I’m becoming increasingly doubtful of the last choice. I’m not able to find any build in that case outside of that picture I posted here. Outside of some mentions of the case on Reddit, nobody seemed to have bought it in the West and I have no much luck in China either. Websites indicating listing of that case only use one of two sets of pictures, which include the aforementioned one. And availability are either out of stock or 2304 available. No pictures of the other colours available. Well, I was able to have a picture of a black one on a kind of chinese kijiji I think, but only one picture not showing a lot.
I had to use my special weapon, image search in Yandex. Only was able to find also a russian site which have one different picture of this case, but no more. And the site does not call the case Formula 2S but Loli 2S (there is legitimately a case named Loli 1). Was not able to find other stuff useful or interesting using this name, outside of a wall scroll of Takagi
And the more I look into it, the more it seems precarious to buy directly from China. I think I will just try to grab one of the B-stock Velka 3 that will be available soon, using a US forwarder.
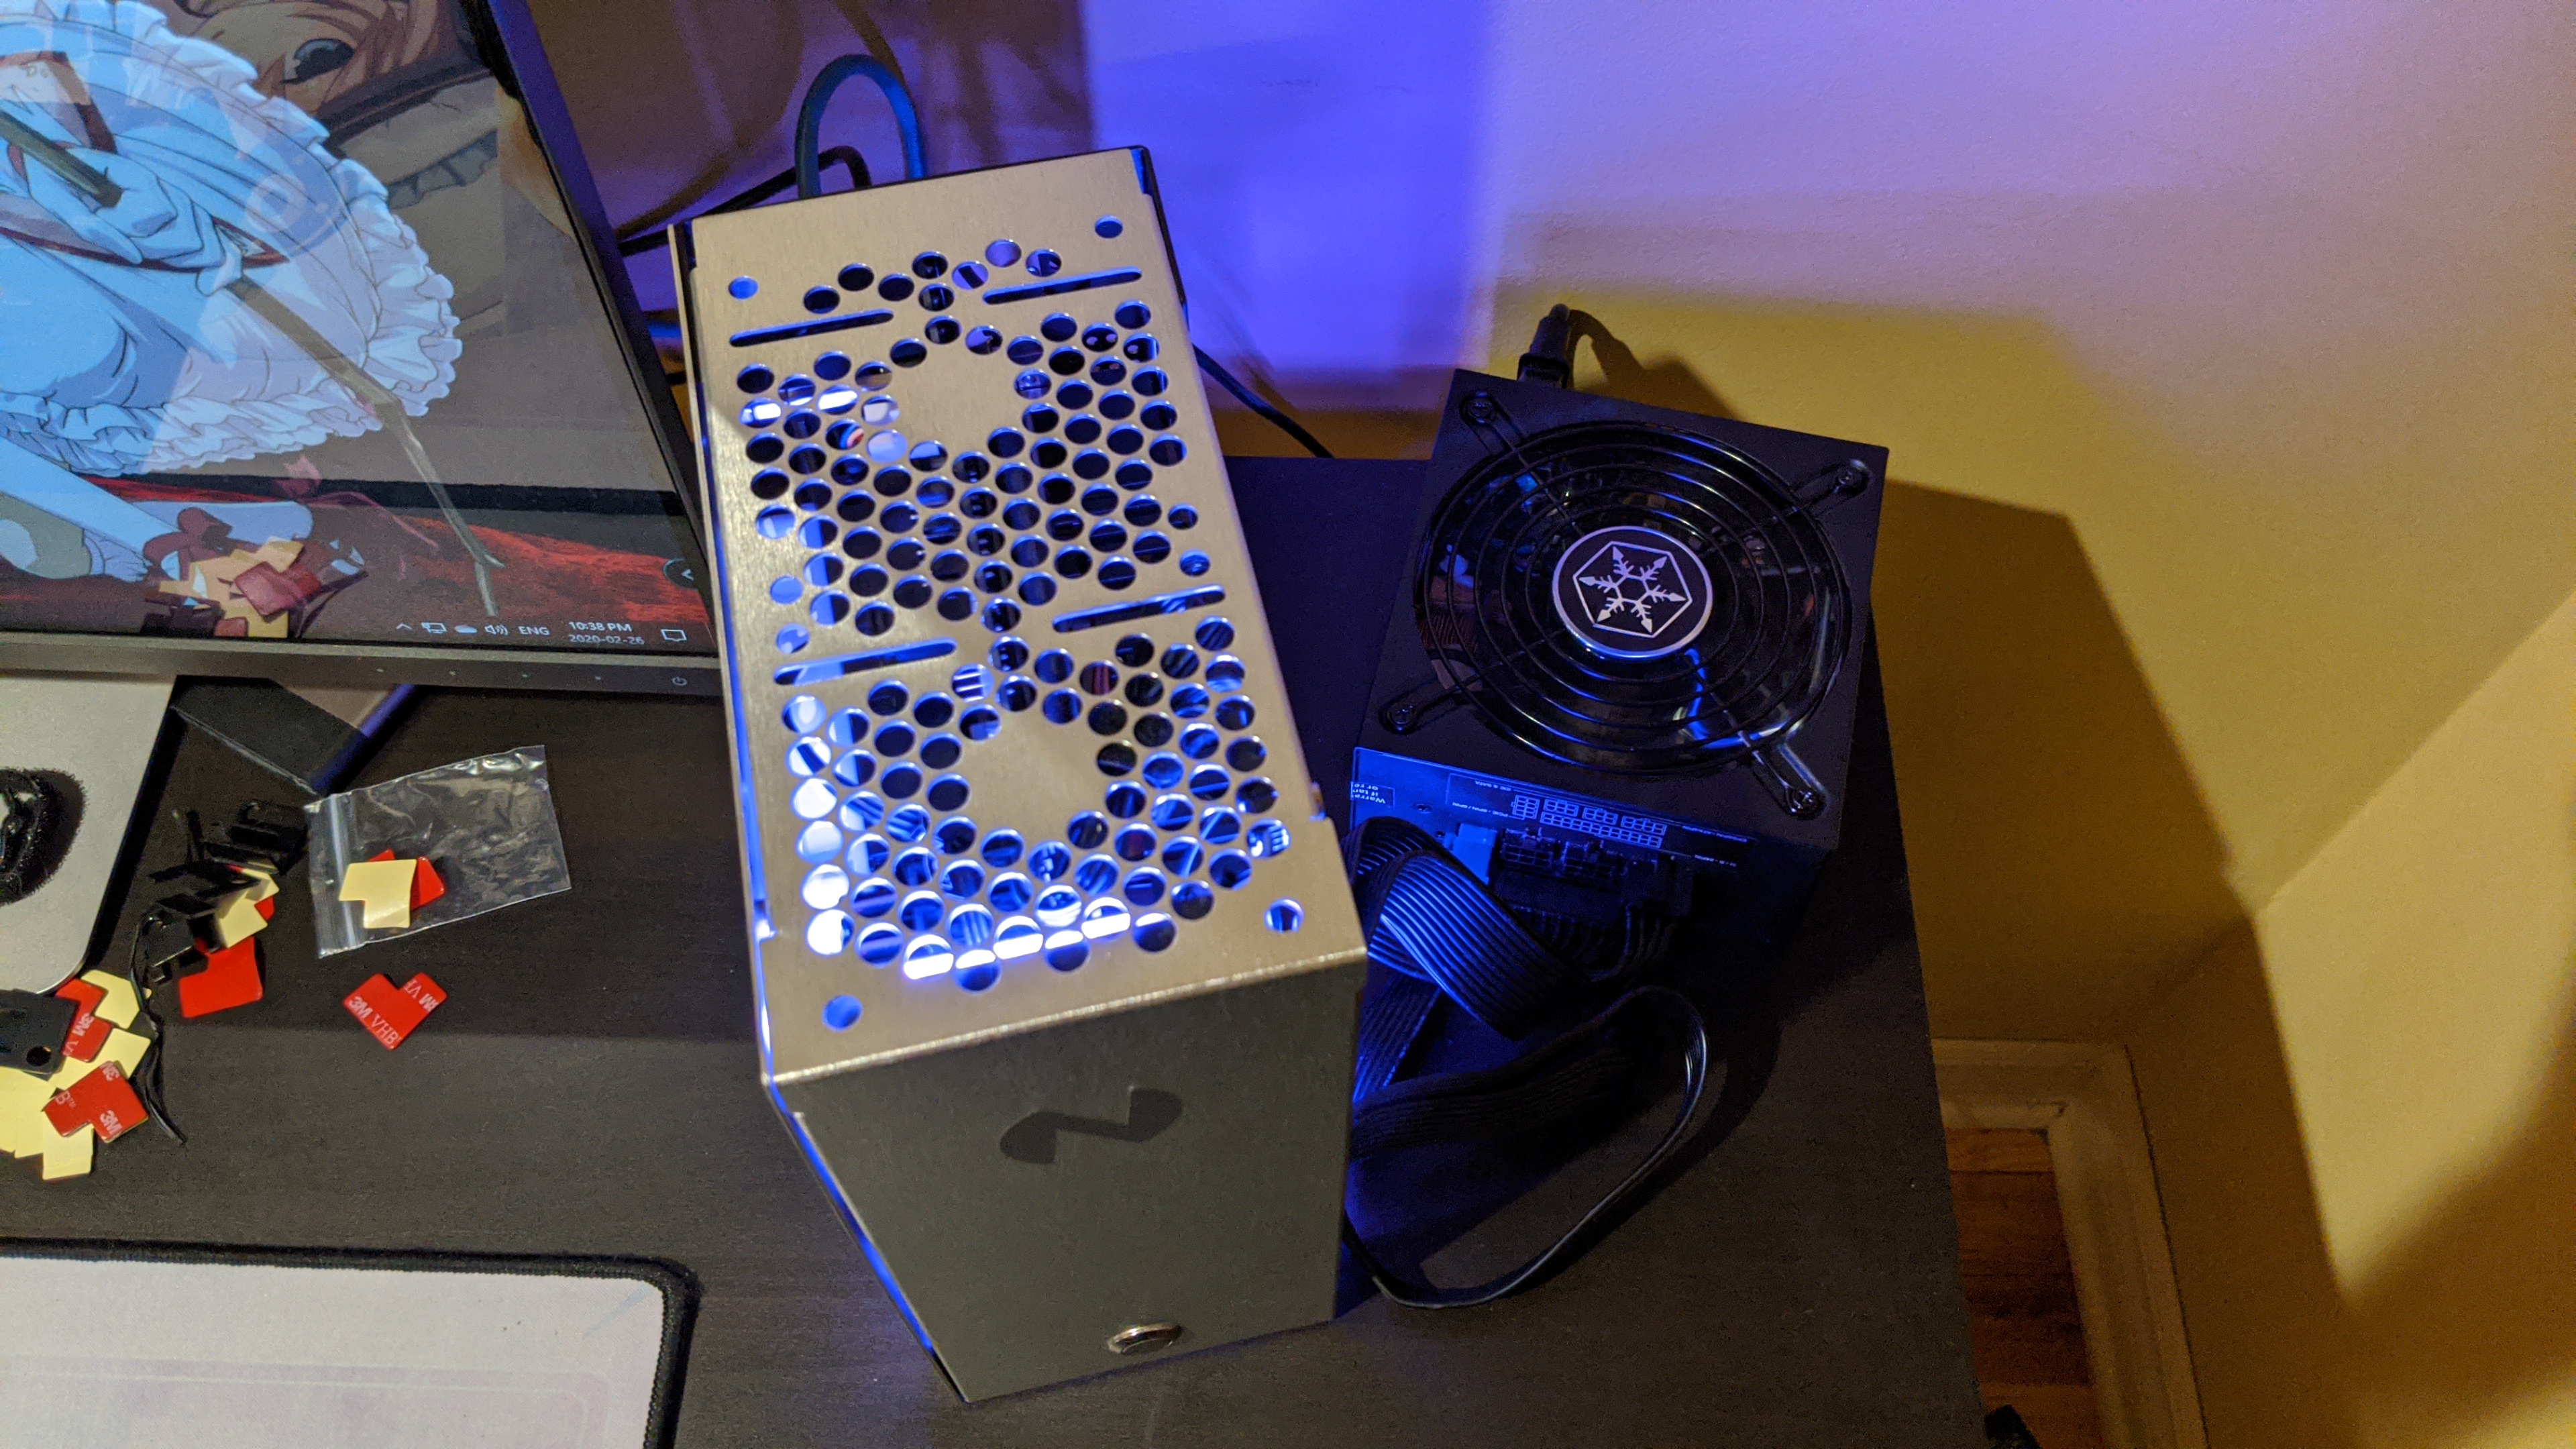
Bought two of the three more critical parts of the build: the GPU and the PSU. For the GPU I bought a GTX 1660 ti mini removed from a prebuild HP. Was below 300$ CAD with shipping so it was a good price. And got a SilverStone FX350-G for cheap at 125$ CAD on ebay from Germany. Pretty much the cheapest I can go while having a reliable PSU Flex and no issue of out of stock. And the b-stock gonna be sol soon so will probable buy the case soon also.
Planning to mod the SilverStone FX350-G by swapping the fan for a Noctua one, removing the SATA, molex, and floppy cables (either by cutting or desoldering I don’t yet) and will replace the bulky sleeving for individual sleeving. Maybe will try to shorten the cable also, but I’m unsure if I will be confident enough to desolder and resolder every cable power of the PSU. Unless I shorten on the pin side, individually sleeve from there and re-pin. Might be the easier way.
I still plan on doing custom cables for my EVGA Hadron 1U psu because its a mess inside otherwise. As long as you document everything it’ll be fine just tedious.
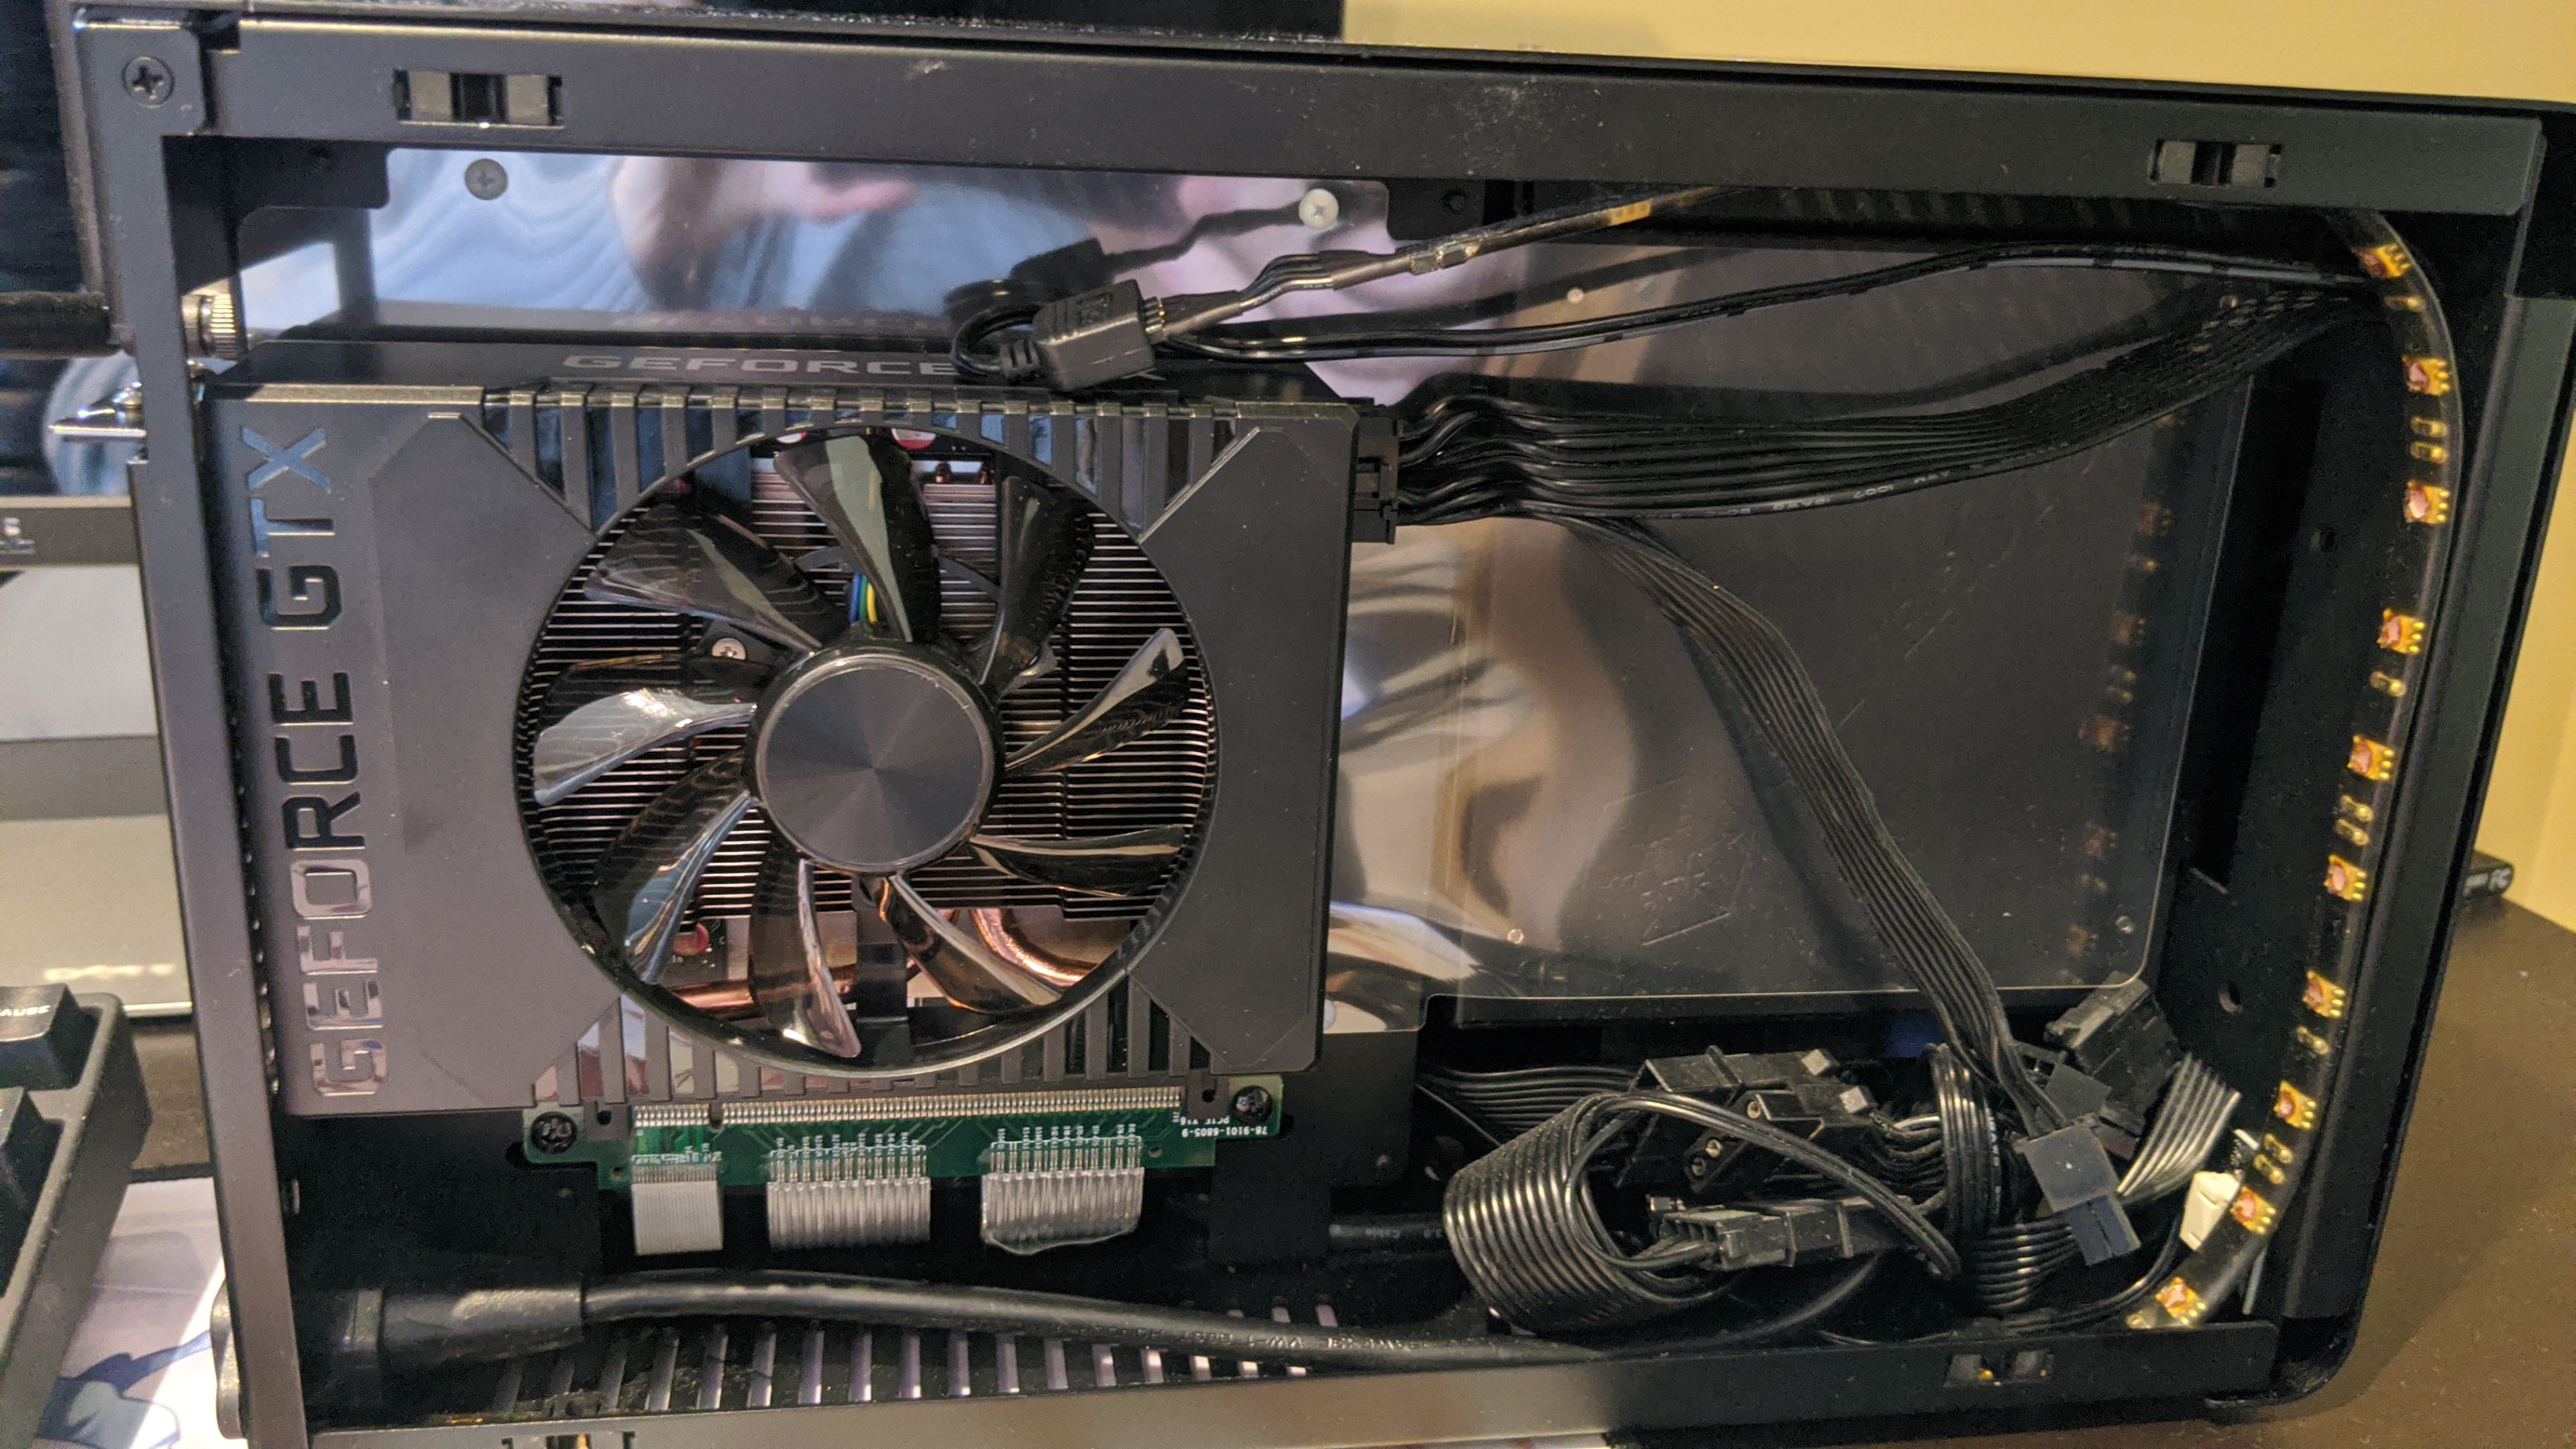
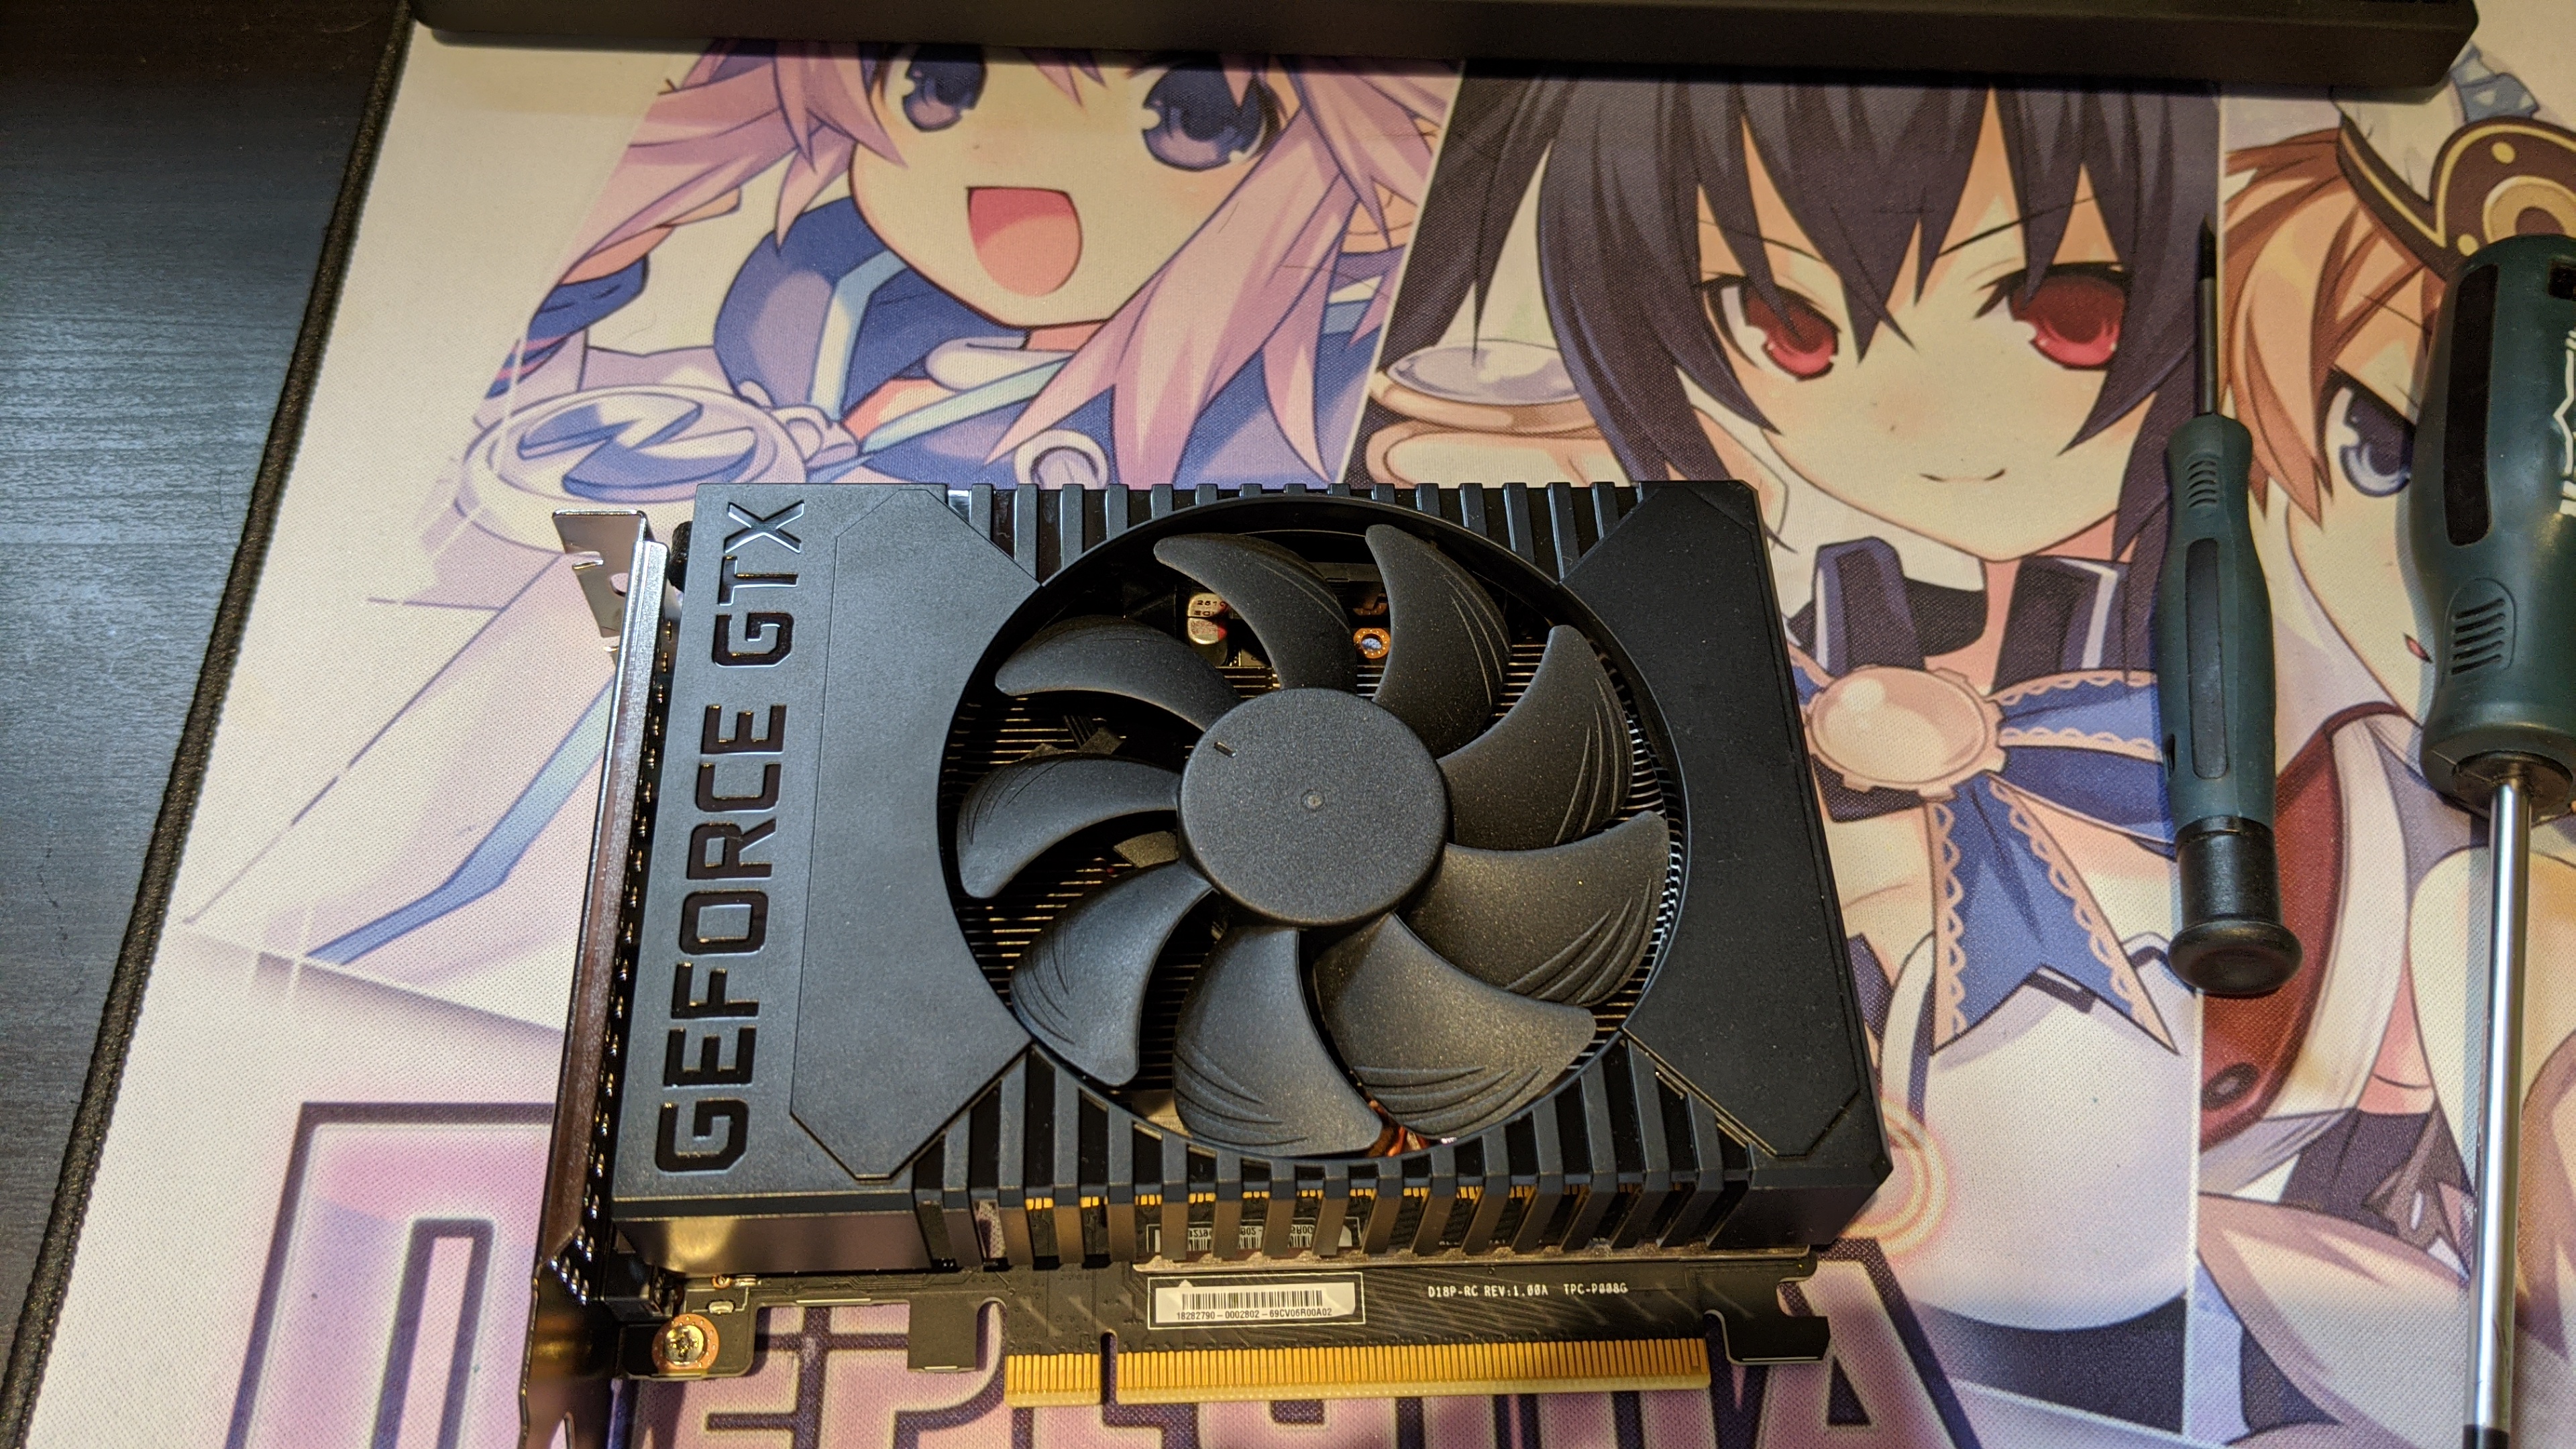
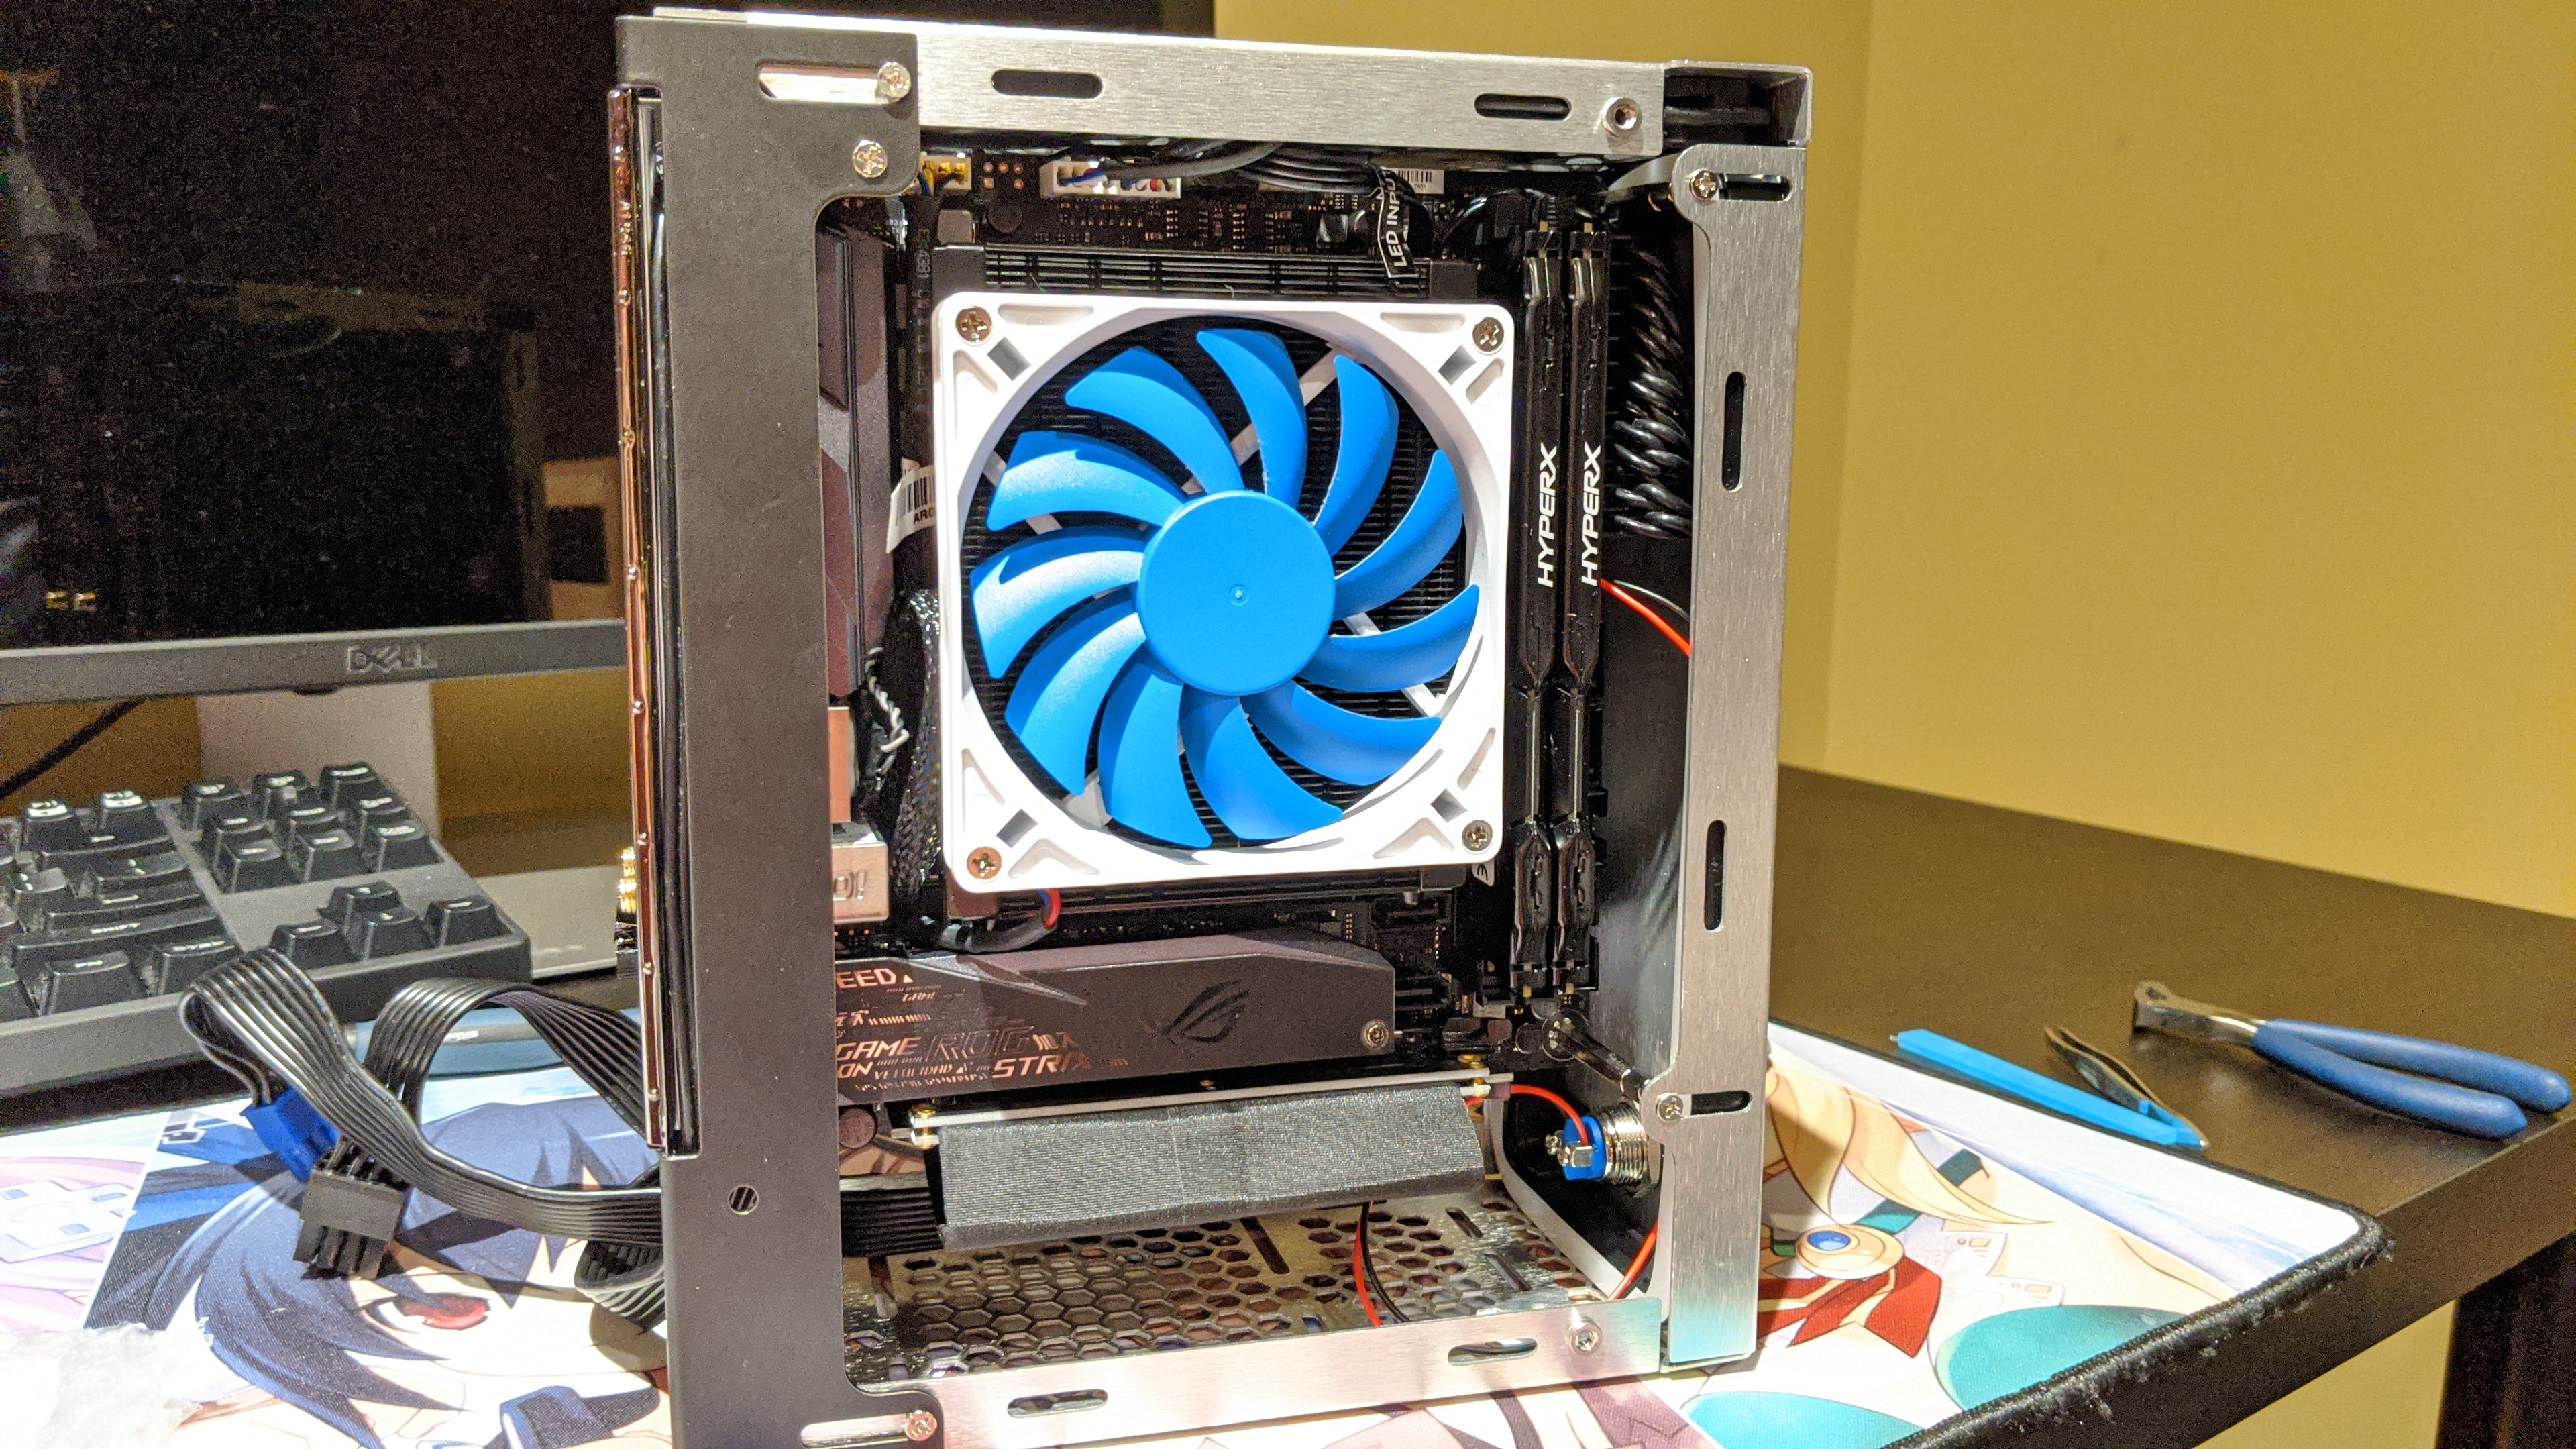
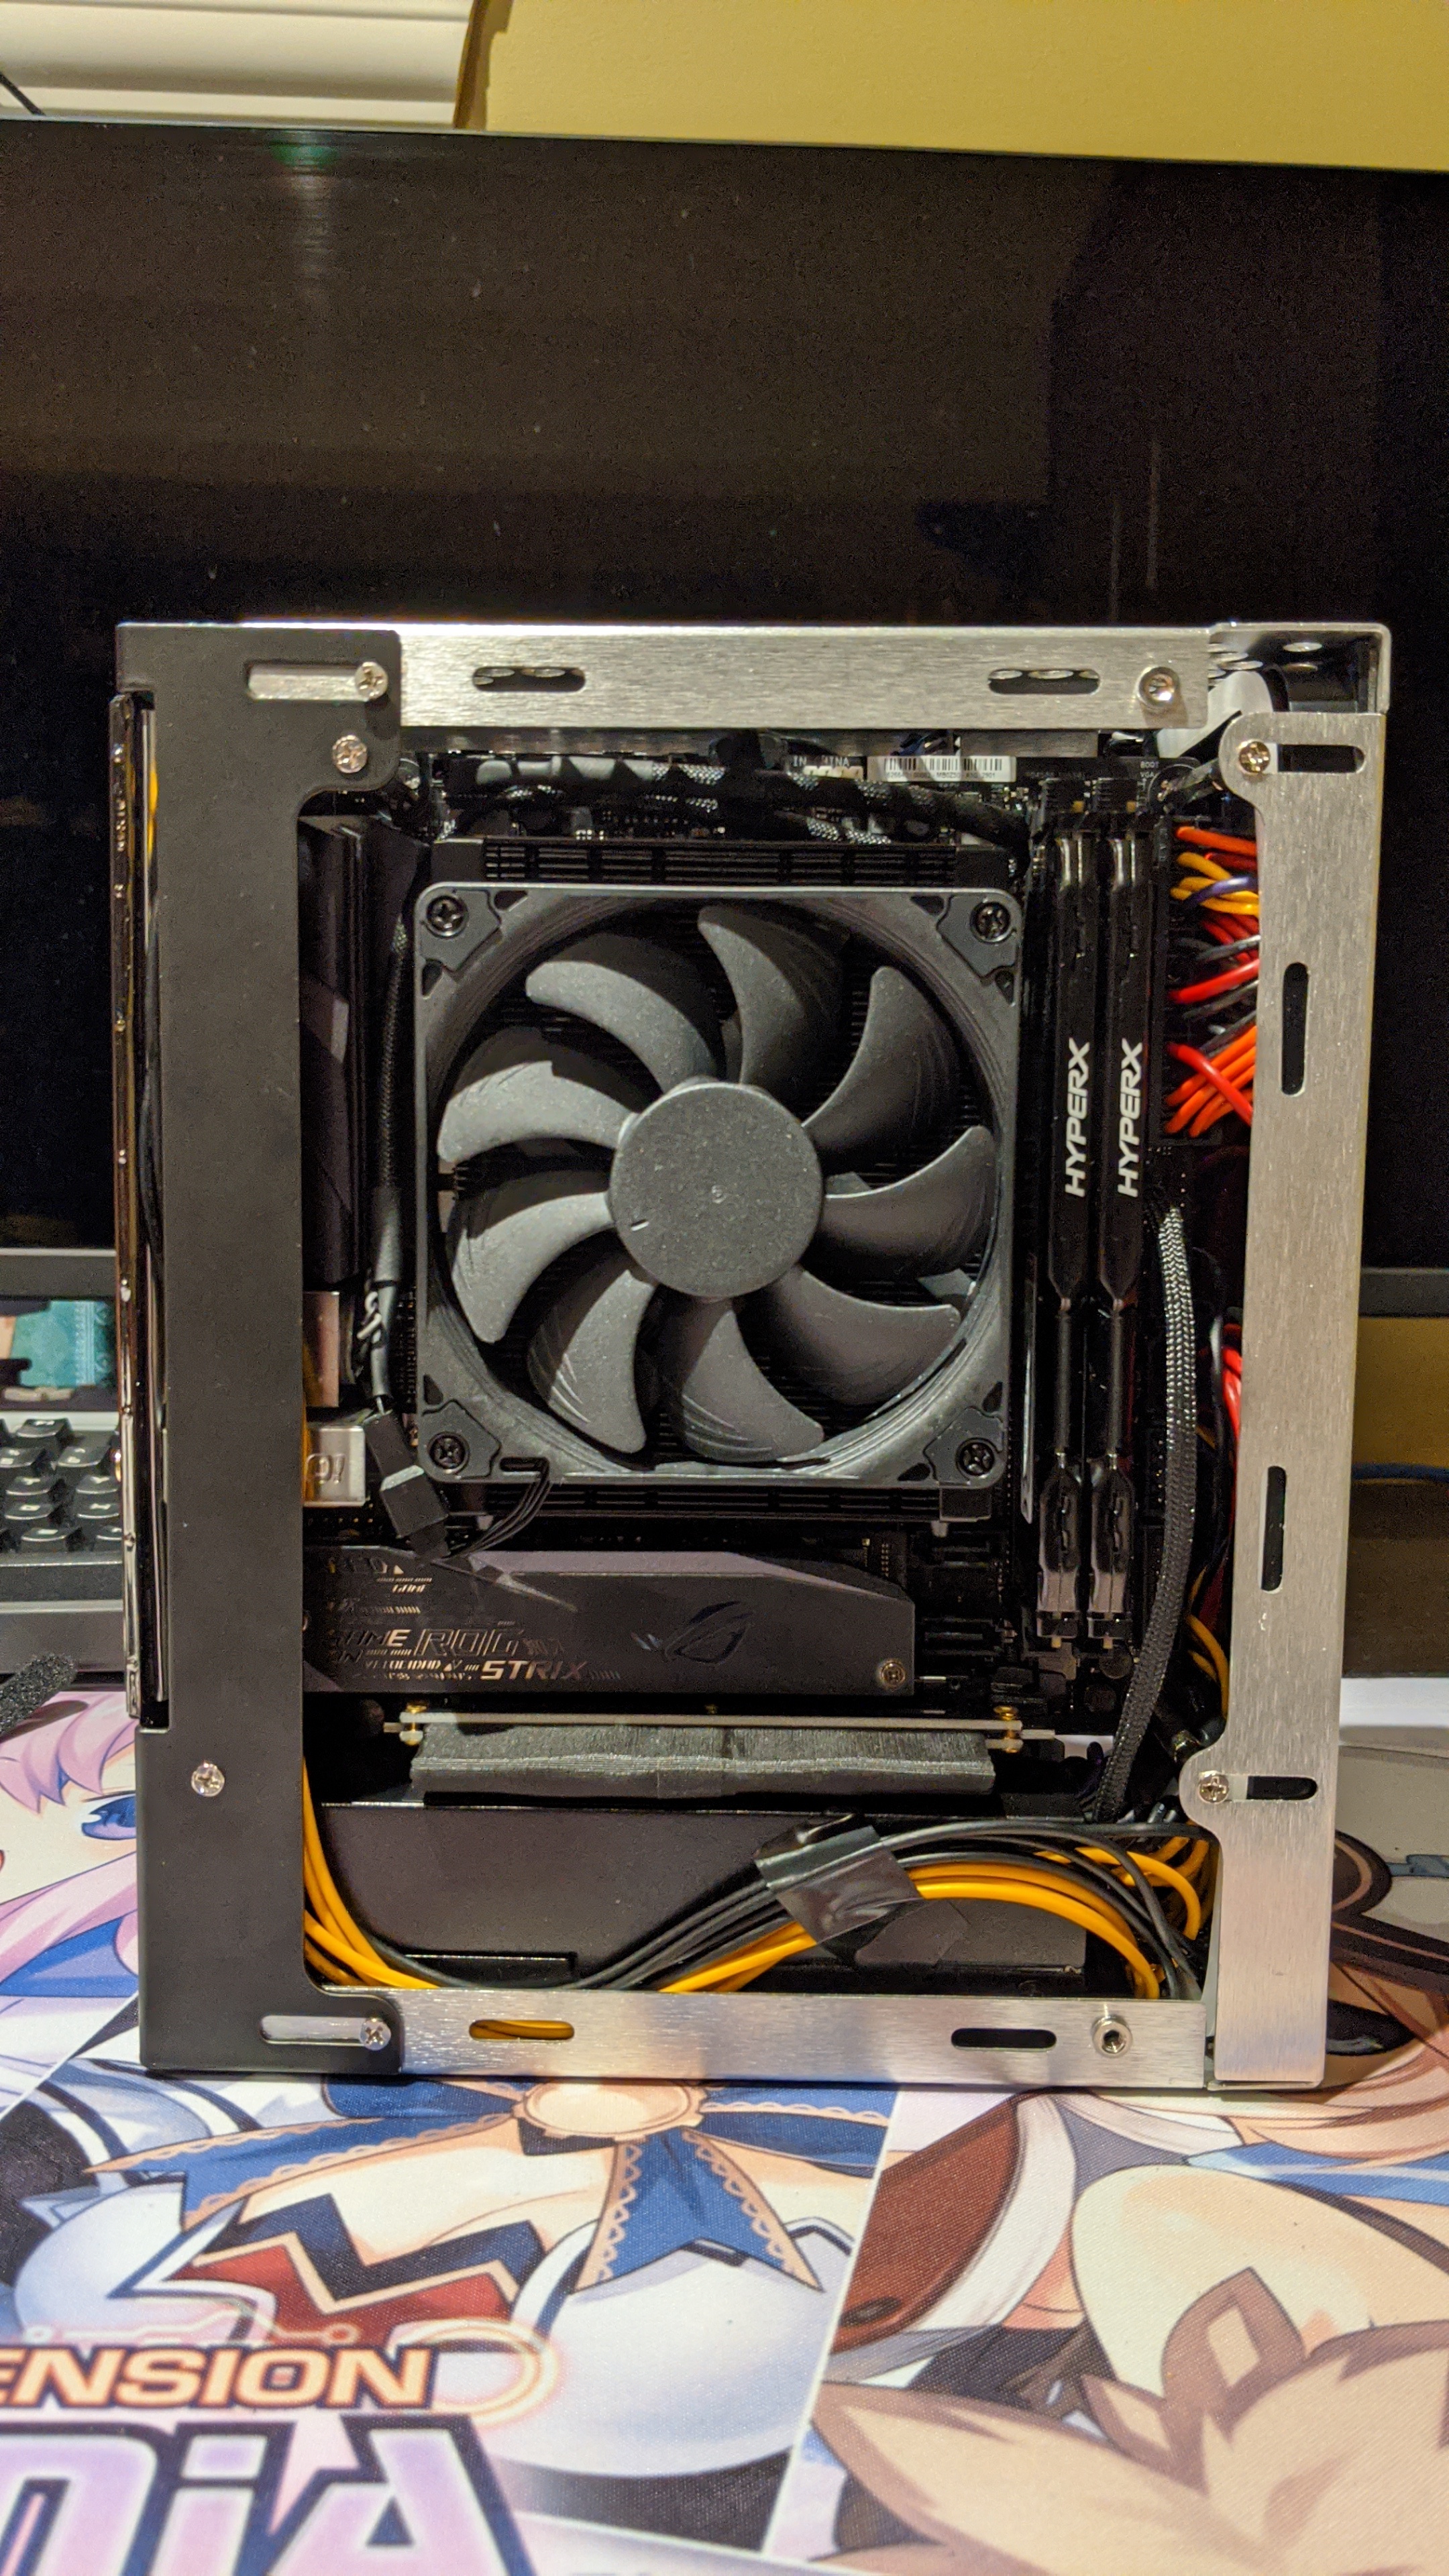
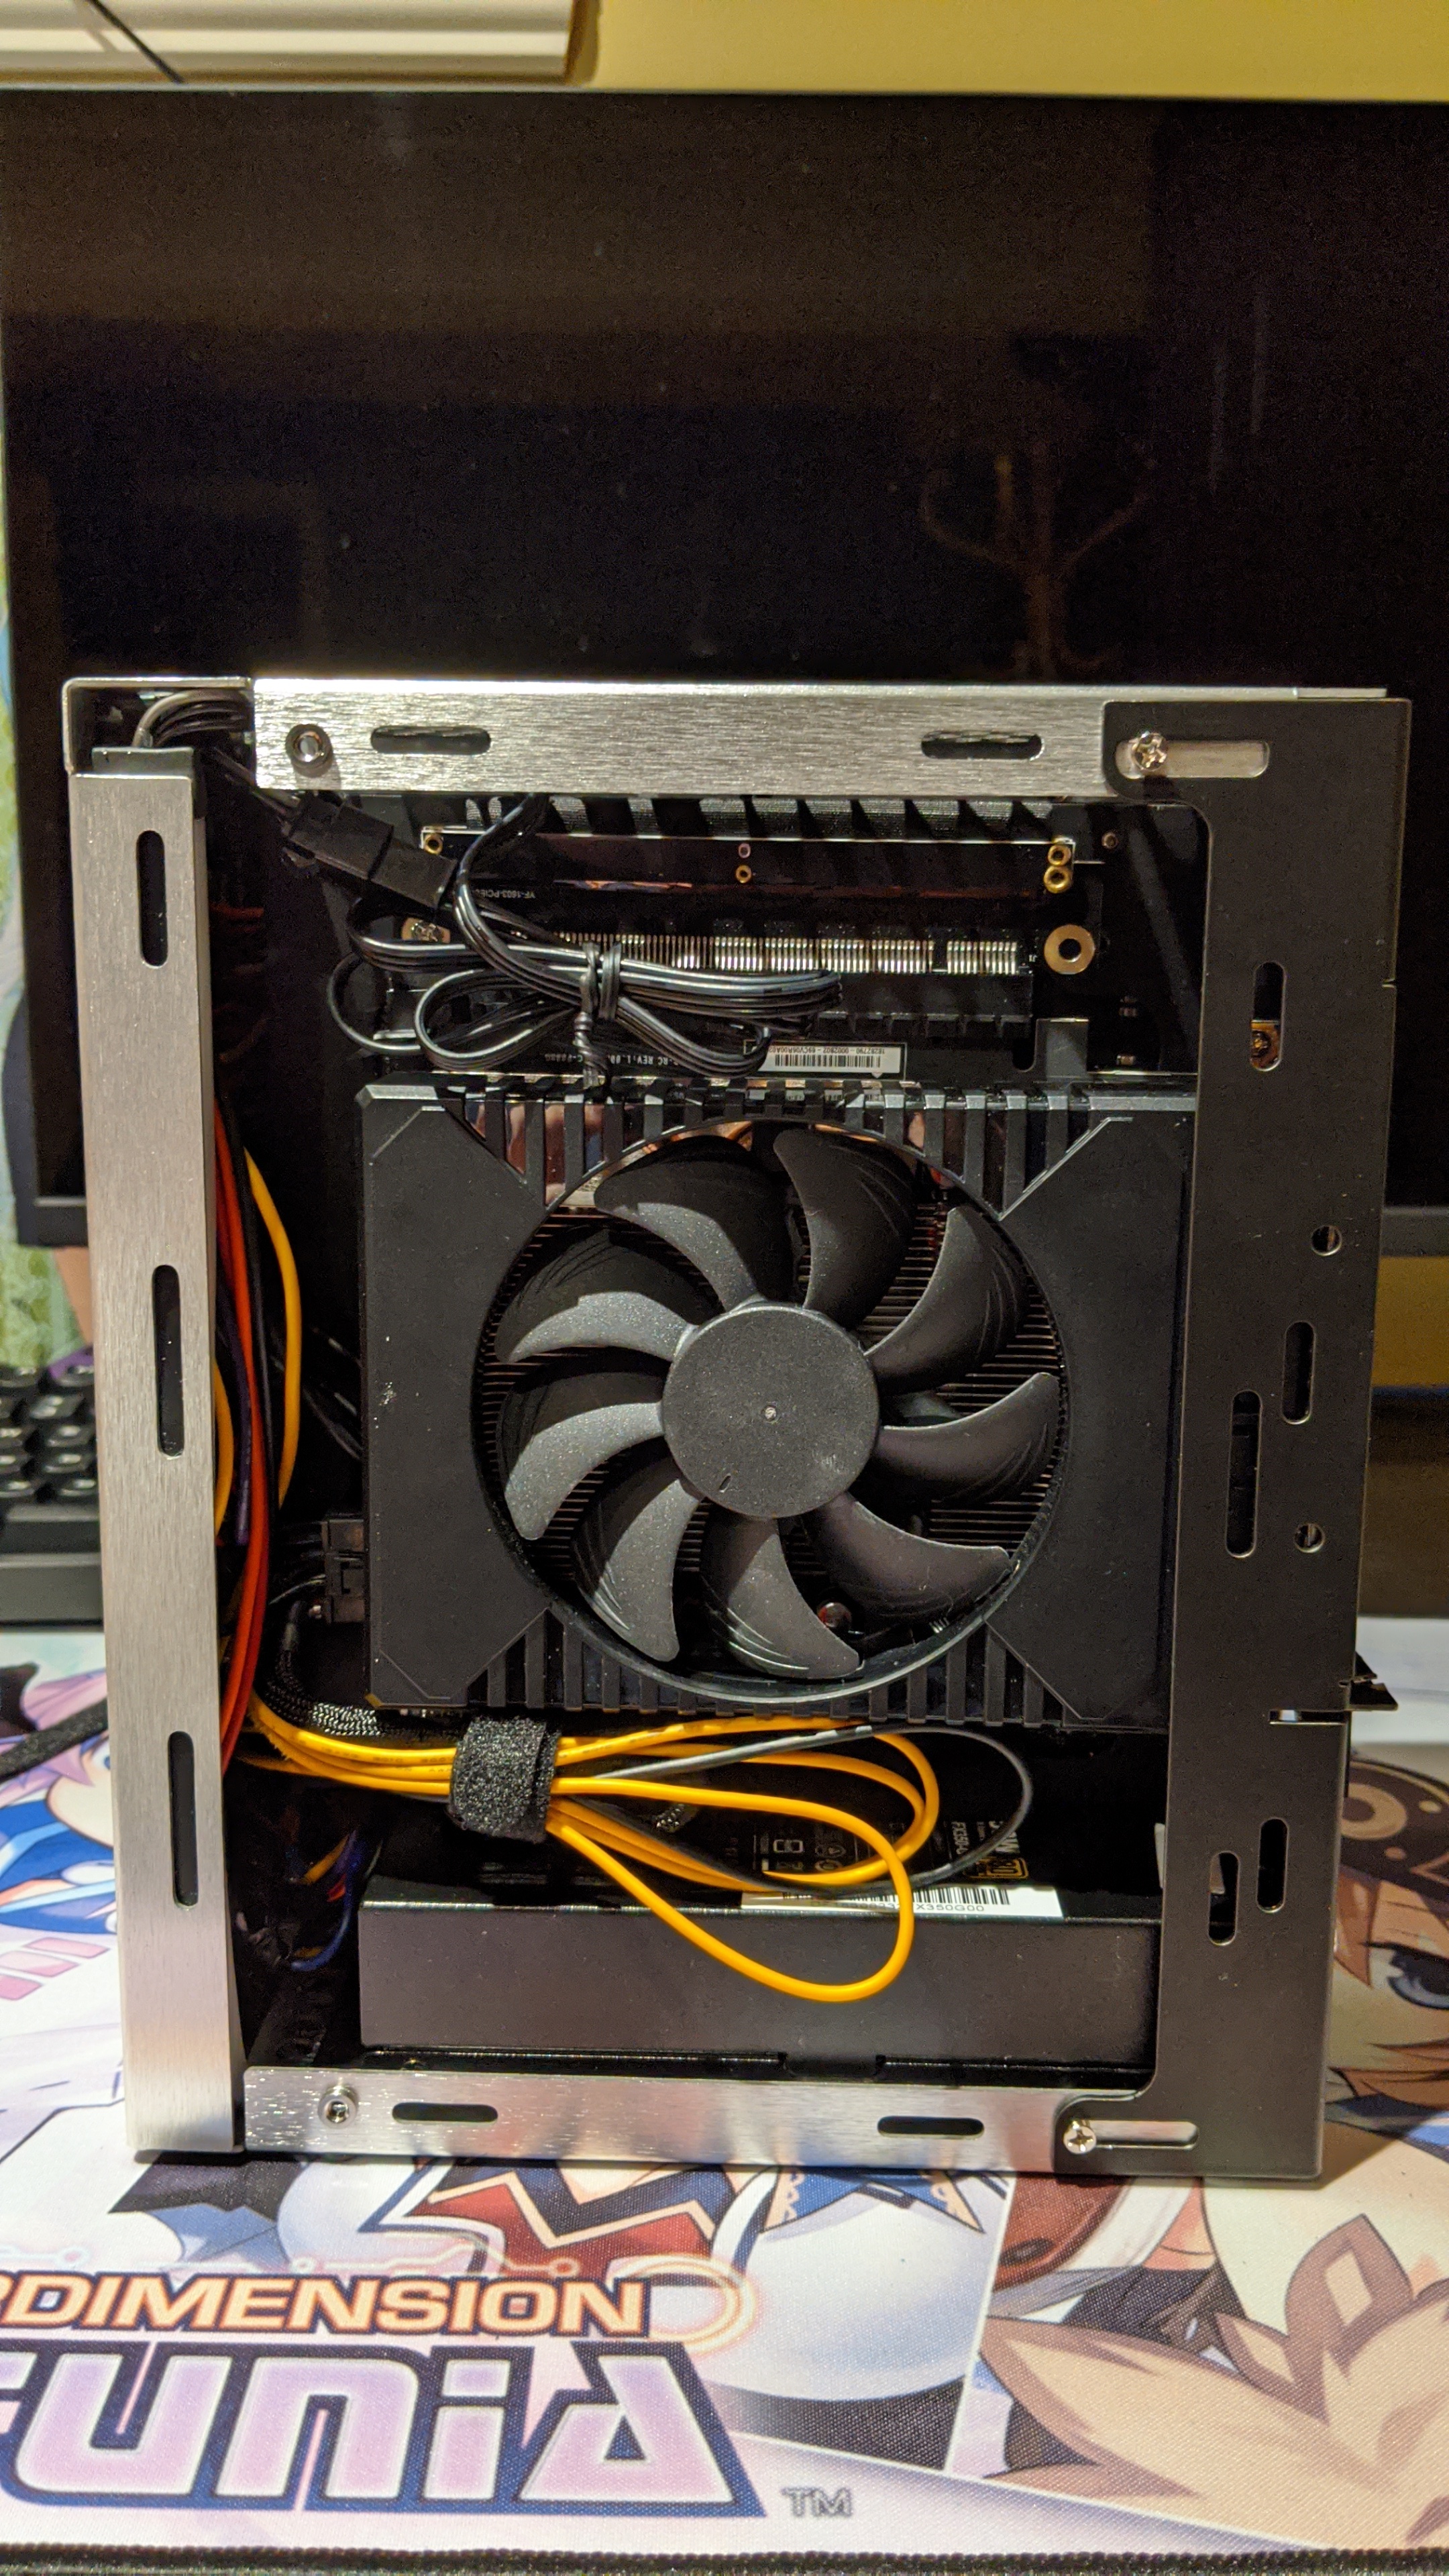
Received the first part of the build, the 1660 Ti. It is ridiculously small in the Dan case. Everything works fine and performance is adequate so probably gonna order the Noctua fan for the swap as the one included can be a loaded under heavy load and always spin.
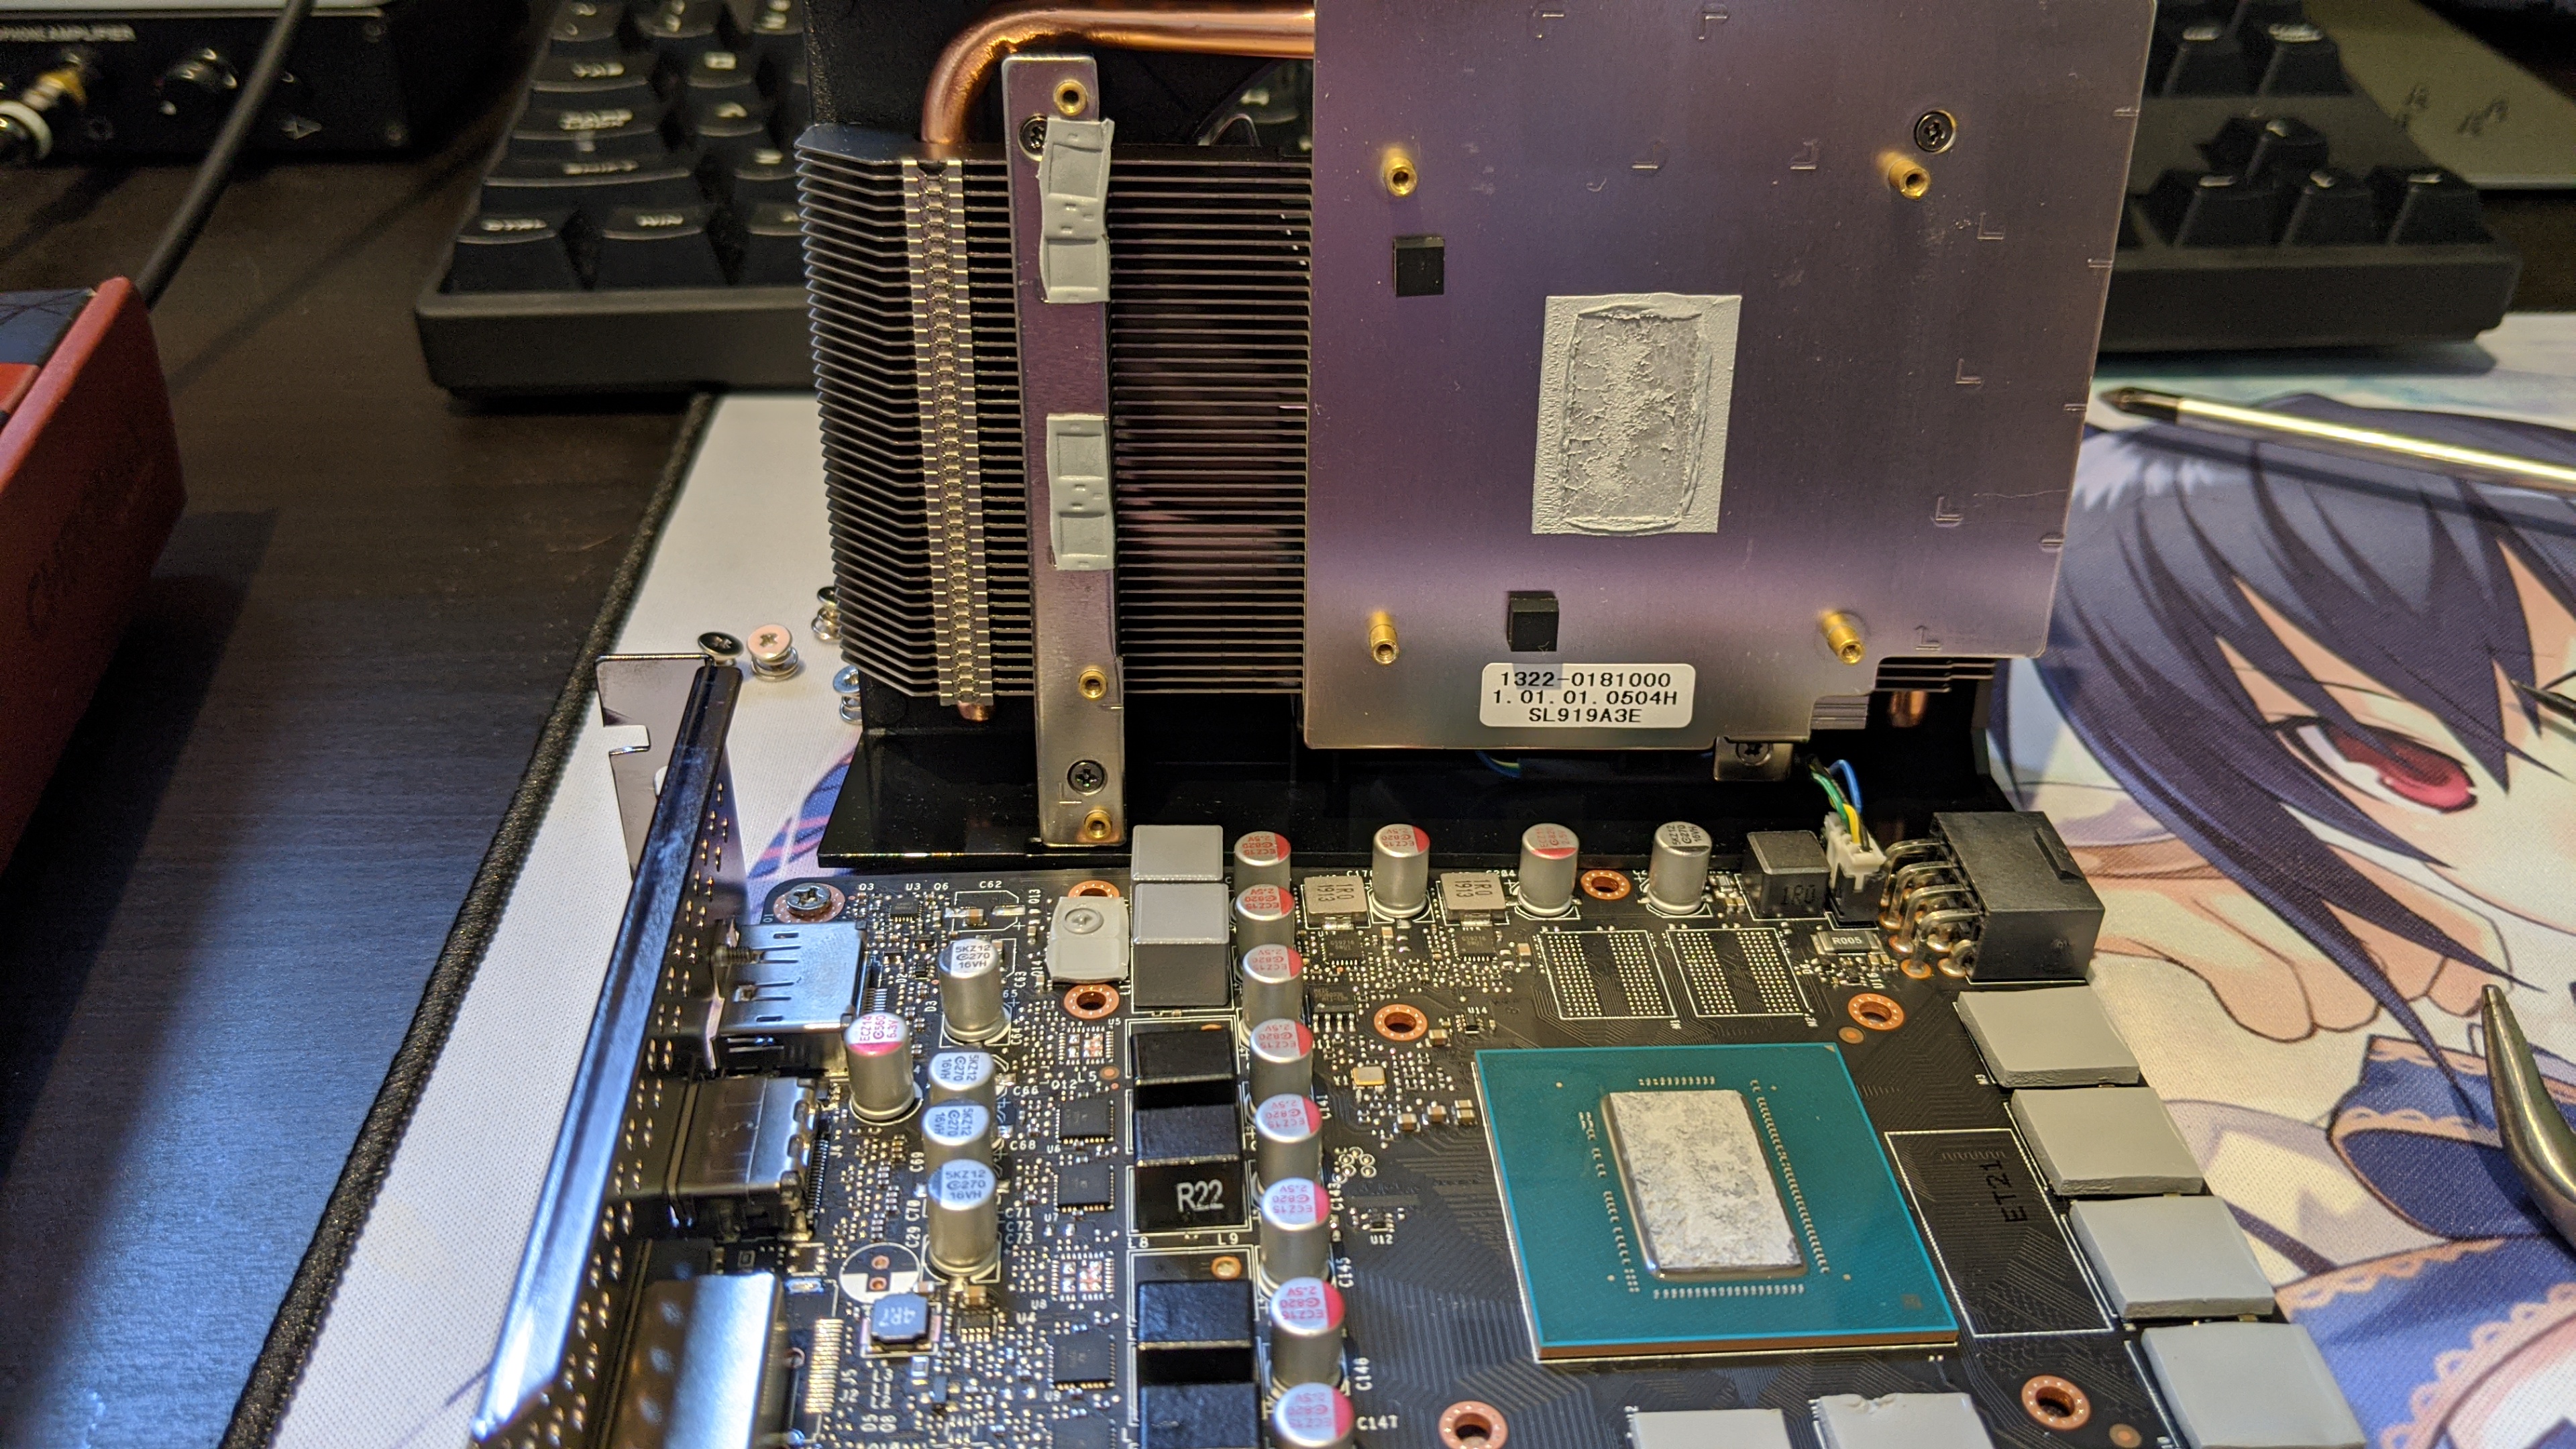
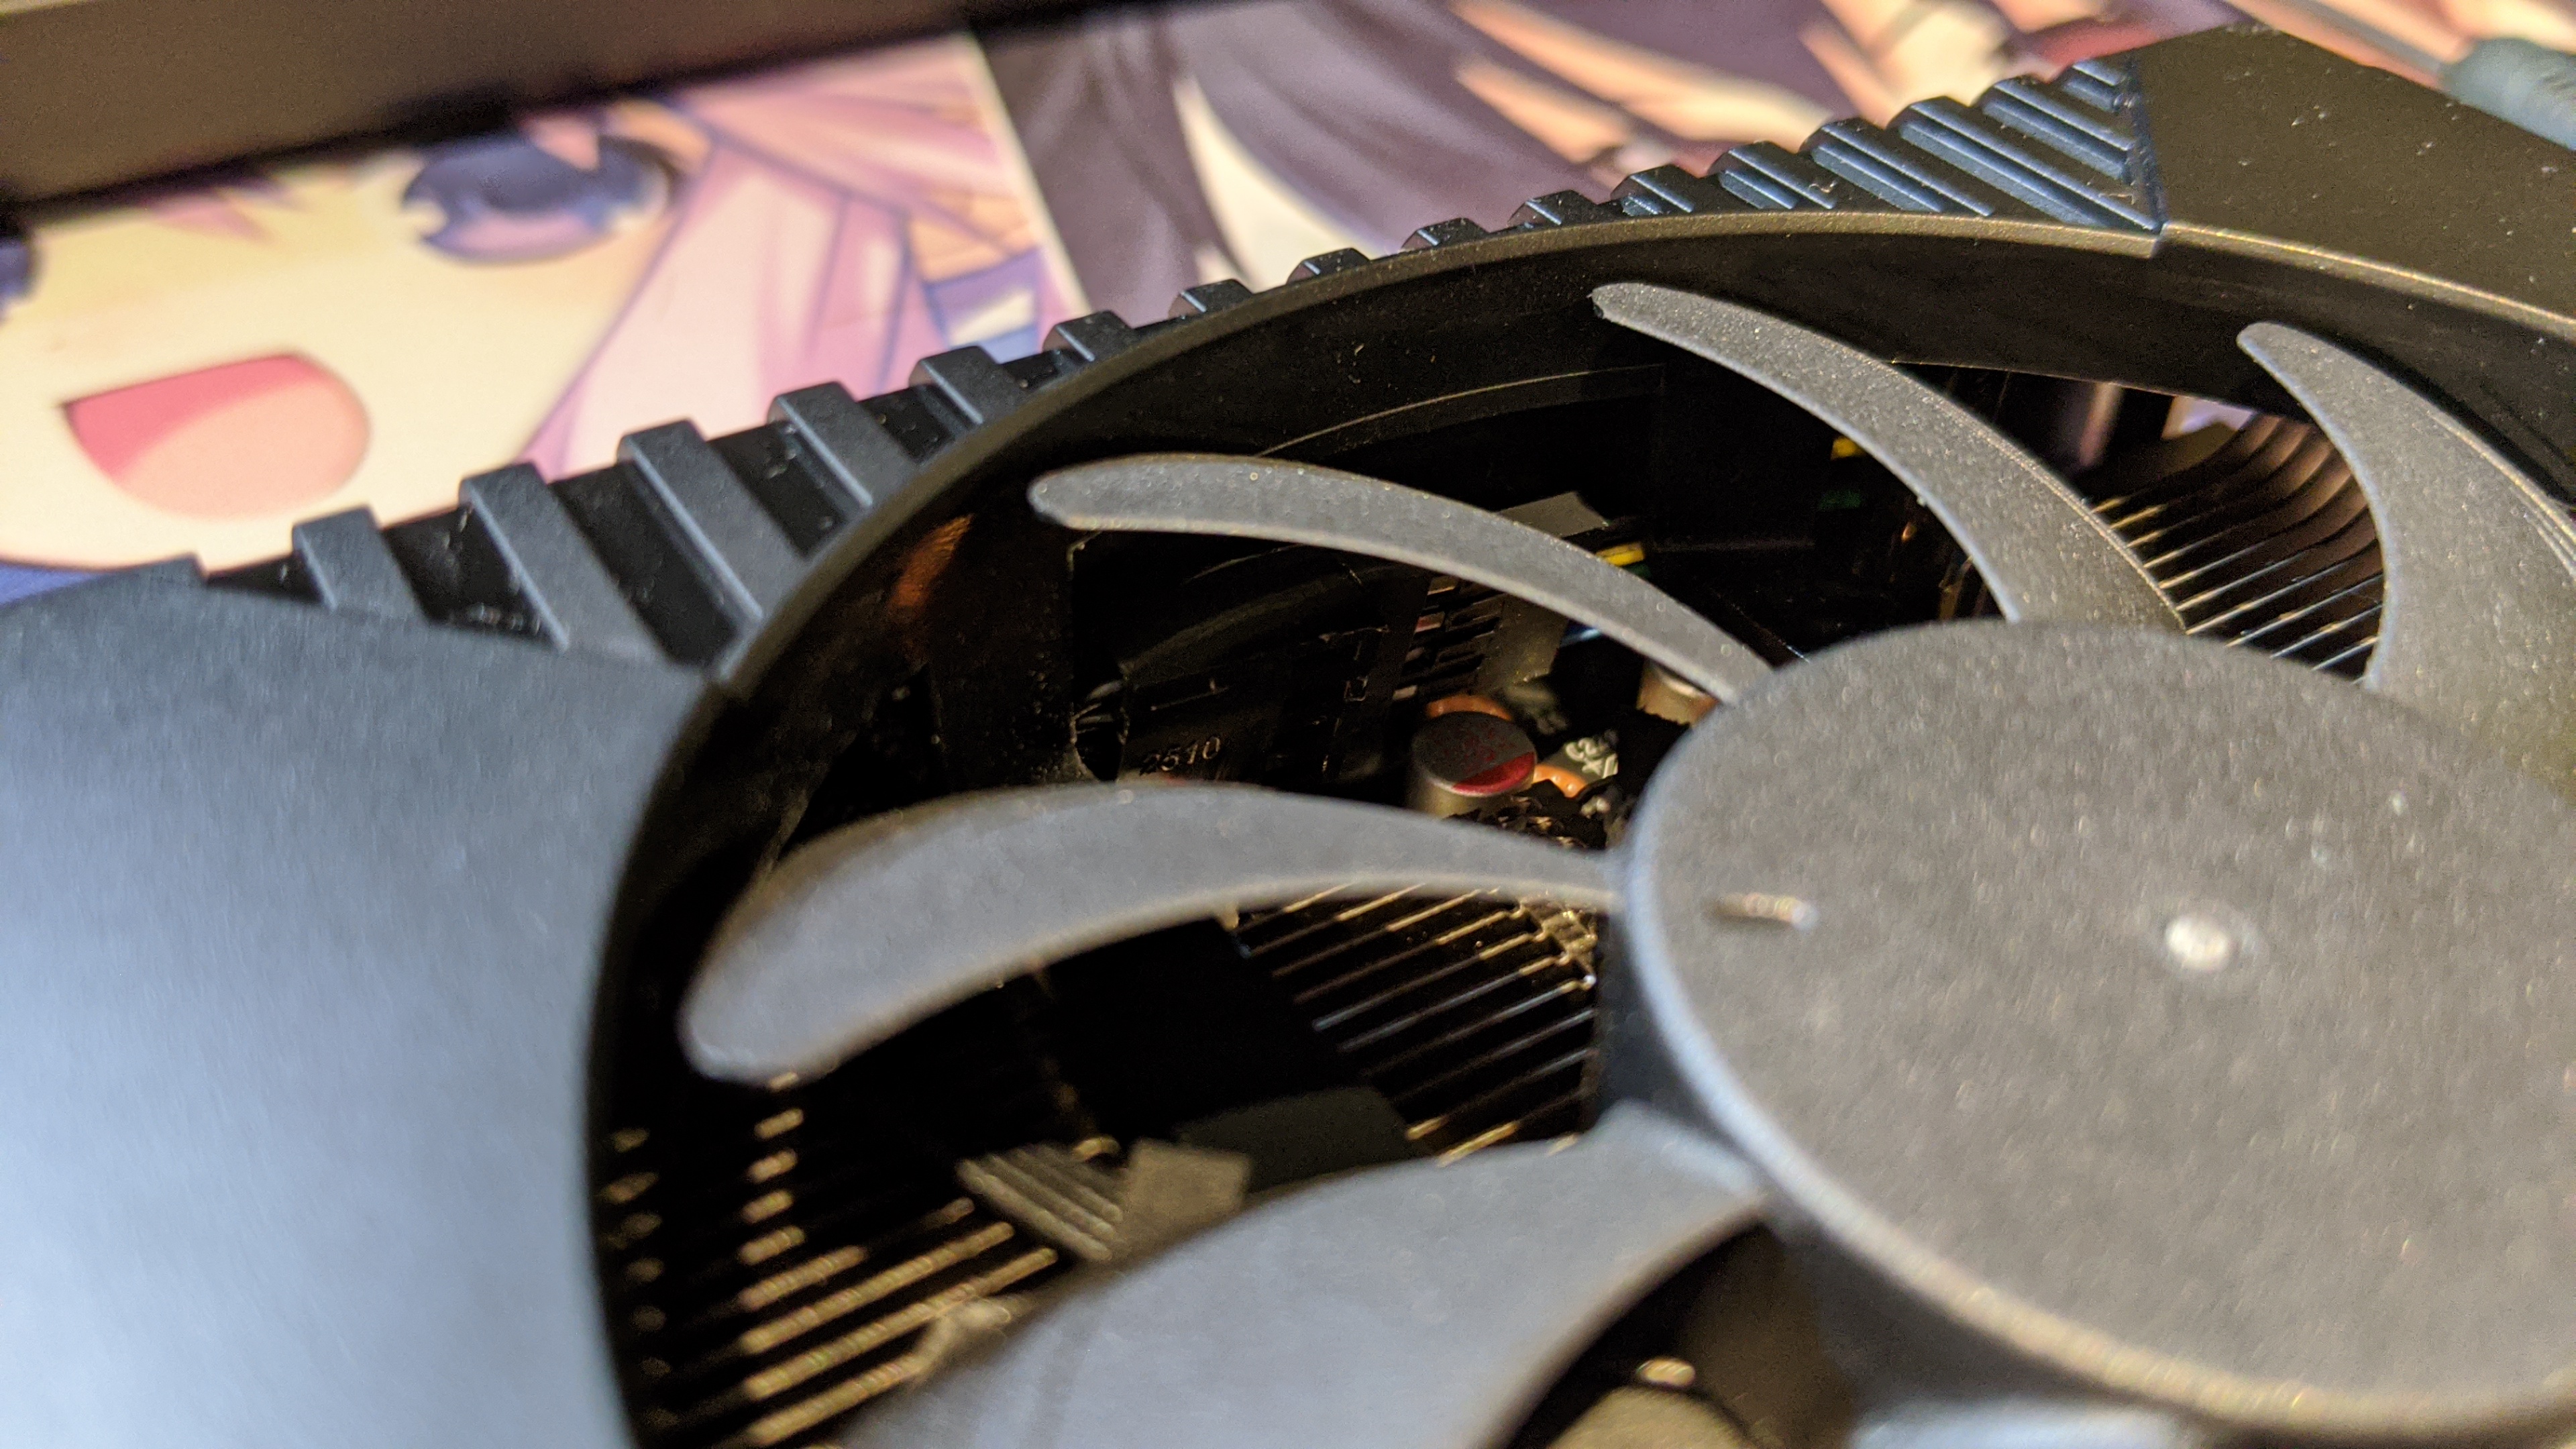
Received my first ever Noctua fan. Removed the heatsink of my GPU because the shroud is held by screw accessible underneath it. And the fan cable was a pain to remove. At the end, it was just the whole casing that I removed, and I discovered there was two tiny pins that you’re supposed to push when it is blocked by a choke.
Then I discovered I couldn’t use a 120 mm low profile here as the heatsink is higher than I thought. I assumed it was about 20mm but no on the thickest part it is about 30mm and would not fit within the 43mm constrain of the Velka 3 (and in the Dan case) (and also I didn’t find it aesthetically pleasing)
92mm Noctua chromax fans are hard to come by here and are more expensive than their 120mm variant and I didn’t want to return the fan and have to wait, so I wonder if I could use it later on the CPU cooler. With the help of @Den-Fi, he confirmed I would be able to fit it on top of the cooler with the Asus Strix B450-i board. So tomorrow, I gonna received the Noctua NH-L9a-AM4, will take the 92mm fan and cut it to fit in the GPU shroud, and the 120mm gonna be use later for the mobo.
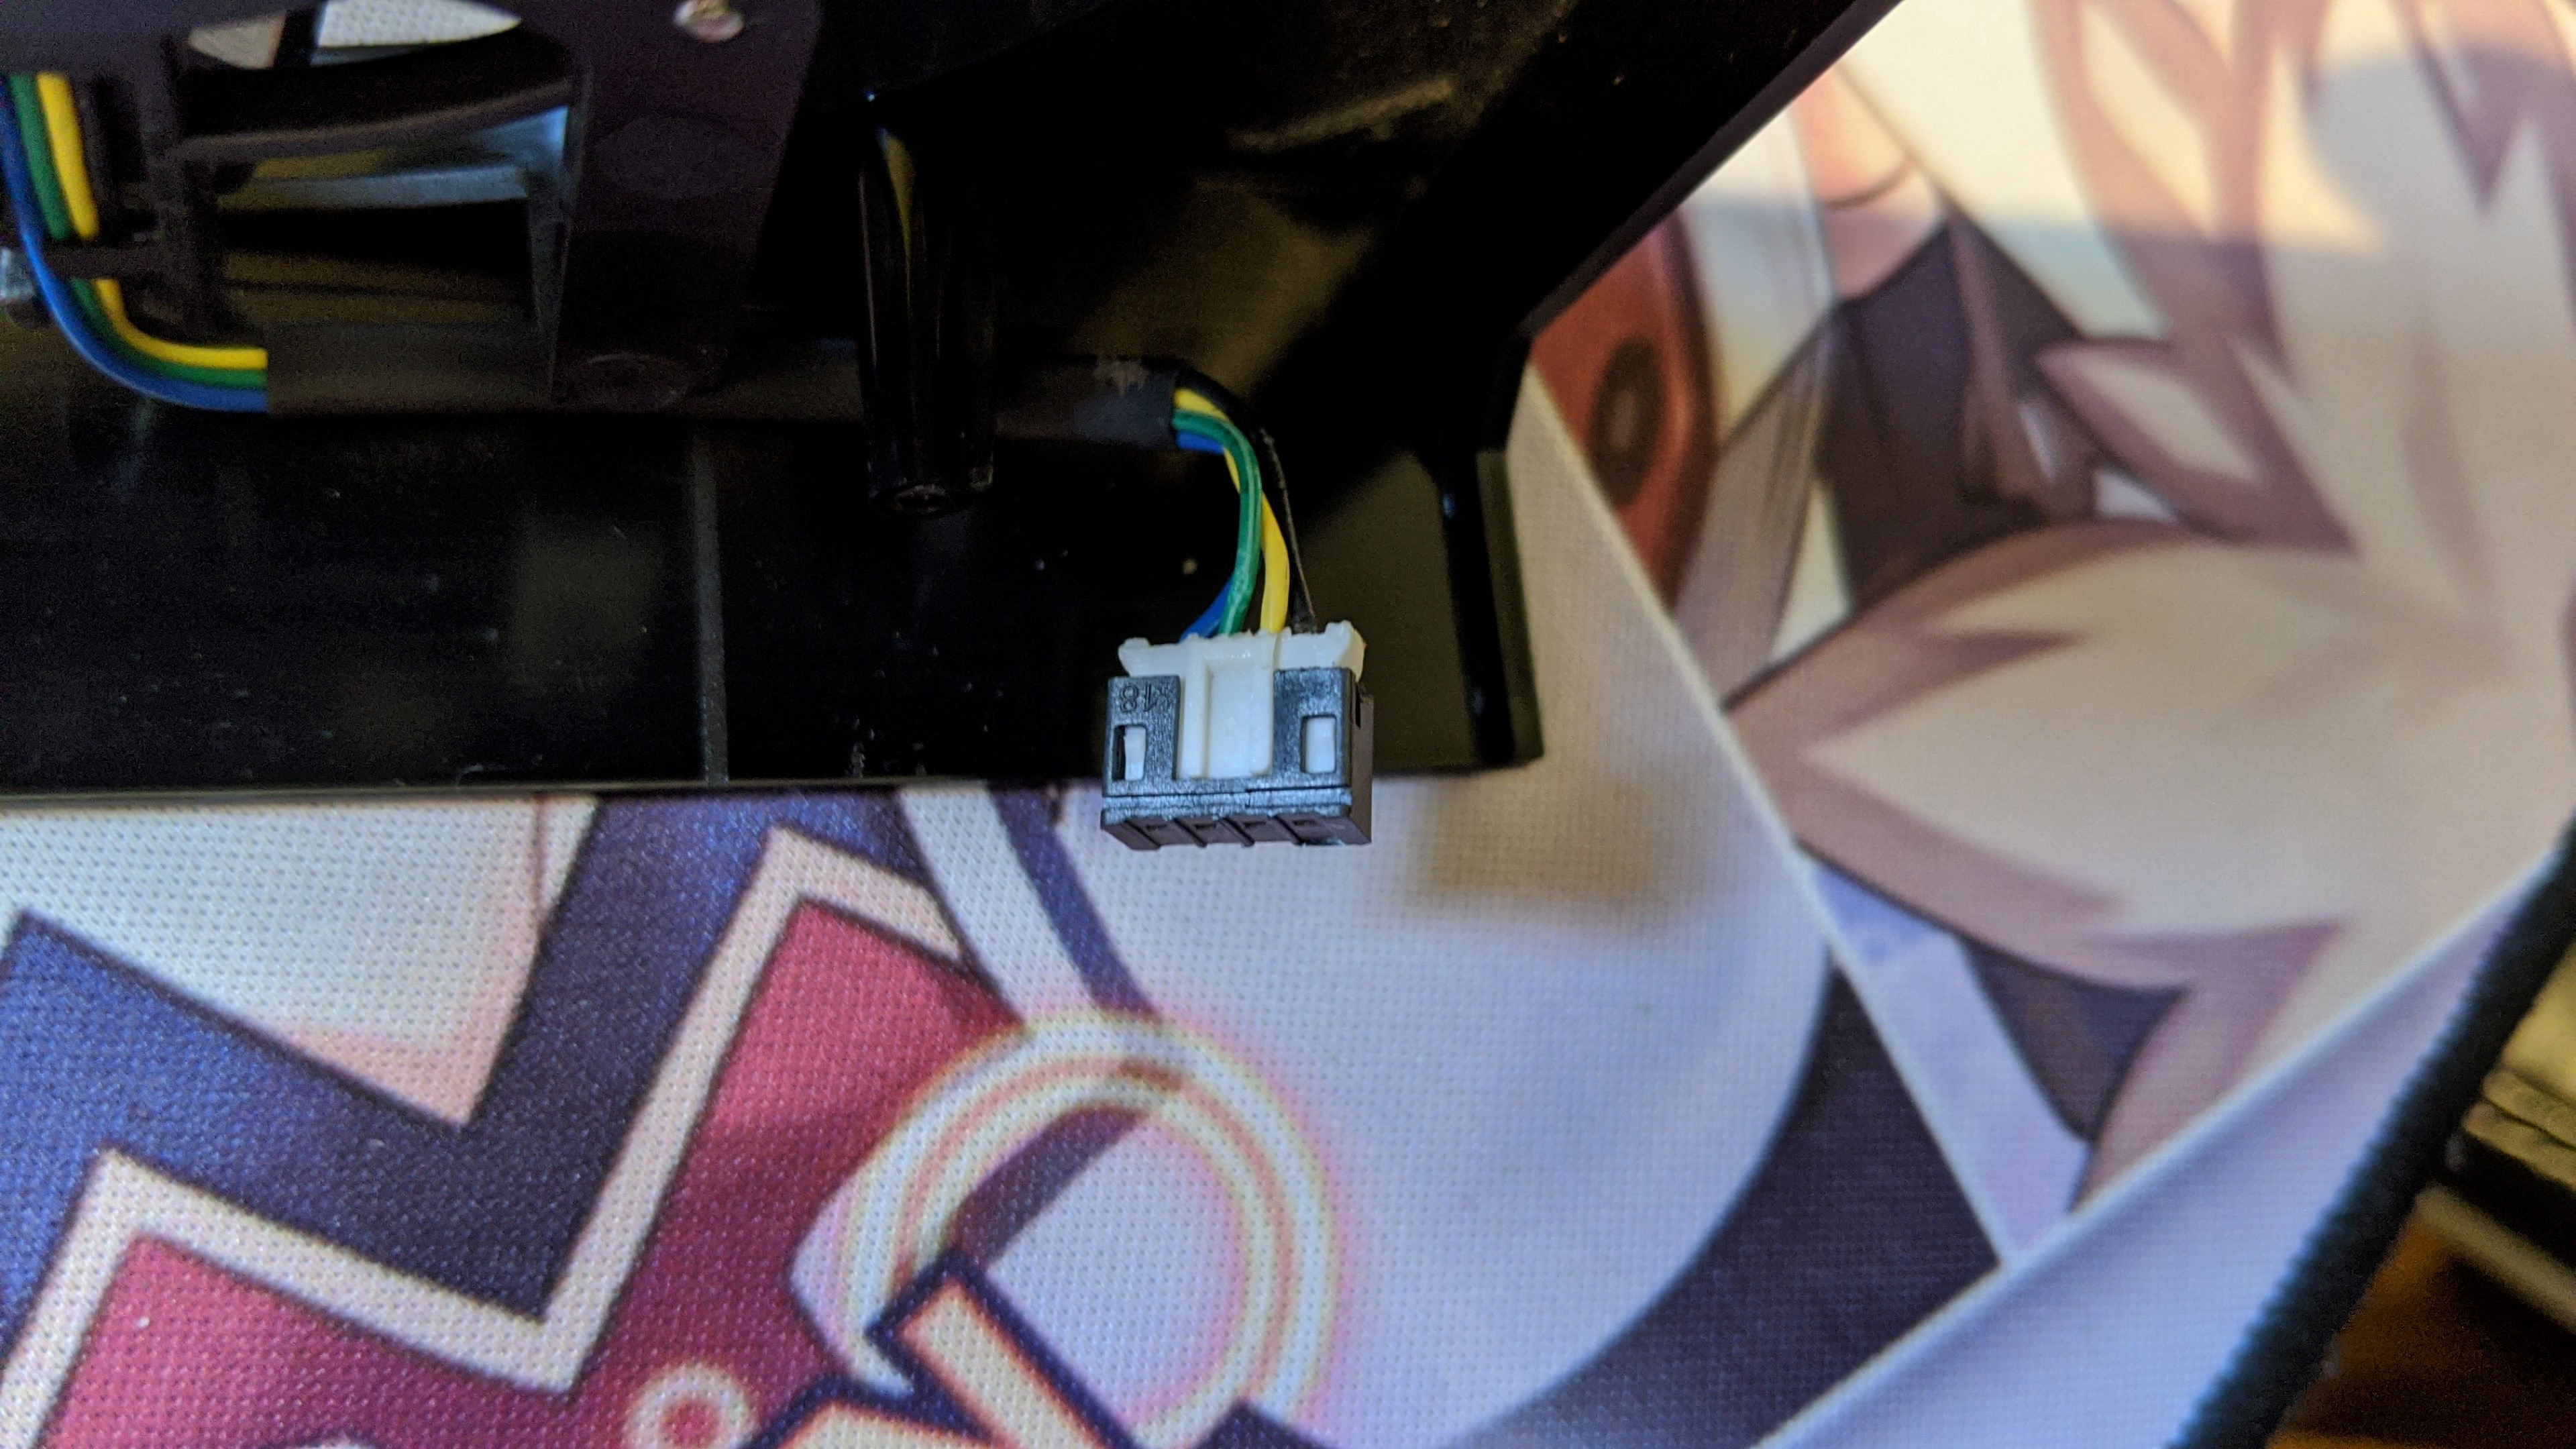
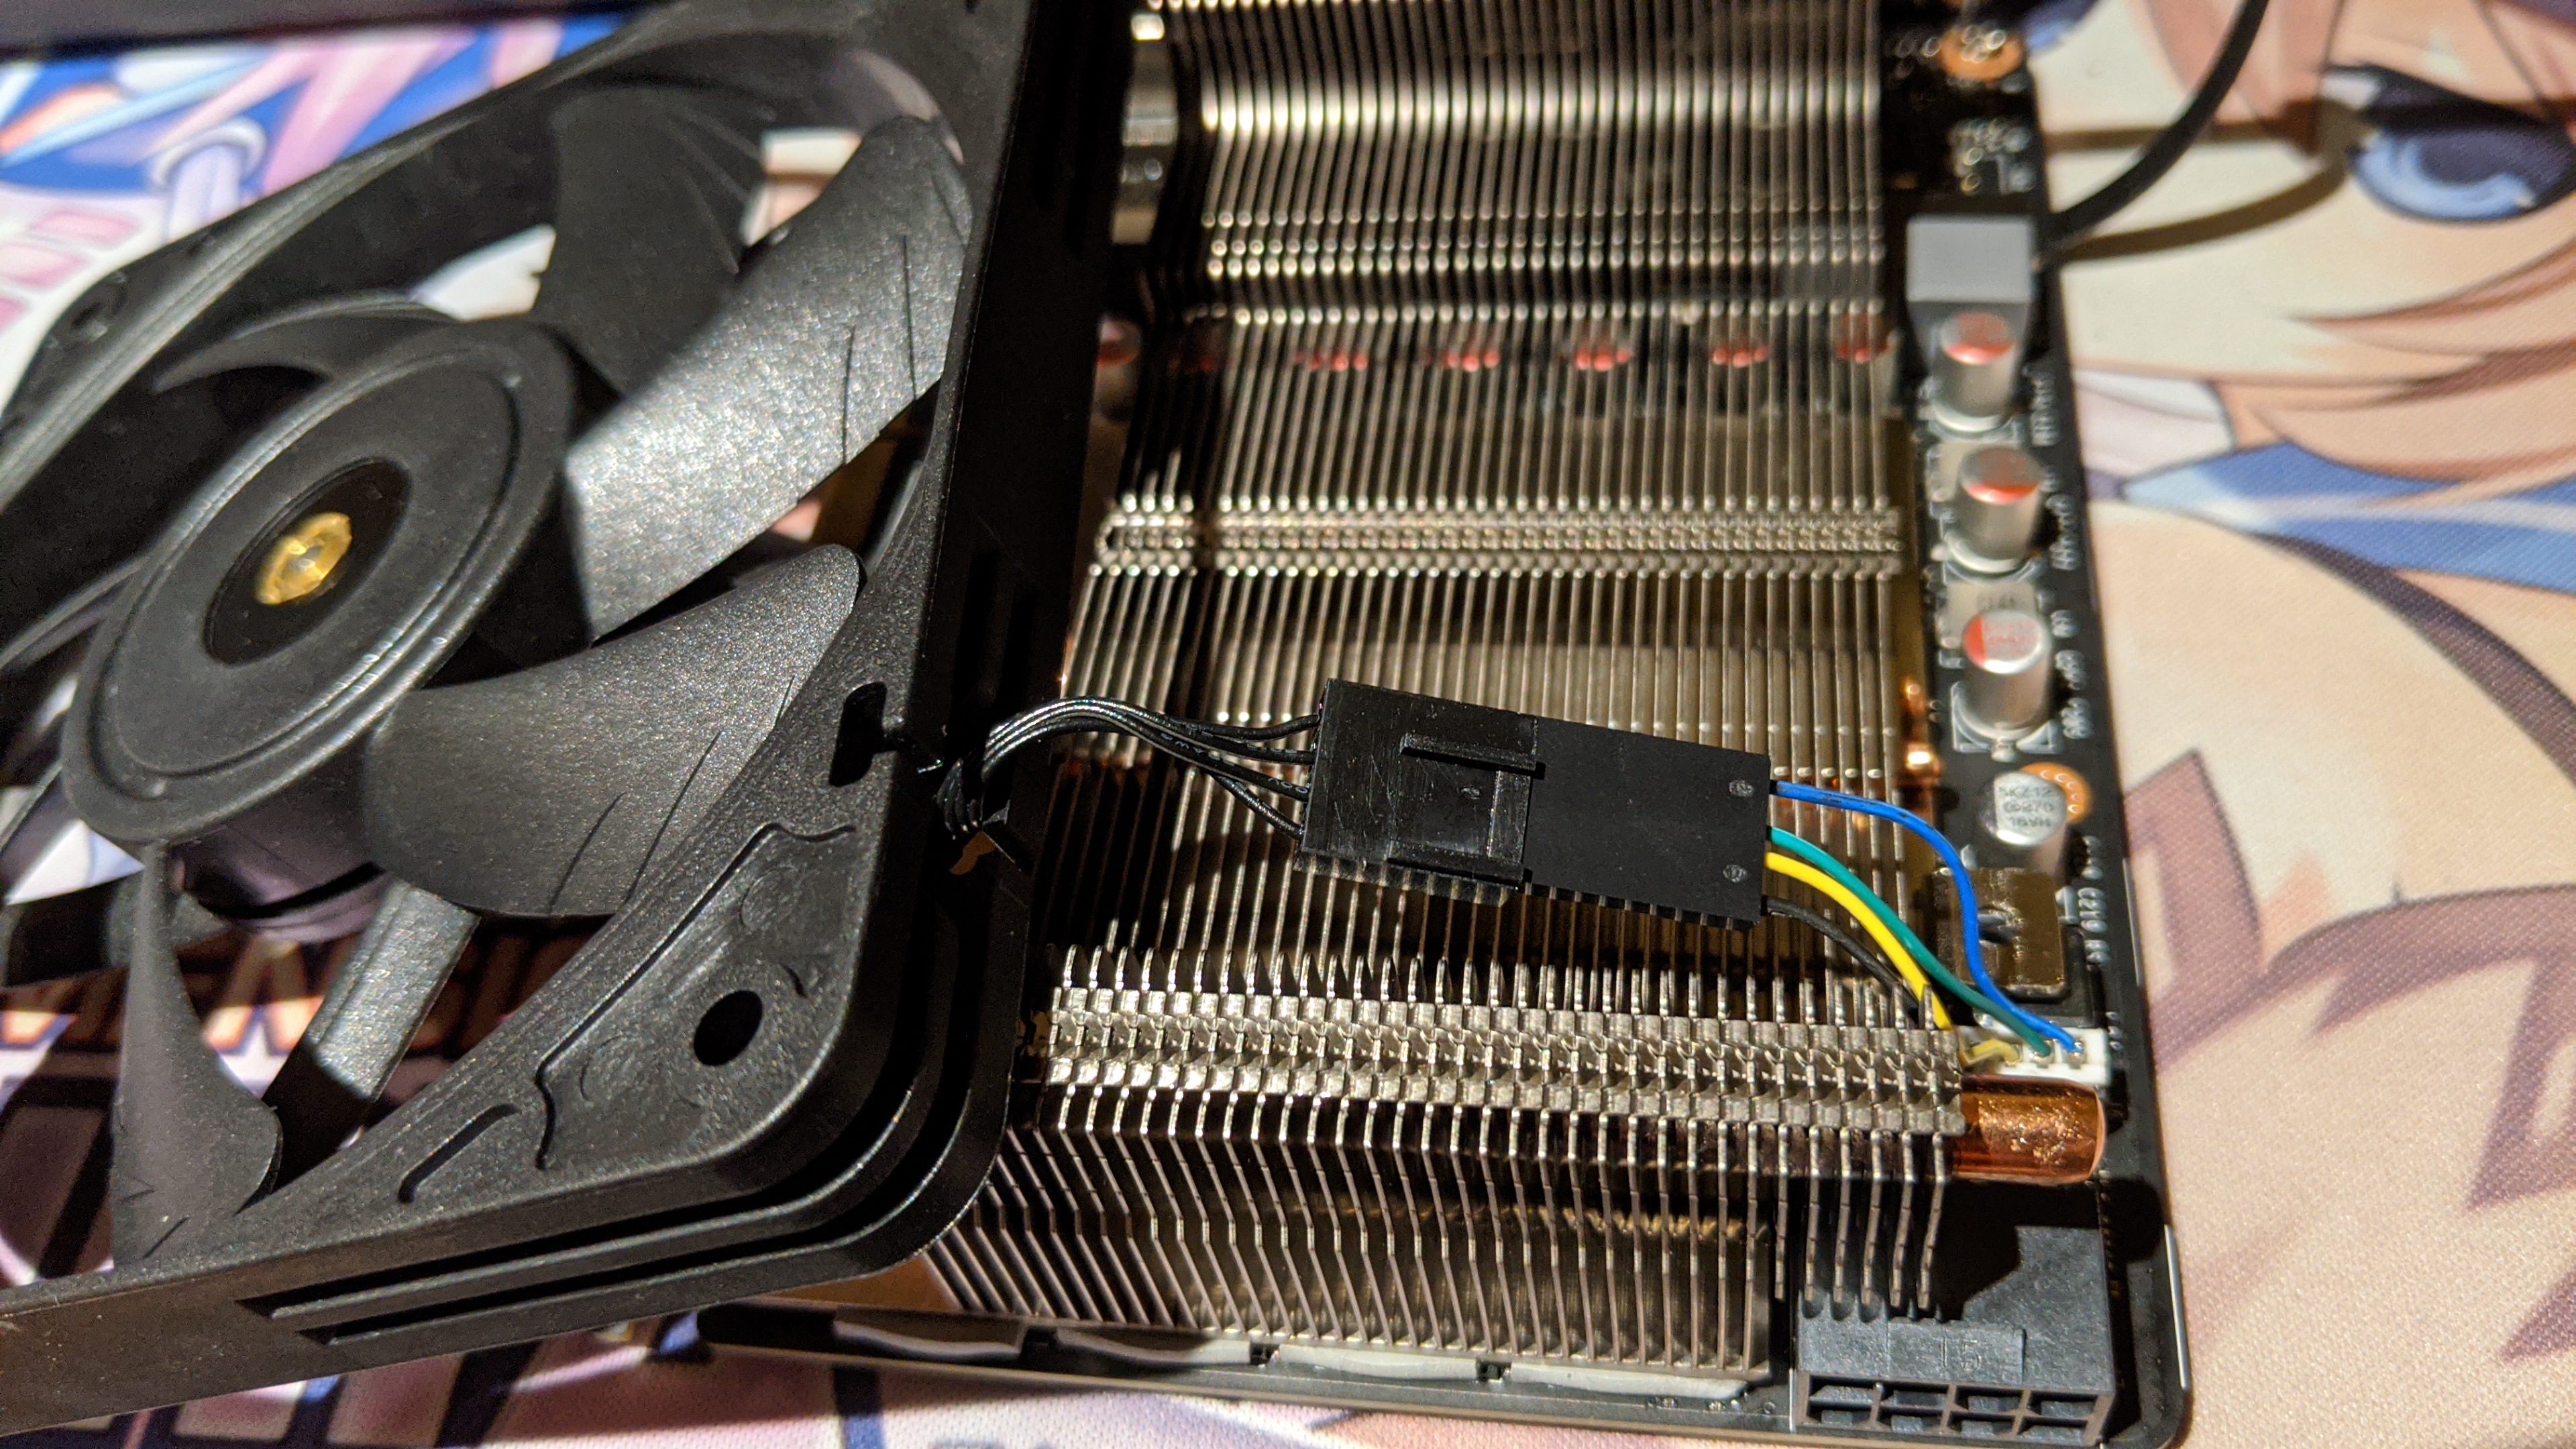
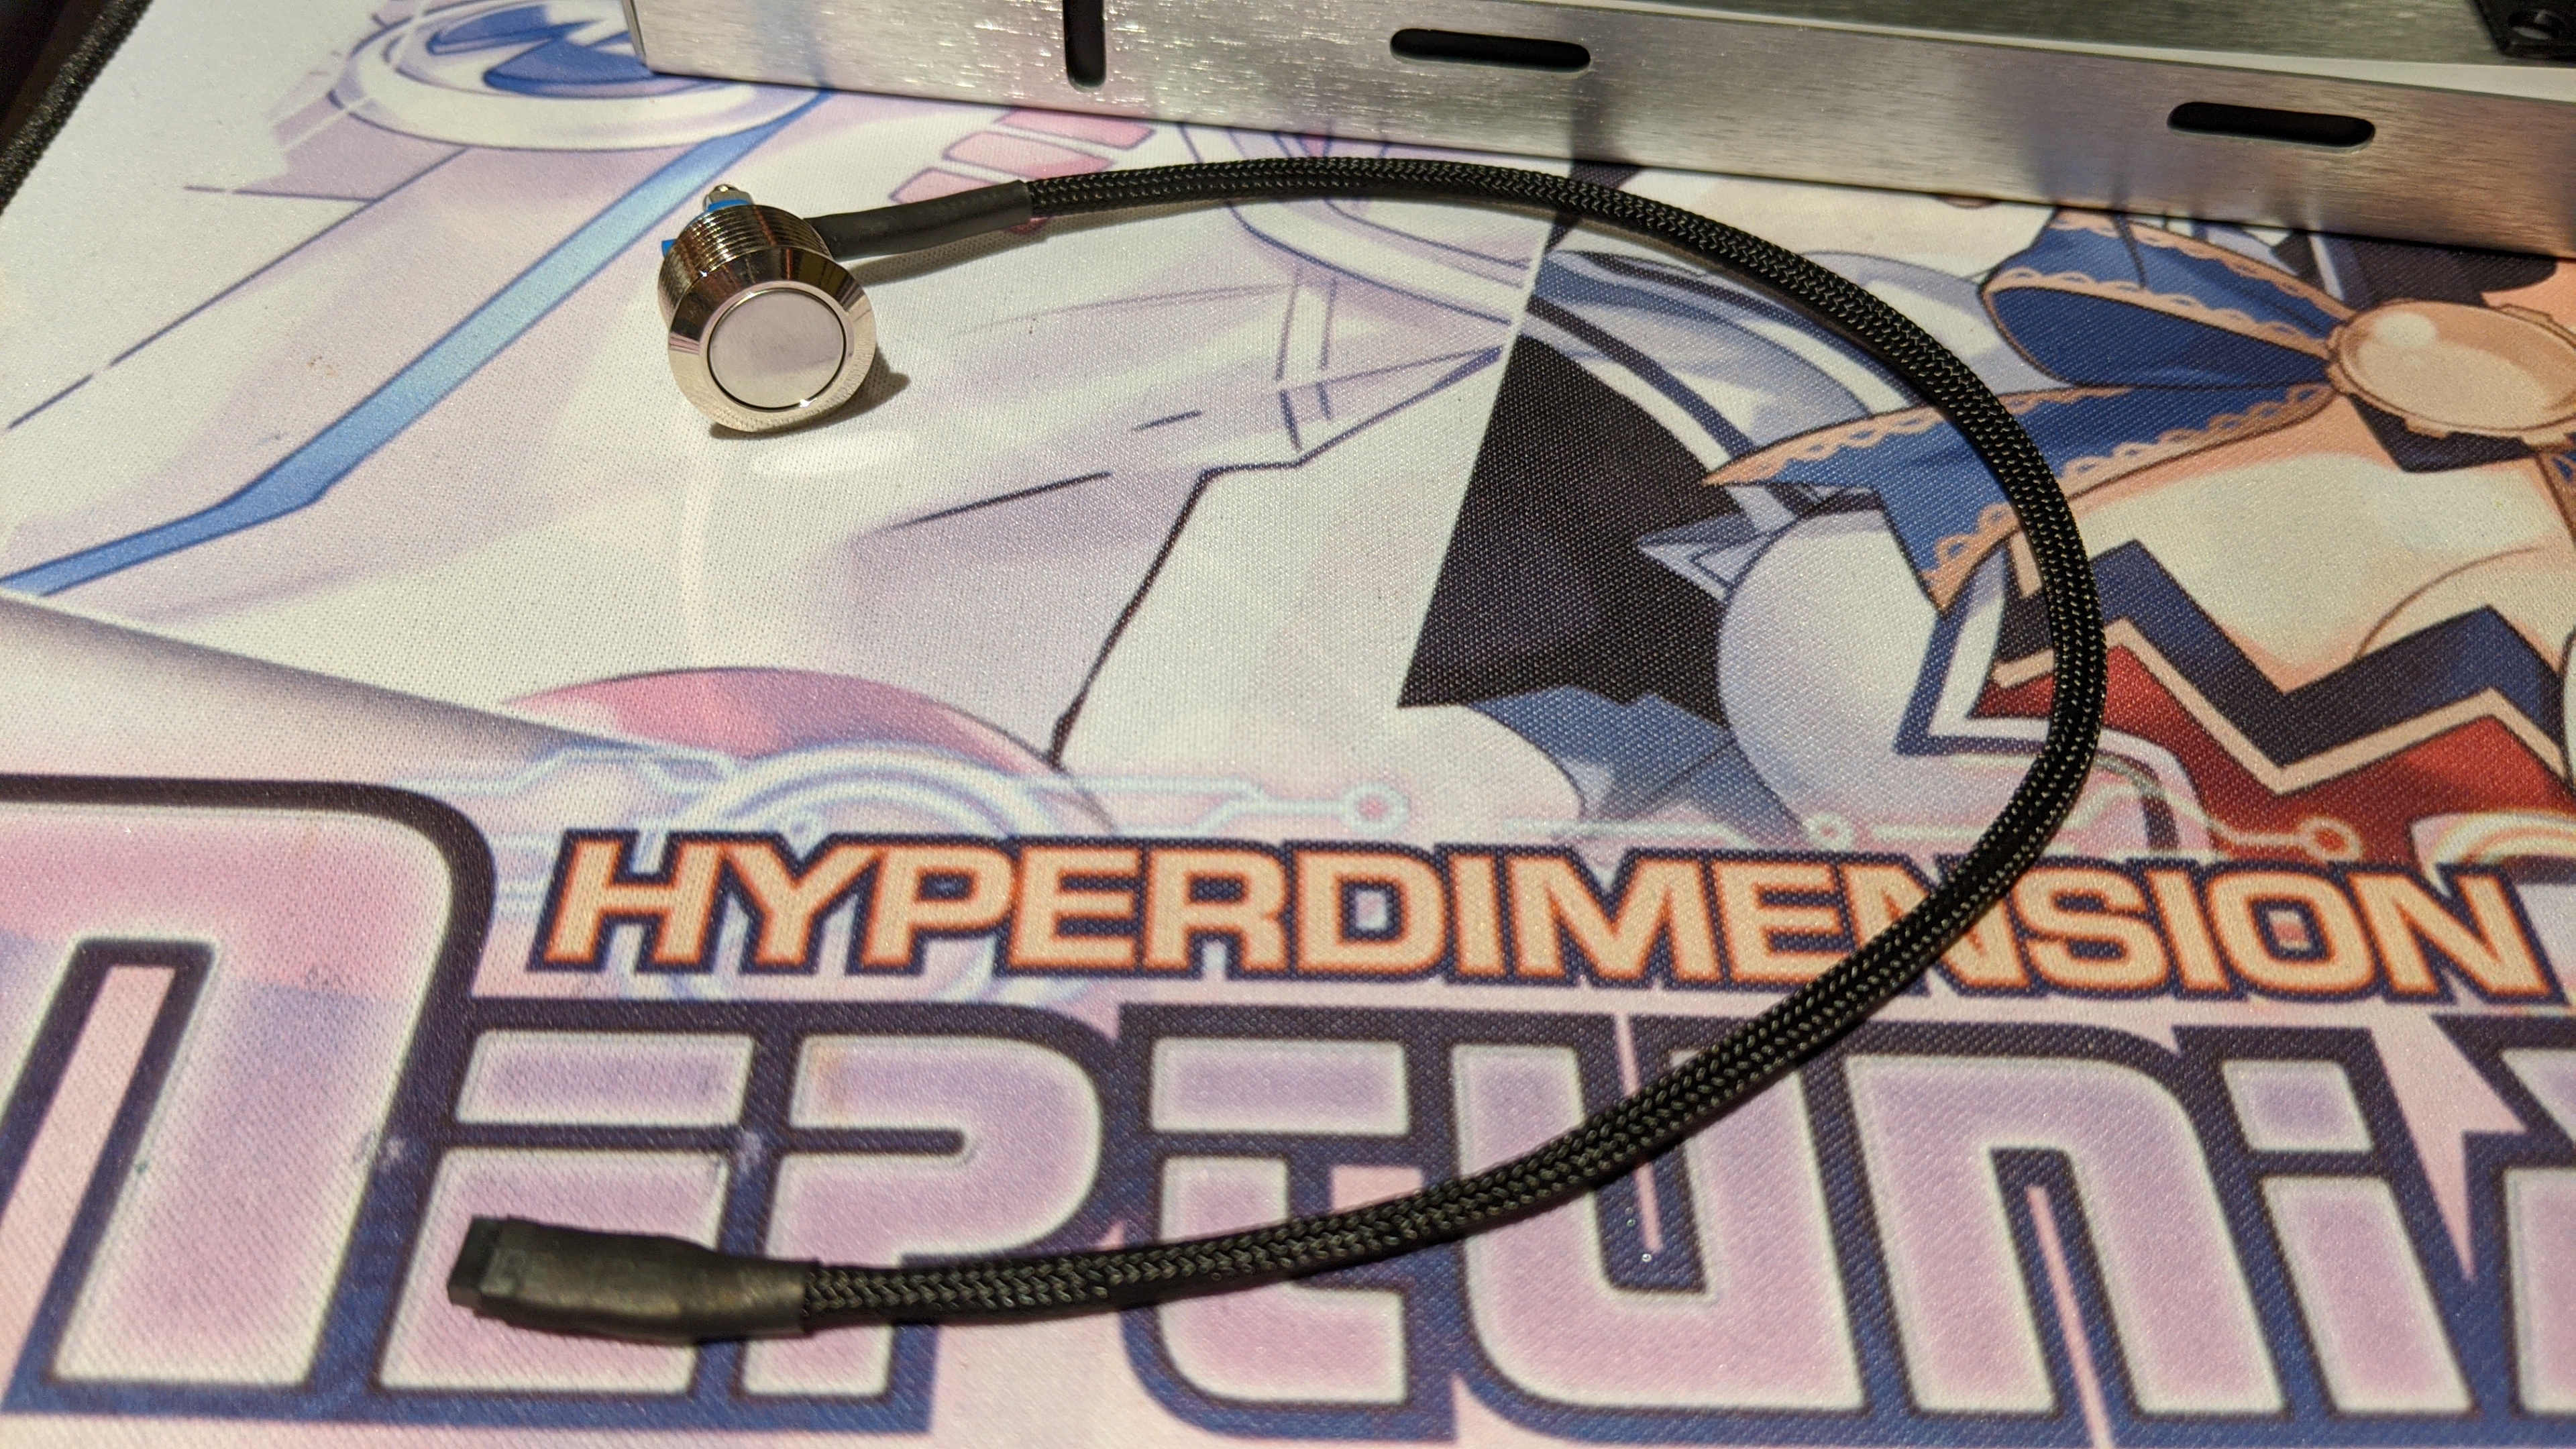
I managed to make a PWM to mini 4pin GPU header with what was lying in the house and it works! So no need to have a fan cable going to the motherboard.
I feel dirty of having cut a Noctua fan. The cable fan and the adapter are a tight fit in the shroud as there almost no space to work with. And had to do a new adapter because I bend the first one in a way that made the shortest cable do the longest bend, so it snapped. Discovered when I power on the pc and the fan was running at full speed.
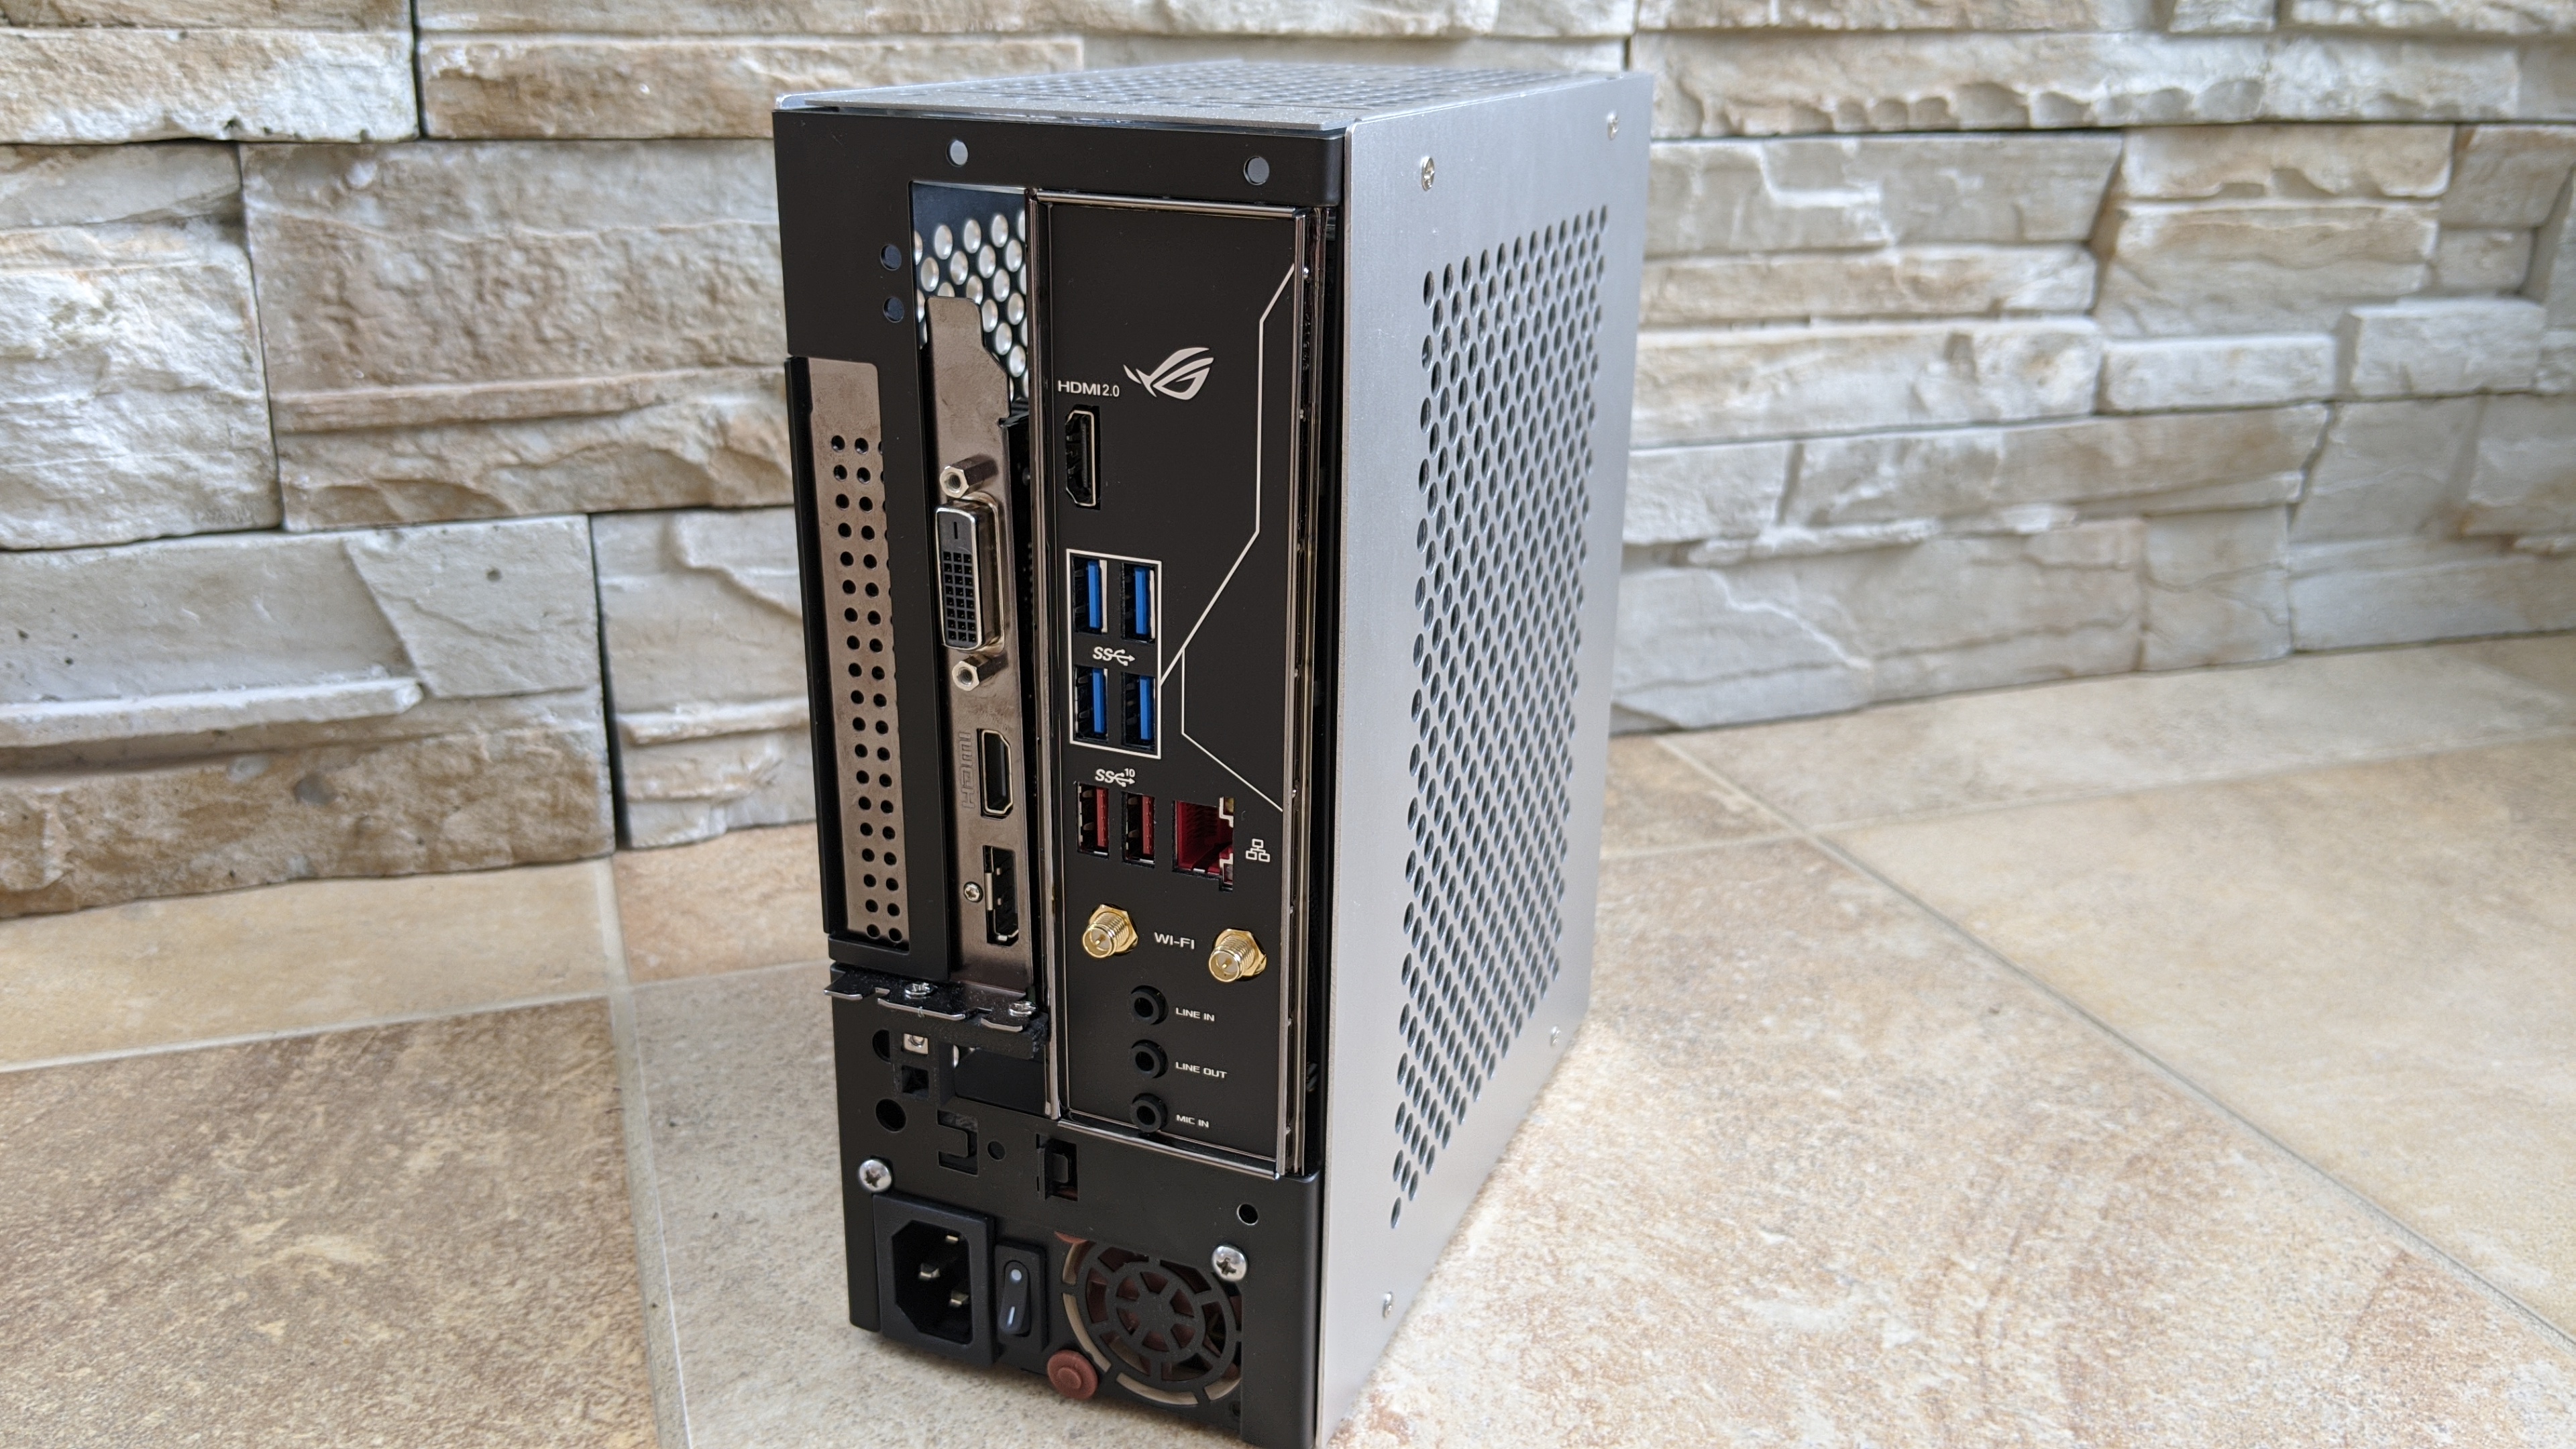
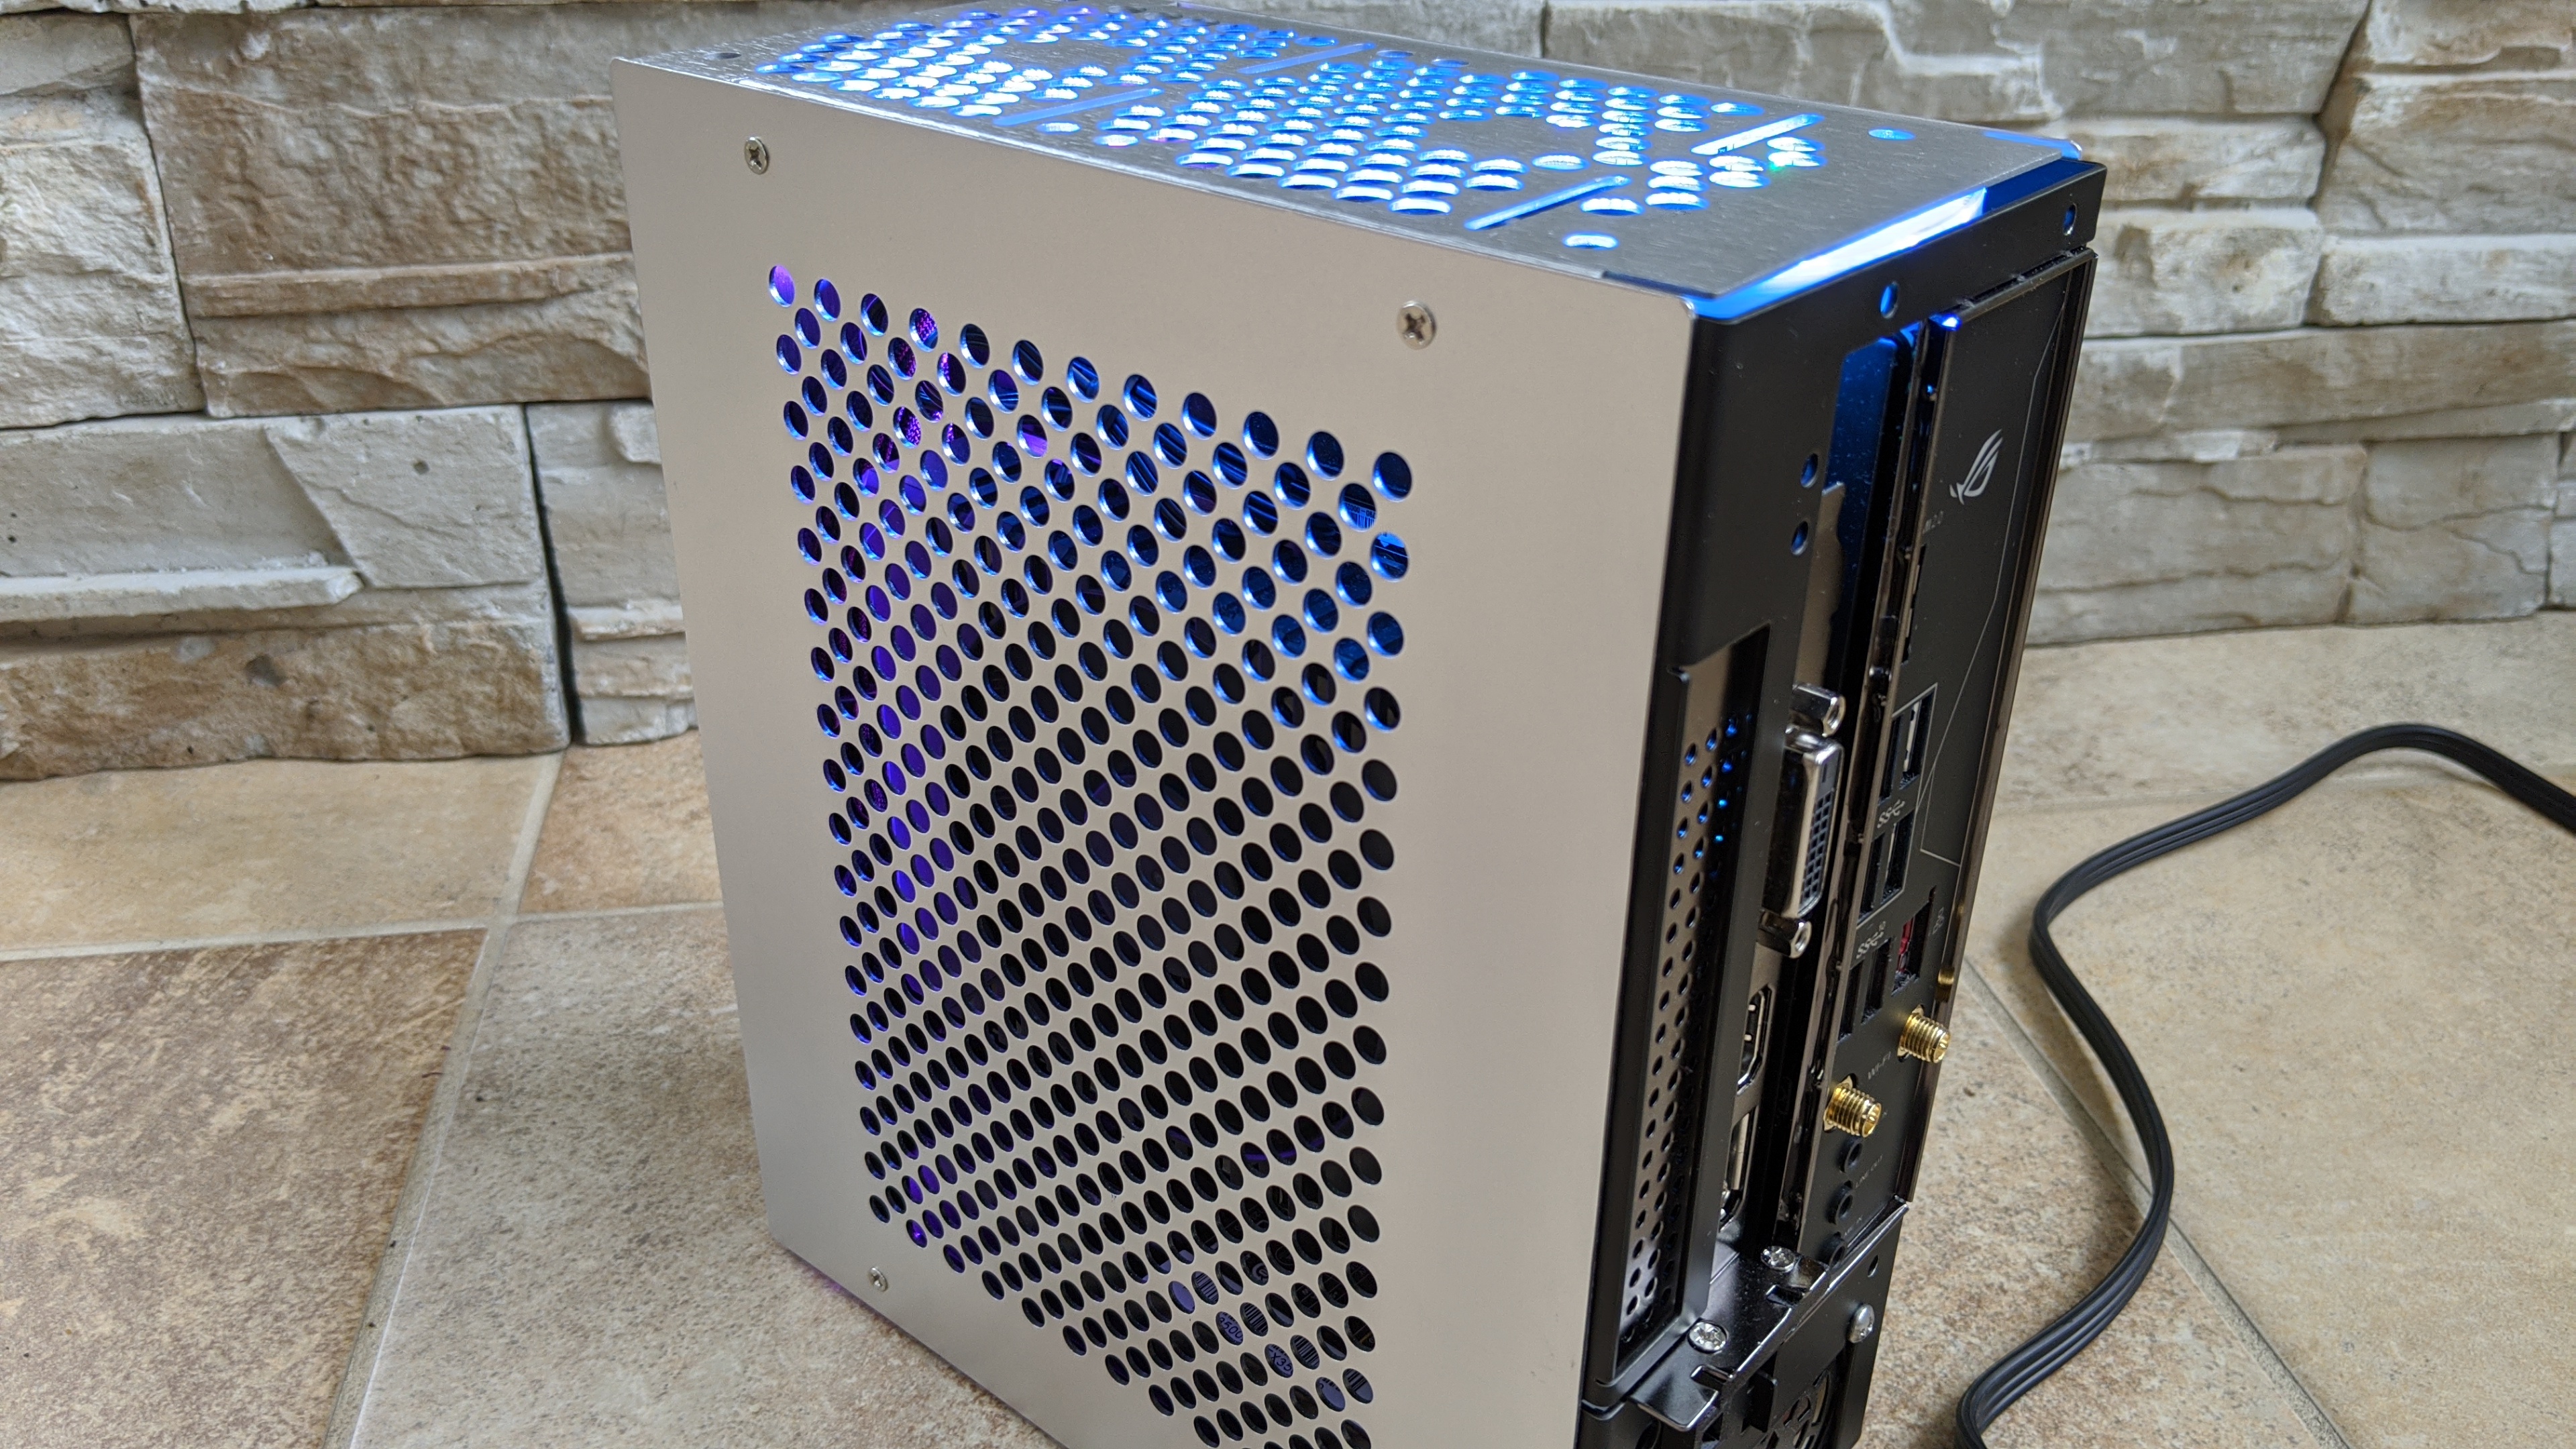
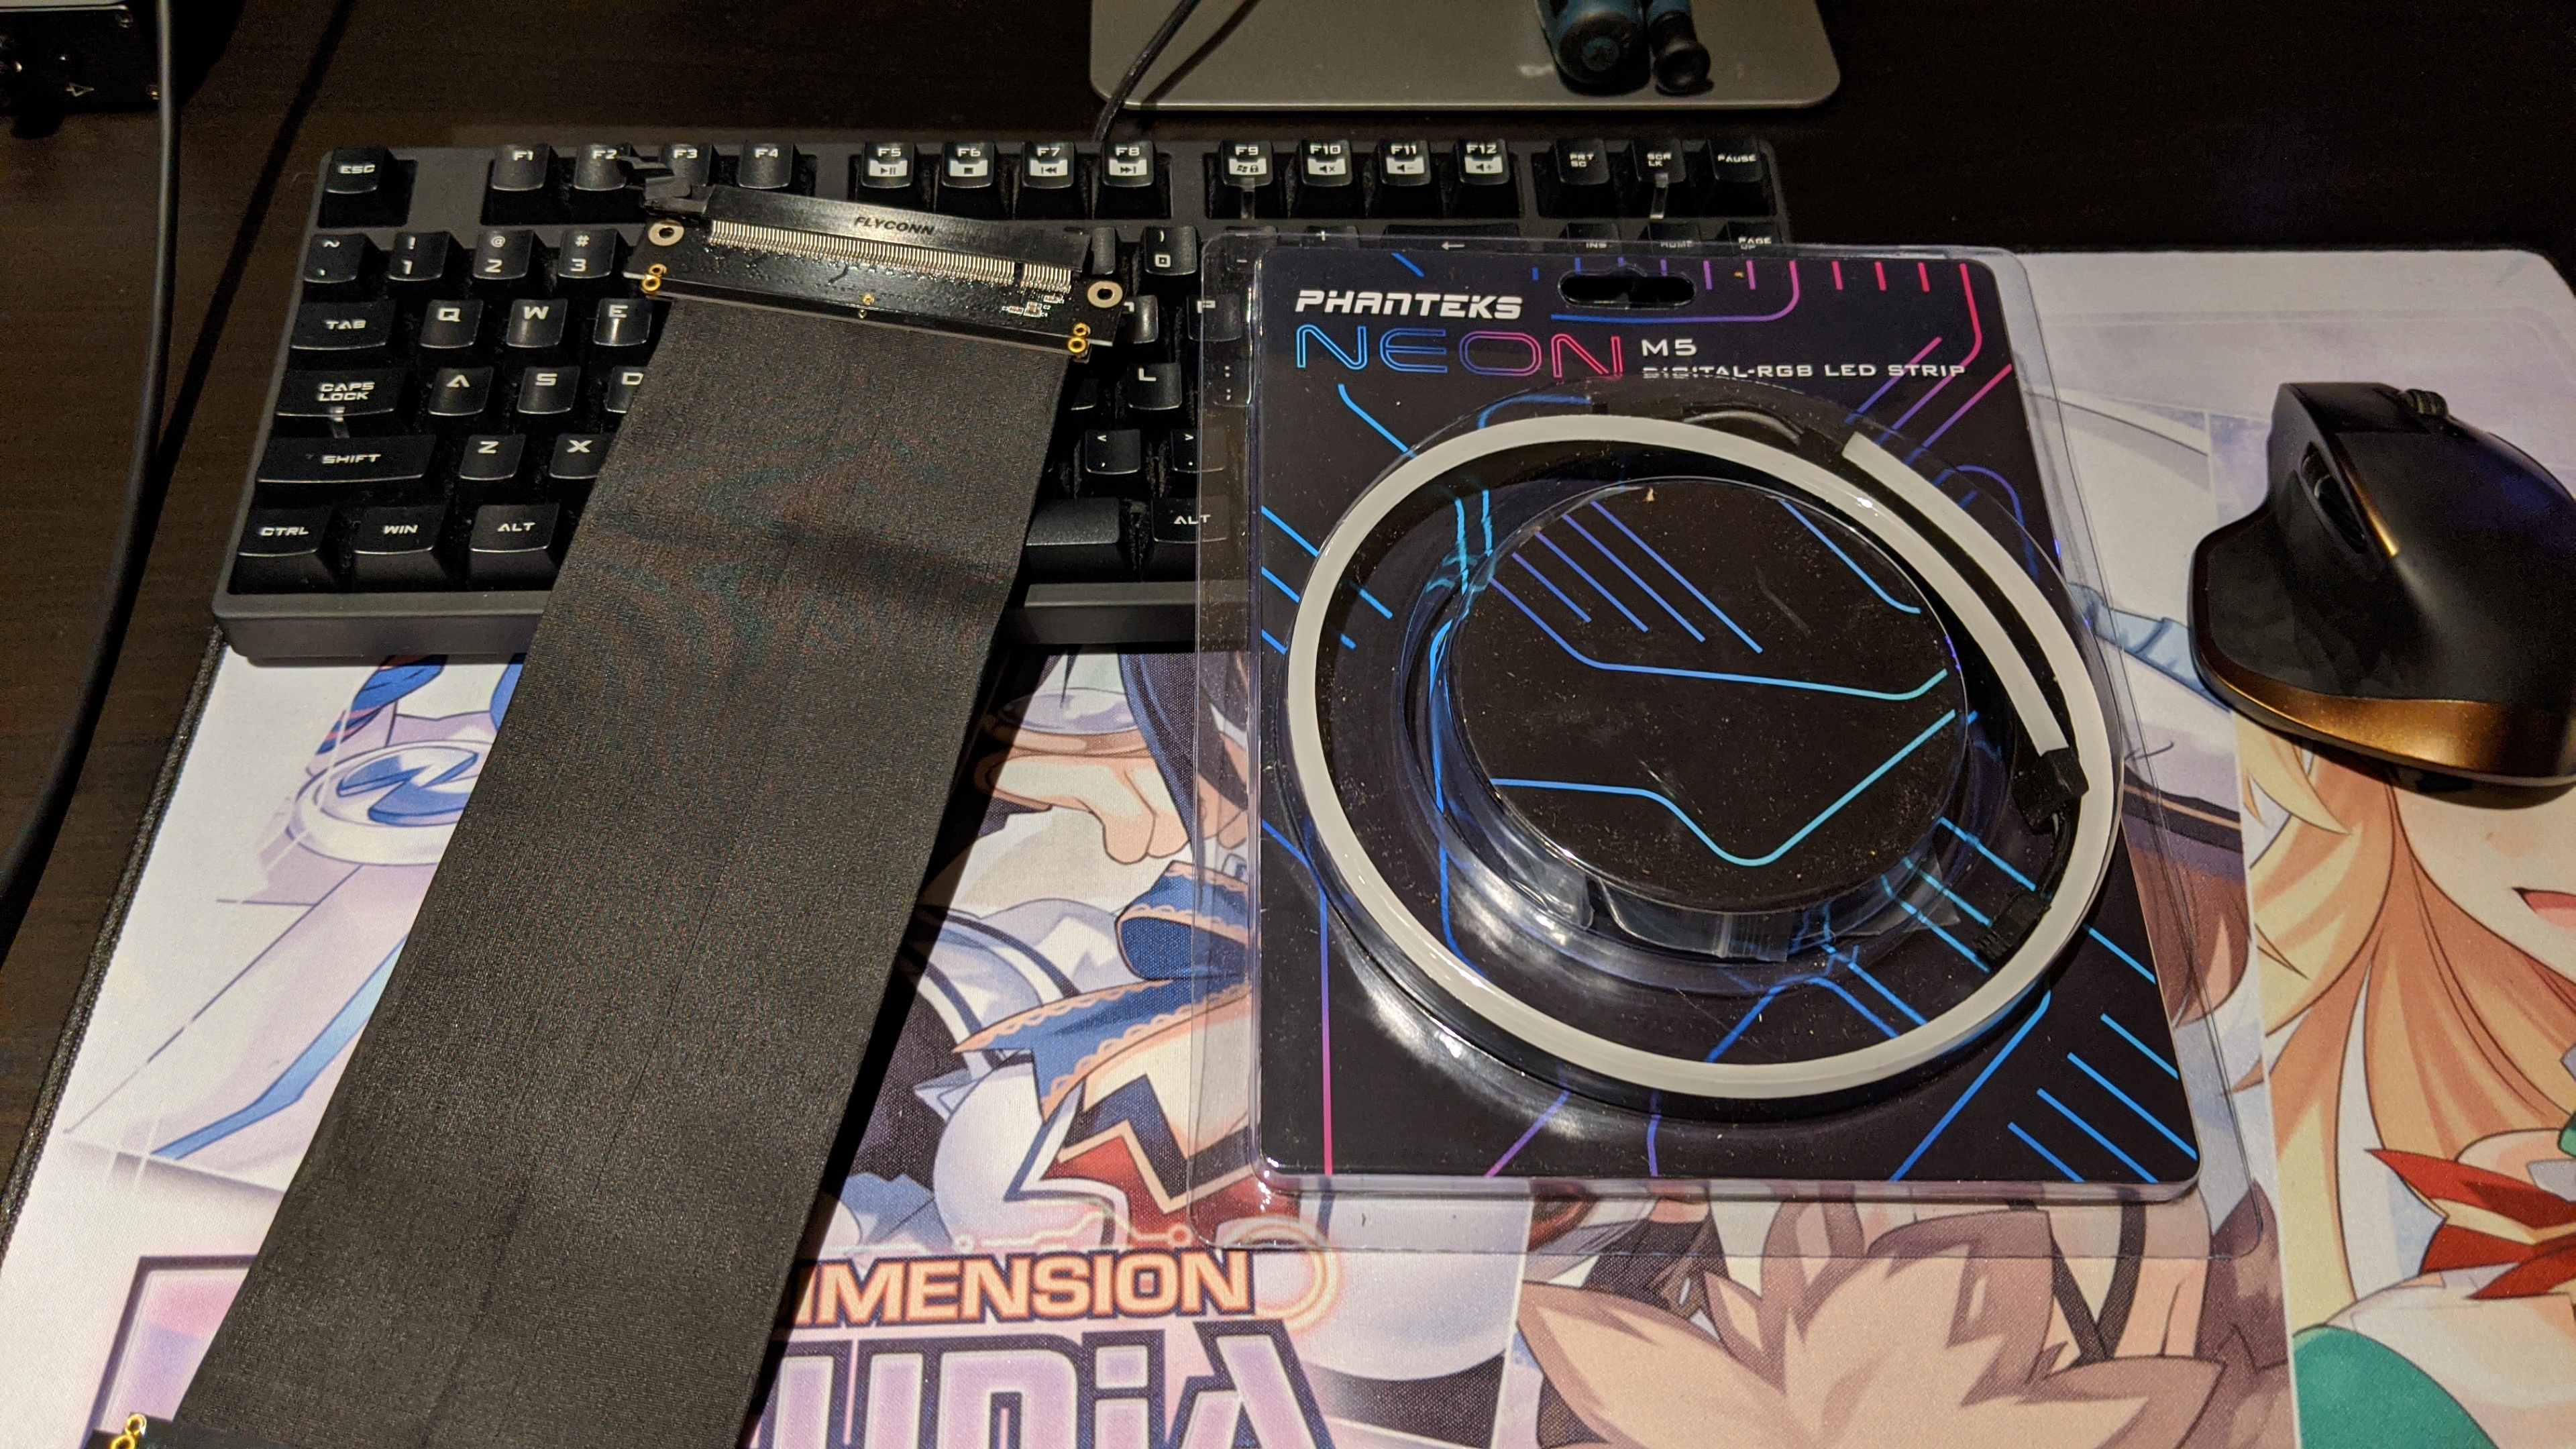
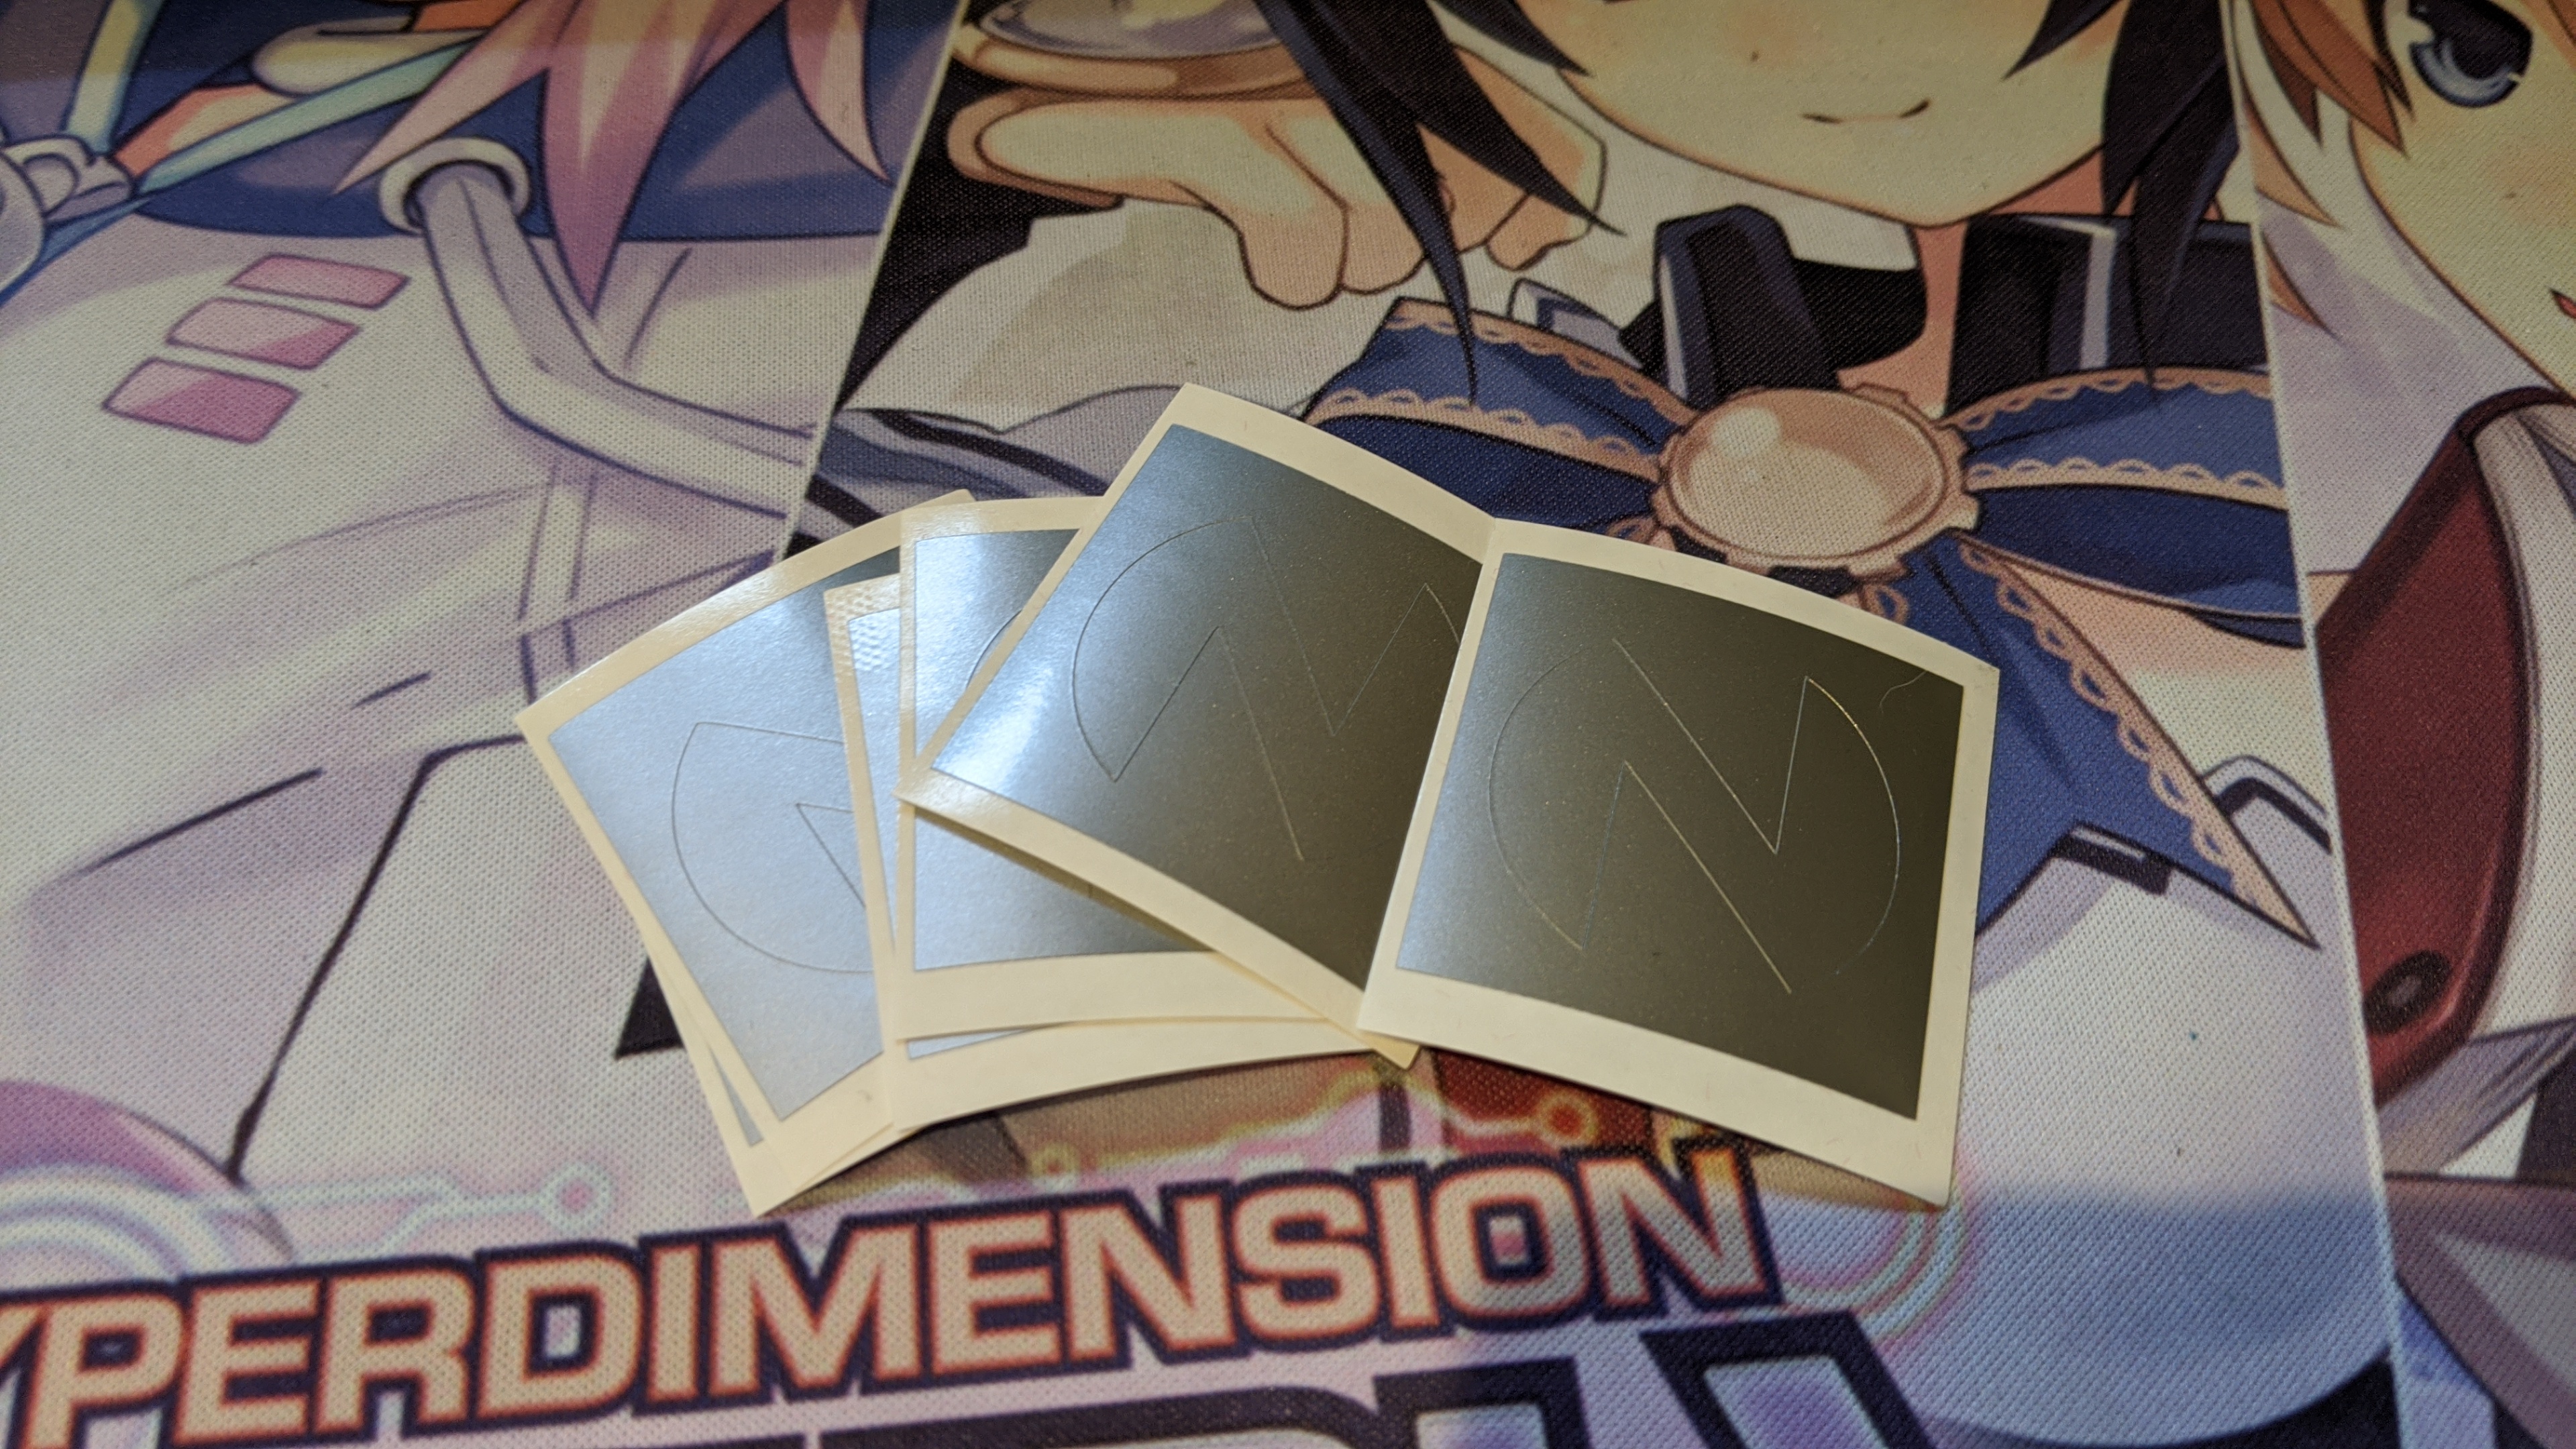
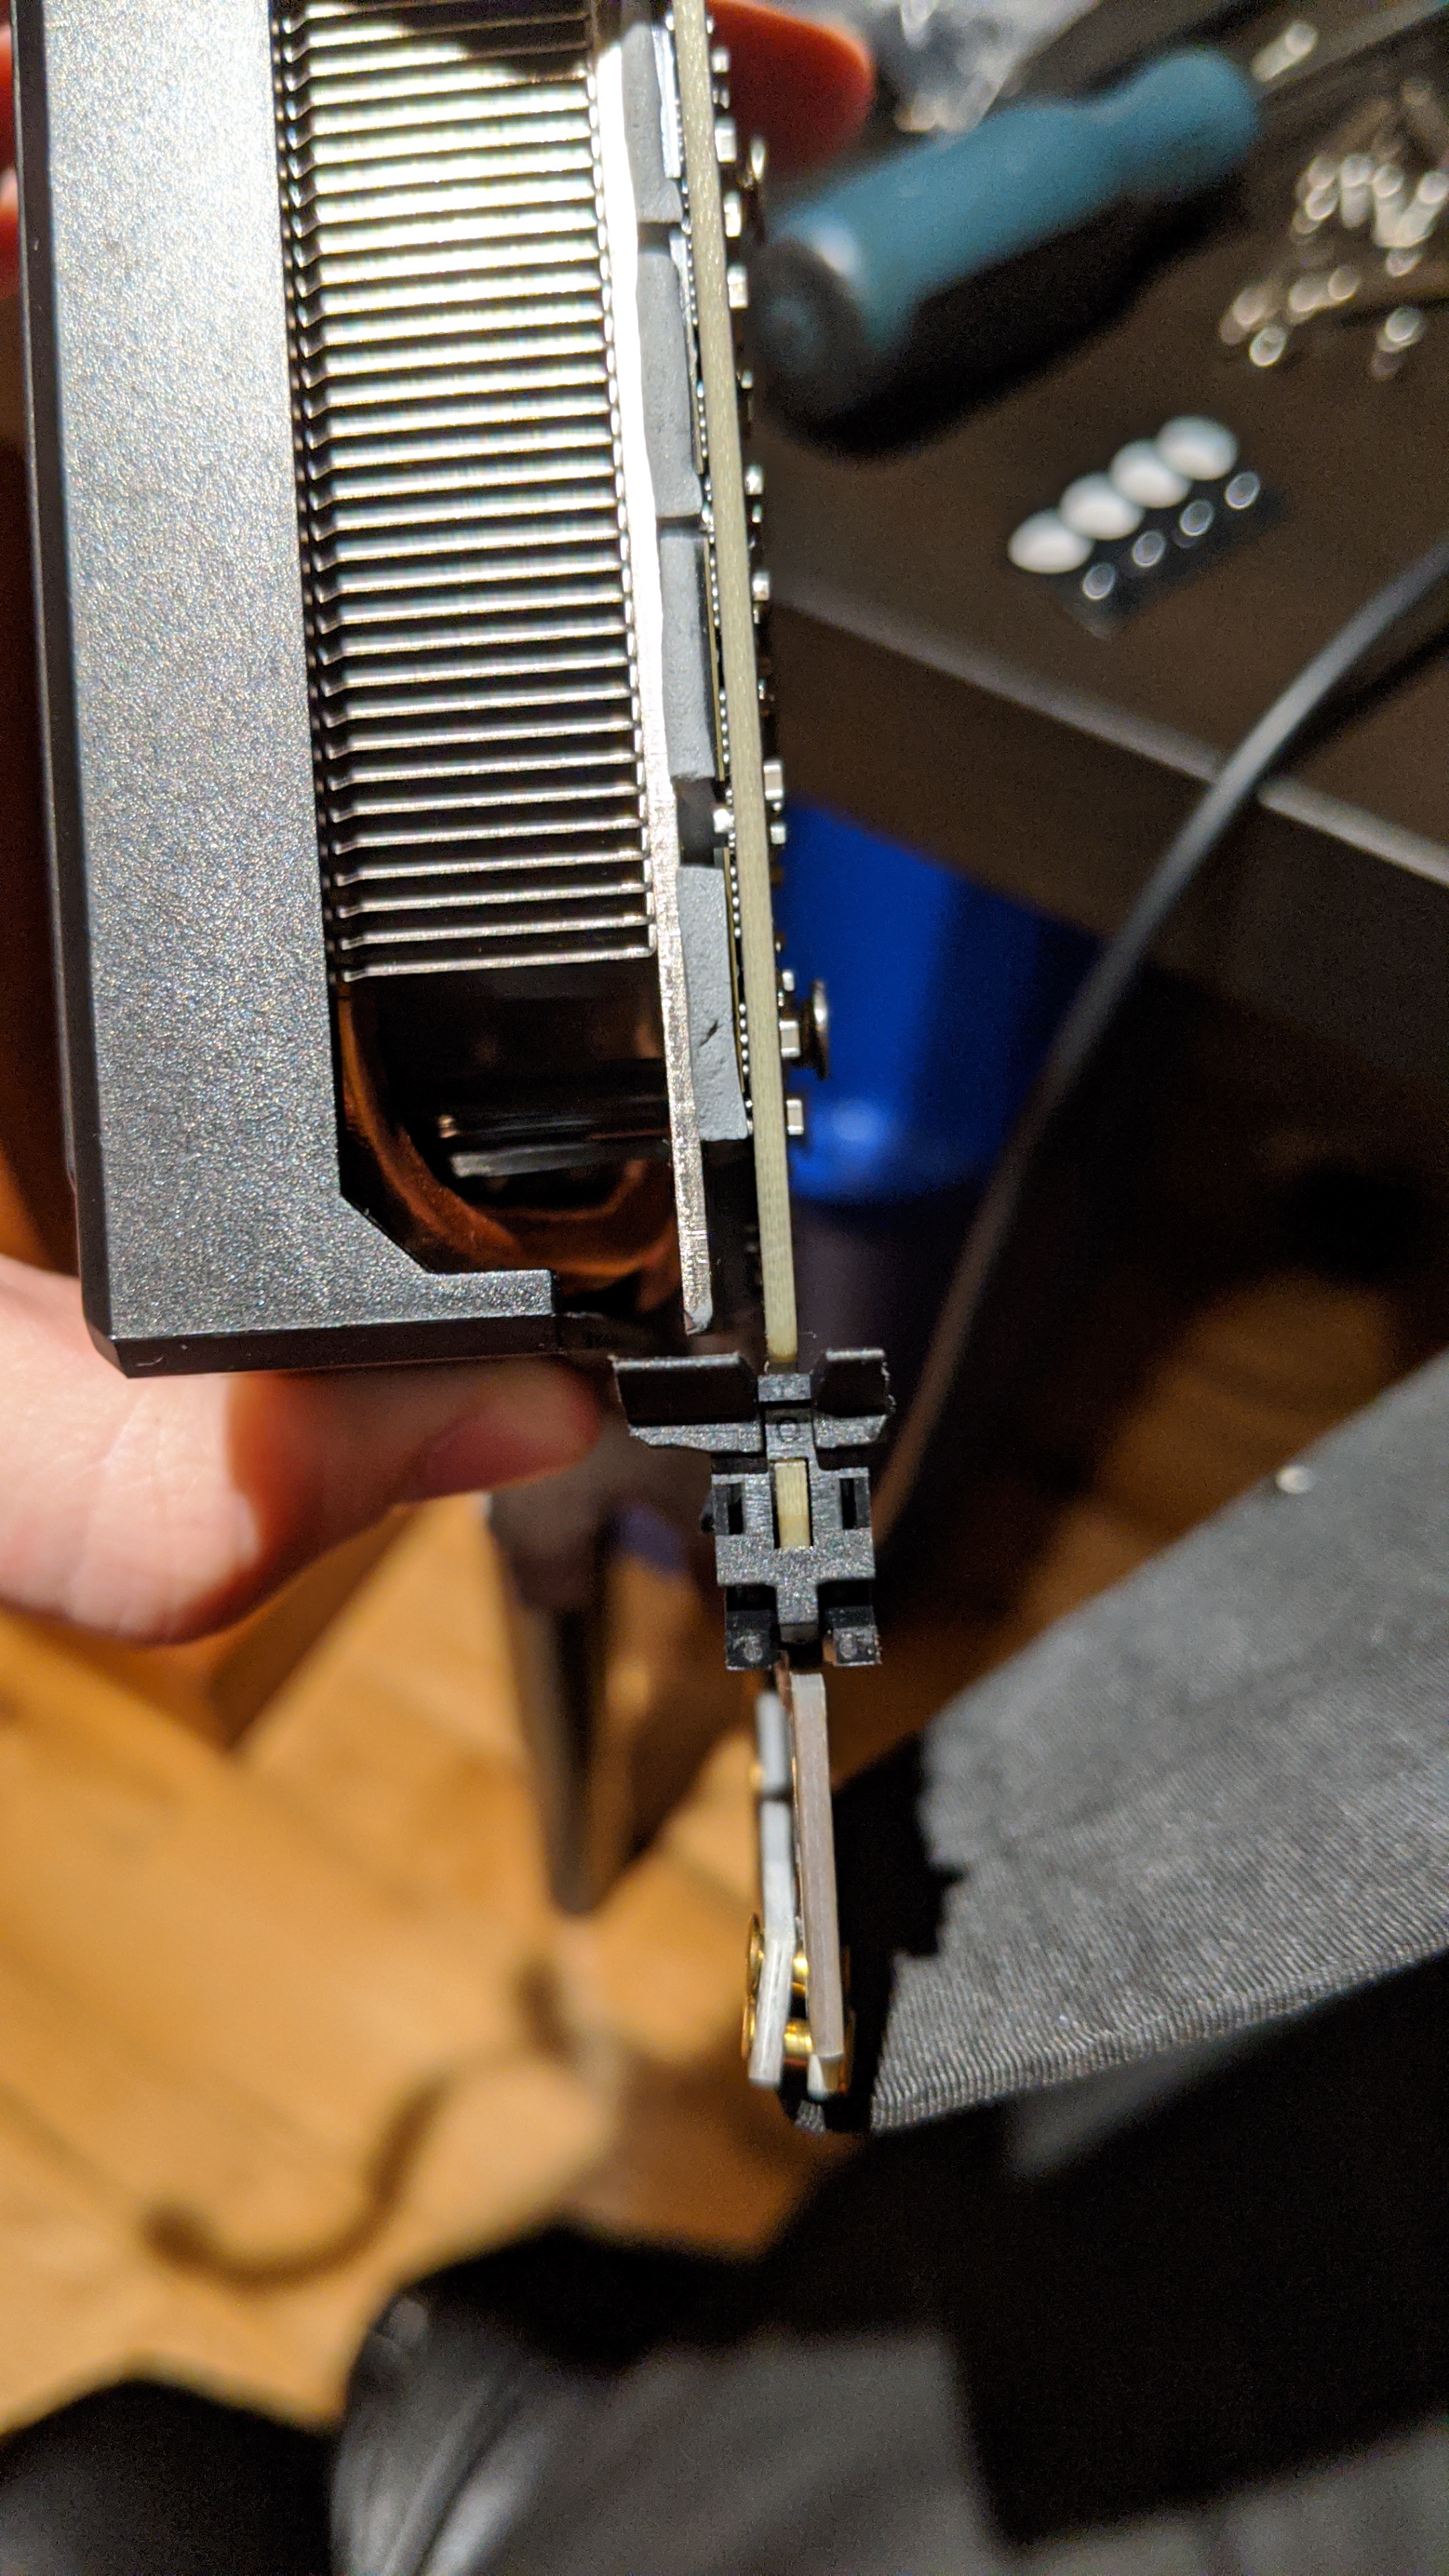
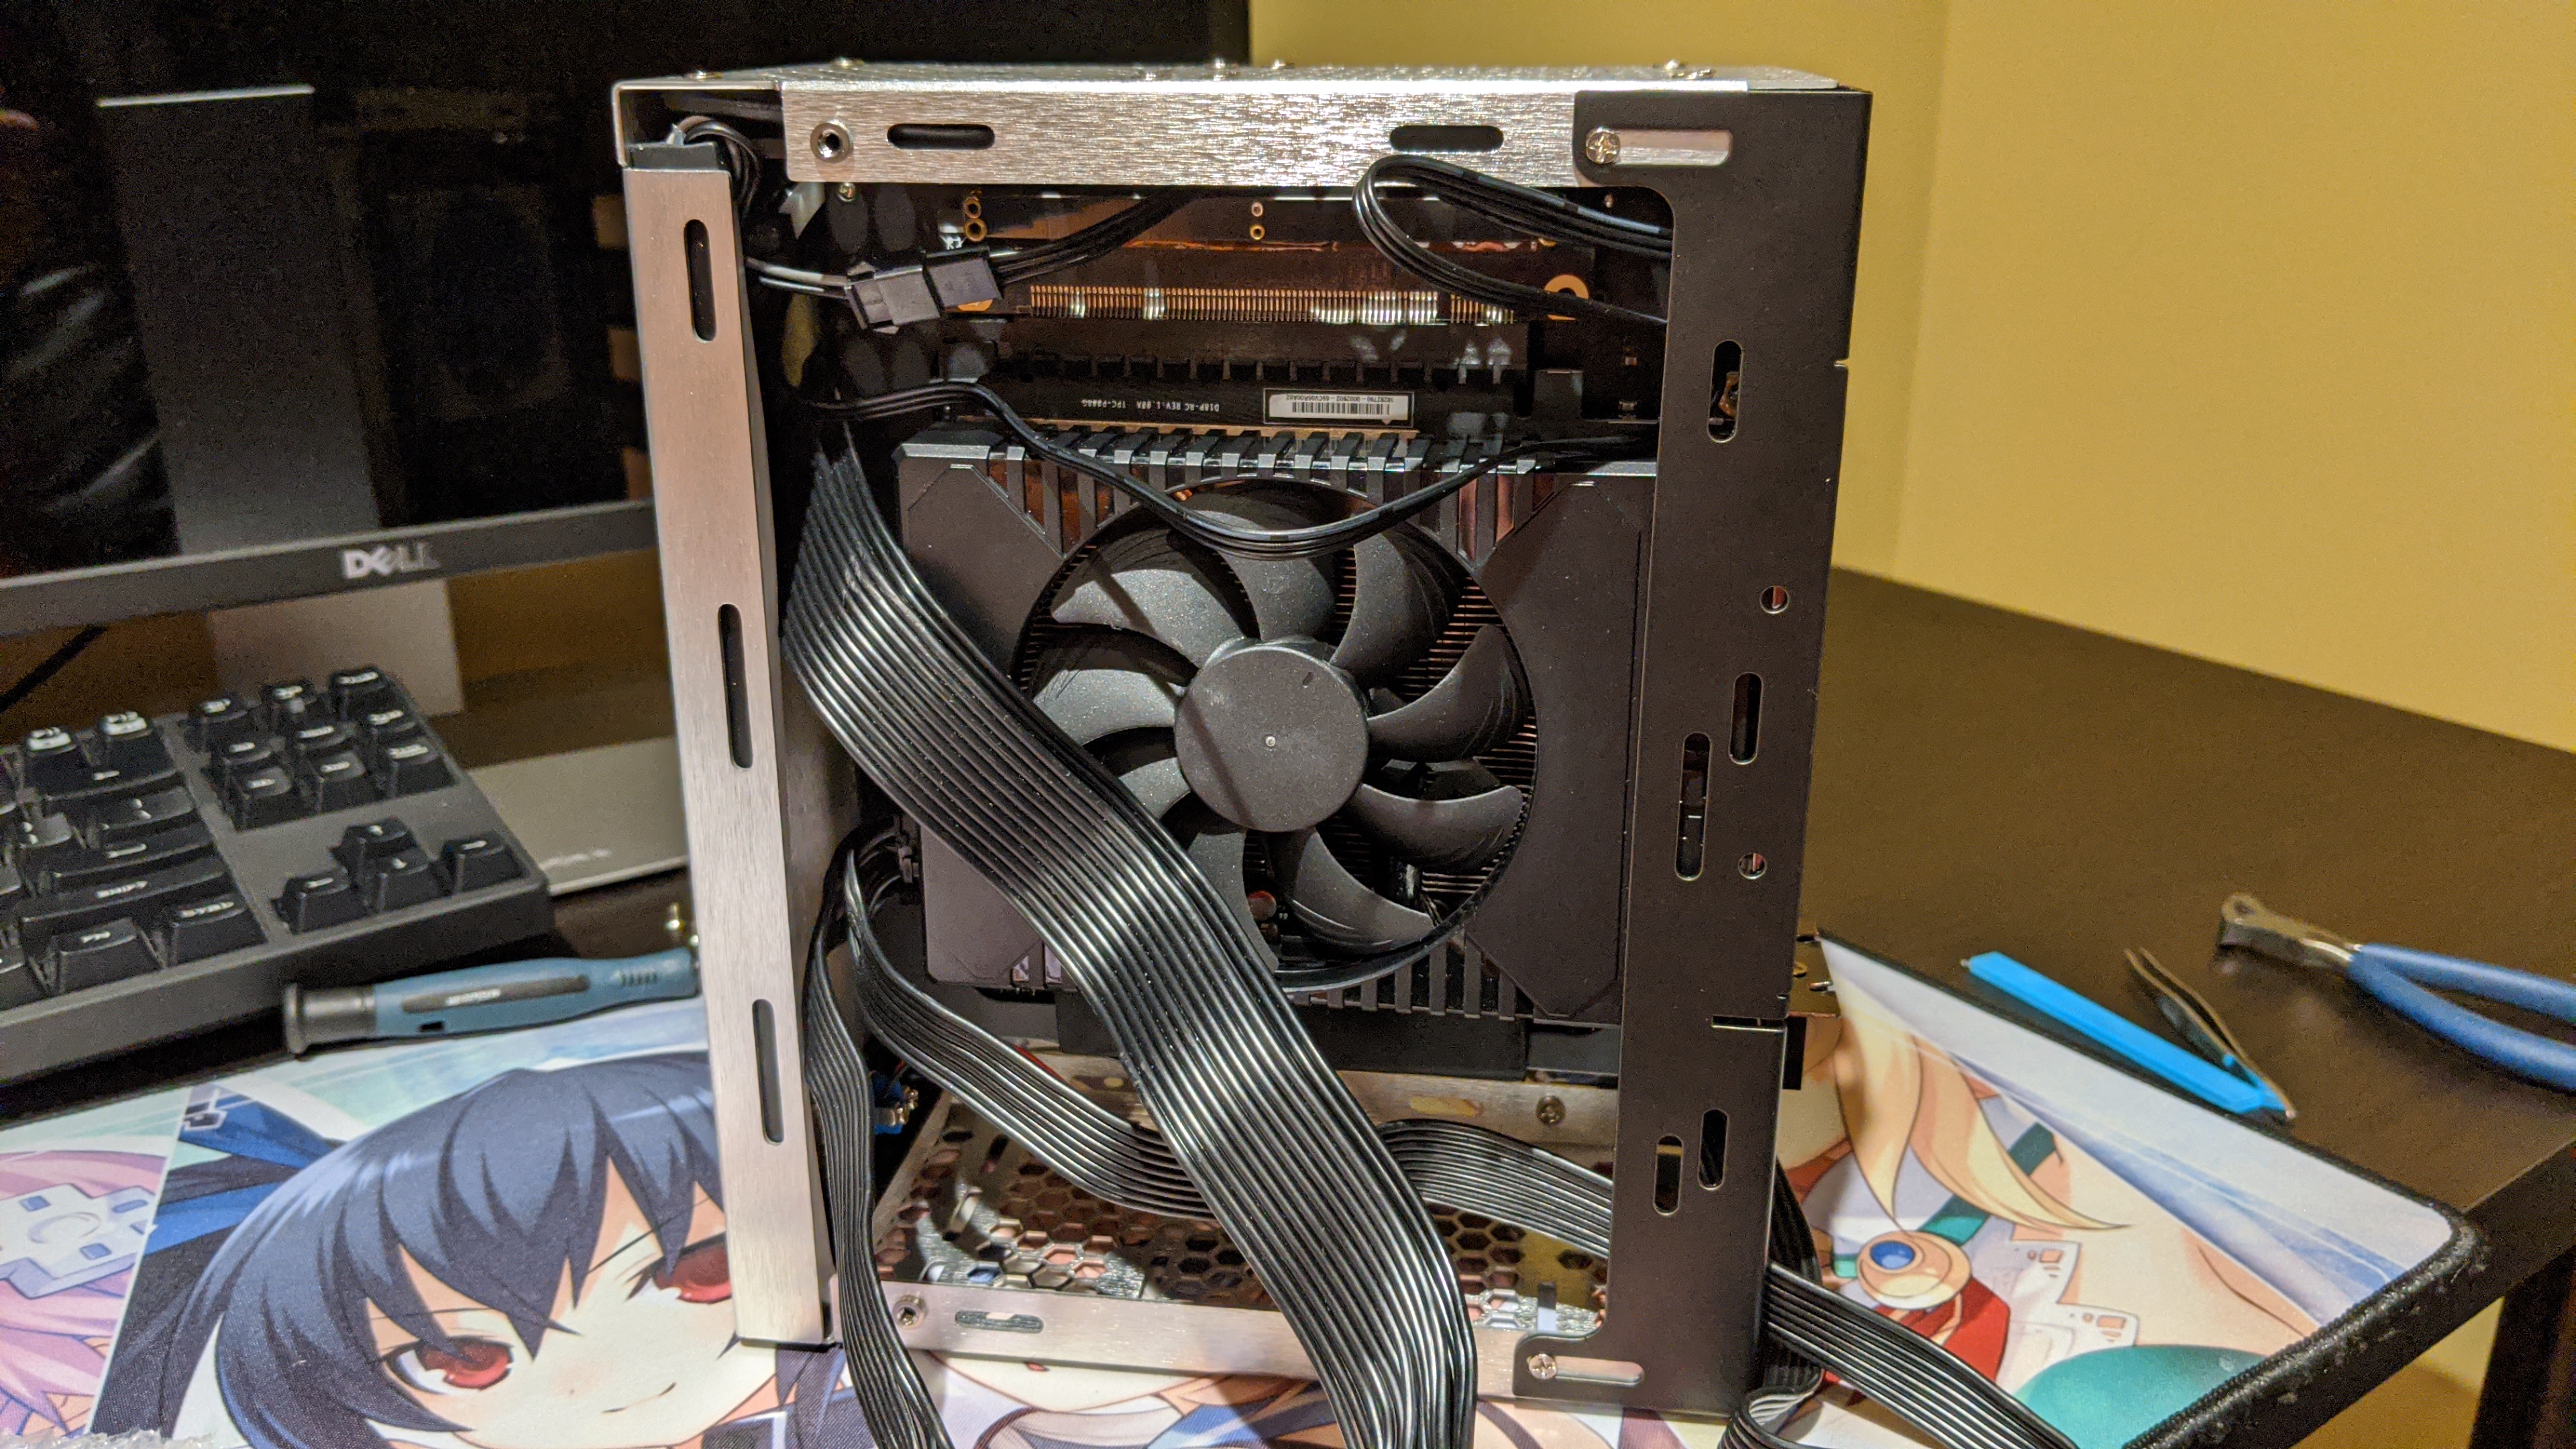
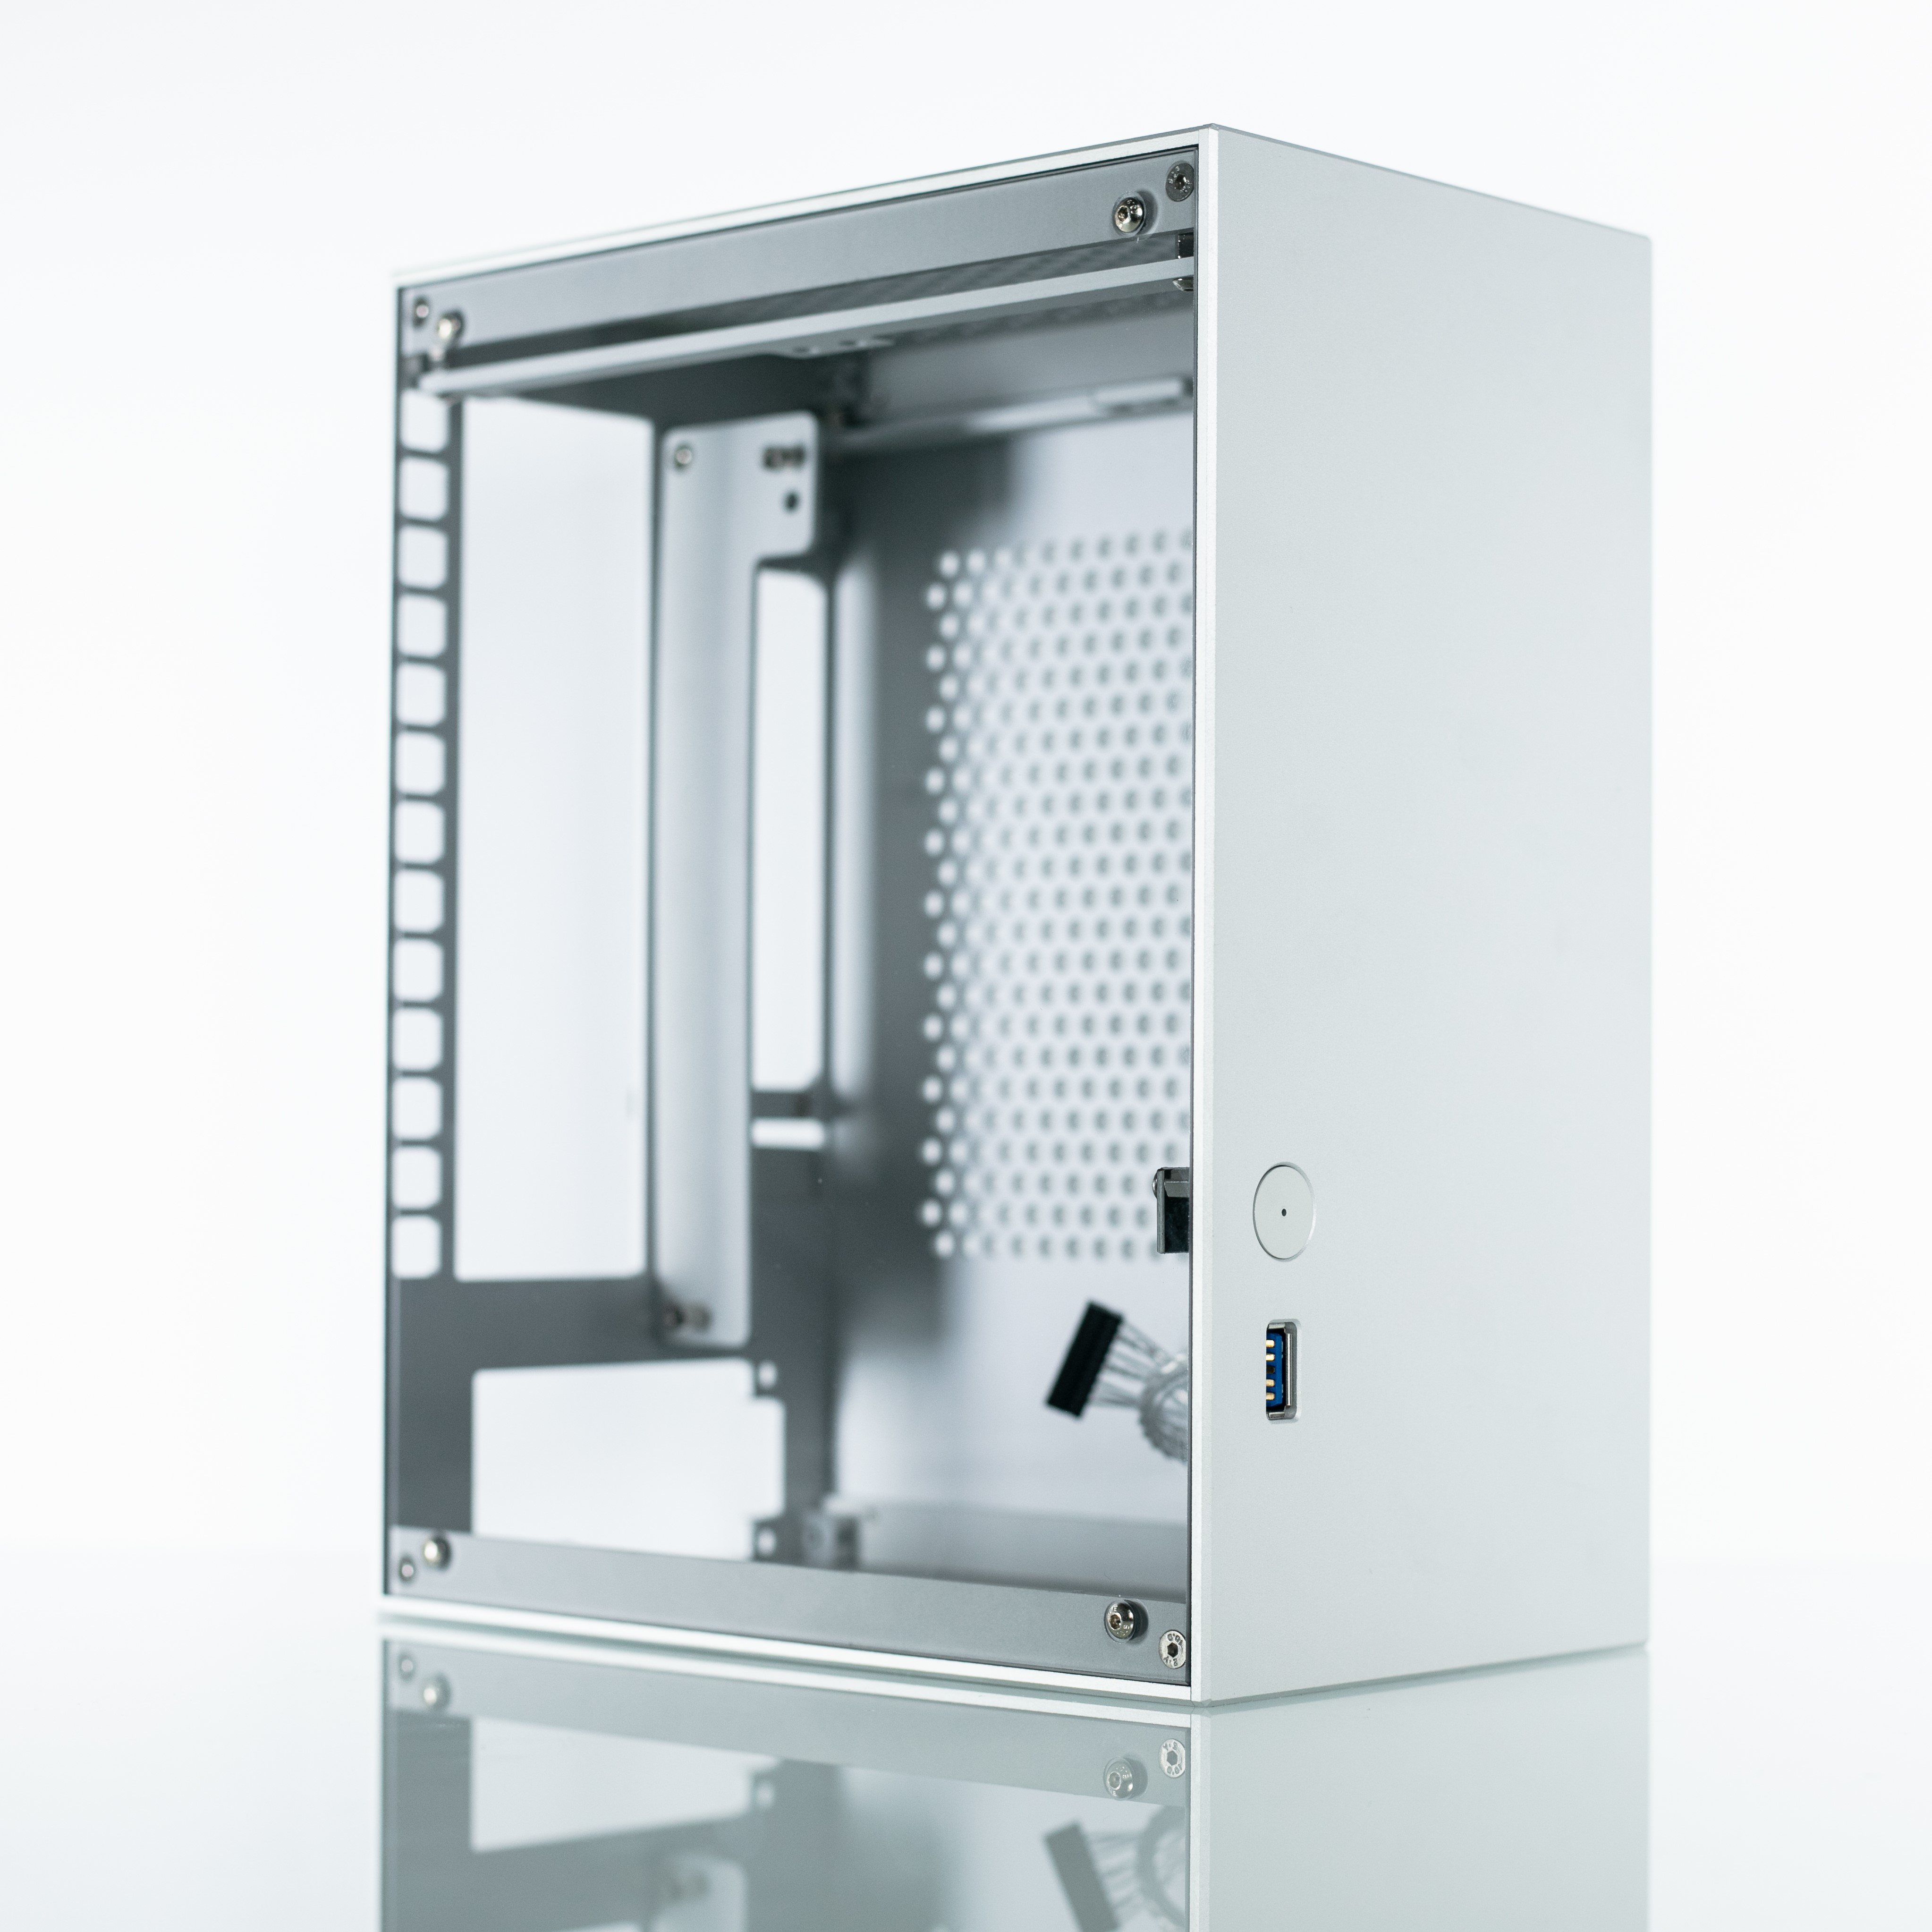
Yesterday I’ve received my second PCIE riser and rgb lights. The first riser I bought was a standard 300mm one, but quickly realized it was not flexible enough, so bought a 250mm flexible one instead. People seemed to say online that you absolutely need a 300mm, the one prescribe by Velkase, but they are wrong because it works nicely. And I received vynil stickers from that guy that make the Homura vinyl to use as a logo, but they are not shiny enough. So maybe will plastidip using the outside vinyl.
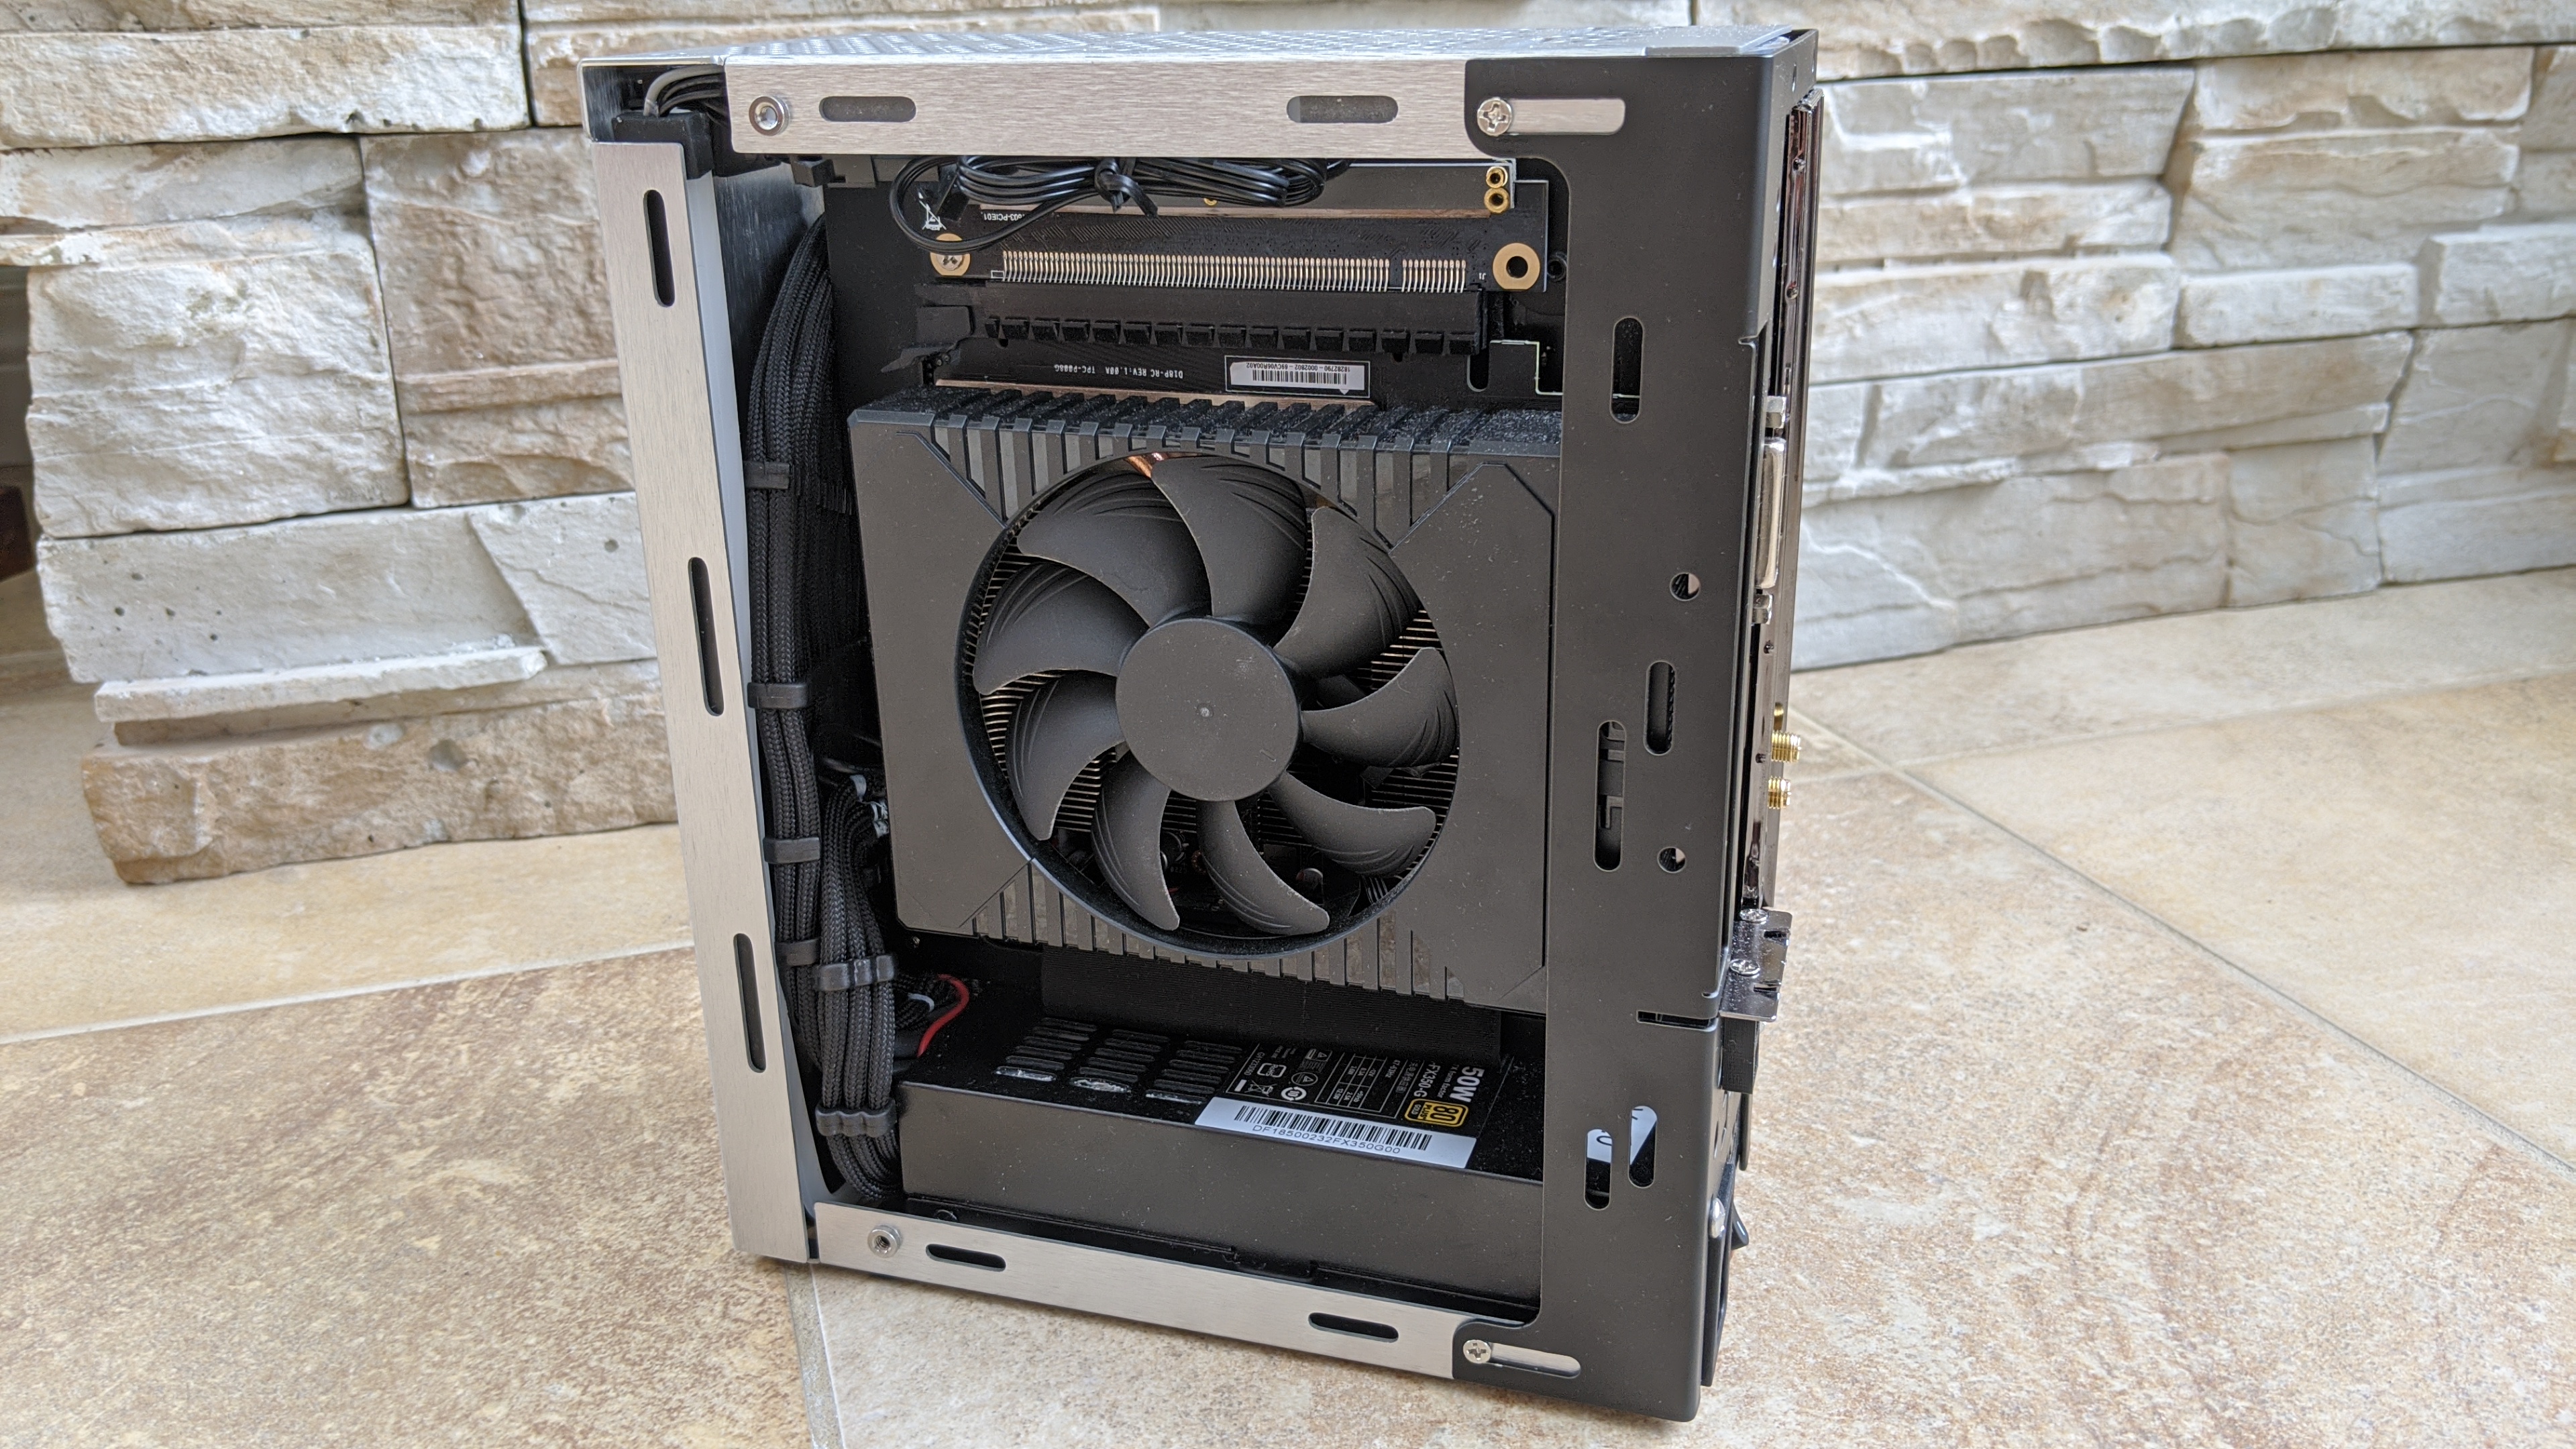
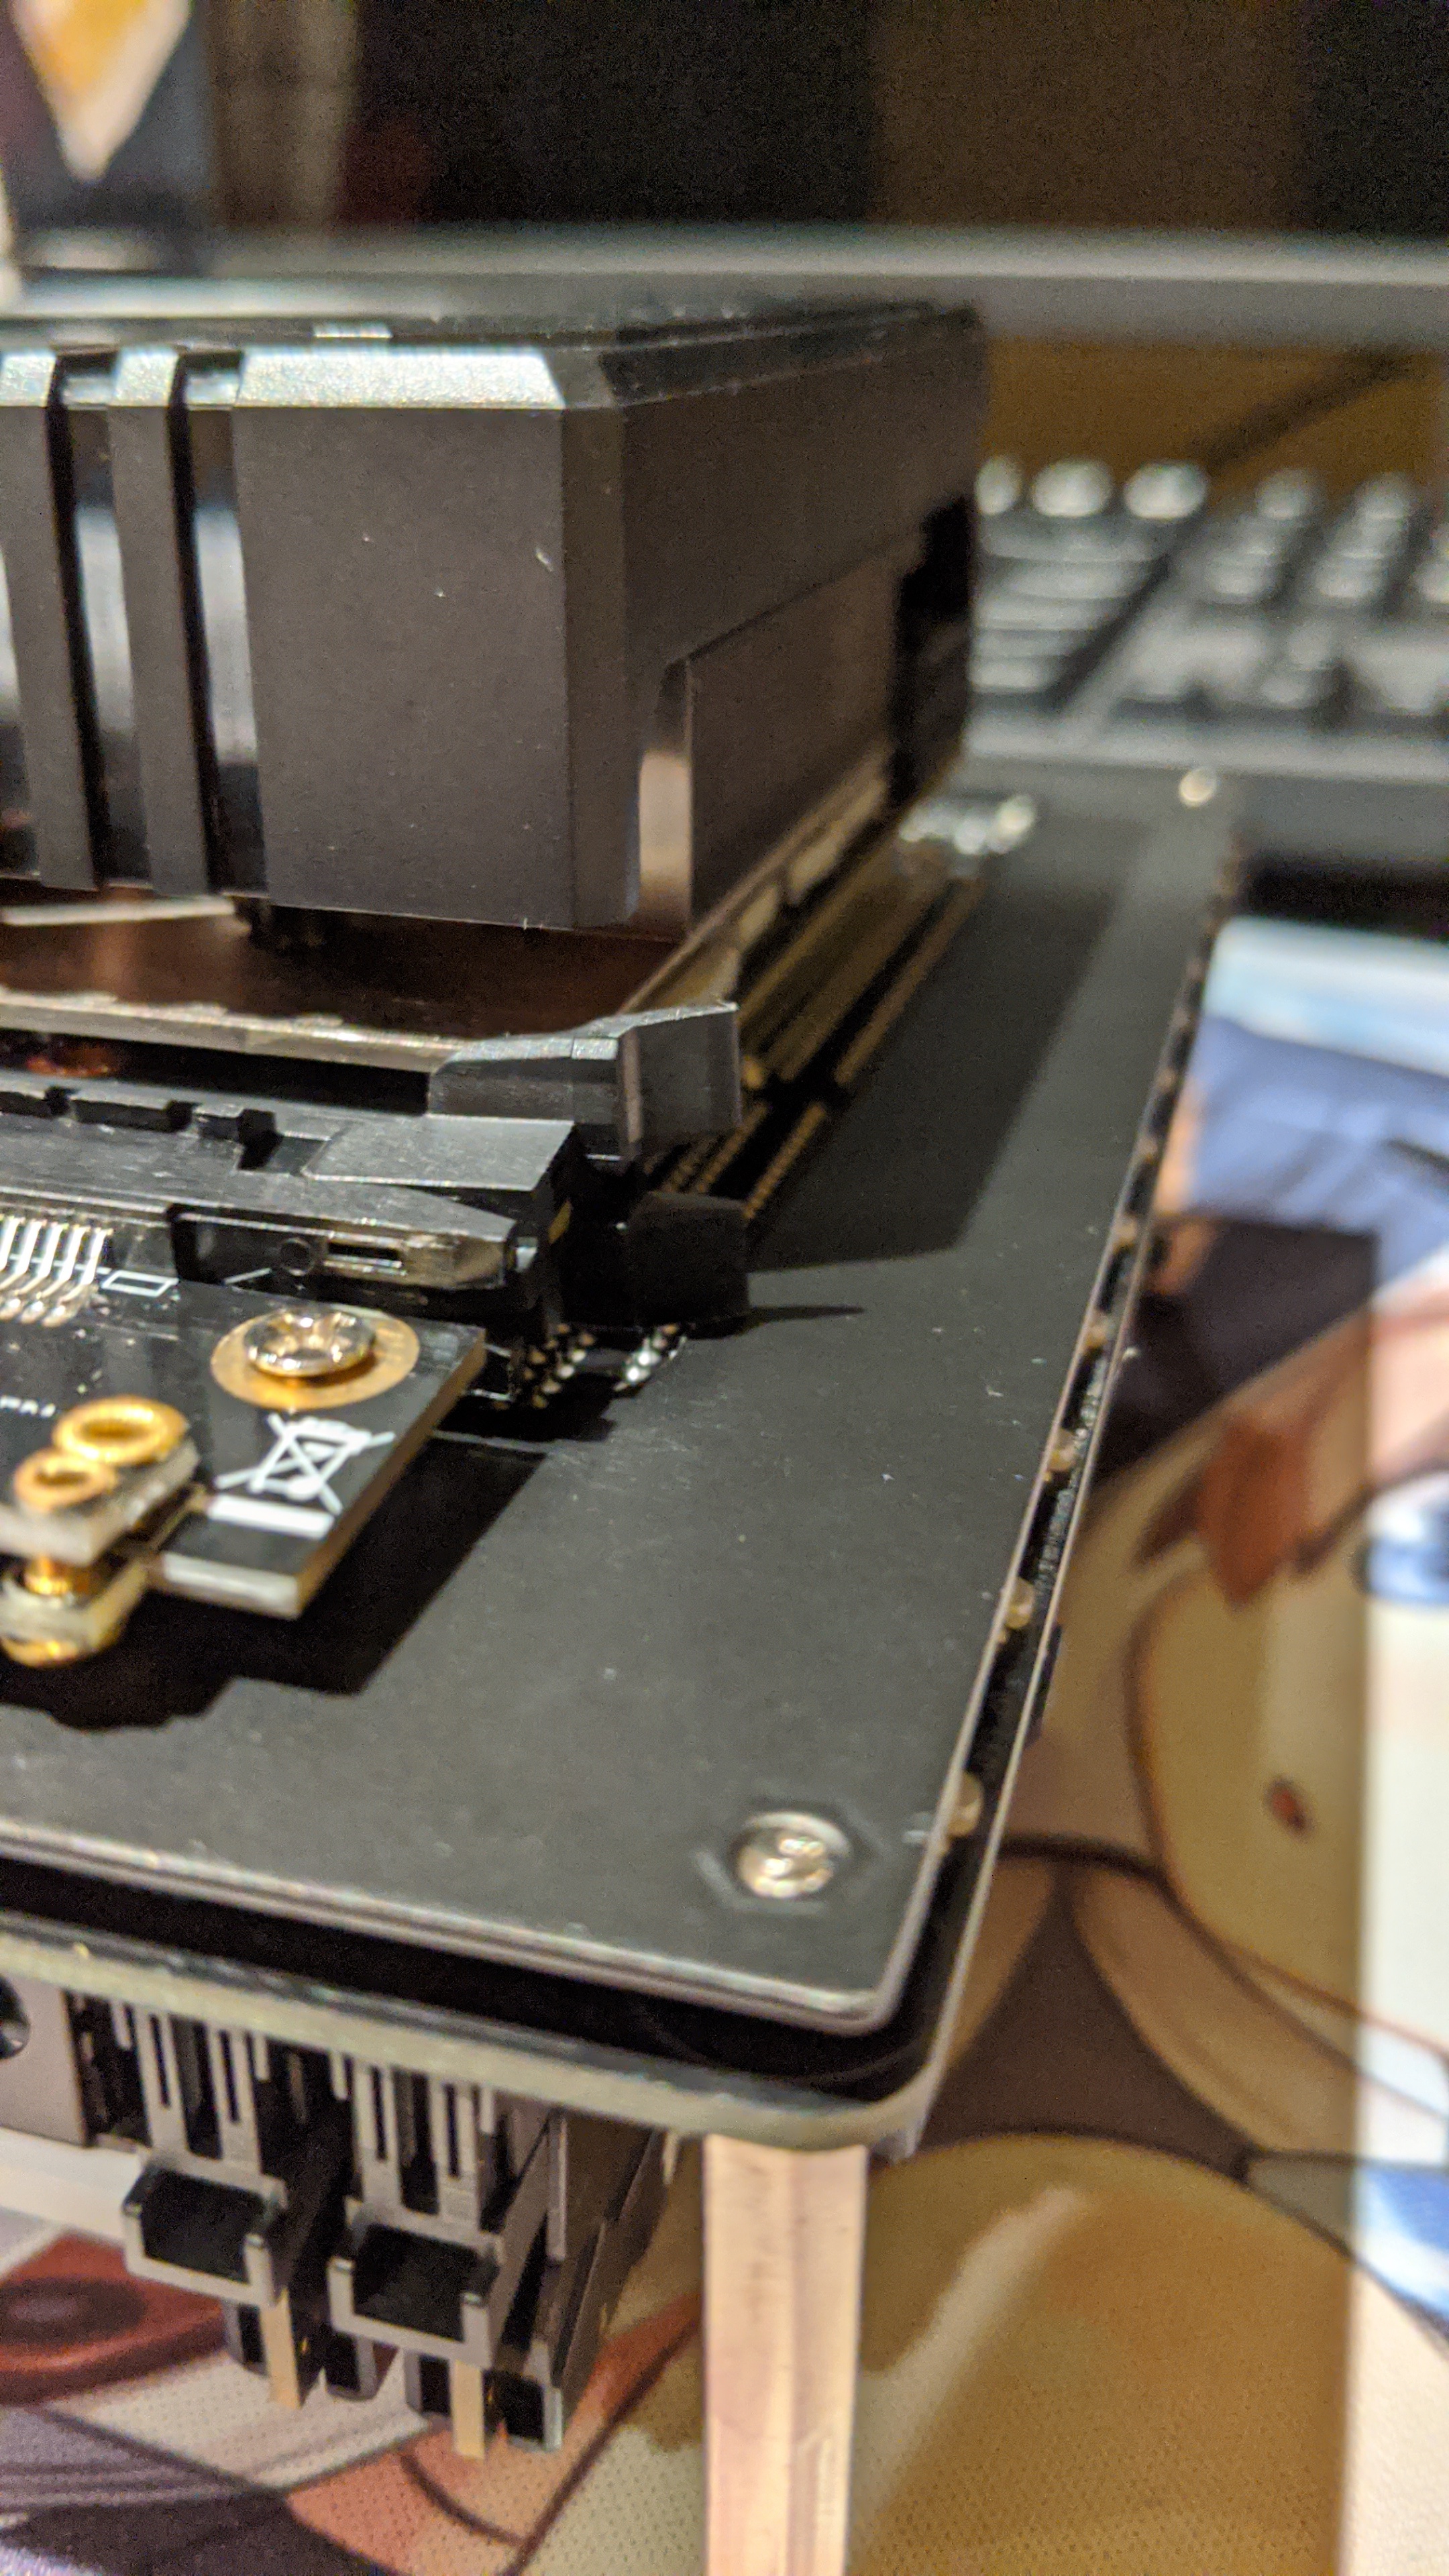
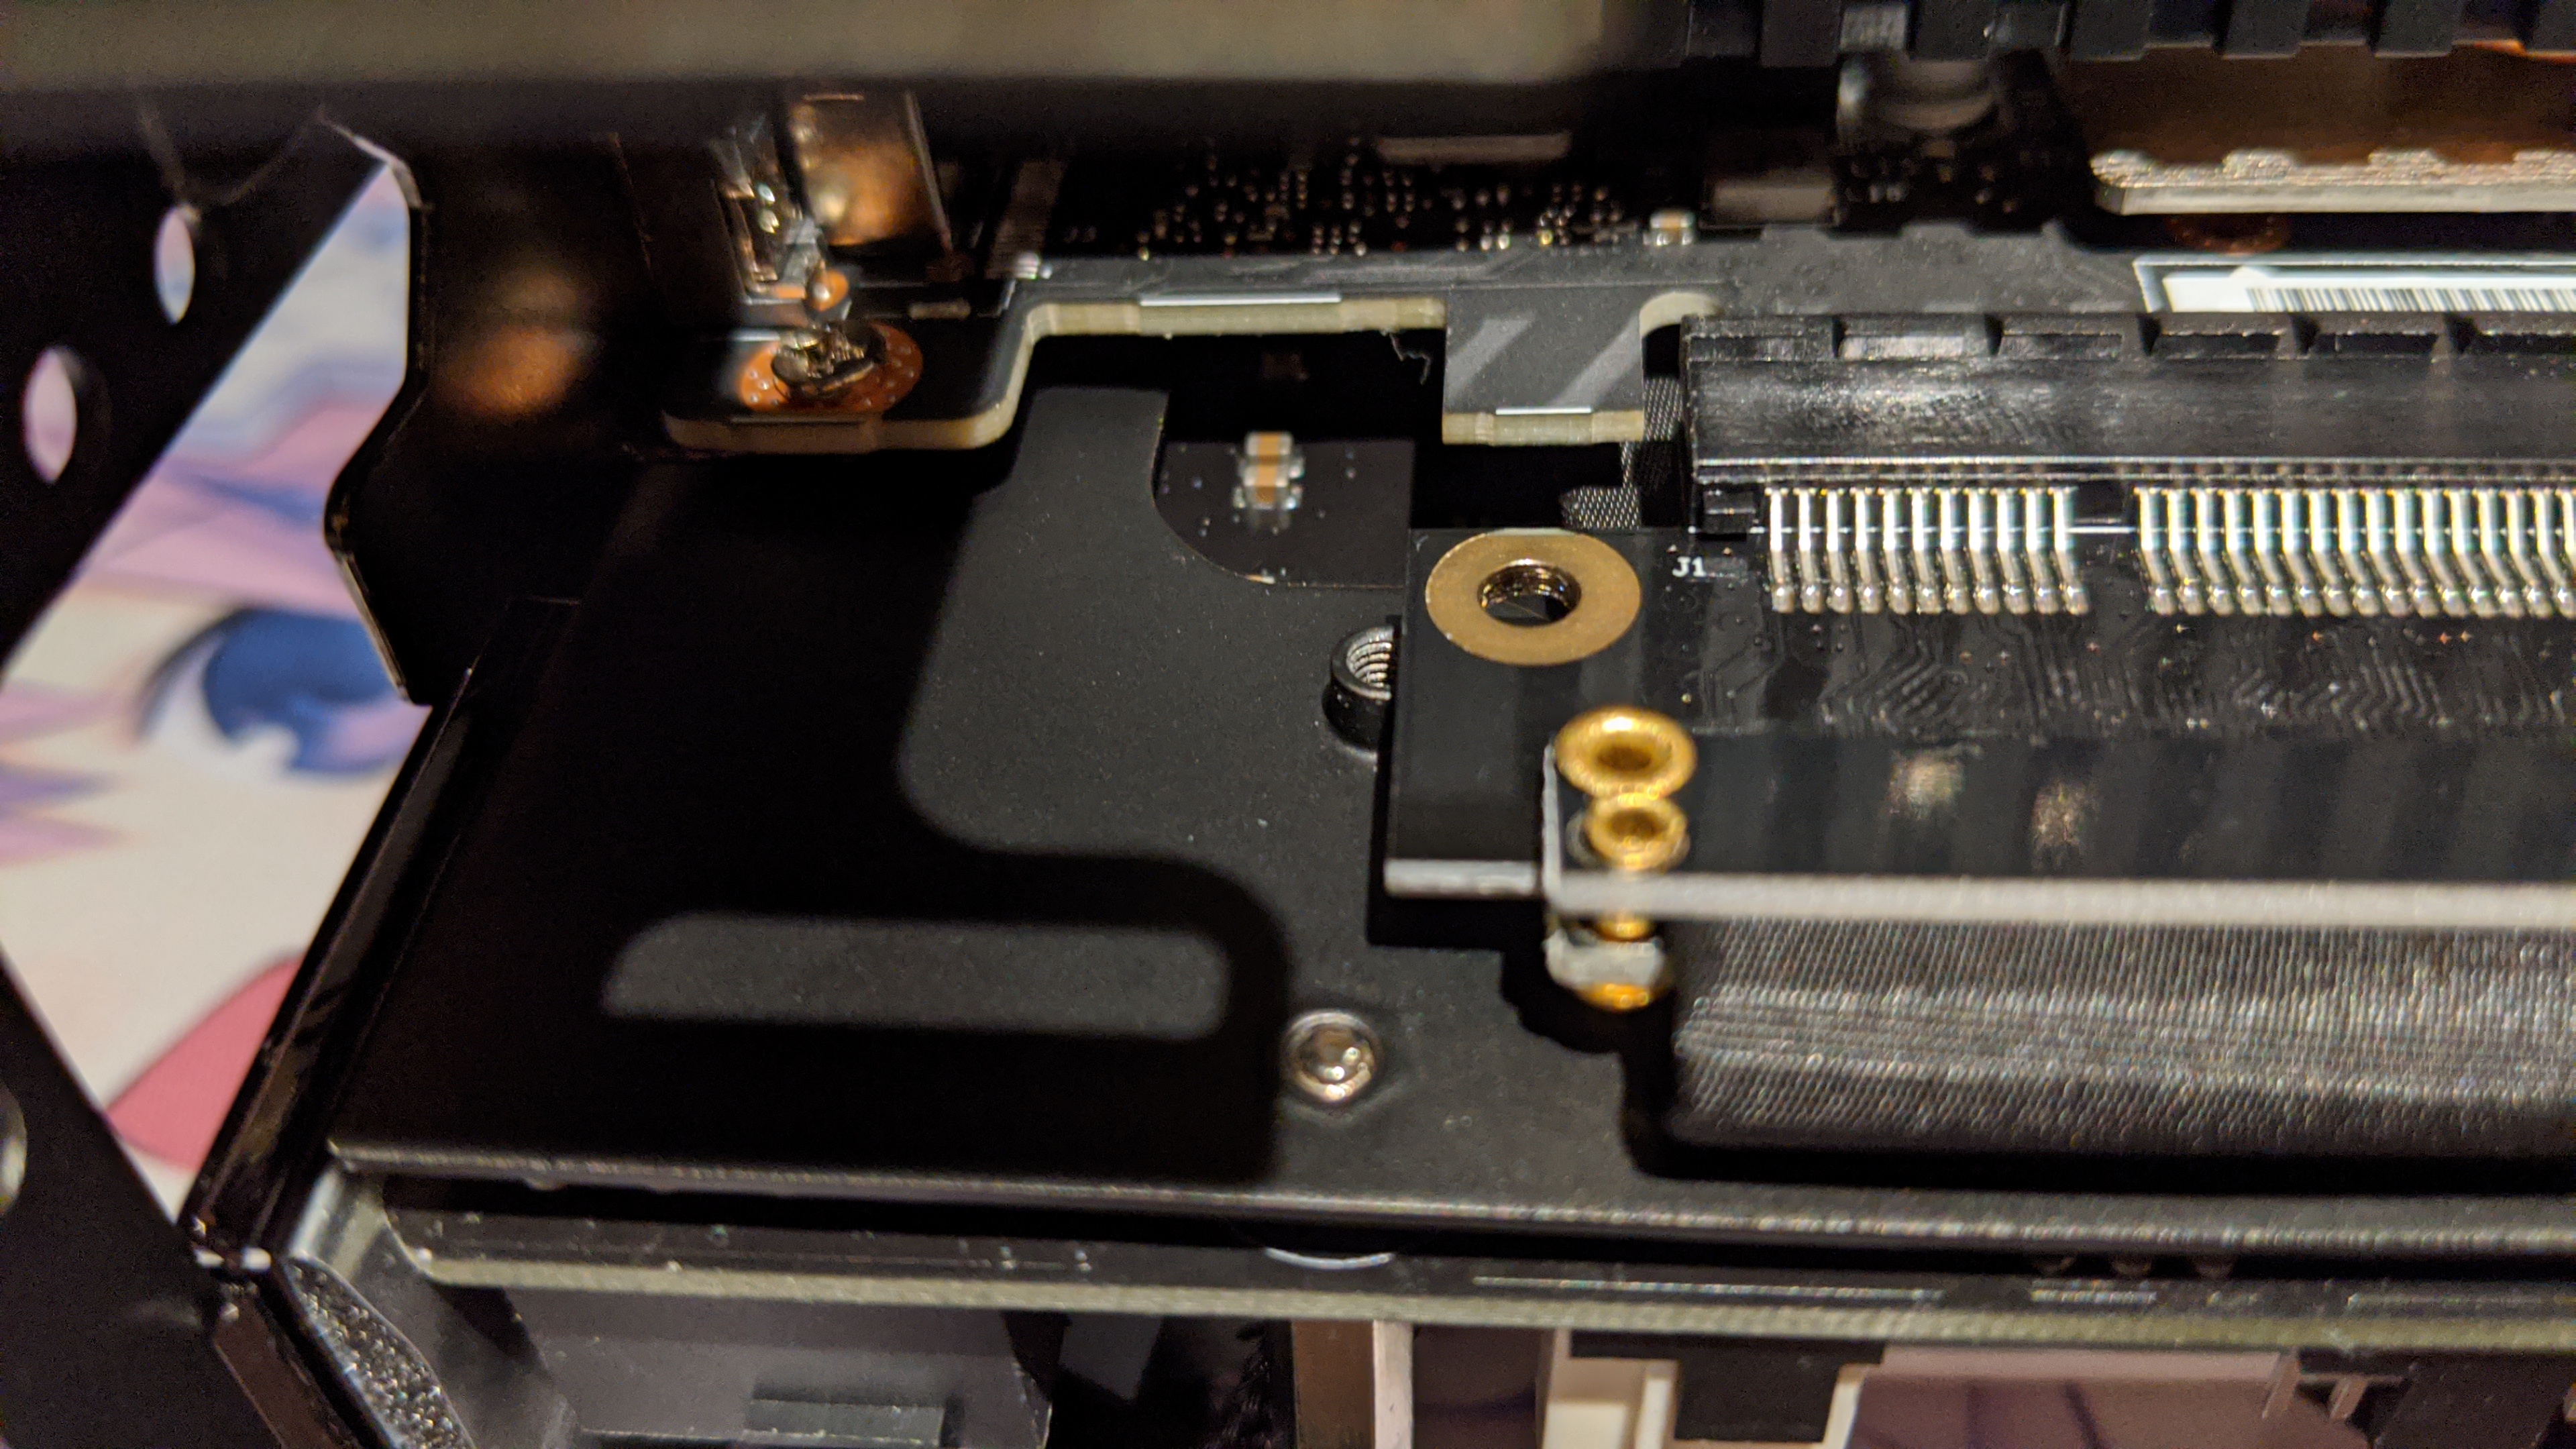
However, going with the EZDIY-FAB PCI Express 16x 25cm riser brought me some compatibility issues. First, the mounting holes do not seem standard, so I could only screw the last hole. Second, there was the retaining mechanism that was interfering with the backplate of the mobo, so I had to cut it. And to be sure the GPU will be solid with only one screw, even if it already seemed so, I used the 3d printed GPU bracket that was among the screws. There is no mention of that bracket anywhere in the manual, but figured out its usefulness. I think it is still beta because the second bottom hole did not aligned with the case.
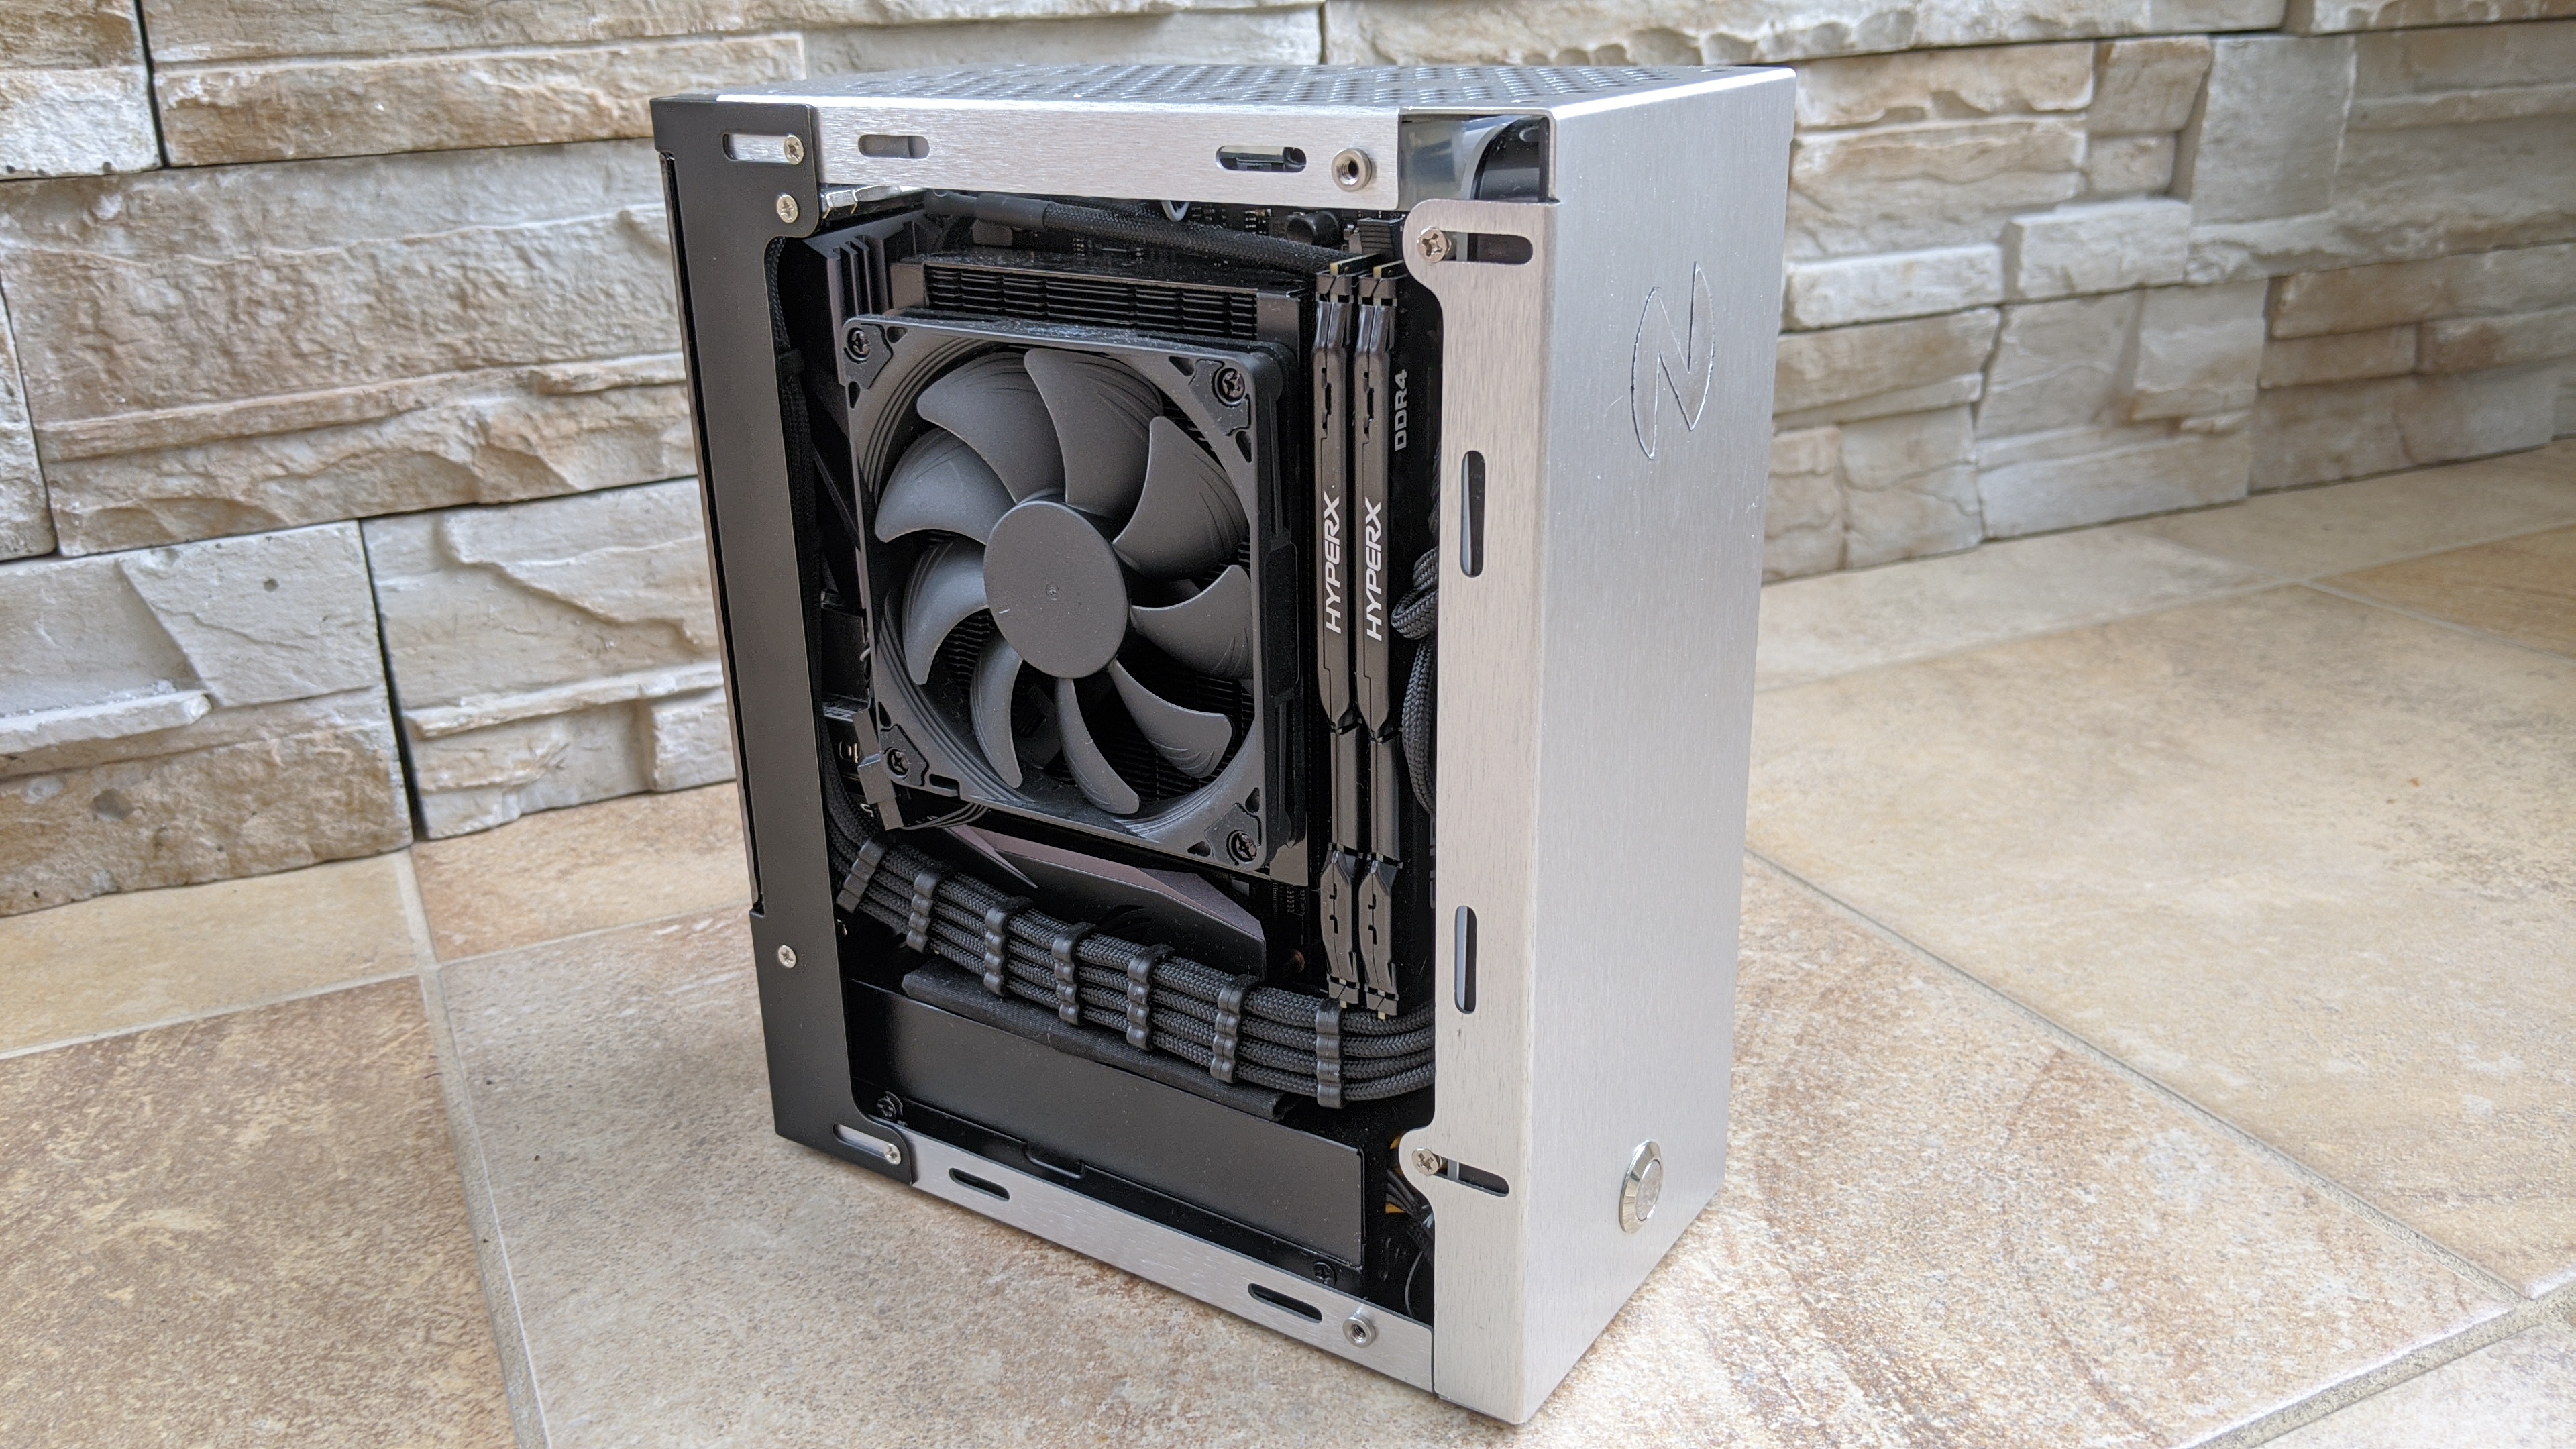
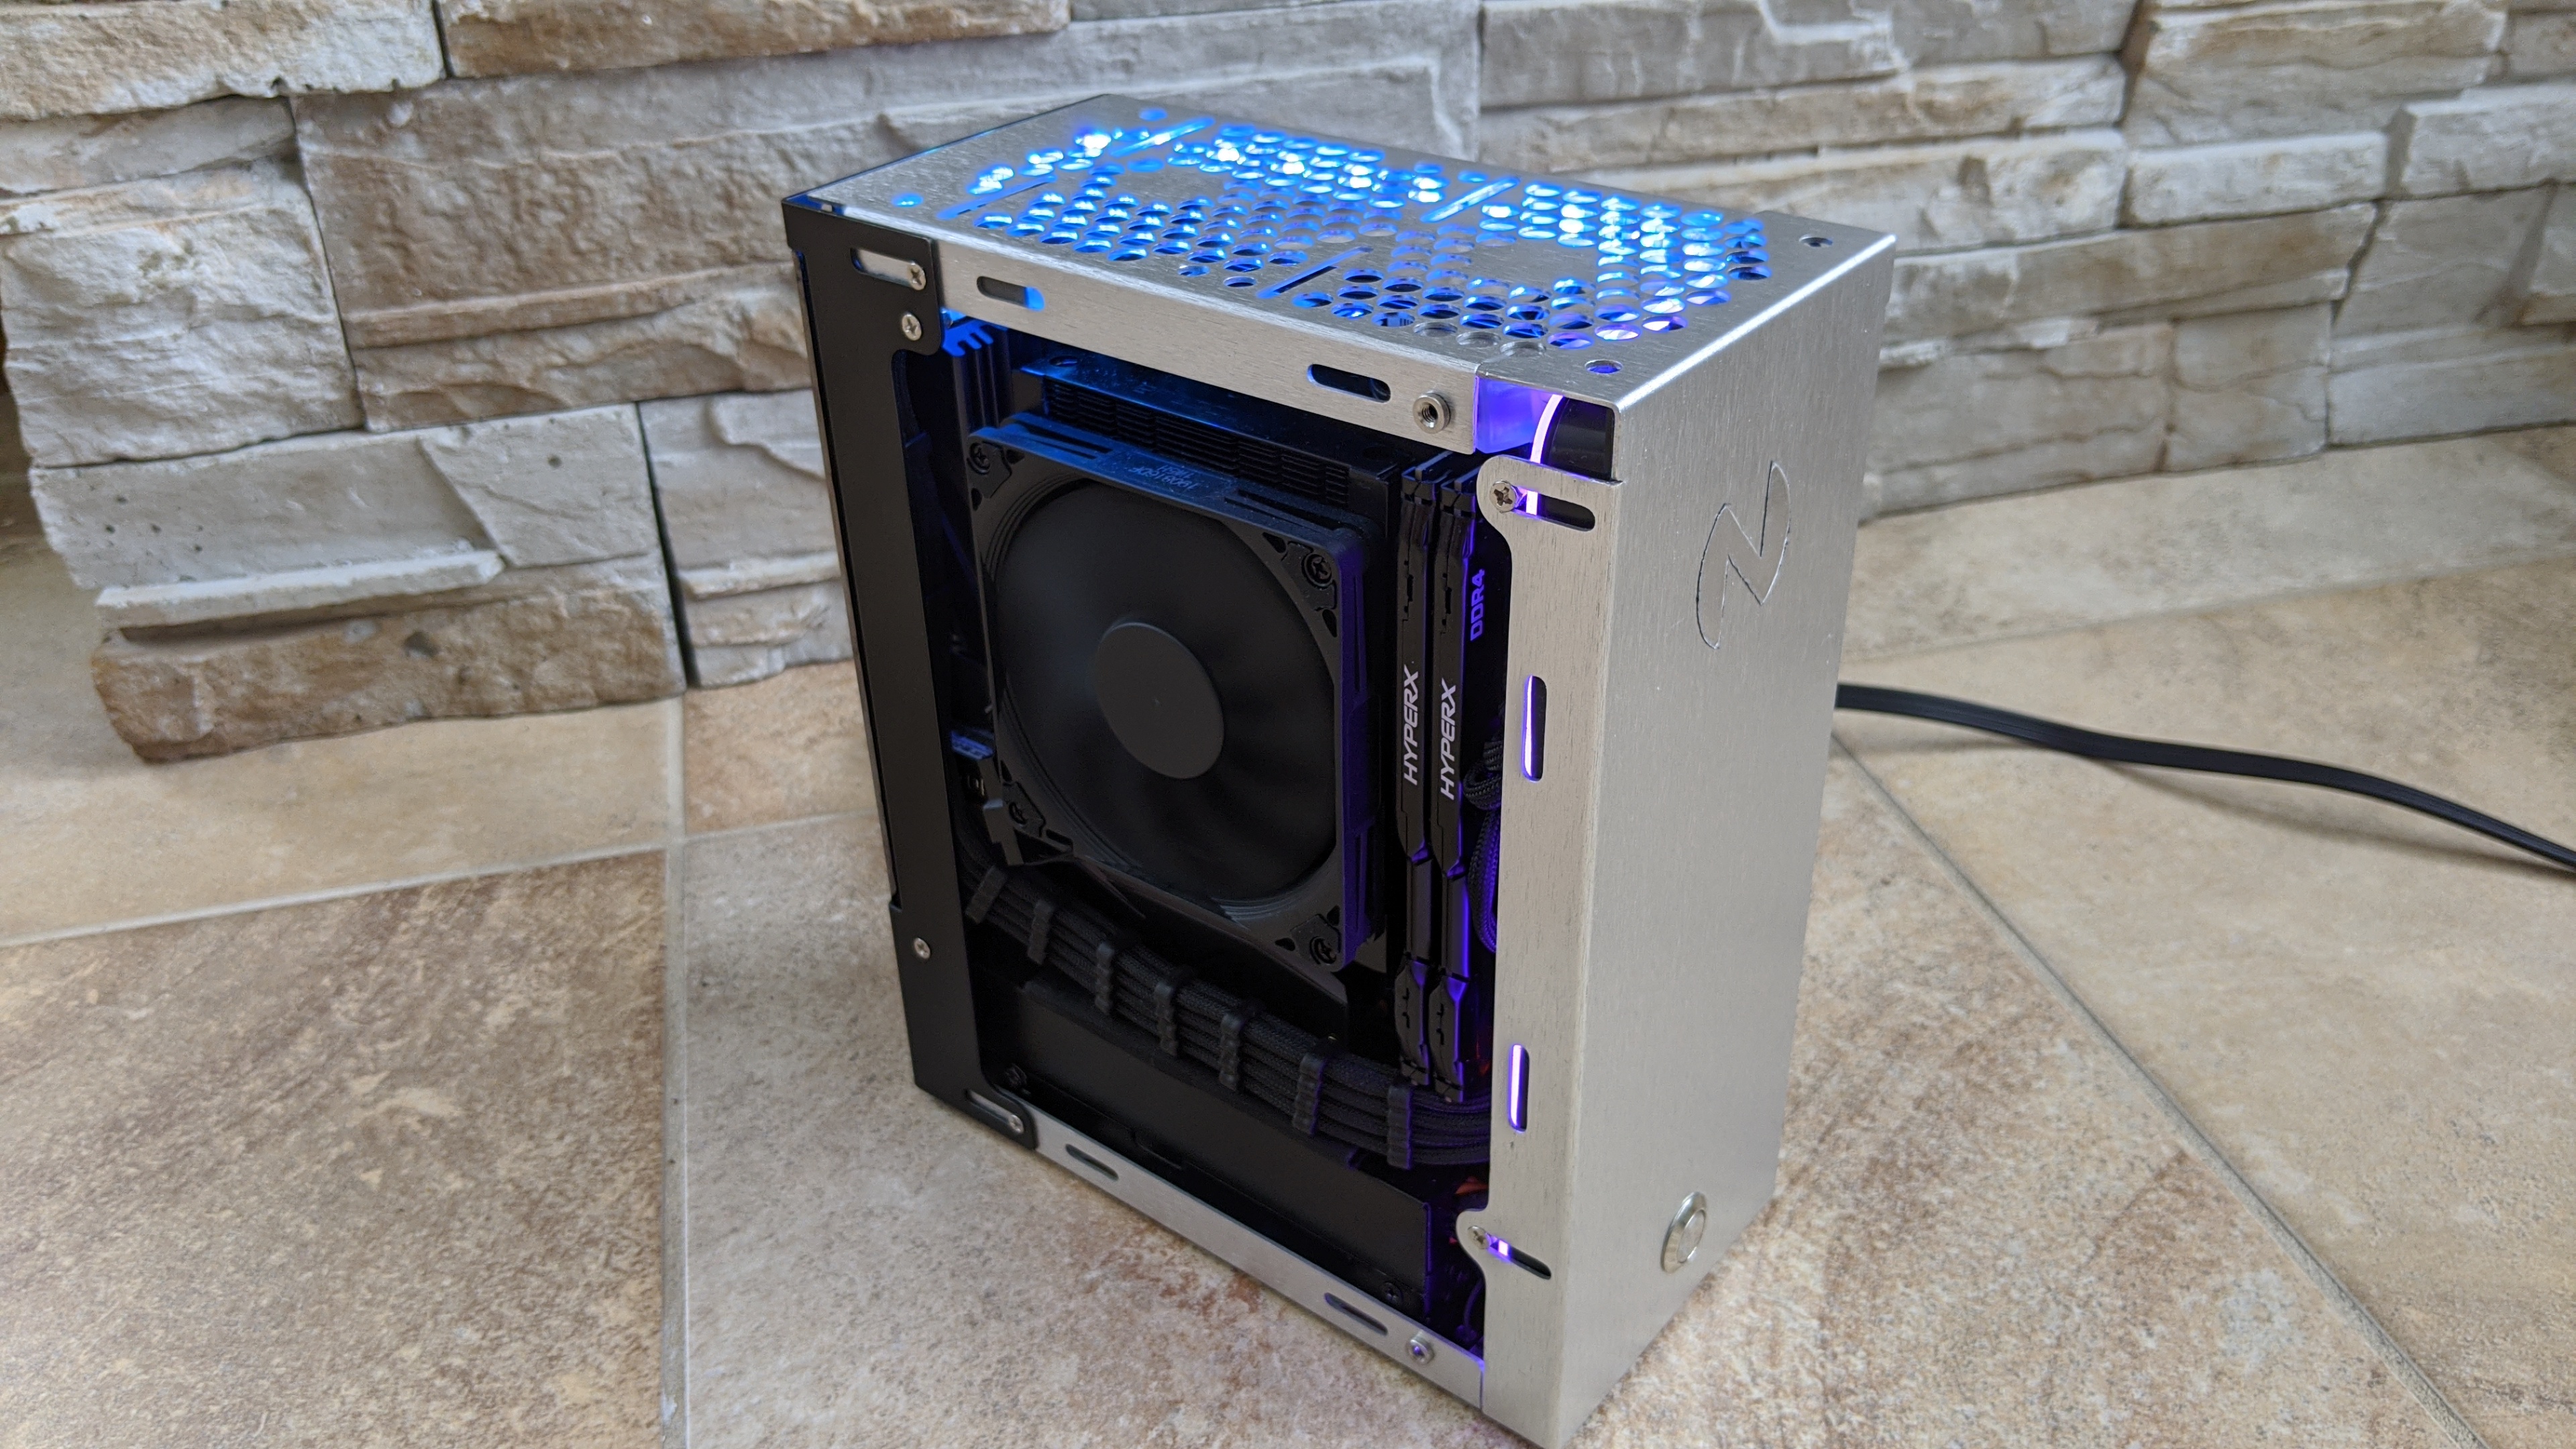
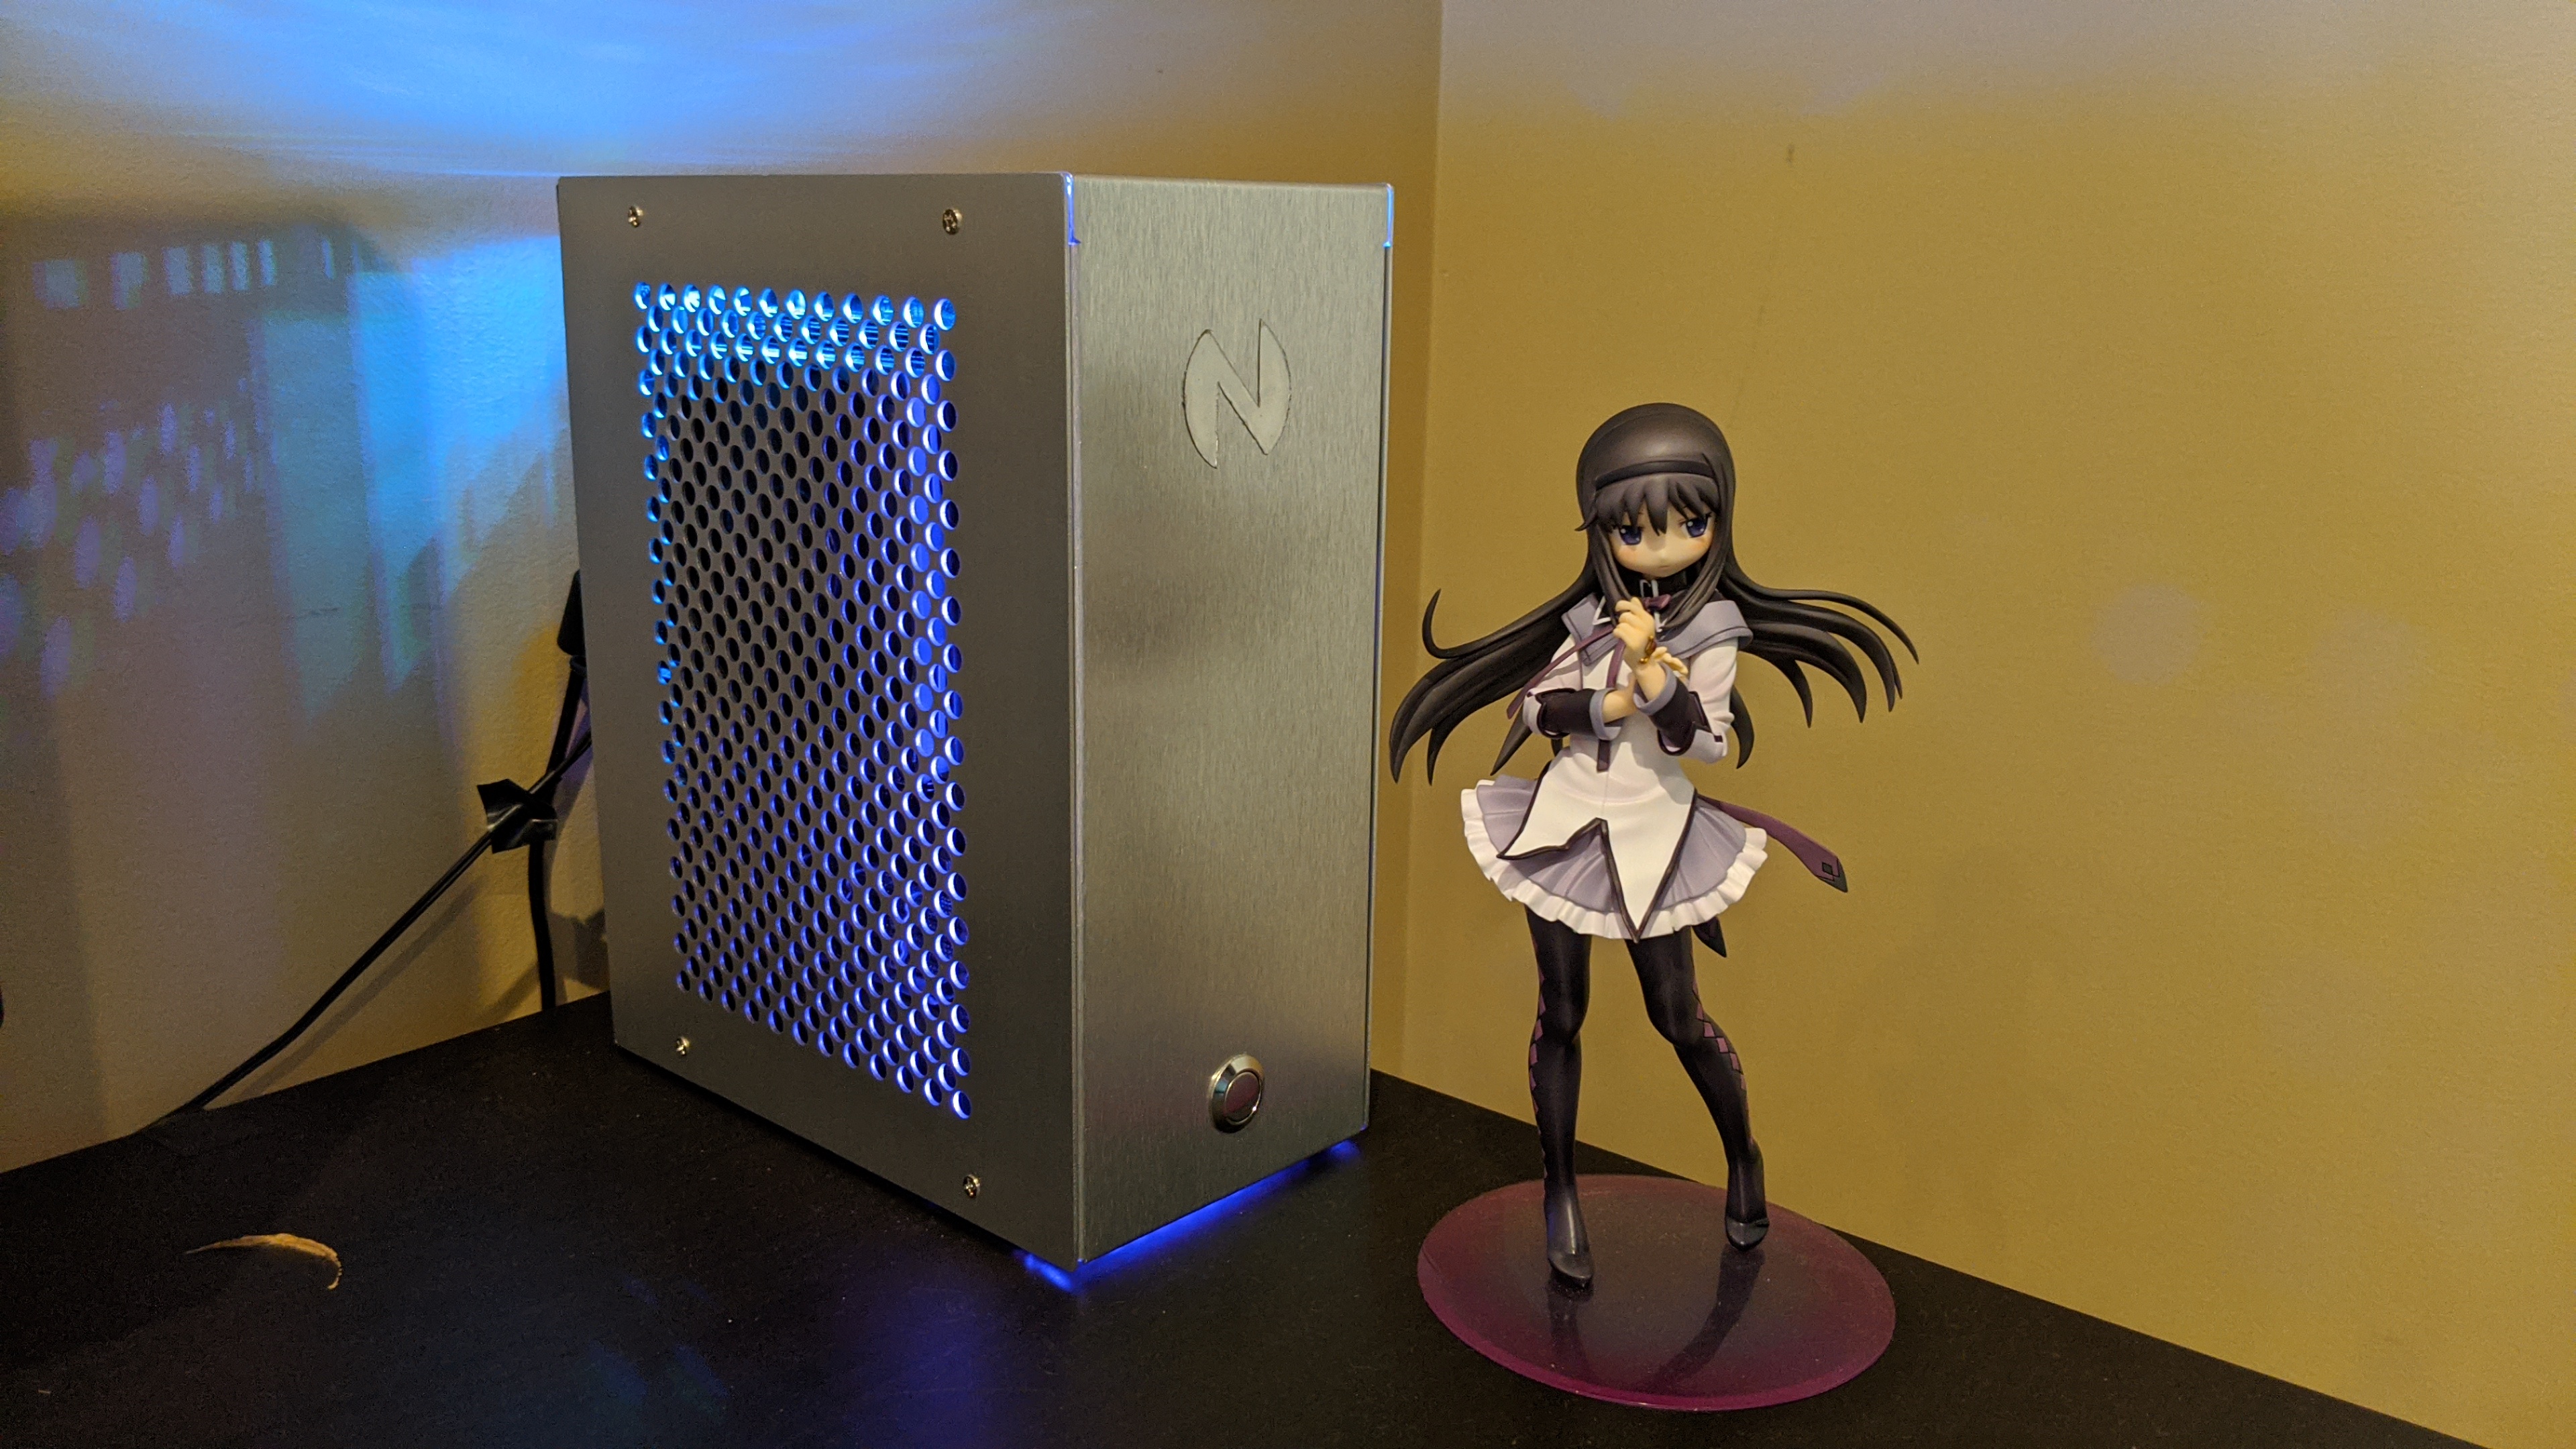
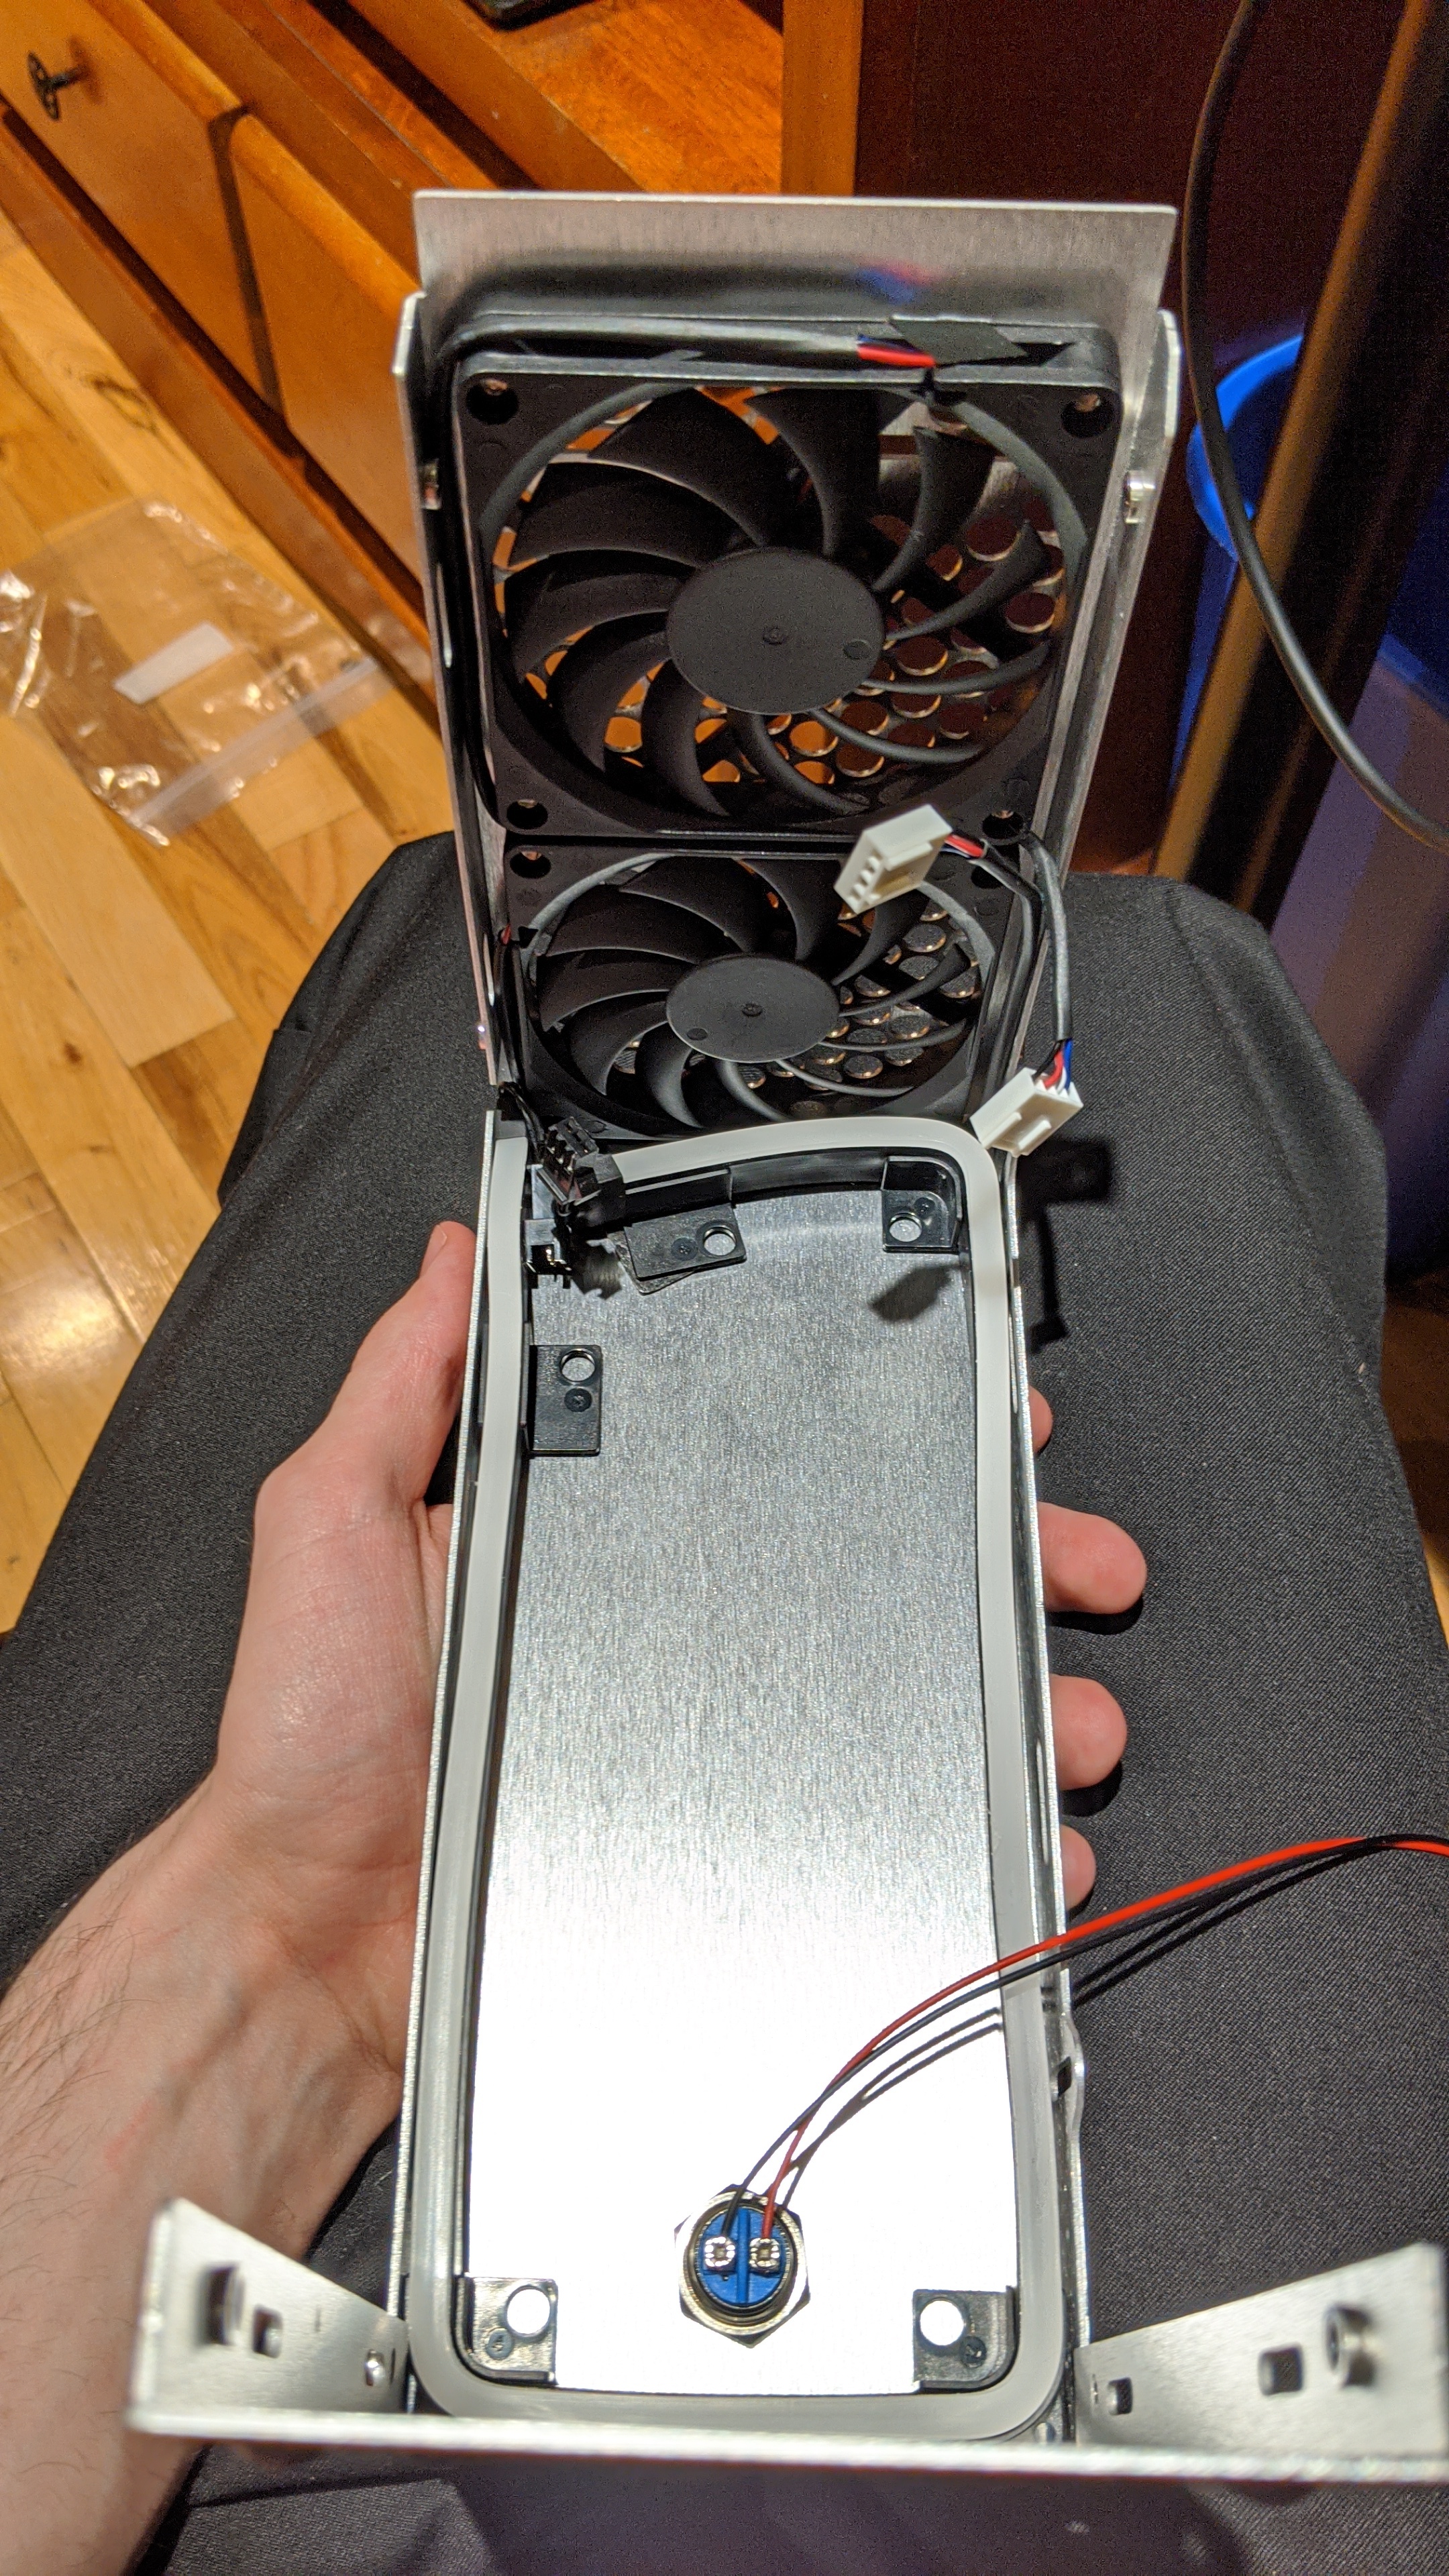
I think I built and unbuilt the PC 3 times before being happy with how everything is laid out. Also I don’t know why I wanted only the phanteks neon because they had a diffuser, but it complicated my life just a little. But everything fits. When the PSU will arrive, I will just mod the cable right away because oh god some spots will be difficult. Just the CPU cable, because of the positioning at the uppermost left corner, it is really tight to bring a cable to. Now powering it with the SFX PSU outside the case (because I think my Flex PSU is stuck at the customs -_-). The Noctua fan is on the way to replace the blue Silverstone one.
Right now the top fans are removed, but I think I will put them back into place as now I know more how to use ASUS AI Suite 3 and was able to stop the annoying ramp up and down of the CPU fan. Will probably use double tap to dampen vibration. Surprisingly, even if I undervolted my Ryzen 3600 to 1.2V, the software applied a slight overclock to 3.8Ghz. Tend to over around 40-42C.
So I more seriously focused on the issue of noise and heat in the system. Having tinkered with the 10mm fan, in part by lubing them and using them at low rpm, I decided to just remove them because their whiny sound was still annoying.
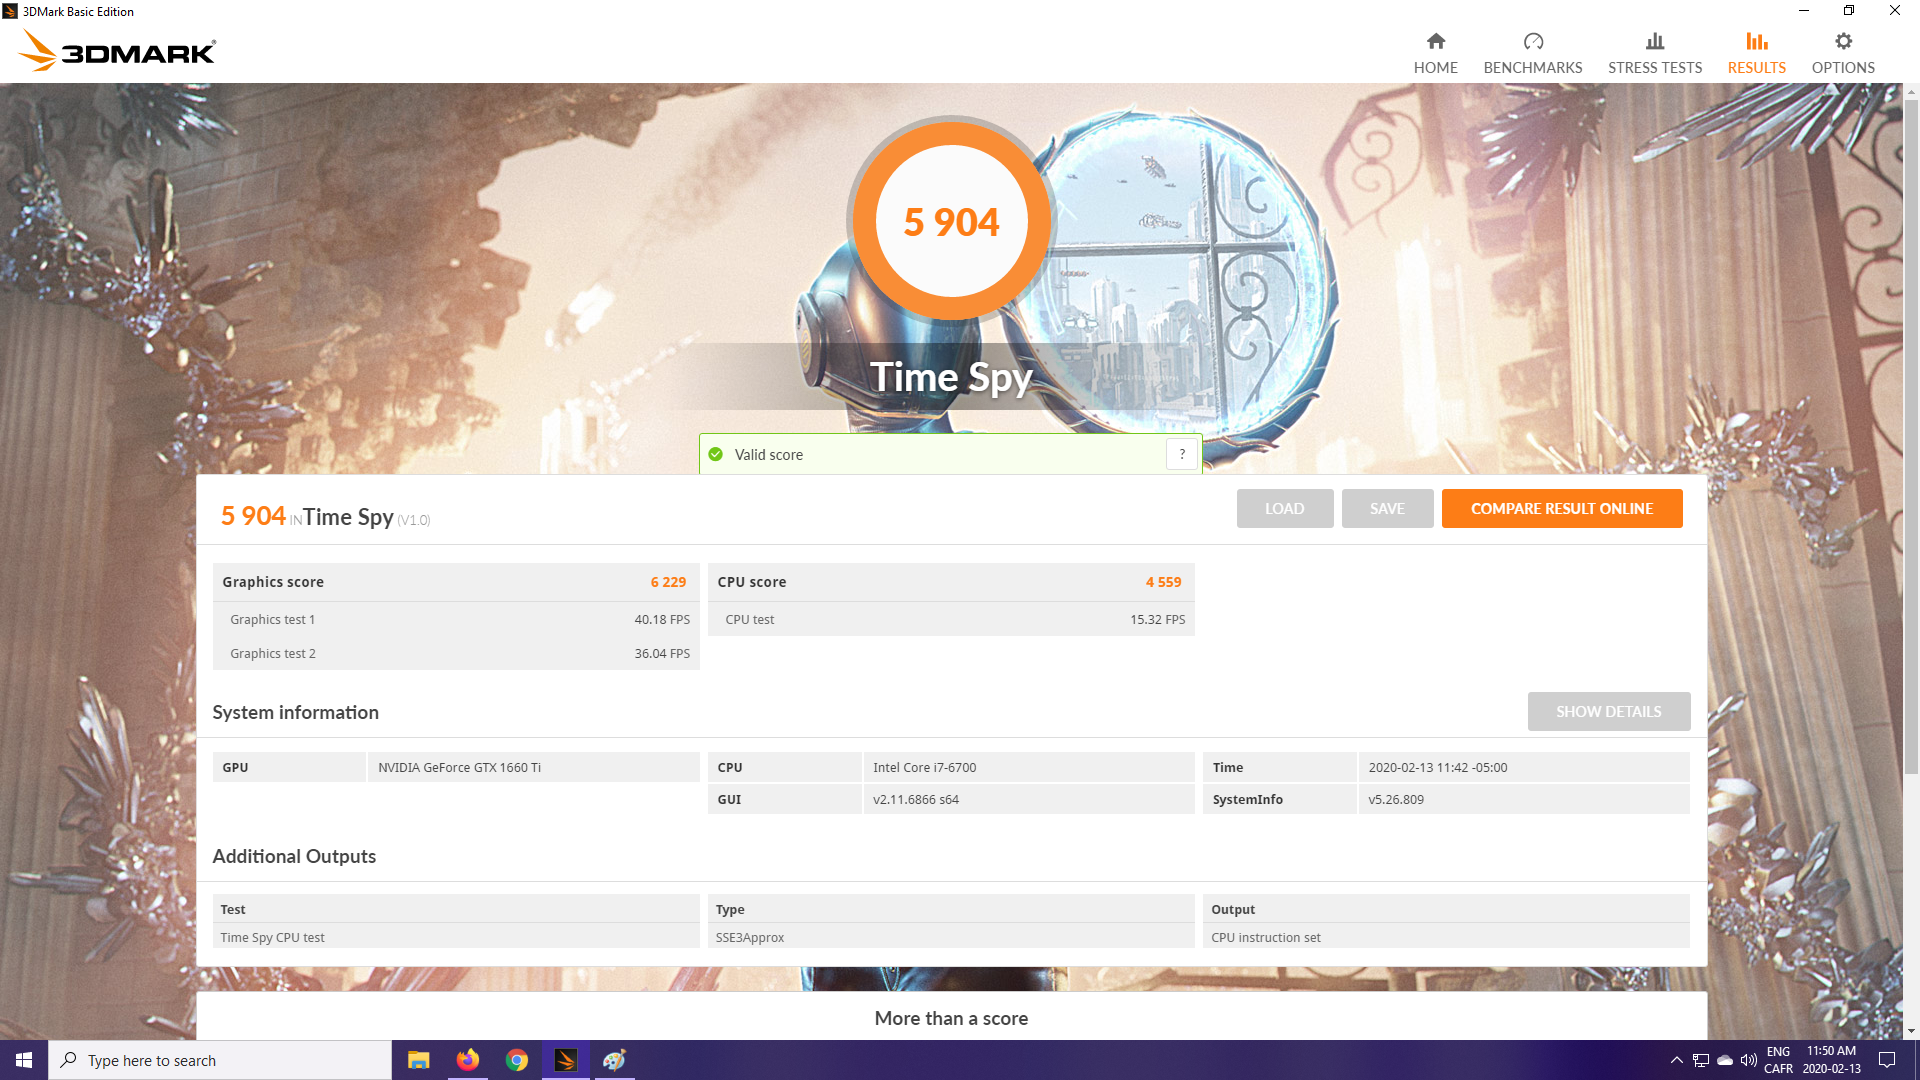
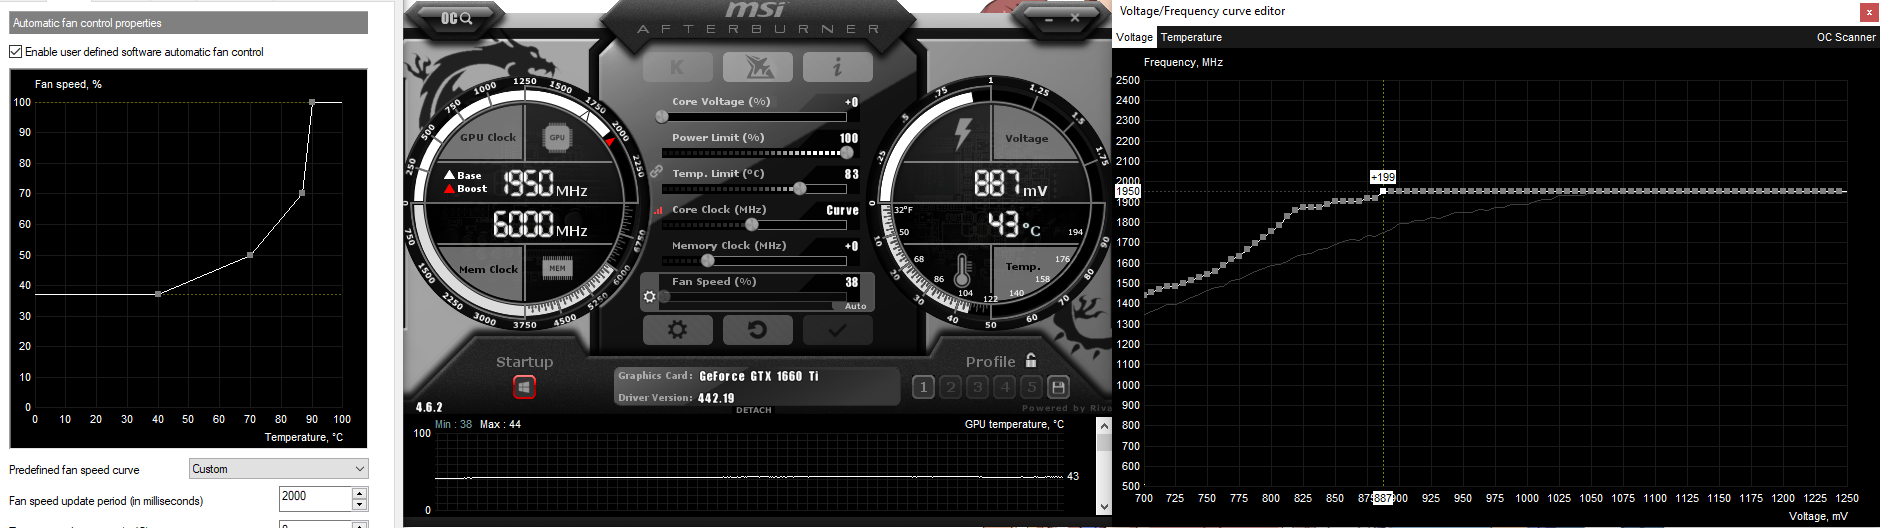
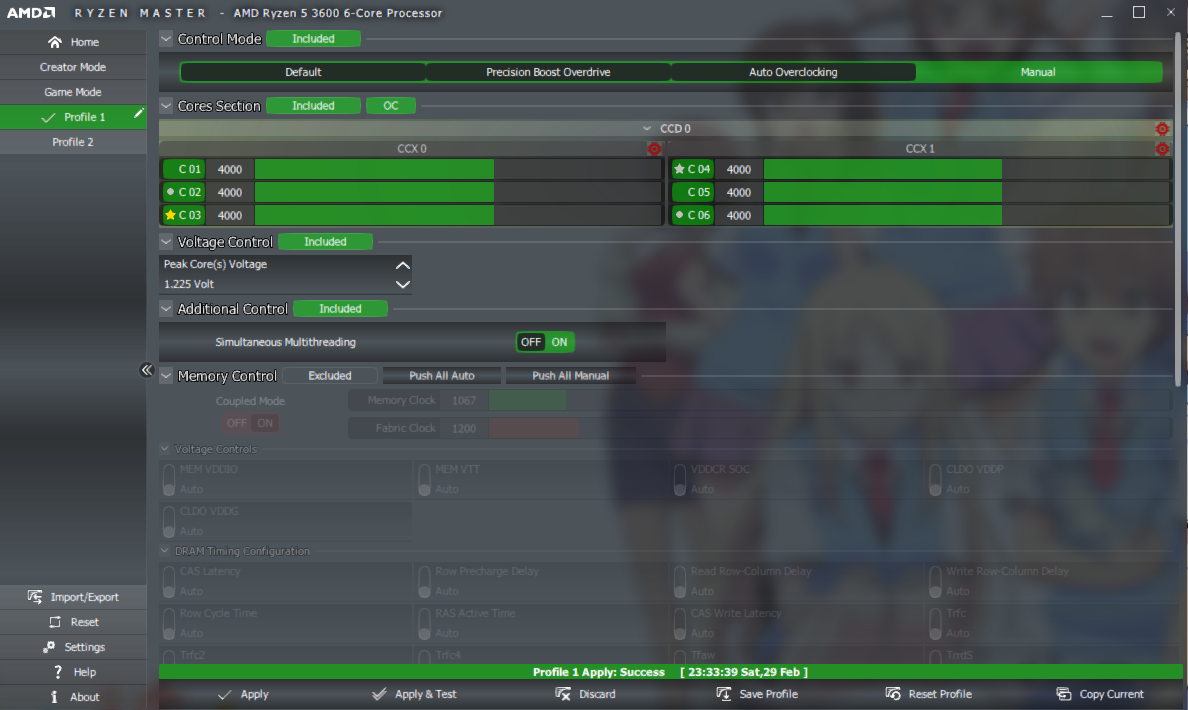
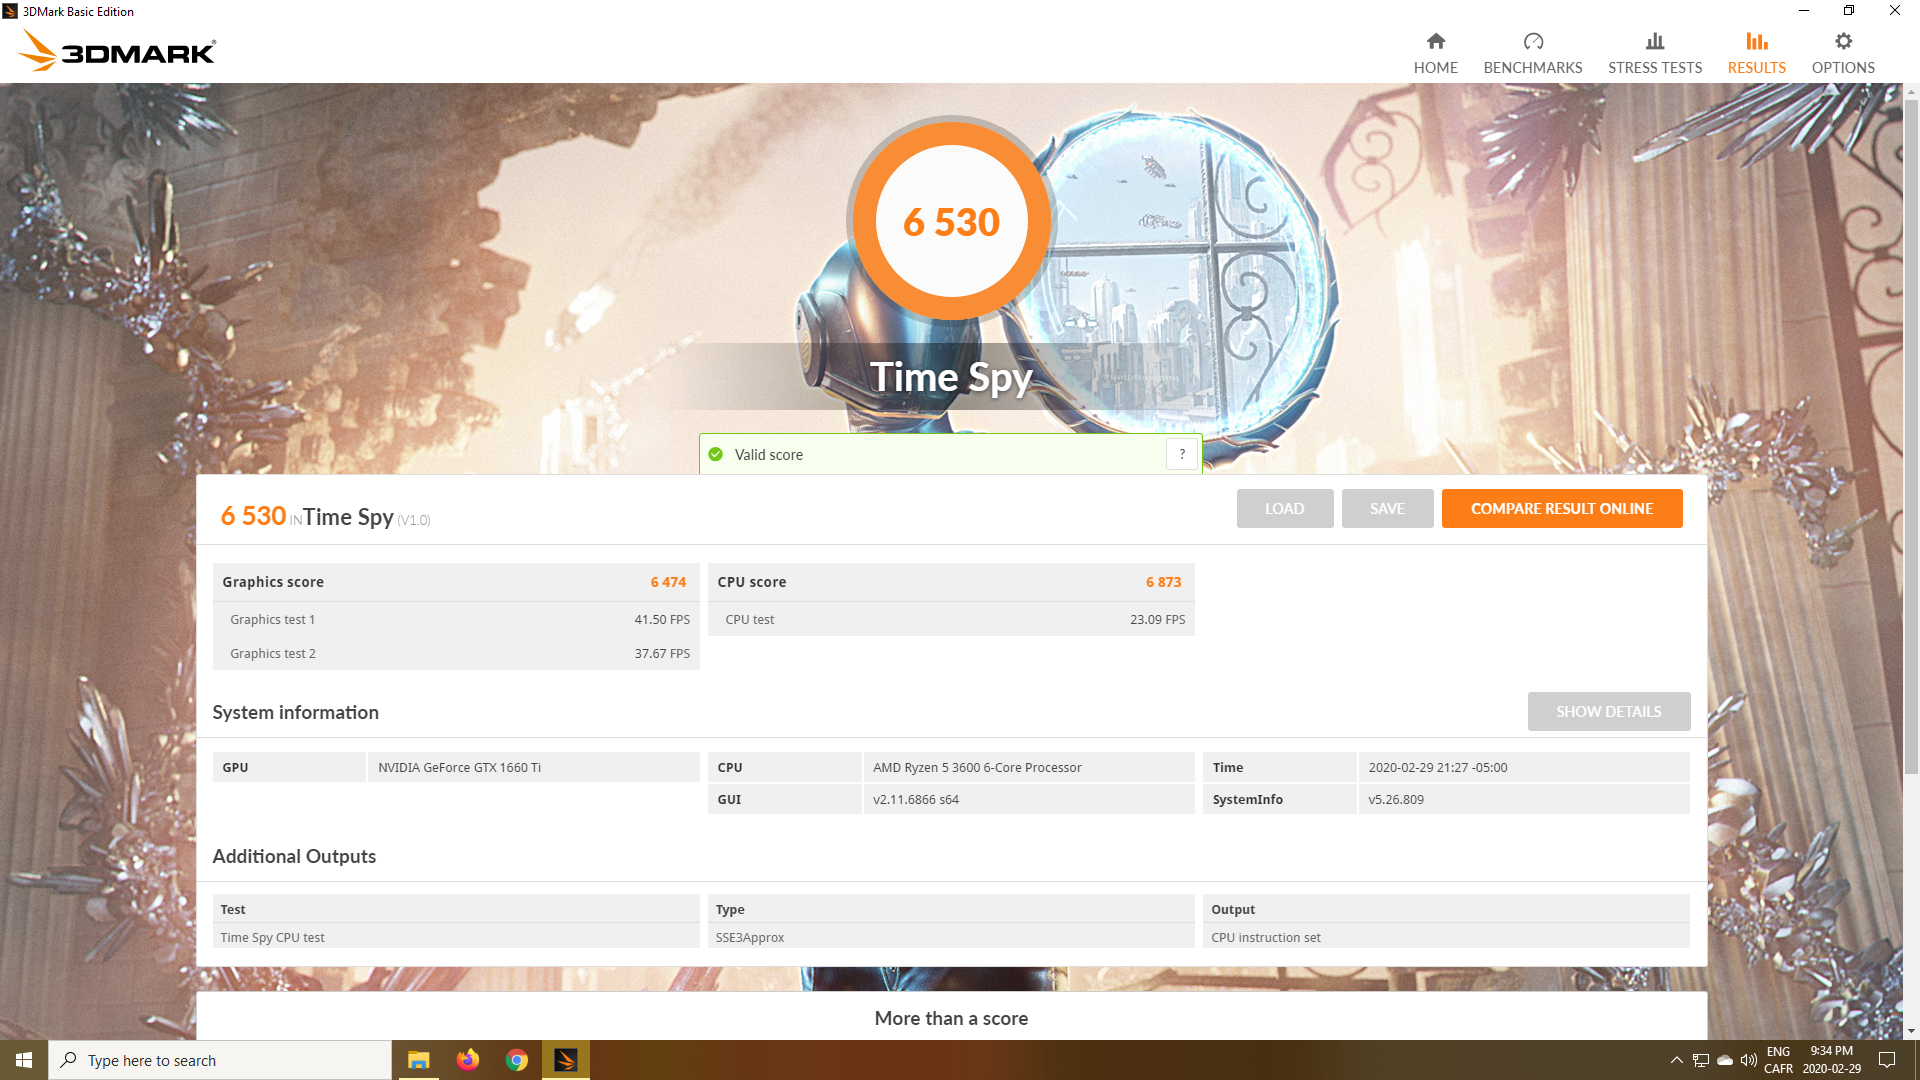
I undervolted my GPU so that the really slightly overclocked max frequency of 1950 Mhz is reached at 887 mV. Temps are 44C at idle with a quiet custom fan curve. I overclocked slightly my Ryzen 3600 to 4Ghz while undervolting it at 1.225 V. Temps hover at 40C at idle with a fan curve similar to the one of the GPU. I could have worked more on those, but I don’t seek to squeeze all the performance. The PC is now quiet, and not really noisy under load, while giving good results, so I’m happy. I think max temps I’ve seen on both were around like 66C.
I thought sleeving the cable would be easy, it was not.
I replaced the fan by the noctua 40mm, only to realized after the whole day after I assembled everything that it was not working because the polarity of the fan are inverted in the case of the PSU. Had to unbuild everything to switch the polarity. But it didn’t really seemed to spin by itself despite being of lower amperage than the stock fan. So I reput the stock fan, only now to realize the fan ramps up because now I have a jet engine next to me.
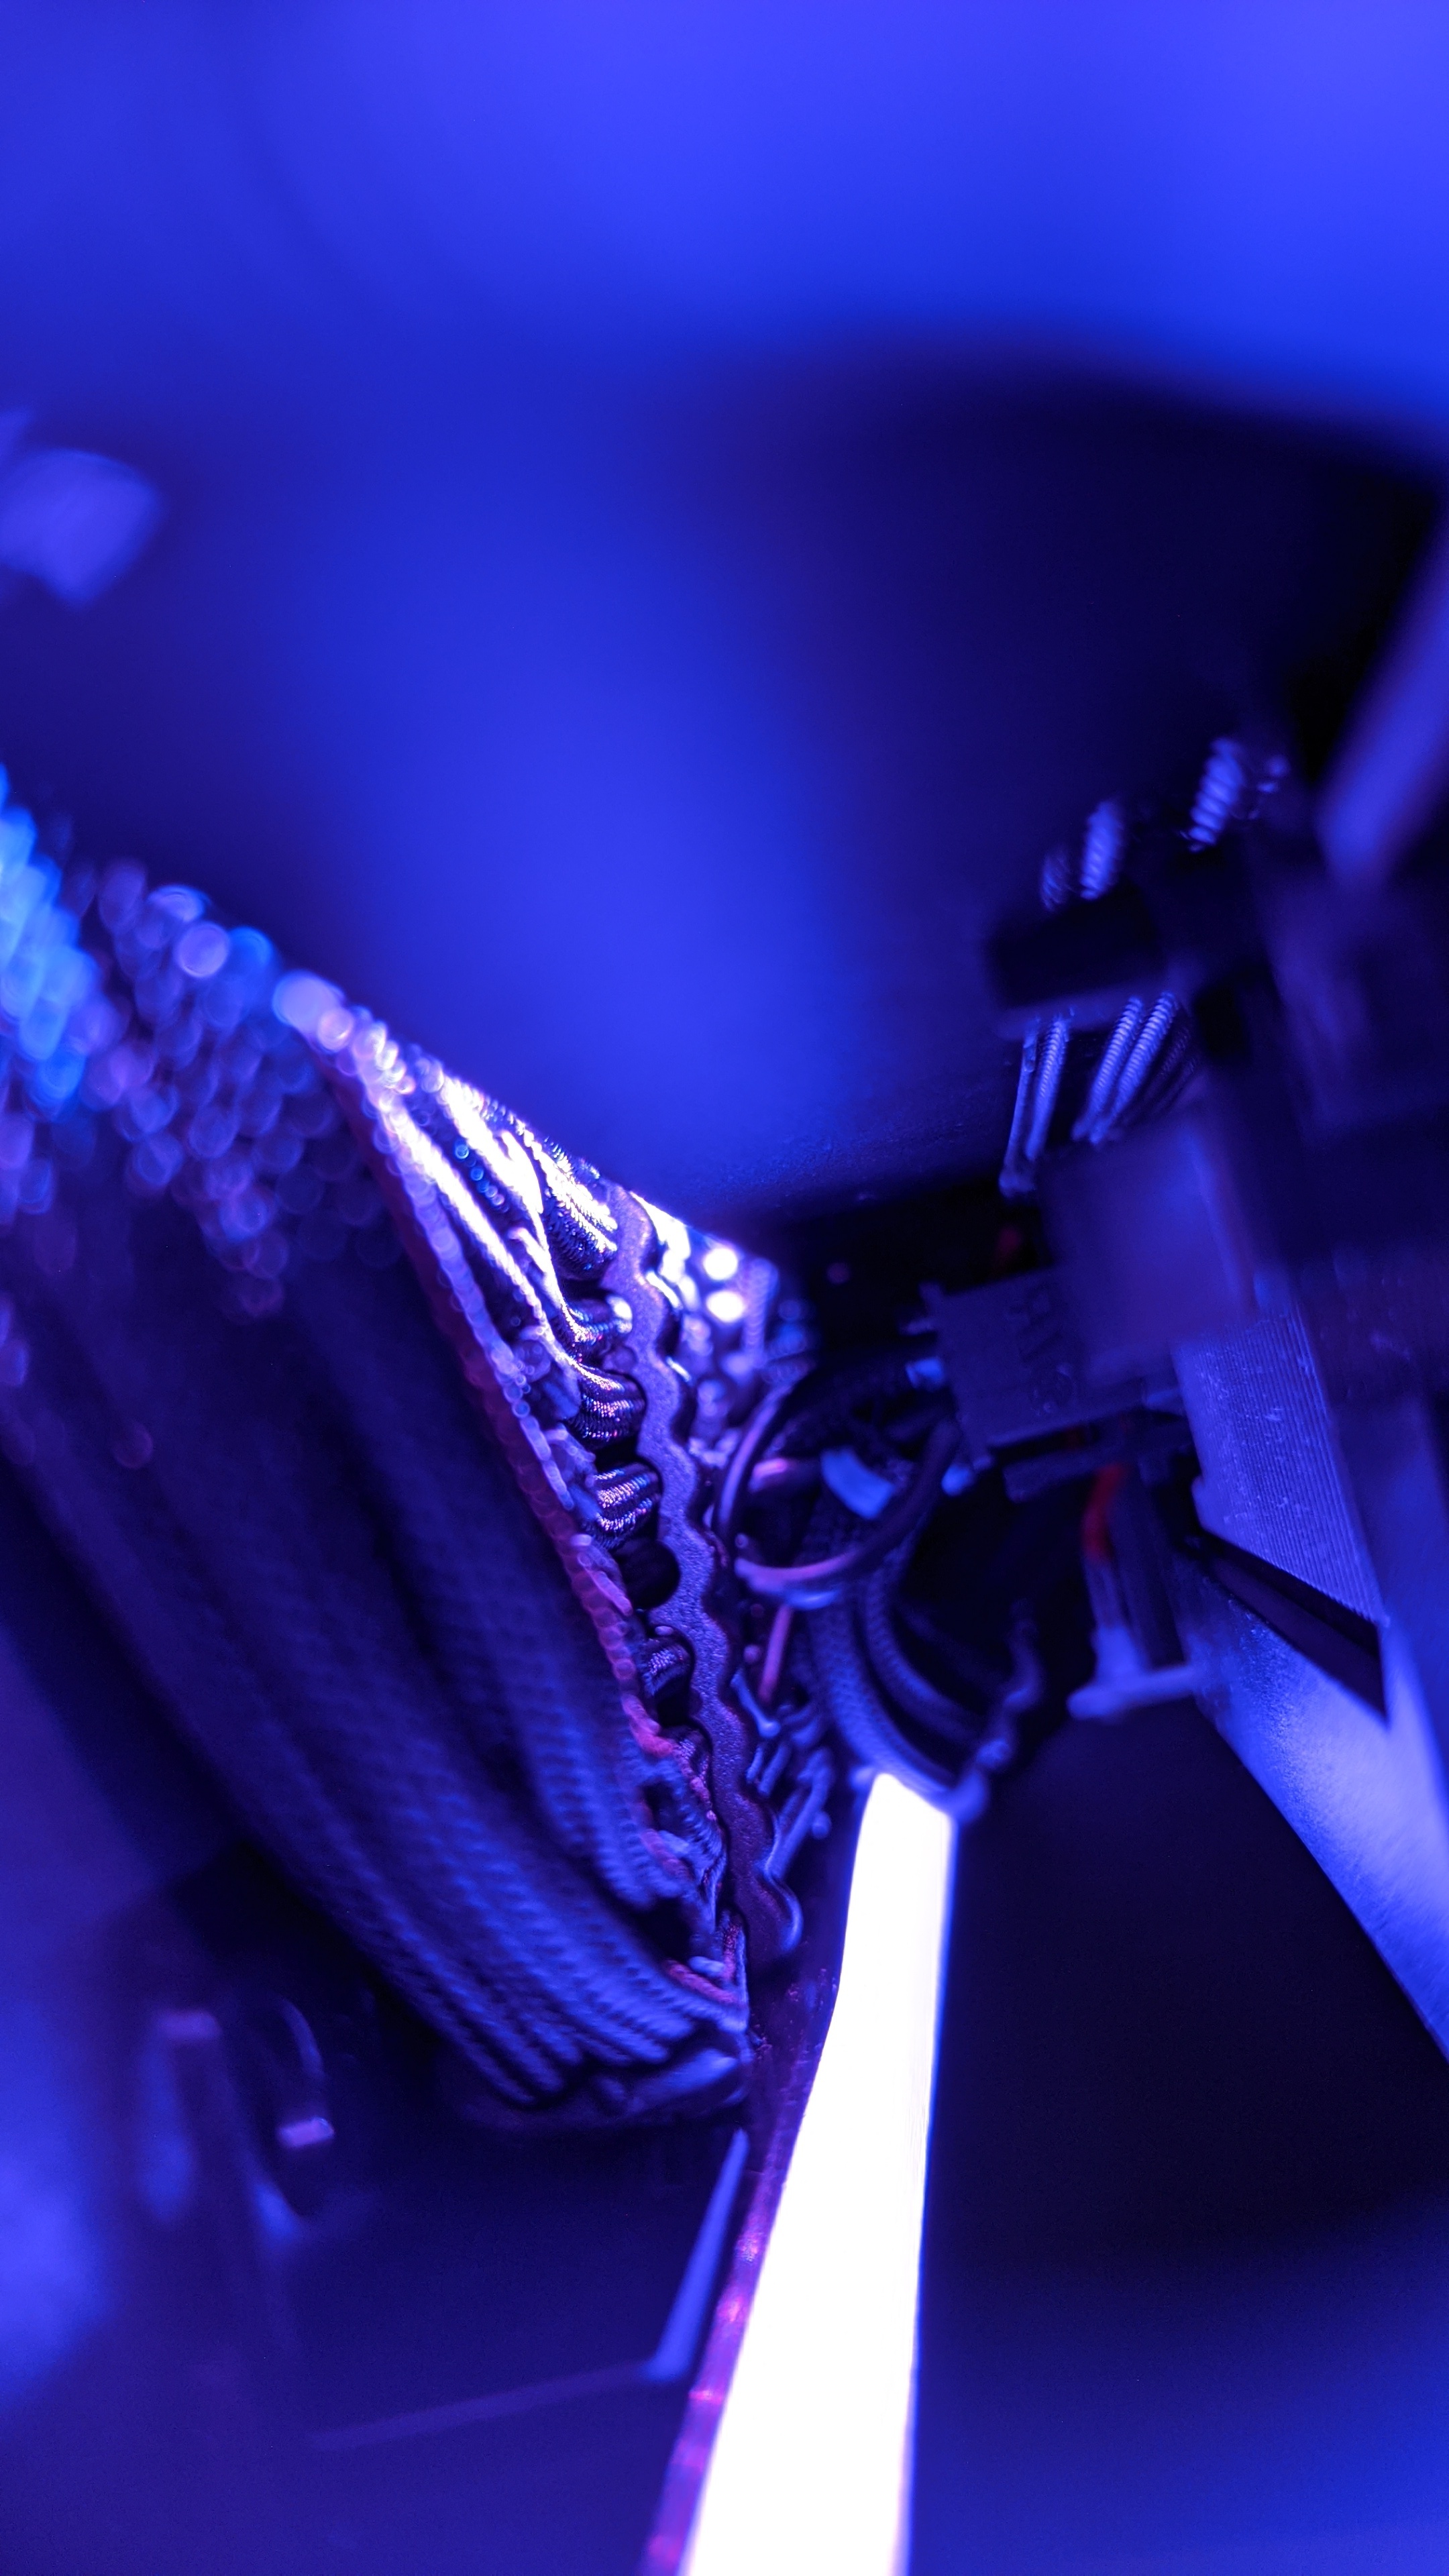
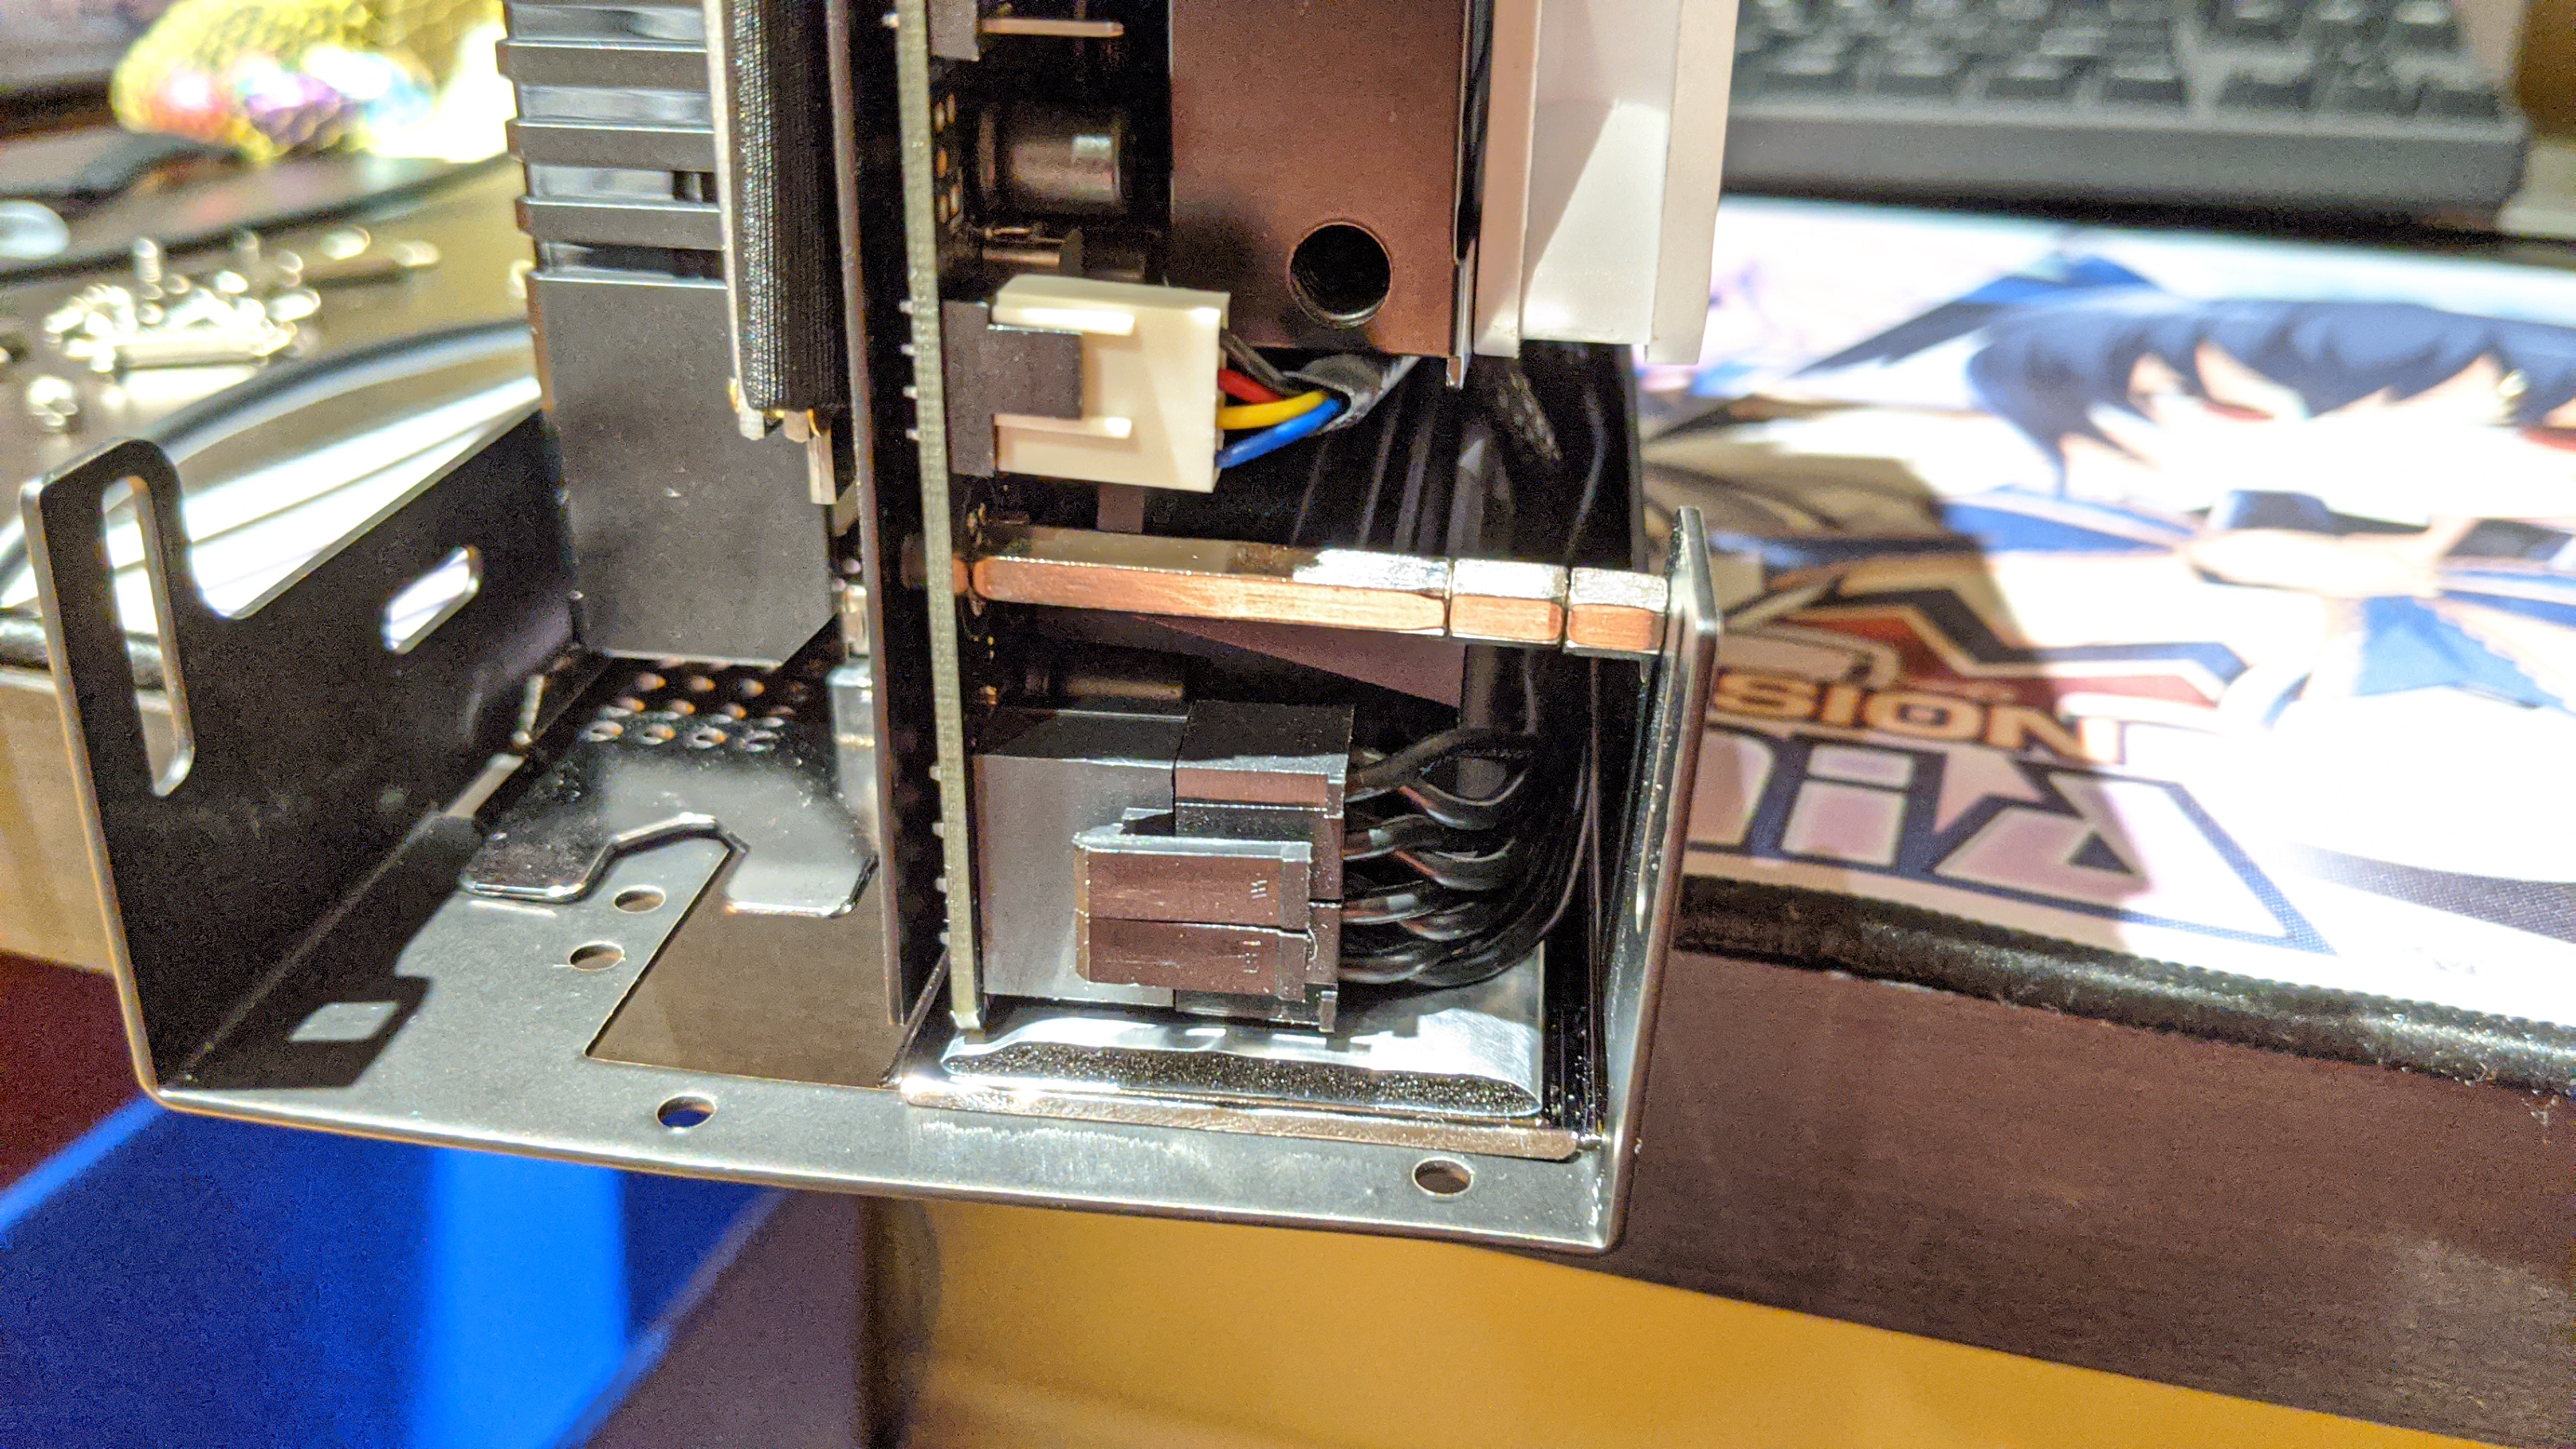
The stock “sleeving” on the cables is the worst kind. They put glue with the heatshrink! Was so much of a bitch to remove. And the crimper I bought is bad because it always twist the rear part of the crimp at the end, so I need to rotate back into position. I cheapen on that part so ya will buy a better crimper. And I realize I didn’t had enough heat shrink on hand. So had the end of 4 mobo cables and of 2 gpu cables shorten, but that’s it. And I really badly sleeved two cables. And my fingers hurt.
Will remove the PSU tomorrow to continue the SFX outside in the mean time. Will do the close the loop thingy during at least 2 days to empty the capacitors and I will take everything out of the casing with a proper place to work on the PSU. But at least my 6 now 8 pins gpu cable is working ¯_(ツ)_/¯
It looks kinda cool but the PSU question is what kills most small cases for me. I still love my handbag build in the Lian Li PC-TU100, though I almost never use it.
When you have to deal with SFX is pretty easy. There is a variety to choose easily purchasable. Flex is another story.
In the meantime I made a wire schematics for the SST-FX350-G so i don’t loose track of the wires. Let it here in case someone is crazy as me to play in it.
Btw, does anybody know if I can just bring the wires of the 2 extra pins on the 8pin gpu to the empty ground hole left by the removal of SATA and molex? It is ground, so it should not cause any problem, eh?


 . It’s like if the Velka 3 had a baby with the Louqe Ghost S1. It’s gorgeous and appear to be solid built. Silver with a dark grey cover looks really good. It’s 4.58L. Also it’s fucking expensive at $235CAD
  , plus shipping and the agent so probably $300CAD or more. Ya I bought my Dan case for a lot of money also, but that much and bought directly from China is an hard sell a little bit. But it would be so perfect.