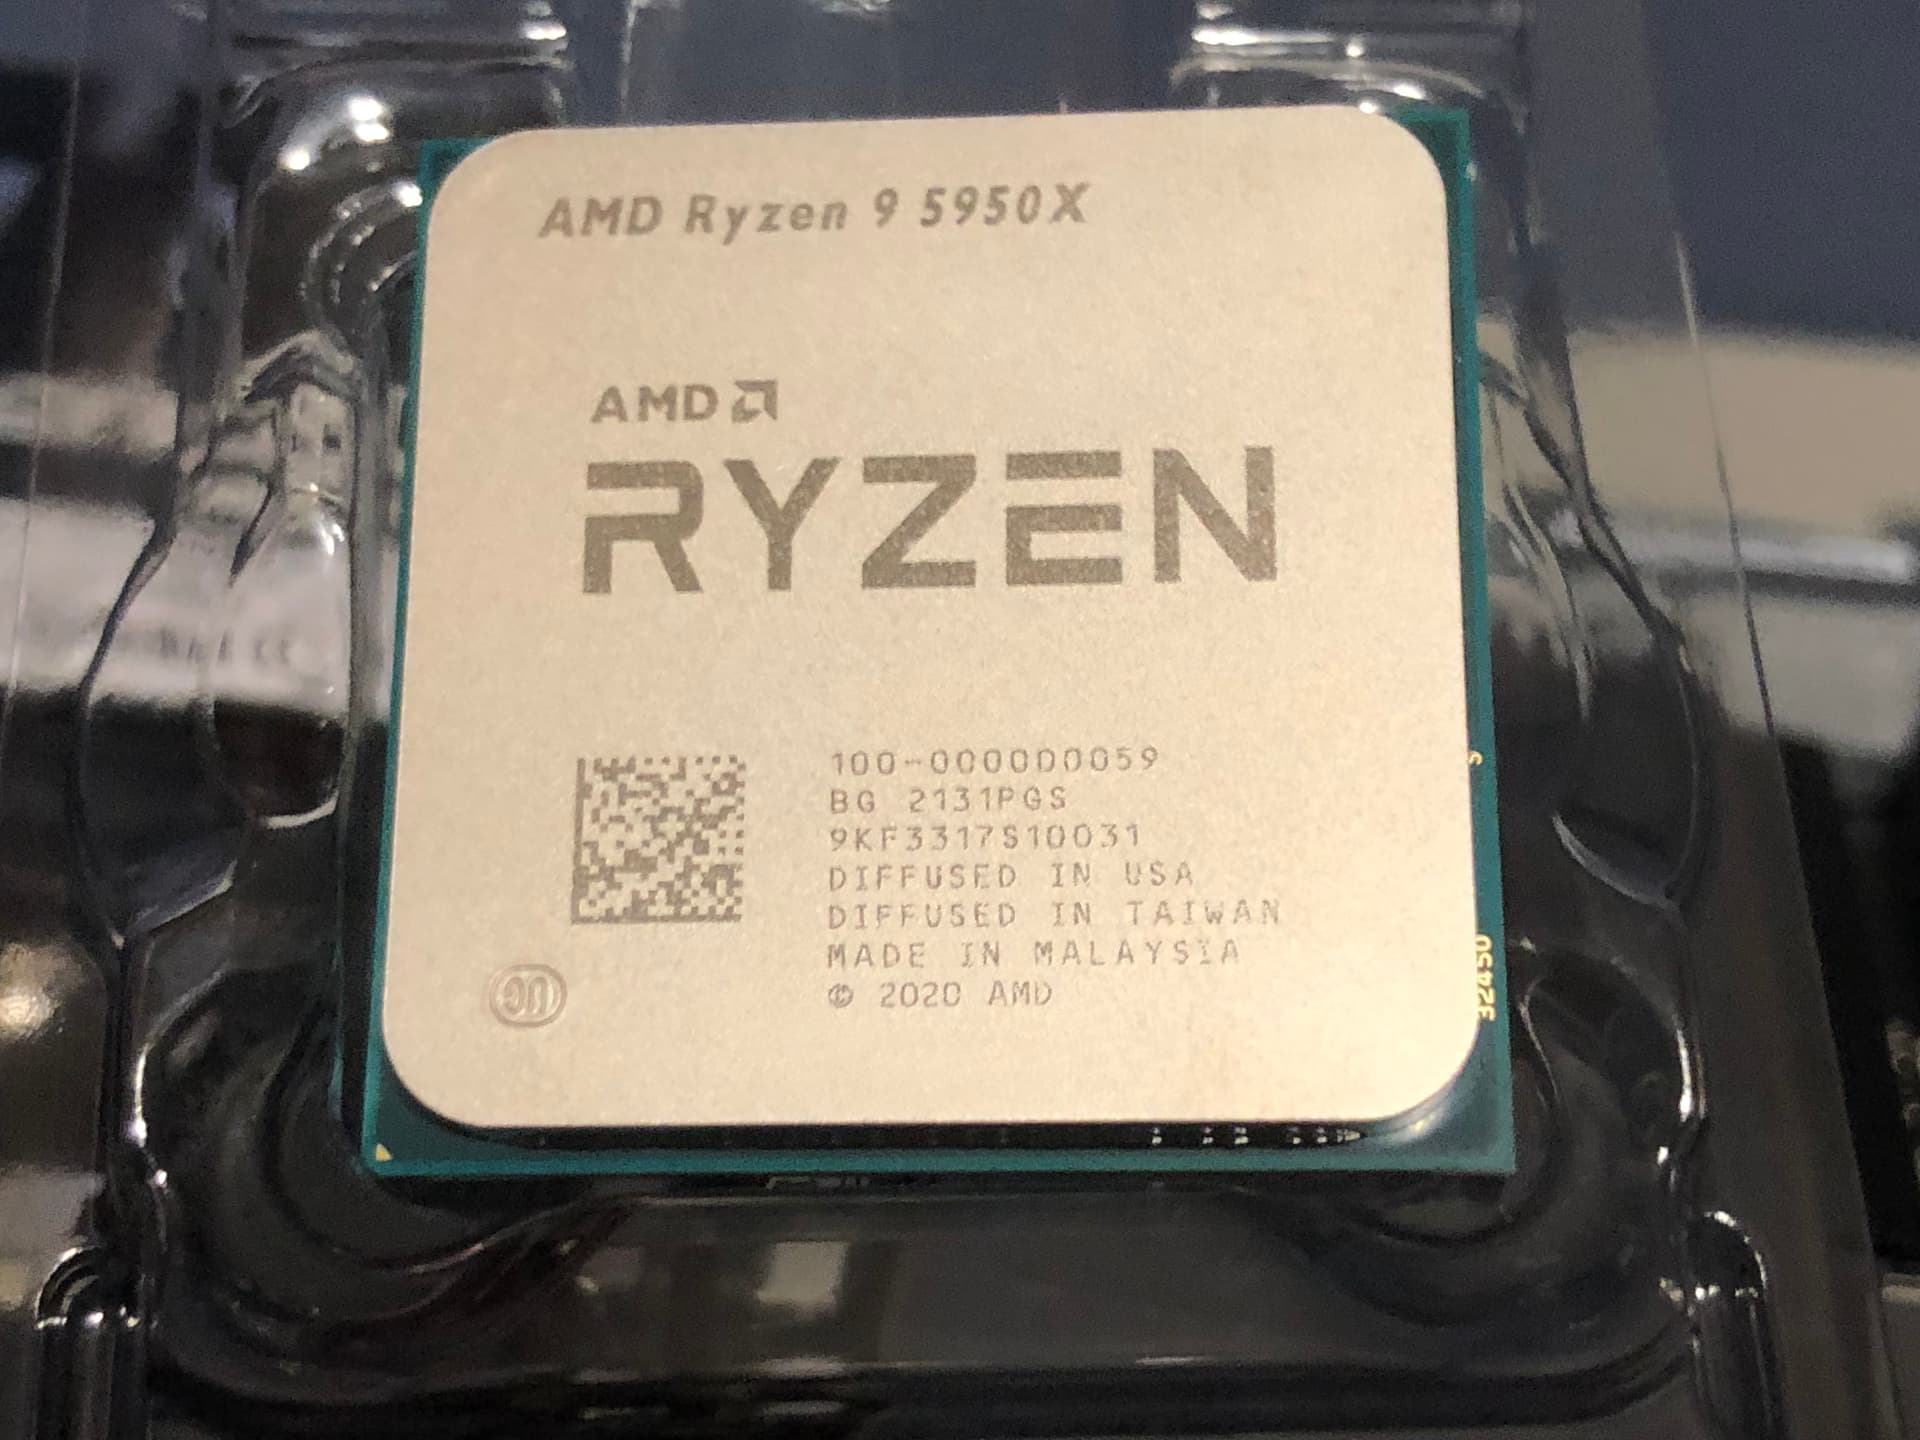
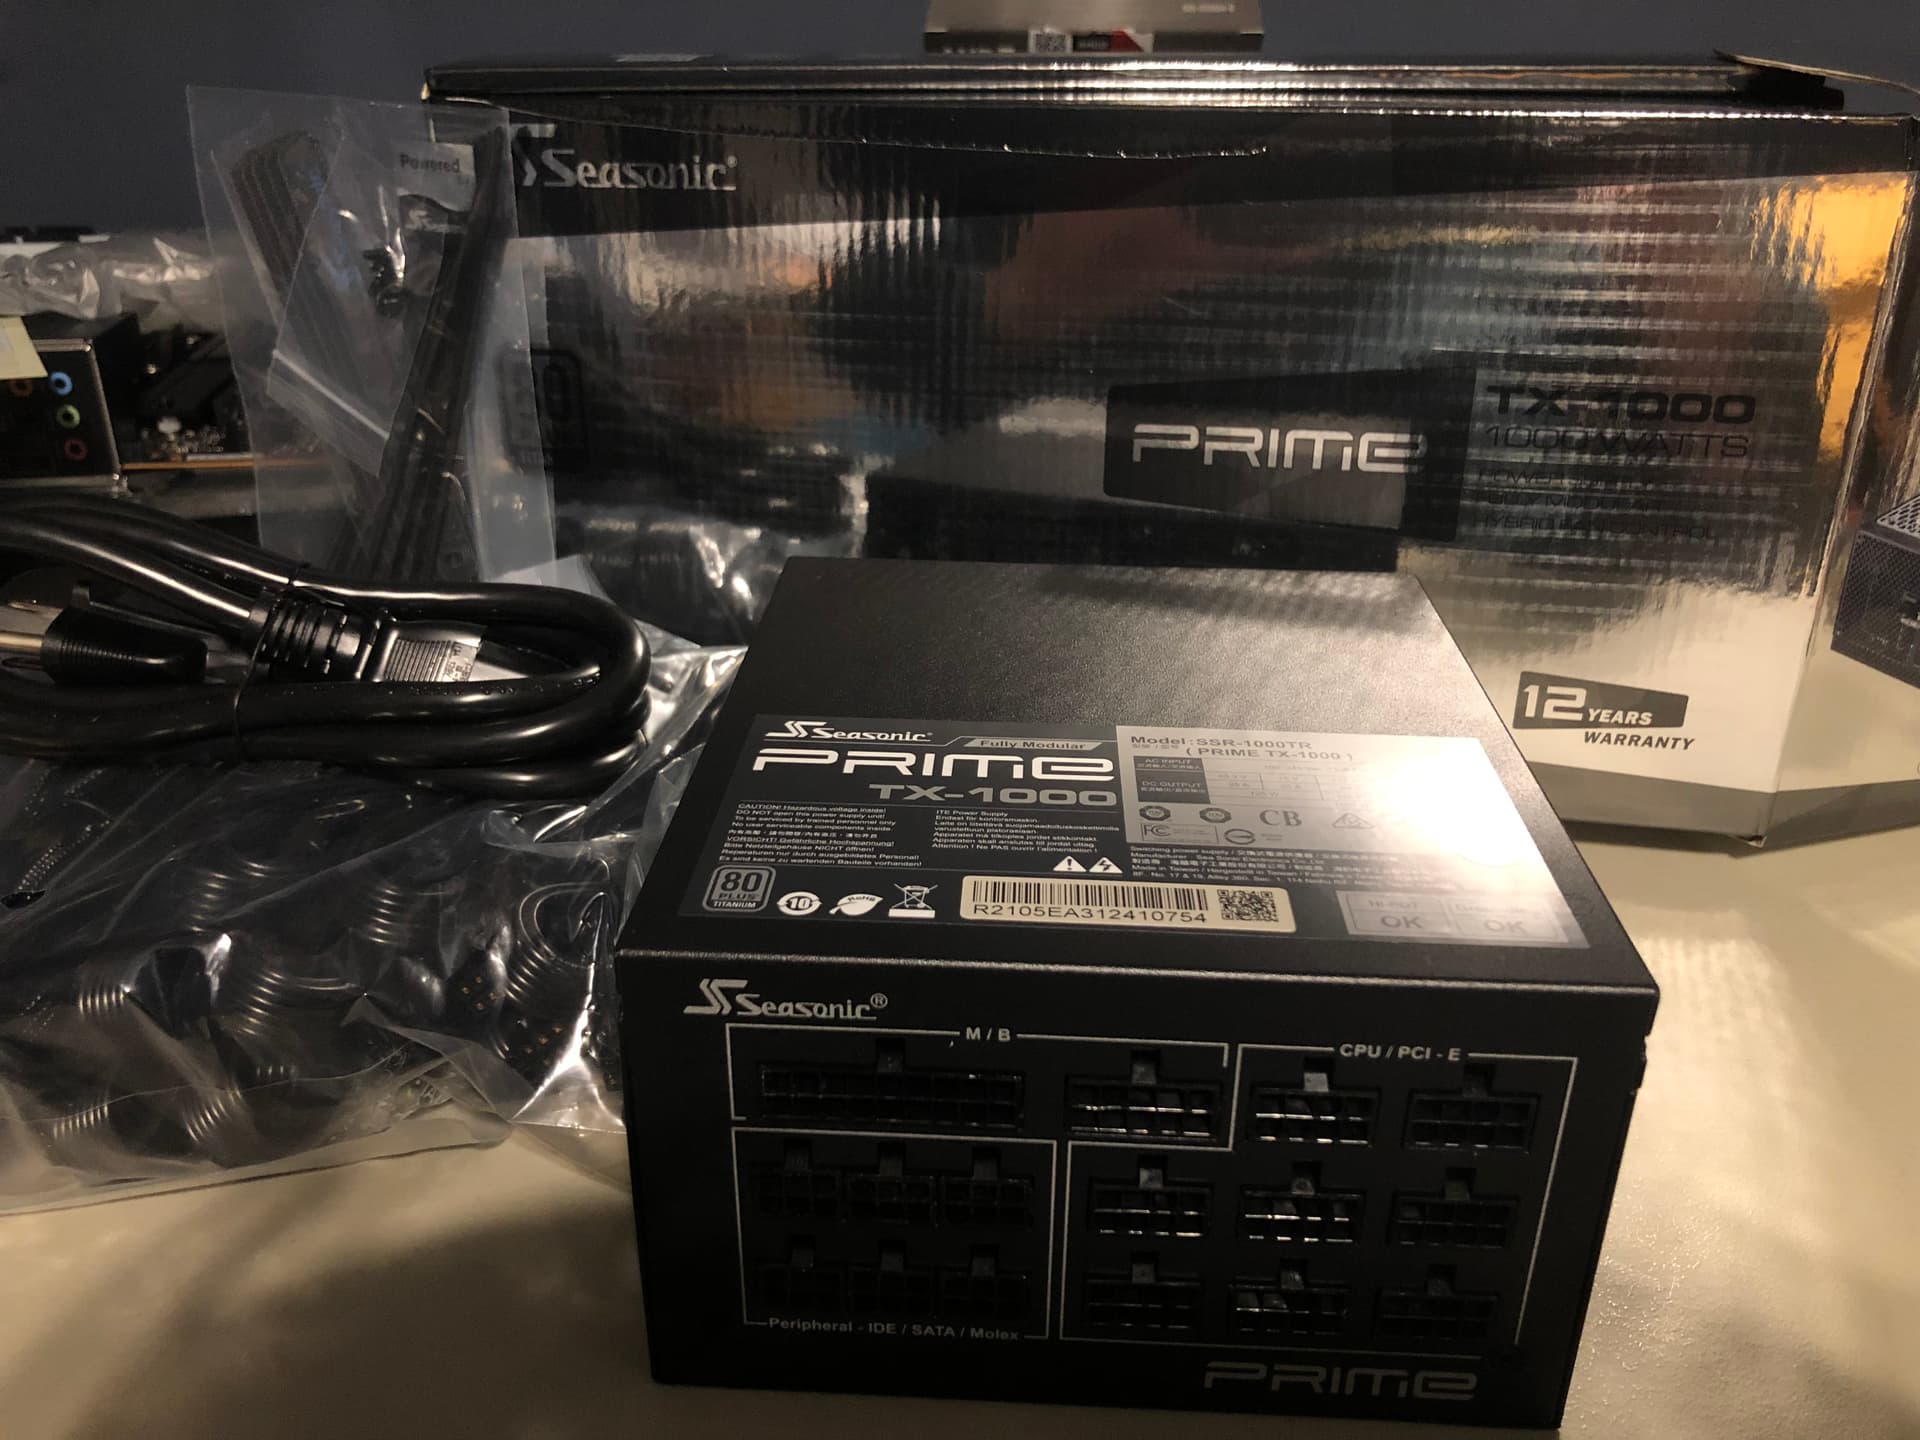
Most of the parts for this build have arrived. The Seasonic power supply and NVMe drive should arrive Friday.
Decisions to make still: local storage, case, GPU - these depend on availability and further considerations.
I plan to use an HB EVO case for testing.
I plan to use an older GPU initially.
I have plenty of spinning rust to monkey with for testing.
I will be upgrading to a new router - currently using a TP-Link Archer C9
I will have most of my new components in today. Hopefully will get to set up the testing phase of the build. Hope to post photos and some charts as I go.
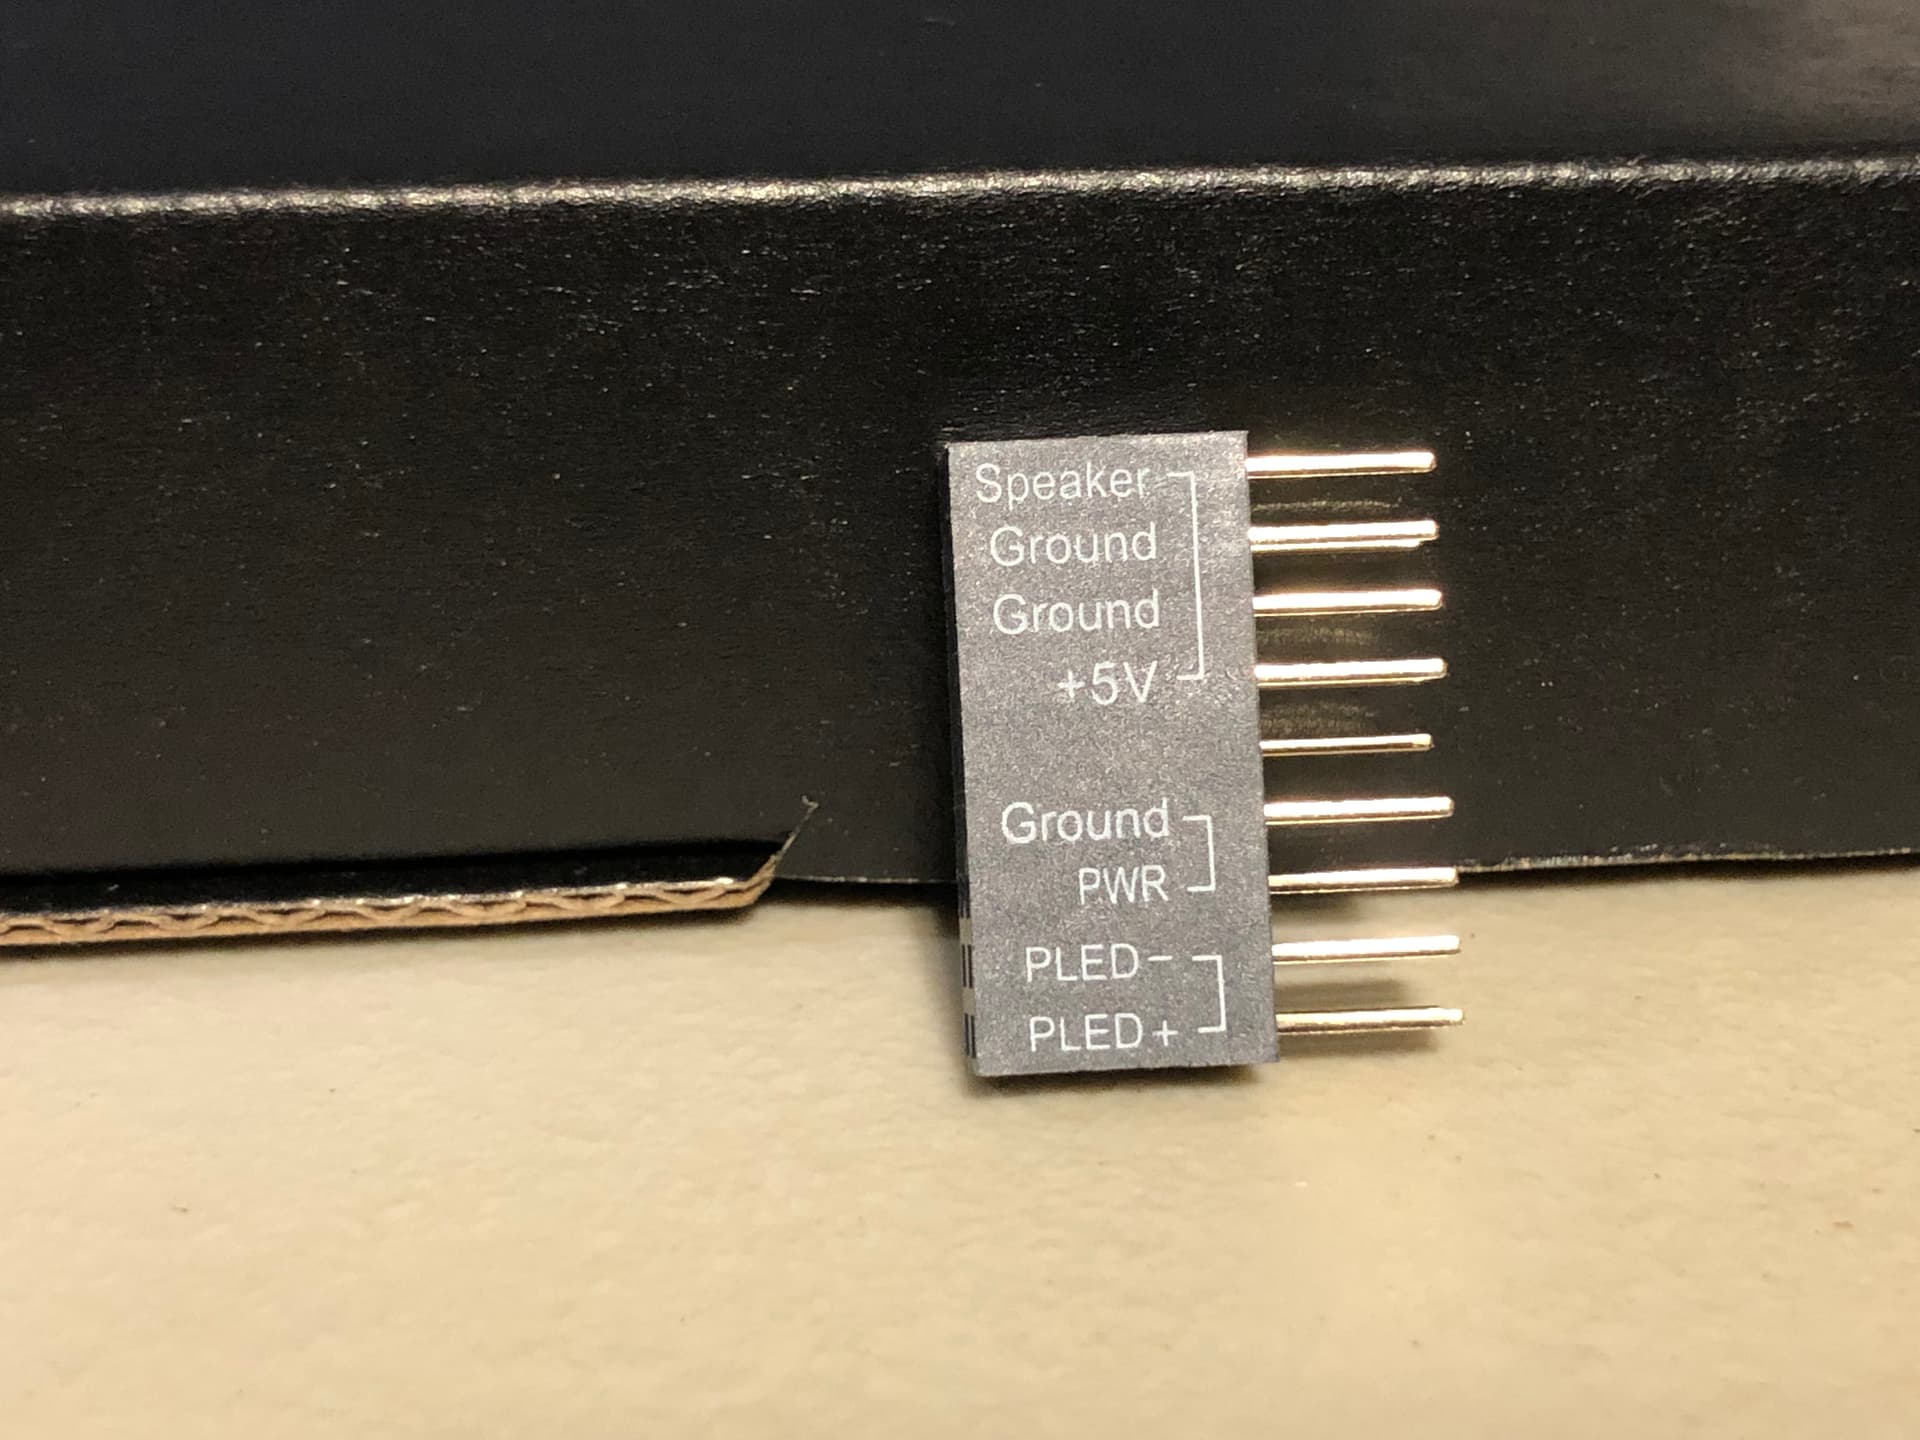
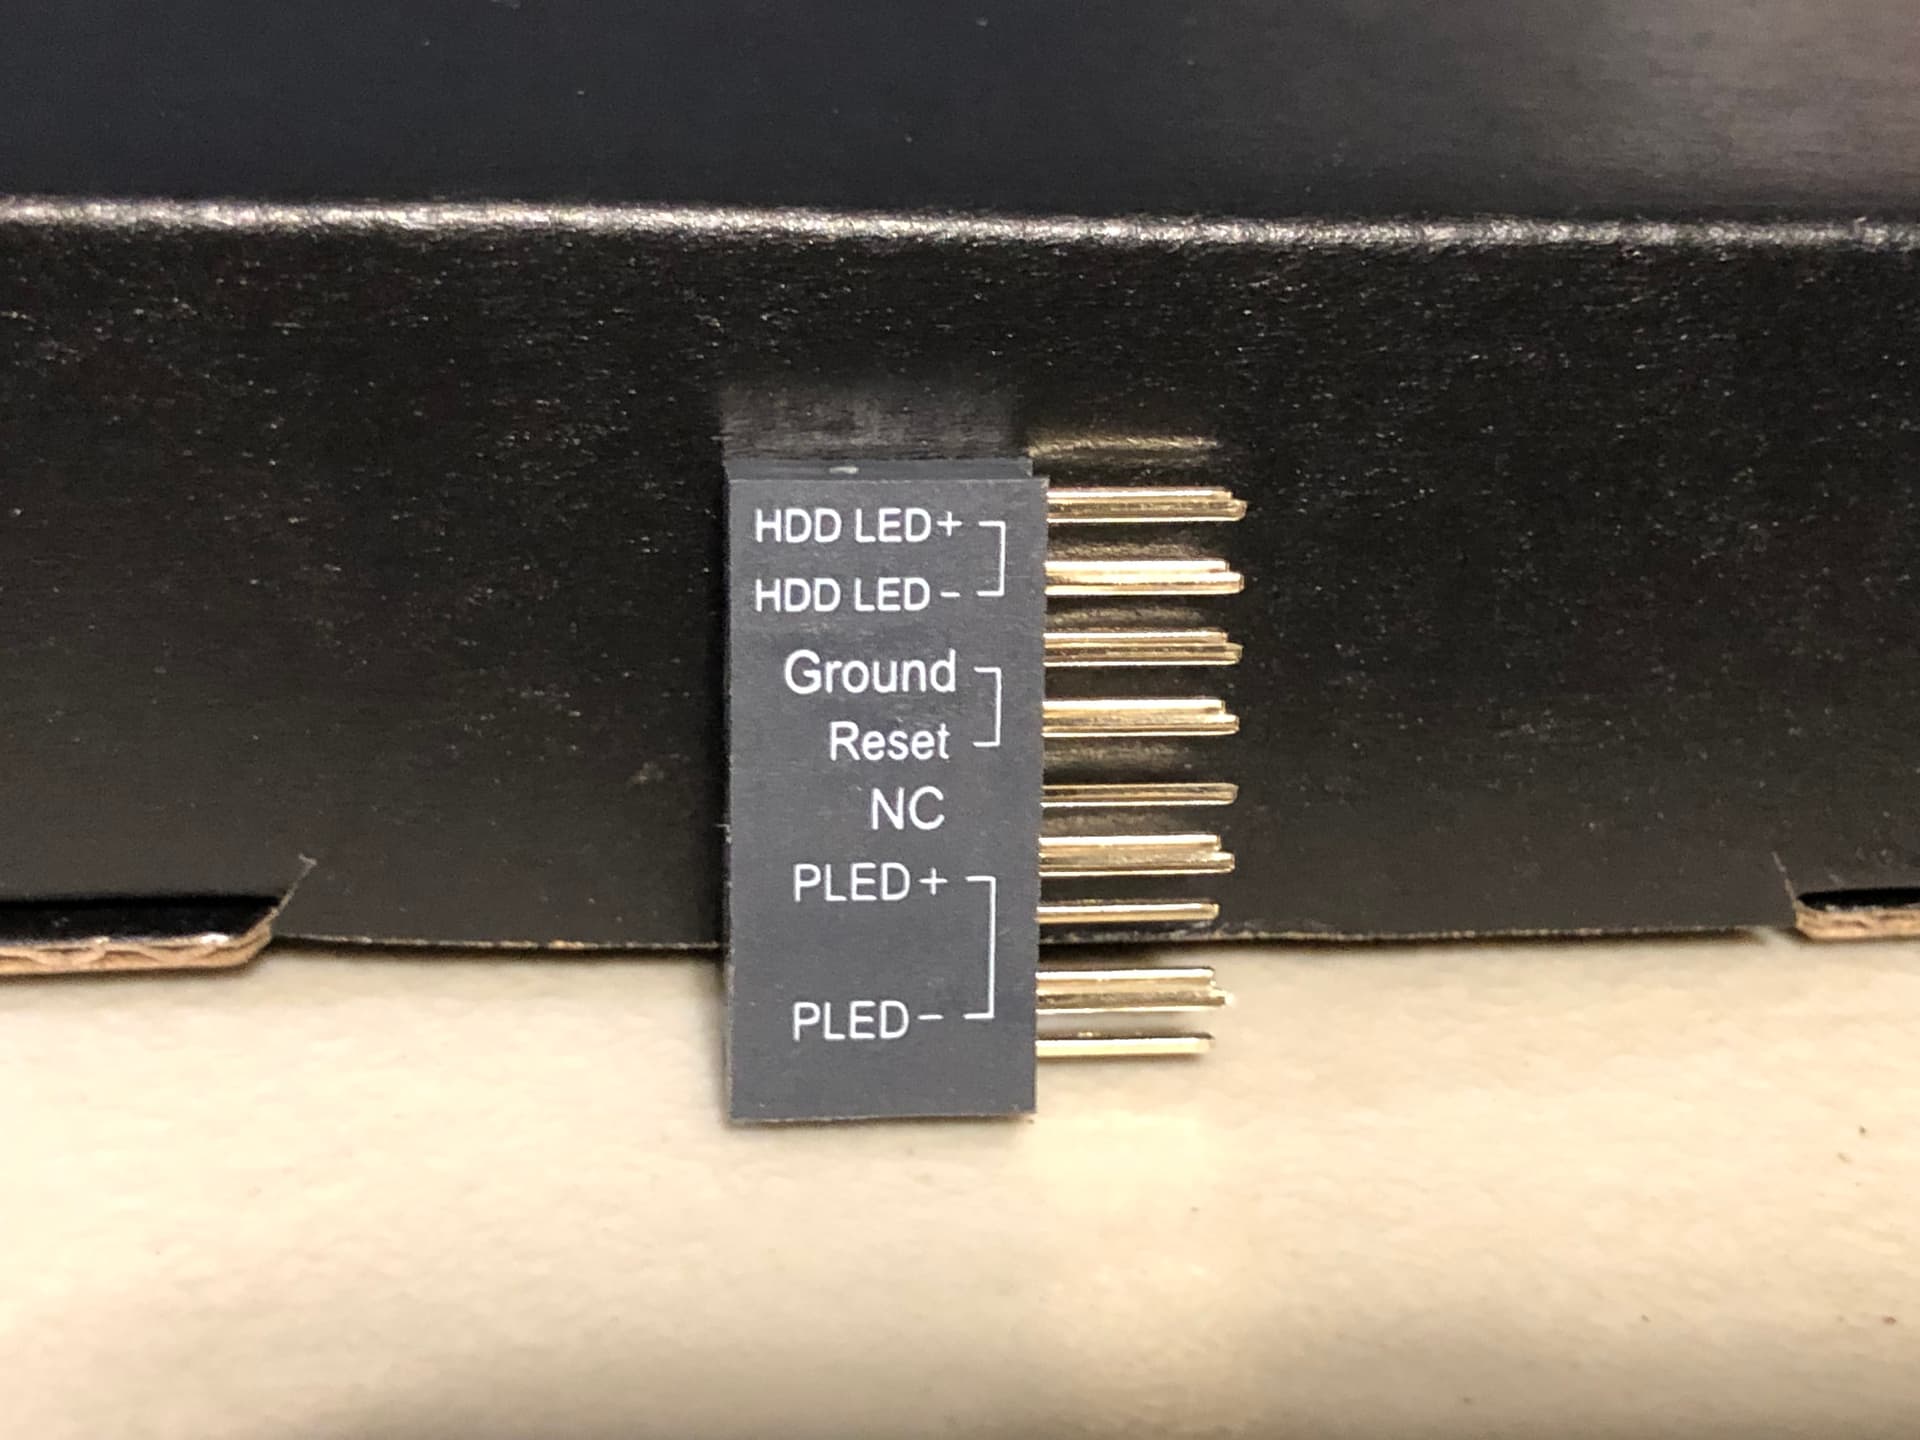
And looking forward to using this thing - ASUS calls it the Q-connector - allows you to plug all the case header wires into it, then plug it into the case header on the motherboard
Really cool build you have right there.
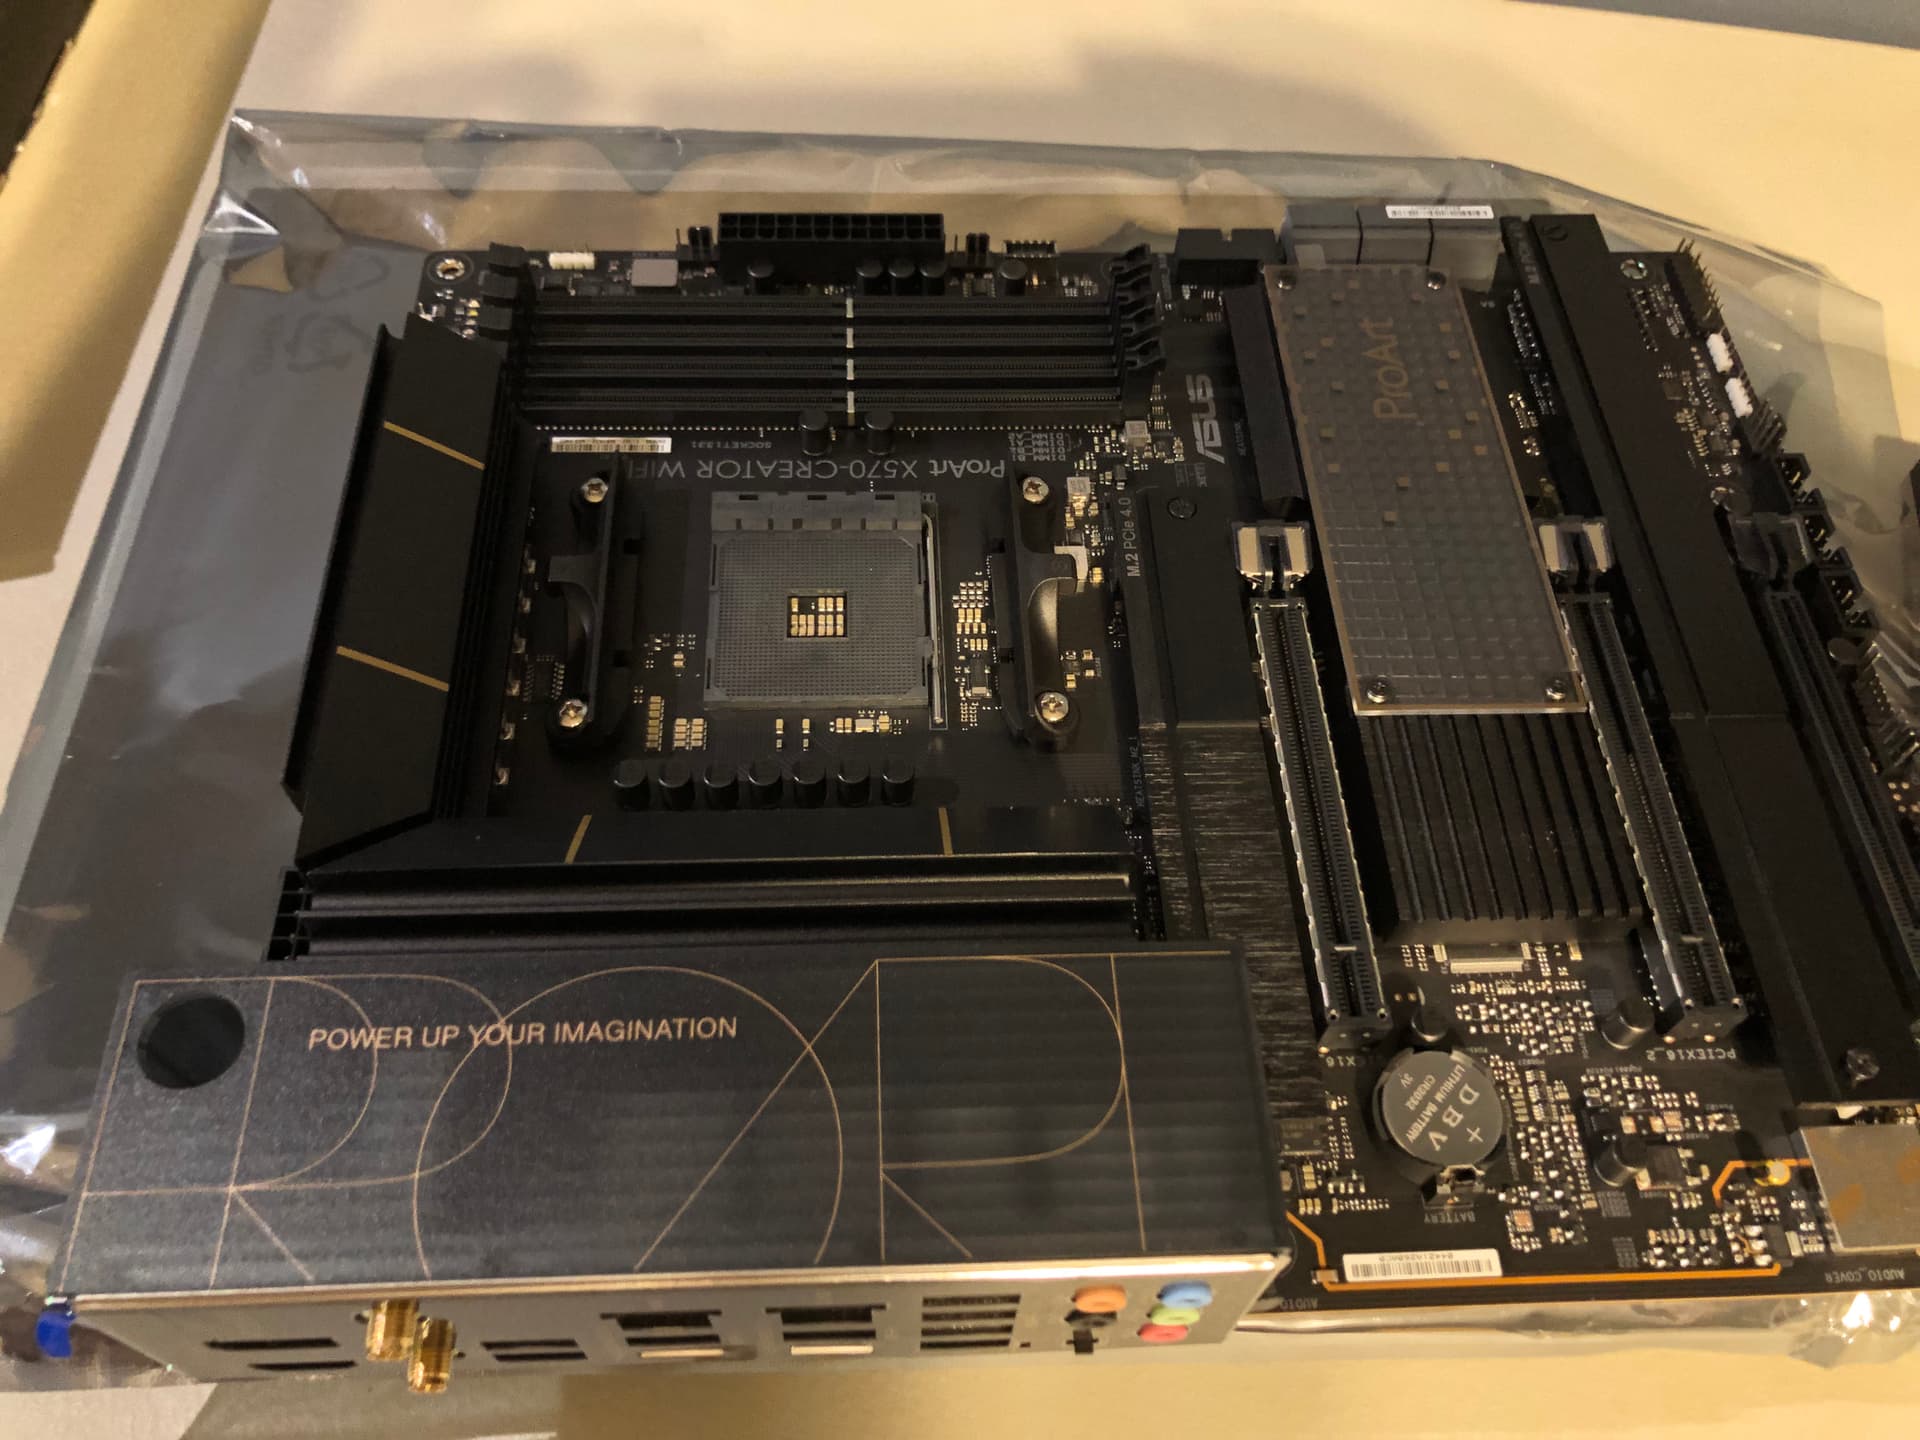
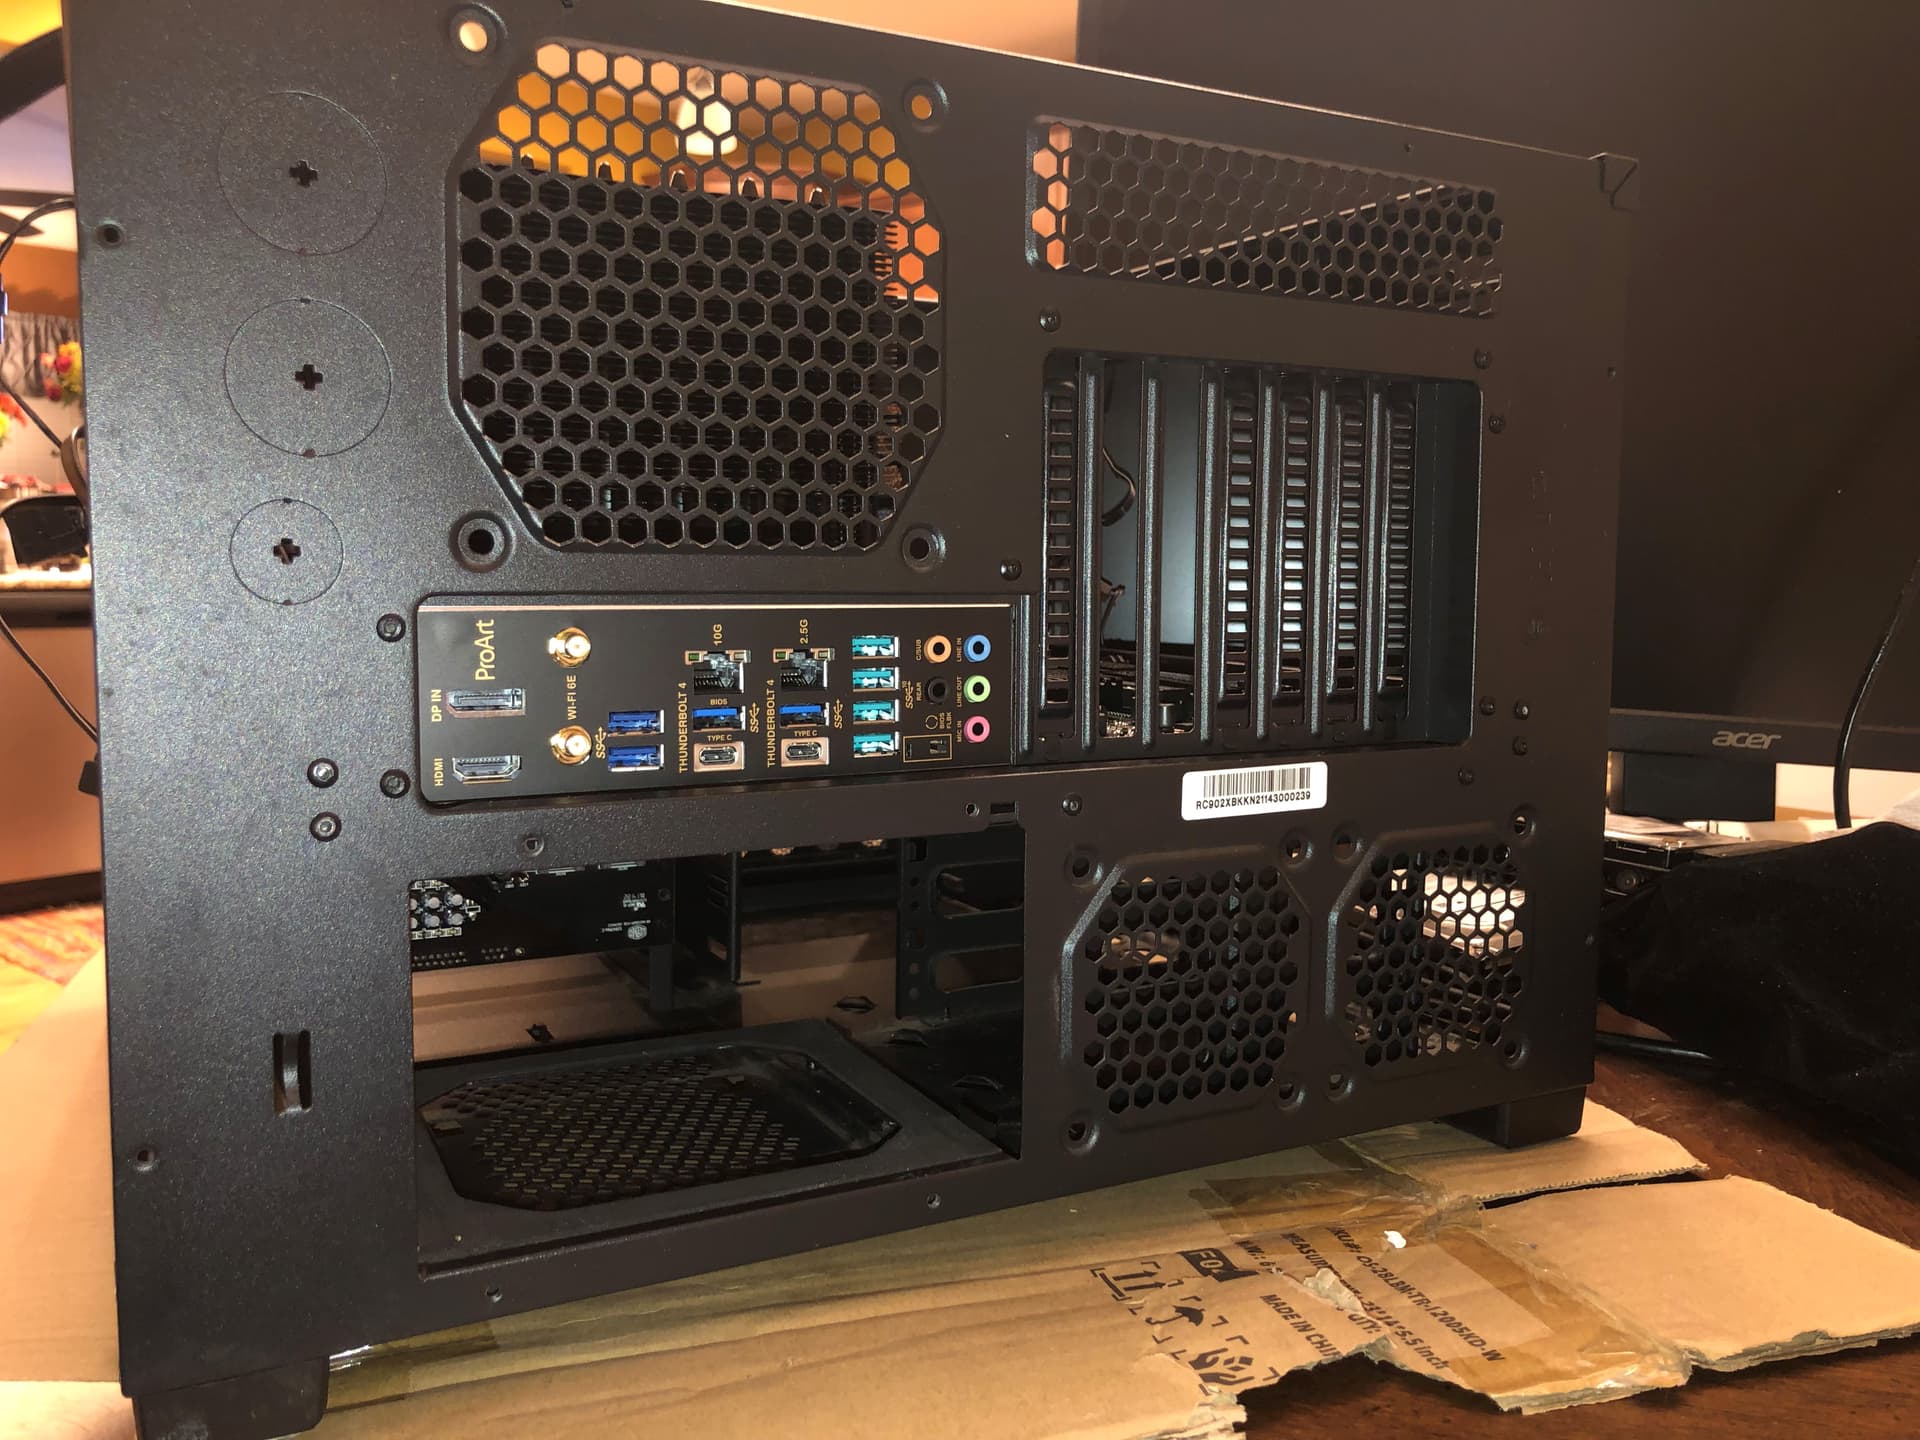
I personally really like the X570 Pro Art board it has all the right features for content creators.
I’m going to follow your topic to see how the system works out for ya.
Because that board is also on my watch list.
Yeah that is really nice Asus already has this for years really convenient.
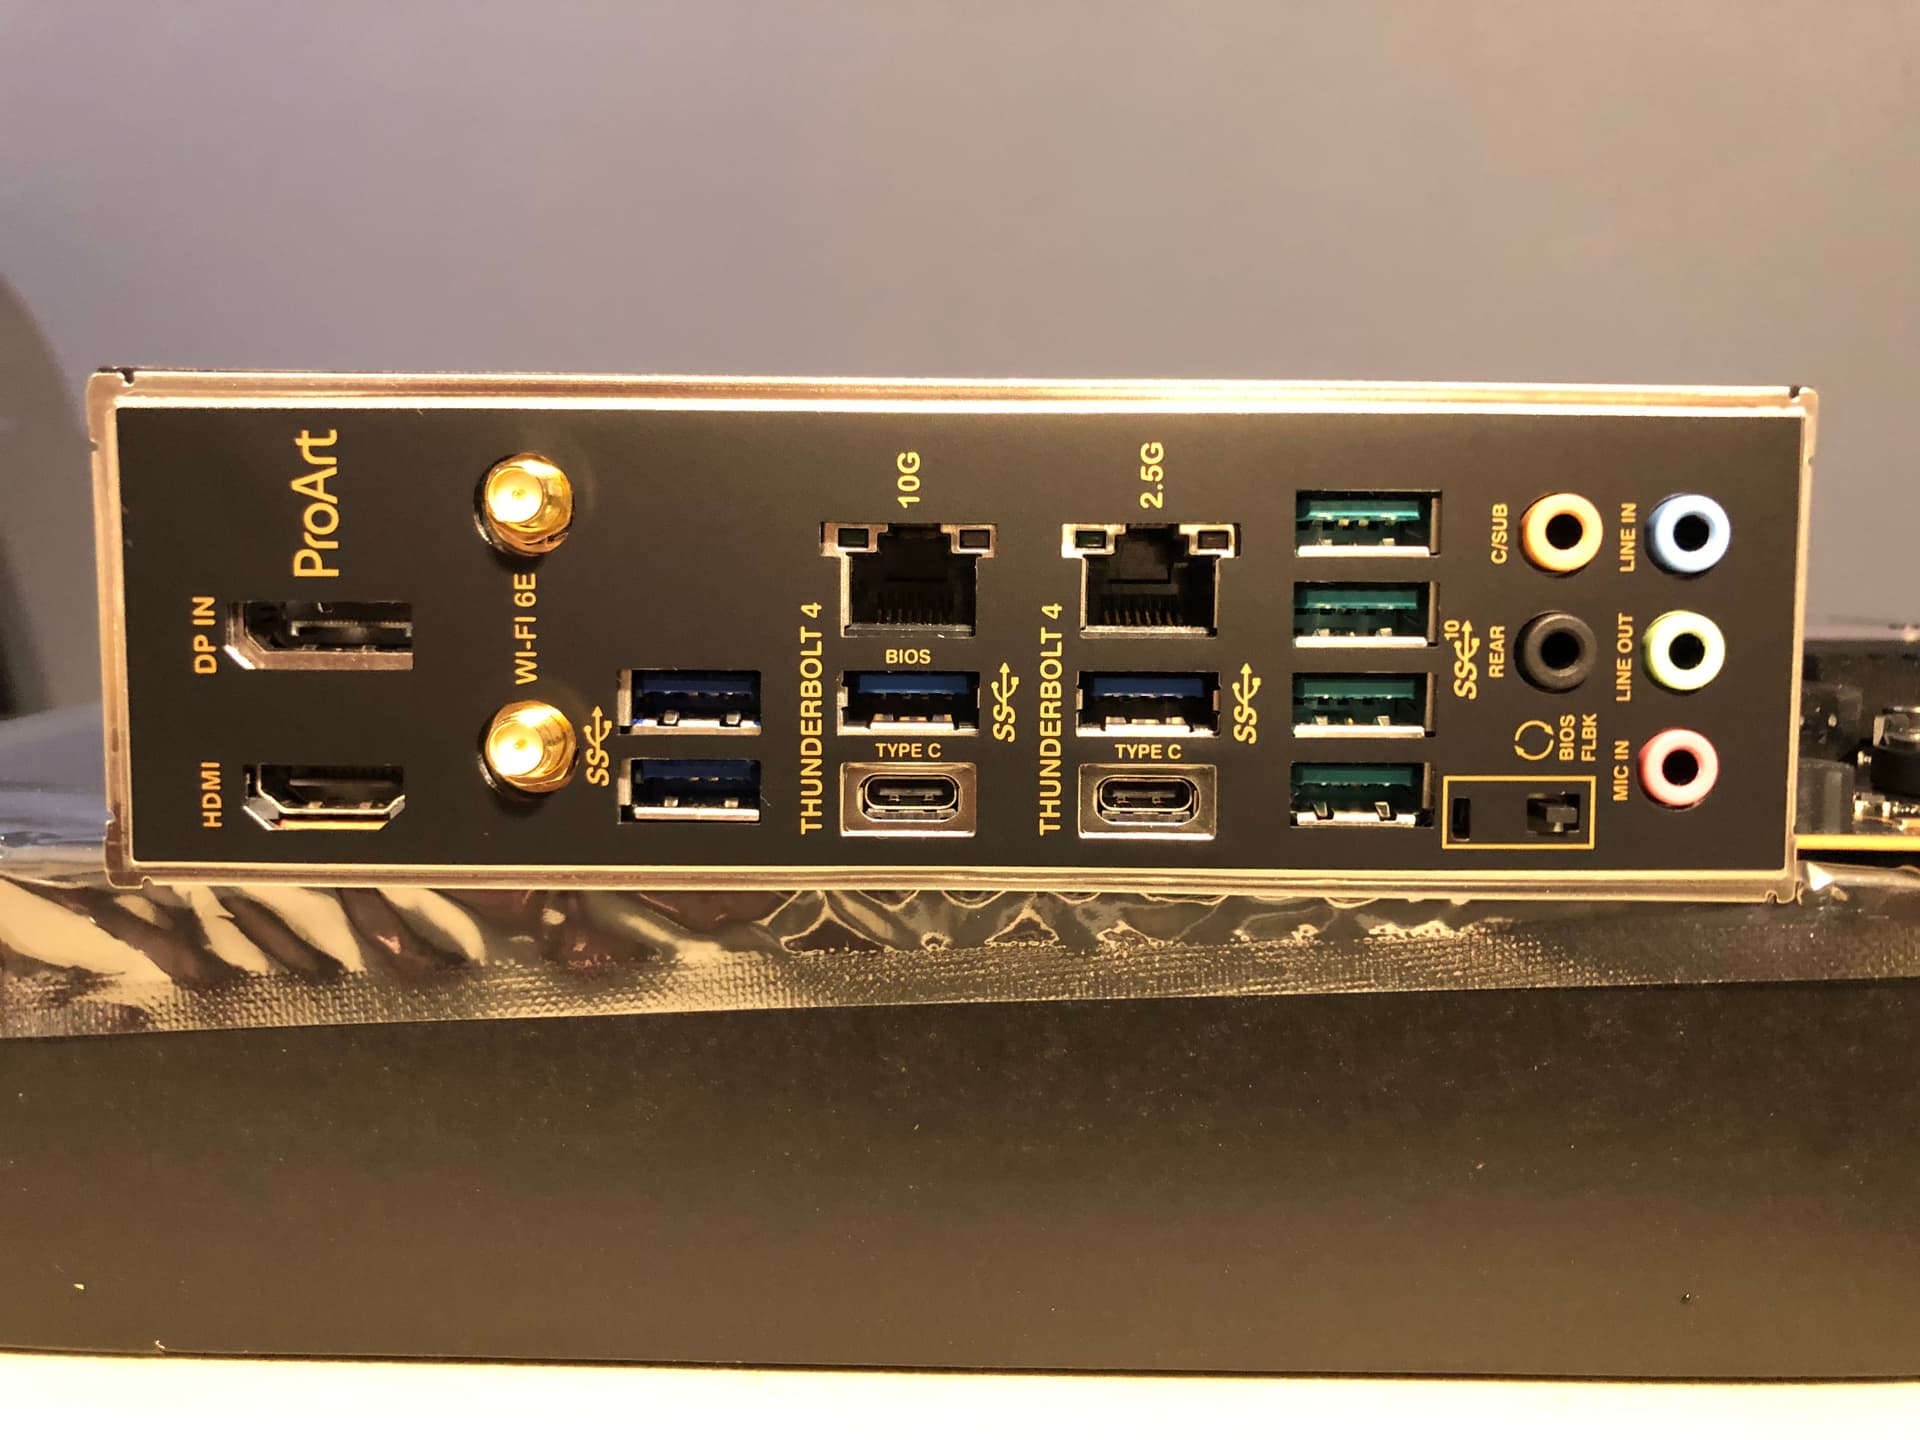
Excellent features you won’t get on most other boards. 10Gig LAN is still a rarity for consumer boards, but also increases price by a lot. You can get a good Threadripper board (e.g. AsRock creator) for the price of these highend boards, and the upgrade from 5950x to 3960x is about double as going 5900x → 5950x.
This is where highend consumer ends and HEDT/Workstation begins and the gap is not very wide. But that Asus ProArt board is probably be the pinnacle of what can be done with the AM4 platform.
“Yeah that is really nice Asus already has this for years really convenient.”
I also got this thing called a mouse…
Yeah I can’t believe I have been uising tweezers and a flashlight to cram my components into cases that are 3 sizes too small. AsRock, Gigabyte why haven’t you provided this over the last several years.
After my first PC, which was a used 286 with a math coprocessor, I had a couple of boxes built locally by a Vietnamese company. They could put a middle-of-the-road system together in 30 minutes while you watched. It ruined me for years thinking I should be able to slap a system together quickly. Of course this was before modular power supplies and cable management was a thing.
When I checked Threadripper was not just a bit more than Ryzen 9. Motherboards $1000+ and CPUs the same. Then the RAM. If these items were even available. I decided to wait till 2022 to see where I could go - but not sure prices will ever come down.
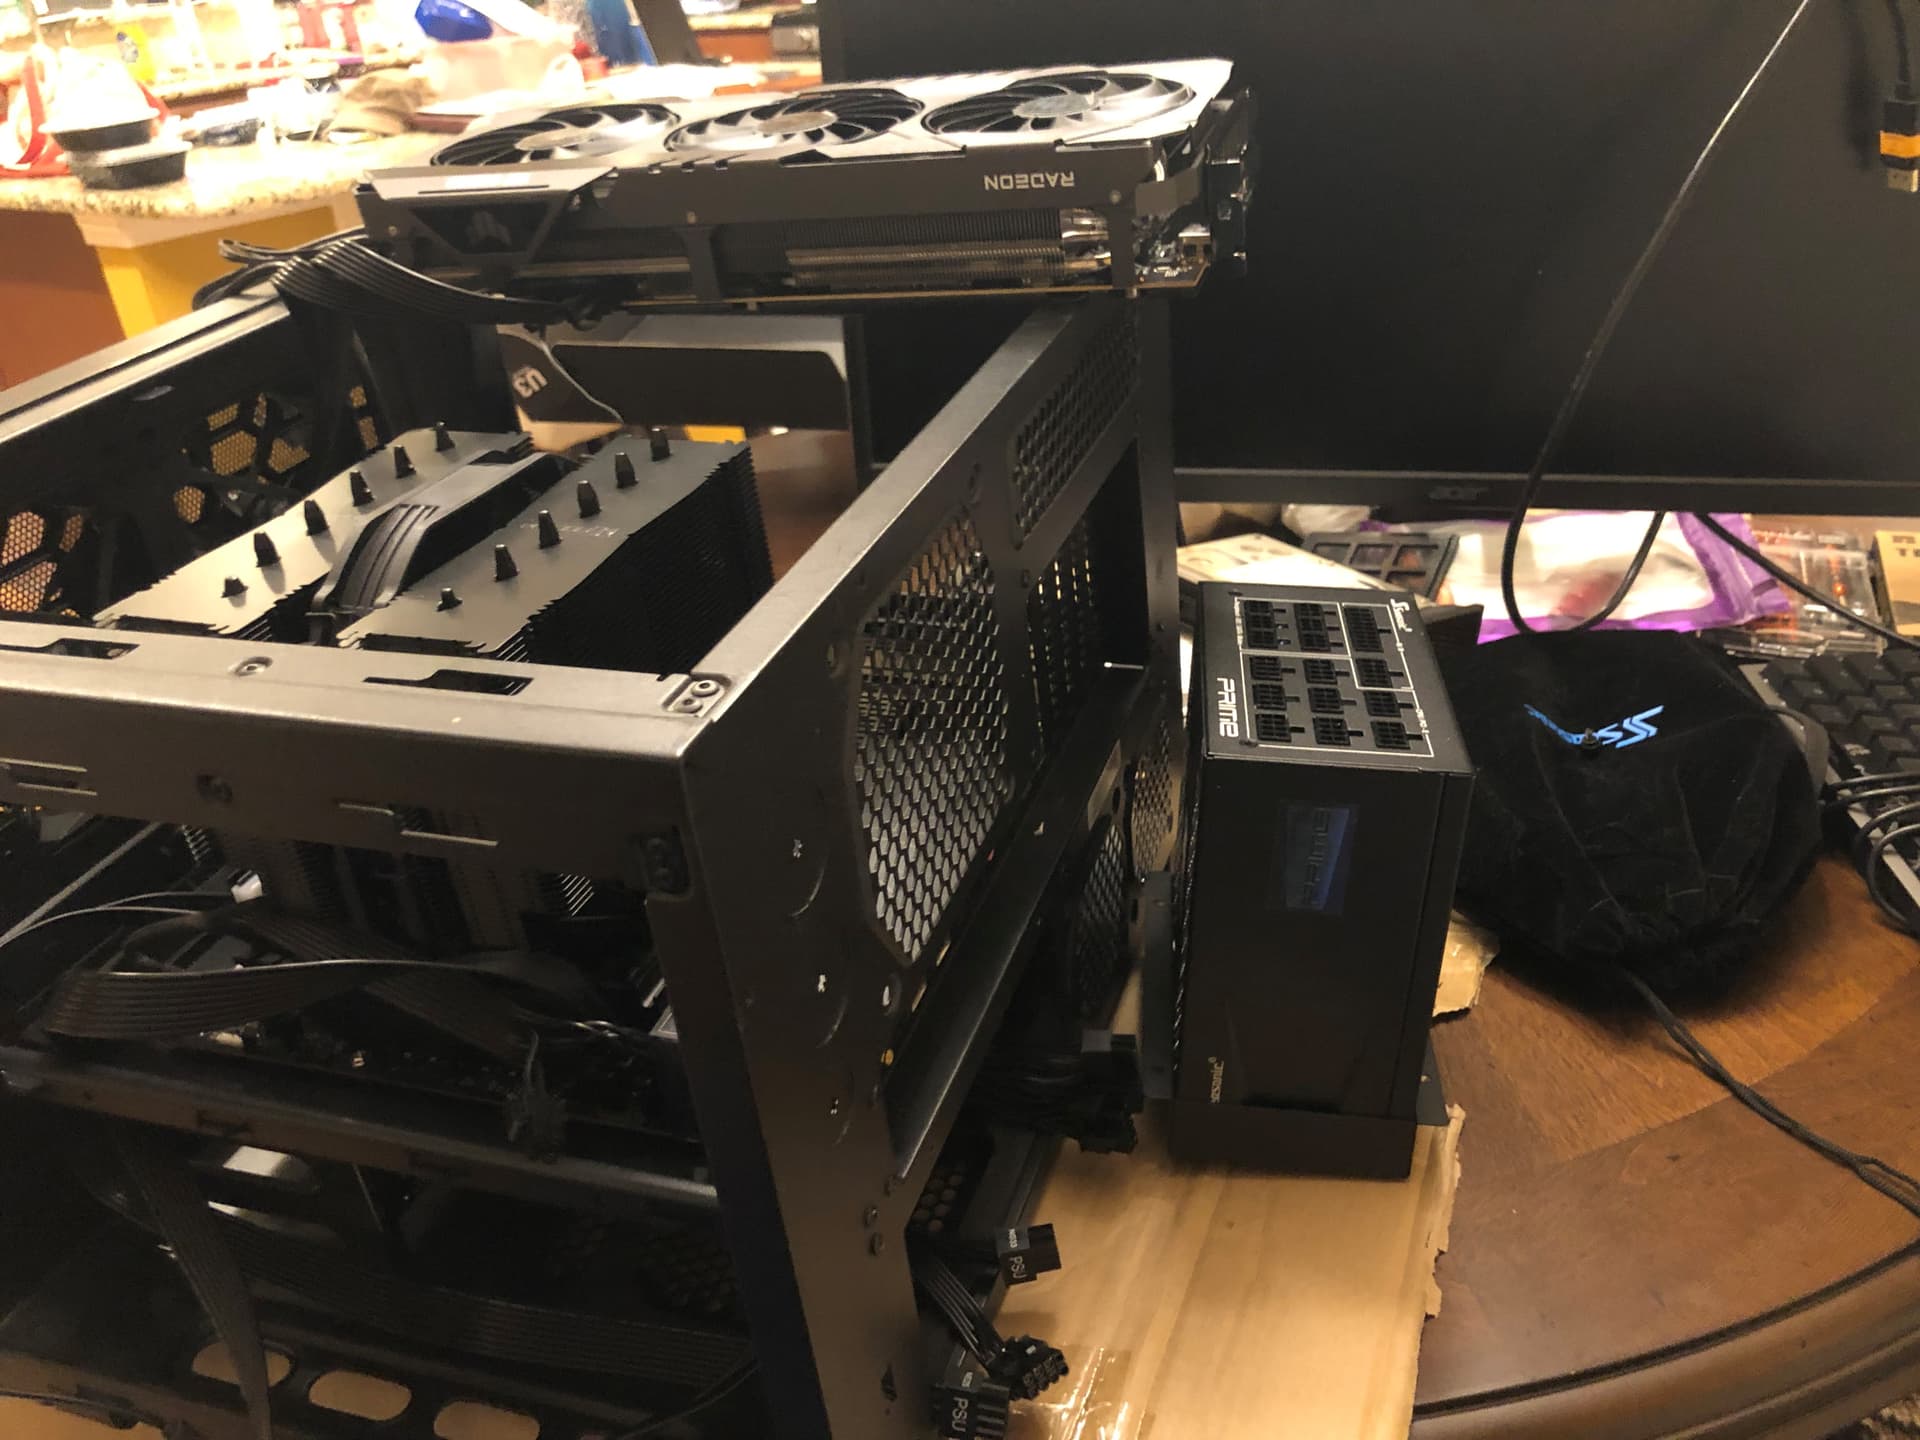
While I wait for my 3070ti I am gathering components and preparing to do some testing with what I do have. I have a GTX 1080ti and Radeon HD 7970/R9 280X in my 2 current AMD machines, and I will likely pull the 1080ti out for some configuration and testing. I have charged up an old Back Ups 1500 XS for now.
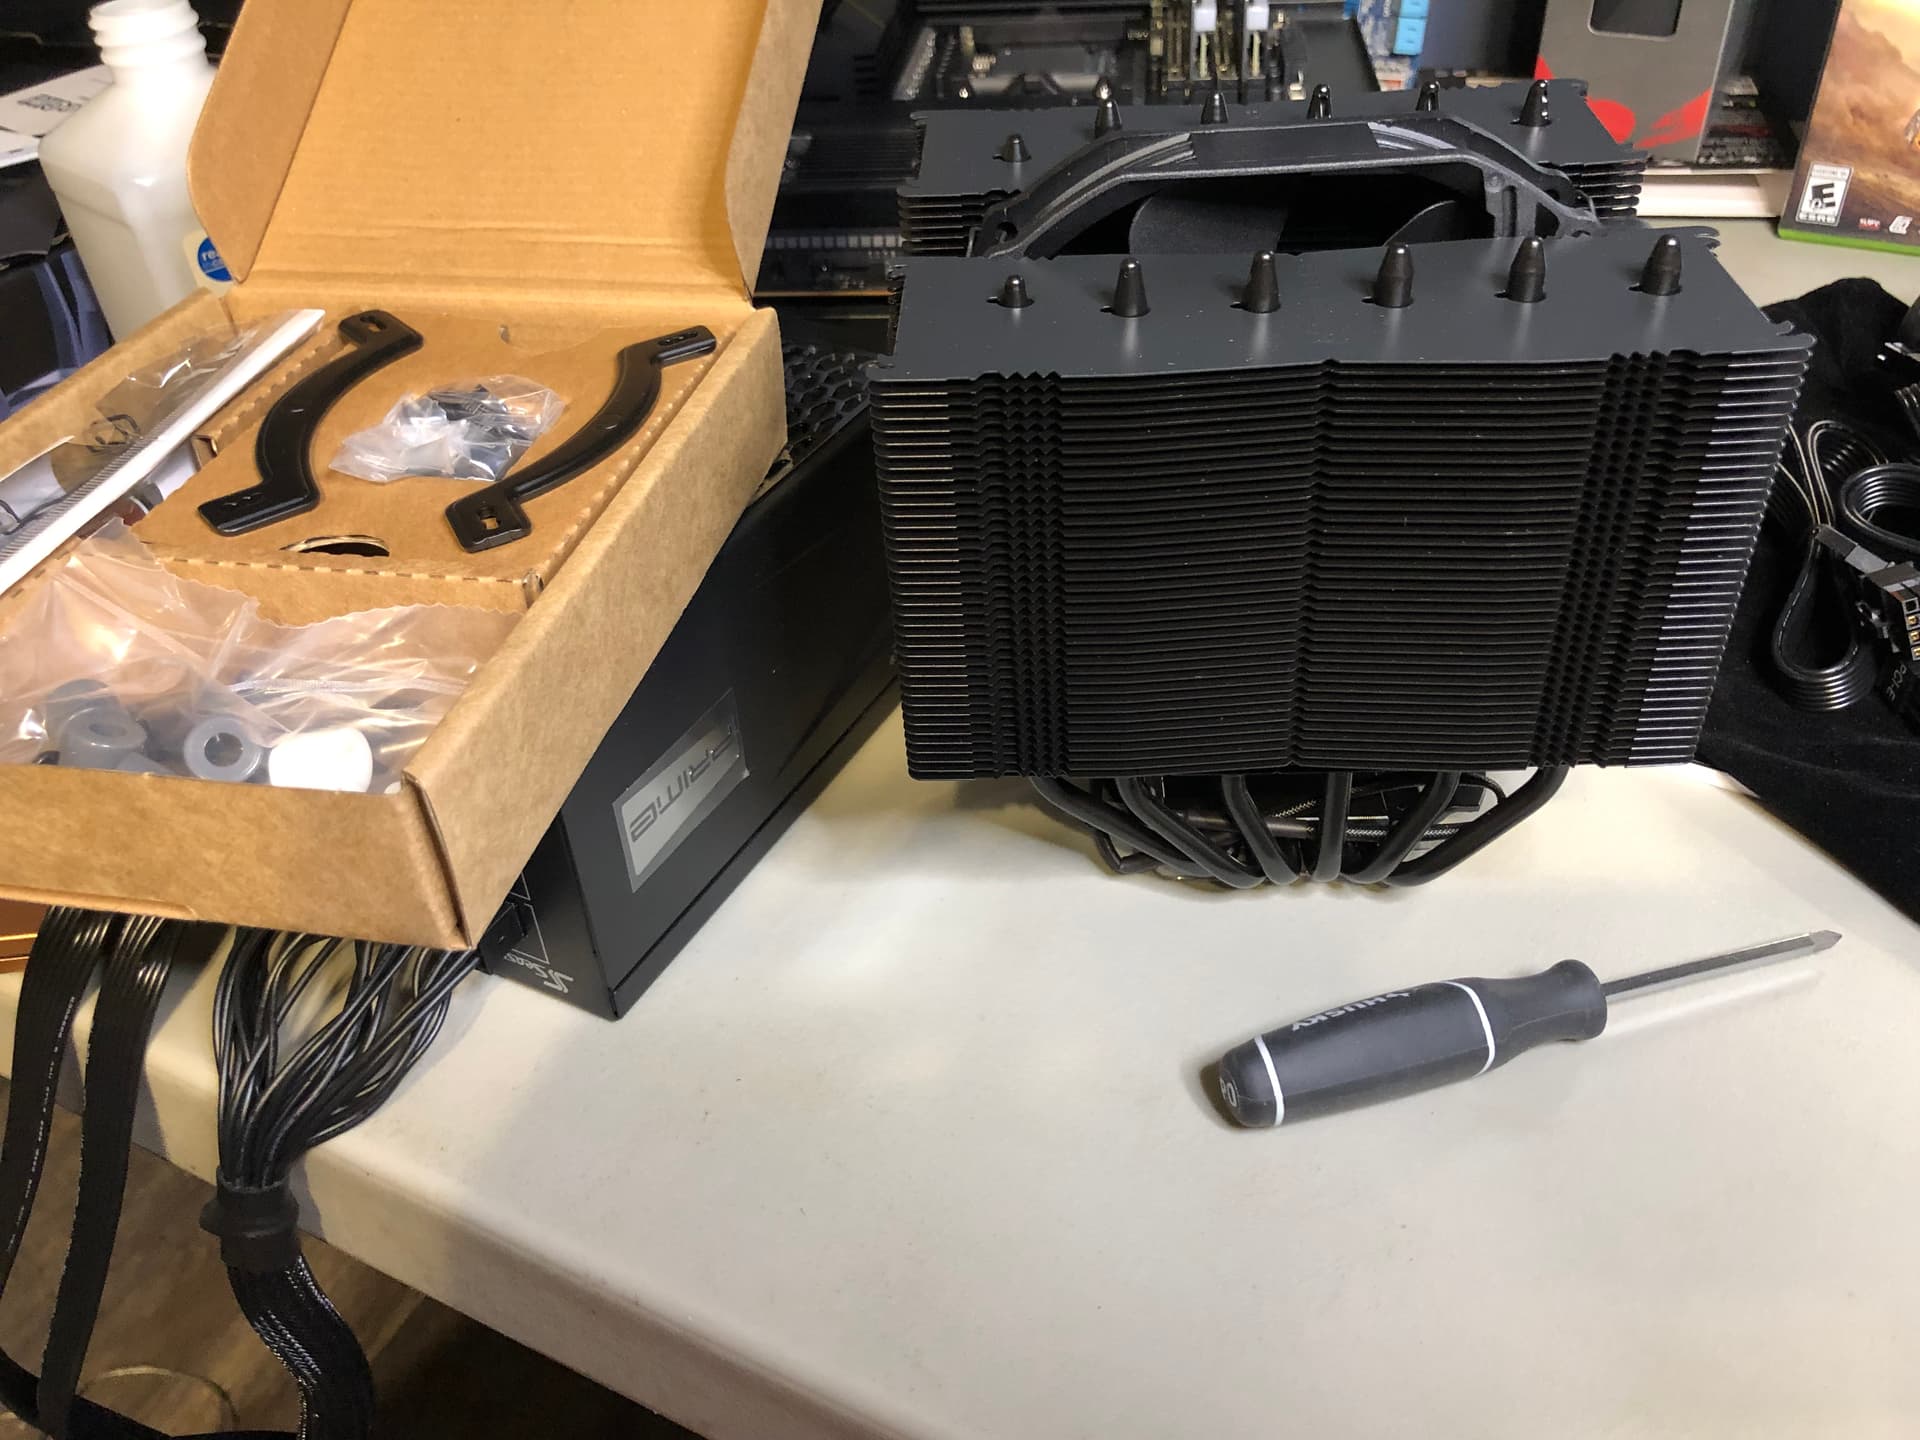
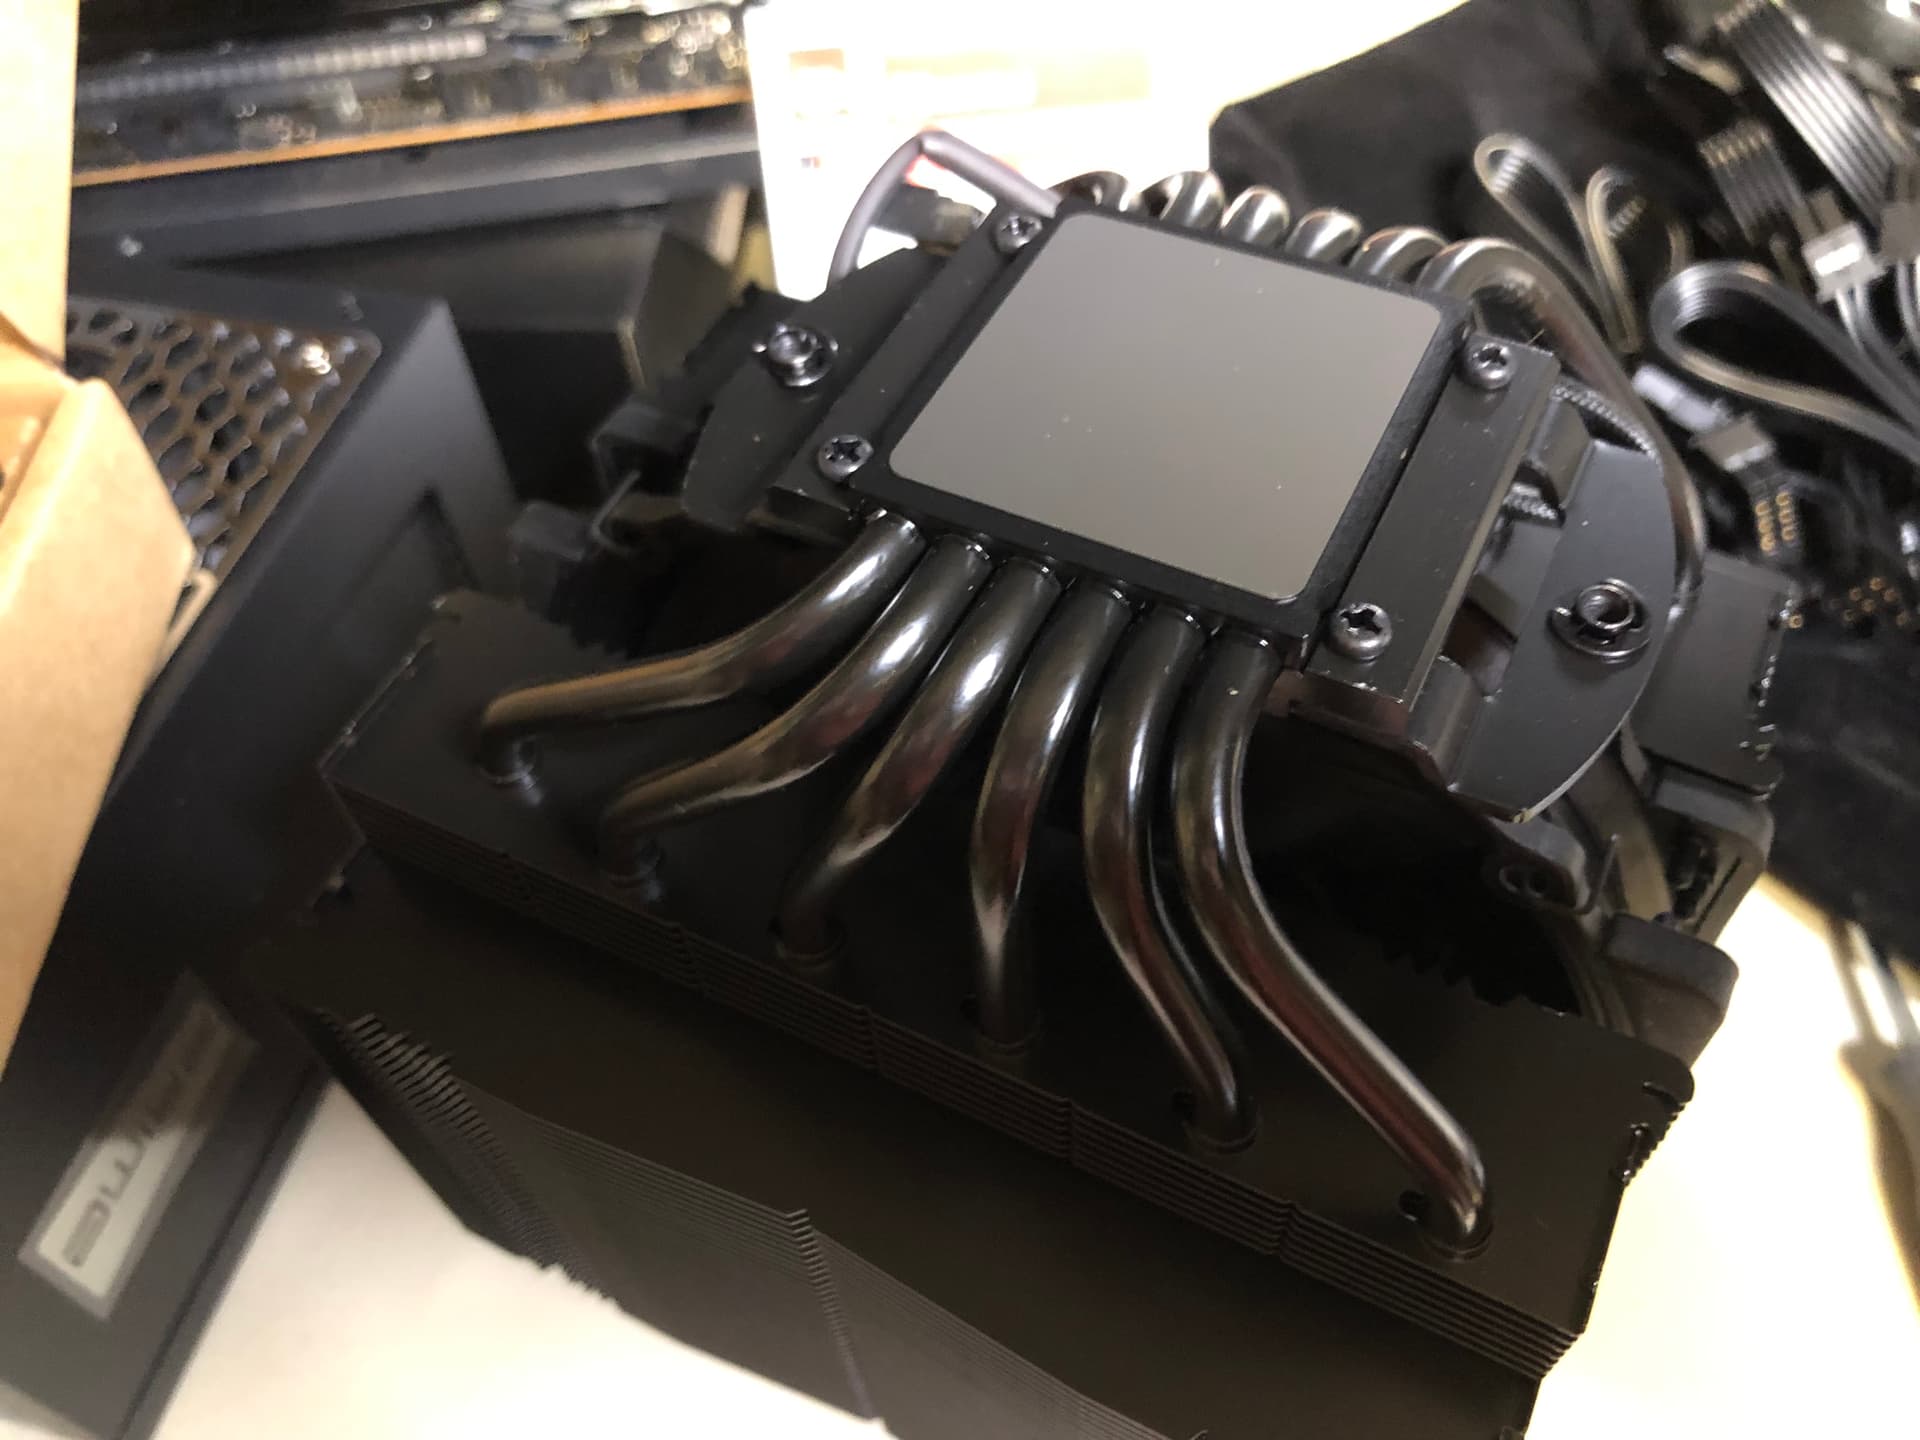
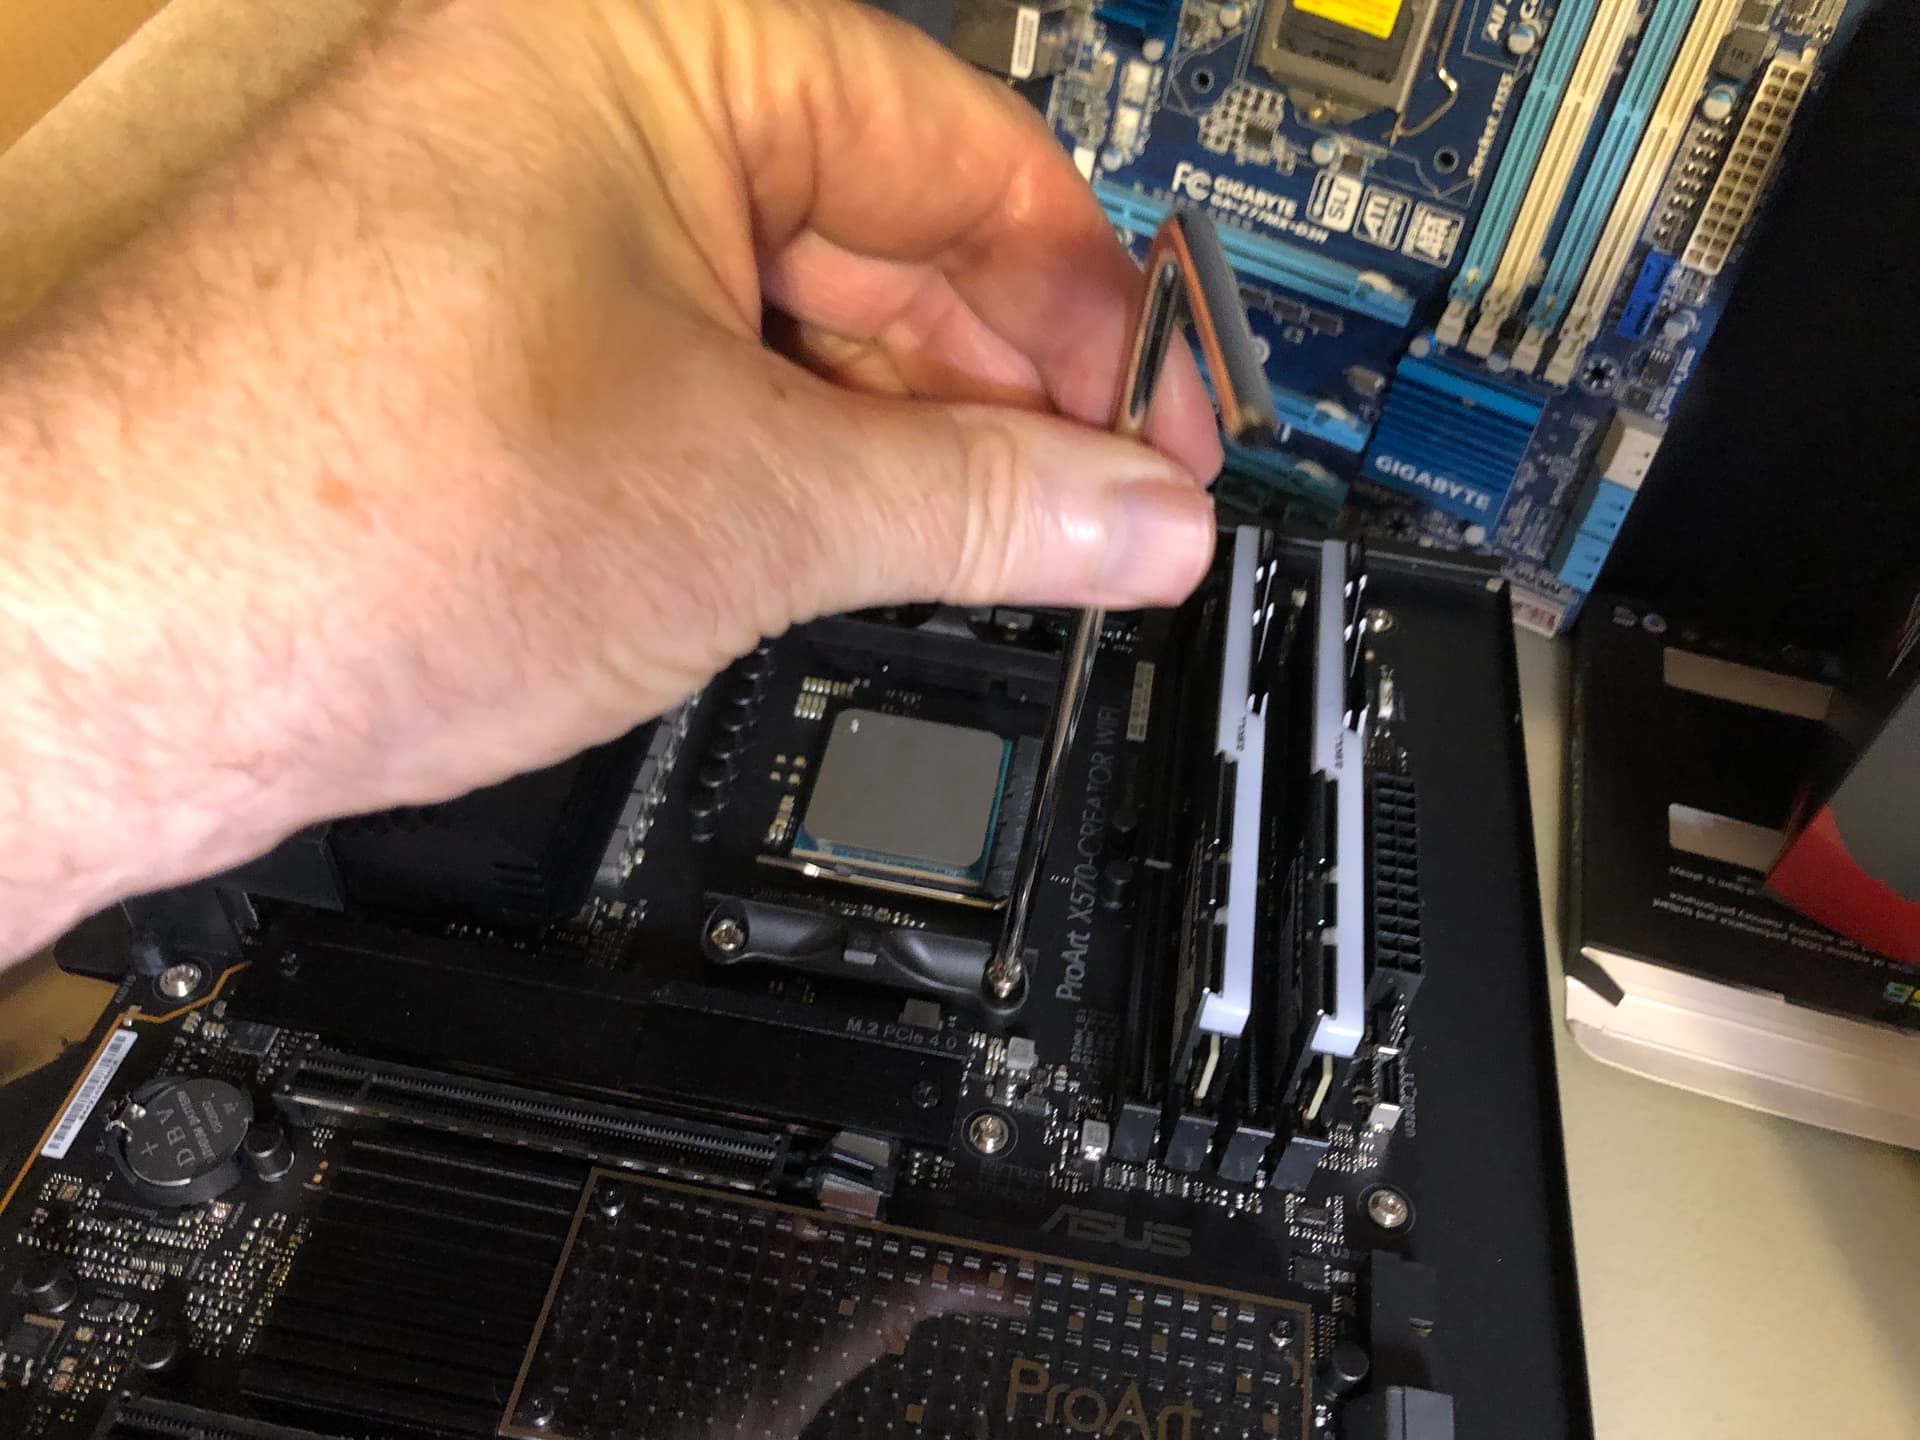
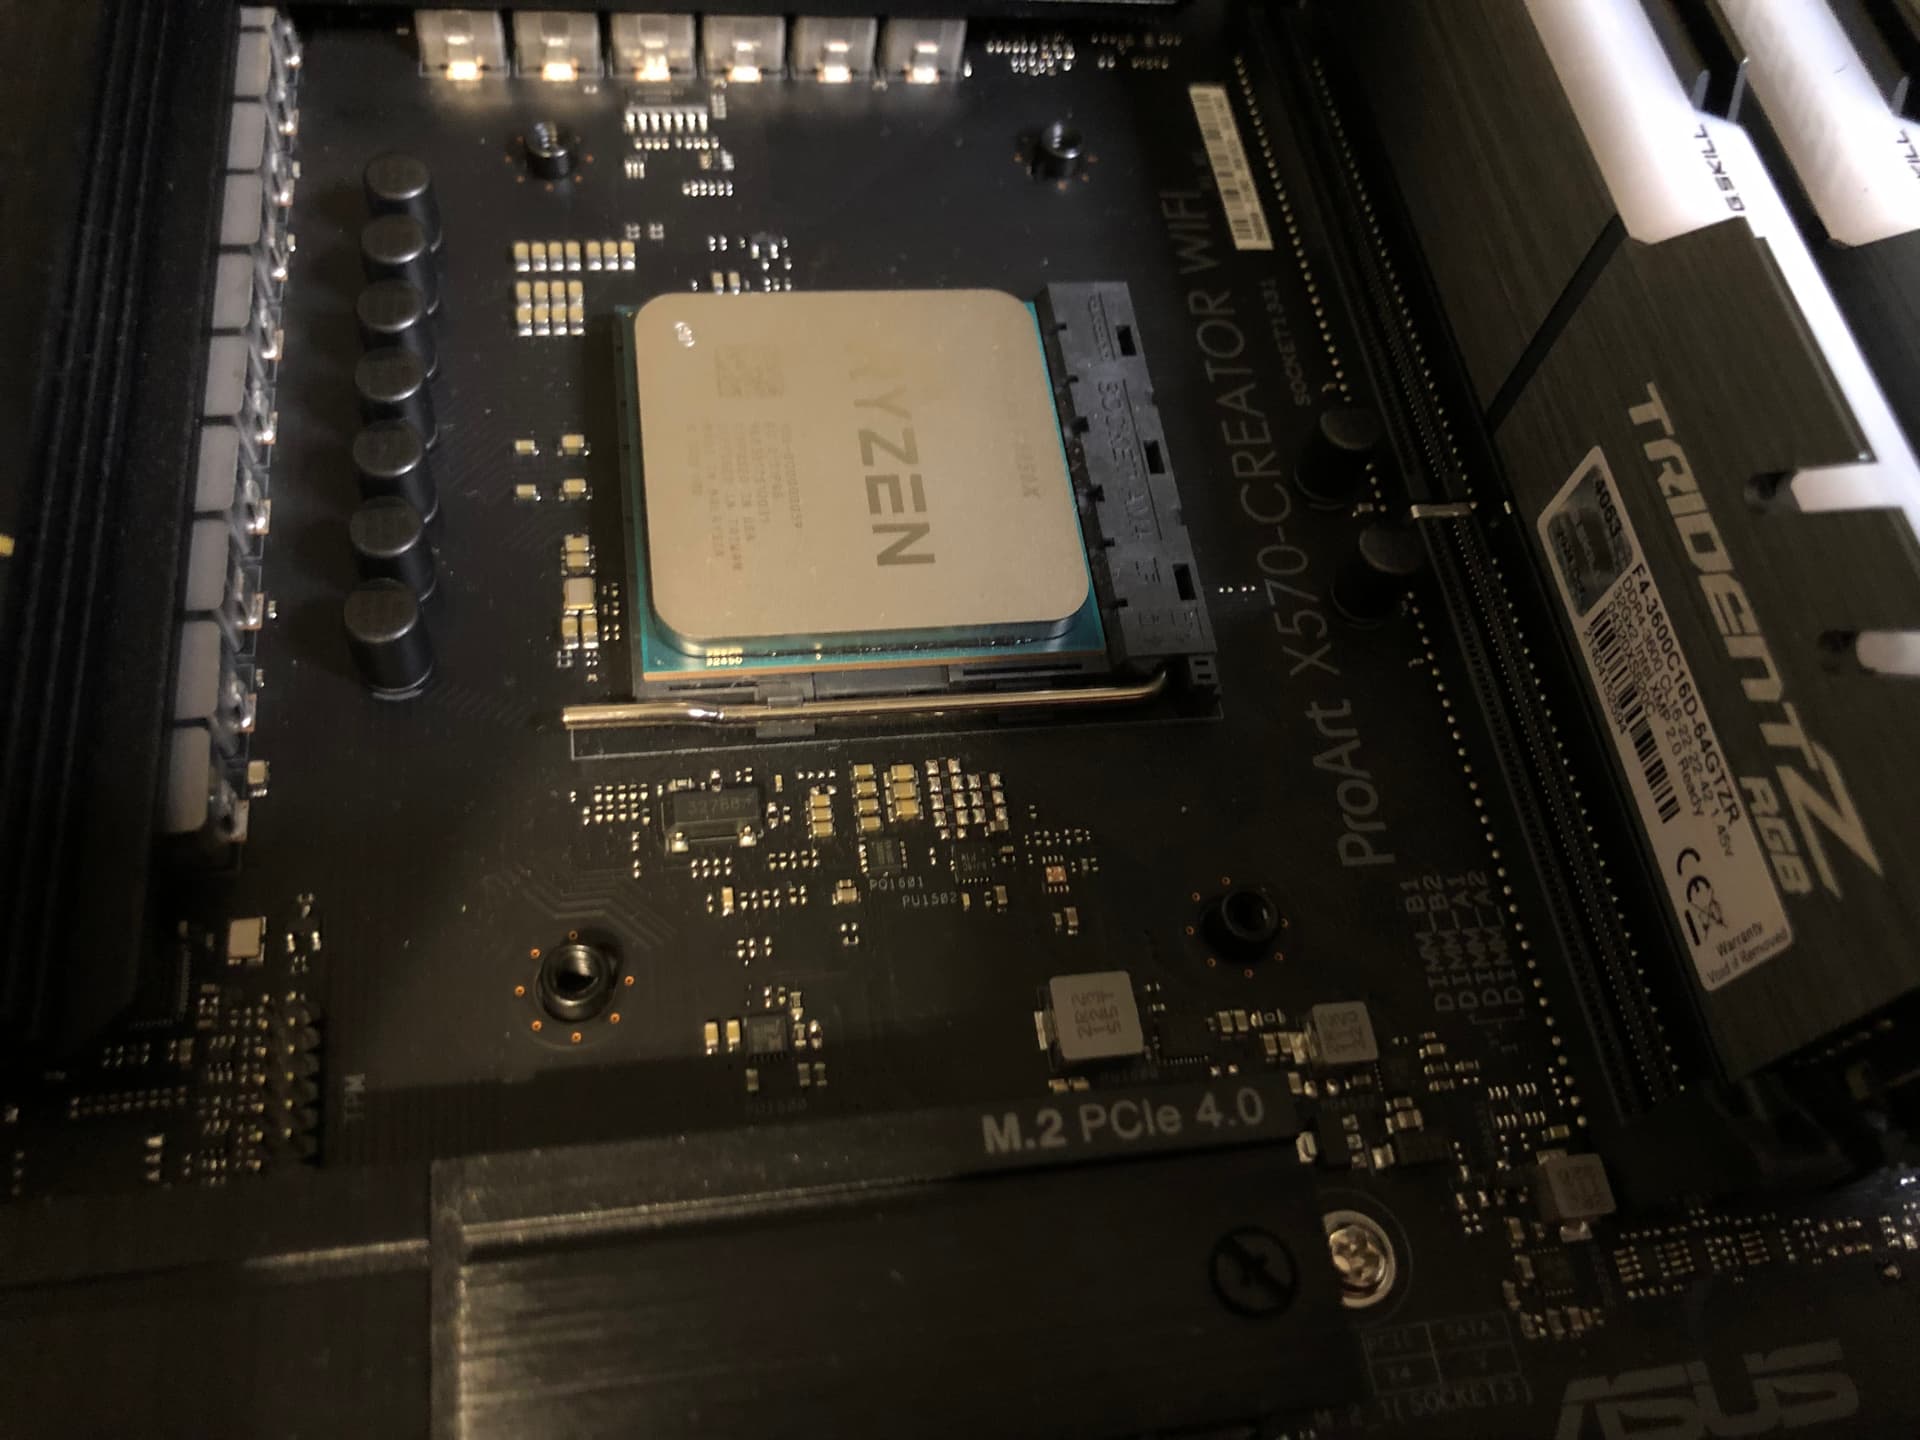
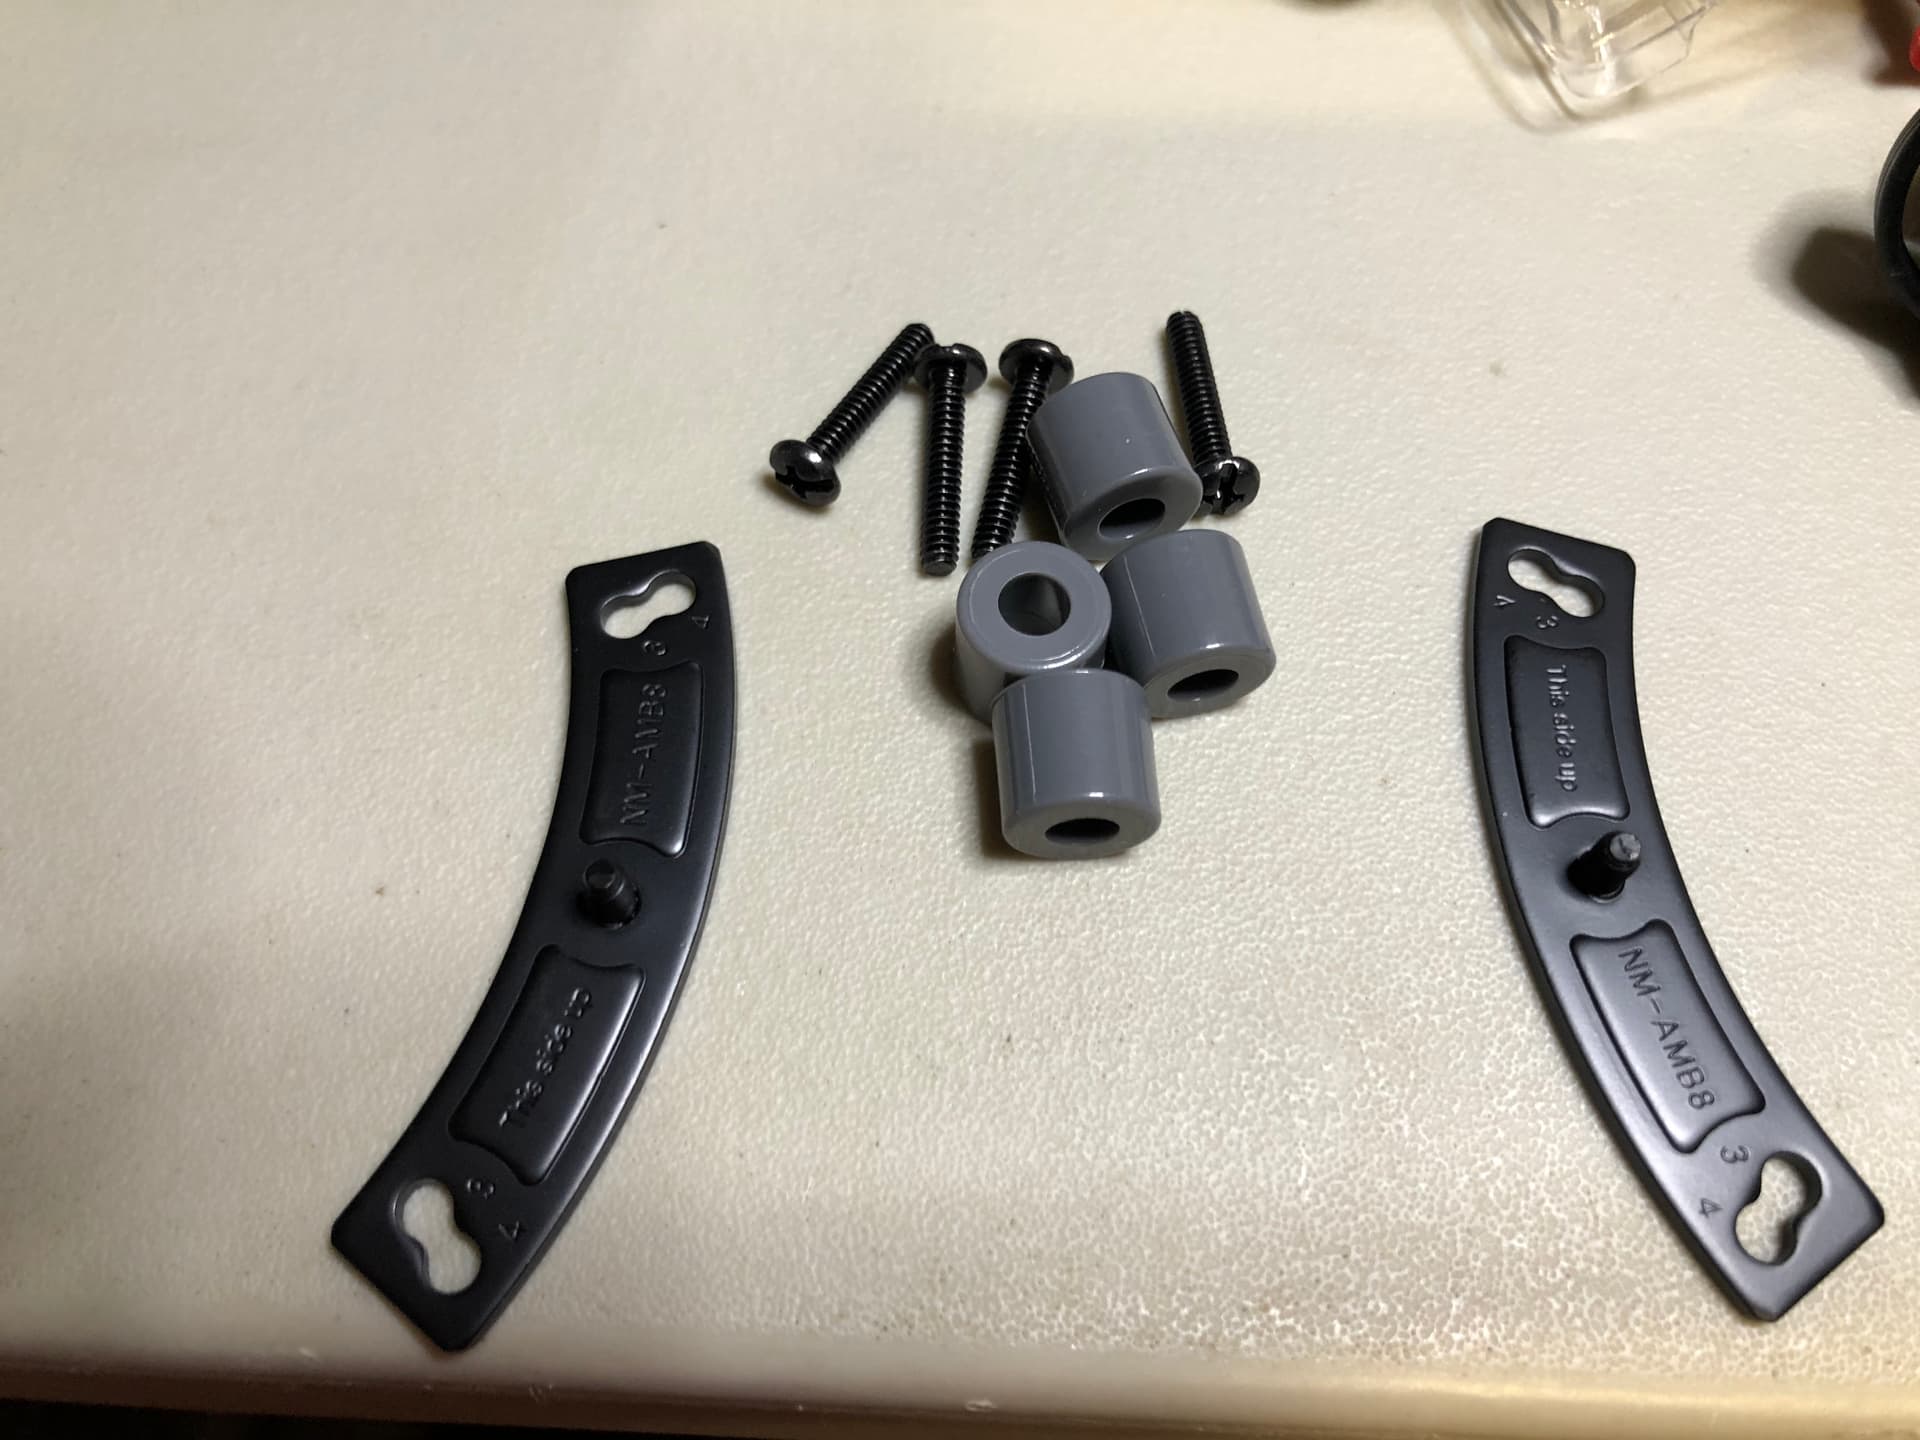
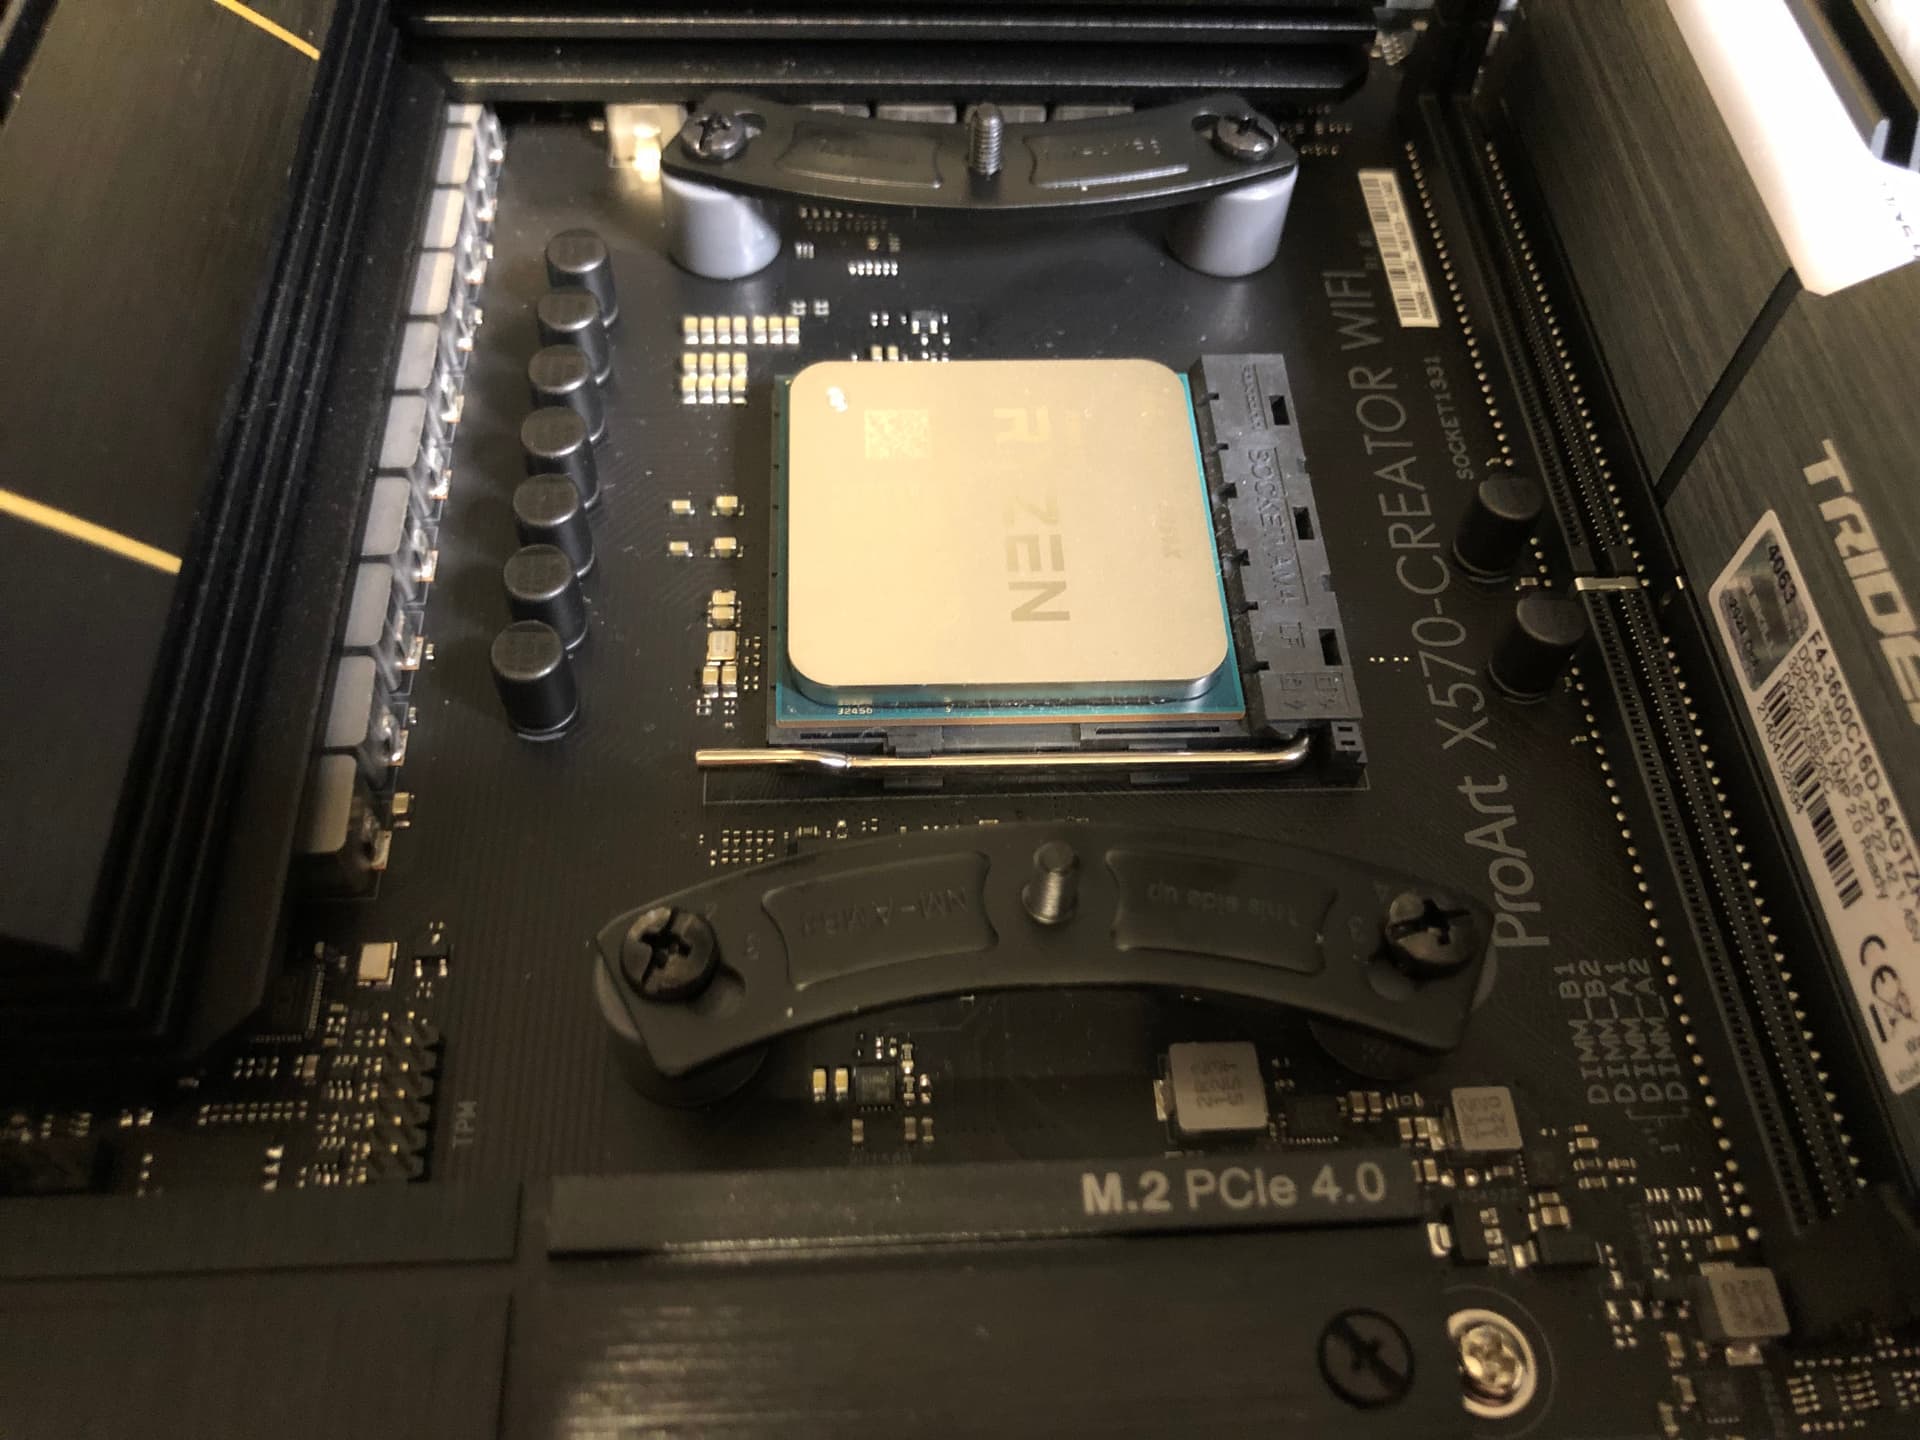
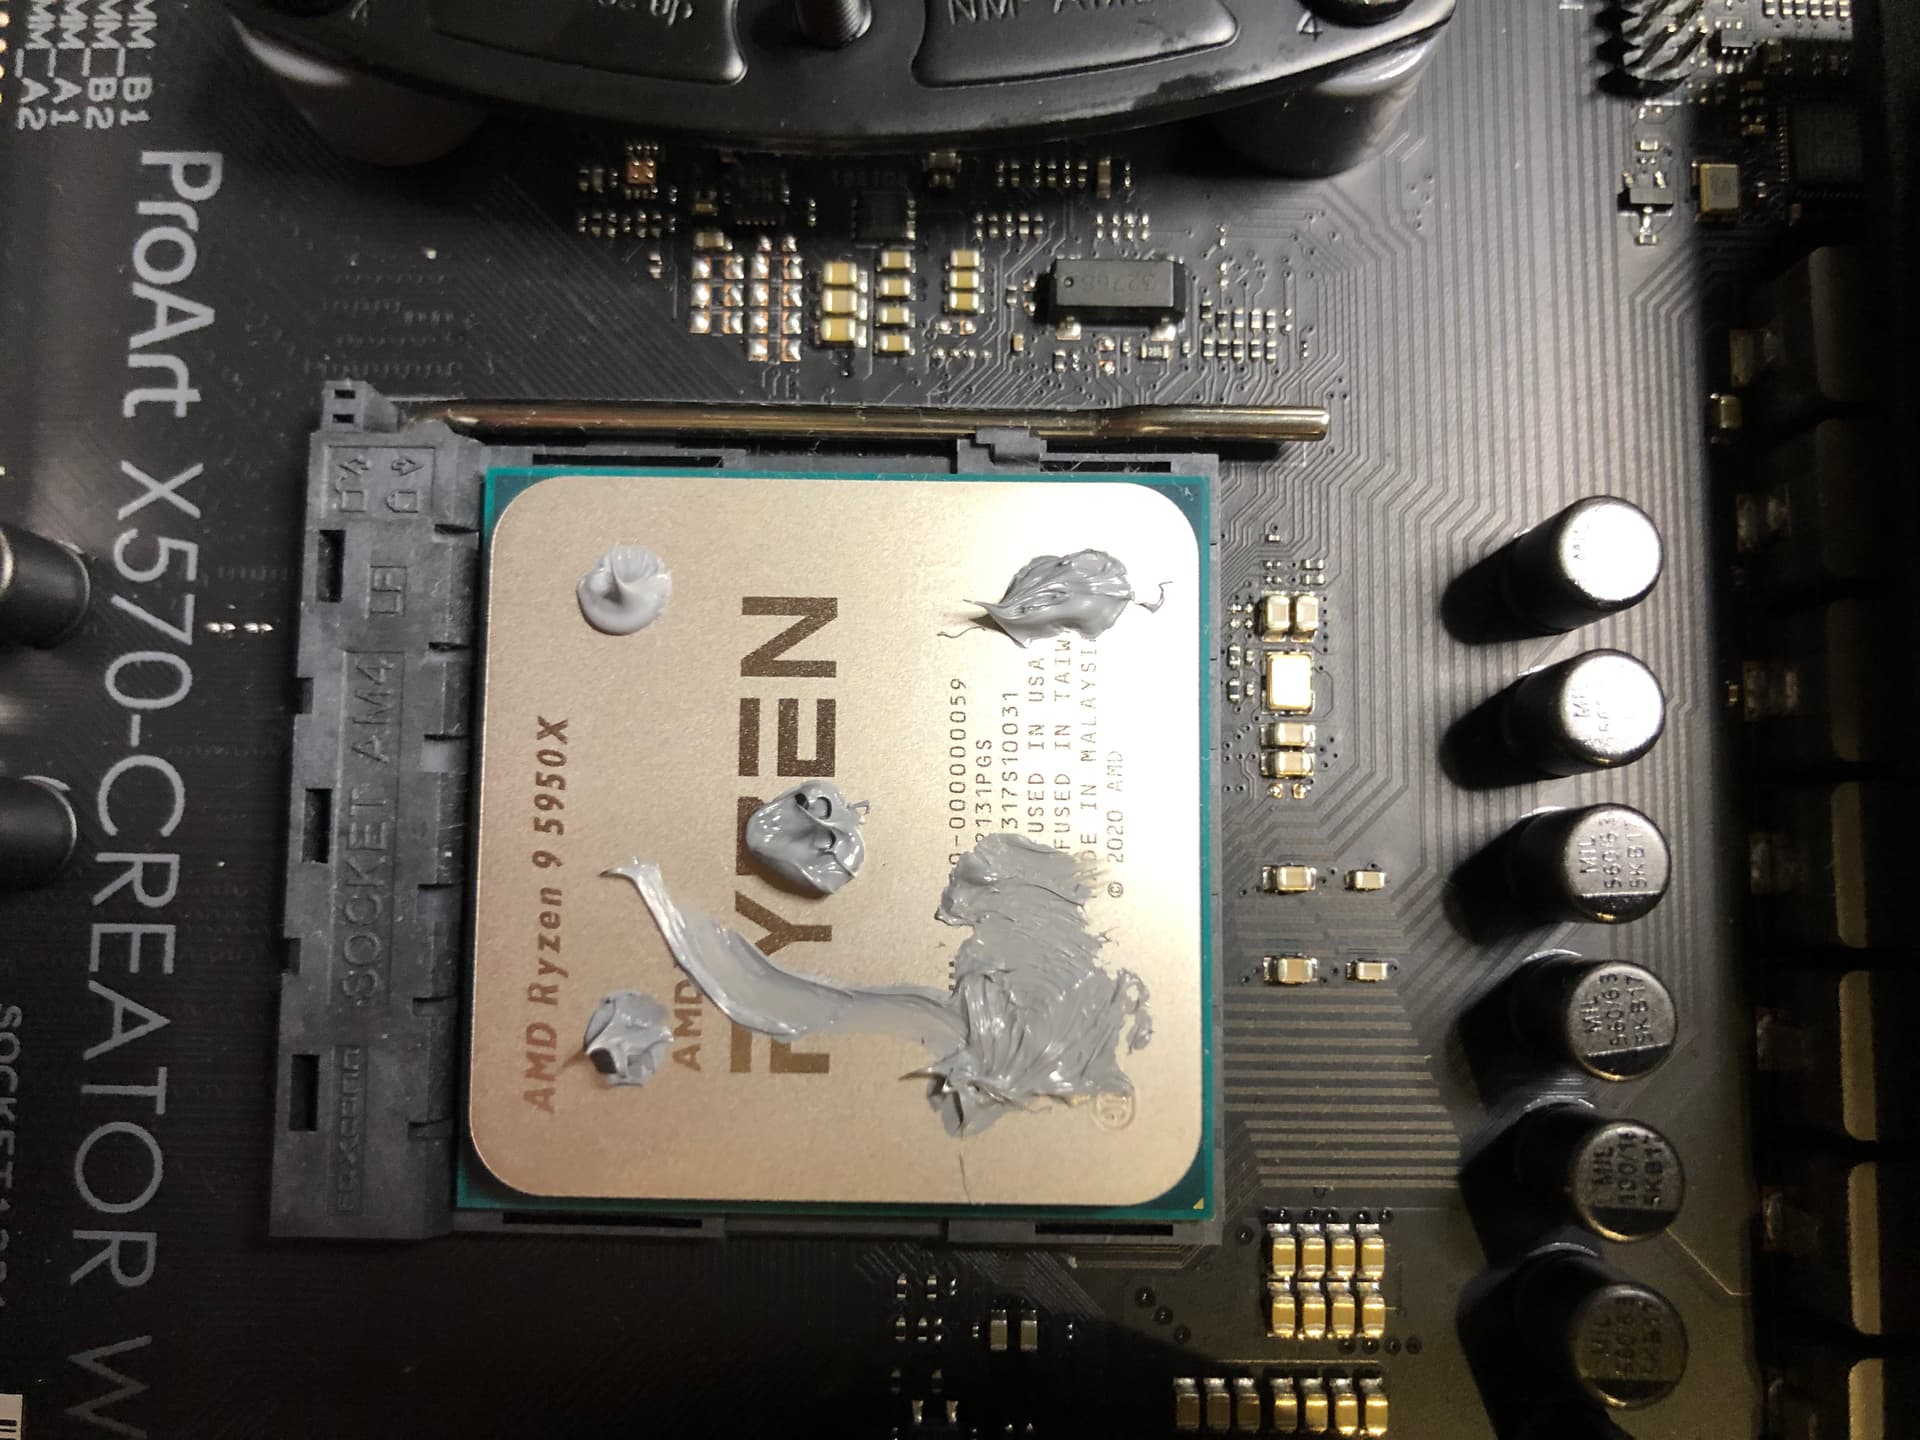
I have secured the ASUS ProArt motherboard to my Coolermaster HB EVO’s removable motherboard tray. I poked around under heatsinks and looked at all the headers and the manual. I popped into the M2_3 socket an older Adata XPG SX8200 480GB 3D NAND NVMe Gen3x4 that I got a great deal on a few years ago (This disables SATA 5 and 6). The next big thing is to transfer an appropriate Noctua cooler to this build from my stock of Noctua parts.
I saw a “deal” on NewEgg - WD RED 4TB 7200rpm drives - 139 with $30 off. They are trying to dump those asap. I picked up two as I have an old NAS and will be getting a newer one later.
I will be running Linux and Win 10, after I get things working and benched with Win10 Pro. But I don’t have my GPU yet, will be working with a loaner in the mean time.
Thunderbolt will have to be later, since I don’t currently have any thunderbolt devices. ( I do have some firewire though!) I want a video streaming/capture, an audio interface, external SSDs.
Keep us informed. I really love that board and I consider getting one myself once AMD retaliates on Alder Lake next year. Also supports ECC…will be glorious!
My 3070ti has not shipped yet, so I will have to temporarily pull my 1080ti out of my “gaming machine” where I play Civ 5 from time to time. My brother creates maps and I mostly play them.
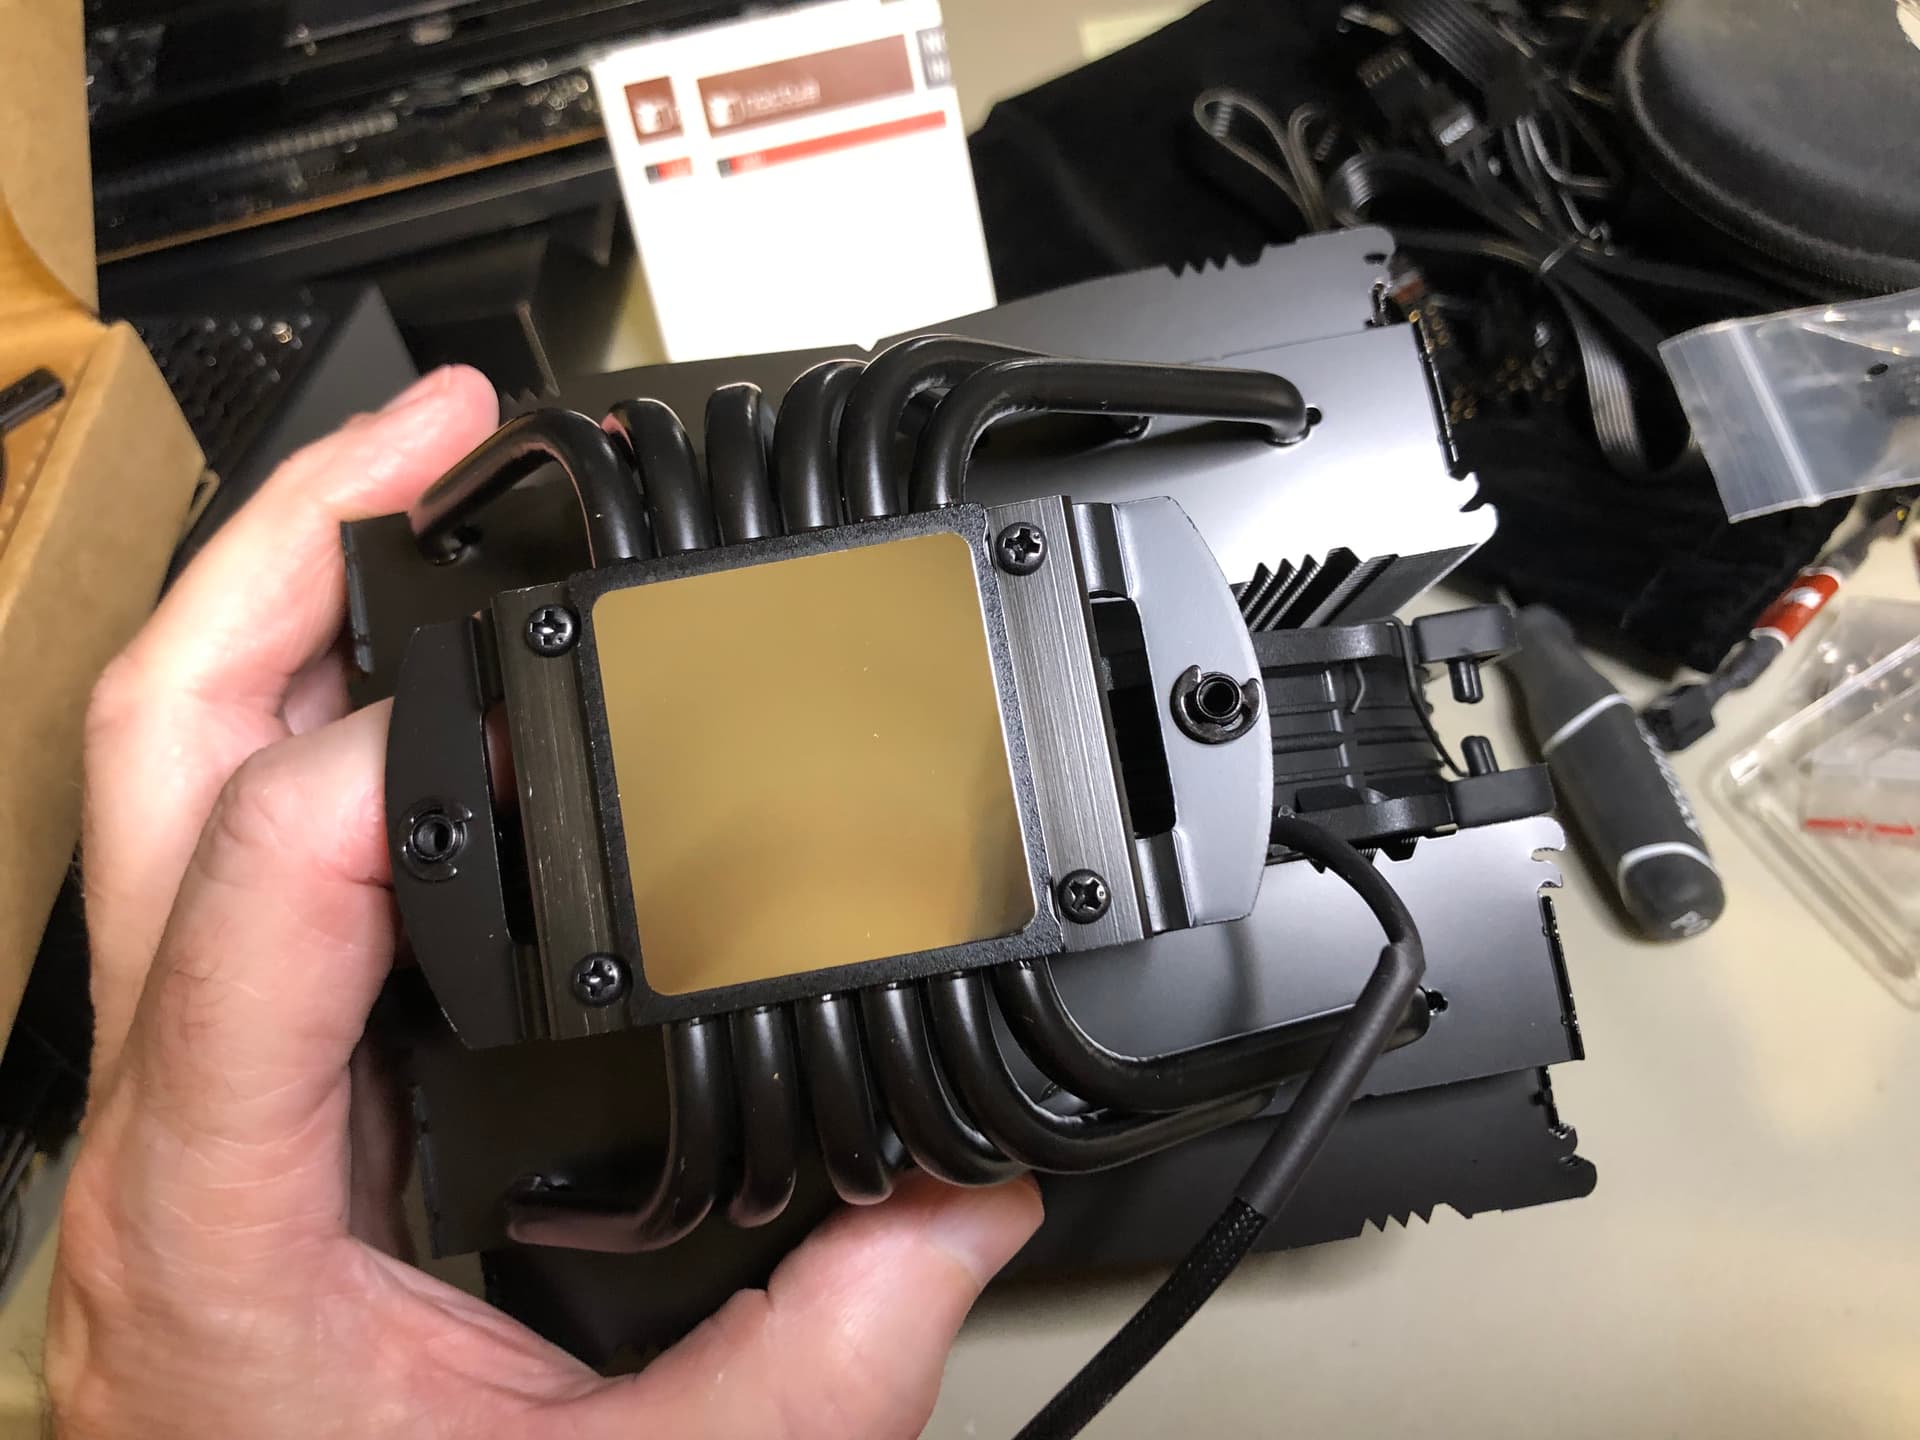
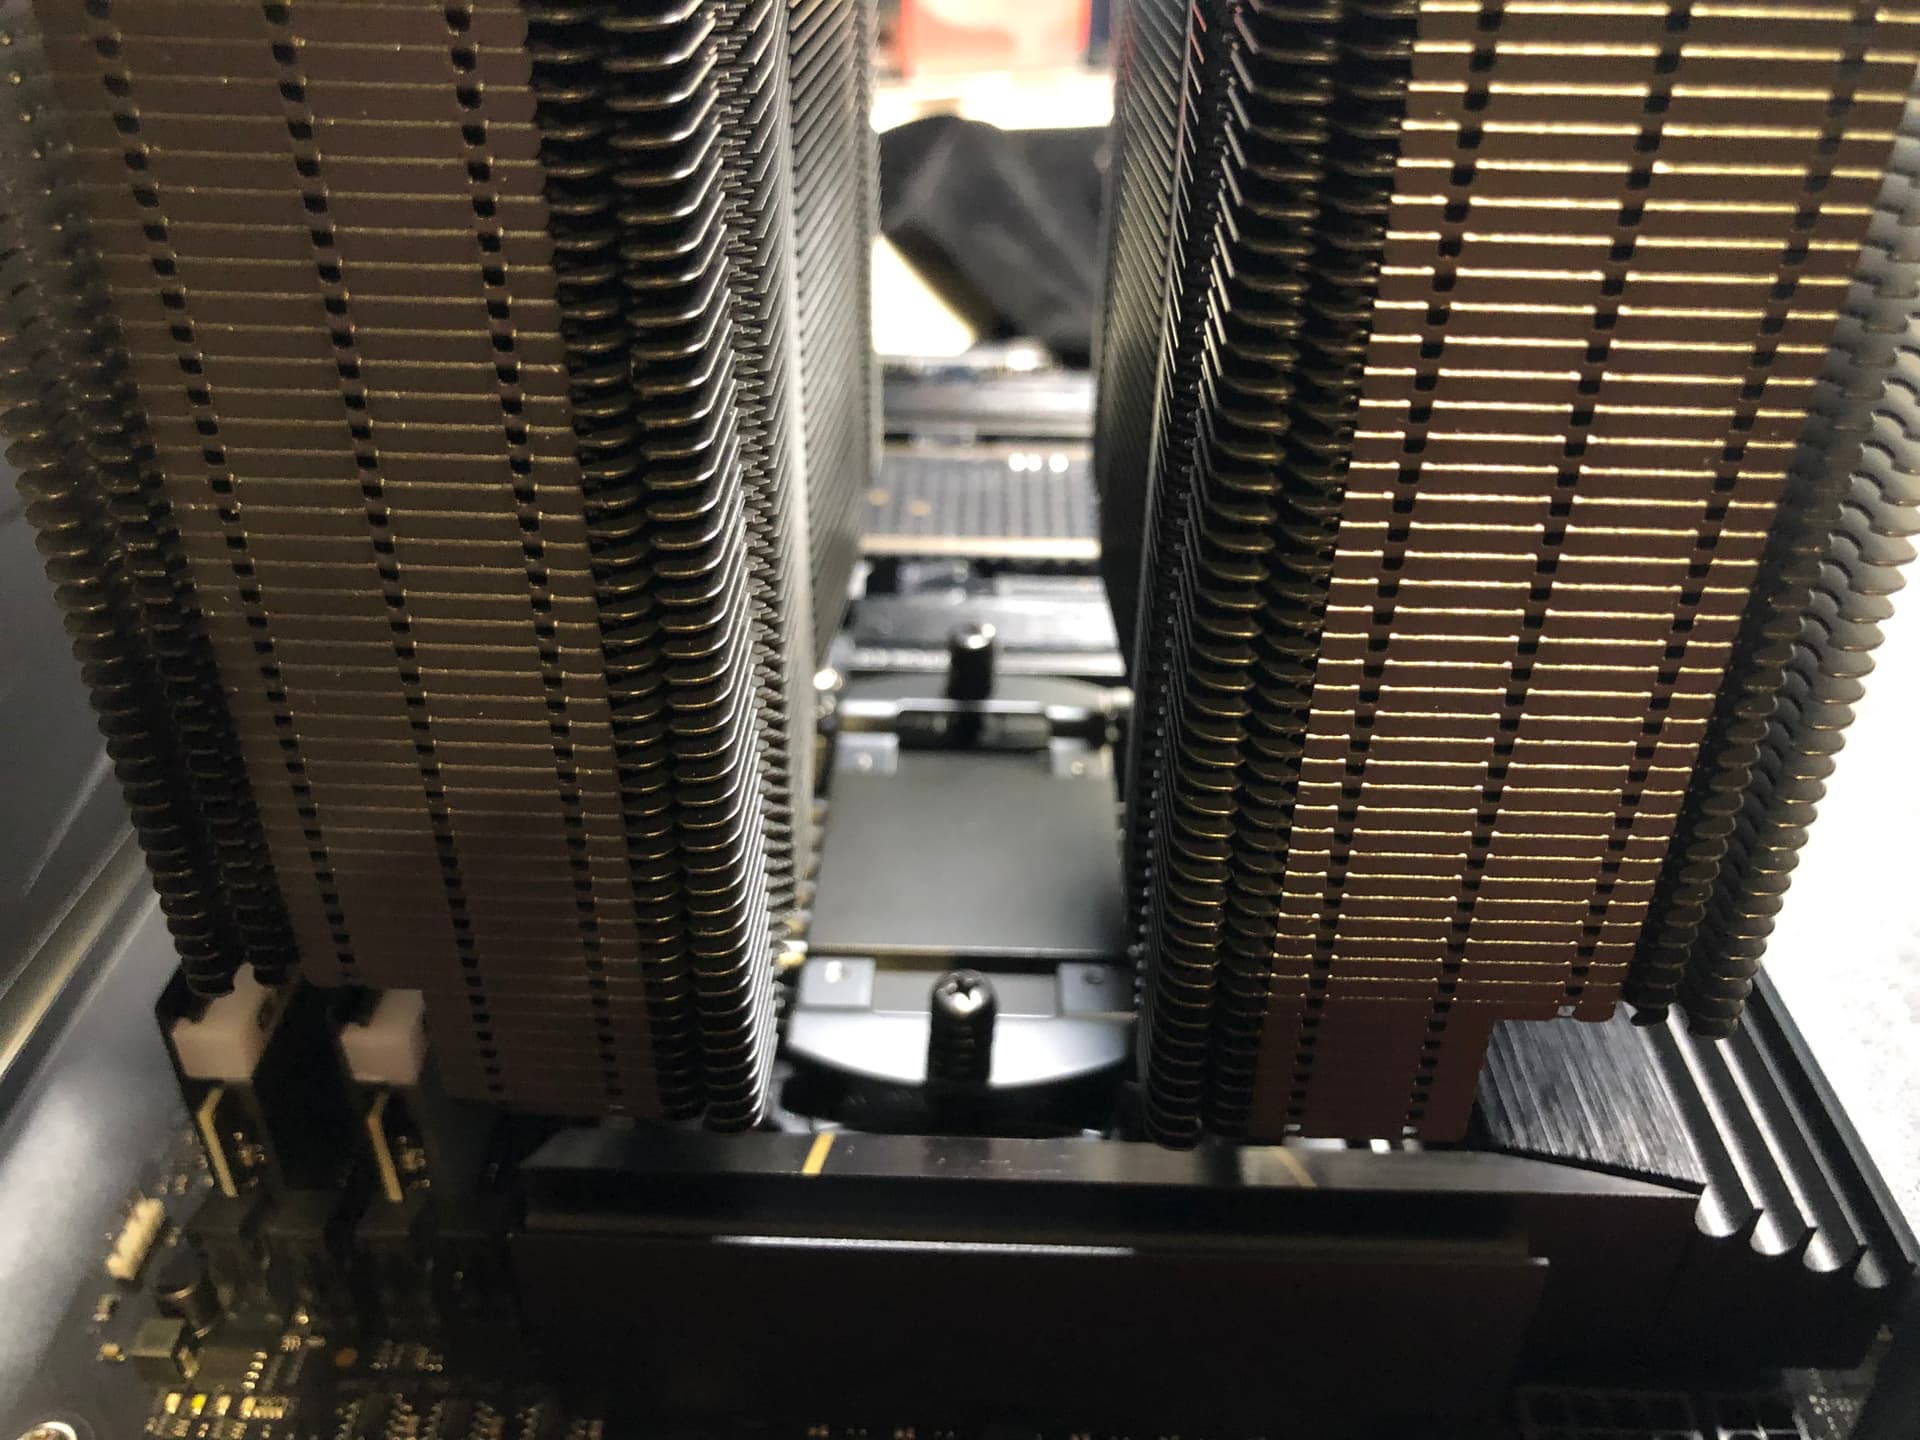
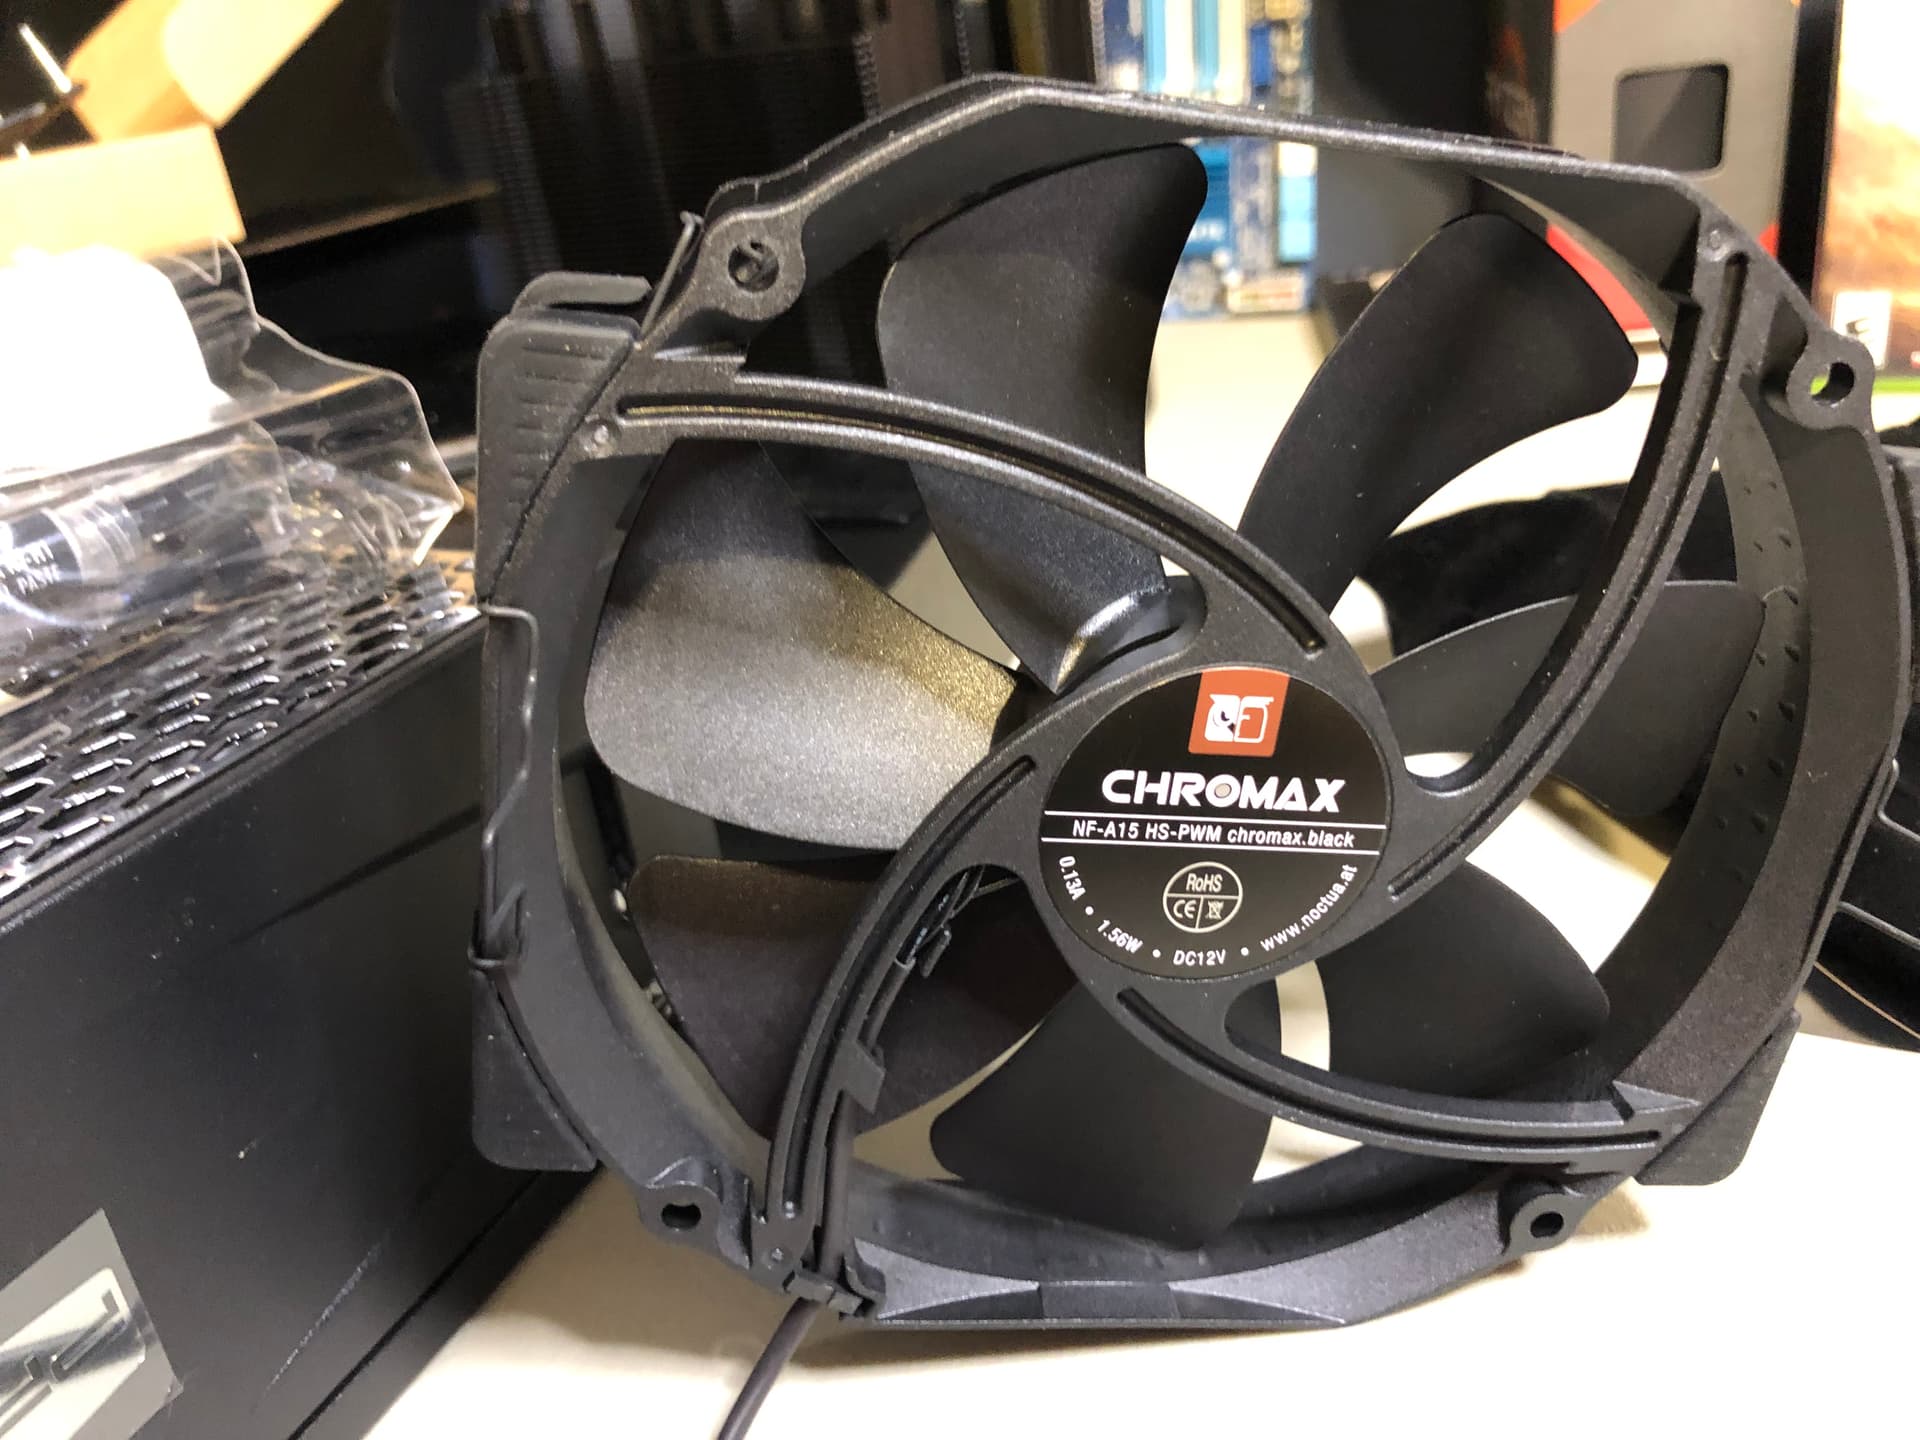
Today the Noctua cooler arrived and I have been installing it this evening. It goes well with the build since my components are mostly black and understated.
This is what the stock backplate looks like when you have removed the plastic stock retention module just the screw sockets are poking through the motherboard.
Place the fanless radiator back carefully onto the two screws on the brackets - tighten the spring loaded fasteners, a few turns back and forth on each screw, until they are firmly screwed down.
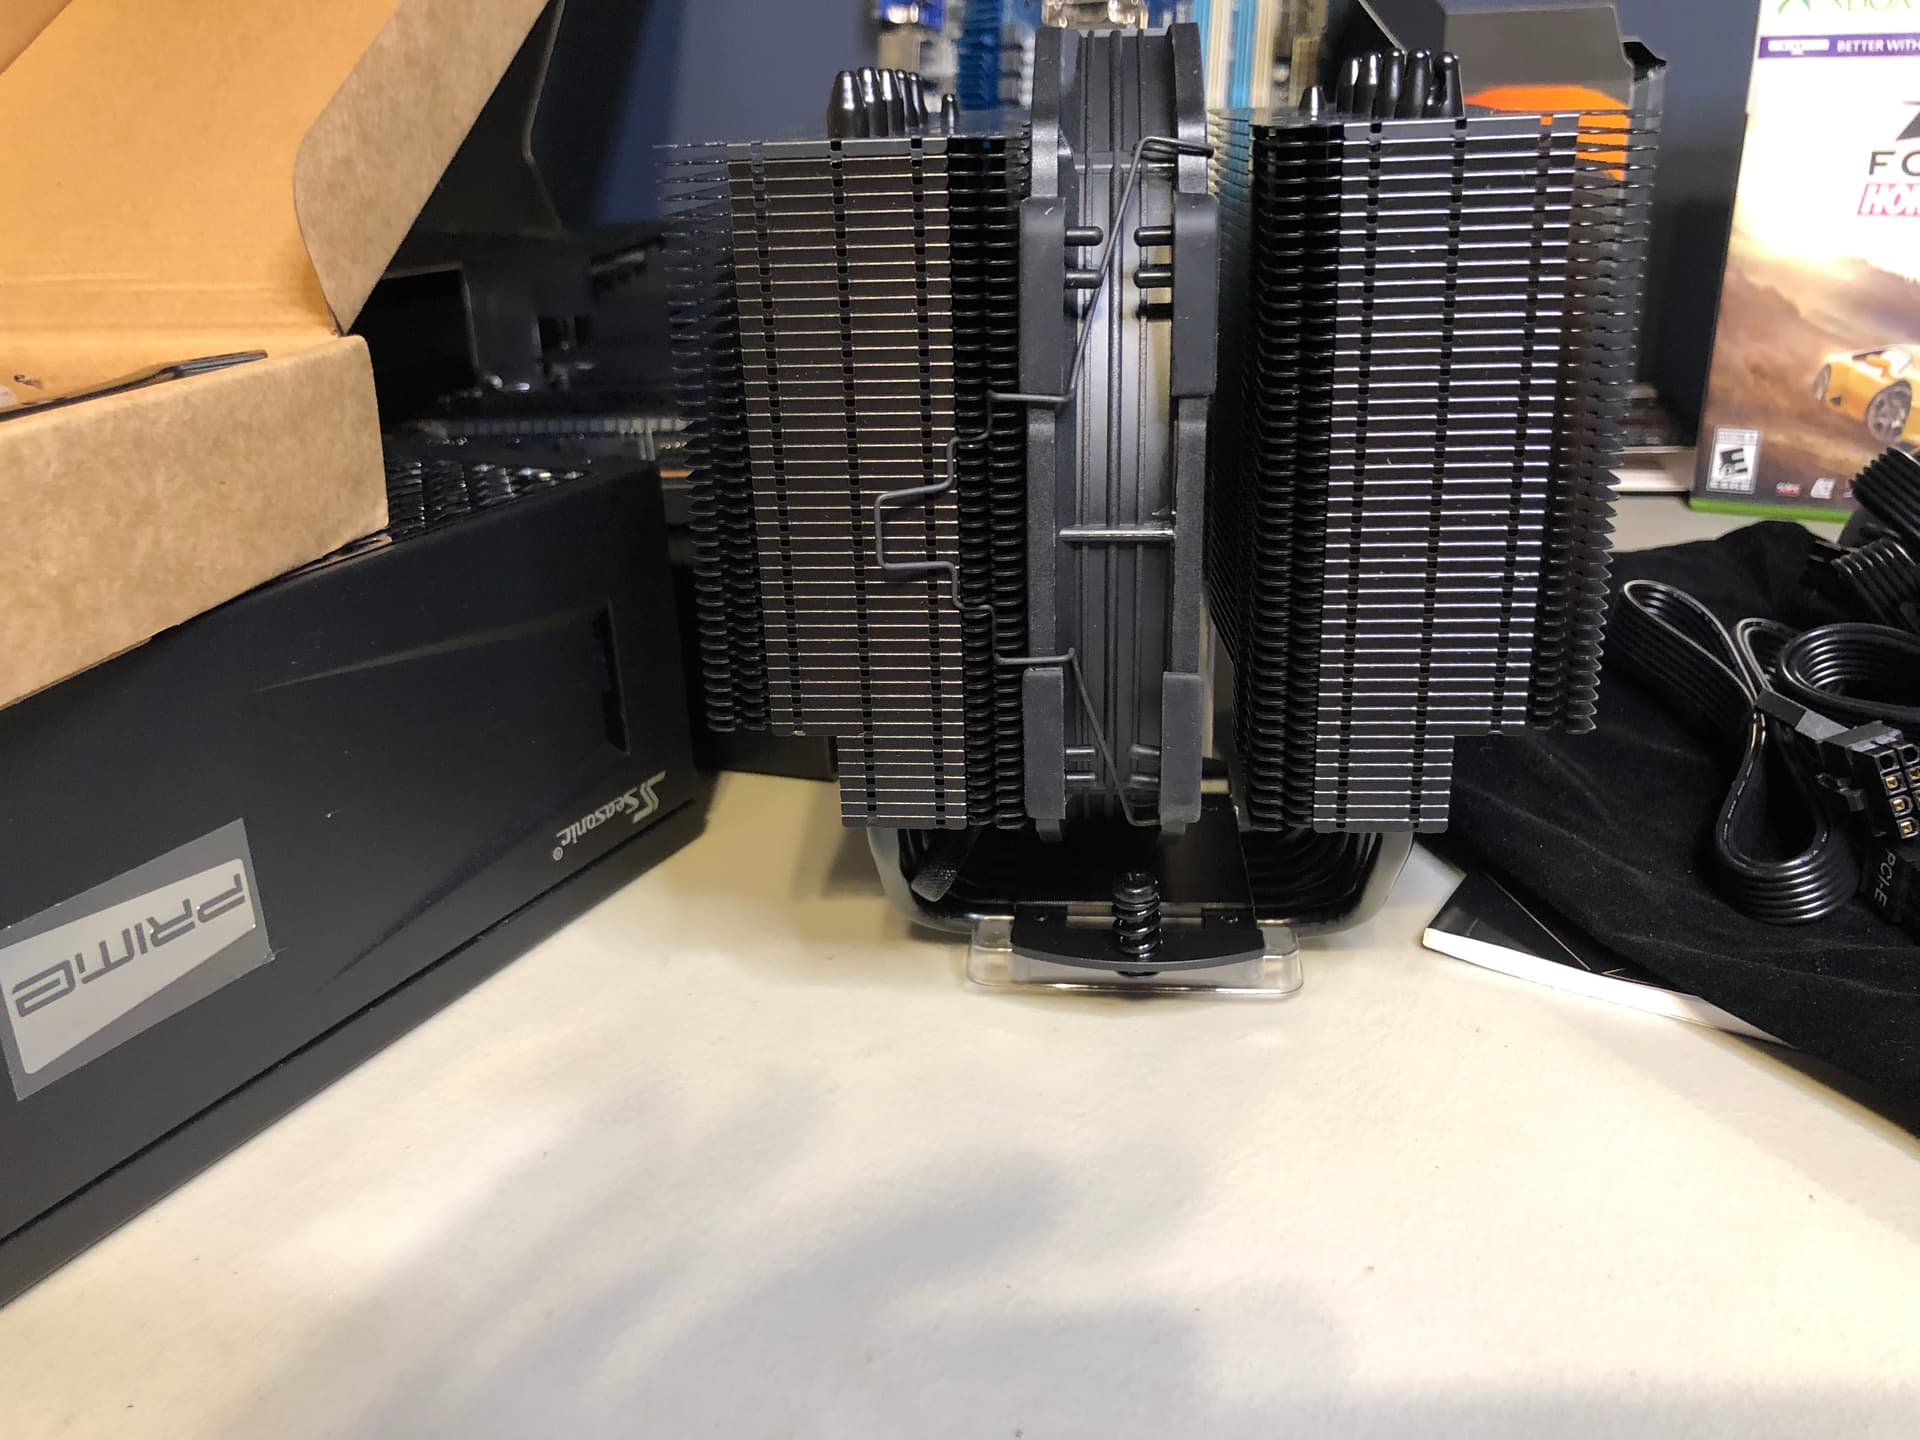
Now you are ready to replace the single NF-A15 fan onto the left fins. I will add a second fan to the right fins later.
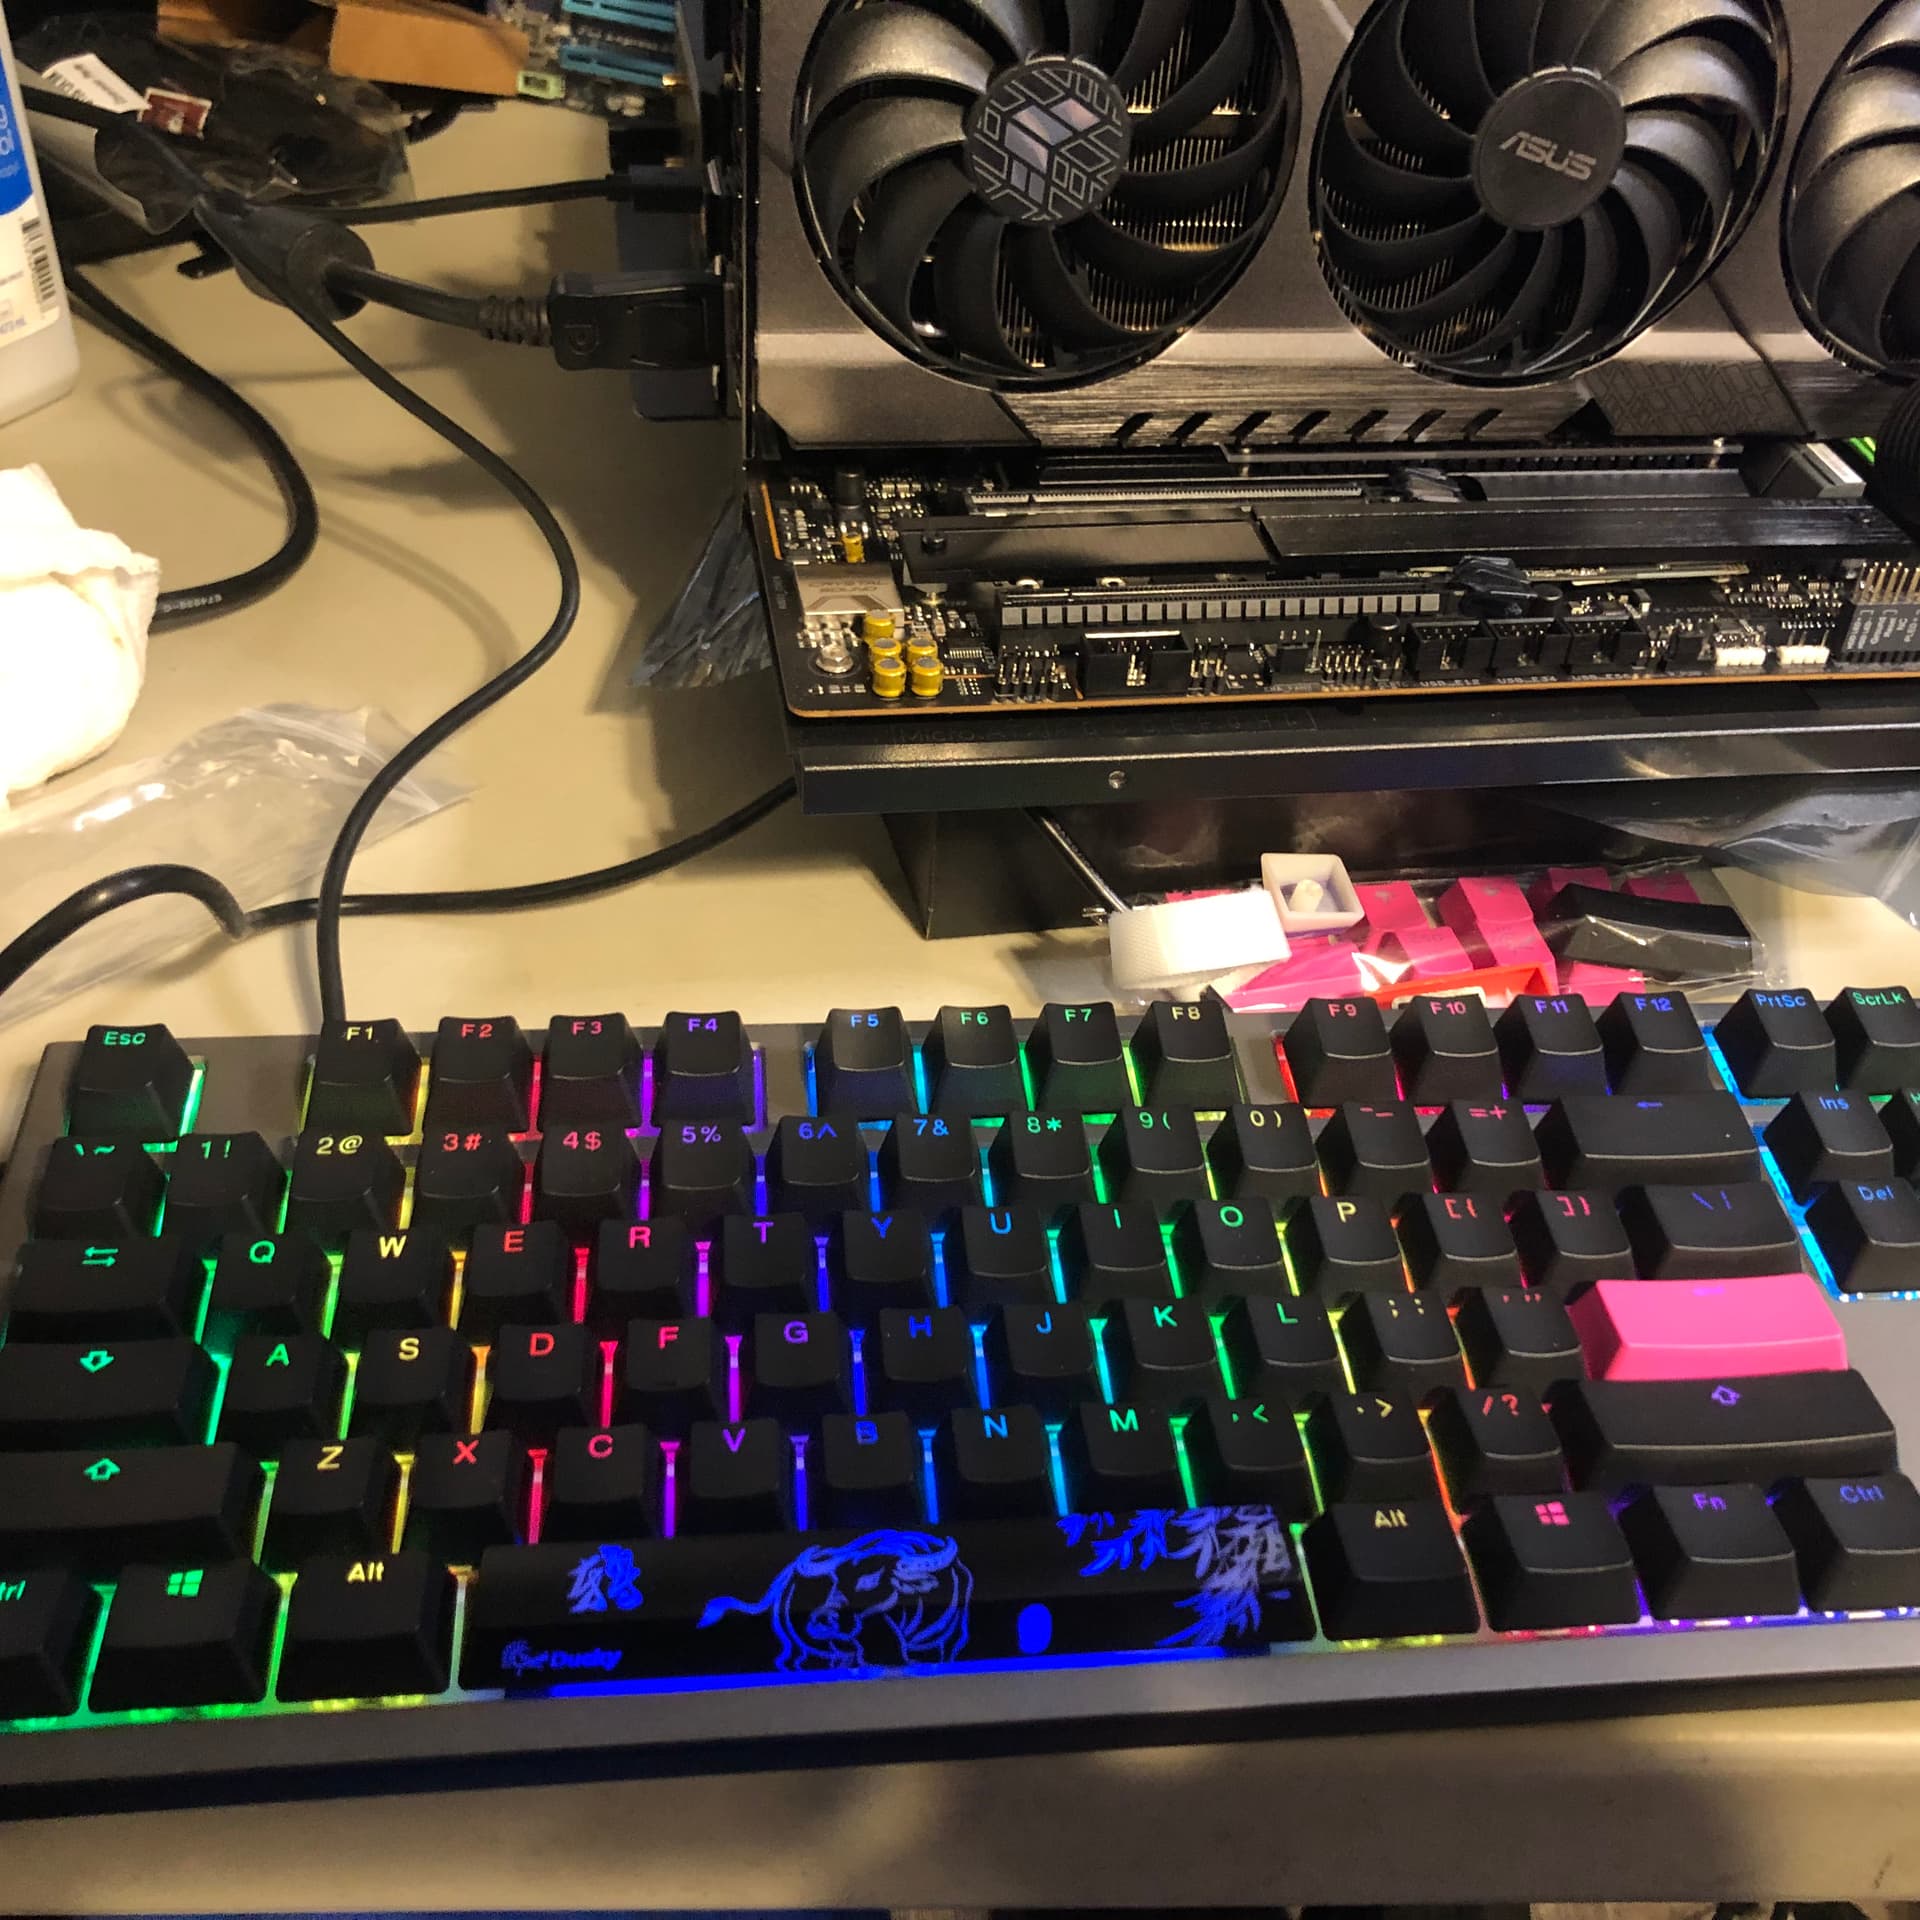
The spacebar commemorates that 2021 is the Year of the Ox .
I have only had time to verify everything is not DOA, taking care of my friend who went into the hospital for major surgery. She will be in for several days so I will not be able to do much for now.
Thanks it is going as well as can be expected at this point. Will be spending the night at the hospital again - home to feed some animals and shower. Was tempted to take the keyboard to the hospital but that would be just too much. She would enjoy it though!
My friend is out of the hospital and recovering at home. Since she needs me at her house much of the time, I have moved my project hardware to her house, and hopefully I can make some progress.
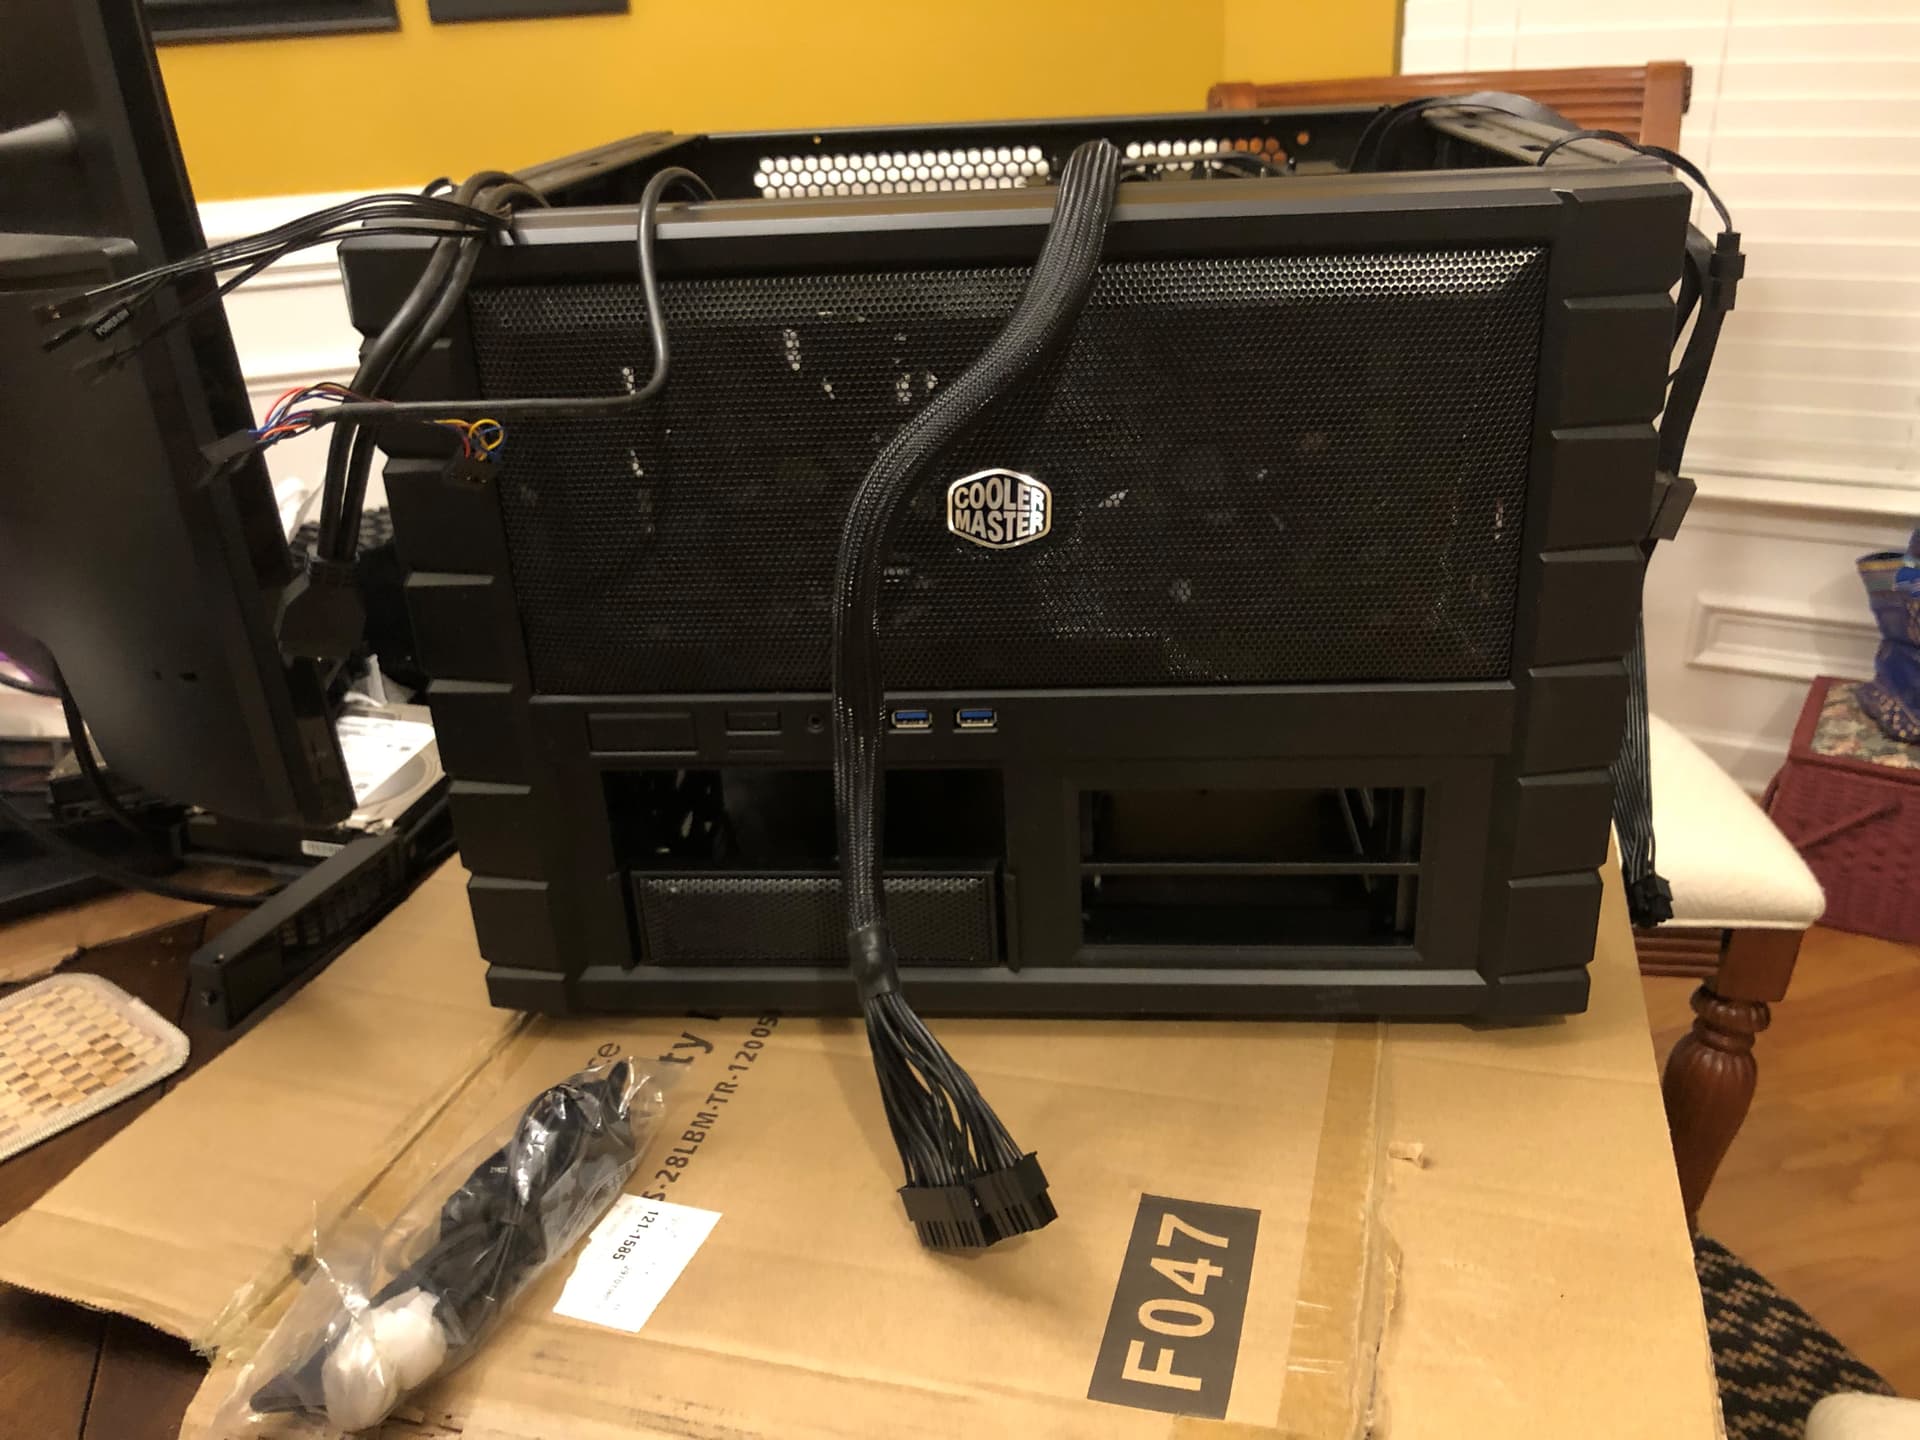
I will be staging the build in my Coolermaster HAF XB Evo. Not sure what case I will end up with - I have an 1800x build in a Fractal Design Define R6 White that may be tempting, or I may get a Fractal Torrent, or a large Meshify. I will also look at several other cases in the meantime.
Here is a nice step-by-step review of the HAF XB (I have the XB Evo) which I am reviewing since it has been a while…
I have removed the old PSU a Seasonic 650 semi-modular and wiped the case down.
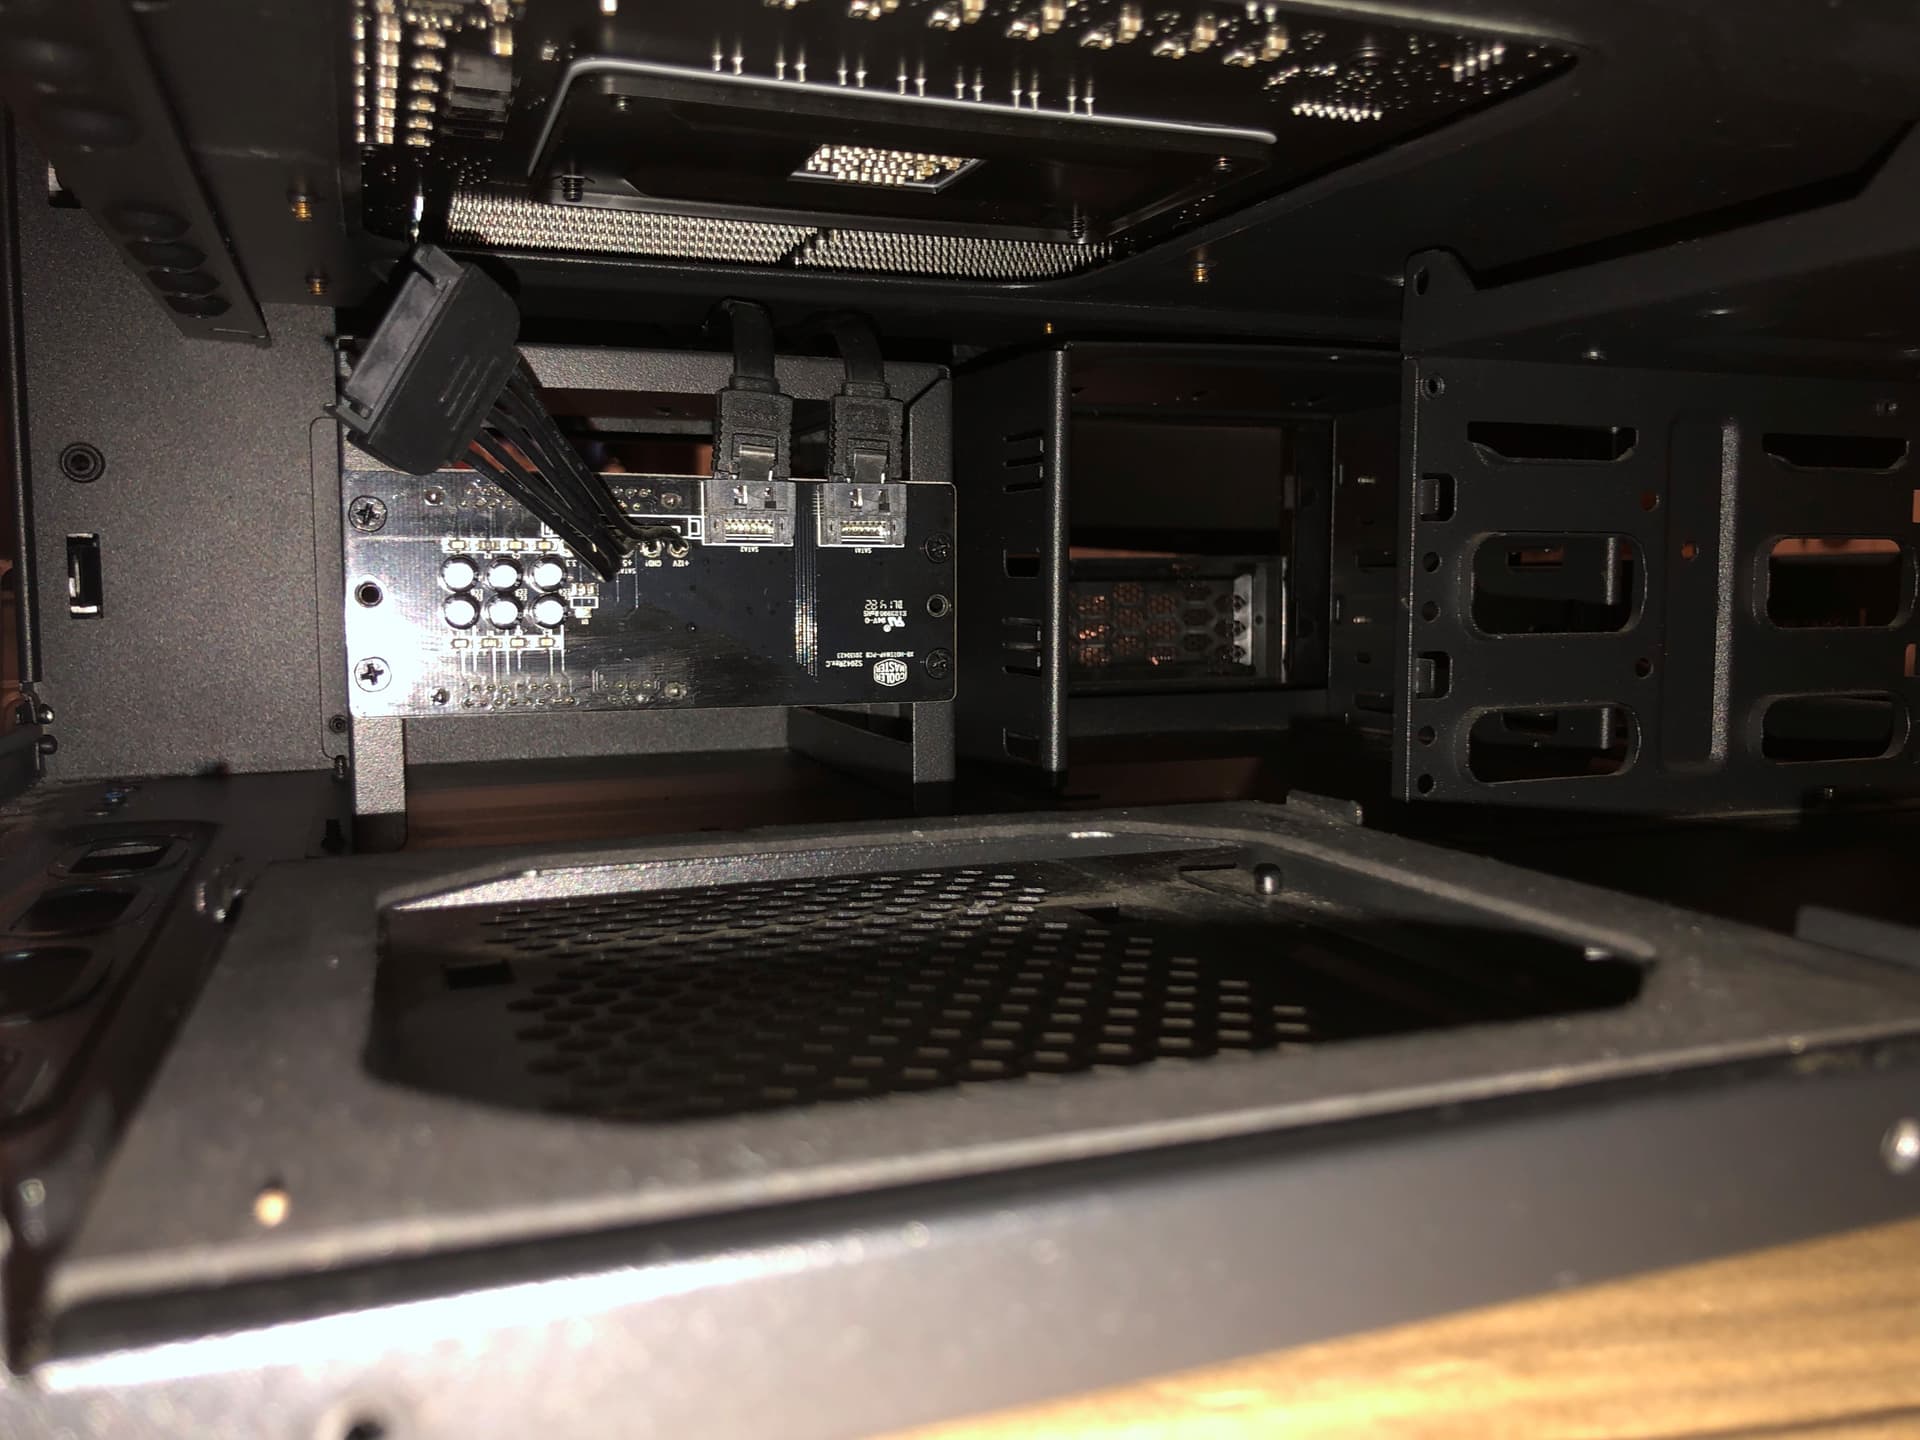
The case features 2 hot-swappable 3.5" bays and 2 x 5.25" bays in the front. Plus room for more drives on the lower level behind these.
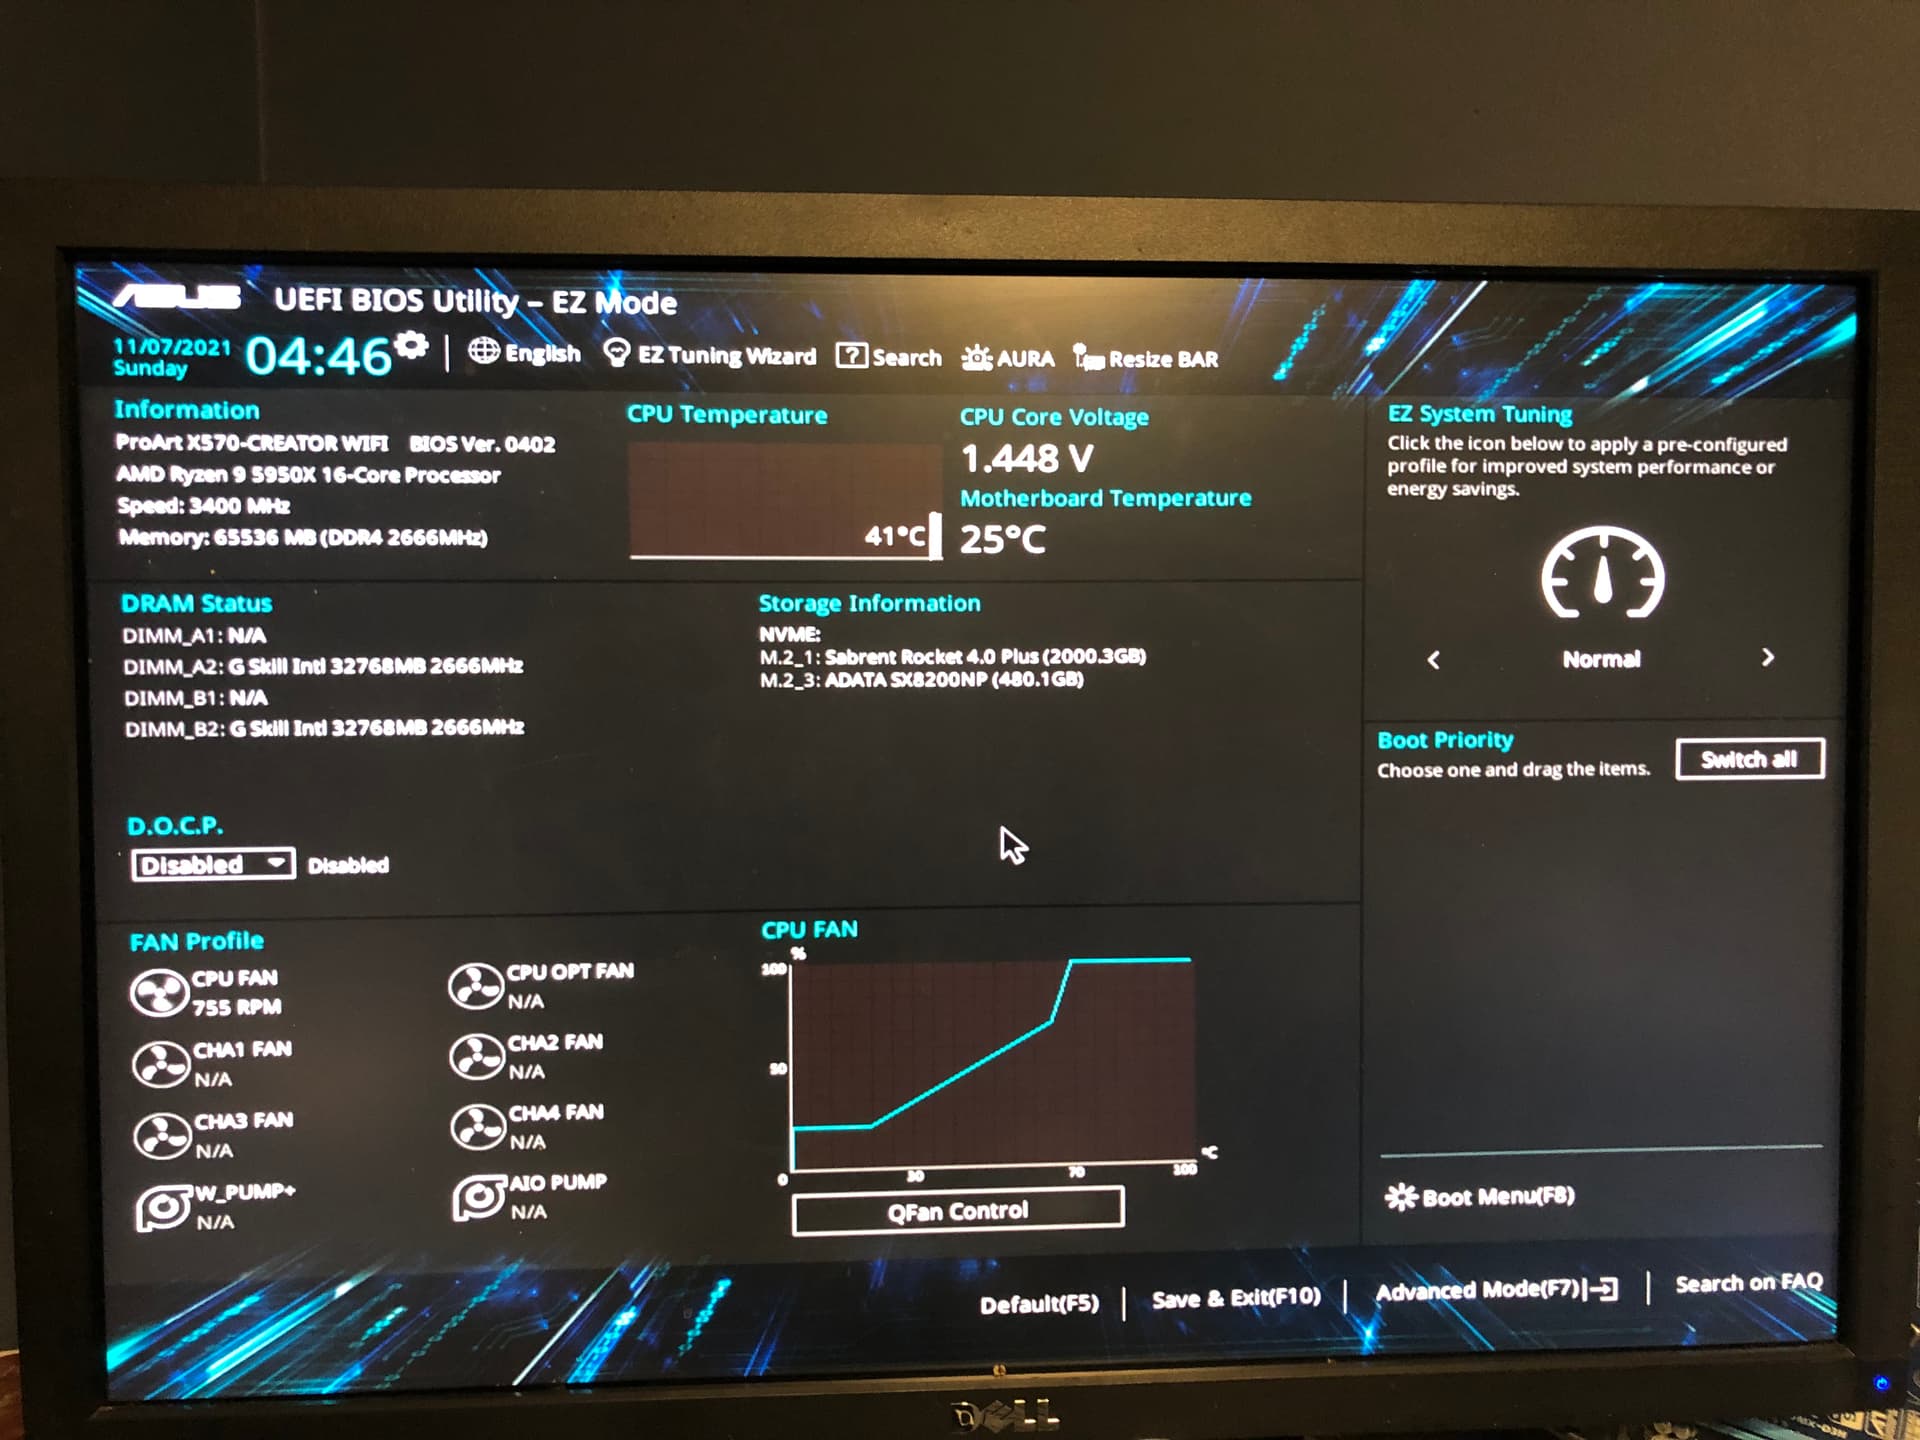
Since I have successfully booted to the bios, I will go ahead and place the motherboard tray on the top level of the case and connect the power and video again. My keyboard, mouse, and wireless will be next.
The lower level of the case hosts the hot swap bays, optical/disk bays, the power supply and another corner that can be used for something like more drives.
The motherboard tray sits halfway up, on the floor of the second story. Cables can all be fished around the front of the motherboard tray, and also on the sides of the the motherboard in a gap.