I used PartedMagic with dd rescue to create an image of a failing 1TB harddrive. DD rescue was able to “rescue” 96% of the drive before it totally died. Here’s the map view of the logfile.
Is that loop mount command exactly what you use? It seems a bit off. I would have expected something like this:
# mount -t <fstype> -o loop,offset=1936028192 /media/sda1/hd.img /mnt
Three things are missing in your command:
missing fs type, the-t in my example,
formatting of the offset option; behind the scenes you are passing on the offset value to the --offset option of losetup, that equal sign is missing in your command,
the leading slash is missing for the path to the image, unless you are in the root directory when executing the command, it will fail.
That said, ideally you are supposed to make multiple passes with ddrescue, in decreasing block sizes. Essentially you are recovering one chunk at a time, and in a subsequent pass you skip over complete chunks, and fill in the gaps with smaller chunks for incomplete chunks. So I’m not really sure what you mean by “96% rescued”.
Here’s a thread from eons ago where I report recovering an entire drive along with its partition table using ddrescue. As you can see, I did everything from the CLI, and the process is rather straightforward.
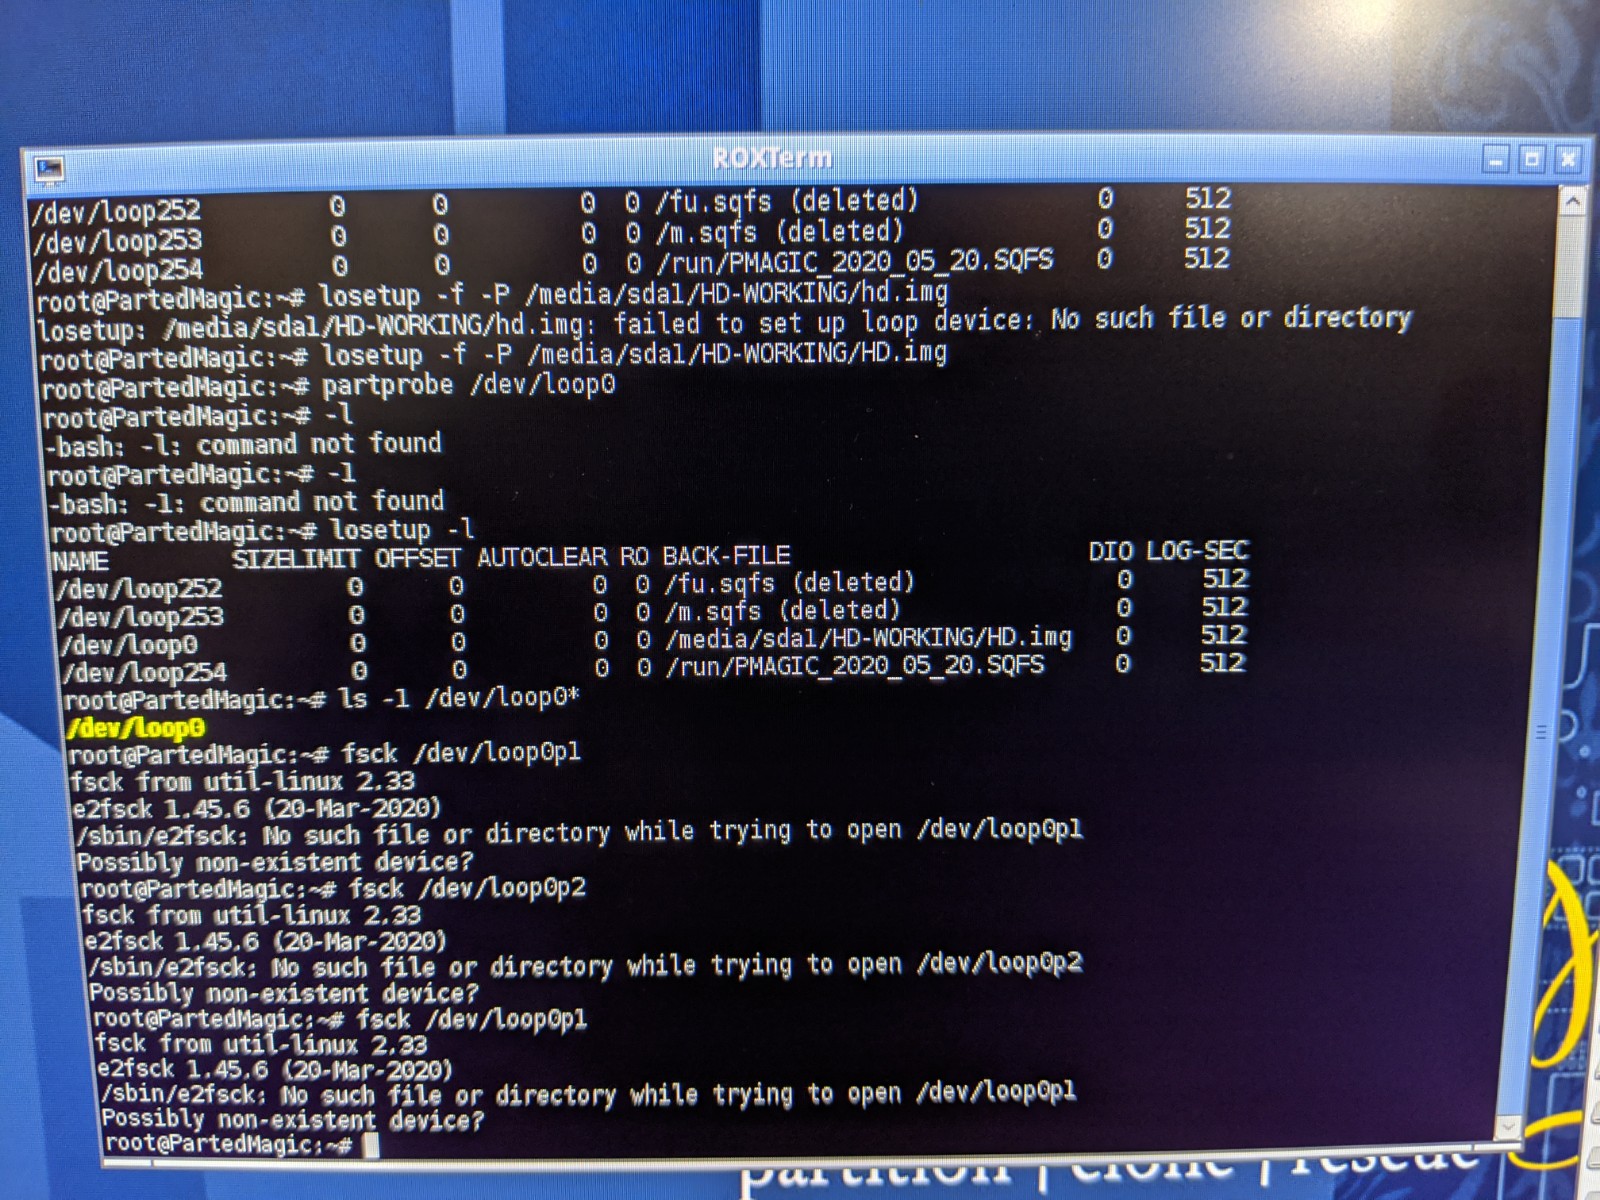
Yes, that was the exact command I ran originally. I was obviously running it wrong. If I run the new command (mount -t ntfs -o loop,offset=1936028192 /media/sda1/hd.img /mnt) as you specify I get the following result:
mount: /mnt failed to setup loop device for media/sda1/HD.img
Here’s what I ran as my dd rescue terminal command: ddrescue -d -r0 /dev/sdc1 hd.img hd.log
I also checked out your thread about the dd rescue process. I am unable to run anymore commands against the drive as it does nothing and gets no additional data. The drive is totally dead.
The 96% came from the dd rescue gui that I tried after the commandline runs.
if you just wanna copy files out, run testdisk on the image. You don’t actually have to loopback mount an image to get data off of it, or even fsck it IIRC.
example: sudo testdisk recovered.img
it’ll list the partition structure, etc then you can to go filesystem tools and list the files on the drive and even copy them.
testdisk against image > (select gpt or mbr depending on source disk) > advanced > select partition > list files
it’ll give you an option to copy files if the partition isn’t fucked. Could also try running fsck/gparted against the image and try to repair it if the fs is damaged.
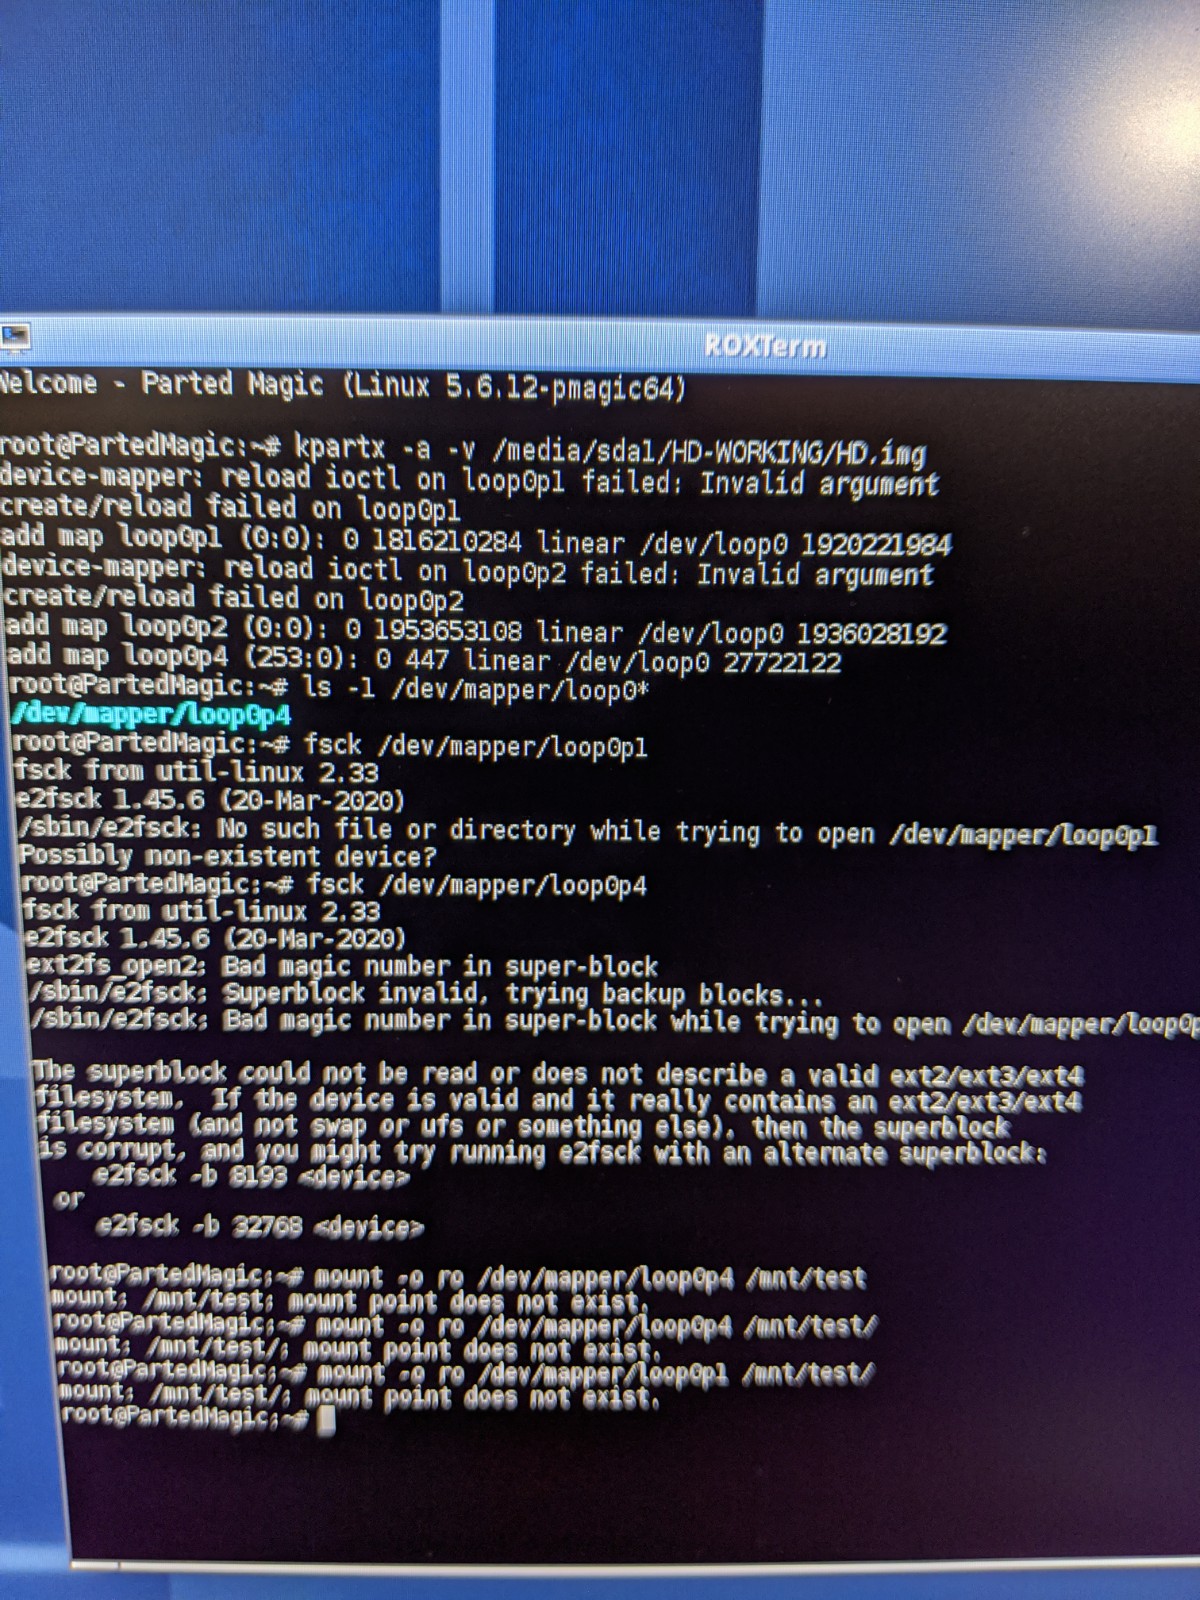
I suggest you reboot and try just the kpartx commands. losetup didn’t find any partitions and kpartx may have errored because you’ve got multiple conflicting loopbacks.
it’s possible testdisk will restore a sane partition table to the disk image. Just guessing, though. Fdisk shows nonsense and you haven’t said how the disk was partitioned/formatted originally.
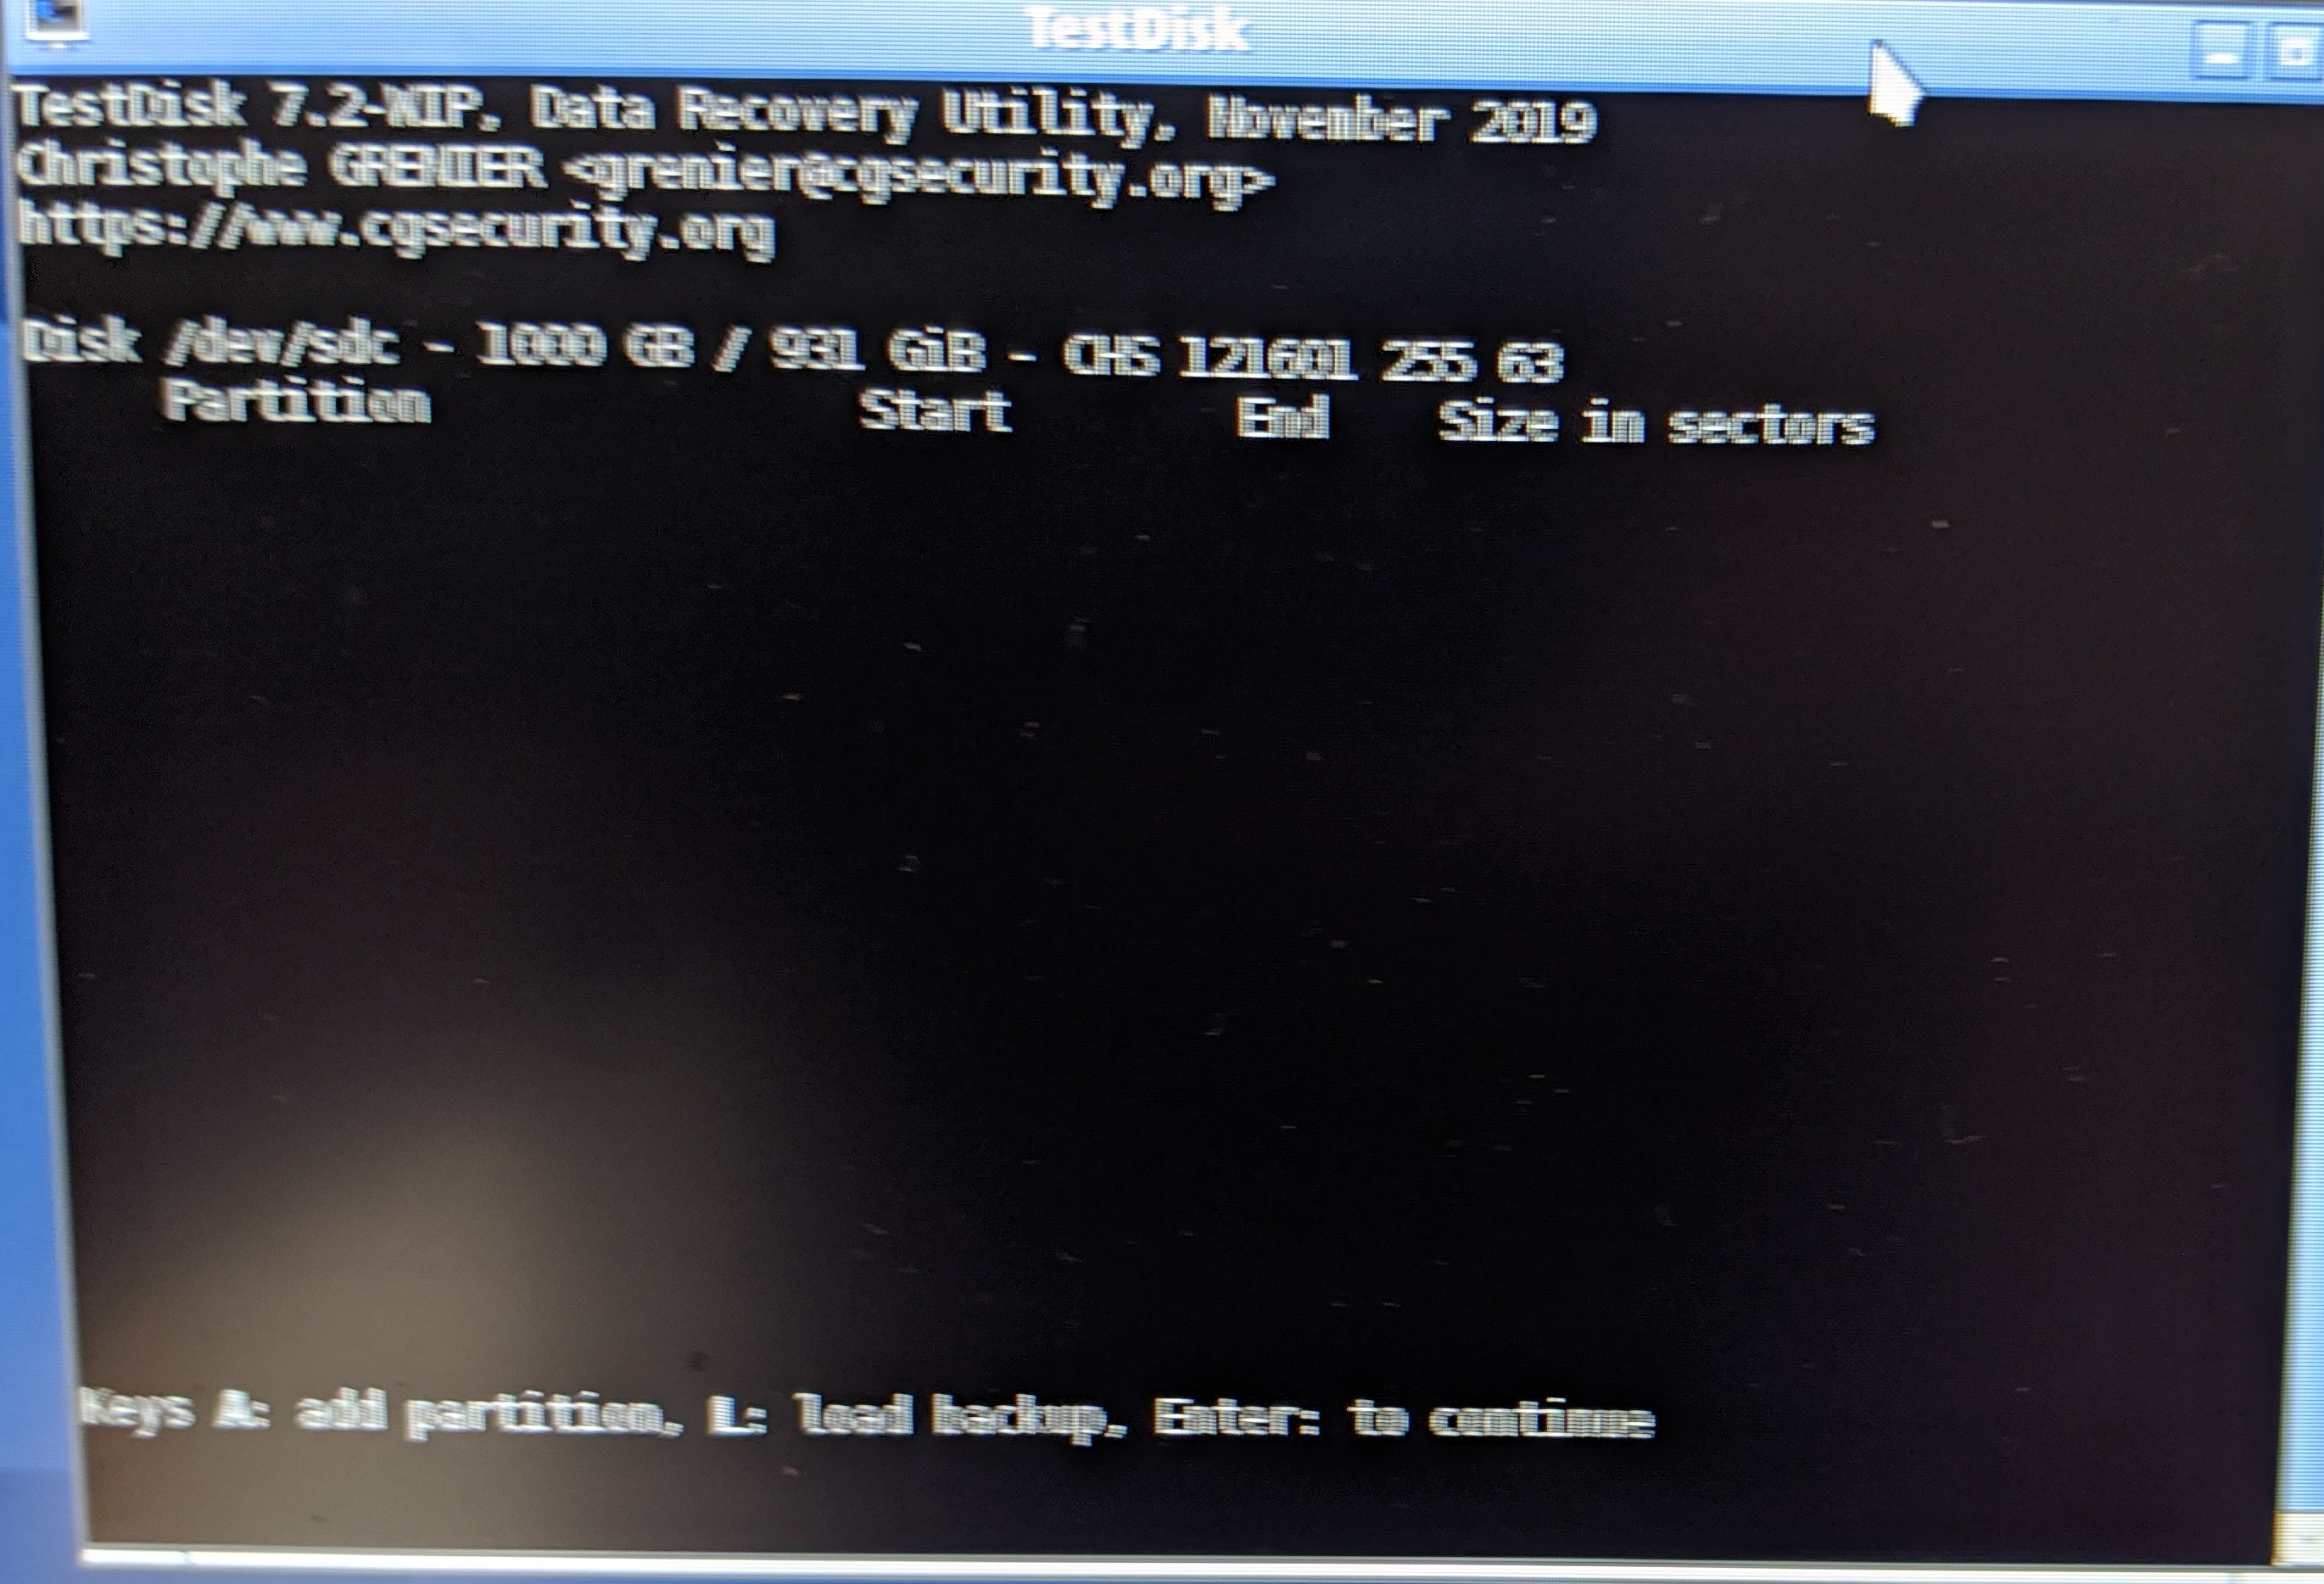
Testdisk did end up working for me to see the inside the image. Unfortunately, it looks like it recovered everything except the Windows and Users directories. Everything I am trying to get back is in the User’s profile. So, its a bit of disappointment right now.
If you’re looking for proper filenames/structure try fsck or write the image to a drive and use windows to run checkdisk on it.
if names don’t matter and you just want data (pictures,videos,pdf documents) photorec should be able to scrape most of that without issue.
to have recovered 95% or better of the drive with ddrescue, unless the user data was absolutely tiny or you’ve got some sort of defrag program that just happens to only move user data to the bad spots on the drive, You’ve got a really good chance of getting nearly everything back.
Looks like you have had some success with testdisk.
About ddrescue, it is important to run multiple passes. That is how it recovers the data. Essentially the log file contains sectors it couldn’t recover in an earlier run, so in the next pass it tries them again. Ideally after the last run, the log file should be empty. You ran only one pass (since you had -r0).
Also, when running fsck, you could make sure the right backend is being run by passing -t ntfs. In one of the screenshots I see e2fsck was attempted. That’s for ext* filesystems. Maybe you don’t have ntfsprogs installed. On Fedora fsck.ntfs is provided by that package.
Okay, i won’t give up just yet. I’d love to preserve the names and file structure if possible.
When trying to write the image file back to a disk how do I do that? I assume you mean run ddrescue again which I tried but I can’t seem to get it to work.
I am trying, “ddrescue /media/sda1/HD-WORKING/HD.img /dev/sdc /media/sda1/HD-WORKING/ToDiskDDLog.log” (sdc is the blank physical disk). If I try sdc as the target it just “output file exists and is not a regular file” or if I try sdc1 it will start the copy but after a few seconds “no space left of device.”
I think right now you are confusing different steps. ddrescue does recovery, either to a new disk, or to an image file. The recovered image, maybe then written to a new disk with dd. And finally, individual files can be recovered from the disk image, or the faulty drive (in read only mode) using the testdisk utilities. Here are some possible options for you.
To try recovering the faulty drive again, try something similar to the mailing list thread I referred to:
Repeat this a few times - either with the -r option, or by running the command yourself again (mentioned in the mailing list thread).
To write a disk image file (be it the existing recovered image, or a new one) to the new drive, you may use something like this (check the manpage for other options):
then mount. This may fail if your recovered image has a corrupt partition table (maybe that was the part which couldn’t be recovered). Note: if this approach fails, you should reformat the target drive before using it again, don’t want a corrupt partition table on it.
The final option is to recover individual files with testdisk from the recovered image (as suggested by others in this thread).
Please be patient when attempting either of these, the steps are slow and tedious, there’s no way around it.
the -P gives you a preview of the data being copied, its not required, but sort of handy to know if you’ve been waiting a couple hours just copying zeros, the -f flag is force overwrite. Not including the -f is probably why you’re getting the out of space error.
Of course, make sure nothing important is on the destination before starting the copy.
The image finally finished writing to disk after 24 hours. I tried to then run testdisk on it to repair the partition before trying to boot windows but I am getting stuck.
I was able open to have testdisk analyze the disk but then the partition start/end is empty. Do I need to say add partition?
May need to reboot the machine or power cycle the drive to get the os to re-read the partition table on the disk.
if testdisk was able to see the partition table of the image without having to do anything you should be able to use a windows machine to run checkdisk on the drive.
if not, have testdisk scan for partitions
Select disk> select gpt or mbr> analyze> look at the partitions found, if they appear valid or have the proper files listed you can write them to disk.
then run checkdisk /f /r on the drive with a windows machine.
I have tried rebooting and powercycling the drives several times but testdisk doesn’t seem to find anything on the partitions after the analysis. I am trying to run a chkdsk now.
I rebooted the PC again before I ran chkdsk and Windows showed a letter, D. I looked at diskpart and it showed the drive as RAW. I never got a prompt about formatting (never would want to do that anyway).
So, chkdsk is running as of now. I have never seen such a busy chkdsk window. Its going through lots of stages. The total % still stands at 0%, while the ETA is bouncing around from 10-24 hours.
I’ll update once its done. Thanks again for all the help.
ah cool, just making sure nothing blew up. Hopefully checkdisk can sort things out and get you the data you’re looking for without having to use photorec to do raw file recovery and all the hassle of sorting out what is what.